I’m reviewing the new Durango DEX210 2wd 1/10th scale electric buggy and I received in the mail the other day. I thought I would take you with me step by step in assembling this rig. I went ahead and reviewed the kit manual and did a little research on the DEX210 on Durango’s website, which got me super pumped to build this car and get it on the track ASAP! There are so many features packed into this car, I didn’t think it was possible to do that! One of the big things that the DEX210 has that I don’t remember a 1/10th scale buggy having in recent history is droop screws! I know droop screws are nothing new, but it’s a nice addition to the arsenal of adjustments this buggy has. Lets get er’ done!
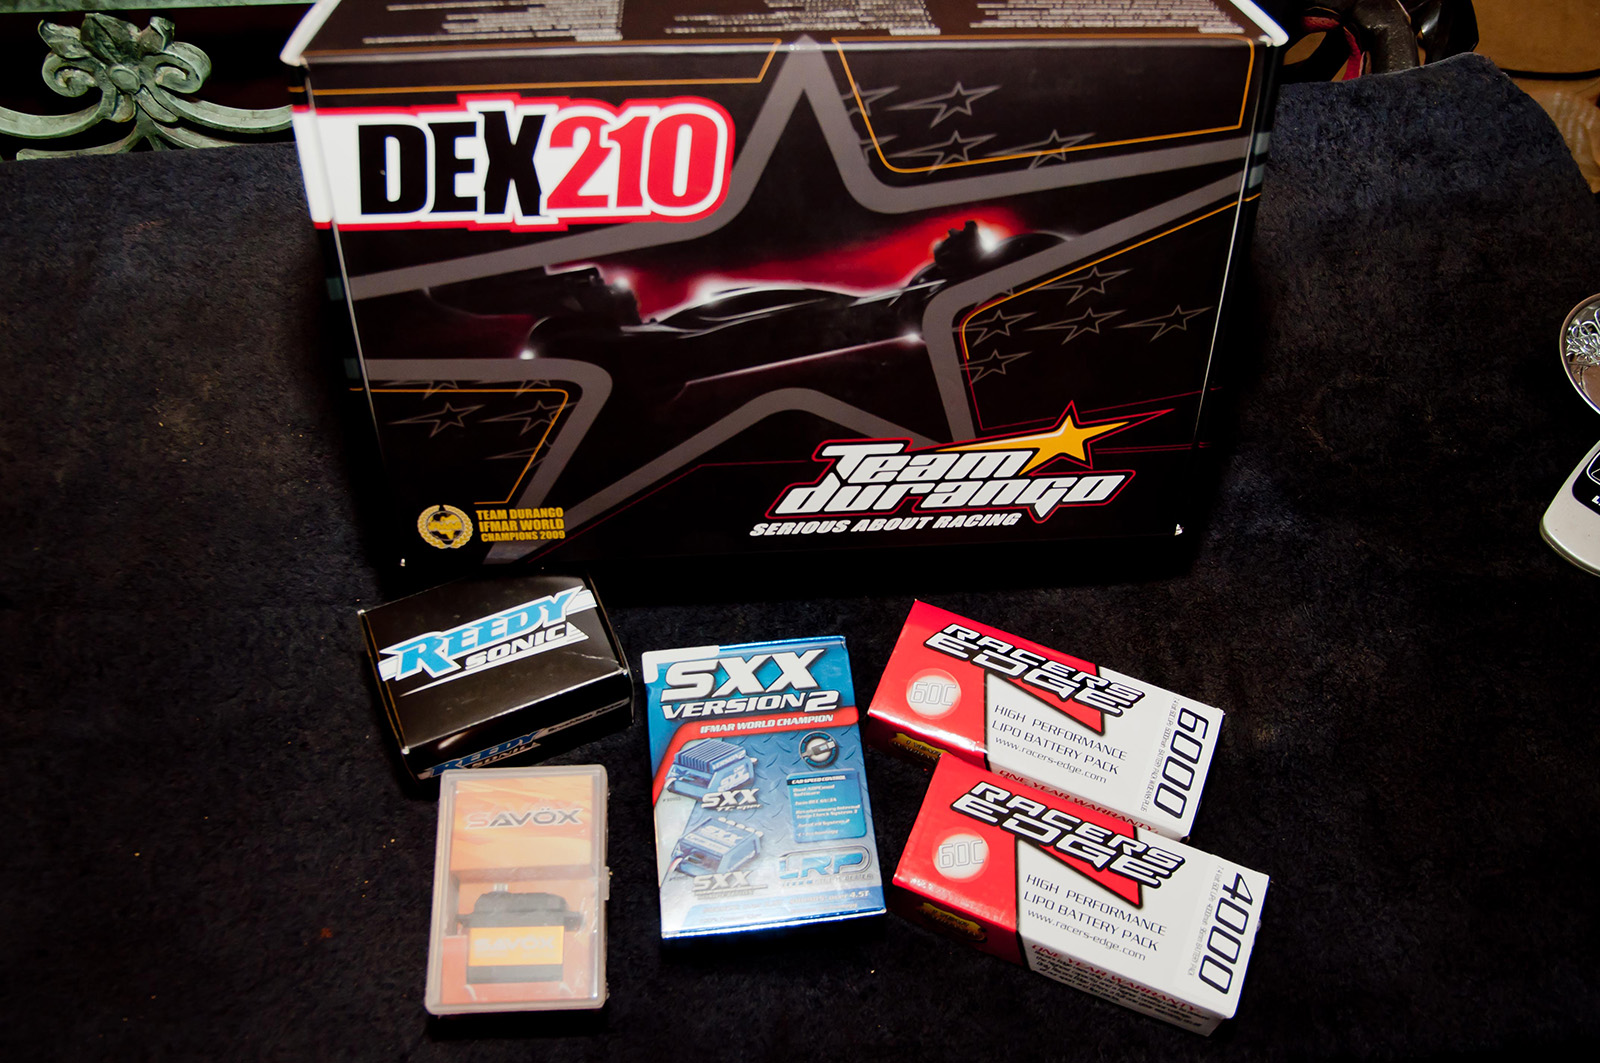
Mail delivery! The Durango DEX210 buggy was delivered today and all the goodies that will go in it.
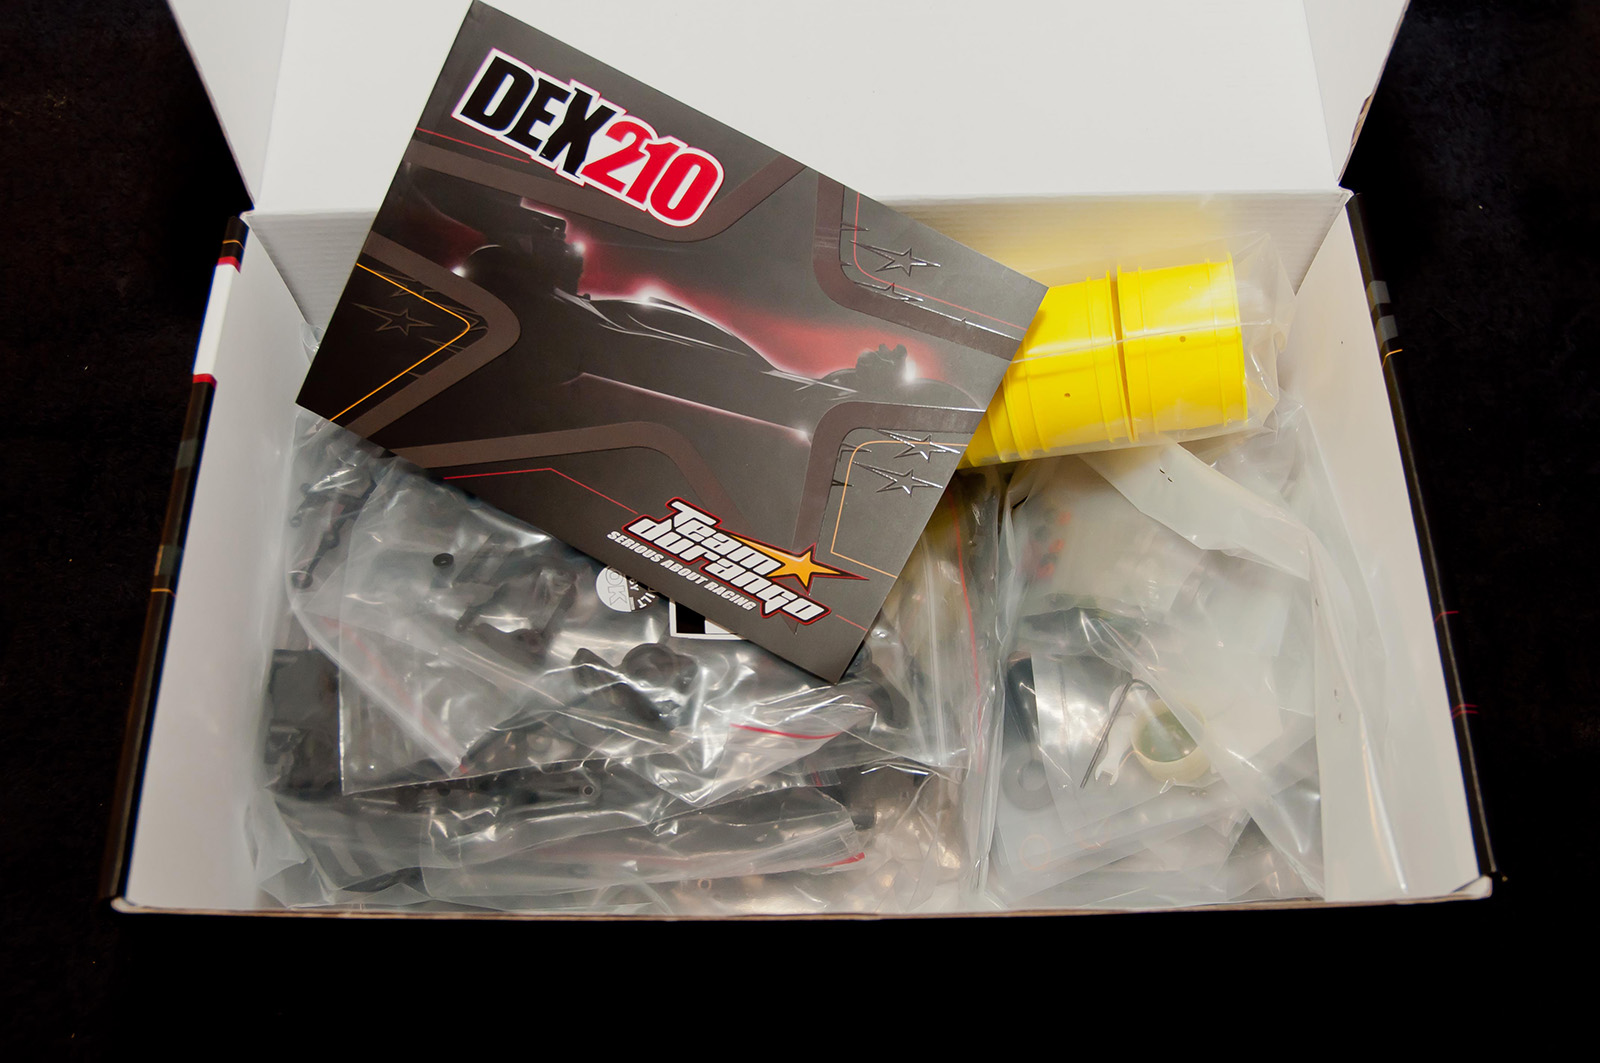
This is what greets you when you open the box, minus the body/wing/motor cover, which I sent off to Charlie Barnes of CFX Paintworks to get a sick paint job.
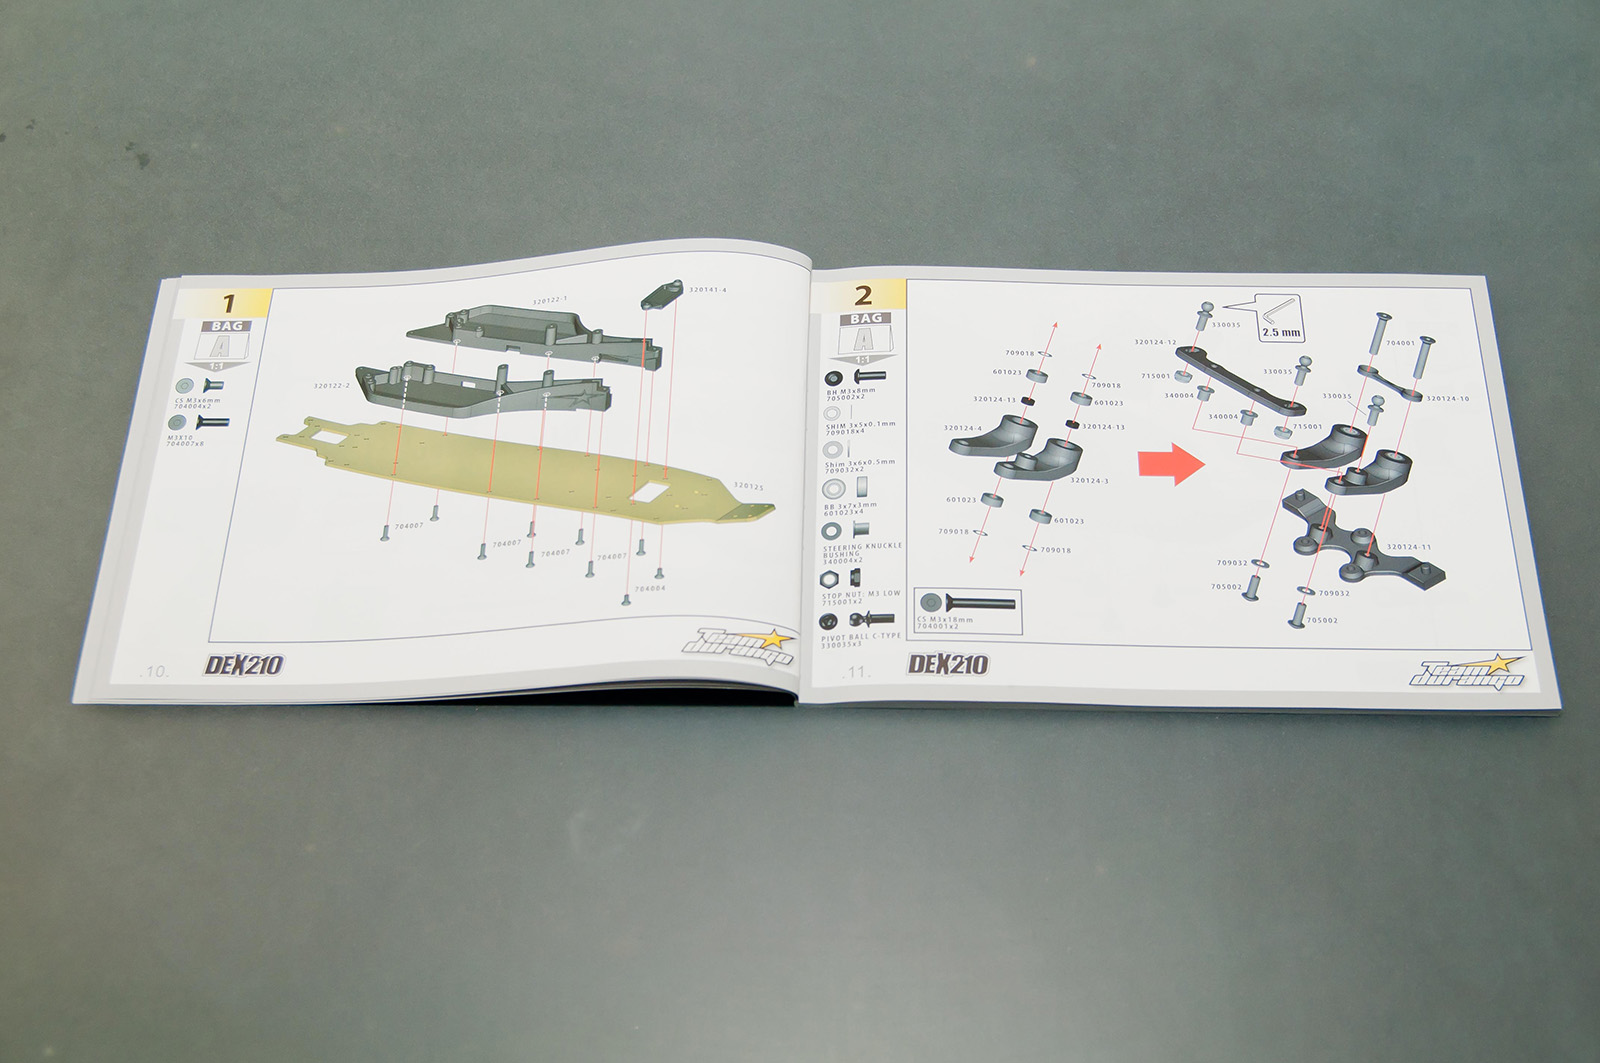
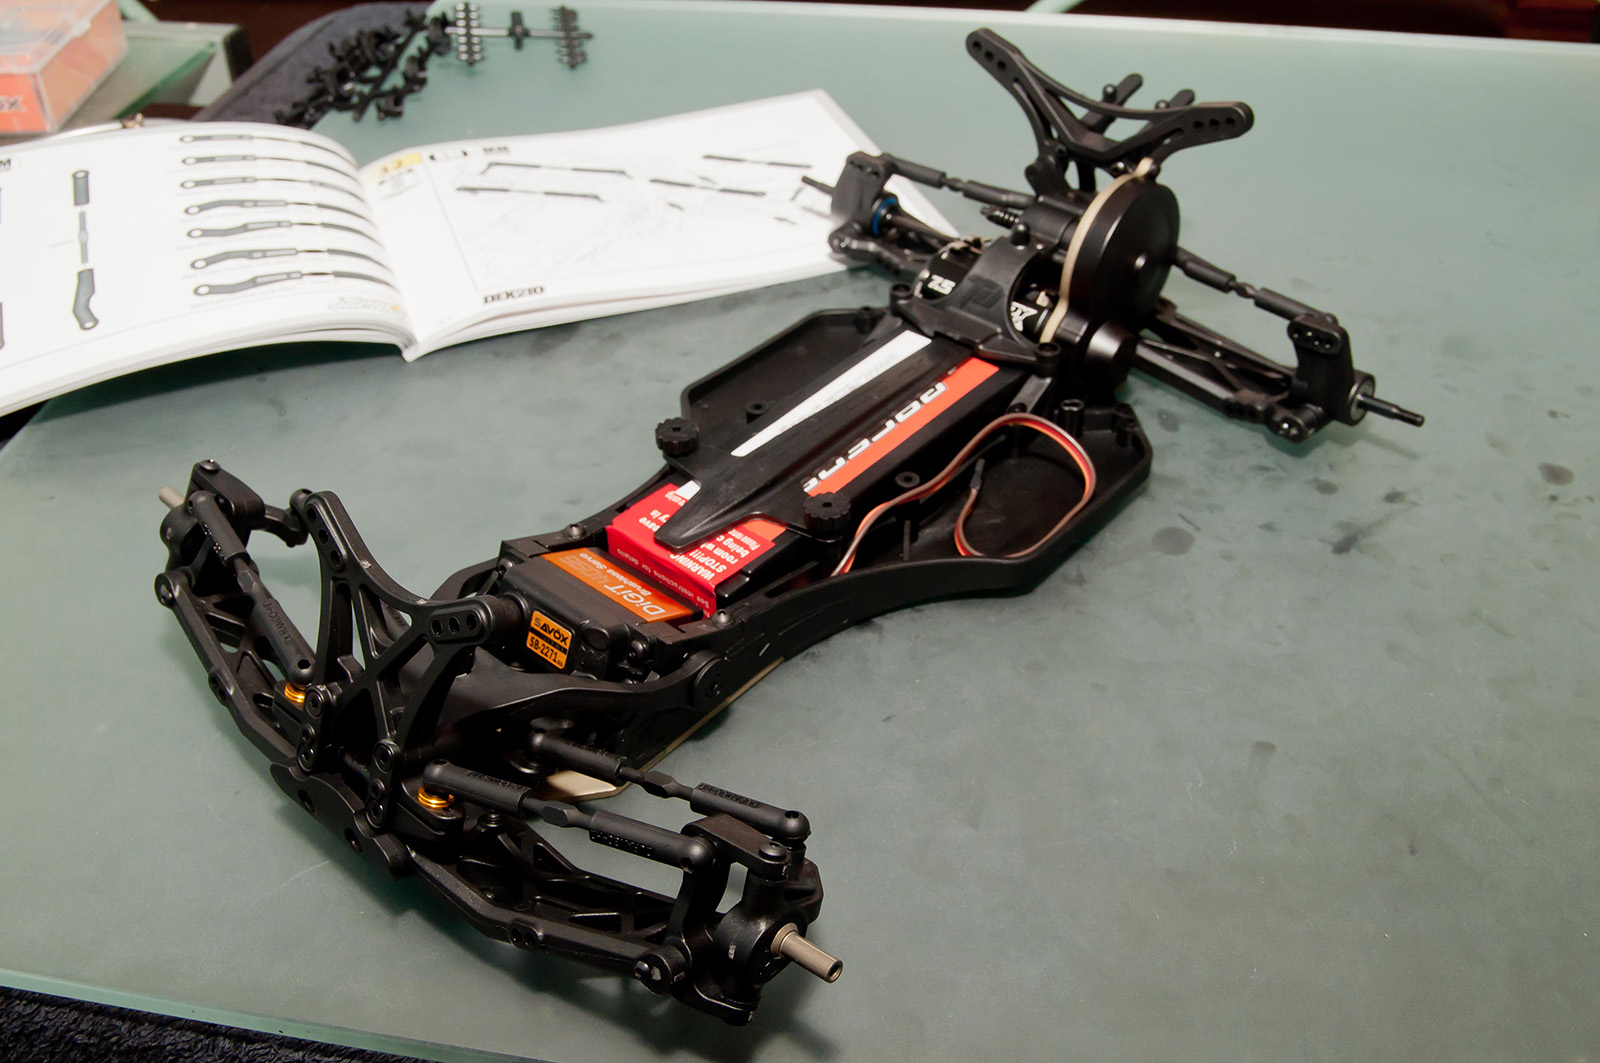
The instruction manual is clear and concise as any of the best I’ve ever seen. Super easy to follow and 100% small parts blow up so you can hold the screw/washer up to the manual to make sure it’s the right one.
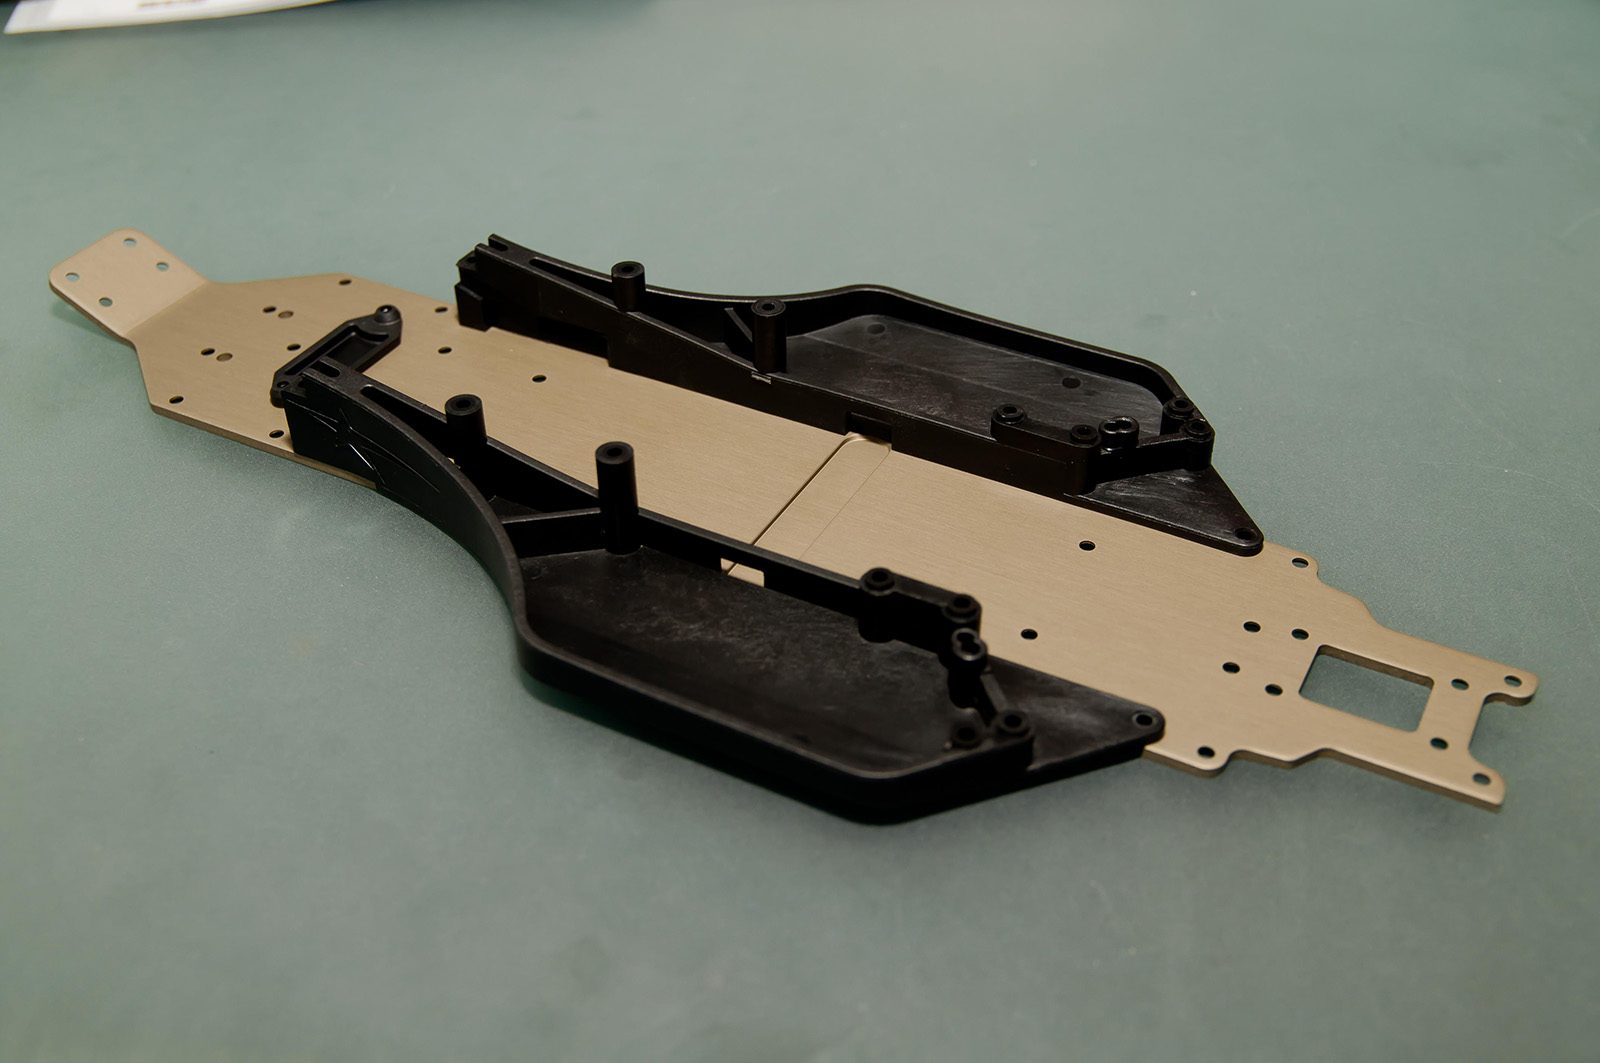
First step in the manual is to install the composite side rails that will house your ESC/transponder/receiver. Leave these pieces loosely installed so it will make it easier to install the servo later. I applied a small dab of medium CA to the shorter crews towards the rear of this assembly to keep them from coming loose.
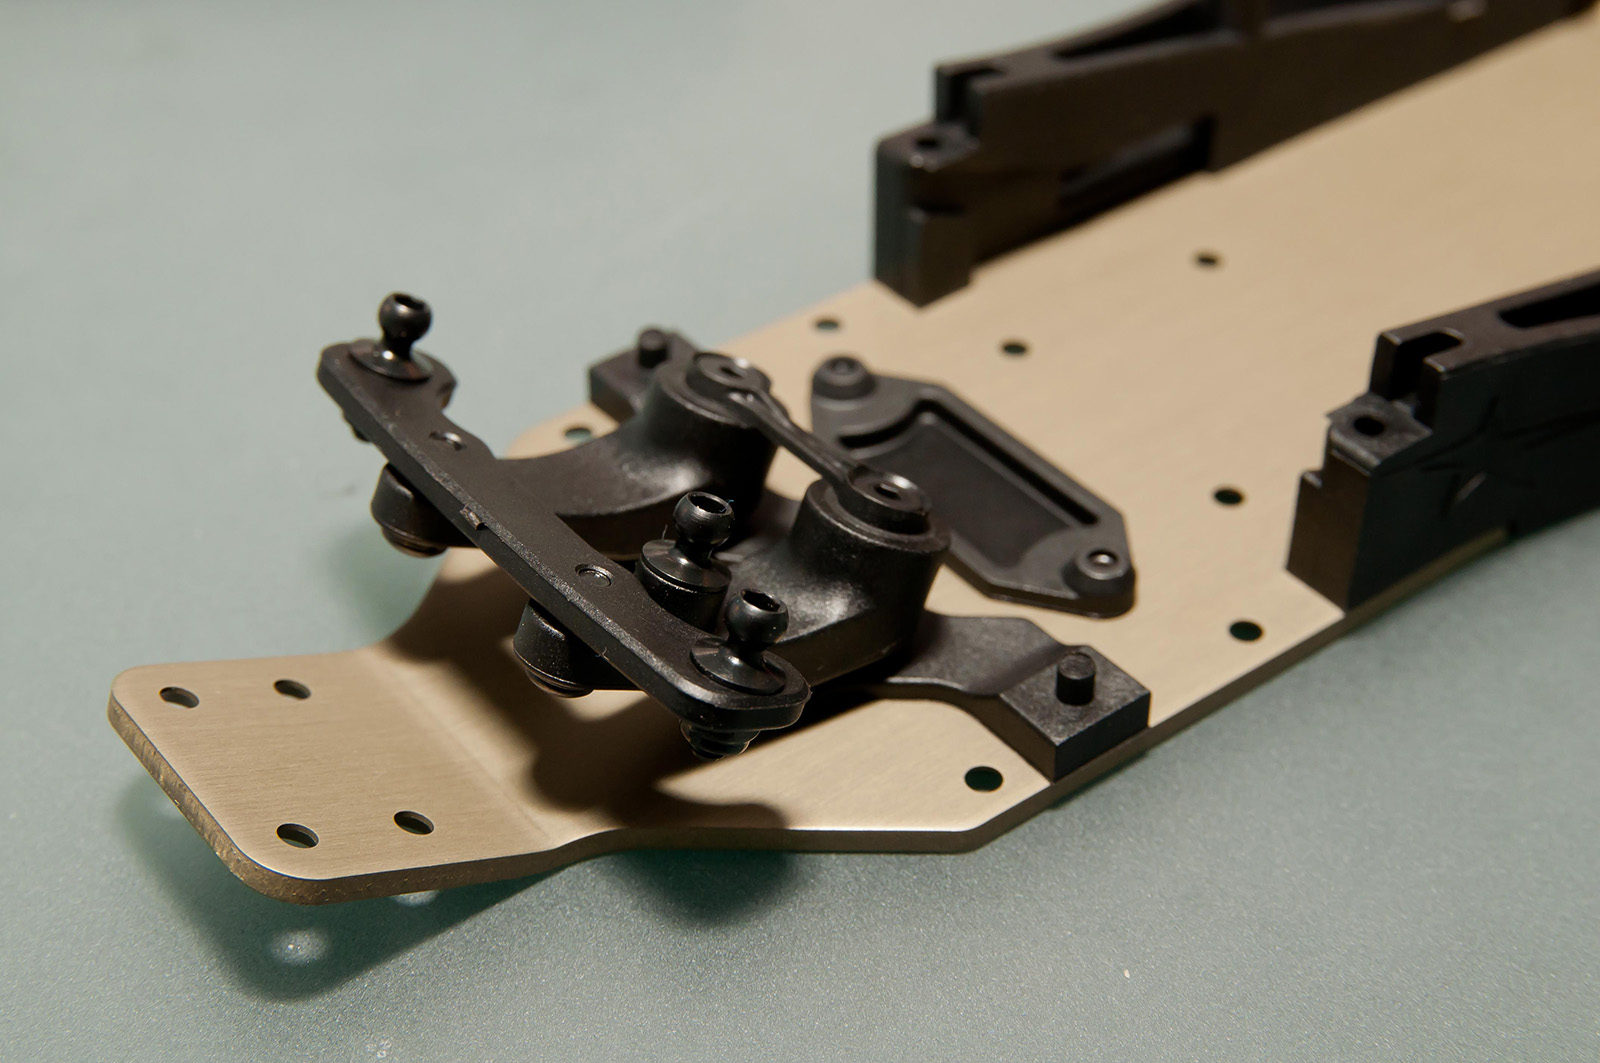
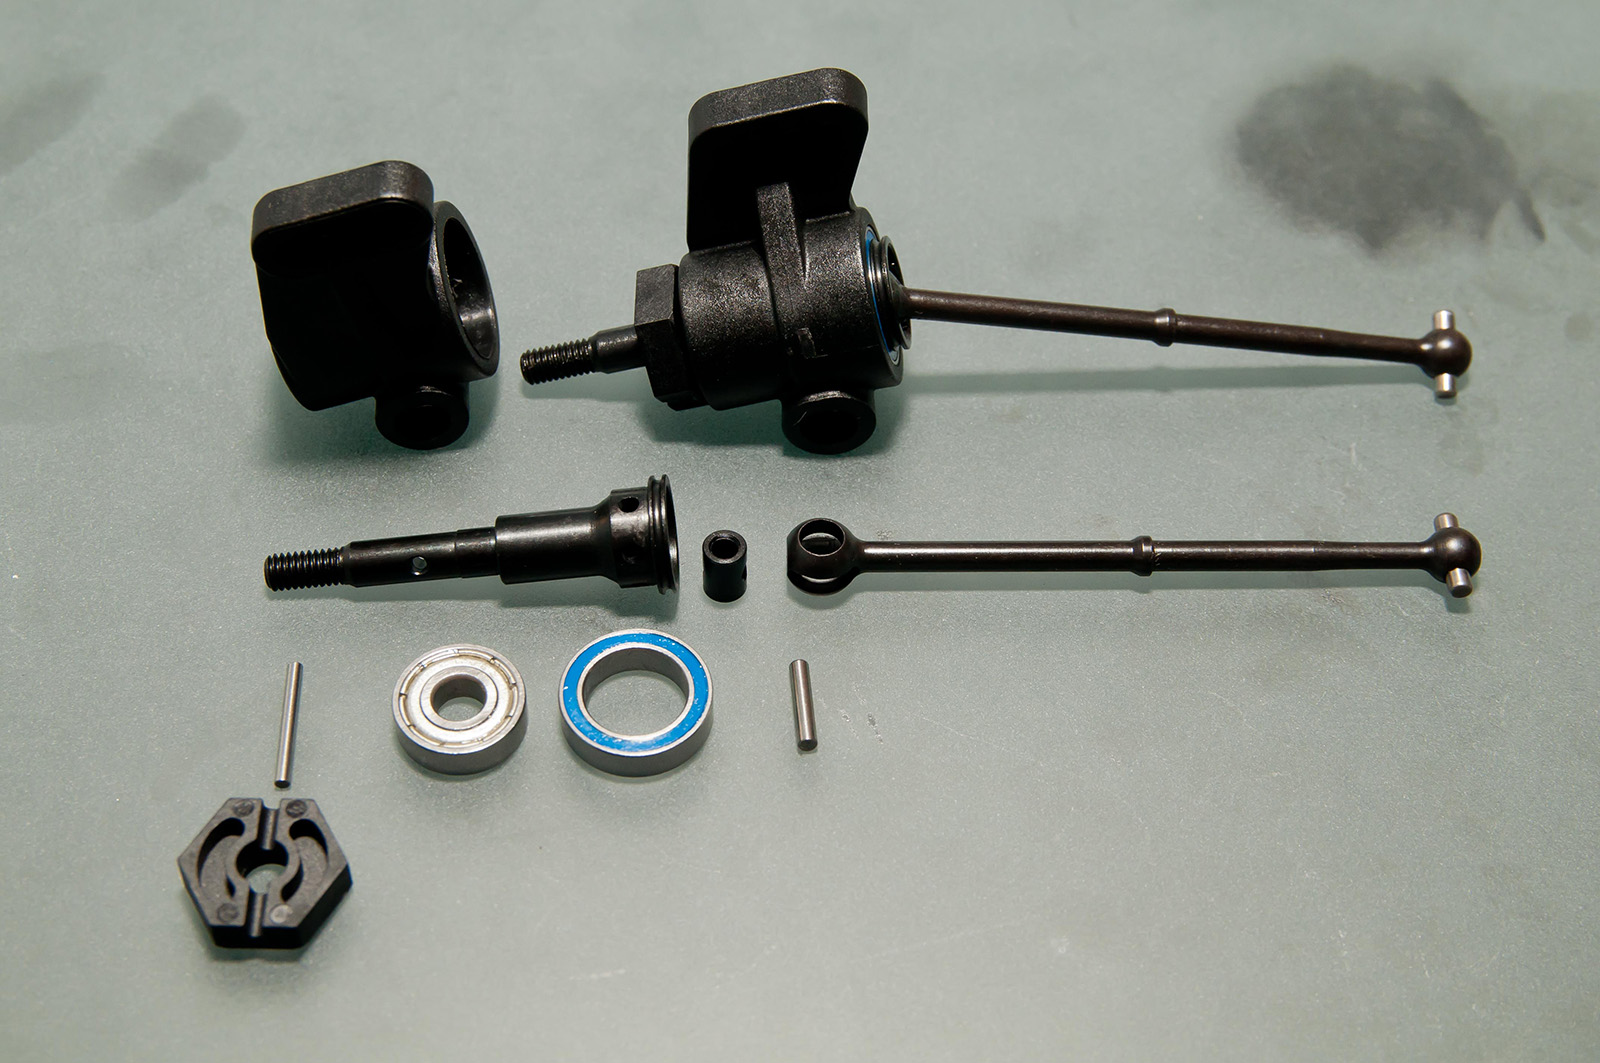
Next up was the steering assembly. Assembling it was pretty straightforward. Its self-sustained with its own mount, meaning you can take it out of the car intact. This will make maintenance a lot quicker and easier.
Here’s the assembly mounted on the aluminum chassis plate. 3 short screws hold it in place for now, the forward side rails will be mounted later and help keep the steering assembly mounted strong.
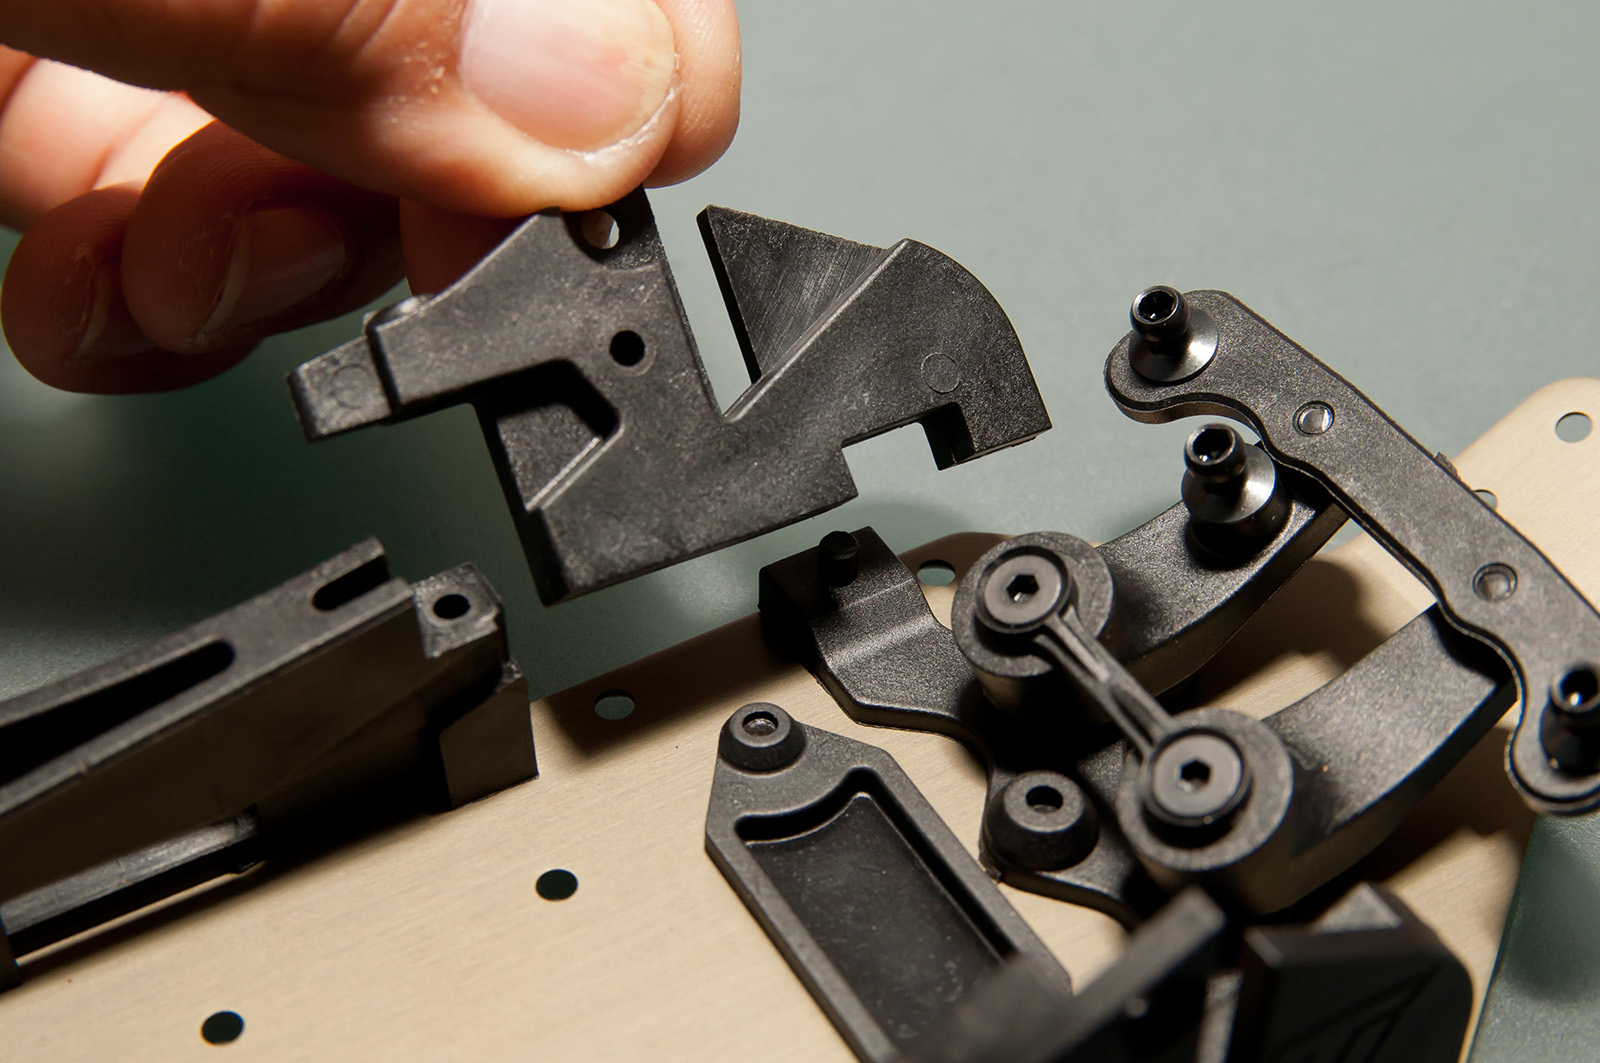
Here are the forward side rails that will help keep the steering assembly in strong. Keeping the first side rail main pieces we mounted in the first step loose, will ease the installation of the forward pieces.
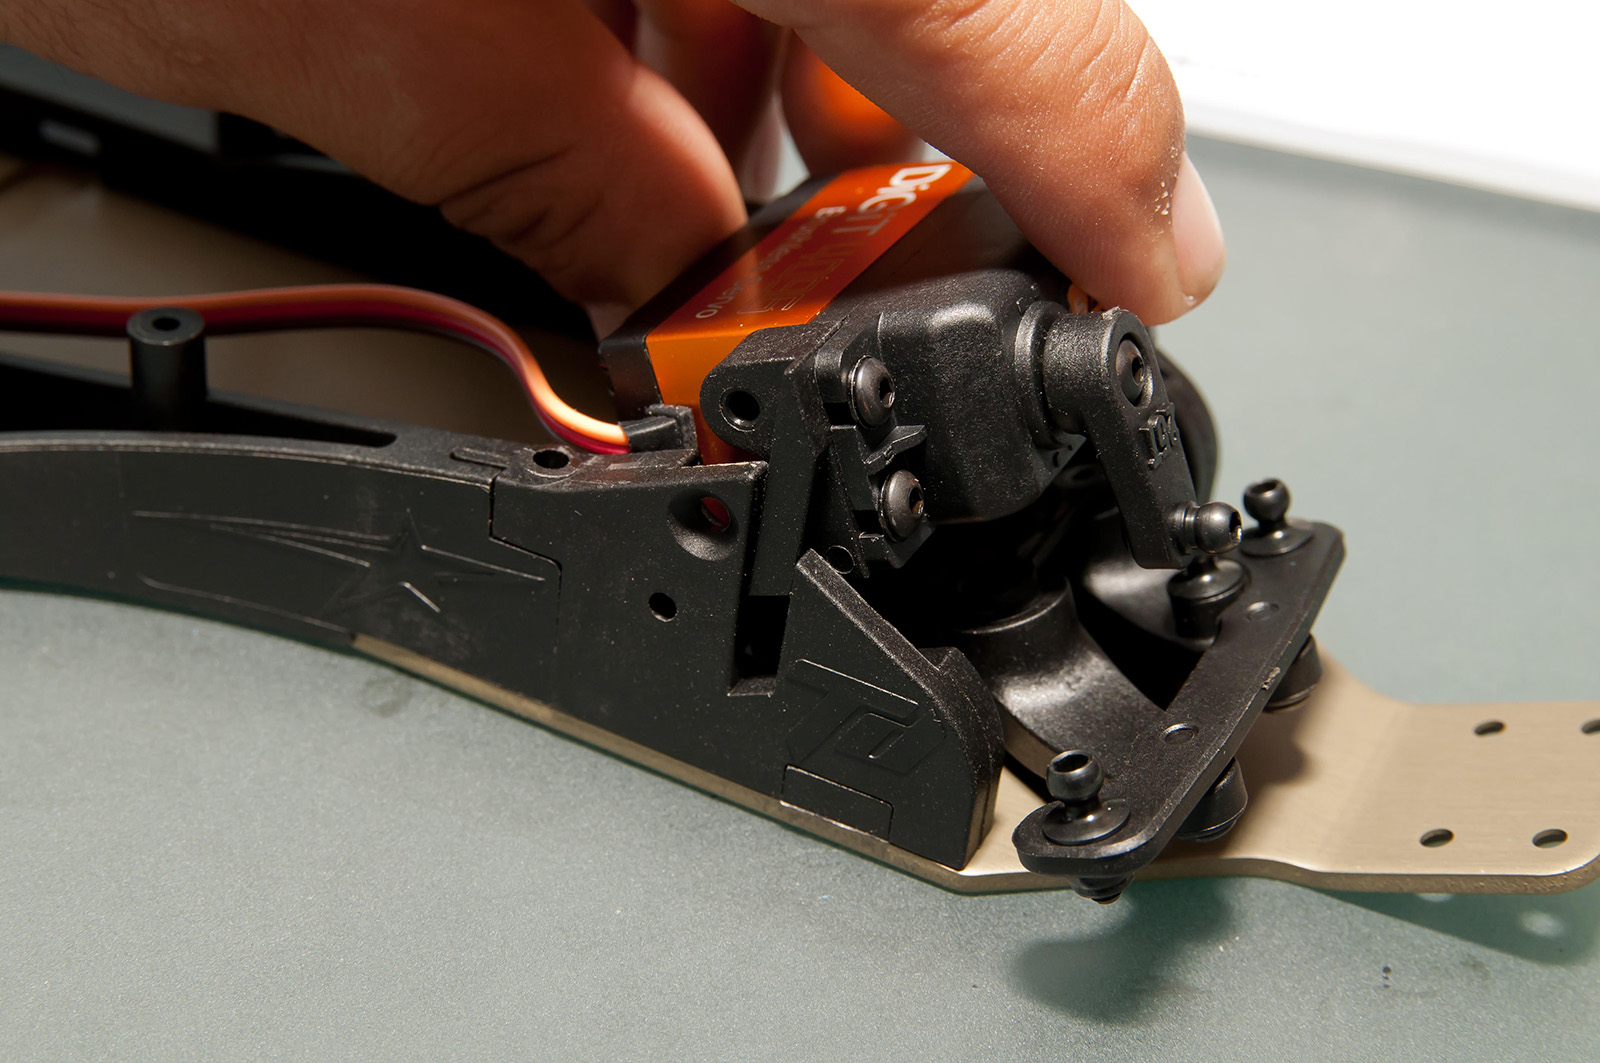
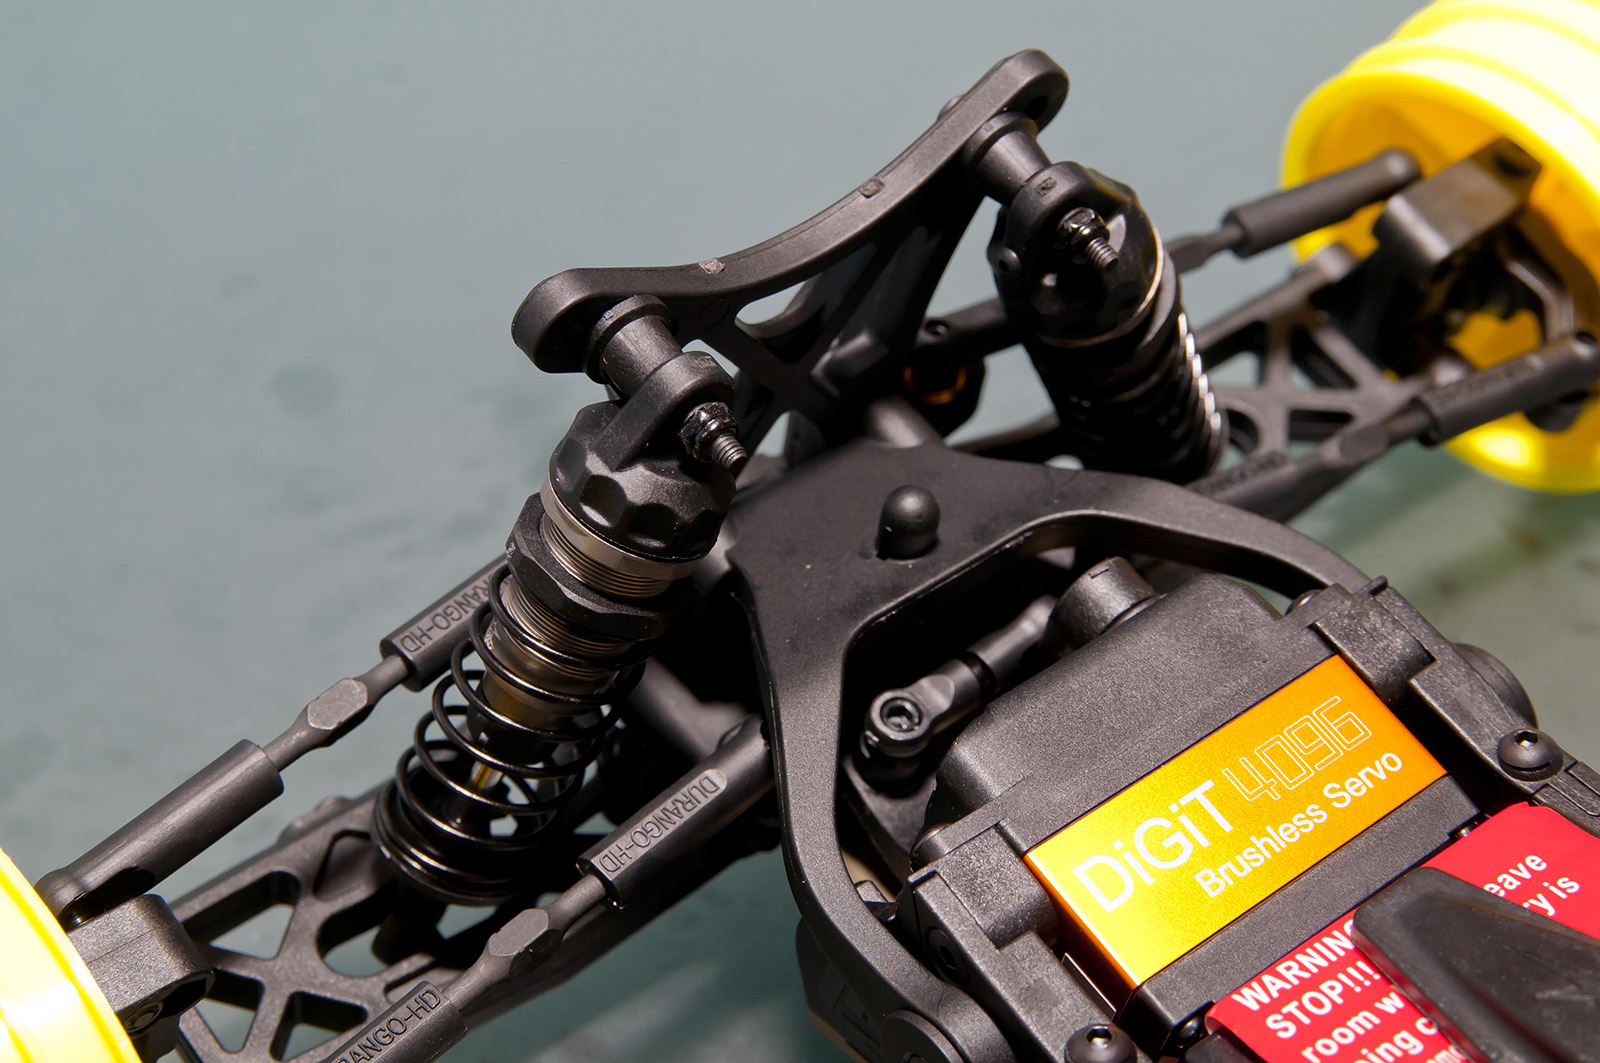
I installed the servo horn on my Savox 4096 servo, as well as the servo mounts. Installing the servo in the car was a cinch thanks in part to the super cool slot/slide-in system incorporated in the side rails. Everything puzzles into place and secured with screws to make a rock solid assembly.
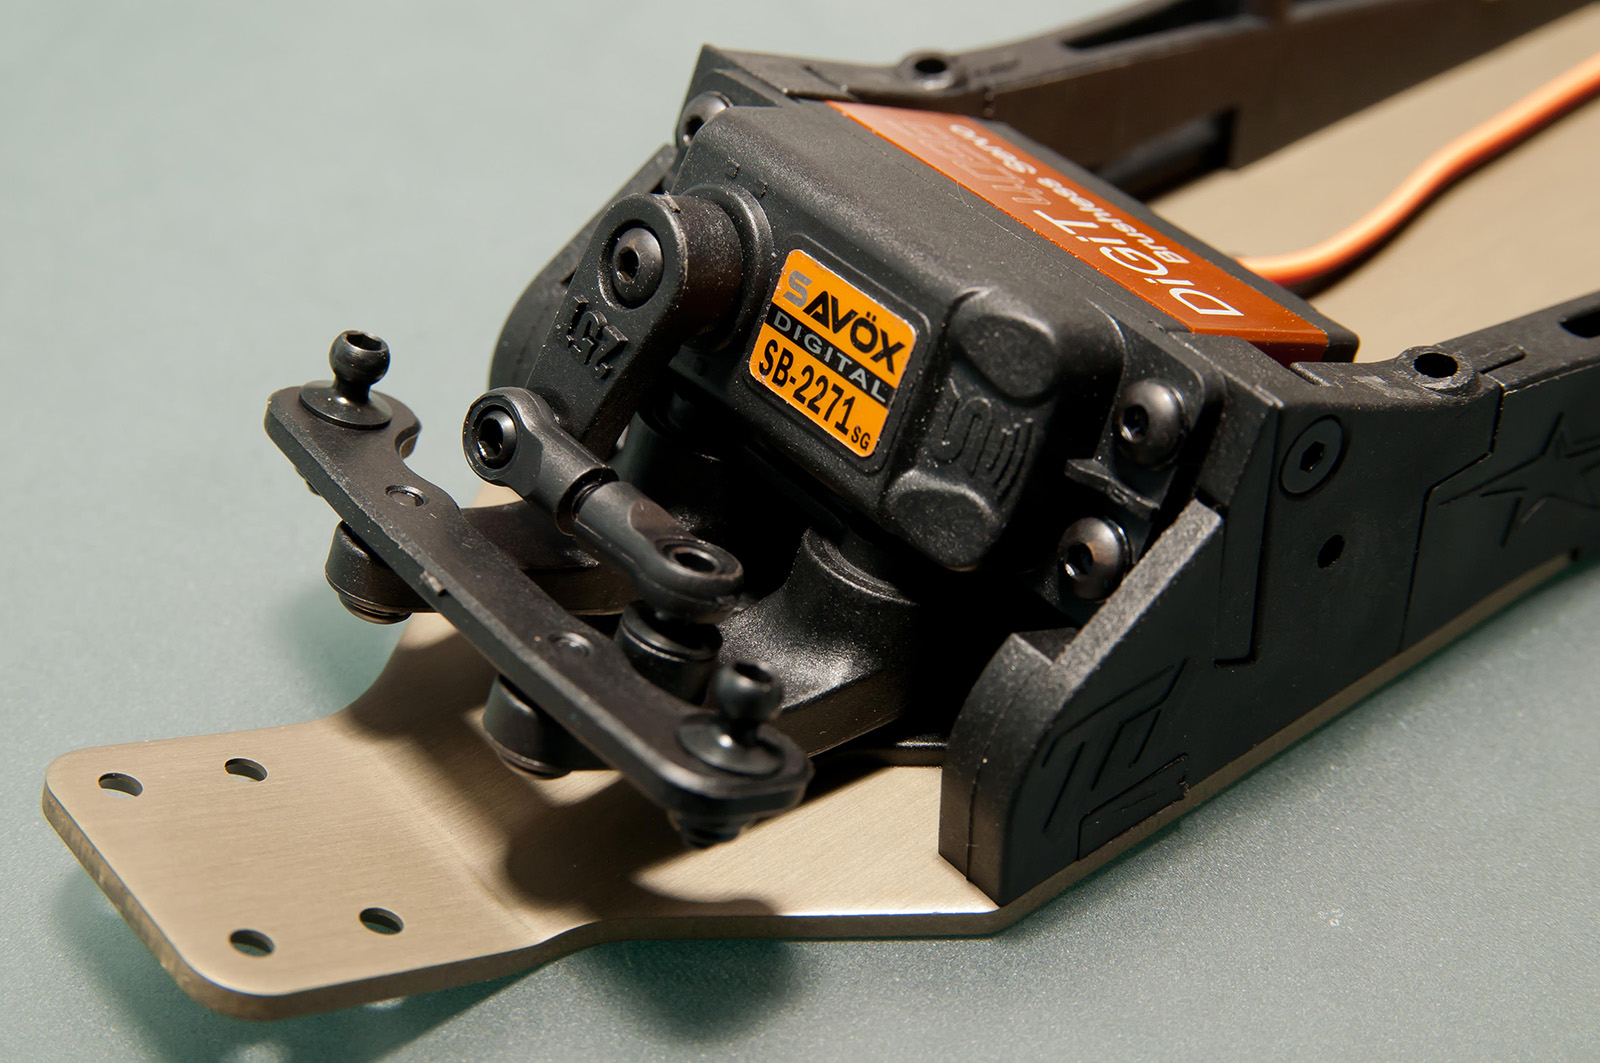
Here’s the servo locked in, mounted and ready to go.
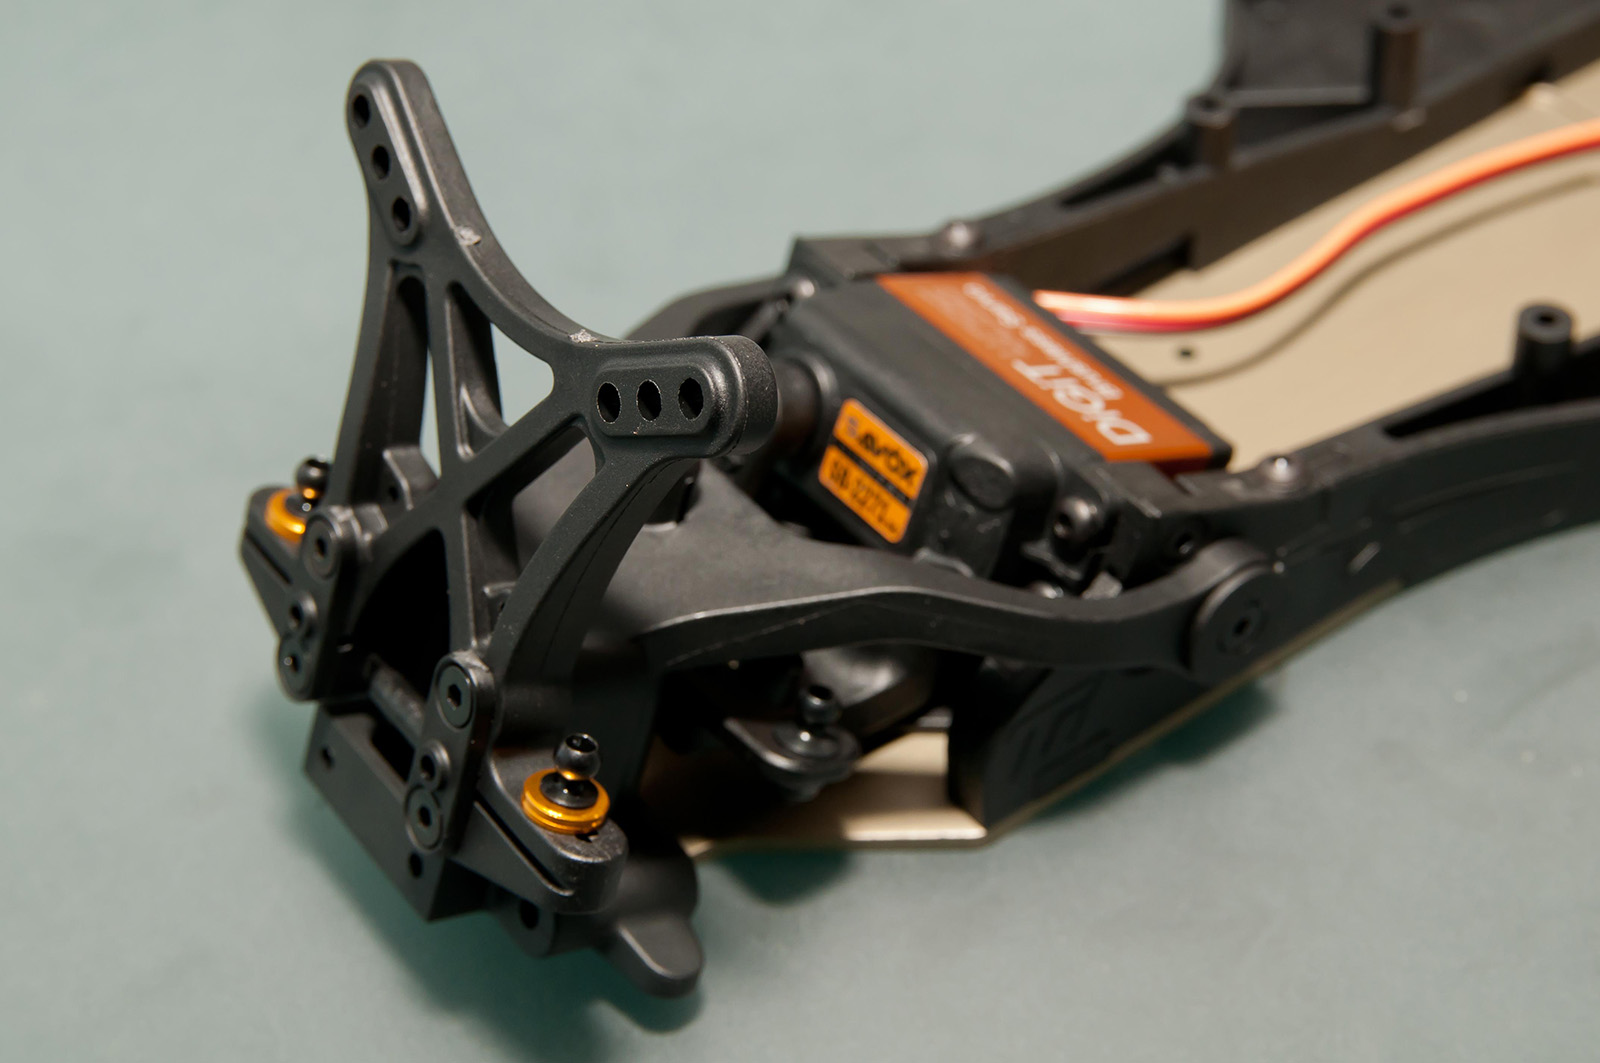
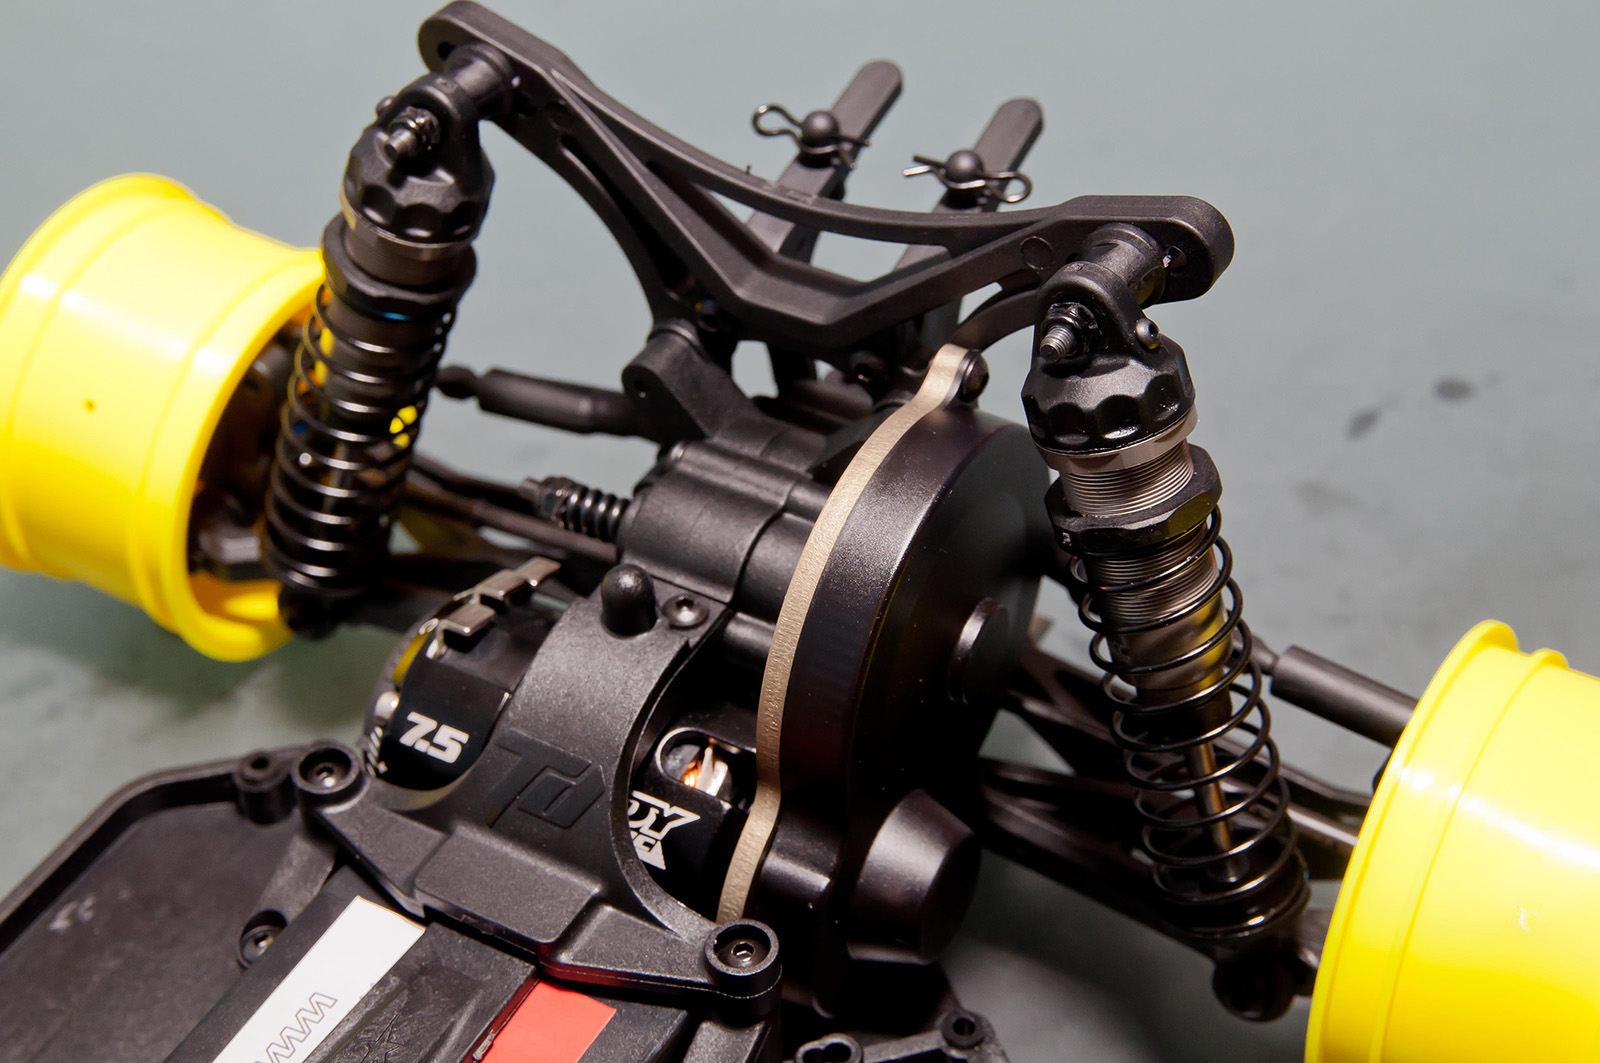
Next was the front chassis brace that mounted the front shock tower. The camber link balls asked to be installed with two, 1mm aluminum washers anodized orange.
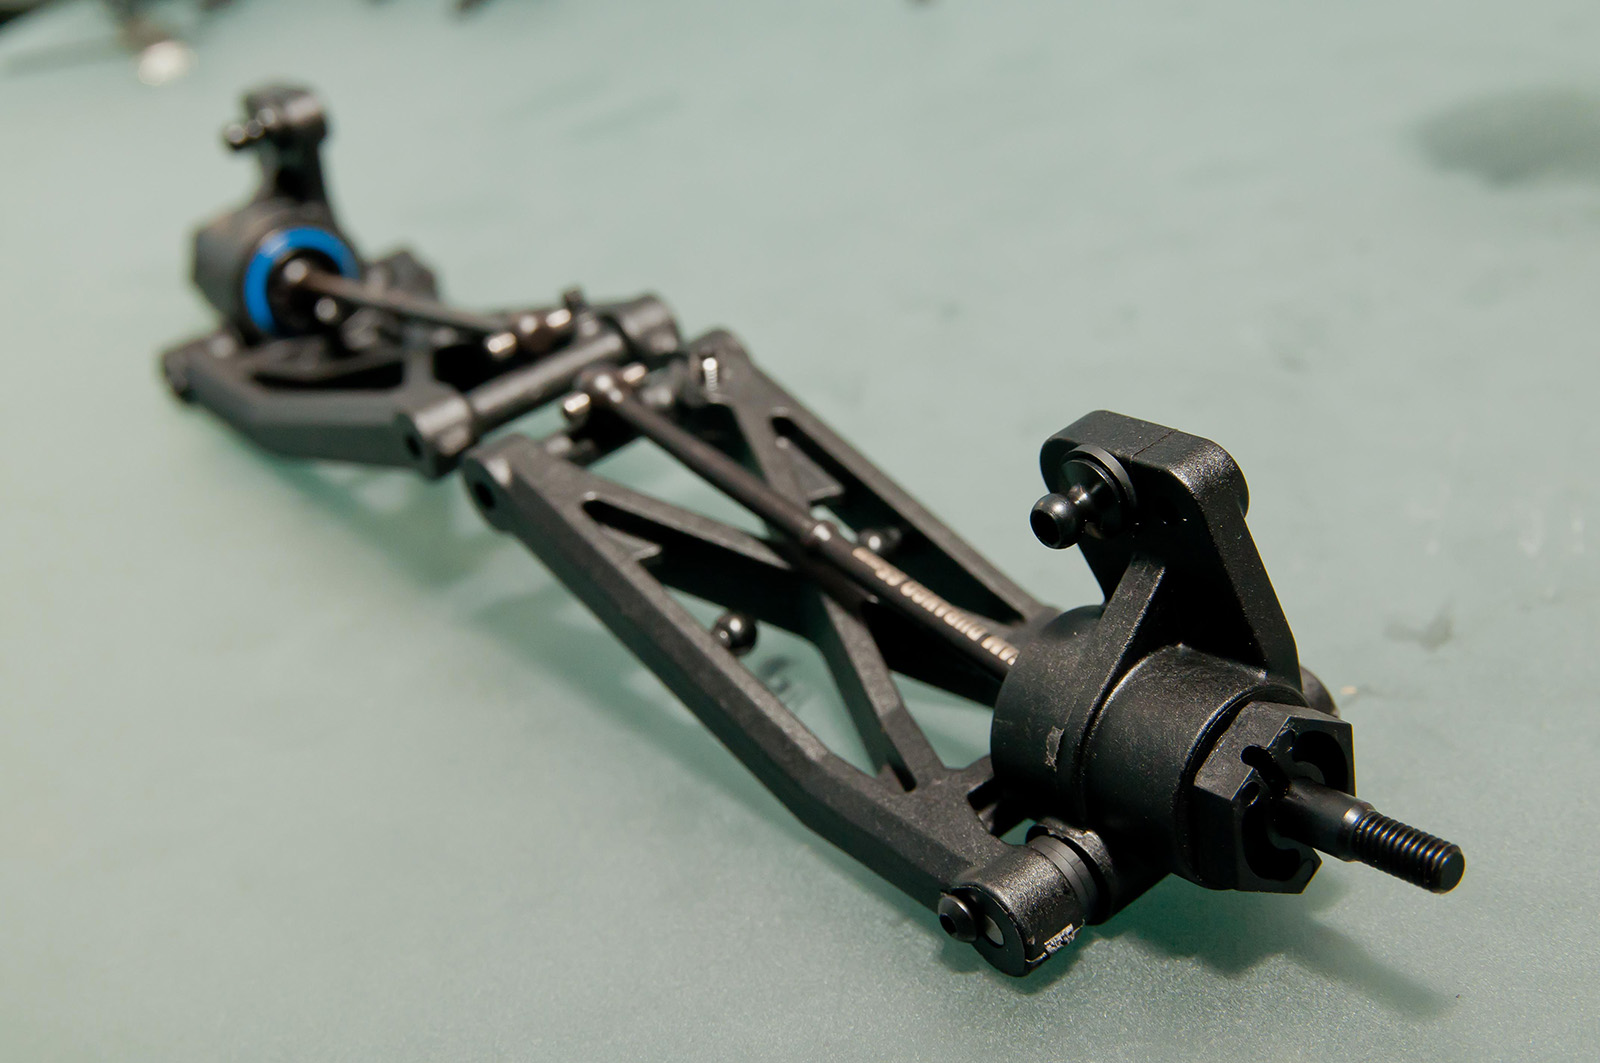
Next was to mount the front suspension arms. In addition, I threaded in the droop screws, and with the inner hinge pins in the arms, I installed it in place. Everything is secured with the front hinge pin holder and bumper.
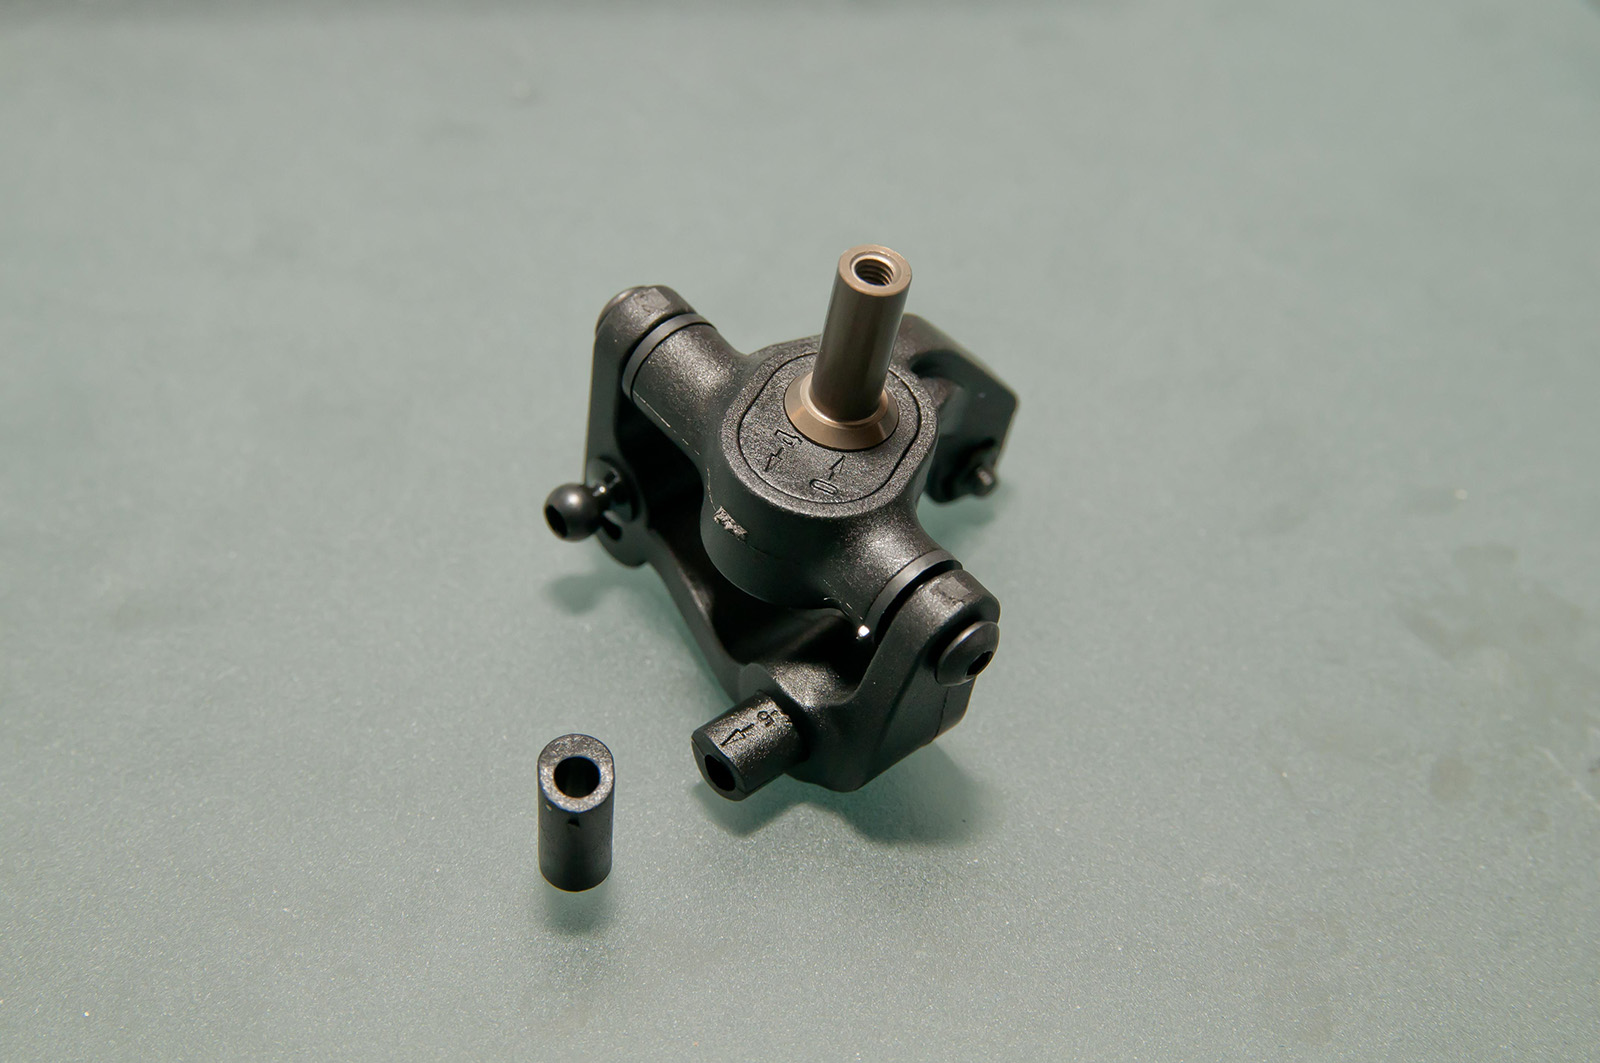
The steering knuckle and C-hubs went together very easily. They feature these very smart inserts that quickly and easily let you adjust the caster angle, and the inline/trailing axle position. More details about those adjustment. The rear hubs also have this feature and let you adjust the toe-in angle.
Here is a pair of inserts. I partially inserted one into the C-hub. They easily change out and have absolutely no slop. No more carrying around multiple C-hubs!
Here is the assembly installed on the arm. Captured hinge pins means no lost clips.
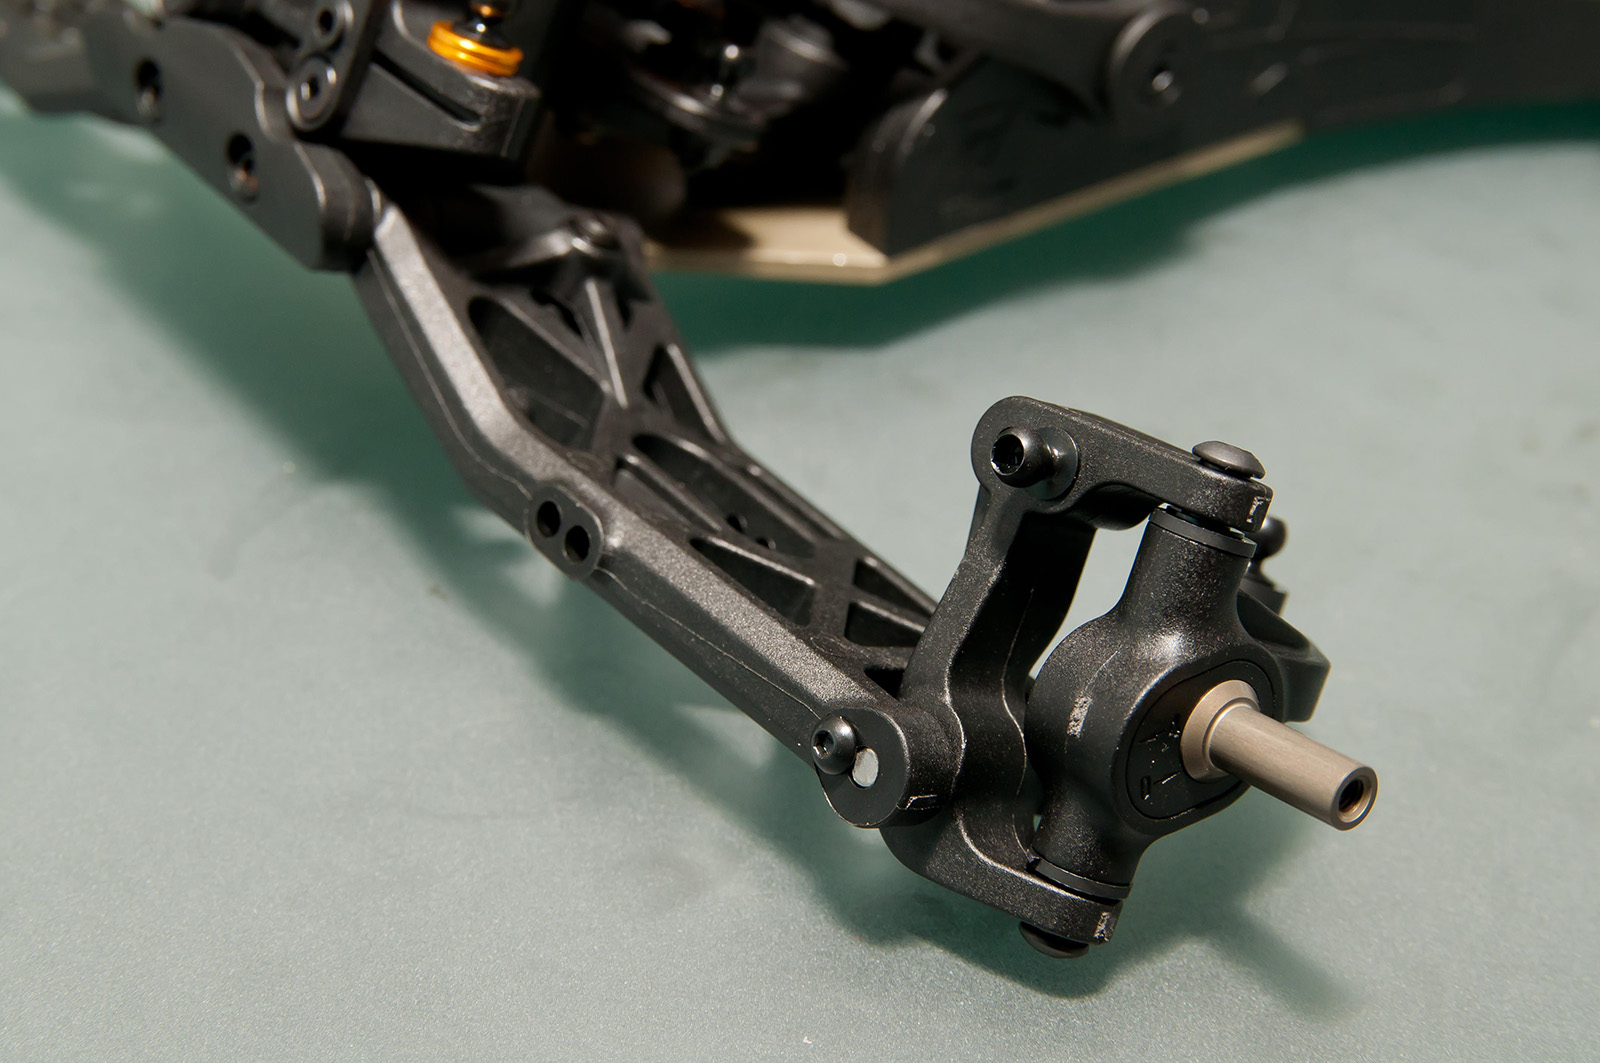
Here is the rear hub/universal assembly showing you all the parts in use, and a finished piece. The universal joint features a captured pin held in place by the bearing with the blue seal. The bearings themselves are oversized and are built to take abuse and offer long life.
I put the 3-degree toe-in insert in the hub and installed the assembly on the rear arm. Looks like I need to trim some flashing on the arm!
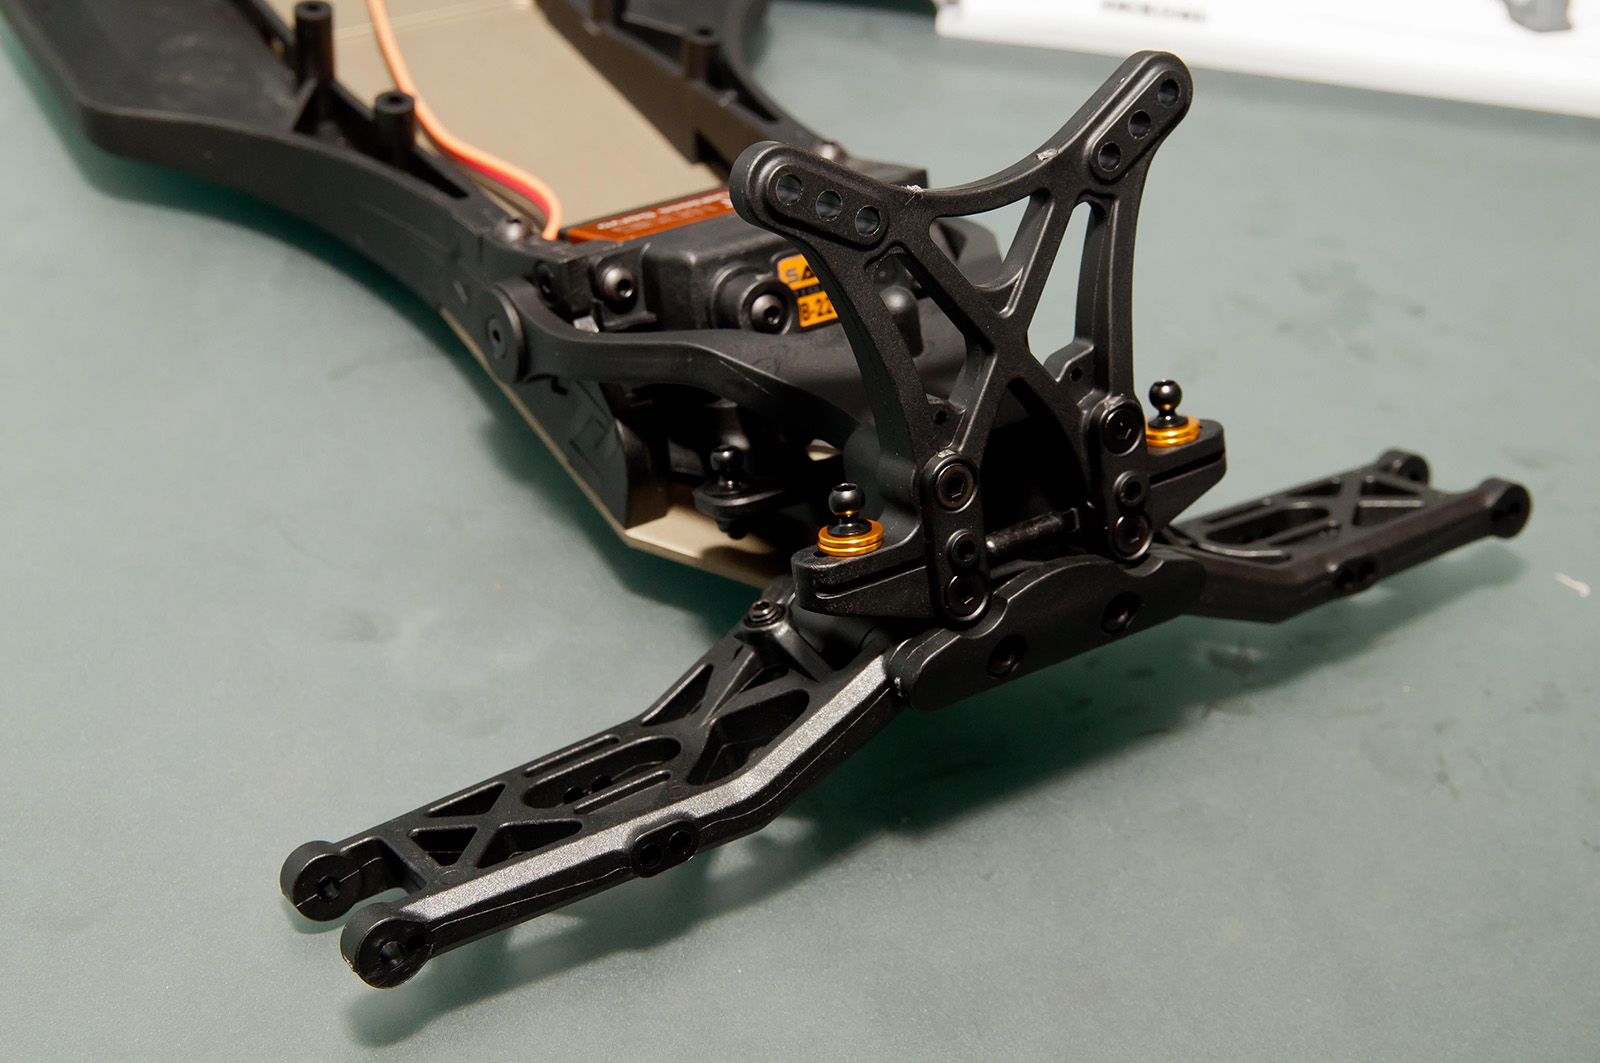
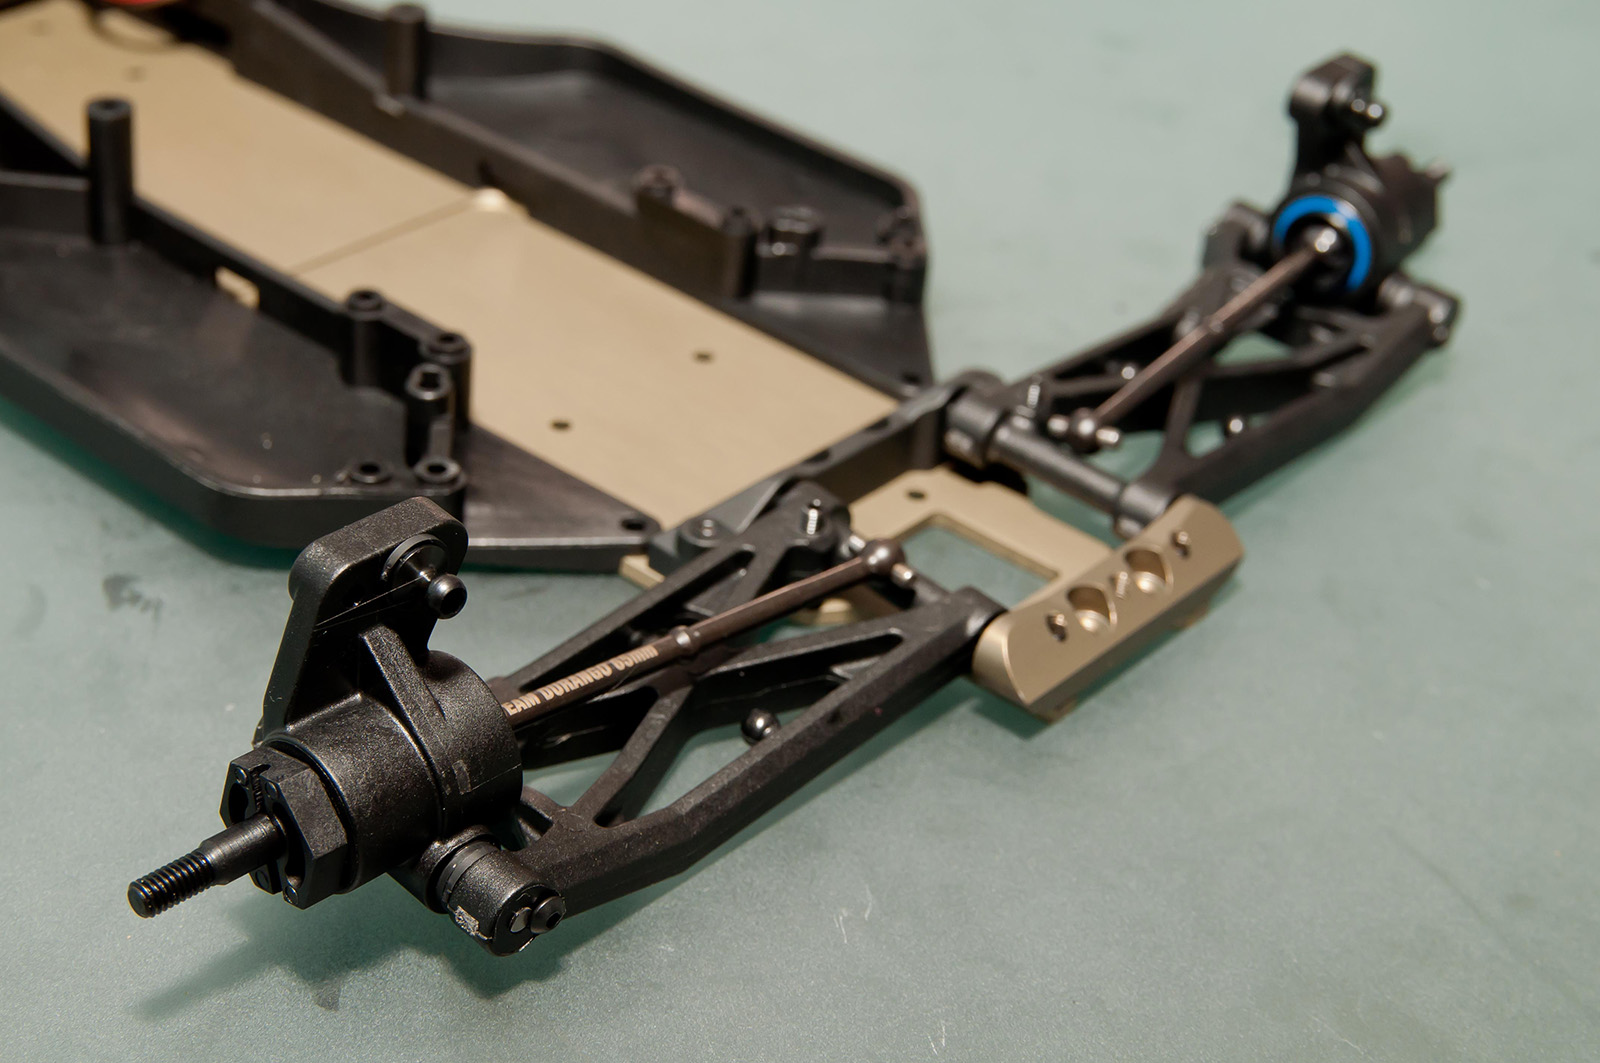
Here are the arms installed on the chassis. There are different plastic inner hinge pin holders that let you adjust the kick-up/toe-in. Washers fore/aft of the hub let you adjust the wheelbase. I also installed the droop screws in the arms.
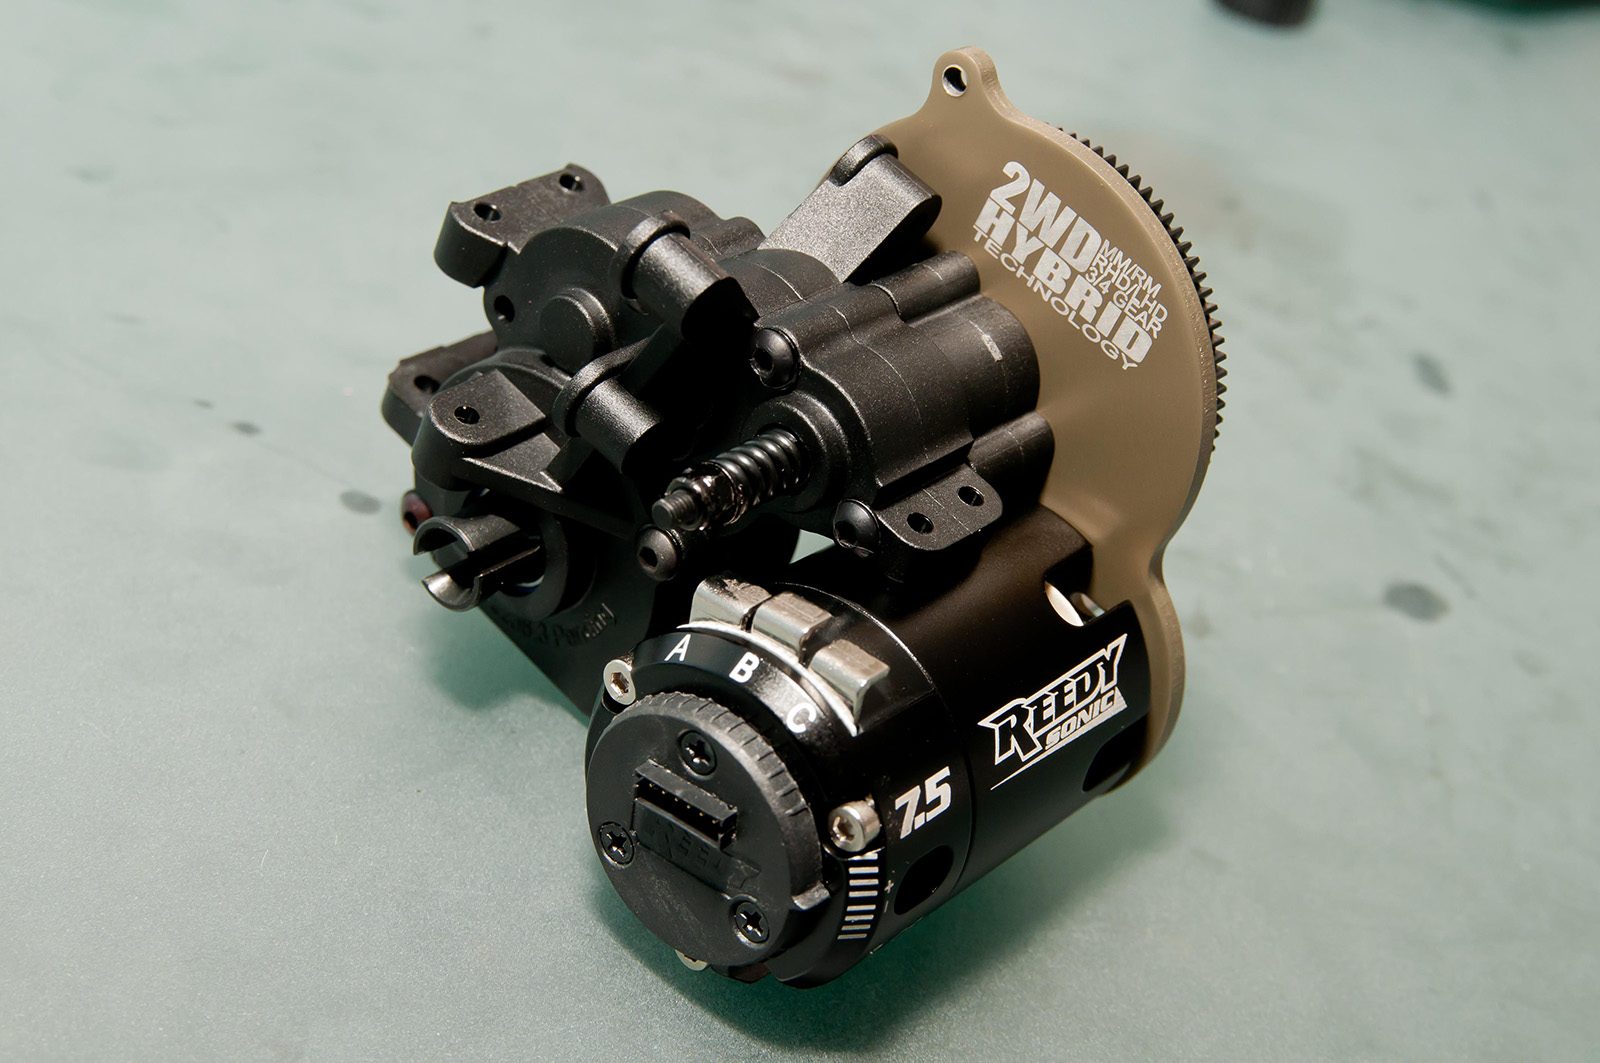
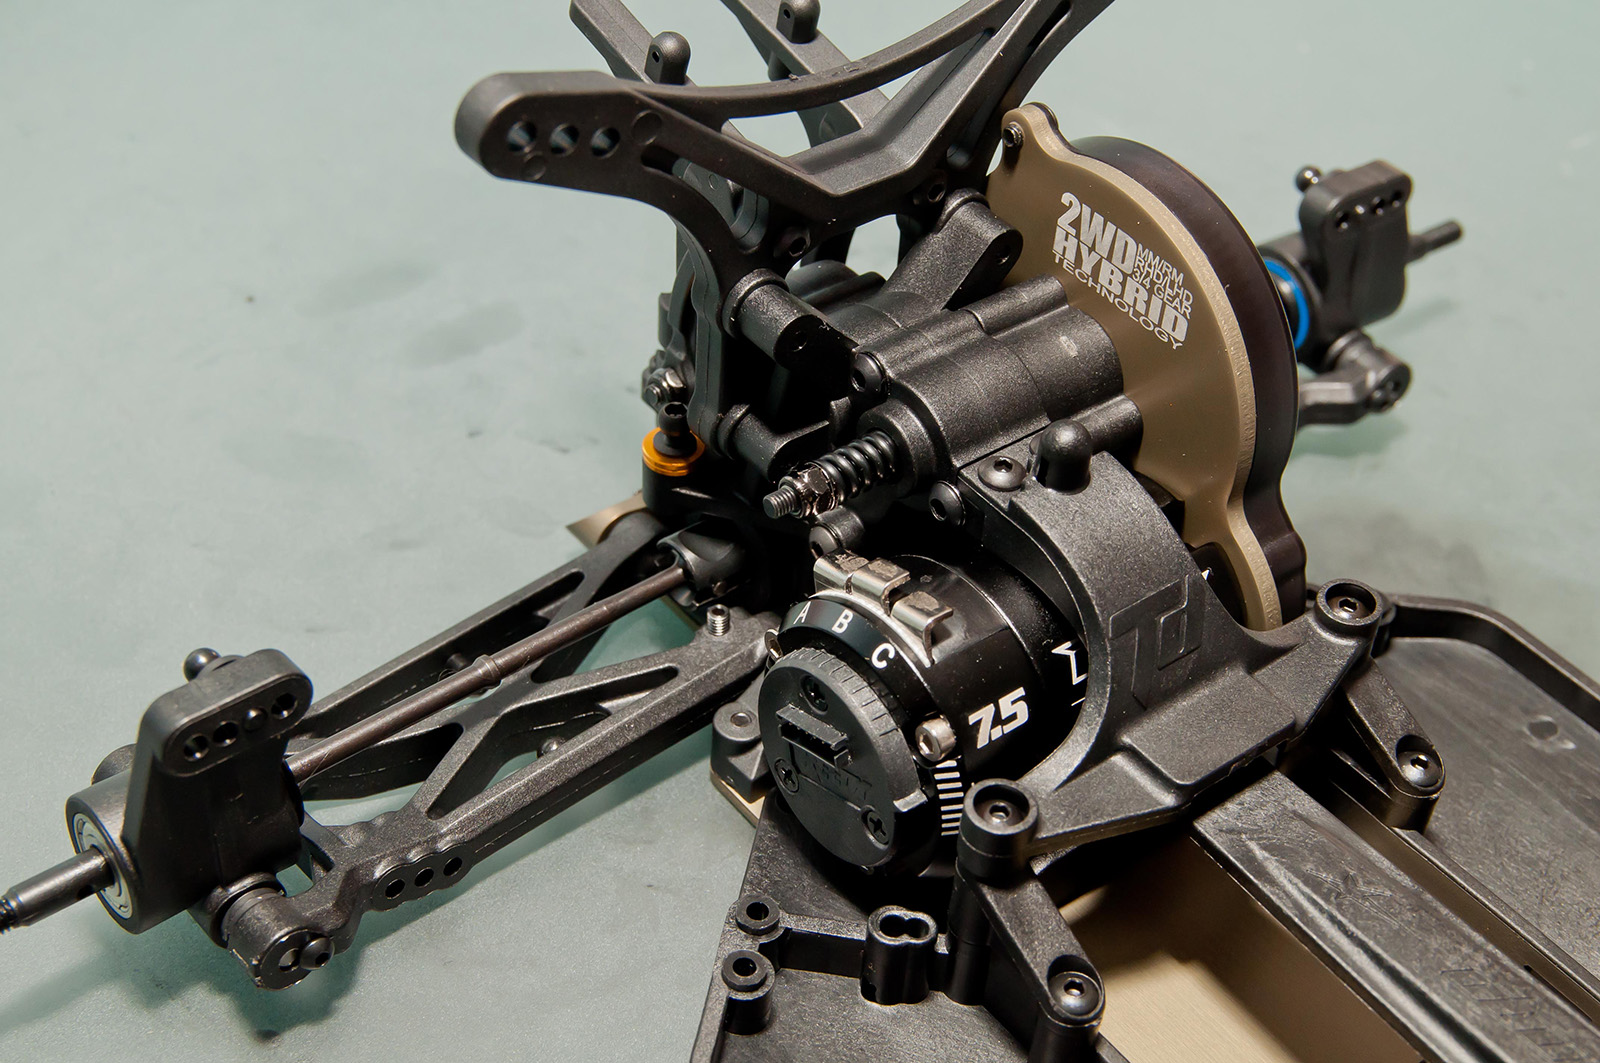
Here’s the finished gearbox. The diff is pretty standard and went together easily. Durango has a web page to help you build it like a pro. Here’s the link. I decided to first try the Mid-Motor 4-gear design when I initially test the DEX210.
The opposite view of the gearbox.
Here’s the gearbox installed in the car as a Mid-Motor 4-gear (MM4). All the parts are included in the kit to position the gearbox as a MM3, Rear-Motor 3-gear (RM3) or a RM4. Talk about tune-ability! The rear shock tower installs right on the gearbox along with the wing mount. The camber link balls were installed with two 1mm orange washers. More details about motor configuration.
Next went on the rear chassis brace and I threw on the battery bar assembly.
She’s almost finished! I also assembled the turnbuckles and installed them on the car. Durango has a great guide on how to more easily do this.
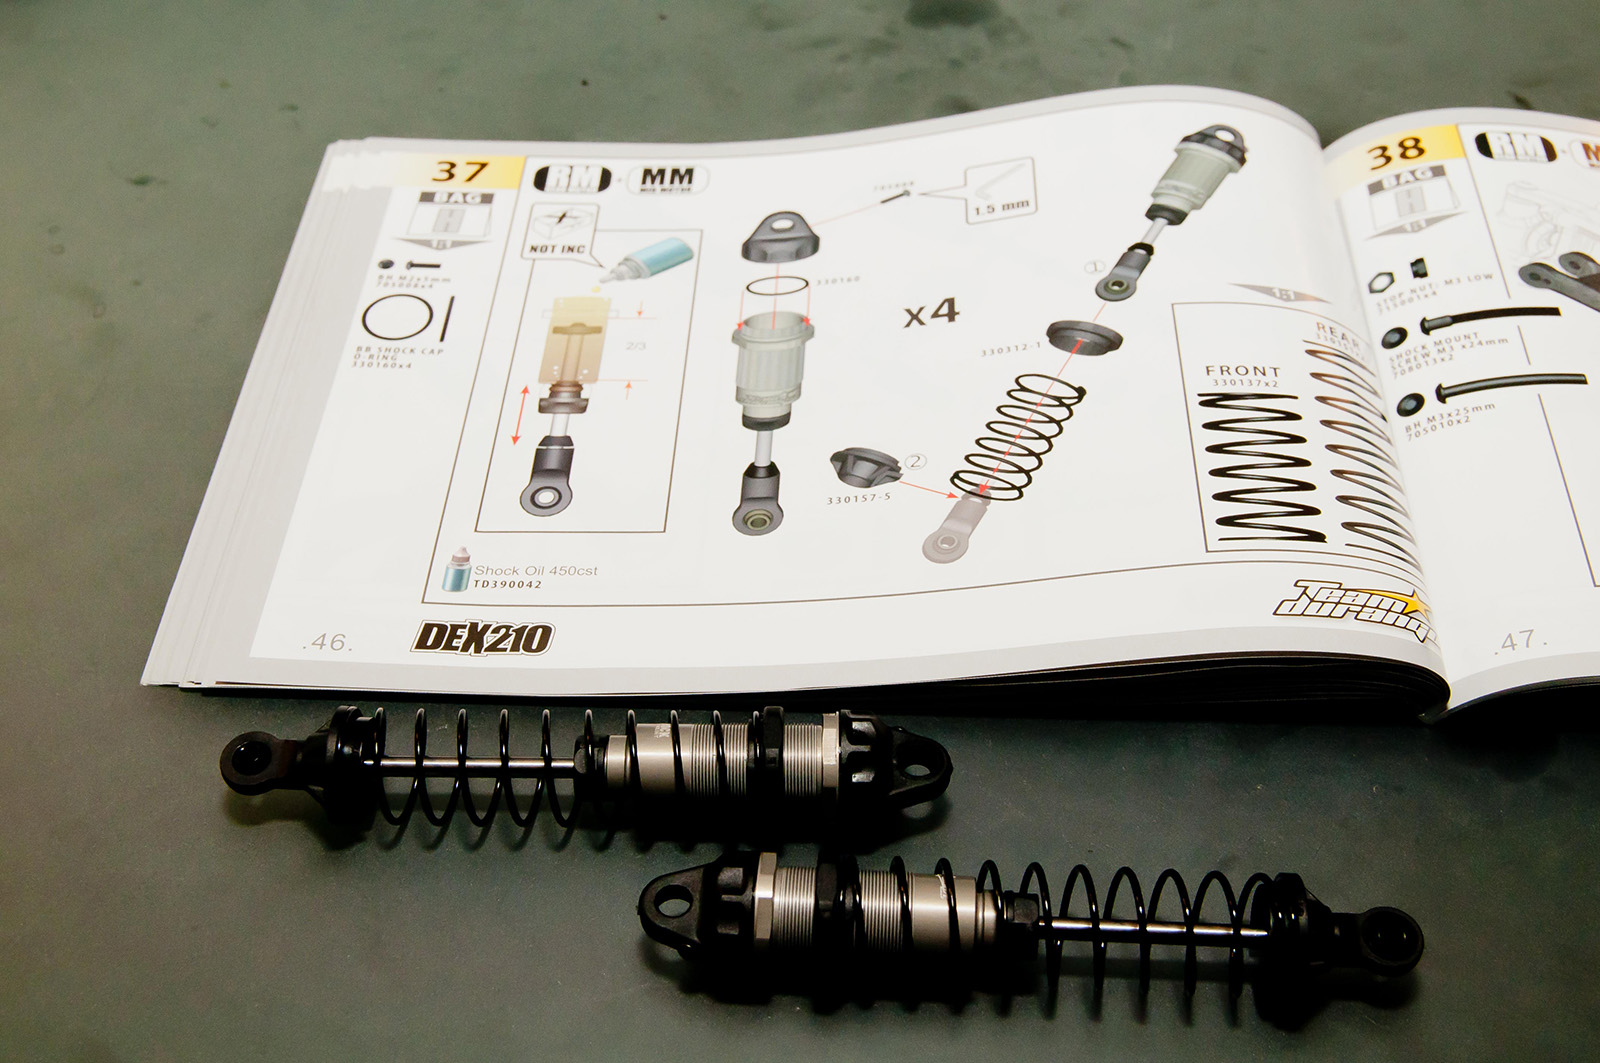
The big bore shocks were next to go together. They are super easy to assemble and are silky smooth. I put 30wt in the front shocks, and 25wt in the rear.
Here are the front shocks installed on the car.
Here are the rear shocks installed on the car.
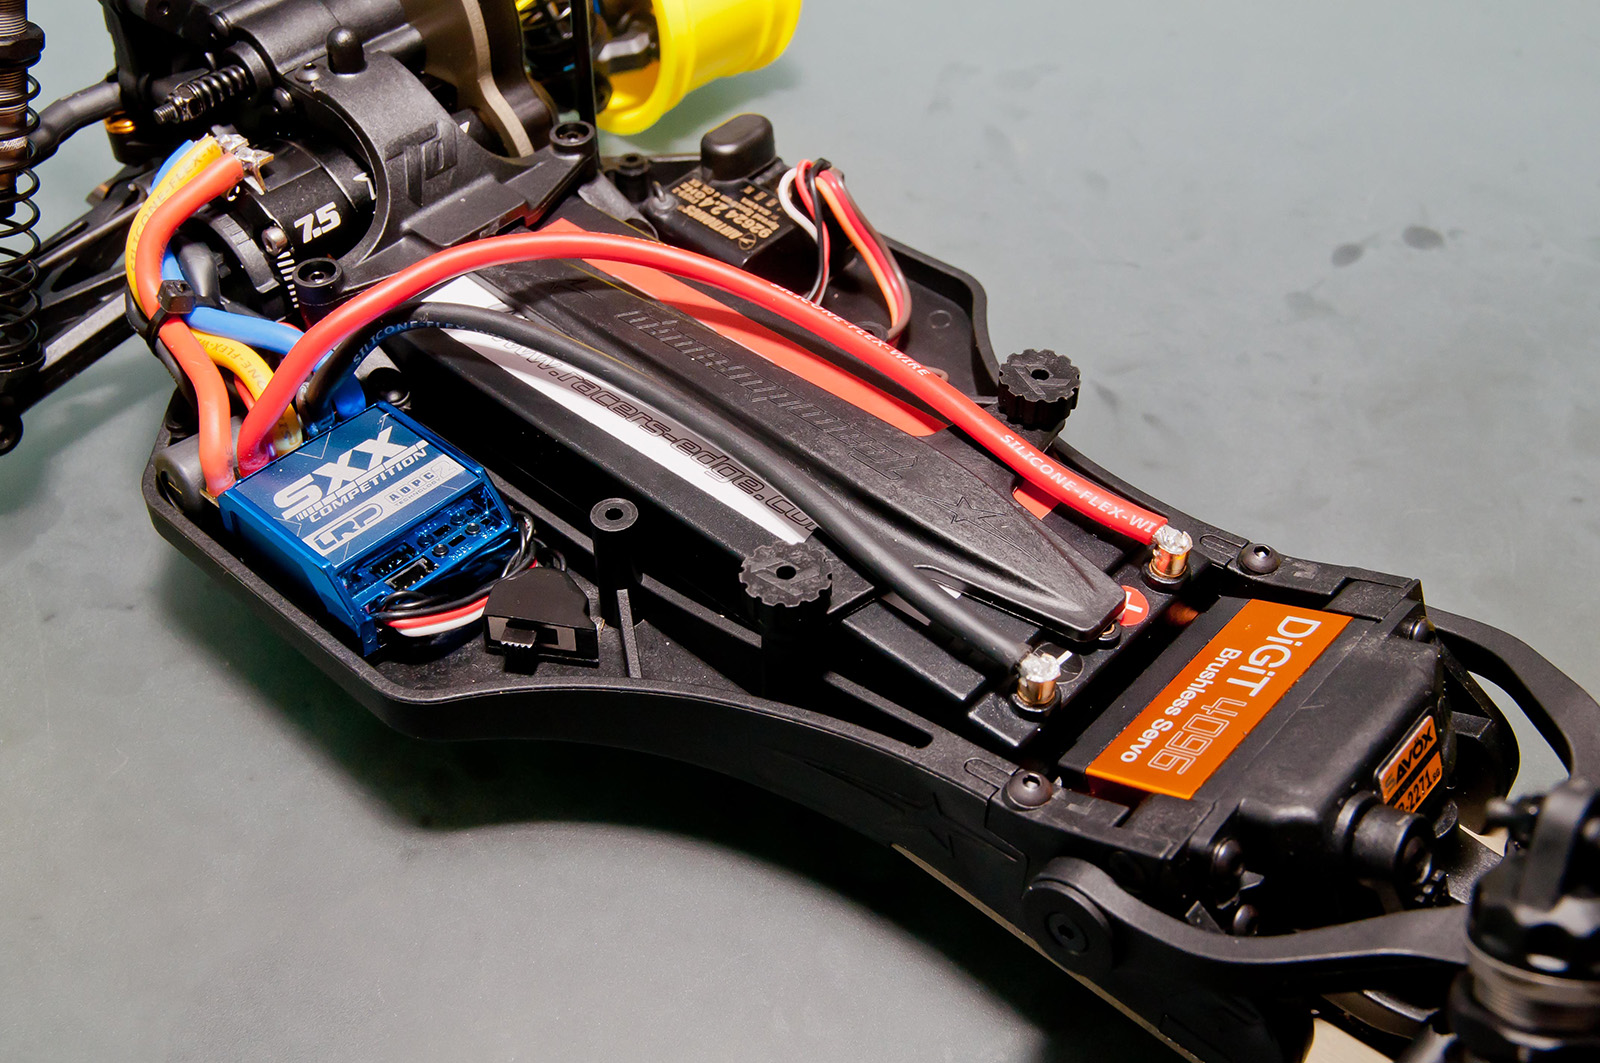
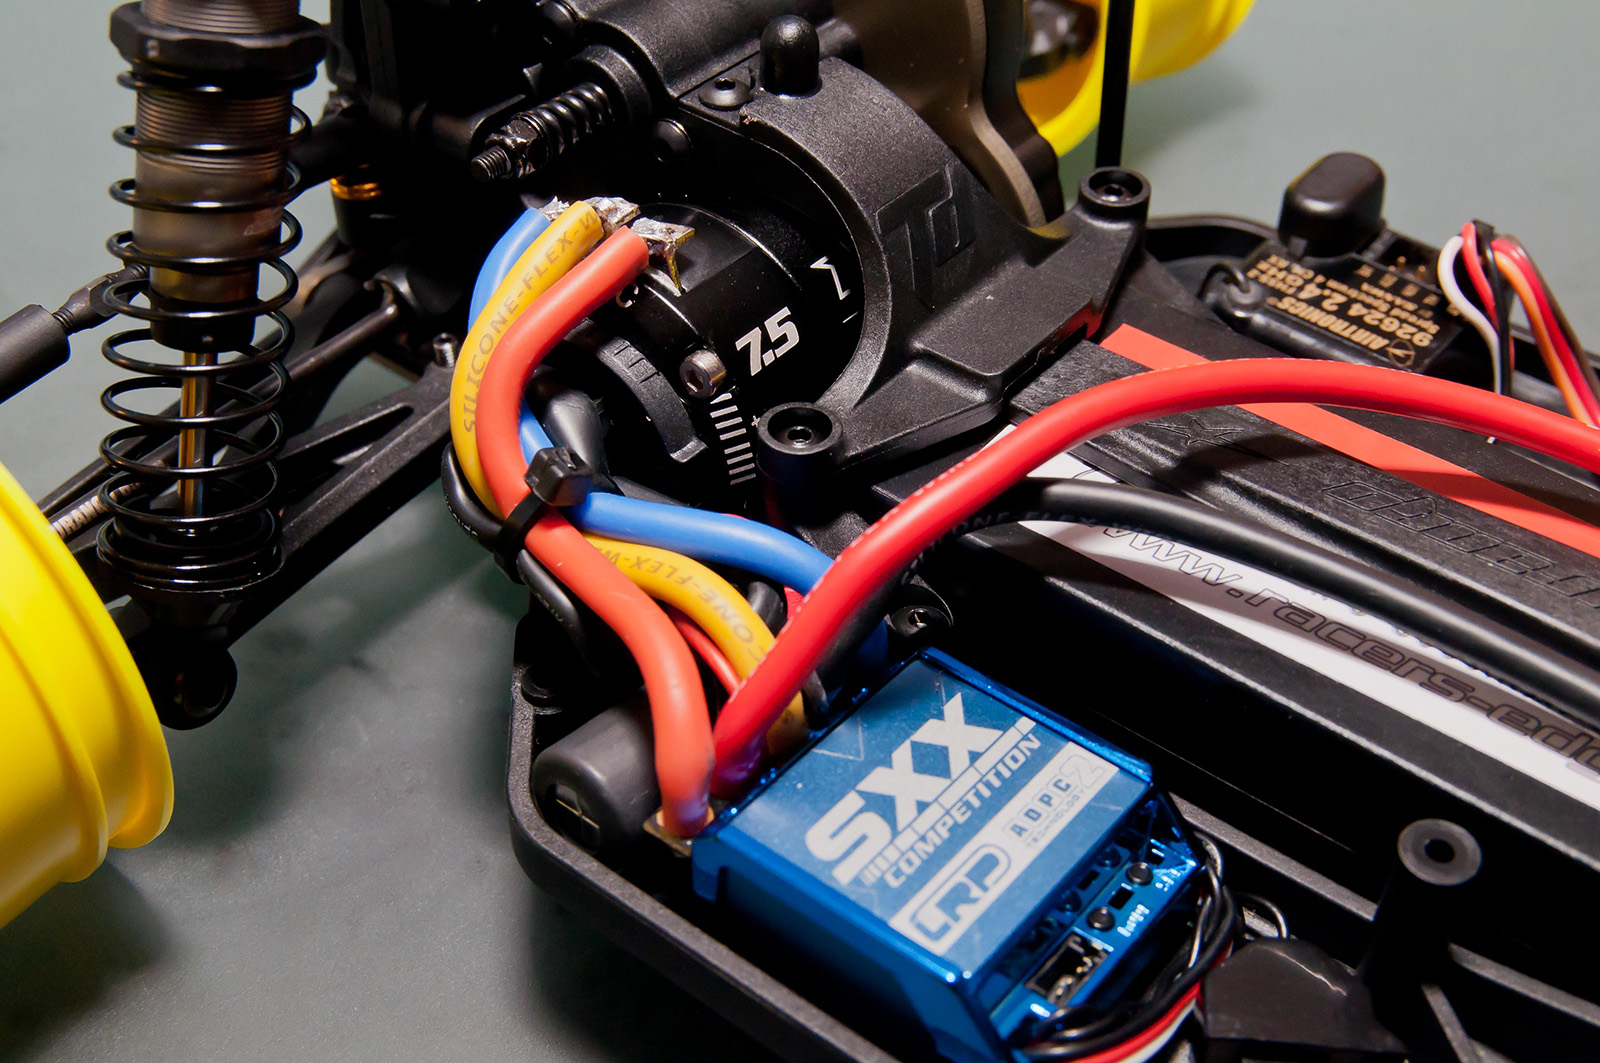
Here are all the electronics installed (minus my transponder). I keep all the wires organized nice and neat, plus short as possible. She looks photo ready to me!
Another view of the electronics installed.
Close up of the motor wiring. That Reedy Sonic 7.5-turn BL motor should provide a ton of power!
Overall, putting together the Durango DEX210 was a breeze. I usually prefer kits versus RTR’s. I like to know every piece that went into putting a car together, so on race days, I understand exactly what needs to be adjusted, and if something breaks (especially something internal), I know exactly what has broken, and in what sequence I need to take the car apart to get to that broken piece. For beginner builder, I think the instruction manual is very clearly laid out, and with the additional Durango web support pages, you can’t go wrong in the assembly process. All that’s left is to slap on some rubber (I’m going to test with AKA tires) and throw on the painted body when I receive it from CFX Paintworks (you too can also send your body to CFX to get painted) then pack it all up and head on down to SDRC Raceway! See you on the track!
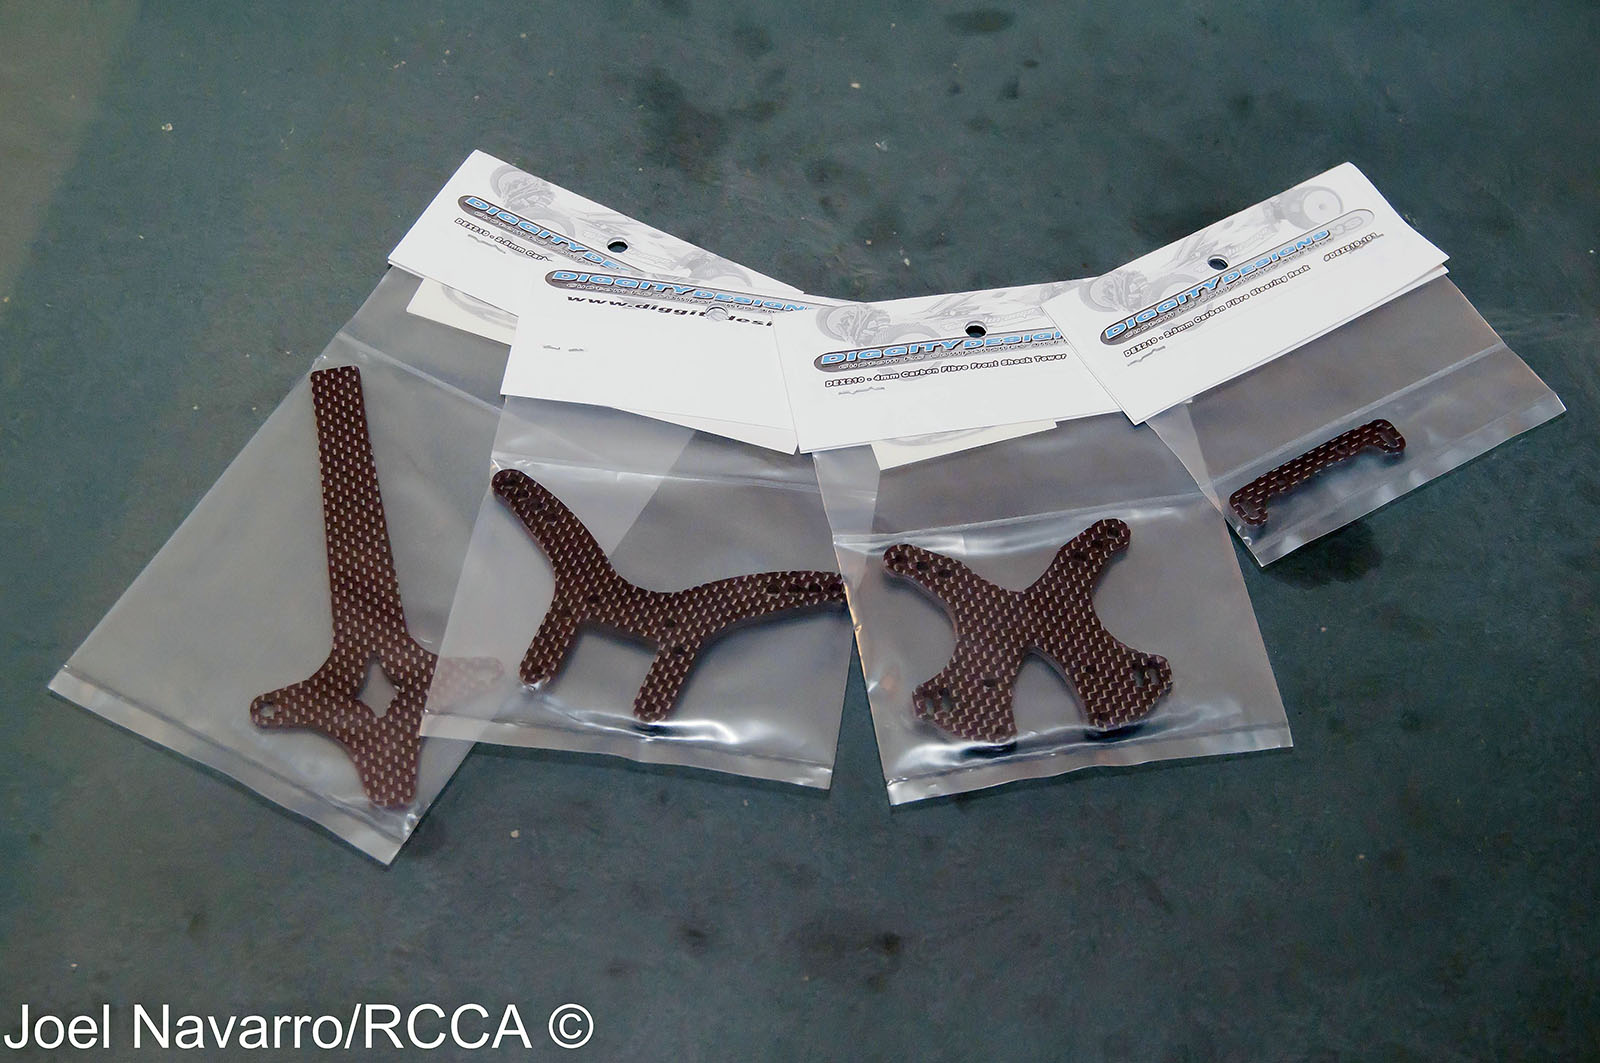
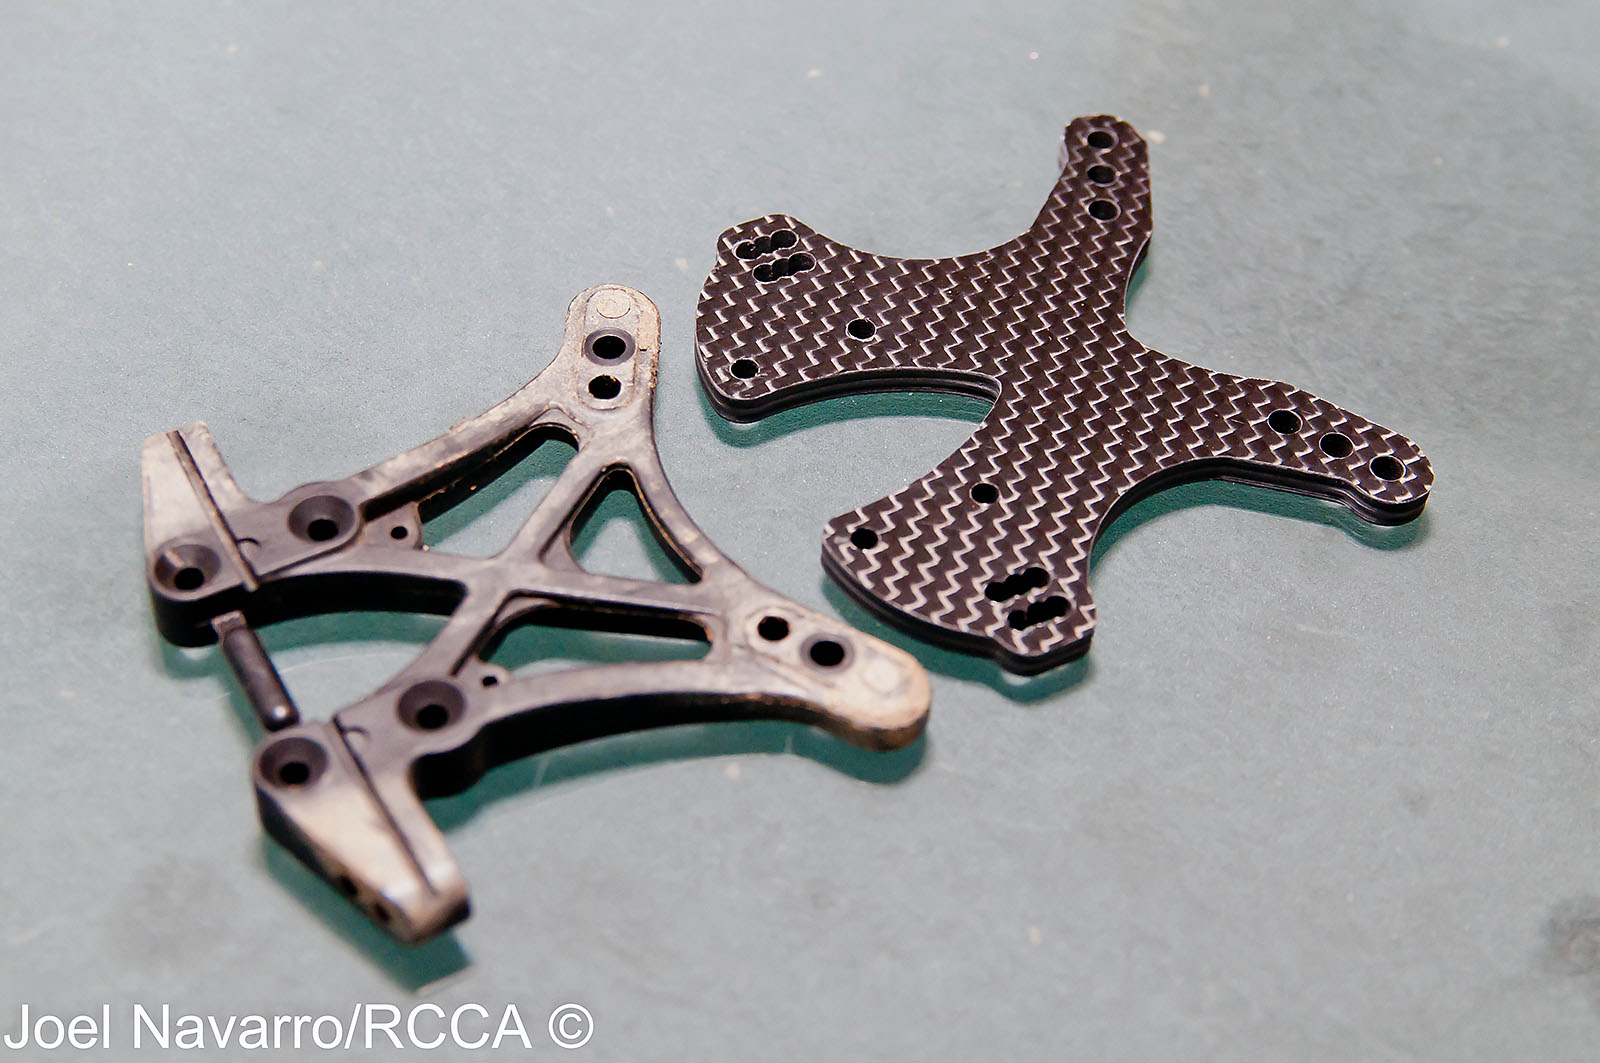
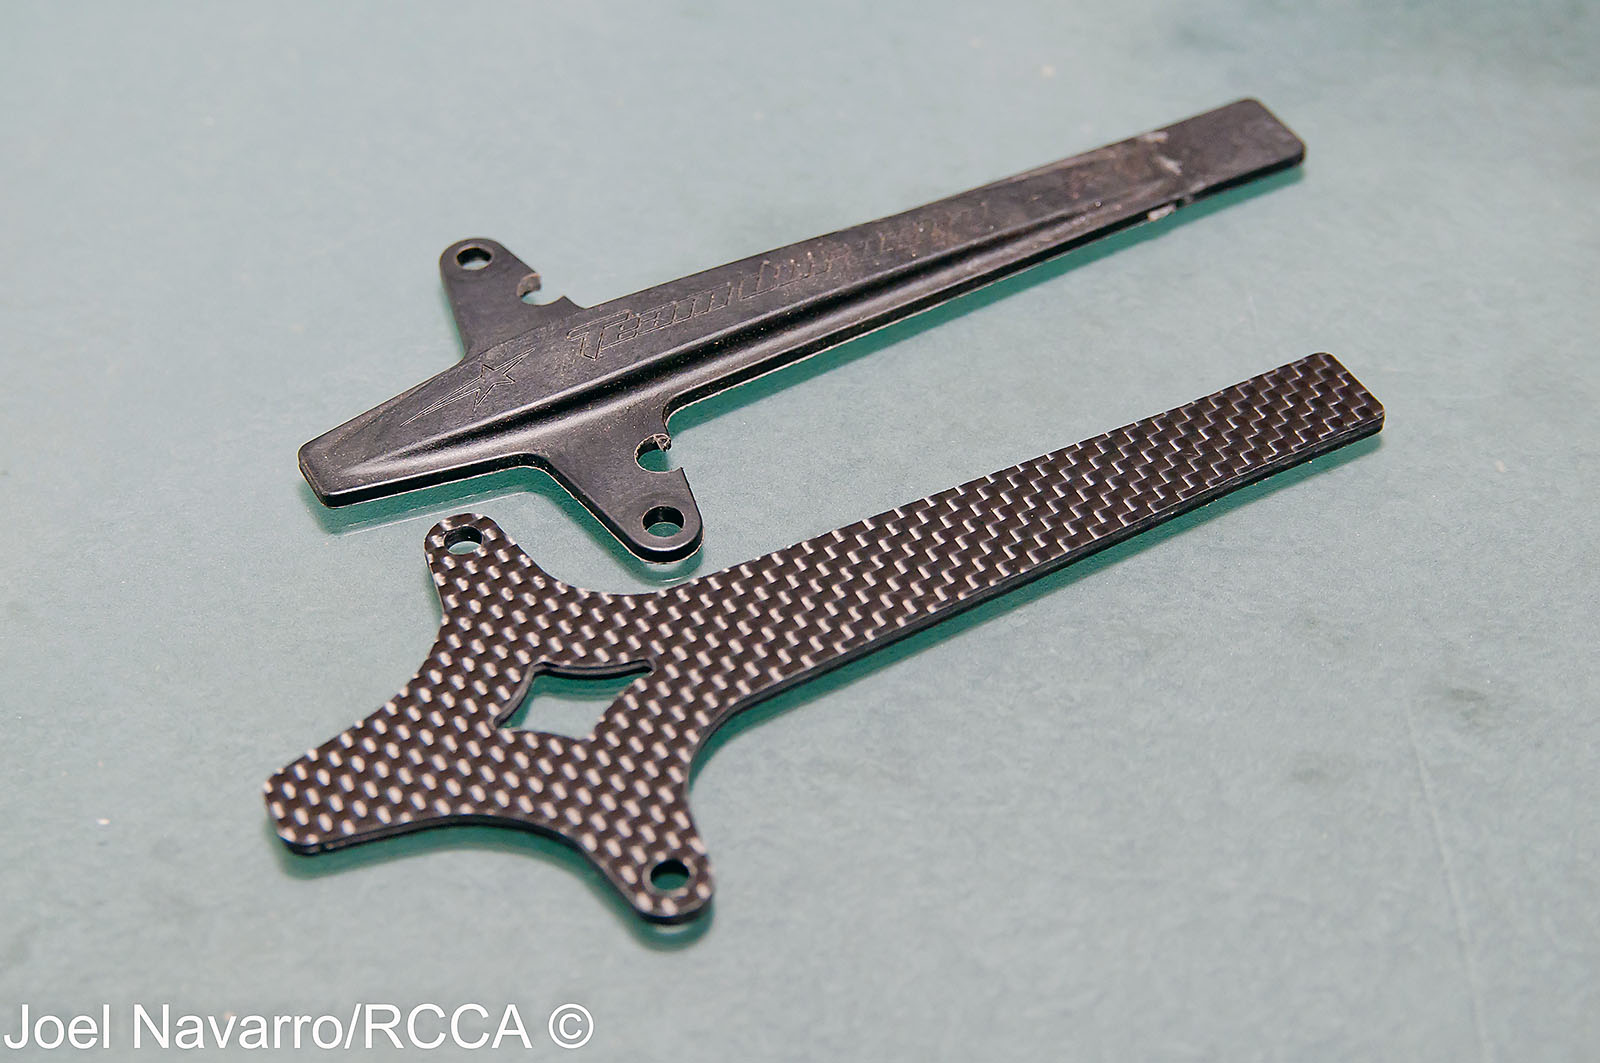
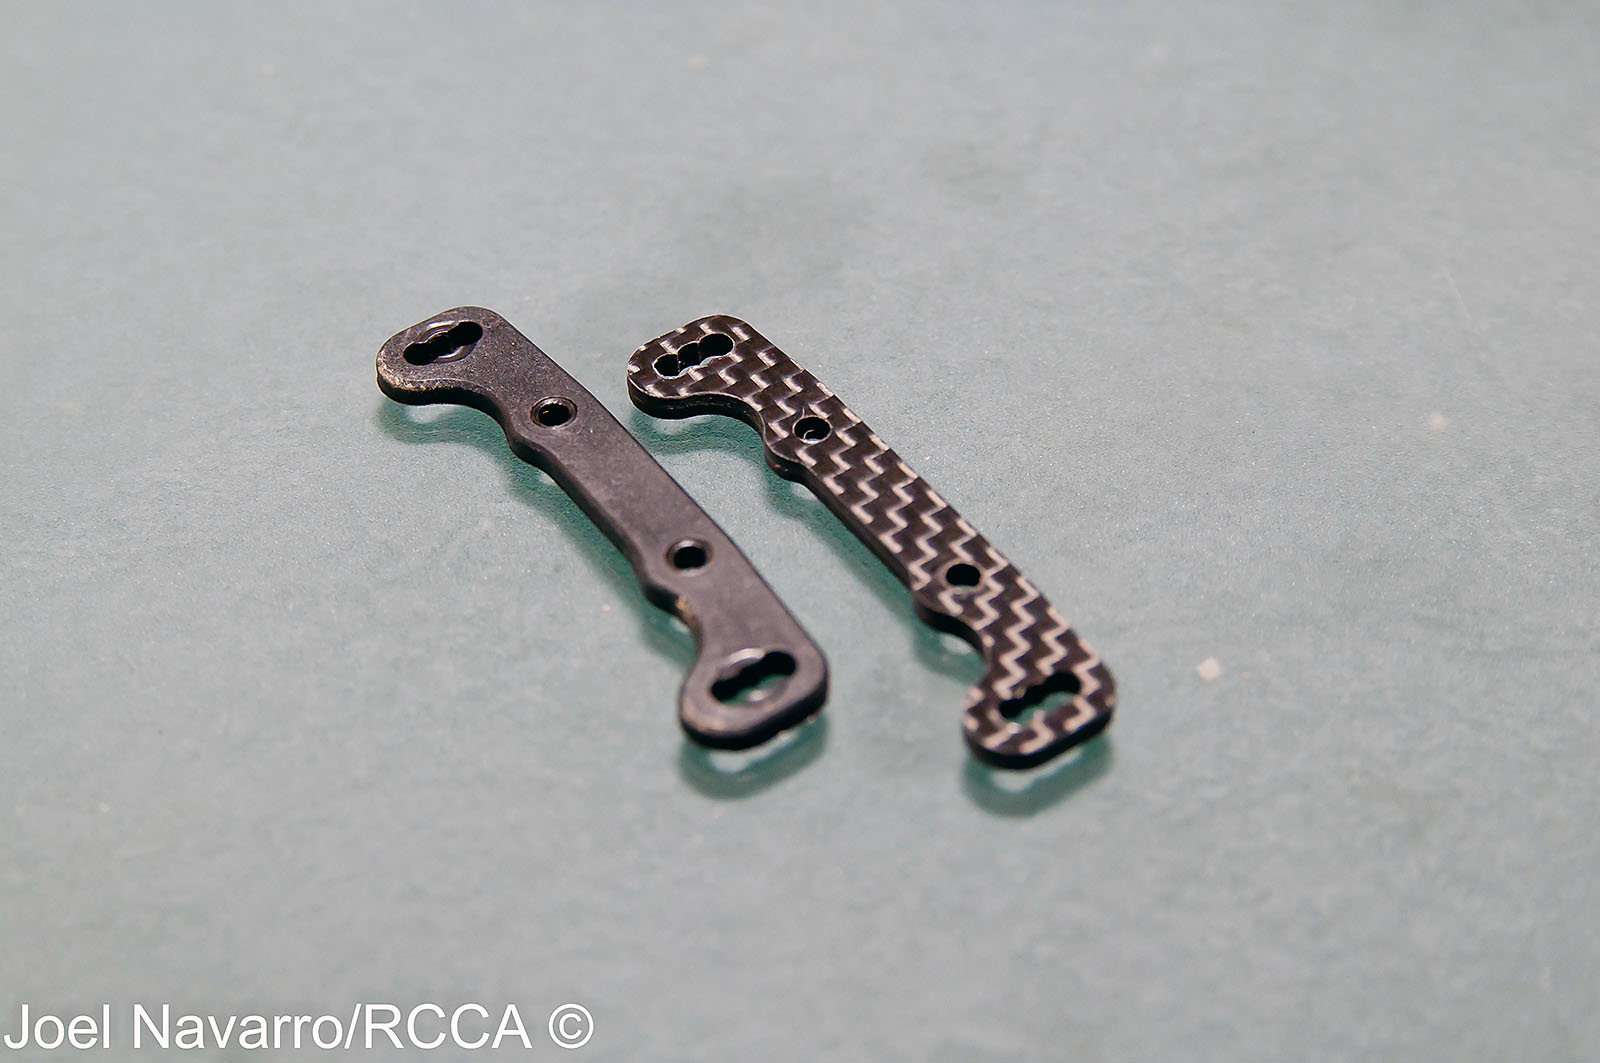
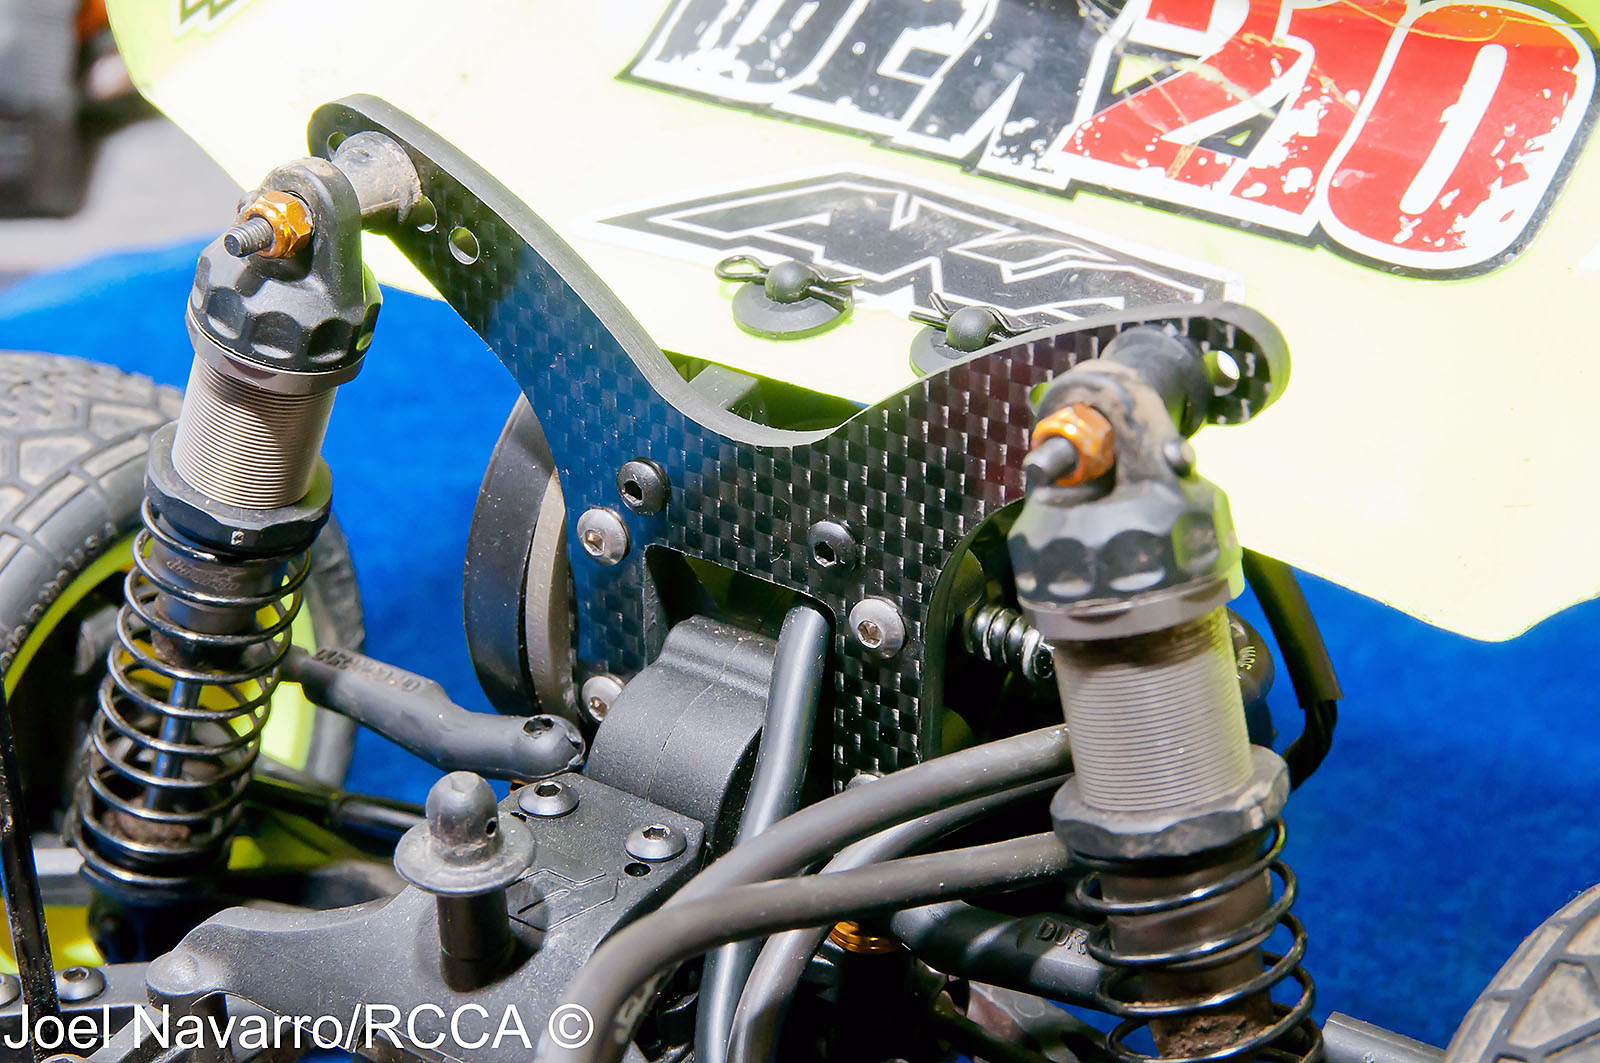
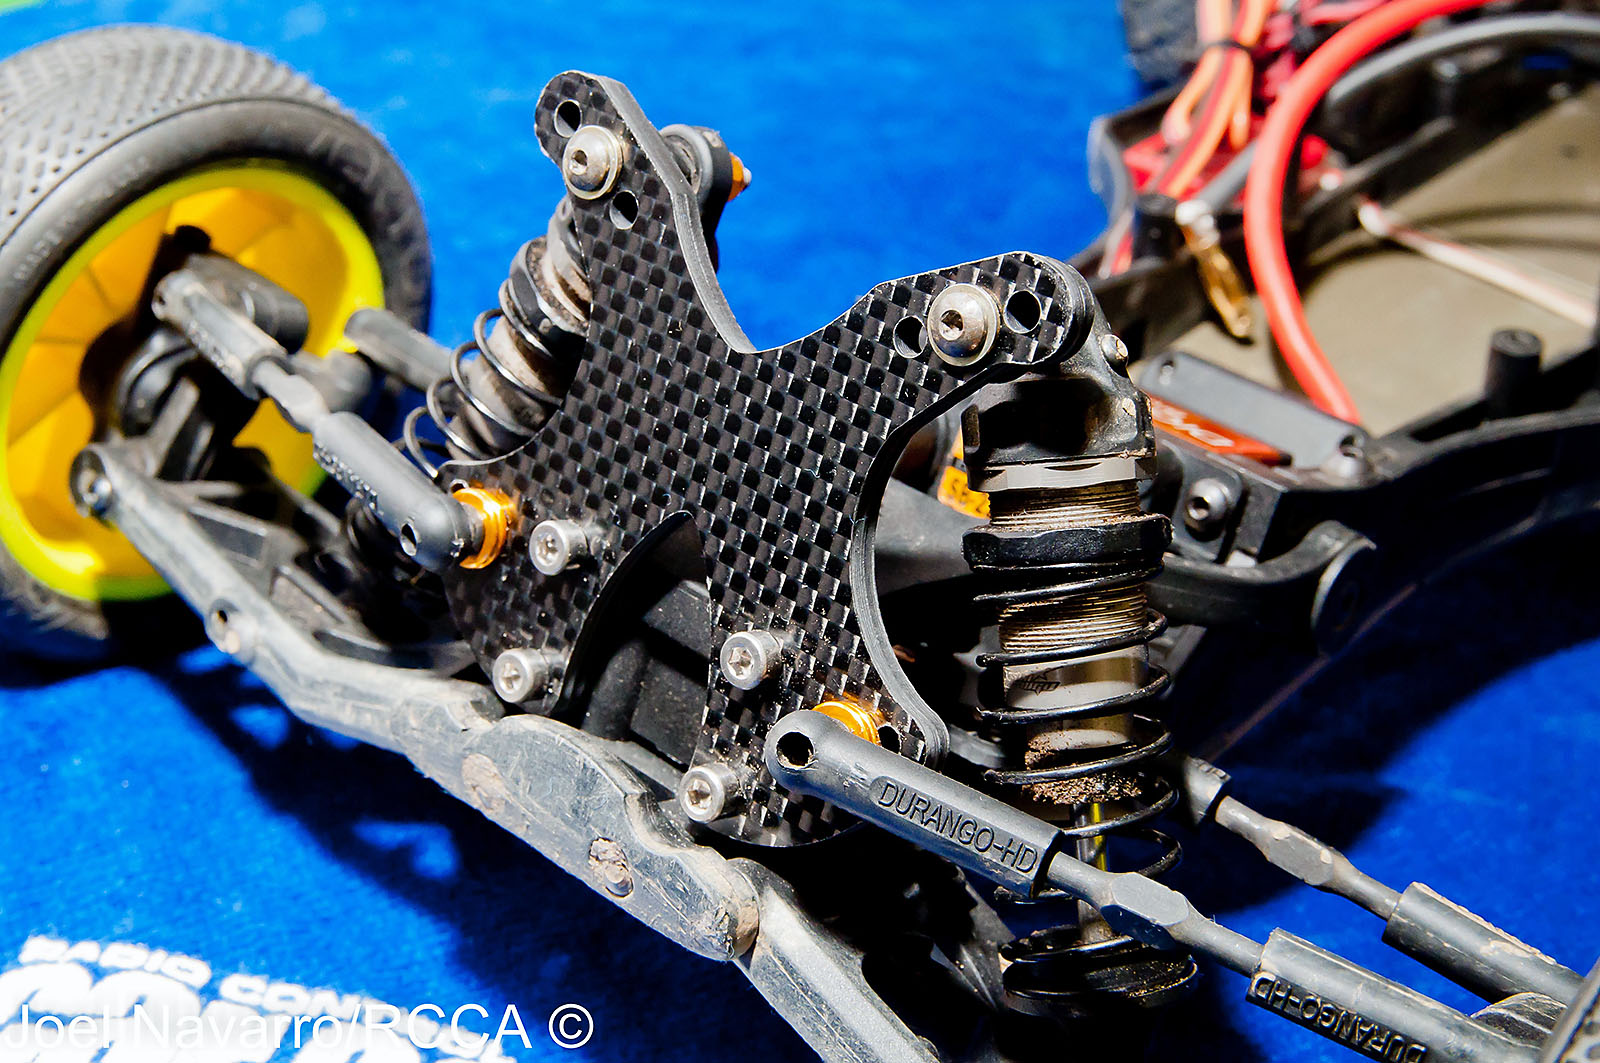
While doing the test drive on the Durango DEX210 2wd 1/10th electric buggy at SDRC Raceway in San Diego CA, I was working with Team Durango driver Steve Butts, I noticed his DEX210 had some nice hop up parts on it. Of course I asked where he got all his trick parts and Steve said they were from Diggity Designs and suggest I try them out. Diggity makes an aftermarket carbon fiber front and rear shock towers, a battery strap, and steering rack. All the parts are direct replacements for the stock pieces and easily swap out and give the DEX210 a stealth look. All the Diggity Design parts performed exceptionally well on the track. The shock towers are extra beefy and can withstand crashes nicely. The front tower adds extra adjustment on the inner camber link positions over the stock piece. The rear tower adds a 4th inner shock mounting hole for extra soft dampening. Uber adjustability and good looks, what more can you ask for? - Joel Navarro
#DEX210-100 – Team Durango DEX210 – 4mm Carbon Fibre Rear Shock Tower. Improved air flow for rear wing and additional 4th mounting hole.
#DEX210-101 – Team Durango DEX210 – 4mm Carbon Fibre Front Shock Tower.
#DEX210-102 – Team Durango DEX210 – 2.5mm Battery Strap.