The DEX210 ball differential has been designed for optimum performance but some users have had problems correctly building and maintaining the diff. As with any ball differential it’s a fine setting between too loose (and slipping) or too tight and damaging the plate/balls or other parts. The largest source of build errors comes from the circlip used to hold the thrust bearing in place. This circlip ideally needs to be installed using circlip pliers but other methods are possible with care – it’s easy to bend the circlip and weaken its hold which could lead to premature failure. We’ve put together a written guide (this article) and a video guide for the DEX210 ball diff build.
DEX210 Differential pro build
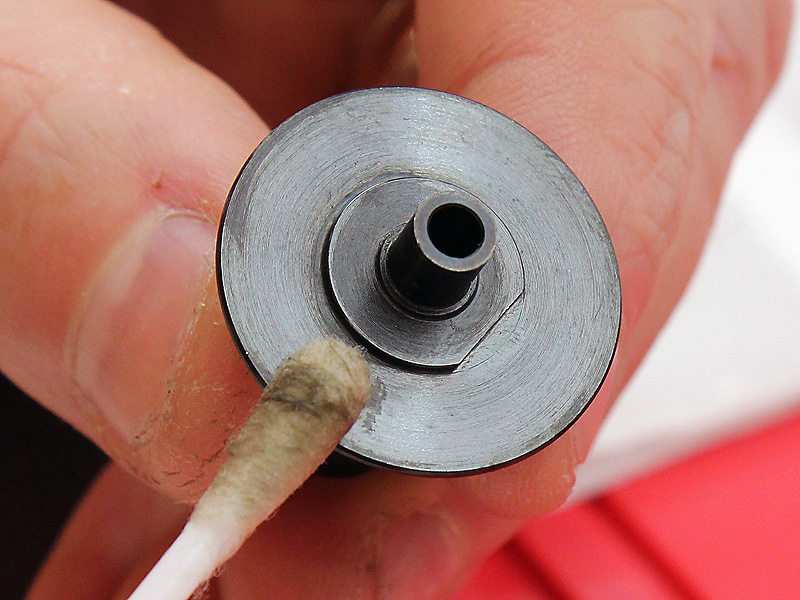
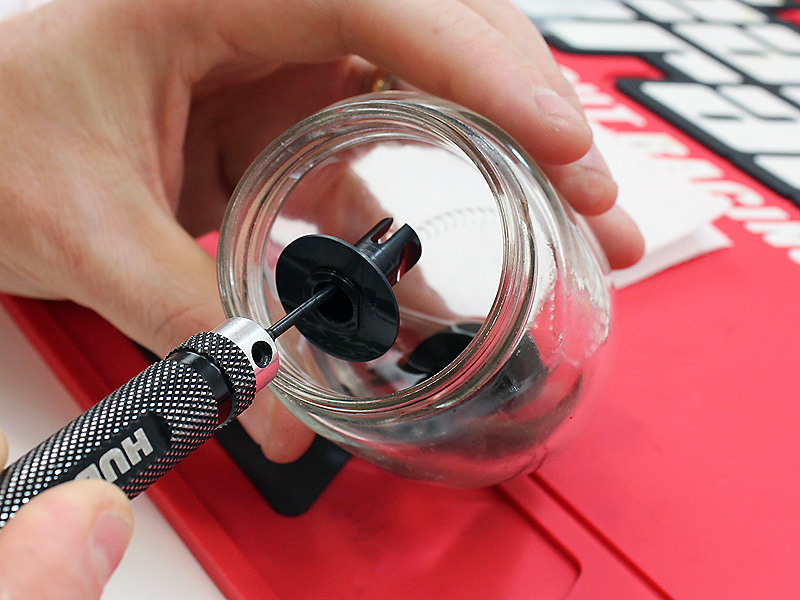
To start the differential build you need to clean all the parts thoroughly. You can use motor cleaner / brake cleaner or similar to degrease and clean the parts. The reason for doing this is that the metal parts could be covered in oil and small metal fragments from the manufacturing process – and any oils on the ball differential could cause it to slip or perform poorly.
Cleaning using a cotton bud soaked in brake cleaner
Soaking the parts speeds up the process of cleaning
THRUST BEARING
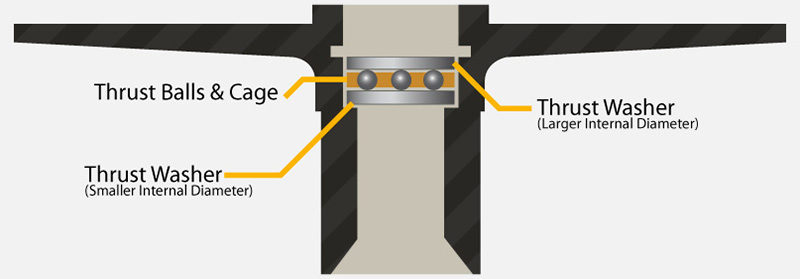
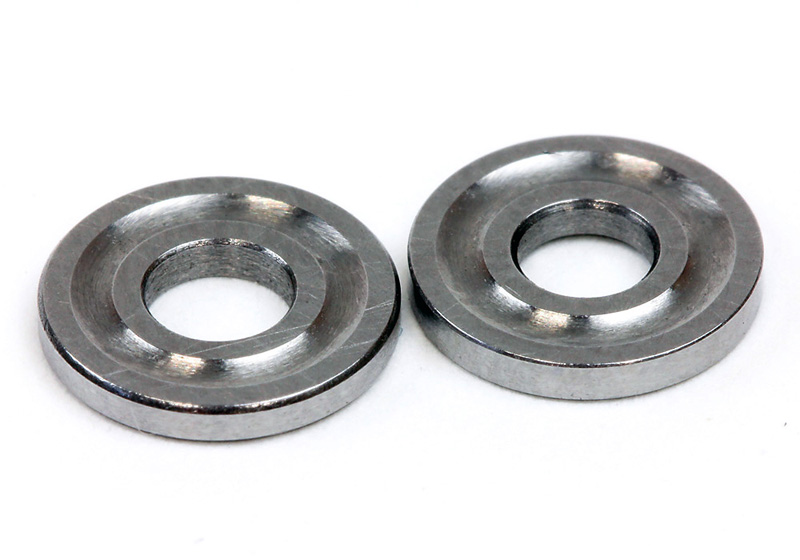
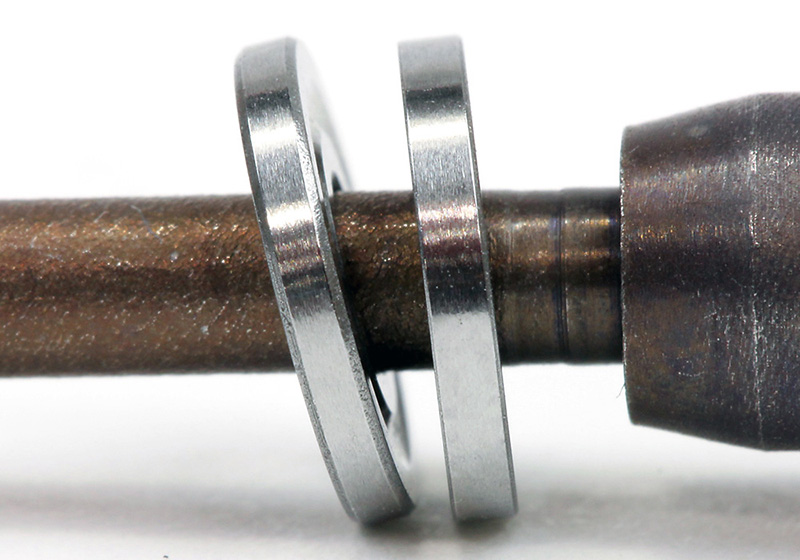
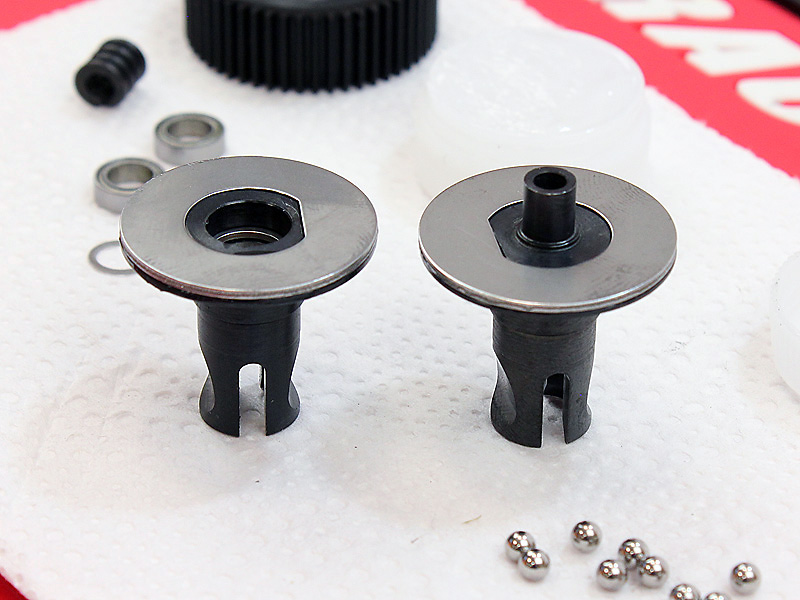
The thrust bearing is made up from three parts – two thrust washers and a caged thrust race which makes assembly and maintenance easier. The thrust washers look nearly identical at first glance but they’re different from one another and designed to be assembled in a certain way. The thrust washers have different internal diameters and this can be easily checked by placing them onto the diff screw and seeing how far they’ll lean over. The larger internal diameter washer is designed to sit on the inside of the thrust race (the same side as we install the circlip) and not contact the diff screw (hence the larger inner diameter). The tighter washer is designed to sit against the head of the diff screw and will be placed into the diff half first.
The two thrust washers side by side
The smaller diameter thrust washer doesn’t lean as far (on the right) and will sit against the head of the screw.
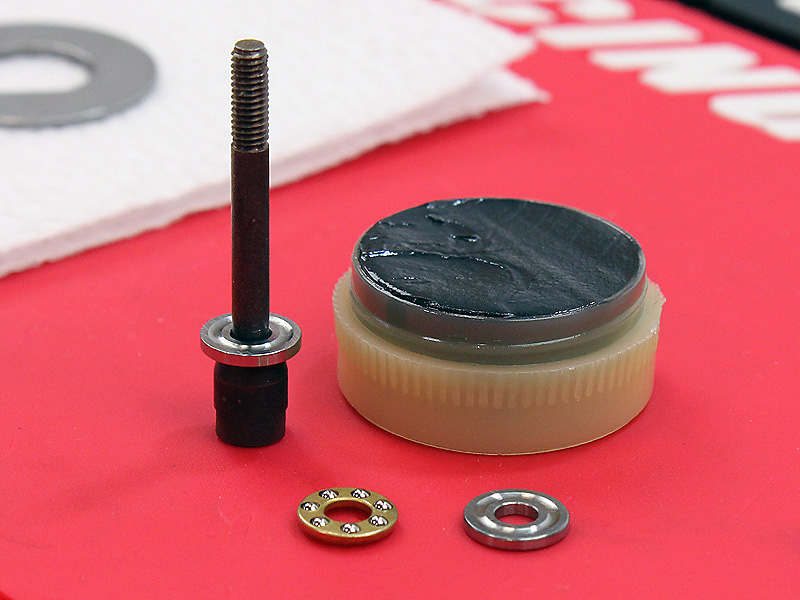
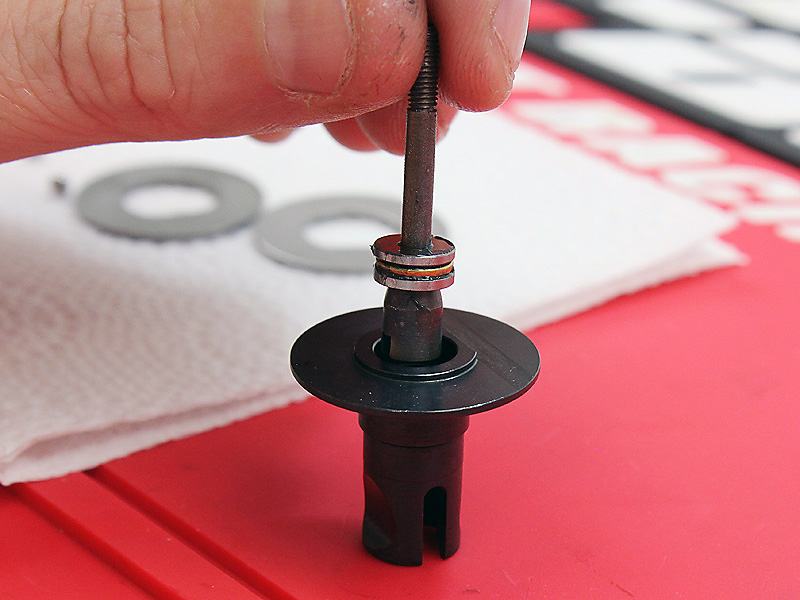
The easiest way to assemble the greased parts into the differential-half is to build the thrust bearing onto the diff screw and then drop the screw backwards through the diff half – allowing the screw to fall out of the outdrive whilst the thrust bearing sits inside the recess within the diff half. With the tighter thrust washer on the diff screw – coat it well with the provided black grease before dropping the caged thrust balls on top. Finish the assembly by coating the other thrust washer in grease and placing it on top to effectively sandwich the thrust balls. You need enough grease to coat the parts well but not so much that excess grease will spin out and into the differential where it could cause slippage.
Thrust bearing parts ready for greasing / assembly
Use plenty of black grease – but not too much!
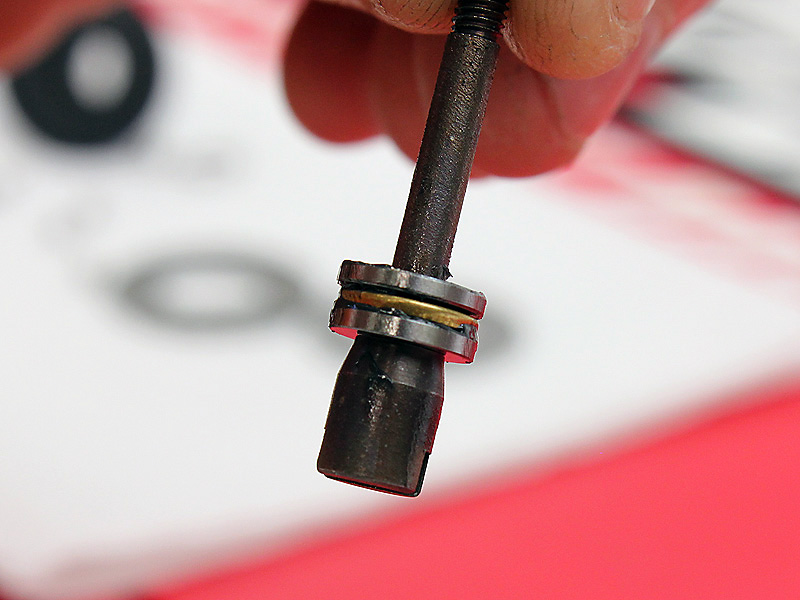
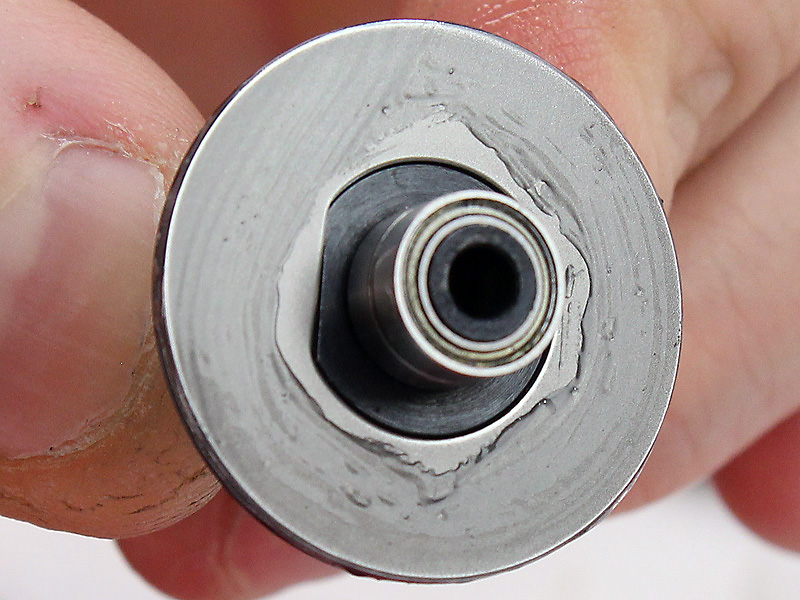
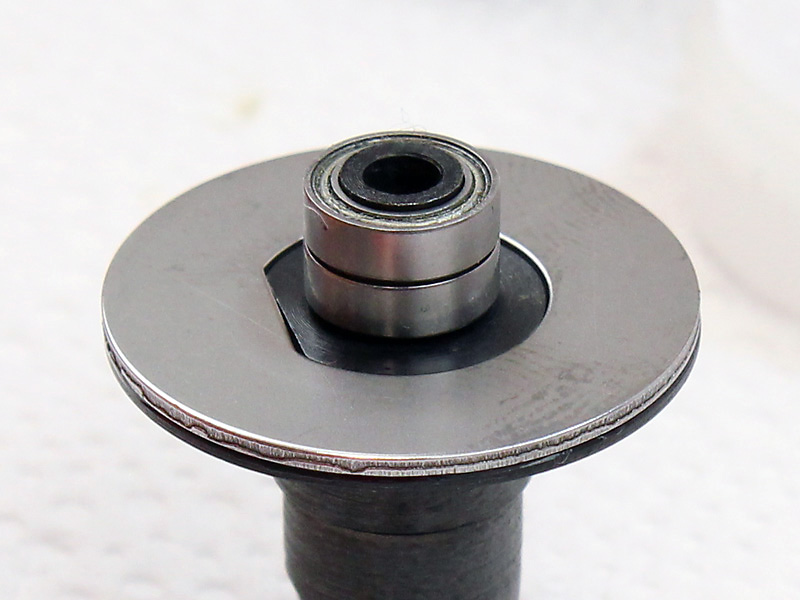
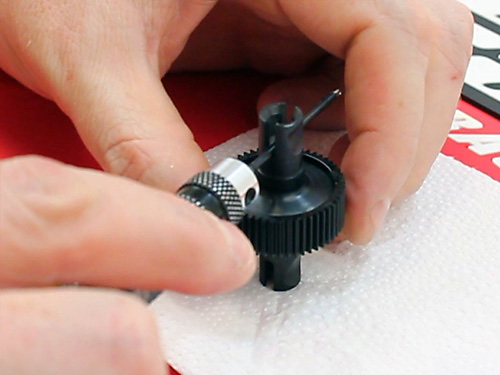
With the thrust bearing assembly still on the screw – wipe off excess grease and drop it backwards through the outdrive to leave the thrust bearing inside the diff half. A gentle prod with a driver should help the thrust bearing sit fully inside and expose the groove where the circlip will sit.
Thrust bearing assembled on the diff screw
Slide the diff screw backwards through the outdrive to seat the thrust bearing assembly
CIRCLIP INSTALLATION
The way the differential is held together means this circlip takes a lot of strain as the differential screw sits on the outside thrust race plate and transfers the pressure to the inner-facing edge of the circlip.
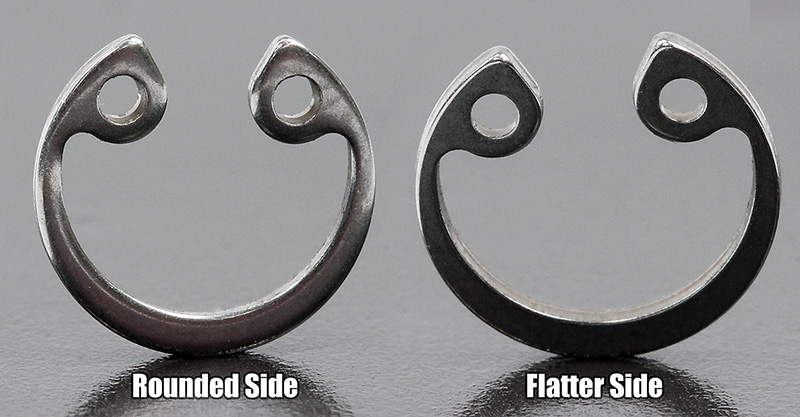
Due to the way the circlip is manufactured, one side has a slightly flatter appearance than the other and for the best possible fit it’s advisable to install the circlip so this flatter side faces away from the thrust bearing and in toward the differential. It can be hard to see the difference looking at the side profile but looking at the face of the circlip and comparing each side makes things a little easier. The reason for orienting the circlip in this way is that the sharper edges of the flatter side will hold better against the lip of the groove inside the diff half.
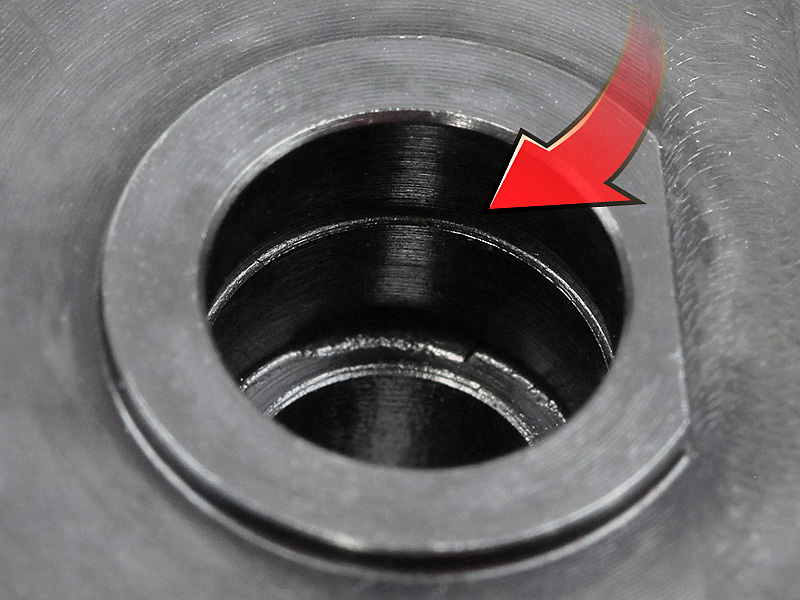
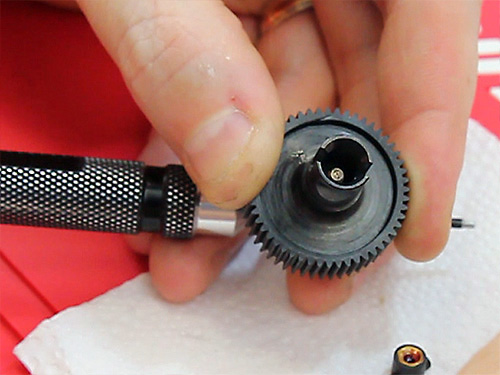
The groove where the circlip will sit
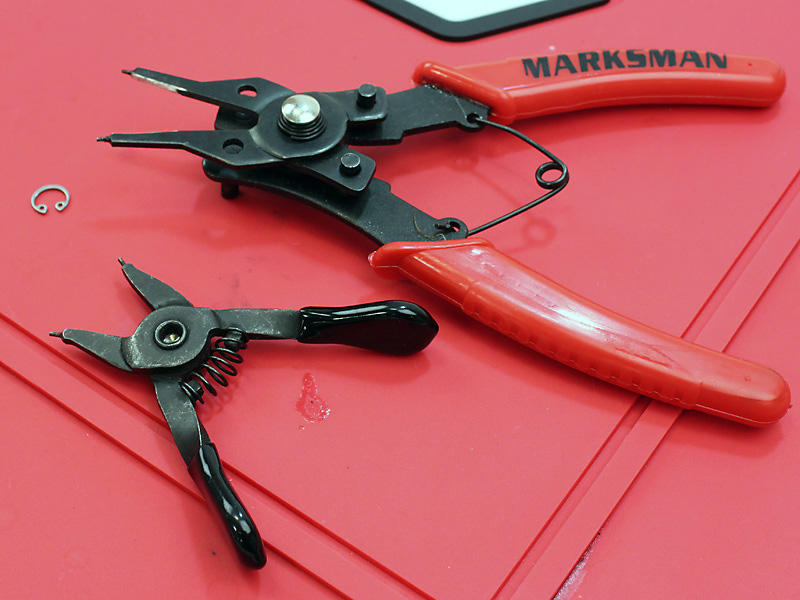
Two different circlip pliers – you’ll need some which can work with small circlips
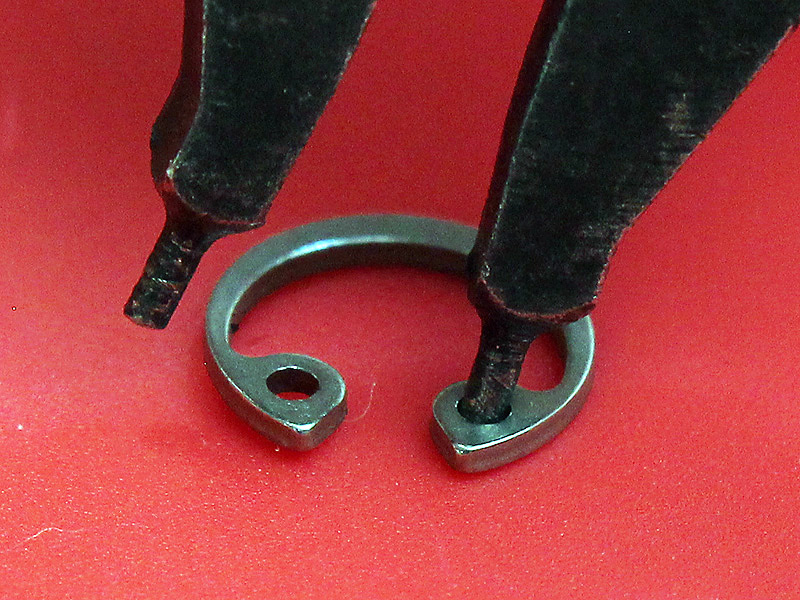
Using the proper tools for the job is the best way to avoid damage or other problems later. Some small circlip pliars are highly reccomended for this part of the build. The circlip needs compressing slightly to get it into position over the thrust bearing and then it should snap back into shape to hold firmly in place.
Two different circlip pliers – you’ll need some which can work with small circlips
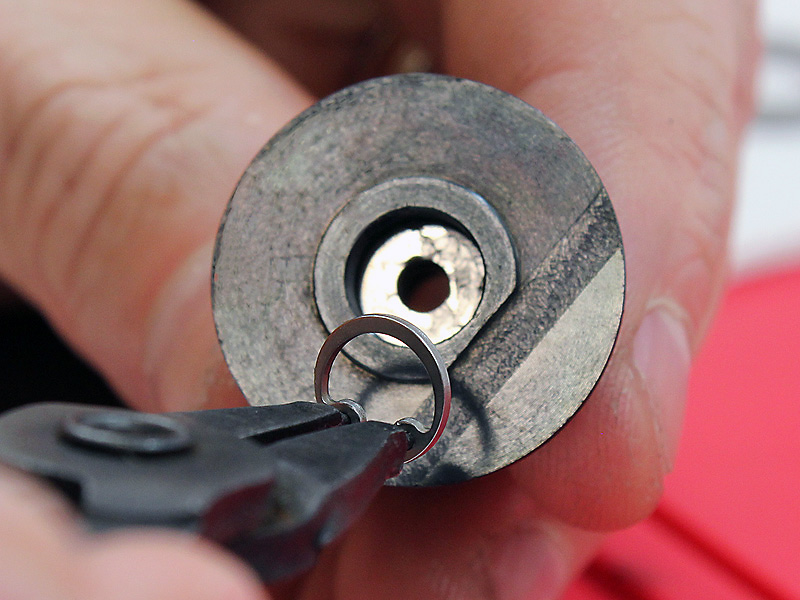
With the circlip compressed – place it into the outdrive
FIXING A DAMAGED CIRCLIP
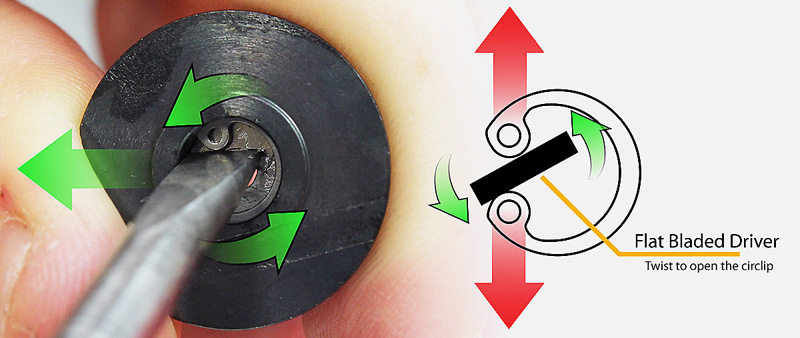
If you’ve managed to damage the clip during installation, either by using incorrect tools or by applying too much force – you might be able to expand the clip back to its original shape when its in position by opening up the open ends of the clip. Using a large flat-bladed driver, hold one side of the blade against the outdrive and between the open ends of the circlip – then turn the driver to force the two ends apart and stretch the clip back into its original shape to fill the groove.
ASSEMBLING THE DIFF
To make building the differential easier, use some clear silicone grease to attach the differential rings to the diff halves – this just stops the rings from falling off during assembly.
There are several ways to build and lube a ball differential and some of the methods are down to personal preference rather than there being a definitive method. Suffice to say, the differential needs to be well lubed with clear silicone grease but past a certain point you’ll just be wasting the grease and making a mess inside the gear case.
Place the two ballraces along with the shim between them over the extended sleeve of the outdrive and grease both differential rings so the diff balls will be running over the clear grease right from the start.
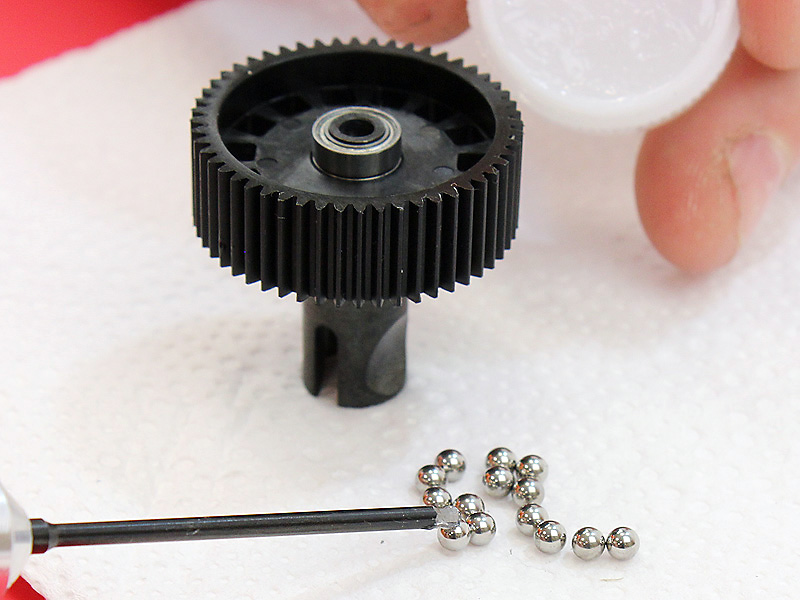
Place the moulded differential gear over the bearings and slide it fully down over them against the diff ring.
Using a driver liberally coated in clear grease, pick each of the 14 diff balls up one at a time and place them carefully into each pocket on the diff. Make sure each gets a touch of grease to keep it in place.
Place the thrust bearing side diff half over the gear to complete the differential and drop the screw through.
Compress the spring.
Holding the diff screw in place before turning it over
Ready for the spring and T-nut
Place a driver through the outdrive to keep the screw from falling out and turn the whole assembly over to drop the spring and T-Nut through the opposite outdrive. Turn the diff on its side and hold the T-Nut in place whilst tightening the diff screw to clamp the diff together.
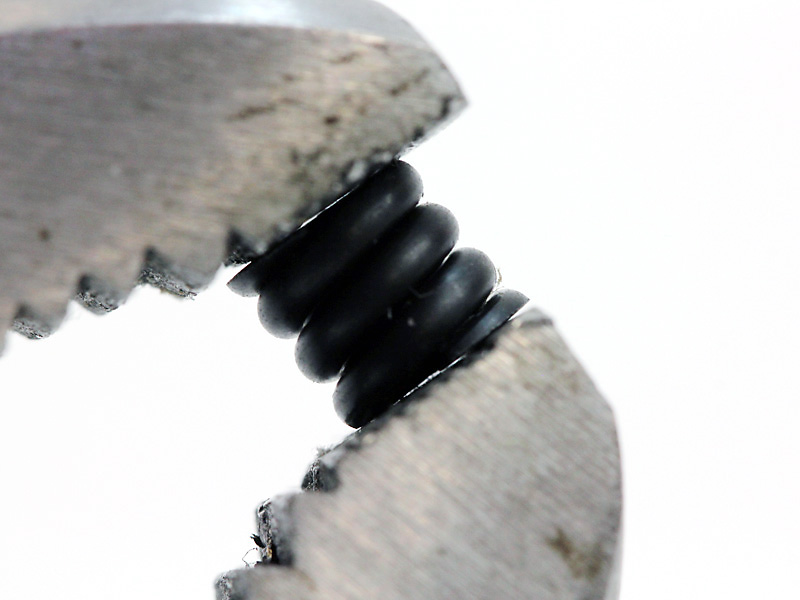
TIP: The diff spring is freshly wound and has never been compressed – to achieve a consistent setting we advise compressing the spring with some pliers a couple of times before installation.
They best way to achieve the desired setting for the diff is to tighten using only finger pressure and test. Keep tightening a little and testing and don’t be tempted to over-tighten and possibly damage parts. The final setting will need to be fine-tuned in the car, and we’ll go into more depth in the next installment of our DEX210 ball diff build guide. Look out for Part 2 of this build guide, coming soon.