|
- Team Durango DEX210 - Guide de réglages des inserts -
The DEX210 has many setup options available from the moulded inserts included in the kit. Rear toe-in along with front caster and axle-position settings can be adjusted by using different inserts or orienting them in different ways. The manual isn’t in-depth with these settings and understanding them just by looking at numbers on the moulded insert doesn’t always give the clearest explanation, so this guide is to help explain the possible settings and how to achieve them.
REAR TOE-SETTING INSERTS
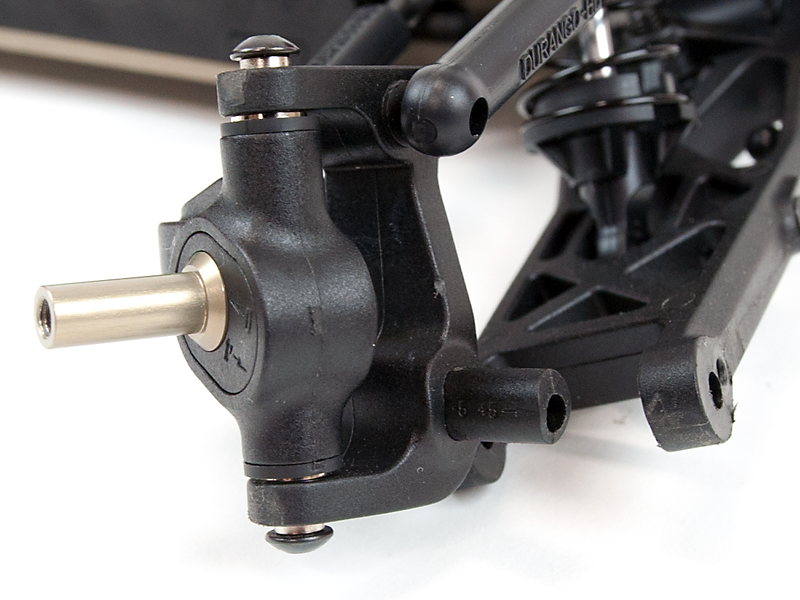
The rear of the car has 3° of negative toe, or toe-in, as standard. This is set by the inner hinge pins and can’t be changed. 3° is widely regarded as a good base setting for off-road racing. The DEX210 kit comes supplied with four different inserts which push into the rear hubs and change the outer hinge pin angle relative to the hub which will either point the hub further inward (more negative toe, or toe-in) or closer to parallel (less negative toe). The inserts aren’t sided – meaning you can use them on either side of the car, though their settings need to be read properly.
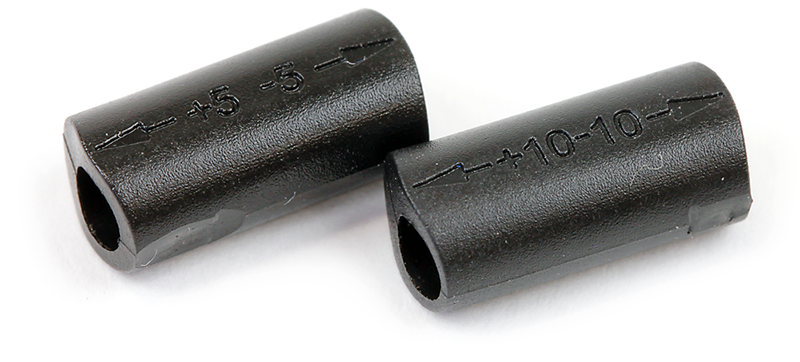
The four inserts supplied in the kit give a range of adjustment from 1.5° toe-in to 4.5° of toe-in, in 0.5° steps.
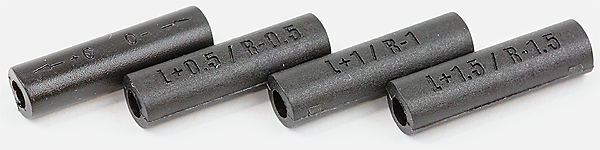
The inserts need to be read relative to the side of the car you’re placing them on. For the left side of the car, you’ll read the value of the ‘L’ designation as it faces upwards – or the top of the insert. Whilst it doesn’t make a difference which way round the insert is pointing it’s easier to read and understand if you always orient the insert so the setting you’re using is facing toward the front of the car.
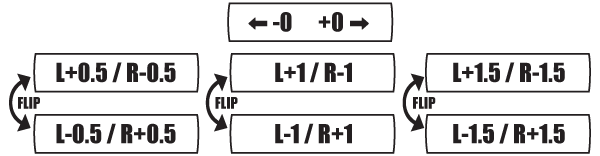
Bearing in mind the 3 degrees of toe-in on the car already, using the ‘L+1' insert as shown below adds 1° of negative toe (toe-in) and will result in 4° overall of toe-in. Flipping that same insert over you’ll see the setting ‘L-1' designation can be used on the left of the car. When used in the same way, with the ‘L’ designation facing forward, the insert will now take away 1°of toe-in from the car to give a setting of 2° of overall toe-in.
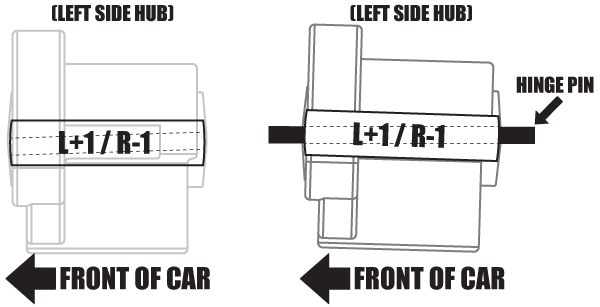
In the above example with the L+1 facing upwards the insert will ADD 1° of toe-in to the left of the car, or REDUCE toe-in by 1° on the right of the car. The pin runs through the insert at different angles depending on which insert is being used – this is what changes the angle of the hub.

The example above shows how the hub is effected by the L+1 insert – the +1 adds 1° of toe-in. Flipping the inserts over gives the opposite effect, plus becomes minus and vice versa.
Running more toe-in on the rear of the car will provide more traction coming out of corners and help stabilise the rear and keep it tracking straight. The down side is that it will also reduce steering and scrub speed on the straights.
Running less toe-in will be less stable and the rear of the car will feel less planted. The car will have more steering and be faster in a straight line.
CASTER ANGLE INSERTS
The caster angle of the front hubs effects the straight line stability of the car and the way it reacts to different track conditions.

The chassis kick-up on the DEX210 (angle of the front of the chassis plate to which the steering is attached) is 25° and the hub insert either adds or subtracts caster from this default 25° angle. Two inserts are provided and are similar in design to the rear toe-in inserts – so flipping them over gives an equal but opposite effect to the angle. The inserts come in 5° and 10° angles so the possible caster angles are 15°, 20°, 30° & 35°.
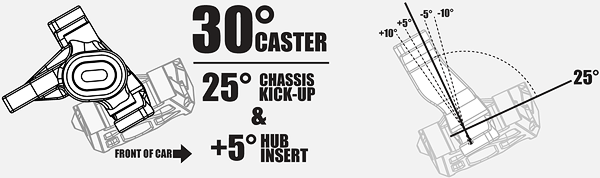
The inserts need to be read properly to understand the settings you’ll get and it’s easiest to understand when the writing is upright as read from either side of the car. The setting with the arrow pointing toward the front of the car in this instance is the one you’ll be using. The example below shows all possible caster angles – shown in this example on the right-hand side of the car. caster-illustration2_1
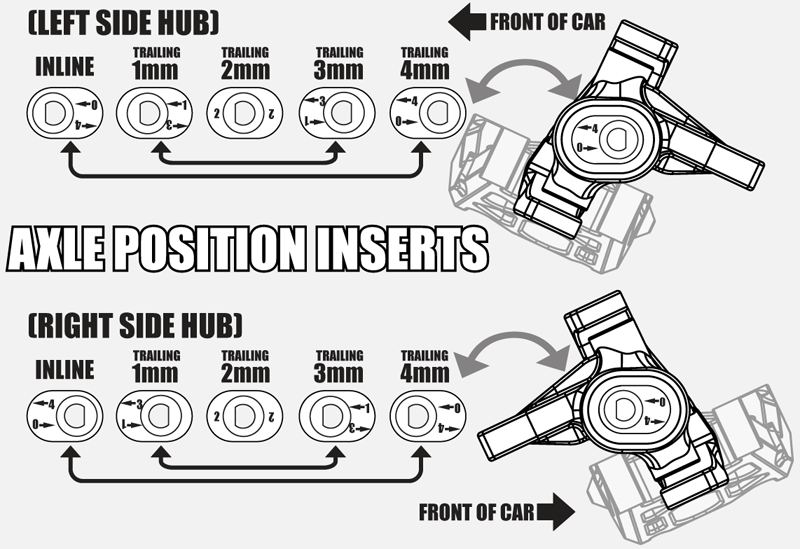
AXLE POSITION INSERTS
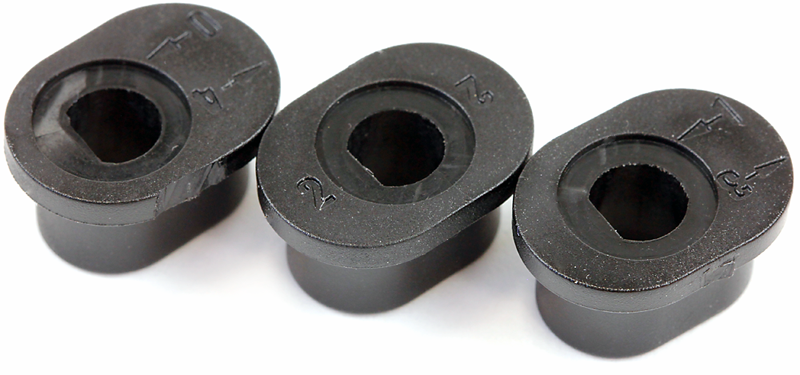
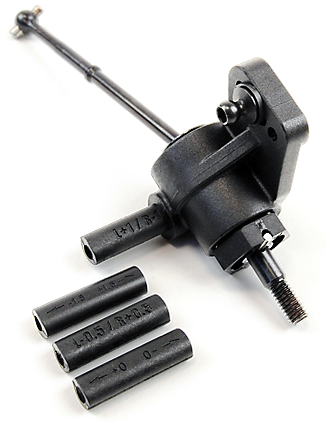
Axle position is another great setup option on the DEX210 and using the three inserts provided you can go from an inline axle to 4mm trailing in 1mm increments.
The setting is read with the arrow pointing toward the front of the car as in the illustration below.
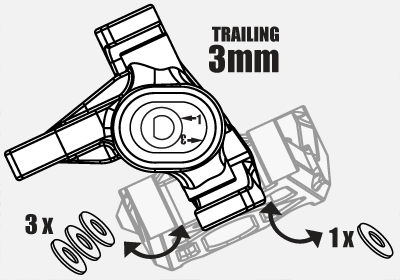
The example above shows the spacers required for 3mm trailing
three 1mm spacers behind the hub carrier and one 1mm spacer in front.
The DEX210 as per kit set-up comes with the front axles in maximum trailing. This gives the front of the car the most feel and is the easiest to drive. The further forward you put the front axle to more aggressive the car becomes on initial turn in, this can help you to make the car ‘pivot’ more on entry to a corner when grip is low and steering is at a premium. When you move the axle forward in the block by use of the inserts, remember to move the 4 wishbone spacers which space the c-hub in the wishbone.
The Rule of thumb is however much trail you have you must have the same number of 1mm spacers behind the C-hub.
Source:

|
