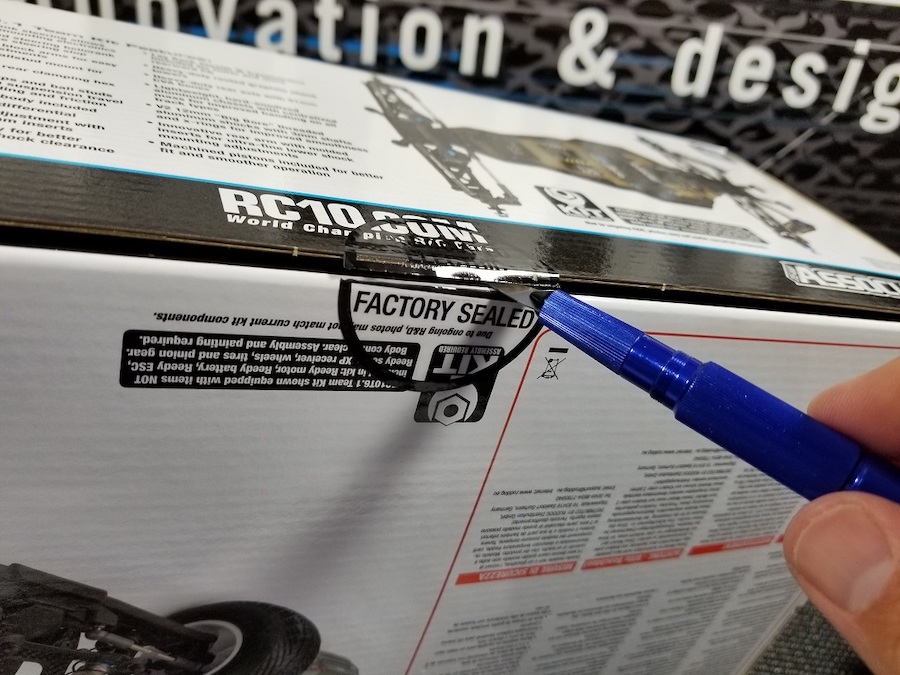
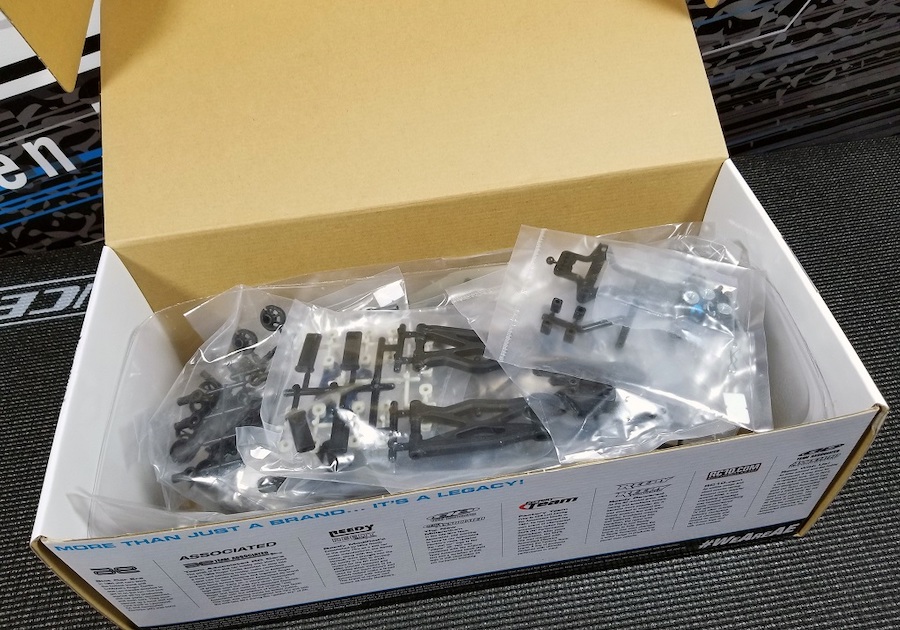
Team Associated has a long standing racing heritage in the Stadium Truck class, and their latest kit breathes new life into this classic off-road genre. This new kit is based on their winning B6.1 platform which means many components are shared between the two vehicles, but there are some parts that are truly unique to the T6.1 as well. So in this edition of The Garage we will discuss some previously released JConcepts option parts that are compatible with the T6.1, plus go over a few items that were developed exclusively for this new truck.
Compatible B6 | B6.1 Series Parts
Usually for these Garage builds I try to follow the kit's manual in
the exact order and point out JConcepts option parts when needed.
But again since many of these parts were already covered in previous Garage builds for the B6D and B6.1D,
I'll briefly review those items before moving onto the parts made
specifically for the T6.1. And even though many JConcepts parts are
available in either blue or black color options, for this build I'll
primarily only feature blue items.
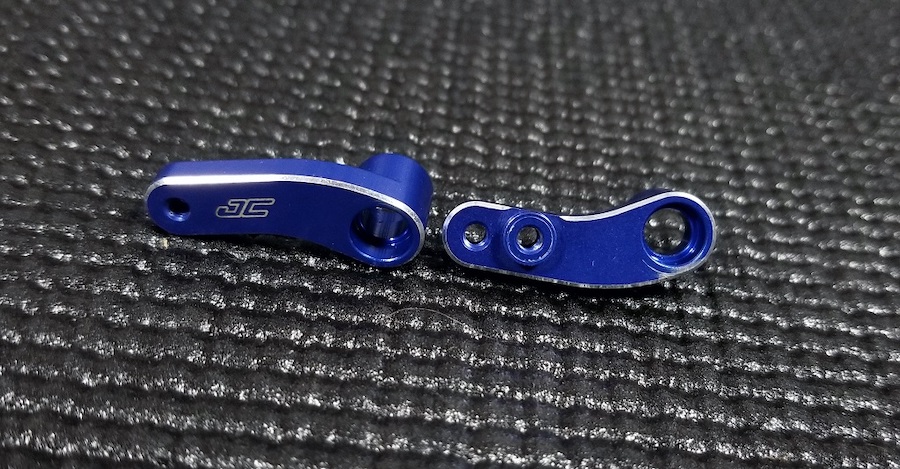
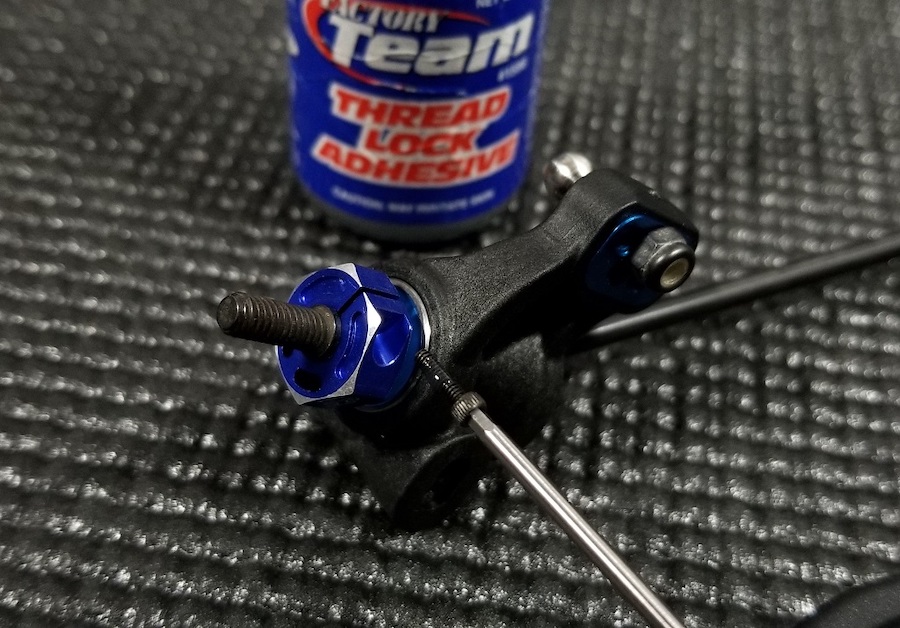
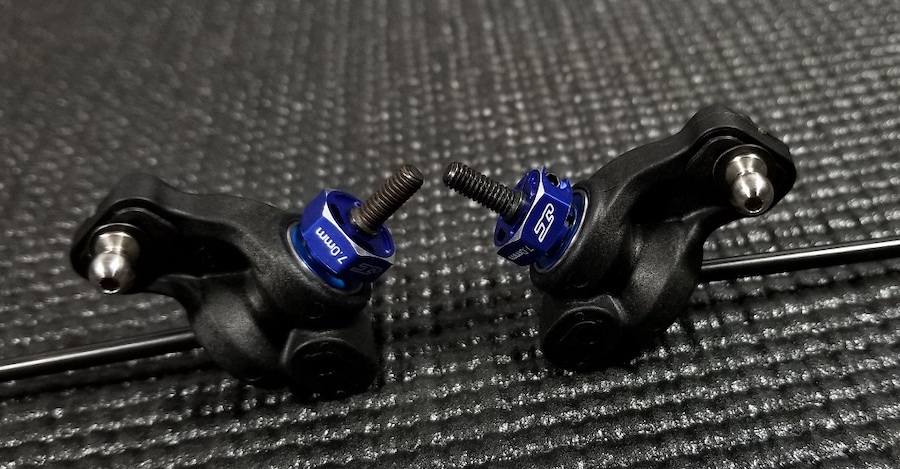
The JConcepts Aluminum Steering Bellcranks are available in both blue
and black color options, and comprised of aluminum. The aluminum
material offers a driver a stiffer response without adding any
additional weight.
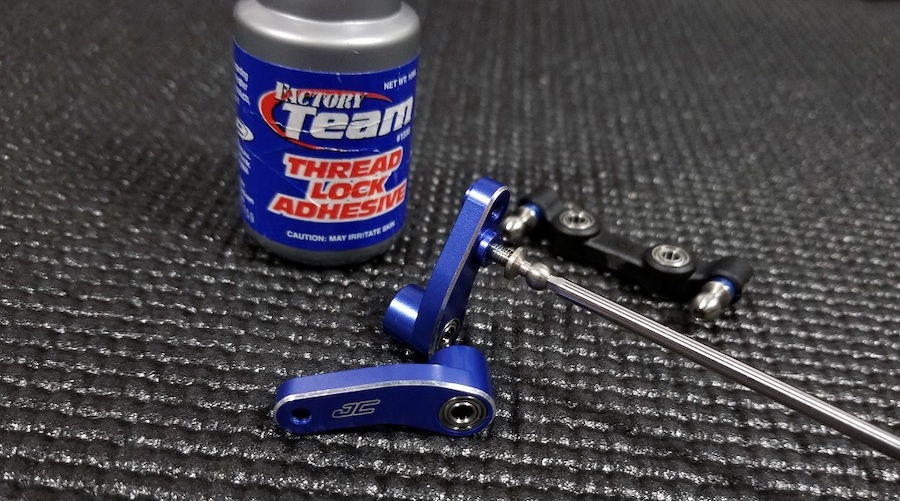


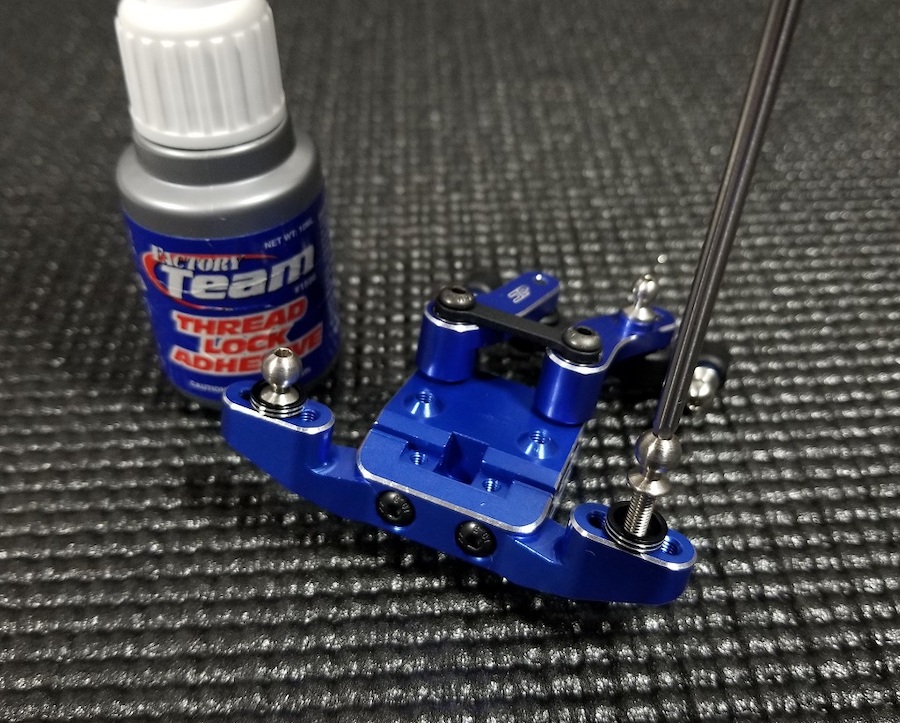
When assembling the bellcranks with the kit's components make sure to
use some blue thread lock since you are now threading into aluminum and
not plastic.


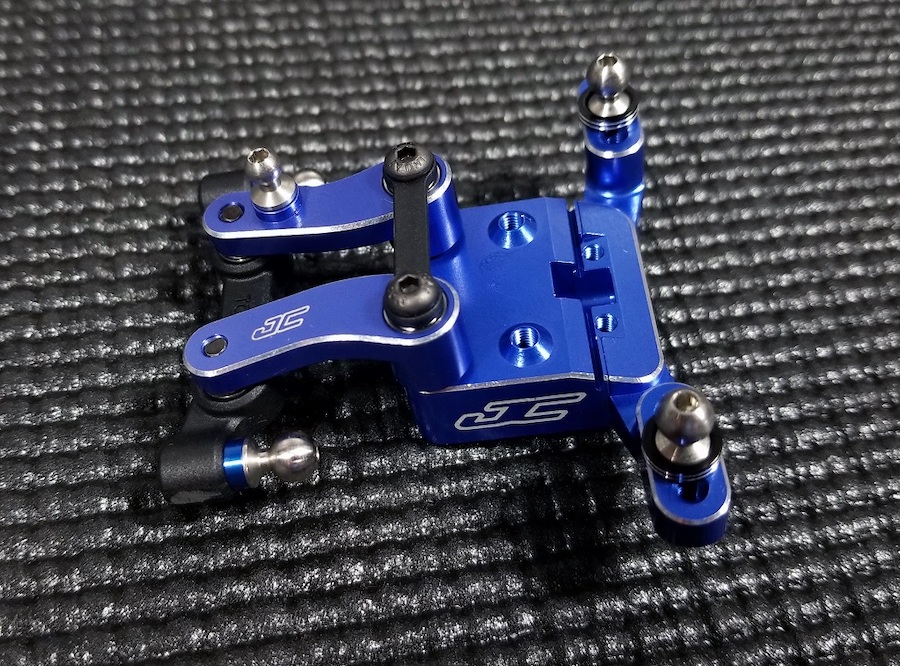
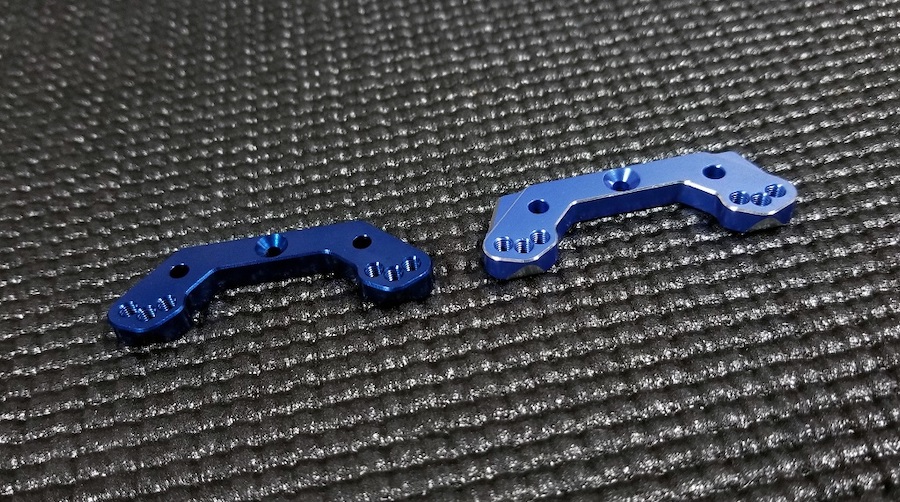
The Front Camber Link Mount Bulkhead is also offered in either blue
or black, and unlike the stock counterpart it is separated into two
pieces.
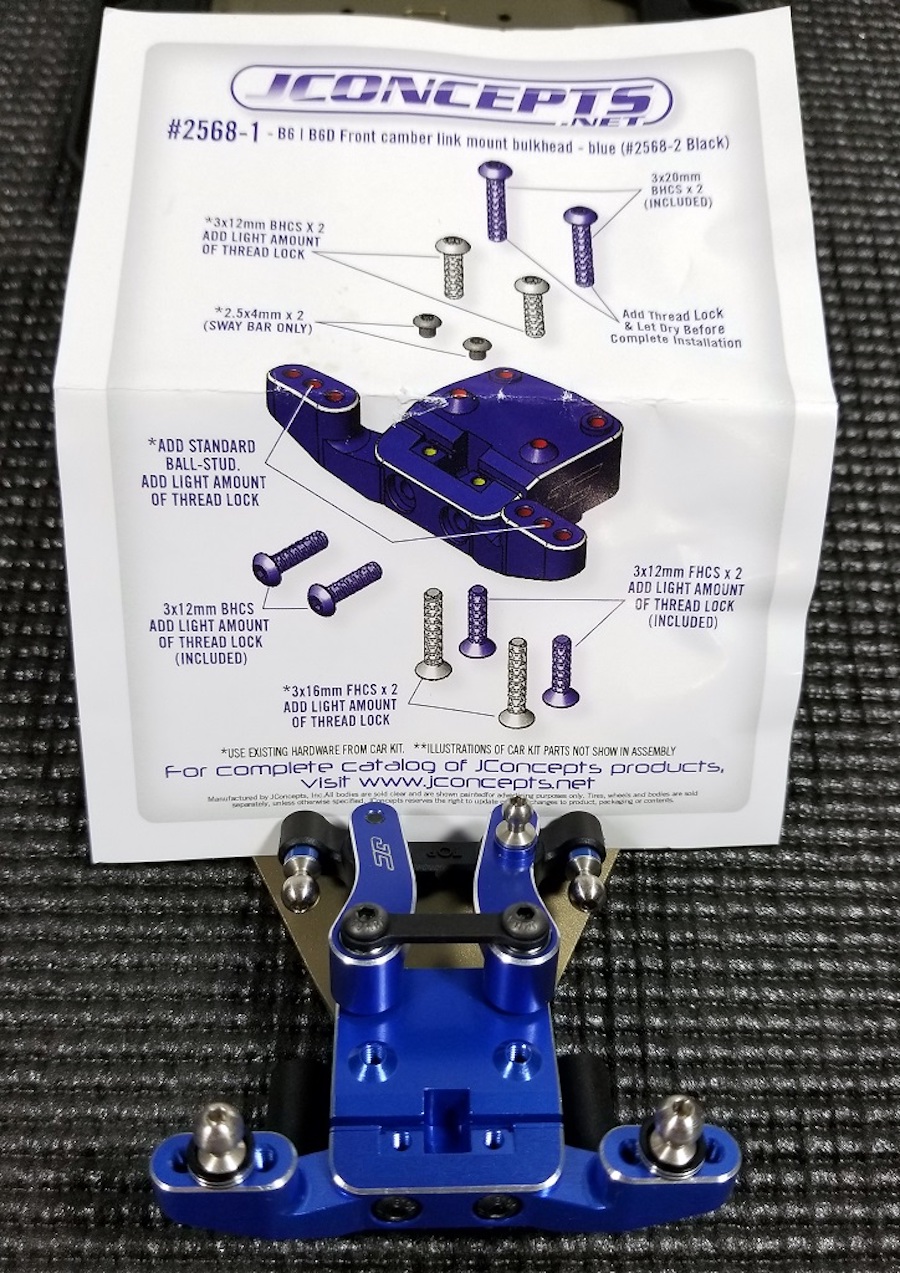
It comes unassembled but using a combination of the included screws,
provided instructions, and items from the kit you can easily assemble
it.
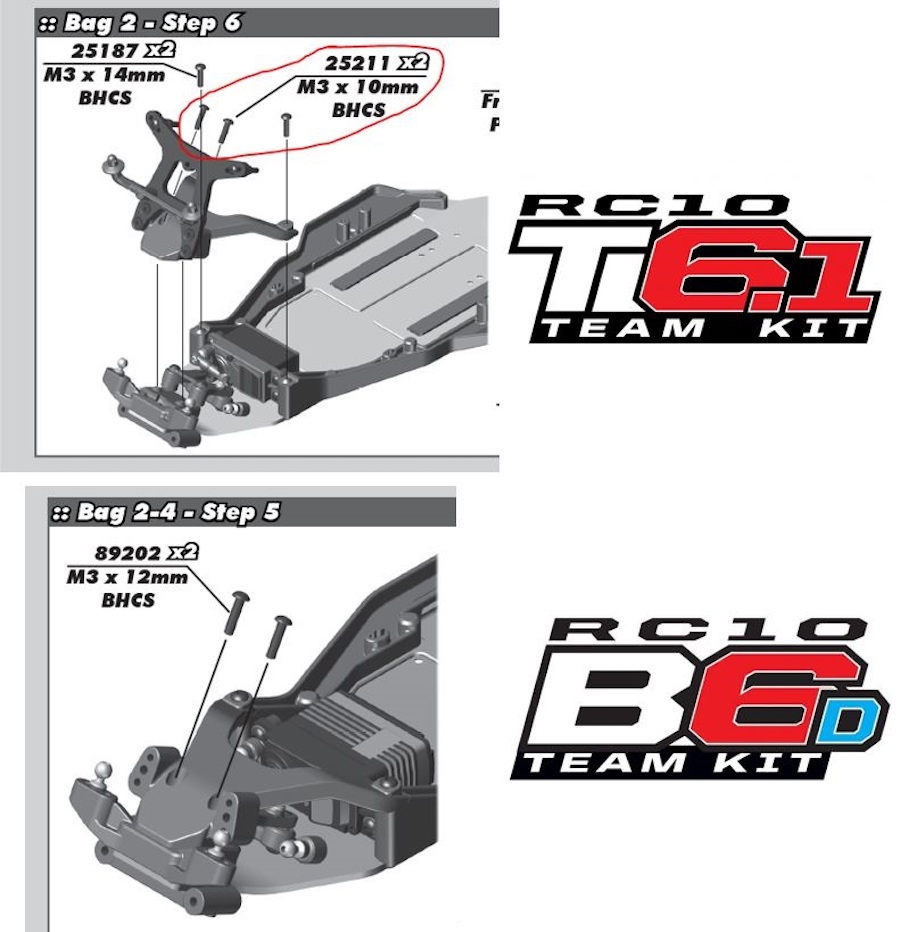
One thing to note however is that these instructions were written for
the B6 series. For the new .1 series a shorter 10mm BHCS is needed to
install the top plate, and the instructions call for 12mm BHCS instead.
But no worries, the 10mm can be used too.

The front camber link provides you the same mounting holes as the
stock part for the front ball studs, and is made from aluminum. To
unlock more setup configurations you can combine it with Associated's
weighted suspension mounts listed below:
Team Associated front plastic camber link mount and bulkhead with plastic AE suspension mount = ~14.8gms
Team Associated front plastic camber link mount and bulkhead with aluminum AE suspension mount = ~20.3gms
JConcepts front camber link mount and bulkhead with plastic AE suspension mount = ~28.5gms
JConcepts front camber link mount and bulkhead with aluminum AE suspension mount = ~34.0gms
Team Associated front plastic camber link mount and bulkhead with brass AE suspension mount = ~41.7gms
JConcepts front camber link mount and bulkhead with brass AE suspension mount = ~55.4gms
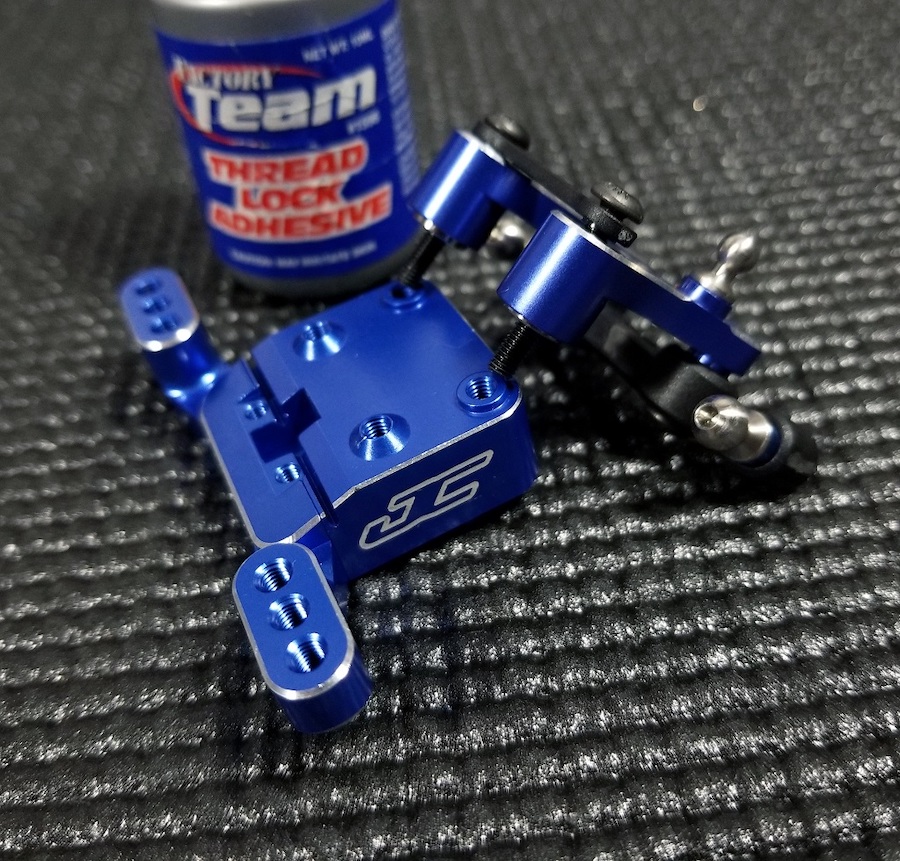
And again since we are mating two metal surfaces together make sure to use a dab of thread locker too.

For the ballstuds that are attached to the front ball stud mount I
used the Dirt Racing Products Dirt Washers. The kit's default setup
calls for a 1mm blue aluminum washer, but with the Dirt Washers you get
that plus more.
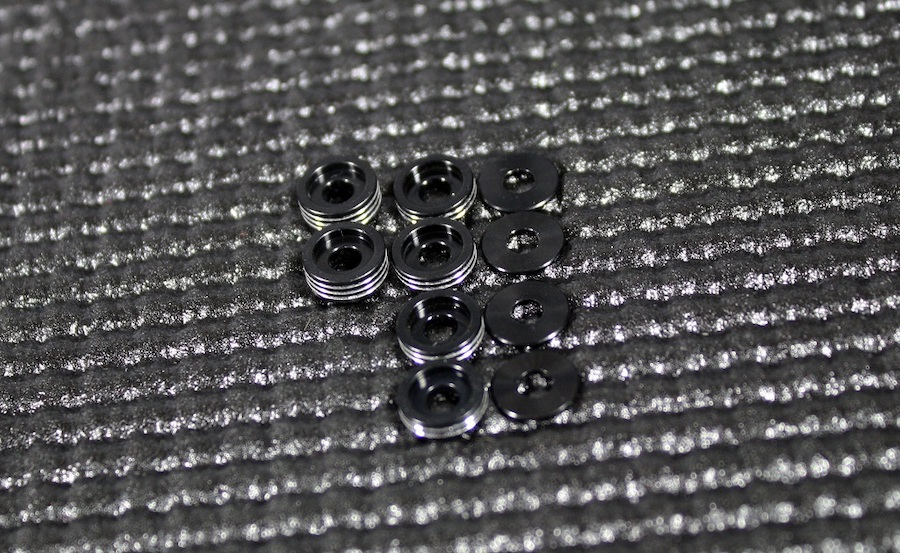
Each package of the Dirt washers comes with 10 washers and they are
currently only available in black. Included in the package are:
Two 2-3mm washers
Four 1-2mm washers
Four .5mm washers
These washers give you the ability to change your ballstud height by
simply flipping them over vs. completely removing or adding washers each
time. This will help you to eliminate dropping washers by mistake, make
quicker setup changes, and they also work on a variety of 1/10
vehicles.
NOTE: These were previously covered in more detail in a previous version of The Garage which you can read here: http://www.jconcepts.net/garage/projects/dirt-products-2
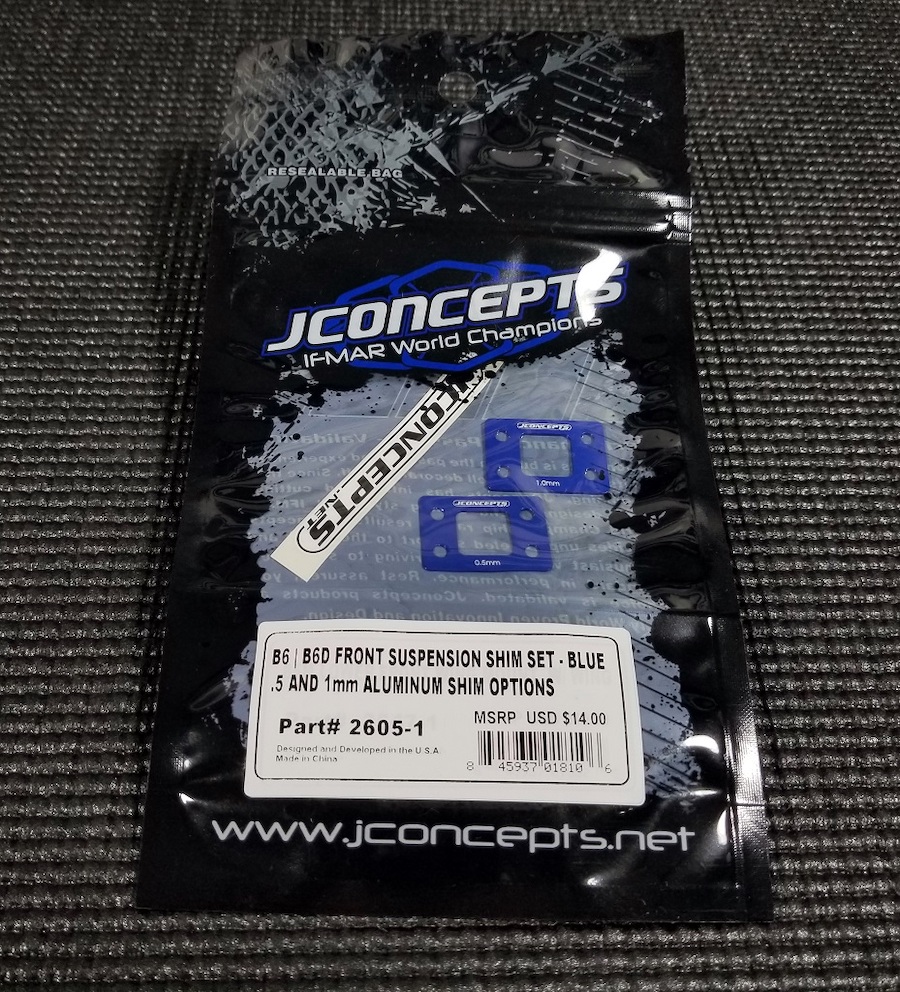
For more front end tuning JConcepts offers a Front Suspension Shim
Set. These are only available in blue and you receive both a .5mm and
1mm shim.

Each shim is laser engraved with a thickness indicator and JC logo of
authenticity. These aluminum shims are also more reliable than molded
plastic or 3D printed shims since they are more unlikely to warp when
installed into your vehicle too.

In testing drivers reported that lowering the front roll-center
provided a smoother steering response while also increasing the overall
steering during mid-cornering. It is recommended to start with the .5mm
shim and move to the thicker 1mm if so desired.

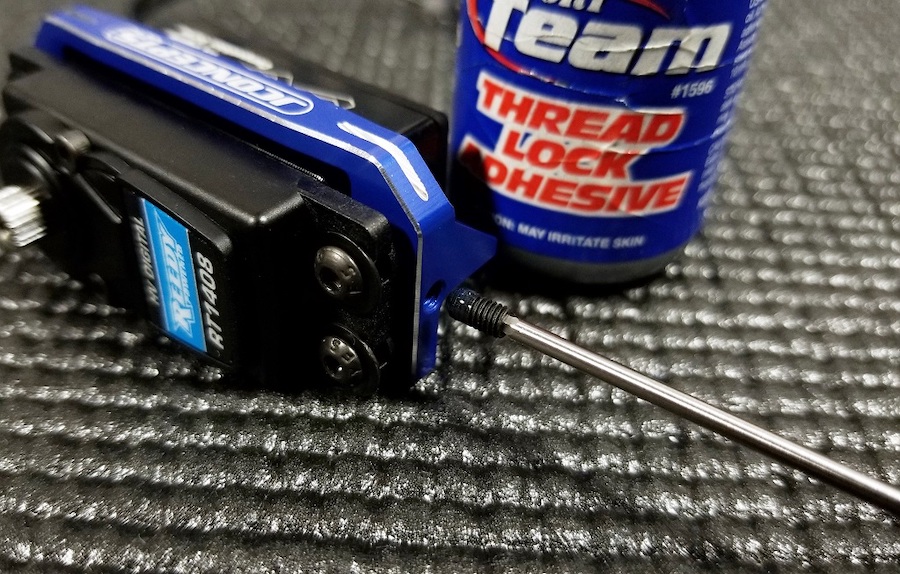
The Fin Titanium Steering Turnbuckle is a 10mm long option part for your servo.
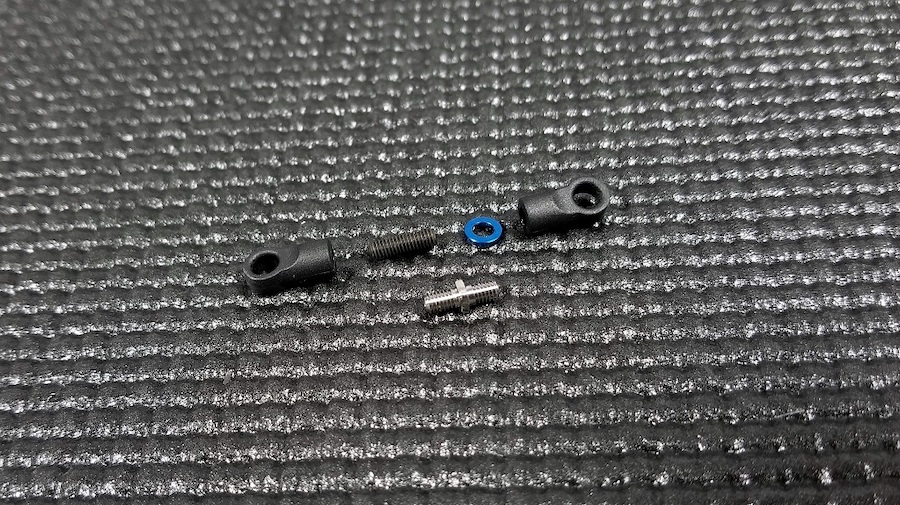
As the name implies it is made from titanium which will make it
stronger than the stock steel part, but also keeps it lightweight as the
same time. The Fin Titanium Steering Turnbuckle uses the standardized
3mm thread base on each end so it fits perfectly with the kit's steering
links.
In the center there is a square shaped adjustment nut that eliminates
the need for the kit's blue 1mm aluminum washer. This will also help
you from overtightening one end so that your steering link is set
correctly.
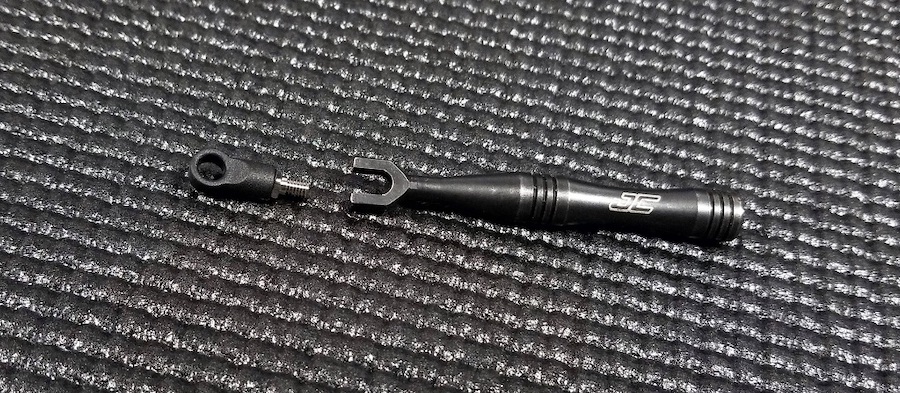
You can use the JConcepts Fin Turnbuckle Wrench to install the steering links.
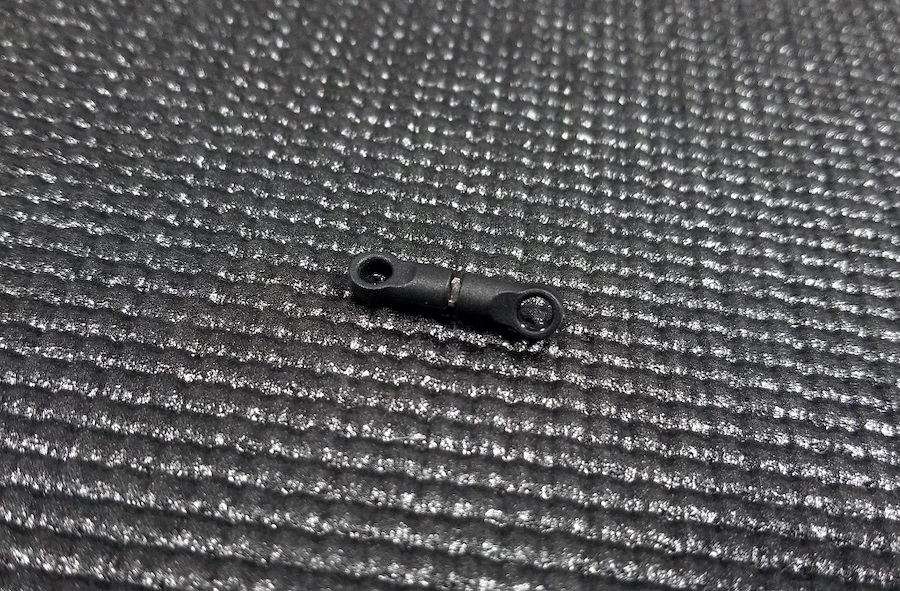
Here you can see the steering links installed and how they rest cleanly against the square adjustment nut.
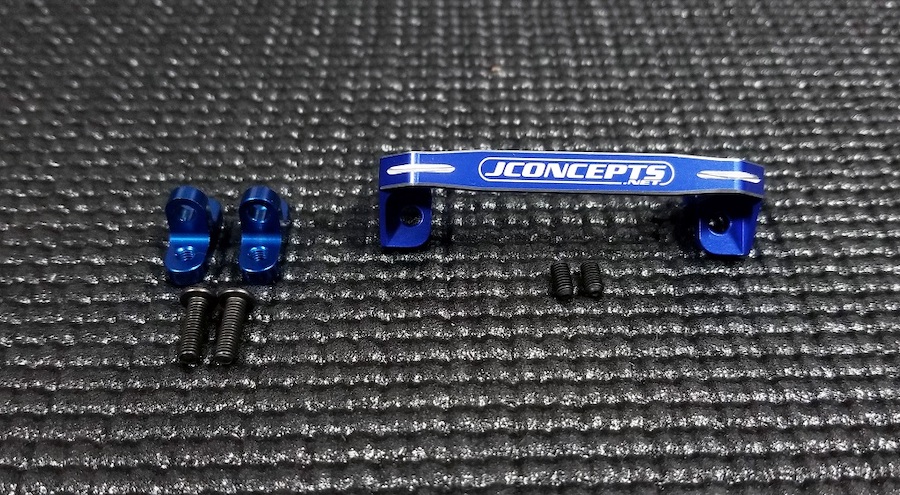
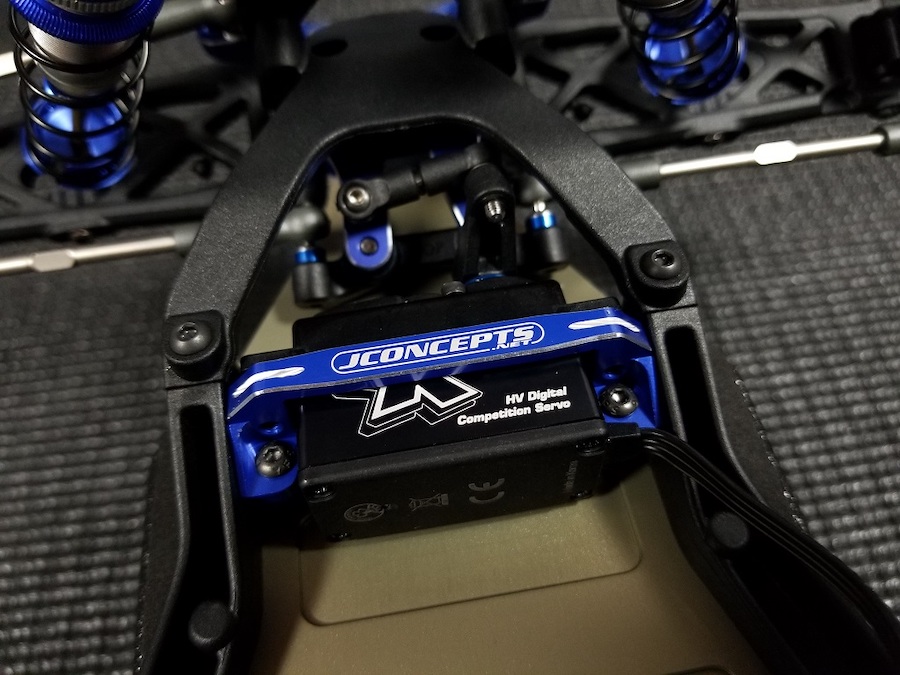
Sticking with the servo let's look at another JConcept option part,
the Servo Mount Bracket. With the kit's setup you attach your servo to
the side rails with two blue aluminum servo mounts. JConcepts sought out
for a unique design that achieves this task while also providing you
more stability which I'll detail in a little bit.

The JConcepts Servo Mount Bracket is available in both blue and black
color options and crafted from aluminum. A laser etched JConcepts.net
is sits on top of the “bridge” piece that runs across the servo, and to
highlight the design more silver chamfering was added to the edges too.

Also included are two 3x6mm set screws, but to mount it to the side rails you will still need to use the kit components.
To install it you first need to set your servo horn in the correct
position. For our purposes since this is a new build, and I'm not ready
to detail all of the electronics yet that were used for this Garage
story, I'll skip that step. Then depending on your setup you might need
to install a few of the kit's servo spacers too. Next, install the kit's
M3x8mm BHCS through each servo ear and into the sides of the mount but
don't tighten them all the way down yet. Since you are now working two
metal surfaces make sure to add some light thread locker too.
Then using a 1.5mm driver sink the JConcepts Servo Mount Bracket's
included set screws through the mount until they are snug with the
servo. This will help you to center the servo and keep it aligned under
hard racing conditions. And again make sure to add some thread lock too.

Once that is complete go back and lock down the M3x8mm BHCS on each
side of the horn now, and then finally attach it to the side rails with
the kit's M3x10mm BHCS.
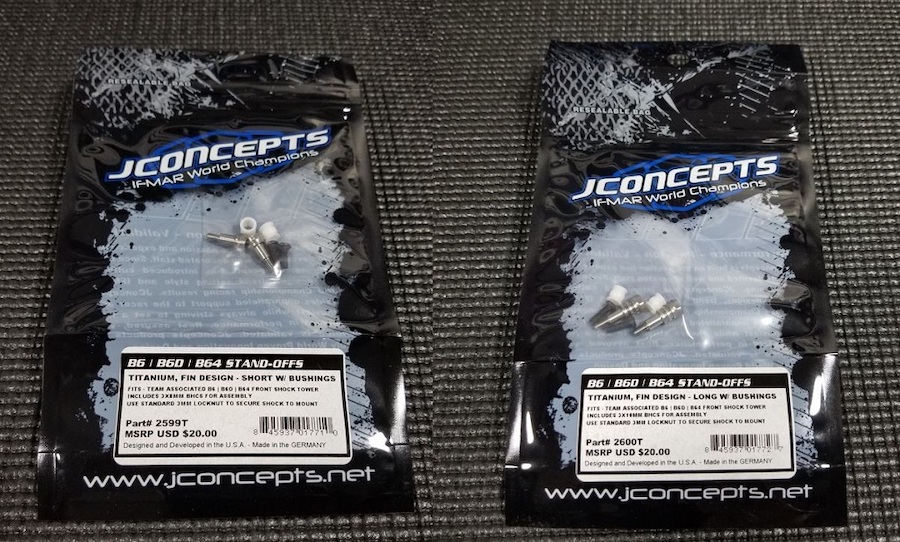
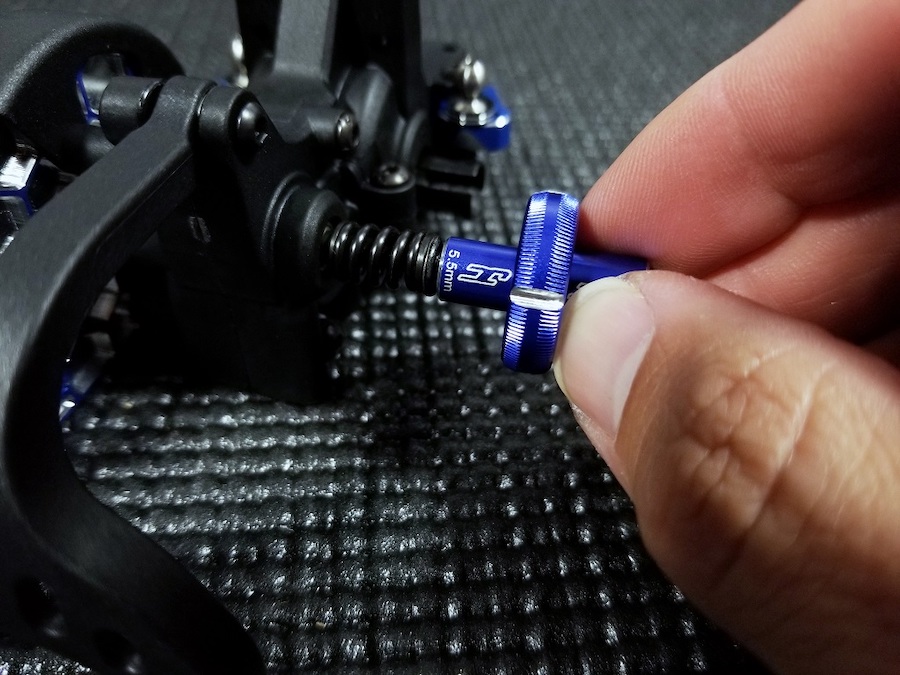
The JConcepts Fin Titanium Shock Stand-Offs were first designed for
the B64 and B6 series, but they are also compatible with the entire 6.1
family too. JConcepts has released two versions that can be used for the
front and rear shock towers which are simply referred to as short or
long.
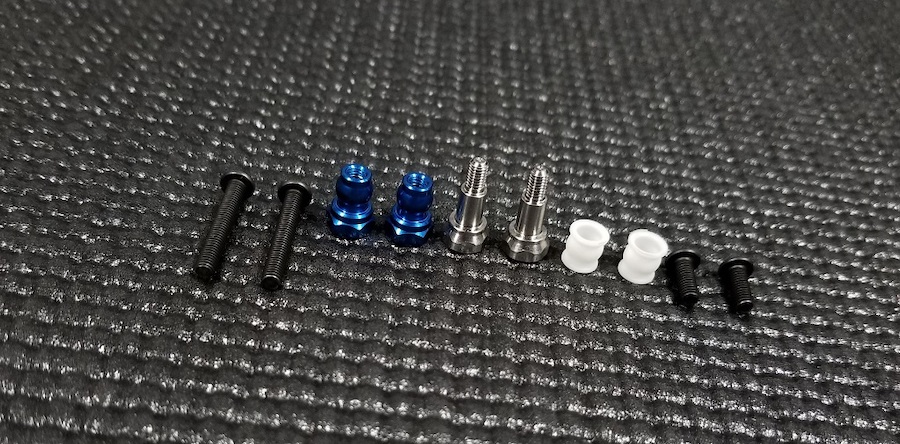
The kit's shock mount is designed to pass either a 3x20mm (front) or
3x22mm (rear) BHCS through a blue aluminum mount. But JConcepts wanted
to offer something unique so they opted for a two piece design.

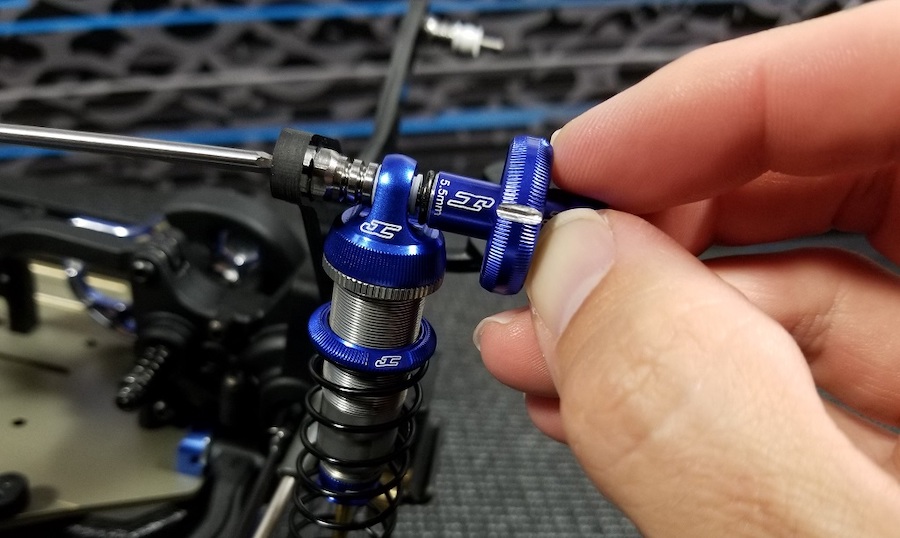
As the name implies these are crafted from titanium and each one uses
a 7mm base so they can be easily tighten up with the JConcepts Combo
Thumb Wrench.
NOTE: For more information about the Combo Thumb Wrench, please read this earlier edition of The Garage: http://www.jconcepts.net/garage/projects/combo-thumb-wrench

Passing through the shock tower mounting hole and into the Fin
Titanium Shock Stand-Offs are either two 3x8mm (short) or 3x10mm (long)
BHCS screws. Frist, place these into the mounting hole of choice, add
some thread lock, and then thread on the Fin Titanium Shock Stand-Offs.

Since the titanium material is stronger than molded plastic or
aluminum shock caps they will eventually rub and tear into the caps
themselves.

So to help avoid this JConcepts incorporated the Delrin pivot
bushings into their design. This acts as a barrier between the two
contact points and can be easily replaced when they show wear.
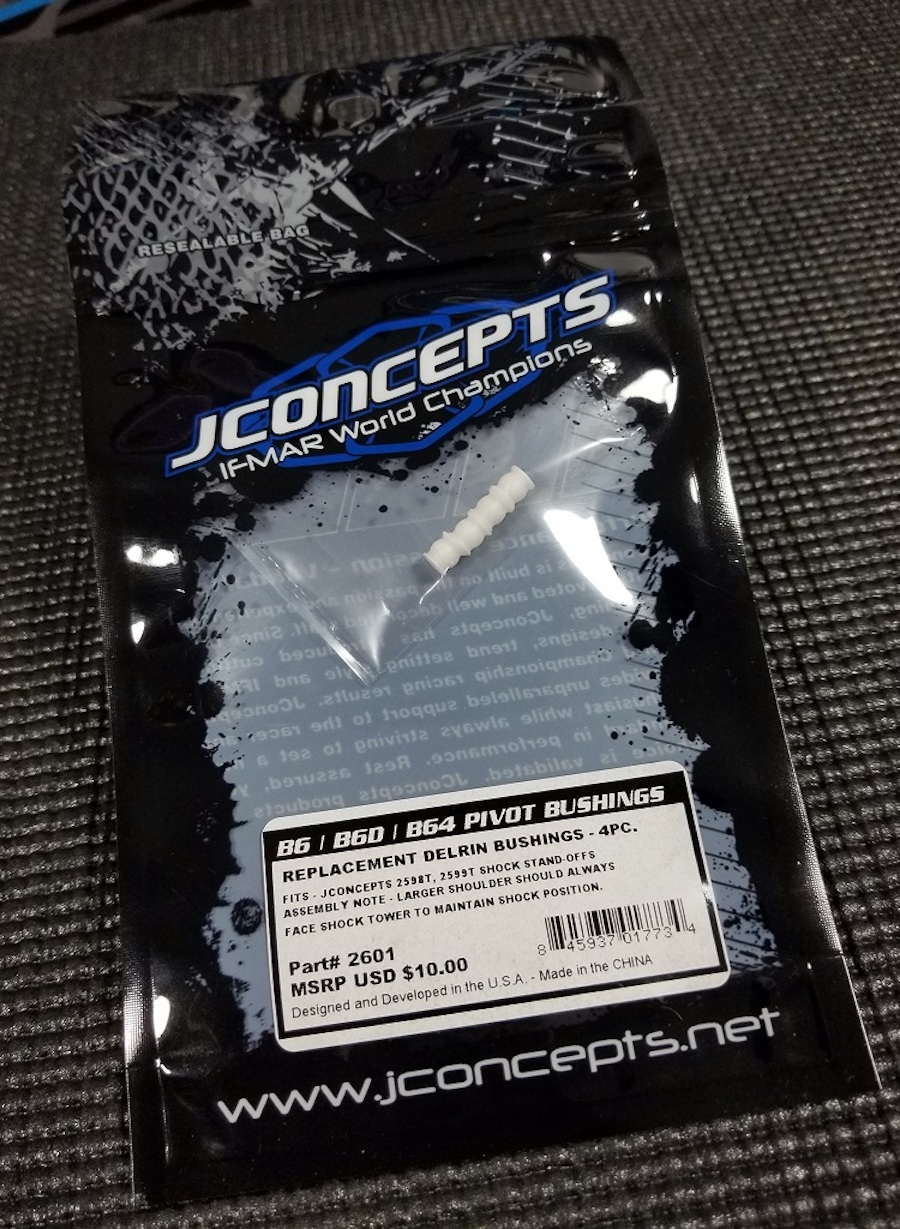
All the bushings are the same length and can be bought separately too.

The JConcepts Carbon Fiber Steering Arm uses the same geometry as the
kit's stock component so it installs cleanly into the steering
block.

It offers the same mounting holes too and is forged from 2.5mm thick carbon fiber.

Each arm is under 1g in total weight and they can be flipped over and installed on either side of the vehicle.
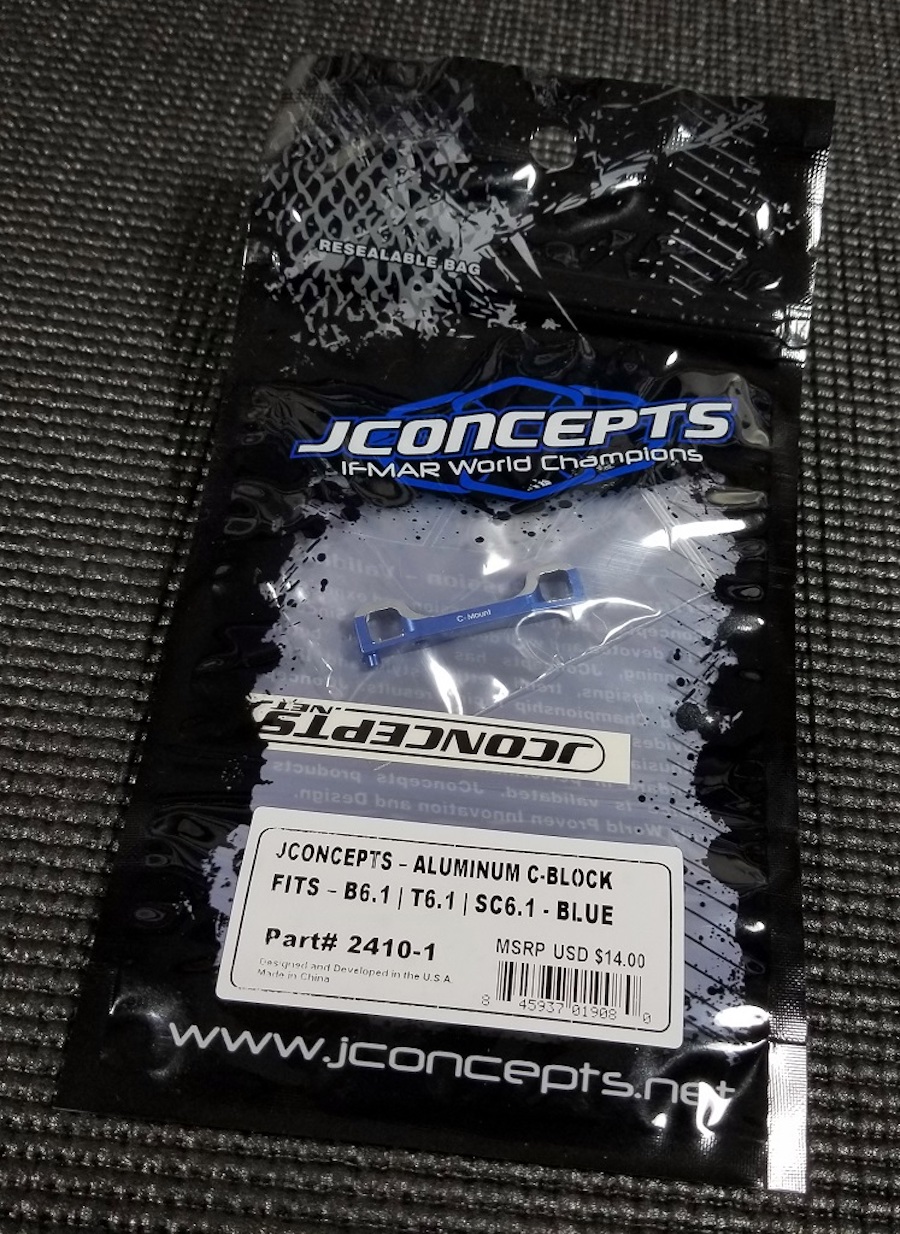
One of the newest JConcepts option parts that work on all of the 6.1 series vehicles is their Aluminum C Block.
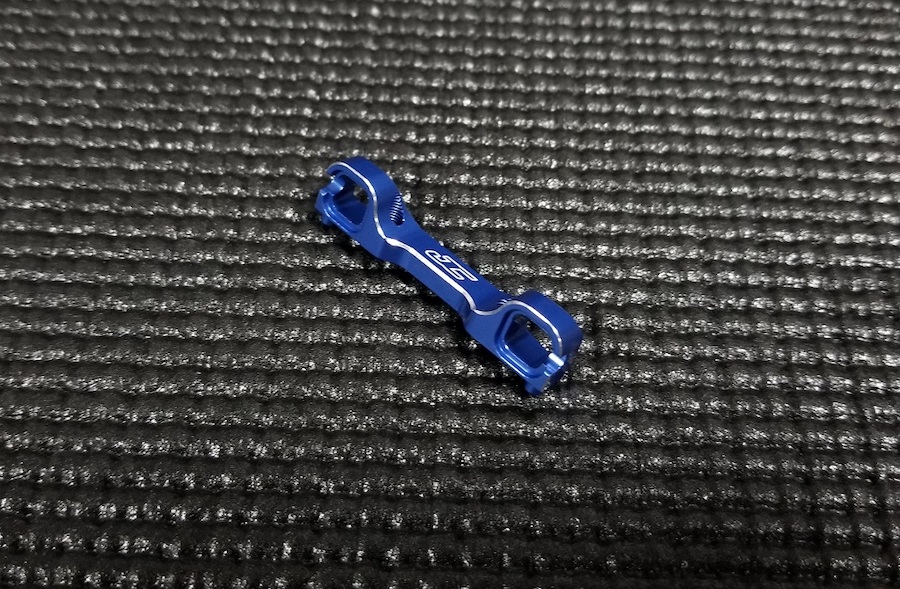
This is offered in both blue and black color options and is precision
machined from aluminum. Chamfer highlighting has been added to the
edges along with a laser etched JC logo and block identifier label.

It uses the same geometry designs of the stock part so that the kit's pill inserts fit firmly into place too.
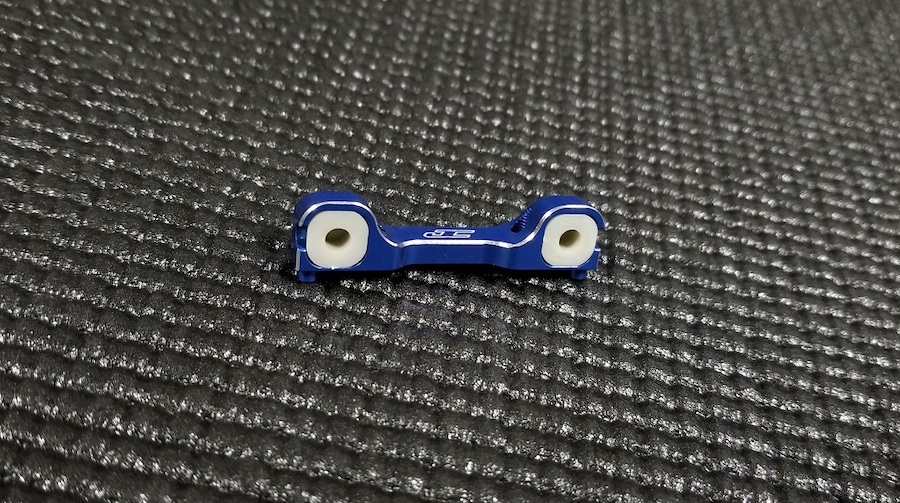
And some material has been removed from the holes used to seat the pills to lighten it up without sacrificing any durability.
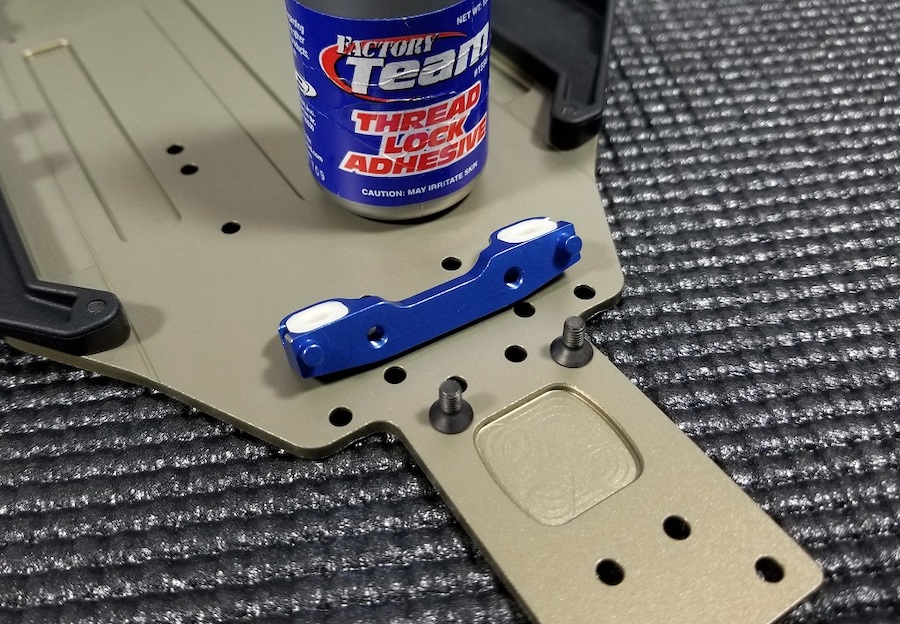
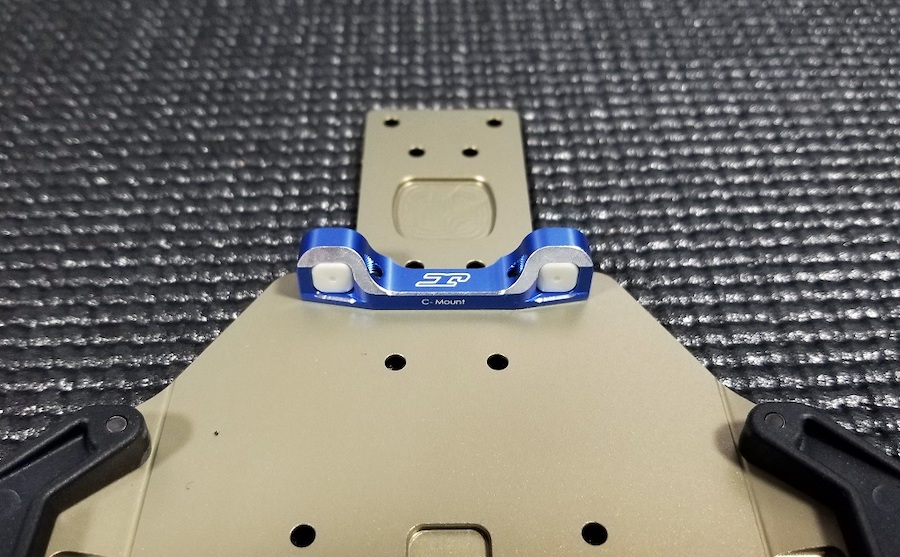
It fits perfectly into the T6.1 chassis and it is recommended to use some blue thread lock to keep the screws in place.

JConcepts also offers a few Rear Suspension D-Mounts too. Their
aluminum version is anodized in either blue or black, while their brass
version is a brilliant gold color.

The brass version weights 12g so it gives you another tuning option for track conditions.
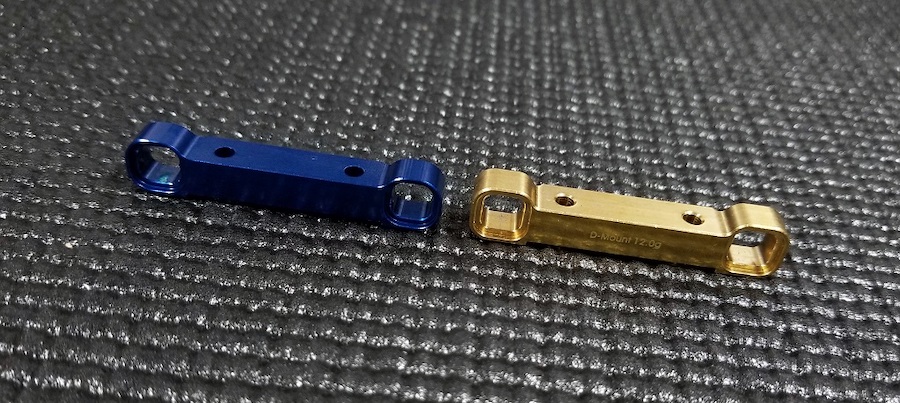
It uses the same design concepts as the OEM part so it mates up perfectly with the arm mount inserts.
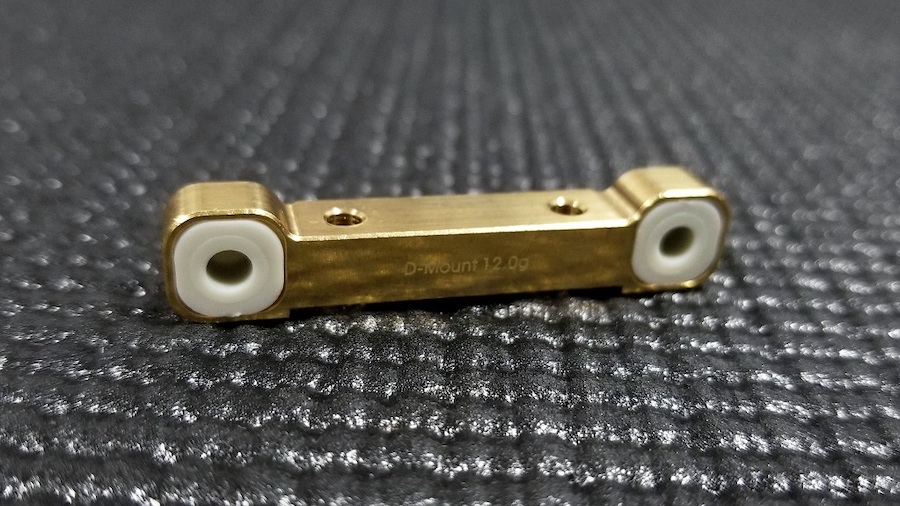

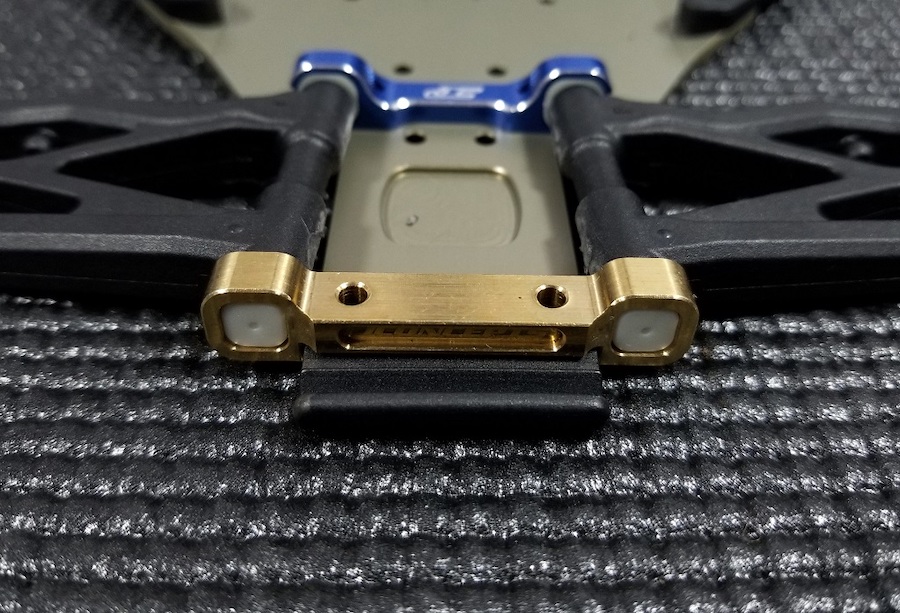
For this build I went with the brass offering. On one side it
features a laser etched JConcepts logo while on the flip side there is a
mount identifier and weight indicator.

Staying in the rear of the vehicle let's now talk about the JConcepts Rear Ball-Stud Mount.

This is a new part exclusive to the B6.1 series, and it is forged
from CNC-machined aluminum. It is available in either blue or black
anodizing with chamfered silver edging to enhance its overall
appearance.

To strengthen the mount JConcepts added some more material to outer curves of the “U-brace” too.
Otherwise, it is nearly identical in design to the kit component which also includes the three standard setup holes.
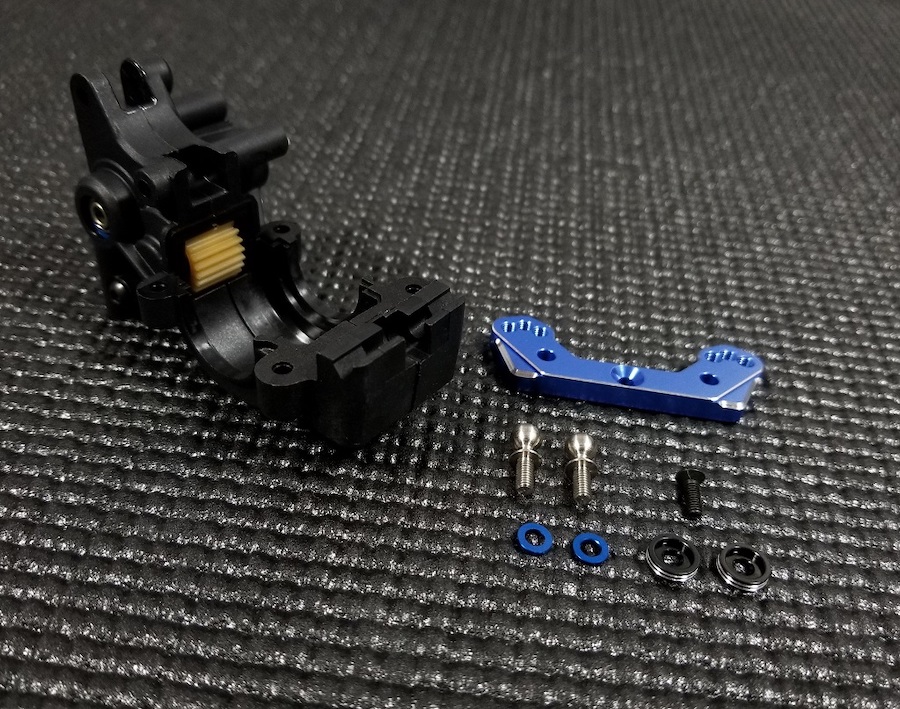

For this build I elected to not use the kit's 1mm blue aluminum
washers but instead went with the Dirt Racing Products 1-2mm Dirt
Washers.


And as usual make sure to use some blue thread lock since we are working with two metal components again.

The JConcepts 3-Gear Laydown | Layback Transmission Plate is offered
in two choices of color, blue or black. It is machined from 3mm aluminum
and it a new item for the 6.1 series.

But it has been milled out in several places to create the honeycomb pattern.
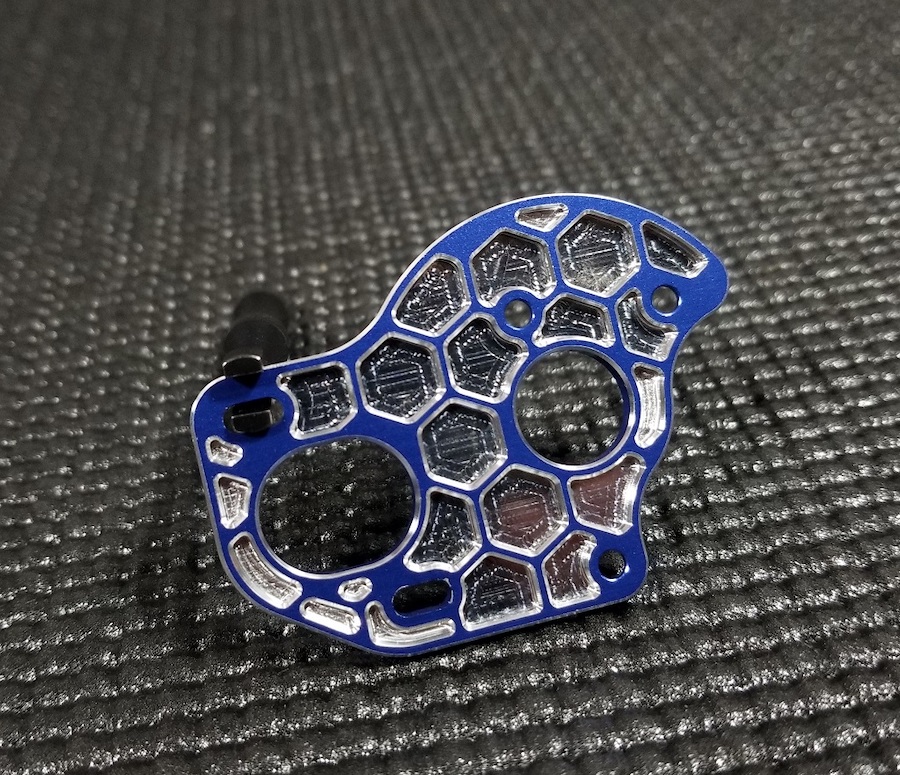
This unique design reduces the weight even more but it is still just a rigid as the stock part.

It is compatible with the kit's plastic spur gear guard and silver
chamfer highlighting has been added to several locations to enhance its
looks.
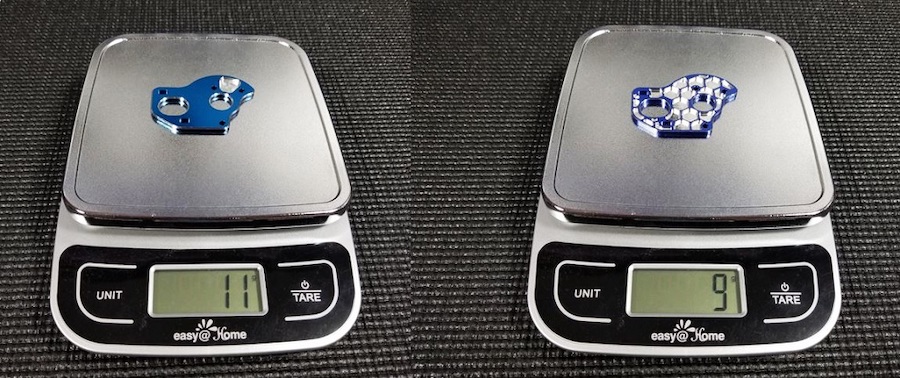
And for spec racers looking to shed extra weight the JConcepts motor plate is 2 grams lighter as well.

It synchs up perfectly with the rest of the surrounding parts, and we have one more rear located option part to review next.
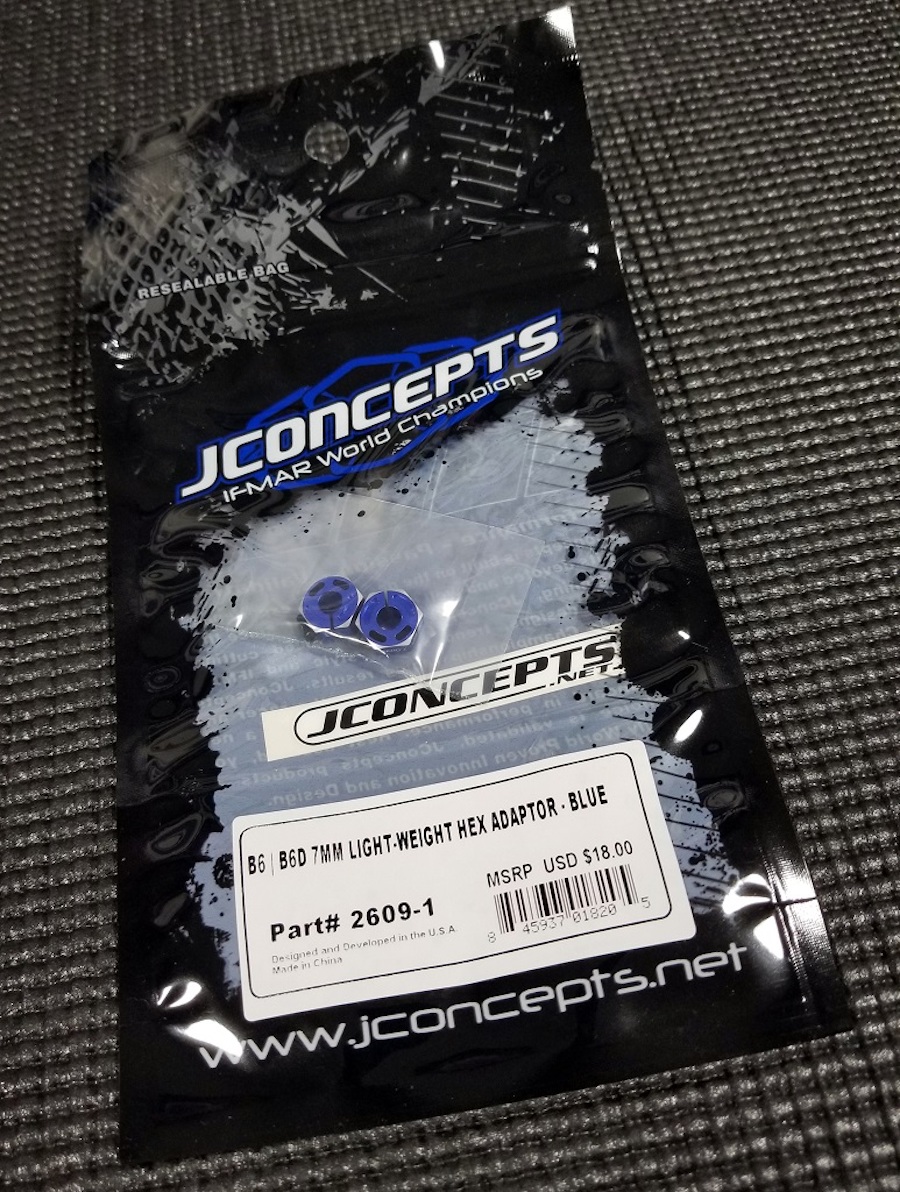
Frist designed for the B6, the JConcepts 7mm Light-Weight Hex Adapter
is available in popular blue or black anodizing options.
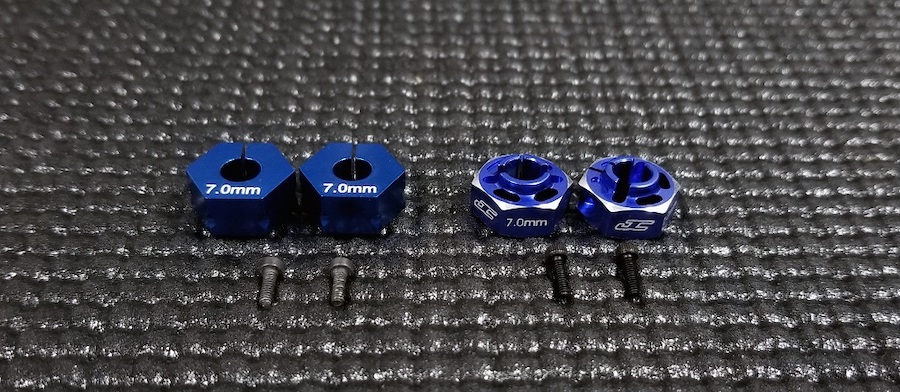
This part is compatible with the new 6.1 series and uses a clamping
design just like the kit's components. But there are a few features that
makes the JConcepts part different.

It has been slimmed down to reduce its weight thanks to the pockets
of material that have been removed from it. It also looks narrower too
since part of the hex has been removed from the section of the hex that
clamps down on the CVA towards the hubs bearing. Together these lower
the total amount of rotating mass which in turn frees up your drive
train more. Silver chamfer edging highlights the Light-Weight Hex
Adapter, and a JC trademark and width indicator are both laser etched
into the hex too.

Included are two 1.6mm SCHS that you will need a 1.5mm wrench to
install them with and some blue thread locker is also recommended to
keep everything in place.

JConcepts offers many accessories for Team Associated 12mm shocks
going all the way back to when the B5 was first released, but they still
work with the B6 and 6.1 platforms too. We have covered all of these
previously in Garage stories on the B6D and B6.1D, but I'll briefly go over each item once again.

The first item is the JConcepts 12mm AE O-Ring Shock Set. These blue
o-rings can be used to replace your seals for your shock's VCS3 Shock
Bottom Caps, 12mm Threaded Collars, and the top of your shock bodies
where the cap screws onto.
I bring this up since the JConcepts Fin 12mm V2 Shock Caps don't
include replacement o-rings. The stock black o-rings are fully
compatible with the JConcepts shock caps, but I'm going to elect to use
the blue o-rings instead for this build. Features of the Fin 12mm V2
Shock Caps include that they are made from lightweight aluminum,
knurling has been added along the bottom to aid you in tightening them,
clear washers and 2x4mm BHCS screws are included for the bleeder holes,
and they are also available in both blue and black color options. I'll
show these installed in a little bit.

Next, let's look at the JConcepts VCS Shock Bottom Cap. These do come
with the JConcepts blue o-rings and are available in your choice of
blue or black anodizing.
Double knurling rings rest at the top and bottom of the VCS Shock
Bottom Caps, and etched between them are JConcepts.net and JC authentic
logos.
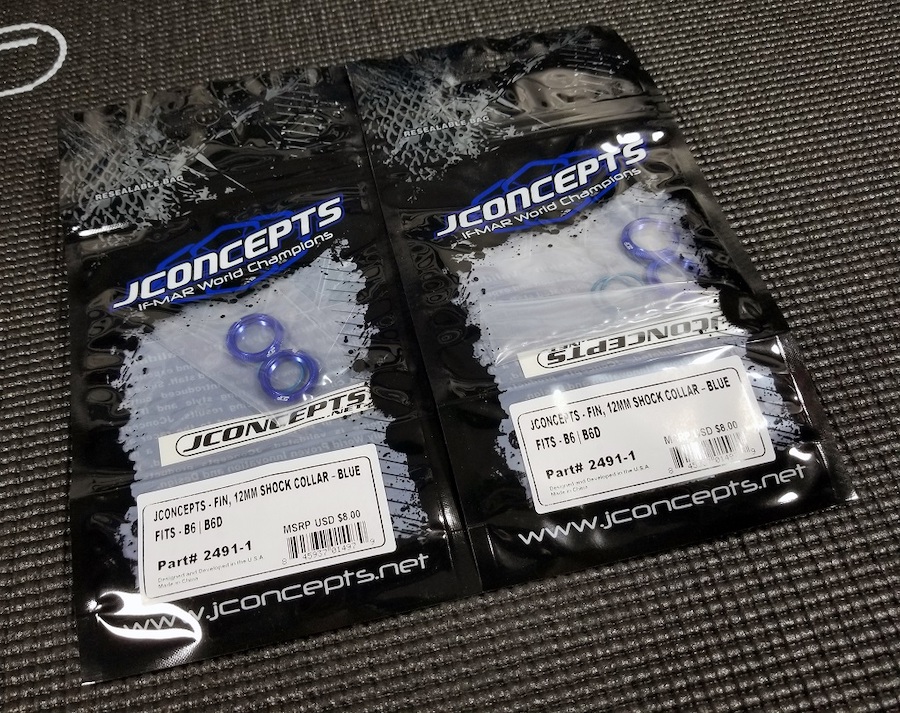
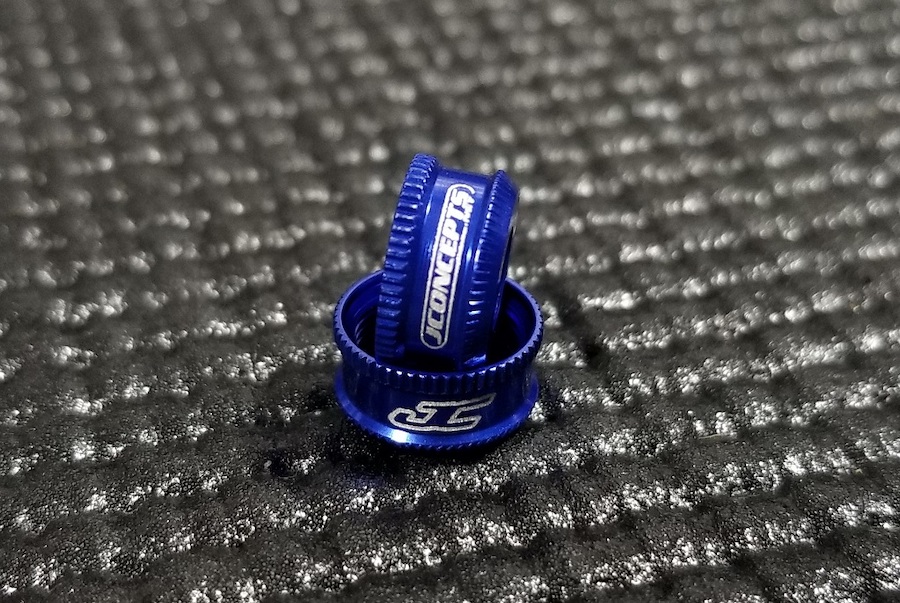
Up next are the JConcepts Fin 12mm Shock Collars.
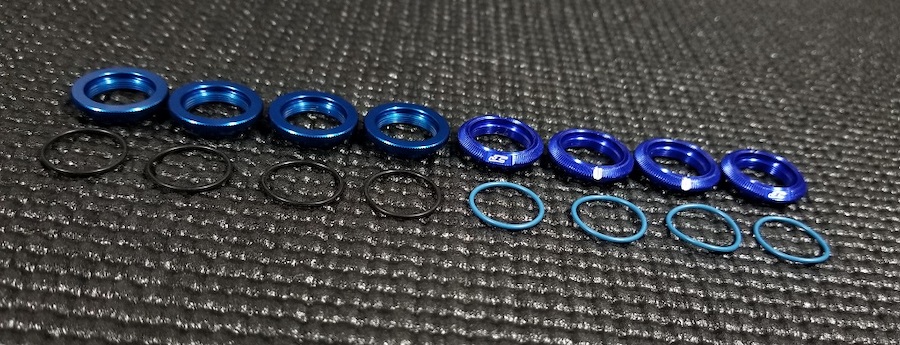
These are also available in either blue or black, and also include
the JConcepts blue o-rings. The JConcepts Fin 12mm Shock Collars are
comprised of aluminum and there are two color options to choose from,
blue or black.
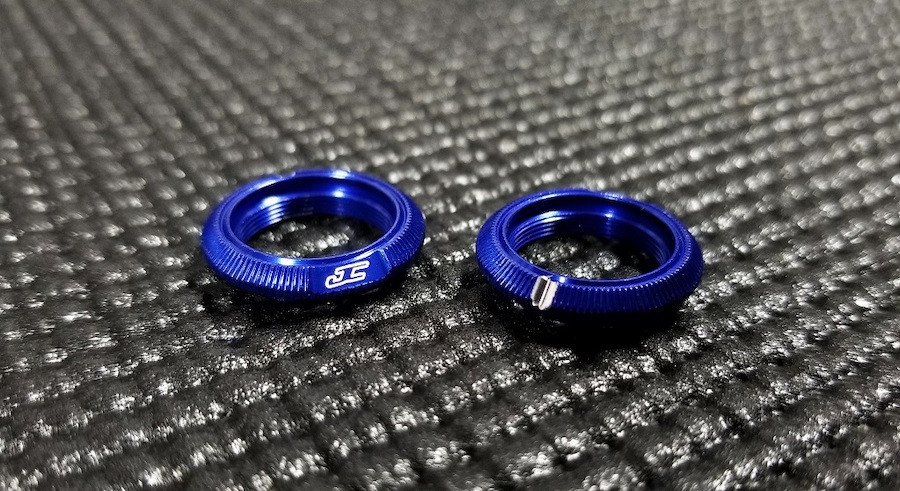
These collars help you when it comes to adjusting your vehicle's ride
height in a few different ways. Frist, knurling has been added to the
aluminum to help you grip it better when it eventually gets slippery
from the buildup of dirt, dust, and possibly shock fluid. There is also a
notch in the collar to help keep track of how many turns you make
during your adjustments, and on the opposite side is an etched JC logo.

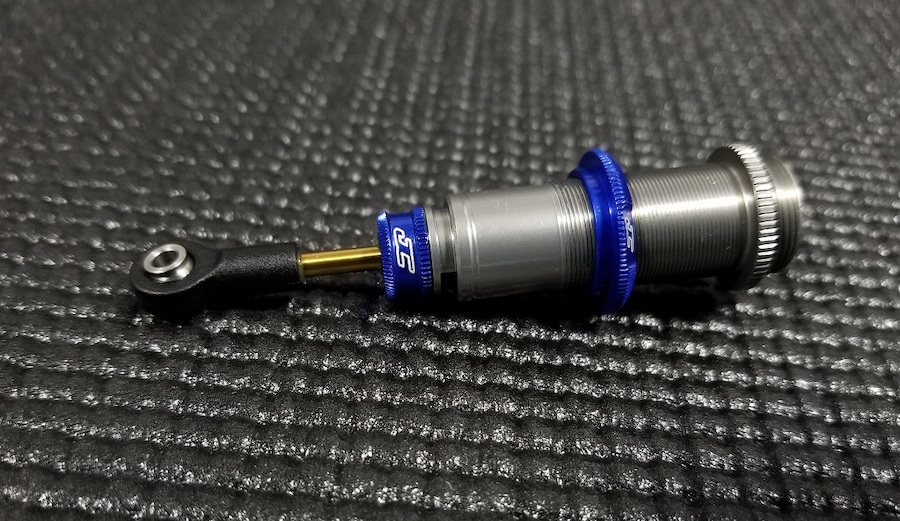
Here you can see the JConcepts Fin 12mm Shock Collars and VCS Shock
Bottom Cap installed along with a JConcepts blue o-ring.
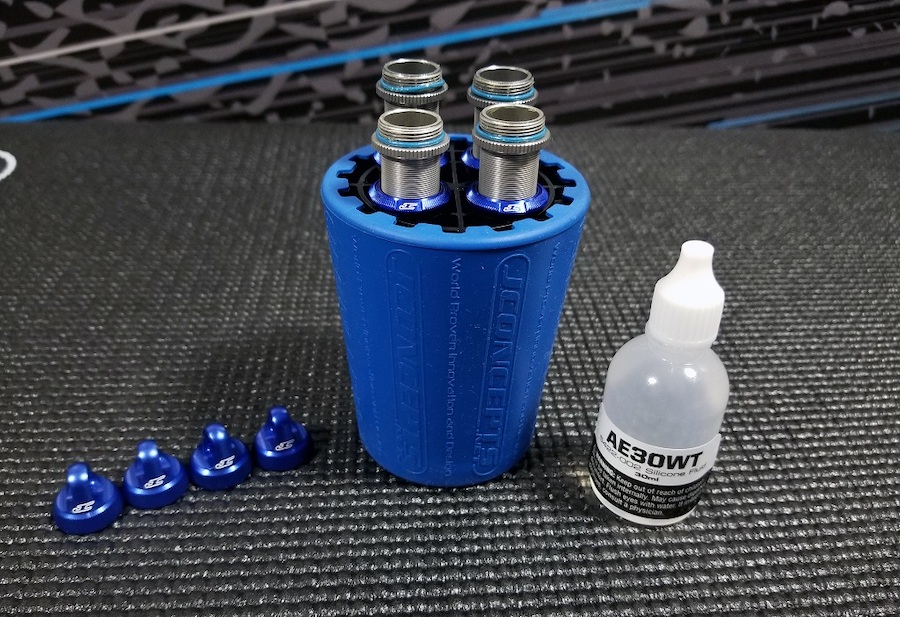
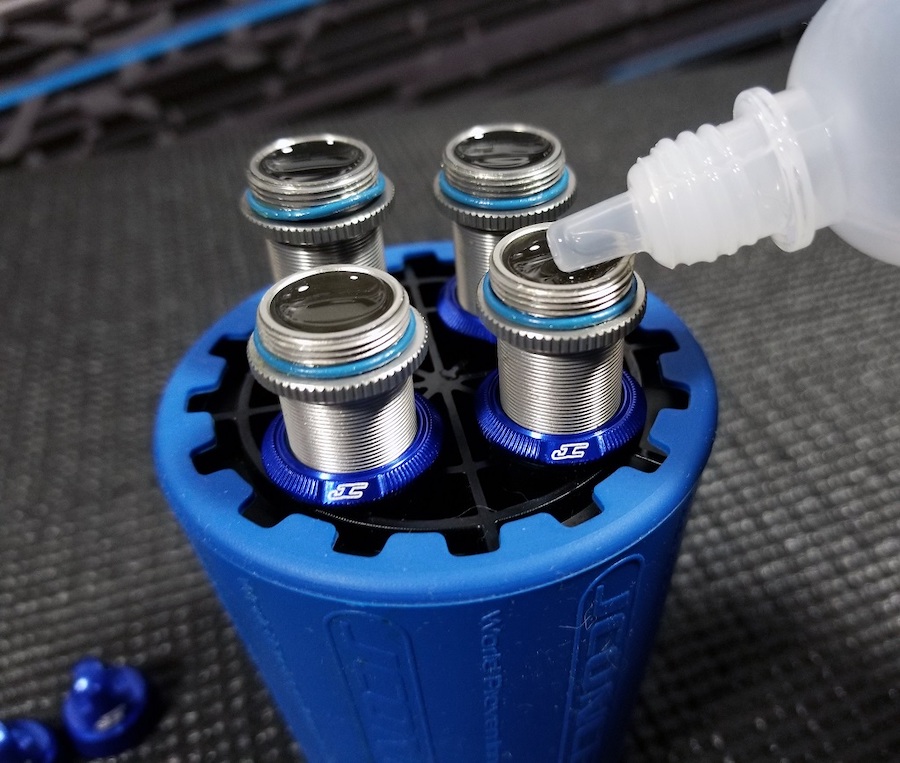
I used the JConcepts Exo 10th Scale Shock Stand and Cup to top off
the shocks with fluid. This shock stand has four long, vertical holes
that are designed to hold your shock bodies while you fill them up with
oil.
NOTE: For more information about the JConcepts Exo 10th Scale Shock Stand and Cup, please read this earlier edition of The Garage: http://www.jconcepts.net/garage/projects/jconcepts-exo-shock-stand
The holes run the entire length of the stand so if so desired you can
flip the stand over to the opposite side for a different look and feel.
And the molded rubber cup that wraps around it can be removed to hold
small parts during your shock build too.
Now that the shock caps were installed and the shocks were bled, it
was time to look at the final “shocking” product offered by JConcepts.
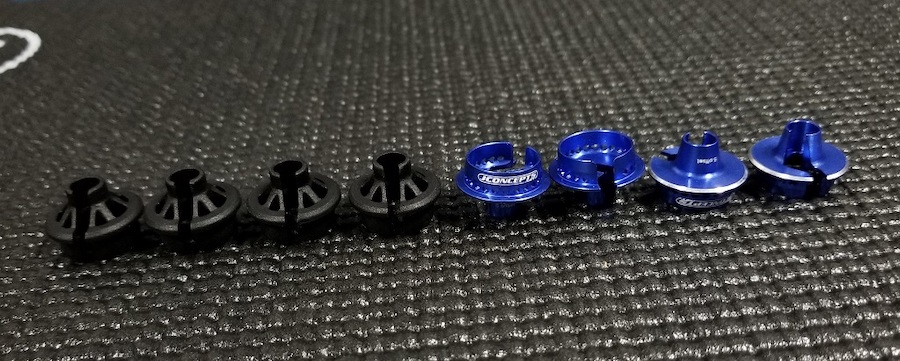
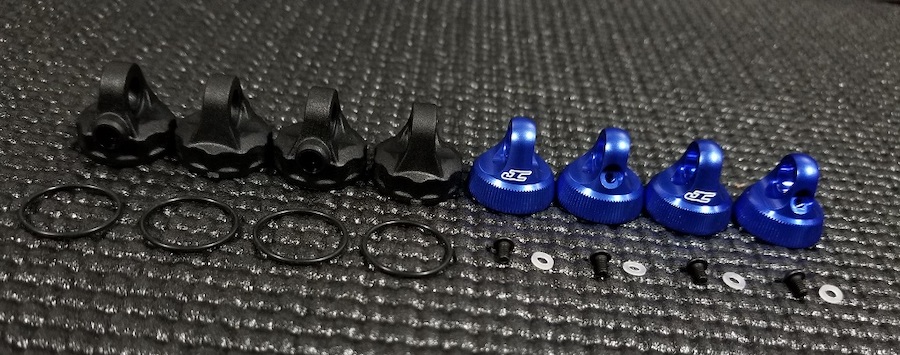
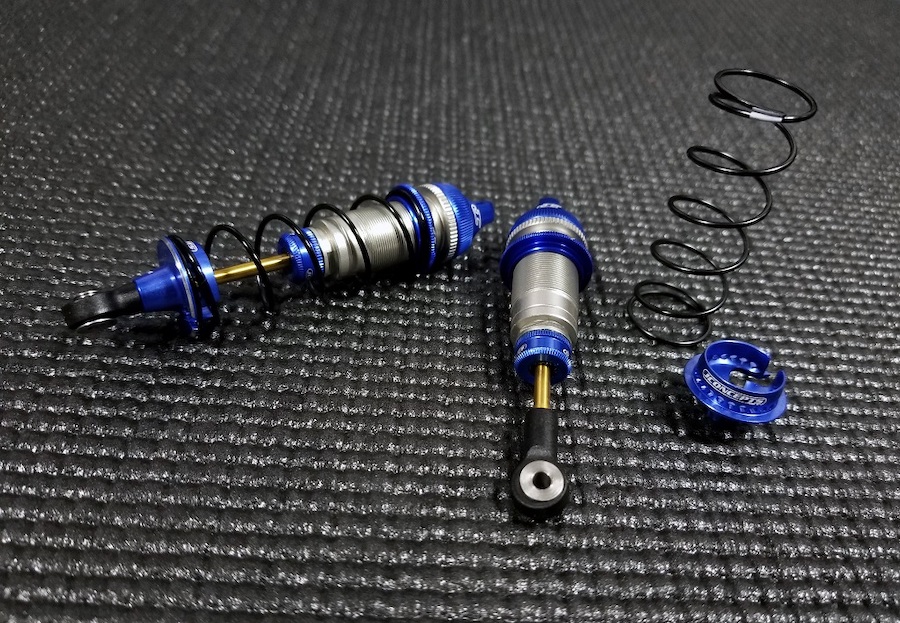
The T6.1 kits come with black, mold plastic 5mm spring cups. The
JConcepts Fin Shock 5mm Off-Set Spring Cups are instead constructed out
of aluminum and offer a few other key differences. Since they are
aluminum you get your choice of blue or black color options.

To decrease the change of a spring cup popping off during a TQ run,
JConcepts engineers created a new design where the shock shaft has to
make two movements before it is free. This non-linear path gives a
driver a little extra insurance on a race day.

The cups are even lightened up more thanks to small circular cutouts
along the sidewall of the cup. And there is also a laser etched
JConcepts.net logo and off-set indicator as well so you know which cups
you are using at a glance.
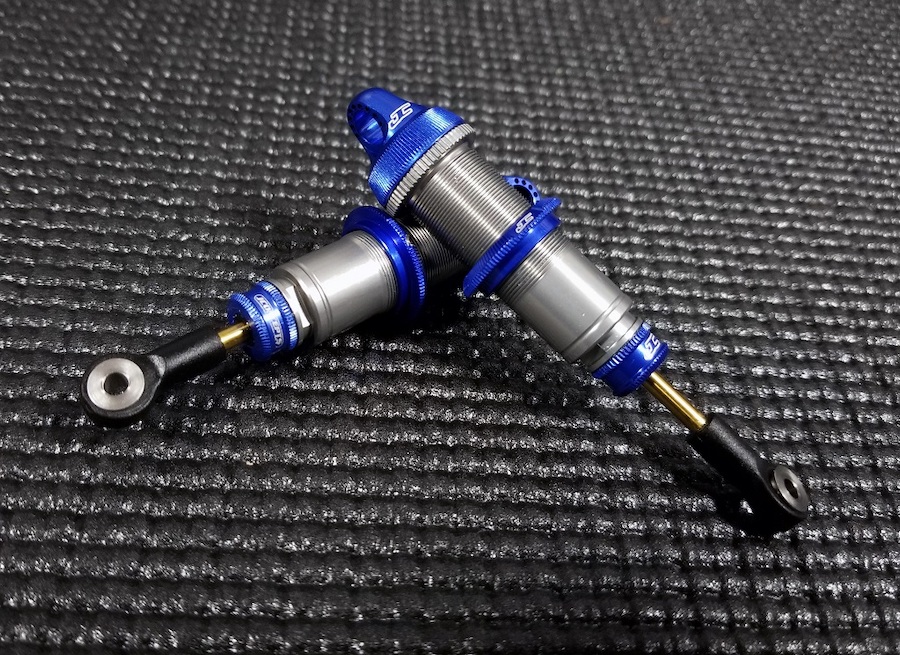
I assembled the shocks and then installed them onto the T6.1 using the JConcepts Combo Thumb Wrench.
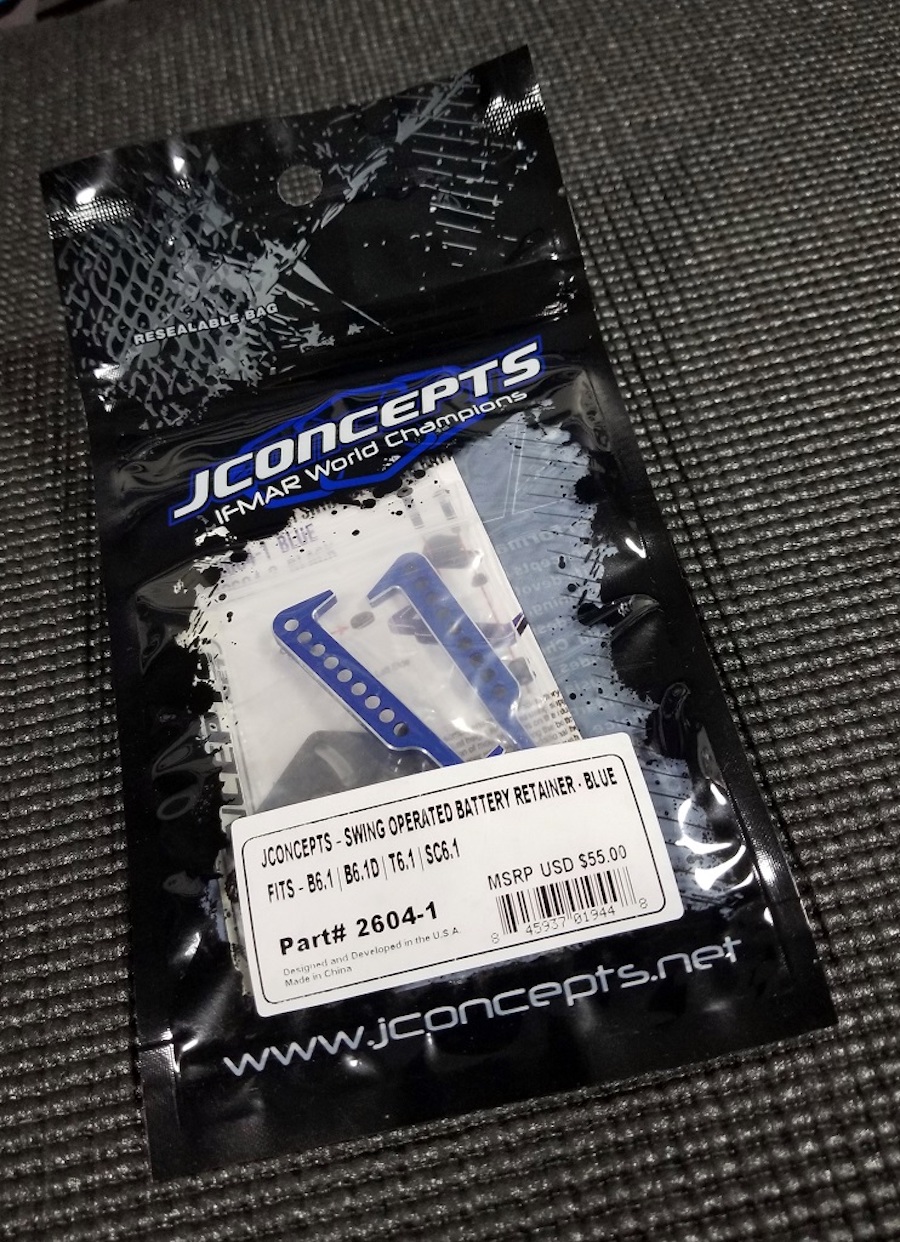
Another new JConcepts option part that is compatible with
Associated's 6.1 series of vehicles is the Swing Operated Battery
Retainer Set.
The kit's battery strap is a large, molded plastic piece that is
designed to fit over the length of the battery and secure it on each
side with the help of shoulder screws, washers, BHCS, and plastic nuts.
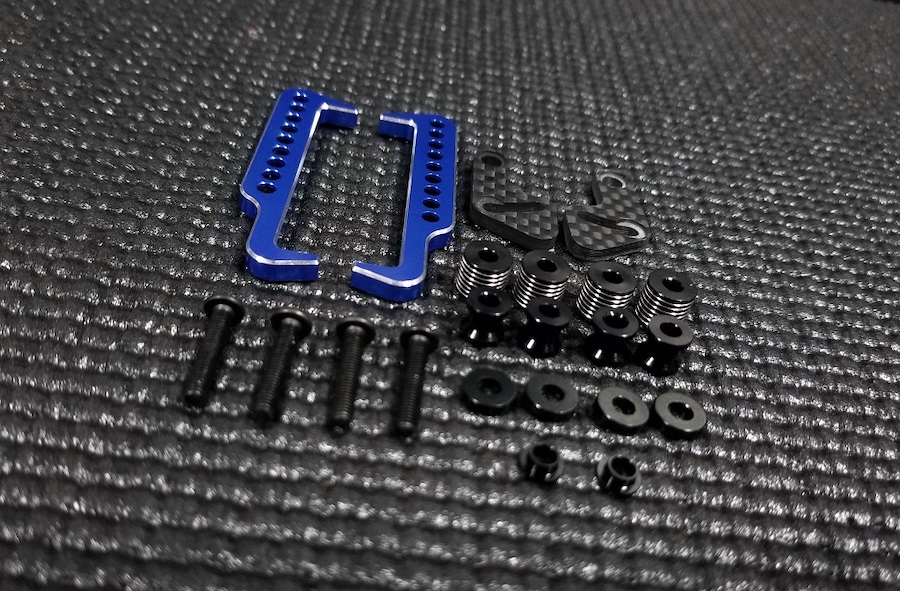
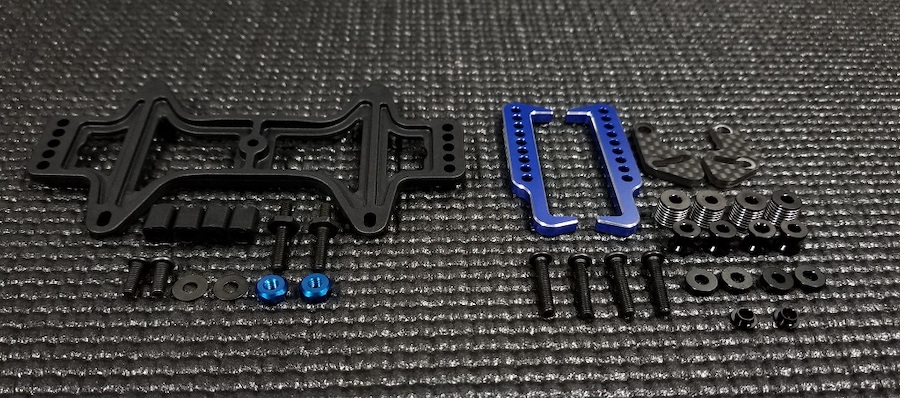
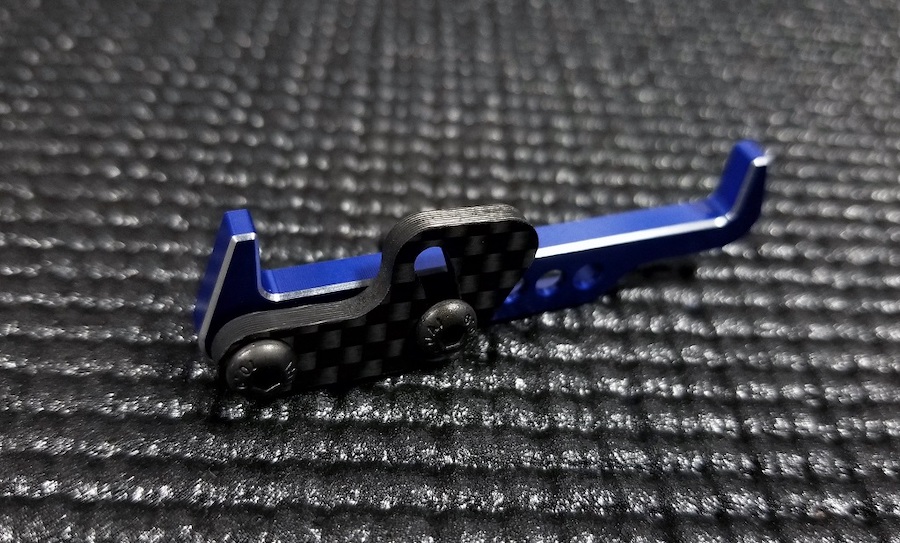
The JConcepts Swing Operated Battery Retainer Set uses a different
approach and secures the battery by clamping down on each end of it via
the included hardware and aluminum rails.

These rails are available in either blue or black anodizing options
and the edges include some chamfered highlighting. A lasered
etched JConcepts.net logo has also been added for brand recognition too.
The stock battery strap includes five different mounting holes, but the
JConcepts rails offers you a total of nine holes to help you dial in
your perfect weight distribution.

Also included with the rails are multiple stand-offs, four 3x16mm
BHCS screws, two carbon fiber “swing” arms, plus two steel top hat
bushings for the carbon arms. Since each LiPo pack can vary in height
these multiple stand-offs are included along with some installation
instructions.
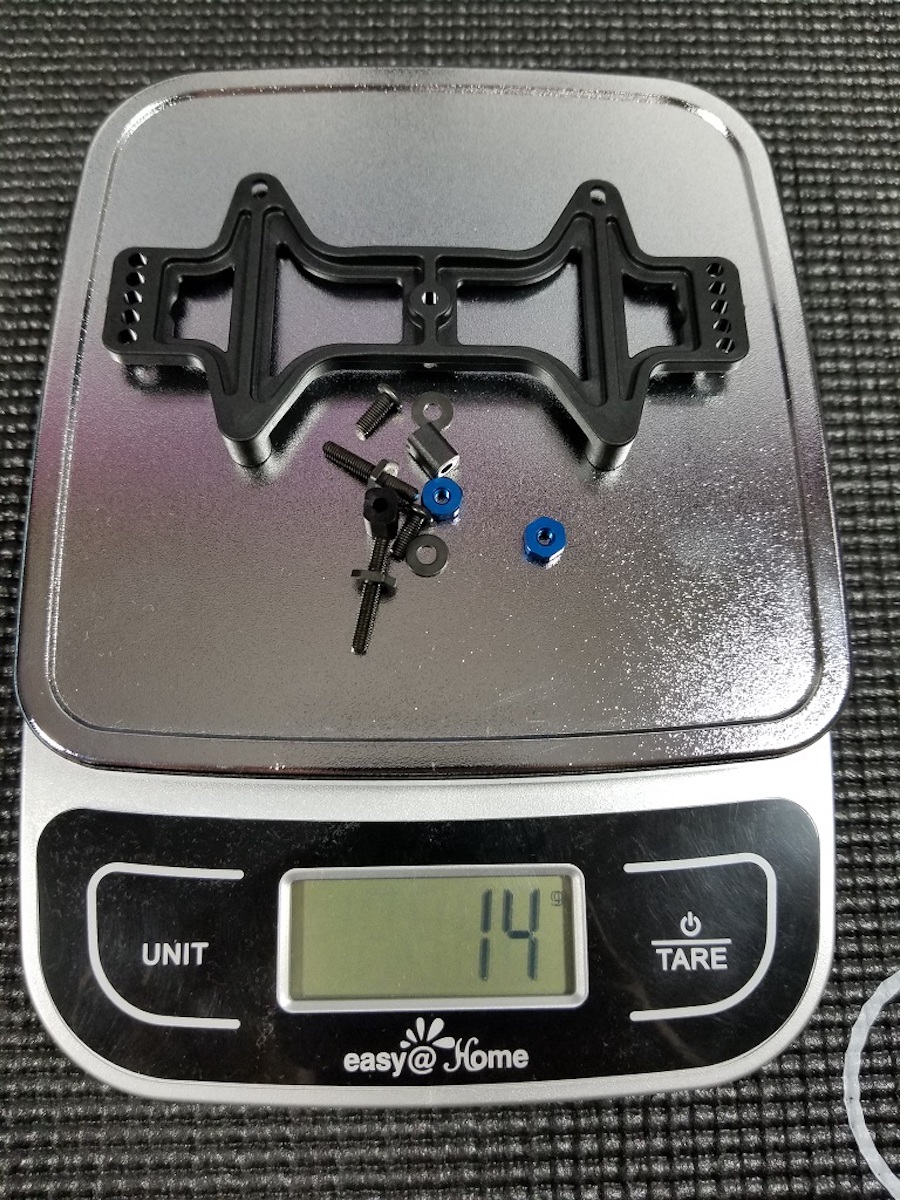
For spec racers looking to gain that extra edge this battery
retaining system is lighter too. The stock battery strap and support
hardware weigh in at 14g.
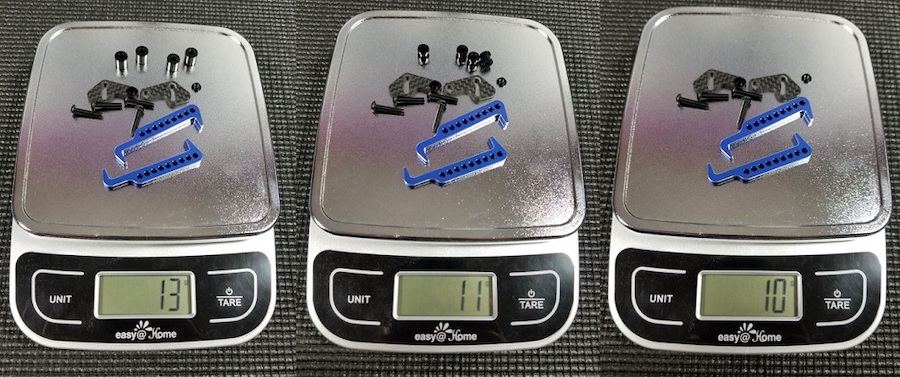
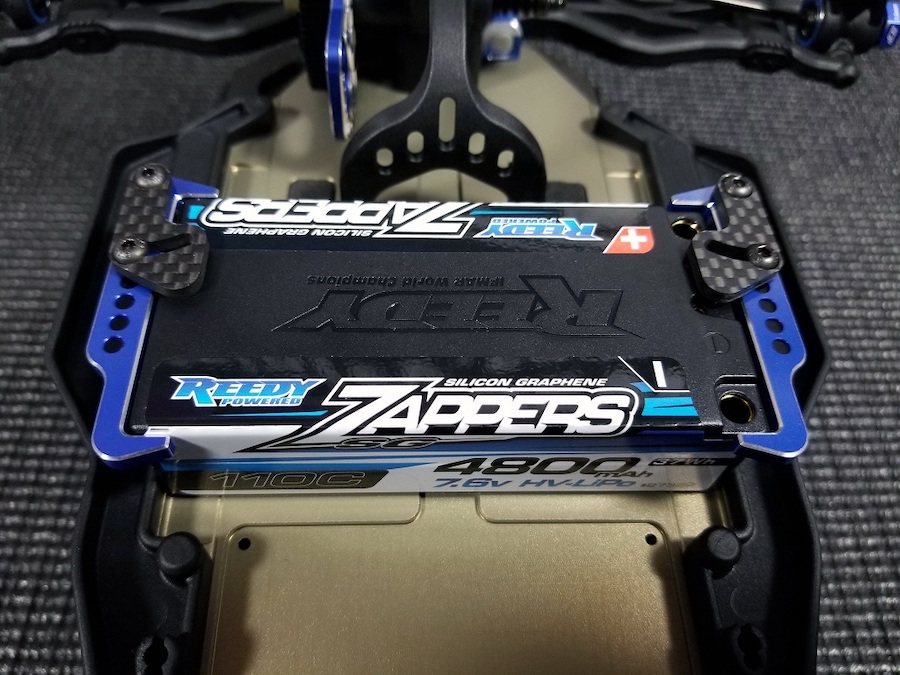
With the JConcepts Swing Operated Battery Retainer Set normally you
will use one of three different mounting configurations shown above, but
all three weigh less than the stock setup. For this build I used the
hardware shown in the middle setup option and I'll walk you briefly
through that process next.

Here is the hardware I'll need to build one side rail to secure in my Reedy pack (more on that pack later in this story).

Frist, I'll place one of the included 3x16mm BHCS screws through the
carbon fiber swing arm and then place the steel top hat bushing on the
bottom side. This top hat bushing seats into a recessed section of the
swing arm.
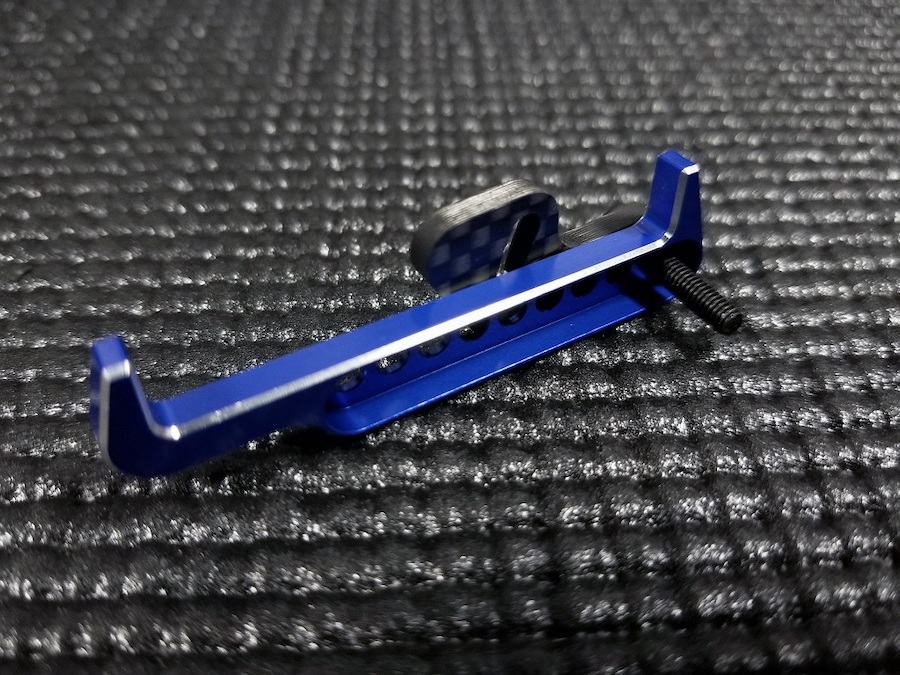
Then to hold that into place with the aluminum rail I would take that
3x16mm BHCS screw and slide it through the desired mounting hole.
Then I would use the other screw to go through the front hole of the swing arm.

Then on the bottom side I would slide on one of the 6.3mm stand-offs
to get the desired height for my pack. So this is what one rail would
look like when assembled, but unless you are some sort of wizard it
would be very difficult to keep this intact and then install it into
your T6.1.

So once you have the general idea of how this should look when
assembled, you now need to remove your existing battery strap (unless
this is a new build). If this is a new build then I would pre-thread one
of the 3x16mm BHCS screws into the rear molded holes of the side rails.
Then assemble the hardware for the rear of the aluminum rail and then
install it with a 2mm driver but only tighten it enough so everything
stays in place. Then add the front screw and stand-off and tighten it
down till the point that the swing arm is secure and won't move. Then
make sure to sink the rear screw all the way down tight into the side
rail.

Repeat the process for the other side and now your pack is locked and loaded.

Finally, let's take a look at the JConcepts 4mm Large Flange Serrated
Locknuts. These are available in two different color choices, blue or
black, and are compatible with several vehicles including the 6.1
generation.

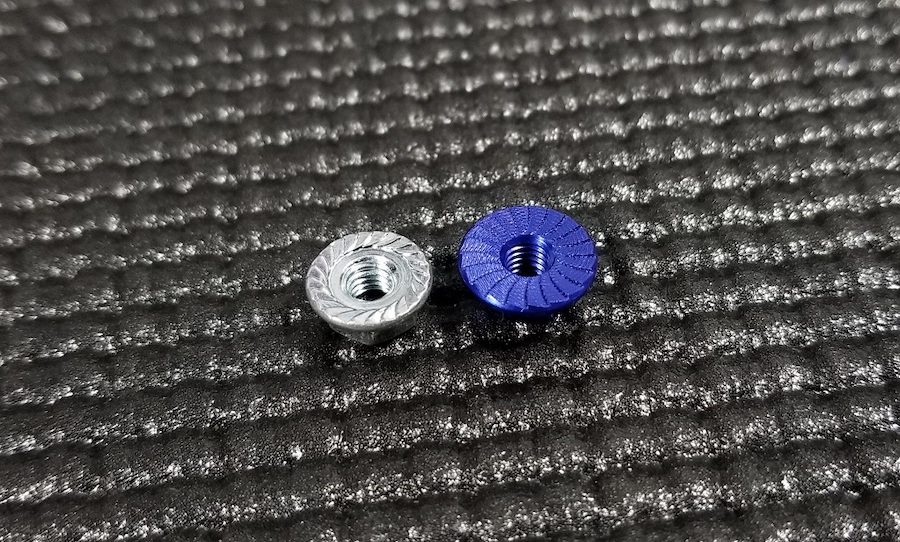
When compared to the kit's included steel wheel nuts, the JConcepts
locknuts use a slightly larger surface area the secure your wheels.

This larger “disc” will grab more surface area on your wheel to keep
it in place, and just like the OEM part it uses serrations to dig into
the wheel too.
Parts Exclusive To The T6.1

Now let's talk about some parts made exclusively for the T6.1 starting with the JConcepts Carbon Fiber Front Shock Tower.
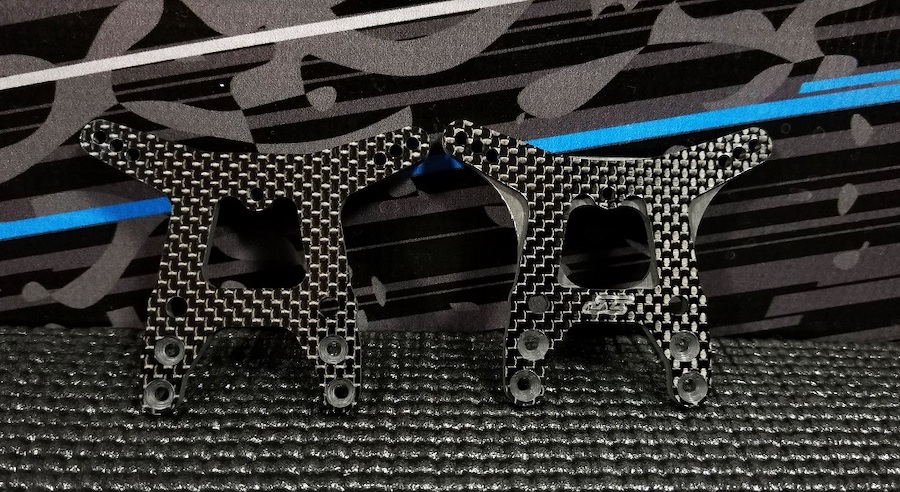
Here you can see the kit's OEM tower on the left and the JConcepts
tower on the right. They are nearly identical except for a few small
details.
The JConcepts Carbon Fiber Front Shock Tower incorporates the three
standard holes for mounting your shocks, and a milled JC logo is located
on the front too. It is also comprised of 4mm thick genuine, carbon
fiber material.
The tower is slightly wider in key areas that have been reinforced to
strengthen up the tower without adding additional weight to it thanks
to the lightweight carbon fiber materials. And this tower is also
compatible with Associated's SC6.1 short course truck too.
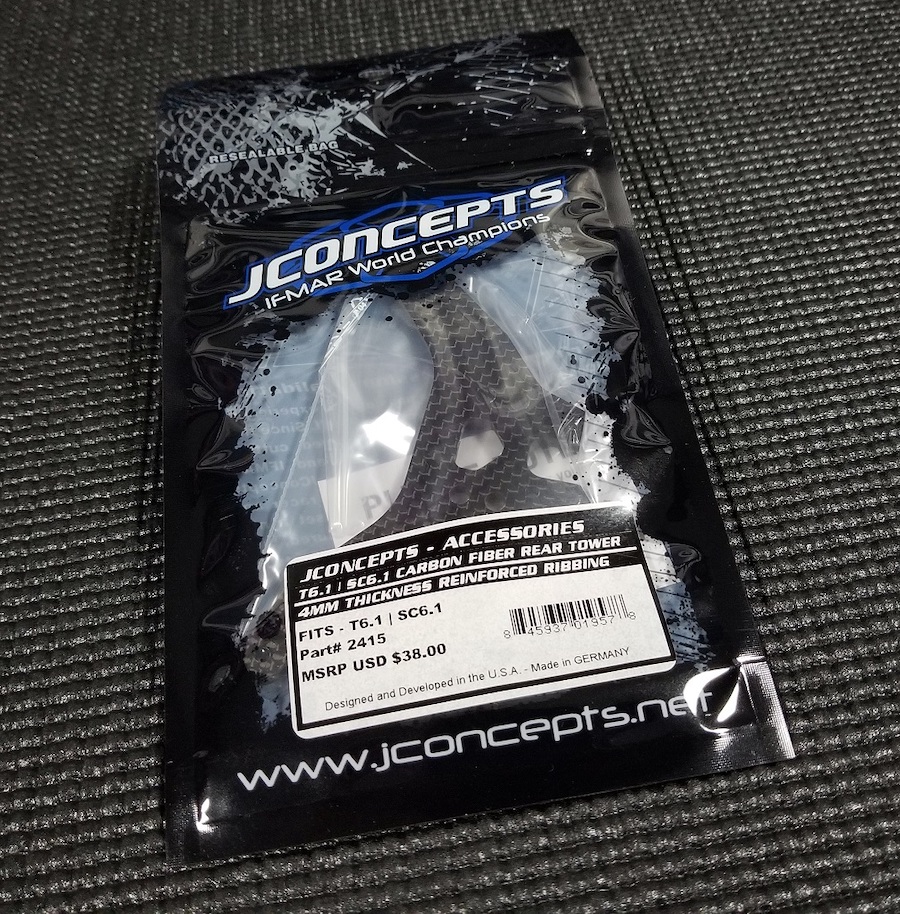
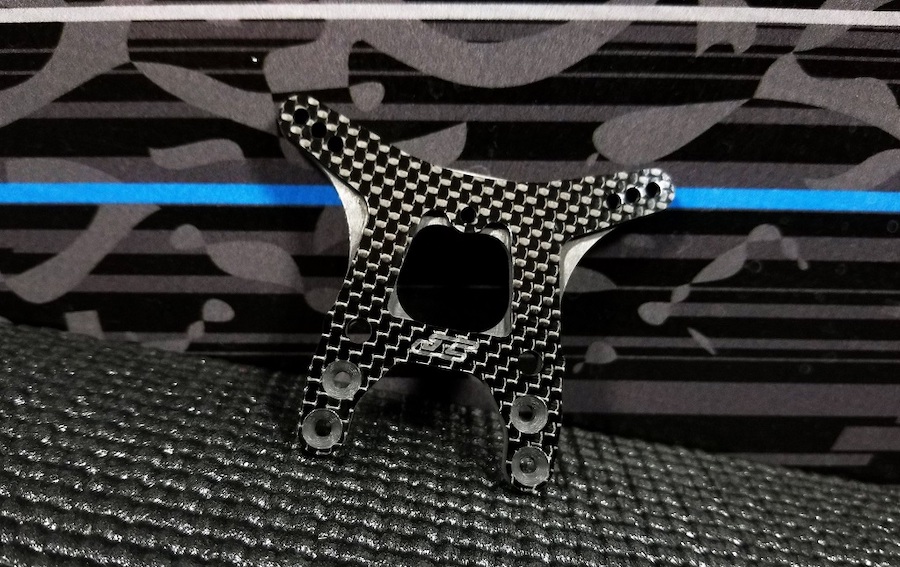
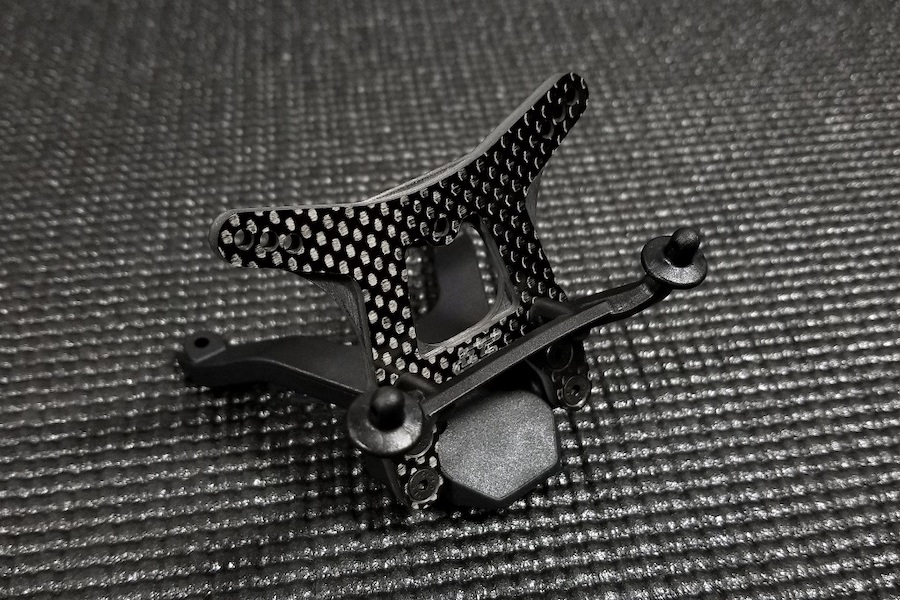
Now let's move to the rear and look at the JConcepts Carbon Fiber
Rear Shock Tower. Just like the front shock tower, this one is also
manufactured from genuine, carbon fiber that is 4mm thick.

And again when you compare it to the OEM rear shock tower they are
nearly identical which also includes the standard three shock mounting
holes. And this tower is also compatible with the SC6.1 as well.
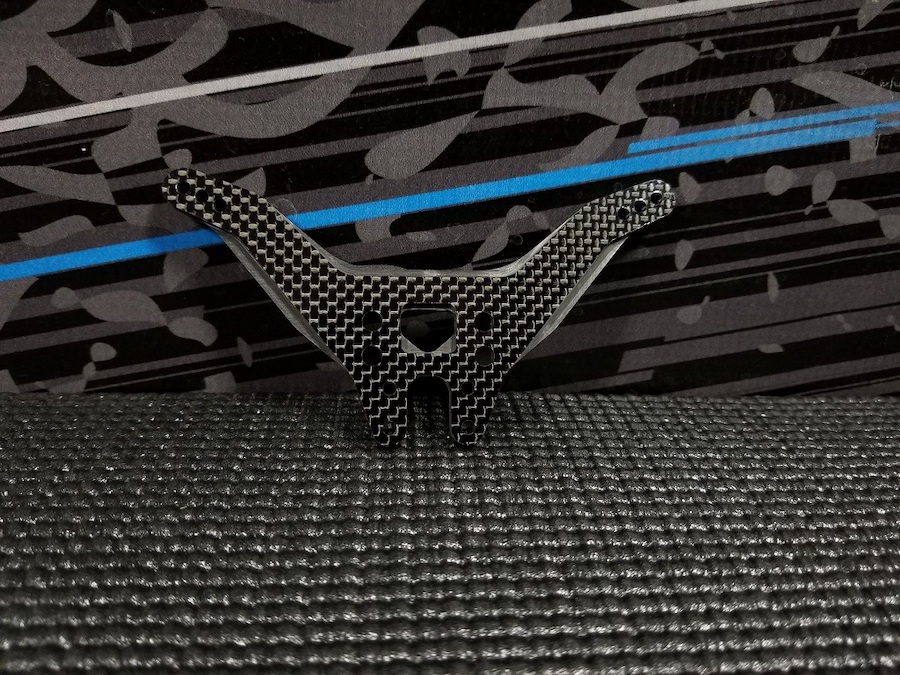
But one key difference again is that JConcepts has reinforced their
tower with some extra ribbing that doesn't increase the weight too.

Flipping the T6.1 over let's look at the next exclusive option part from JConcepts.
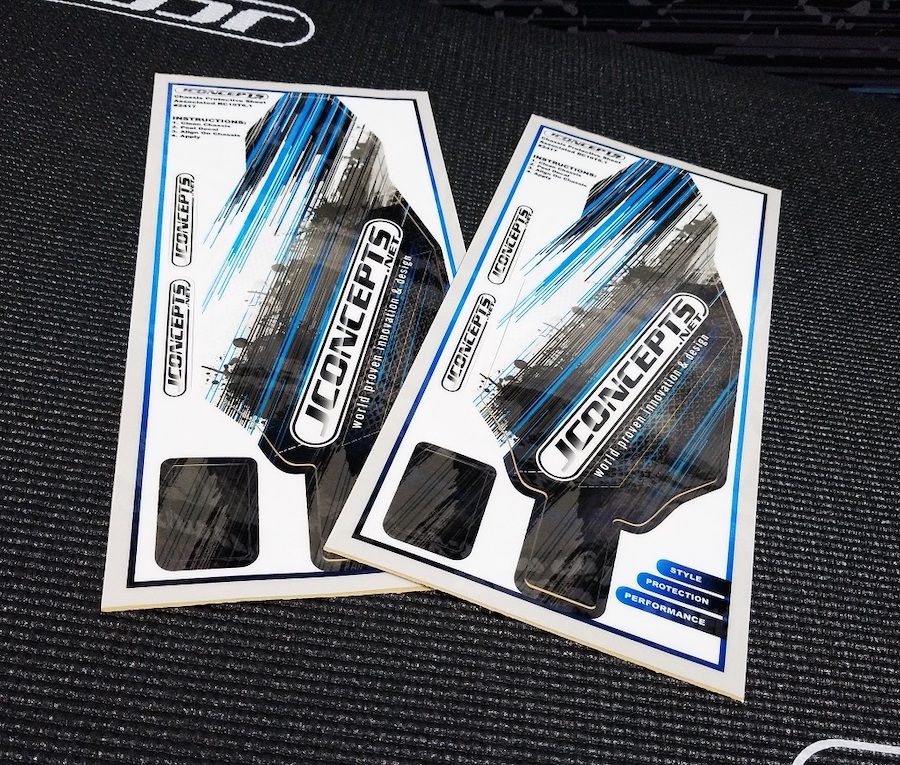
The T6.1 Precut Chassis Protective Sheet includes two pieces per
package. These sheets are precut to fit on your T6.1 chassis perfectly
without any modifications. By installing a chassis sheet not only do you
decrease the wear and tear to your metal chassis, but you also create a
barrier between the chassis and track surface too. This barrier will
decrease the amount of friction between your chassis and the race
surface. This friction can silently scrub your speed and you drag across
the track surface. It also keeps the flat head screws on the bottom of
your chassis clean too so it is easier to perform maintenance.

Each sheet also includes an extra tail piece since that area can lose
it adhesive quicker thanks to bottoming out on jumps or frequent
transmission maintenance.

Installation instructions are printed on each sheet and let's briefly go through this process.
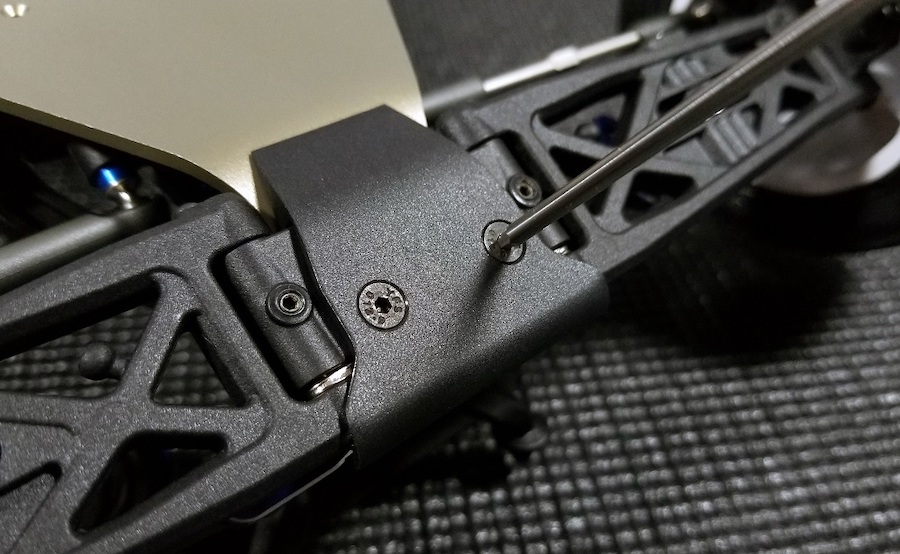
The first step is to clean your chassis so if you have been racing
your vehicle for a while make sure to clean off the dirt and grime that
has built up on the bottom. Since this is a new kit build I can skip
over this step. Next remove the front bumper and two M3x16mm FHCS screws
and then set them aside.

Next peel off one of the T6.1 Precut Chassis Protective Sheets and
carefully place it onto the chassis. Make sure to smooth out any air
bubble as you slowly apply it from one end to the other. If you are
slightly off just gently pull back the sheet and start over again. The
sheet's adhesive has just the right amount of give to allow you to
install this properly with a little trial and error.
Once you have it in place install the front bumper and screws again.
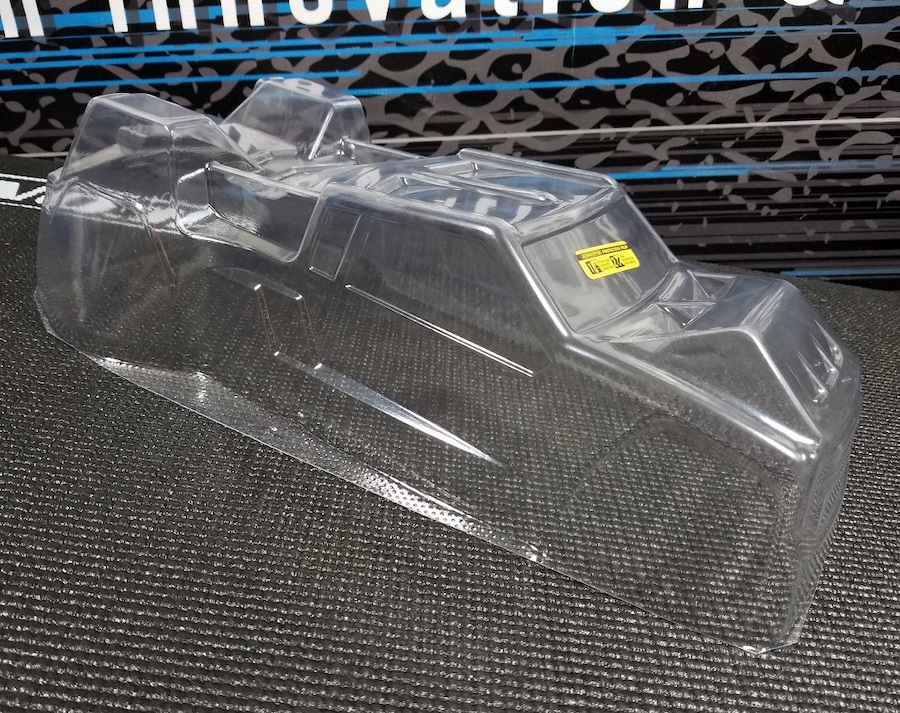
The final exclusive item for the T6.1 is the JConcepts F2 T6.1
Finnisher body. With the advent of the 6.1 series, drivers now have the
ability to mount their shocks on either the front or back of the rear
a-arms. So this called for a new body that was compatible for dual setup
configurations and once again JConcepts has answered the call.
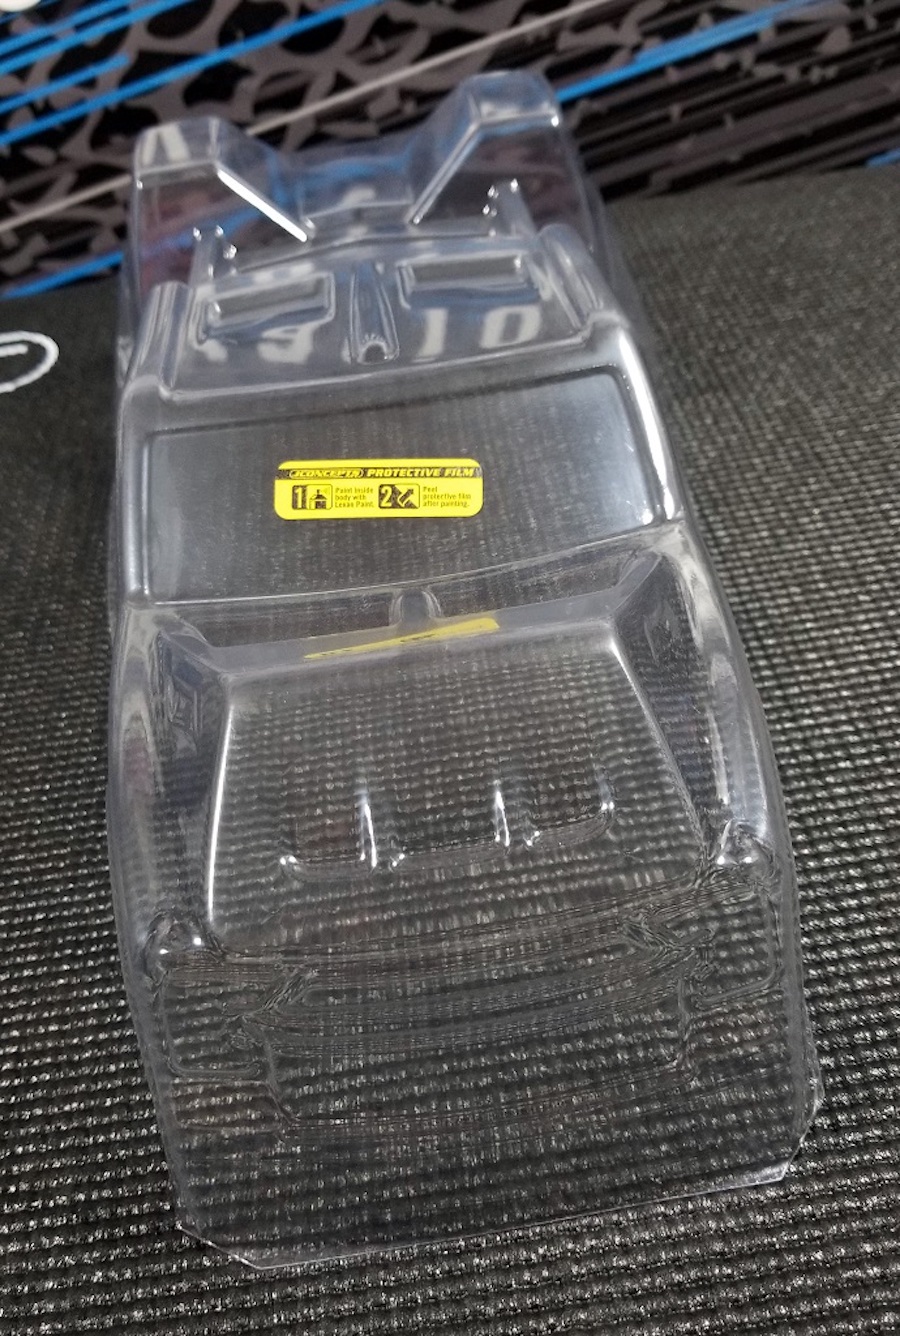
The rear “humps” on this body will allow for both rear shock setups
and resting in front of them are the customary Finnisher “V step-downs”
in the truck bed area. Other features on this new body include a
narrower front end which will help to keep the front tires from rubbing
the body in high turning situations. And the nose of the F2 and the cab
include recessed areas that can be removed to increase air flow which
gives you another tuning aid. Now I'll go over the steps to prep the
body for the T6.1.
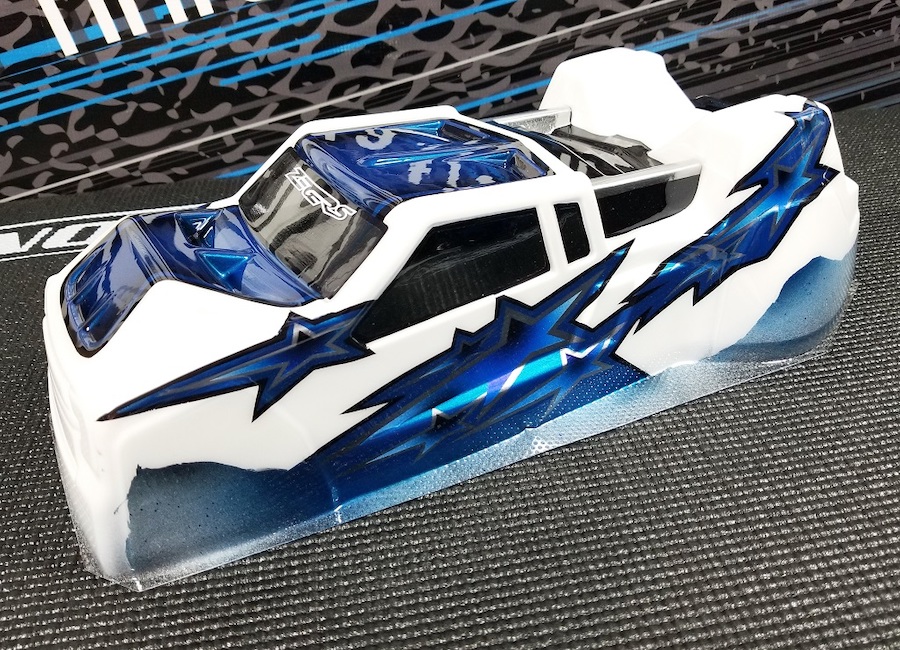
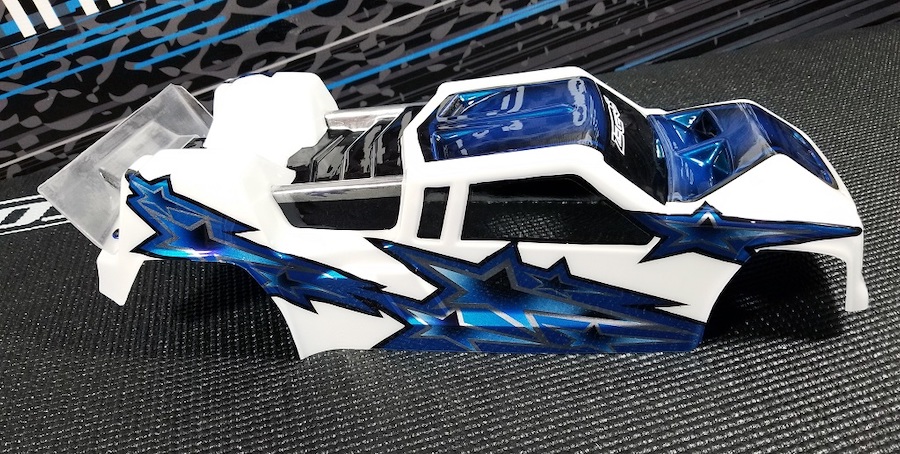
Since this body does comes clear the first thing I needed to do was to send it to my painter Zegers RC Graffixx to have my custom paint scheme added to it. About a week later it came back looking great as usual!
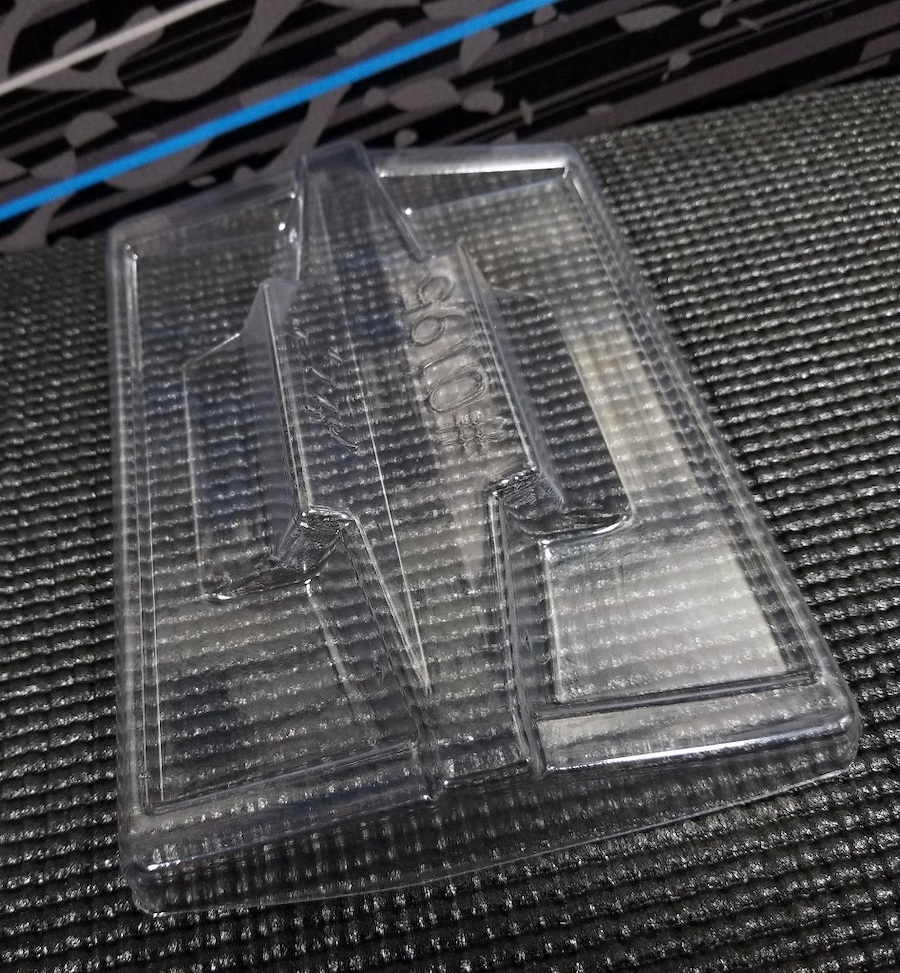
The JConcepts F2 T6.1 Finnisher body also includes two spoilers which
are molded as one piece. The taller spoiler is intended to be used for
low to medium traction track conditions, while the shorter one is best
suited for high traction race conditions. And this spoiler is sold
separately too as part # 0195.
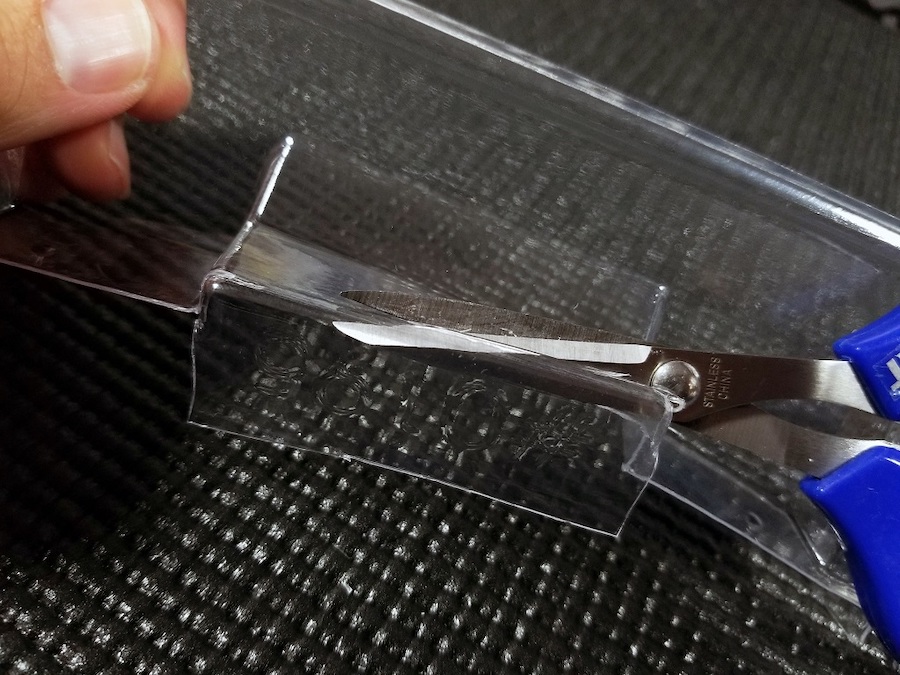
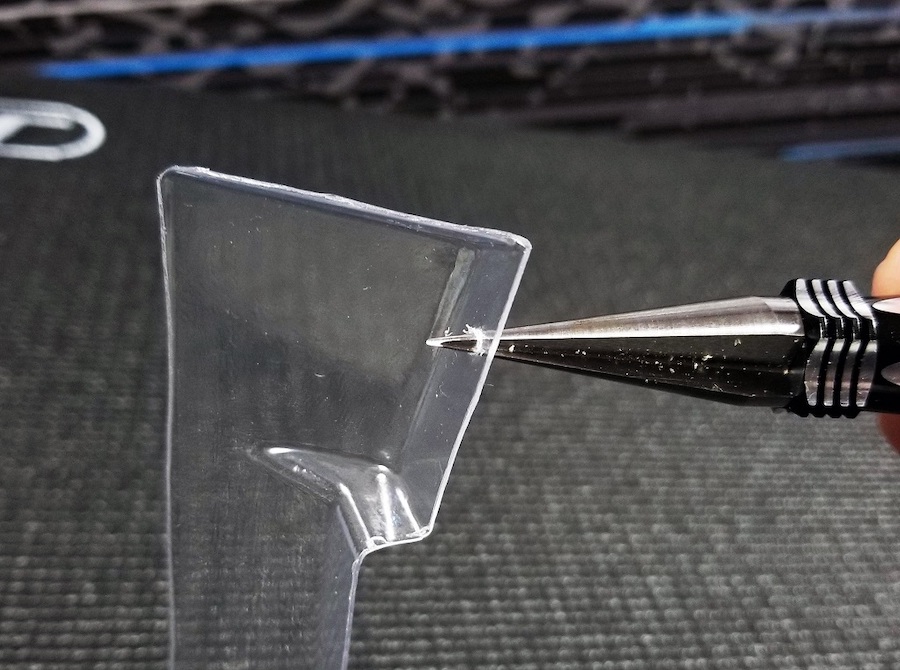
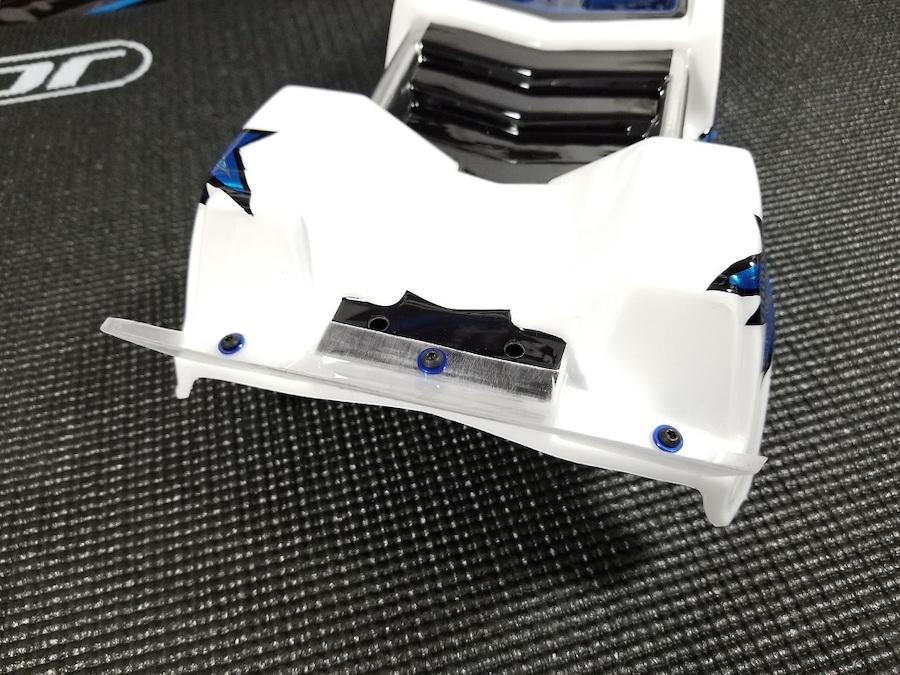
I decided to use the shorter spoiler so first I needed to trim it out
and aiding me were the Dirt Cut Precision Straight Scissors.
Once I had the spoiler trimmed out I needed to ream out three mounting holes so I reached for the JConcepts Fin Reamer.
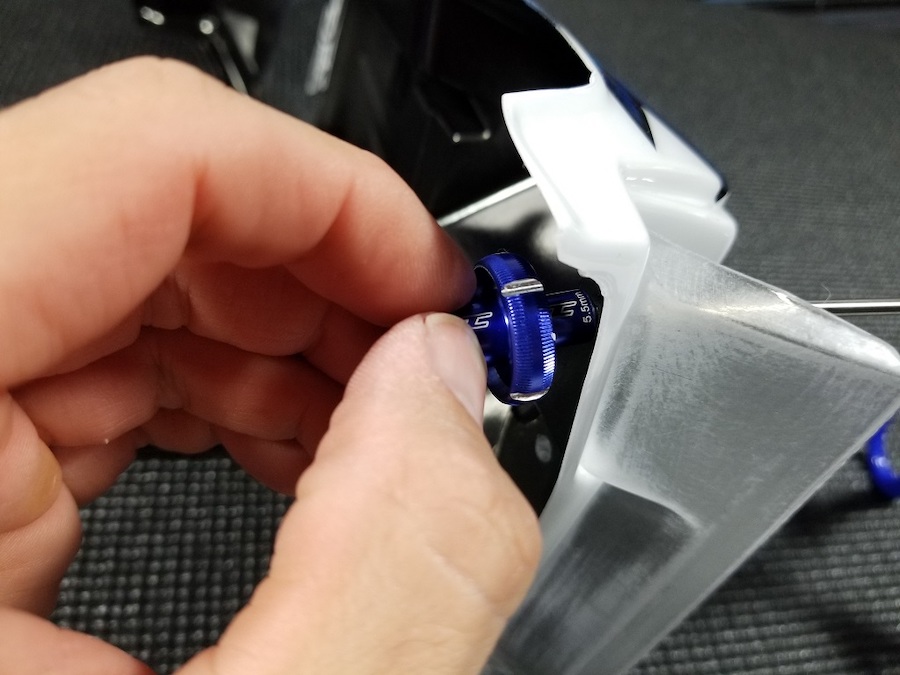
JConcepts provides mounting hardware for the spoiler, but to add some
bling to this wing, I opened up a package of the JConcepts Metric
Washer Set and placed some 1mm washers under each screw.
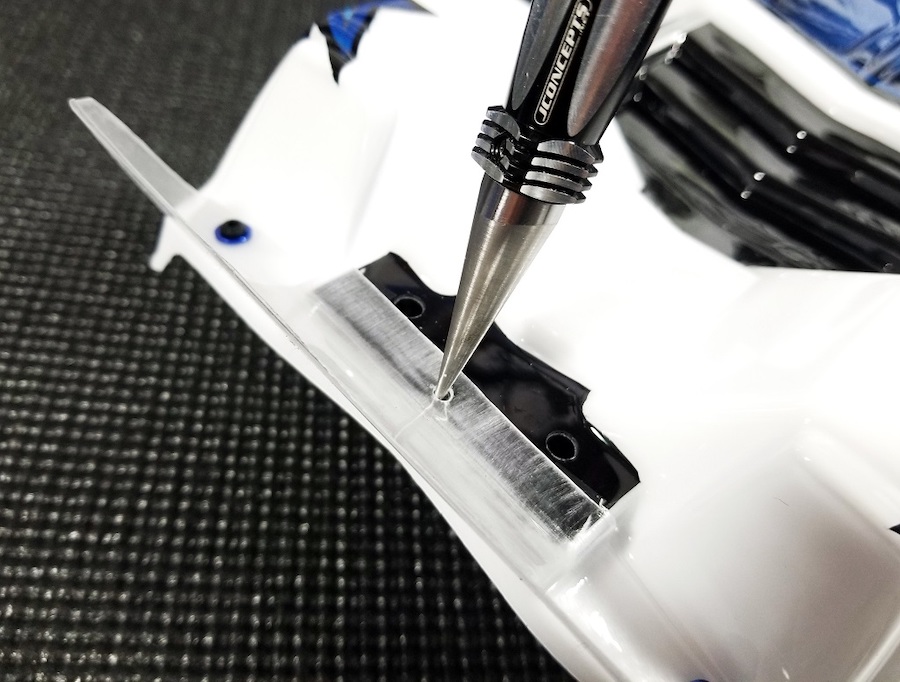

The JConcepts F2 T6.1 Finnisher body has small dimples to indicate
where the body posts are located so I used the JConcepts Fin Reamer to
ream out the mounting holes.
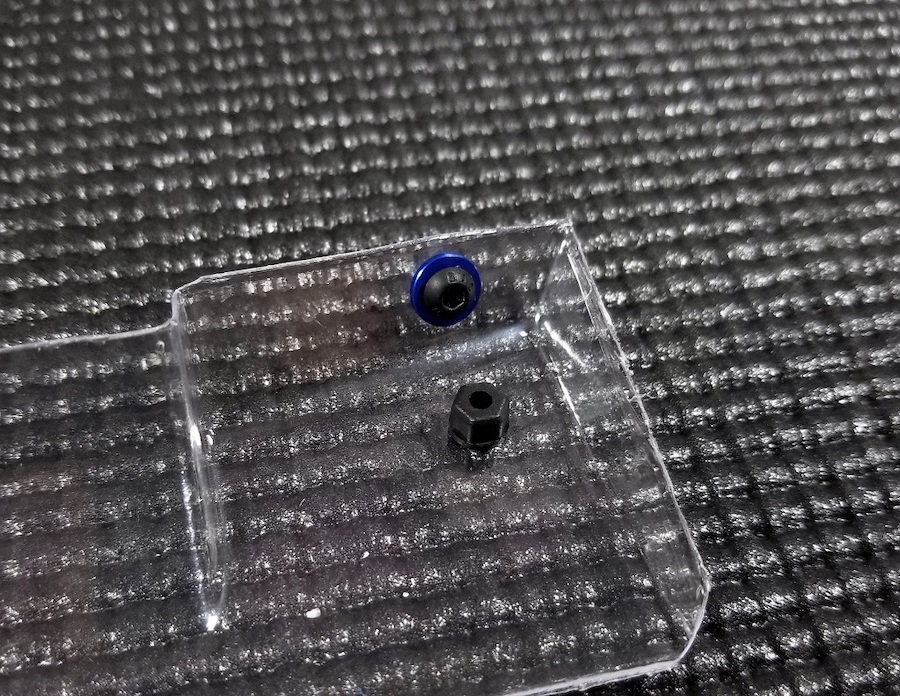
Once you pass the included screws through the mounting holes for the
rear spoiler you attach them with the included nylon nuts. I used the
JConcepts Combo Thumb Wrench to complete this task.
Now that I had the body trimmed out and spoiler mounted it was time to add some decals.

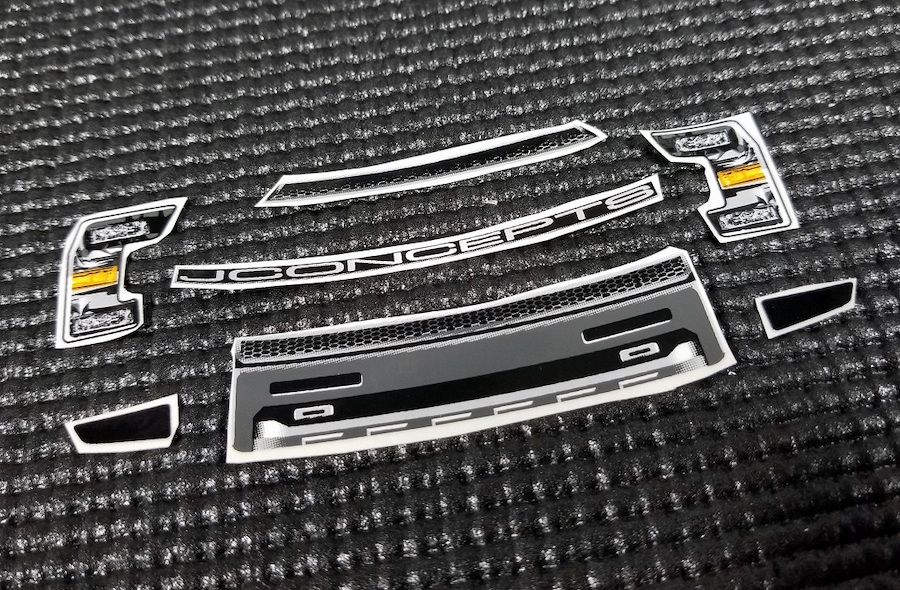
The JConcepts F2 T6.1 Finnisher body comes with a decal sheet that
contains an array of various JConcepts brands, plus four different front
end grill options.

Stadium truck bodies have traditionally included more than one decal
for the front grill which allows you to customize the look of your truck
even more.
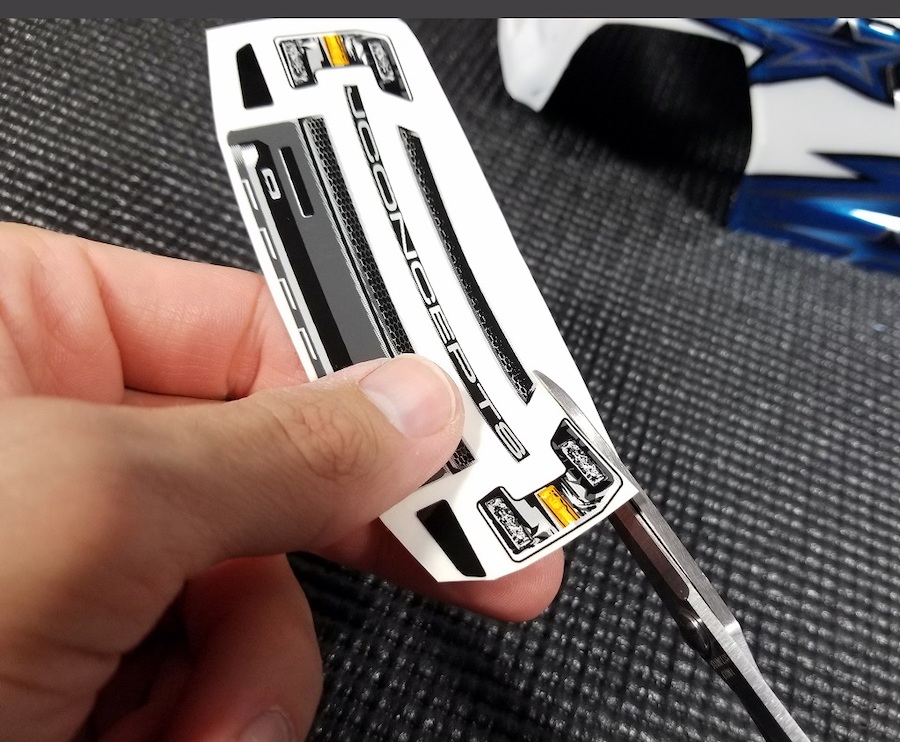
Once I decided on which grill option I wanted to use I used the Dirt Cut Precision Straight Scissors to trim it out.
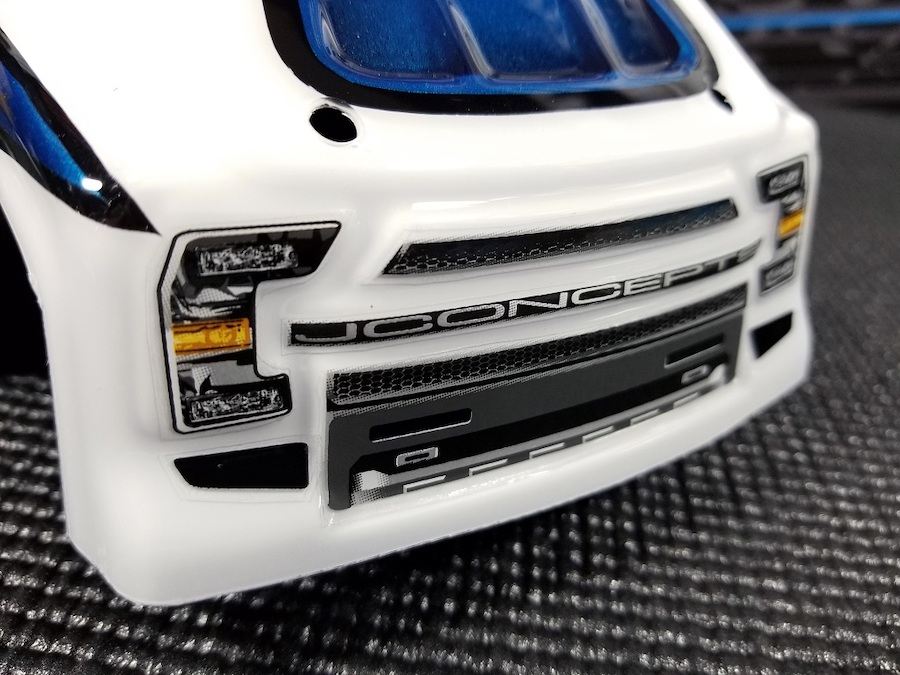
Here you can see the front grill decals applied to the F2 T6.1 body.
Electronics
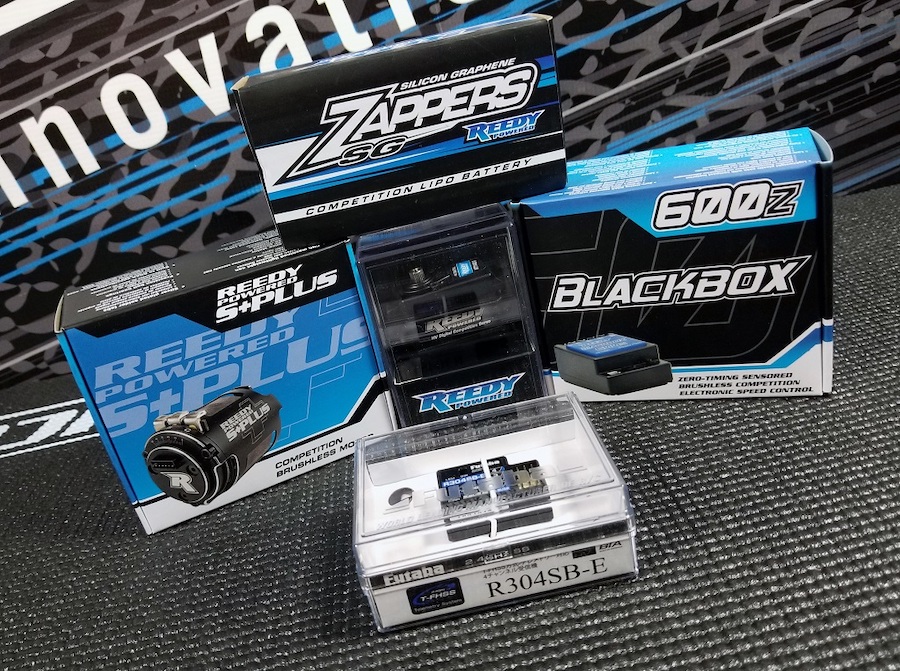
Now let's go over the electronics used for this build courtesy of Reedy and Futaba.

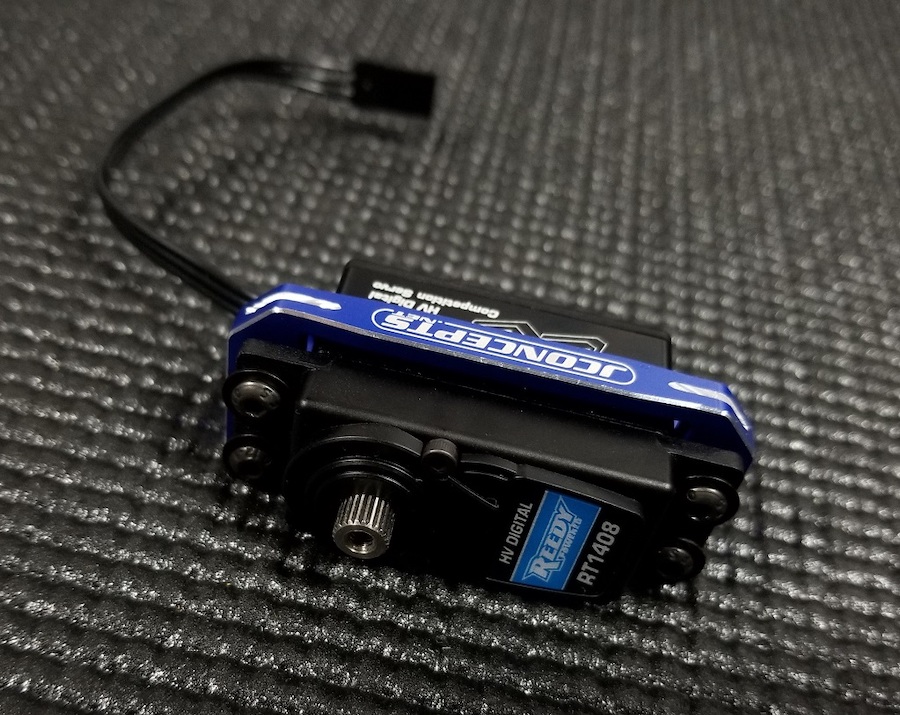
Earlier we briefly looked at the Reedy RT1408 LP Digital HV Hi-Torque
Competition Servo when we installed the JConcepts Servo Mount Bracket
so let's go into more details on it now.
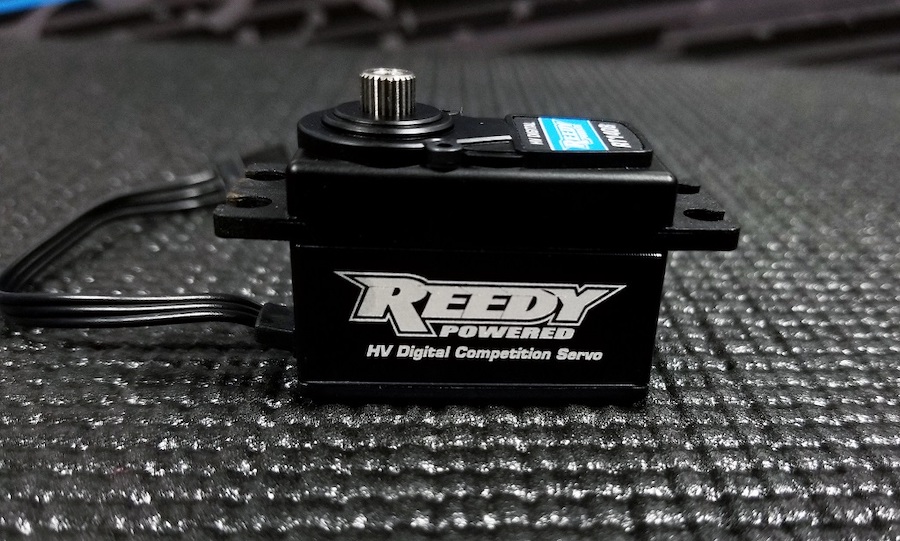
This servo uses a low profile design to help reduce your vehicle's
center of gravity, and it not only works for stadium trucks but also 2WD
and 4WD buggies, plus touring cars.
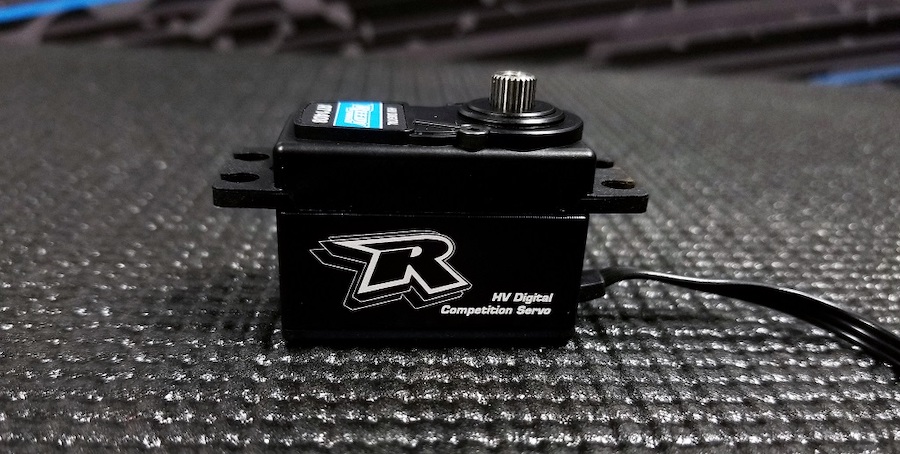
Internally are precision metal gears along with a powerful motor, and
on the outside is an integrated aluminum mid case to help keep them
running cooler.
This servo is compatible with high voltage applications which means
that an increased ESC BEC can be used without the fear of damaging your
internal elements.
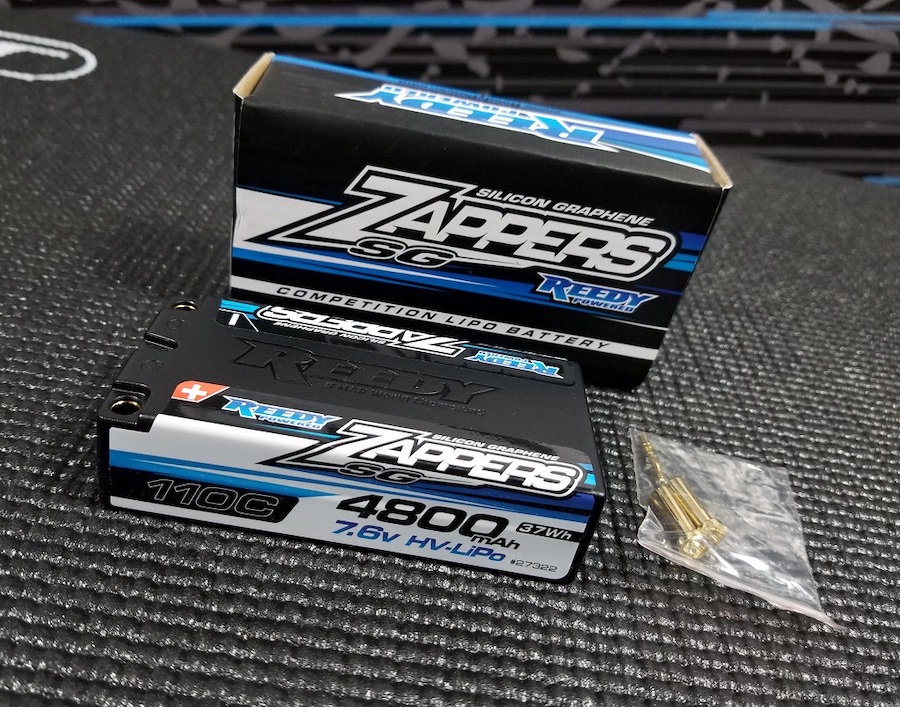
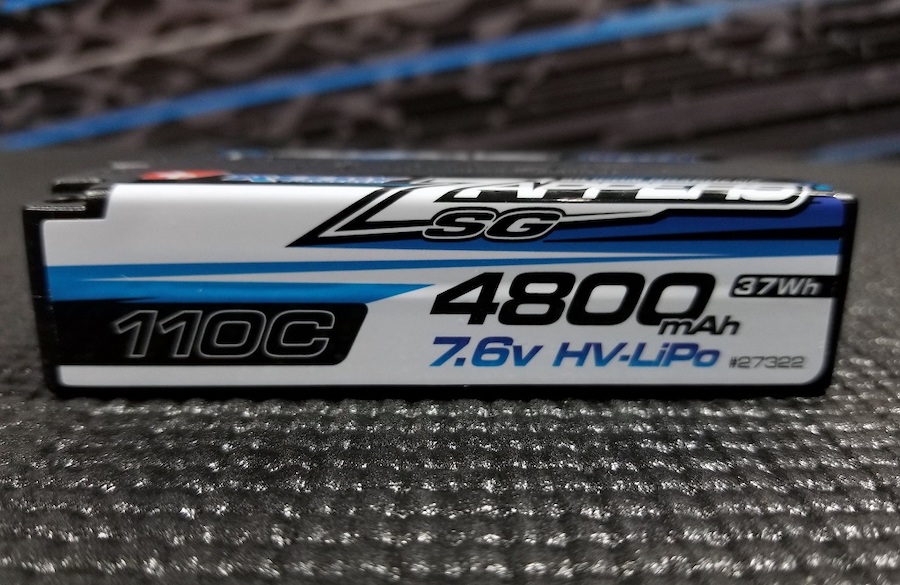
Another electronic item that was shown earlier in this build is the Reedy Zappers SG 4800mAh 110C 7.6V Shorty LiPo pack.

This pack is constructed from silicon graphene to help lower its
overall internal resistance. Those materials also help to reduce
operating temperatures and it will also improve the life cycle of your
pack too.
These silicone materials are safely enclosed in a durable hard case,
and 5mm socket connectors rest firmly into the pack's casing.
And since this is a HV pack it uses a nominal 7.6 voltage which means
with the proper charger you can charge each cell up to 4.35v. And, if a
racer is required to not charge higher than 4.2v per cell then this
pack can also be safely charged to that limit too.

The power plant for this build is a Reedy S-Plus 13.5 Competition Spec Class Motor.

This new motor design is packed with features like a lightweight,
machined can, a low resistance stator, a high-strength balanced rotor,
adjustable timing, and precision ball bearings.


Due to the lightweight can design this motor sheds nearly 30g which is perfect for spec racers trying to gain another edge.
The stator also uses shorter wire lengths which also helps to reduce the weight of this motor too.

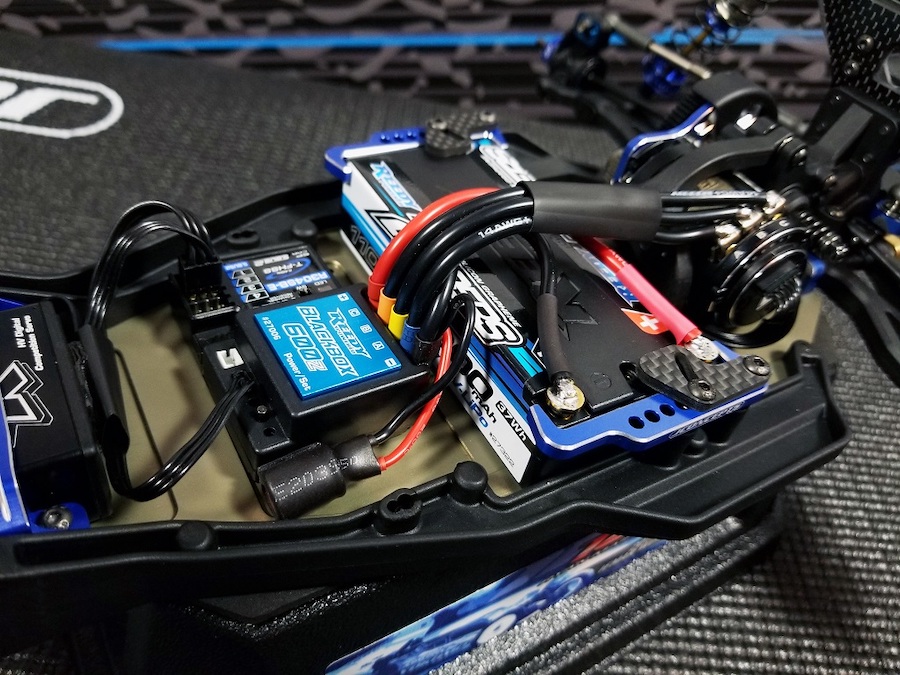
Controlling the motor would be the Reedy Blackbox 600Z Zero-Timing ESC.

This ESC has a motor limit that goes down to 13.5T so it was a perfect fit for this build.
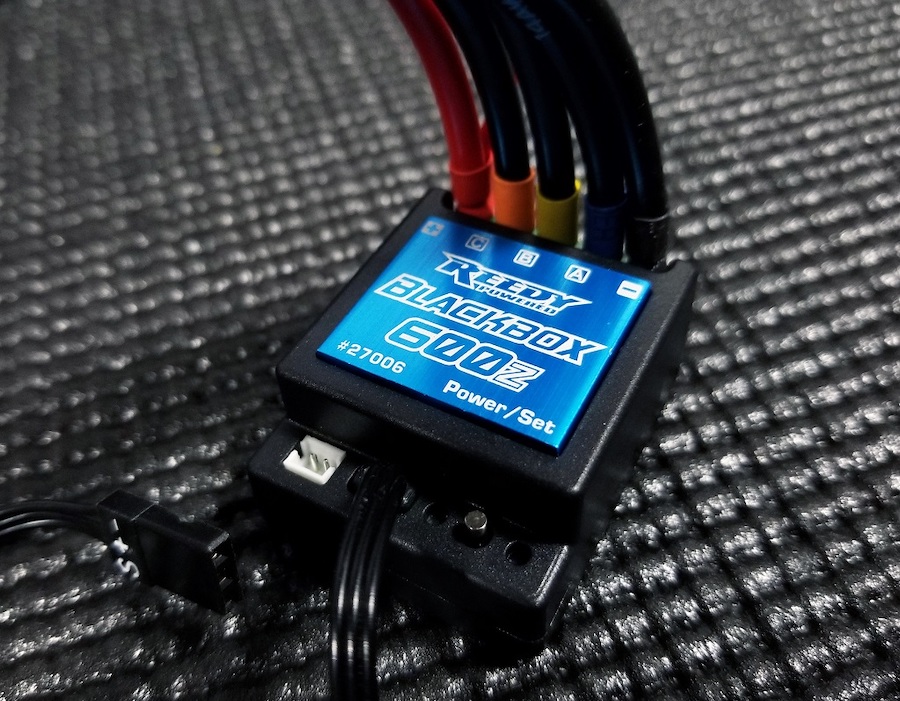
The Blackbox features a lightweight plastic case design with a small
footprint when installed into your vehicle. The nonmetal case helps to
reduce the overall weight which is key to spec class racers. It also has
no electronic timing capabilities which keeps it legal for “non blinky
mode” race formats.
But to help keep the internal electrical components cool there is a
blue integrated, low-profile heat sink resting in the middle. And
precision brake and throttle adjustments are possible thanks to the
on-board, single-button programming.

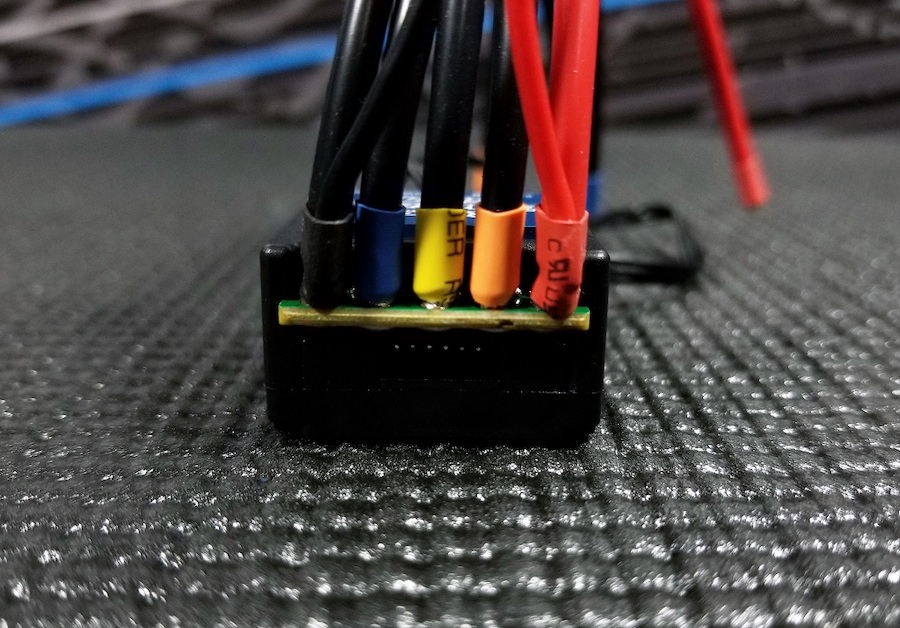
Silicone power wires come pre-installed and are clearly marked to help you identify them when installing this ESC.

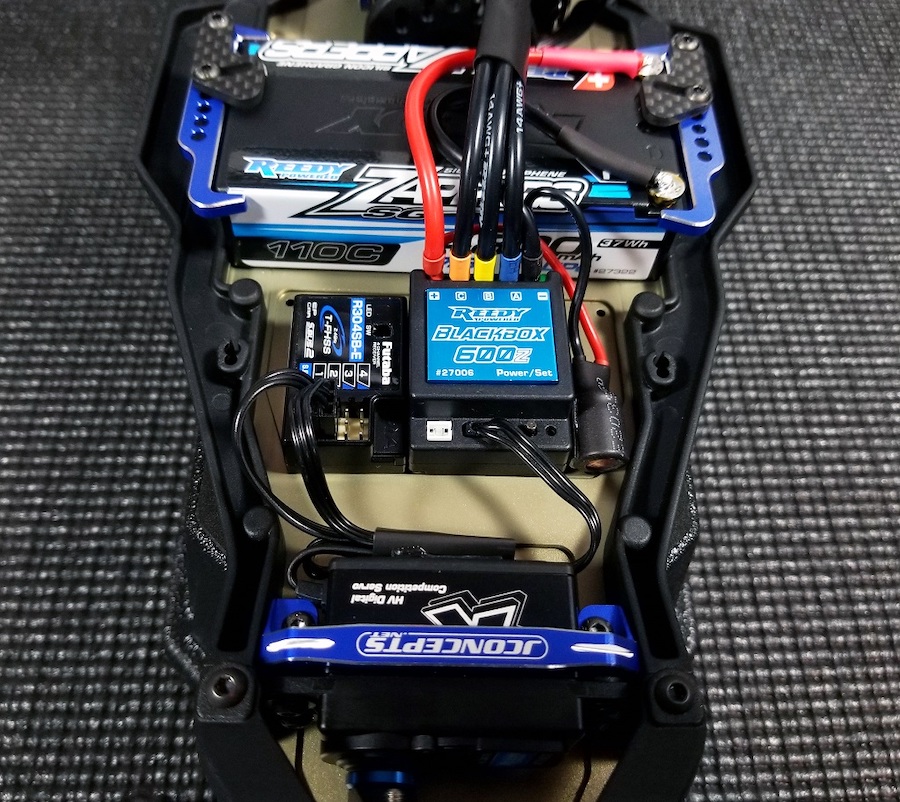
For the receiver I used Futaba's R304SB-E T-FHSS 4-Channel Telemetry
2.4GHz receiver.This compact receiver is compatible with all
Futaba T-FHSS telemetry transmitters. It offers you four channels and
doesn't have an external antenna wire too. But do note that due to no
antenna this receiver can only be used in electric vehicles.
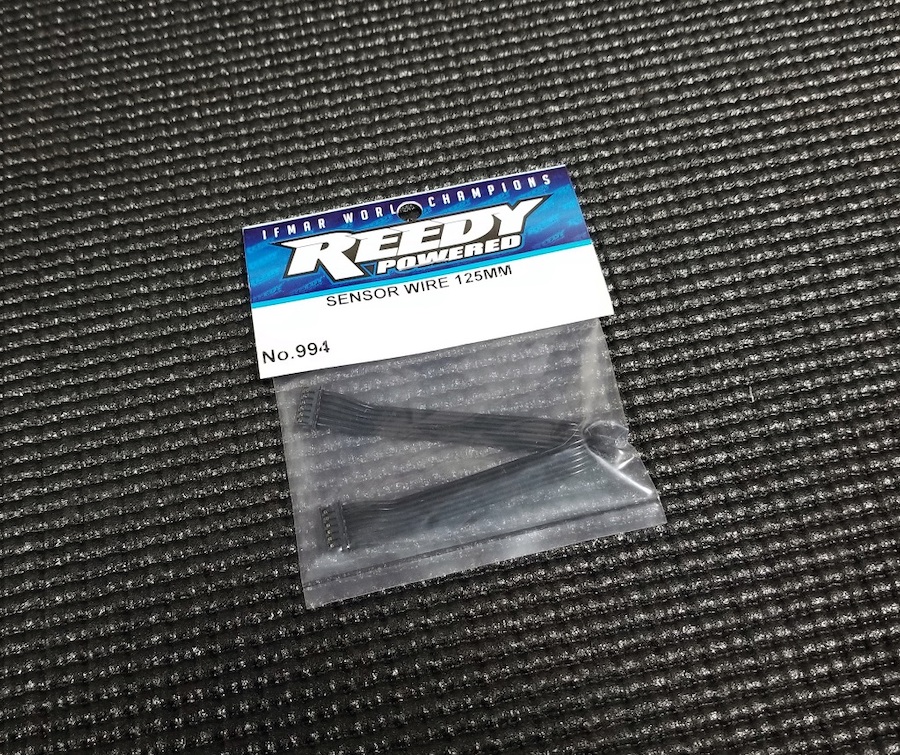
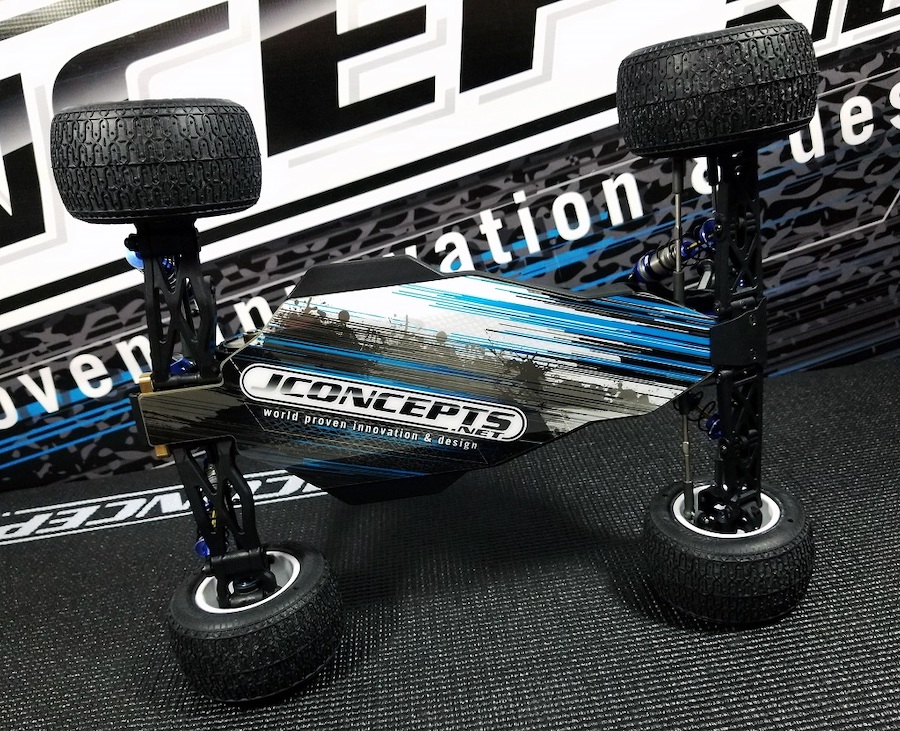
When I installed all the electronics into the T6.1 I opted to use
Reedy's 125mm Flat Sensor Wire. The Reedy S-Plus motor does come with a
longer sensor wire, but for a cleaner, factory look I opted for this
shorter version.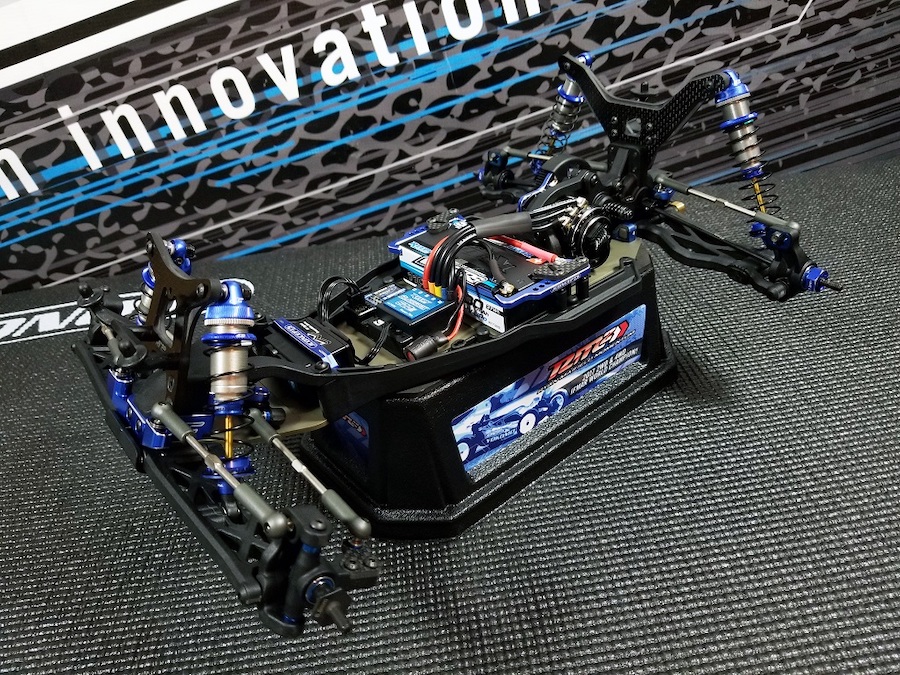
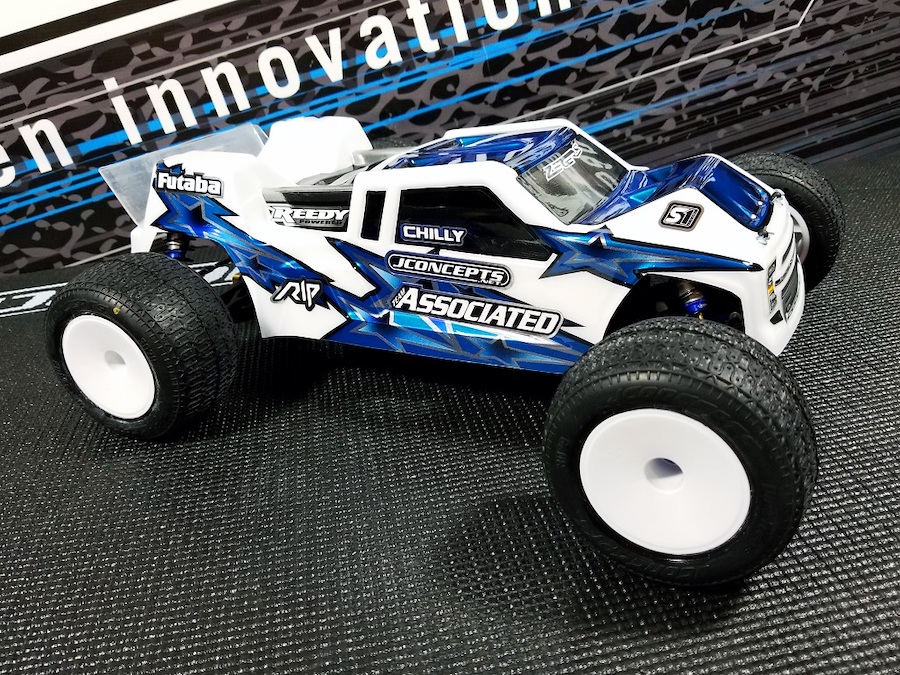
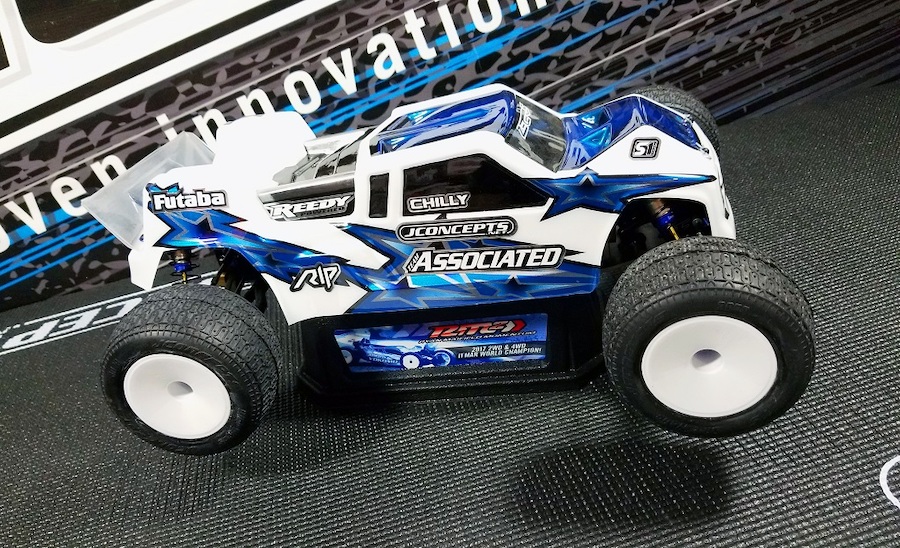
Here you can see all the electronics installed into the T6.1 with many of the JConcepts parts we have covered thus far.
Finishing Touches
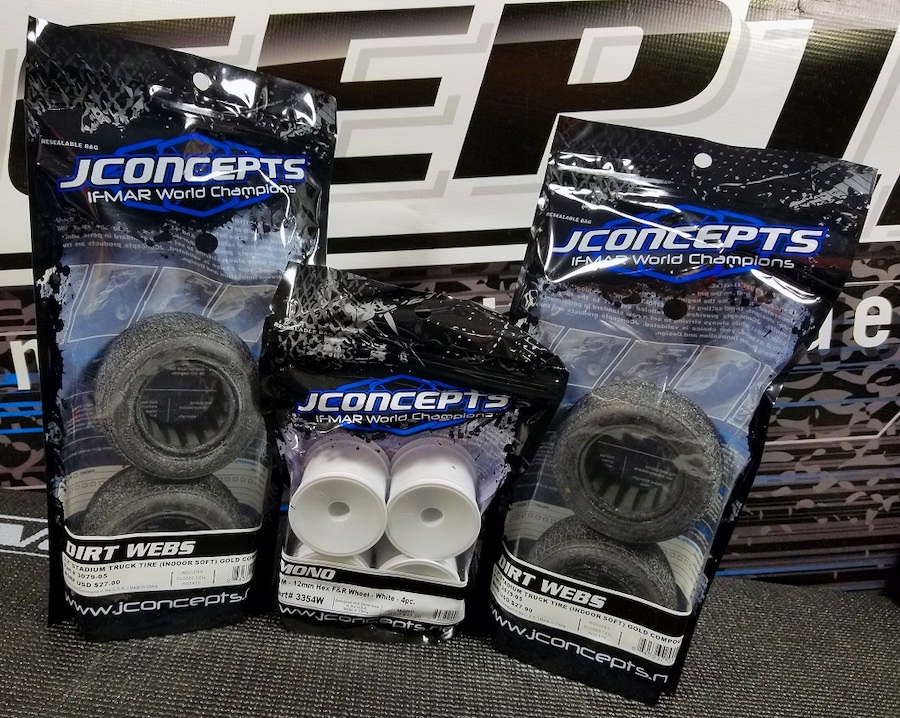
One of the last steps in the build was to prep some fresh tires and
wheels. So I elected to use the popular Dirt Webs in the Gold compound
along with white Mono wheels. Now let's briefly go over the process to
properly clean and mount the tires.
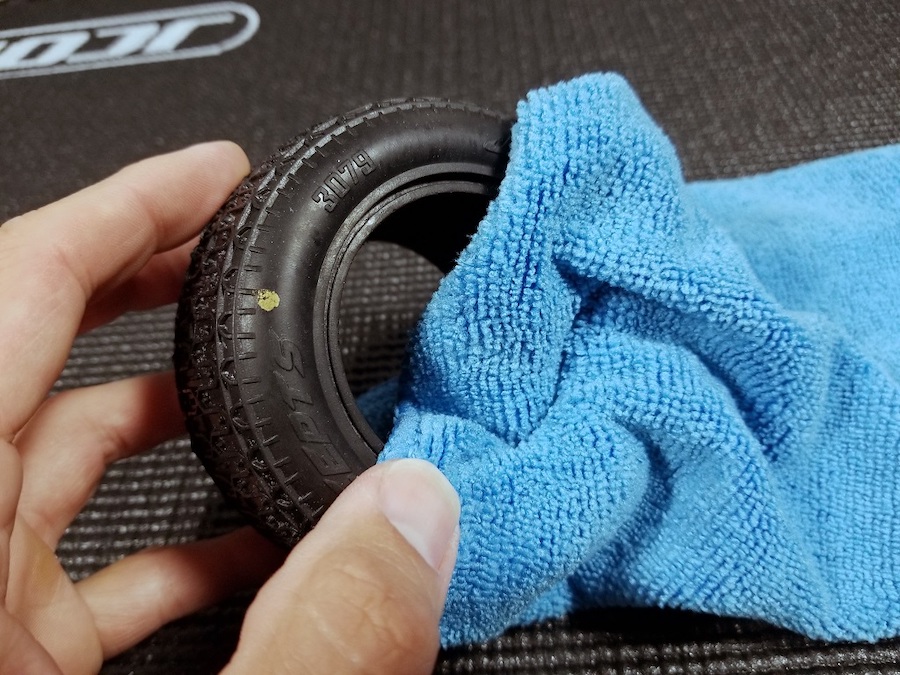
The Mono wheels come standard with small vent holes but I wanted them
slightly larger so I used the JConcepts Fin Reamer to enlarge
them.Once that was done I used some cleaner and a JConcepts
Microfiber Towel to remove any leftover mold residue from the wheels and
tires.
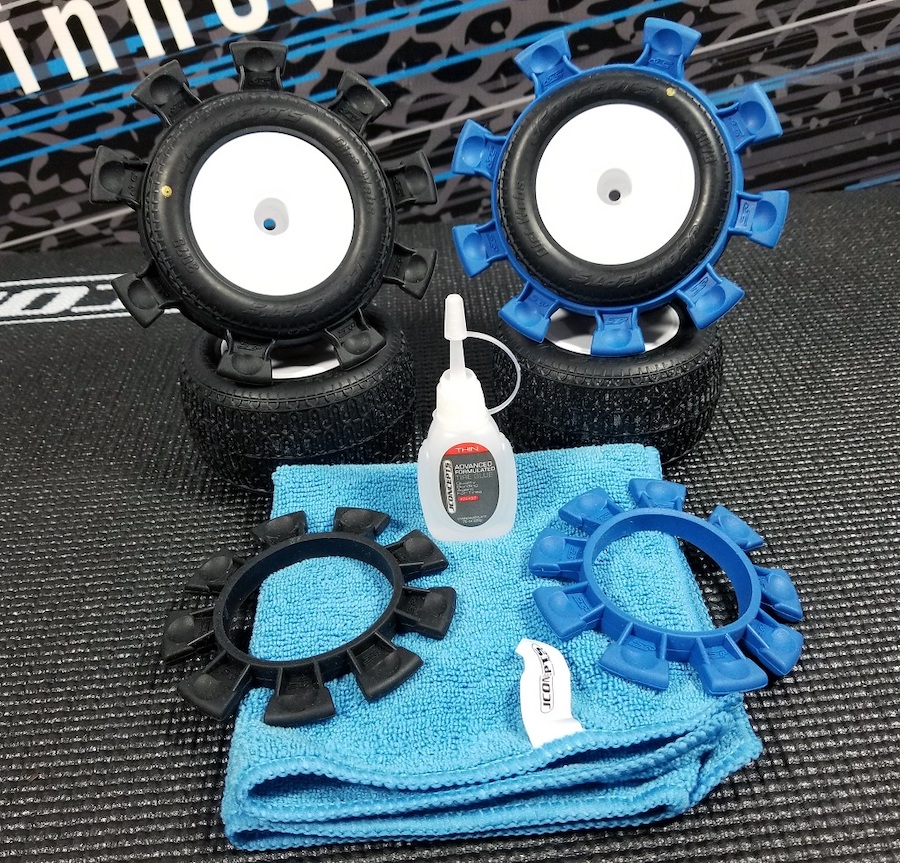
The tires and wheels were ready to be glued so next I reached for a
bottle of the JConcepts Advanced Formulated Tire Glue in their fast
drying thin formula. I wrapped some JConcepts Satellite Tire Rubber
Bands around the tires to aid me in the gluing process and then set them
aside to dry.
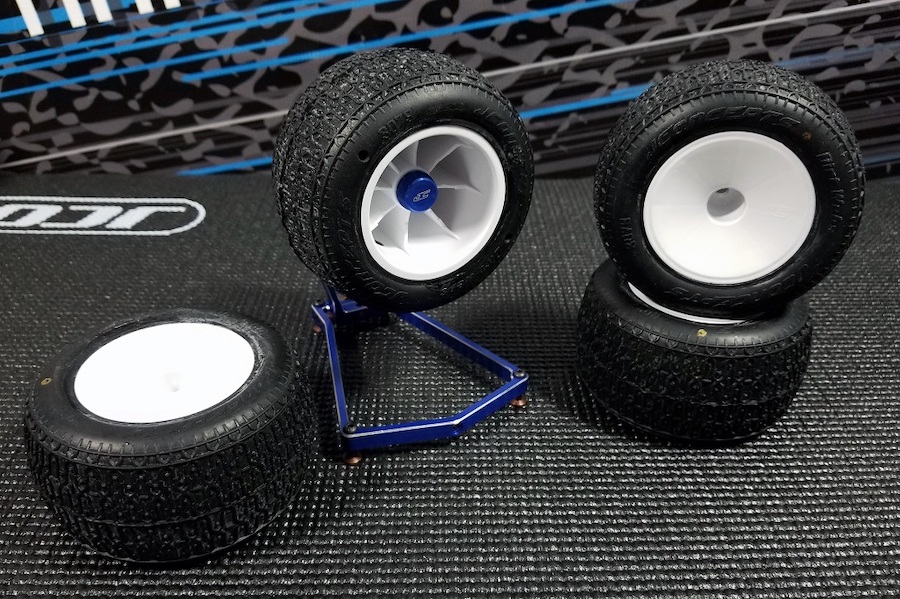
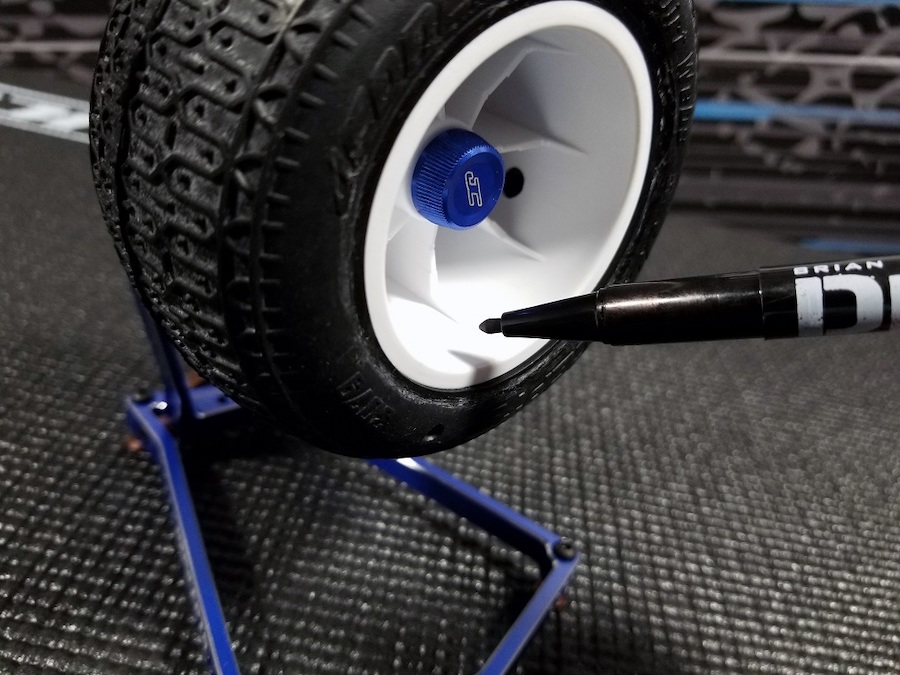
After they were dried I mounted them one by one onto the JConcepts
Tire Balancer to balance out each tire.I used a Dirt Racing
Products Permanent Dual Tip Pen to mark each heavy spot on the tire and
some modeling clay to wrap up the balancing procedure.
NOTE:Use this link to read an earlier edition of The Garage where I dive more into this balancer: http://www.jconcepts.net/garage/projects/tire-balancer
The final touch was to add some project sponsor decals courtesy of Stickit1Racing.
Products Used
I hope you enjoyed this edition of the Garage, and a complete list of the items featured in this story is listed below:
JConcepts Products:
0355 - F2 T6.1 Finnisher Body And Rear Spoiler - MSRP $32.00
2029 - JConcepts Racing Banner - MSRP $20.00
2043T - Advanced Formulated Tire Glue – Thin - MSRP $11.00
2133 - 4' Pit Mat – MSRP $20.00
2212-1 - Satellite Tire Rubber Bands - Blue - MSRP $13.00
2212-2 - Satellite Tire Rubber Bands - Black - MSRP $13.00
2234 - JConcepts Fin Turnbuckle Wrench - MSRP $7.00
2237 - JConcepts - Metric Washer Set (.5, 1, 2 and 3mm thickness) 16pc. - MSRP $11.00
2263-1 – 7mm Fin Quick-Spin Wrench - Blue - MSRP $25.00
2341-1 - 4mm Large Flange Serrated Locknut – Blue – MSRP $22.00
2371B- Exo 10th Scale Shock Stand And Cup – Black - MSRP $14.00
2408-1 - B6.1 | B6.1D | T6.1 | SC6.1, 3-Gear Laydown | Layback Transmission Motor Plate - Blue - MSRP $20.00
2409-1 - B6.1 | B6.1D | T6.1 | SC6.1 Rear Ball-Stud Mount - Blue - MSRP $16.00
2410-1 - Aluminum C-Block - Blue - MSRP $15.00
2414 - T6.1|SC6.1 Carbon Fiber Front Shock Tower - MSRP $34.00
2415 - T6.1 | SC6.1, Carbon Fiber Rear Shock Tower - MSRP $38.00
2417 - T6.1 Precut Chassis Protective Sheet - MSRP $20.00
2452-2 – Fin Reamer - Black - MSRP $45.00
2490-1 – Fin - 12mm V2 Shock Cap – B5M, T5M, SC5M - Blue – MSRP $15.00
2491-1 – Fin - 12mm Shock Collar – B5M, T5M, SC5M - Blue – MSRP $8.00
2492-1 – Fin - VCS Shock Bottom Cap – B5M, T5M, SC5M - Blue – MSRP $8.00
2493-1 – Fin - Shock 5mm Off-Set Spring Cup – B5M, T5M, SC5M - Blue – MSRP $15.00
2538-1 - Tire Balancer With Case – Blue - MSRP $90.00
2539 - Microfiber Towel - Blue / Black - MSRP $5.00
2552-1 - Precision Hobby Knife Handle - Blue - MSRP $36.00
2556-1 – Combo Thumb Wrench – Blue - MSRP $10.00
2561 - B6 | B6D Carbon Fiber Steering Arms – MSRP $10.00
2565-1 - B6 | B6D Aluminum Steering Bellcranks – Blue – MSRP $20.00
2567-1 - B6 | B6D Servo Mount Bracket – Blue – MSRP $21.00
2568-1 - B6 | B6D | B6.1 Front Camber Link Mount Bulkhead – Blue - MSRP $32.00
2572B - B6 | B6D | B6.1 Rear Suspension D Mount - Brass (12G) - MSRP $14.00
2589 – 12mm AE Shock O-Ring Set - MSRP $6.00
2598T - B6 | B6D Fin Titanium steering turnbuckle – 10mm, 1pc. - MSRP $6.00
2599T - B6 | B6D | B64 Fin Titanium shock stand-offs w/ bushing – Short - MSRP $20.00
2600T - B6 | B6D | B6.1 | B64 Fin Titanium Shock Stand-Offs - Long - MSRP $20.00
2601 - B6 | B6D | B64 Delrin Shock Stand-Off Bushings - 4pc - MSRP $10.00
2604-1 - Swing Operated Battery Retainer Set - B6.1 | B6.1D | T6.1 | SC6.1 – Blue - MSRP $55.00
2605 - B6 | B6D | B6.1 Front Suspension Shim Set - MSRP $14.00
2609-1 - B6 | B6D | B6.1 7mm Light-Weight Hex Adaptor – Blue – MSRP $18.00
2661M - Ryan Maifield Car Stand - MSRP $25.00
3079-05 - Dirt Webs - Fits 2.2" Truck Wheel - MSRP $27.00
3354W – Mono - T4.3 | T5M | T6.1 | ET410 | YZ-2T - 12mm Truck Wheel– White - MSRP $17.00
Dirt Racing Products:
7999 - Dirt Racing Products - Decal Sheet - MSRP $5.00
8009 - Dirt Cut - Precision Straight Scissors – MSRP $15.00
8111 - Dirt Cut – Recessed Ball-Stud Washer - Set – MSRP $23.00
8116 - Dirt Racing Products – Permanent Dual Tip Pen Set - MSRP $5.00
Team Associated:
1345 - FT Aluminum Pinion Gear, 27T 48P, 1/8 shaft - MSRP $7.49
1349 - FT Aluminum Pinion Gear, 31T 48P, 1/8 shaft - MSRP $7.99
1350 - FT Aluminum Pinion Gear, 32T 48P, 1/8 shaft - MSRP $7.99
1351 - FT Aluminum Pinion Gear, 33T 48P, 1/8 shaft - MSRP $7.99
1352 - FT Aluminum Pinion Gear, 34T 48P, 1/8 shaft - MSRP $7.99
1353 - FT Aluminum Pinion Gear, 35T 48P, 1/8 shaft - MSRP $7.99
1596 - FT Locking Adhesive - MSRP $6.49
70002 - RC10T6.1 Team Kit - MSRP $499.99
Reedy Products:
994 - Flat Sensor Wire 125mm - MSRP $8.99
27006 - Reedy Blackbox 600Z Zero-Timing ESC - MSRP $109.99
27109 - Reedy RT1408 LP Digital HV Hi-Torque Comp. Servo - MSRP $176.99
27322 - Reedy Zappers SG 4800mAh 110C 7.6V Shorty - MSRP $132.99
27403 - Reedy S-Plus 13.5 Competition Spec Class Motor - MSRP $149.00
Futaba Products:
FUTL7681 - Futaba R304SBE S.Bus2 4-Channel T-FHSS Telemetry Rx - MSRP $58.99
Sources: http://www.jconcepts.net | http://www.teamassociated.com | http://www.reedypower.com | https://futabausa.com
