|
- Team Associated RC10B6D 2WD Buggy Build - Gearbox -
Intro Page
The Build – Part 4
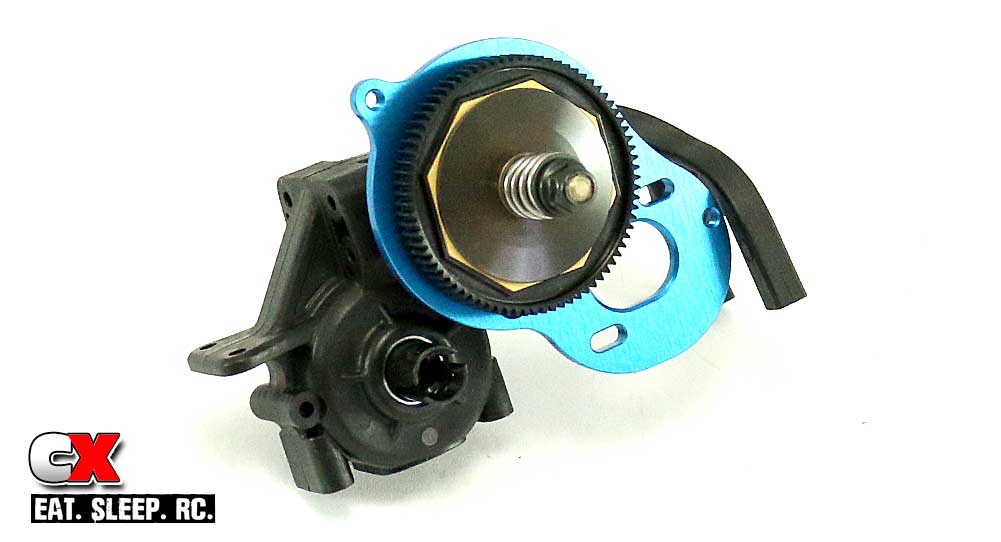
The Team Associated B6D uses a 3-gear, laydown transmission. AE’s fantastic ball diff is included as is a lightweight motor plate, aluminum top shaft and their Factory Team V2 slipper clutch.
Build Notes:
▶ If you’ve built an AE differential before, you know how easily they go together. When it comes to assembling the two diff halves to the diff gear, I always do it a little differently than what’s shown. Either way is ok, I just prefer to do it as shown in Step 4.
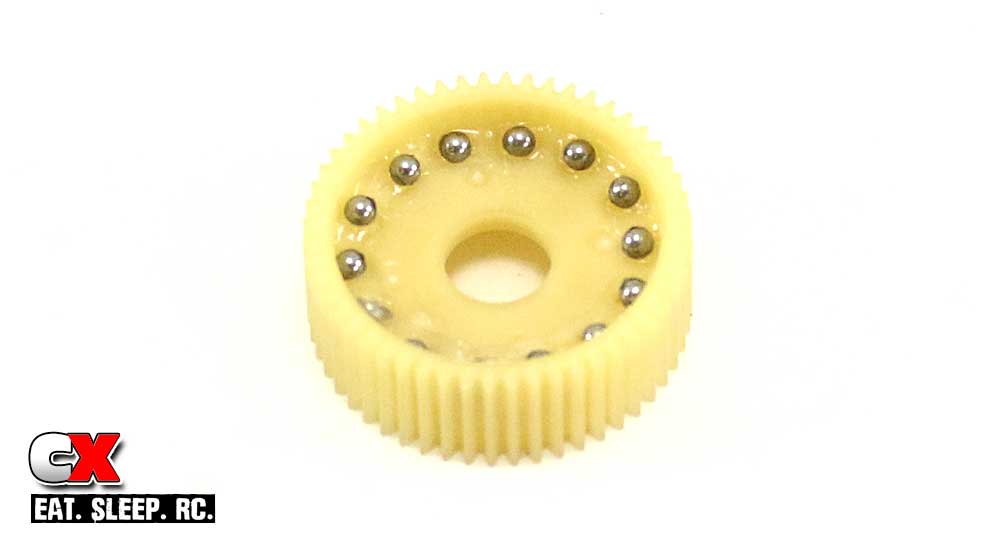
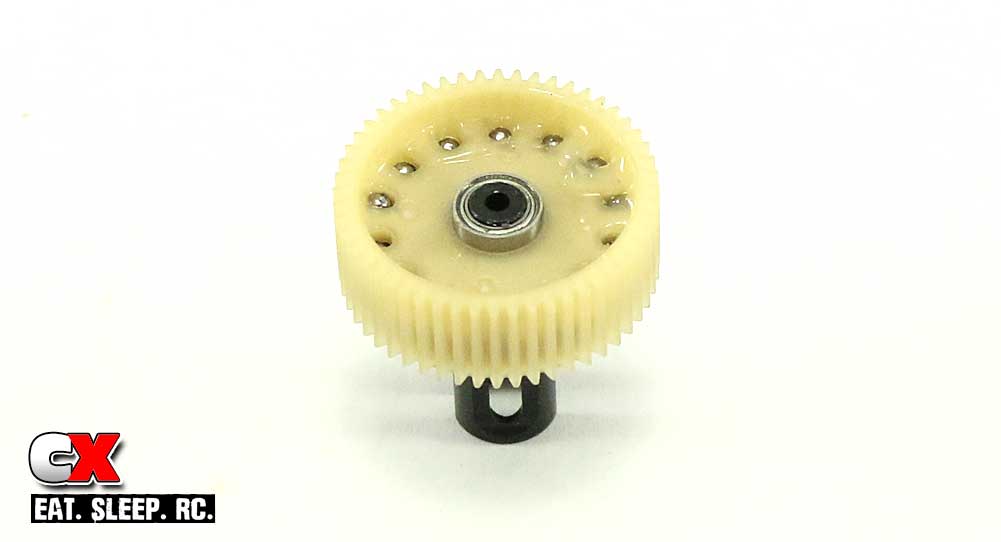
Using the clear diff lube, apply a liberal amount into all of the holes in the diff gear. I usually pour the diff balls into the gear and slide them into place in the holes; that’s just me. Feel free to use whatever method you’d like to place them.
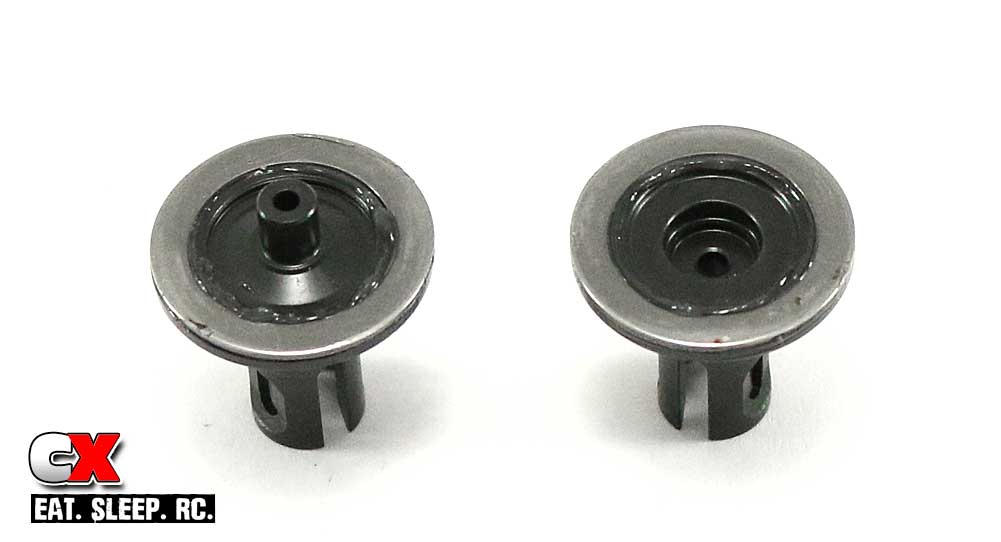
Apply a couple small dabs of clear diff lube to the outdrives, then set the diff rings into place. Rotate the rings to help spread the diff lube.
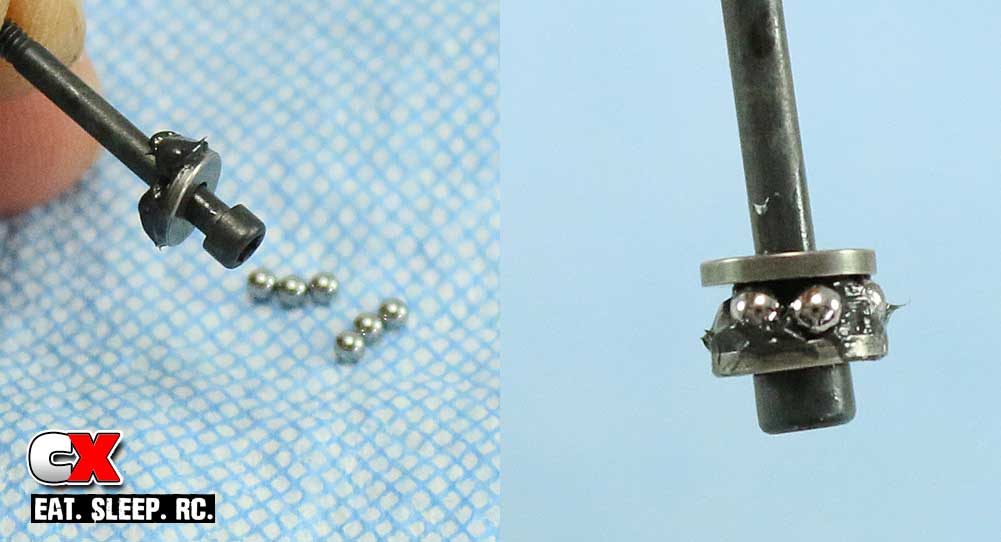
Here’s another easy way I’ve found to build the thrust assembly. Dump the thrust balls onto a clean rag or towel. Slide one of the thrust rings onto the thrust nut and apply a liberal amount of black grease as shown. Now roll the greased thrust assembly through the balls and the grease will pick them up. Drop the second thrust washer onto the assembly and press all the balls towards the screw. Wah-lah – easy peasy.
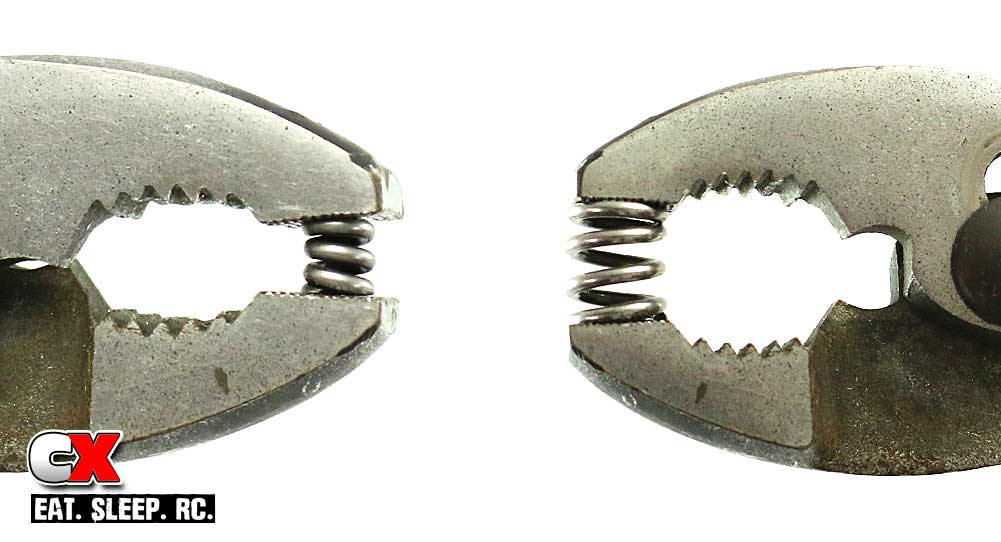
Before further assembly, pre-compress both the diff spring and slipper spring. One or two full compressions is fine.
Here is where I always do things a little different than the manual; slide the two 5×8 bearings onto the male diff outdrive followed by the diff gear assembly. This makes it easier to handle in the next step.
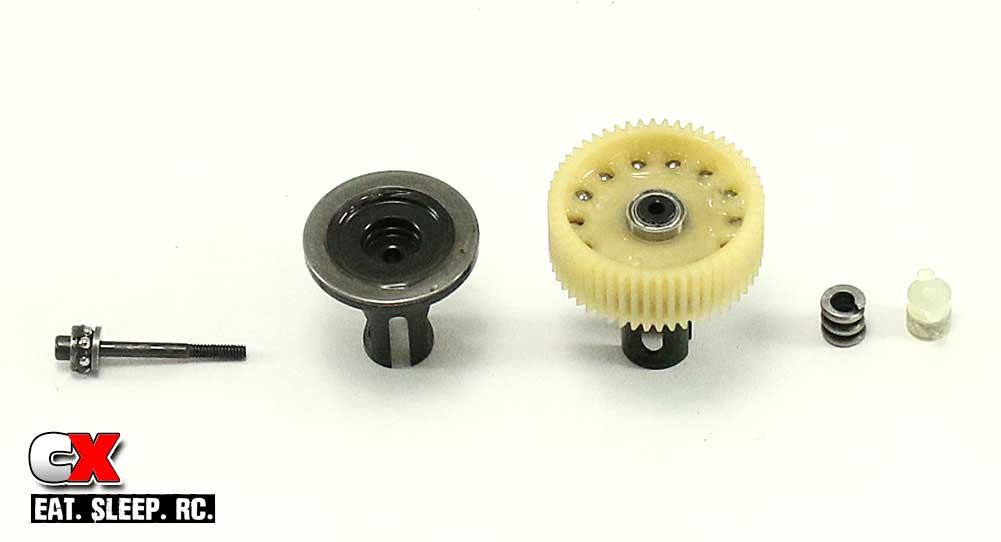
Connect the two diff outdrives together, then insert the diff thrust screw assembly through the female outdrive. Slide the diff spring and locking t-nut into the male diff outdrive and tighten down the diff screw. Follow the diff tightening instructions in the manual; tighten until you feel the diff spring bottom out, then back off 1/8 of a turn. This should be a perfect starting setting.
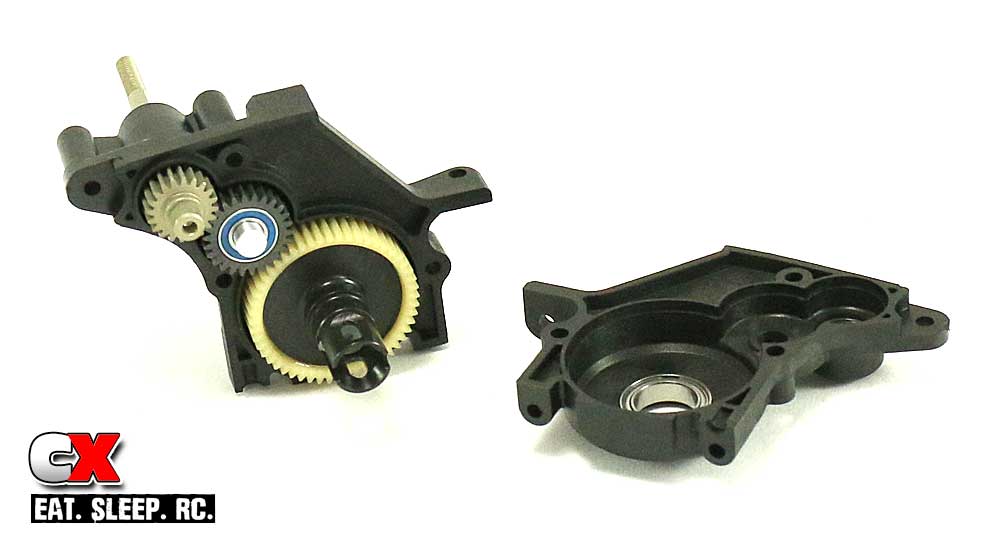
Press the 5×10 and 10×15 bearings into both gearbox cases, making sure the blue shield is facing out. Press two more 5×10 bearings into the idler gear followed by the idler gear shaft. Insert the aluminum top shaft, idler gear assembly and diff assembly into the gearbox case, making sure the diff adjustment nut is facing the spur gear (or, in this picture, facing out of the case half). Press the two case halves together and secure with the 14mm screws.

Press the pivot ball into the chassis brace arm and attach the assembly to the gearbox.
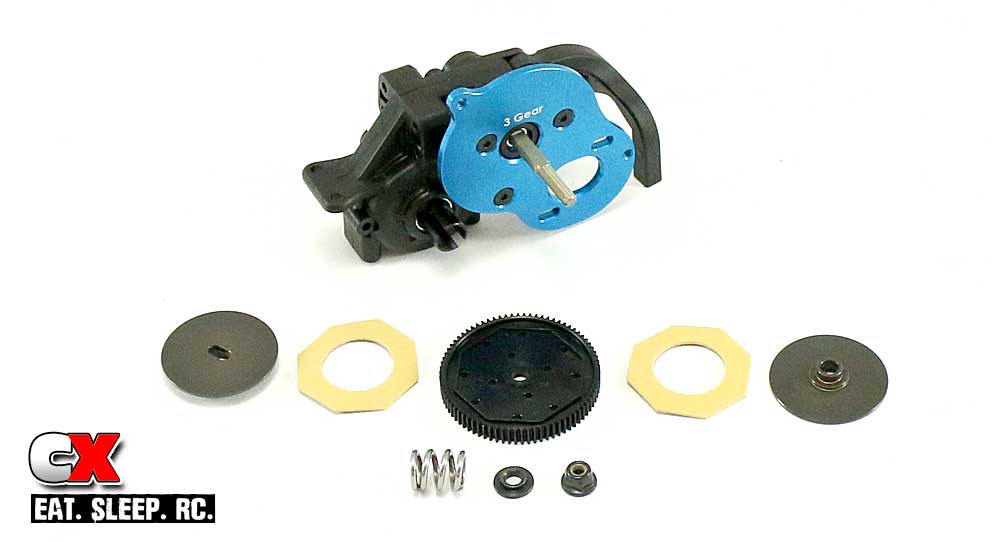
Attached the aluminum motor plate to the gearbox. Press the slipper pads into the spur gear grooves; they should stay put. Install the inner hub, assembled spur gear, outer hub, spring, spring adapter and secure it all with the M4 locknut. Stock setting is the nut flush with the end of the top shaft, but I suggest double-checking this on the track before your first run.
Laydown 3-gear transmission done! Make sure it spins freely, although I’m not sure how it wouldn’t if you followed this awesome guide. Let’s get it installed in Part 2 of the rear suspension build.
|
