|
- X-6 CUBED ASSEMBLY INSTRUCTIONS -
Previous - Table of Content - Next
BAG D - TRANSMISSION INSTALLATION
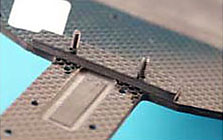
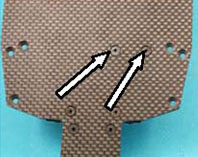
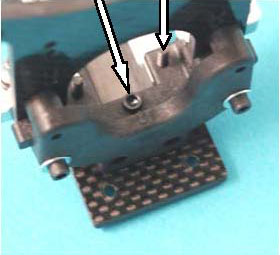
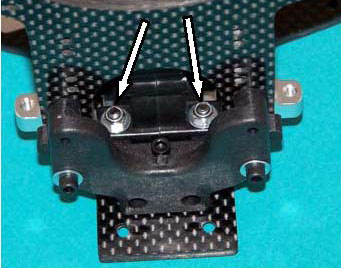
D1) Place two 3/8" flat head screws (XF 6022) up from under the chassis, put the 2mm Hinge Pin Brace Spacer (XF 3262) over the screws, and install the Hinge Pin Brace (XF 3260) with the bushing holes (arrows) facing back.
  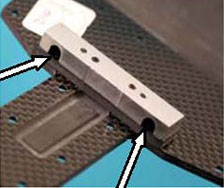
D2) Place two 3/8" flat head screws (short arrows) up from under the chassis for the front of the transmission cradle and two 1" flat head screws (XF 6027, long arrows) for the back of the cradle.
D3) Install the transmission cradle (XF5030). The front two 3/8 screws will thread in to the cradle and tighten down. If you use thread lock, a drop in each front hole now. The two 1" screws just go through the cradle, and you may have to hold them in until Inst. D5.
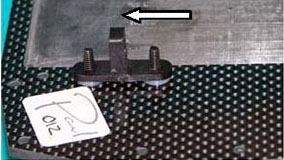
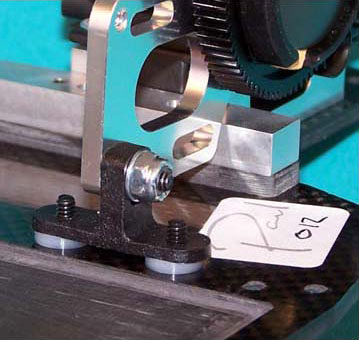
D4) Place two 3/8" flat head screws up from under the chassis for the Motor plate support bracket. Put one 0.030" spacer (XF 3250) on each screw, and install the motor plate support bracket (XF 1130). Leave these screws finger tight for now. Note that the bracket is off-set to the left.
D5) Place the bulkhead and shock tower assembly into the rear of the transmission cradle and secure with the 1/2" cap head you saved from inst # 16 (long arrow). The bulkhead fits over the 1" flat head screws (short arrow).
D6) Here is a photo from the rear:
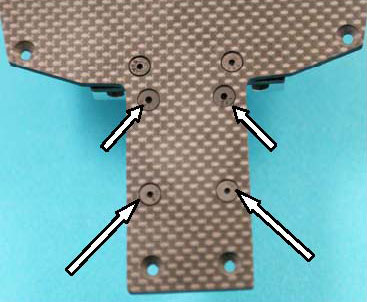
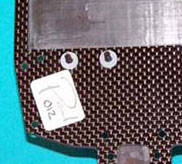
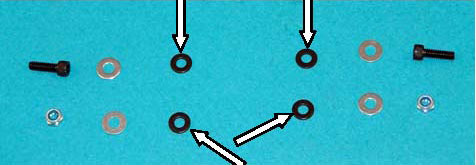
D7) Gather together the two 4-40 X 3/8” cap head screws saved from Inst. #14 and remove from Bag D two #4 mini nuts (XF 6073), and four #4 flat washers. Also, check the Set-Up Sheet and Tuning Section to determine which Transmission Shims (XF 5702) you will use, and remove those four shims from the little bag. Here we are using 0.030” (arrows).
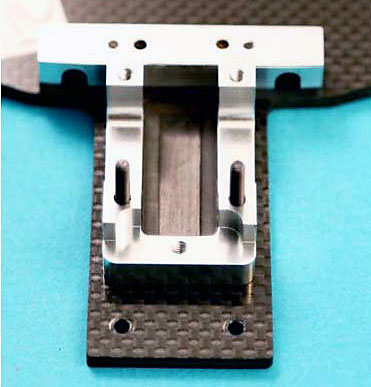
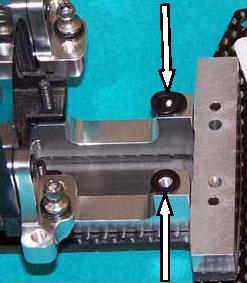
D8) Place a transmission shim over each of the 1" bolts that come up through the bulkhead. For this photo we have used 0.060" shims so they show well. This is strictly for purposes of clarity. It is important that all four shims be the same size on your X-6 Cubed!
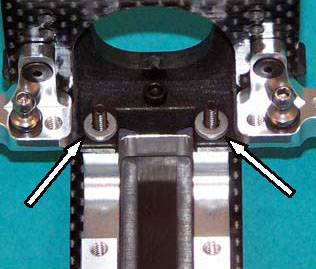
D9) Place the other two T\transmission shims over the front bosses of the transmission cradle. In this photo we have used the 0.030" shims for clarity. Again, make sure ALL SHIMS ARE THE SAME SIZE!
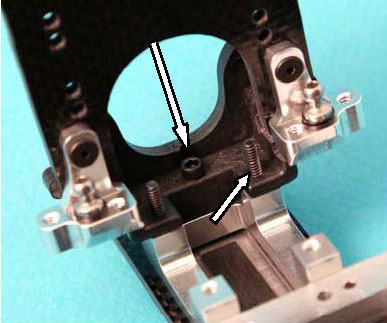
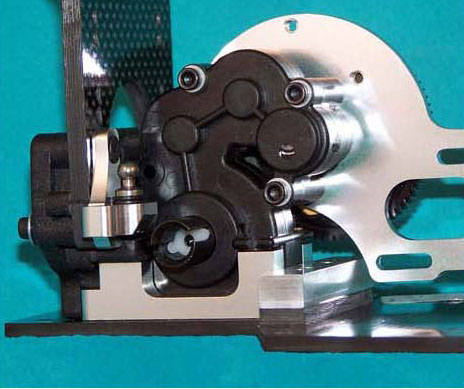
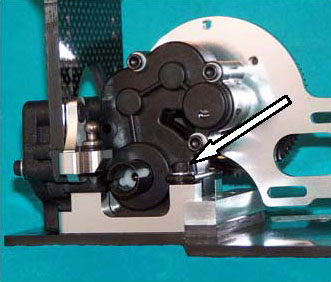
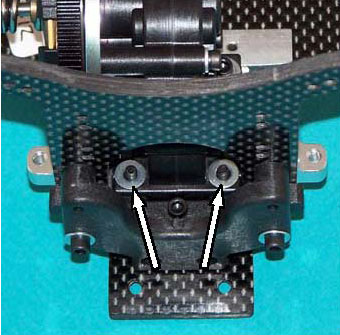
D10) Slide the transmission into its cradle over the shims. The back two shims will stay just fine, but the front two are another matter. Some drivers take the right front one out until after the left front bolt is installed, then slide the right front shim back in. Also quickly check that the motor plate mates properly with the support bracket. See the photo in D14.
D11) Put a washer over a 4-40 X 38" bolt, and install the left front of the transmission. Finger tight for now.
D12) Put a washer over the other 4-40 X 3/8" bolt and secure the right front of the transmission. Make sure the shim is still in there! Make this bolt finger tight for now.
D13) One last check now to be sure the correct shims stayed under the transmission at the rear, then put #4 flat washers over the 1" bolts (left photo) and secure with the #4 mini nuts (right photo). Once all four transmission fasteners are snug and the unit is comfortable in its cradle, put final torque on the two bolts and two mini nuts.
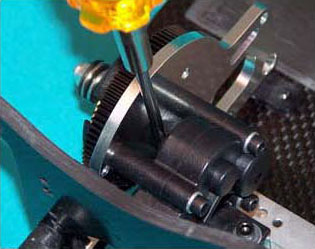
D14) Secure the motor plate to the support bracket with the 4-40 X 1/2" flat head screw, washer, and #4 lock nut, finger tight for now. If your transmission is higher than 0.030", add shims under the support bracket. Once it's all happy together, tighten the bracket bolts from under the chassis (D4) and the plate-to-bracket bolt (D14).
Many drivers think installing the transmission is the hardest single thing to do on an X Factory car, and it's done! Let's put the rear suspension on and finish.
Previous - Table of Content - Next
|
