|
- X-6 CUBED ASSEMBLY INSTRUCTIONS -
Previous - Table of Content - Next
BAG B - NOSE PIECE
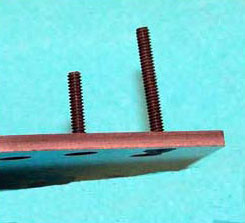
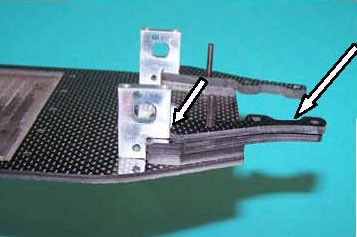
B1) Place a 5/8" flat head screw (XF 6024) you saved from inst. # 12 up from the bottom of the chassis in the second hole from the front at the outside of right side of the chassis (short arrow). Place a 7/8" flat head screw (XF 6026) from Bag B up through the front outside hole (long arrow).
 B2) Place a Nose Bridge Spacer (XF 1534) over the two bolts. B2) Place a Nose Bridge Spacer (XF 1534) over the two bolts.
 B3) Place a Nose Bridge (XF 1533) over the screws onto the spacer, curved side out. B3) Place a Nose Bridge (XF 1533) over the screws onto the spacer, curved side out.
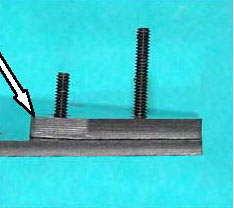
B4) Using a 3/8" Flat Head screw (XF 6022) from Bag B (arrow) and the 5/8" flat head, install a Top Deck Support (XF 1400). If you are using thread lock, a drop now in the bottom holes of the support.
B5) Now repeat the first four steps for the left side.
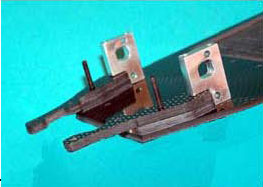
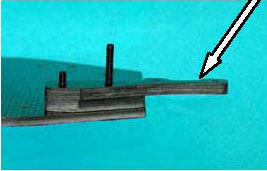
B6) Let's do both sides together now. Put the Lower Nose Bridge Stiffeners (XF 1535) over the 7/8" flat heads. They should fit snugly against the top deck support (short arrow).
B7) Guess what? Now the Top Nose Bridge Stiffeners (XF 1536) Again, nice and snug against the top deck support (short arrow). Both sides, please, even though the photo only shows one.
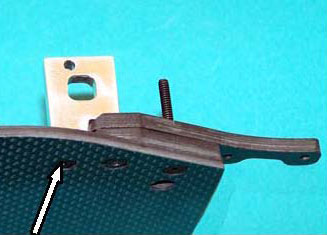
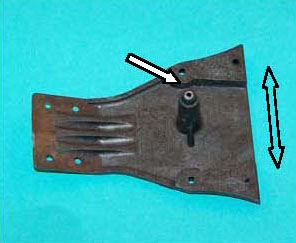
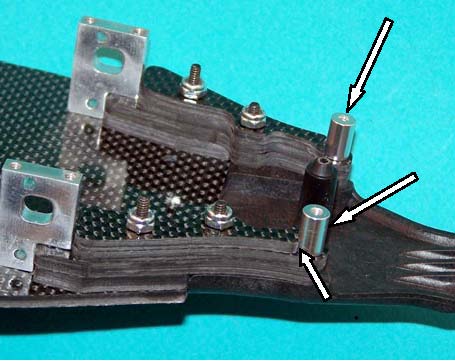
B8) Get the nose piece (XF 1002) from Bag B and touch it with a file if necessary to clean up any mold flashing. The back of it should be straight so there is no interference with the chassis (long arrow), and the post should be nice and round (short arrow) to fit well with the AE top plate. Before installing the nose piece, check inst F14.

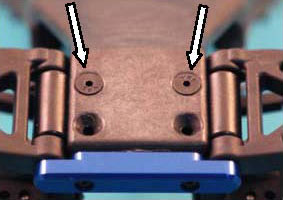
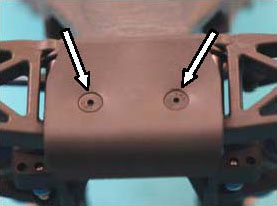
B9) Turn the chassis over and install the nose piece with the post to the top of the chassis. Use the four 5/8" Cap Head screws (XF 6003).
 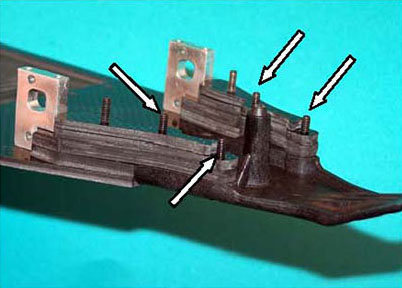
B10) Back to the top. Put the 13/32" Stand-Offs (XF 6803) on the two front screws (long arrows). They should snuggle up with the top stiffener (short arrow). If you are using thread lock, put a drop in the stand-off here. Hold them with a pliers and tighten from the bottom. Team drivers put a cloth between the stand-off and the pliers to keep the stand-off nice and shiny. Secure the other four screws with locking nuts (XF 6071).
B11) Place the complete front suspension and steering on the X-6 Cubed just as it was on the B 4.2. Secure the top plate (AE 9566) with the three screws and countersunk washers that were on the B 4.2. Drivers using thread lock should put a drop in the stand-offs. Finger tight for now. Make sure the top plate is snug with the nose piece.

B12) Turn the car over and use the flat head screws you saved to install the bulkhead to the nose piece. When everything is right, tighten the two bottom screws and the three on top from B11,
B13) Use the saved flat head screws to put the bumper on.
FRONT END'S DONE NOW, AND LOOKING GREAT!!!
Previous - Table of Content - Next
|
