|
- Team Associated RC10 Classic - Build -
Page 2
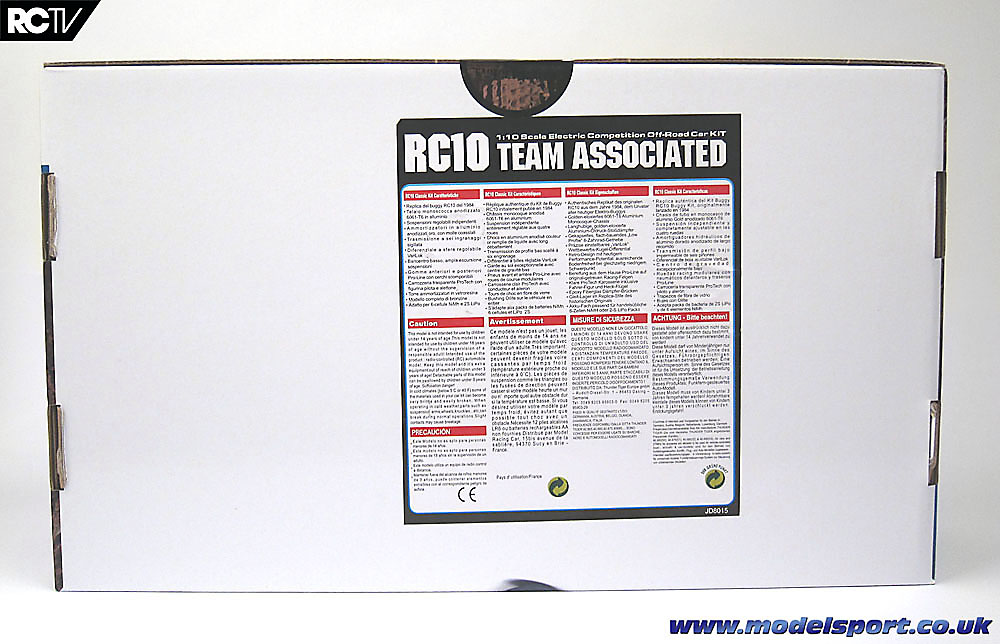
The box
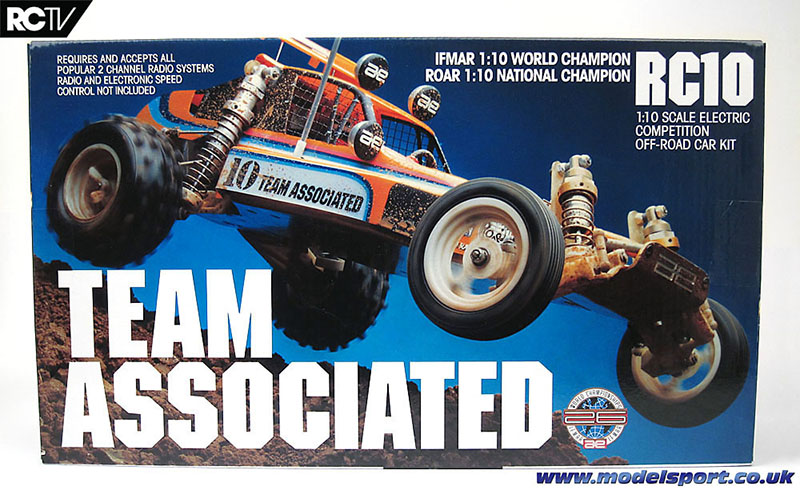
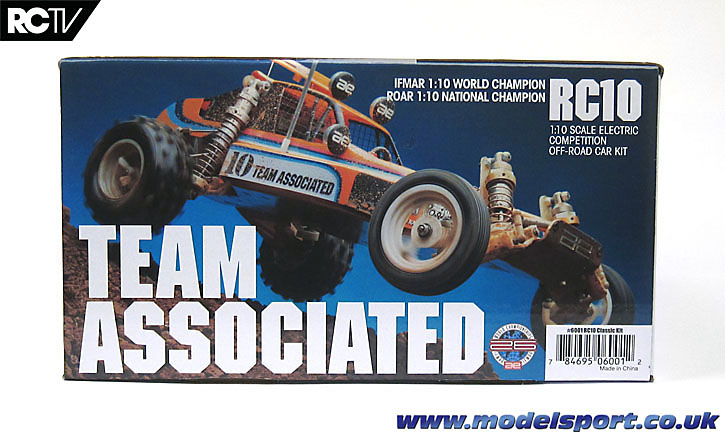
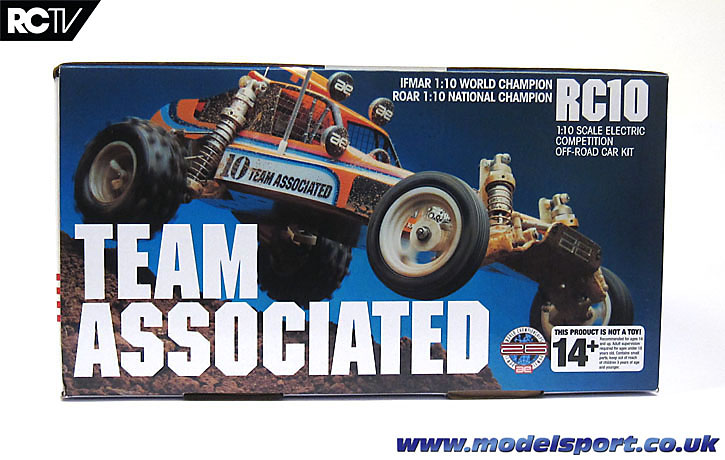
The front of the box – iconic picture but the modern logo is added
OK, I know the box might not be the most interesting part for everyone, but for all the RC nerds out there the outside of the box is pretty interesting. (and no, it’s not a bad thing to be a nerd about anything!)
At first glance, the kit (supplied by the good folks atModelsport.co.uk)looks like something that was shrink-wrapped in 1983 and kept safe in someone’s loft, and only just discovered. But once you start actually reading the text and looking closely at the pictures, several things jump out at you.
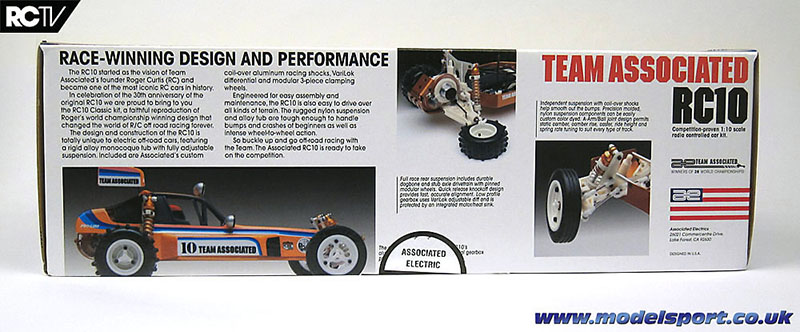
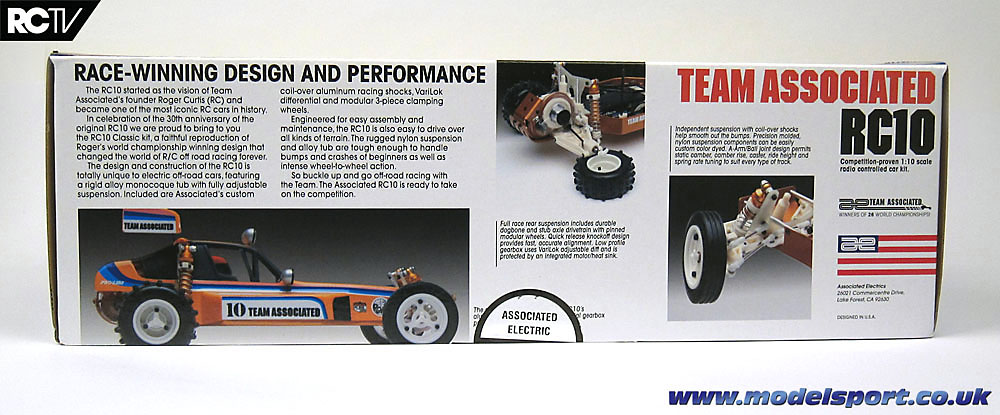
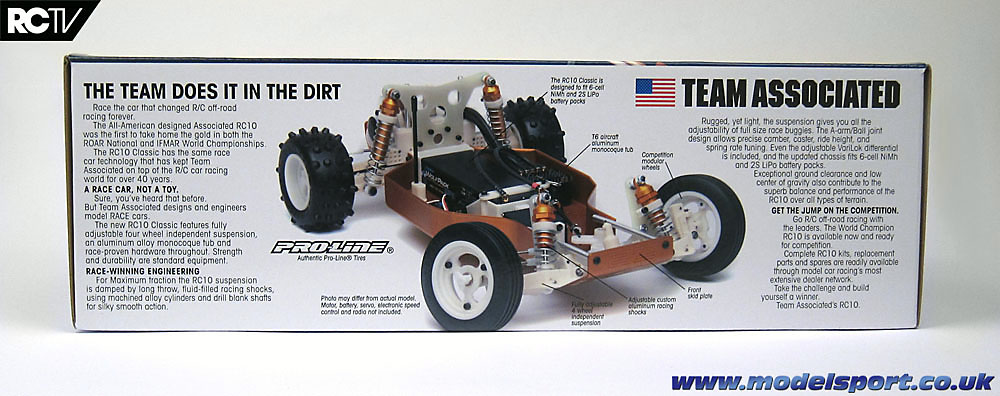
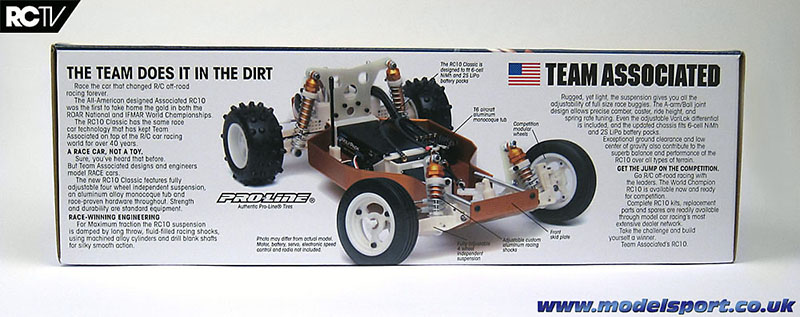
The side of the box that opens – you have to read the text to catch the differences from the original!
To help celebrate the 30th anniversary of the RC10, Associated used vintage photos for the action shots, the same fonts and old logos, but the cleverly changed the wording on the kit box. When you get up close and personal, you can quickly spot words and phrases like ‘30th anniversary’, ‘2S LiPo’, ‘NiMH’ and more – which is a brilliant touch, I think! The biggest thing that might jump out at you is the picture of the assembled chassis with a Reedy 2S LiPo and brushless speed controller mounted in it – but it’s practically a blink-and-you’ll-miss-it sort of thing!
The opposite side of the box – play Spot the Modern Electronics!
The end result is that from arm’s distance the box looks like the original, so it’ll slot right alongside any 80’s kits you might have on your Shelf of Pride, and you’ll only spot the differences when you look real close.


The box ends – can you guess if the original box had a barcode?
One of the really cool things you can pick out on the box is that the ‘RC’ in RC10 doesn’t come from ‘Radio Control’ as you might have thought (and yeah I admit it, I thought so too), but from the name of the designer: Associated’s founder Roger Curtis. In case you’re wondering if they’re proud of this car and their track record…hell yeah they are!
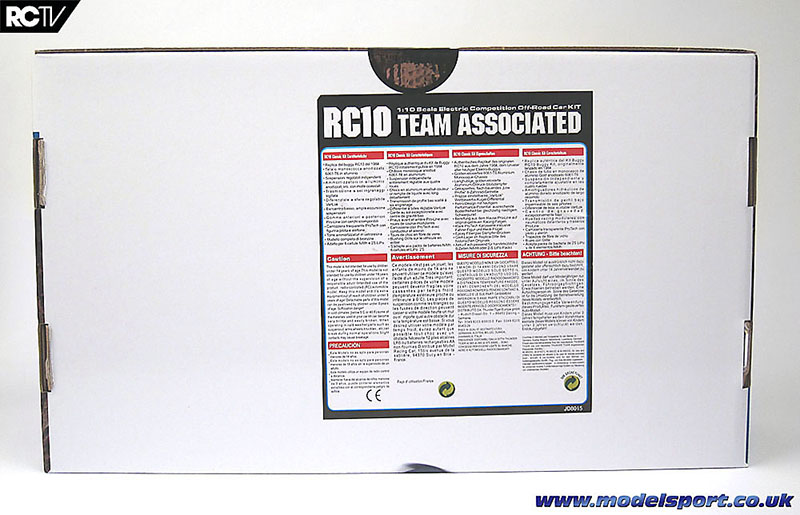
The bottom – in olden times, there were no graphics on the bottom!
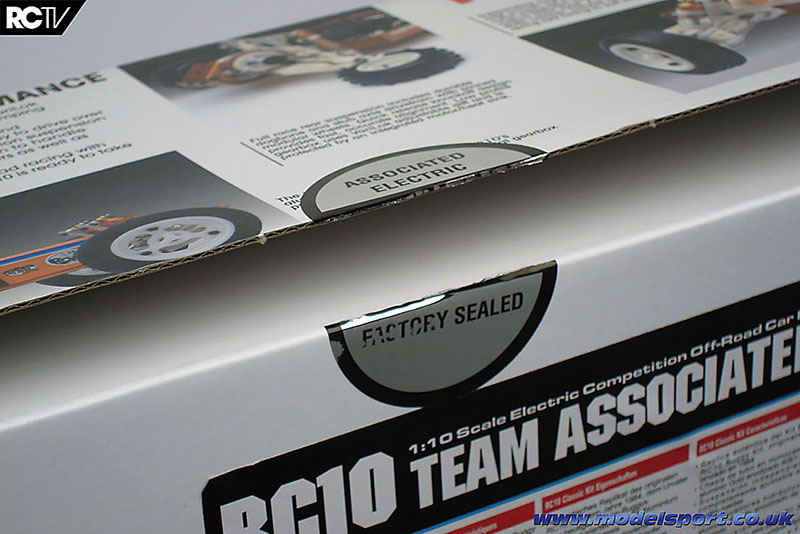
So that’s the outside of the box covered…I’m sure you’re wanting to know what’s inside, though! Let’s just crack that factory seal…
Unboxing

Let’s carry on with the review for the RC10 Classic re-release from Team Associated! I’m sure you’ve been dying to see what’s inside the box since the last installment, so let’s break that seal and jump right in!
Last time round, we showed you all 6 sides of the retro-styled box and teased you with this shot of the broken seal:
And we’ve already shown you what the box looks like when you first open it…but what about your other senses? What about…how the box smells?
You know that smell you get from a brand-new record? Oh, wait, that was a while back, probably before your time - how about when you unwrap a brand new tape cassette from your favorite band? Ack, that’s a pretty old reference too… How about when you open up a music CD for the first time? DOES ANYONE STILL DO THAT?! Do you even understand the reference??
You do? Great! …err, you don’t? Bugger. Anyway – what’s the first thing you used to do – or (…wimper…) the first thing your parents used to do, when that tape or CD box was first opened? You get a big, deep breath of that plasticky, papery smell. You don’t get that these days when you just click ‘buy’ or whatever on oMusic or whatever it is you whippersnappers are logging out to. Get off my lawn!
…I digress. Apologies. My point is, that first whiff of a brand new kit is just magical, especially if it’s one you once longed for back before you could even afford it, and double that if you’ve been waiting (seemingly) for ages for it to arrive on your doorstep. The RC10 Classic kit has that smell – the rubber of the tires seeping through the plastic bags, the cardboard and ink smell of the inside of the box…well I suppose all RC kits have that but let an old man reminisce!
So now you’ve seen the inside of the box, let’s run through real quick what exactly is inside. Maestro, VIDEO!
Now if you’re a proper old-timer geek and still read stuff, you’ll want to have some close-up looks at all those bits! Let’s start with the big bits first!
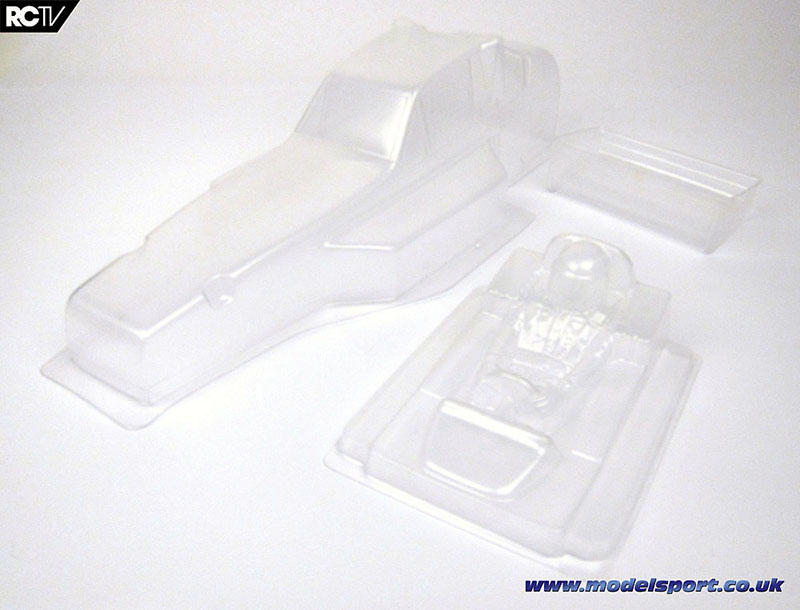
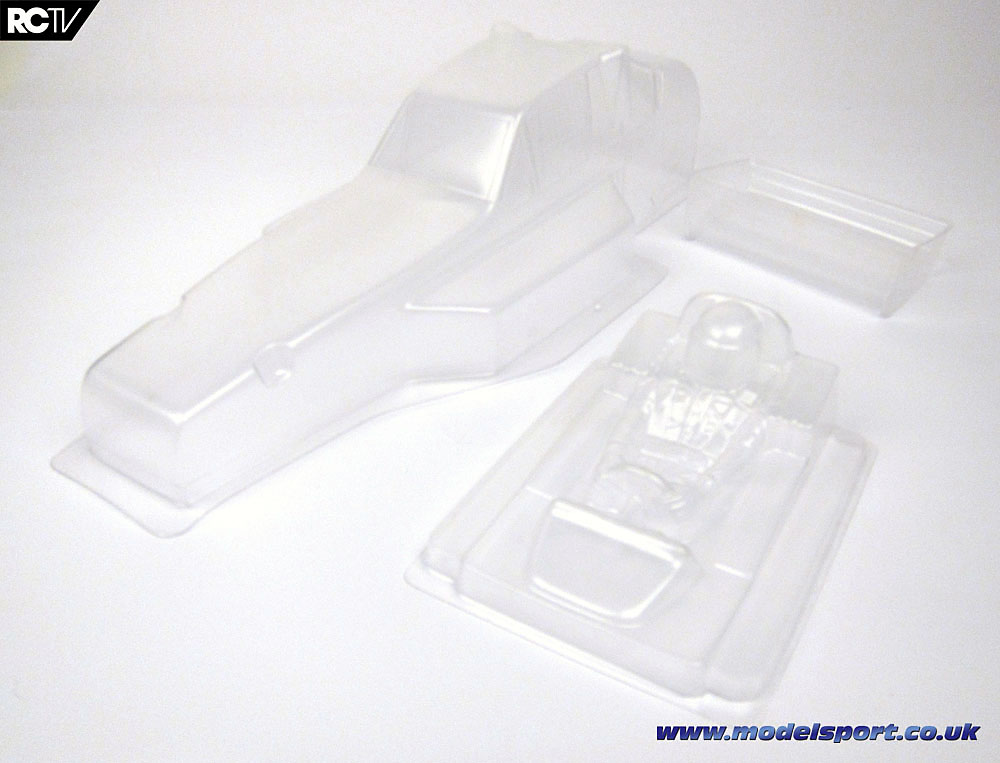
The very first thing I pulled out was the body. Look at those lines! I imagine I’ll be saying ‘retro’ quite a bit (like I did in the video) but that is such a vintage look to the shape of the body, it really did define what RC buggy bodies looked like for the next 20+ years. And a driver figure! Awesome! They are tricky to paint right (unless you go for a single-color job or just leave him out entirely) but when done right they look fantastic. The wing is small in comparison to today’s wings, but still very chunky-looking.

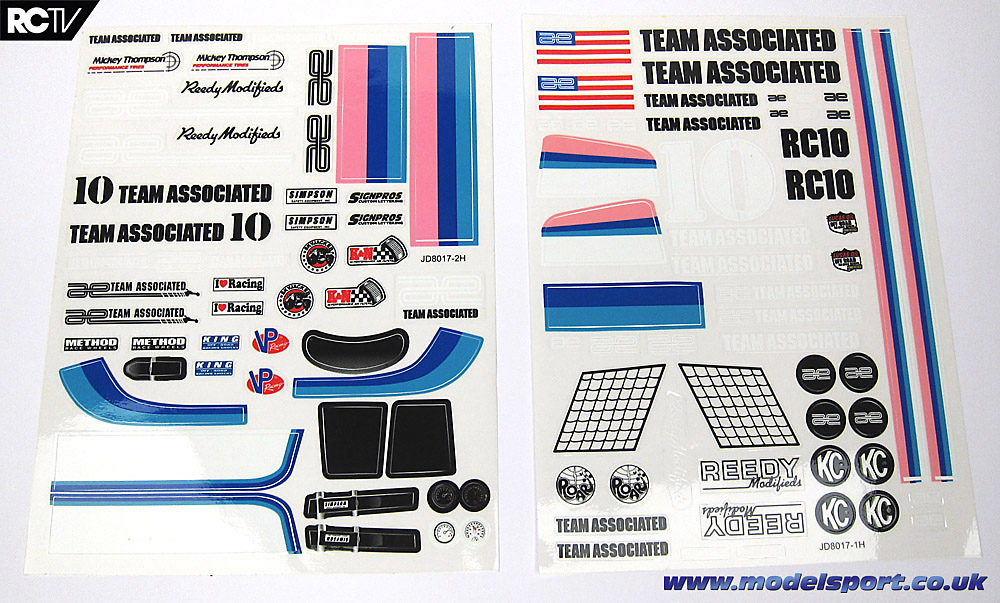
Opening the bag containing the manual, the next obvious thing to pull out are the decal sheets. Look at those colors! Note the window netting – I’m told the body is a bit thinner than the original body, so cutting out the windows isn’t actually recommended, so the window netting is there to replicate the actual cloth netting used on the box photos.
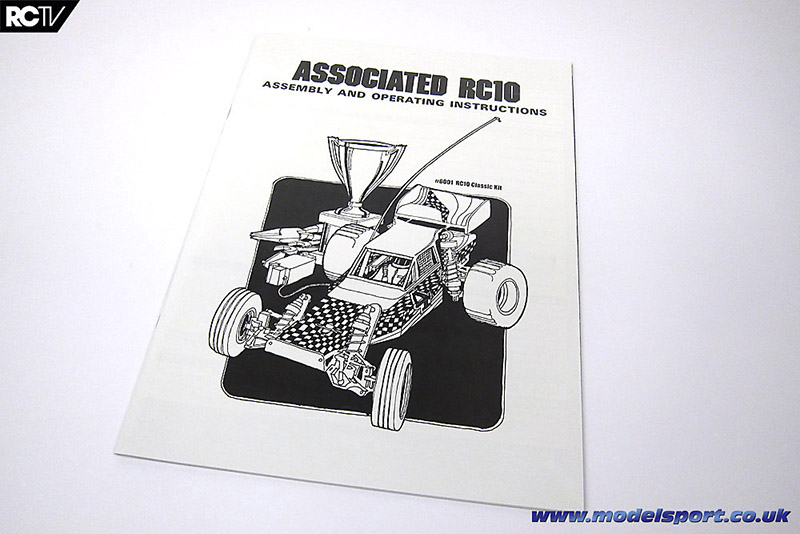
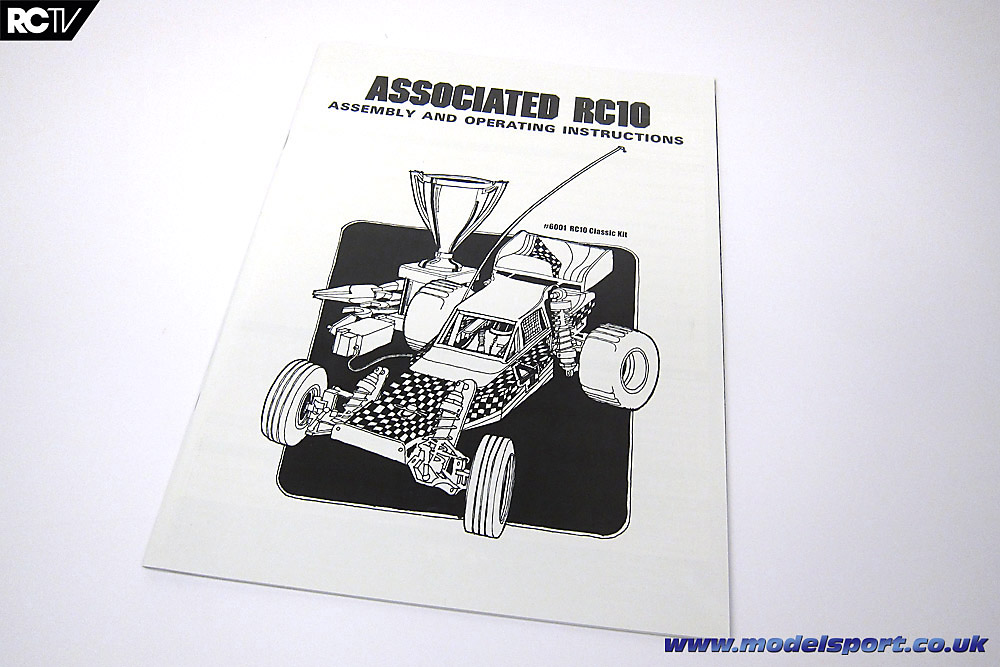
And here we’ve got the manual. How cool! A drawing of the RC10 on the front, with of course a very well-deserved championship trophy next to the buggy. Note the part number and ‘RC10 Classic’ clearly noted on the front – carrying on the theme from the box, at first glance it looks like a period piece, but these little details let you know this isn’t the original. (of course, it helps the collectors and owners of the original car maintain the value of their cars, too!)
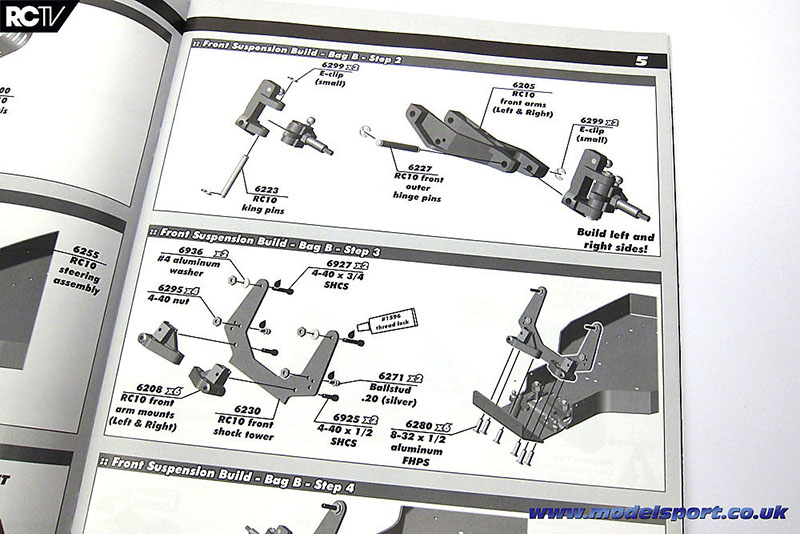
Inside the manual, we’ve got CAD drawings! I don’t think these were around back in the day! Well, not outside of NASA maybe. I really don’t remember what the original kit manual looked like, but I’m pretty sure it wasn’t as cleanly put together as this. I haven’t built an Associated car in decades, so this will be a re-learning experience!
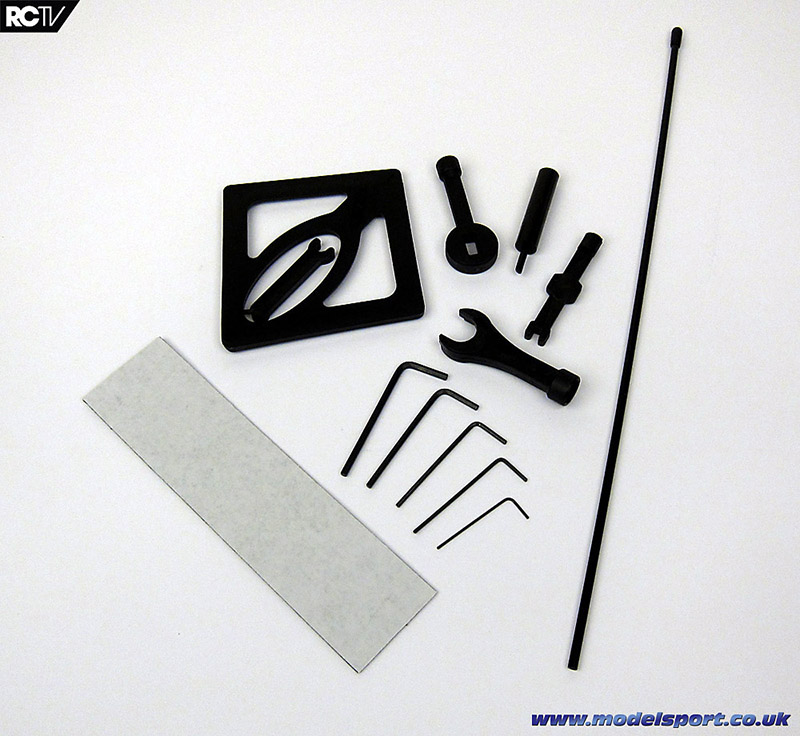
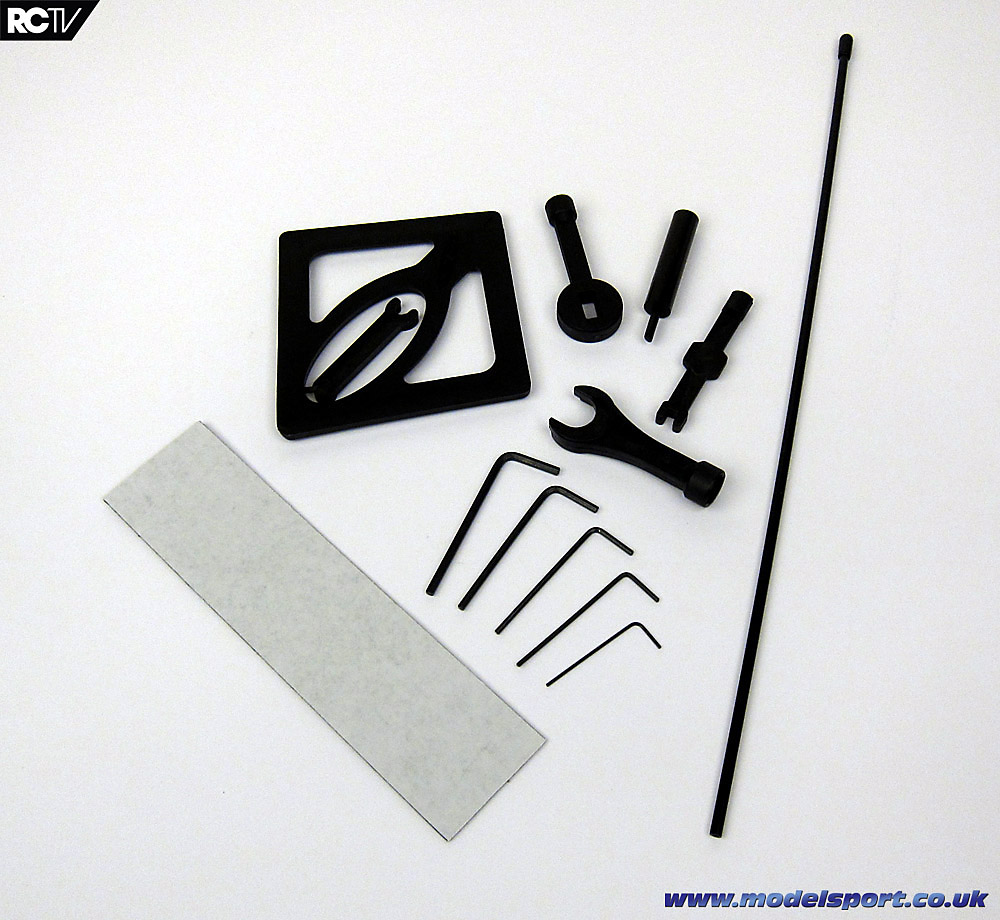
Also in the bag with the manual and decal sheets are shock building tools, those horrible L-wrenches you really should just toss out, a camber setup gauge (hey that’s pretty cool), a very long antenna tube (gotta use that!) and double-sided tape for the electronics.
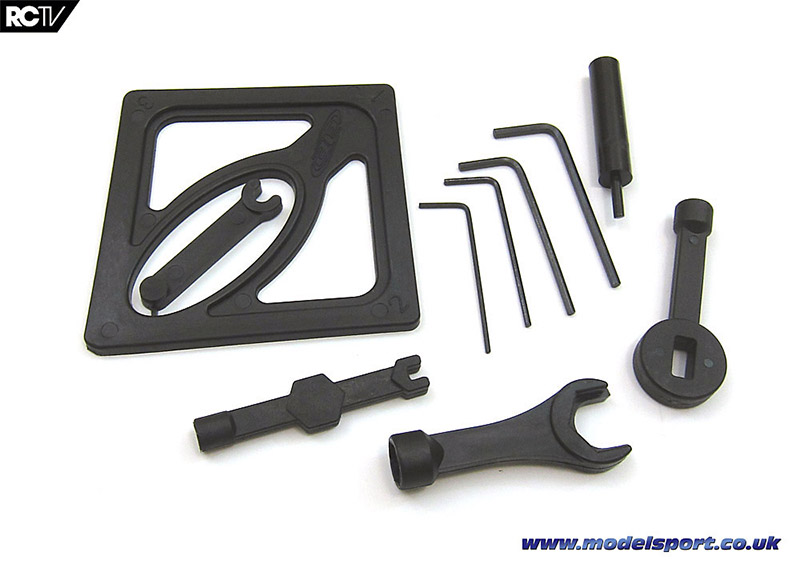
Here’s a closer look at the tools you get. There’s wheel nut wrenches, shock building tools, a couple more small wrenches that look like they fit Associated turnbuckles (ha! wait till you see what you get with this kit!) and again the L-wrenches. I still have my super-old Bolink hex wrenches I used when I used to race my RC10 Worlds and RC10T…those wrenches were among the first things I bought when I started racing! I don’t use them any more but I’m going to have to dig them out for this build.
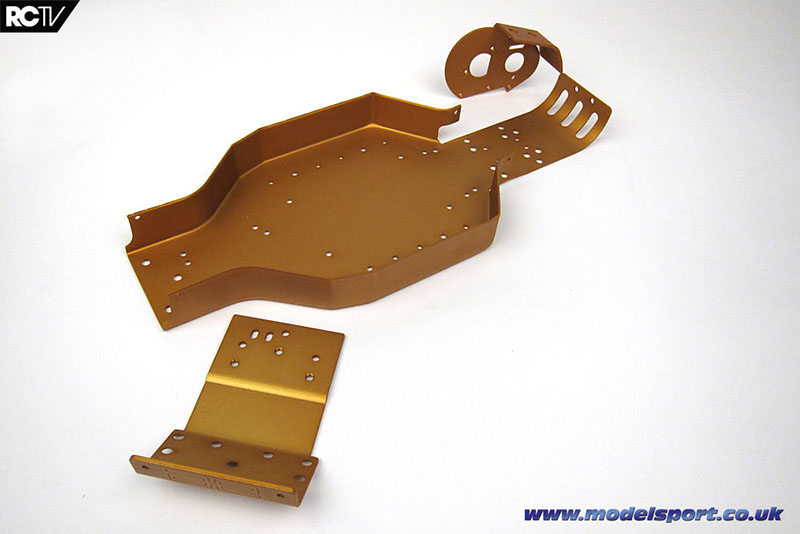
Ah, here we go! That classic gold-anodized tub. Did Roger Curtis know that it would be so iconic? And that nosepiece!
DAT NOSEPIECE
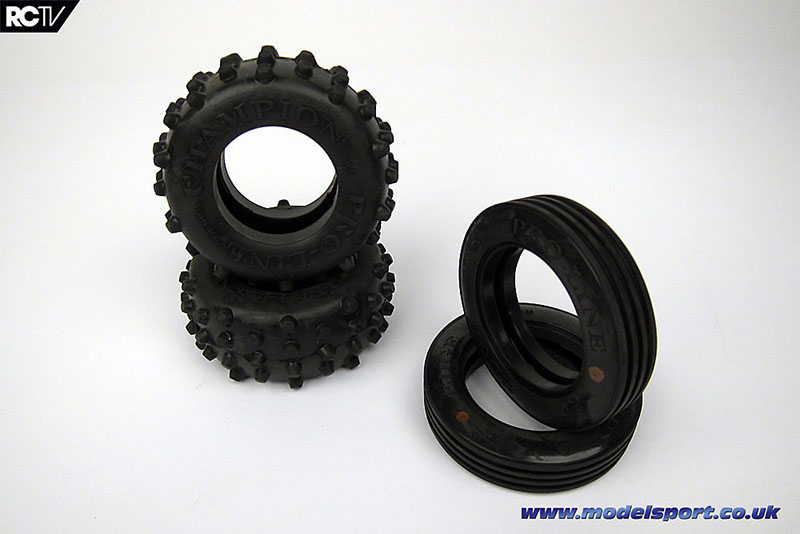
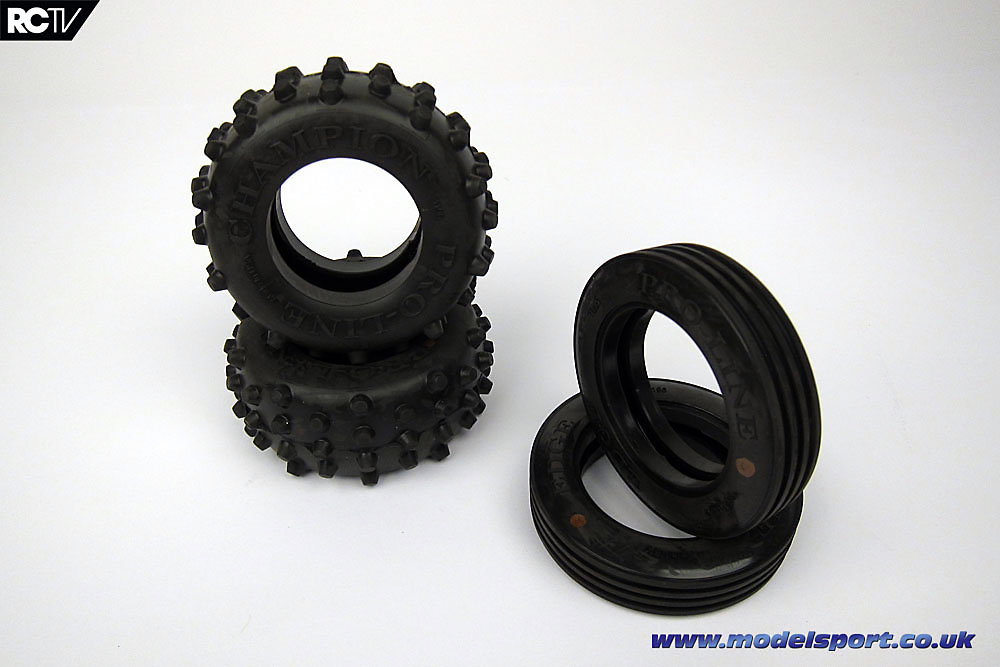
And now for the tires! Look at these things! People used to RACE on these hoops! Can you even believe that?
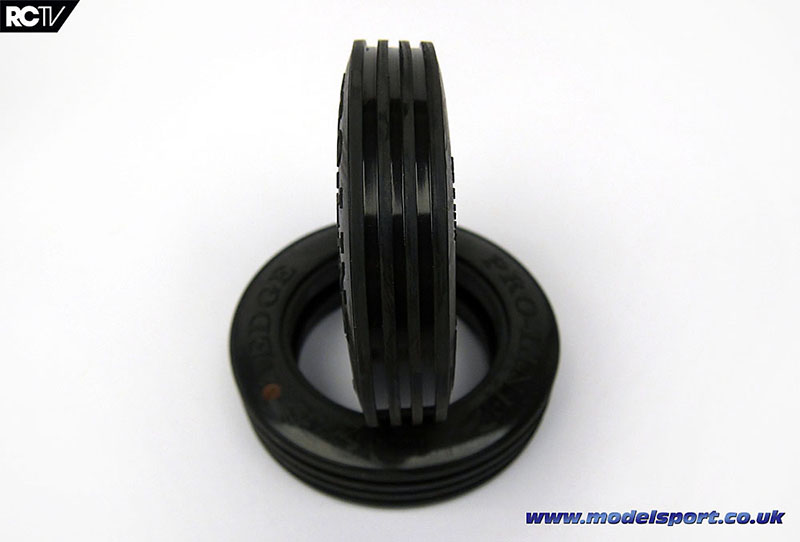
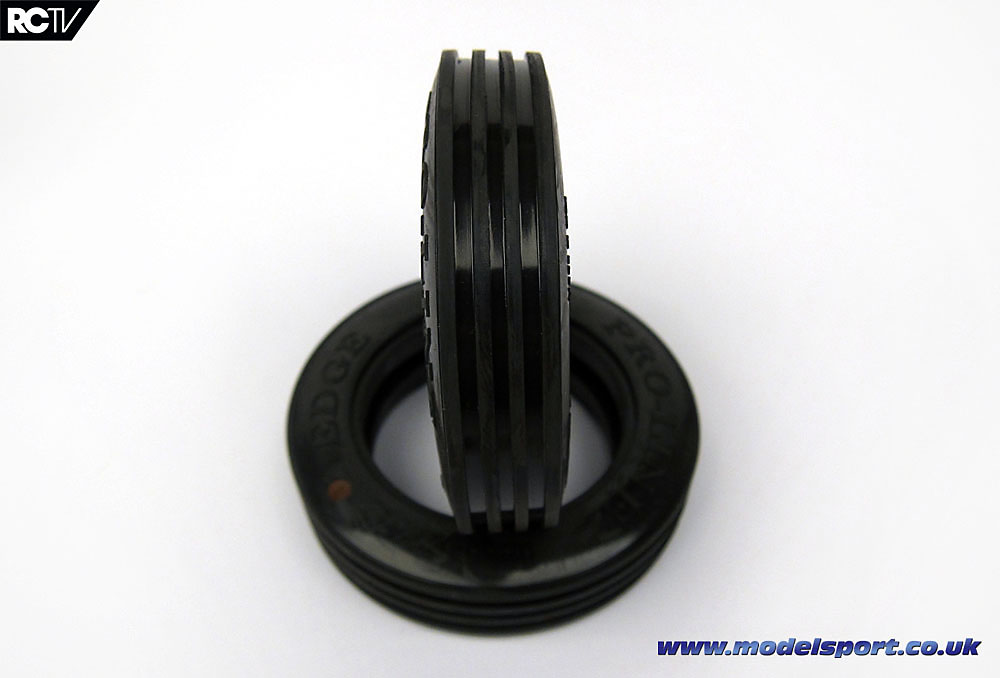
I mean really – look at the squared-off edges of these front tires. These are the original Pro-Line Edge tires. They are so skinny, and so square, they ought to be hauling a Macbook to Starbucks while wearing square spectacles and a check shirt and rubbing a 3-day growth of beard.
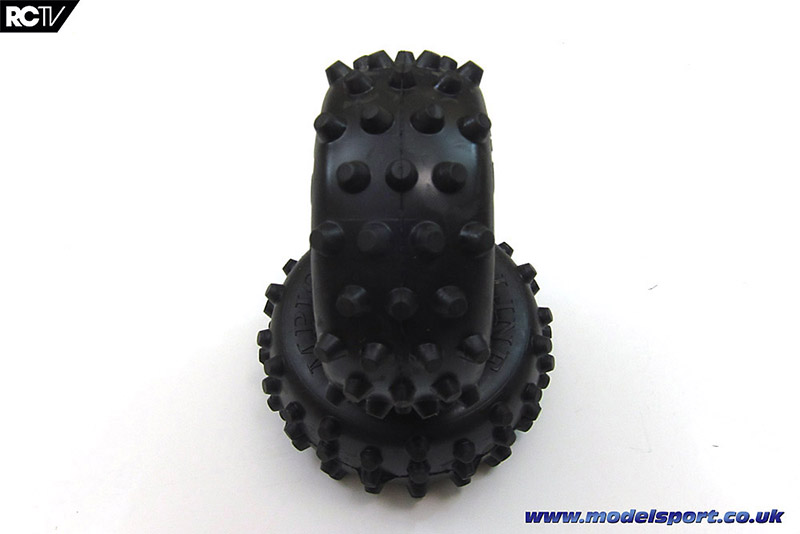
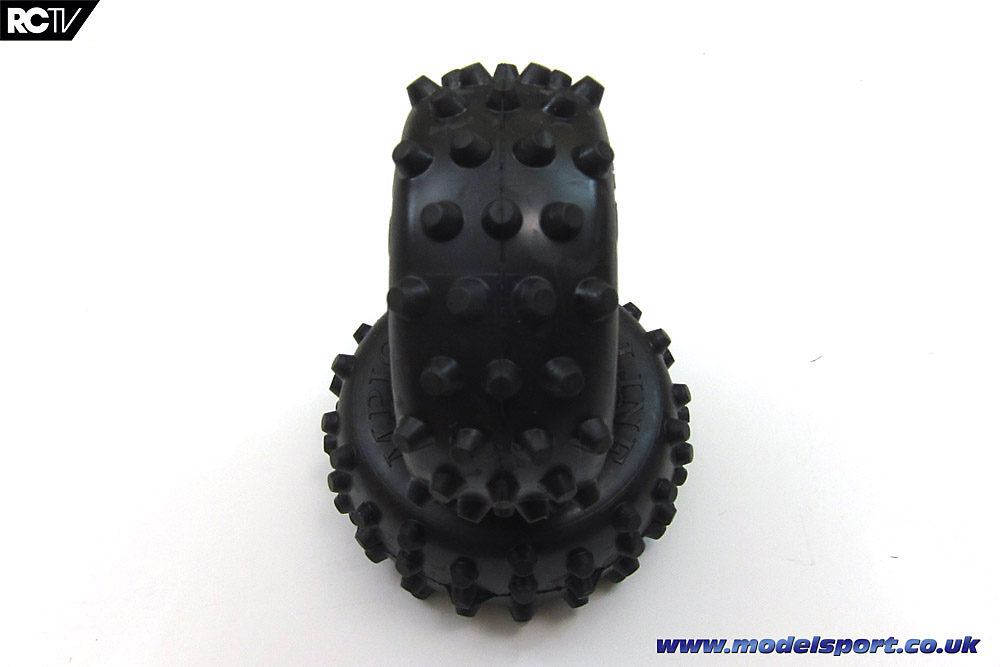
The rear tires, on the other hand – these look like they’ll kick dirt in your face and take your lunch money while you cry for your mommy. Forget bar-type tire patterns, mini-pins and pink compound rubber – these tires are from when men were MEN. And from when I was but a wee lad.
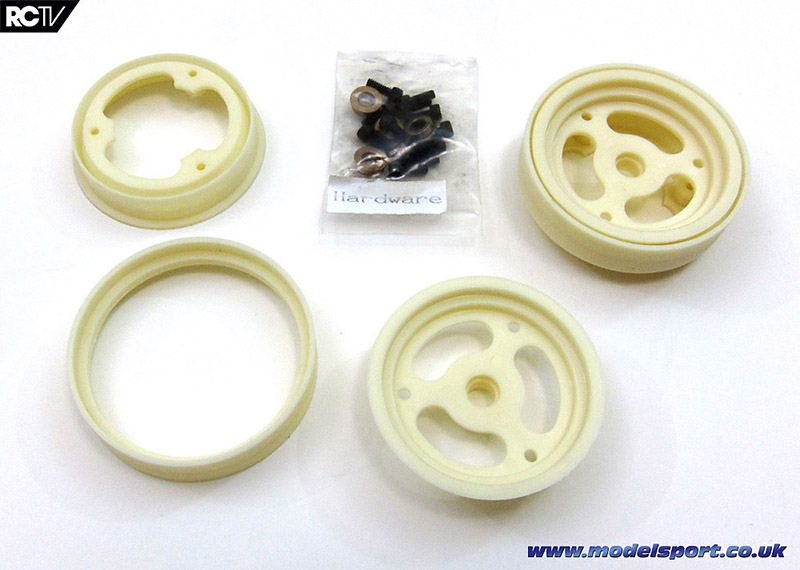
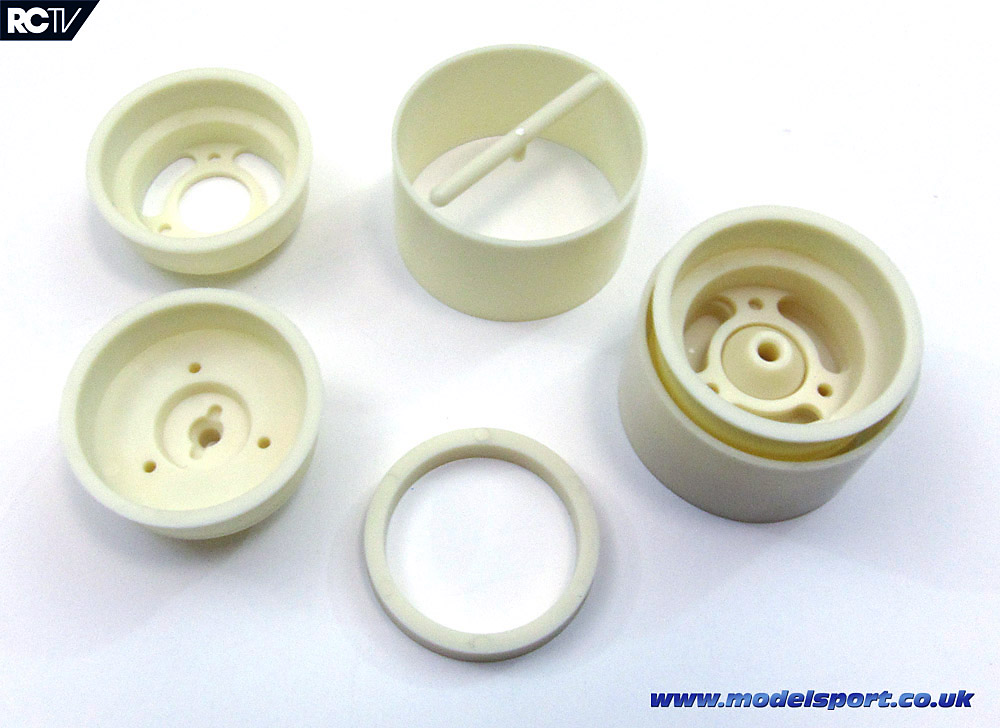
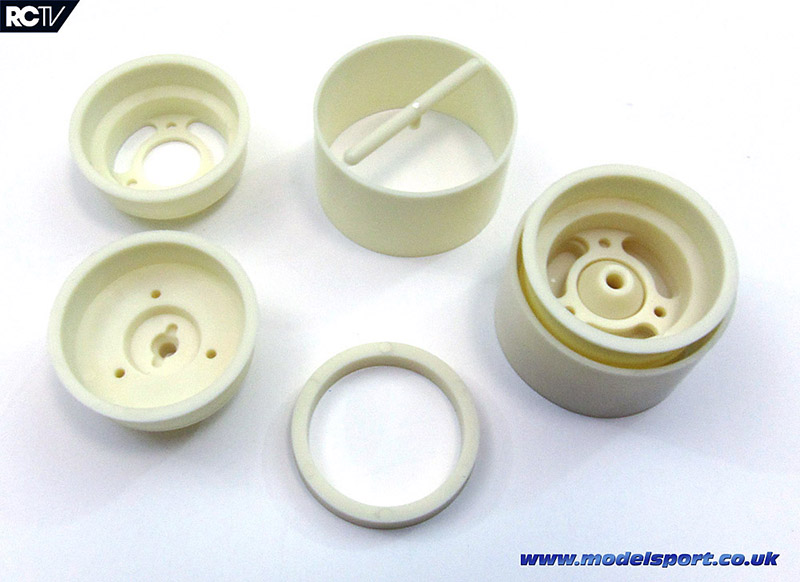
The front wheels, like the rears, are 3-piece wheels that bolt together. The hoop at the bottom left fits into the tire, then you bolt the inside and outside of the wheel around the tire bead. Not too shabby. I’ll be assembling these and running the car on the tires, but I’ll be thinking seriously about getting the Associated option part for this car that allow you to run modern 2.2? wheels.
NOPE
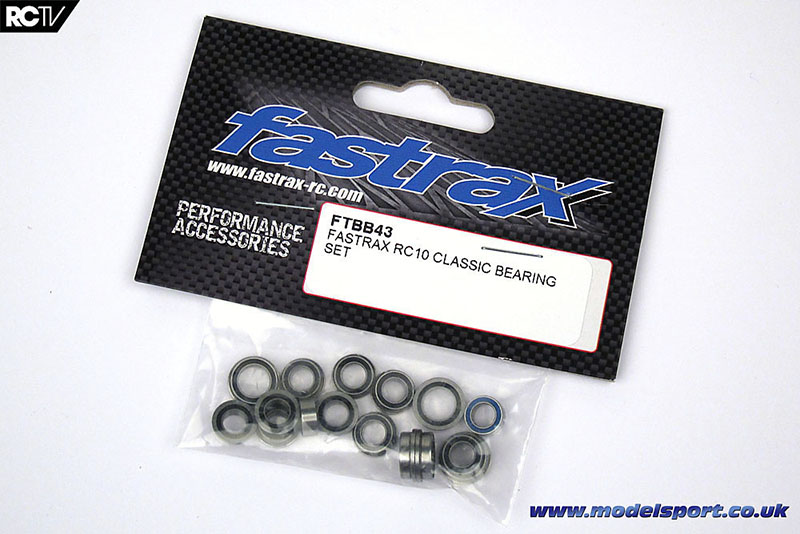
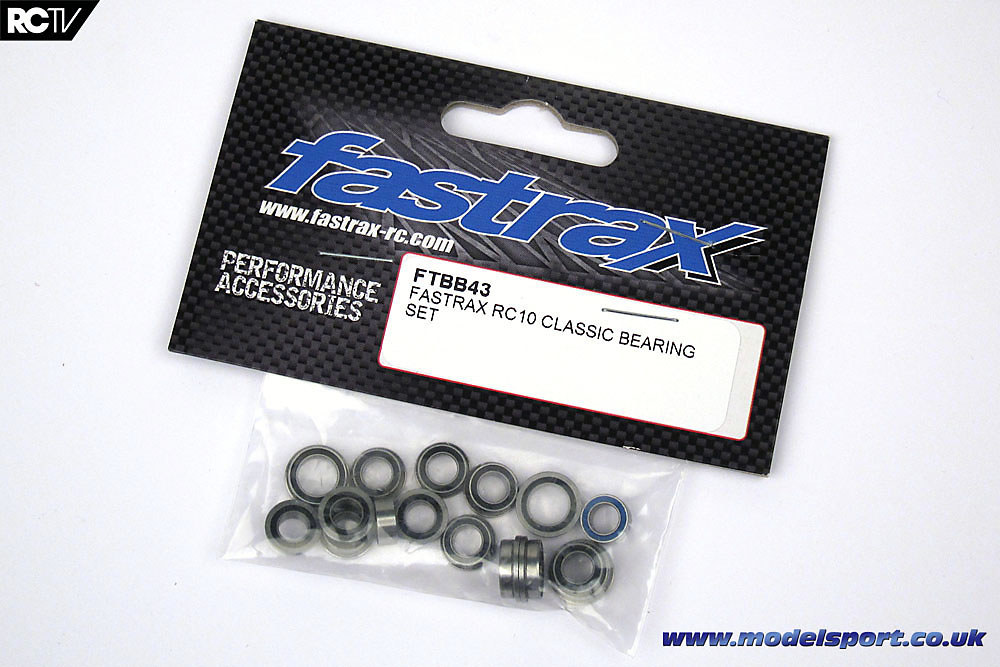
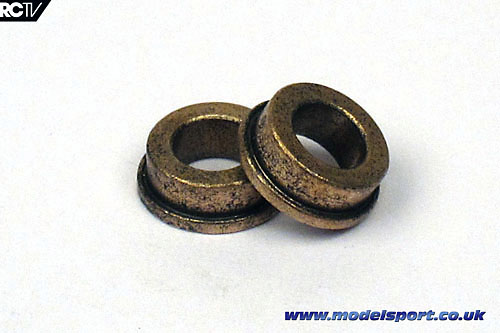
Yes! I understand why bushings were included, and obviously I get the whole retro thing, but forget running on bushings! I want to run like the champs! So luckily Modelsport included a set of these rubber-sealed bearings to completely outfit the car.
The rear wheels are pretty much the same as the fronts, but there’s no bushings that support the wheel. Like today’s buggies there’s a drive pin in the axle and the wheel bolts onto the axle, which is supported by bushings. Or bearings.
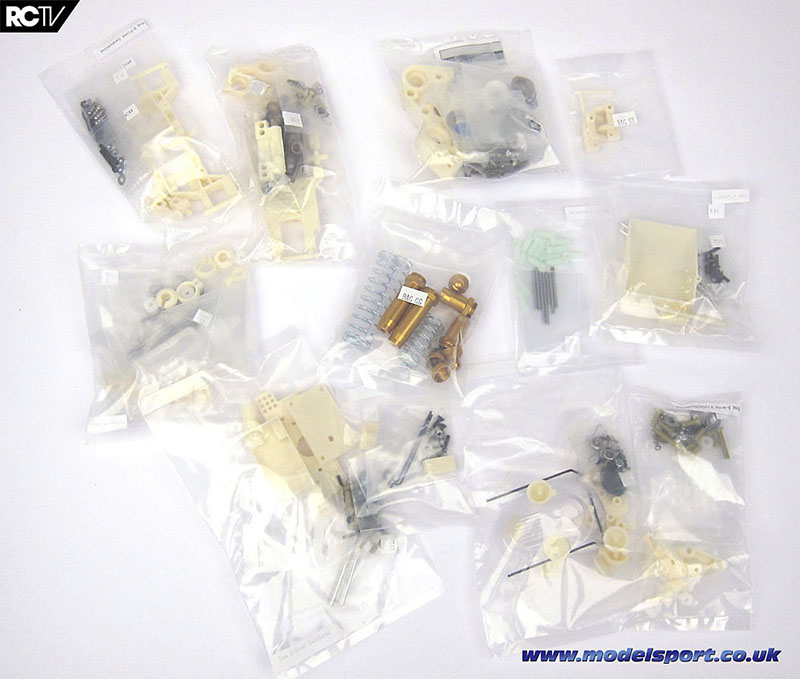
And here’s the rest of the parts in the kit, in their original bags. They won’t be unopened for long…
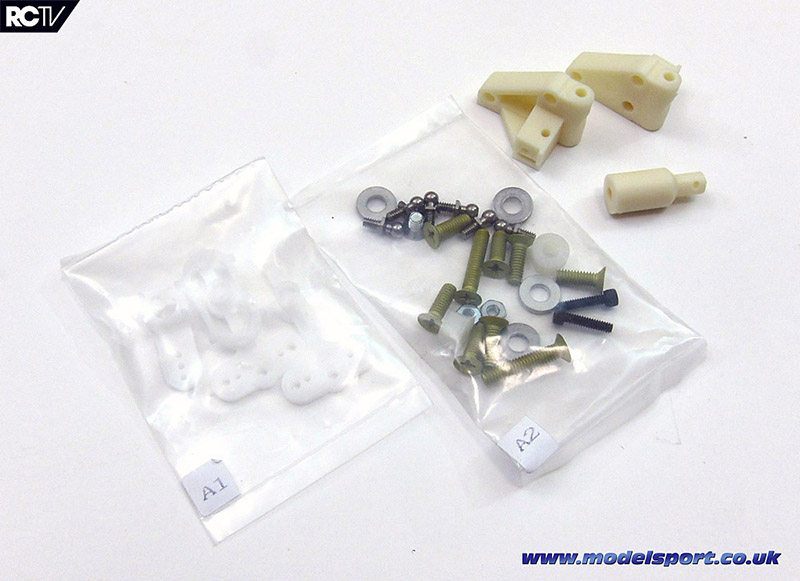
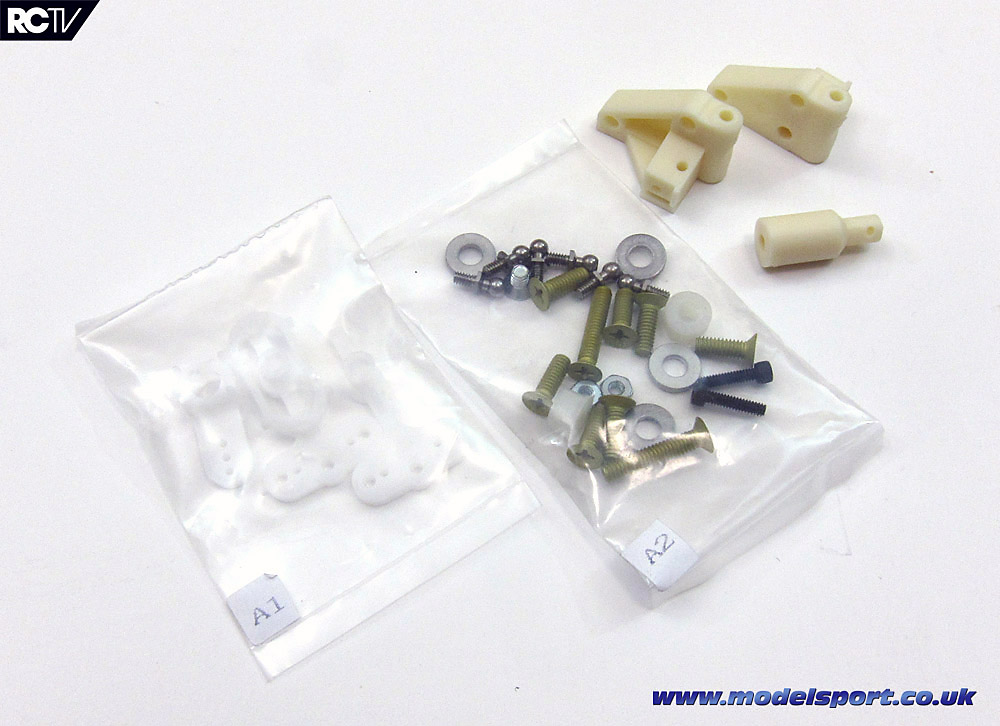
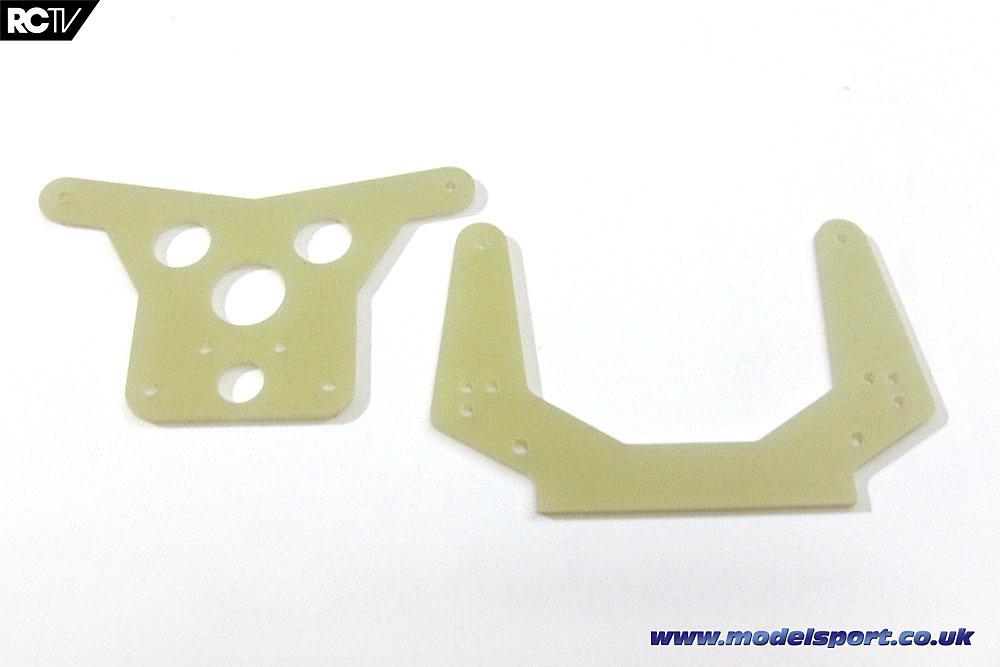
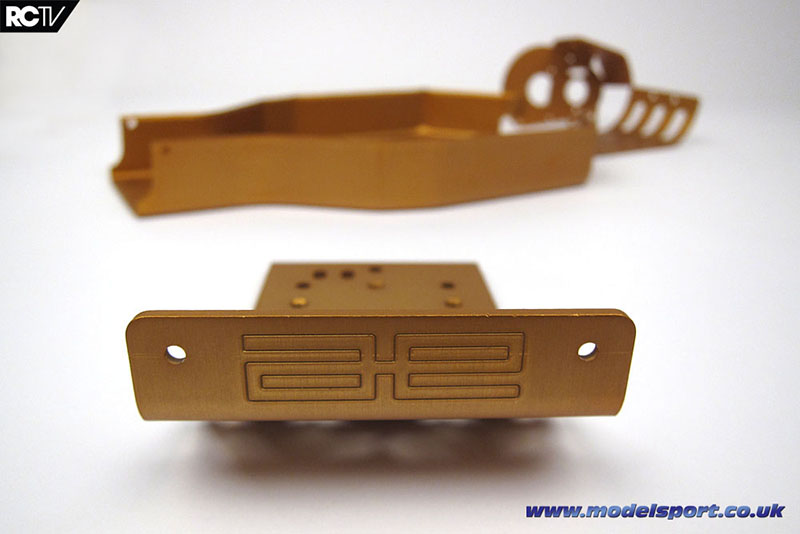
Bag A contains the steering arms and nosepiece support. I gotta say, seeing those gold-anodized screws brings back some memories! Memories of stripping those bad boys – they’re made from aluminum from what I remember, and my junky screwdriver didn’t really want to screw them in properly. And those steering arms have got to be the strangest design I’ve ever seen. But hey, if it wins championships… Bag AA is the nosepiece and front shock tower (which is shown below) – Bags A and AA are used in the first couple of assembly steps.

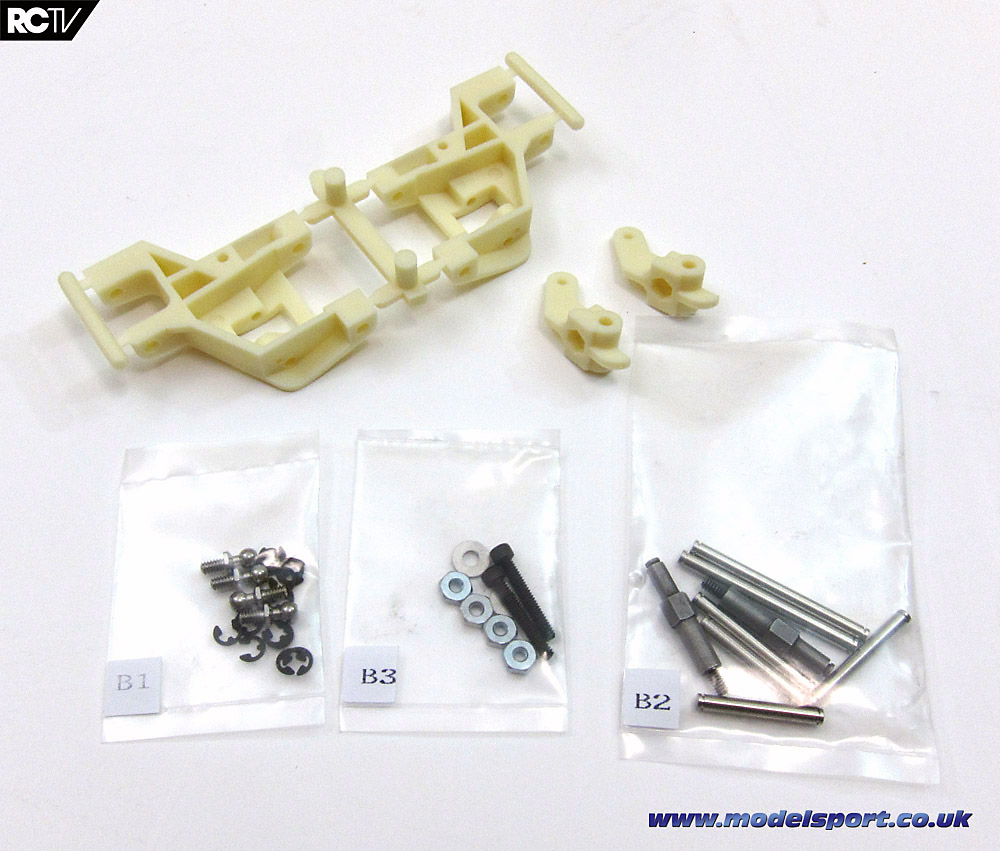
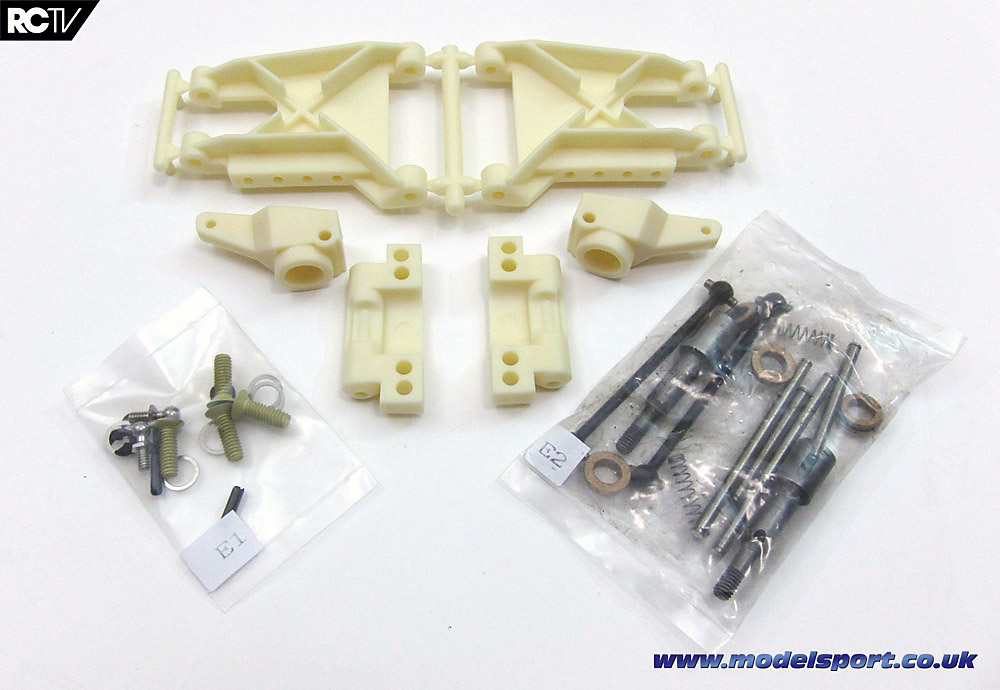
Bag B hold the front suspension arms, steering knuckles, hinge pins and related hardware. Clearly the car is built from the front to the back.

Bag BB has the uprights. Not sure why this single parts sprue is not tossed into Bag B, but whatever – nostalgia, right? Bags B and BB take up 4 assembly steps and look pretty straightforward to put together.

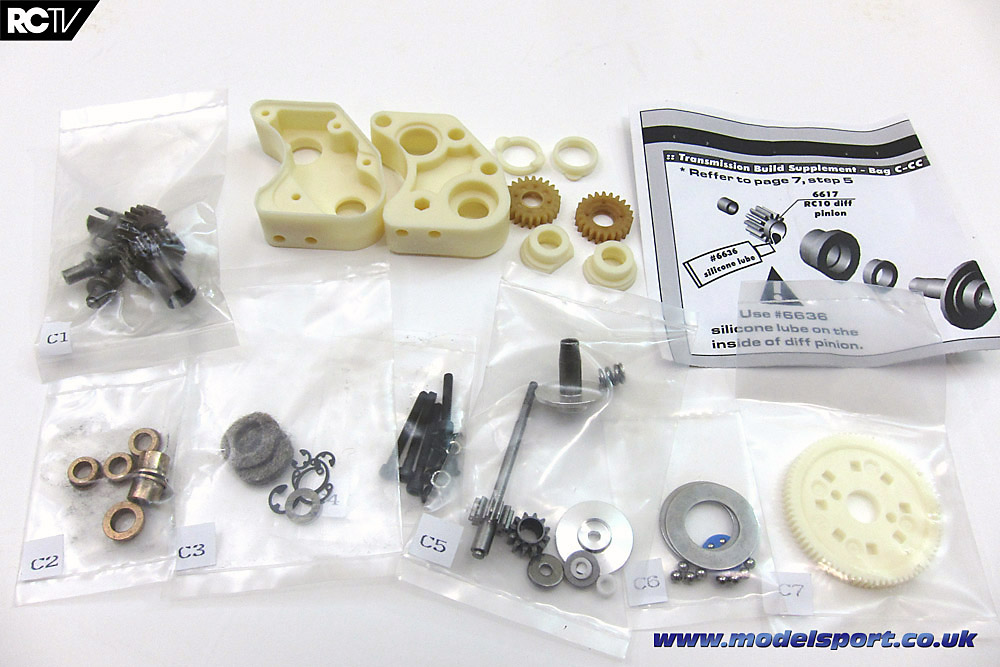
Bags C and CC make up the next 3+ pages of the manual – that’s TEN steps. And obviously there’s a lot of parts in this page. AND an addendum to the manual (with an unfortunate typo). Over 3 pages, 10 steps…basically, take your time and follow the instructions clearly. This is pretty much the entire drivetrain, so it’s a pretty vital part of the build.

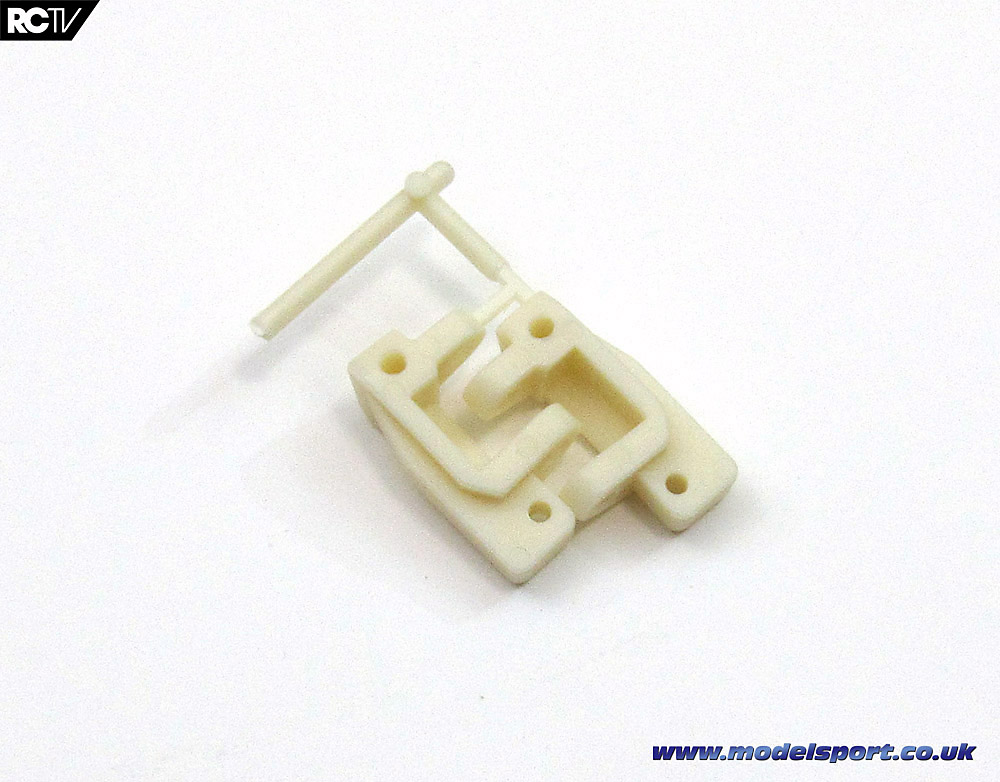
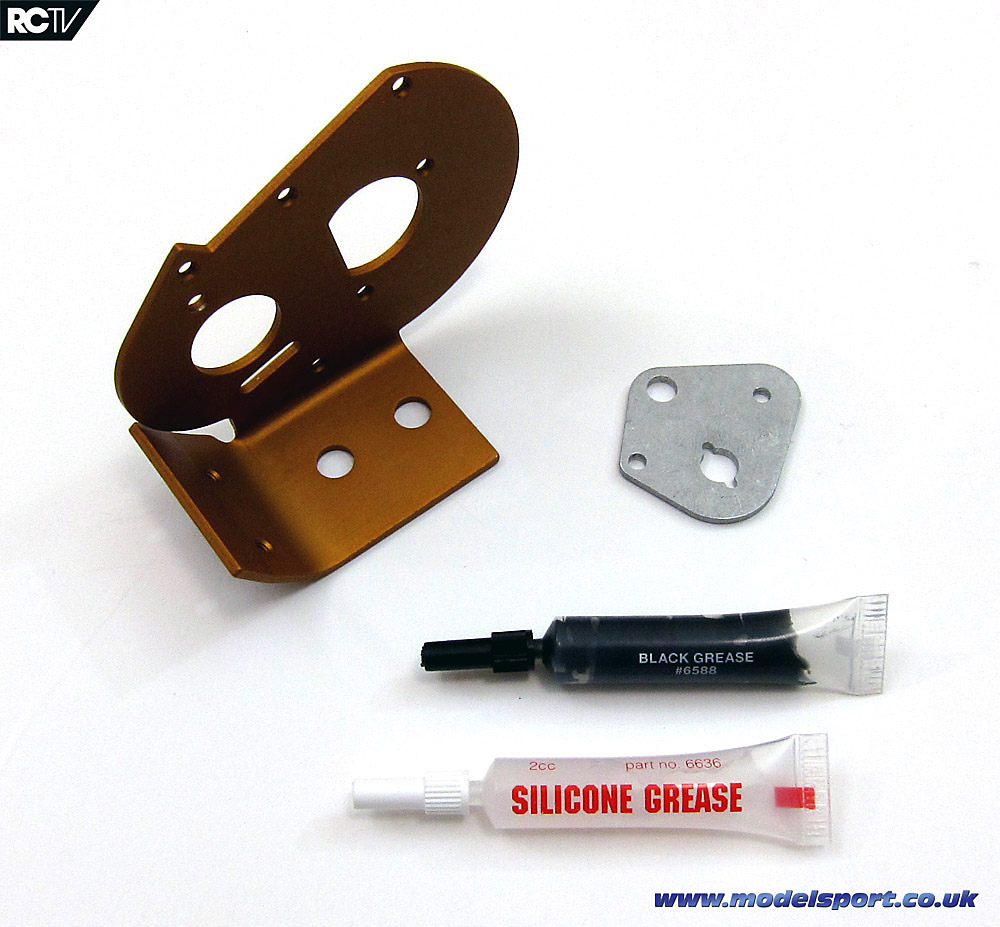
Bag CC is the gearbox support, motor spacer and greases used in the transmission. This is the last piece of gold-anodized aluminum you’ll be attaching to the car!

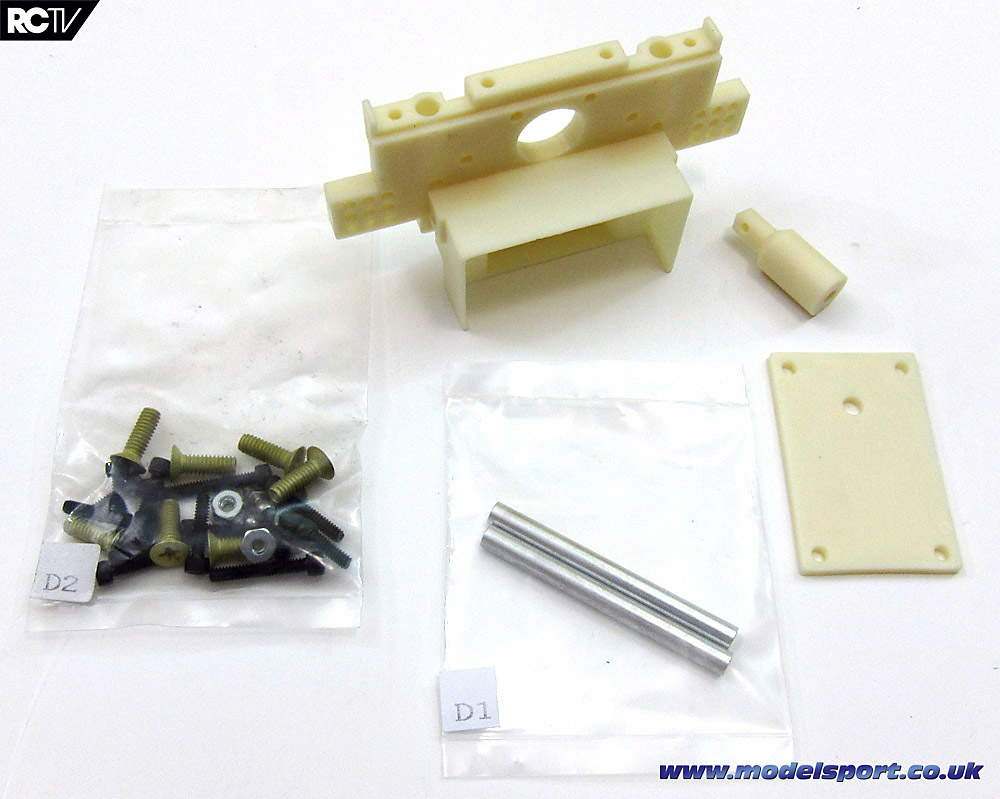
Bag D is the rear bulkhead, rear body post, wing wire supports and a bunch of screws to attach the transmission case and bulkhead to the chassis.

Bag DD is actually just the rear shock tower (the one on the left), but it’s all on its own, I figured the front shock tower should really keep it company – the front shock tower is bagged with the front nosepiece in Bag AA. Bags D and DD are used in 4 steps over about a single page of the manual.

Bags E and EE make up the rear suspension arms and driveshaft bits. Are those springs in that bag with the driveshafts? Well so they are. I’ll have to show you where those things go later on!
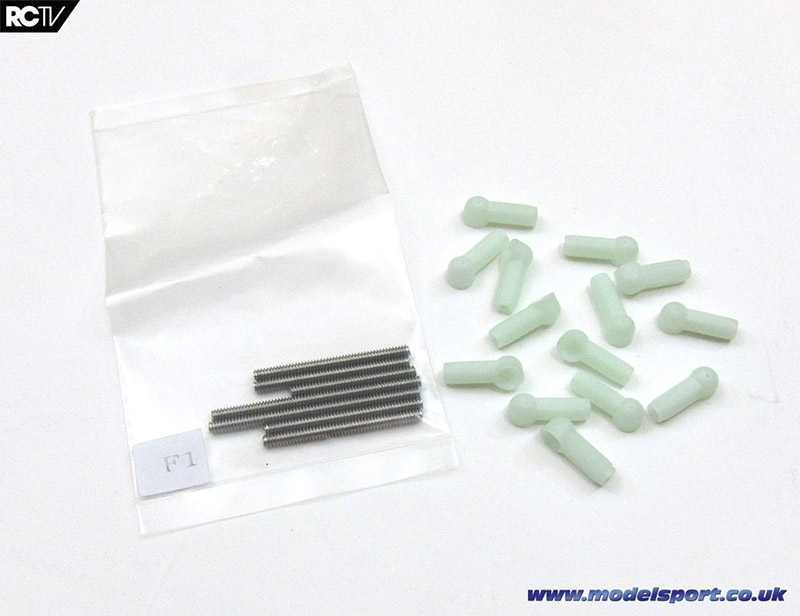
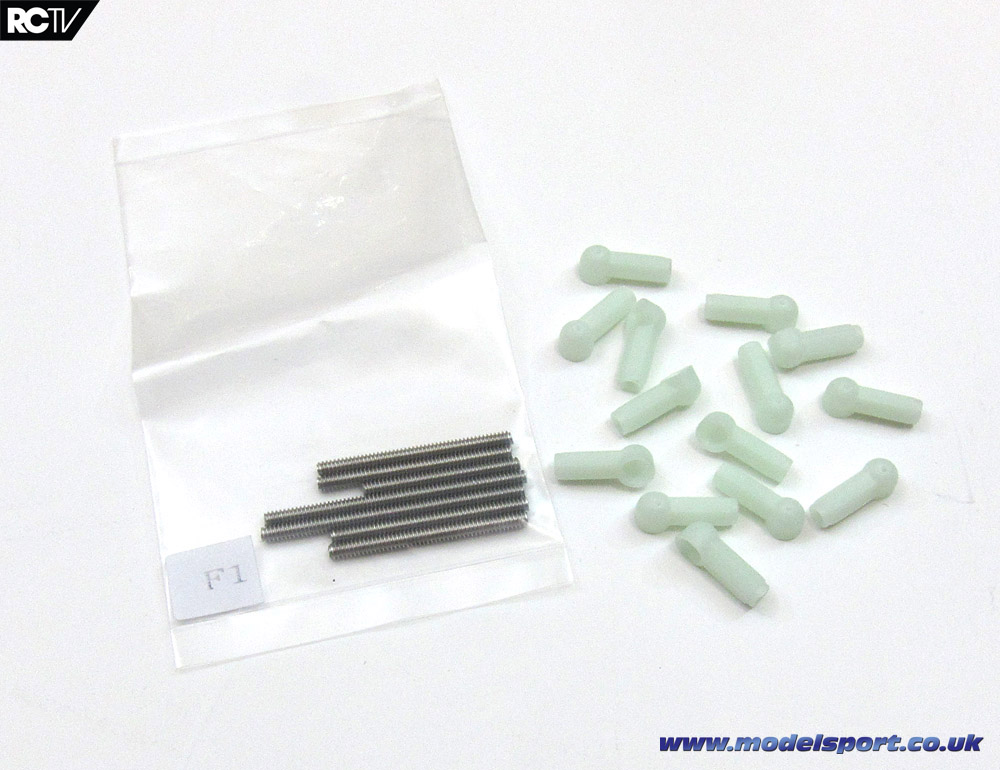
Bag F contains all the camber and steering link pieces. Ever wonder why turnbuckles are on just about every car nowadays? This is why. These things SUCK. …but again, nostalgia! Honestly, they’re not that bad. They’re just difficult to make fine adjustments with, but for driving and whatnot they’re OK.

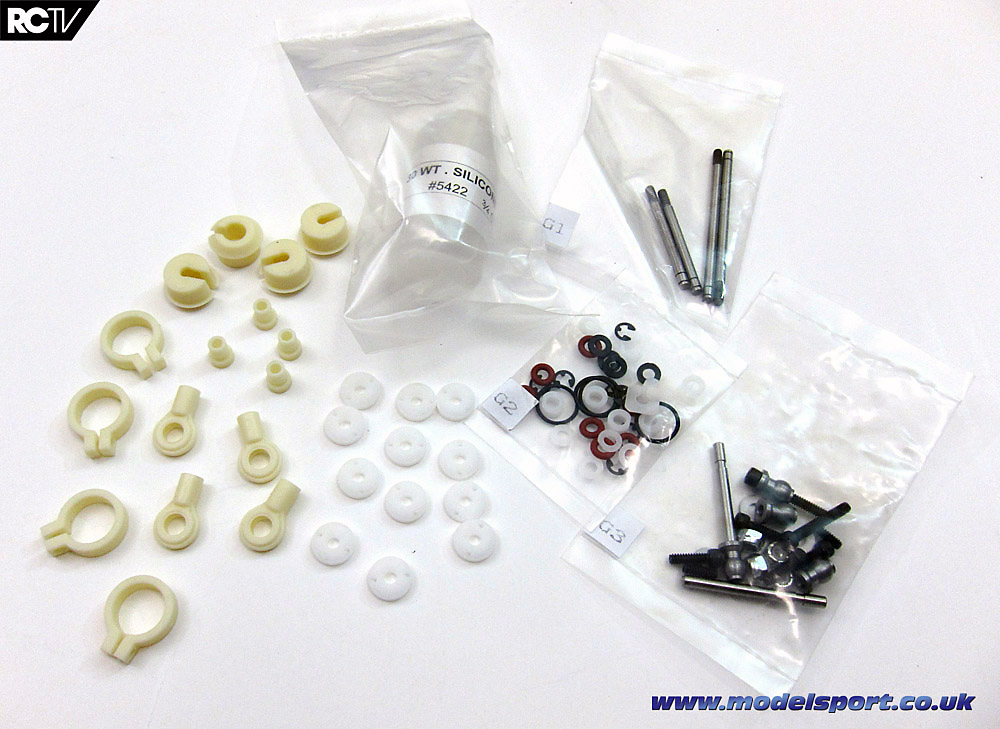
Ah, here we go. The shocks! Well the internal parts of the shocks anyway. Bag G (above) basically all fit inside or just outside of bag GG (below).
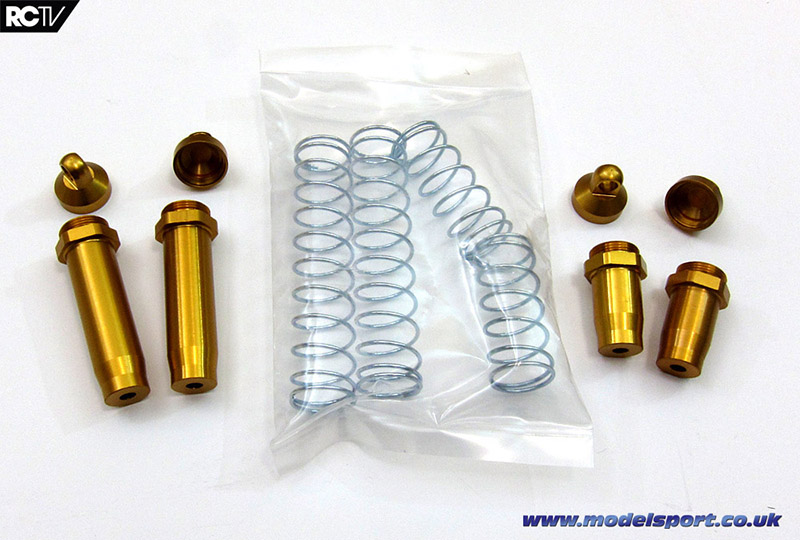
OK I lied earlier. THESE are the last gold-anodized bits you’ll be attaching to the car! These are so chunky and so…dare I say ‘iconic’ again?…they just have a look about them that captures a really long period of RC history. Of course, as soon as you showed up to the track with your gold-tub car, you spotted a sponsored driver with a dark greeny-grey anodized chassis and shock bodies and you wanted THAT…but hey that’s how it always is, isn’t it?
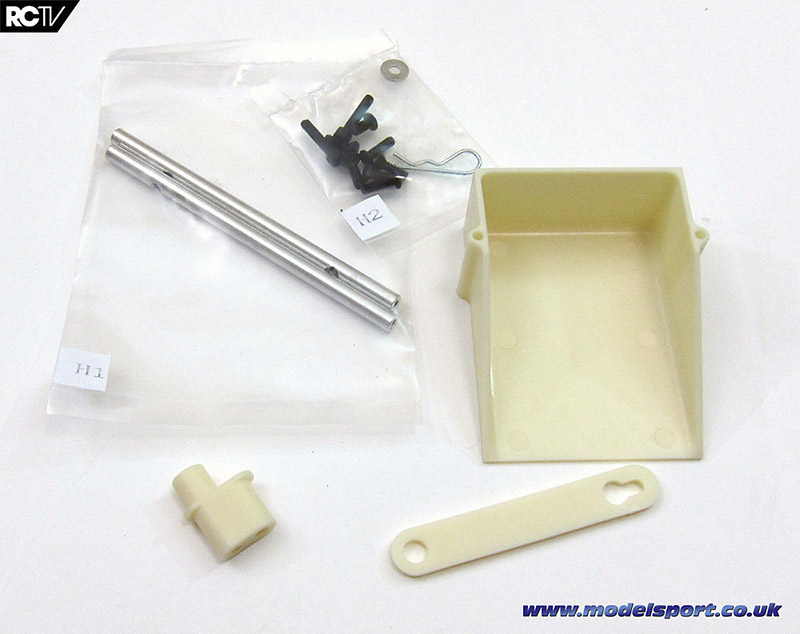
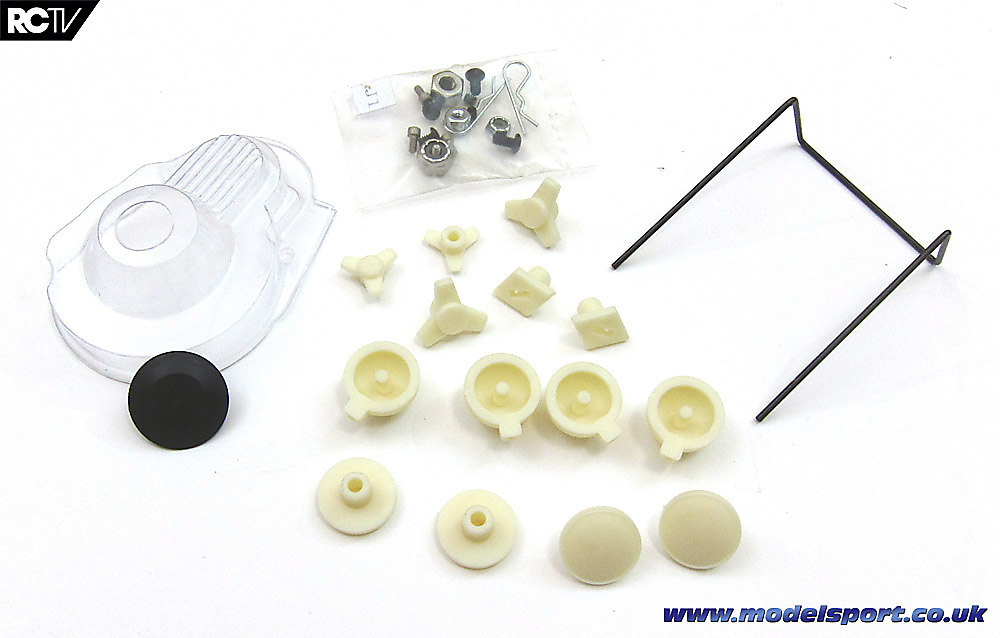
Bag H has the battery holder, antenna tube mount, nosepiece braces and the strap that goes across the battery box to hold the battery in. Not hugely exciting but essential nonetheless!
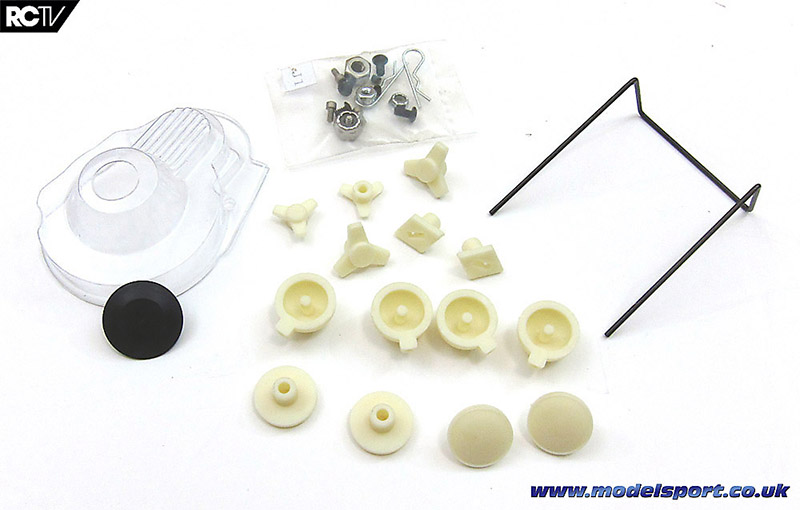
Ah here’s some exciting stuff! The spur gear cover, the wire wing mount, those classic knock-offs for the wheels (how cool were those?!) and…what are these? Yes! LIGHTS! Well, mock lights, to attach to the body. Sweet! …and wait a sec, what’s that in the bag – I think those are wheel nuts in case you don’t want to use the knock-offs. Pretty cool, if that’s the case! And of course the kit includes the wrenches to put those nuts on and off.
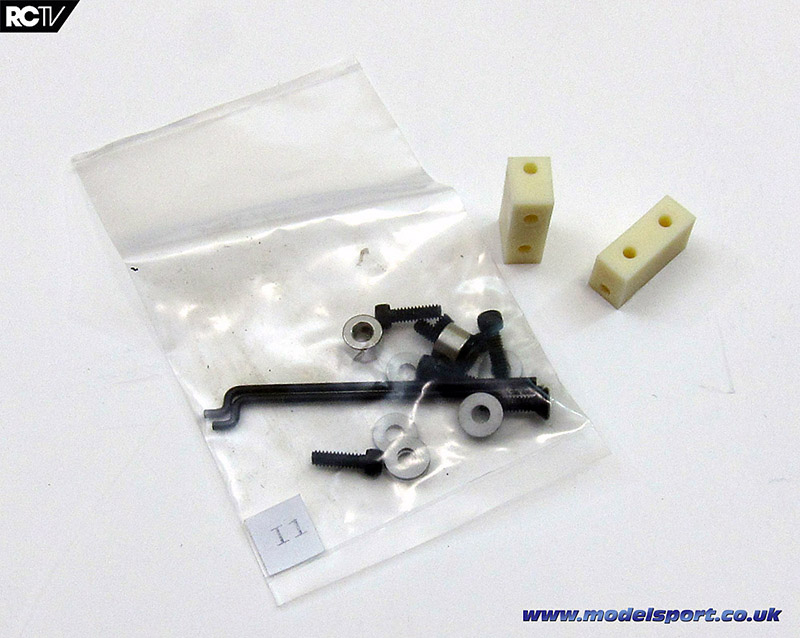
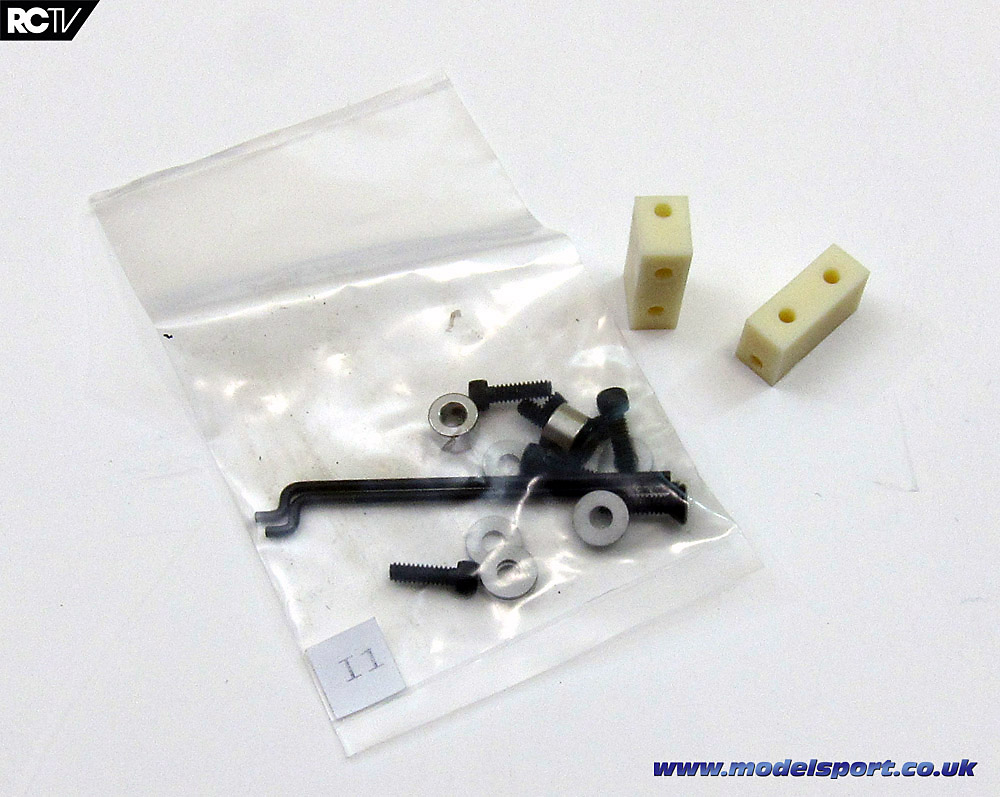
Ah. And we’re back to another not-so-exciting bag, with the servo mounts. If you are ‘of an age’ you may remember having to drill out the servo mount blocks to get your servo mounted in your car. That’s right – you bought tiny, solid blocks of plastic about the size of a 1×2 Lego block and had to DRILL YOUR OWN HOLES in the plastic. At least, I remember people doing that at my track. Either they were crazy or I’m insane.
And…oh wait that’s it. That’s all the parts in the RC10 Classic kit!
So what’s next? Well, we BUILD!
Page 2
Source:

|