|
Time for the driveline. The Tamiya TRF419XR is a 4WD Touring Car, using a dual-belt setup to drive all 4 wheels. The center bulkhead houses a Tamiya-pitch spur gear – that’s fine and all, however the mounting pullies utilize an odd 4-pin locator to key to the spur gear. This becomes an issue if you want to change spur gears; not all aftermarket gears have 4 holes in the locations needed for mounting.
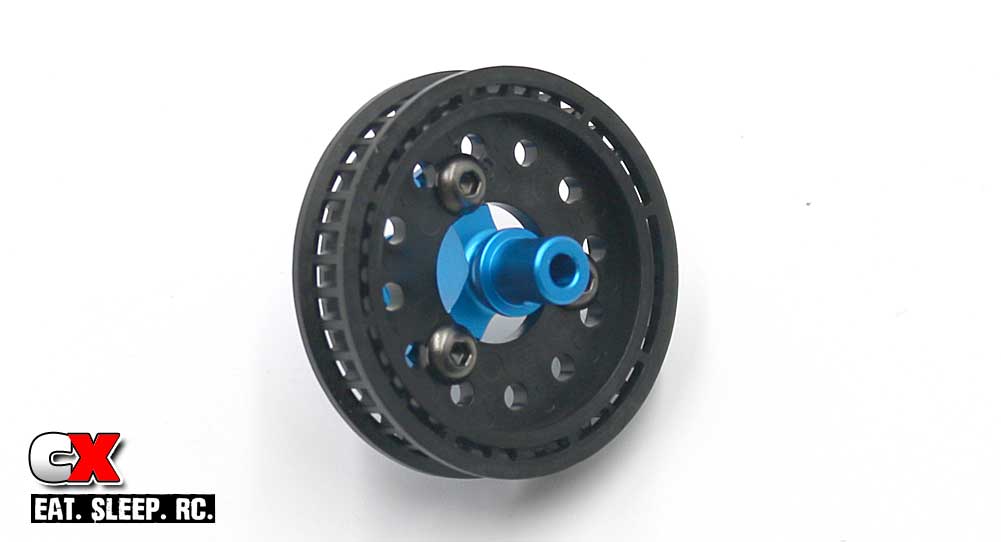
The gears I found that work are the Panaracer-Xenon gears. They’re available in a ton of different teeth counts and have the 4 holes in the desired locations for easy mounting.
Build Notes: There are a few steps that require shims to tighten up tolerances. Sometimes you’ll need them, sometimes not. Pay special attention to these so you don’t have to disassemble the TRF419XR later (like I did).
Belt tensions are critical on this car to make sure one end isn’t over-driving the other. I’ll point this out in the steps below.
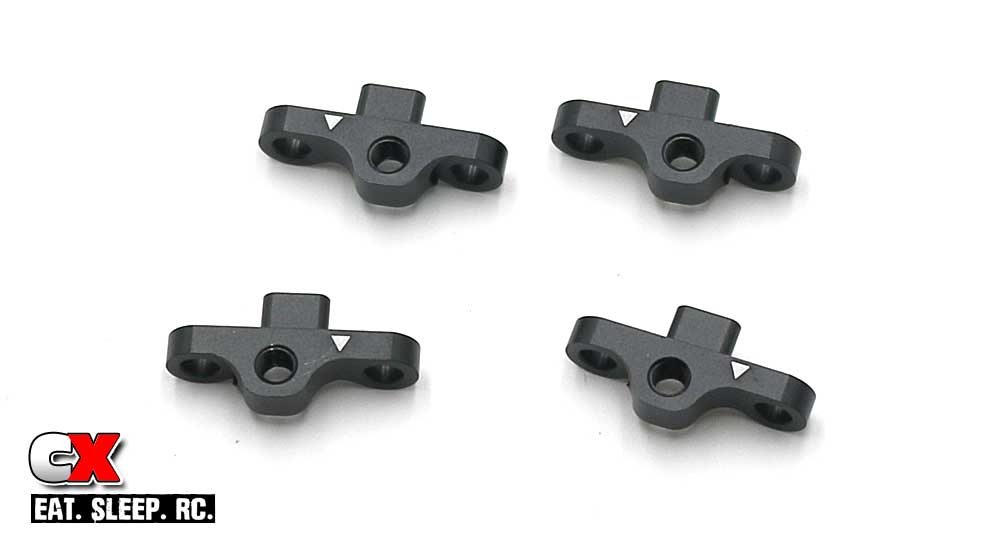
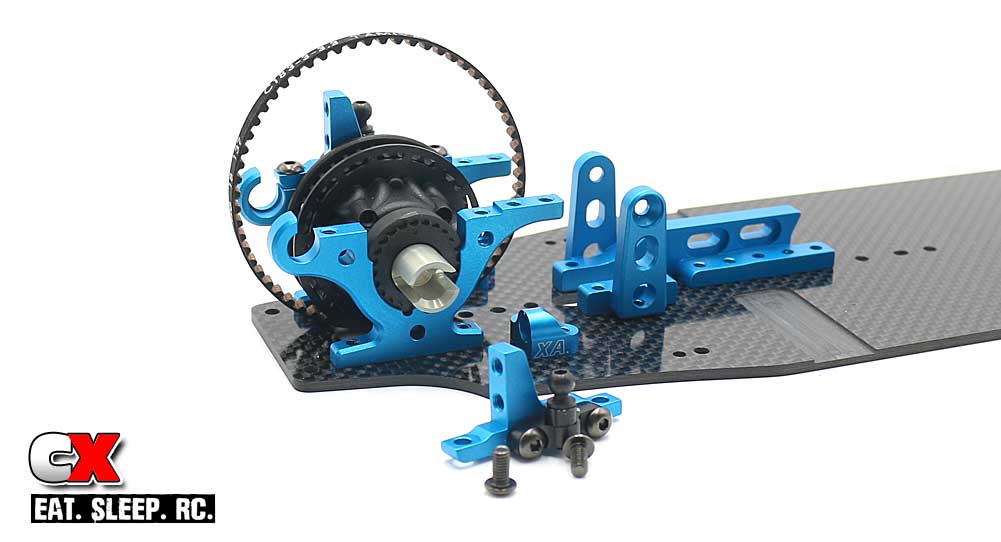
Step 1: Before we start building, you’ll need to recognize the parts used. Some look similar so you want to make sure you don’t mix them up.
These are the Upper Arm Mounts. Note the differences between them; one mounts on the right, one one the left. The little white arrow will help designate which side it mounts on.
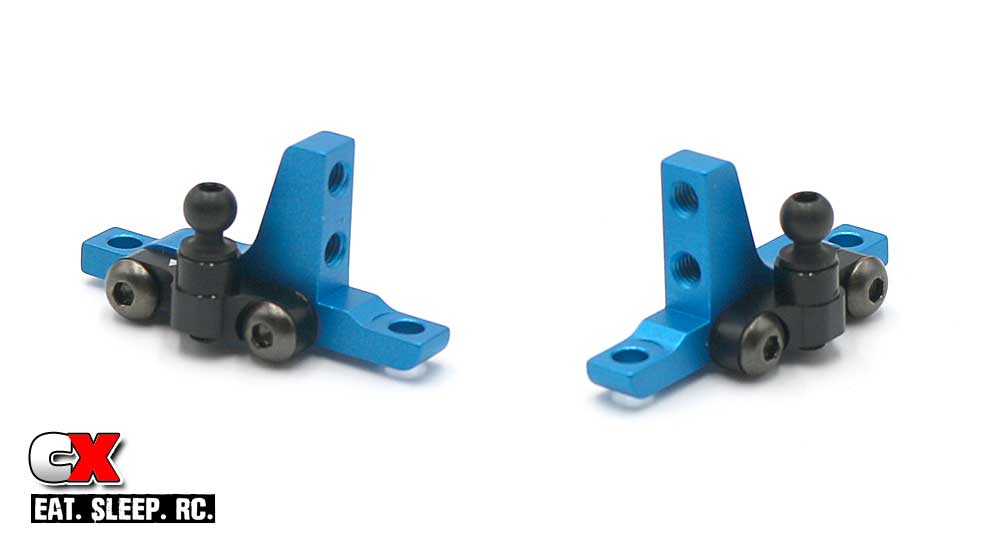
Step 2: Build a left and right upper bulkhead. Note the arrows for the Upper Arm Mounts in the manual.
Step 3: Install a bearing and cap onto both sides of the rear differential.
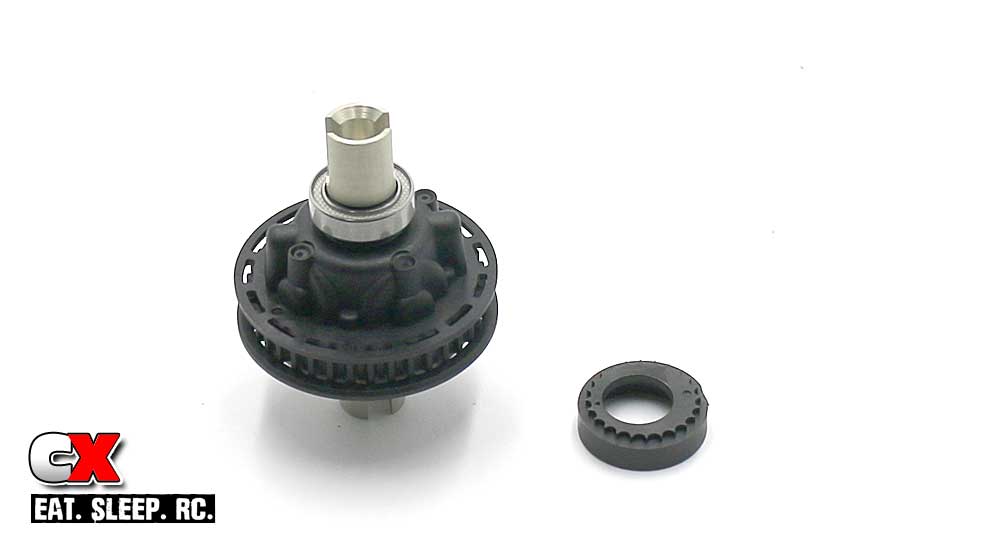
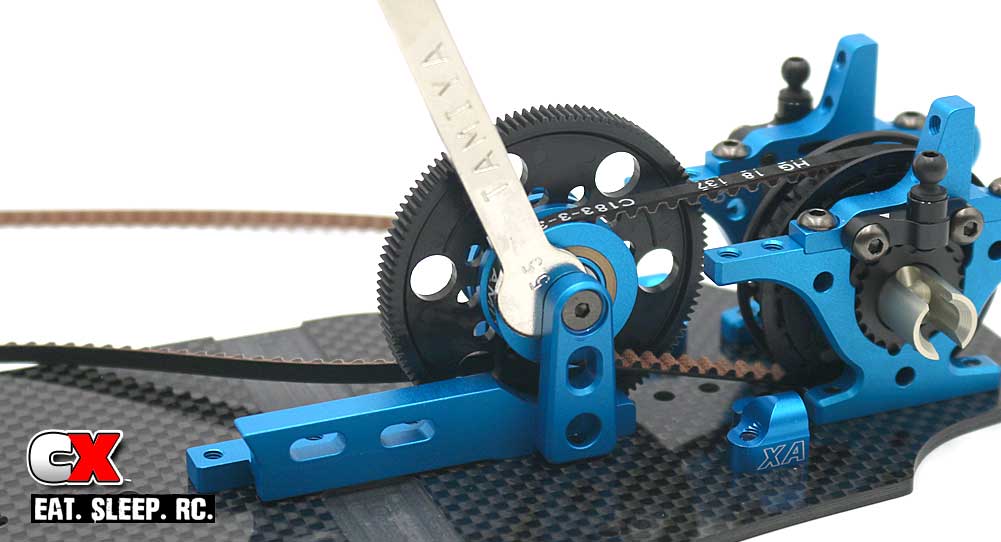
Step 4: Wrap the rear belt (small one) over the diff and drop that assembly into the bulkheads. The manual shows the key point being straight up; I clocked mine forward 2 notches for a slightly looser belt. Capture the rear diff with the Upper Bulkhead assemblies from Step 2.
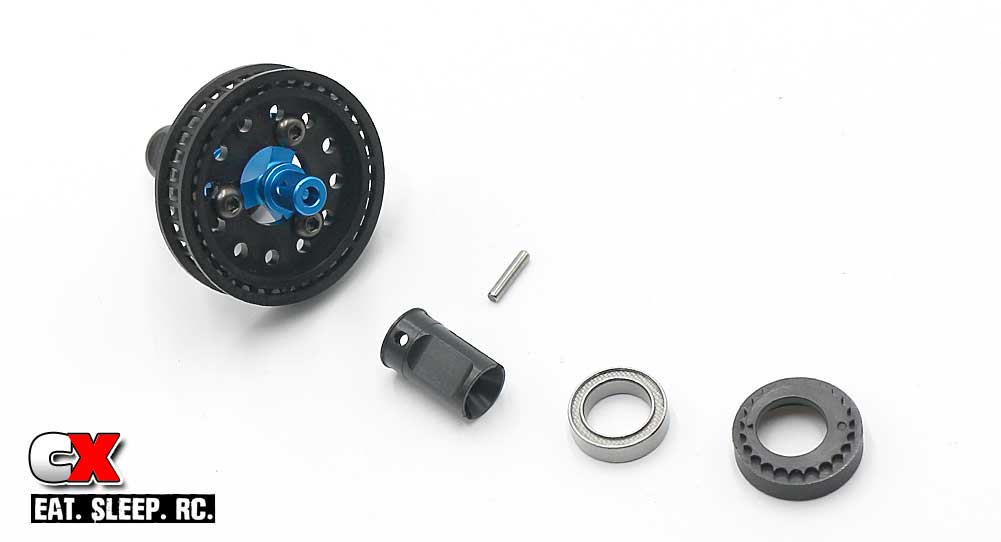
Step 5: Slip a .2mm shim and flanged bearing onto the center shaft followed by the main drive pulley.
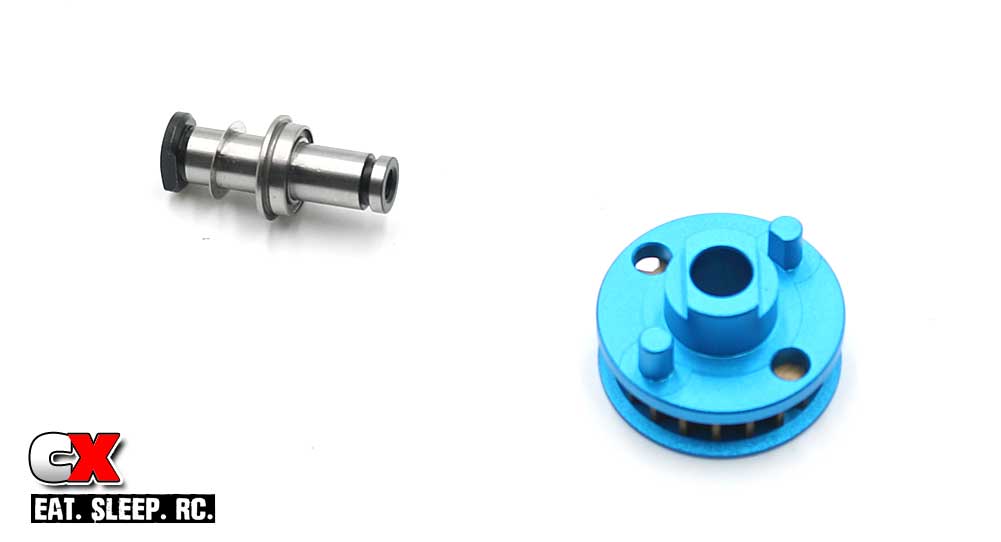
Step 6: Key the assembly from Step 5 to the spur gear. Key the second drive pulley to the spur gear, then slide another flanged bearing and .1mm shim onto the center shaft and use the 4mm e-clip to capture it all.
Here is where you’ll need to experiment a little with the shimming. With this setup (on the stock gear), there was a little bit of spur gear wobble. After replacing the gear with one of the Panaracer-Xenon gears, I was able to remove the .1mm shim altogether.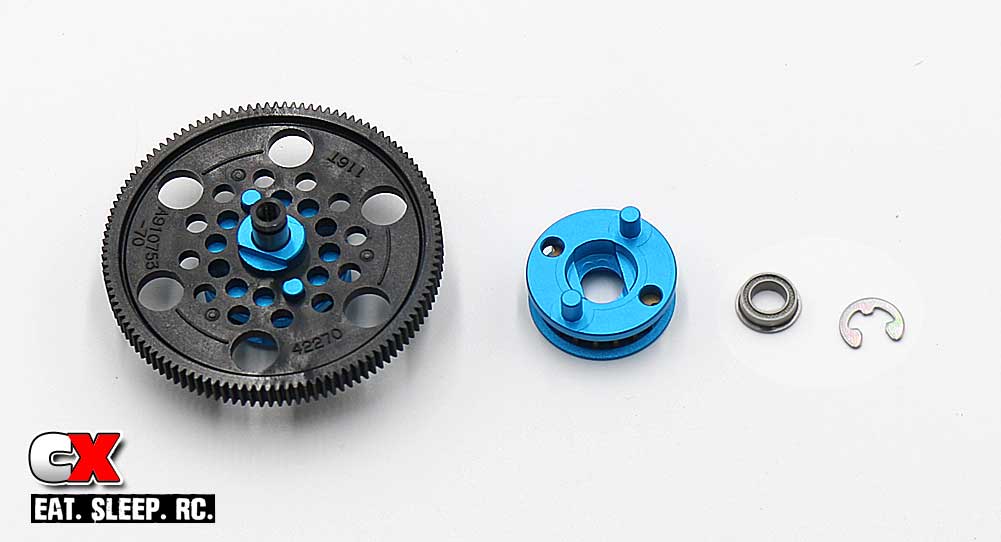
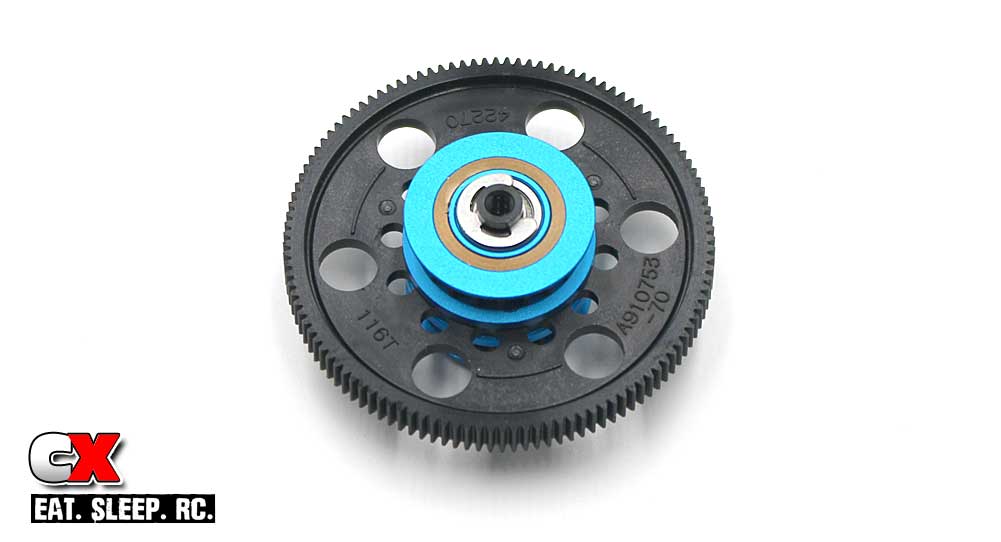
Step 7: Your completed center shaft/spur gear assembly.
Step 8: Slip the long, front belt and rear belt over the center shaft assembly and drop between the motor mount. Using the included wrench, hold the center gear assembly in place while you insert the two 3x8mm screws. A very light dab of blue threadlocker is suggested here.
Step 9: Build a pair of front Upper Bulkheads. Like the rear, pay attention to the white arrows during assembly.

Step 10: Assemble the front spool.
Step 11: Slide the drive cups into place, secure with the drive pin and hold that in place with the large bearing. Press the cap onto the bearing.
Step 12: Slip the front drive belt over the spool assembly and drop into the bulkheads. Again, the manual shows it keyed straight up and down; I clocked mine back 2 notches to loosen it up slightly. Secure with the Upper Bulkhead assemblies from Step 9.

Boom – driveline done! Give the belt a little pull to make sure everything moves freely. You may need to adjust the belt tension slightly after the first couple of runs.
Let’s move on to Step 4, the Steering!
Use the links below to follow each step.
Tamiya TRF419XR Touring Car Build – Opening Page
Tamiya TRF419XR Touring Car Build – Part 1 – Chassis/ Bulkheads
Tamiya TRF419XR Touring Car Build – Part 2 – Rear Differential
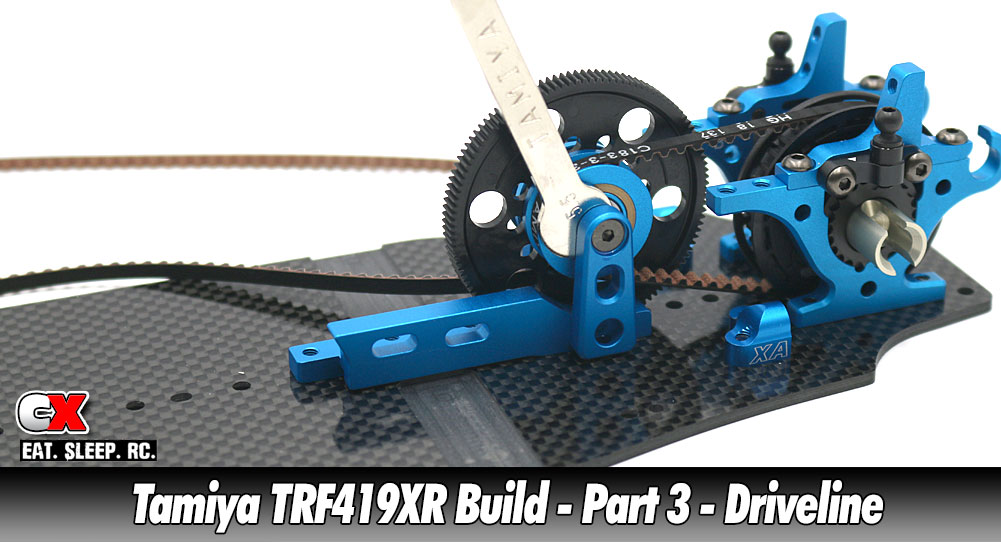
Tamiya TRF419XR Touring Car Build – Part 3 – Driveline
Tamiya TRF419XR Touring Car Build – Part 4 – Steering
Tamiya TRF419XR Touring Car Build – Part 5 – Suspension
Tamiya TRF419XR Touring Car Build – Part 6 – Anti-Roll Bars
Tamiya TRF419XR Touring Car Build – Part 7 – Shocks
Tamiya TRF419XR Touring Car Build – Part 8 – Final Assembly |
