|
- How to build a A800 and a few tips -
Here you can find the manual for download
Step 1:
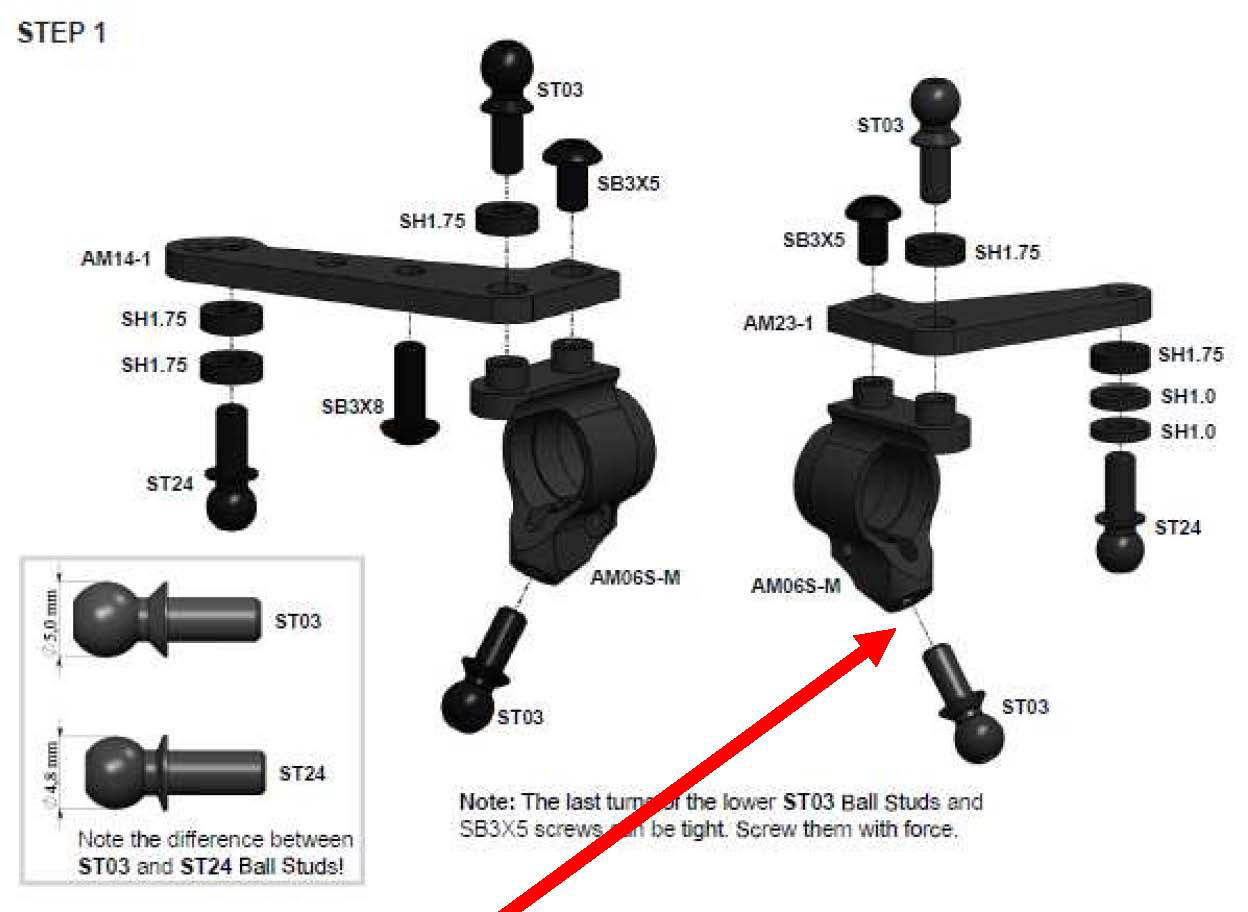
You can also use shims under the lower ST03. This will change quite a lot of things at the same time -> the car gets wider, droop changes (if you measure at the lower arm), rollcenter,...
The angle of ST03 is ~45° in the AM06s -> if you ad d 1mm under ST03, your car will become ~0,5mm wider (each side) and you will have to change your droop setting about 0,5mm.
Why? -> you change the distance between the lower arm (point where you measure the droop) and the axle of the wheel, so just make sure to keep that in mind if you change this setting.
Step 2, Driveshafts:
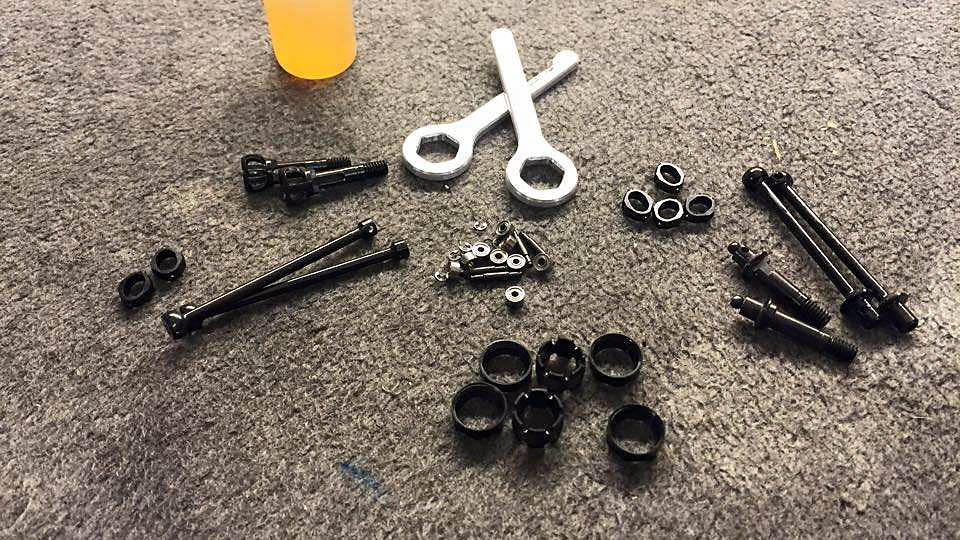
For the front driveshafts I recommend the use of ST17-1-S. With these the front driveshaft becomes nearly indestructible.
I also use UB1 (the small bearings) on all shafts. Makes suspension movement under load of the driveshaft smoother.
For lubrication you can use Spec-R Joint grease or some other oil.
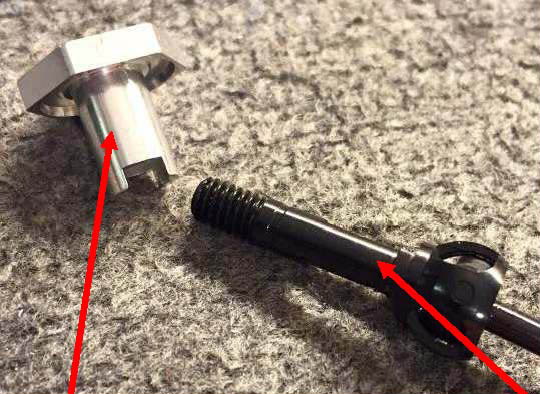
The rear driveshafts ST02 might need some grinding. The fit between ST2 and AT13 is sometimes too tight. You will be able to assemble the driveshaft and everything will be nice and smooth, but as soon as you try to put on the bearing or AT13 your driveshaft will be locked.
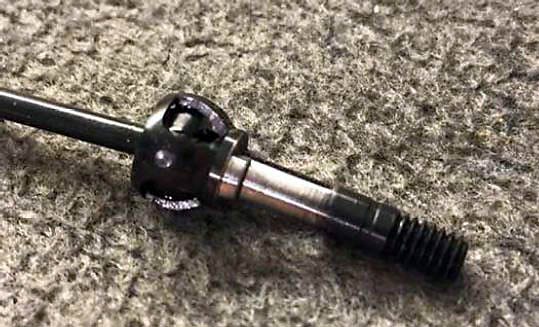
If this is the case, put ST2 into an electric drill and use some sanding paper or a small file to grind away (5/100 mm) some material of ST2. This is no problem for the concentricity of the wheel, because this comes from the fit of AT13 in the B106RS bearings.
Due to the fact that the steel is very high quality, this might take some time and for sure it's no fun.
Another hard to mount part might be P16, the small plastic ring that keeps the driveshaft in place. Best way for easy assembly is to use a wheel spacer and the nut of your setup system.
Step 5, Suspension:
| In Step 5 you have to mount the hub to the arm. Just make sure you don't overtighten the screws in P04. Please check that everything is running nice and free, this can be easily adjusted with the 2 small screws. |
|

|
Step 6, Shock assembly:
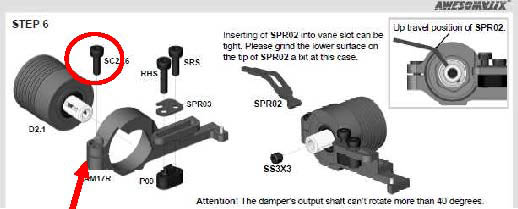
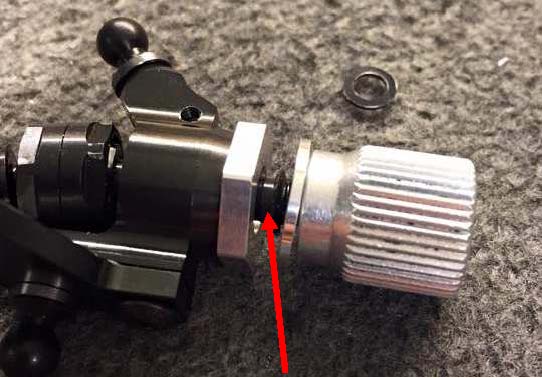
When mounting the shock assembly, please make sure you don't overtighten the SC2x6 screw that clamps the shock housing. With this screw you can apply such a high force to the housing that the B85 bearing in the shock gets stuck and the damper doesn't work correctly. You can check this by just holding the shock assembly in your hand (without spring and ST05) and putting a small weight (5-10g) on SPR02. The damper should start moving easily, without binding. Clamping of the housing doesn't need a high force, so don't be surprised if you only can use a very low tightening torque on the screw....
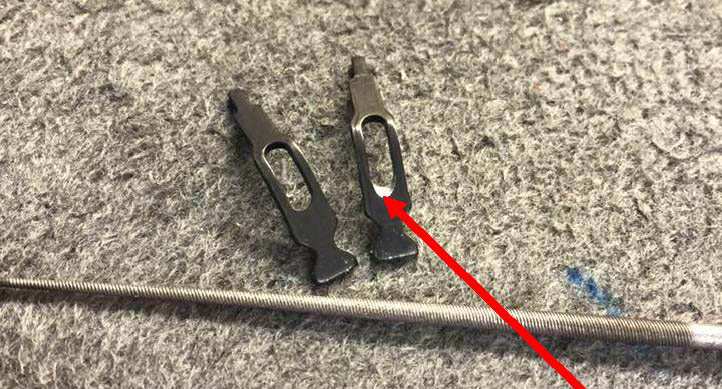
SPR02 also needs some grinding, you should make a small chamfer on the inside. This can be easily done with a small round file. It will help to prevent SPR02 from getting bend during a crash.
The Chamfer should be big enough that ST05L gets contact with the shaft of the shock.
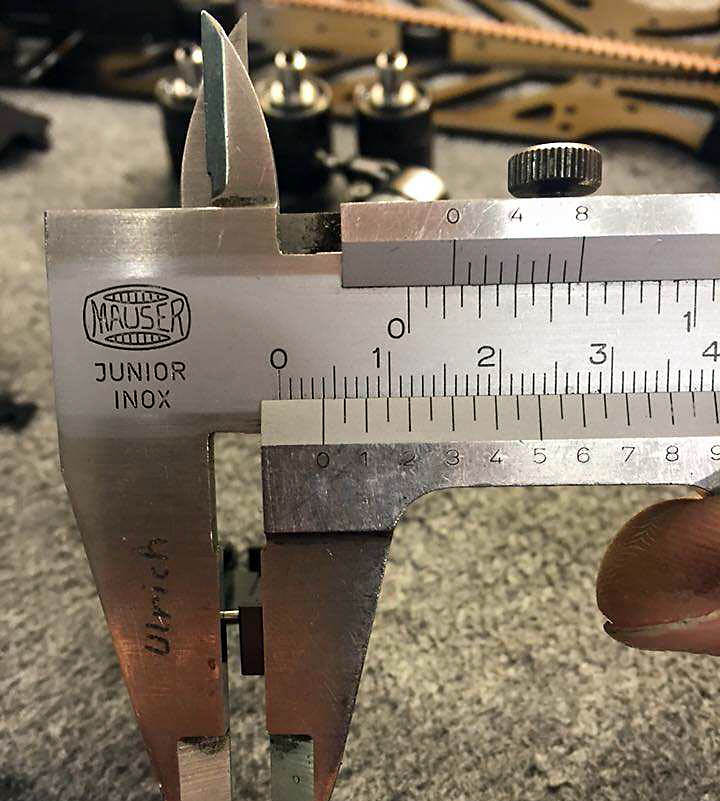
Before building the shock into the car you should check that the pin that holds the spring is no longer than ~3,8mm. Otherwise it might be hard move the shock in the car because the pin touches AM88.
(And please don't ask who this guy named "Ulrich" was...)
Step 7:
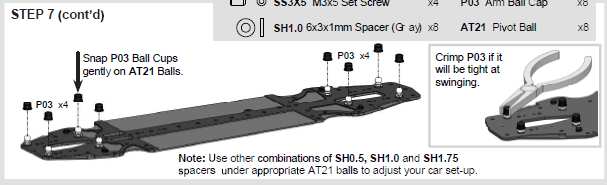
Please check the fit of your P03 in the arms before pressing them onto the AT21 balls. It's important that P03 fits super easy/sloppy in the arm, because it will widen up as soon as you press it onto AT21. Always press P03 onto AT21 before you mount P03 into the arm. Otherwise you might damage P03.
To press on P03 you should use something flat and press from the top. This needs quite some force.
Step 8, Bulkheads / Motormount / Stiffener:
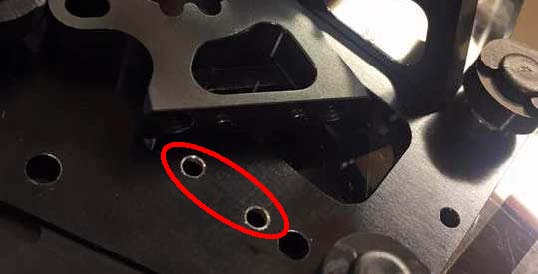
When mounting the bulkheads and motormount to the chassis, please use a reamer to make a very small chamfer on the small holes. The Pins on the bulkhead have a very small radius from milling, without the chamfer this radius might have contact with the chassis before the bulkhead is screwed fully tight and may not sit properly.
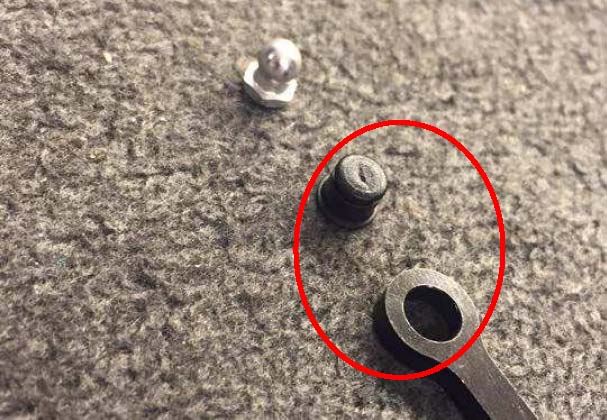
Step 9/10, Differential:
Some of the latest production diffs had a problem with 2 tolerance, which might make it necessary to make a small modification.
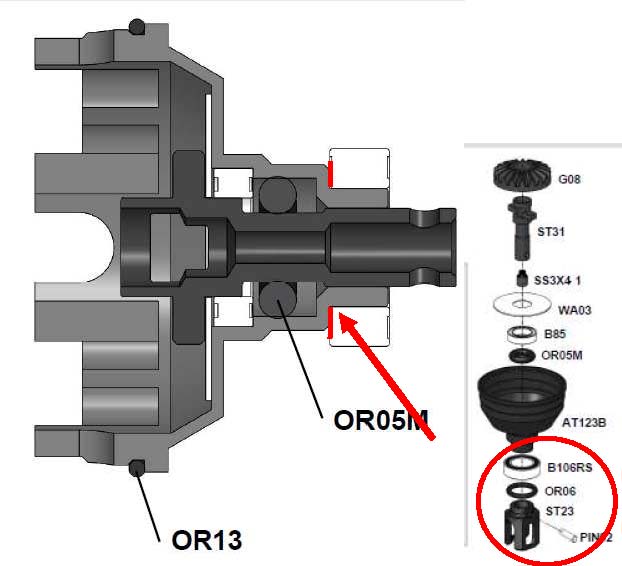
First of all, you can mount the diff like described in the manual, also with oil. But please check if PIN02 and ST23 can be mounted easily (on the "long side" of the diff) or if you need a high force to press in PIN02.
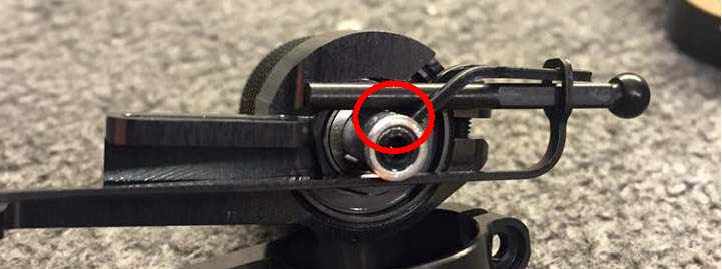
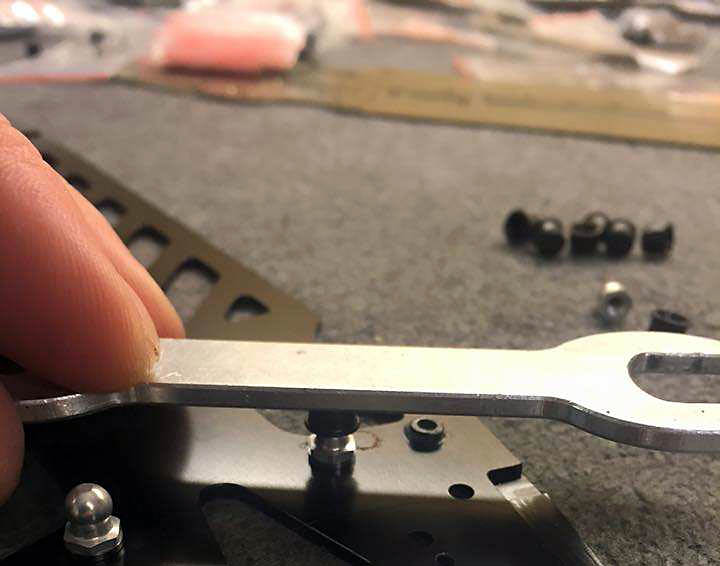
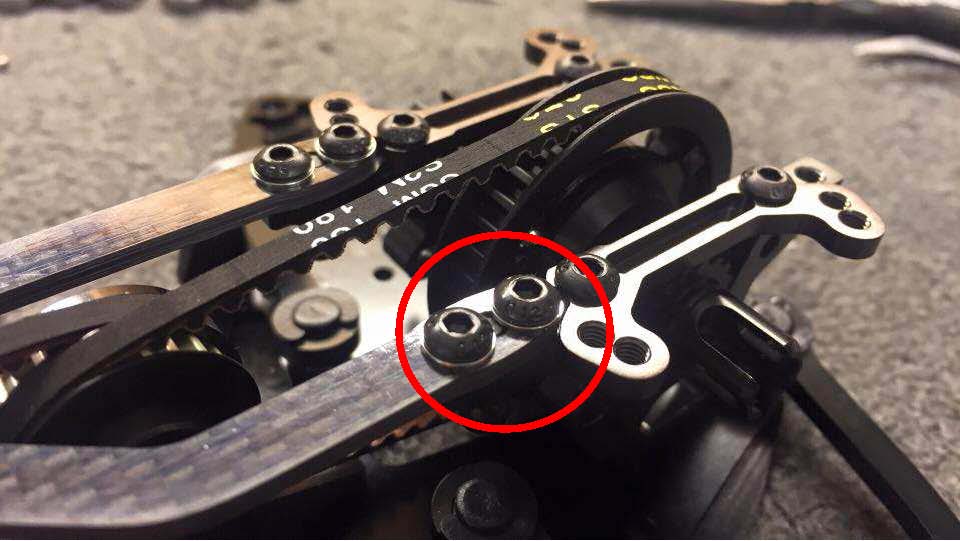
If you need a high force or it doesn't fit, remove the Outdrive ST23, PIN02 and the B106 Bearing. You need to grind of some material from the seat of the B106RS bearing (red marked area), so the bearing can move more to the inside. Problem is, the ST23 Outdrives presses on the inner ring of the bearing and the inner ring of the bearing gets pressed onto the housing -> everything is blocked.
After grinding of the material there should be a very small gap (~0,1 - 0,2mm) between ST23 and B106RS and everything should be running nice and smooth.
To keep the diff from leaking during driving you can use a trick. The reason for the leaking of the diffs is not a bad sealing, it's just the oil heating up and expanding during the heat. To avoid this, you can heat up the diff after building (before mounting the pulley) with a lighter (no joke). Just remove one of the 2 venting screws and carefully heat up the diff, this might take ~510s with a lighter. As soon as the diff gets warm (~50°C) the oil will start to come out of the ST31 axle. Just swipe away the oil and put back in the venting screw.
Step 16, Center pulley:
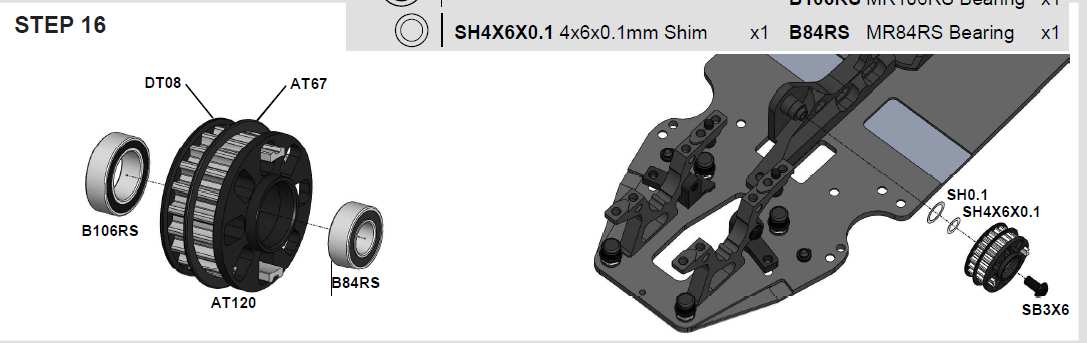
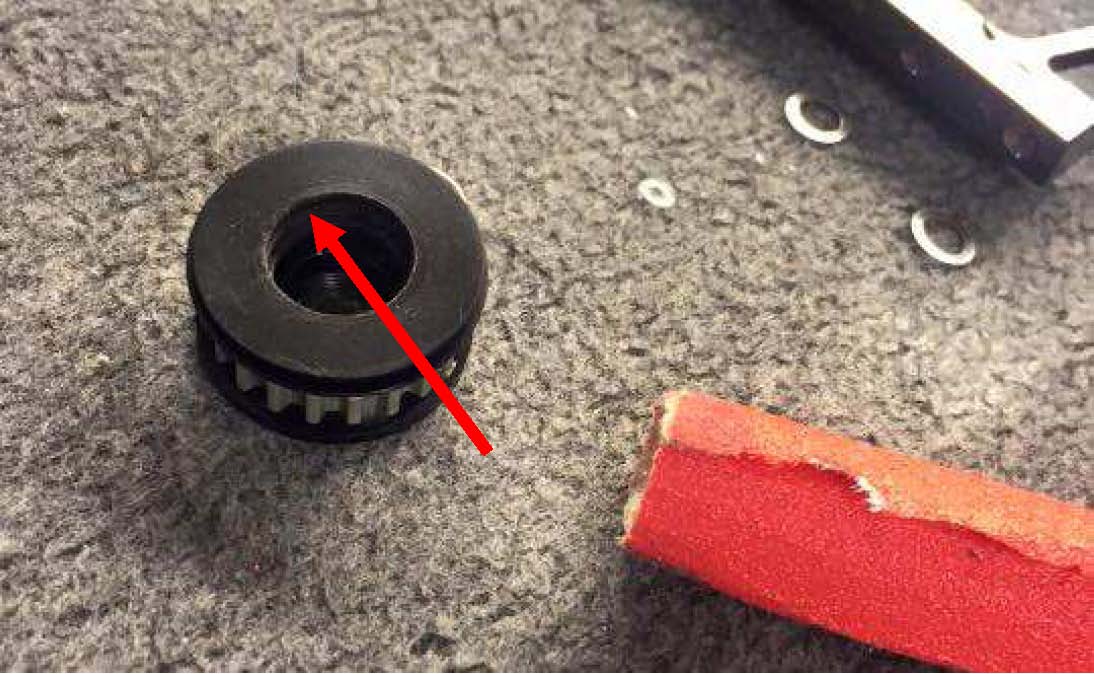
When you mount the center pulley, please make sure it runs smooth. Sometimes the fit for the B106RS bearing in DT08 is too tight. You can widen up the fit by rolling up some sanding paper and carefully grind of some material in DT08.
Step 20, Topdeck:
Please use 0,5mm shims under all screws -> will be easier to build the care "straight".
If you use the standard aluchassis, do not press down the chassis in the middle when tightening the topdeck screws, otherwise the car will be totally bend. This is due to the milling of the topside -> the chassis is not flat in the middle. You can press down the car at the bulkheads. The car will be straight.
Step 26, Upperlinks:
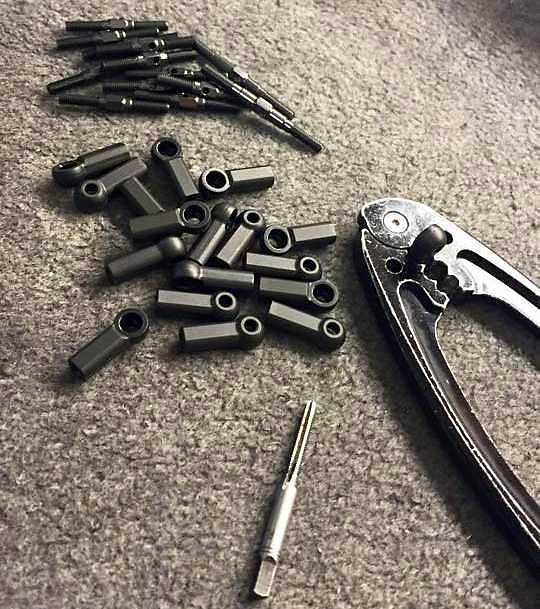
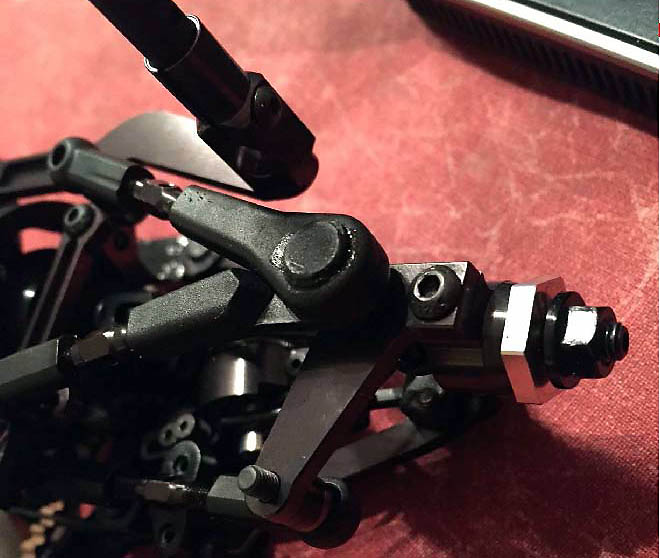
When mounting the top links, use a tapper to "precut" the thread in the ball cups, otherwise they will pop off every time you adjust camber/caster. Also use some oil when turning in the turnbuckle.
You only need to use the tapper on the inner ball cups, not on P01/P02. I always use the "left thread" on the outside. Please use a small amount of CA after installing the upper arms to the car for gluing P01/P02 together to prevent them from popping of in case of a crash.
|
