|
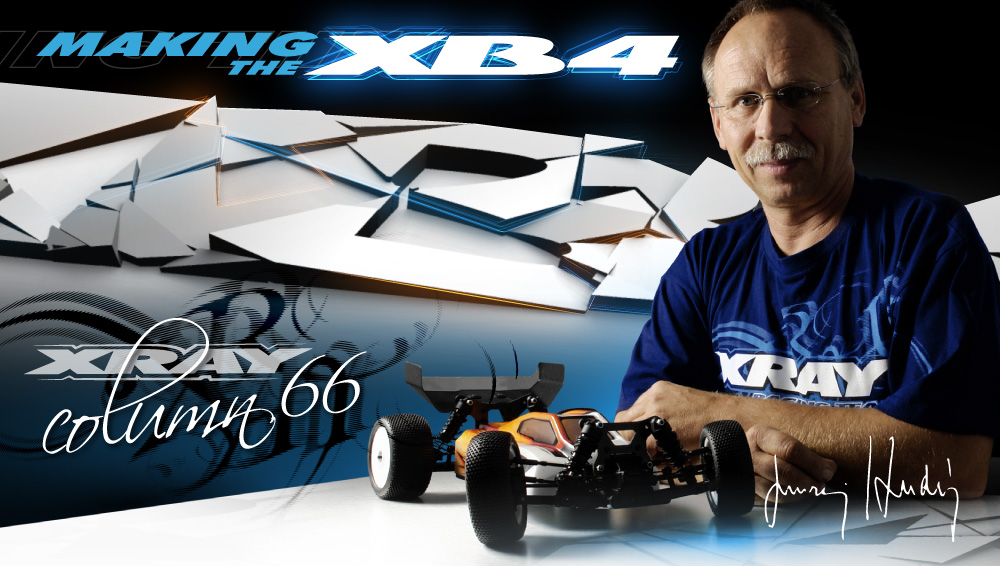
- Team Xray XB4 - Making Of -


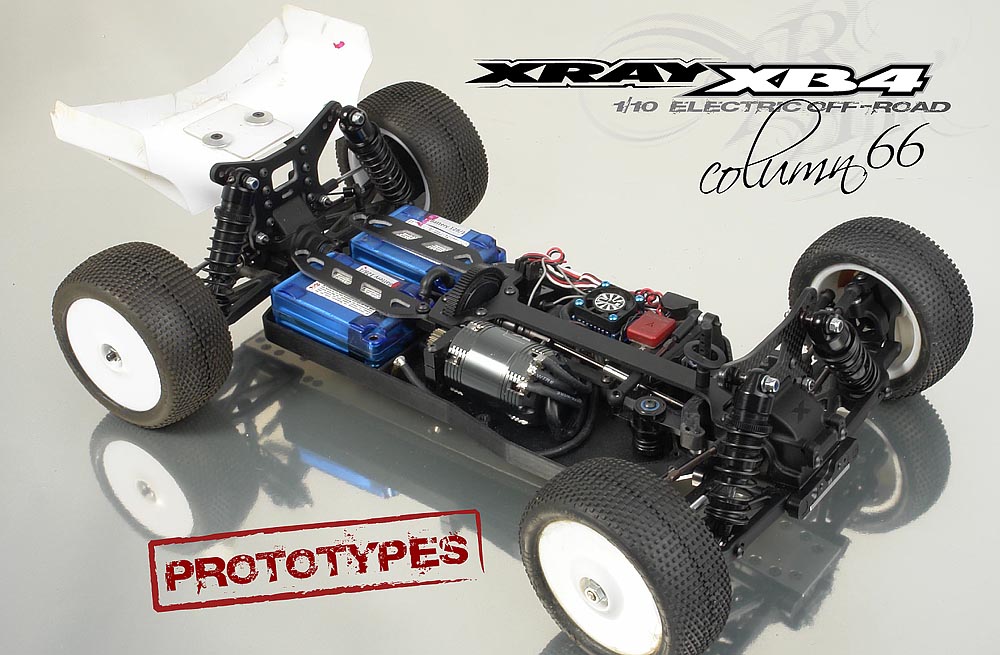
After successfully introducing the RX8 – which was 2 years ago – it was time to start working on the all-new platform for the category. Since there are very few categories left where XRAY does not have a car representing, it could be either a 2WD or 4WD 1/10 off-road; or both? Anyway, 4WD off-road got internal priority and was the first 1/10 off-road platform to hit the market. The project name at that moment was XB4, and since we have lived with this internal code name for more than 2 years it stayed on as the official product name.
For a designer, an all-new project is always the most exciting since there are no limitations from the previous versions … anything and everything are still possible. At the same time, an all-new project is also the most challenging one since you start from absolute zero and have no basis to build on, so logically an all-new project consumes the most time and resources. To start the project, of course I needed to gain some experience and do a lot of research and analysis. To have first-hand experiences you could have spotted me at various races where I have raced almost all cars available on the market. I have collected a lot of feedback and input from team drivers who have had previous experiences with this class and also I talked to many customers at the races. My goal was not to invent something radically new since as in all other classes the cars have undergone development over the decades and have evolved to a certain design stage. As such the logical plan was to start with the traditional design and to improve on all the possible details to raise the bar a step higher.
Despite 1/10 off-road being a completely new category for me, still it was a model racing car which has basic same concepts influenced by physics… and since our 1/8 off-road program has been very successful I had no worries that we would get something wrong with the new 1/10 category. Moreover, at that time I was working on the all new 1/8 off-road car, the XB9 platform, so many of the construction ideas and concepts were shared between the XB9 and XB4.
The basic goals I set to achieve were logical ones, and typical for any XRAY car:
1. No compromise, high-competition racing platform
2. Easy to drive, but fast
3. Easy to service
4. Typical XRAY quality and attention to the smallest detail
5. Reliability
6. Affordability
To design an easy-to-drive car but one that is fast enough to win races is a dream of every designer. Naturally like any racer, I would like to have the car which has plenty of traction, plenty of steering, good balance in the jumps, easy to control and forgiving of my driving mistakes. That would be a perfect car and these were the points I had planned to achieve, but in reality one trait always comes at the expense of something else so during the entire design process I faced plenty of dilemmas and difficult decisions.
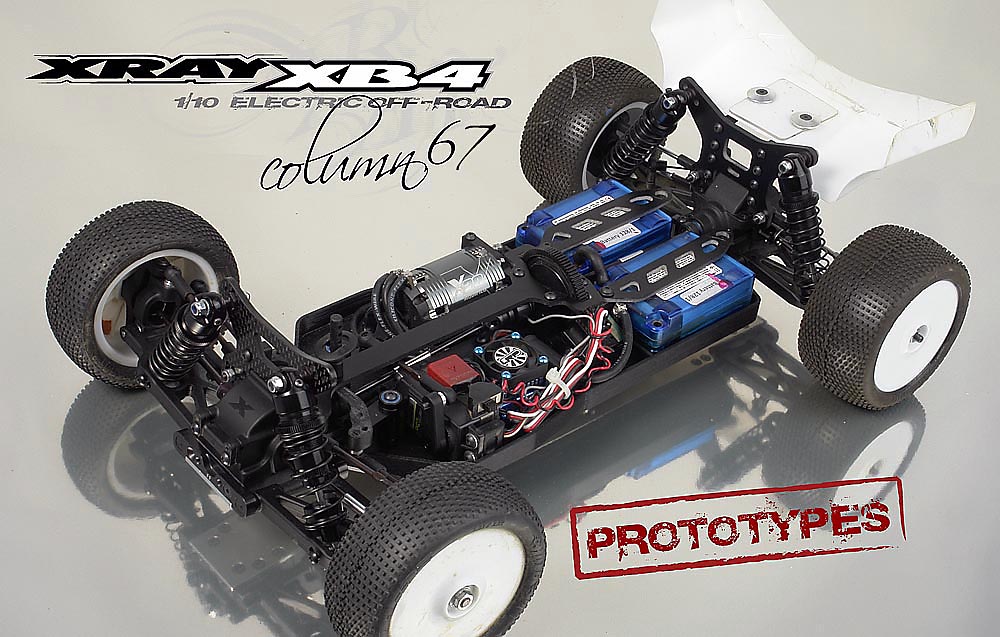
Drivetrain:
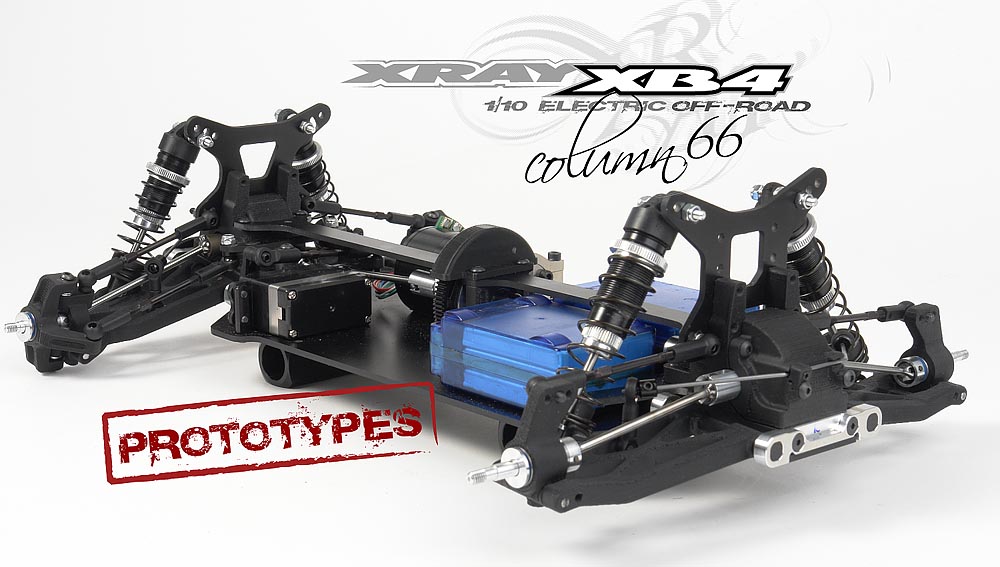
The first dilemma was to make it either belt or shaft driven. After some considerations the decision was very easy and clearly favoring a shaft driven concept. Why? In the past with brushed motors I would be considering a belt-driven car. However modern brushless motors are lightweight, higher motive rotating moments that are much more efficient during acceleration so the car is not pushed to one side. For dirt outdoor racing, the shaft drivetrain is more reliable and easier to service. So a shaft-driven drivetrain was an easy choice in this case.
Chassis flex:
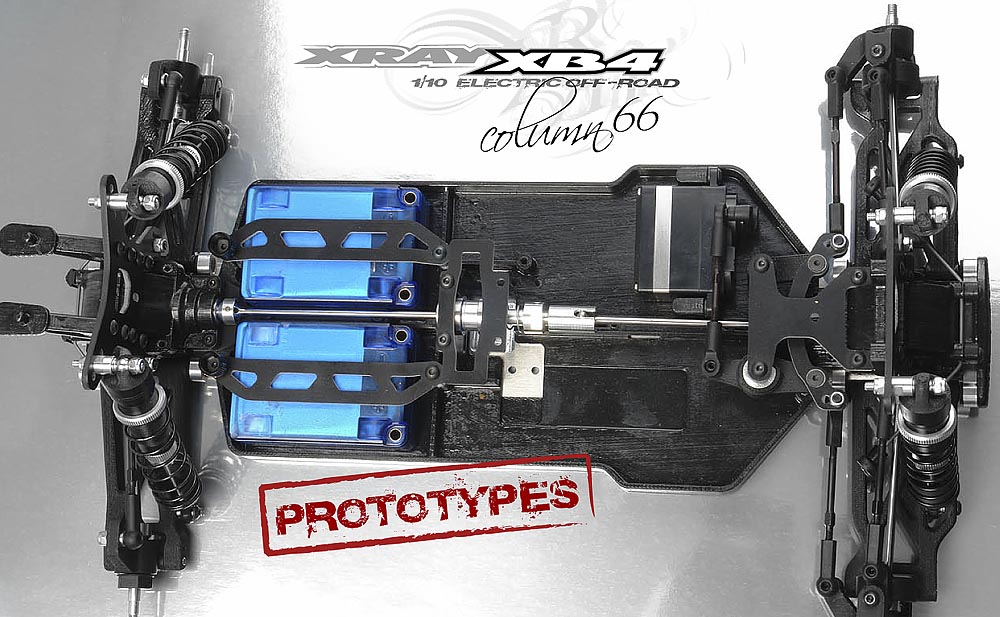
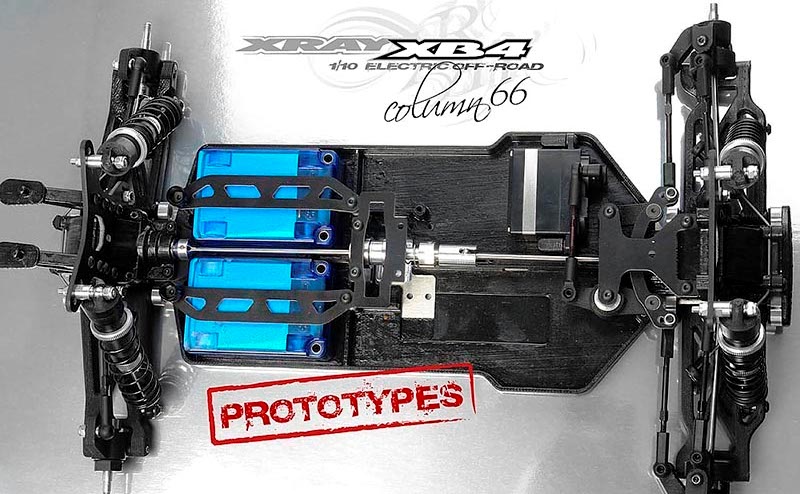
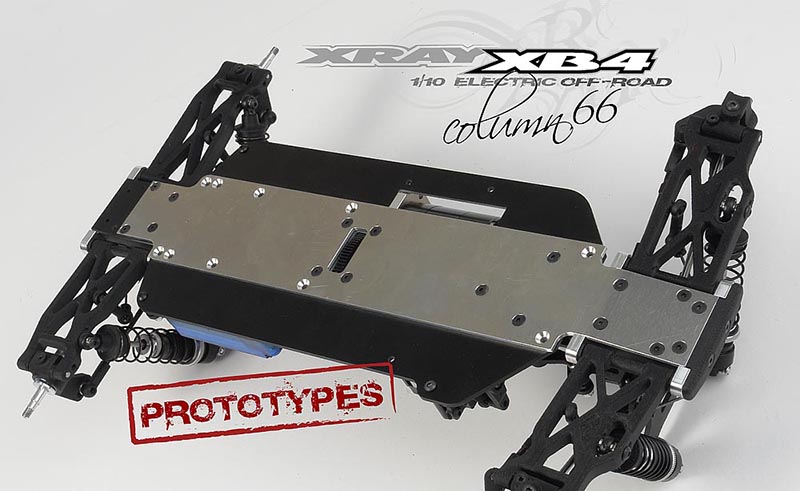
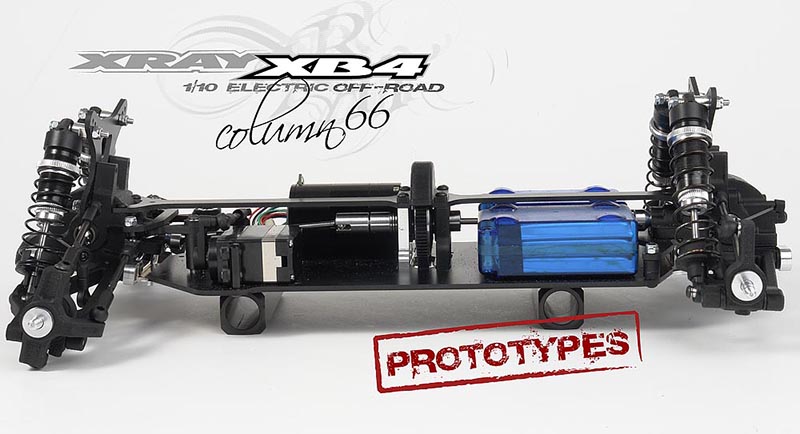
Those who have experience with other XRAY cars know that chassis flex has some of the most significant influences on handling and performance of the model cars, and that is the reason why in the design stage we give it such a high priority. With every XRAY car we incorporate the XRAY Multi-Flex setting possibilities which allow very easy and comfortable adjustment of chassis flex so the driver can easily adapt the car to different track conditions. Since the XB4 will be run both indoor and outdoor under totally different track conditions, it was even more important to incorporate chassis flex as a primary set-up feature. This was a real nightmare for me in the early stages, as I knew what I needed to achieve but had no idea how to do it. The super-high traction carpet tracks and low-traction dusty outdoor tracks are so completely different that it would be a real challenge to make one chassis to work on both. I could imagine a composite chassis with enough flex to generate traction, or a stiff aluminum chassis suitable for clay tracks such as in the 1/8 category.
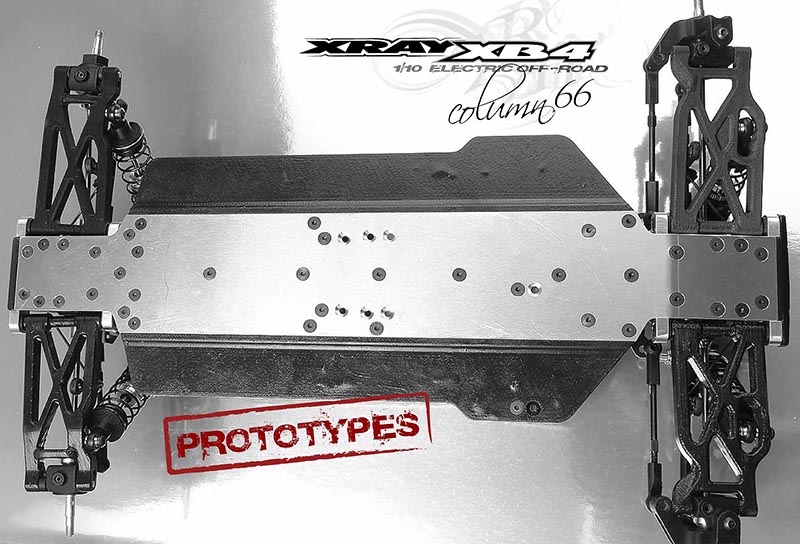
Being lost for while, I just decided to keep from my mind away from typical constructions and forget what was the class standard. I needed to keep an open mind and focus on what I wanted to achieve. Since I wanted ideally to use two different chassis type for two different track conditions, a quick idea flashed into my mind – why not incorporate both chassis and with Multi-Flex settings let the driver adjust the chassis flex as required. So in short, build a chassis from two different chassis which would be used at the same time be able to be adjusted for different traction conditions. For high-traction tracks the Multi-Flex would be set as stiff as possible, while for low-traction conditions the Multi-Flex would be soft to allow the chassis to generate traction. For any conditions in between, Multi-Flex could be adjusted to medium stiffness. The composite chassis would also be great for absorbing energy on very bumpy tracks, which would help stabilize the car. And finally with this idea I could have all the electronics placed in a composite chassis that would be “unsprung” from the main aluminum chassis.
At first thought this sounded like a great and innovative idea, but the moment we hit the design board plenty of related design problems hit. The main problem was how to allocate all the internal parts of the car into the composite chassis, and how to position all the parts so the car had proper side-by-side but also front-to-rear weight balance.
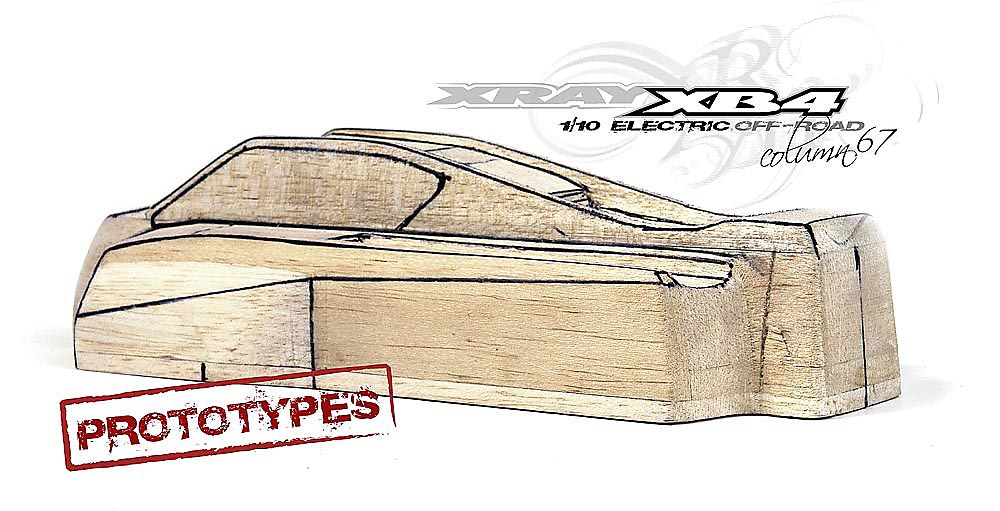
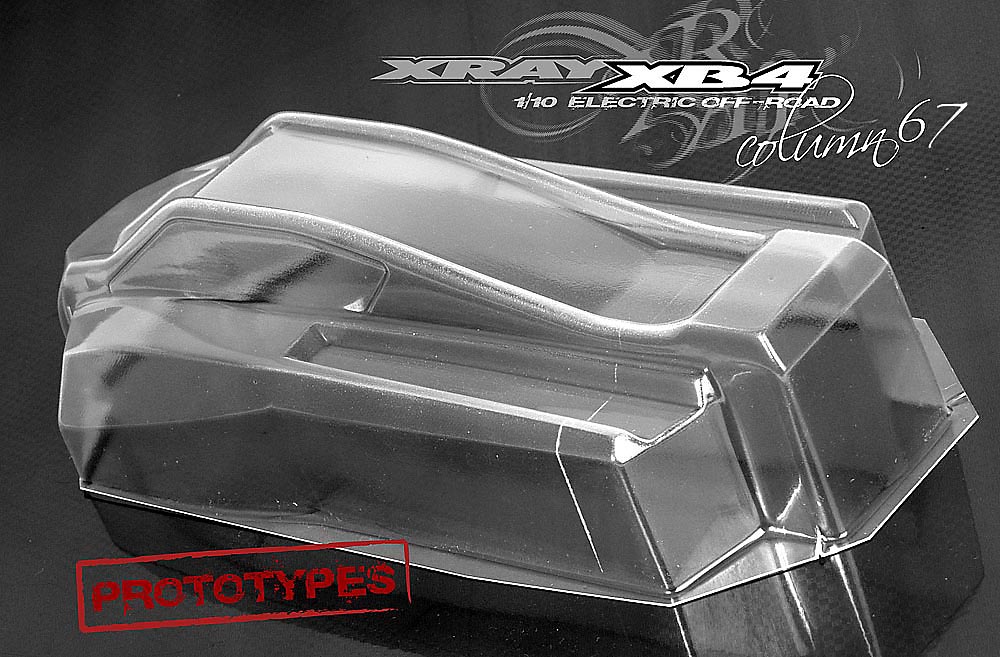
Fighting with every millimeter of space in the chassis, we prepared several different chassis layouts from which I choose my favorites. From those we made rapid prototypes to see and feel the product in real life.
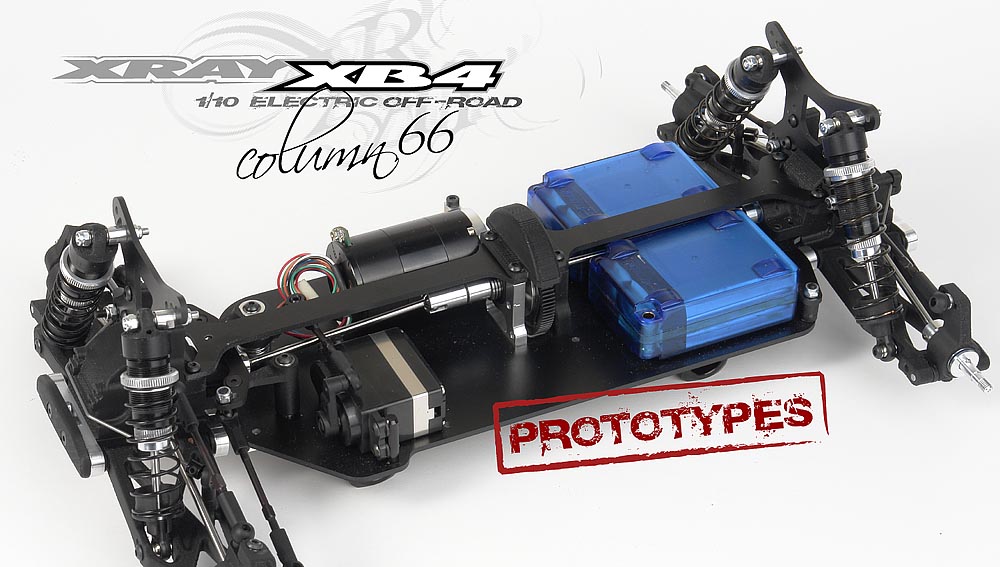
Motor position:
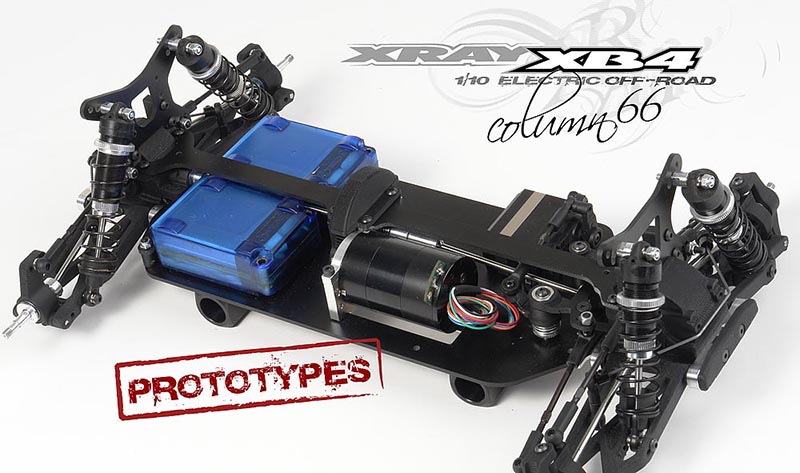
Despite seeming to be an insignificant detail, the opposite is true. The position of the motor – whether it be in front, middle, or rear – influences the rotation of the car in the corners and provides different handling characteristics. After extensive consideration, I decided for a middle-motor position which gives the car neutral rotation in the corners.

Weight balance:
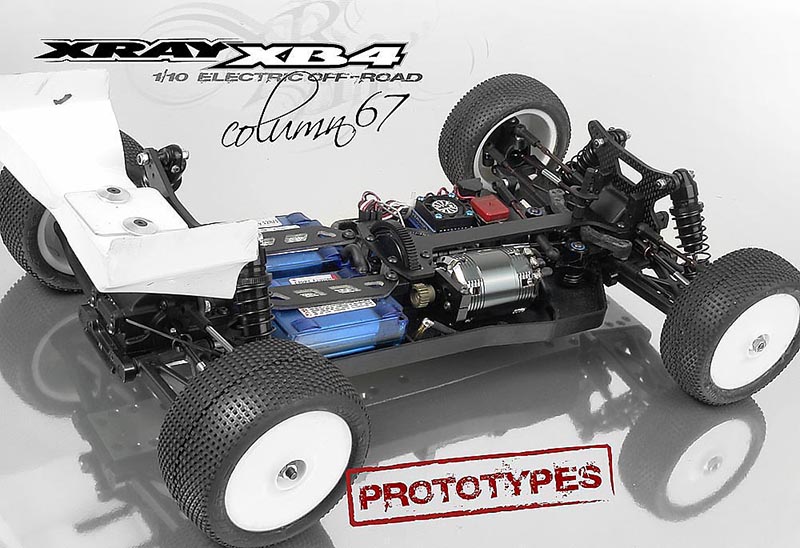
This feature has very significant influence on a handling of the car, especially in off-road with a lot of jumping, and I did not want to make any mistake here. Of course the weight balance possibilities were directly related to the chassis design, so while designing the chassis I had to keep in mind the influence of weight balance too. As a first stage, I needed to decide whether to use a single battery pack or saddle packs. This was a dilemma I was fighting with for some time. Using the single pack allowed the battery to be placed in the chassis centerline for perfect side-by-side balance, but since I already decided on a shaft drivetrain it would mean that the rear drive shaft would have to be above the battery. Moving the rear drive shaft above the centralized battery would also mean that the center slipper clutch and rear diffs would have to be moved higher giving a higher CG. It is true that the upper shaft position gives the car more rotation but for me this rotation is not natural and is kind of forced, which in my experience decreases the stability of the car.

After some consideration I decided on a saddle pack configuration as the current LiPo batteries are much lighter than previous types so the negative effect of more weight on the sides is balanced by the positive features which is that the central drive shaft could be positioned between the saddle packs and be ultra low (along with the center and rears). With a lower slipper clutch position, the rotary moment from motor is also as low as possible which is great for handling of the car. The lower motor position requires using smaller spur and pinion gears, but this was a tiny issue I could live with easily.

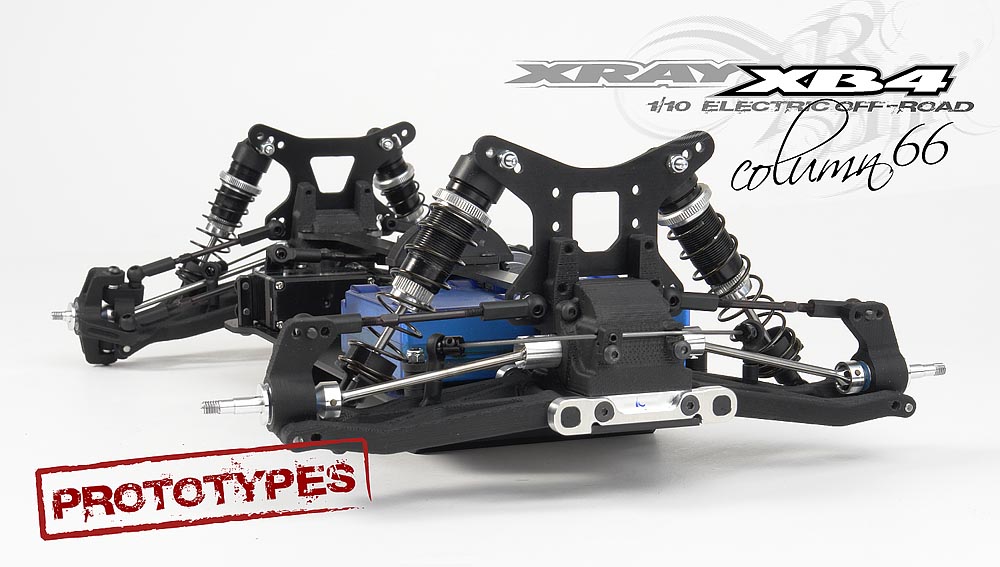
Suspension geometry:
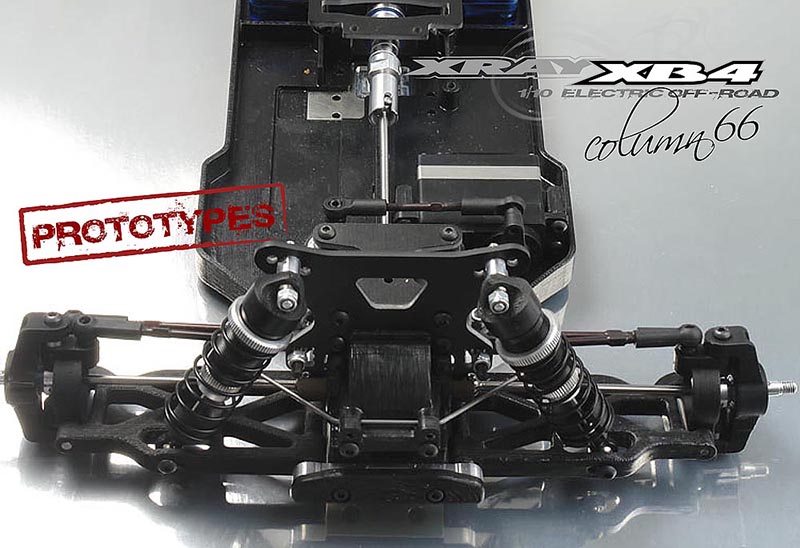
I know this will sound repetitious, but believe me the suspension and its geometry are crucial for good handling and performance of a model car. I was not afraid to search for best composite mixture, as we already have so much experience on that. I narrowed the choice of mixtures to a very few to be used for final prototype testing. I was more concerned about the suspension geometry. At that time I was working on updating the XB9 suspension and so I decided to follow the same pattern and use the same concepts for the XB4 platform. So yes, you will notice that the suspension of the XB4 and XB9 are very similar. The suspension has very easy roll center adjustment which is crucial for quick set-up changes, easy change of roll centers on steering blocks and uprights, and of course similar steering linkages and associated Ackermann positions. Like on the XB9 I used the very useful rear upright lower roll center position, which allows super-fast changing of the roll center by simply moving the suspension pin to a different hole. In conditions when I need the car to be more stable and have more traction, I move the roll center pin to outer position; on the other hand when I need more rotation in the corners (like on carpet tracks with high traction) I simply move the pin inside. In only a few seconds you have completely different handling cars.
Differential:
With very good experiences with the gear diff in the T3, I decided to use the very same construction for the XB4. To be honest I did not even consider a ball diff at all. The only worries I had were for the main crown gear. To avoid problems we made the crown gears a bit larger with larger teeth module so the gear mesh could be adjusted easily and provide maximum free engagement of the teeth. With the higher dimension of the gear, we decided to go for a very special composite mixture which will have the lowest weight to compensate for the increased size. So in the end the gears will have a very low rotating mass.
Drivetrain:
To keep the lowest possible weight and guarantee the longest lifespan, there was no other option considered than to use HUDY Spring Steel™ for all drivetrain parts to keep the lowest weight while still keeping the strength.

Wheels:
This seems to be a very simple part, but this was another dilemma for me. There does not seem to be an industry standard when it comes to wheel mounting in this class, so I had to make the choice on my own. I really do not understand why still some cars use a shim with pin to mount the wheel. For me the hex wheel mounting like on 1/8 off-road or touring cars seems the most logical and I did not consider anything else at all. Especially when I knew that I would want to use different offsets for fine set-up at the different tracks, there was in the end no other choice than to use a hex wheel mounting. To make the wheel mounting strong, reliable and safe I choose the 14mm hex and adjusted the wheel accordingly.
Since I had already prepared the outline of the second part of “Making the XB4” I will use this column to finish the story. Since a half of 2013 is nearly already behind us, I will give a brief analysis of this year in the next column and as already disclosed we have been actively working on the new XB2, so a few more details may be disclosed too. You’ll just have to wait a little bit.
As with all other all-new cars, the XB4 has undergone the following development and production phases in our XRAY workflow:
1. Design and construction
2. First prototype production
3. Implement changes based on prototype build
4. Moulds production
5. Production of working prototype with initial composite parts
6. Prototype testing
7. Implement changes based on prototype testing
8. Moulds adjustments and changes
9. Pre-production car production
10. Testing of pre-production car
11. Implement changes based on pre-production car testing
12. Production of final-spec car
13. Promotion, manuals, packaging, production
14. Packaging and shipping
Each of these phases are extensive and complicated enough for a separate column, so I will try to give only some high-level insights into how the entire process applied to the XB4.
1. Design and construction
I wrote about this very complicated phase in the last column. If you want to read it again, read from top of this page.
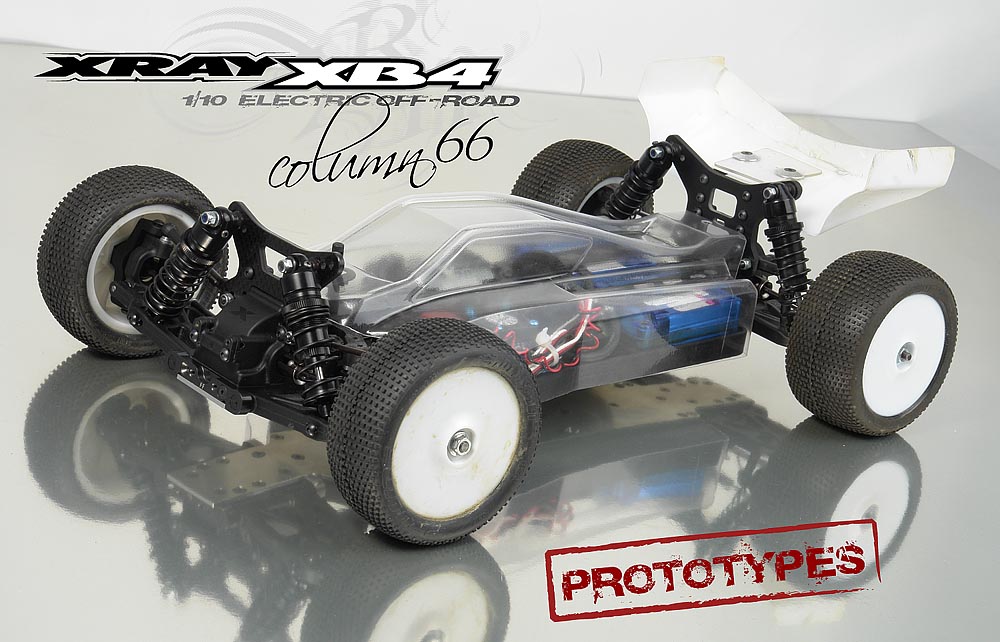
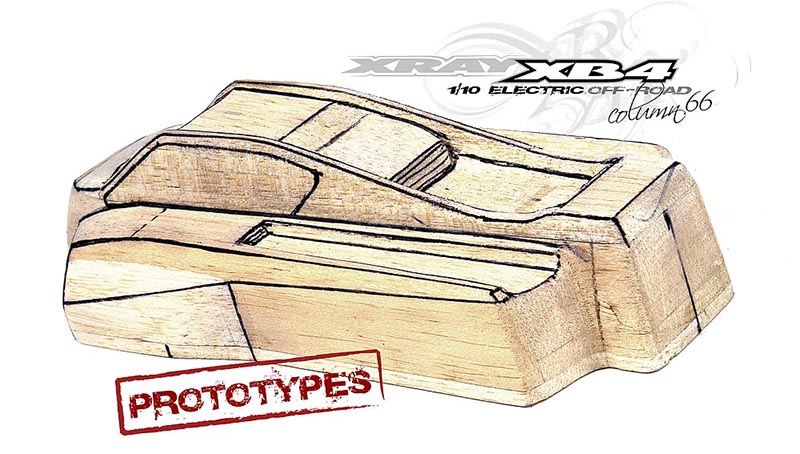
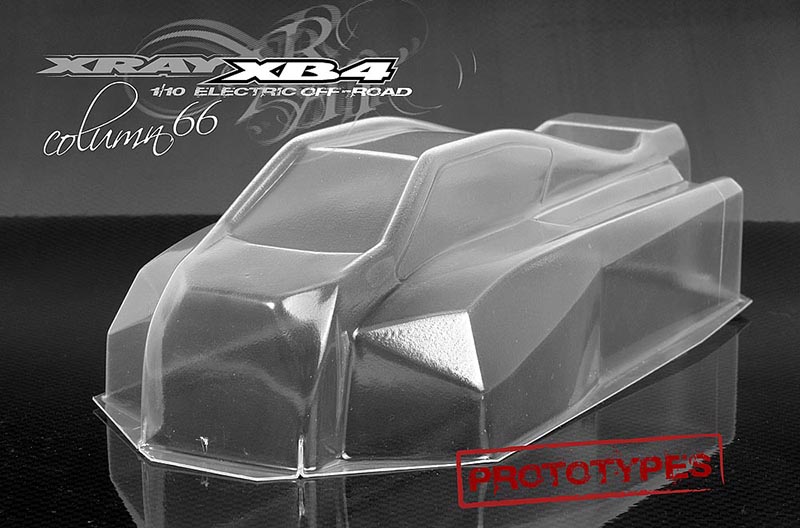
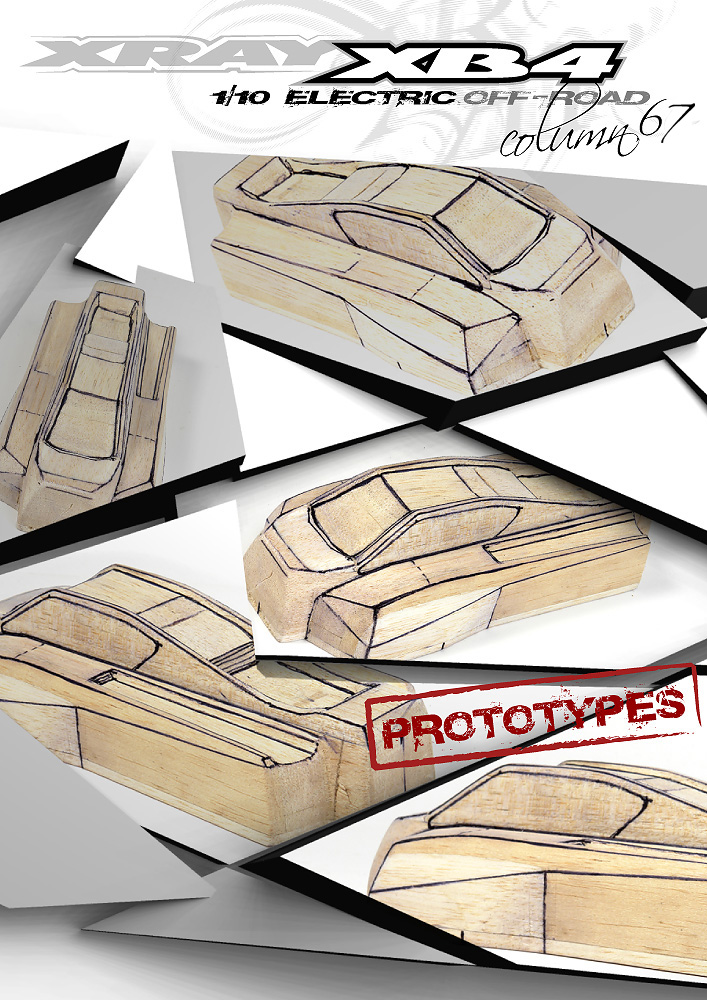
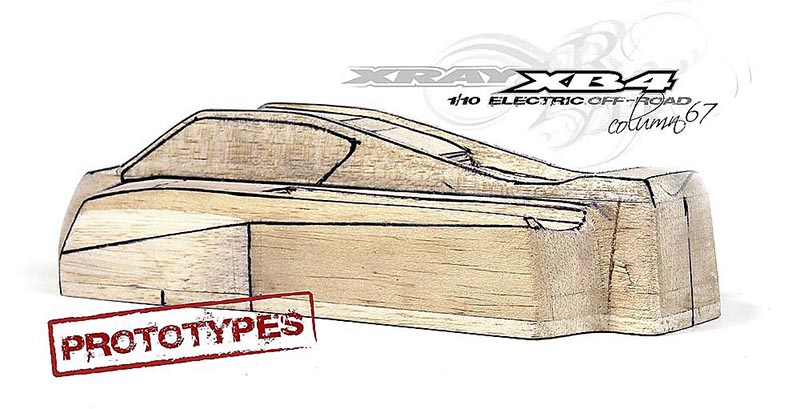
2. First prototype production
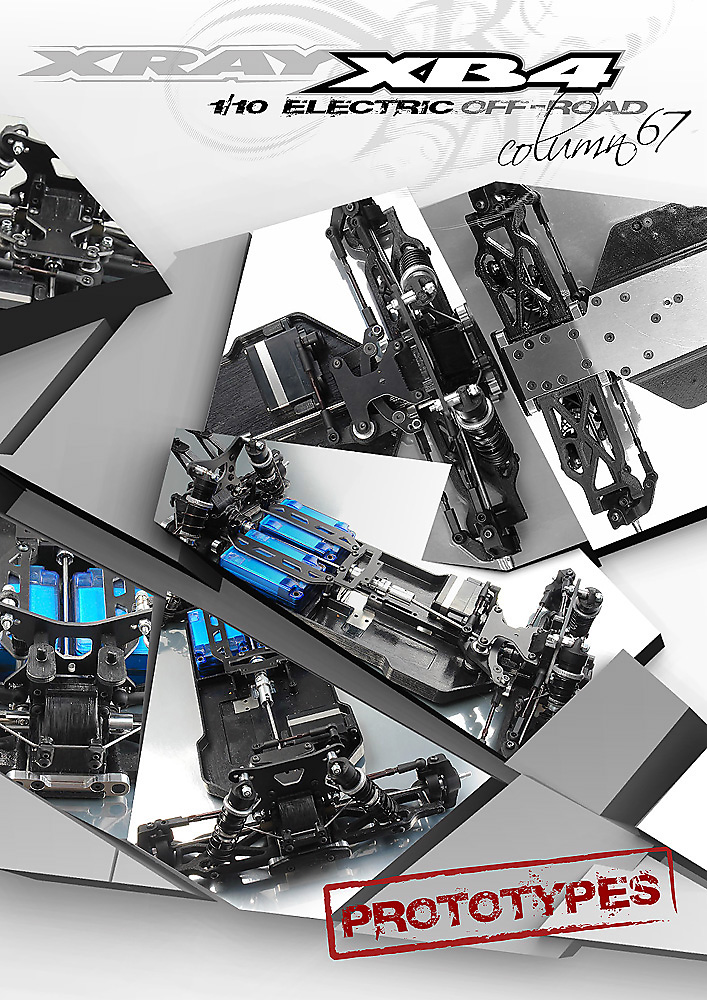
As soon as the design was finished we started to machine and mill all aluminum and steel parts. Meanwhile, the 3D files for all plastic parts were sent to an external company that “prints” for us the plastic parts from special polyamide which is not suitable for racing but gives us a perfect understanding of the shapes and fit of all composite parts before they are produced. As soon as all the first XB4 prototypes were produced, I personally assembled all the parts to get a feel for every single detail and also because this is one of my favorite phases of the project where we still get to play. The built prototype helps to determine any and all design flaws and usually we get plenty of ideas for changes once we see the “real” thing. Having the prototype on hand helps to check on weight balance and also to get a basic understanding of the flex of the car and of course confirm that there are no interferences between parts during different suspension travel settings, steering settings, etc.
3. Implement changes based on prototype build
After we measure and record all the findings, we either confirm every single part or make appropriate changes to those parts that require alteration or revision. All drawings are individually checked and updated.
4. Moulds production
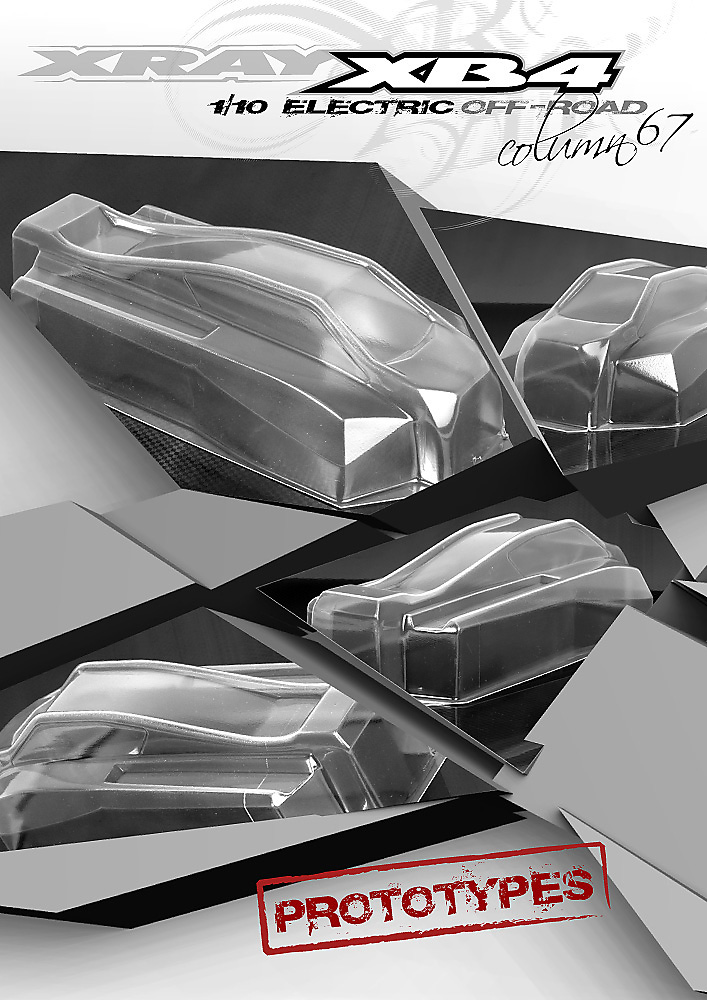
As with all other projects, moulds production is the most demanding, time-consuming and most expensive part of the entire project. At XRAY we have a specialized internal team of six professionals who are focused solely on mould design and production. The XB4 moulds started at R&D where all different composite parts – based on the type of material that would be used for moulding – are arranged into the different moulds, something like solving a puzzle. Unlike most other companies in the industry, for every part we use our own specially-formulated composite mixture which means that we need to split all the parts into numerous different moulds. This of course makes the mould production more time- and resource-extensive because the more composite parts there are in the car, the more expensive moulds will be required. Moulds were designed based on the size and material used on all the XB4 composite part, which took several months of intensive 3D CAD computer work to draw every single part of every mould.
Since we produce all moulds in-house and only from very high tensile steel to ensure reproducible precision tolerance of all parts, these moulds are very complicated, complex and expensive. Every single XB4 mould consists of more than 100 components and all the shapes of the moulds are produced using EDM electrodes which are machined on specialized high-speed 5-axis milling machines which are then then used to create the mould cavities. All the holes of the moulds were cut with a wire machine within a tolerance of 0.001mm. All the parts of the mould were then manually finished for perfect fit. To build one XB4 mould took several hundreds of hours for the entire team. As soon as the first moulds were produced, the first composite parts were injected to allow the parts to dry out and to analyze all of the sizes and fit into the corresponding parts.
5. Production of working prototype with initial composite parts
As soon as the changes to the first XB4 prototype parts were incorporated, the production of the next prototypes started so as to not lose any time. Also, while the moulds were in production we managed to easily produce again all the updated parts. Of course some parts came a little bit later, so to save expenses on the prototype production we had to wait until similar parts for some other car were in production. For example, for new drive shafts we had regular production runs but we also produced prototypes as well. This of course took a bit longer but until all the moulds were ready we had enough time to run all the production around.
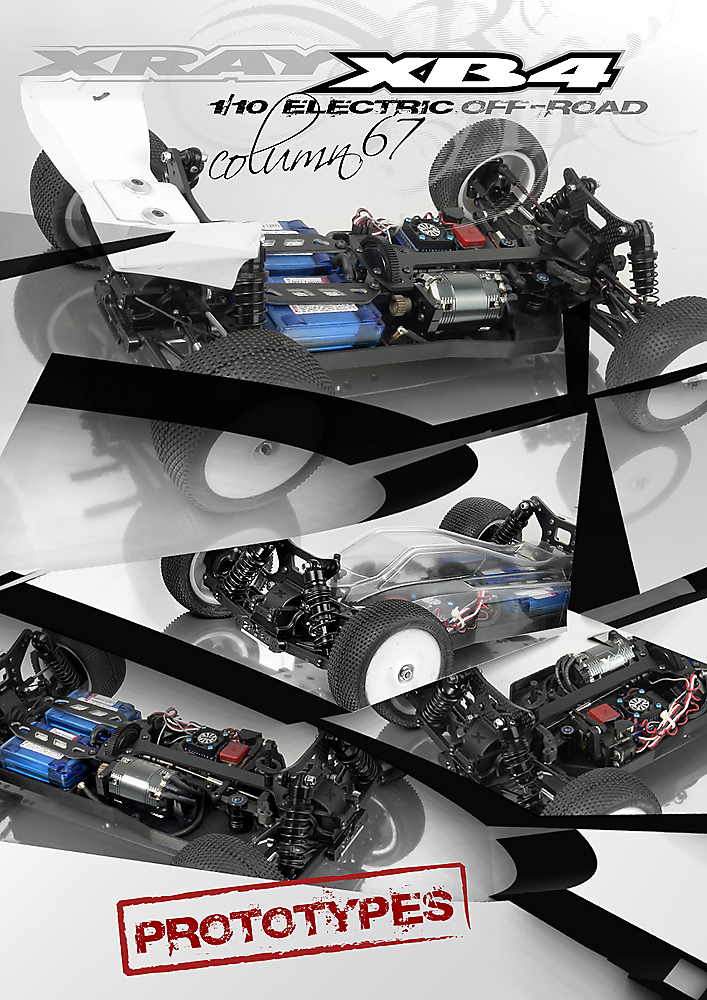
Prototype production was also used to determine the appropriate production process and prepare all the fixtures, tools, and programs for upcoming mass production. Some parts which are directly related to the plastic parts sizes of course had to wait until the XB4 moulds were finished and parts injected. In some cases a small composite part could be blocking the entire large assembly and as such appropriate scheduling and timing were crucial as every part influenced the other parts. In some cases when needed to get a product on time the team had to work non-stop 24/7 as we could not afford to lose any time on critical bottleneck parts but at the same time we had to keep our attention 100% focused on the smallest details because a small mistake in the mould could set us back a few hundreds of hours. As soon as all the XB4 parts for some entire sections were produced, we started building them to double-check and confirm all dimensions and fittings. In this phase, several more prototypes were produced which were sent to team drivers all around the world for testing under various track conditions and to collect as much feedback as possible.
6. Prototype testing
This was a crucial phase of the project because it confirmed if all our theories were correct or not. In other words, it confirmed if what we had been doing was correct. Aside from handling characteristics, we also tested the durability and quality of the XB4 and of course I would constantly assemble and disassemble the cars numerous times to confirm the ease of servicing and working on the car. I always build the very first prototype myself so I can determine every single minor area which needs attention or improvement.
I built the first XB4 just before the EC in Austria, and since I was at this track for the warm-up race where I tested all the different cars I decide to participate at the EC and test the car at the race. As I am more of an average driver and combined with my age I usually do not have high expectations for results from any races so I considered this race solely as a test race of the first prototype. As my schedule was very tight and I had no 2WD prototype at that time, so I decided to skip the first few days of EC with 2WD class and come a few days later for just the 4WD race. To stay unbiased during testing, I used the competition car for the first two practice runs and only then ran the XB4 prototype for the other practice runs.
Running the first prototype for the first time is always an adrenaline-charged moment with a lot of cautious satisfaction for the very hard work of the entire team in the last months; I really could not wait for the new XB4 prototype in the all-new category to hit the track. As soon as I got out of the pits I had very good feeling about the XB4. The car was a bit more aggressive for my driving style and in the long chicanes on jumps it was a bit more difficult to drive. But comparing the amount of mistakes I had made with the other cars, I have improved a lot so I was very satisfied with the very first run. I brought a lot of other prototype parts with me to test, so after every run I did a lot of wrenching and had nearly a new car to test for the next successive run. The main focus in the beginning was on the various chassis/top-deck combinations to determine the proper amount of flex.
As the front of the car felt much too stiff I changed not only the front brace and top deck but also the Ackermann, shock positions, and a few another things. All the changes that I made helped give the car easier handling and already on the second run it handled much more comfortably than all the other cars I tested before. This gave me a lot of confidence and satisfaction, which motivated me to work even harder and faster. For every run I reworked the car and continued to improve the set-up.
For the finals I had the car exactly where I wanted it to be for my driving style, but I had some bad luck and went off the track in a crash in the first lap so I dropped to the back. As I used the entire race for testing only I did not mind at all and actually enjoyed the clear track in front of me. With the easy-to-drive car I was actually able to go from 10th place to the final 3rd just a few meters behind the winner in my final. This was a very good result for the first prototype in the hands of a senior driver. What I thought was the most important thing was that the laptime difference between me and the best drivers have significantly improved. I travelled back home with huge satisfaction that the car achieved my expectations and the goals we set, and of course my head was full of ideas for further improvements.

7. Implement changes based on prototype testing
The next day after I arrived home we started immediate implementation of the changes and reinforcement of some parts. There were dozens of small changes and improvements to be implemented and it would take a very long time to describe them all. So instead, here are a few of the more important ones. While testing I was able to break a front arm when I crashed into a solid concrete fence. (Of course no other car would survive such a crash but I am, like our customers, used to XRAY quality where our cars can survive the hardest impacts and crashes. As such we reinforced the design of the arms and also decided to adjust the composite mixture to add a bit more strength while keeping the same flex. The other area which needed improvement was the motor mount which unfortunately allowed the motor to move in serious crashes and as such I used a new innovative eccentric motor holder which ensures that the motor will never move even in the most serious crashes. In some serious crashes when the motor was engaged, the teeth of the crown gears sometimes broke which was undesirable and as such I reinforced the teeth profile and also decided to change the material mixture to add strength.
8. Moulds adjustments and changes
As soon as the moulds were finished and composite parts were injected and stabilized, all measurements were recorded. Despite our moulding team having extensive experience with composite tolerances and shrinkages of all the different composites, still it was impossible to produce a mould which would not need a following update to fine-tune all the details especially for critical areas like bearings or pins. Usually every new mould requires 2 or 3 and sometimes even more follow-up adjustments and changes until a perfect result was achieved. As I am very strict about maximum tolerances of the composite parts since I know that a racer enjoys a perfect hassle-free building, it took us a long time to fine-tune all the XB4 moulds to be ready for mass production. This process of fine-tuning took in total several months and as with all other projects is also a very expensive phase which very few, if any, other companies make but this is also where the final XRAY composite parts distinguish themselves from the others.
9. Pre-production car production
Before mass production of the XB4 could be started, the final pre-production kit was produced. Of course you can imagine that to produce all the parts individually is extremely time consuming and of course expensive as well, but from all previous experiences I know that this investment is worth it and it is better to double-confirm everything before production starts. In this phase we again produce more cars which are again sent to the team for final tests, as this pre-production car has new and improved parts but also refined handling and driving characteristics.
10. Testing of pre-production car
This phase of a new car project usually takes a long time and it was no different with the XB4. With the pre-production car in the hands of more than a dozen of drivers all around the world, it takes time until everyone gets the car, builds it, and tests it in various conditions. I am always very nervous during this phase and since the XB4 was an all-new platform with new innovative ideas and concepts, the nervousness was even higher because at this stage if something went wrong when all the parts were poised for mass production and the moulds were finished, any changes would be extremely expensive and would mean a serious delay in our schedule. While waiting for the feedback from the team, I used the time for crash tests: testing serious crashes, extreme jumps and really trying to run down the XB4 with exhaustive tests. At the same time I was working on the basic set-up that would go into the kit to give the optimum settings for flex, diff settings, shocks settings, and others.
11. Implement changes based on pre-production car testing
As soon as all the feedback was collected from the team, I added all my latest experiences from testing the pre-production car. Myself I did not experience any serious issues but I was surprised and not very happy that Martin Bayer broke a front diff bulkhead as well as teeth on the crown gear. This of course meant updates to both moulds to reinforce them and to be on the safe side I also decided to change the composite mixture of the crown gears for the graphite one. Based on feedback from the team, some minor adjustments were made to the shock pistons, the shock spring and we also changed shock positions and roll center positions on the shock towers. I was not happy about the mould changes because the indoor season was approaching quickly and it was already clear that we would miss the beginning of the season. But there was no other choice as I did not want to start production of a car which I knew was not perfect enough.
12. Production of final-spec car
While we had to update several moulds, we could run production of all the aluminum and steel parts as well as the graphite parts so everything was ready and waiting only for the composite parts. As all the parts are produced in-house and the production was scheduled on almost all machines, the manufacturing time of all the parts was running very well and quickly so we had to support the moulds update production and for several weeks we again ran 24/7 non-stop.
13. Promotion, manuals, packaging, production
As soon as the final production car was confirmed and all drawings were confirmed, Martin started working on the 3D exports for the instruction manual and the marketing team used the pre-production car to make all the photos to start working on the detailed Internet promotion, packaging, leaflets, advertisement and all other related activities. With the new high-profile promotion micro site for all the new cars, there was more than 6 weeks work for the entire marketing team to finish the promotion.

14. Packaging and shipping
With all the extra efforts everyone in the internal team put into production, we managed to get all the parts into stock in November which was already after the start of the indoor season. We all had to be realistic but we still wanted to get the kits to our customers for Xmas which we successfully managed with all the efforts in the packaging department as well so that many happy XRAY customers could enjoy their new toy for Xmas.
I am very happy and satisfied of the very hard work of the entire team including the racing team, R&D and production teams. Everyone did a fantastic job to realize this all-new project and now it is up to customers to evaluate our job. I am confident that everyone will be happy with the XB4's performance and reliability.
Now I am back to the never-ending process of working on further improvements of the XRAY car line as well as working on the all-new XB2. Also these days we are working on our FX company finishing the FX engine line and of course I am all the time on the road around the world.
I am not getting a lot of sleep again, and I have a lot of work still left to do, but this is what I enjoy.
See you around the tracks!
Enjoy the ride and 'til next time,
Dipl. Eng. Juraj Hudy
XRAY Chief Designer
Source:

|