R1Wurks R1B Build Presentation
INTRODUCING THE R1WURKS R1B
The R1B marks R1's first effort in the 1/10th EP offroad competition buggy market. If you're unfamiliar with the R1B, it is a mid-motor 2wd chassis that comes in both DIRT and CARPET versions.
Having started as an electronics brand, R1Wurks has evolved into a kit and option parts designer/manufacturer - initially launching a 1/10th Drag Racing kit the DC1, with the DC1.2 Pro now the latest incarnation of that platform.
More recently they have introduced numerous option parts for various 1/10th EP buggies from Team Associated, Xray, Schumacher and TLR - notably being the first company to produce a 3-gear transmission for the RC10B7.
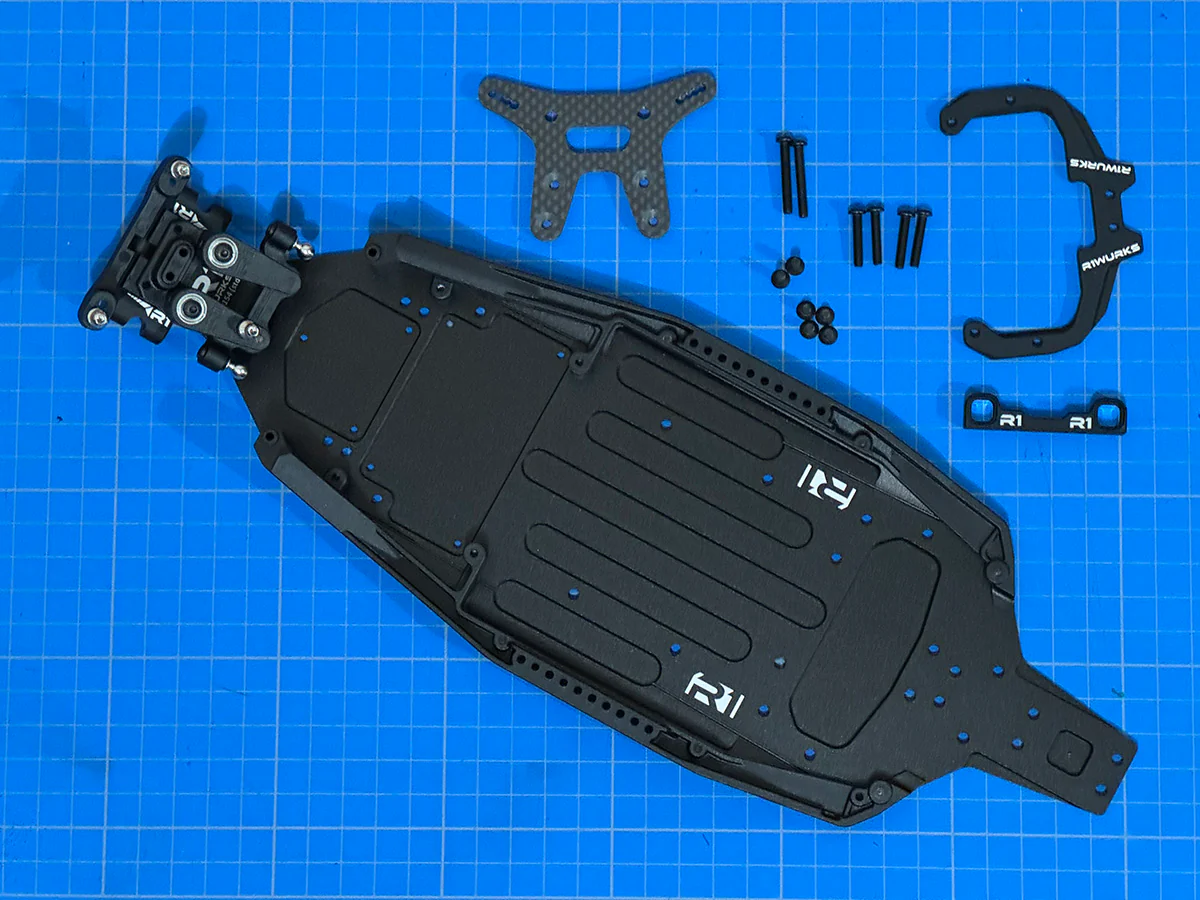
WHAT'S INSIDE
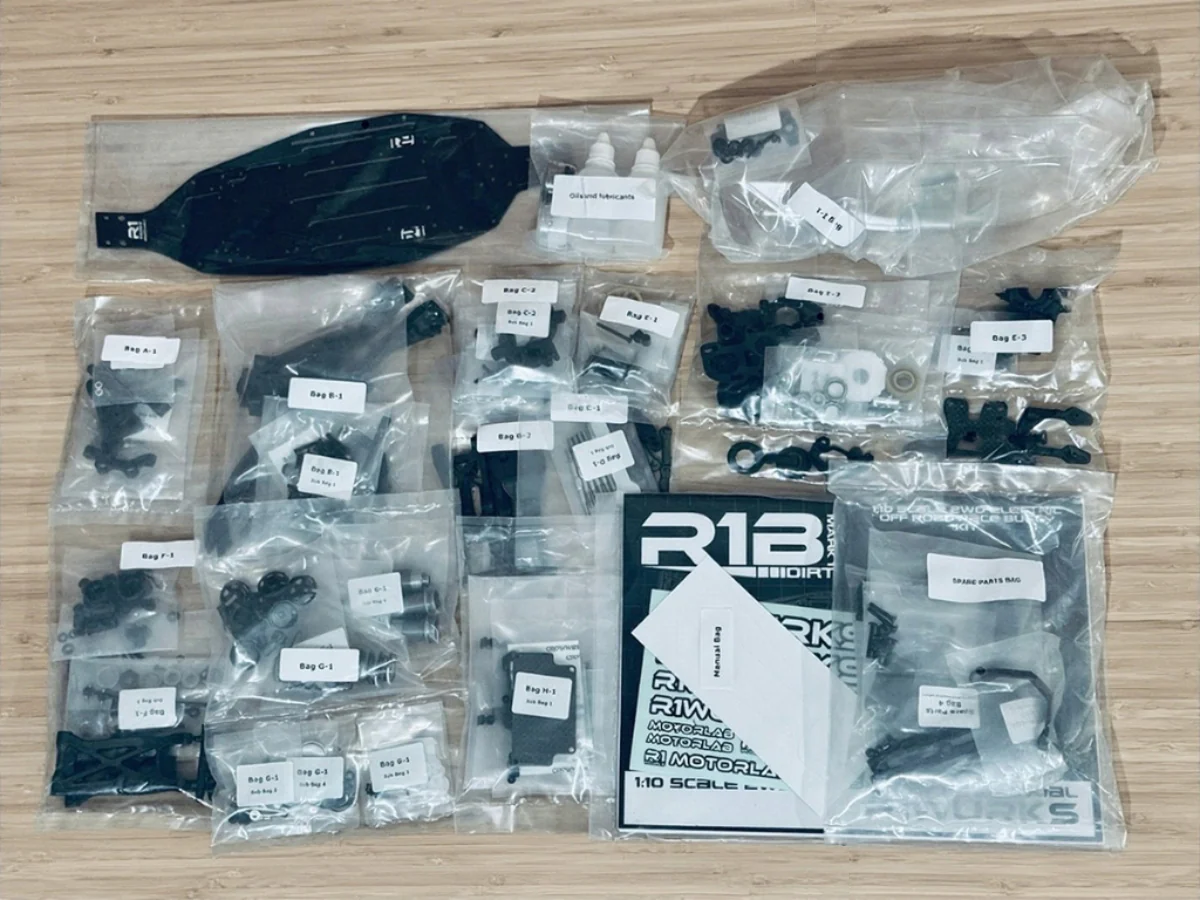
Similar to most kits, parts are separated into individual bags and in assembly order. This means plastic parts are removed from the "tree" they are molded from and individually packed into each bag.
Unlike most other kits however, each bag contains only the parts required for that step. Extra parts such as alternative caster block pills or toe block pills have been removed to simplify the build.
THE FRONT END
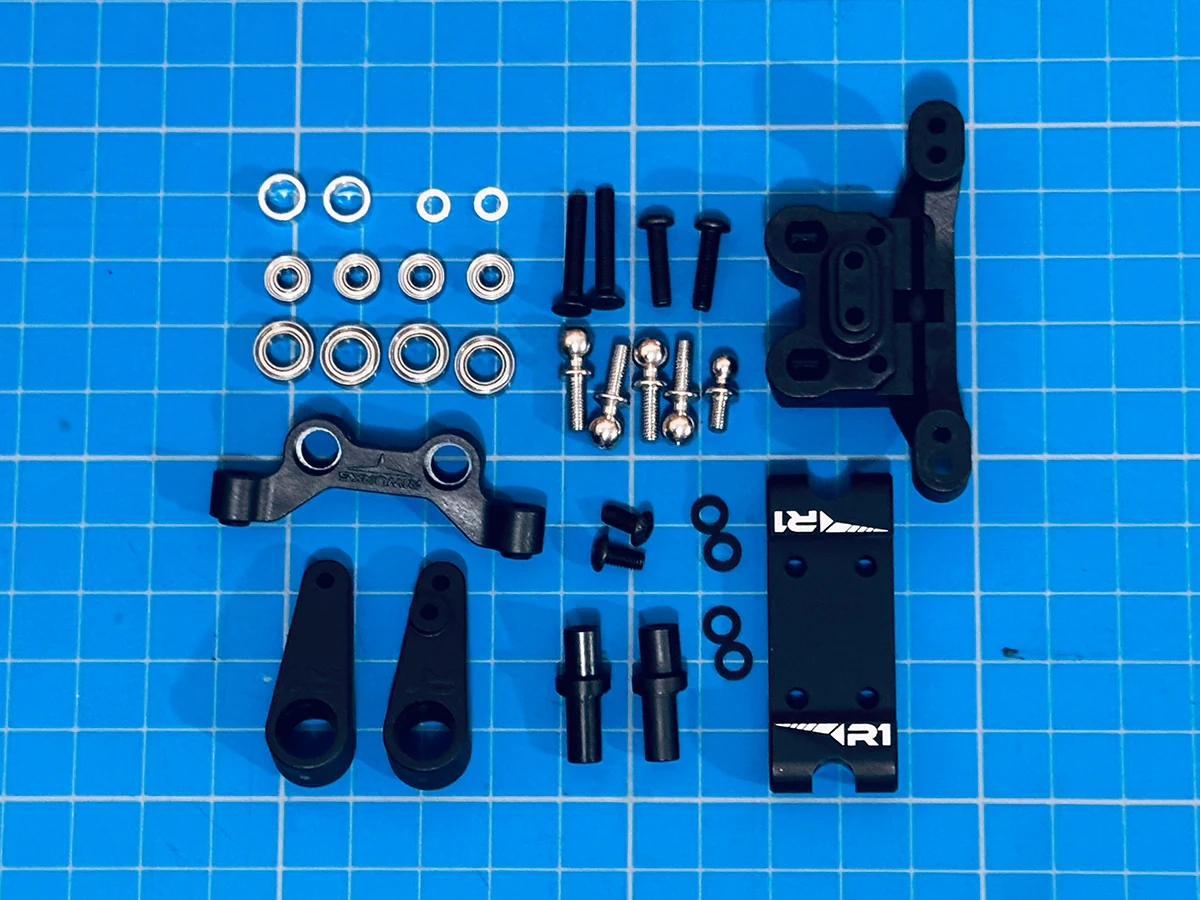
The first step of the build starts with the front end - with the bulkhead, steering bellcranks and steering rack all molded from quality composite materials.
As expected the steering asssembly comes with full bearings which have a nice snug fit into the steering components.
The R1B comes standard with a +/-2.5 degree aluminium front arm mount as standard - a nice little bonus that's usually an option on other buggies!
FRONT END INSTALL
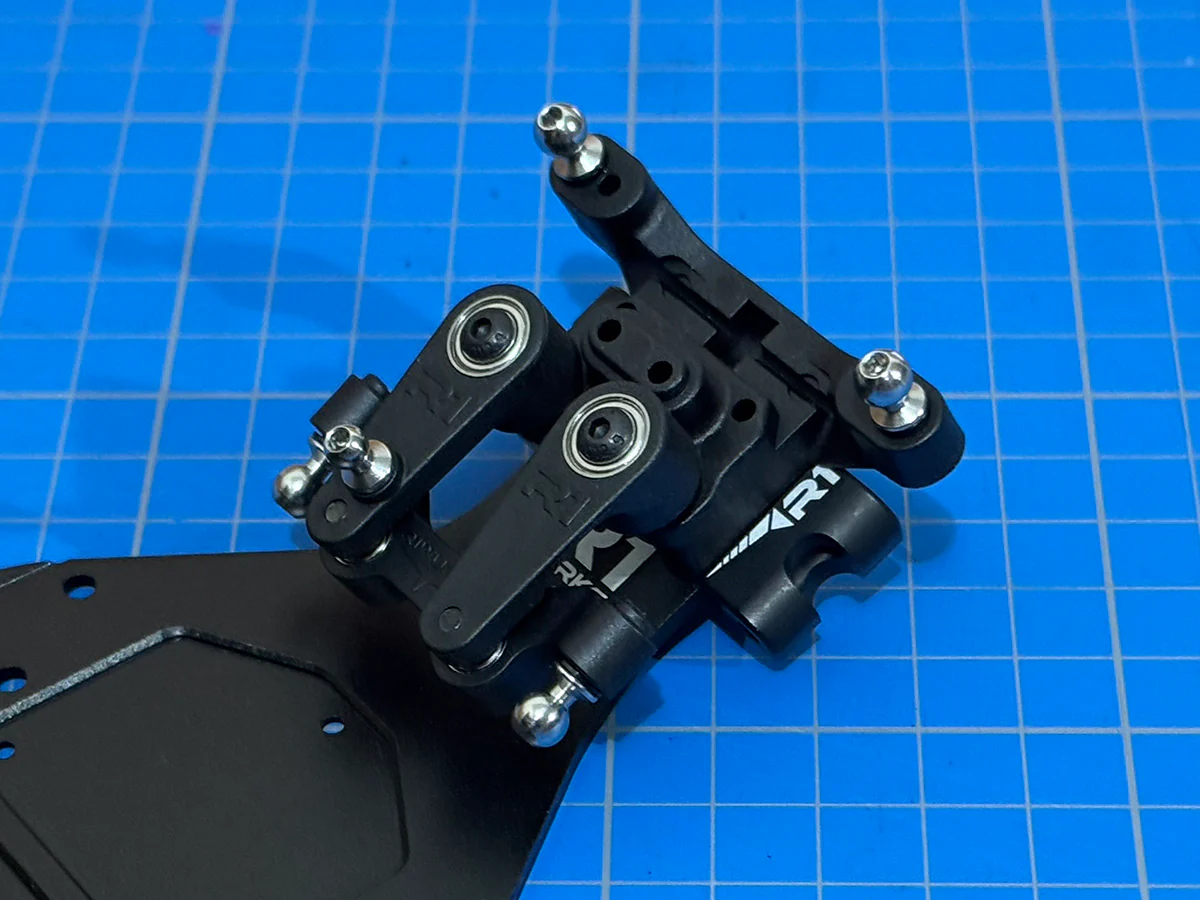
With the various sub-assembly builds completed, the next step is to install them onto the front of the R1B's aluminium chassis, which is finished in black anodizing with some nice laser-etched R1 logos.
The instruction manual makes a specific callout to the orientation of the front arm mount to ensure the car is built with the correct amount of kickup (+2.5 degree).
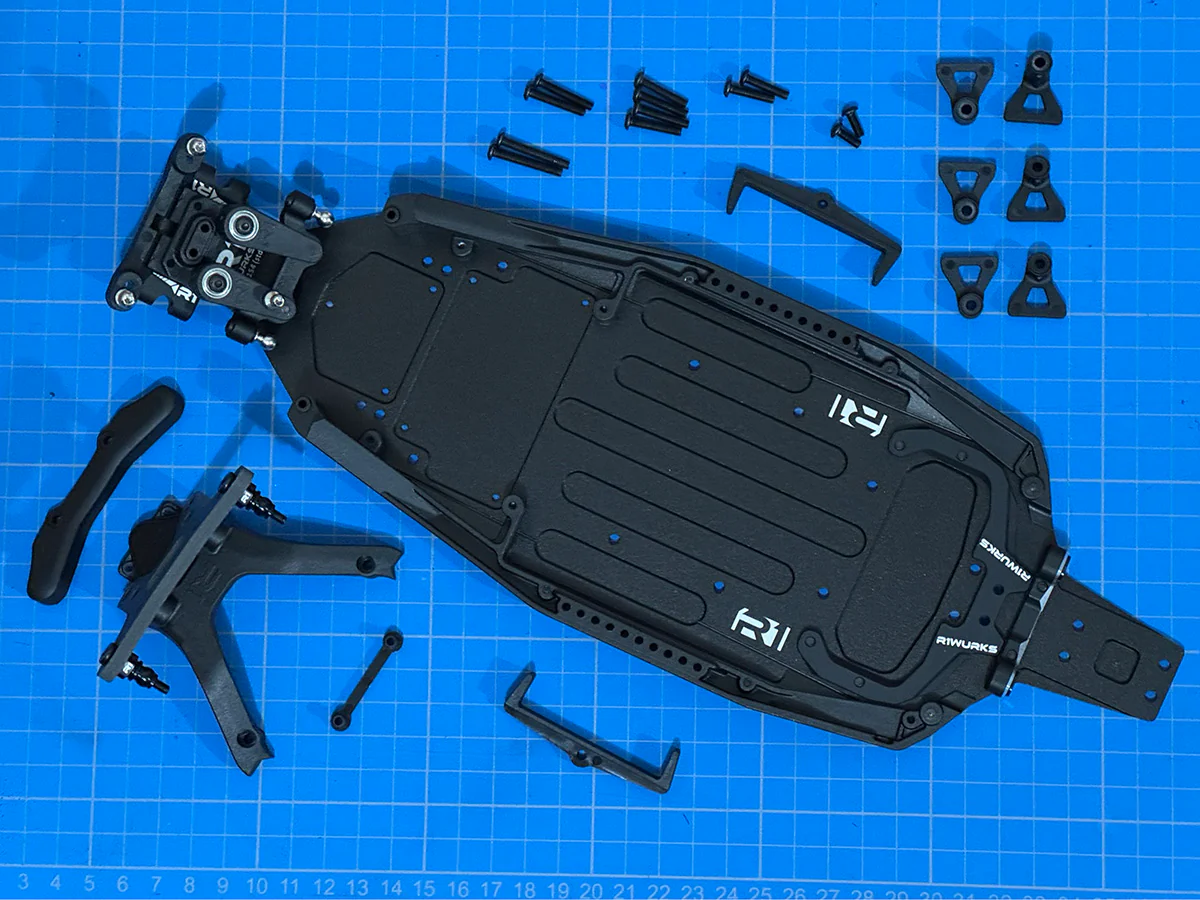
CHASSIS BUILD CONTINUES
Next comes the installation of the side rails onto the chassis. These are molded in what feels like a stiffer composite material. After that comes other pieces of the front end and the initial build of the rear end.
A distinctive feature of the R1B's design is the incorporation of an aluminium rear flex brace. The brace has multiple screw positions that allow racers to tune the rear flex to their liking, according to track conditions.
FRONT TOWER & LIPO HOLDERS
The build continues with the carbon fiber front shock tower installed onto the front chassis brace that's again molded from a stiffer composite material.
The composite LiPo brackets come with three different pairs of retaining tabs so you can choose the height that best suits your LiPo batteries.
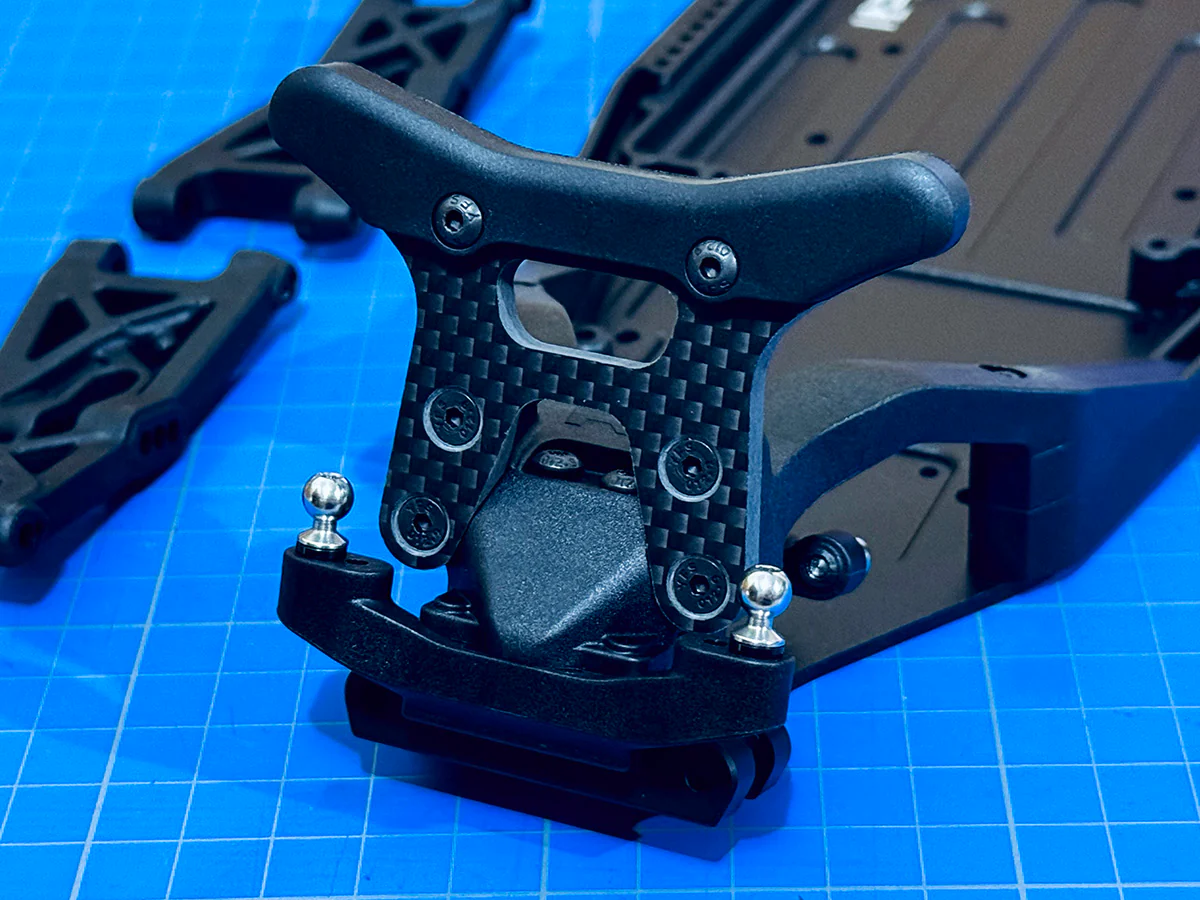
FRONT TOWER INSTALL
The front tower and chassis brace sub-assembly then gets bolted onto the chassis. Make sure it is nicely aligned to the corresponding locating bosses before fully cranking down the screws.
A composite shock tower guard is included which is a standard inclusion on most current buggies. They do a good job of saving the front tower from bearing the brunt of the abuse on poor landings!
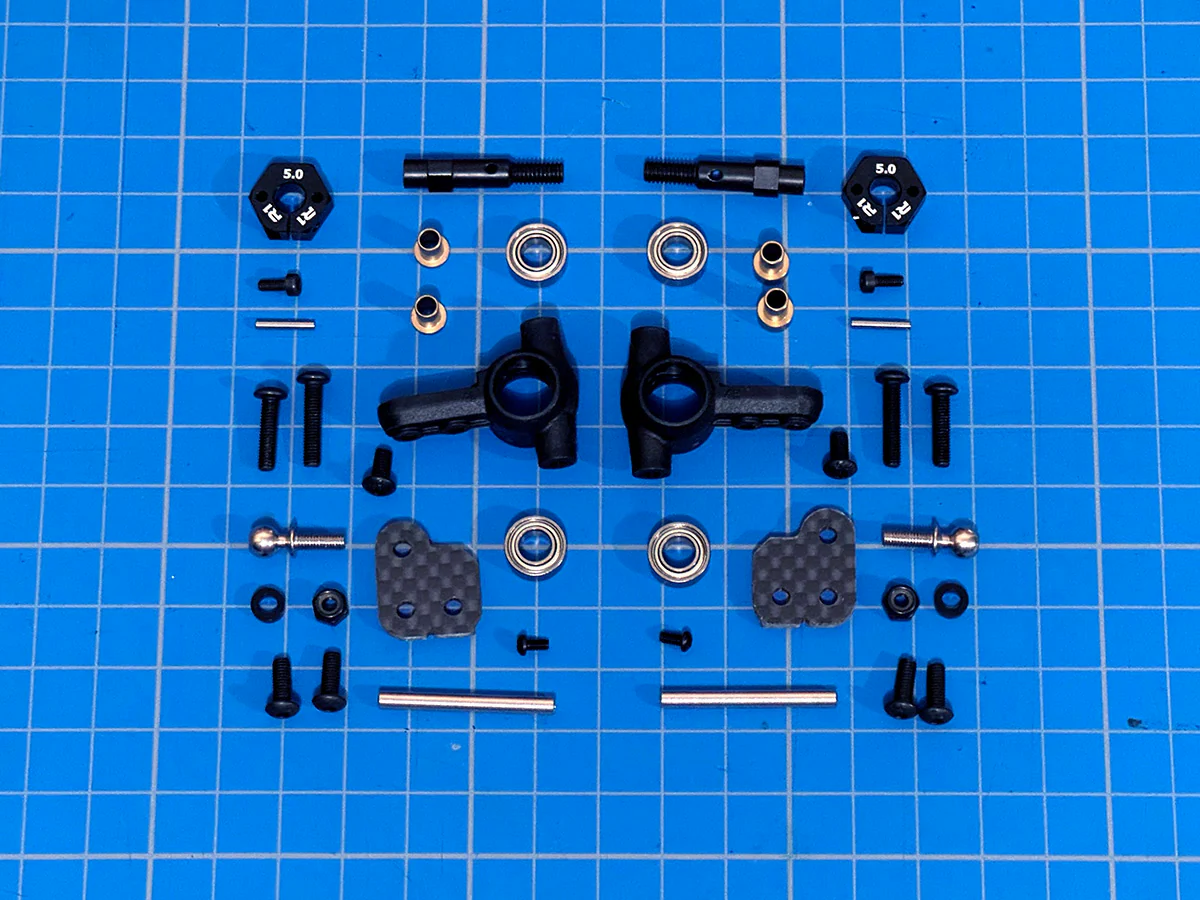
FRONT STEERING BLOCKS
The front steering blocks come next and they too are nicely molded from a high quality composite material.
Hardened steel axles are included as are 5mm thick, laser-etched, aluminium hexes. With optional hexes available in 1mm increments up to 8mm, the front track width is highly tuneable.
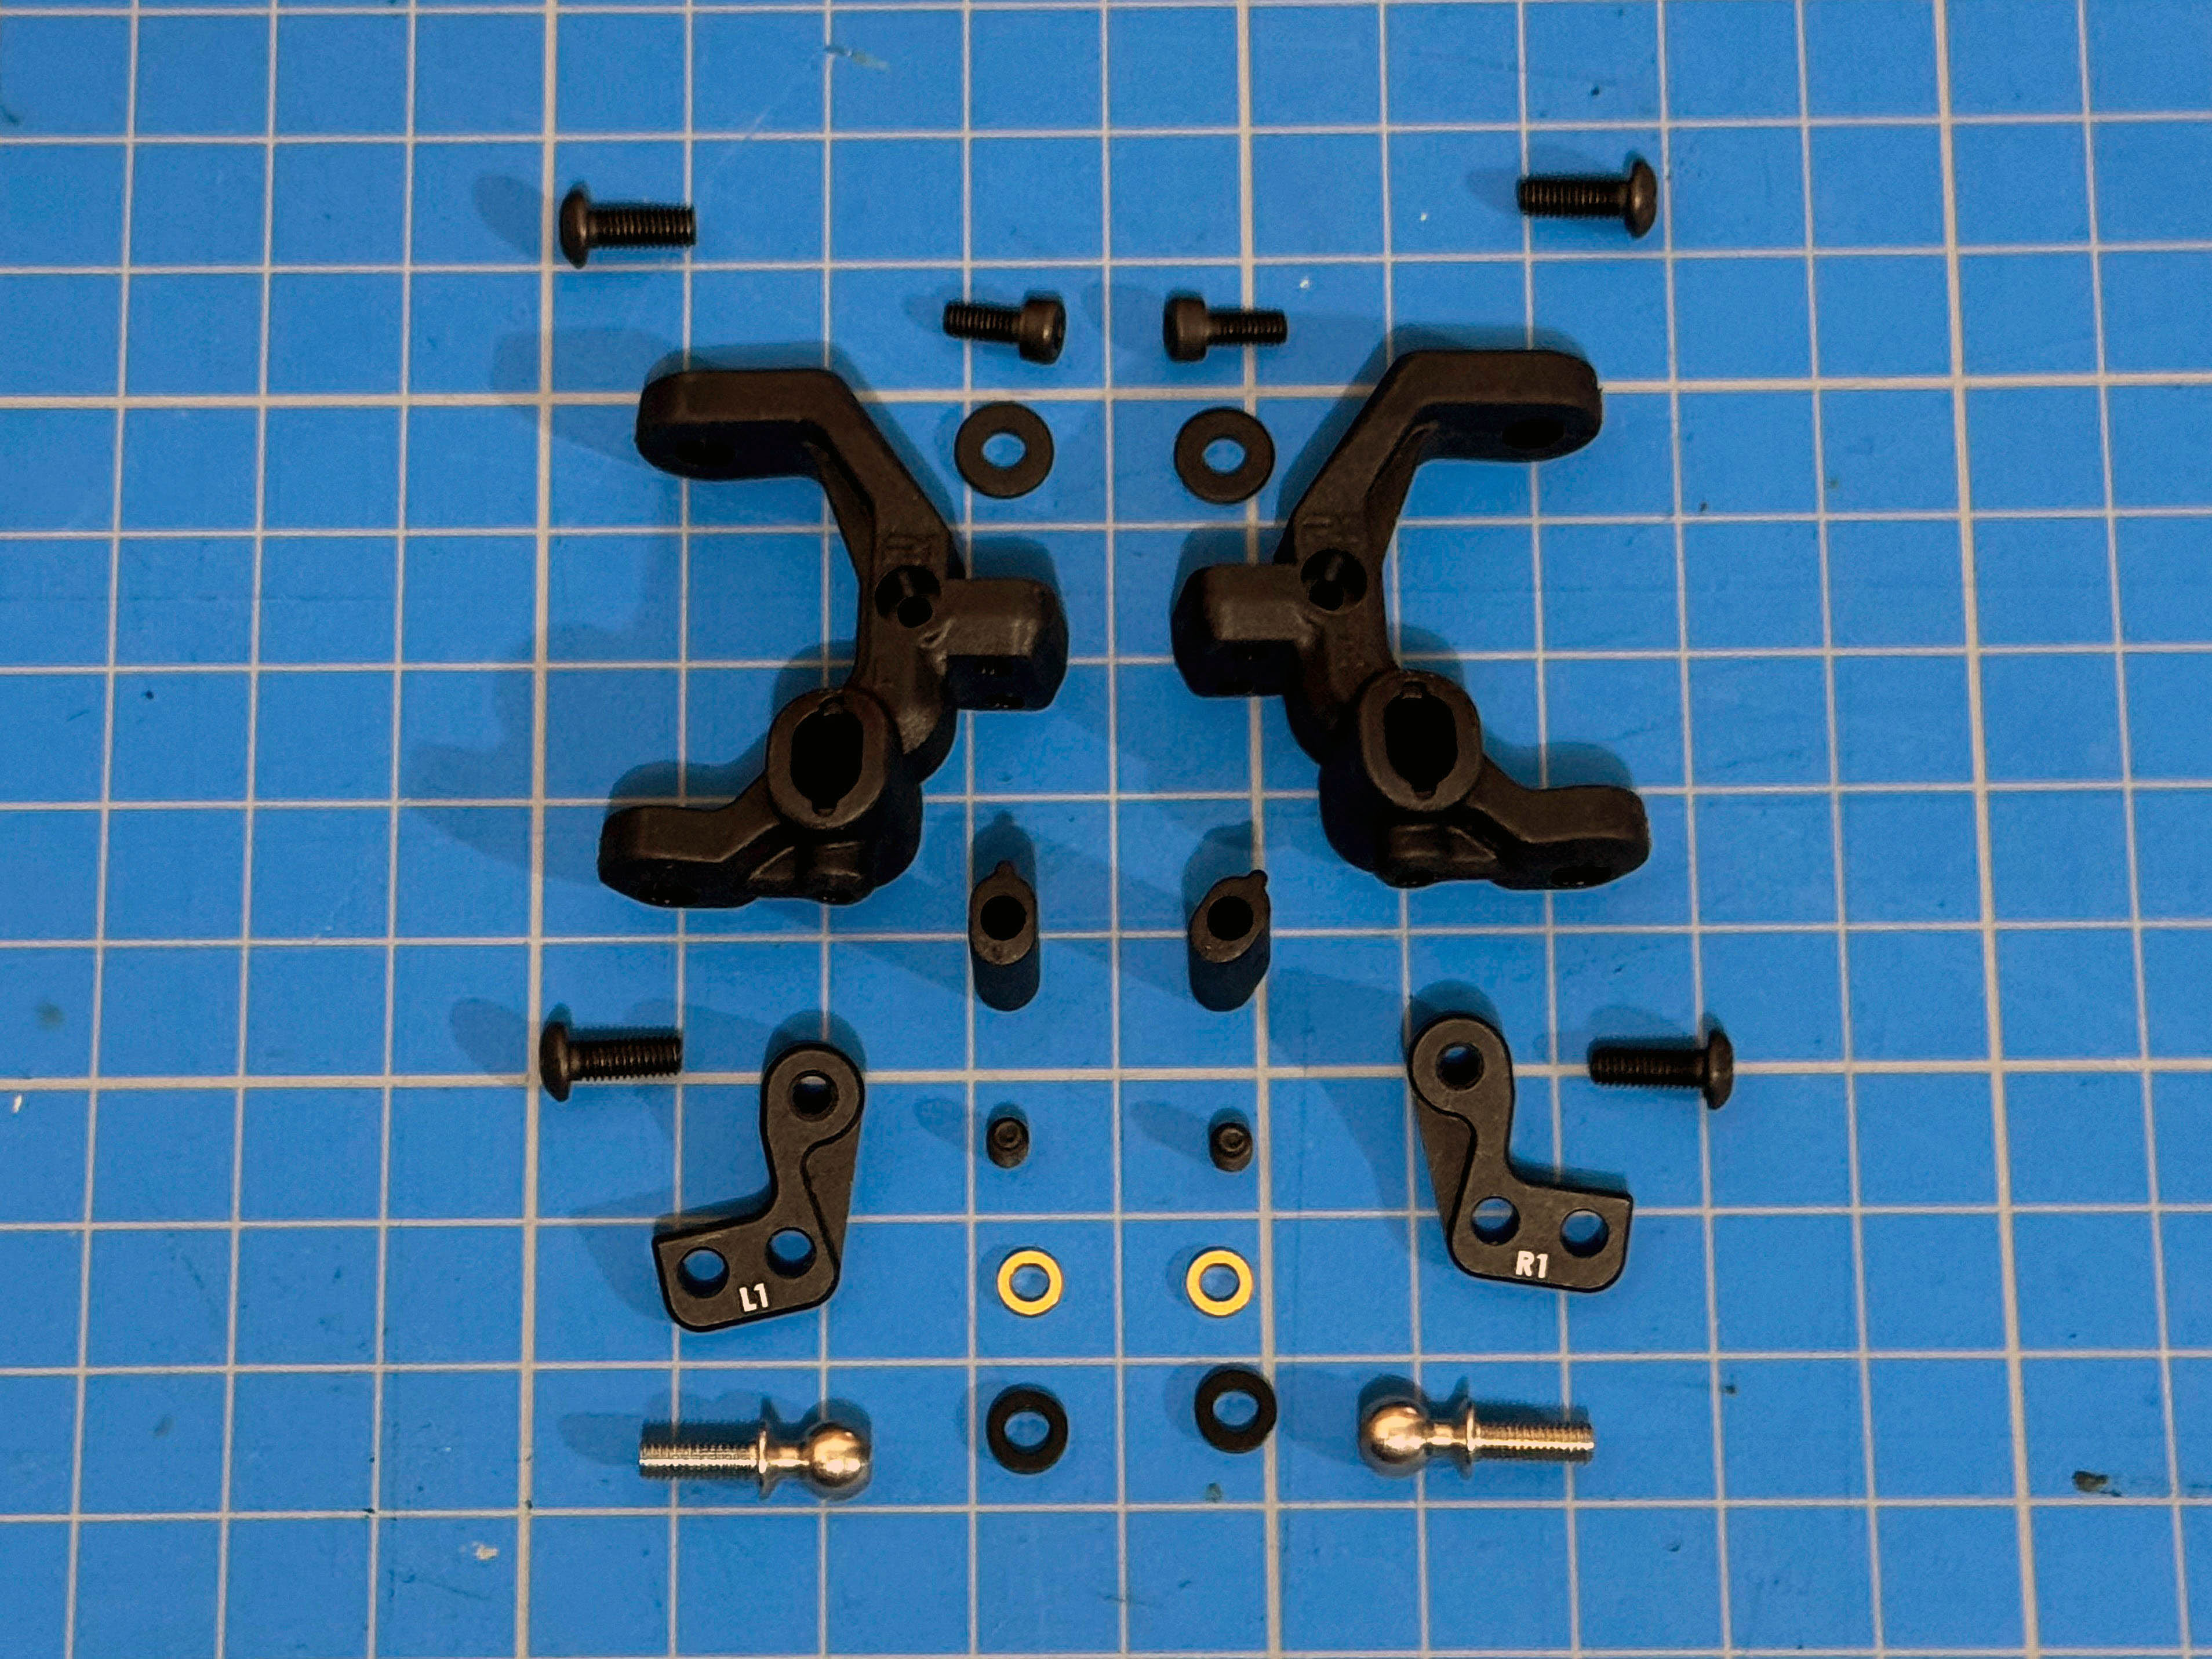
FRONT CASTER BLOCKS
Like most modern designs, the composite caster block comes with interchangeable inserts to fine tune caster angle. The bag for this step comes with the 0 inserts while 3 other inserts come in the "Spare Parts" bag.
The caster blocks also feature steering end stops. To adjust, simply add or remove shims under the cap head screws.
The camber link mounts are CNC-machined from aluminium. This does away with locknuts to retain the ballstuds, for a cleaner design that is more user-friendly when you need to adjust the ball stud height.
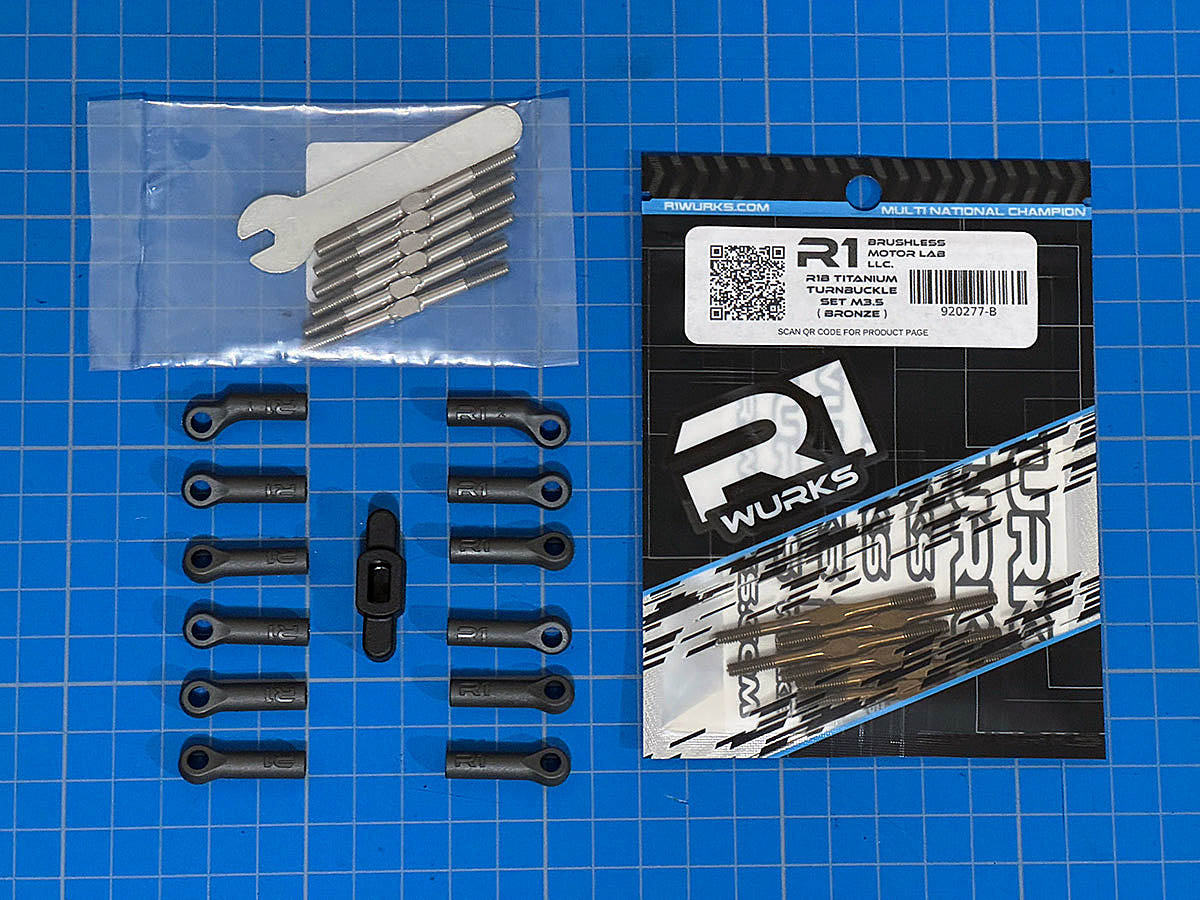
TURNBUCKLES
The dreaded turnbuckle build comes next. So do it once and do it right would be my tip! Do not pass "GO" and head straight for the 920277 R1B titanium turnbuckle set and definitely choose the bronze colour!
One thing to bear in mind with the titanium turnbuckles is that they do go dull if they come in contact with any body oils. But a quick wipe with a cleaner such as Simple Green or brake cleaner makes them look like new again.
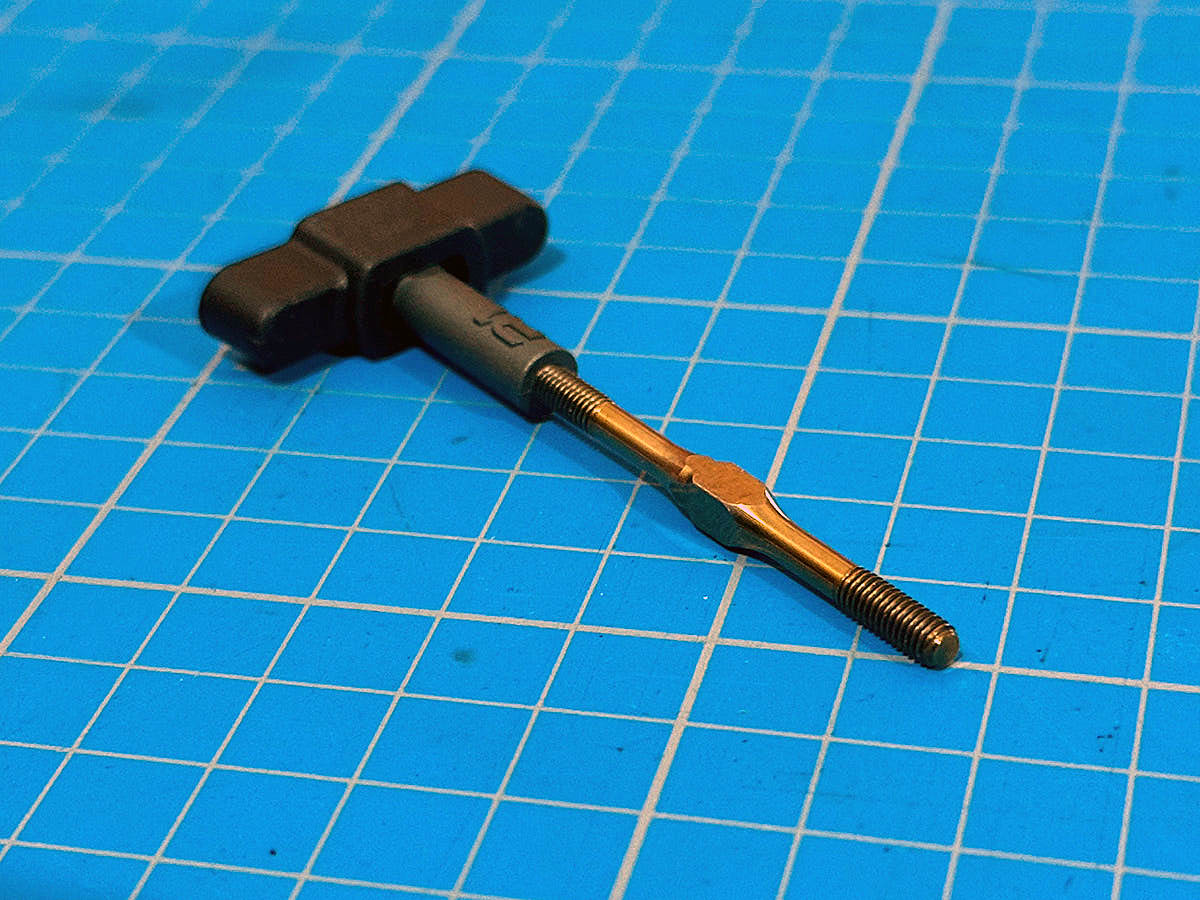
BALL CUP TOOL
One of my least favourite tasks is building turnbuckles... Fortunately, R1Wurks includes a little ball cup holder that makes this task much easier. Bravo R1Wurks!
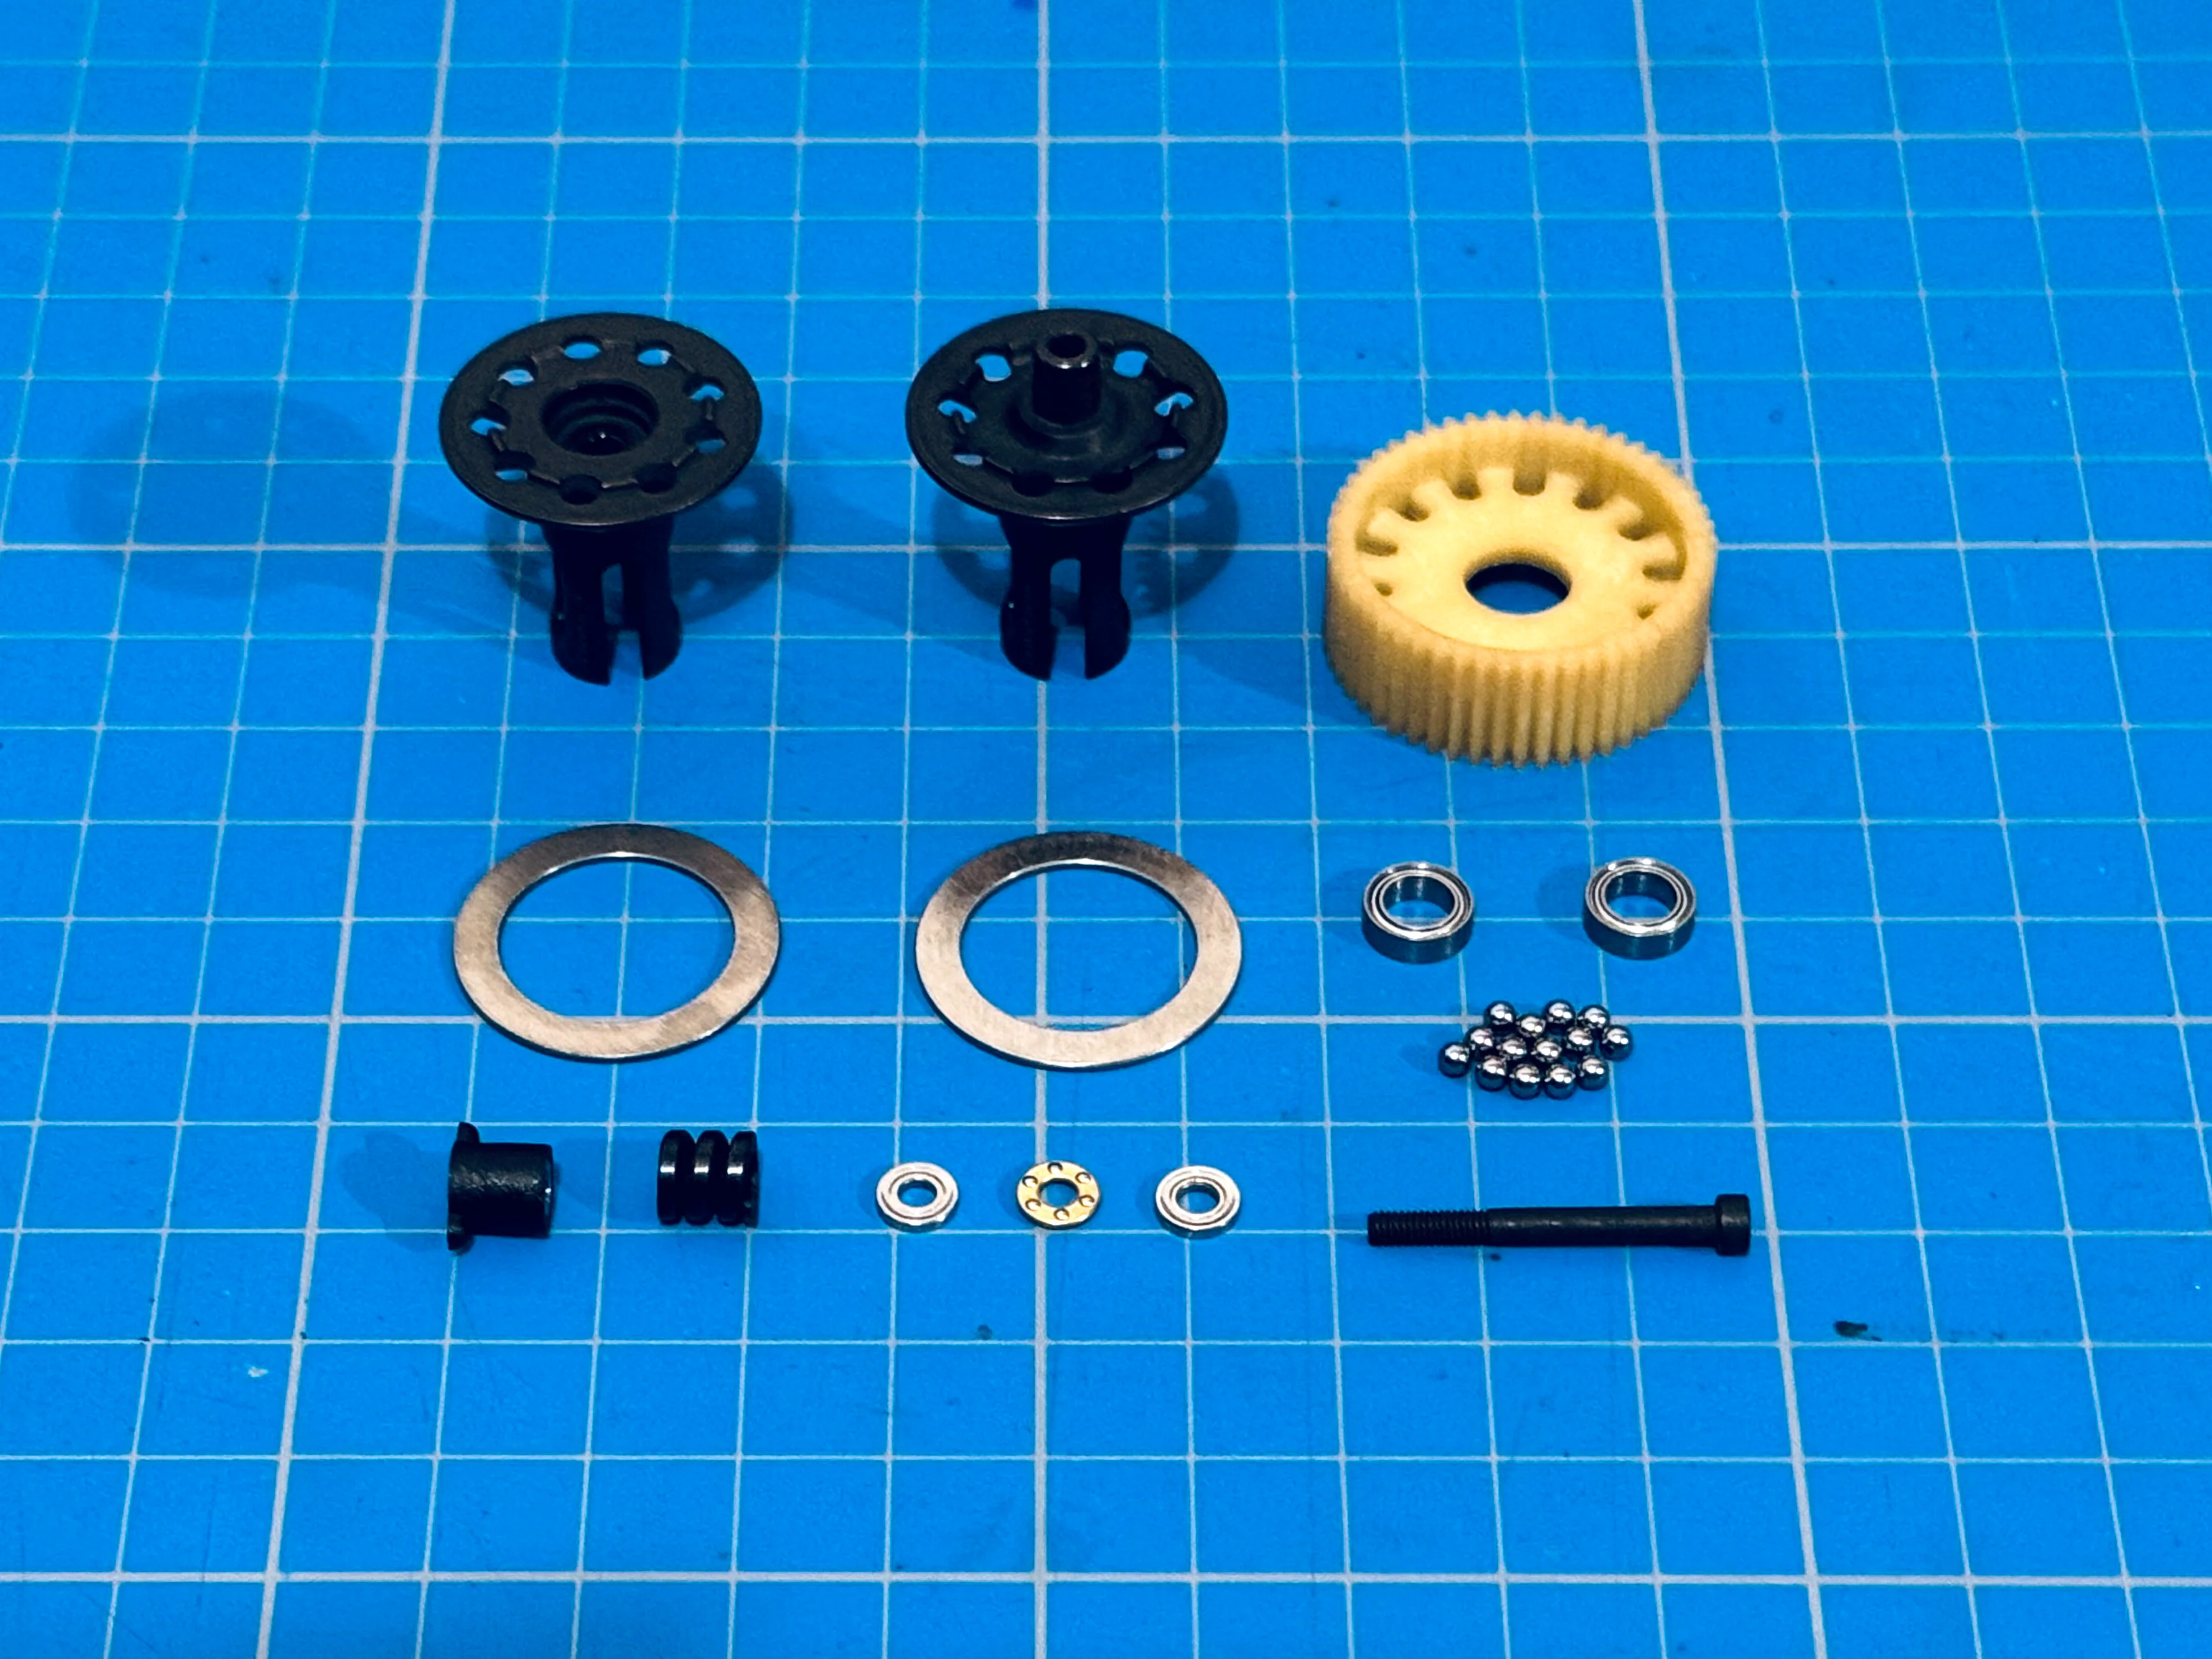
BALL DIFF BUILD
Since we were building the DIRT version of the R1B, the ball diff comes next. This is a pretty standard ball diff build with the required greases are included with the kit.
CNC-machined from hardened steel, the stock ball diff outdrives have been extensive machined to reduce rotating mass for faster acceleration!
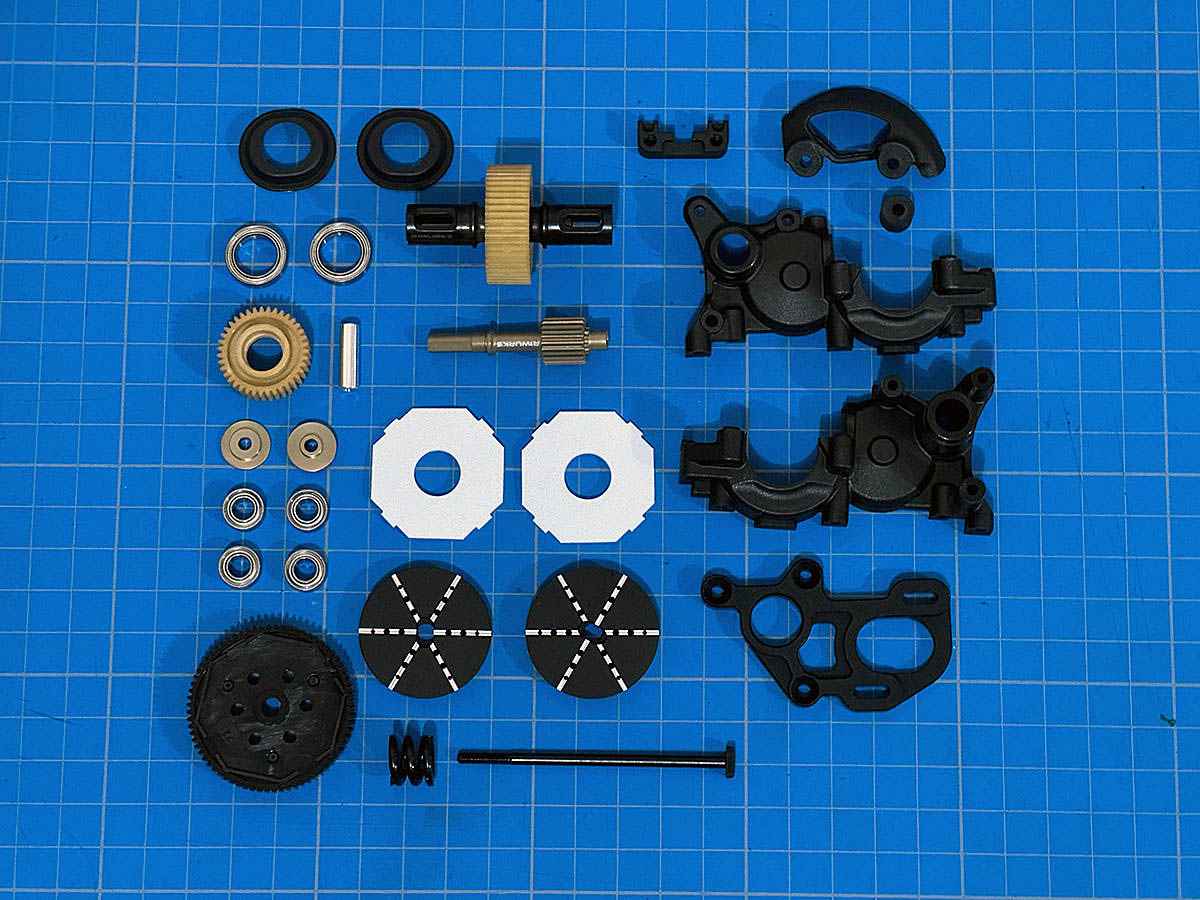
GEARBOX ASSEMBLY
Next on the list is the gearbox assembly. Like the ball diff hubs, the aluminium top shaft and slipper hubs have been extensively CNC-machined to keep rotating mass to a minimum.
The motor mount is yet another beautifully machined piece of CNC-machined aluminium with material removed from where it's not needed - solid yet lightweight.
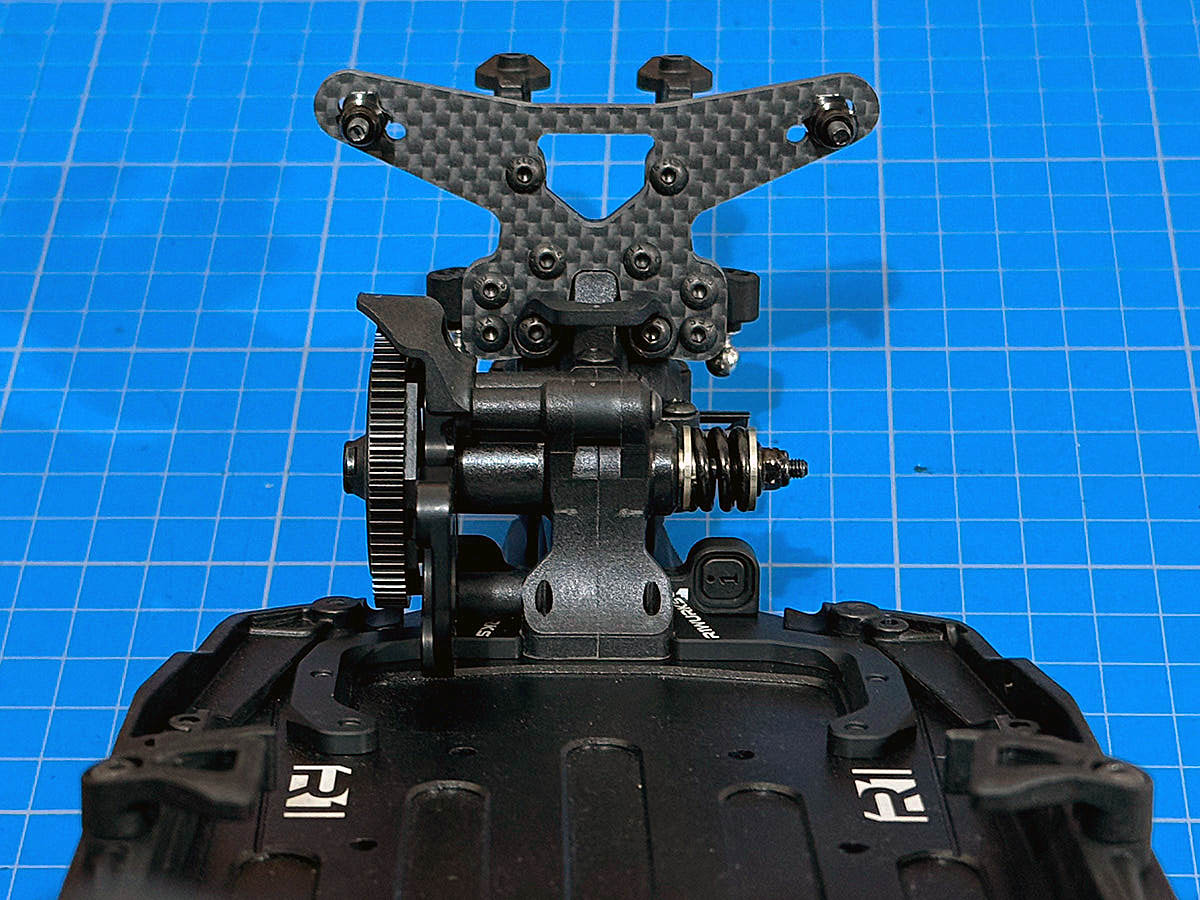
GEARBOX INSTALLATION
It is important to note that the gearbox has a very snug fit to the chassis - patience is required!
We decided to slightly chamfer the edges of the square boss on the bottom of the gearbox with a small file (only by about 1mm) which seems to help.
We also left some of the gearbox screws untightened by about a 1/4 of a turn until it's ready to be installed onto the chassis. This ensures that everything sits nice and square. Once everything is sitting nice and flat, then slowly tighten all the screws.
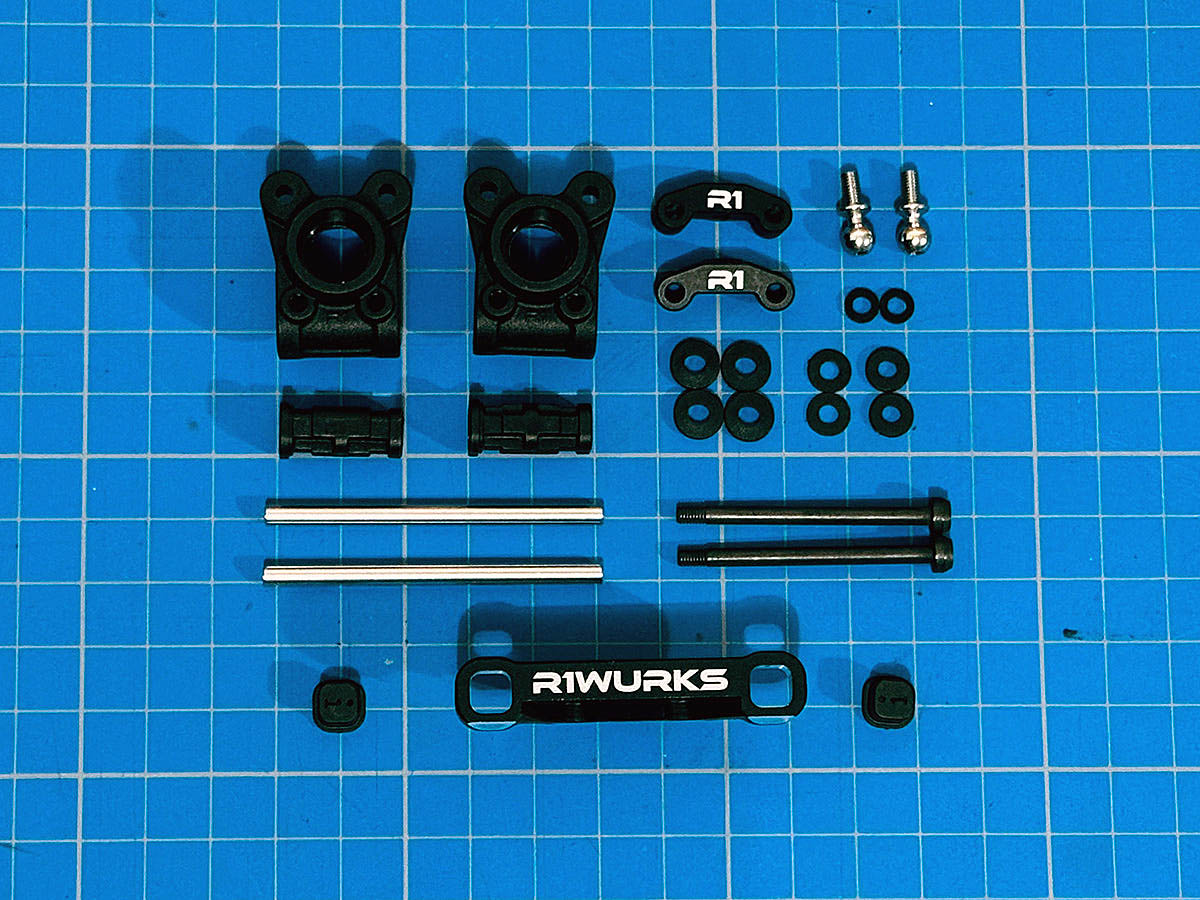
REAR HUBS
Next up are the molded composite rear hubs which come with composite inserts to adjust rear hinge pin positions - 9 positions of varying widths and heights are available.
As noted previously, the inserts/pills in this step bag are what's required to build to kit setup. Other inserts are provided in the "Spare Parts" bag.
The rear toe block and ball stud mounts are both CNC-machined aluminium pieces with the requisite R1 logos.
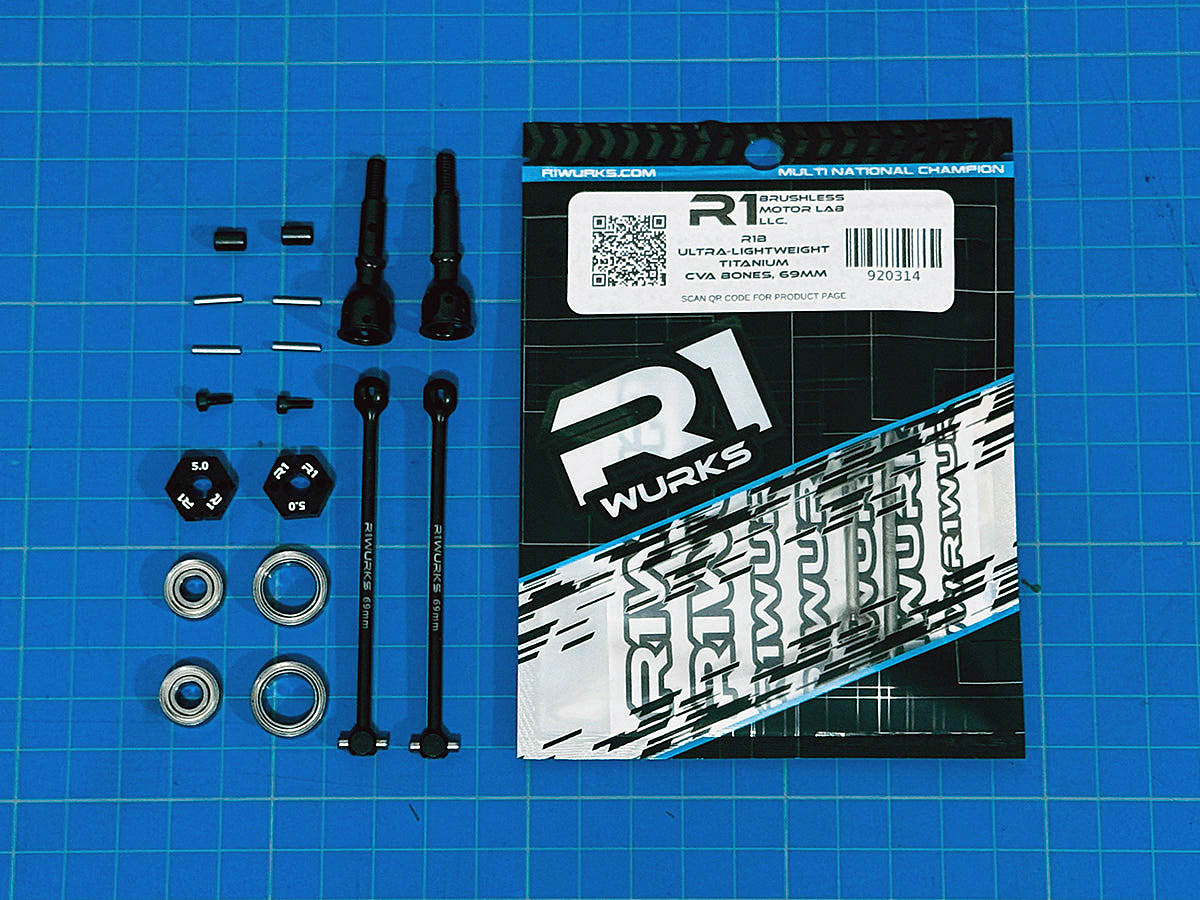
REAR DRIVESHAFTS
Onto the rear driveshafts and we are again doing it once and doing it right. Since we will be doing the bulk of our racing in 17.5T class, we're installing the 920314 lightweight titanium CVA bones from the get-go.
Like the front end, the rear comes with 5mm hexes with optional hexes going all the way up to 8mm thick.
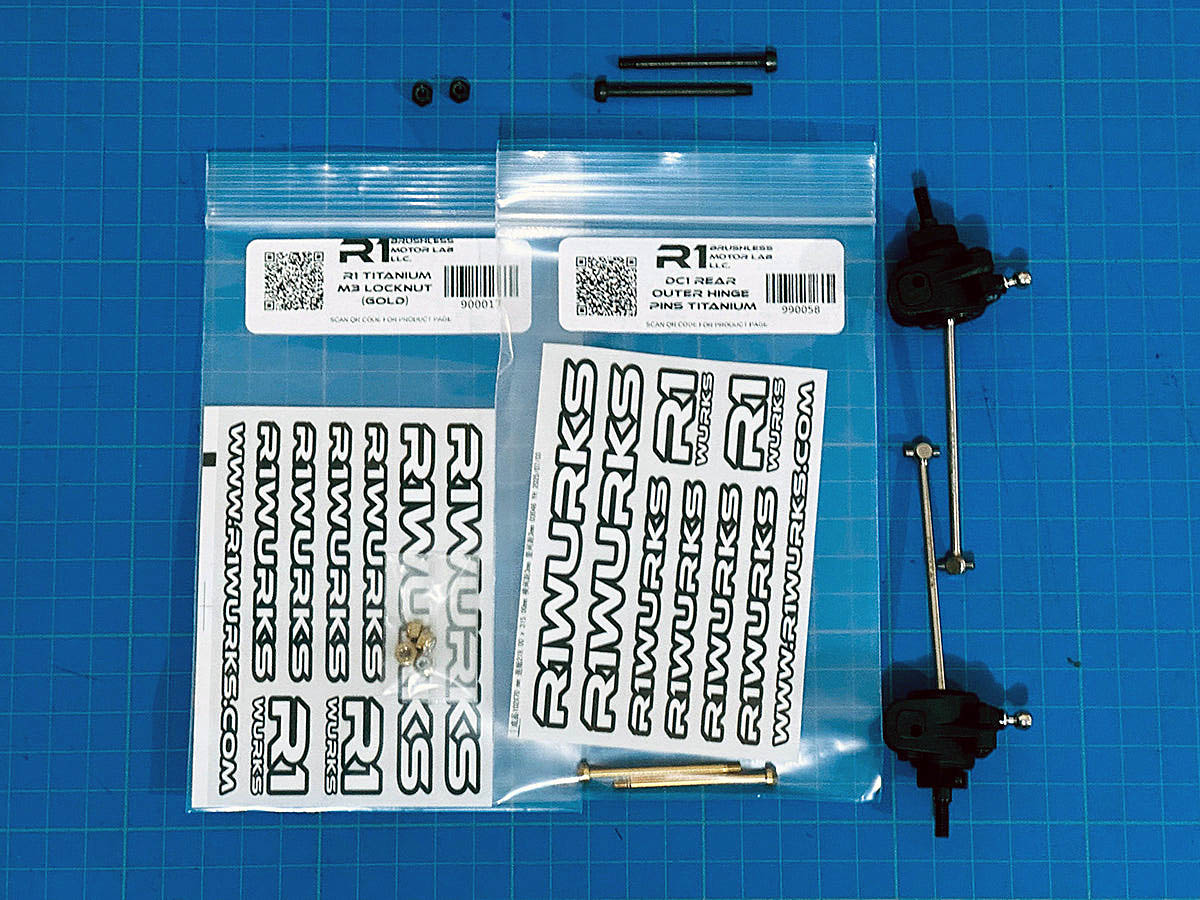
REAR BLING
With the driveshafts assembled and installed into the rear hubs, it was time for more bling!
Enter R1Wurks' own 990058 titanium outer rear hinge pins and 900017 titanium locknuts. The quality of these titanium parts are new level and made inhouse in R1Wurks' US facilities.
It was then time to install the rear end onto the chassis (sorry too excited/tired and forgot to take photos)...
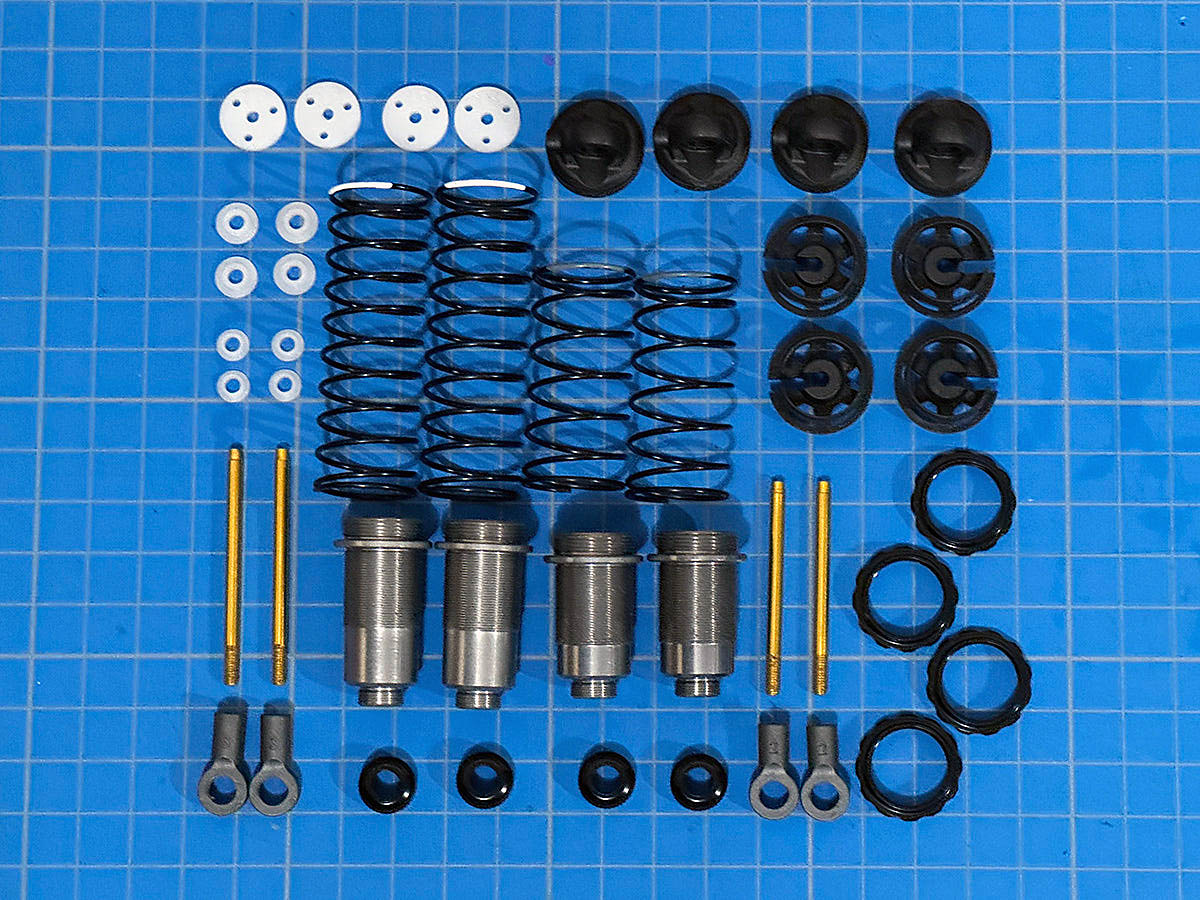
FRONT & REAR SHOCKS
Arguably one of the most important components in an offroad buggy are the shocks and the R1Wurks shocks do no disappoint!
Featuring polished, hard-coated aluminium threaded bodies and titanium nitride coated shock shafts, they produce shocks that are smooth as silk and easily on par with the best shocks on the market!
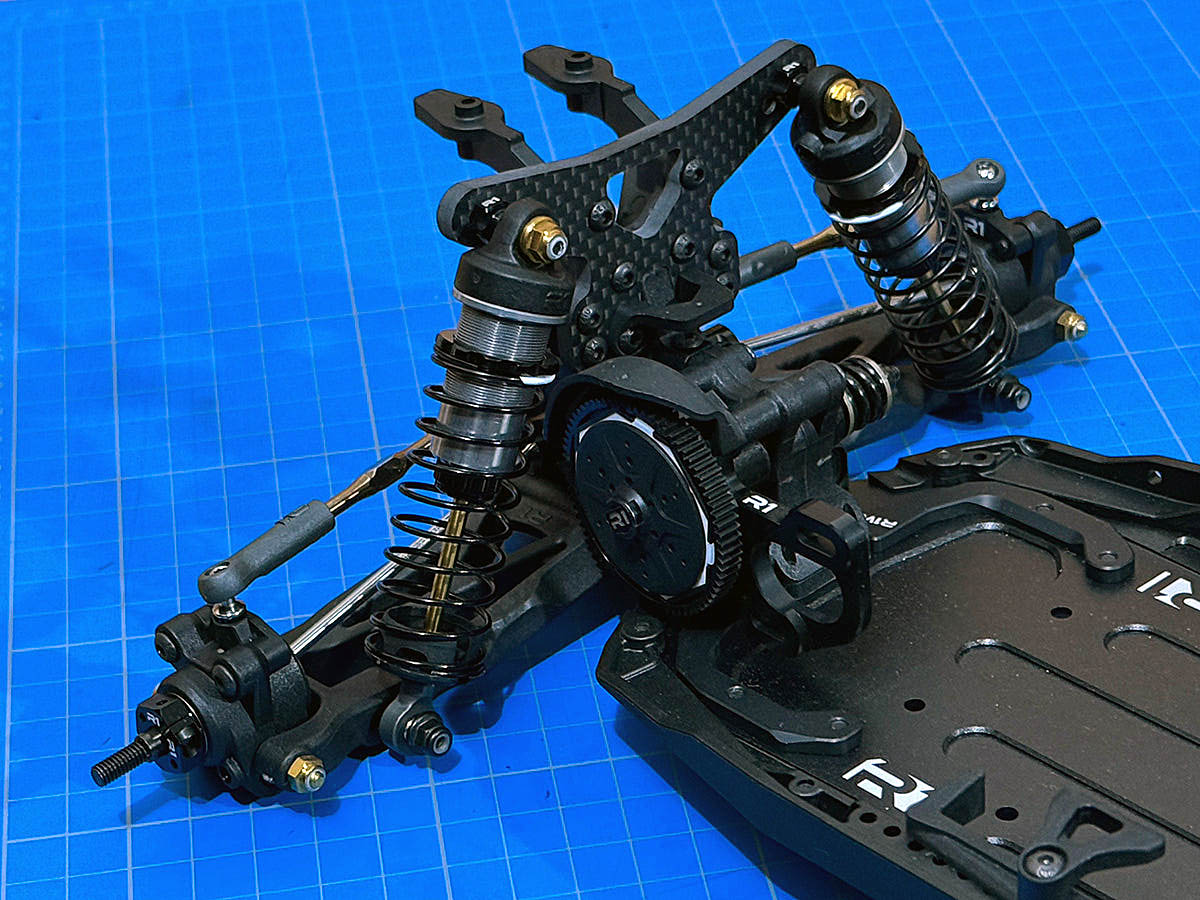
COMPLETED REAR END
The completed rear end looks the business with the shocks installed!
The kit build features 3 degrees rear toe and a narrow track width with the toe pills nominated in the manual - albeit pushed out slightly wider with the rear hub pills.
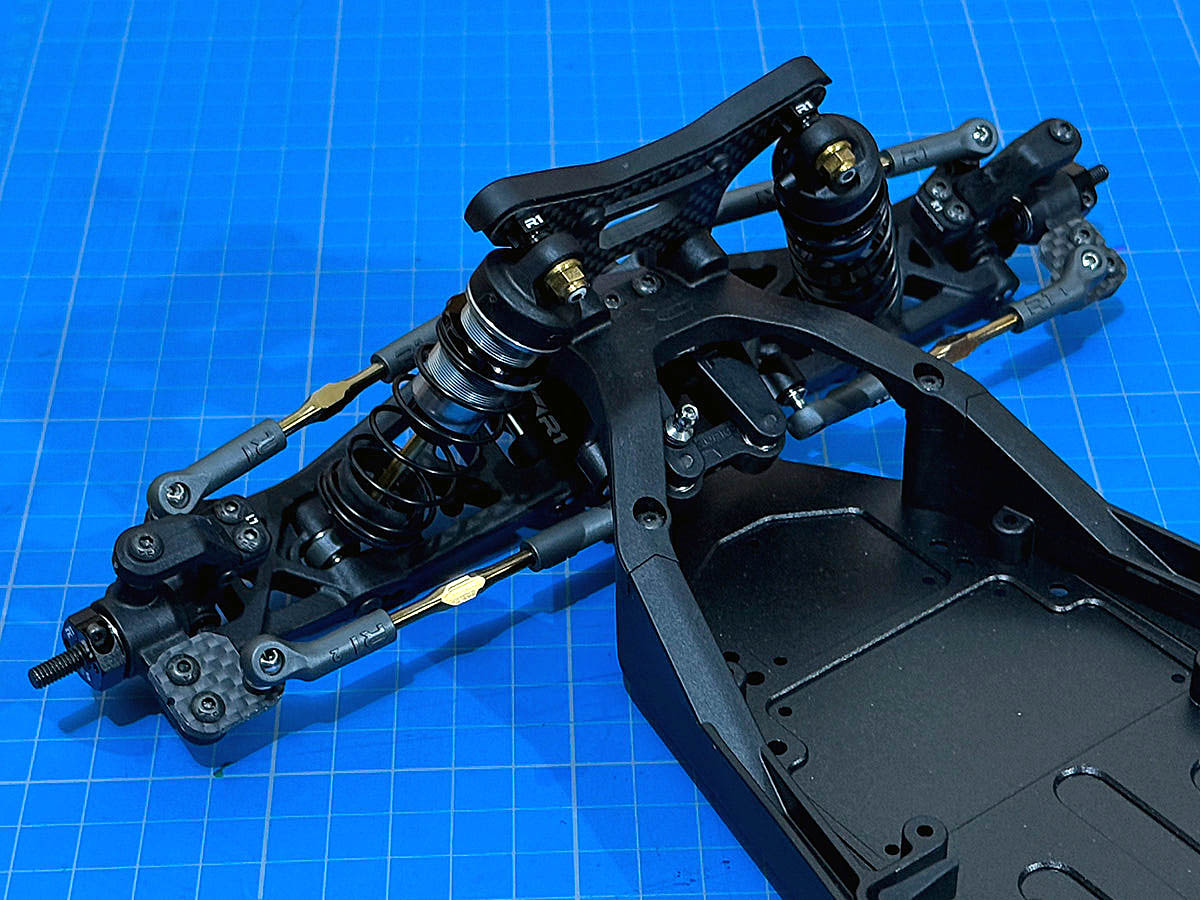
COMPLETED FRONT END
The completed front end with shocks mounted is also looking pretty sleek and ready for the servo install!
The optional bronze titanium turnbuckles and hardware really lifts the look of the buggy while trimming off some weight at the same time.
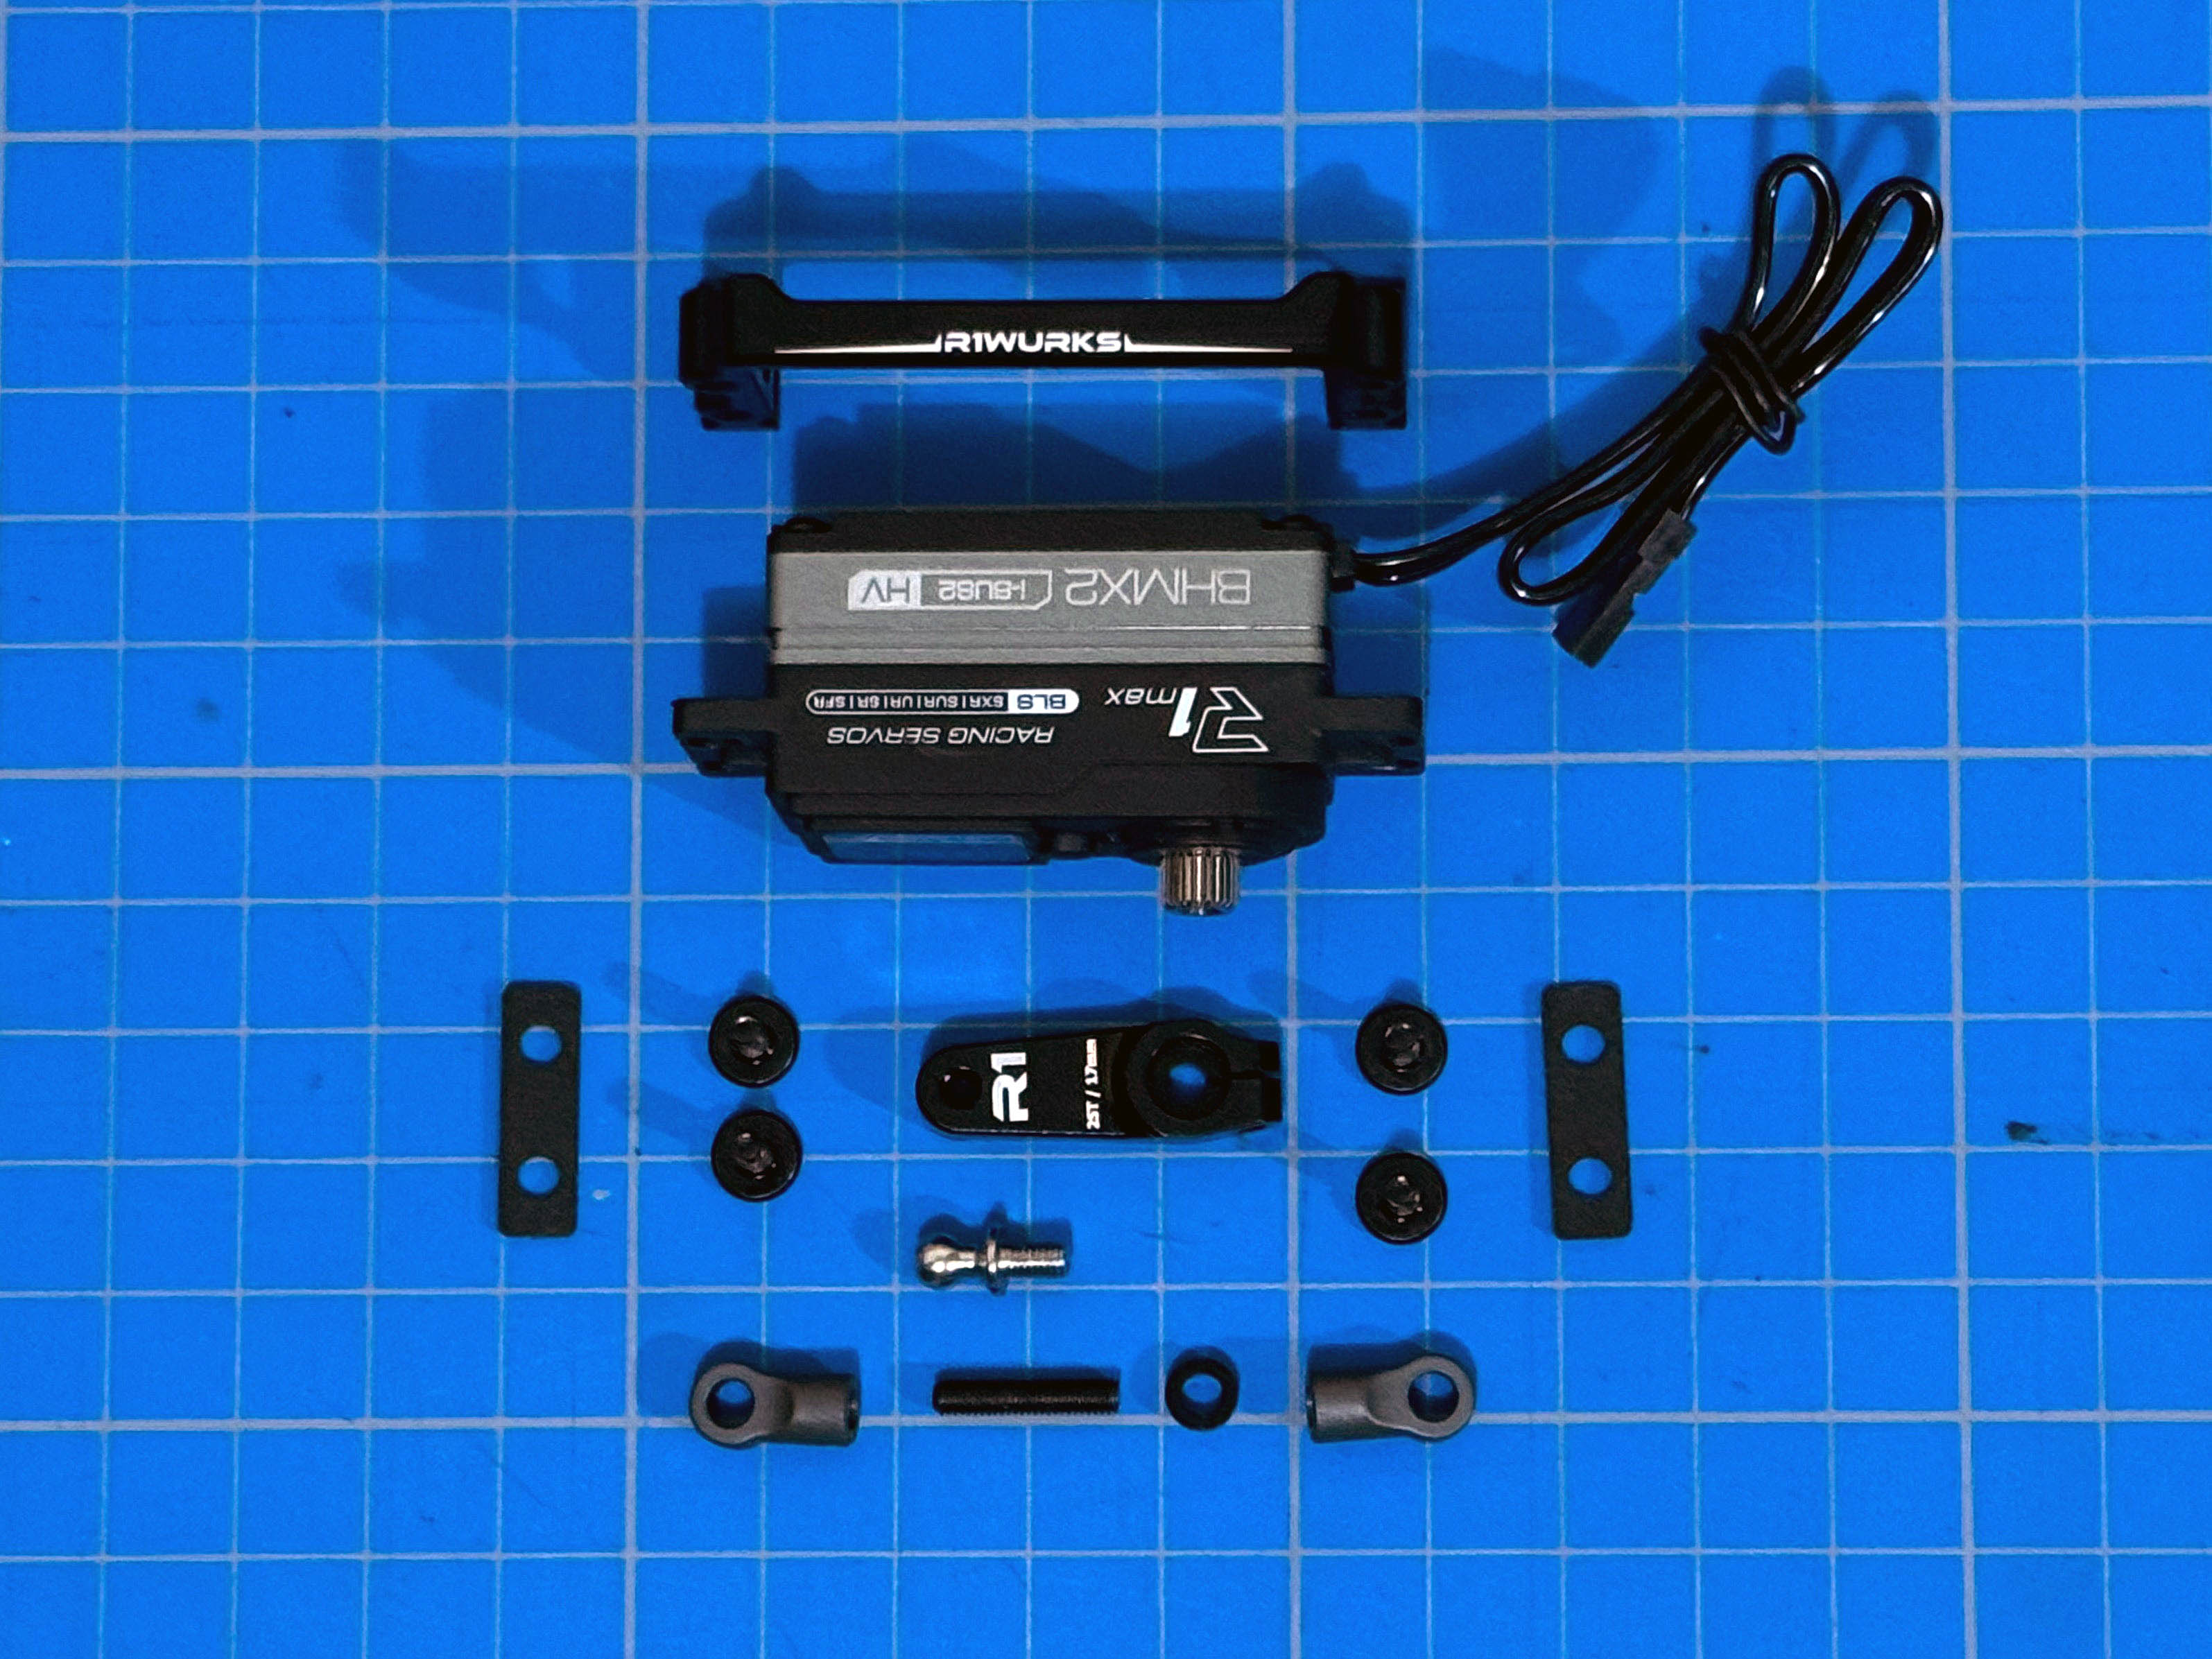
SERVO INSTALLATION
R1Wurks has chosen to include a premium aluminium monoblock servo mount and an aluminium servo horn as standard on the R1B - both normally option parts on most other buggies!
We have chosen the SRT BHMX2 Ultra Low Profile Brushless Servo to perform the steering duties. Shorter than most low profile servos, the BHMX2 weighs in at just a touch over 40g! This keeps the front end nice and light for more rear weight bias to suit our lower traction surfaces.
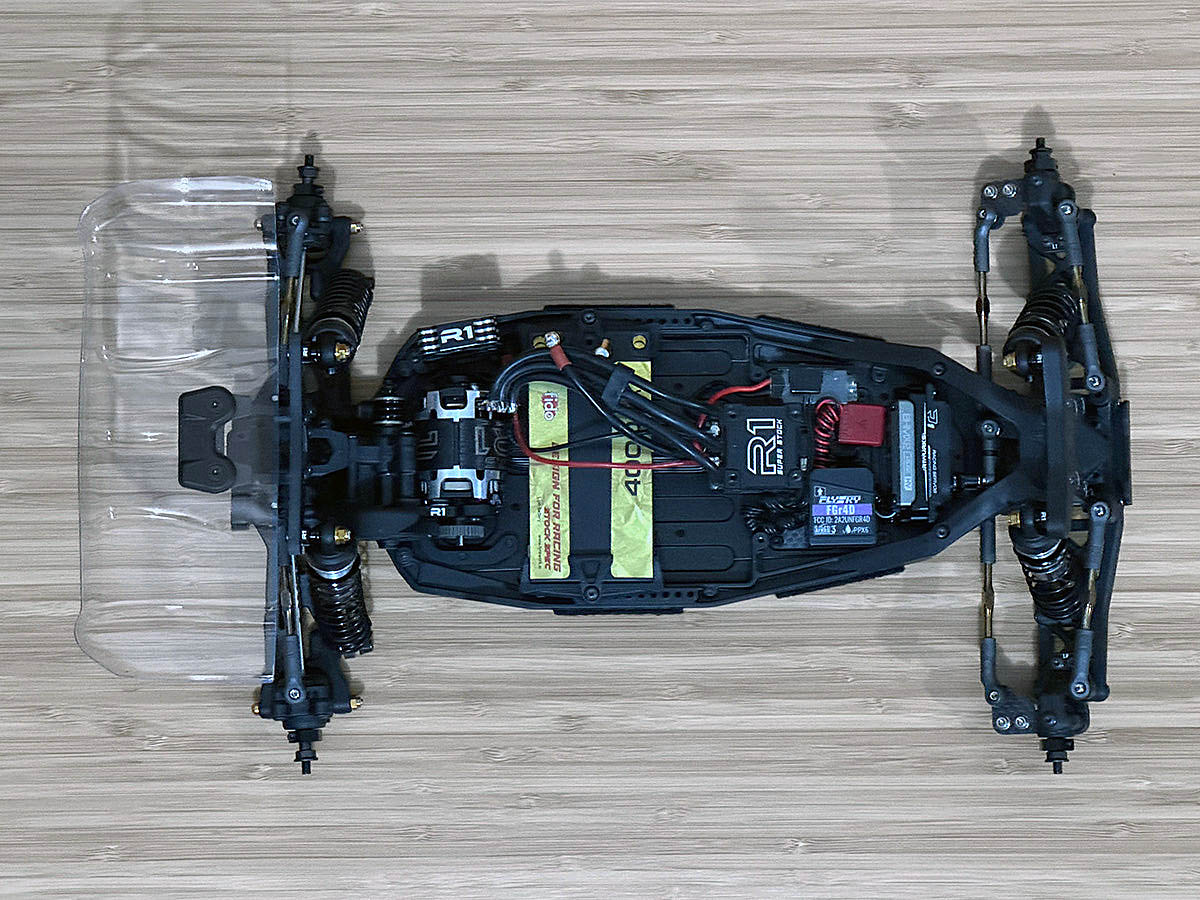
ELECTRONICS INSTALLATION
To complete the electronics package, we've chosen R1Wurks power in the form of a V30 17.5T motor, cooled by their low-profile aluminium fan and controlled by their Digital 3 Super Stock ESC.
Fuel comes from multiple RCRA state-title winning Fido LiPo Batteries with their gold-labelled packs complementing the other gold and bronze accents we've added to our R1B!
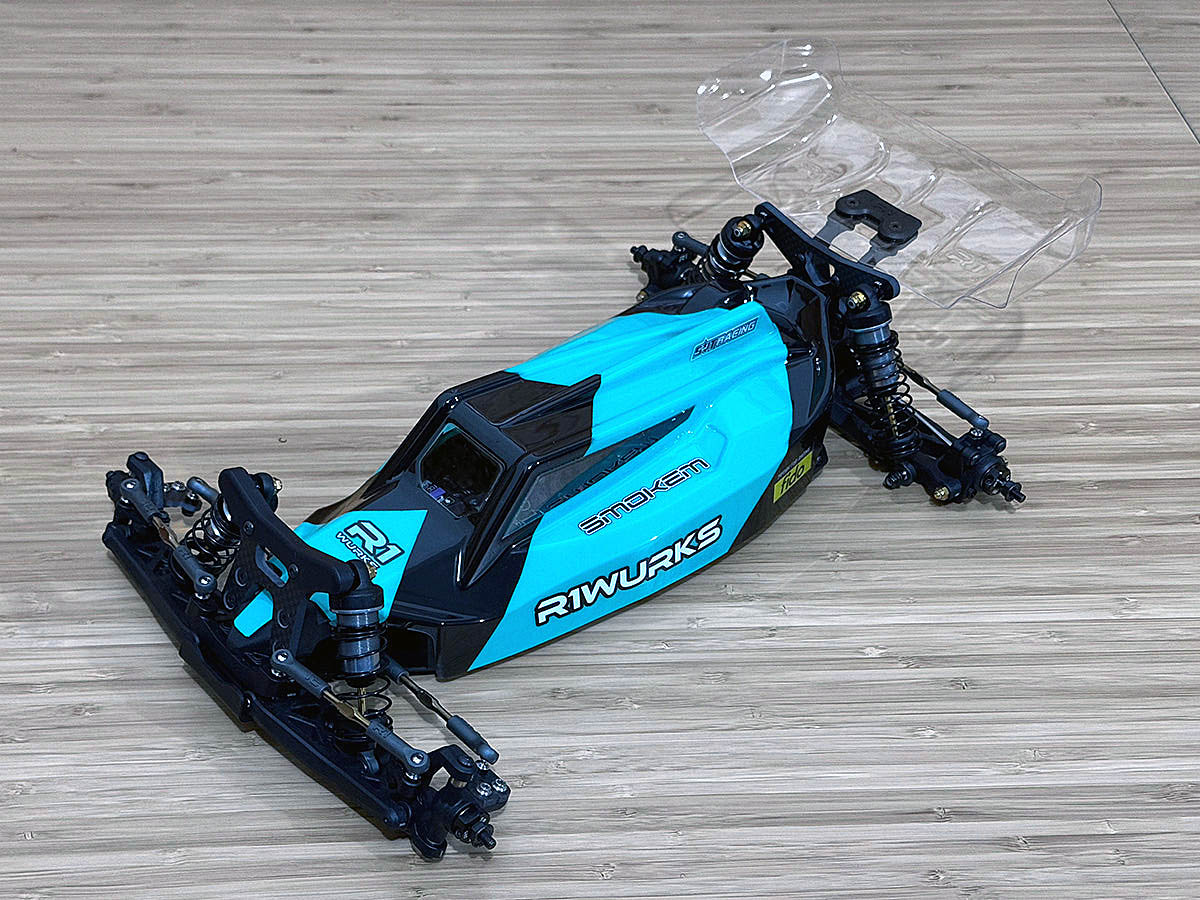
BODY & WING
Last but not least are the body and rear wing. We were presented with a nice surprise as both came precut from the factory - no cutting, trimming or reaming needed! Also included is a precut front wing with mounting hardware should you decide to run one.
With the time saved, we decided to treat the R1B to a 2-colour paint scheme - yes very extravagant!
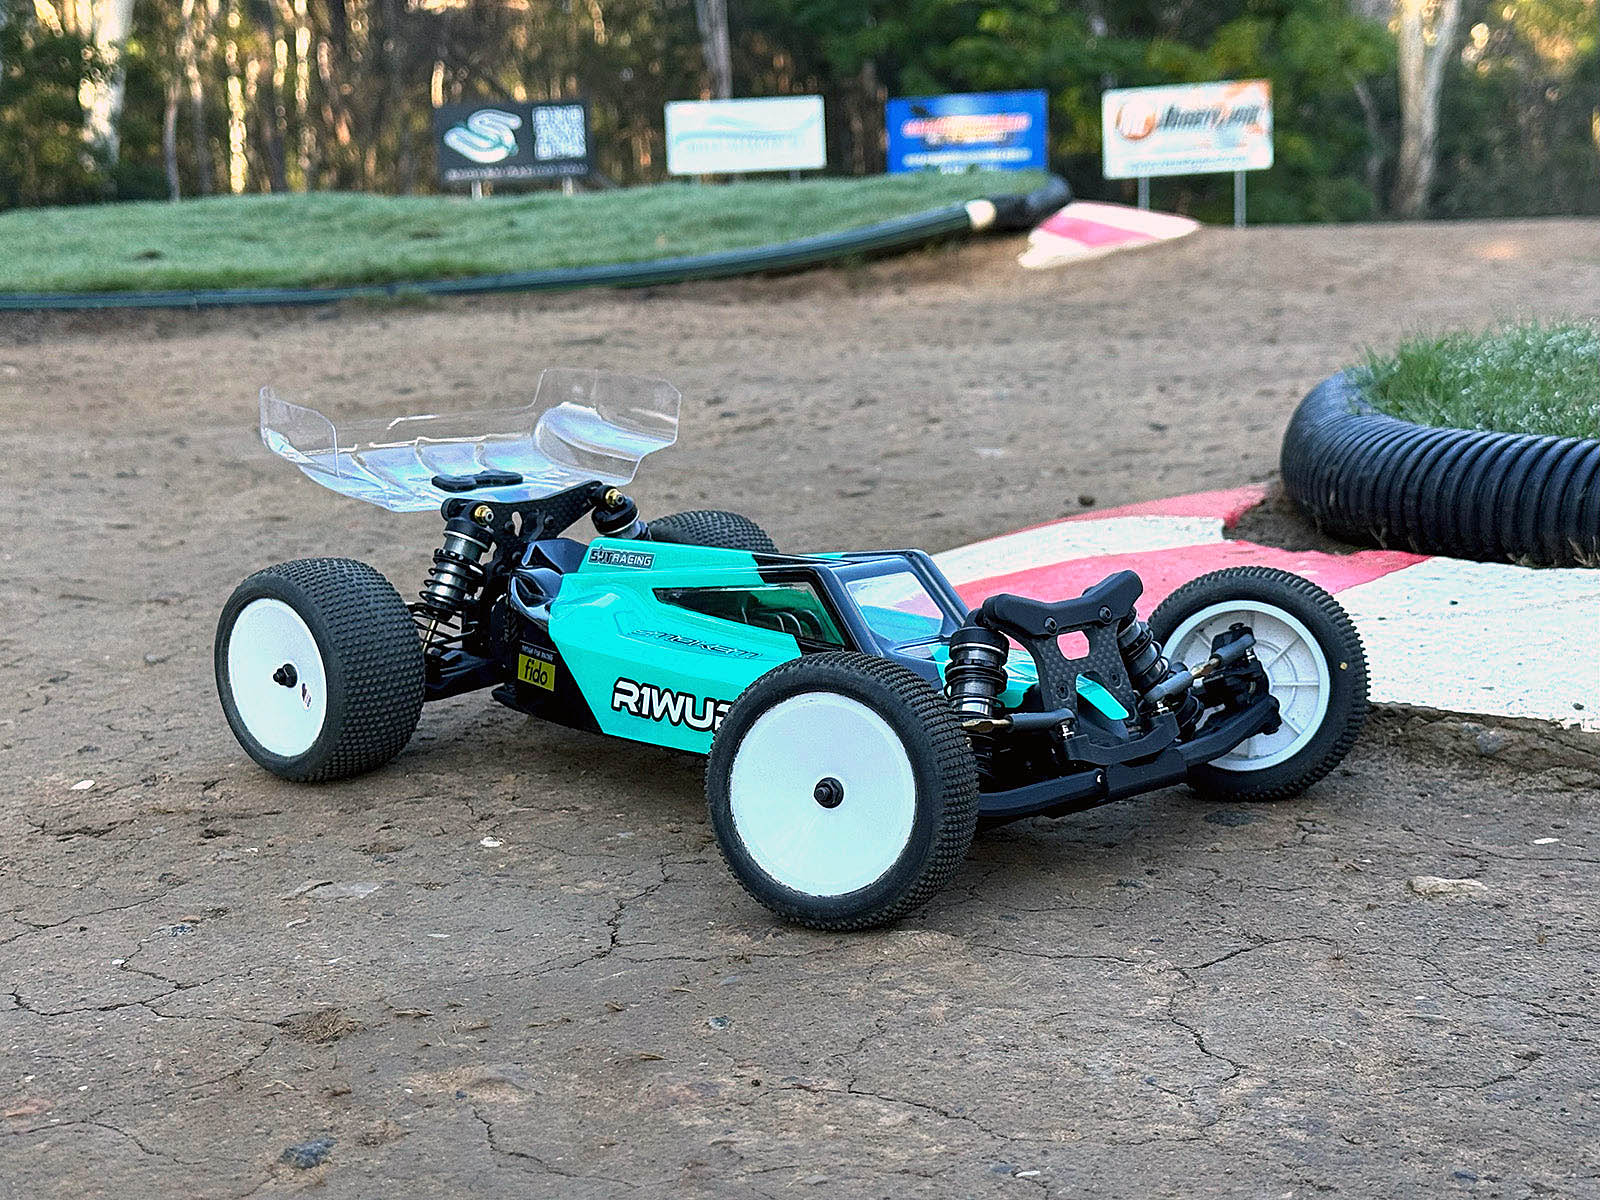
SUMMING UP
If the fit, finish and quality of the components are anything to go by, the R1B should prove to be a worthy competitor to the established players on the market.
With several ROAR National wins already under its belt, the R1B has proven race winning DNA. We can't wait to put it through its paces in the coming weeks!