|
- Team Durango DEX410V3 - Adam Skedling - Base Setups -
Stuart Styles
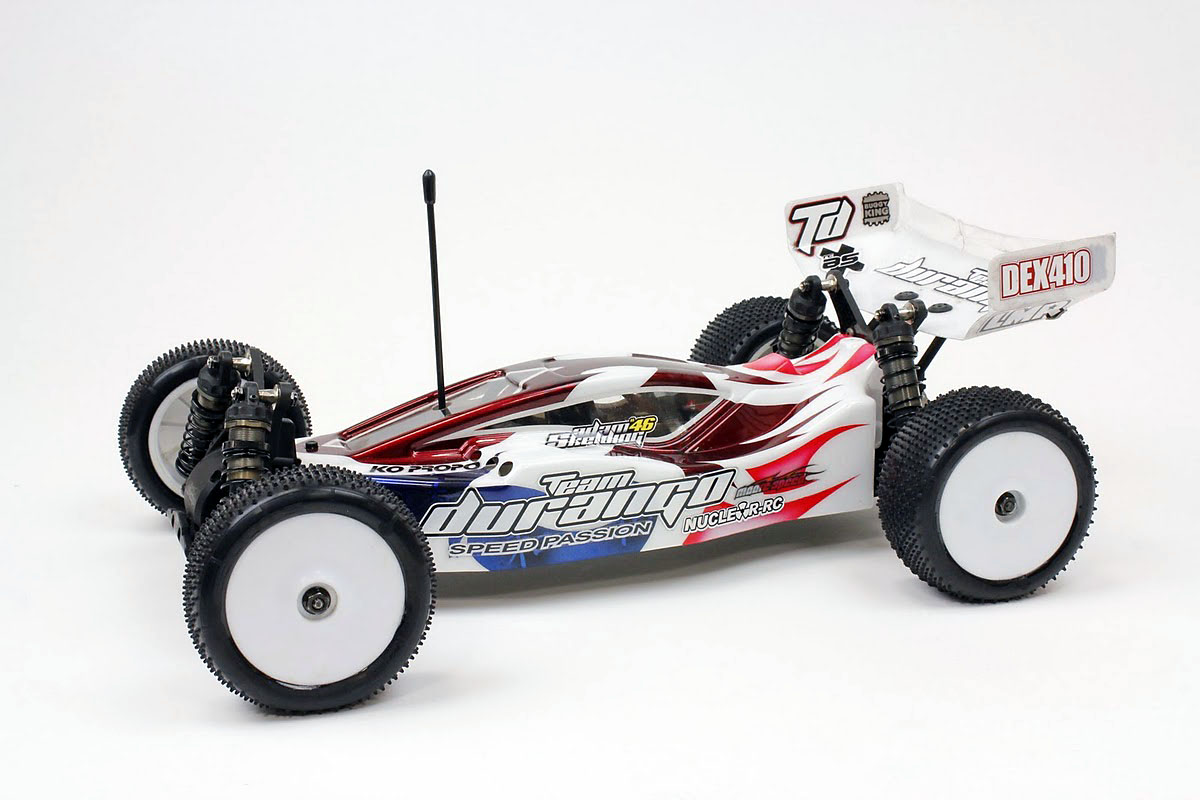
With the recent launch of their version 3 model of the massively successful DEX410 platform, Team Durango has planted themselves firmly in the 1/10th off-road landscape. The brands wonderful attention to detail and truly breath taking build quality has won thousands of discerning racers hearts during their rise to buggy production fame. Imagine the excitement I was filled with when the opportunity arose for me to get a closer look at the new 4wd buggy of U.K team manager and Team Durango designer Adam Skelding? It was a loud and resounding “Yes” from me when Adam asked if I would like to share with the community what’s going on ‘Under The Lid’

When the DEX410 was first released more than two years ago, it turned heads across the entire off-road racing scene. Racers instantly fell in love with the buggy’s bold new design qualities, and the DEX410 V3 is the next evolution of this now famous platform. With a 2009 IFMAR Worlds win and the 2011 EFRA European Championship title stashed away for this platform, we may question just how Team Durango can make the DEX410 any better. Enter stage left the hotly anticipated DEX410 V3……Adam Skelding’s DEX410 V3 to be exact!
Adam was kind enough to share 2 very useful set ups with us. The first one is his ‘go to’ configuration for indoor carpet and polished floor. The second is a set-up that is geared towards outdoor astroturf usage. Adam was keen to point out the following points:
“Across the research and development of our team set-ups for the V3, it’s fair to say that we have experienced a really broad selection of set-up choices. We often test each others cars to see how our set-up changes compare with our unique driving styles. A couple of us can manage to still put in fast laps with the other drivers car, whilst some of the team set-ups just don’t work with each drivers personal driving techniques. In short, these set-ups are intended as a clear solid starting point as each racer is different. Experiment and find a set-up that suits you and your chosen track, the V3 just won’t let you down”
Indoor – Carpet/Polished floor set-up:
Front:
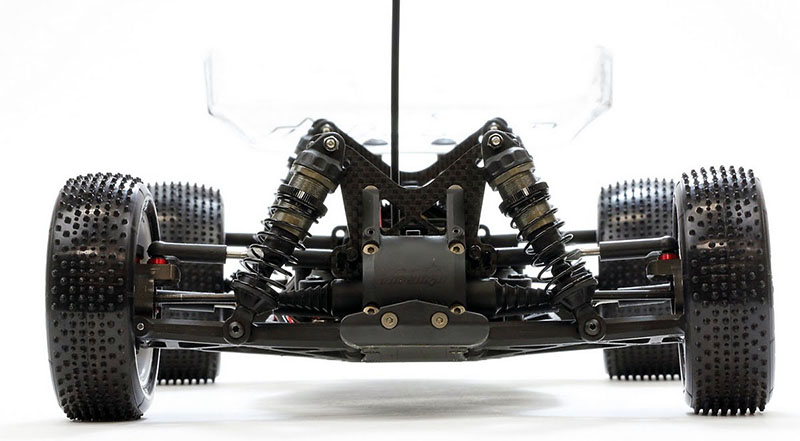
Ride Height - 19mm
Camber Angle – 1 degrees
Castor Angle – Standard Kit
Toe In/Out – 0 degrees
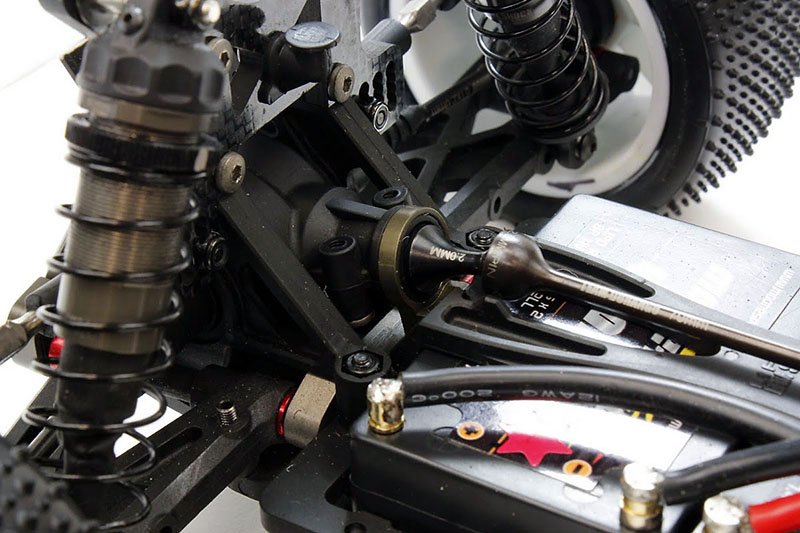
Diff. Oil – 7000 cst
Sway Bar – None
Sway Bar link – N/A
Extra notes – 21 degree Castor Blocks
Shock positions – Top = 2nd hole from outside, Bottom = outside hole on wishbone
Camber link positions – Inside block position 2, Outside 2.00 mm spacer under link, Outside position 1
Shocks – Springs: Dark Red, Rebound: 0%, Preload: 6mm, Oil WT: 500cst, Piston: 6 x 1.2mm, Length: 22.0mm, 2MM Limiter inside cartridge
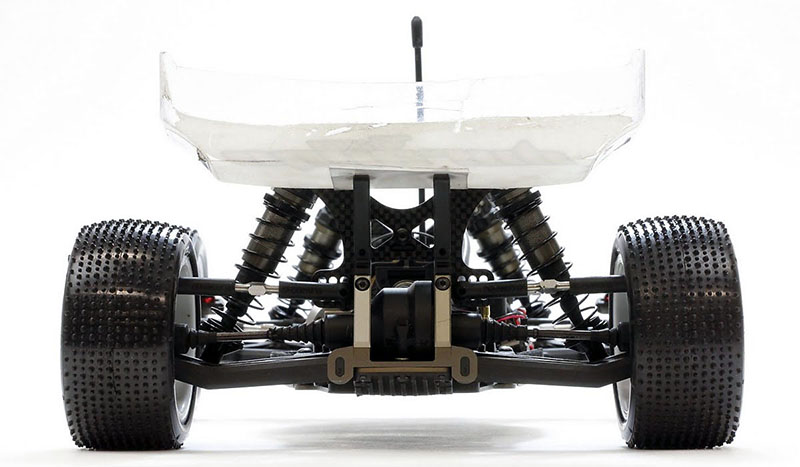
Rear:
Ride Height - 19mm
Camber Angle – -1.5 degrees
Toe In/Out – 2 degrees with 1 degree hubs
Diff. Oil – 3000 cst
Sway Bar – None
Sway Bar link – N/A
Wishbone Droop – 1.00 mm
Extra notes – None
Shock positions – Top = 2nd hole from outside, Bottom = middle hole on wishbone
Camber link positions – Inside block position 3, Outside position 3
Shocks – Springs: Black, Rebound: 0%, Preload: 1.5mm, Oil WT: 300cst, Piston: 3 x 1.3mm/3 x 1.2mm, Length: 33.0mm

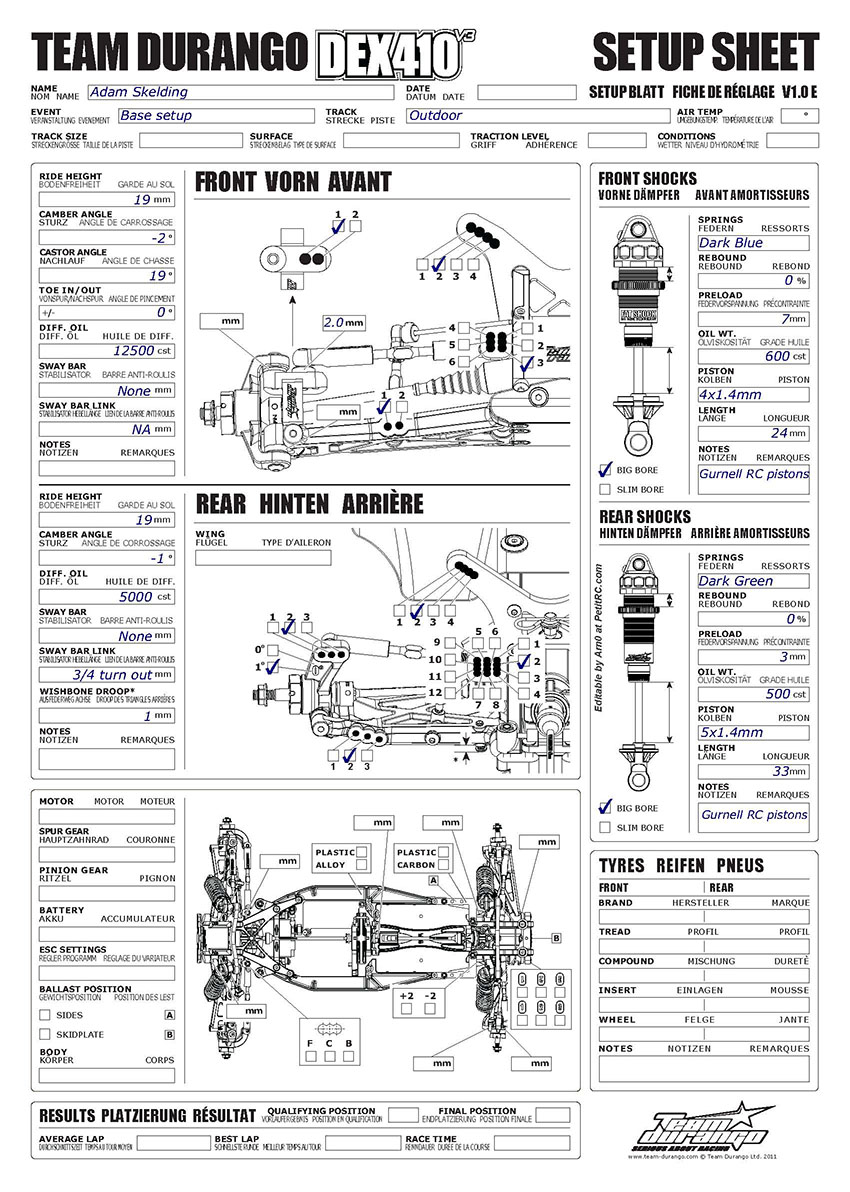
Outdoor starting set-up:
Front:
Ride Height - 19mm
Camber Angle – -2 degrees
Castor Angle – 19 degrees
Toe In/Out – 0 degrees
Diff. Oil – 12500 cst
Sway Bar – None
Sway Bar link – N/A
Extra notes – None
Shock positions – Top = 2nd hole from outside, Bottom = outside hole on wishbone
Camber link positions – Inside block position 3, Outside 2.00 mm spacer under link, Outside position 1
Shocks – Springs: Dark Blue, Rebound: 0%, Preload: 7mm, Oil WT: 600cst, Piston: 4 x 1.4mm, Length: 24.0mm, Gurnell RC pistons
Rear:
Ride Height - 19mm
Camber Angle – -1.0 degrees
Toe In/Out – 2 degrees with 1 degree hubs
Diff. Oil – 5000 cst
Sway Bar – None
Sway Bar link – N/A
Wishbone Droop – ¾ turn out
Extra notes – None
Shock positions – Top = 2nd hole from outside, Bottom = middle hole on wishbone
Camber link positions – Inside block position 2, Outside position 2
Shocks – Springs: Drak Green, Rebound: 0%, Preload: 3mm, Oil WT: 500cst, Piston: 5 x 1.4mm, Length: 33.0mm, Gurnell RC pistons

Adam went on to translate his tyre choices for both outdoor and indoor usage:
Indoor: dBoots NanoByte all round in A compound with dBoots medium inserts up front, and soft inserts in the rear. Adam cuts the outside row of the front tyres for carpet and polished floor tracks.
Outdoor: Schumacher Minispikes in yellow compound all round with hard dBoots inserts up front and medium dBoots inserts in the rear. Adam cuts both inside and outside rows off front and rear for outdoor usage.
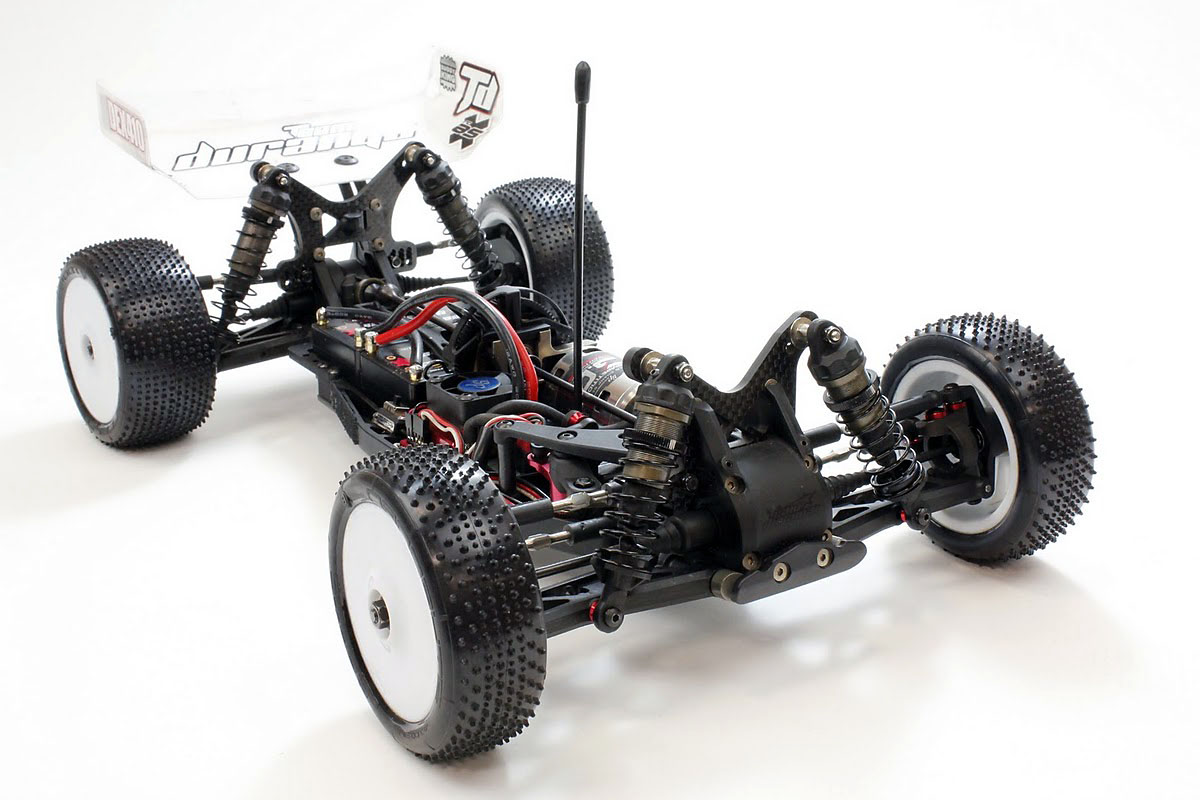
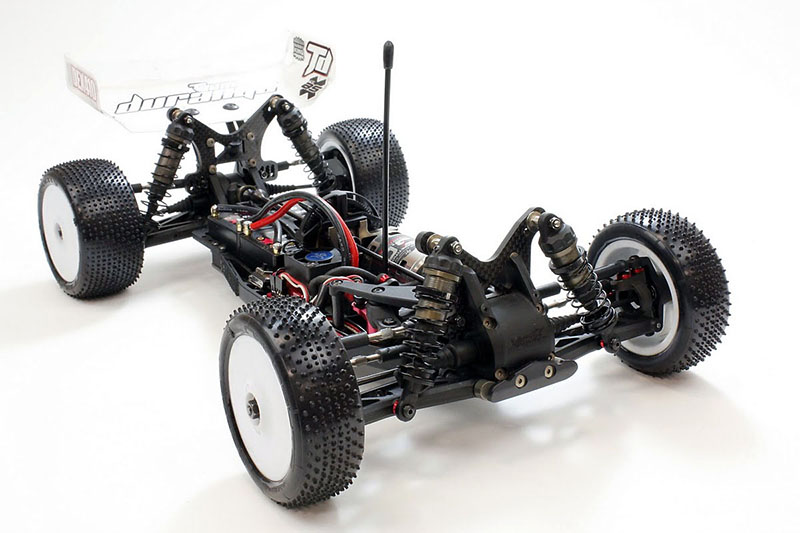
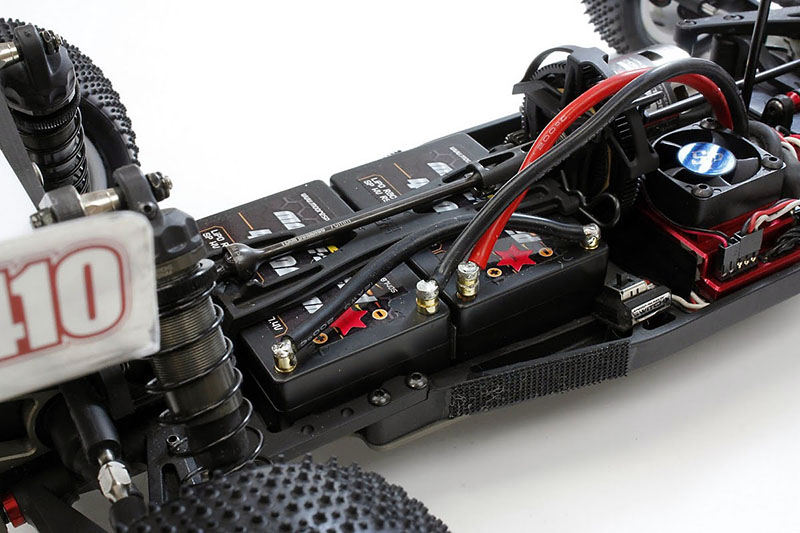
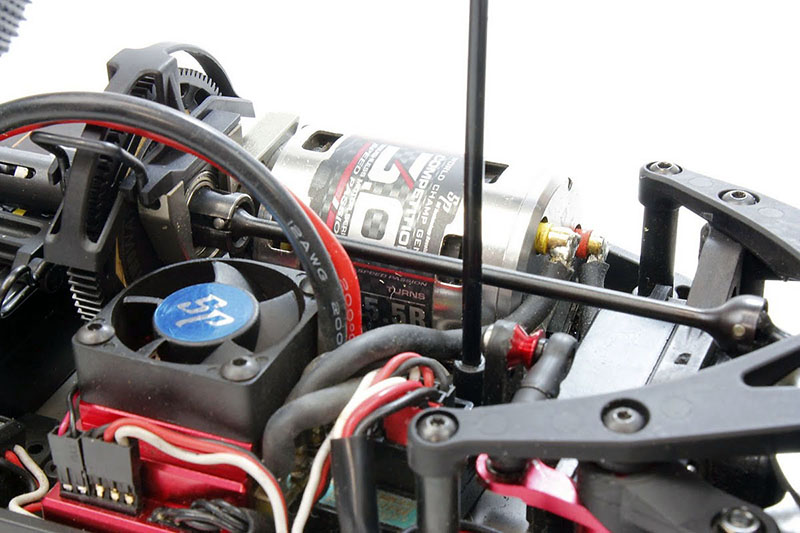
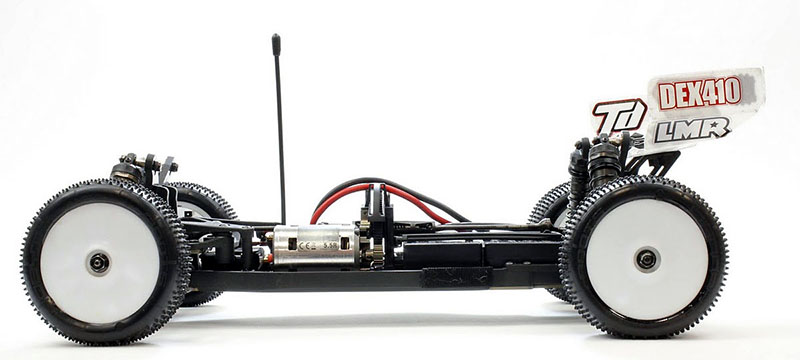
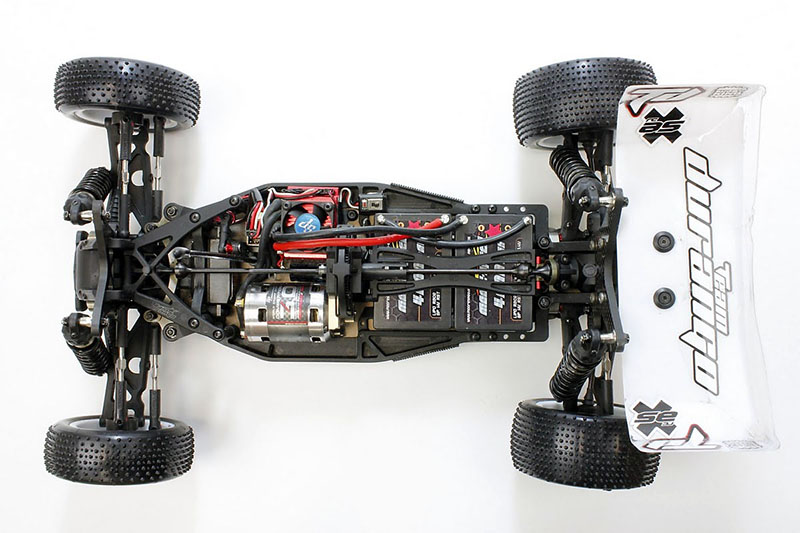
A look inside Adams's DEX410 V3 shows a super neat electrical install. Adam is a fan of simple no nonsense installs and says he always wants the neatest layout he can get, "The DEX410 V3 allows me to get all my essential electrical items in, with a really nice layout and minimal wiring...perfect"
Adam currently runs almost exactly the same electrical set-up both indoors and outdoors.
Indoors:
Motor: Speed Passion v4.0 5.5T
Spur Gear: 84T
Pinion Gear: 20T
Battery Cells: Moore Speed 4600 mah
ESC: Speed Passion 1300 Mod with Turbo set at 0.8s
Outdoors:
Motor: Speed Passion v4.0 5.5T
Spur Gear: 84T
Pinion Gear: 21T
Battery Cells: Moore Speed 4600 mah
ESC: Speed Passion 1300 Mod with Turbo set at 0.8s

From looking across Adams 410 V3 we can all see the solid and simple set-up choices he uses to keep the car in shape across various track conditions. The V3 seems beautifully balanced both in the hands and out in the field. Adam shares his true passion for this buggy with some closing words that we feel give us all a clear outlook on getting to grips with tuning and set-up with the DEX410 V3
"Remember guys, what suits one driver will not suit the next, stay simple and get yourself in a position where you have a 'go to' basic set-up for both indoor and outdoor. That way you always have somewhere to return to if your set-up changes do not give you the desired effect. Enjoy your DEX410 V3 as much as we did creating it!"
I would like to thank Adam for taking time out to share these interesting insights with us all. Durango are certainly creating beautiful products that seem to convey a really solid philosophy of aesthetics AND performance. Stay tuned for more Team Durango set-up tips soon as we begin to explore how other racers get their 'Rango' ready to race.
|