|
B6ProTip : don't be a @b_wheats. install the FRONT bulkhead brace on the FRONT of your FRONT arms
wallietip: if using the FT aluminum steering rack, bellcranks and servo horn run the steel kit screws rather than the titanium ones. The aluminum parts minimize the flex in the steering which stresses these two screws and can cause them to shear.
Pro Tip: You can get the +1 offset axle height using B5M parts on your B6D. Use a "mid" bushing on bottom and a "offset thick" on top.
Schelle bushings shown but the AE work too. I have a B6 basic and complete set coming soon but for now you can makeshift with parts in your box.
In the B6D kit, you get the axle down "0 " setting or axle up "3".
In the B6 kit you get the axle "1" as shown or the "2". Flip bushing for the opposite setting.
|
|

|
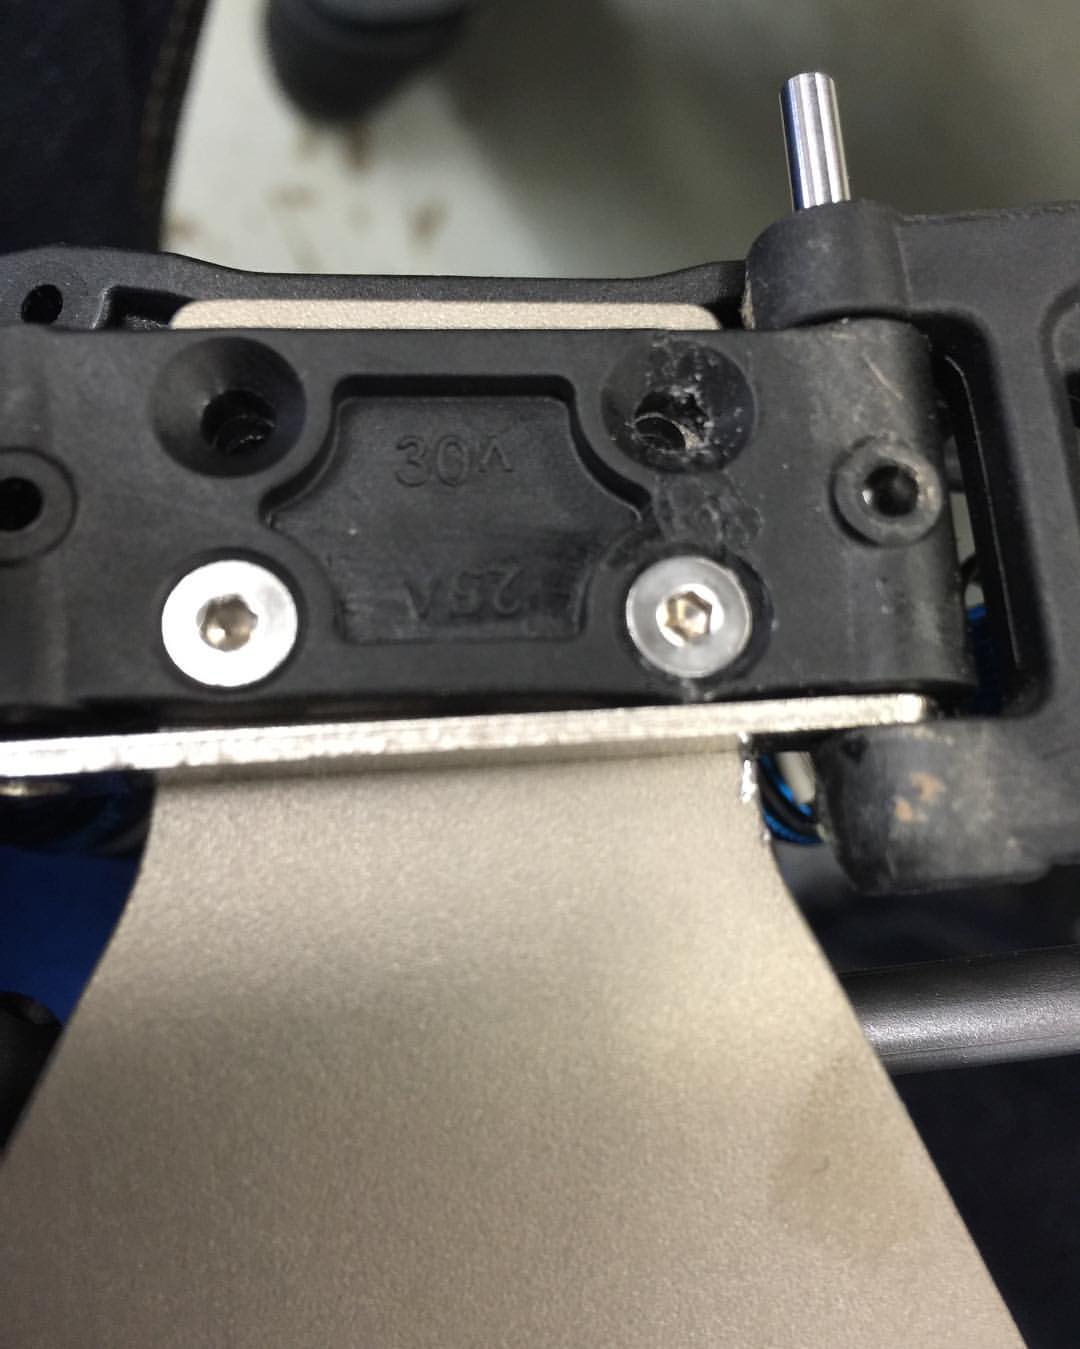
B6Tip for your @teamassociatedrc B6 or B6D.
If you're not able to get full throw to the right, this ballstud may be too high. With all the different servos, servo horns and tolerance build-up, the articulation of the drag link may be the limiting factor.
The aluminum bellcrank calls for 2mm here, but I had to go to 0 in order to get full throw.

B6Tip for the @teamassociatedrc B6 and B6D
I've been asked a few times about the inserts for the "D" arm mount. The inserts are the same for the "C" and "D" arm mounts. The inserts and aluminum "C" arm mounts are included in the kit, however the "D" arm mount is plastic.
If you want to have all the rear roll center, pin height, toe and anti-squat adjustments you need the 91688 Aluminum "D" Arm Mount.
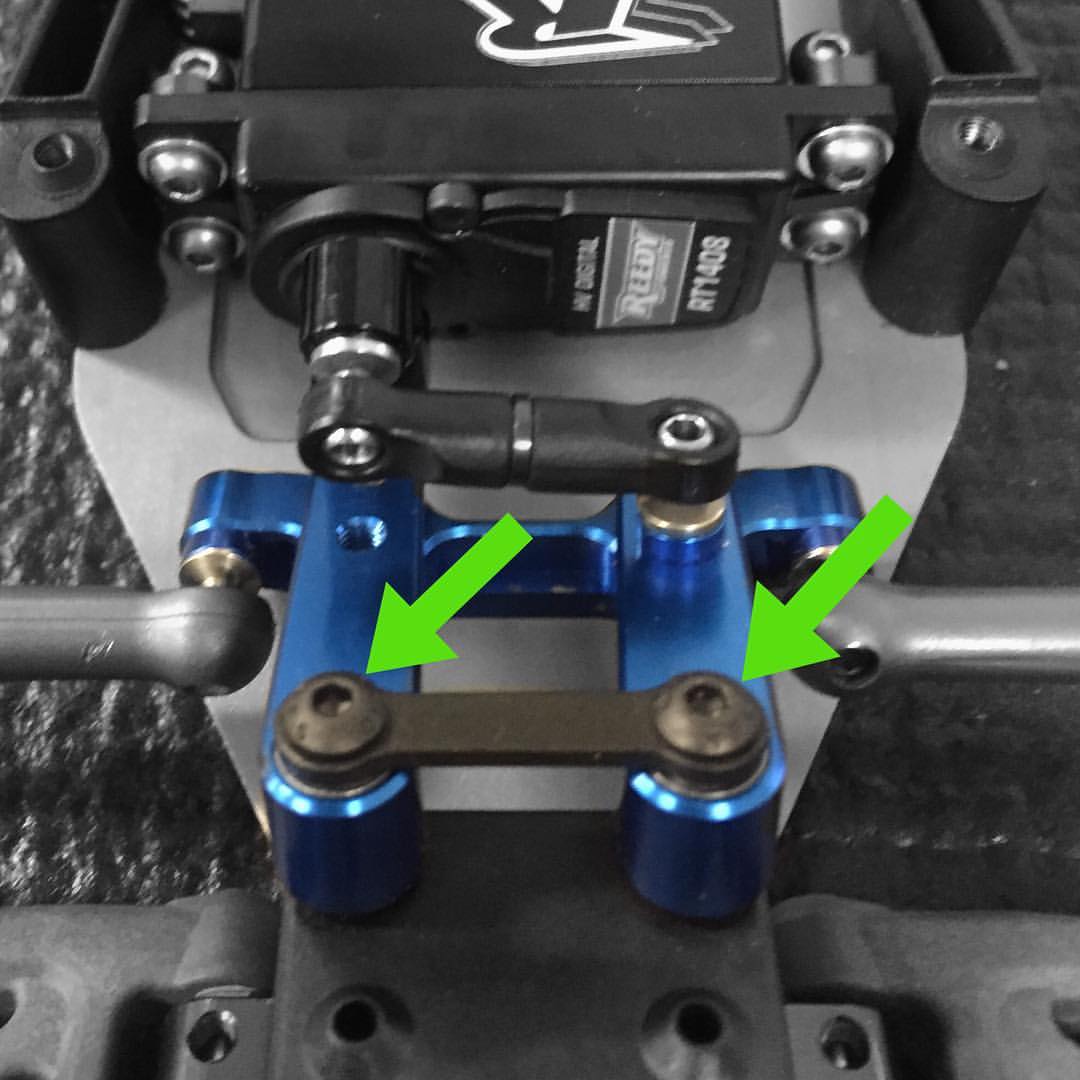
B6 Tip for the @teamassociatedrc B6 and B6D
With all the rear roll center adjustments available in the B6 platform it can be confusing communicating what each position means. For me, the easiest way to talk about them is as center, half and full.
So for this picture, my inserts are "half up and half in". I have the same position in the "C" arm mount, so my toe is still 3* with 1* anti-squat.
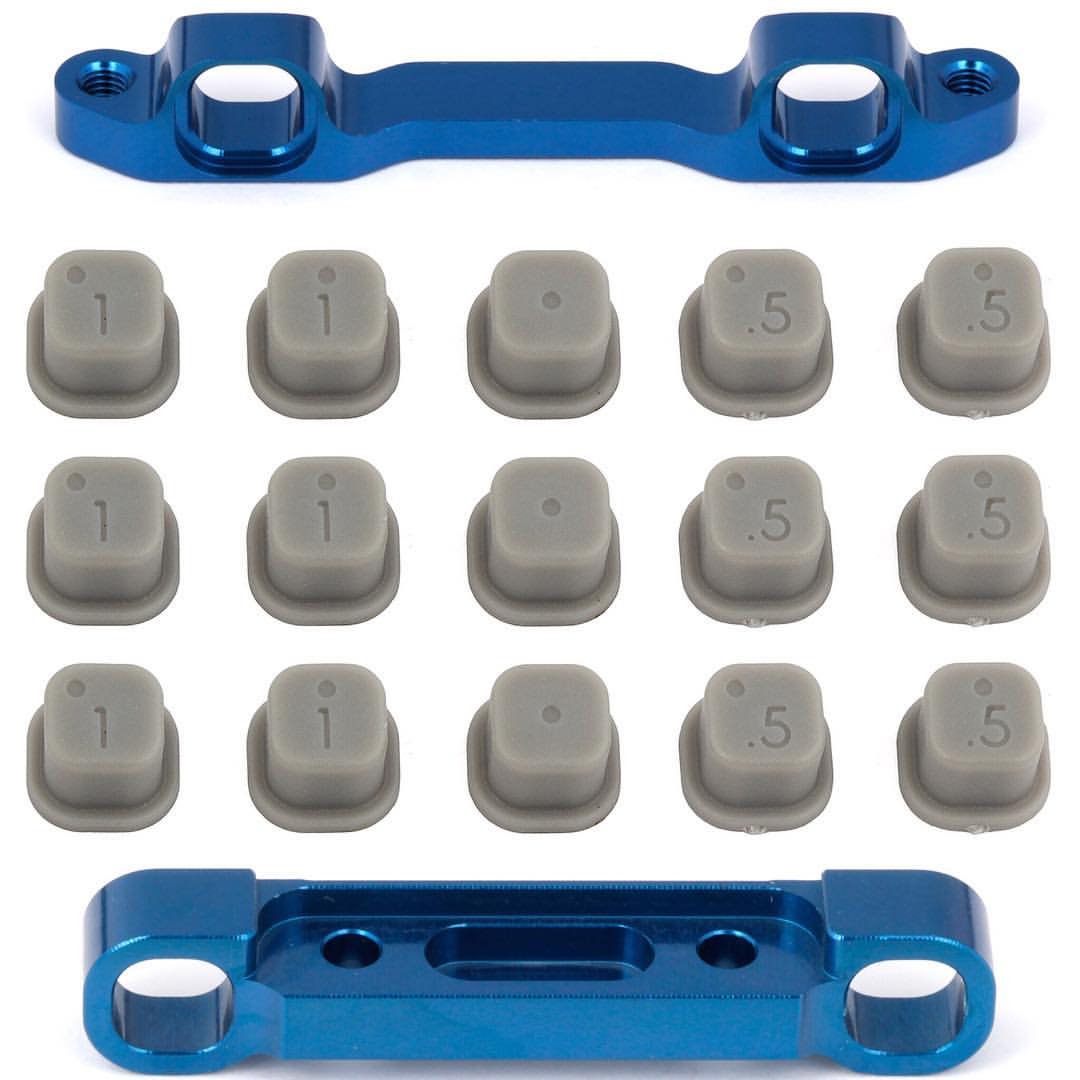
Tips pour le montage du B6:
Dans la notice, le réglage conseillé est :
Pincement : 2.5 deg.
Anti-squat : 1.0 deg.
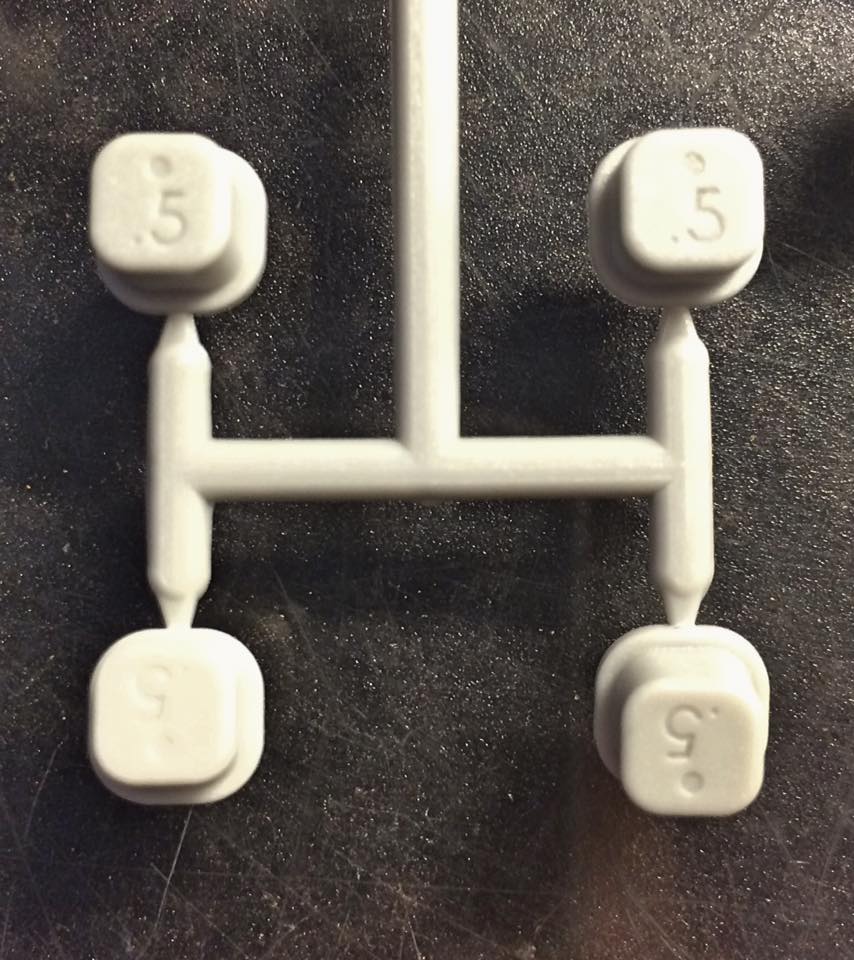
Pour obtenir ce réglage, il faut utiliser les inserts 0.5/0
Pour les reconnaître, ce sont ceux sur lesquels il est écrit 5 avec un point au dessus du 5.
4 inserts identiques sont fournis dans le kit (2 de rechange).
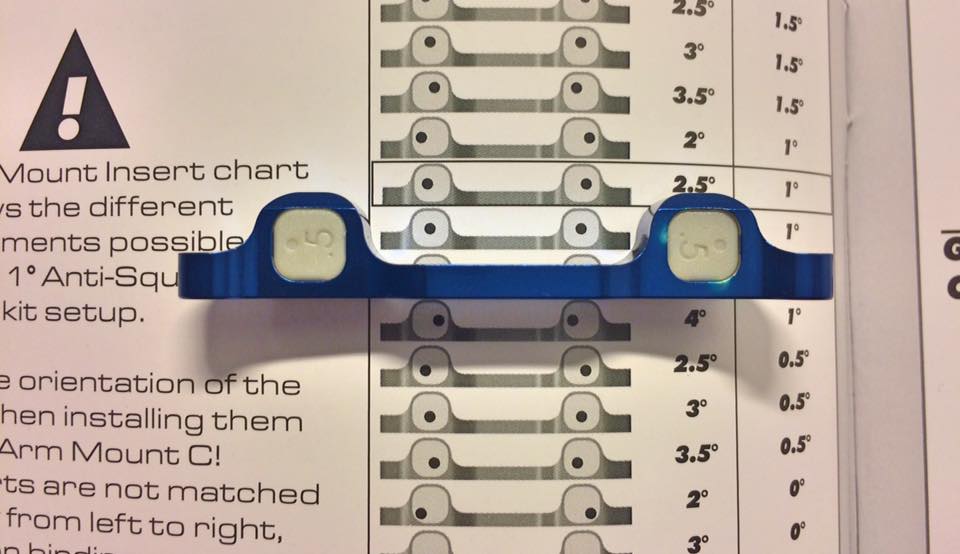
Il faut monter les inserts comme sur la photo ci-dessous pour obtenir le réglage. |
|
Tips for mounting the B6:
In the leaflet, the setting is advised:
Pinch: 2.5 deg.
Anti-Squat: 1.0 deg.
To Obtain this setting, we must use the inserts 0.5/0
To recognize them, they are those on whom it is written 5 with a point above the 5.
4 identical inserts are provided in the kit (2 spare).
We need to get inserts like on the picture below to obtain the setting. |

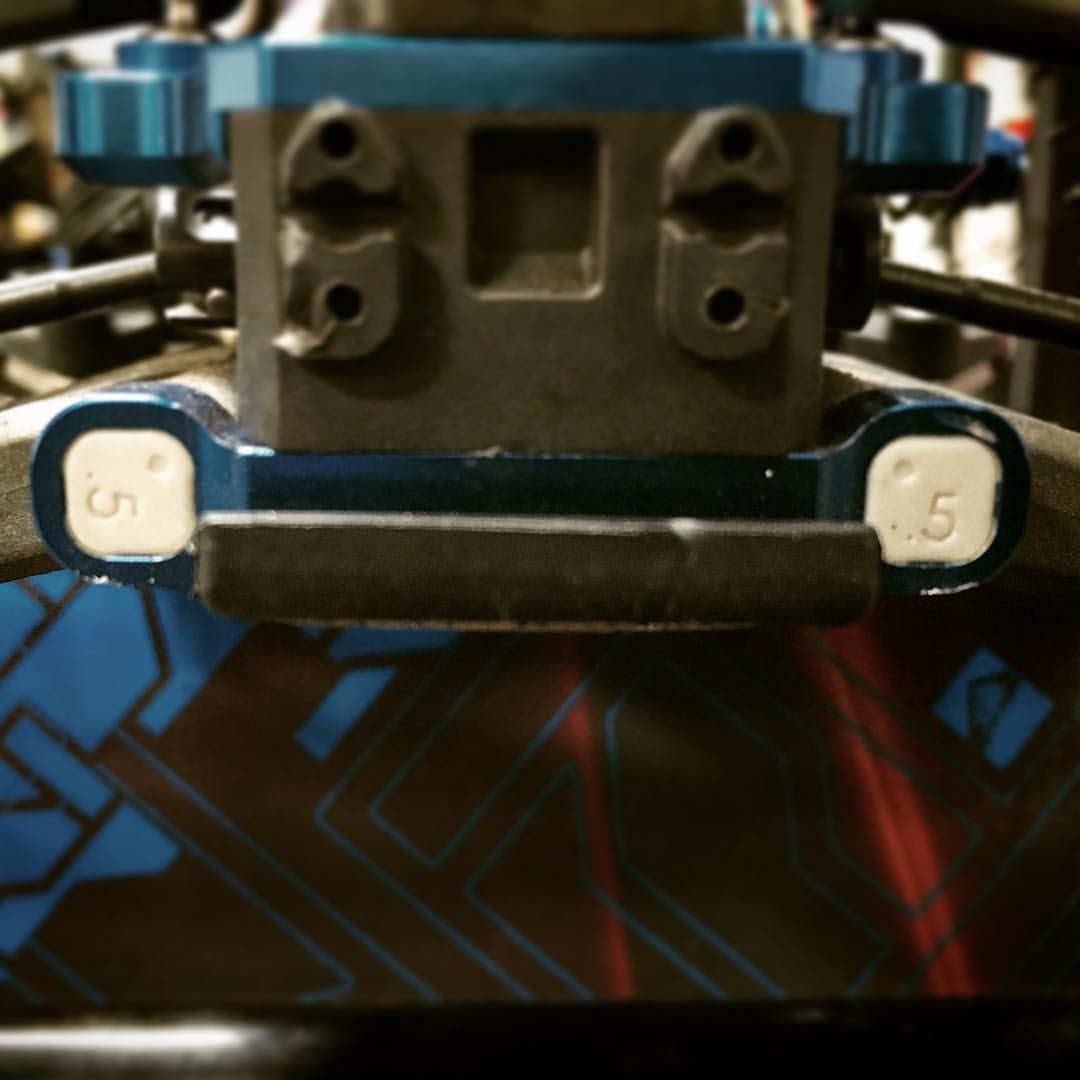
| Les inserts 0.5/0 (réglage d'origine) |
|
Inserts 0.5/0 (kit setting) |
| Le sens de montage (réglage d'origine) |
|
How it should be build (kit setting) |
On the rear hub, the kit calls for an unflanged 3mm nut (shown above). I prefer to run a flanged (shown below) but to help spread out the load for this assembly.

When moving your shocks from the rear of the arm to the front of the arm, to keep the wing in the same place, you need to move the wing back the thickness of the boss that the tower mounts to. This is roughly 5mm.
I've seen quite a people making wing braces for what I assume are tweaked wing mounts. I had this same problem until I realized that I was over tightening the top two screws. I found that if I tightened the screws all the way and then backed them off a 1/2 turn, the wing mount tweaking stopped. There is still a solid connection, but the wing is now allowed to float a little during tumbles.
|
|
|
|
|
|
