|
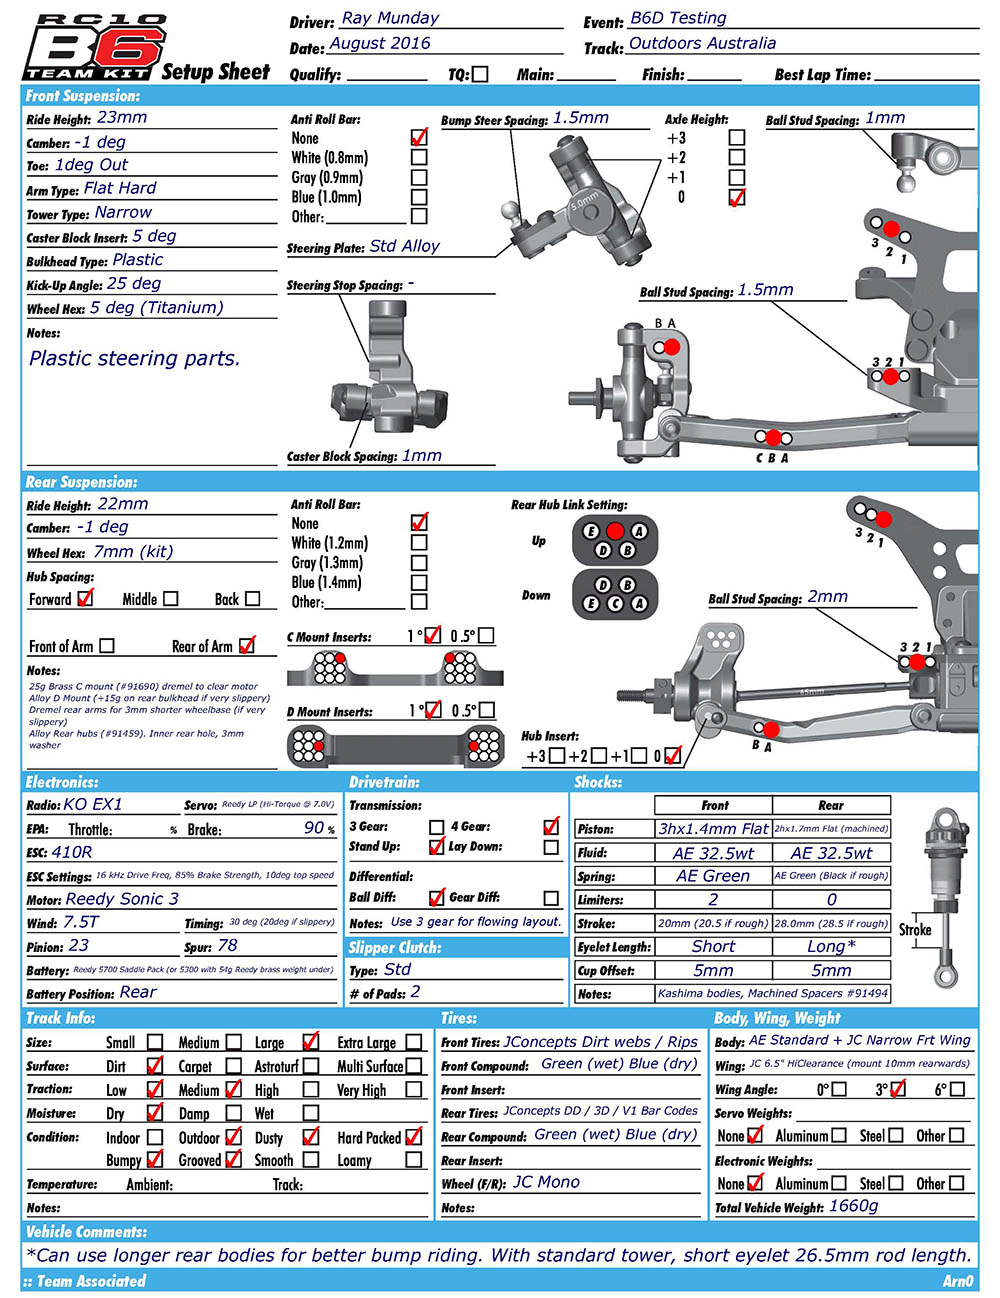
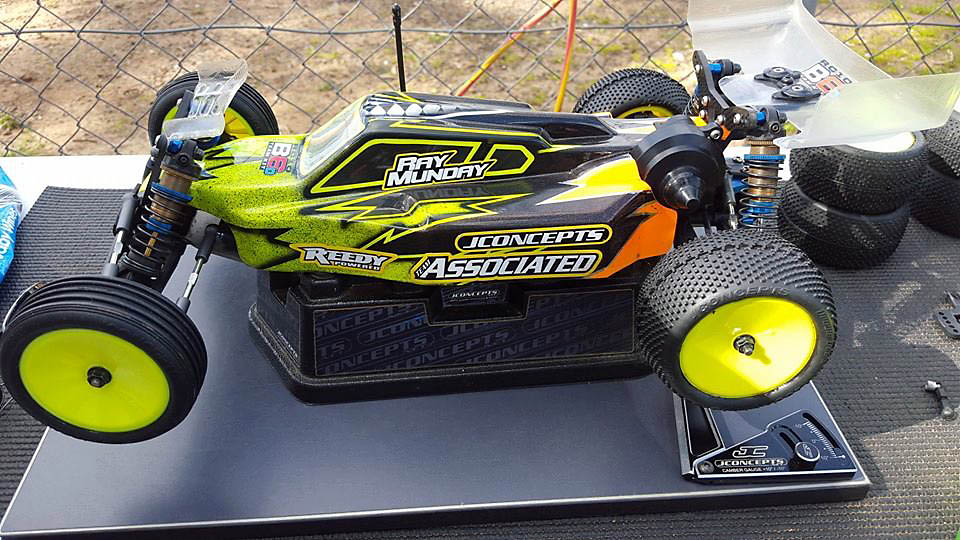
Its taken a few weeks but we have been able to put the B6D through its paces on a number of tracks here in Victoria and have been honing in an allround outdoor setup. A lot of this has been in conjunction with Mark Rogers and Andrew Selvaggi.
A few notes:
- The 6D is lighter (about 50g) and more reactive than the 5M. Generally we are running a spring rate softer than the same conditions on the 5M. In modified I prefer the feel with saddle packs or with 50g under a shorty. If its really bumpy then 50g under a shorty settles the car but slows the handling.
- It seems to like 1mm lower ride height than we ran for the 5m and the rear 1mm lower than the front.
- The weight bias is a little more forward than the 5m with the servo and esc both sitting more forward. I am running an LP servo and mounted the ESC as far back as possible.
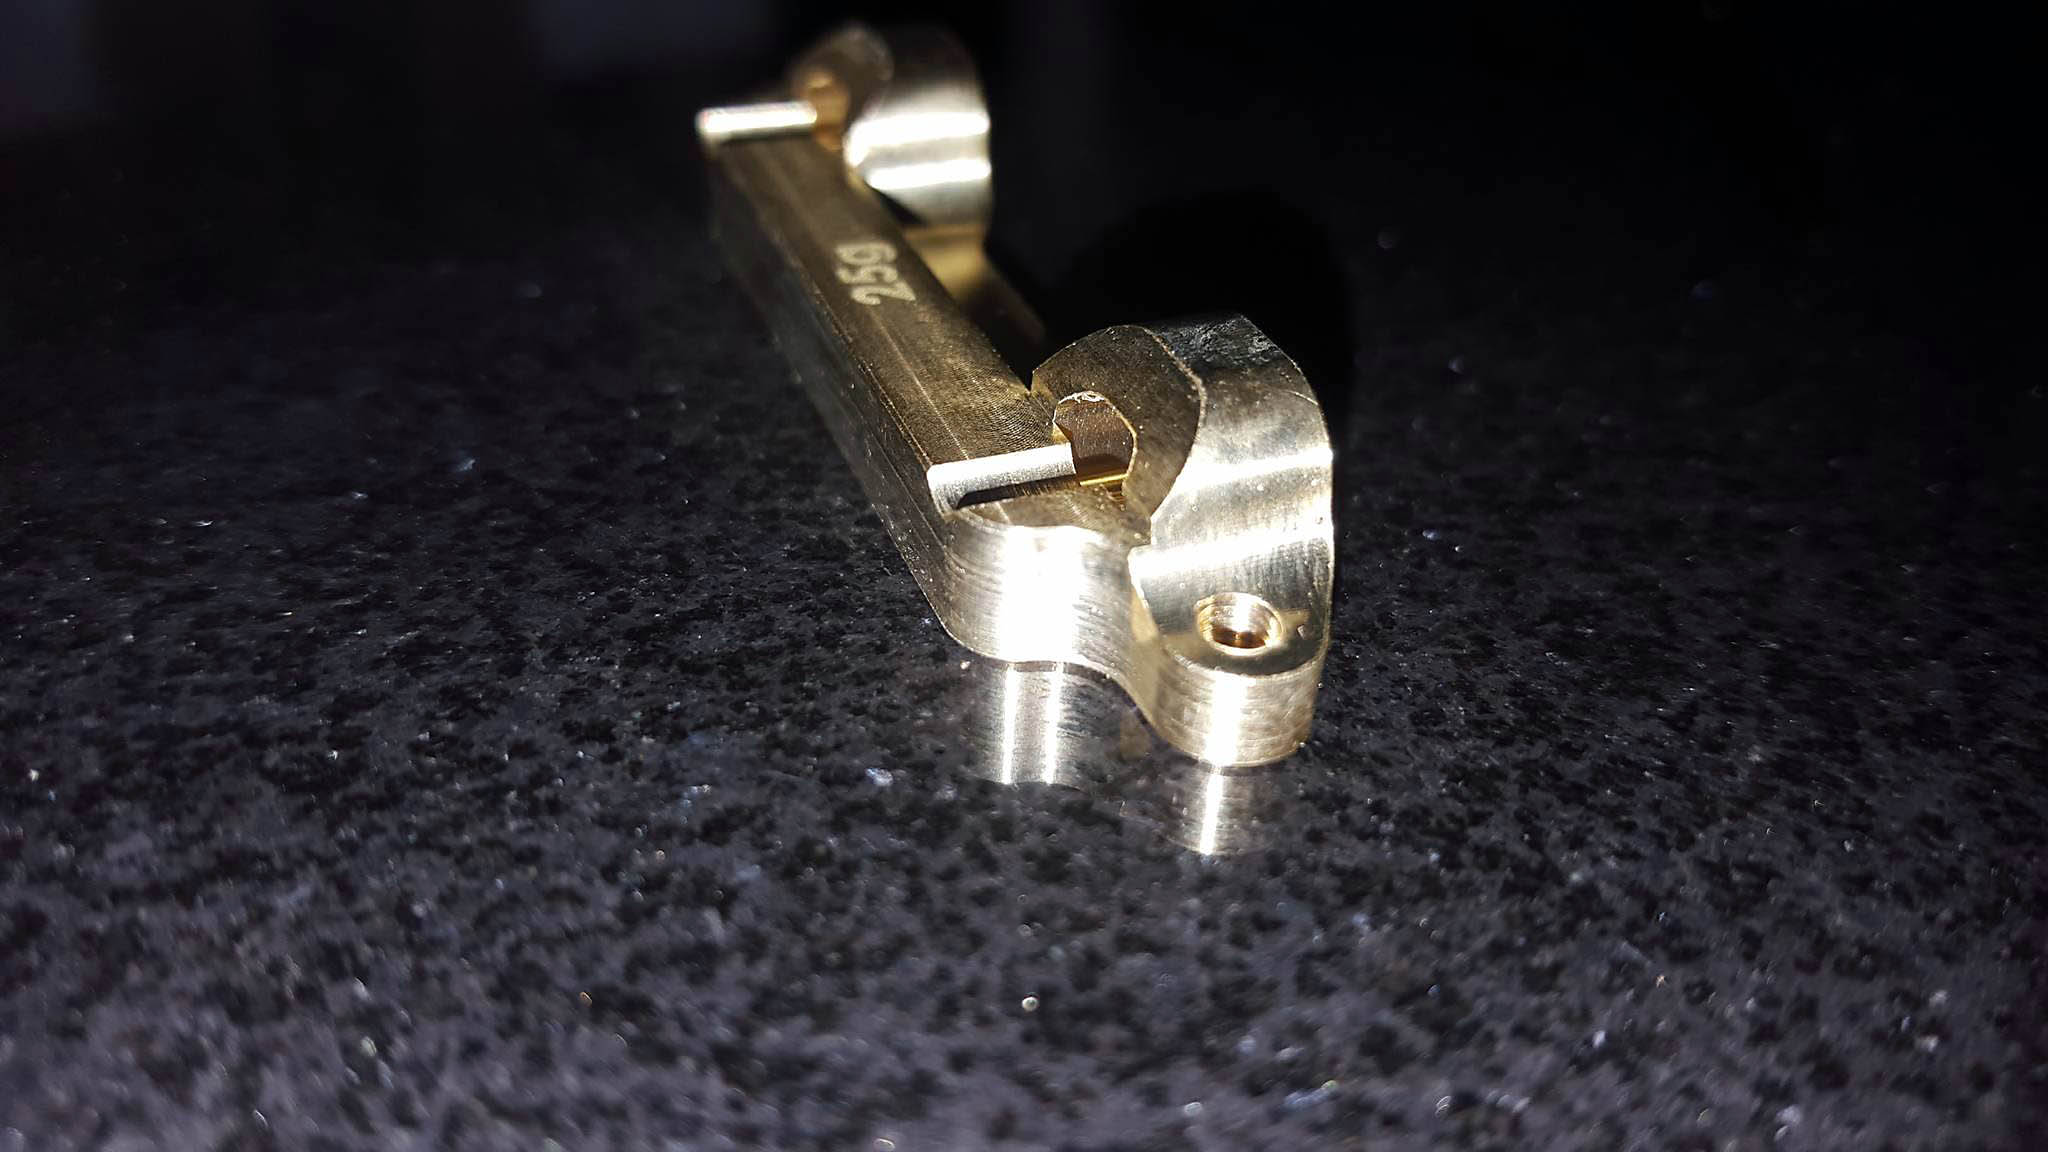
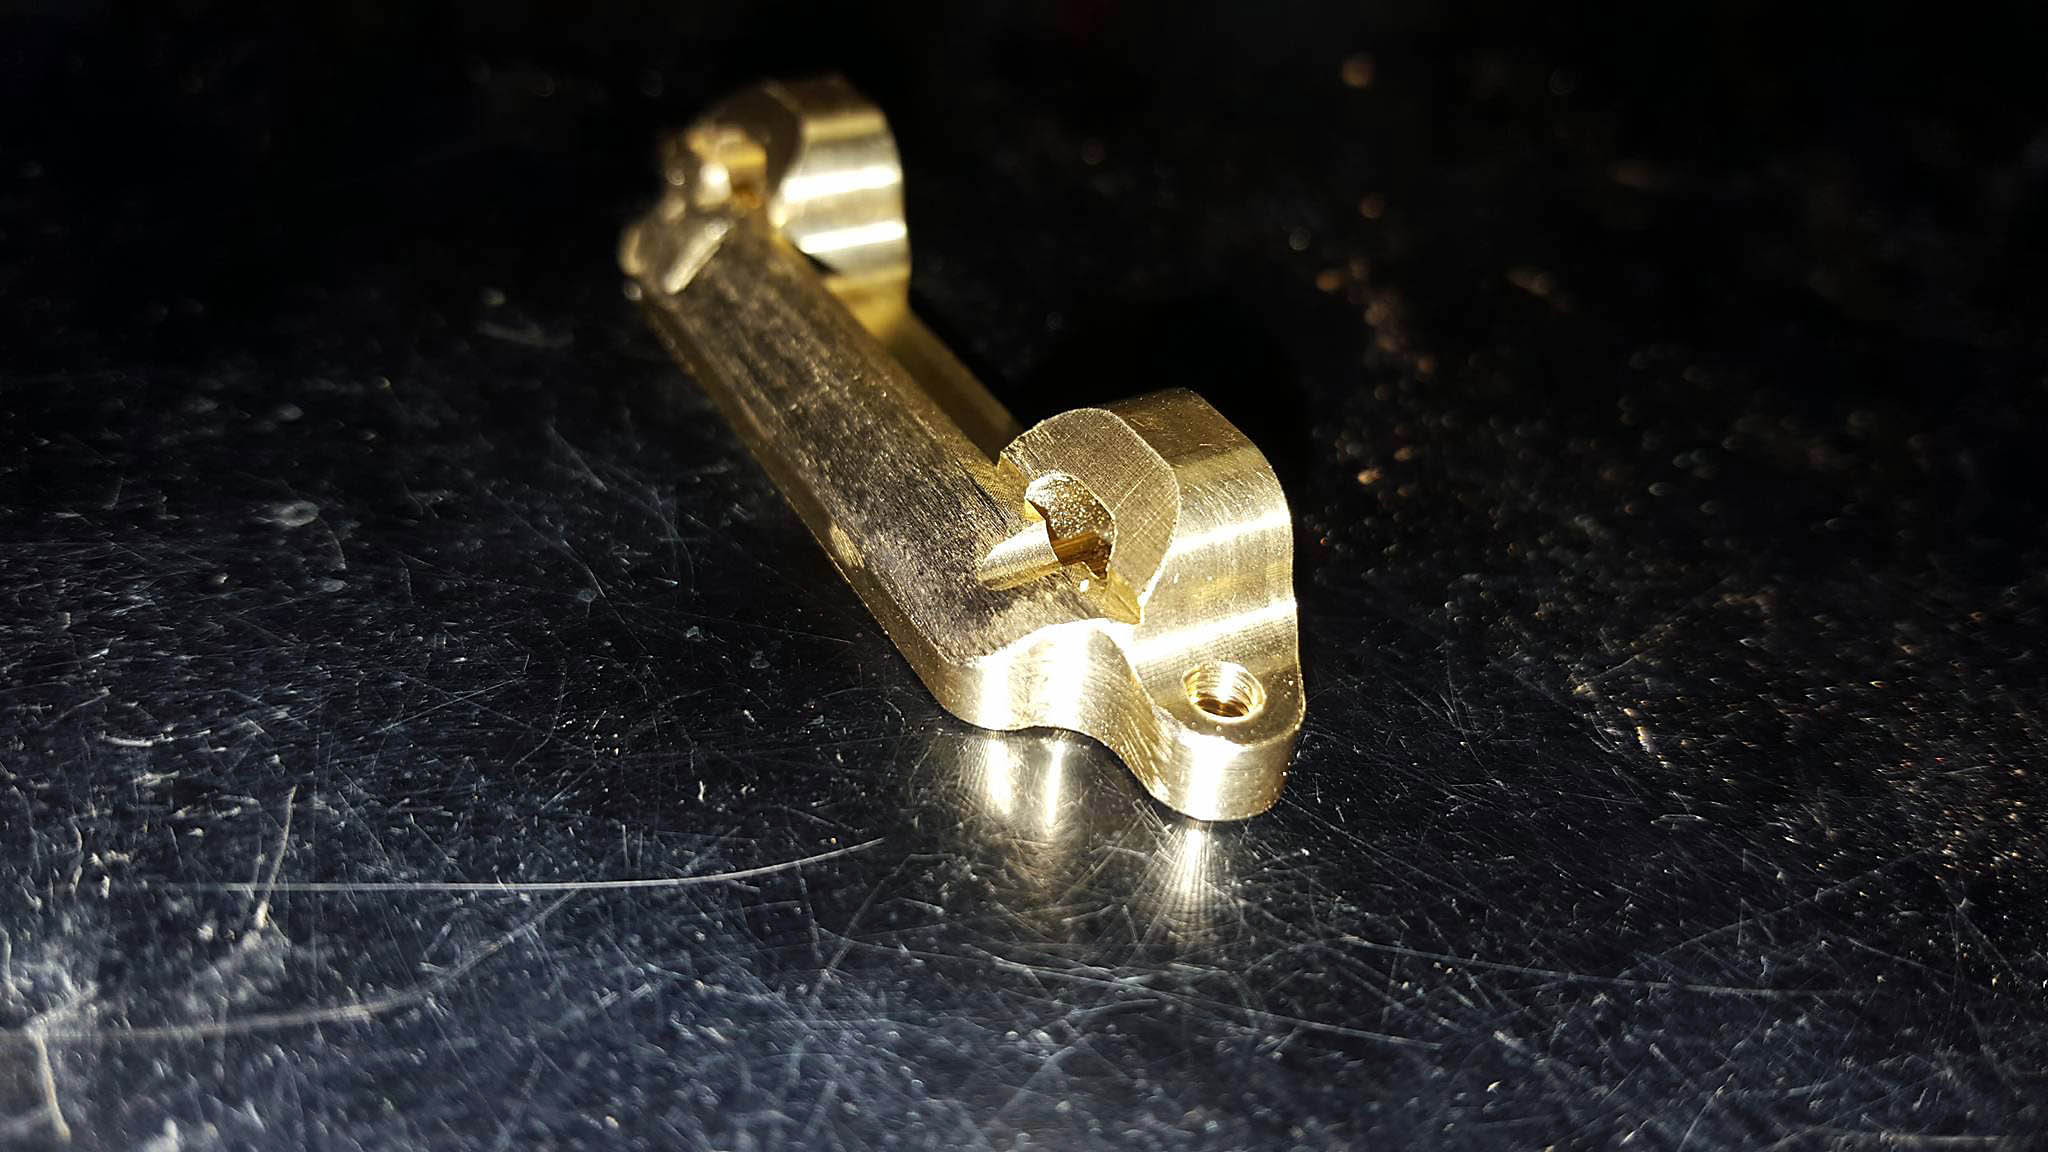
- The car comes with an alloy c block and a 12g brass D block is available as a drop in fit. A 25g brass C is available for the laydown transmission but I have dremelled one to fit the standup (final weight 23g) and this really helps on bumpy / slippery tracks. Currently no brass D is available but its easy to stick / cable tie a weight to the rear bulkhead if its super low grip.
- The rear suspension inner pivots are highly adjustable (the alloy D option part is strongly recommended - the kit includes all of the pills). We are generally finding running them narrower (narrow at the C and D block) helps rear traction on most tracks and I recommend as a starting point. On higher grip tracks run a wider pivot (with a narrower hex) to get more rear stability mid corner and exit steering.
- Alloy steering parts are available, but currently I prefer the feel of the kit plastic parts
- The rear wing sits ~15mm further forward than the 5M. On lower grip tracks, move the wing back ~10mm and you will get a lot more rear grip from low~med speed corners.
- The 4 gear is now available and I like the way it accelerates hard. The 3 gear gives more on power steering and is better for more flowing tracks.
- The kit includes 2 lengths of shock eyelets. At the front, use the short eyelet for the middle hole on the arm (which matches the outer hole on the 5M) and the long eyelet for the new 3rd hole. At the rear, use the long eyelets when the shock is mounted behind the arm and the short when in front of the arm (only applicable for the laydown transmission).
- We have preferred the feel of slightly longer rear down travel. There is a longer rear shock tower option available (I haven't got one yet) but I have tried running the longer 31mm rear bodies with the standard tower and it improves bump riding a little. Use the short rear shock eyelets (same as the 5M length) and 26,5mm rod length.
- I have tested the laydown transmission at Wodonga when the track was very sticky and high grip. Incredible corner speed and balance, but loses lap time as the track gets slick whereas the standup transmission is more consistent. Keep in mind the body cut is different between the laydown and standup but you can tape over the standup body cut if you want to test the laydown without an exposed spur gear.
- The front and rear hubs have adjustable height. This is useful for higher grip tracks but so far I have run them at full height on our tracks. The same alloy rear hubs from the 5M can be used which I find help rear traction (slightly more weight at the rear tyres).
- Ive done a little testing with front bumpsteer and steering rack. Currently I prefer 0.5mm less bumpsteer washer for more mid corner steering and a 1mm steering rack washer which also makes the steering more responsive from turn in.
|