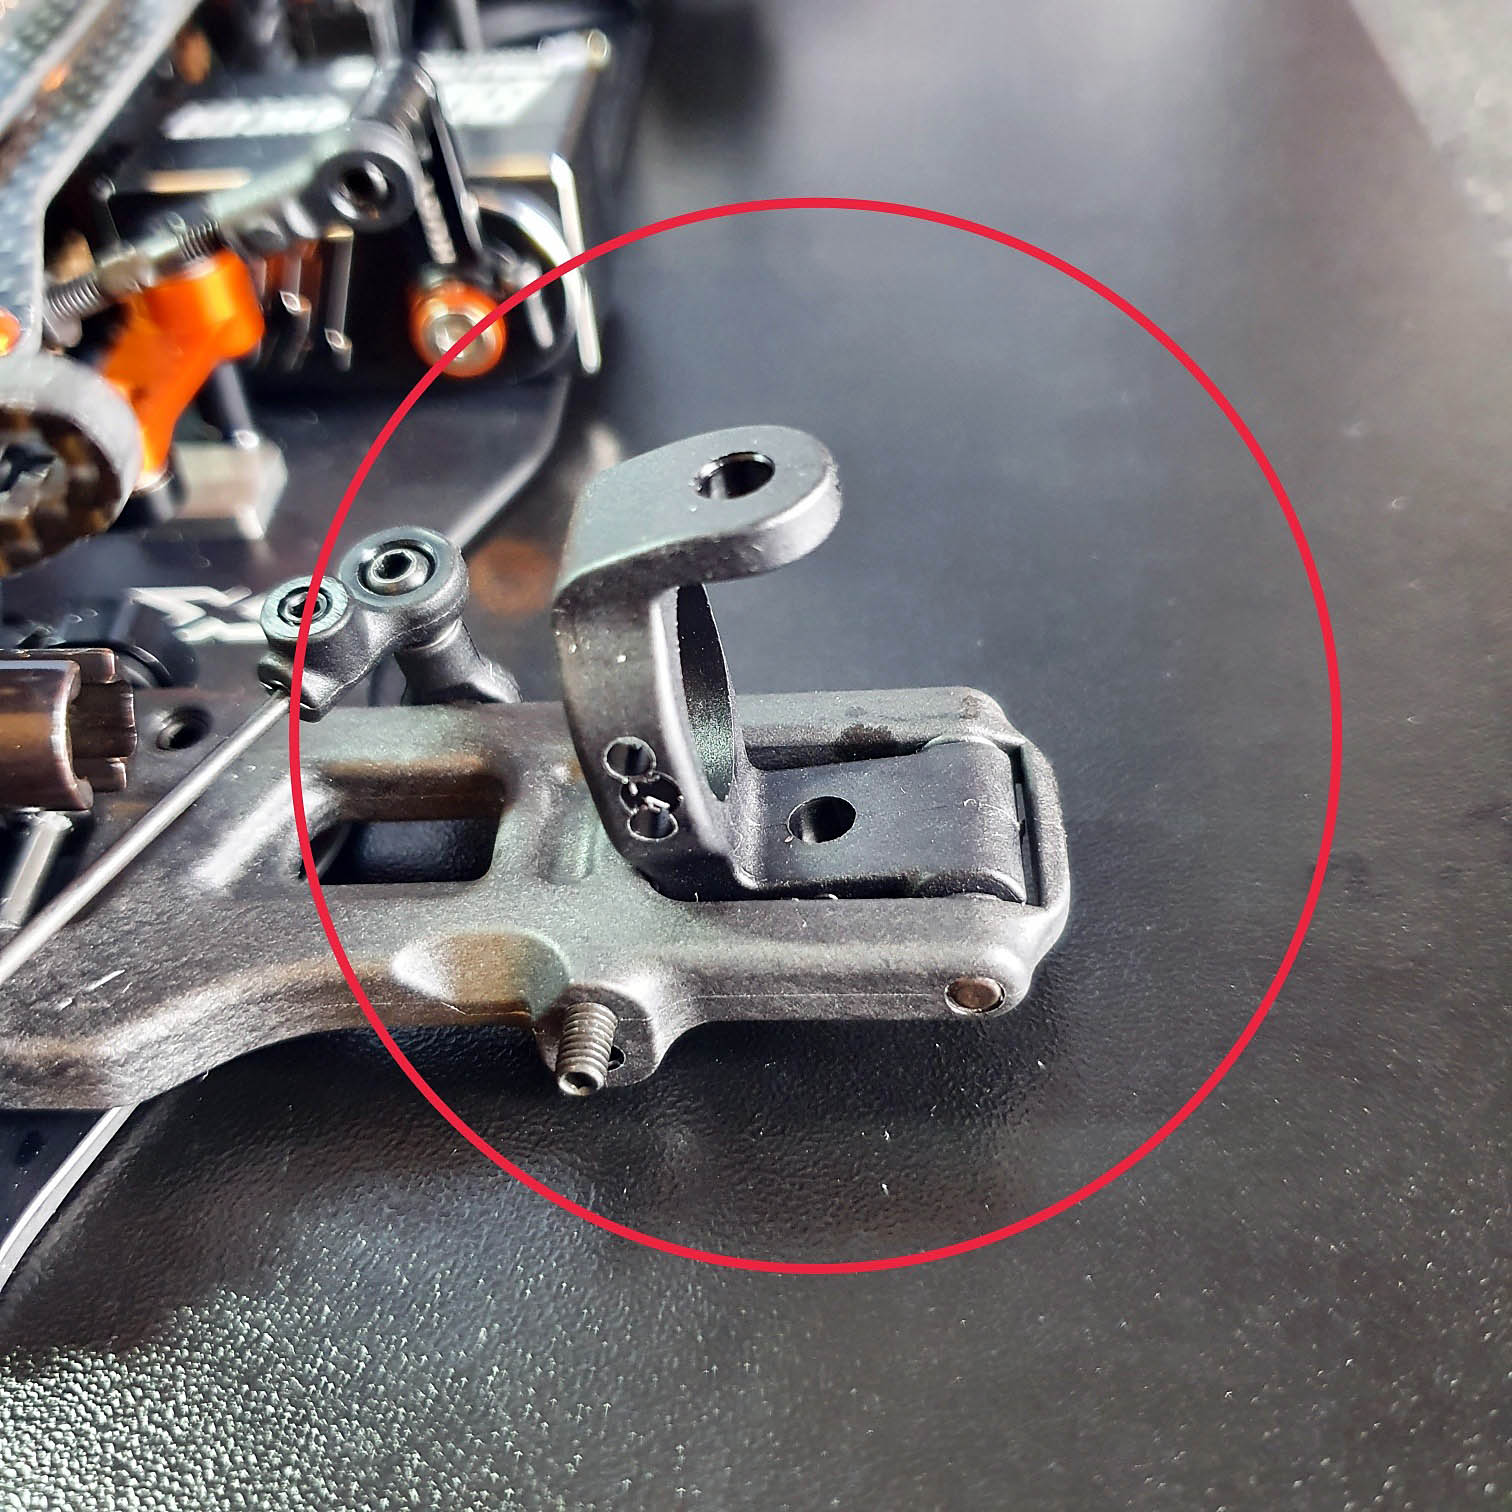
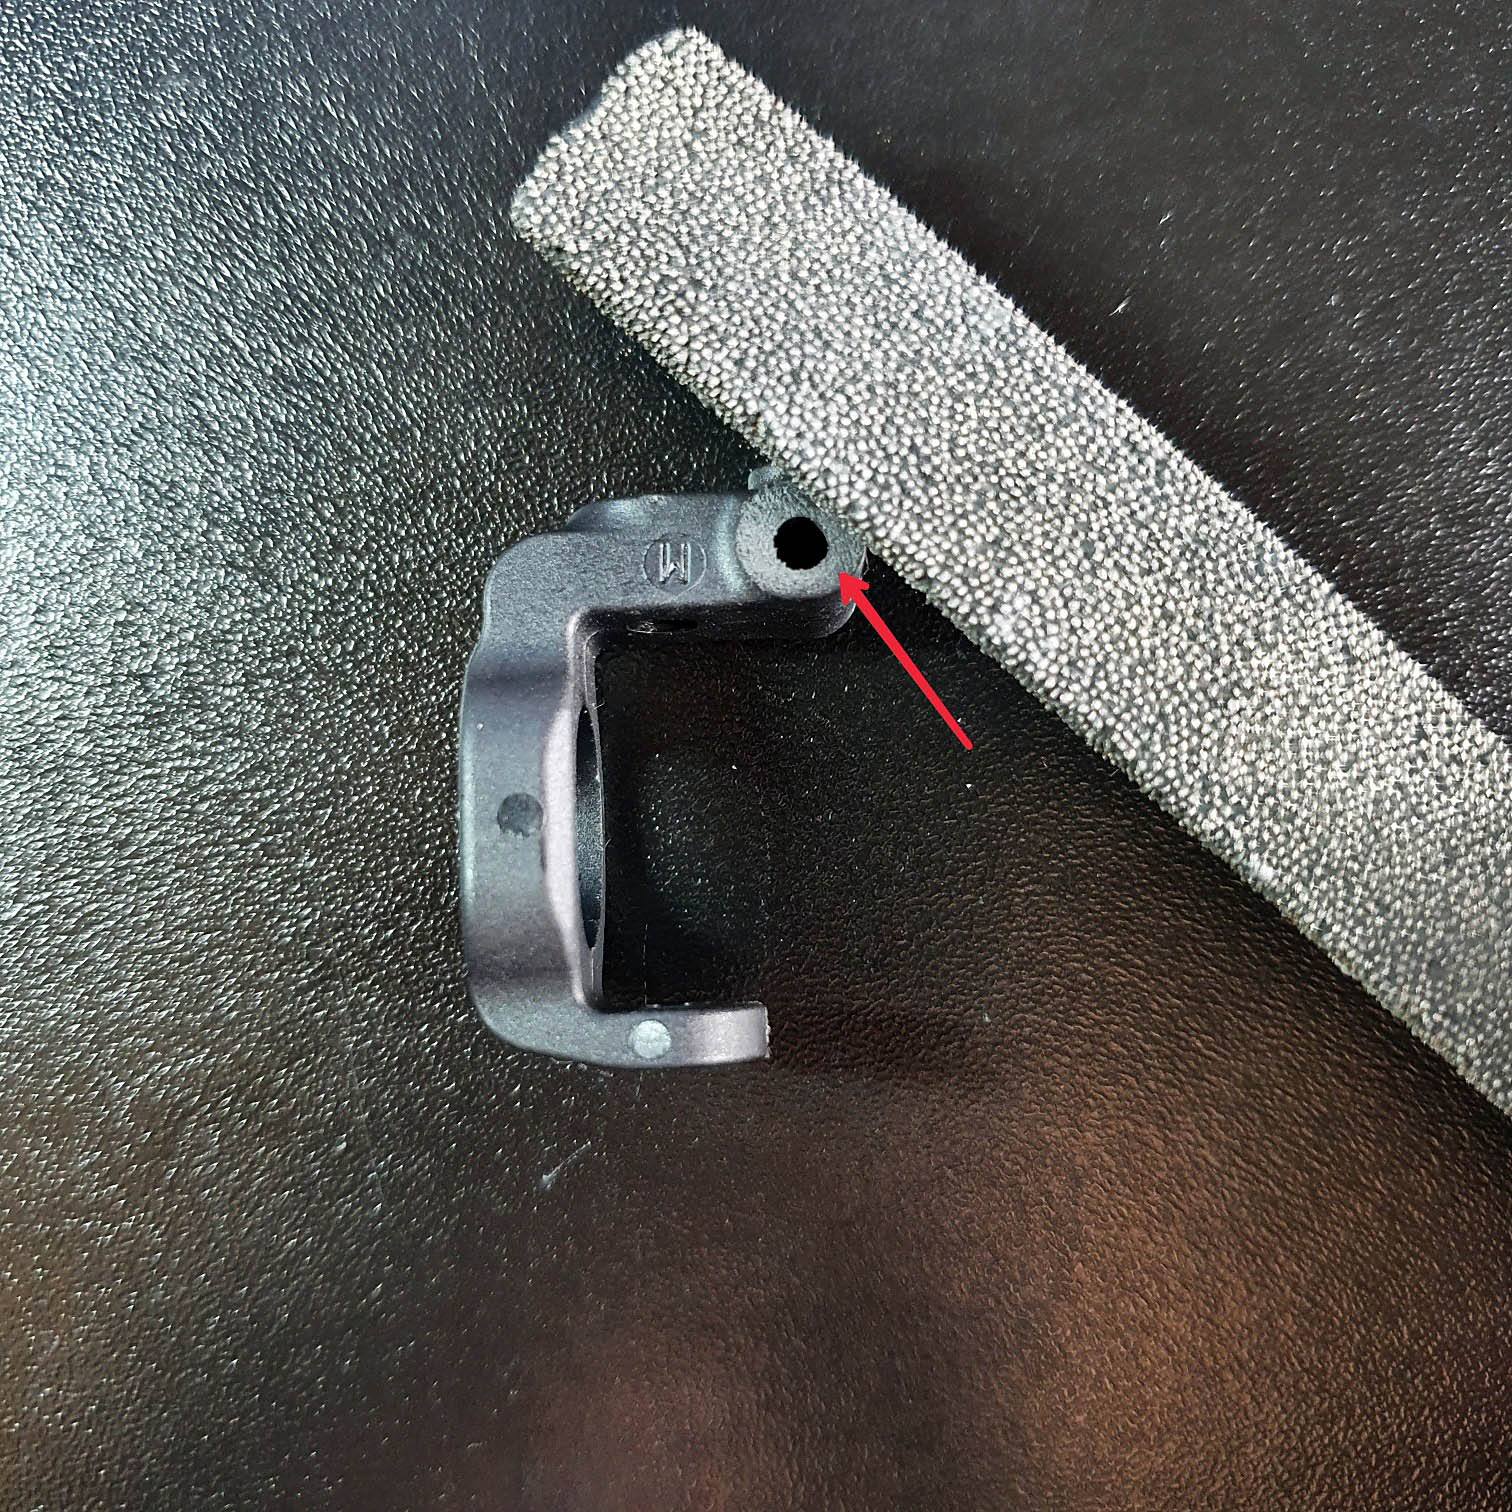
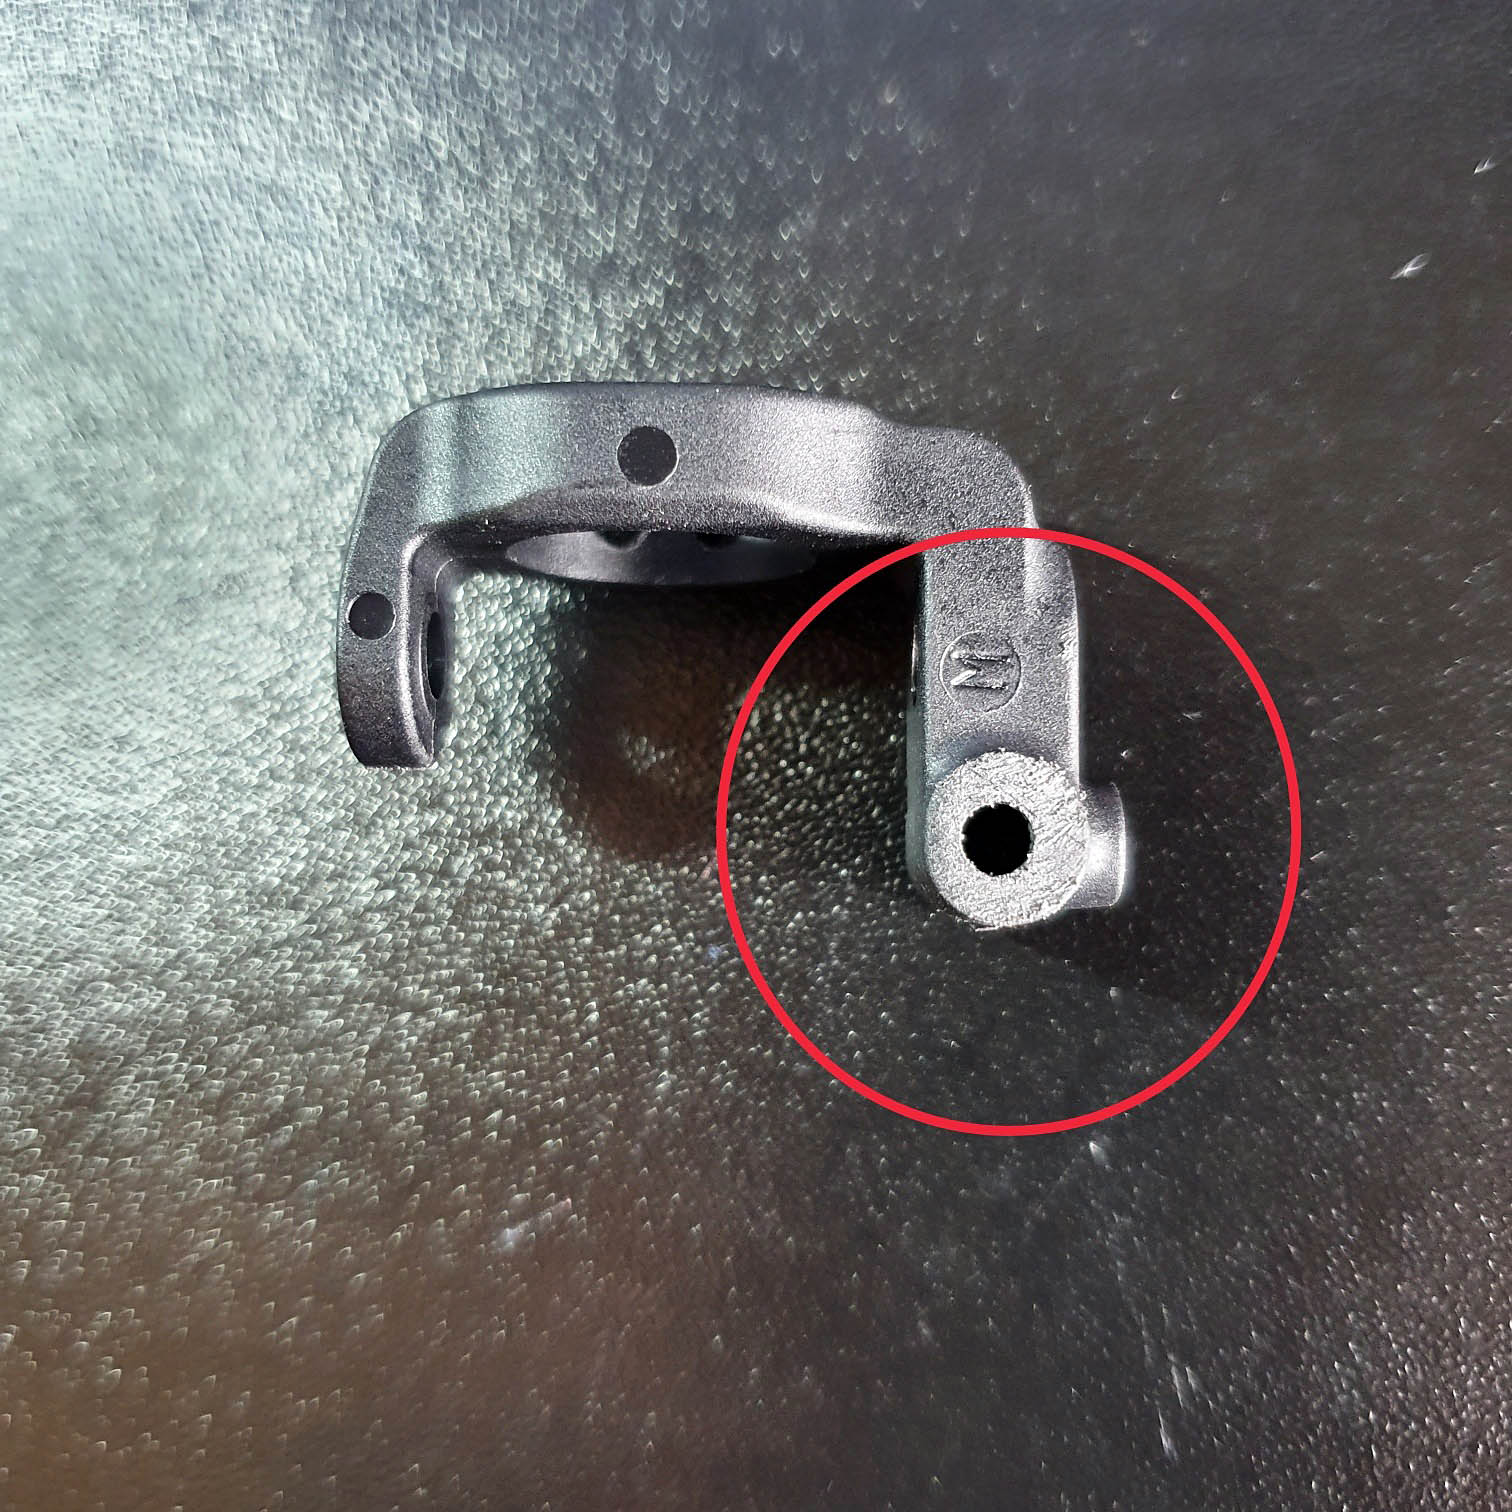
Tech tip by Alexander Hagberg: how to make your c-hub move freely. When building or rebuilding your XRAY T4, its important to make sure that the c-hub can move freely in the suspension arm. It should be able to fall under its own weight.
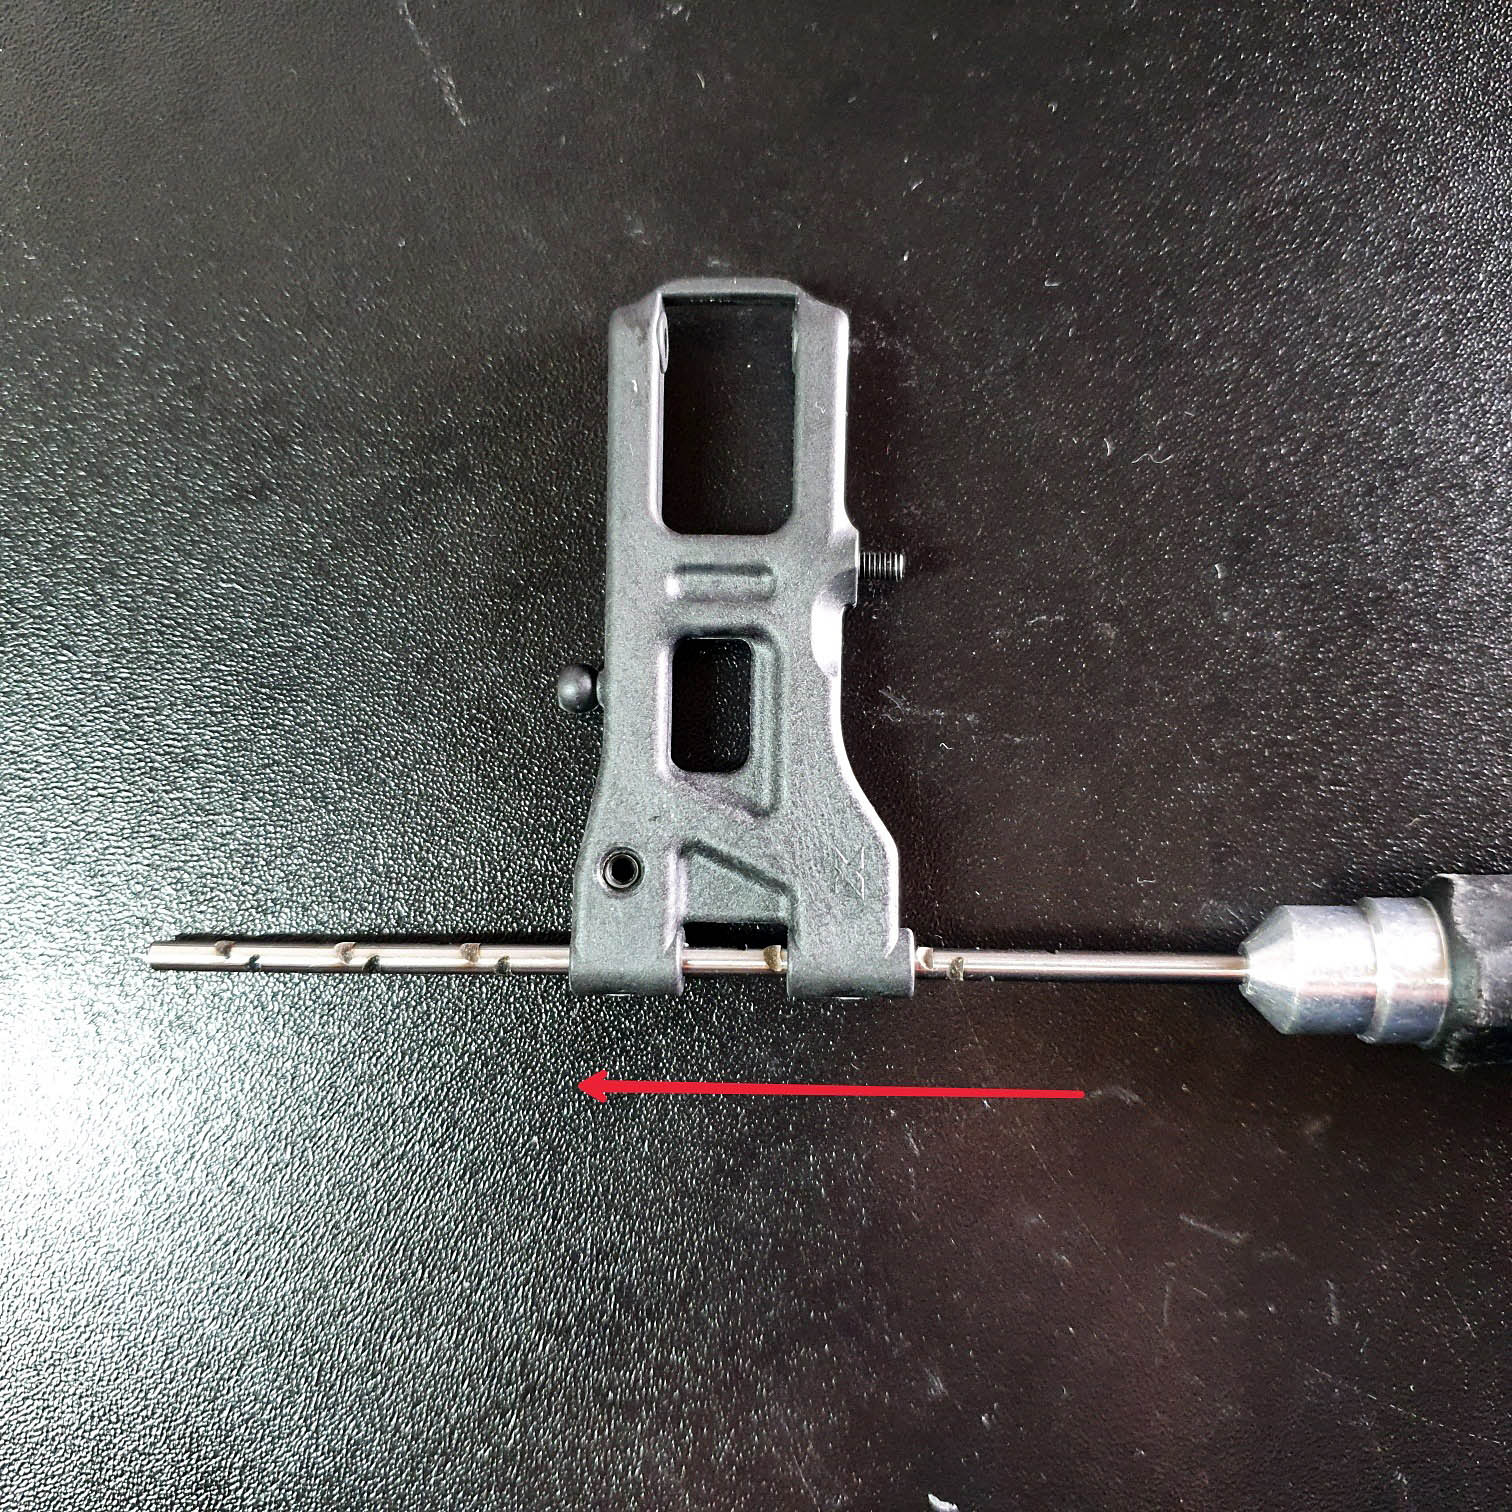
The first thing I always do is, I use the HUDY 3mm arm reamer (107633) to ream the arm AND the c-hub together. This way, I make sure that the diameter of the hole in the arm matches that of the c-hub, so that the hinge pin can move freely. I use the reamer once from BOTH the front and the back. You don't want to do it more than once, especially if your reamer is fairly new (and sharp).
If you still can't achieve free movement, check that the c-hub fits perfectly into the arm - it shouldn't be tight. If that's the case, I use a file to remove a very small amount of material from the back of the c-hub (we're talking 0.1mm or less here). This is sometimes (but not always) required.
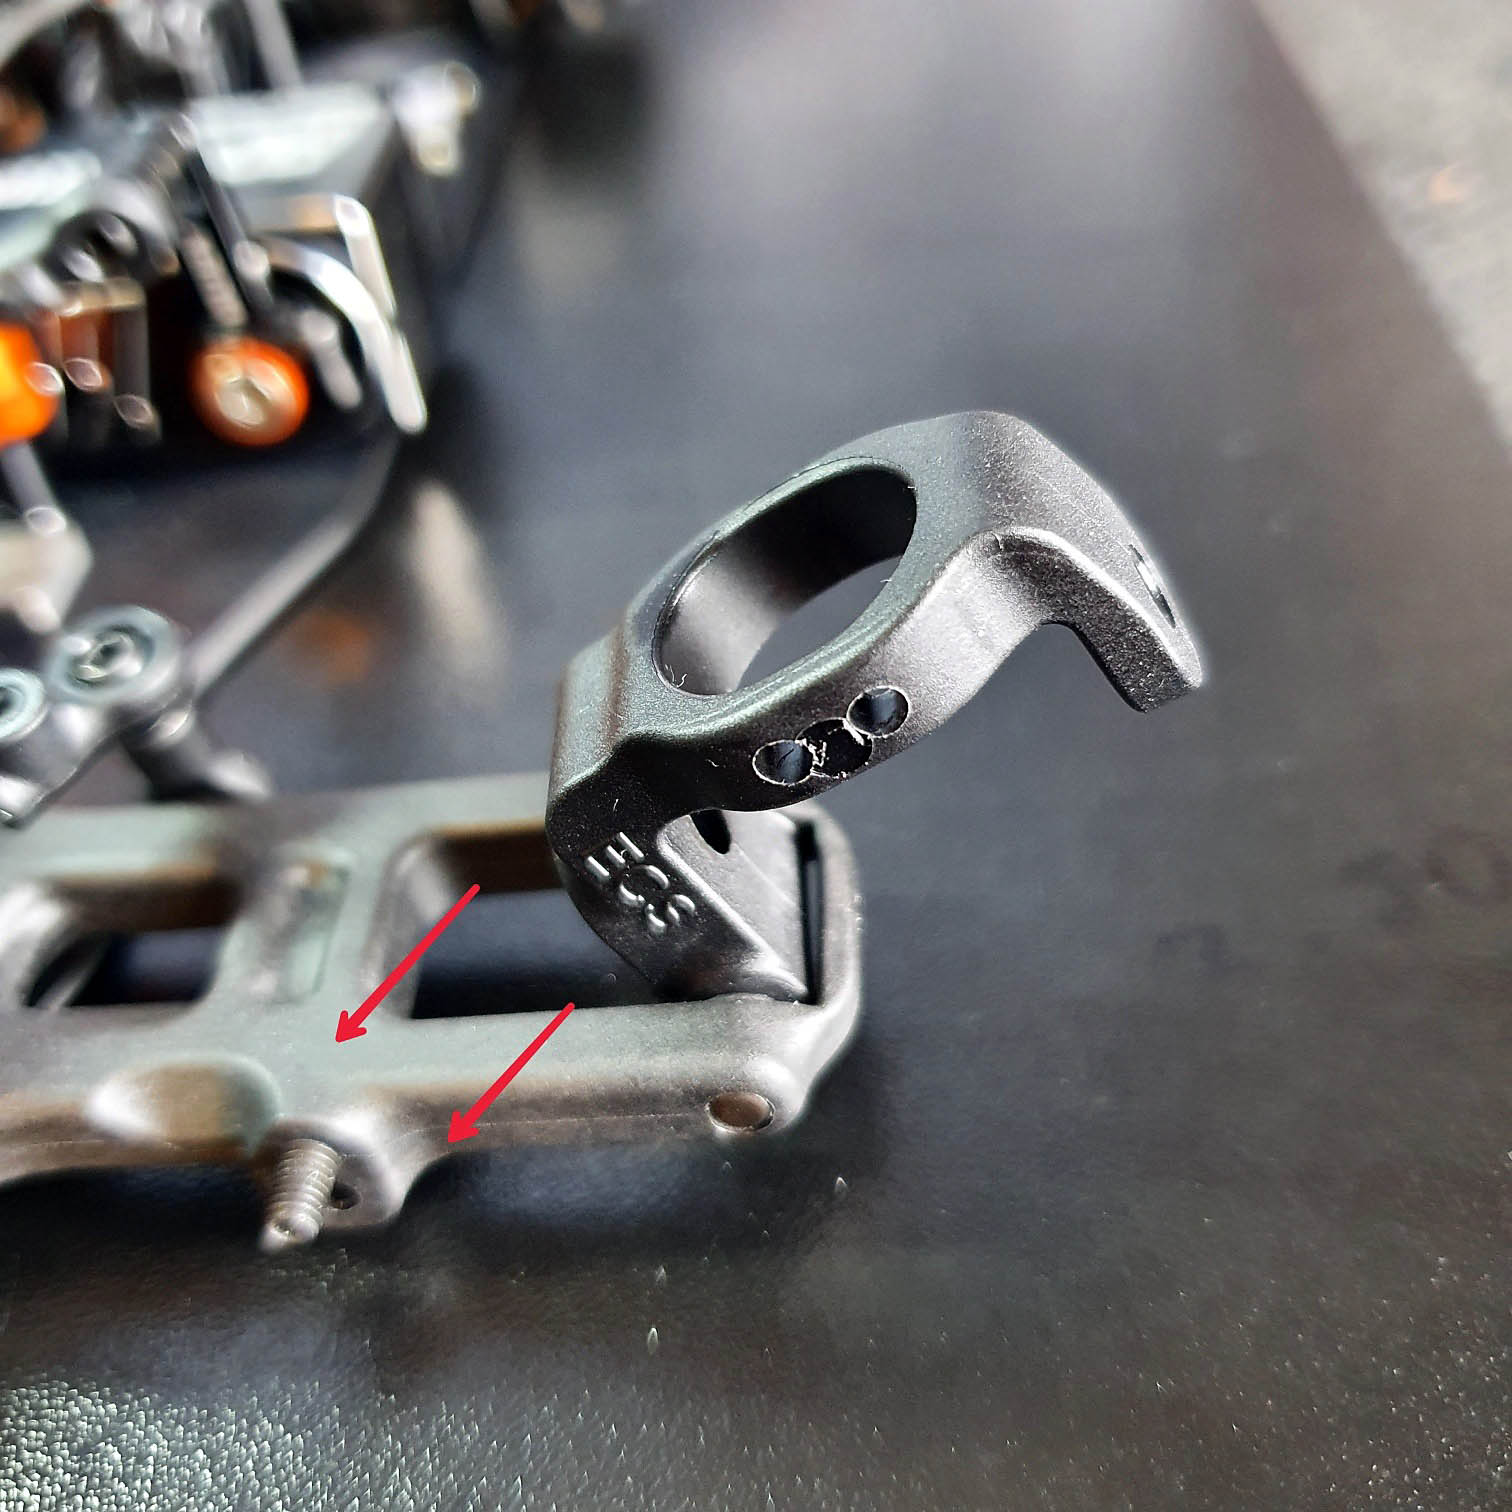

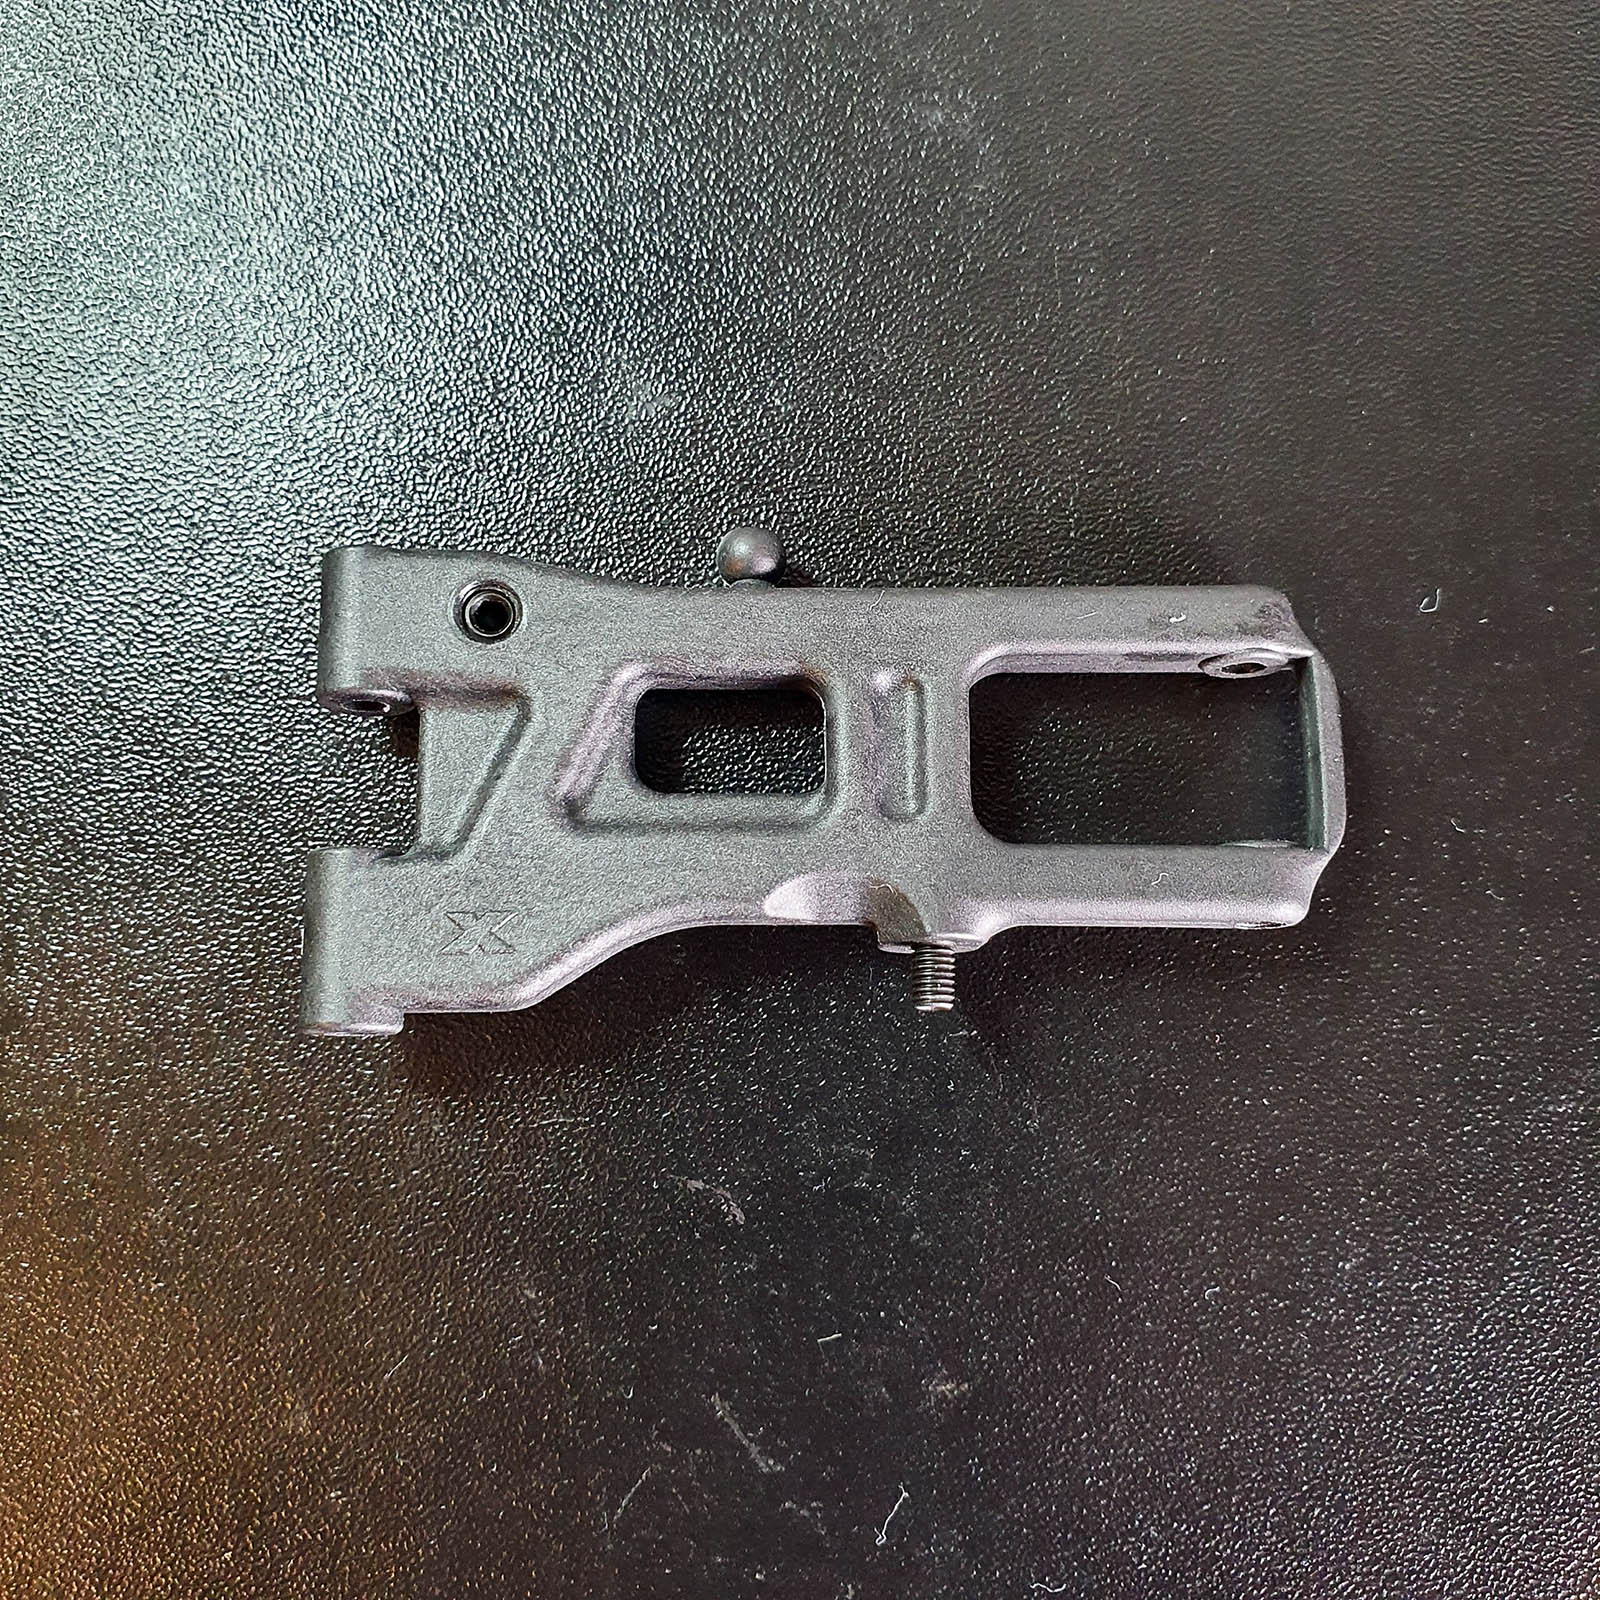
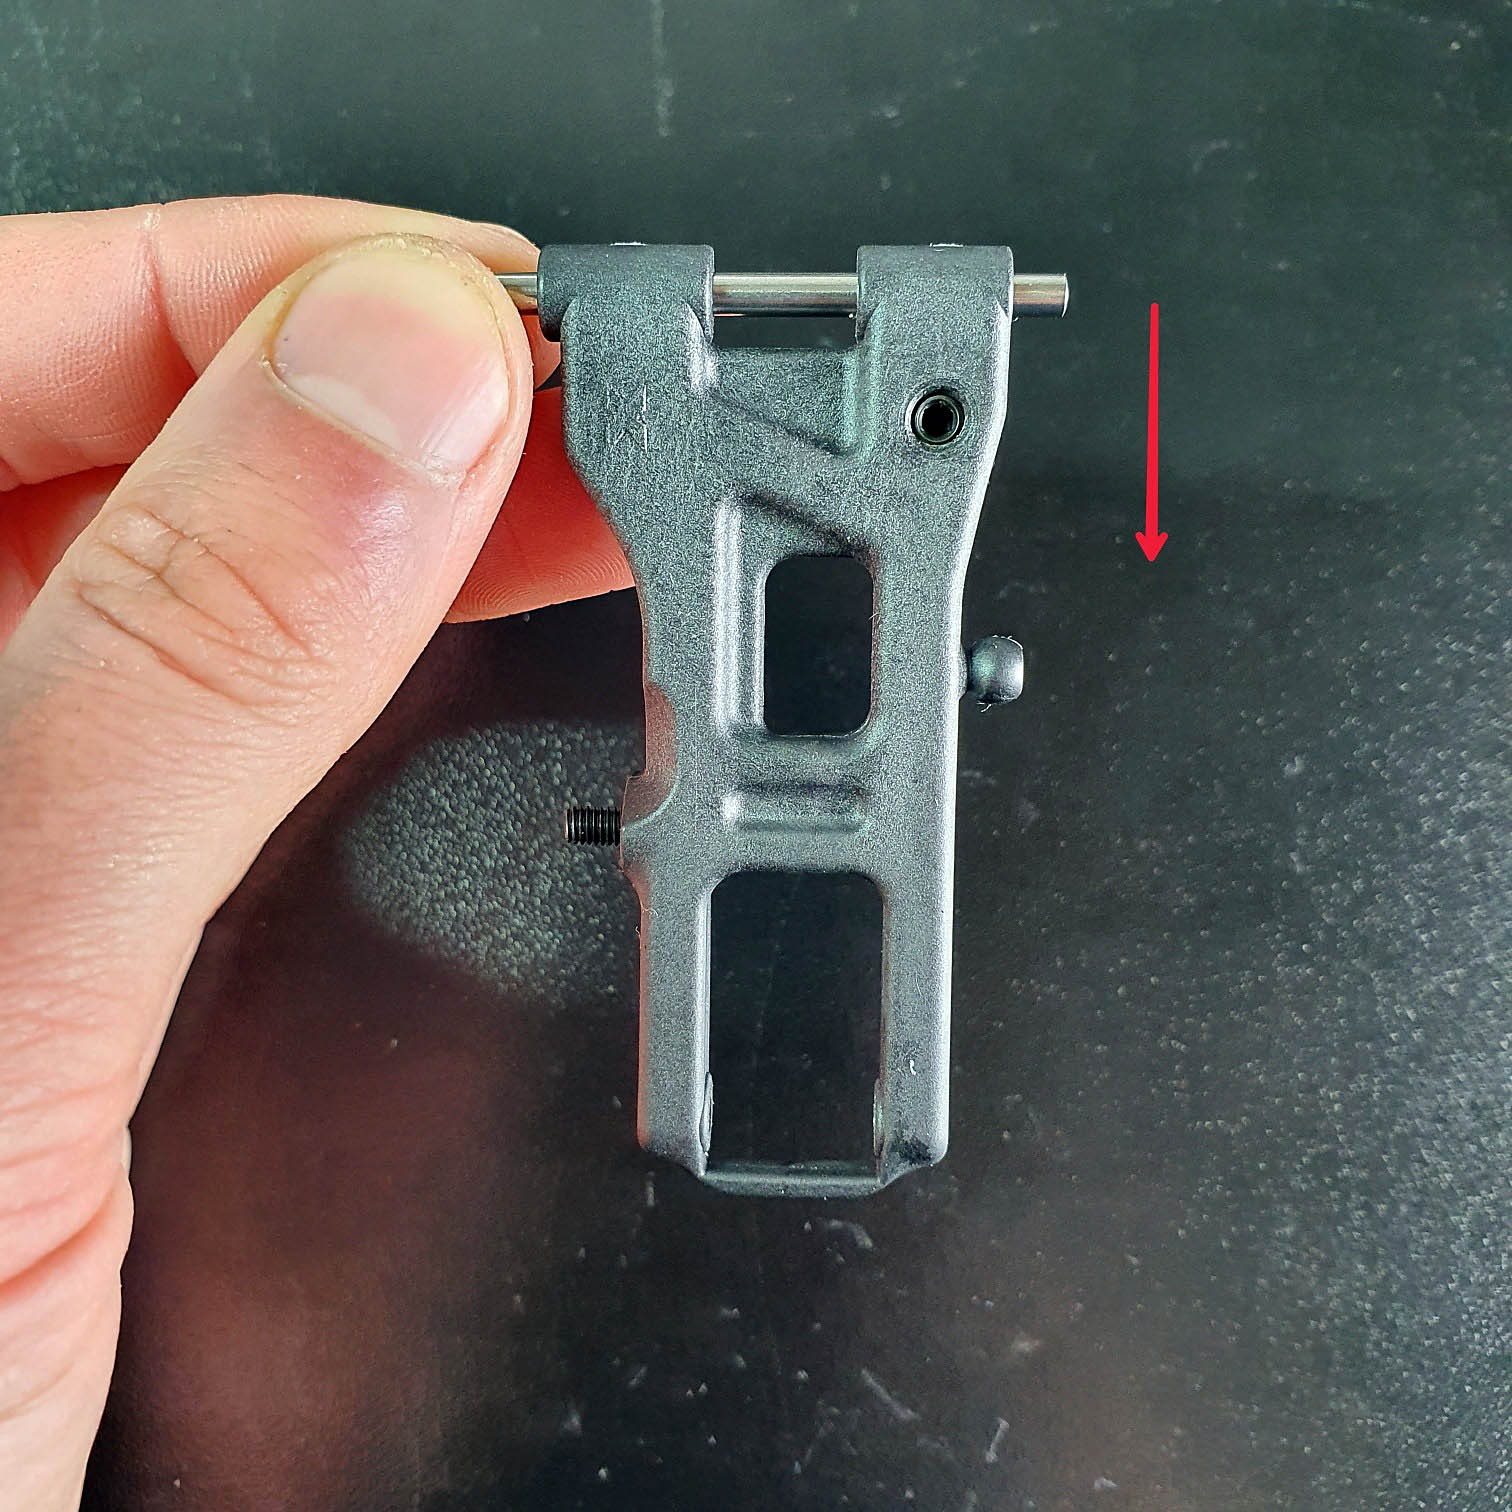
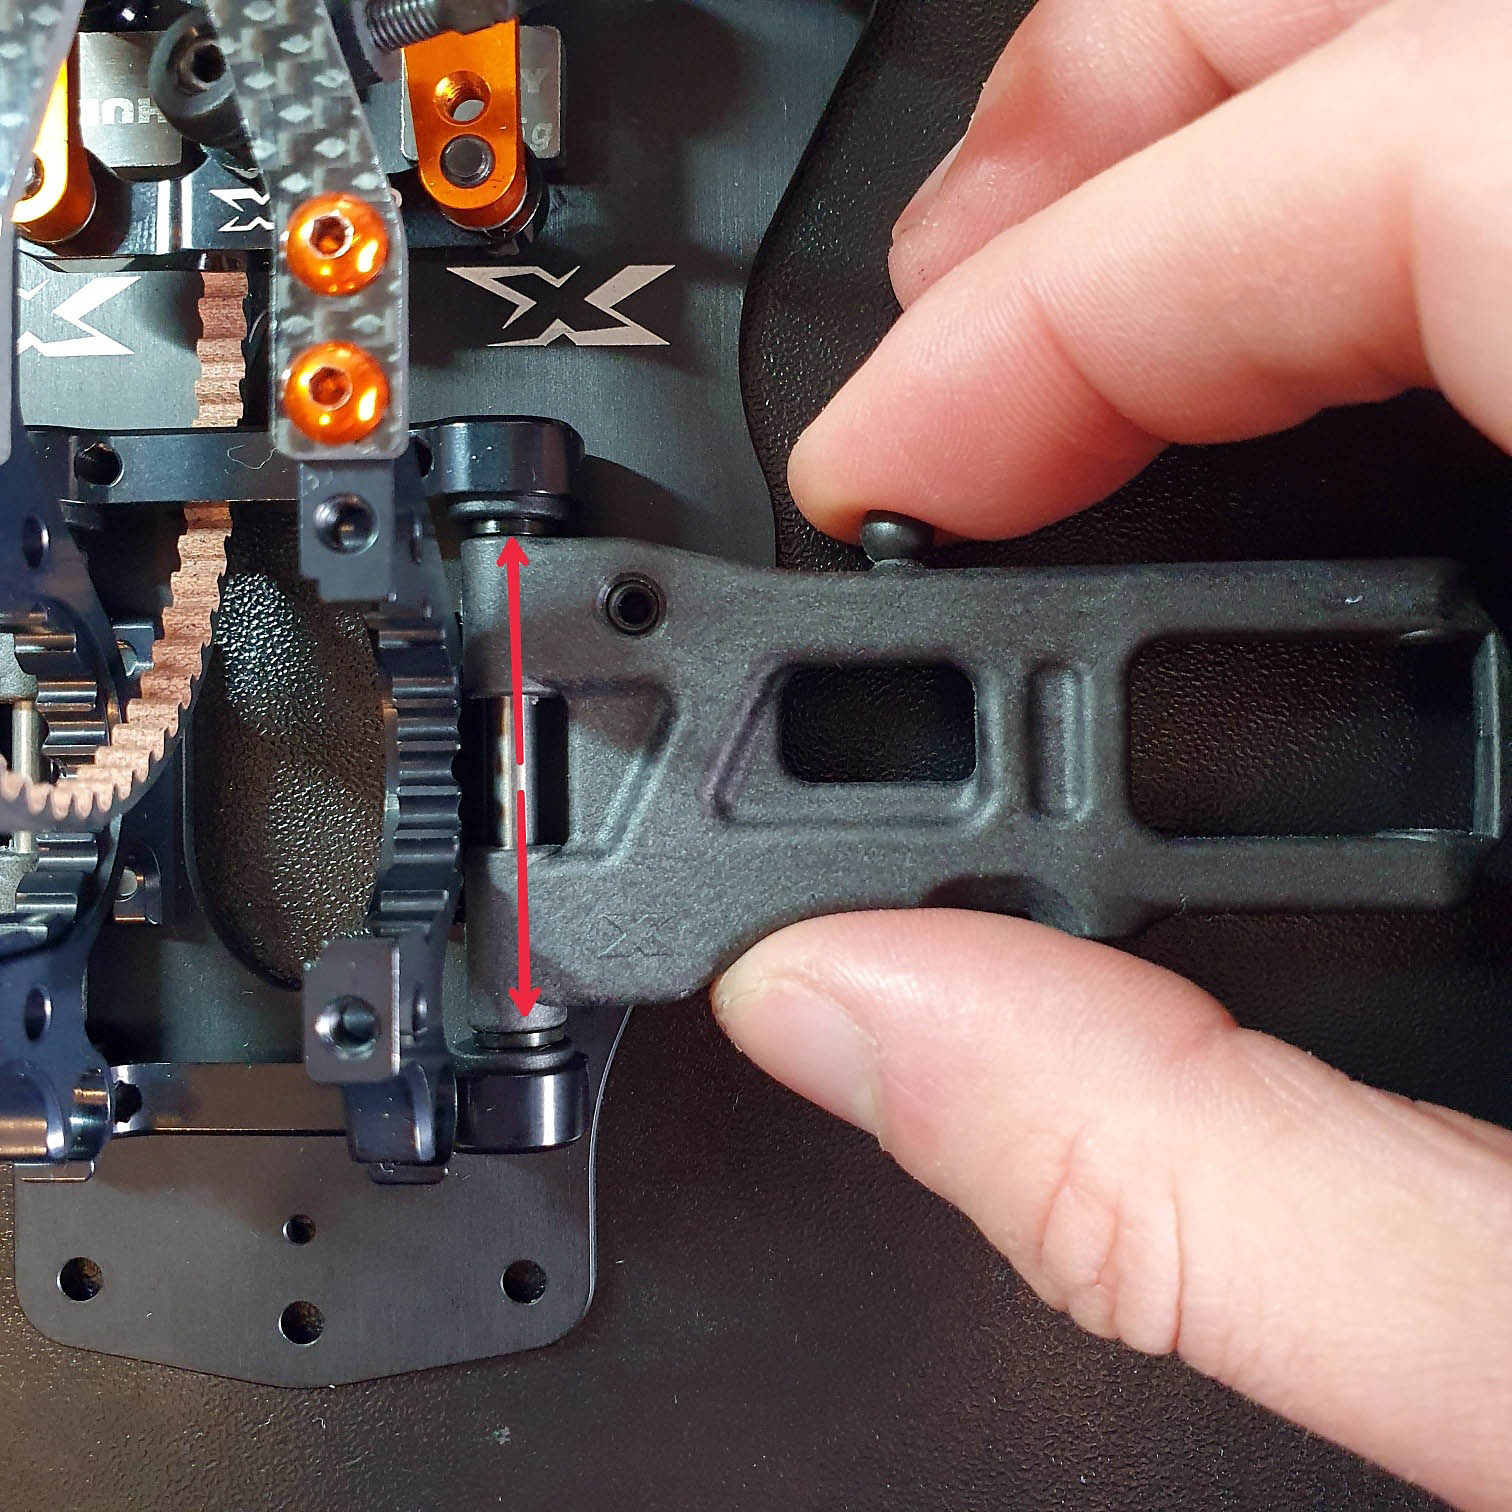
Tech tip: when mounting the suspension arms on your XRAY T4, you mainly need to pay attention to: 1. Free movement of the hinge pin 2. Correct play between the suspension blocks.
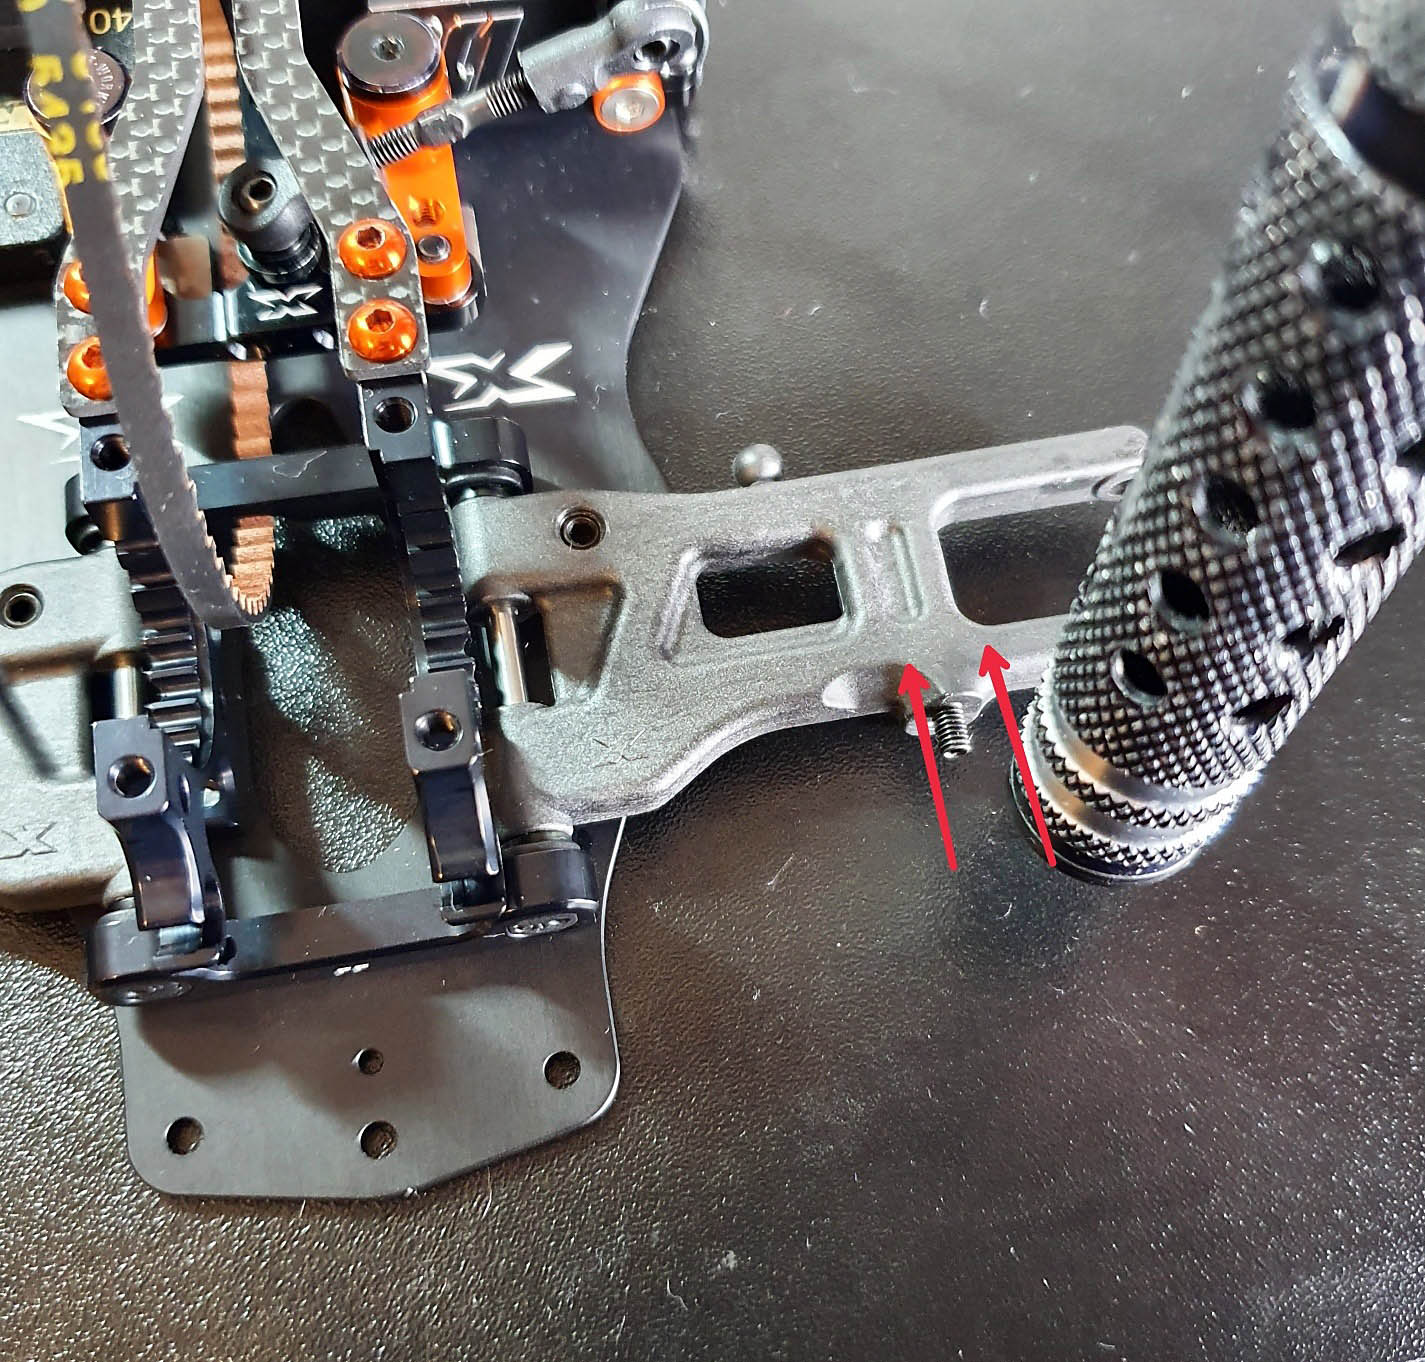
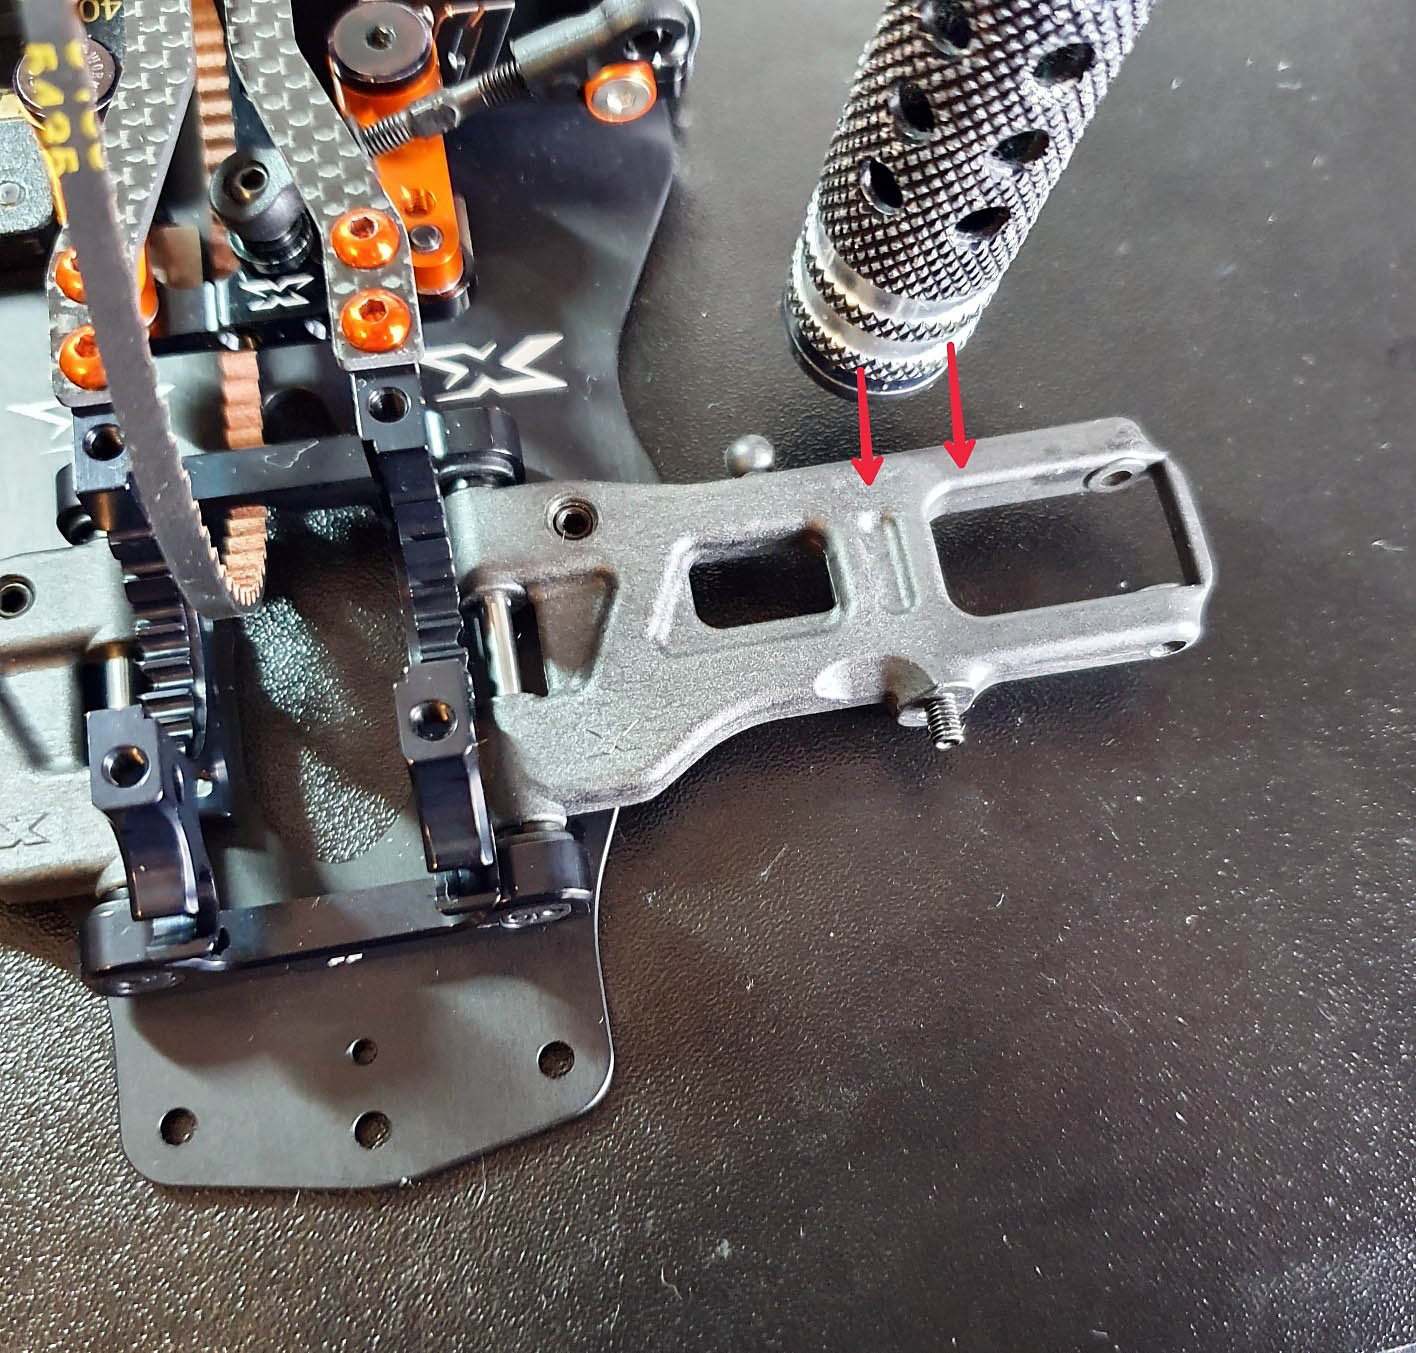
Before installing the arms onto the chassis, I check that the hinge pin can move freely through the arm. The arm should be able to fall under its own weight when you're holding the hinge pin. If it doesn't, use the HUDY 3mm arm reamer (107633) to remove a very small amount of material. If your arm reamer is fairly new and sharp, you will only need to pull it through once. Don't overdo it. We don't want any excess play!
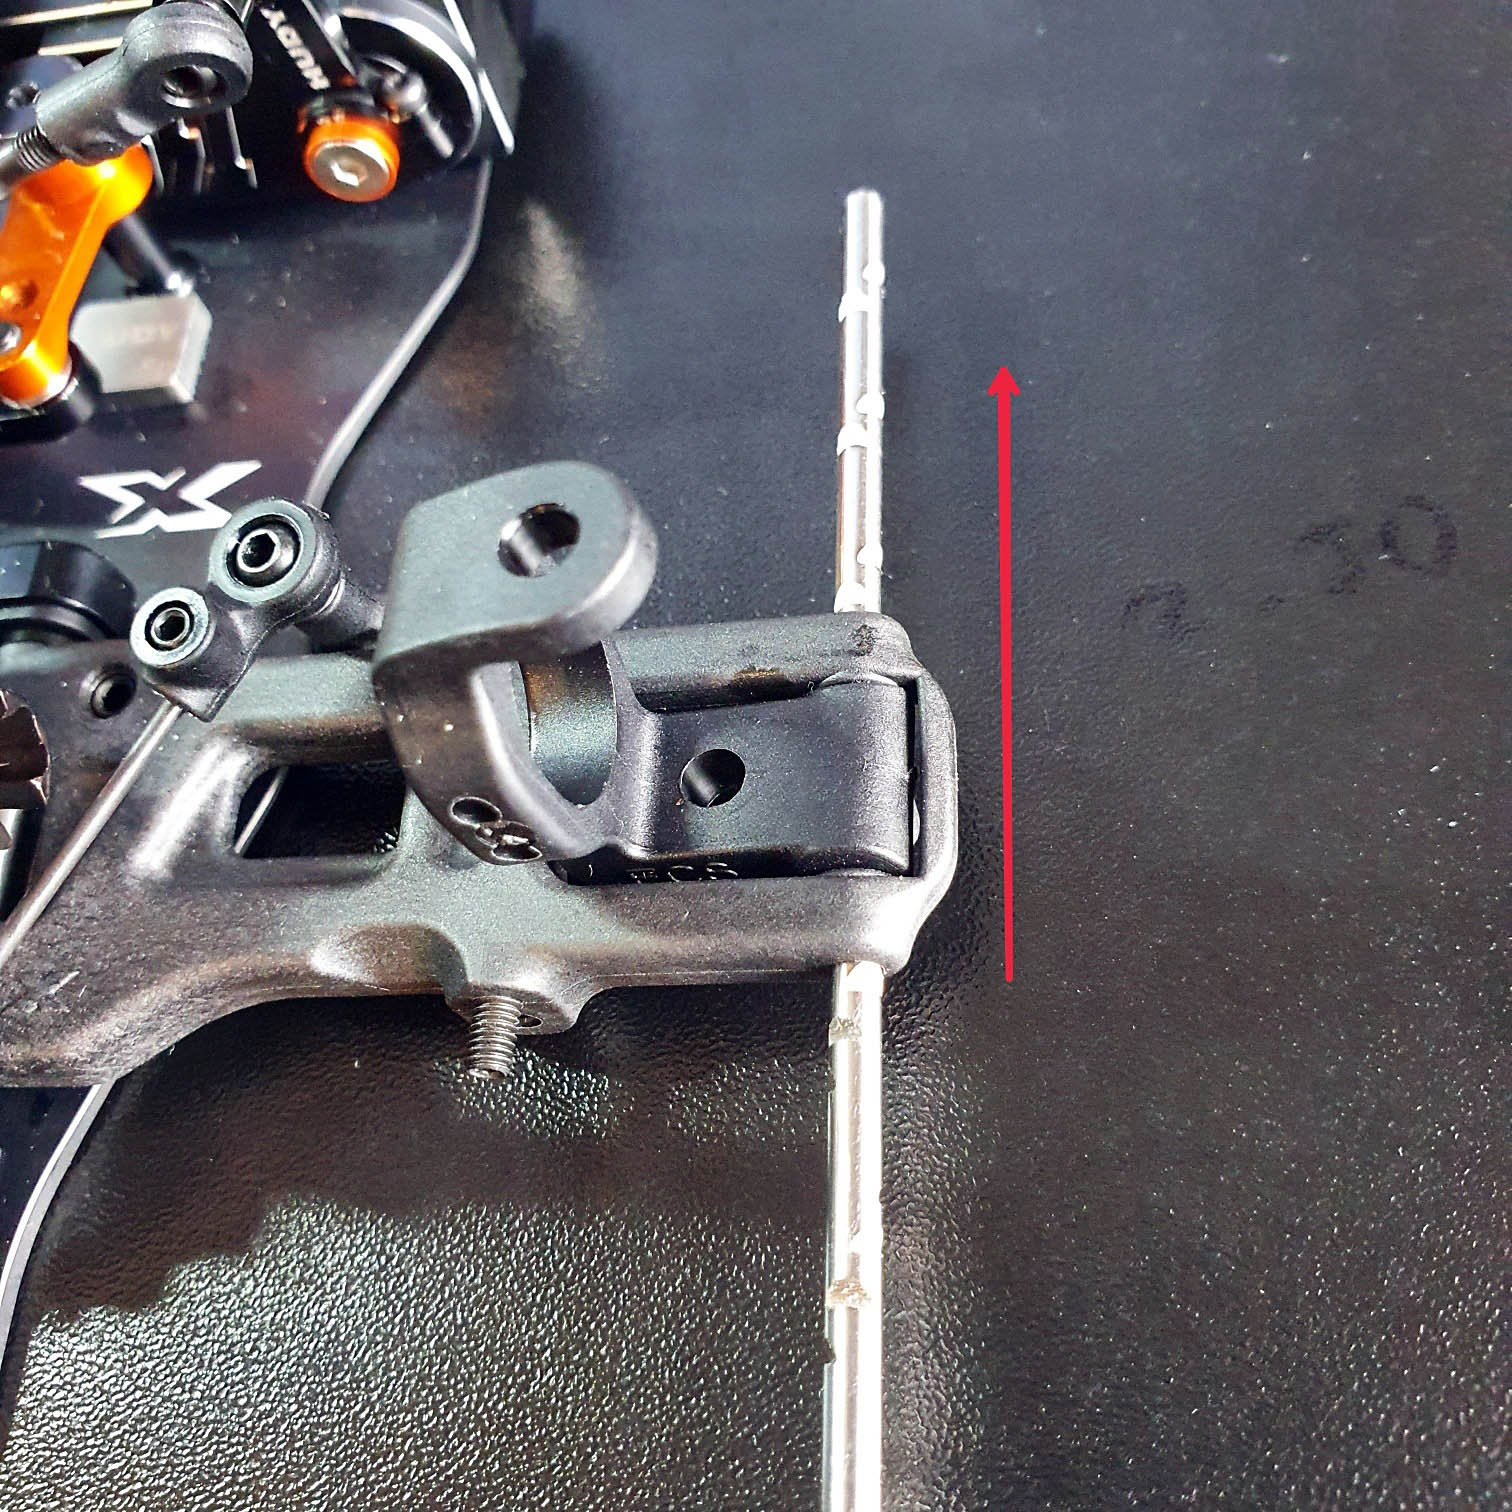
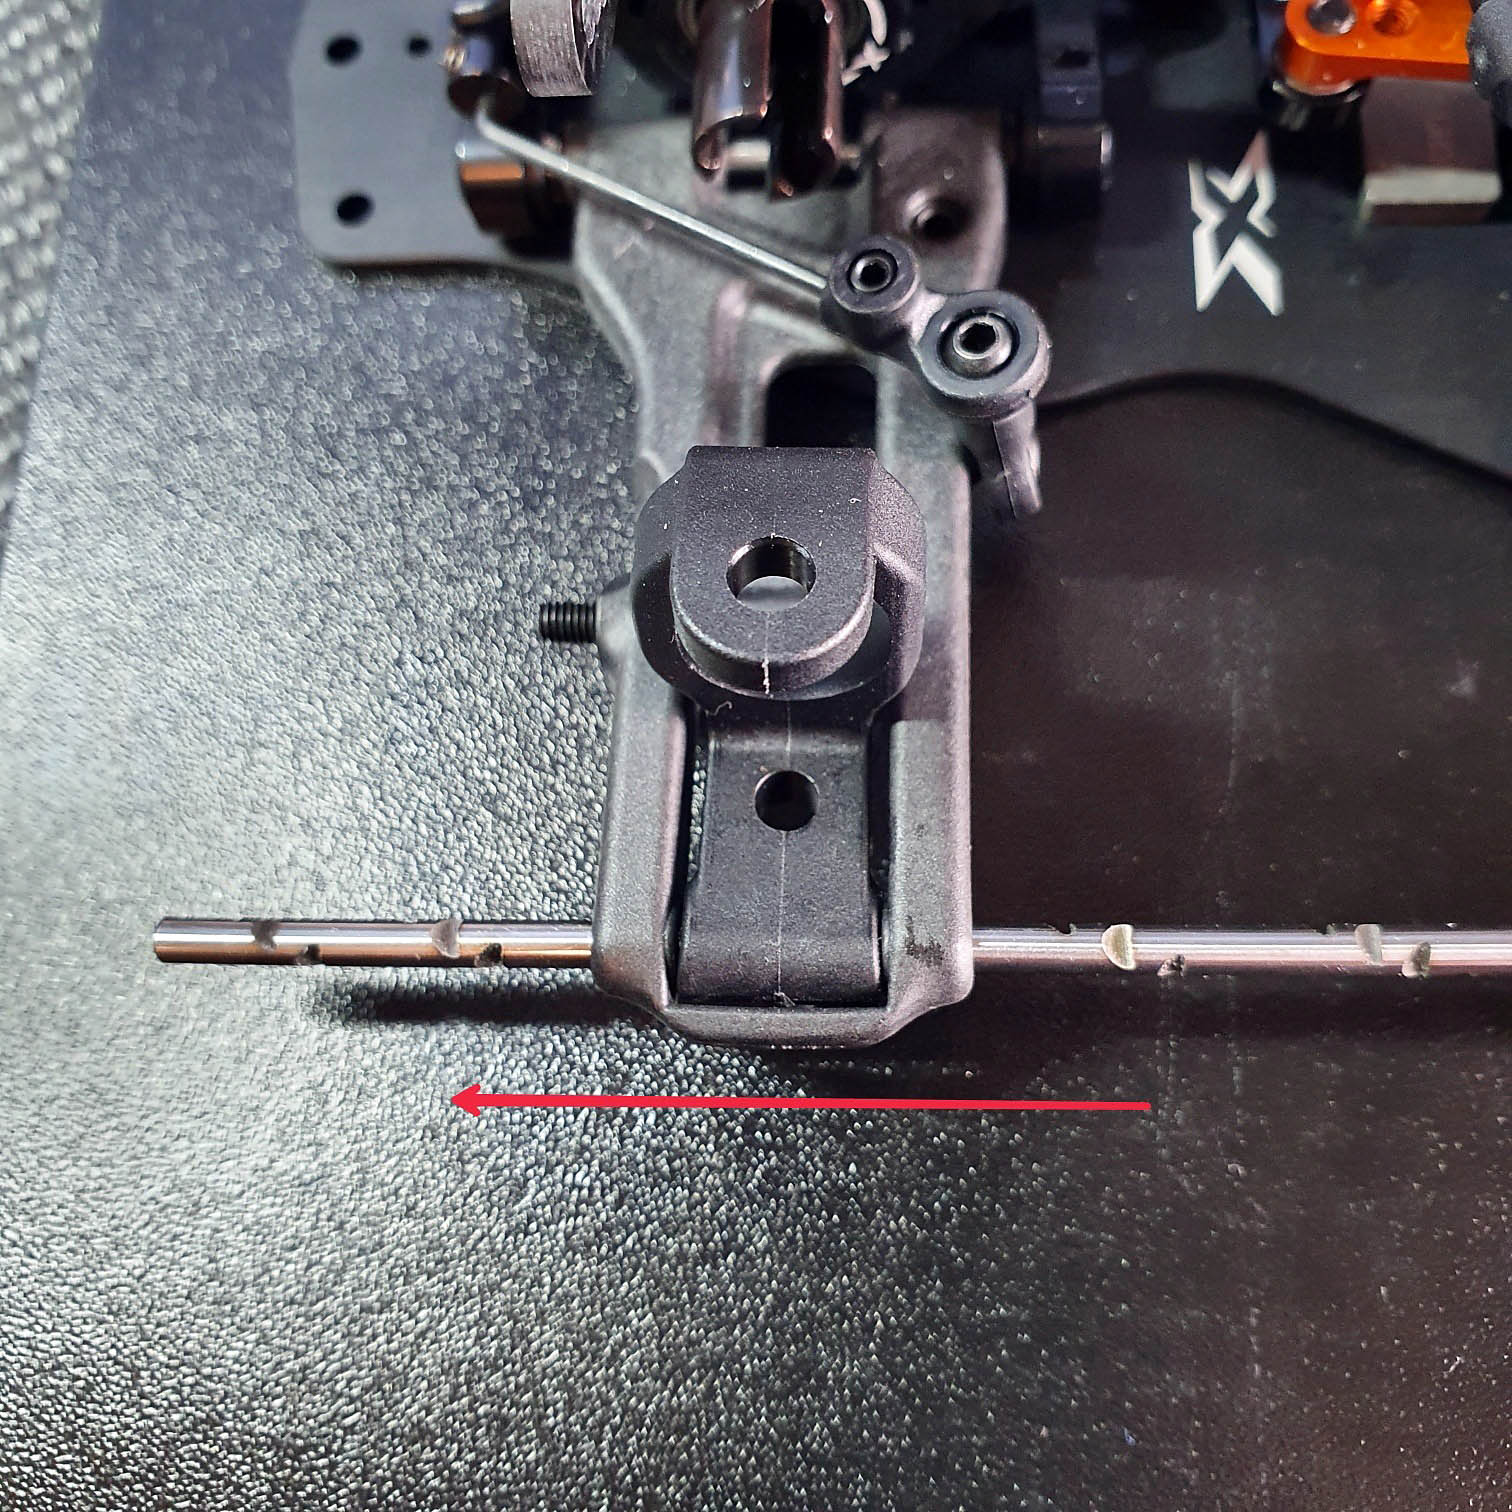
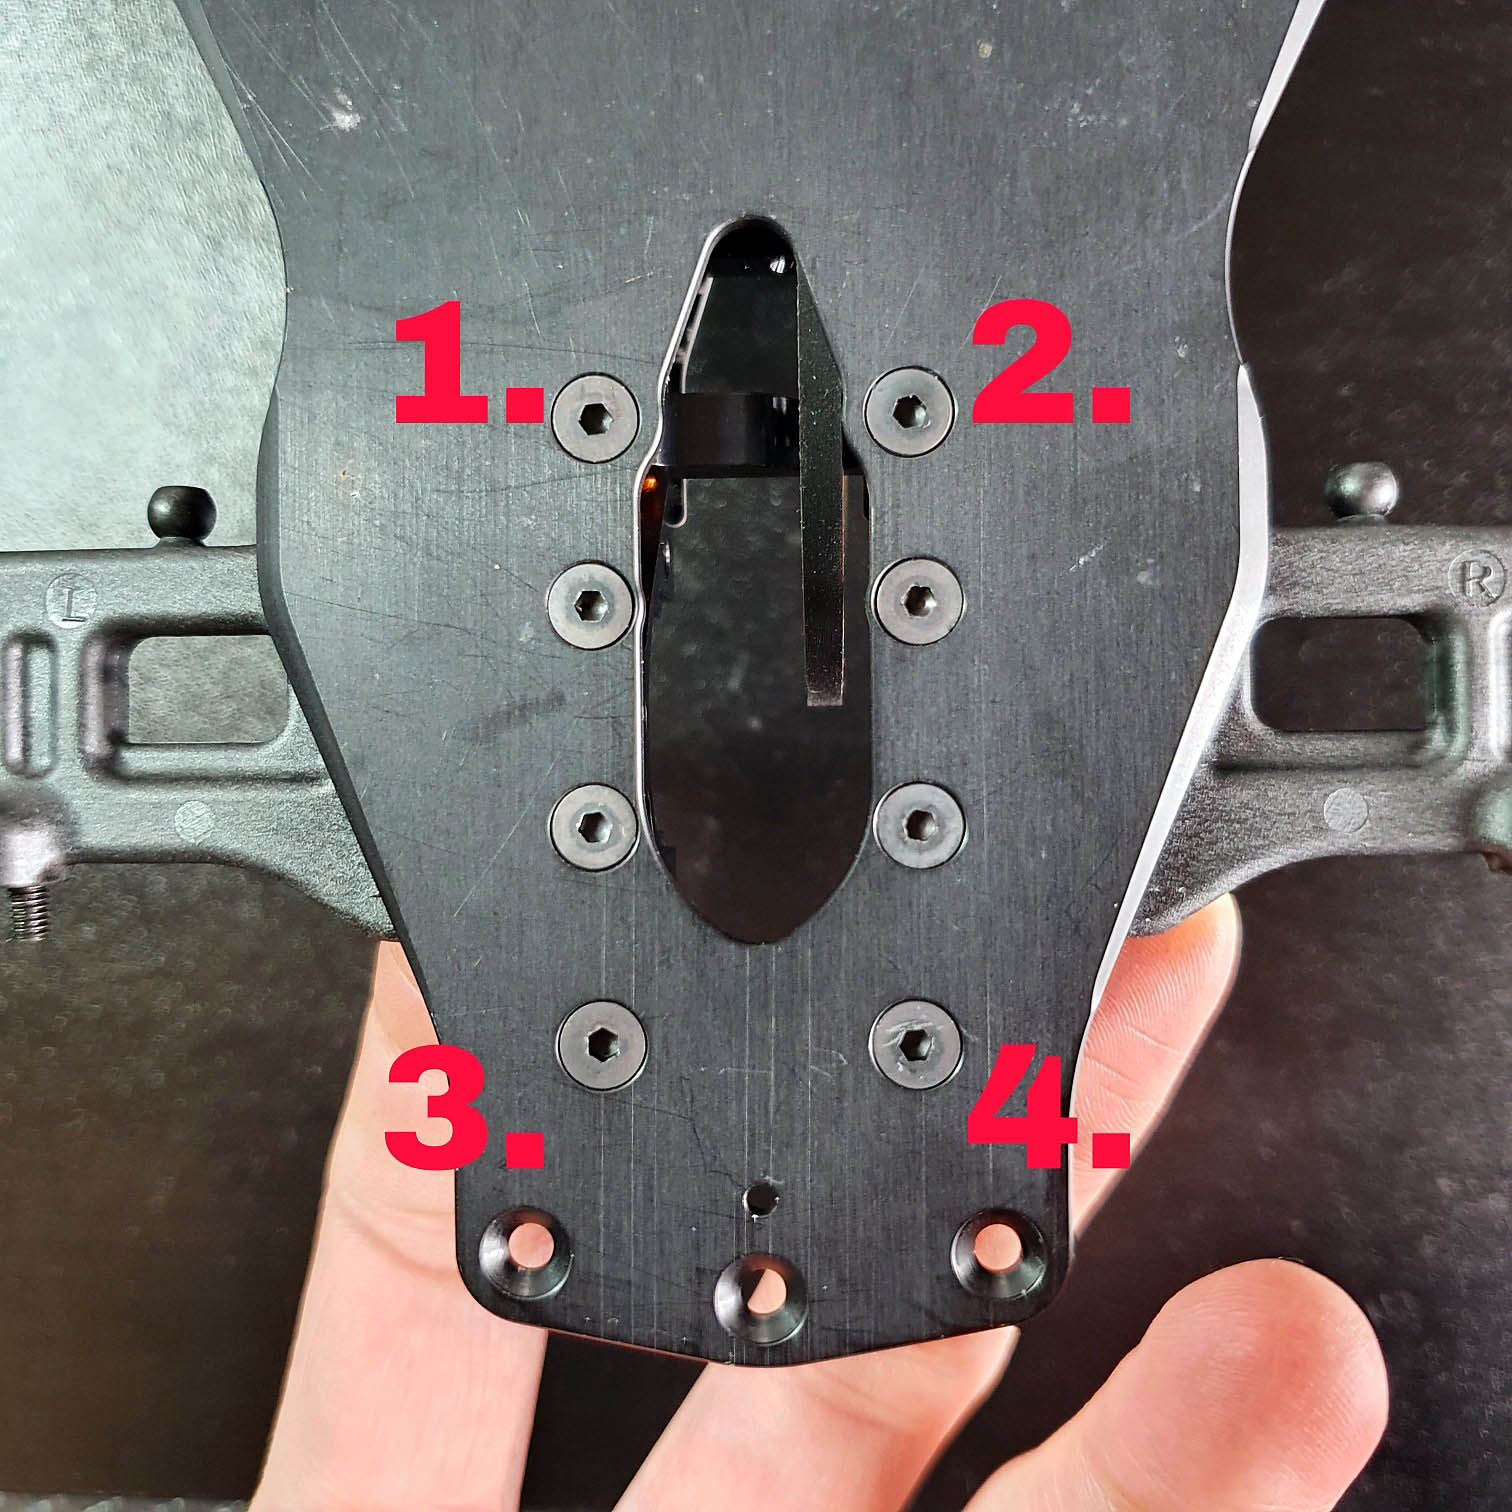
When you've mounted the arm on the chassis with the two suspension blocks and eccentric inserts, its important that you have the correct play between the blocks, so that the arm can move freely. We're talking about 0.1mm of play here, not more - just enough to maintain free movement.
I always tighten the suspension blocks in the order shown in the picture. If the arm sits too tight, push the blocks apart/away from the arm as you tighten down those screws. You can also apply the good old "tapping" trick. Simply tap the arm with the end of your tool handle, both from the front and the back, until the arm can move freely.
Tech tip: the best way to achieve a completely leak free and consistently performing XRAY T4 differential. Consider this as a supplement to the instruction manual:
1. Don't use the o-ring for sealing. It swells up when in contact with oil, and CAN cause issues with leaking (it doesn't always). So I recommend using only the gasket.
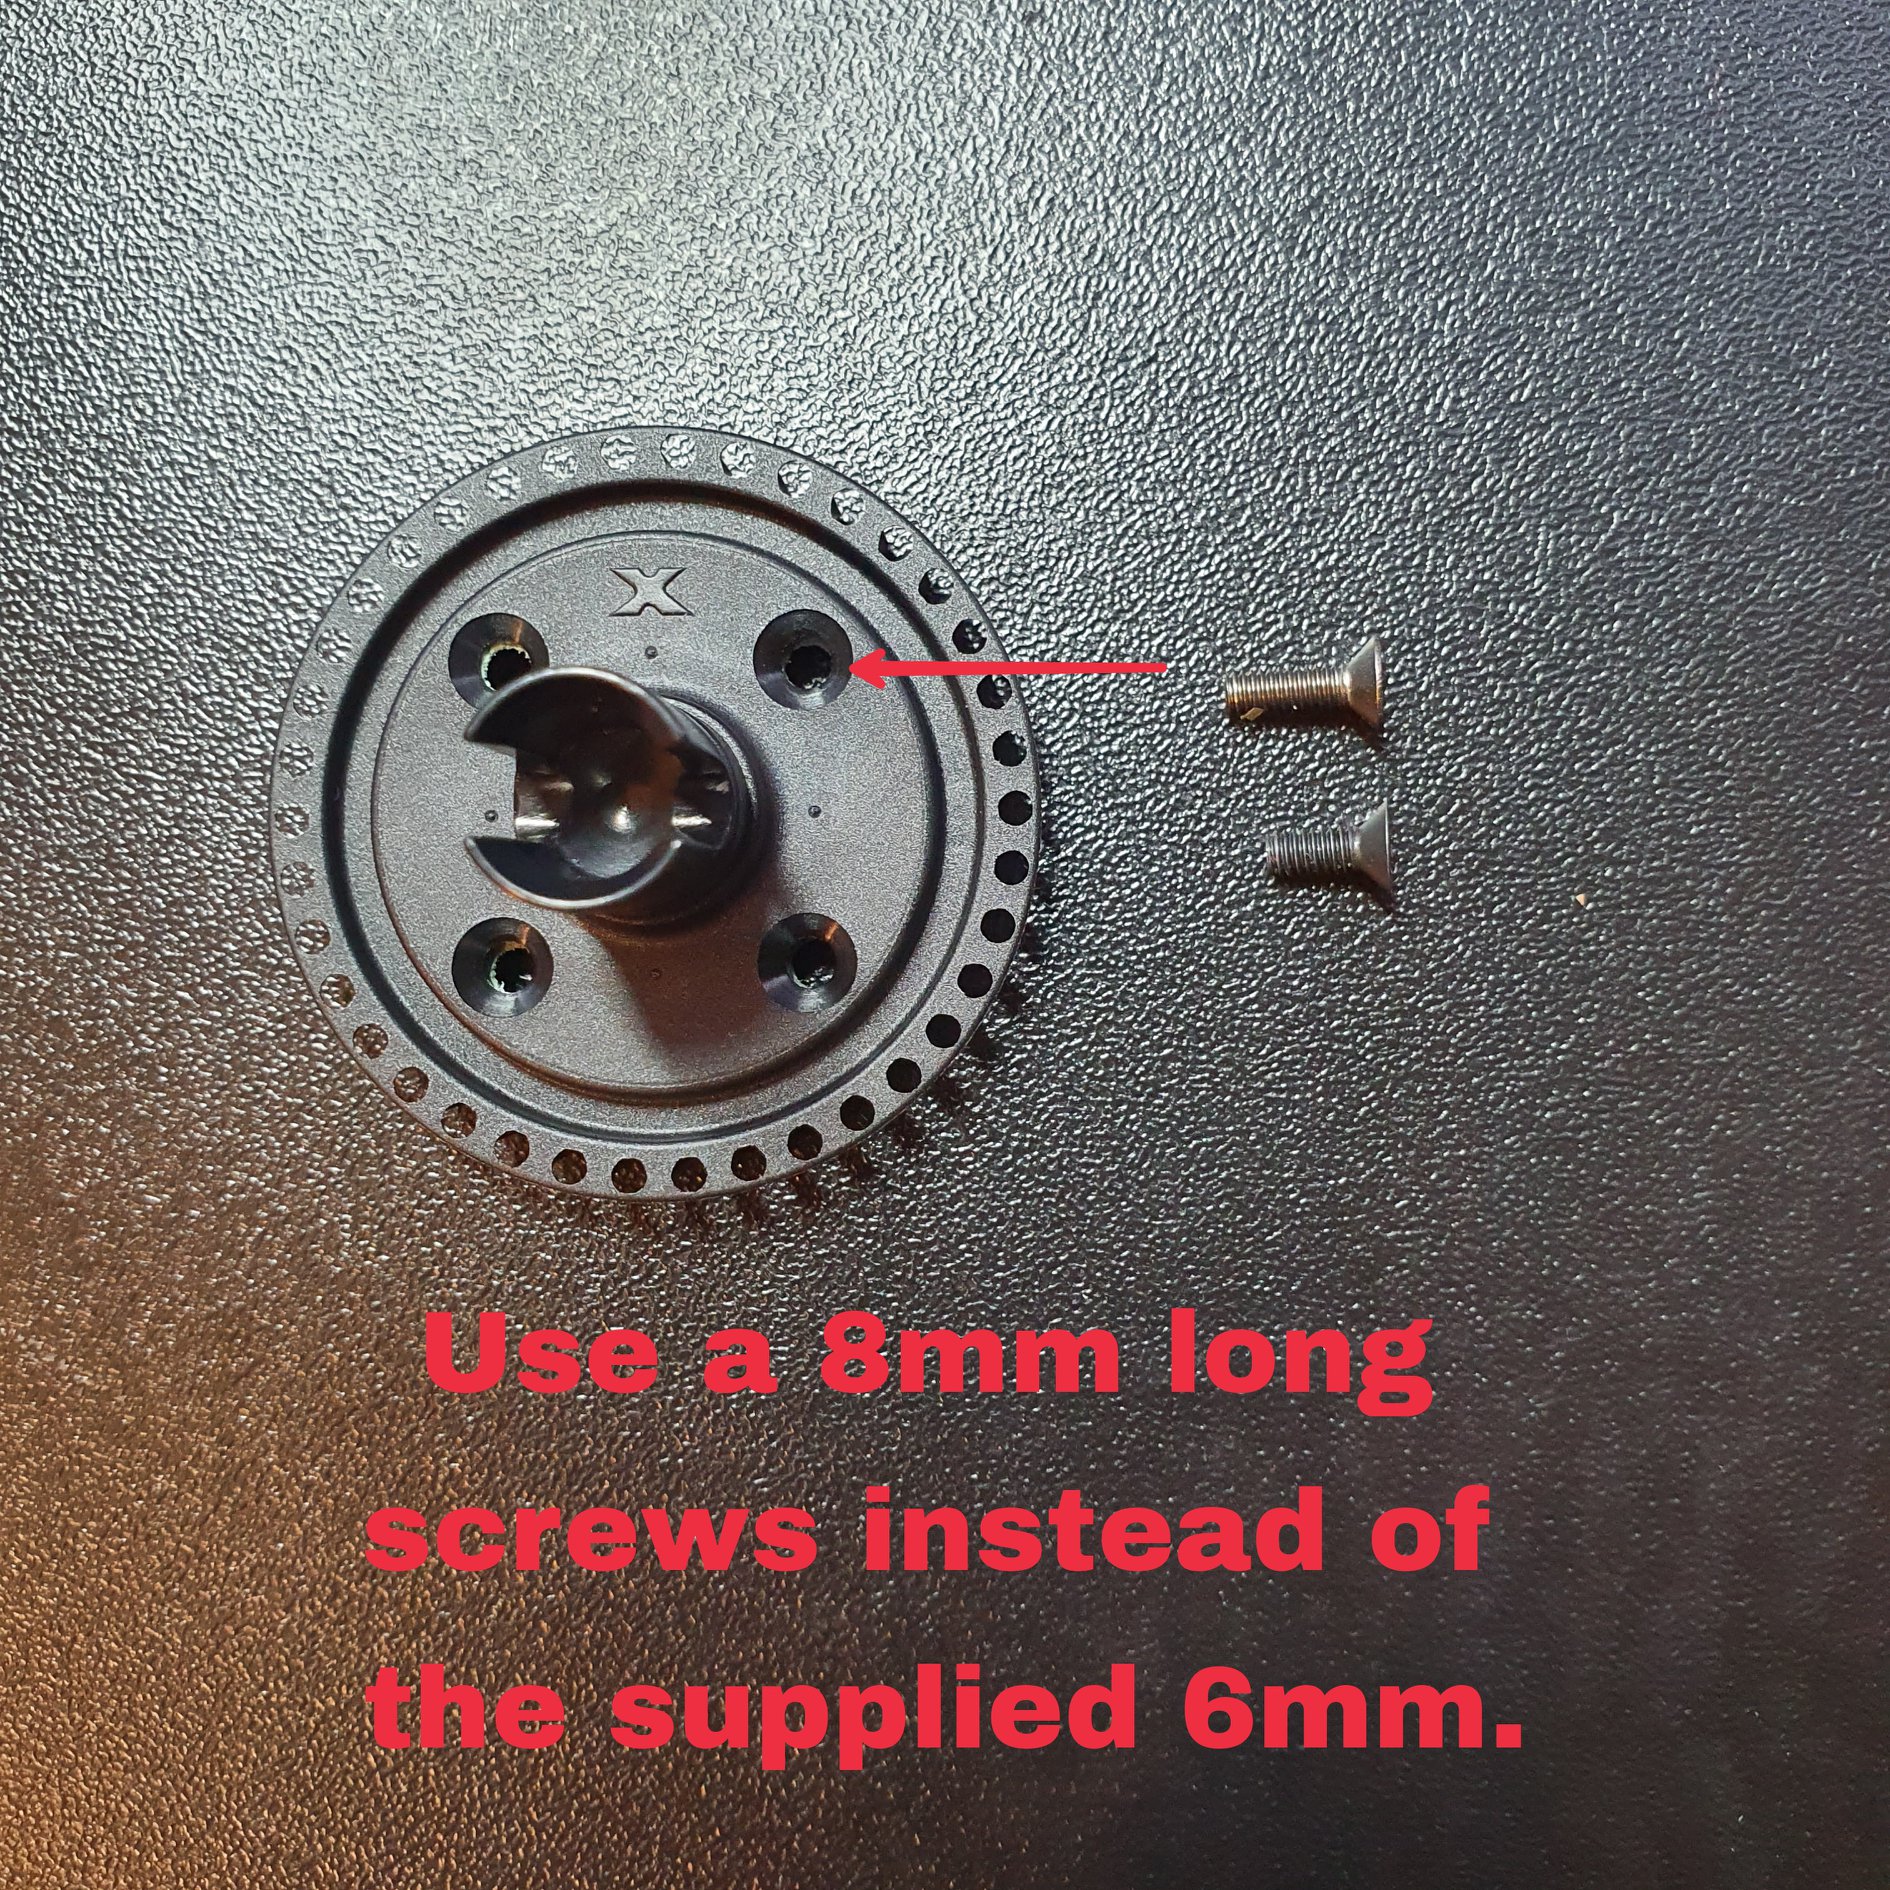
2. Use longer screws for the diff case (8mm, instead of the supplied 6mm). I recommend the XRAY part number 903258. Alternatively, the titanium ones from HIRO SEIKO
, part number 69891. The longer screw will minimize any issues with stripped threads in the case, and you can comfortably crank down on the screws to completely seal the diff.
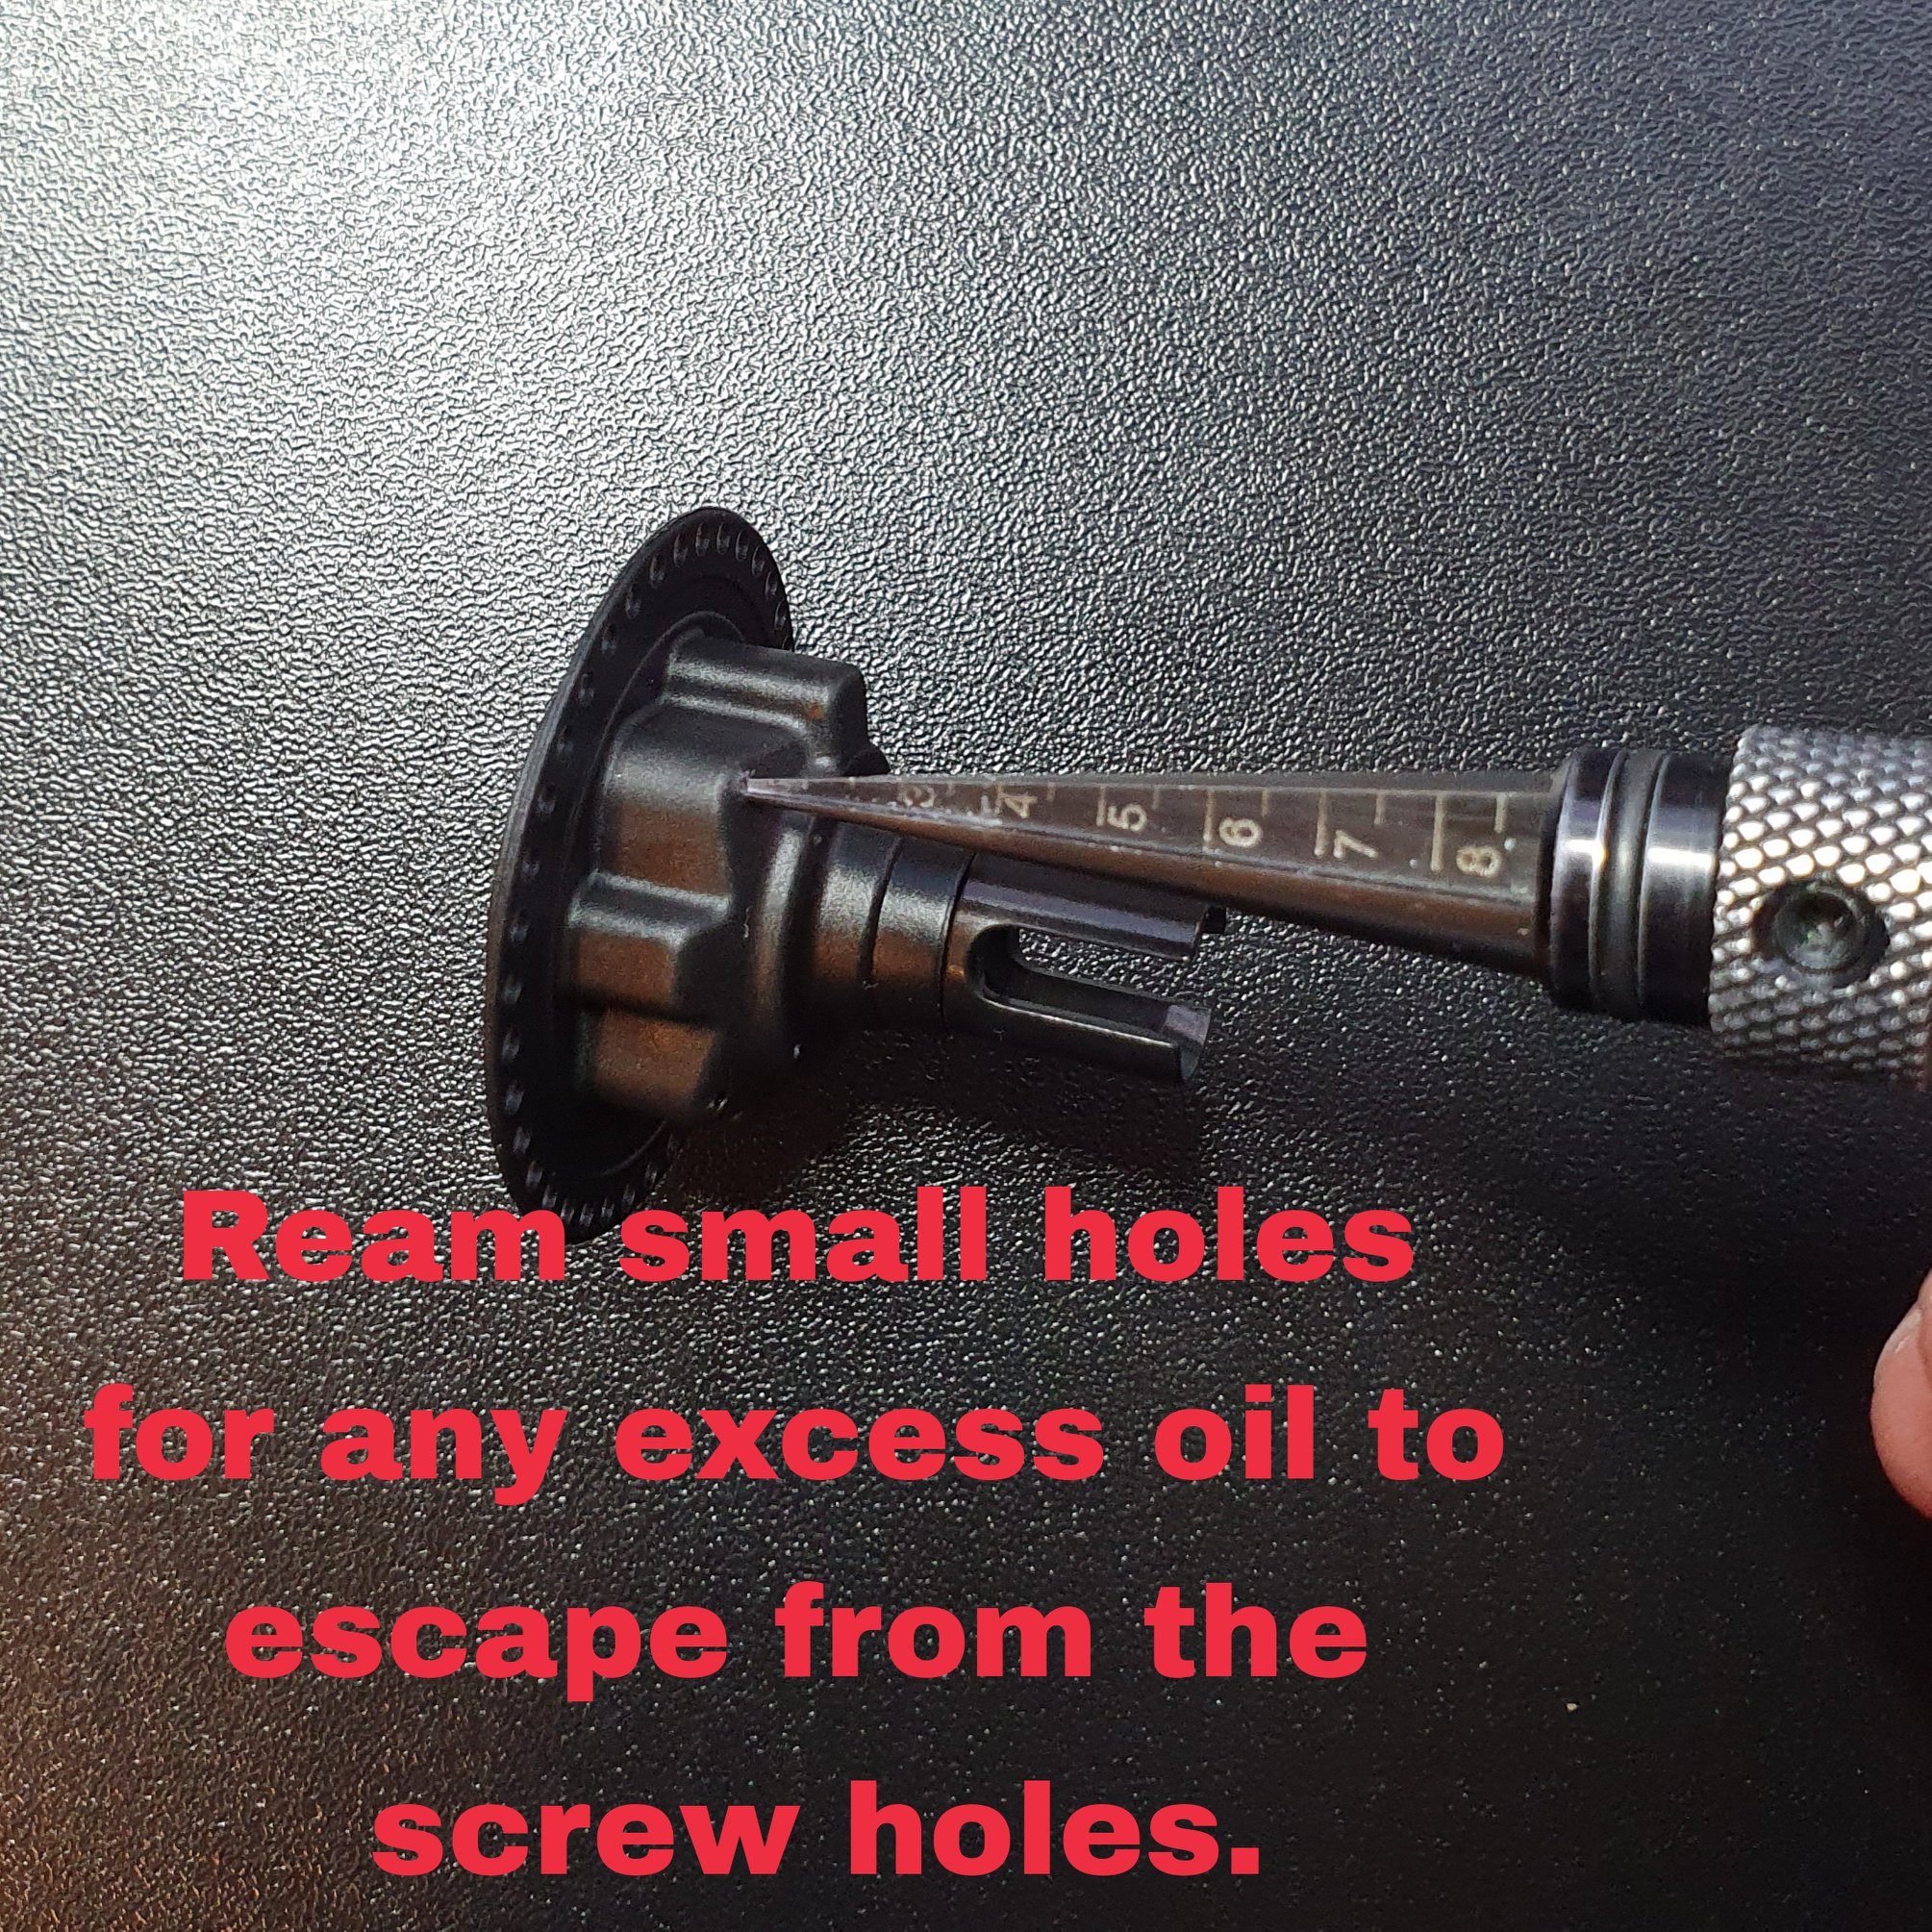
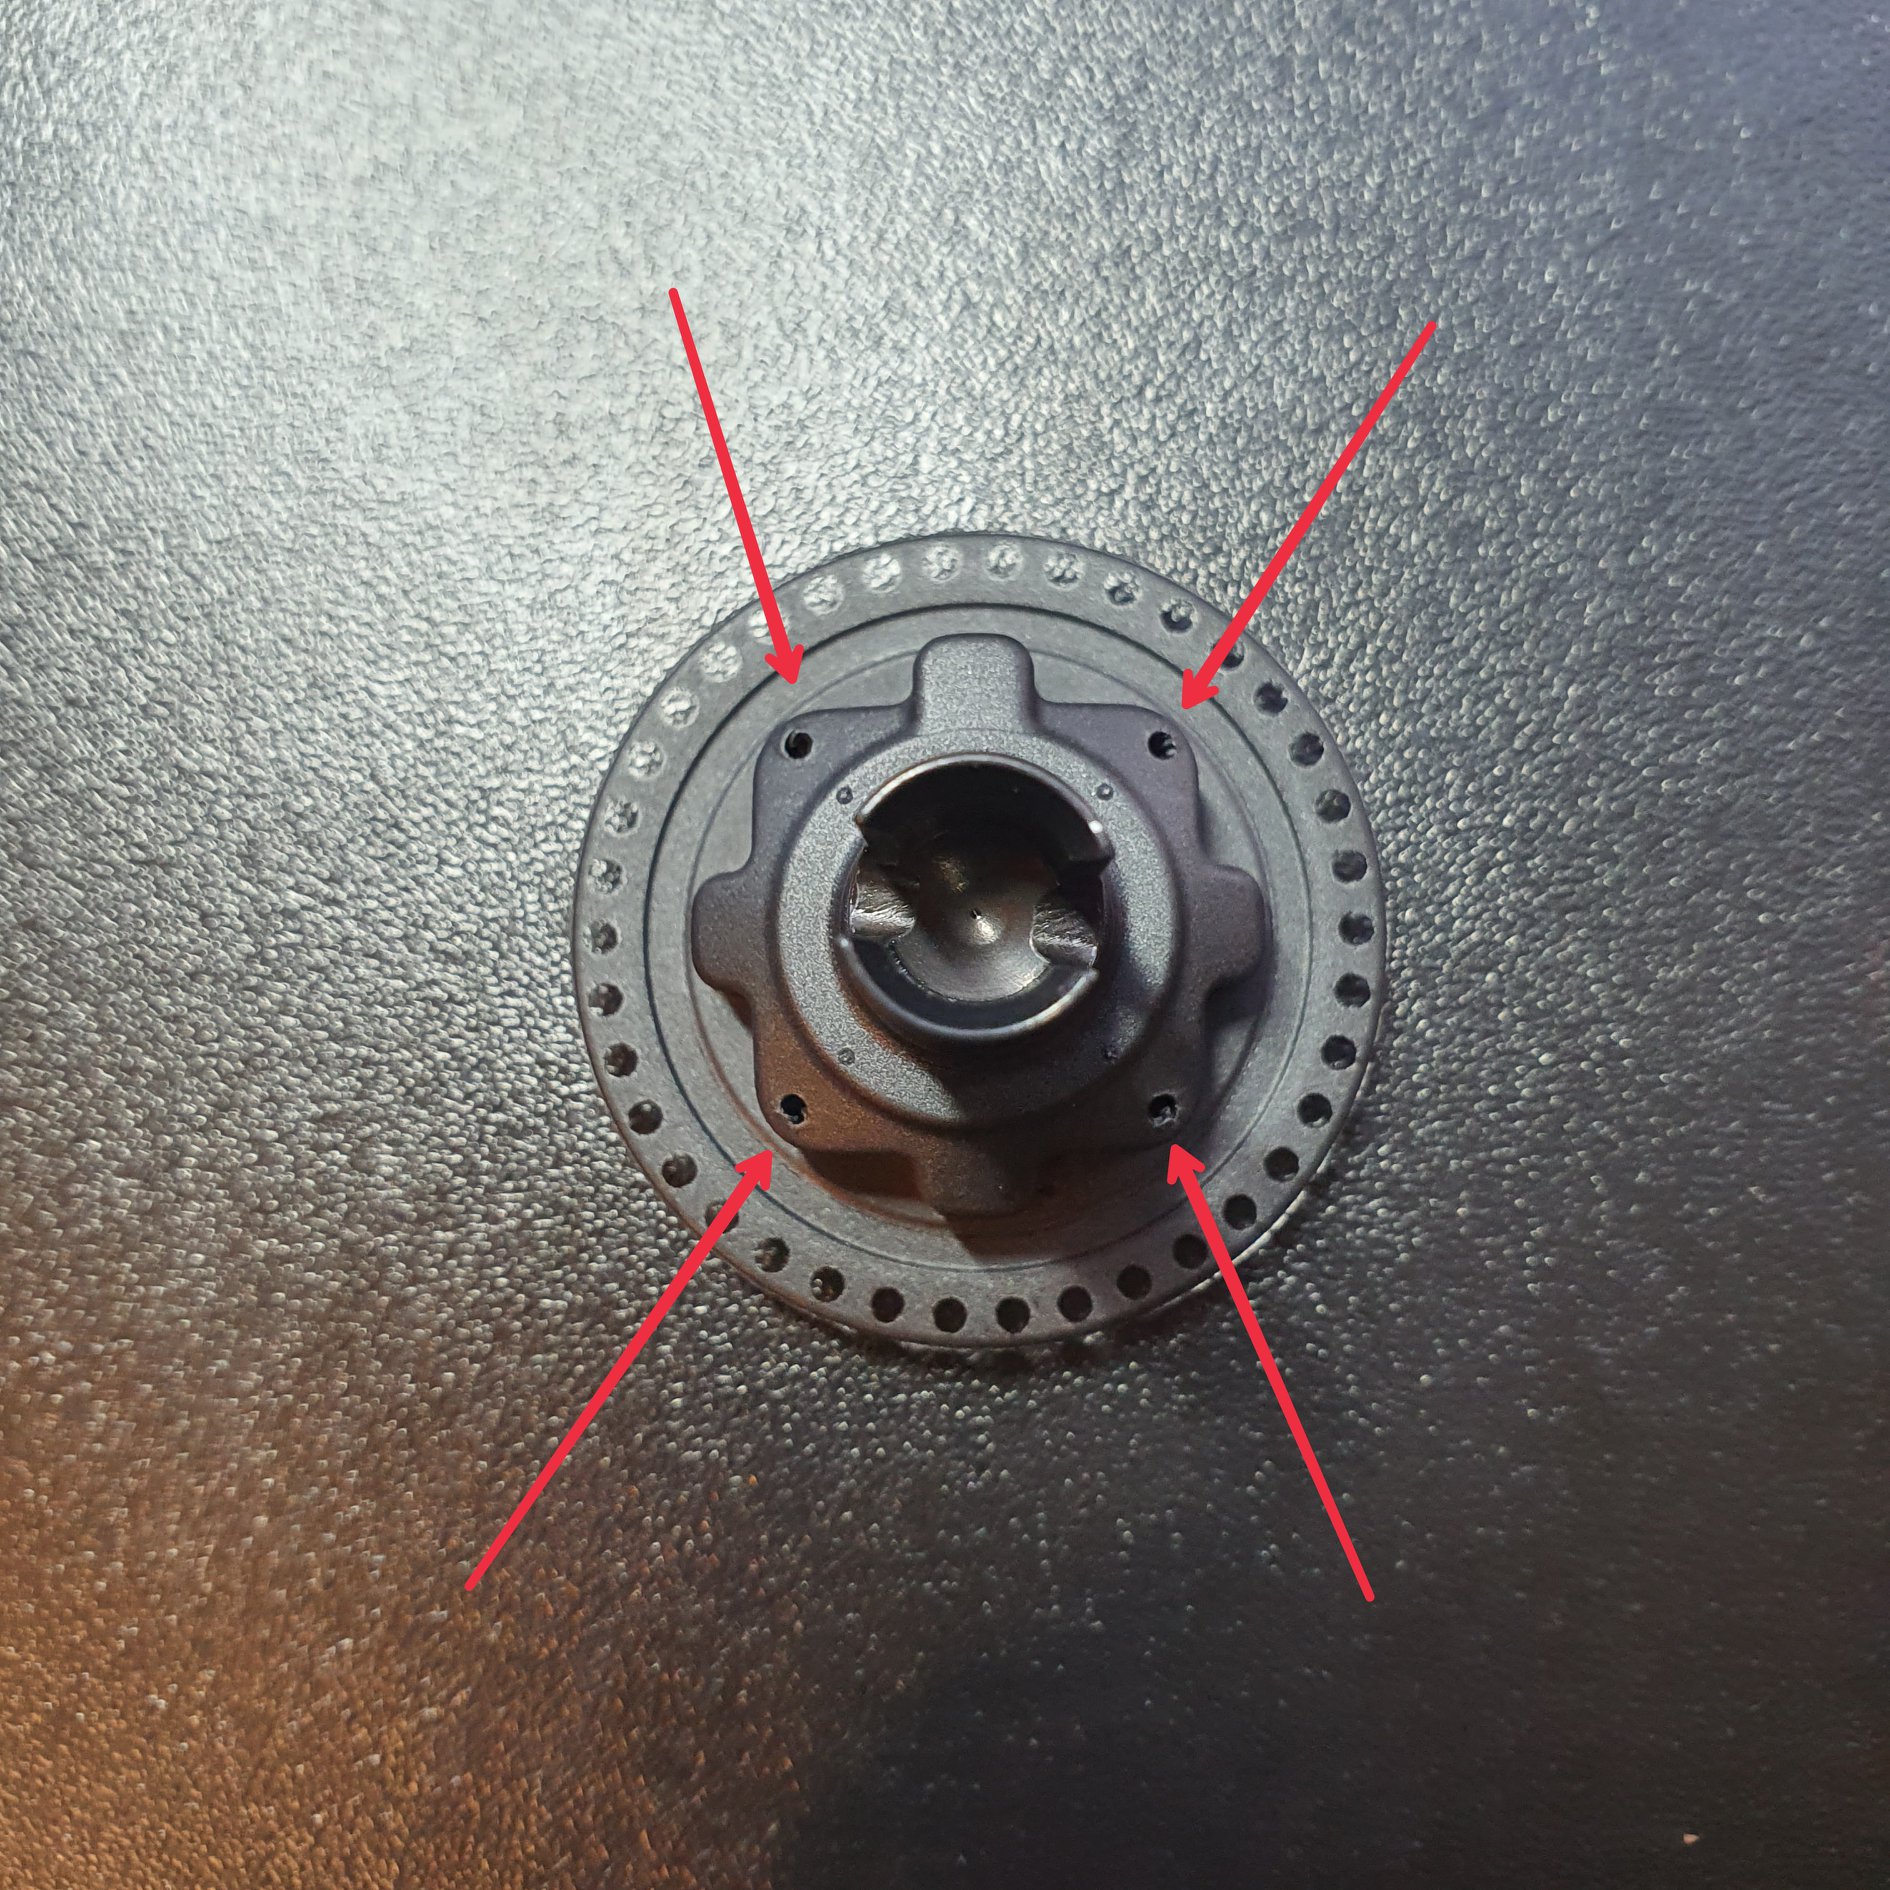
3. Ream small holes from the back of the diff case, to let any excess oil escape. This will prevent any problems with stripping of the threads as well.

|

