|
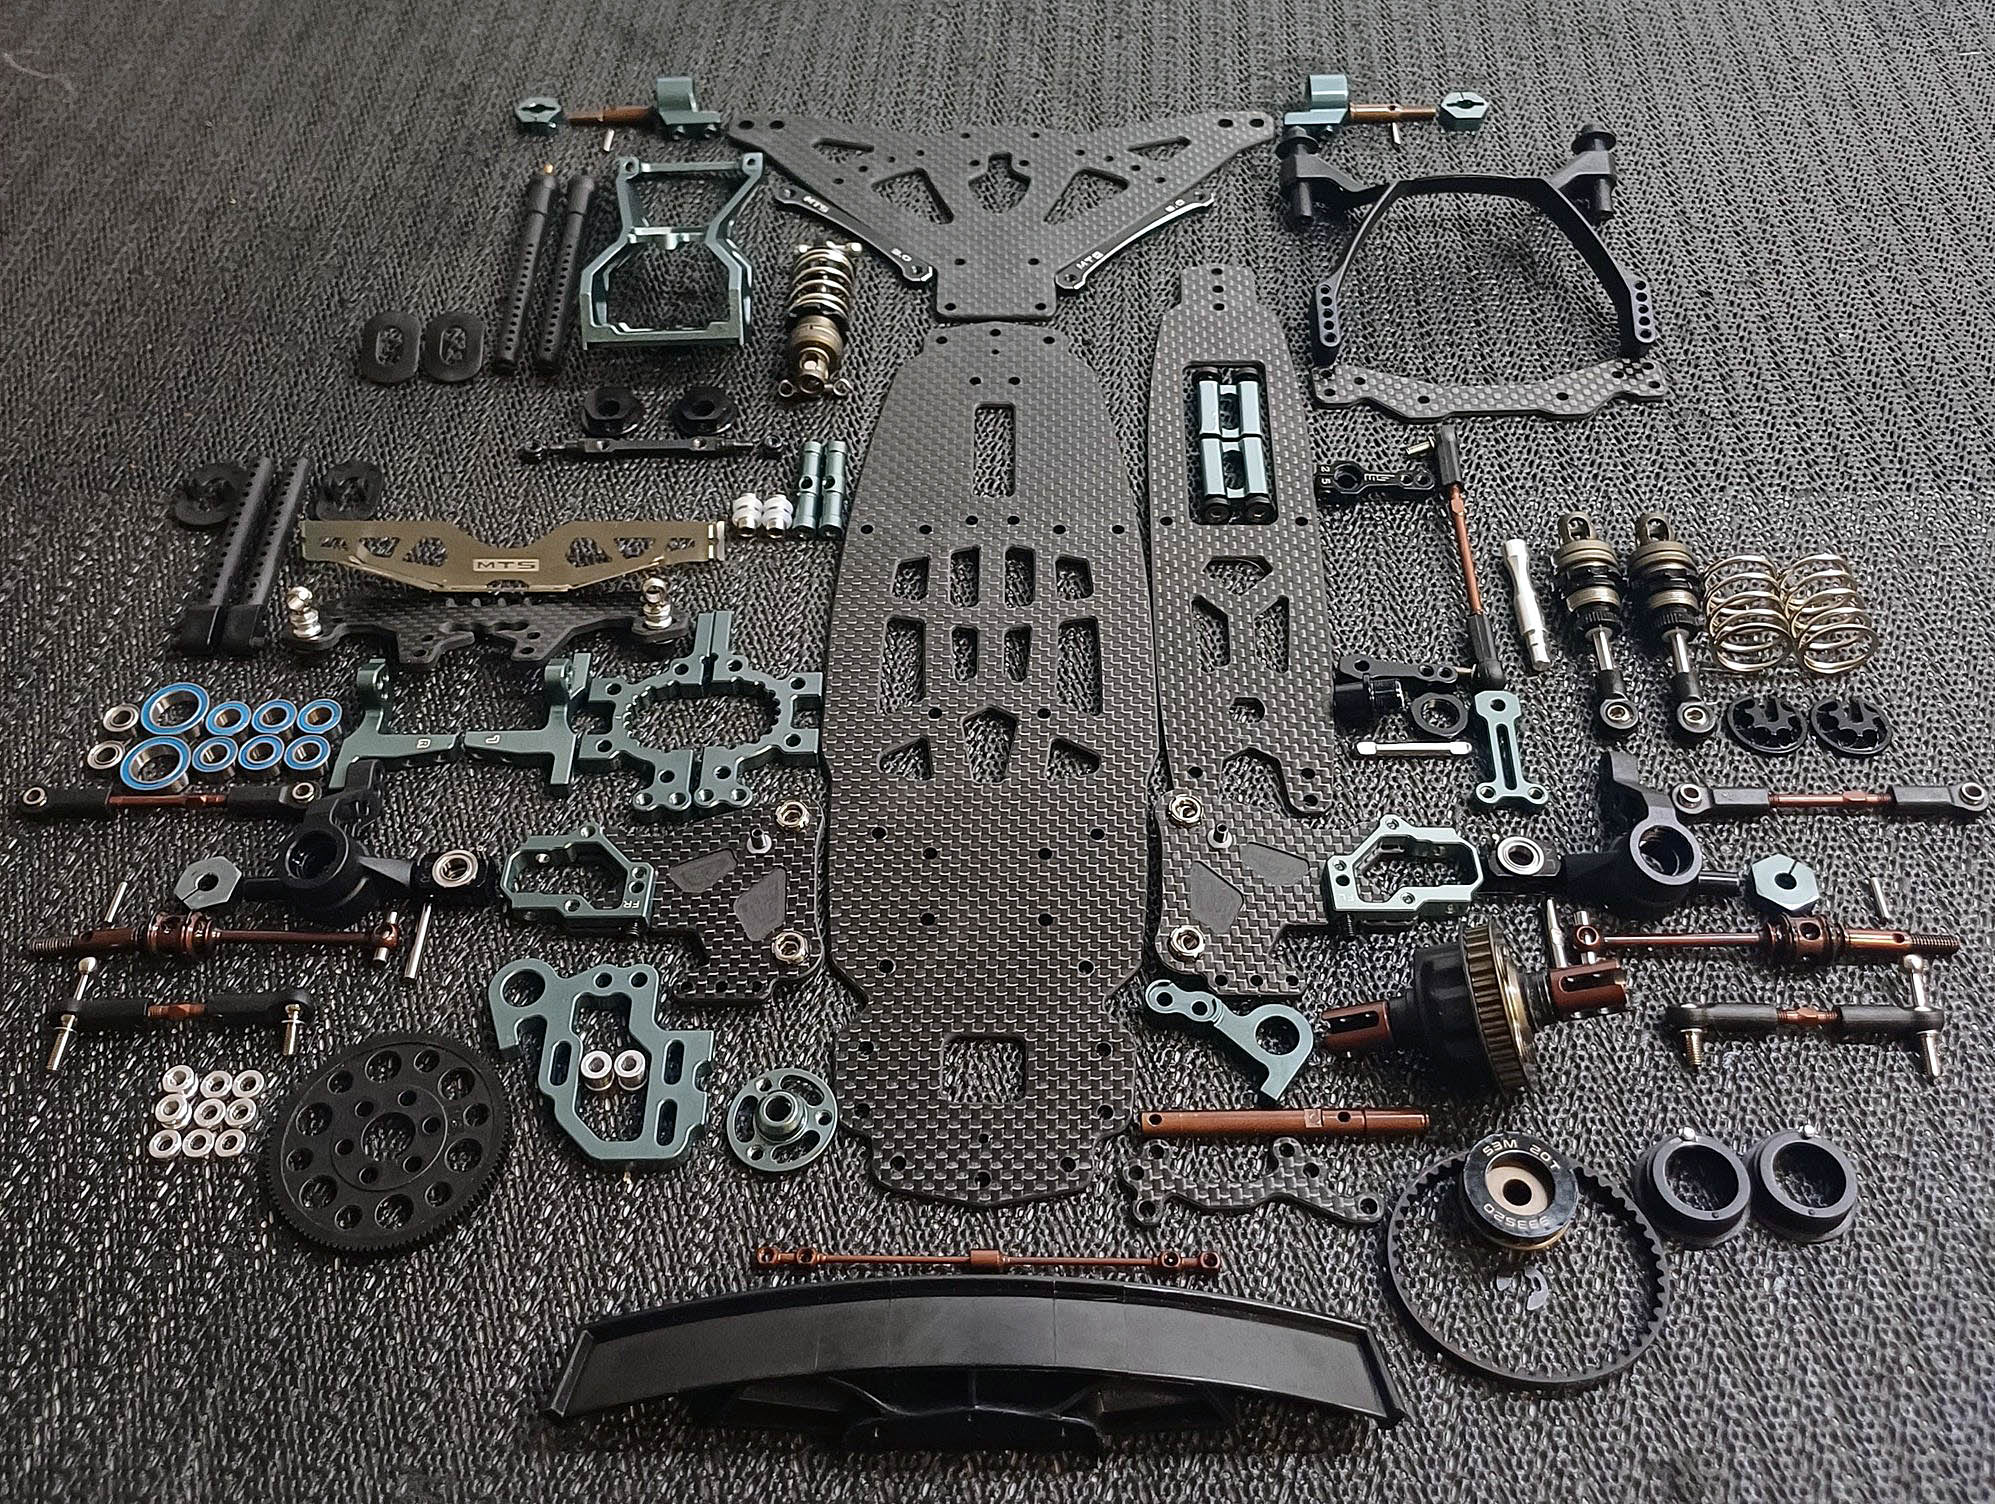
CNC Treated aluminium pulleys. Smoother and more efficcient. Optional drive pulley/belts are available and the diff casing/pulley hos a smaller diameter for reduced mass. As mentioned elsewhere there are several tuning components for the Limited Split Differential. Generally these require a lighter oil than conventional gear diffs. Mine is rebuilt at 30k. (As supplied they are around 5k) I suggest a rebuild after 1-2 race meets of initial break in.
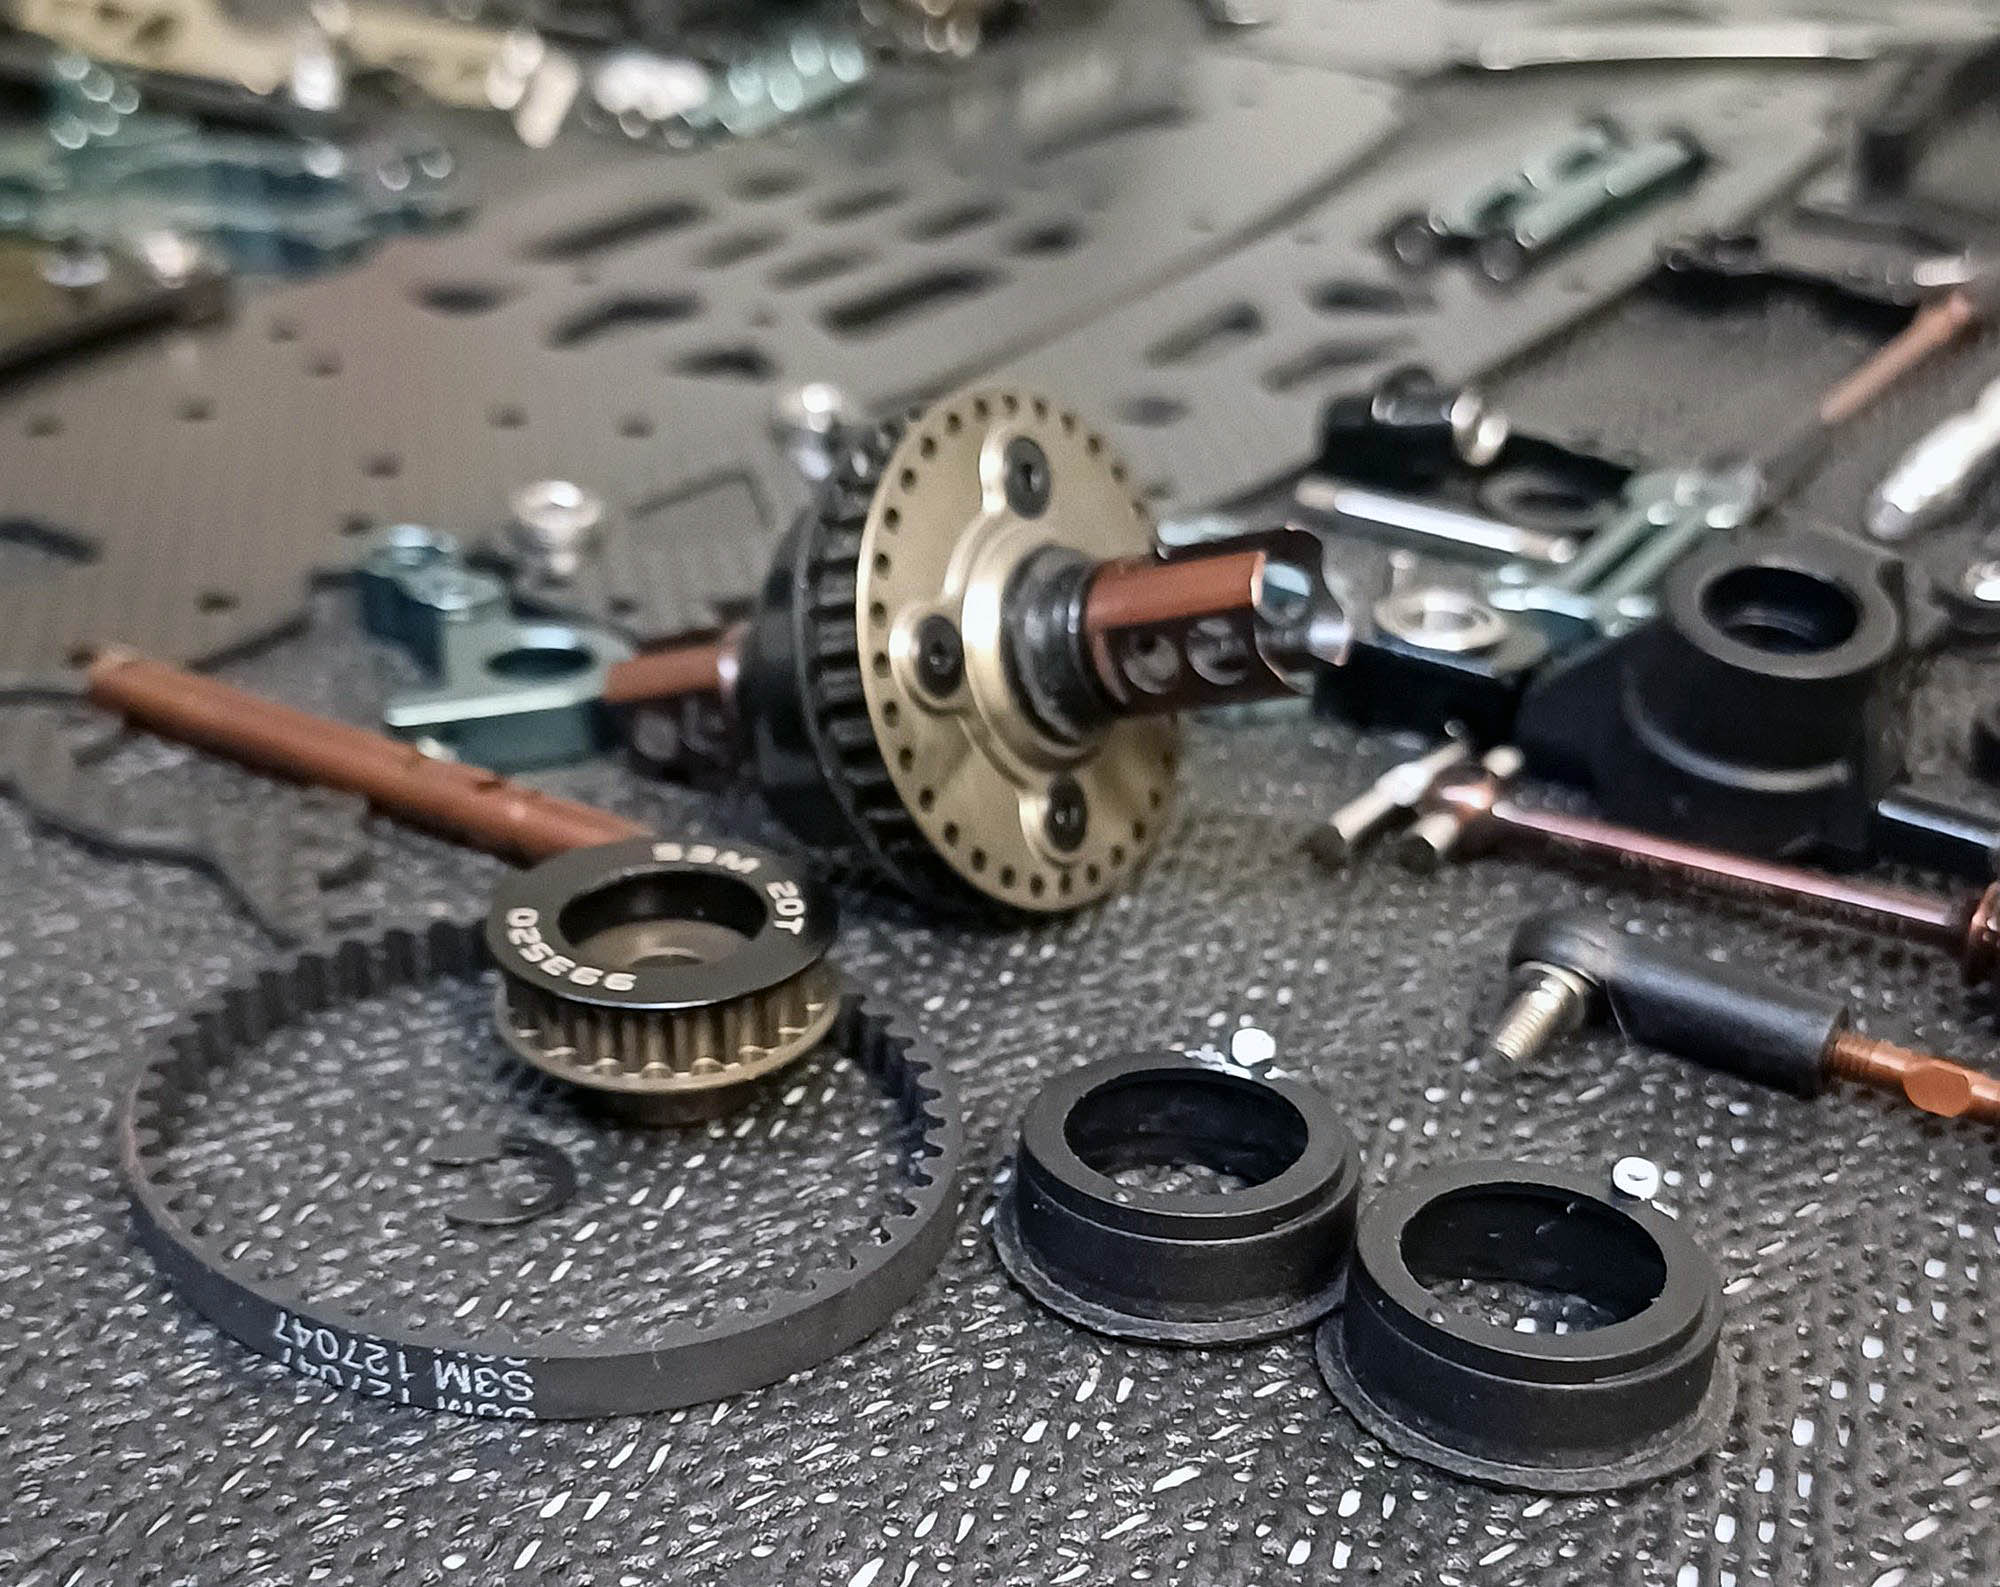
Quality sealed bearings.
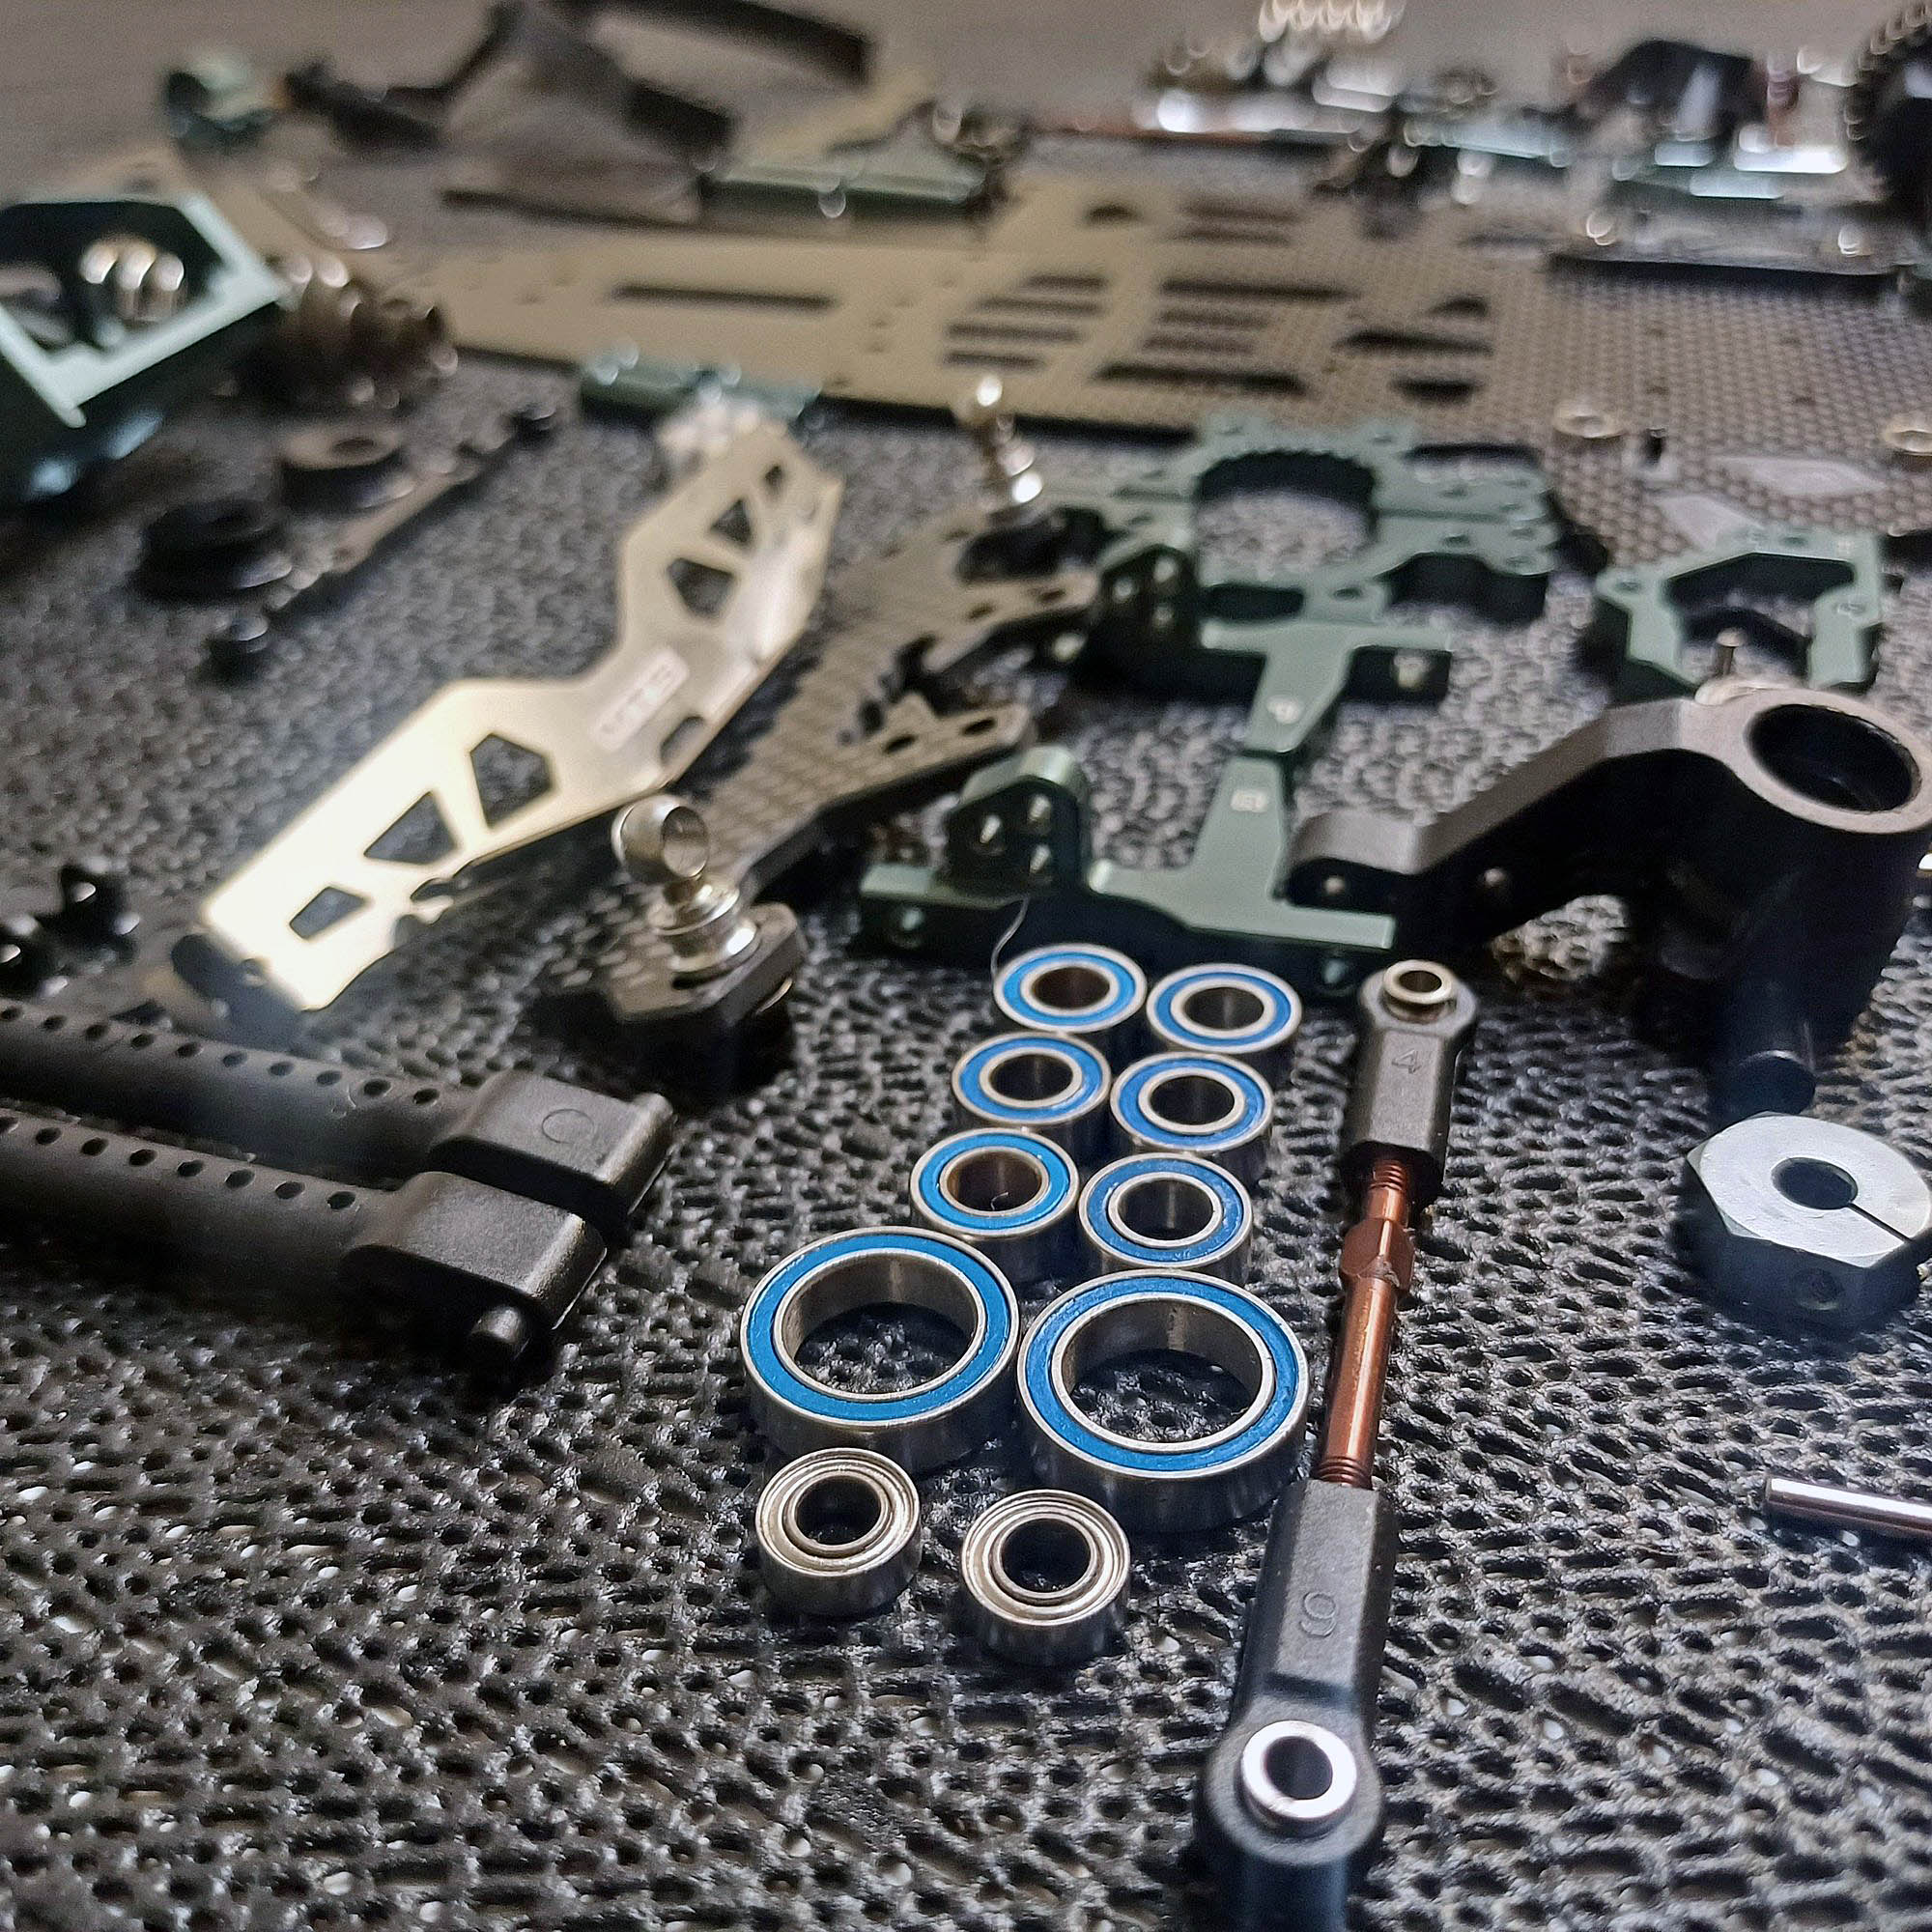
Rear Tower bulkhead assembly. For horizontal posts I've used old worn head Alu. Screws as grub screws. (m3 nut pre fitted) and cut/filed the head. If your body happens to be very long at the rear, Xpress have nice post extender sleeves available.
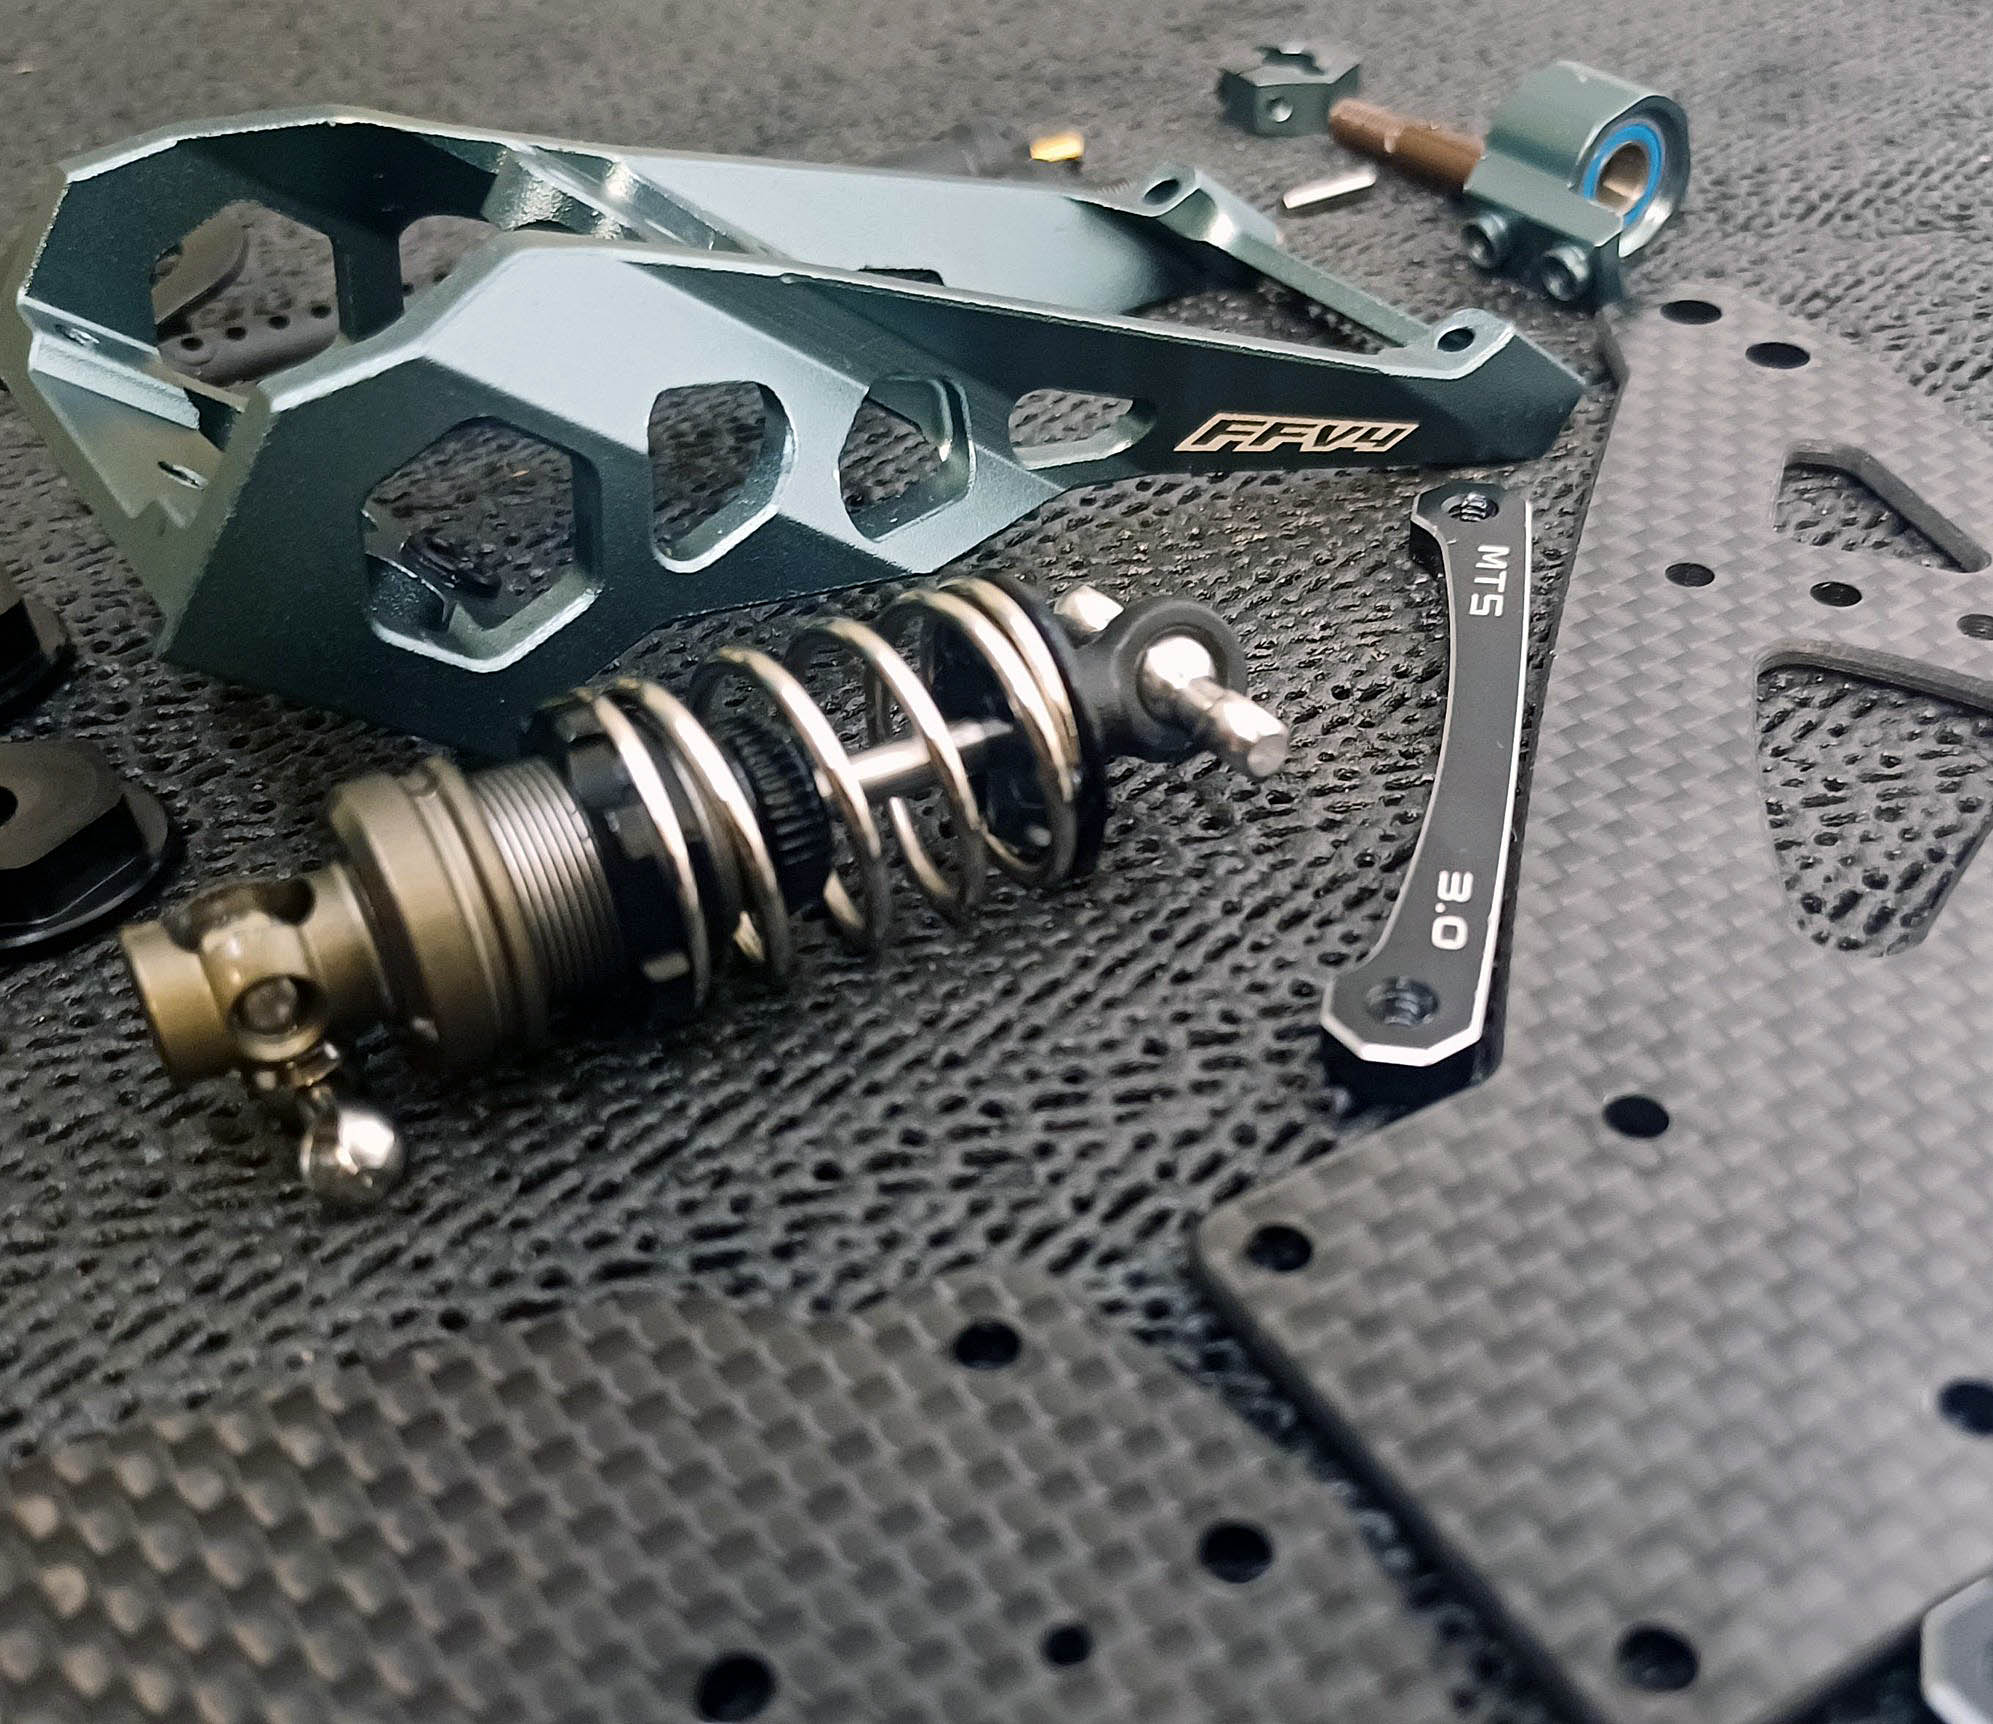
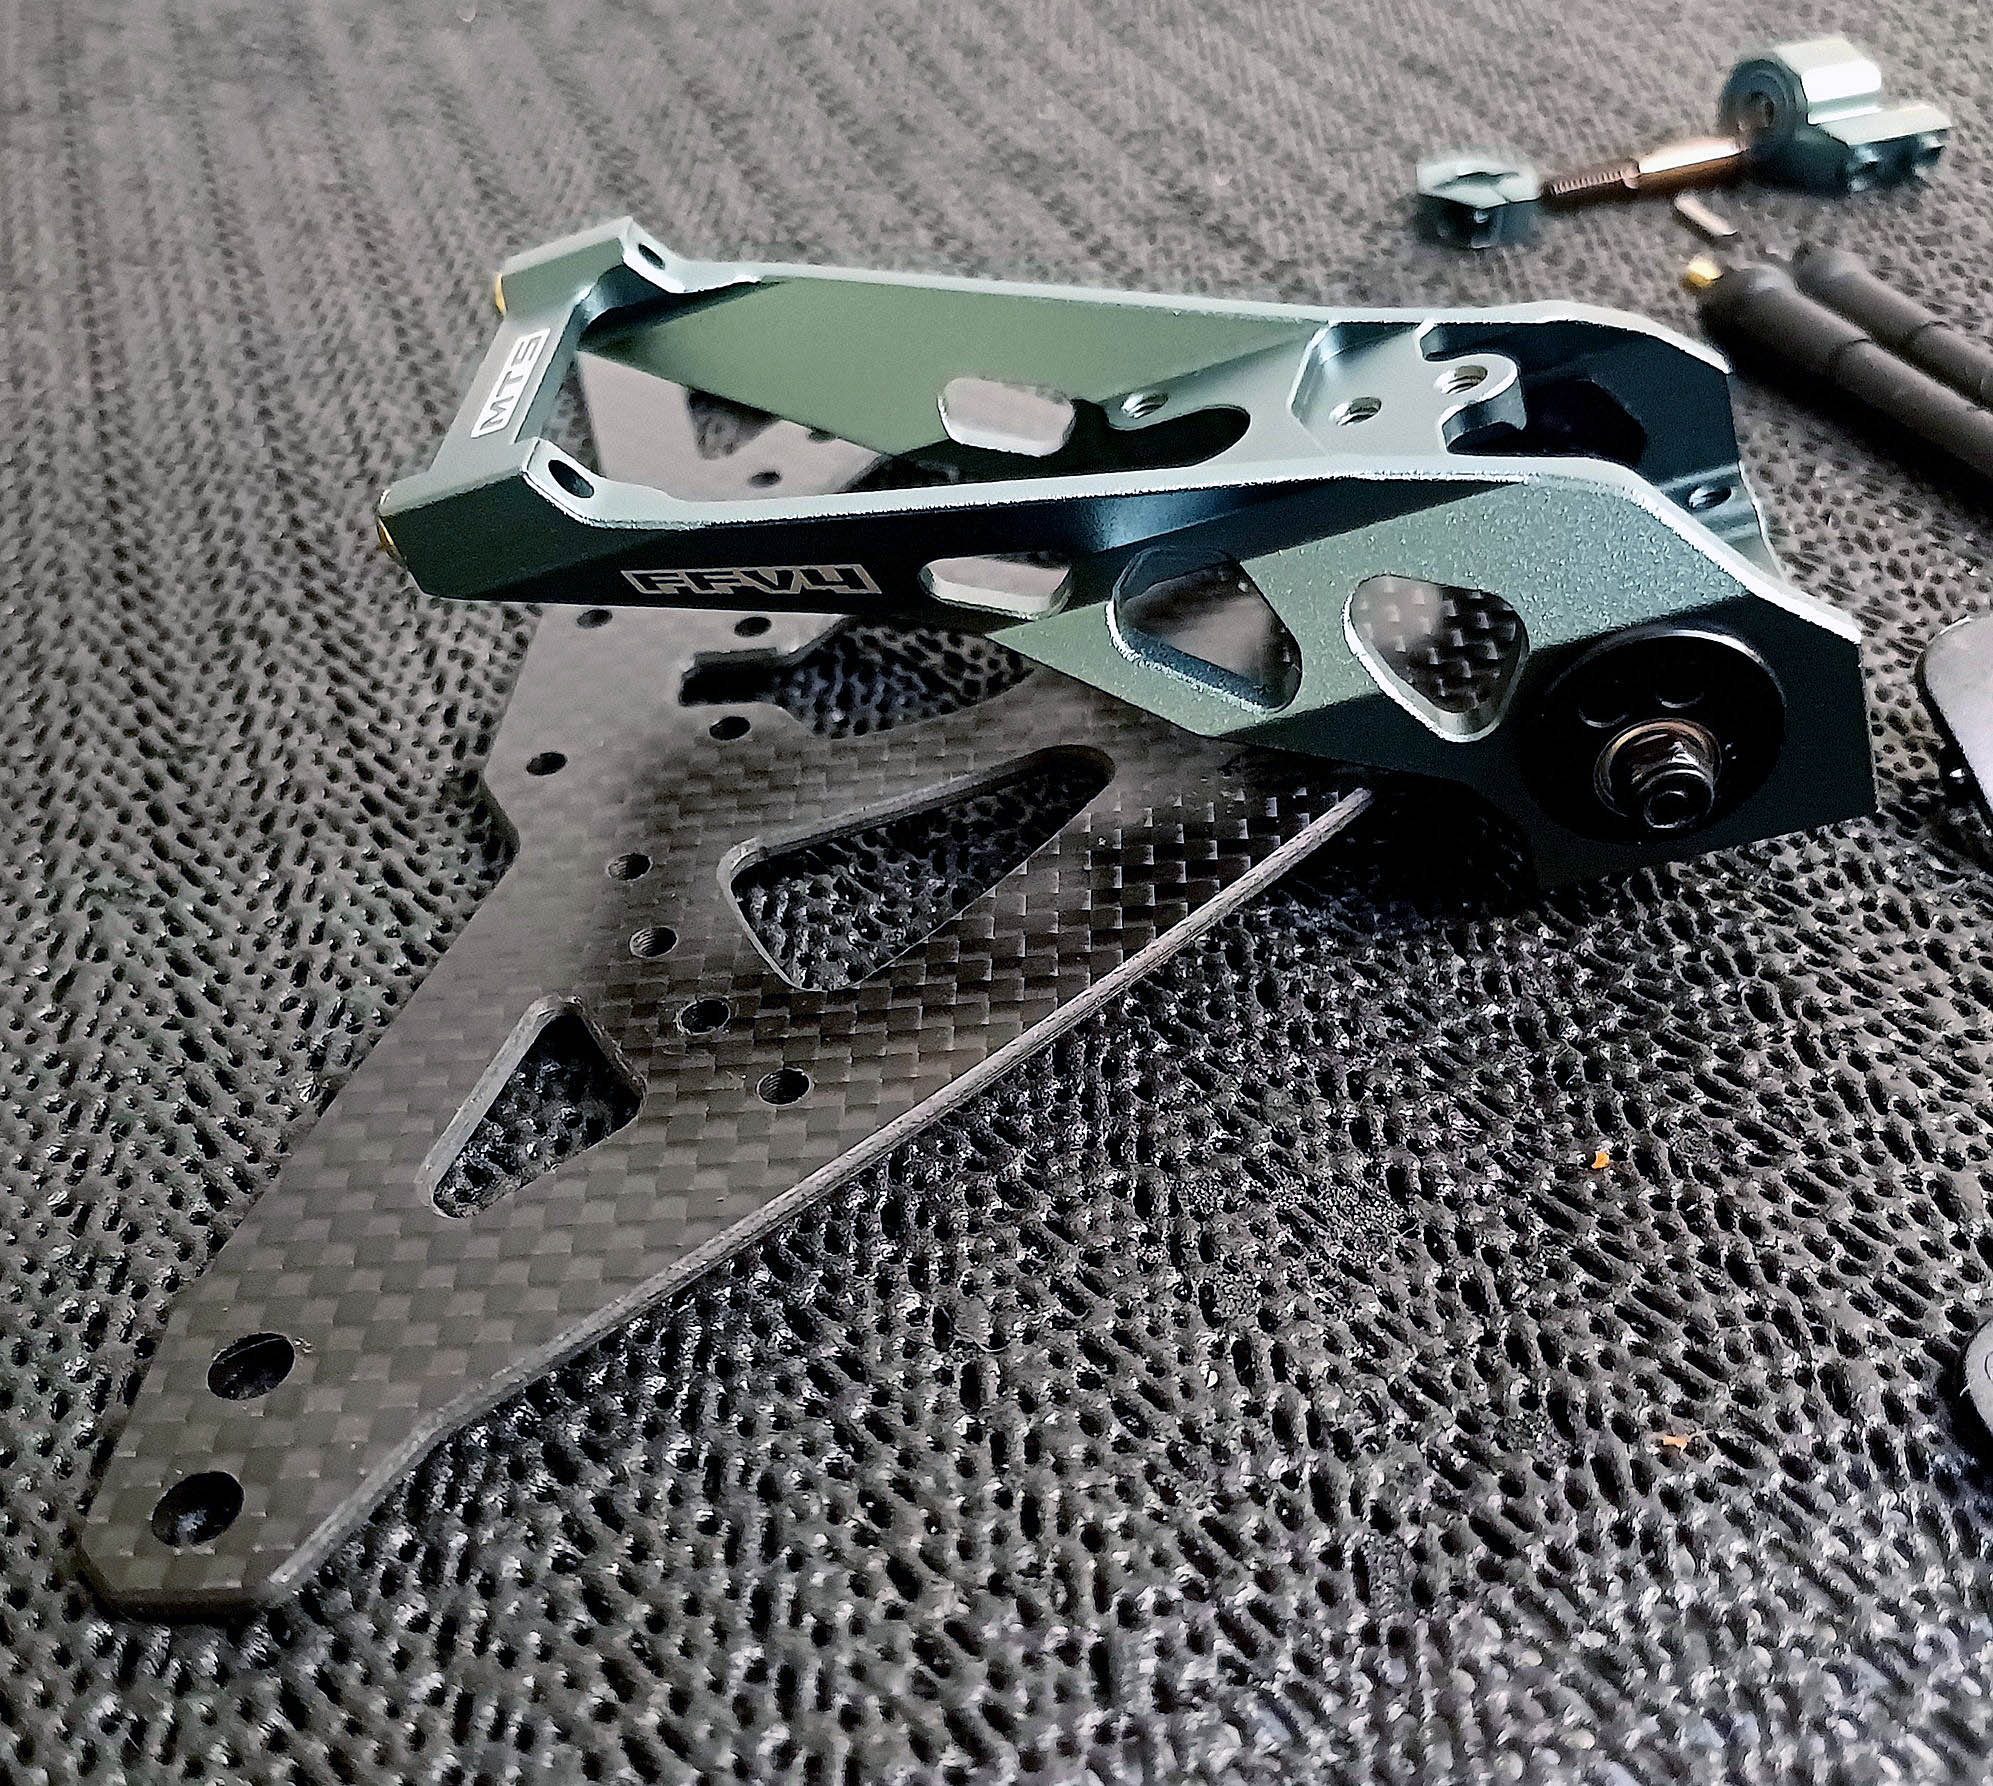
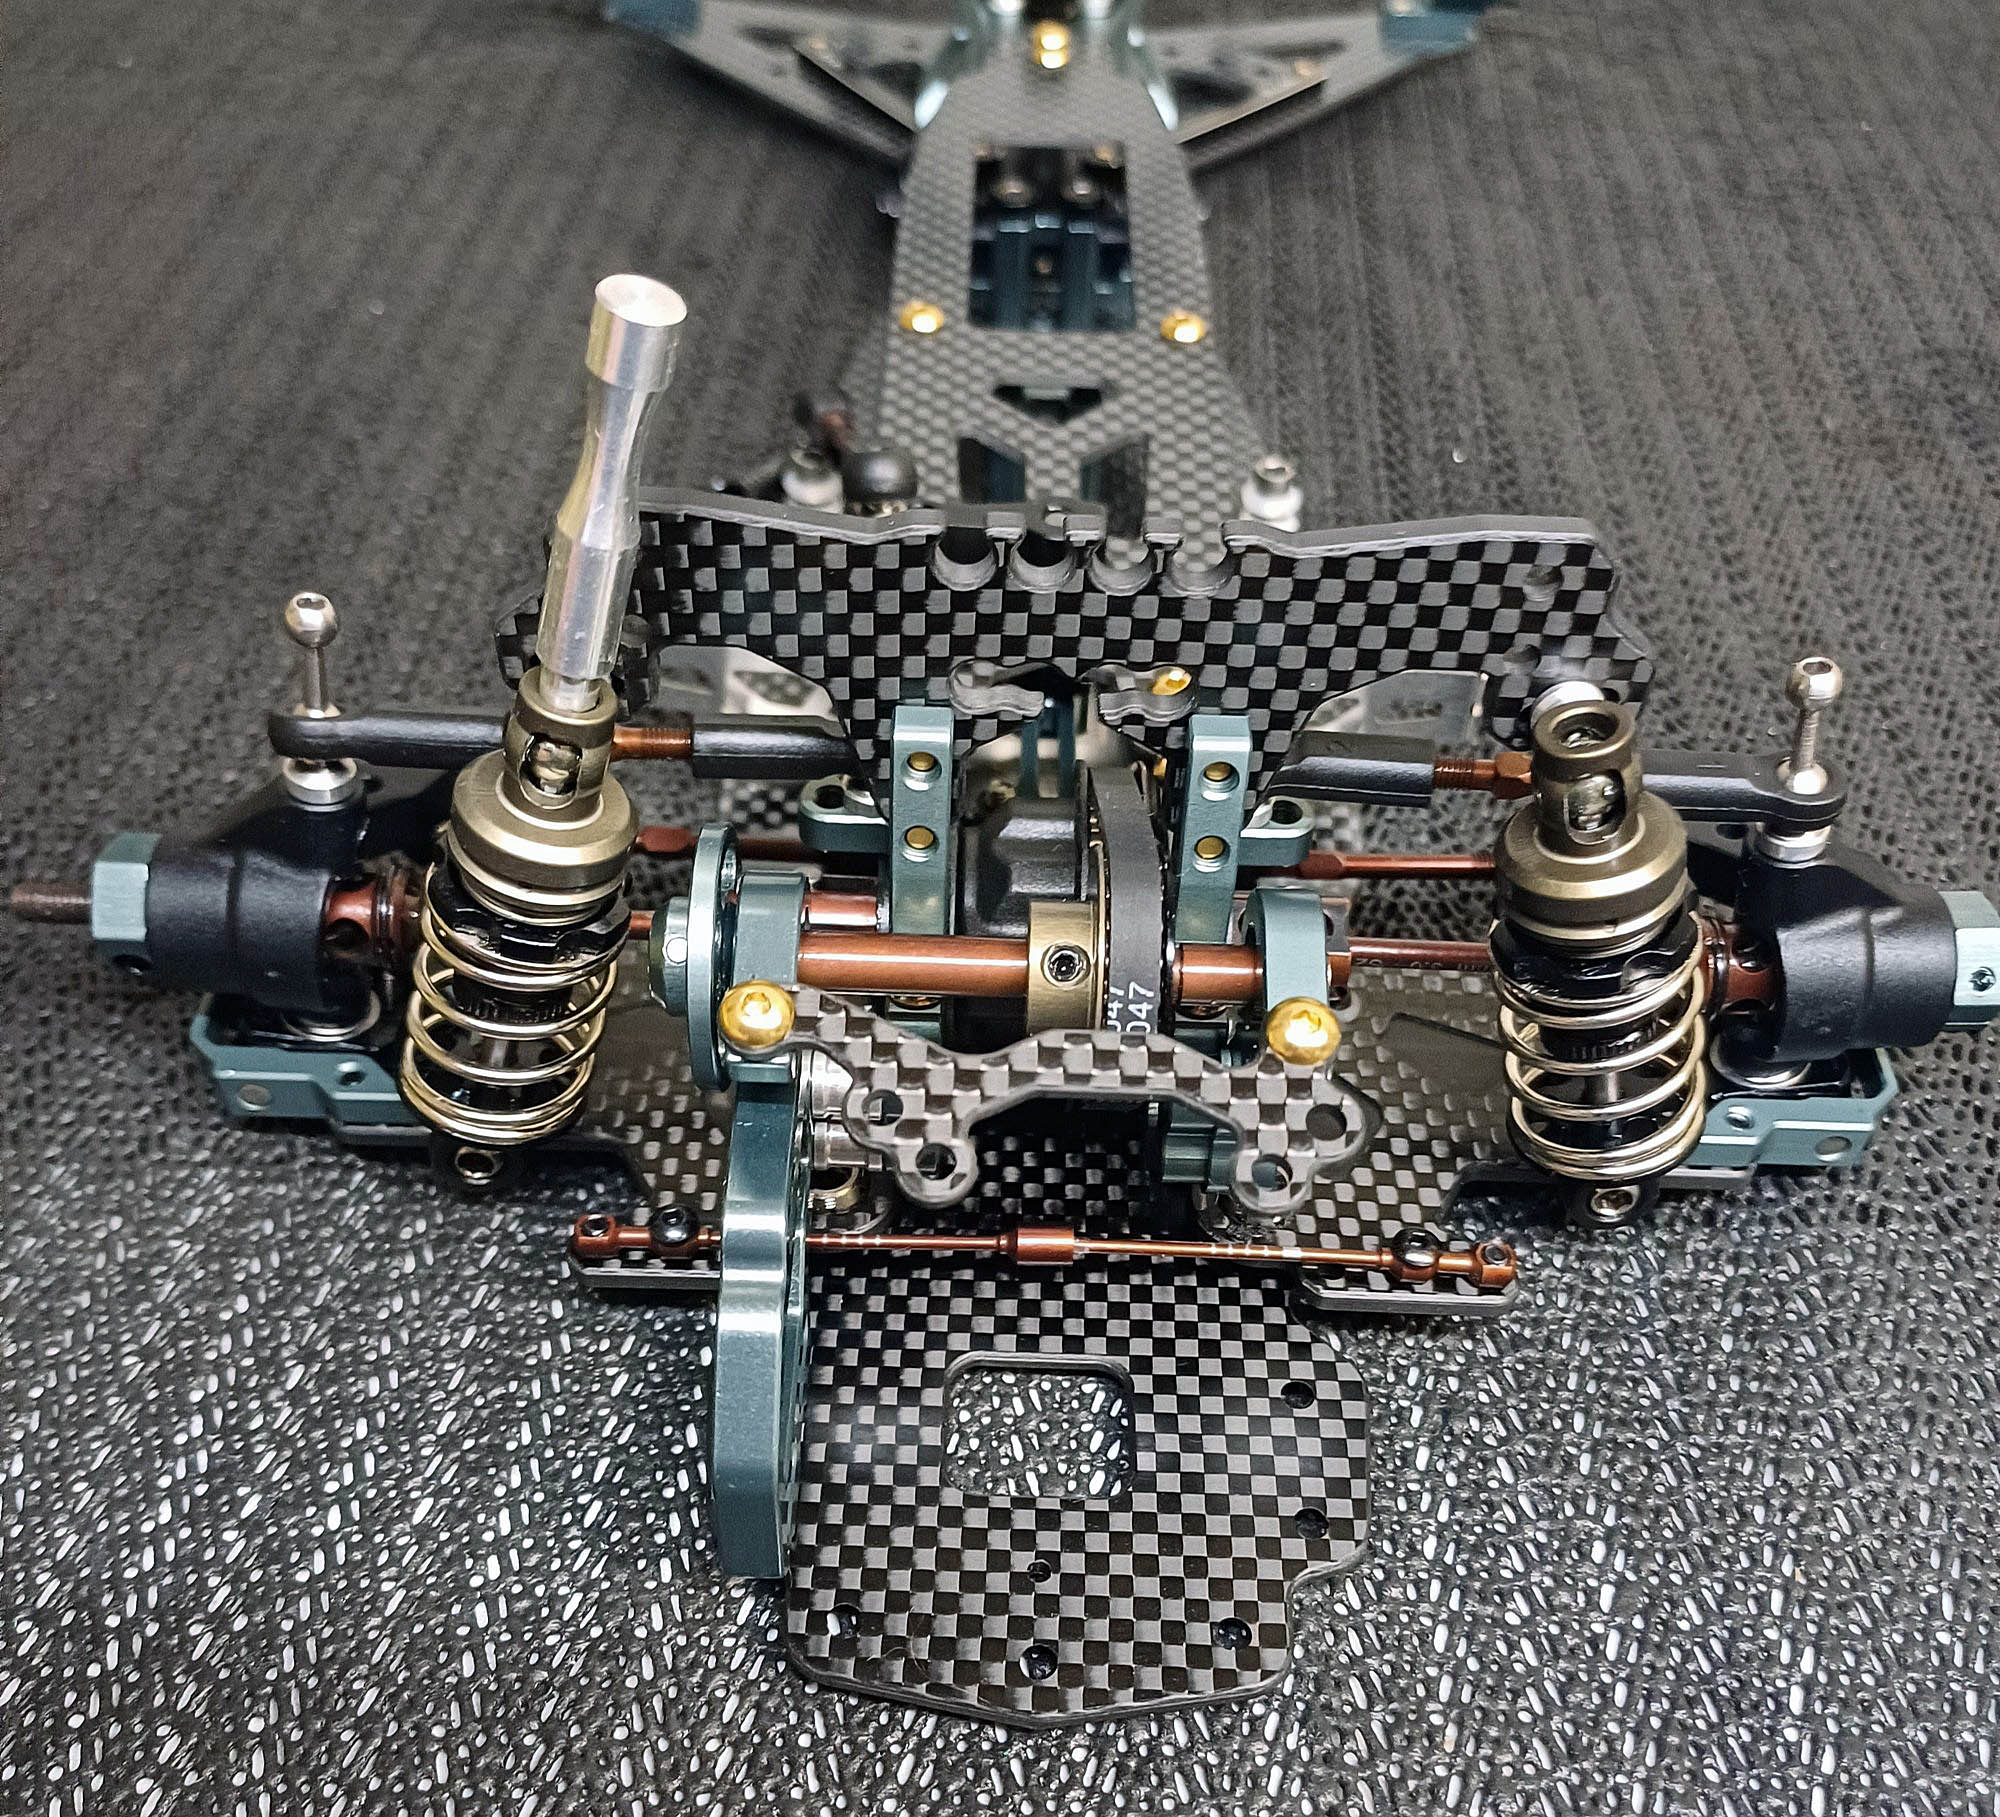
yep FFV4. - RAS rear mono shock. I've removed the internal uptravel spring. There are optional springs available along with tuning machined pistons and top cap plates. (blue or yellow - Kit is white) These "tune" the upper o-ring seal/tension. Optional big bore Linear dampers are 124300. Optional pistons are also available including tapered units.
Regarding the internal limit springs, these are tunable to prevent chasiss scraping- similar to uptravel limiters.
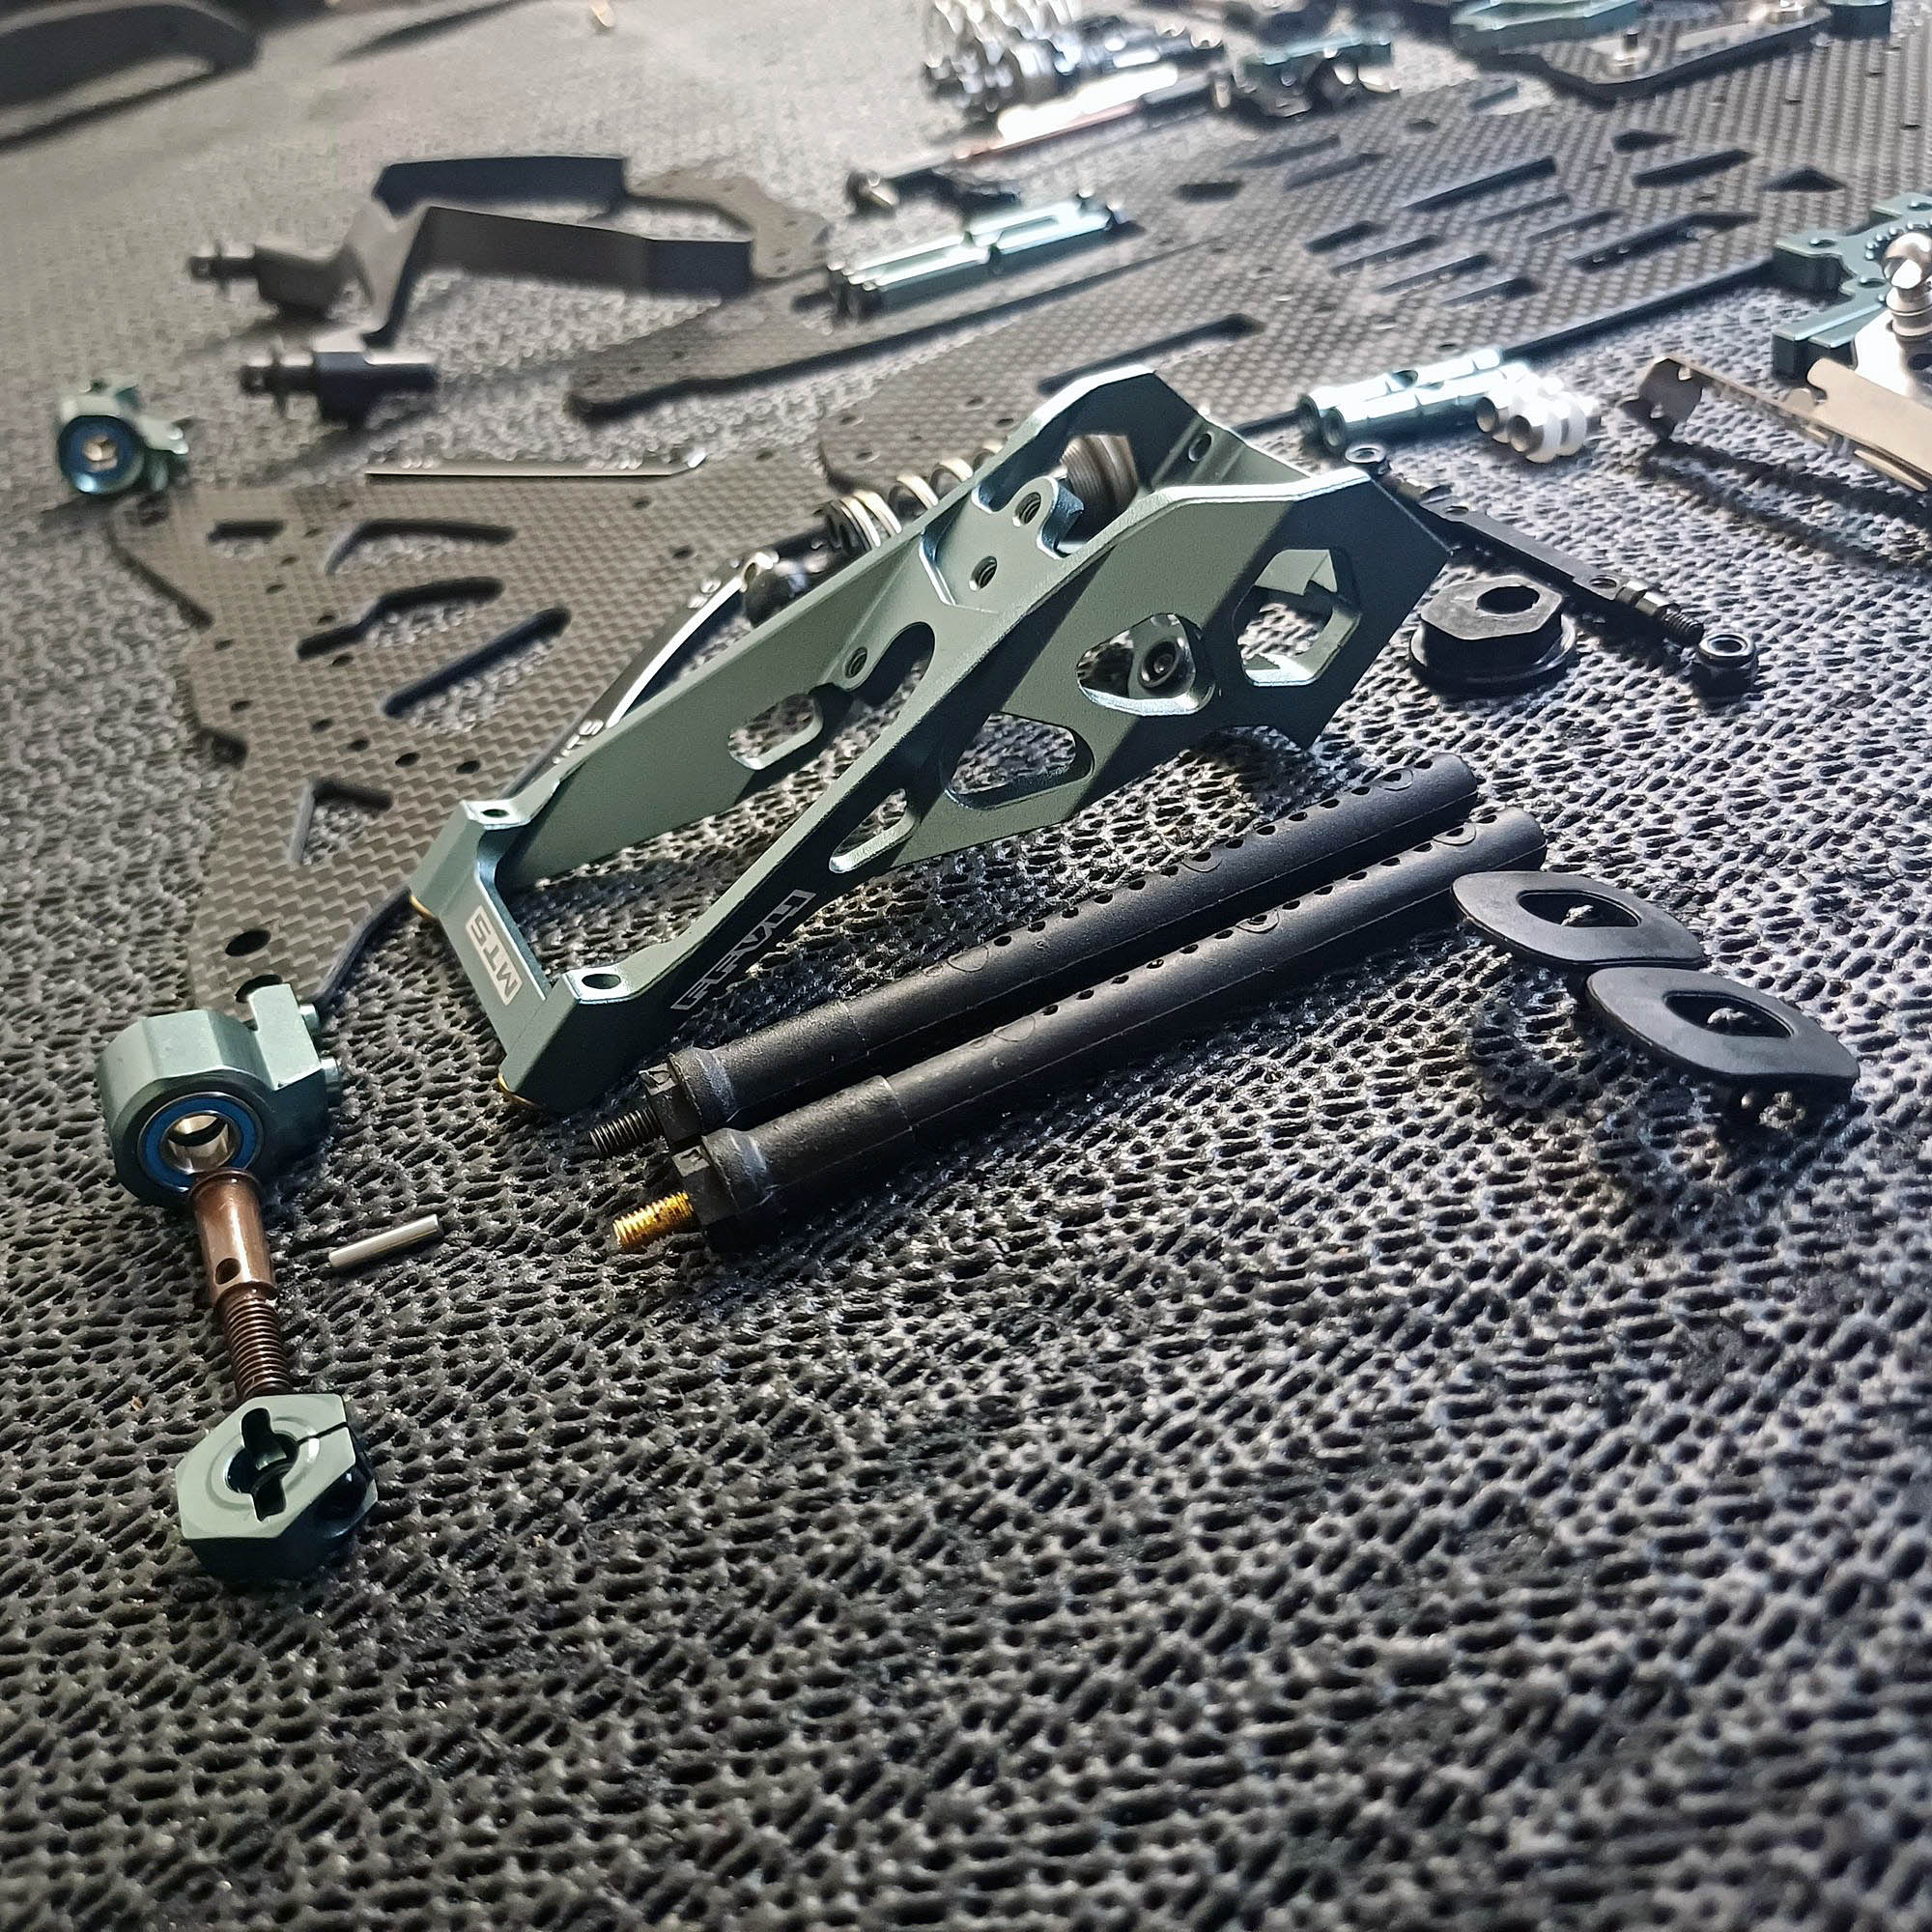
Front tower and quick release battery tray system
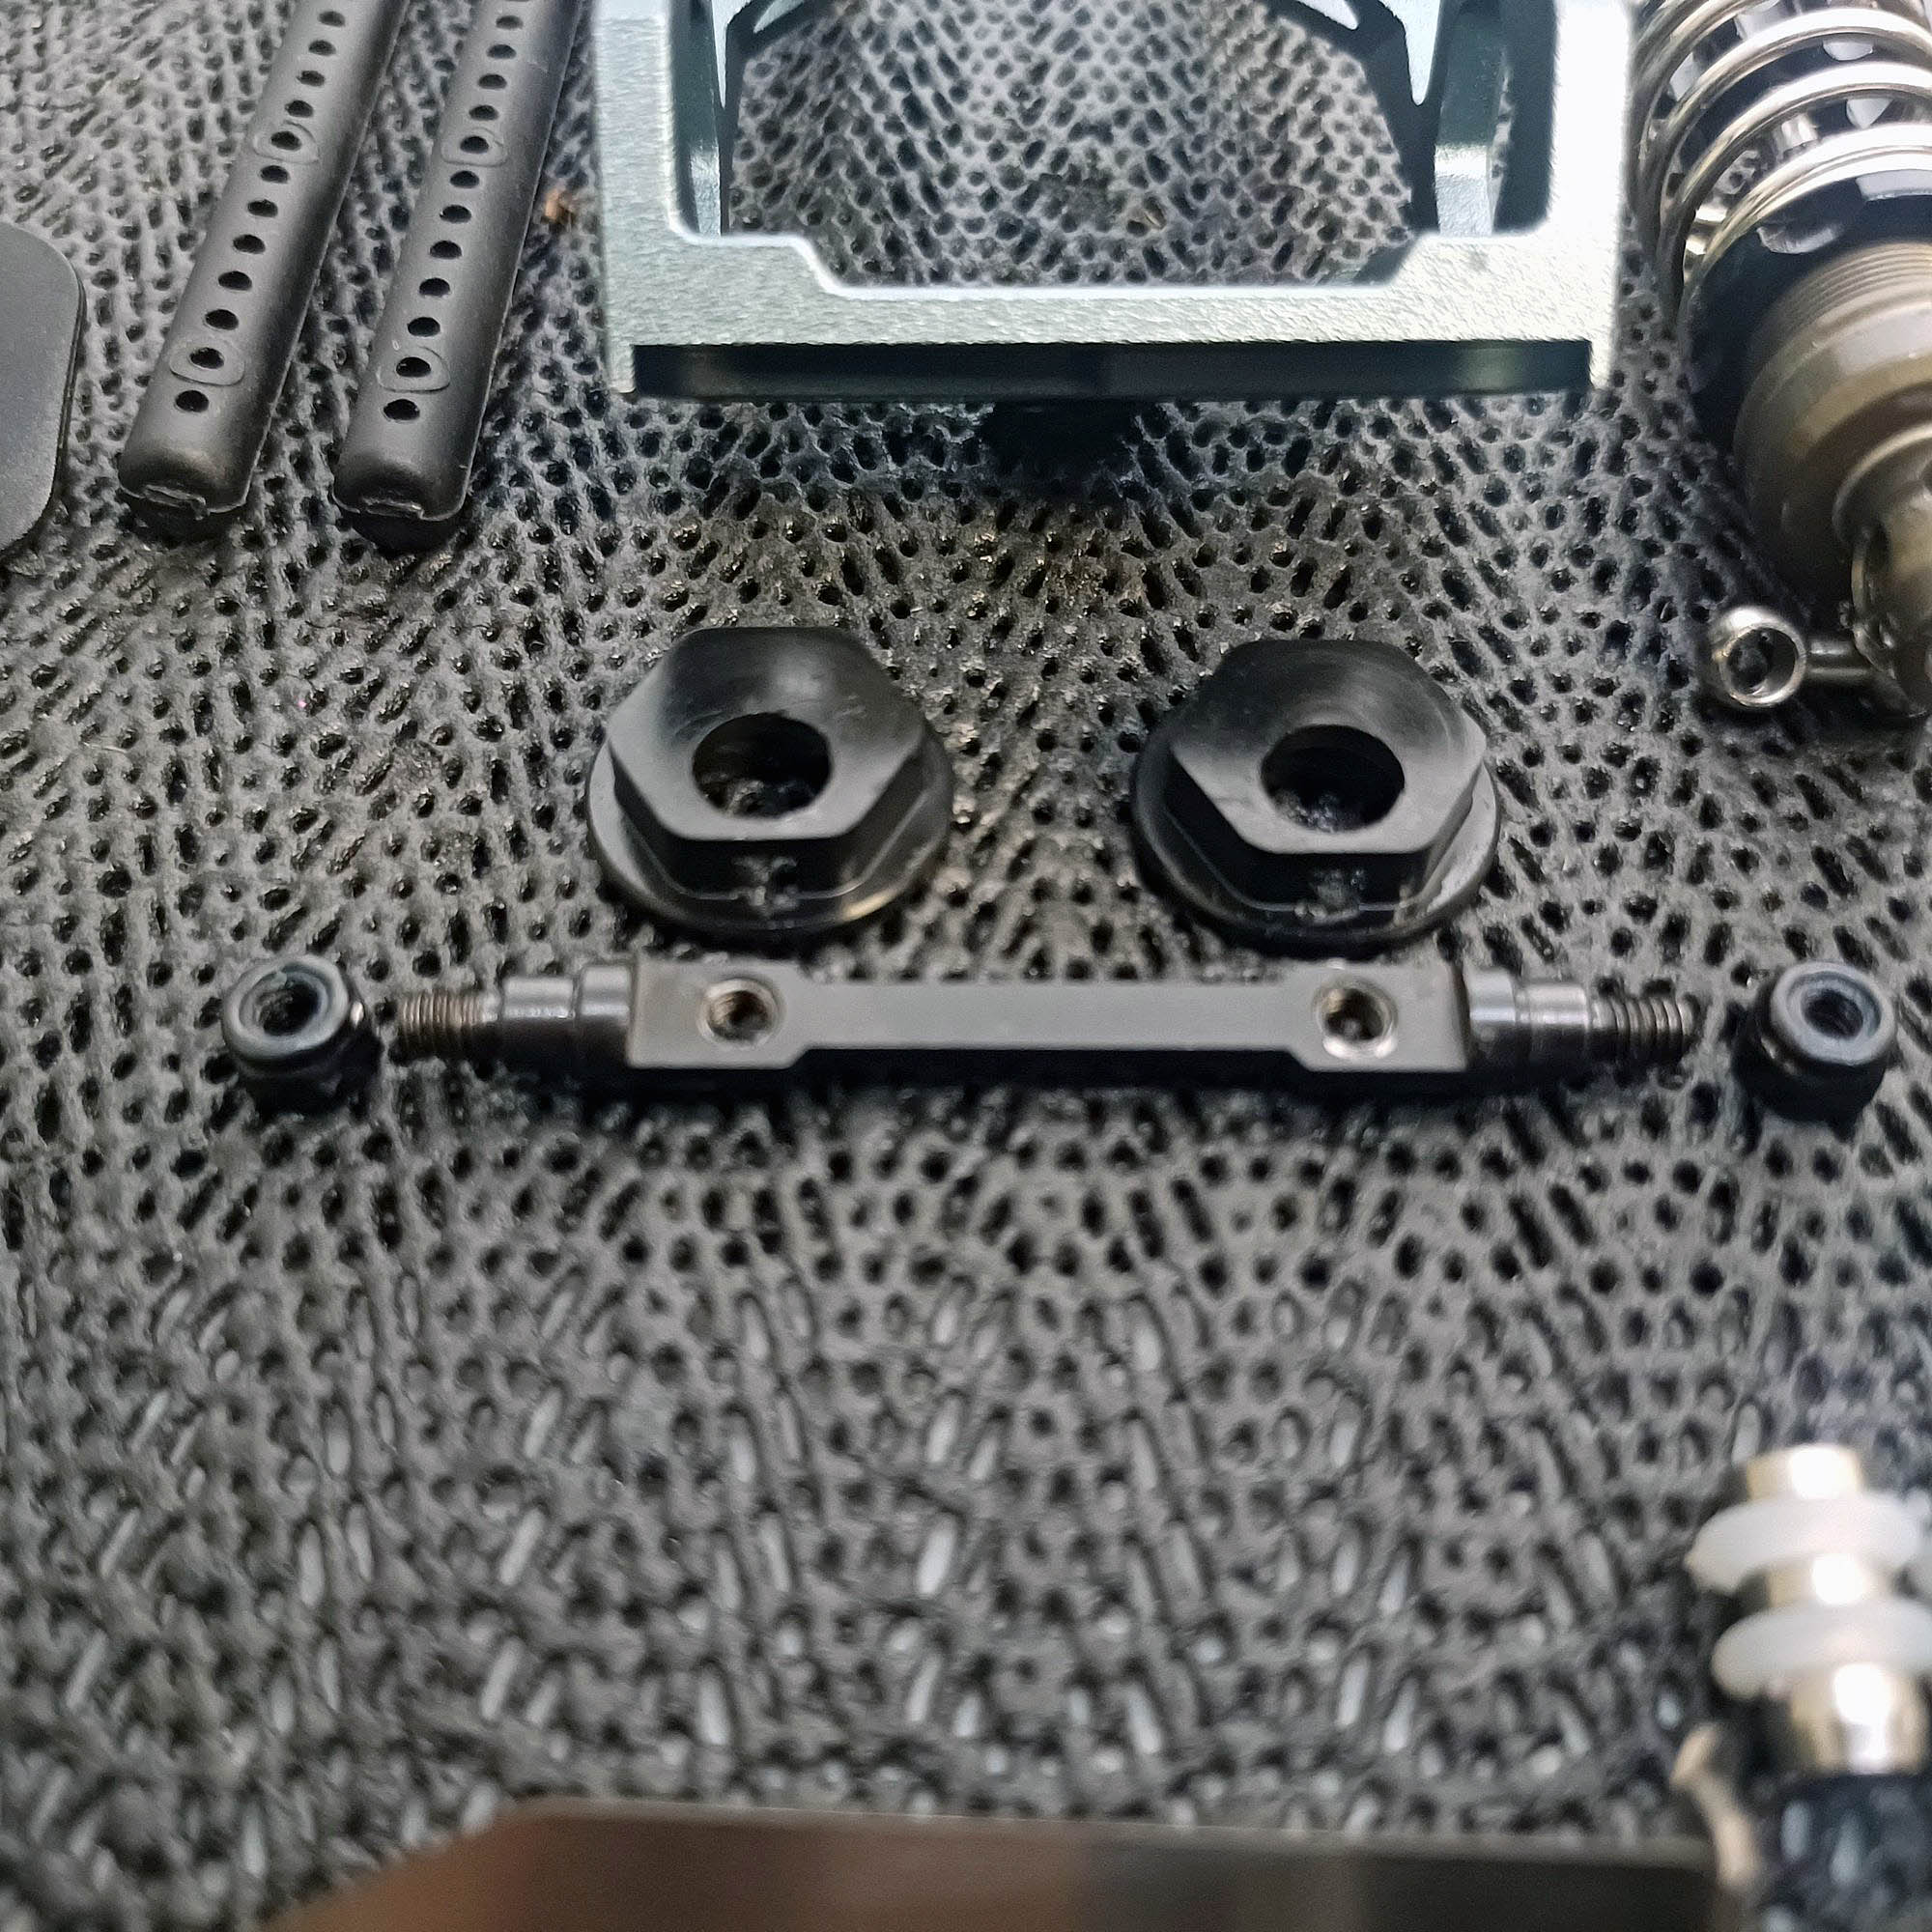
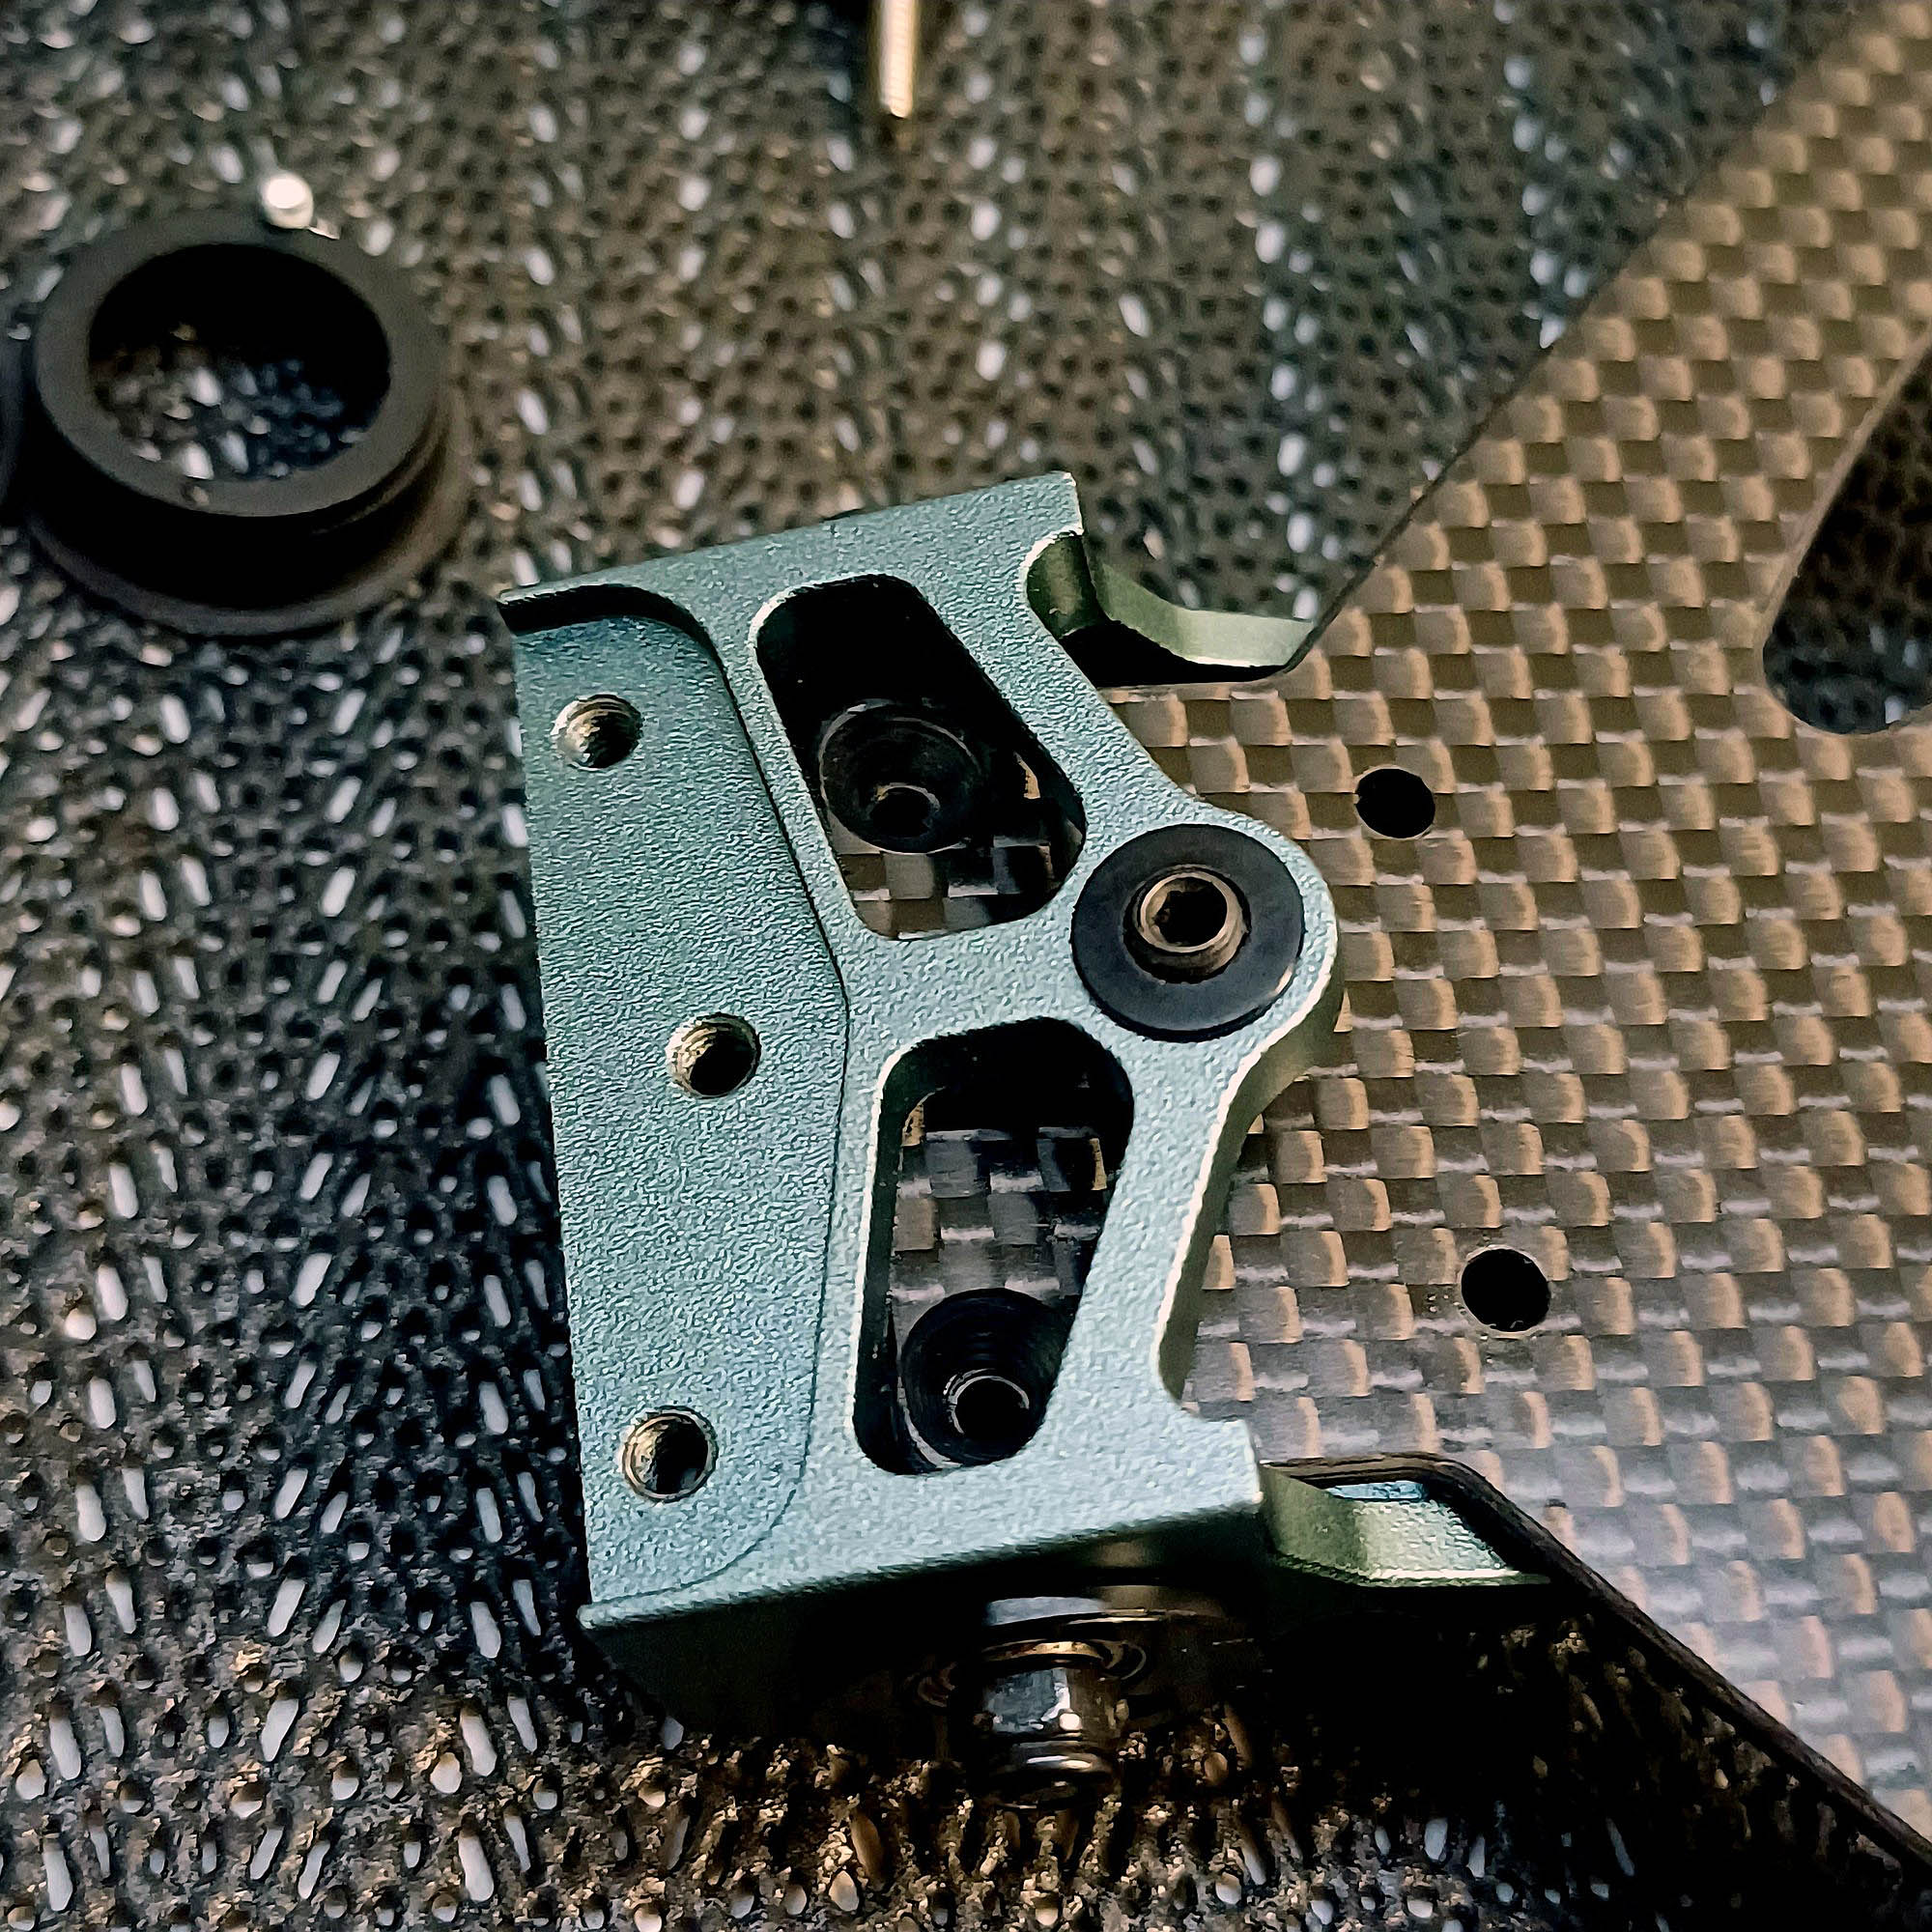
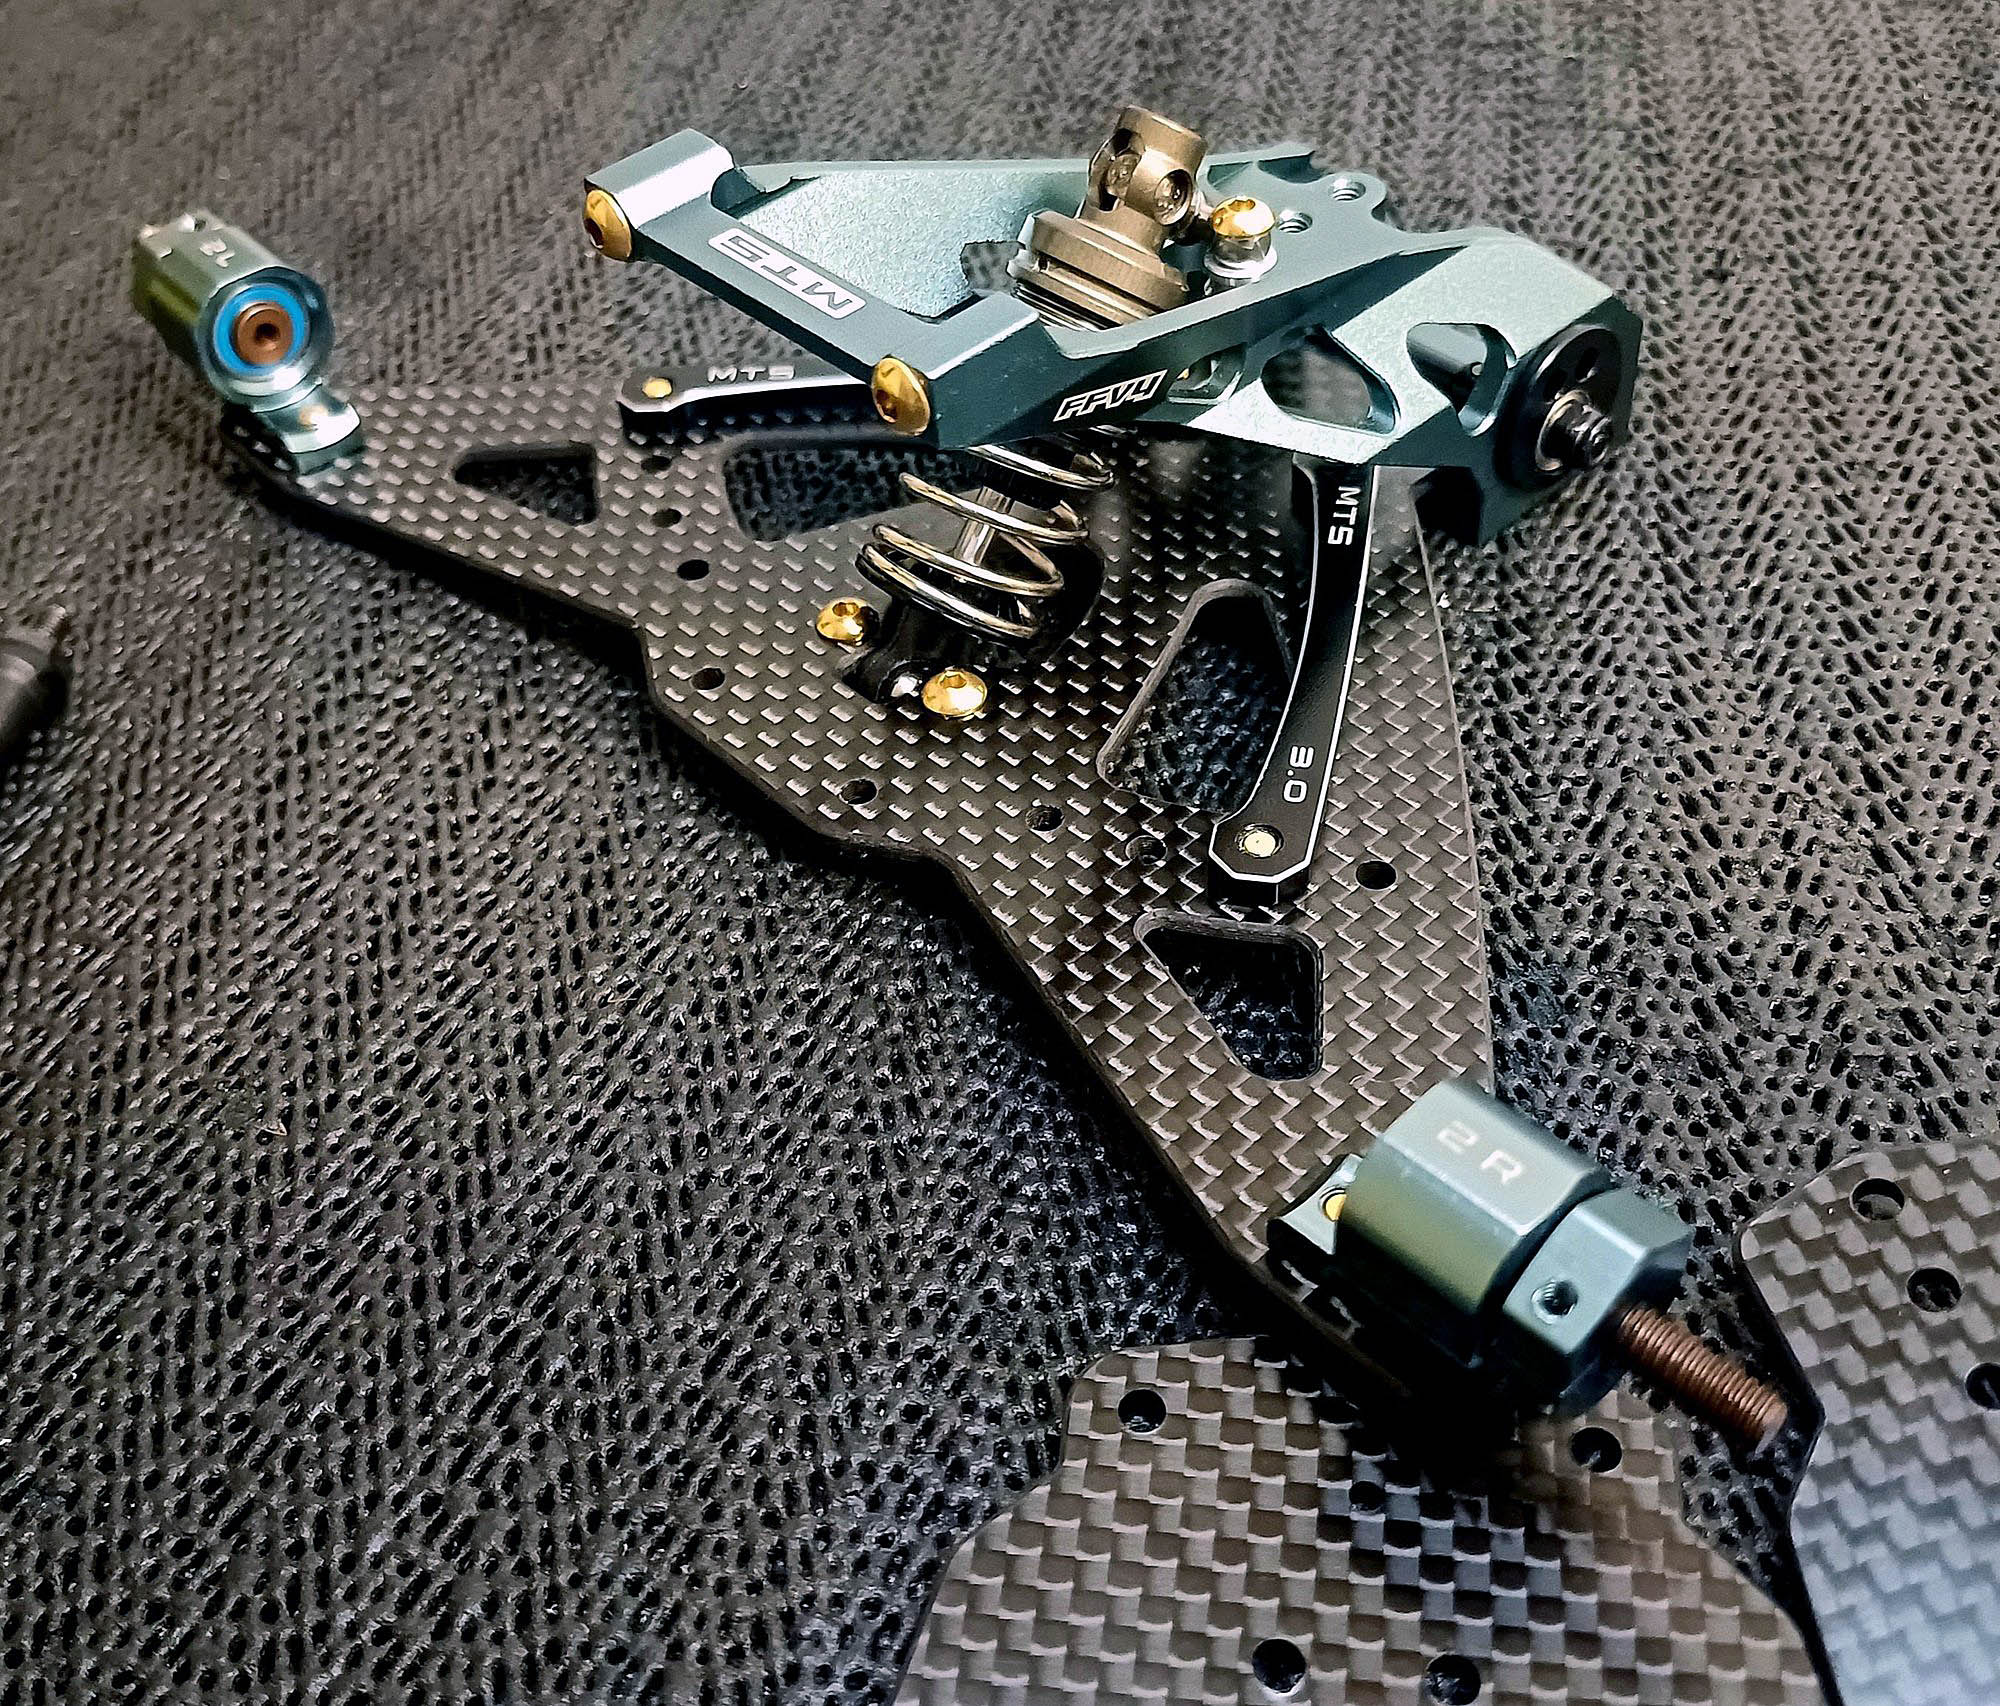
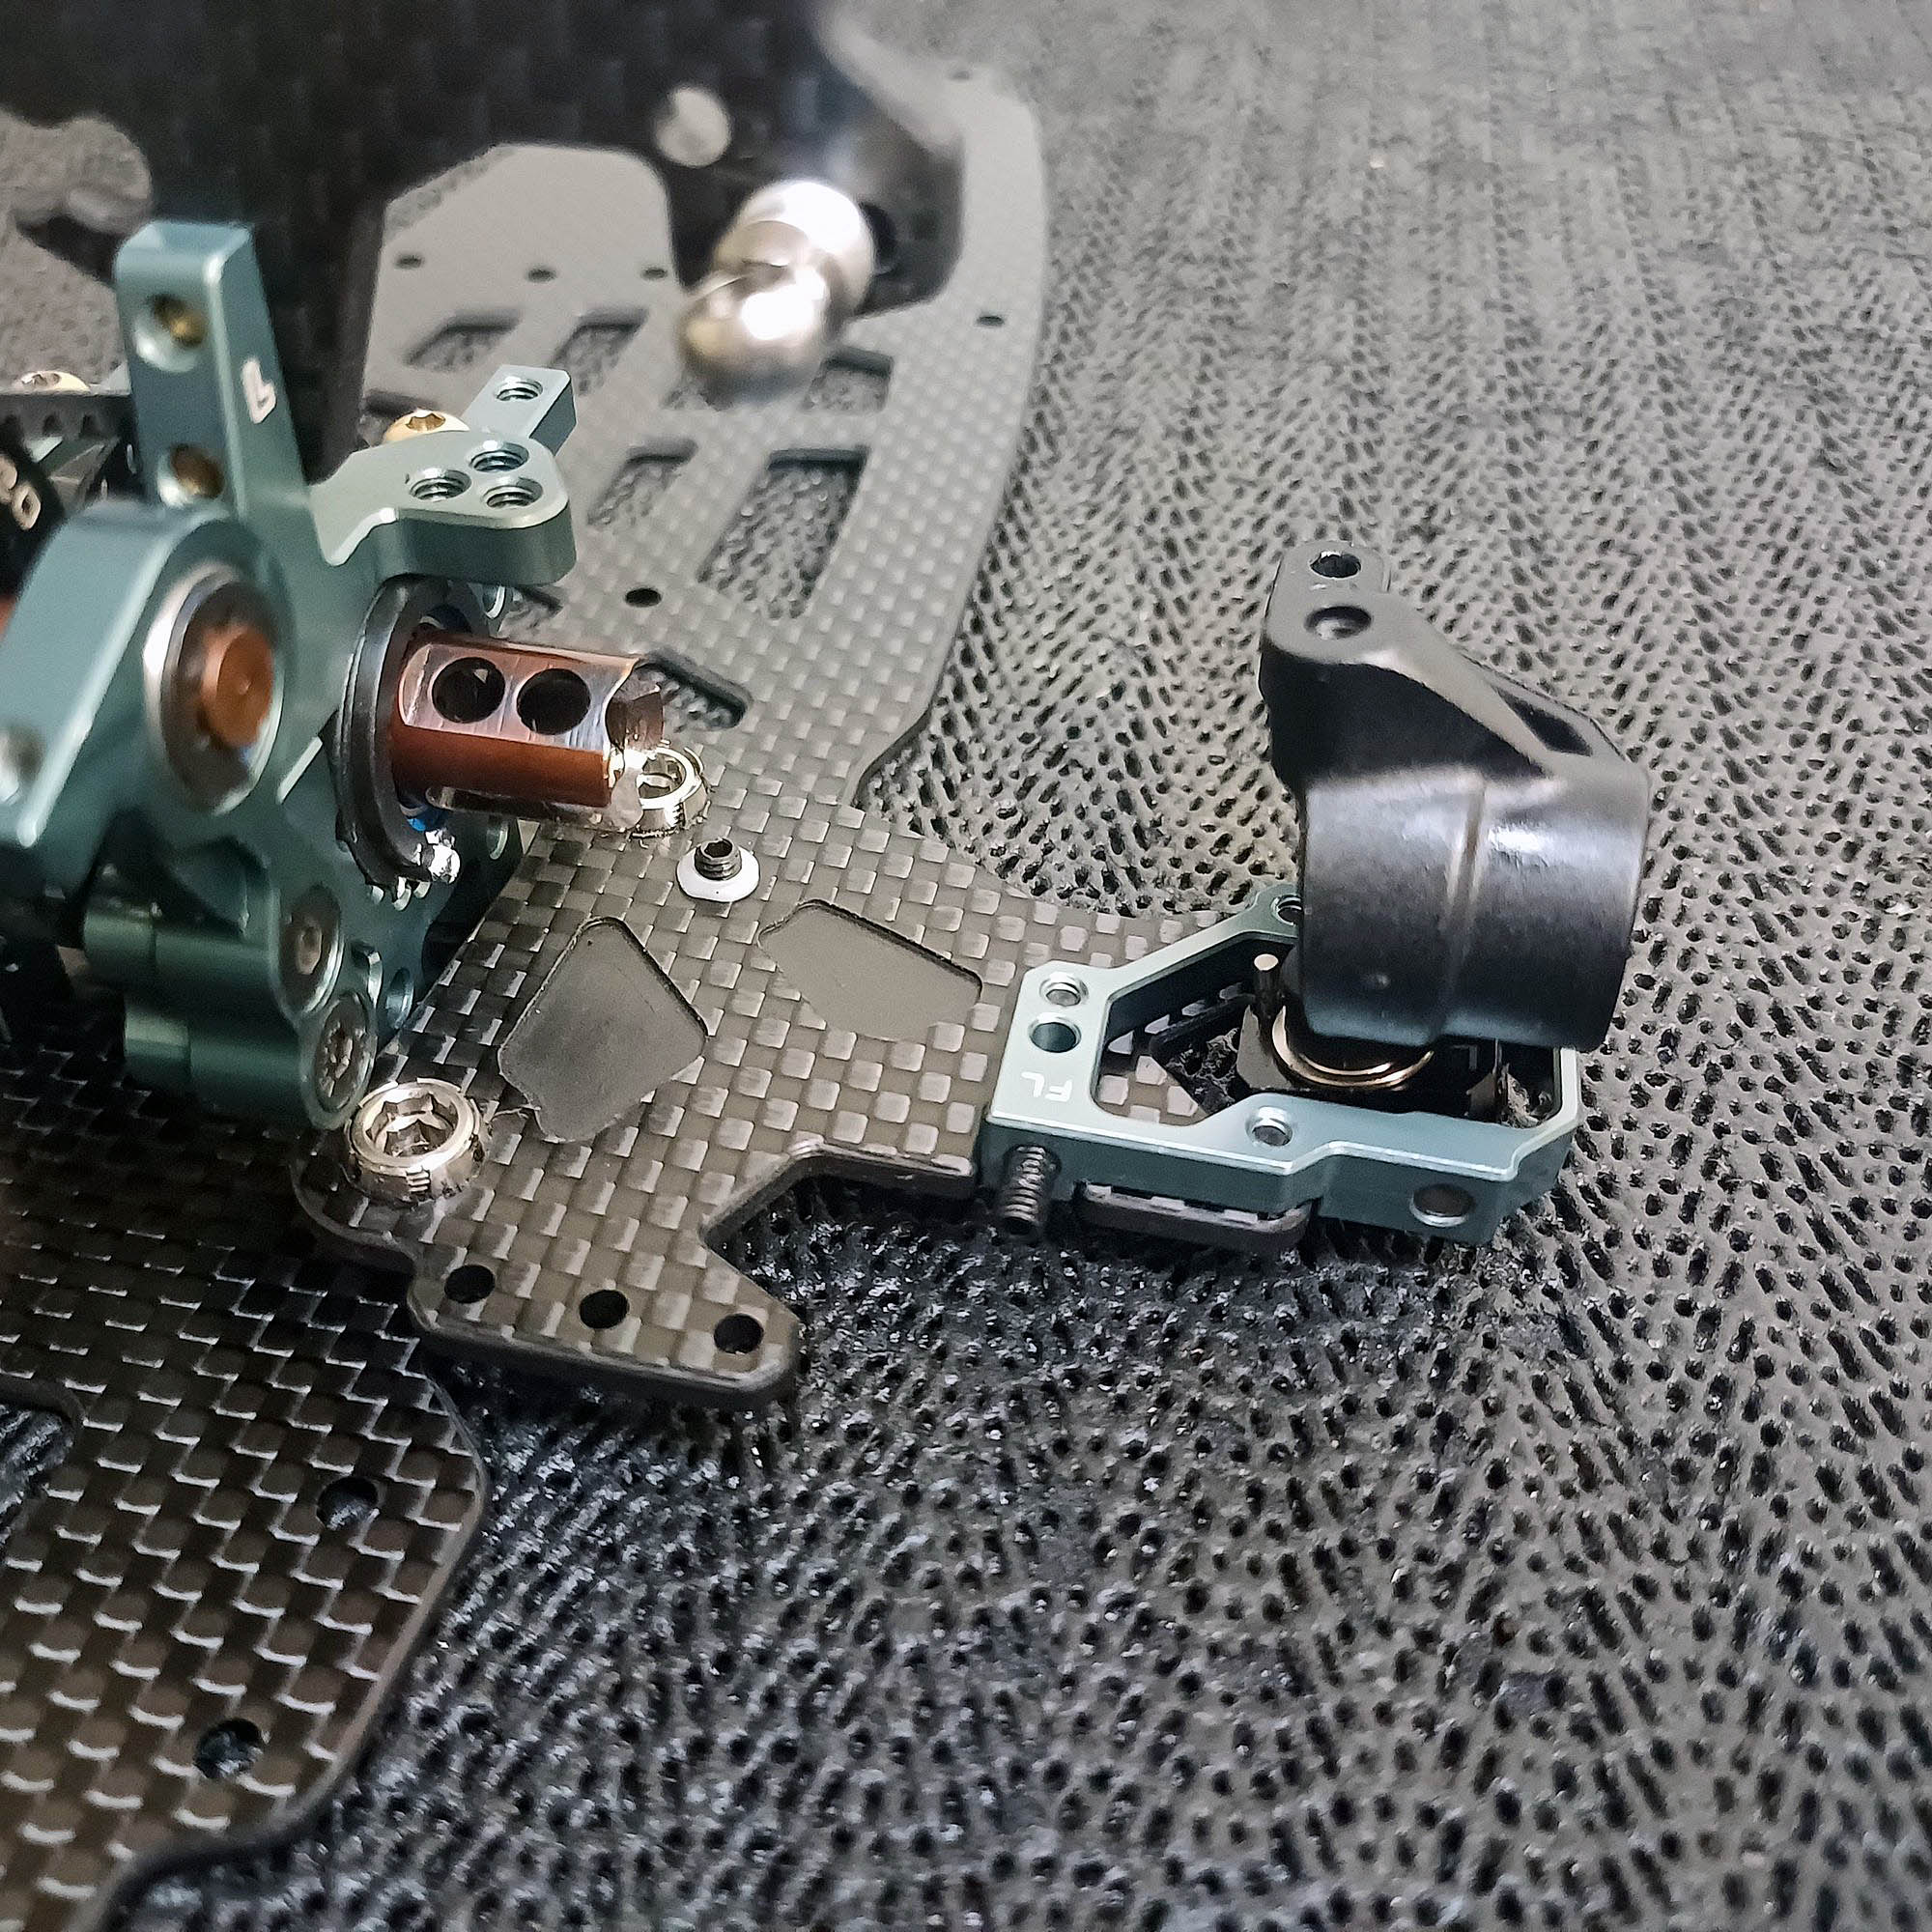
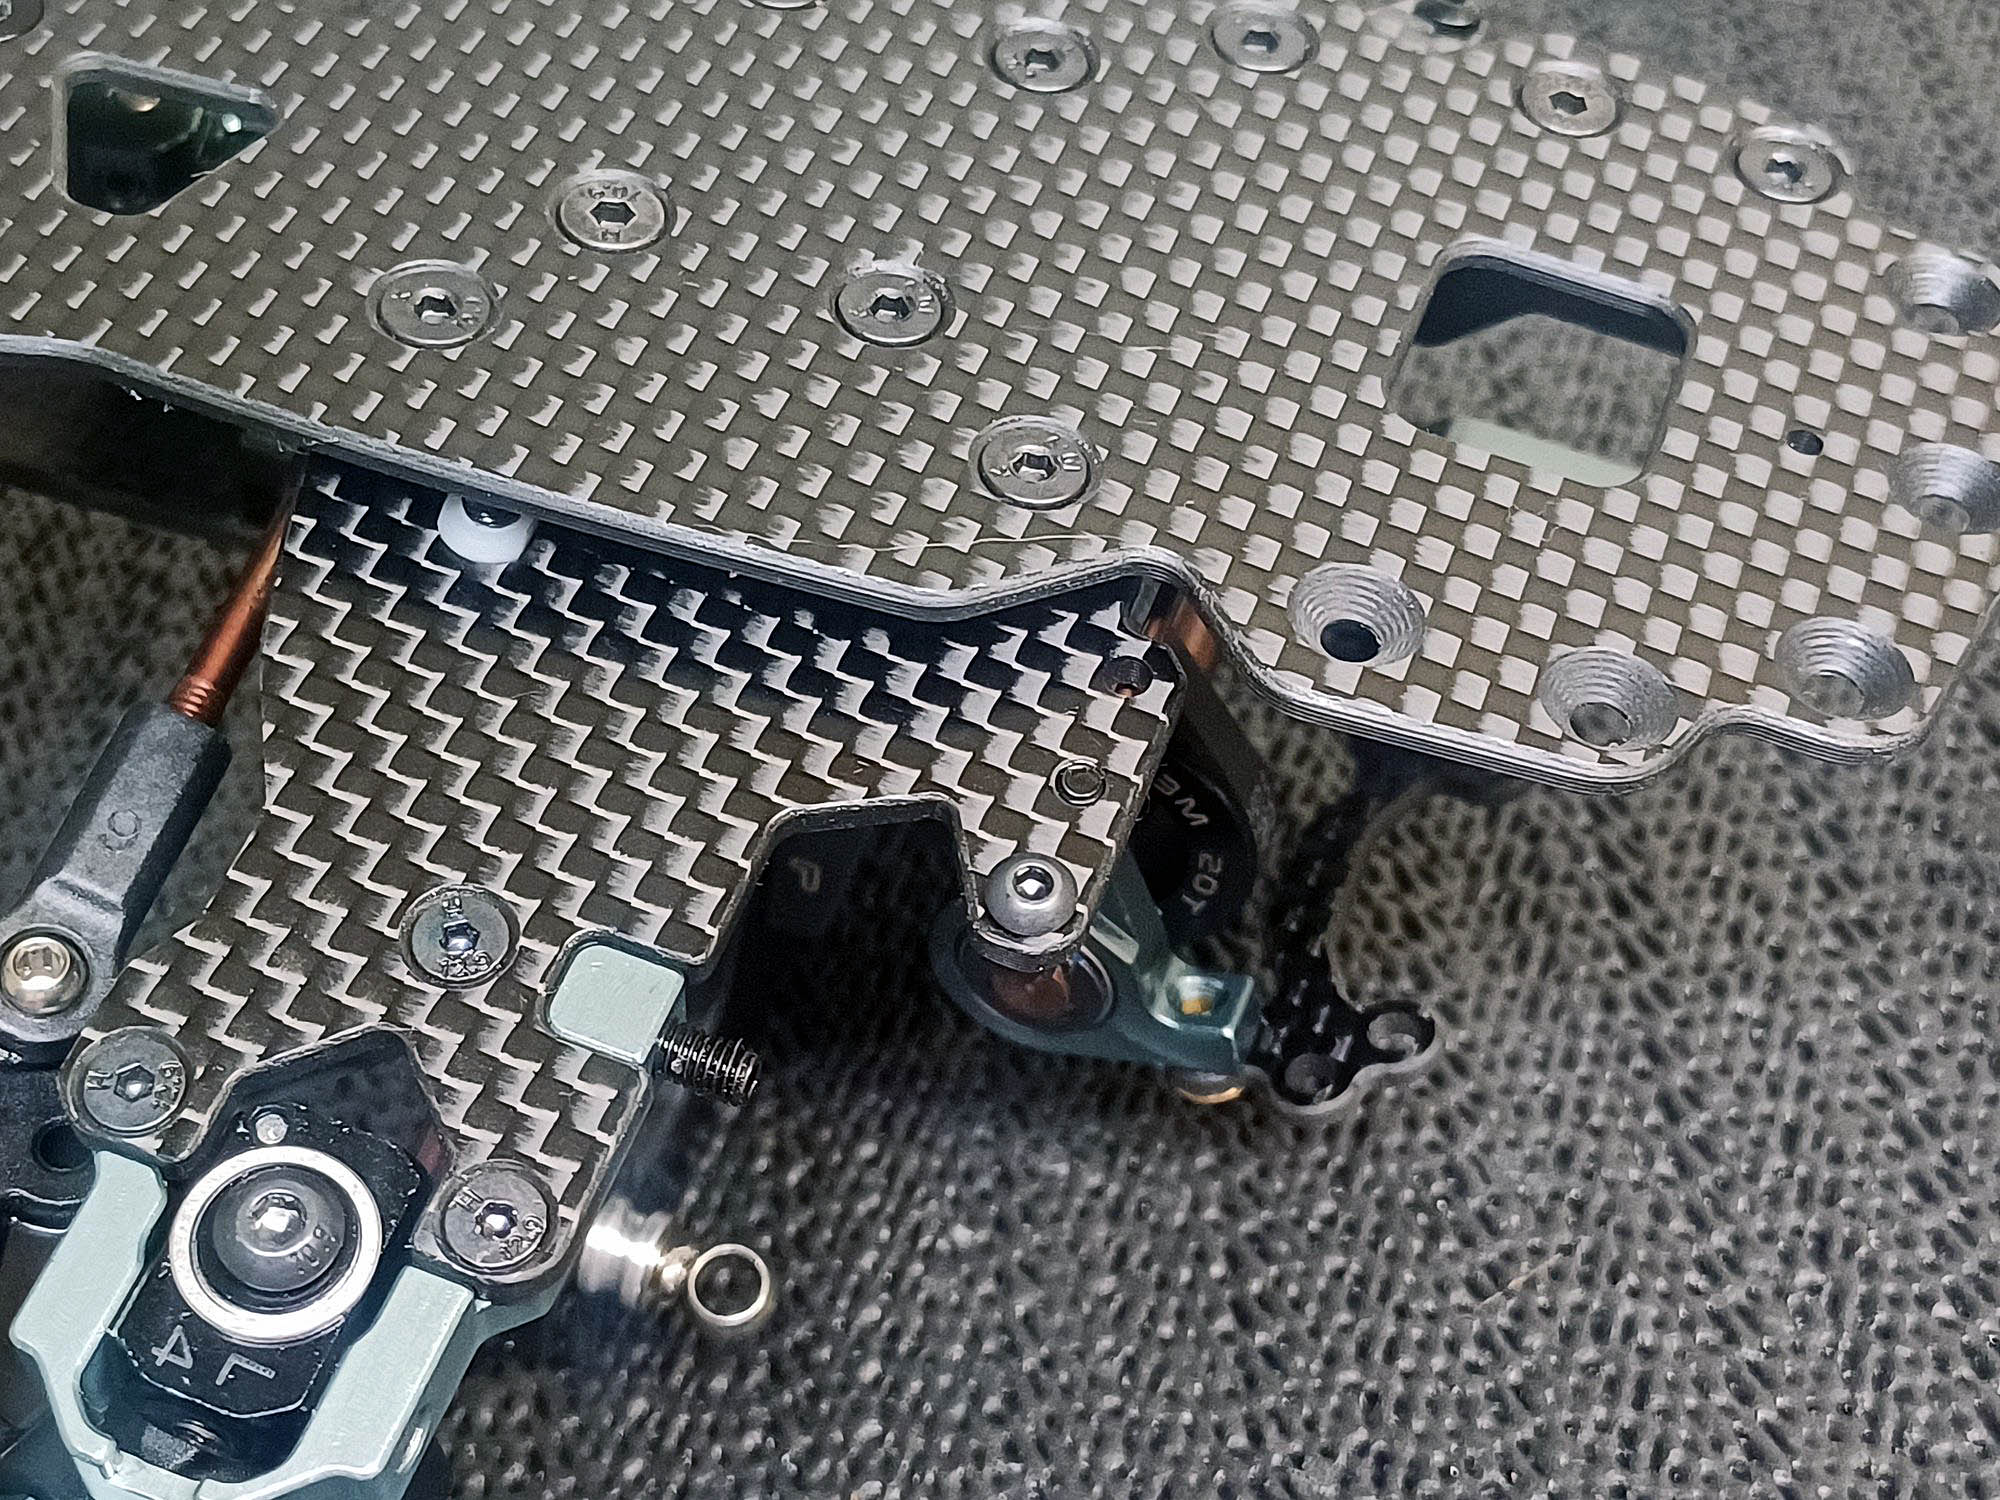
Rear suspension hinge and adjustment cams. Allows for a total of 3.4mm wheelbase and roll centee height. 1.7mm increments. In regards to rear roll centre, this has quite a large tuning windows when using washers and utilising the lower or upper section of the hinge axle.
Simple and quick assembly. Ensure cams are in matching positions (L R) and tighten locknuts without causing binding or excessive play.
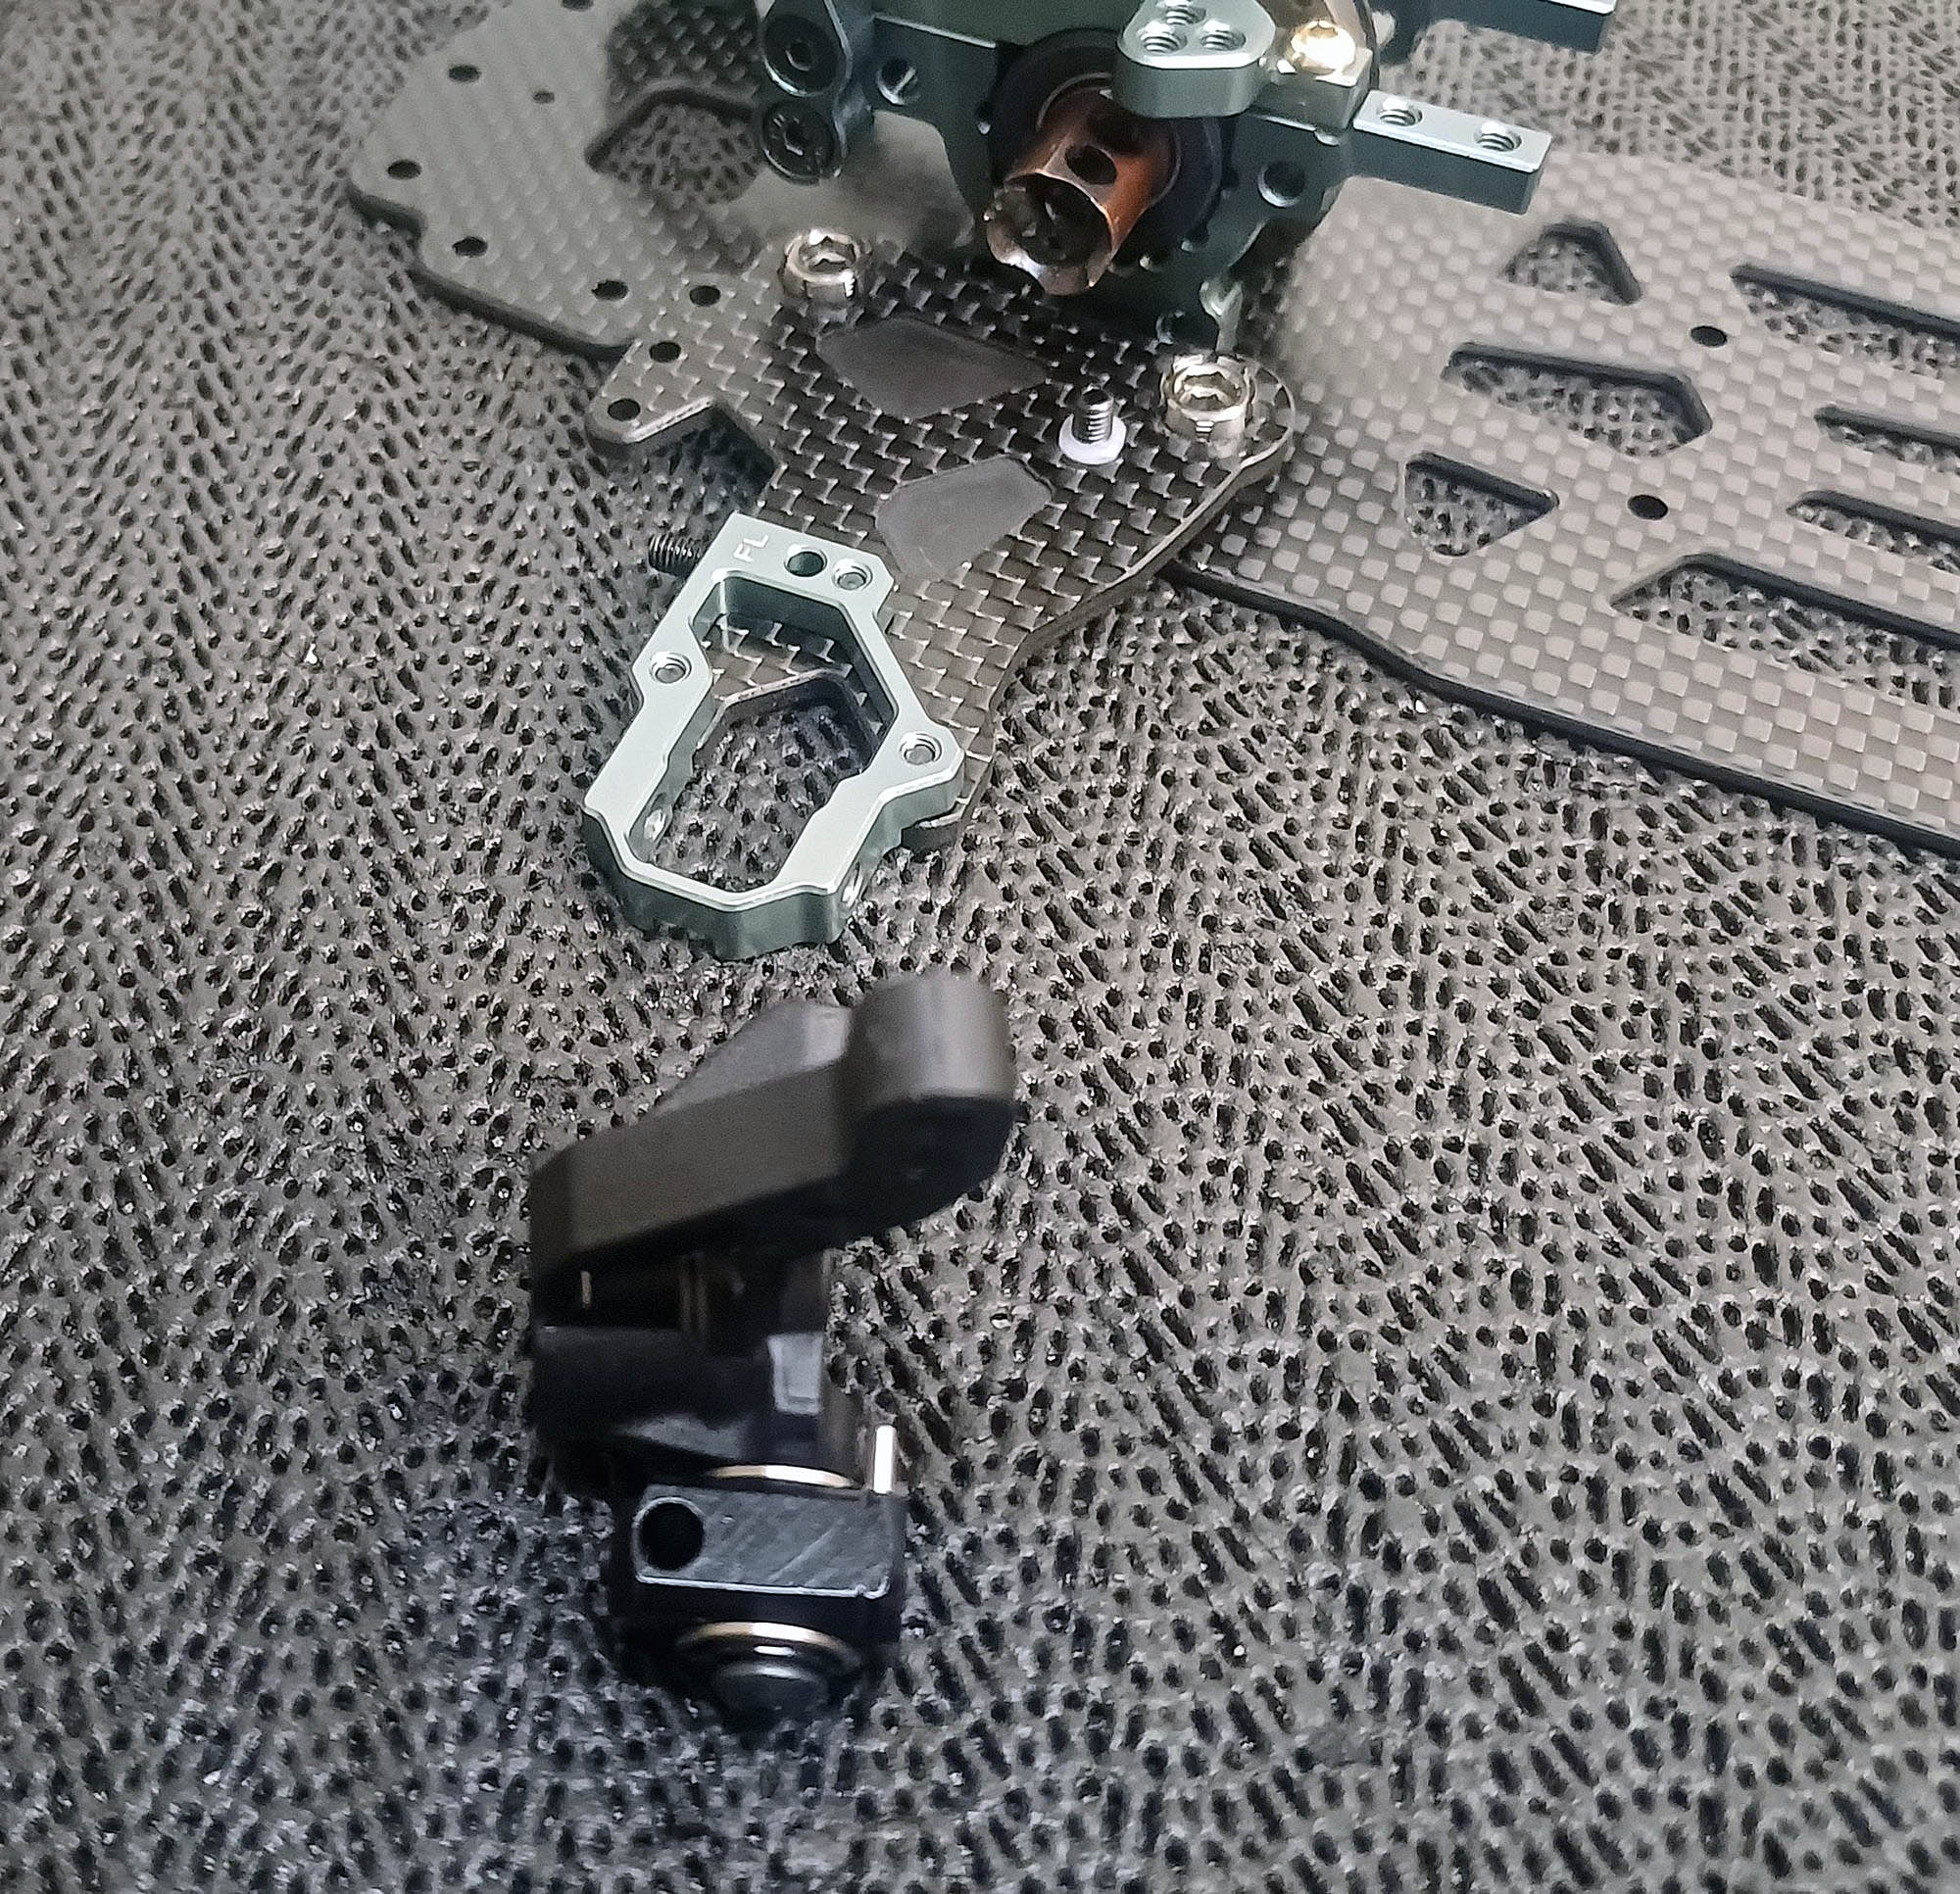
Rear suspension plate "flipper" is attached to the axle with m3 acrews. Very simple. Lightly pain CA glue on the carbon countersink holes for added durabilty from crashes.
As mentioned already, many roll centre adjustments are possible when using spacers.
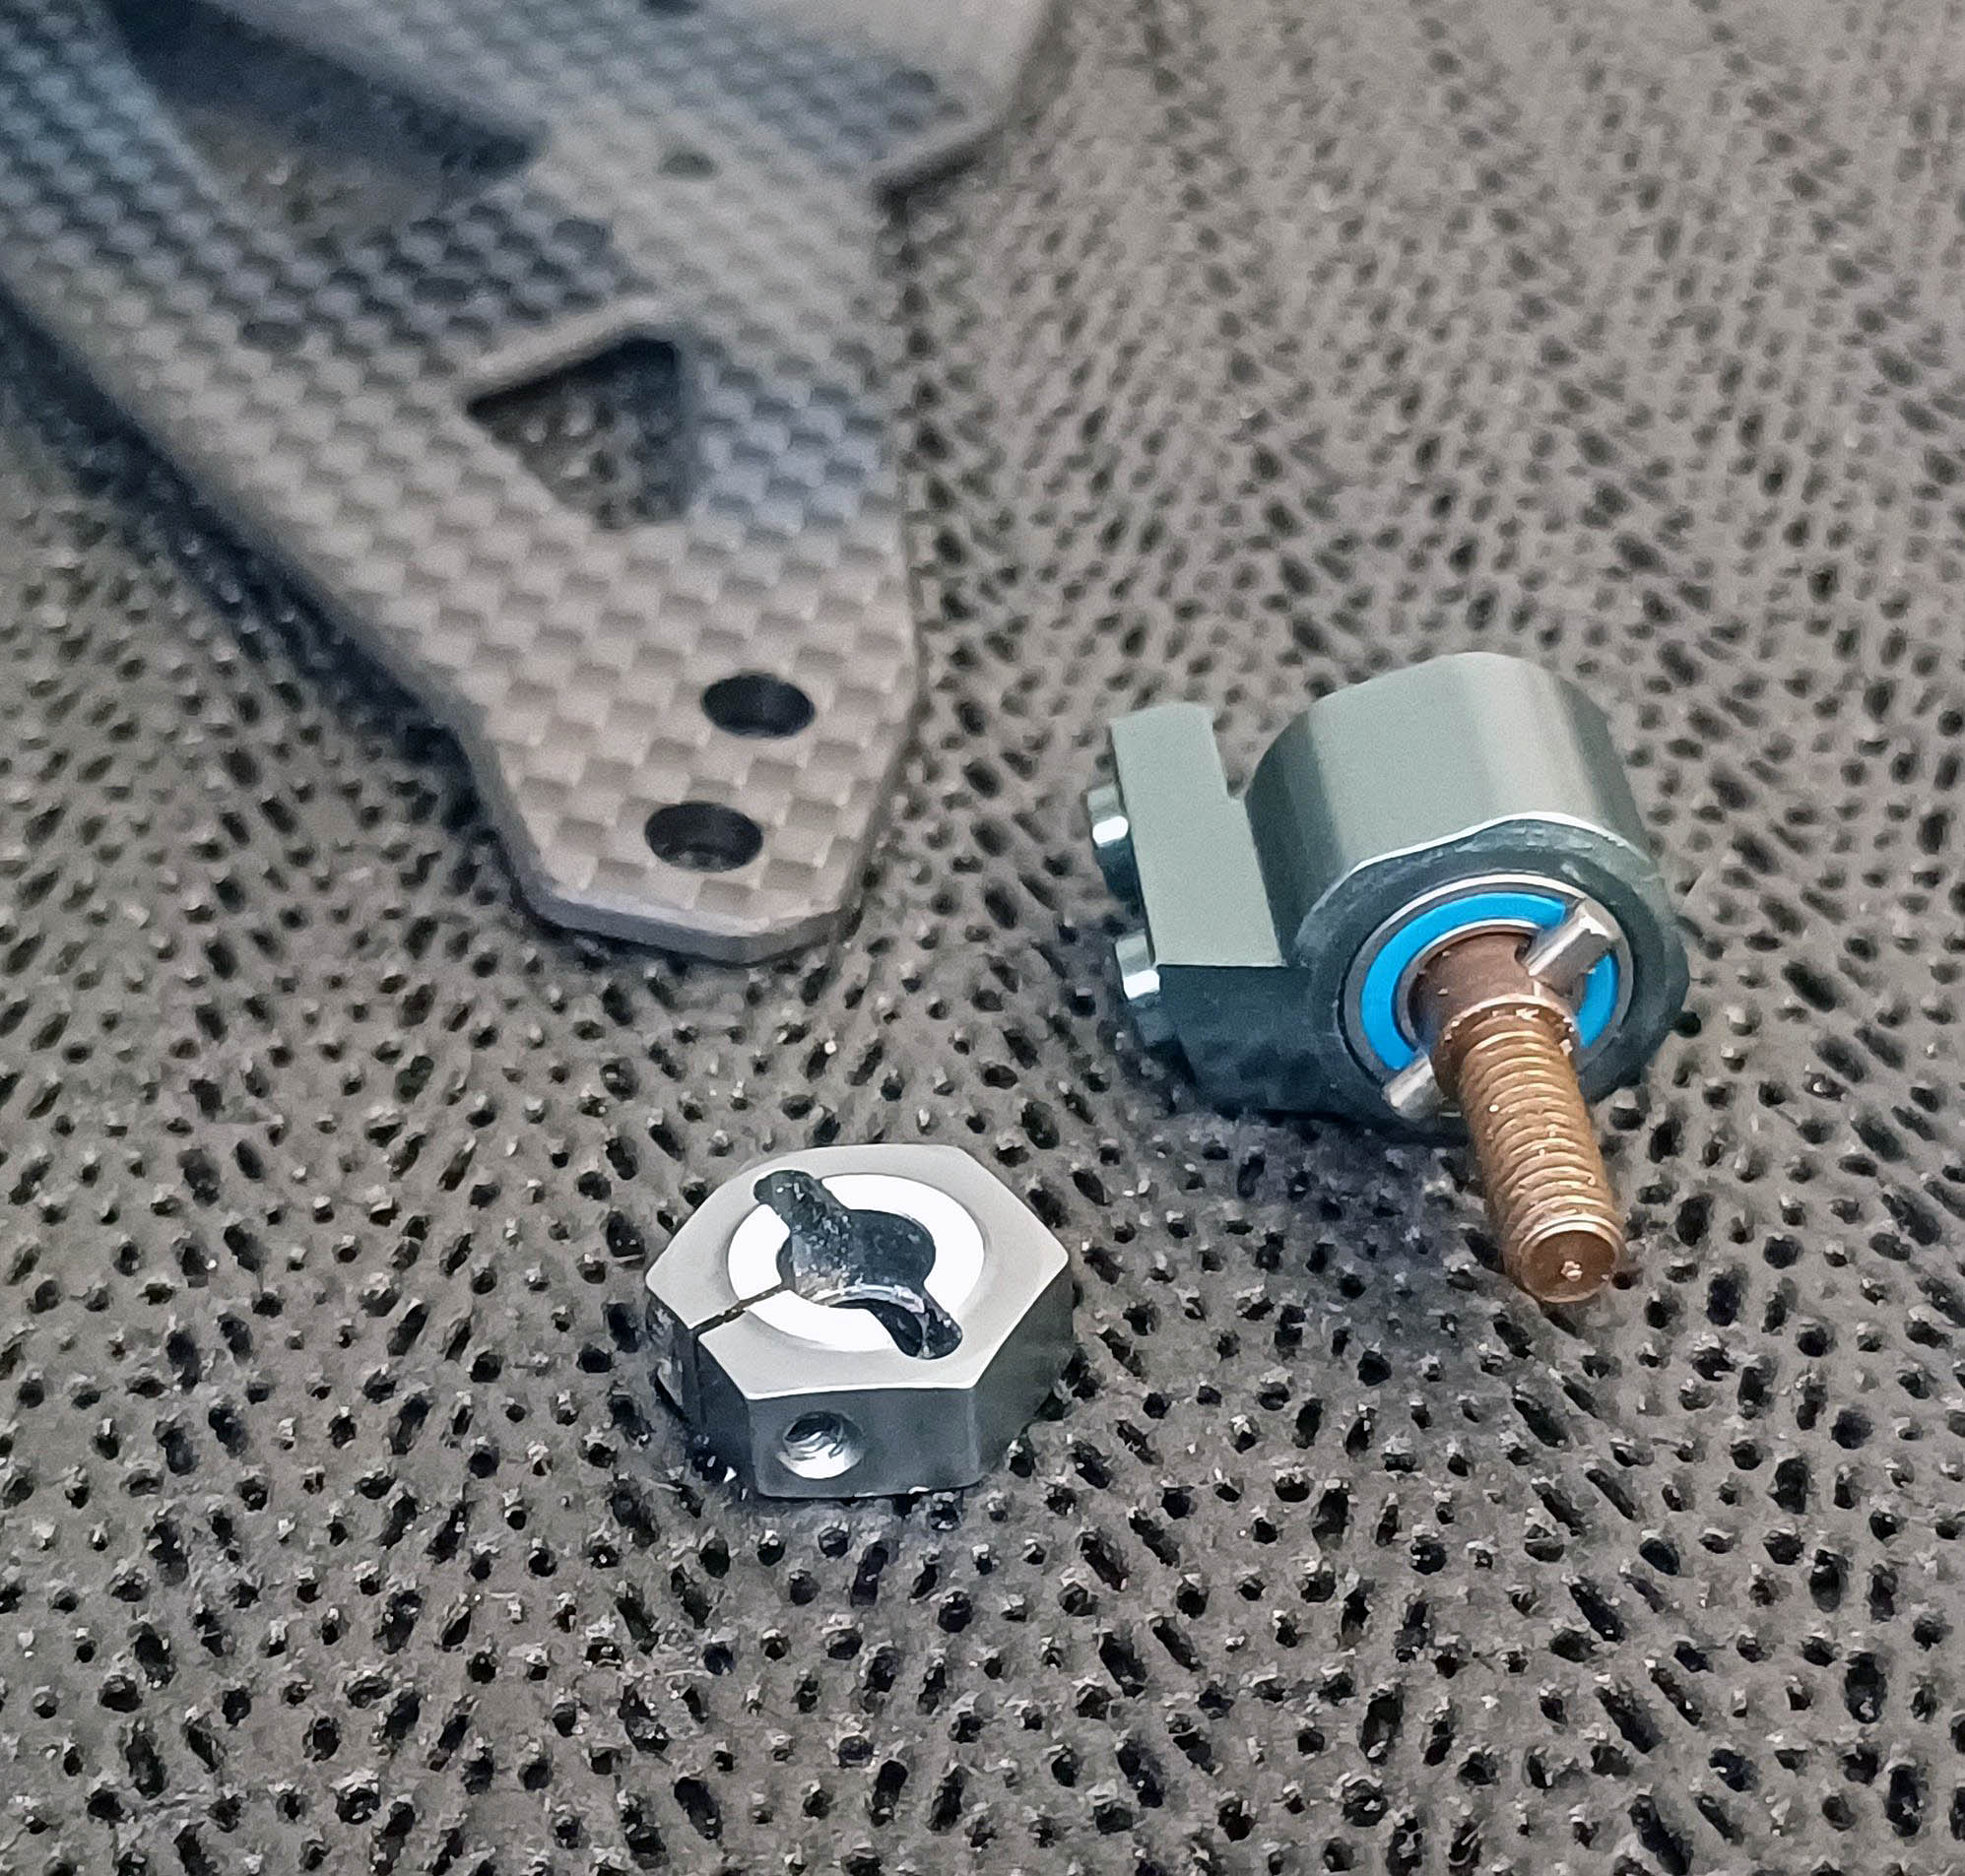
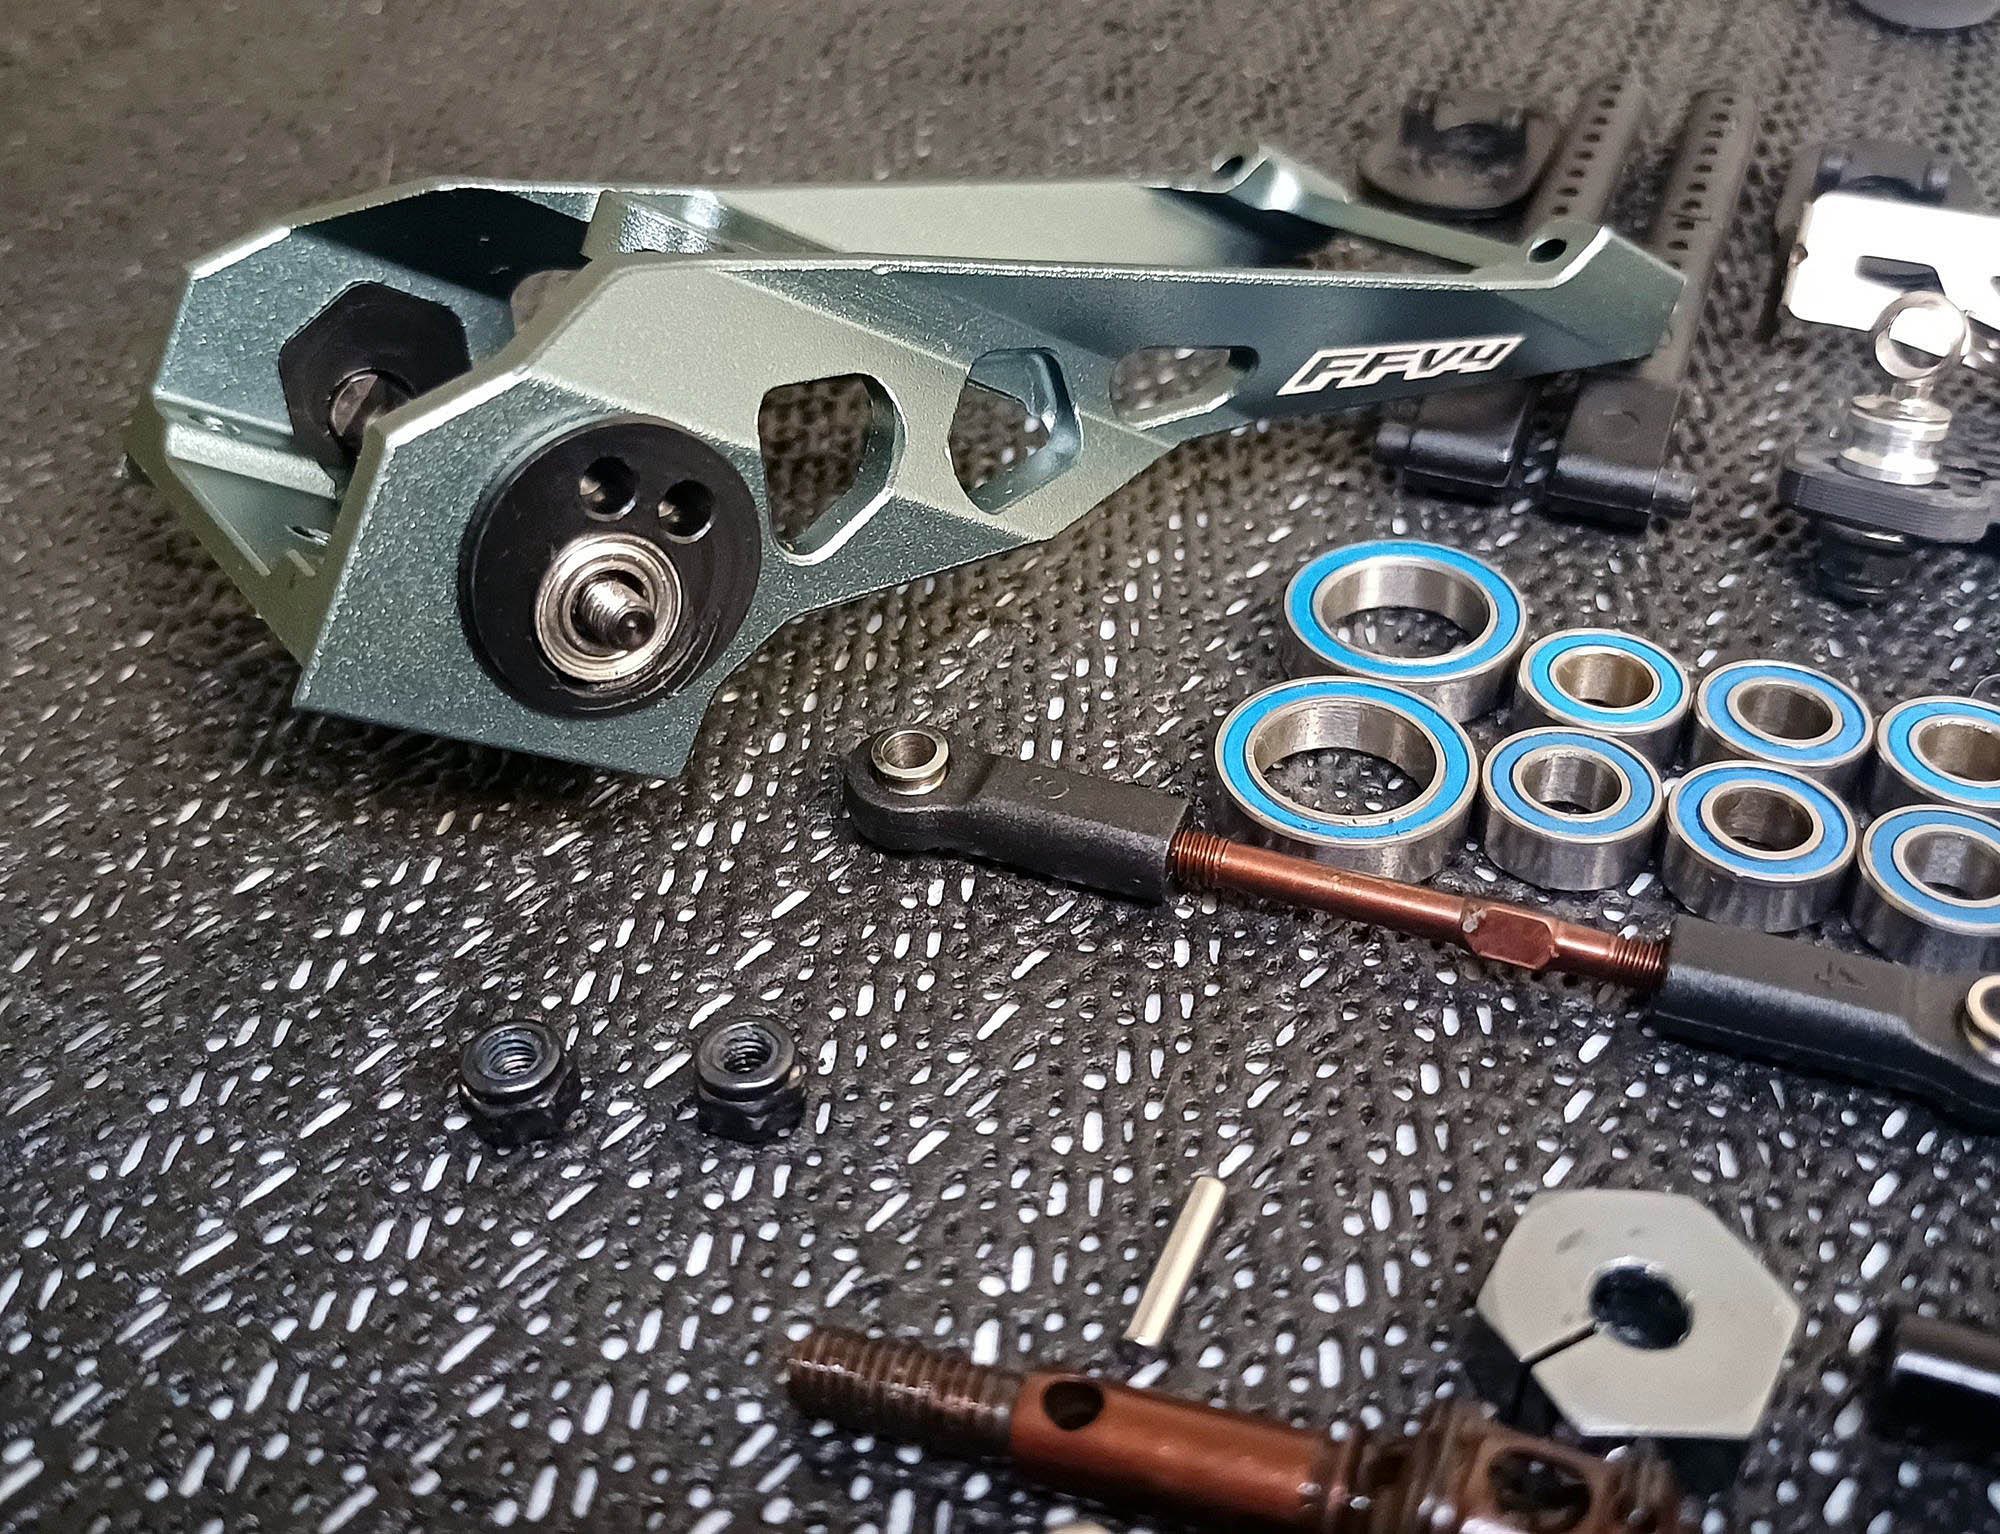
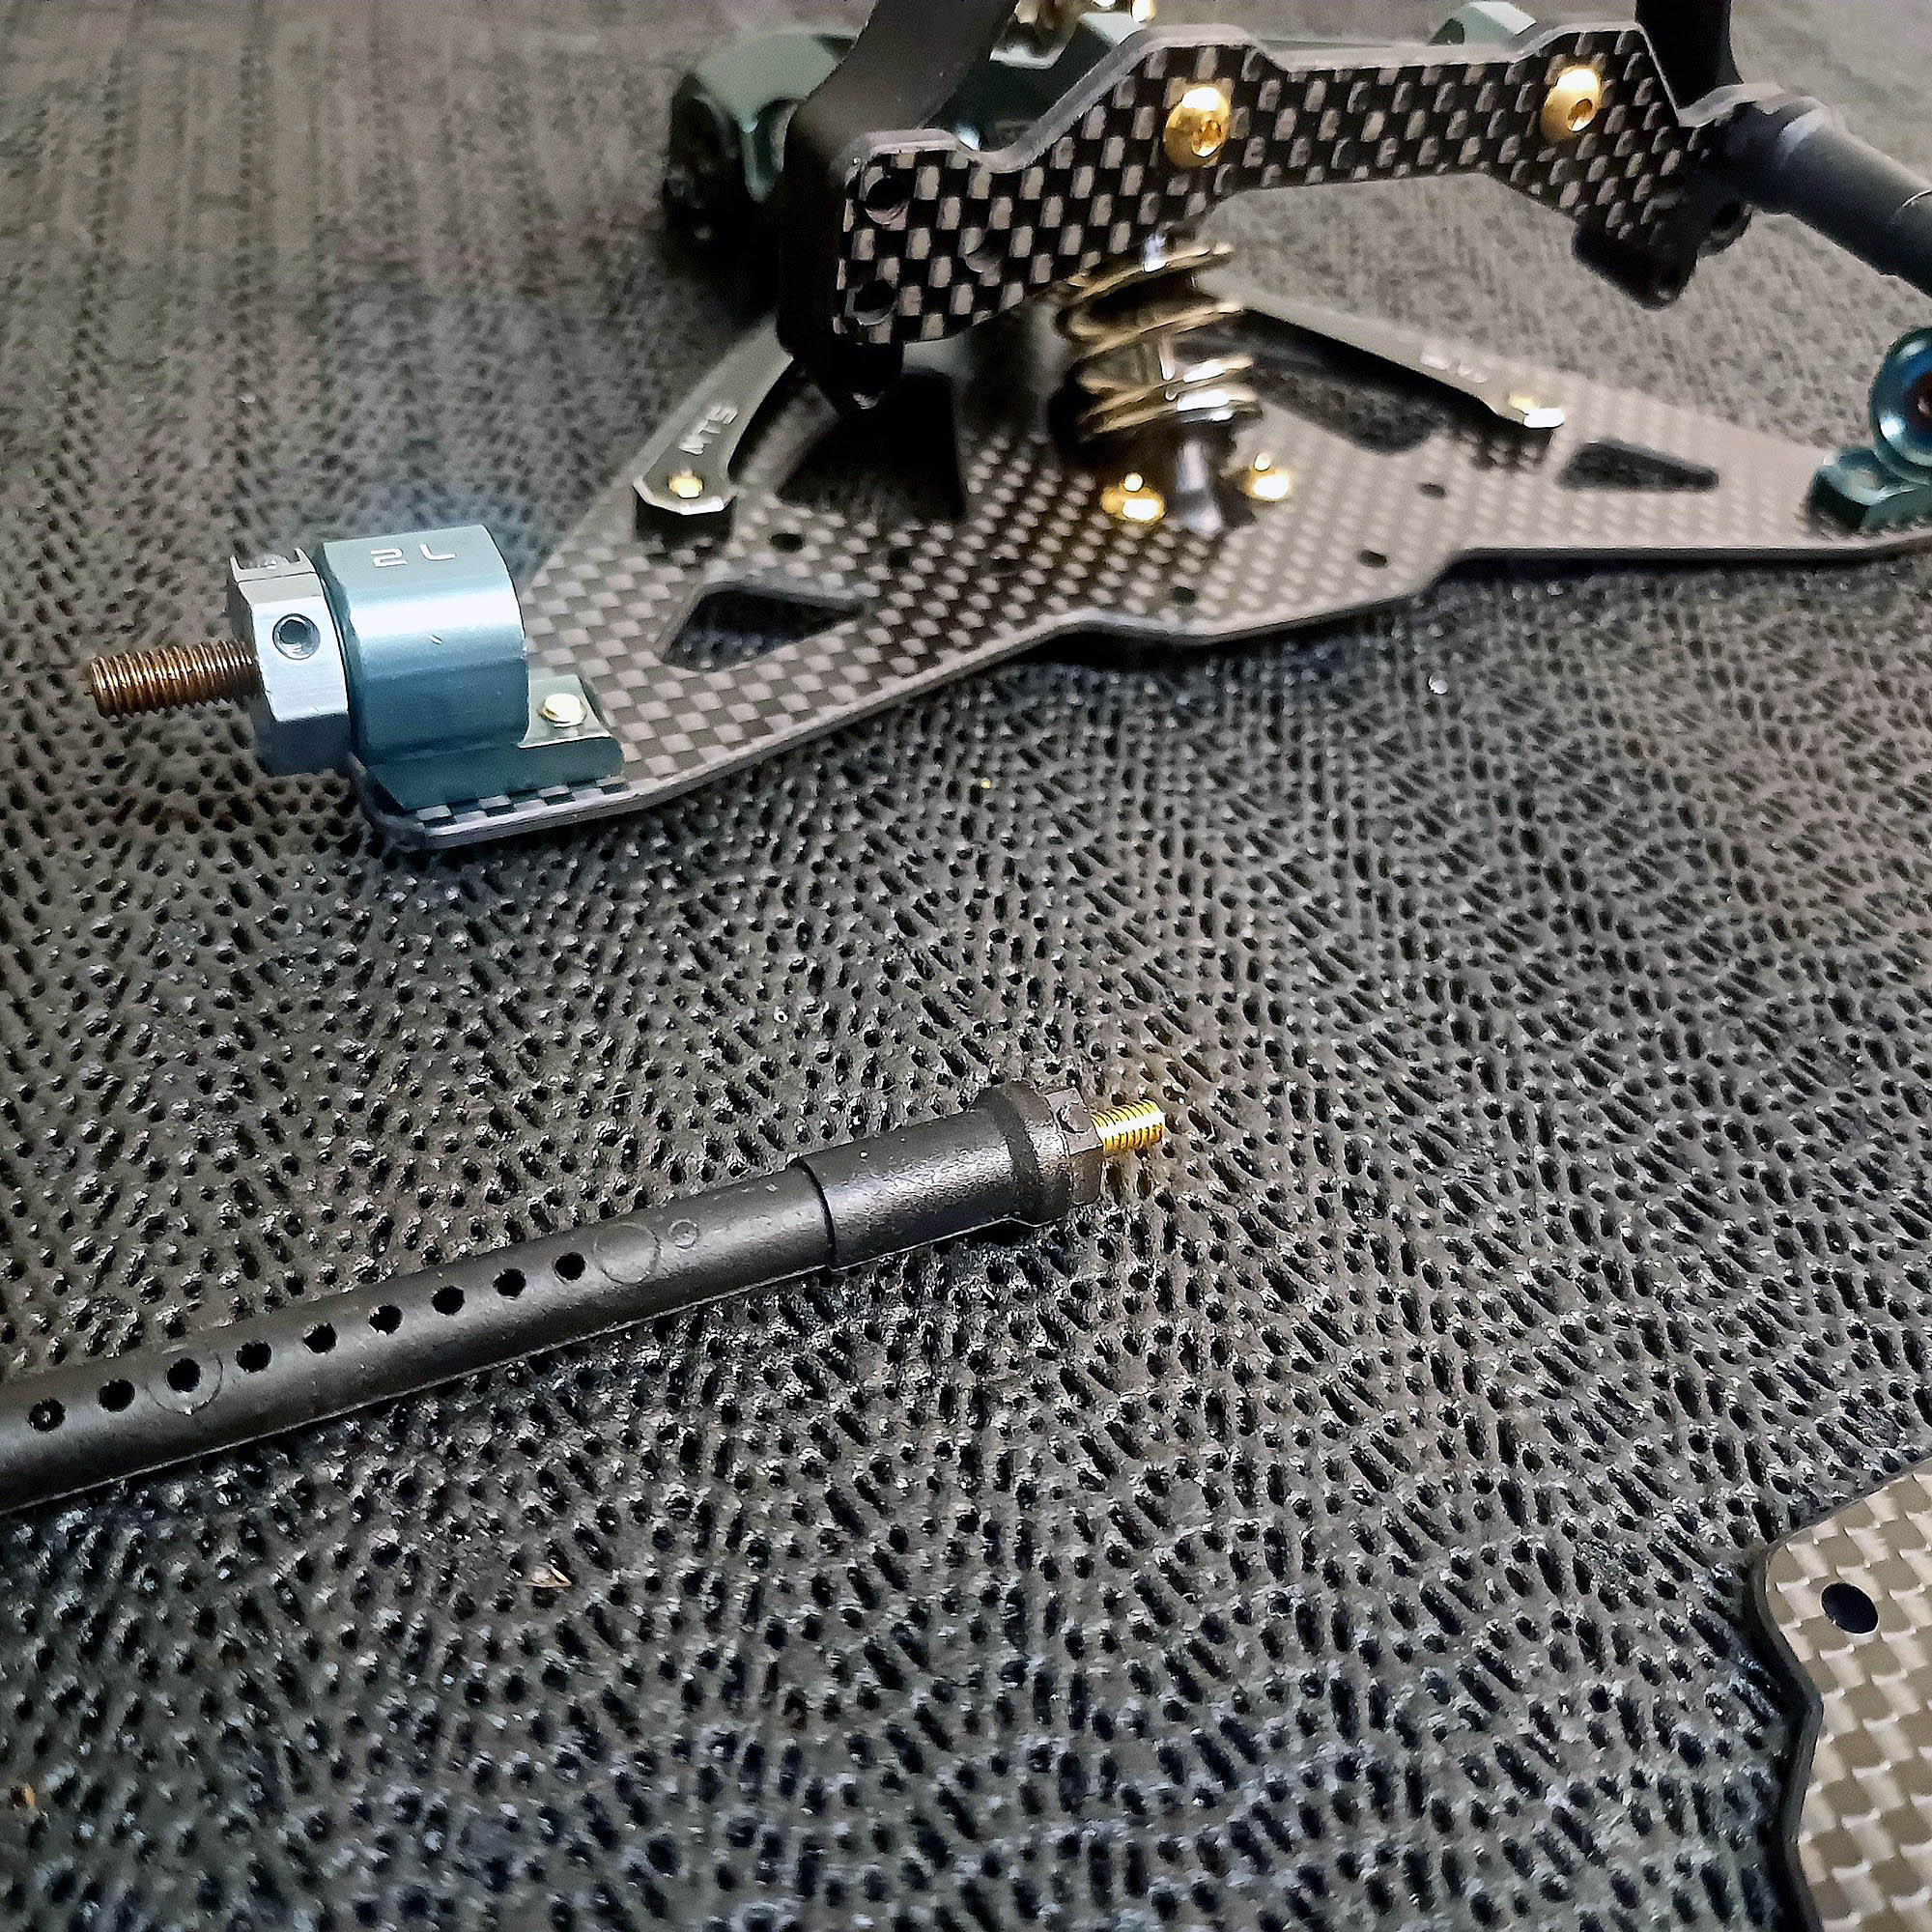
CNC Aluminium Rear Hubs are machined at 2 degrees toe for left and right. 1 deg and 3 degrees are optional. This axle felt slightly tight and I'm sure it would of cleared after a praxtice run, but i lighrly sanded the hex with 240 grit.
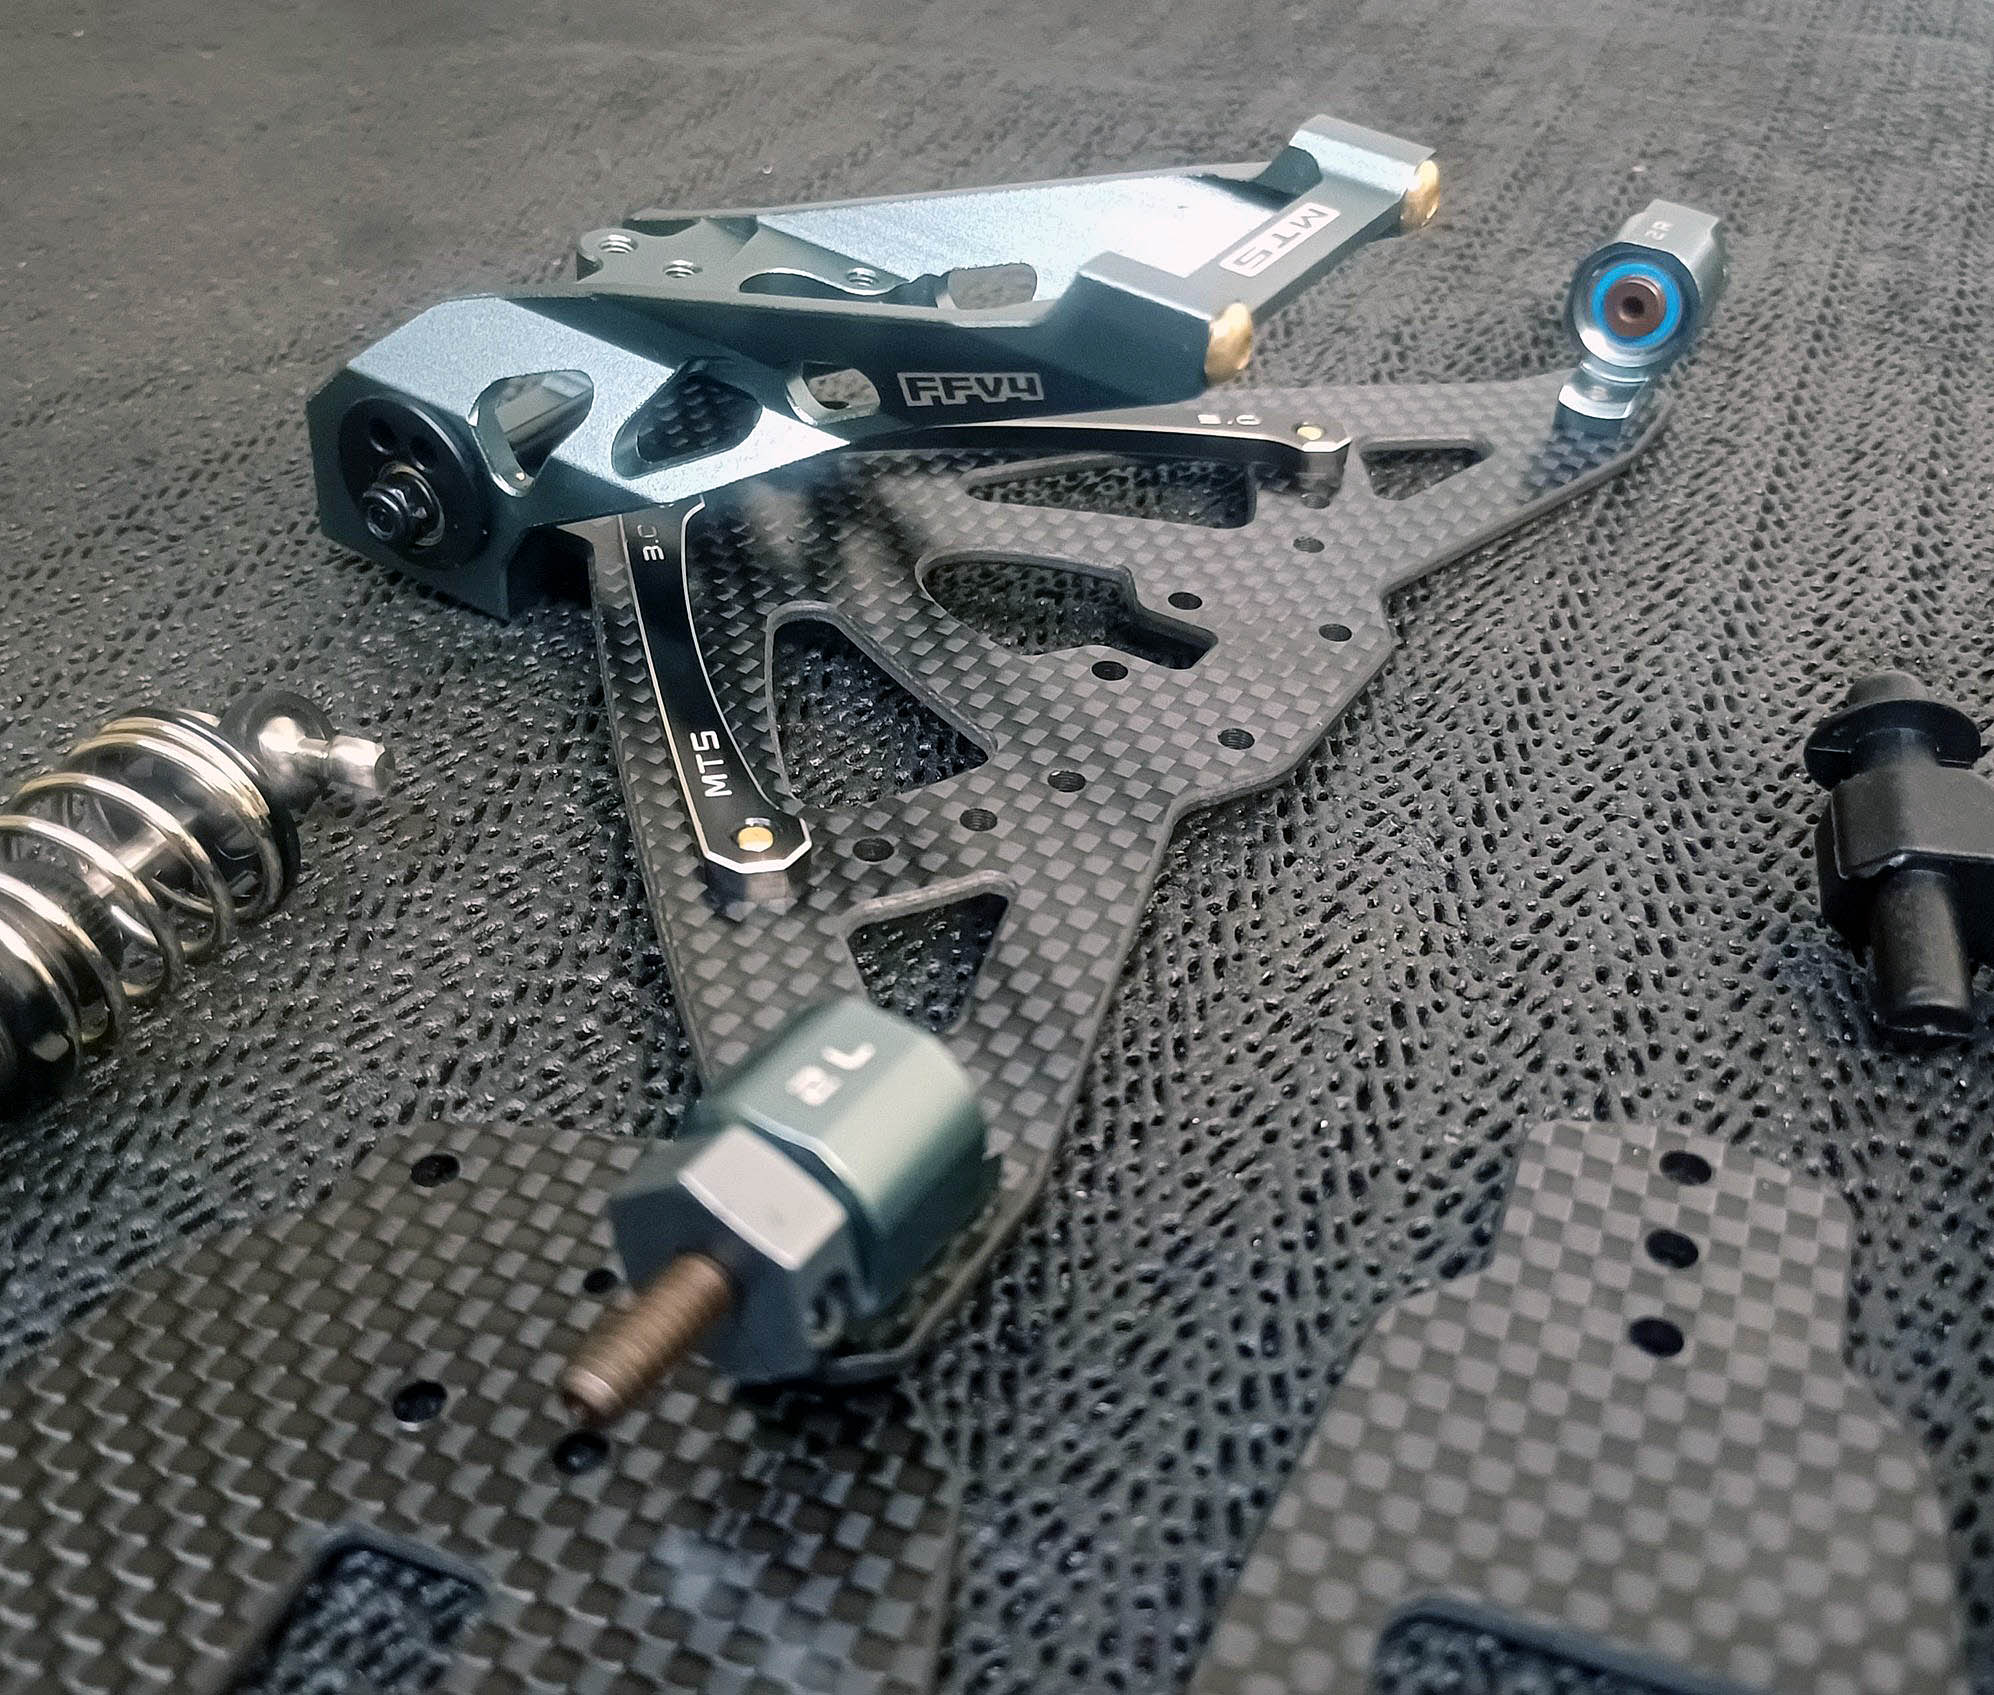
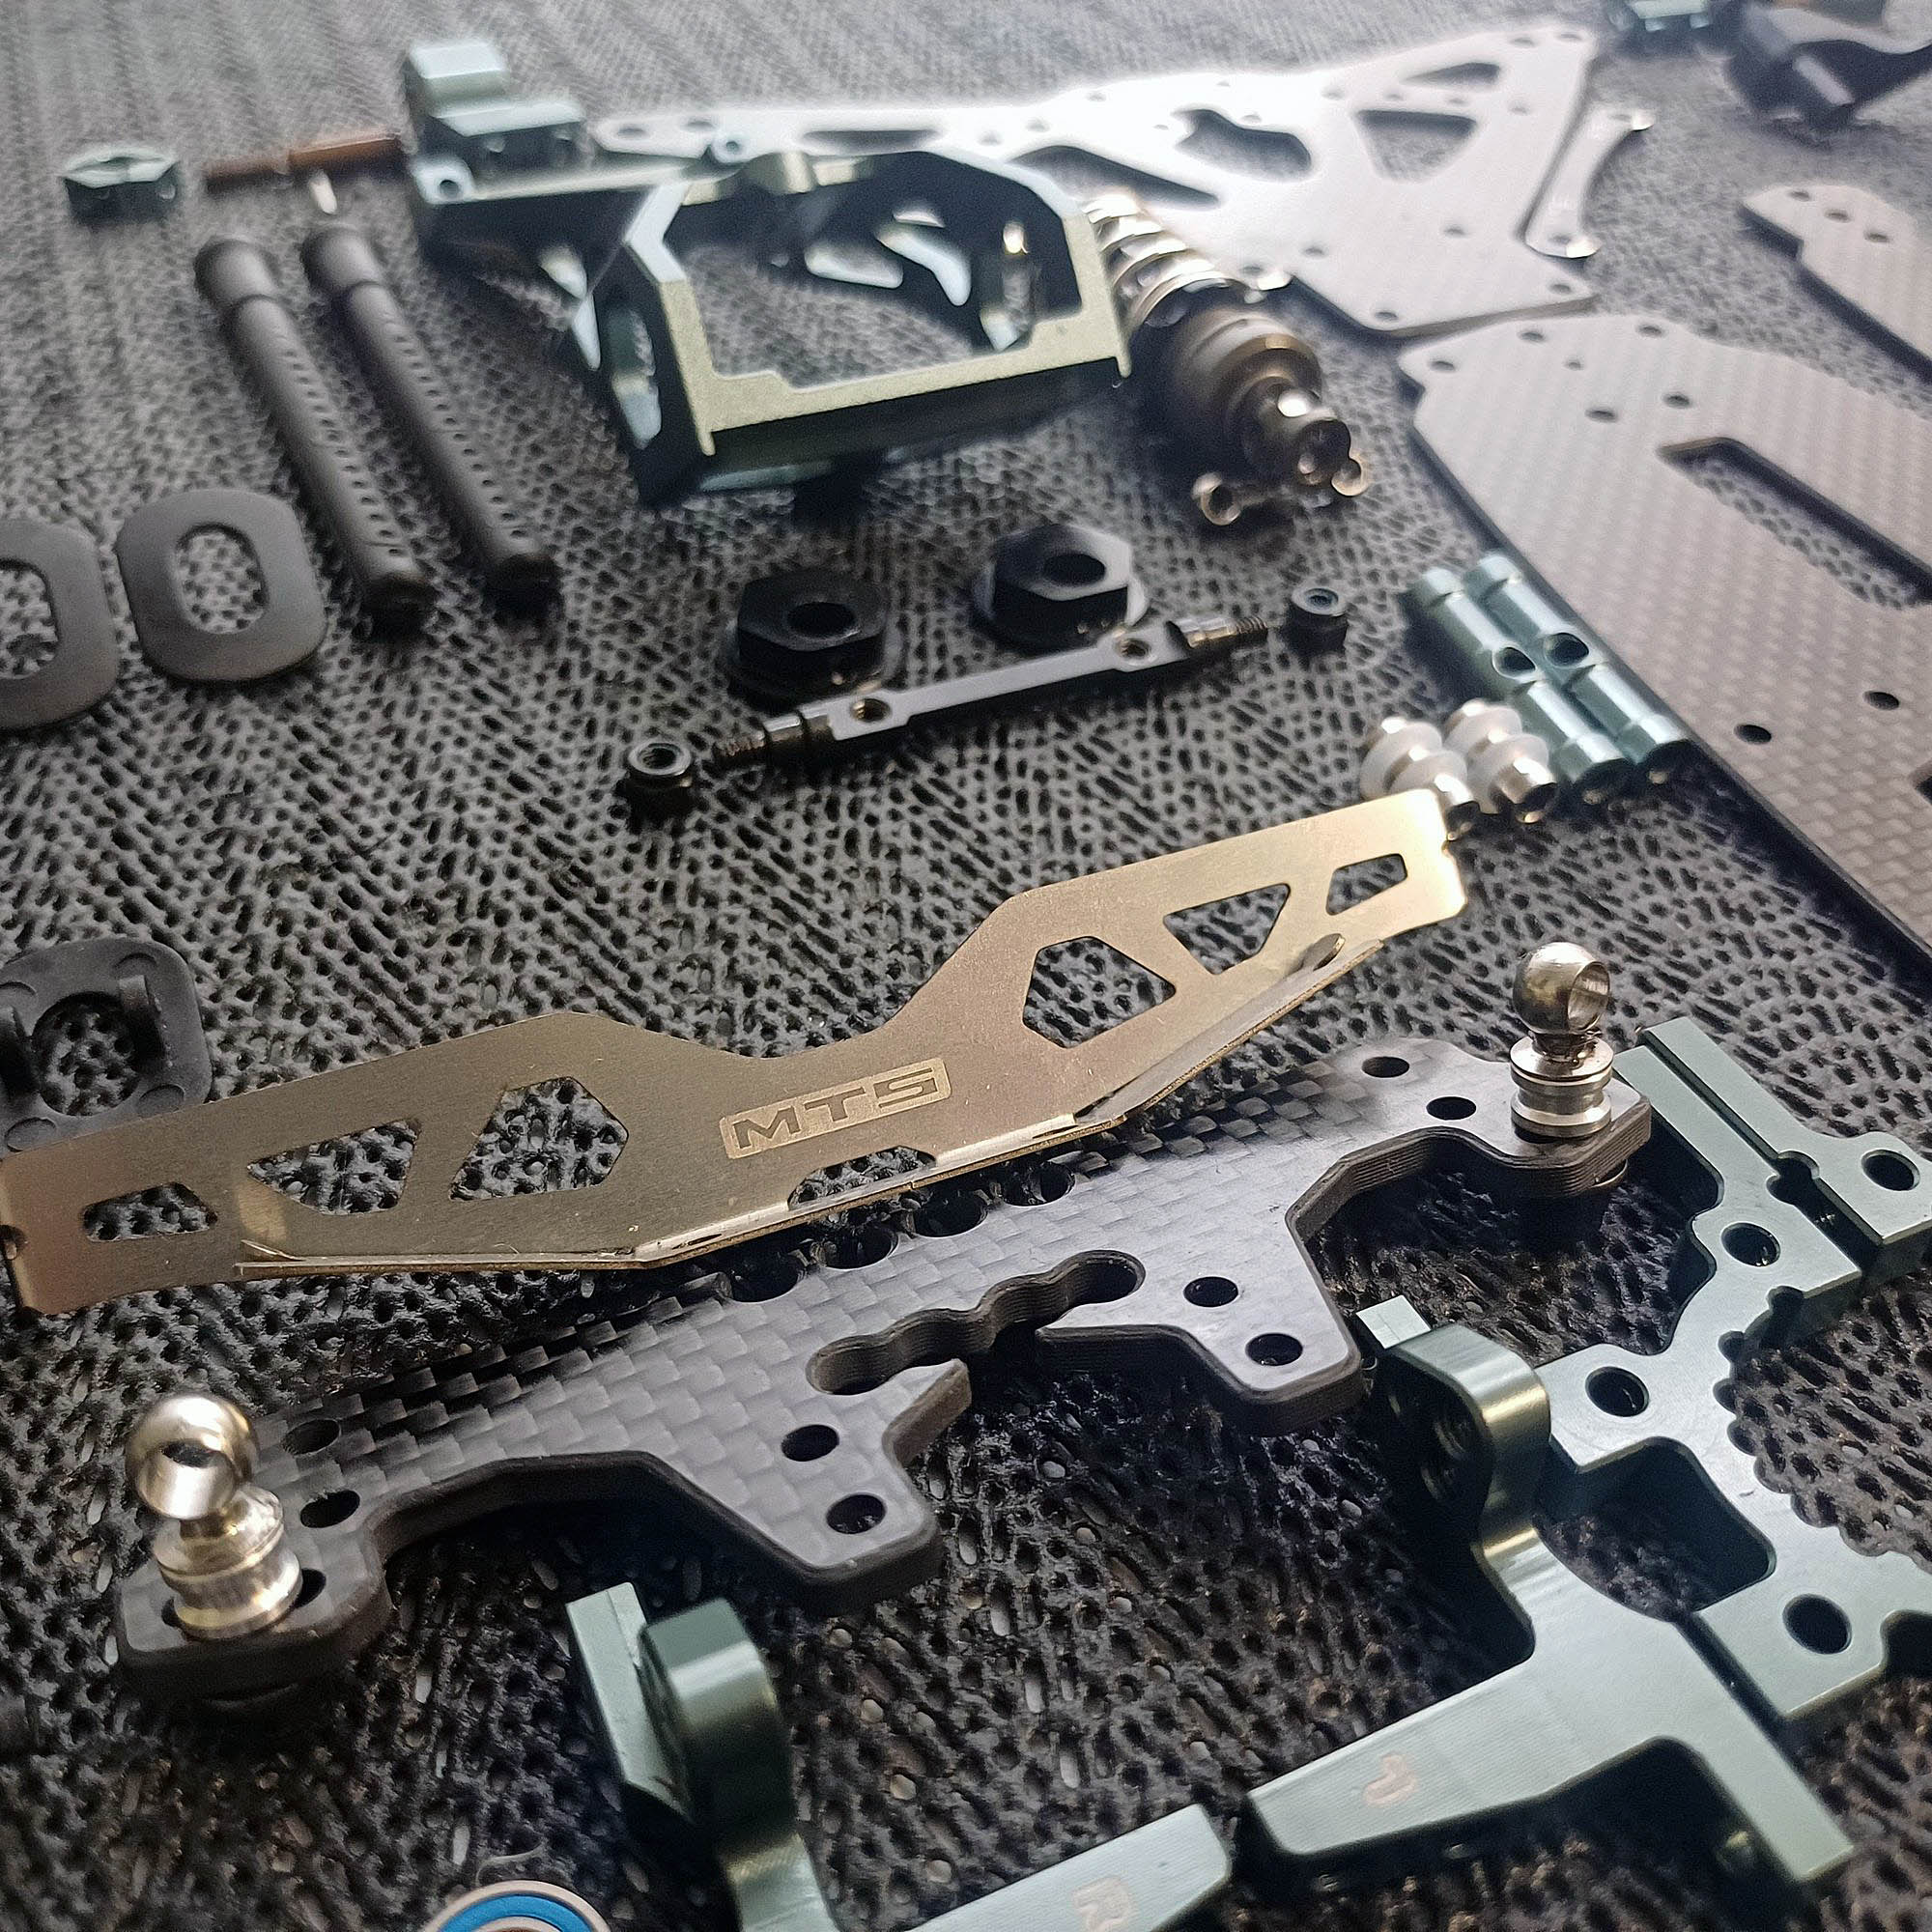
Flipper assembly wirh 3mm Alu (kit) flex adjusters. Many setups have 10-20g weights installed to the rear of the flipper plate.
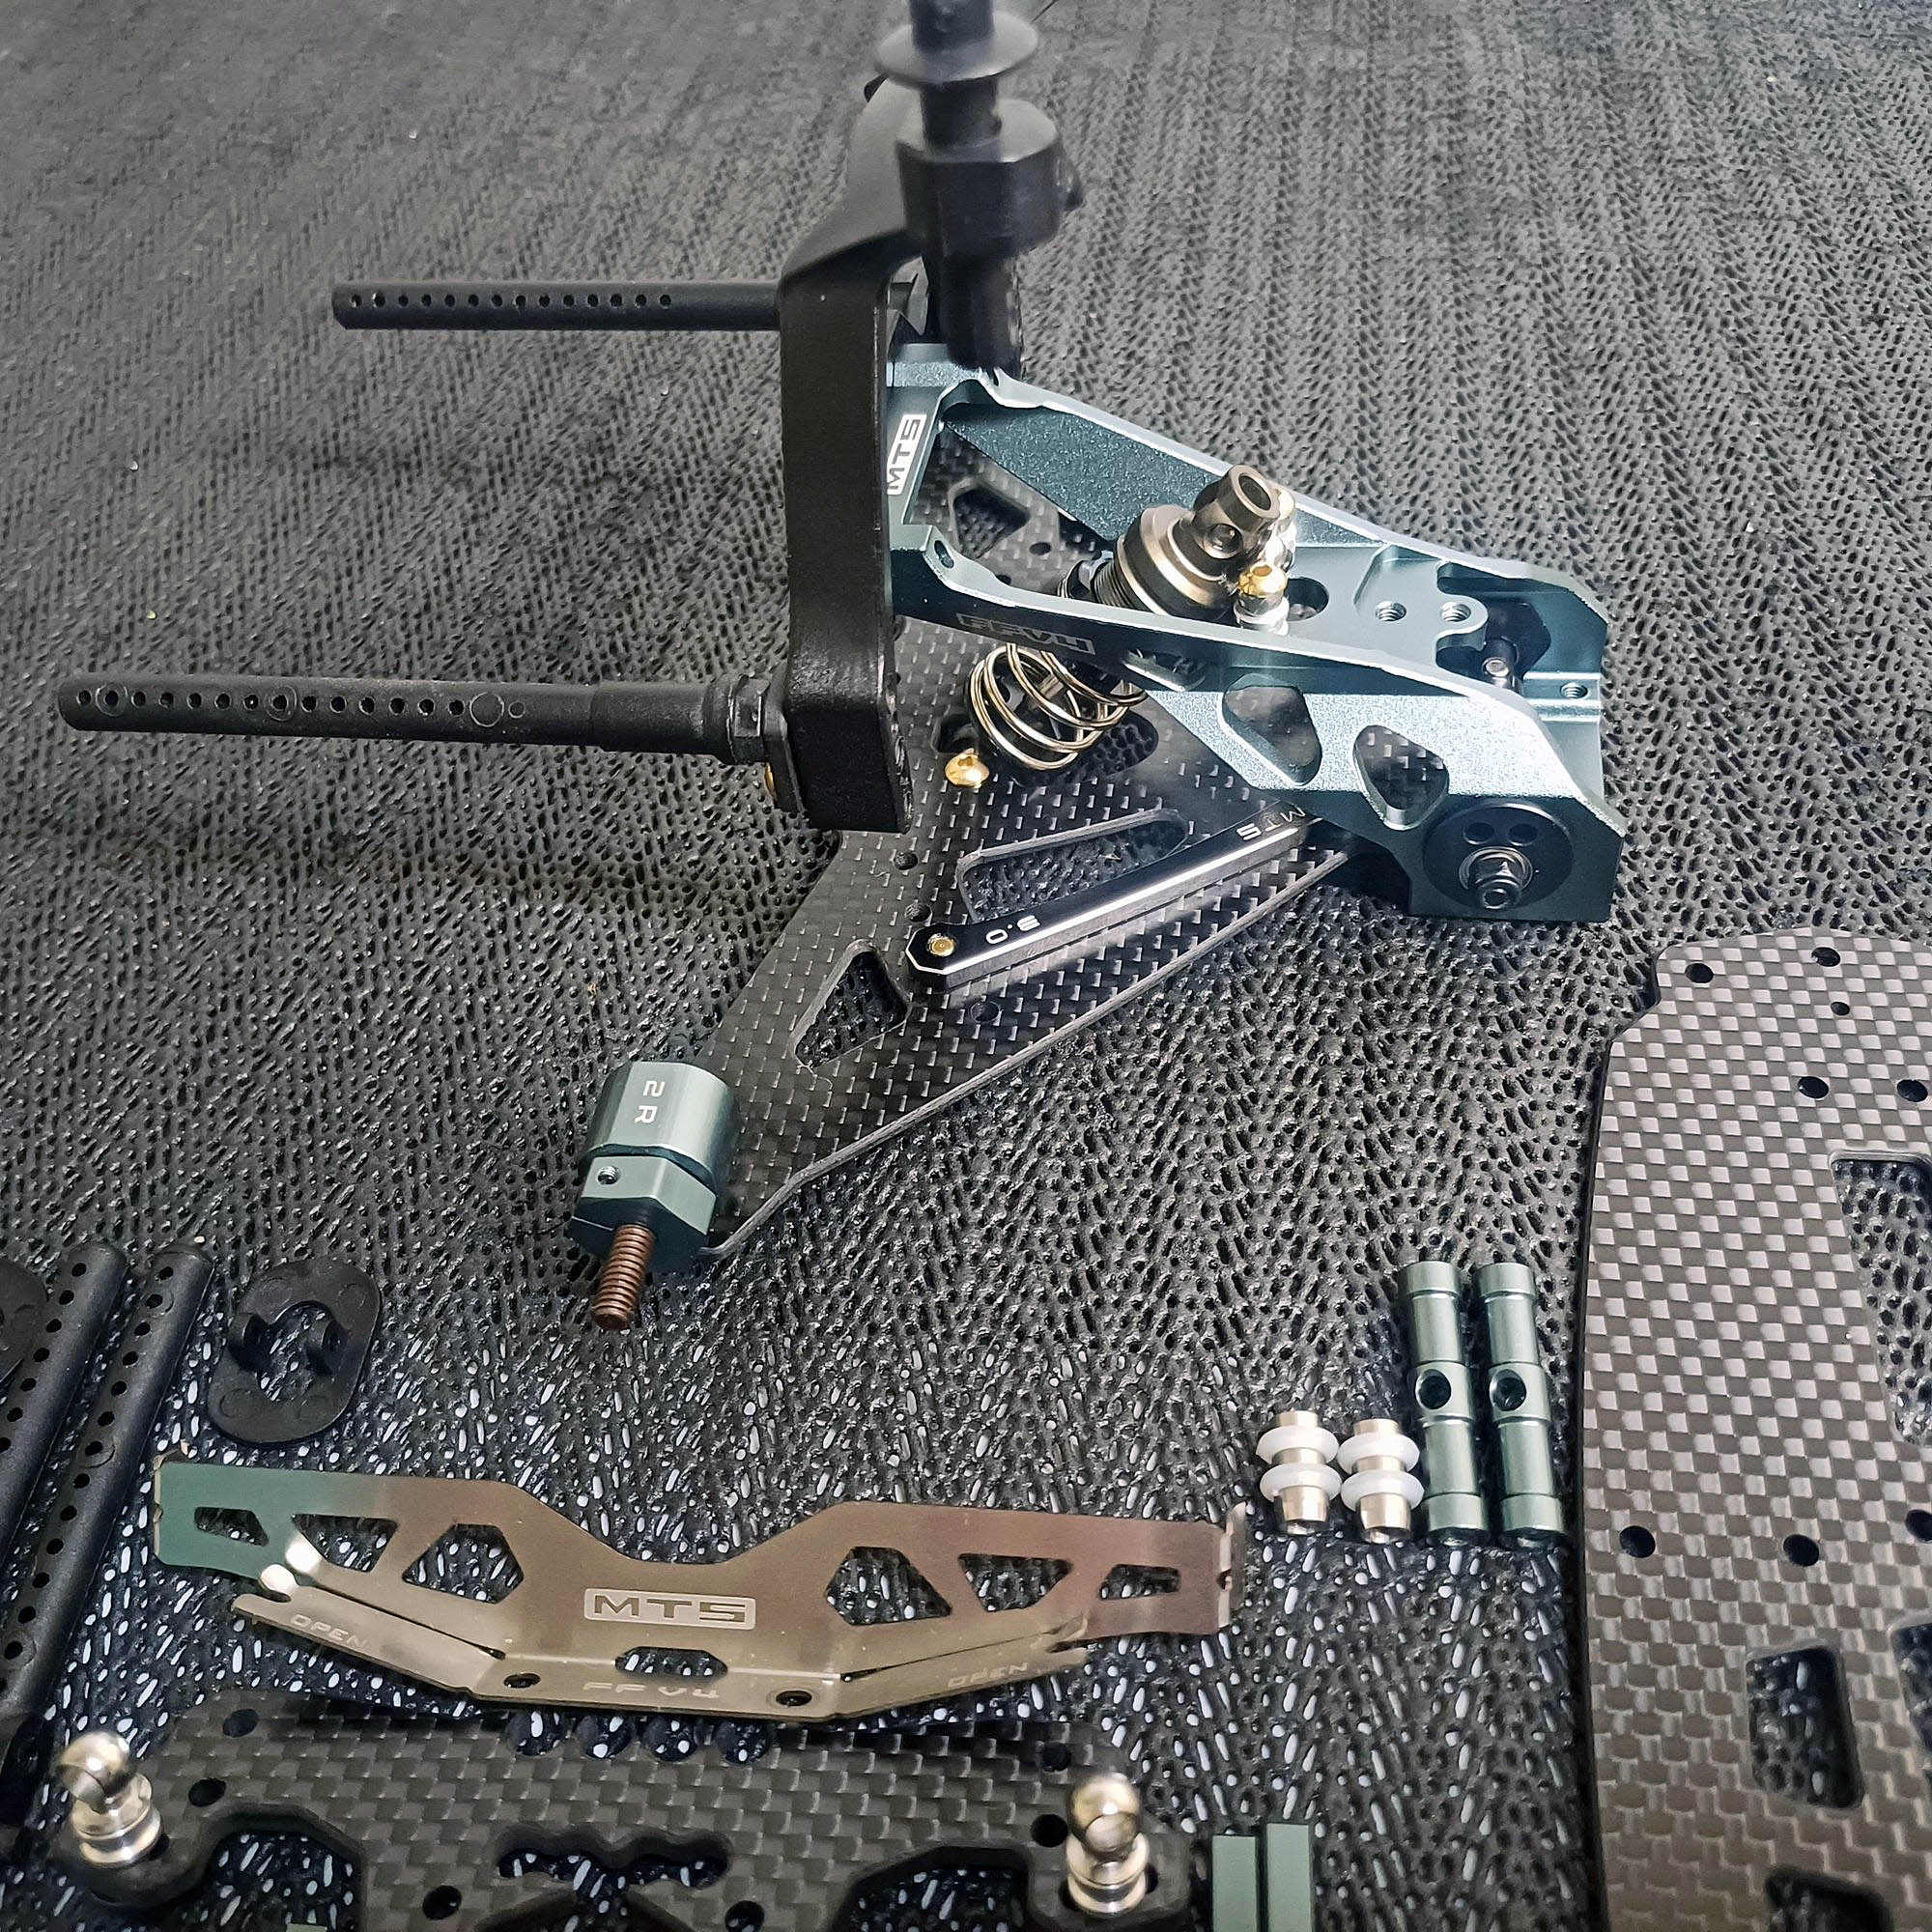
Rear RAS shock has FFV4 specific upper snd lower ball end assemblies. Angle adjustments are achieved with washers.
Pitlane Hobbies (Australia) and Team Powers UK have produced their own flippers that feature a central slot for additional flex tuning.
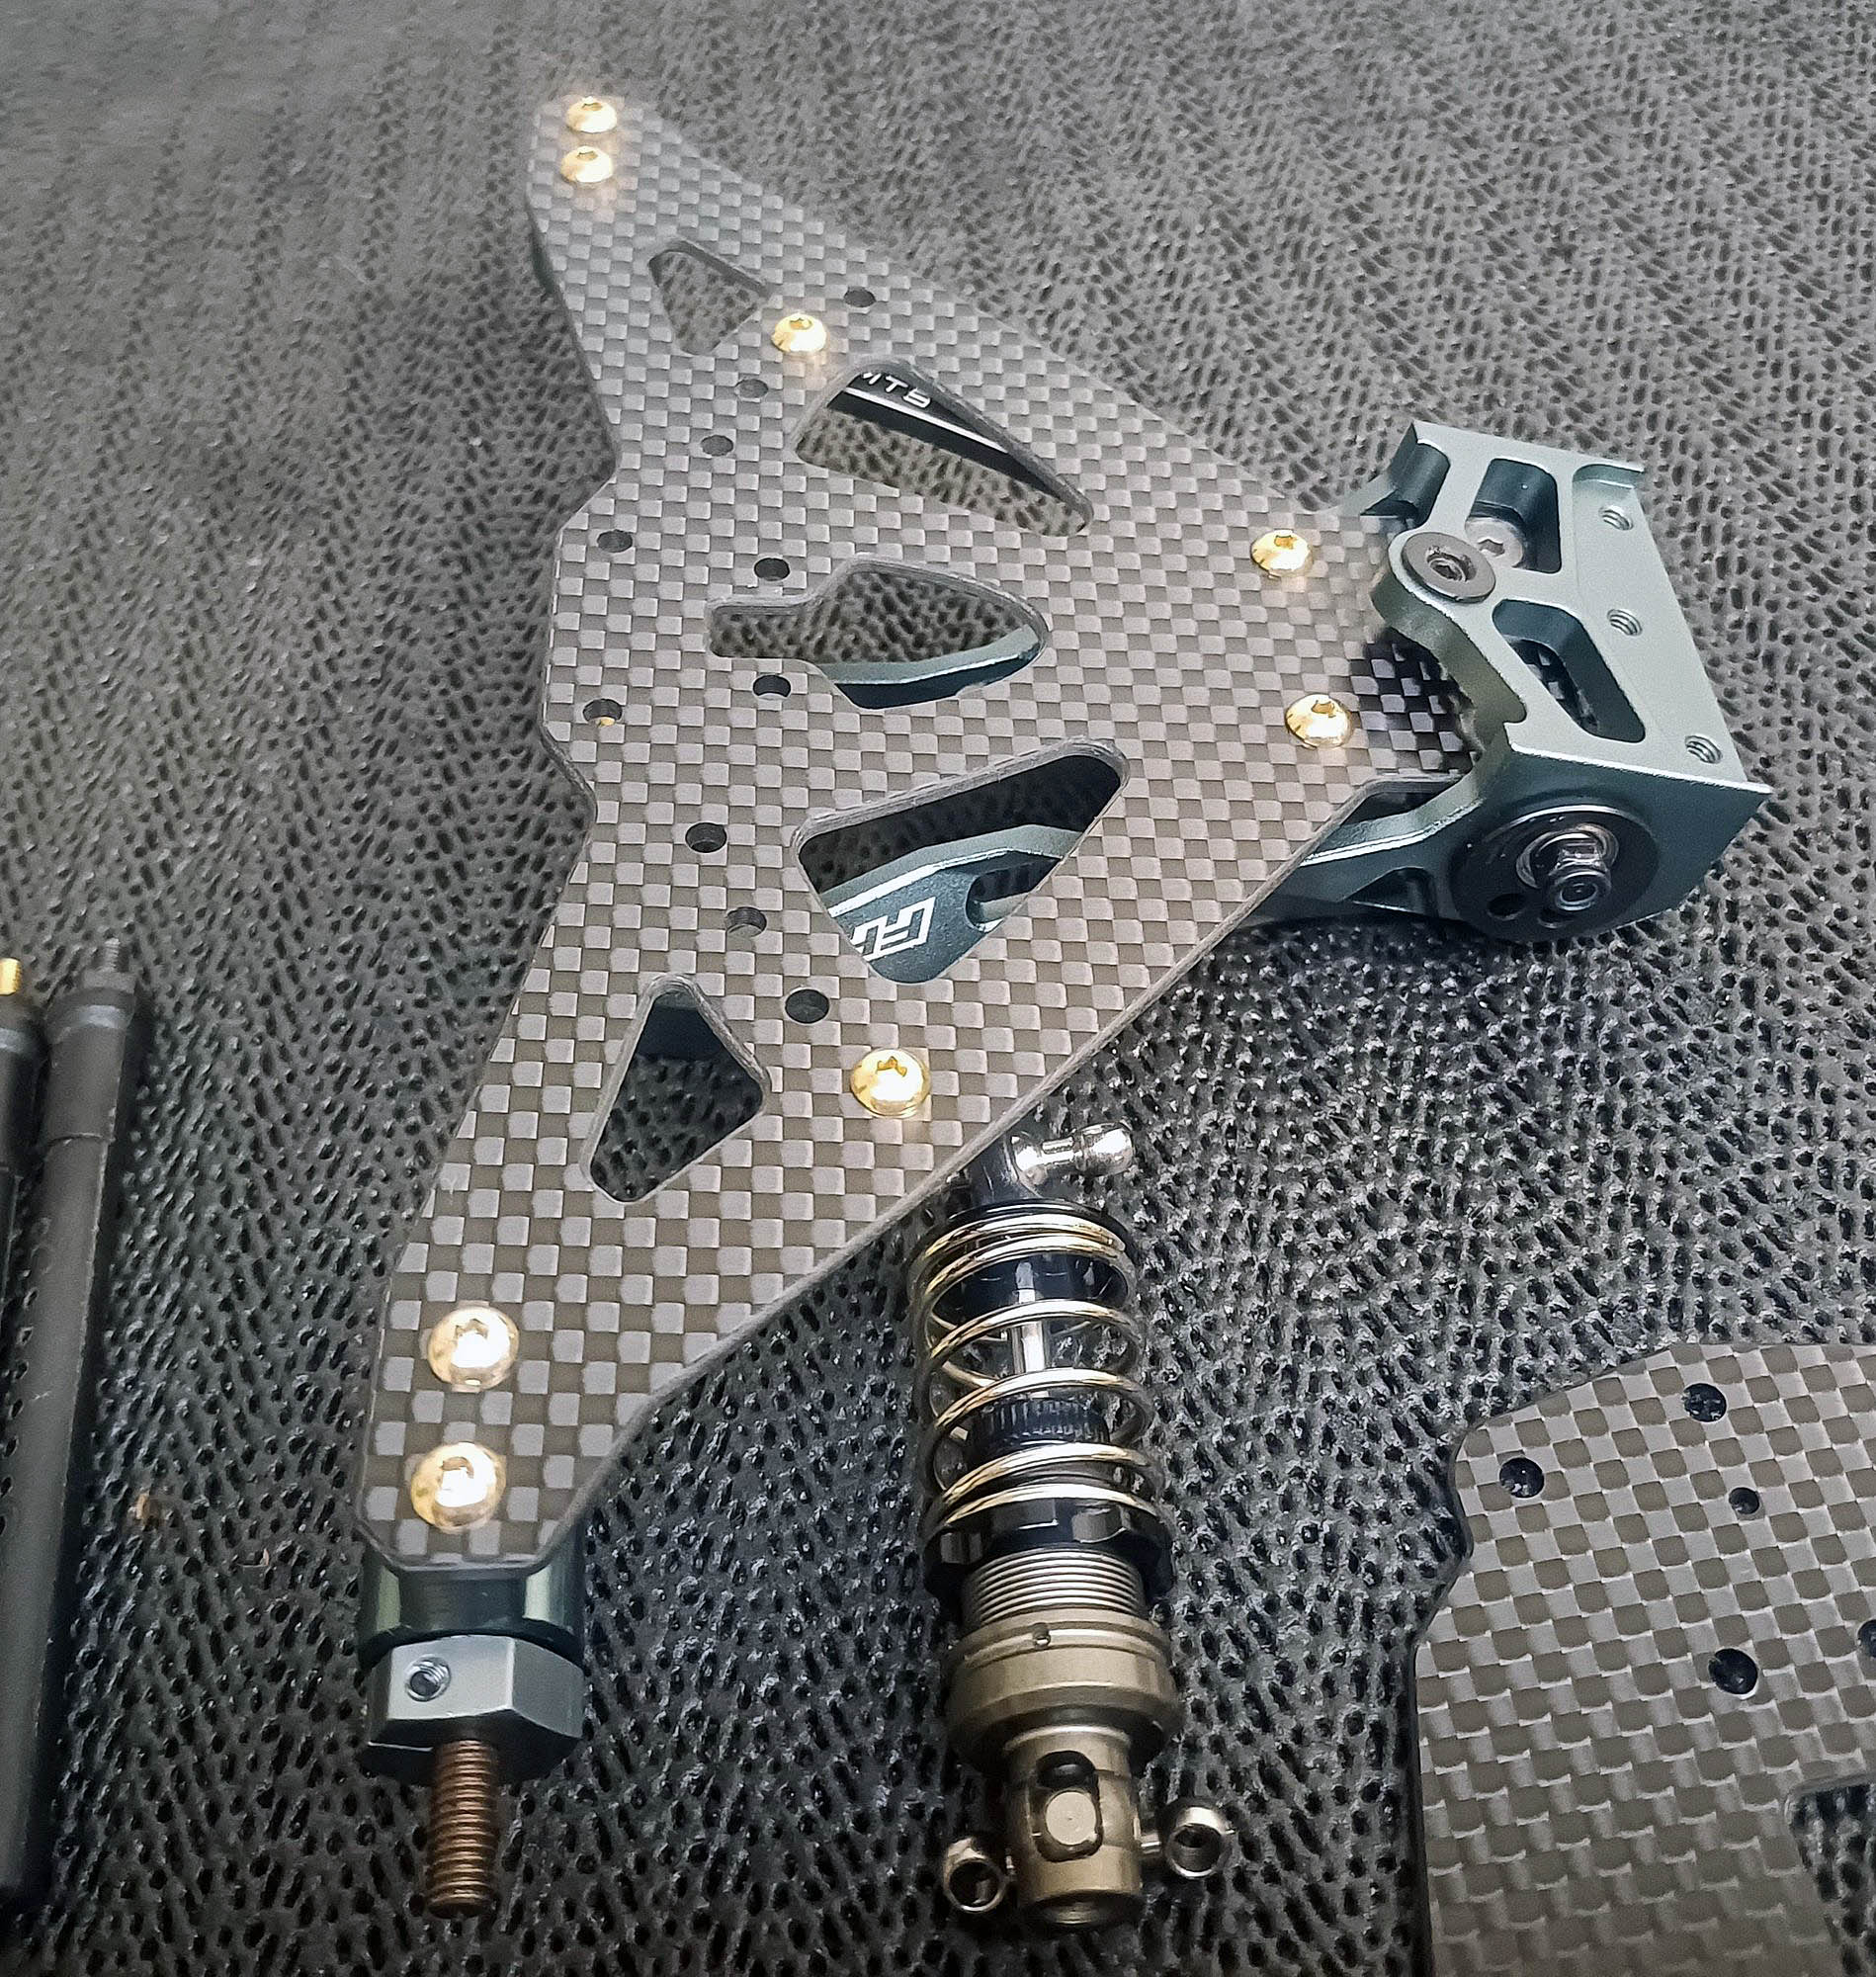
Mono-shock is mounted well forward of the axle line.
FWD class bodies have many variations in rear roof/hatch profiles. The FFV4 rear body mount system can accomodate to suit your preference for vertical/horizontal posts/heights. Many positions of the carbon tower and integrated post system can be tuned to your preference. I have set mine Low and Forward.
Rear assembly complete and shows how I have mounted the body support forward to suit the bodies I have.

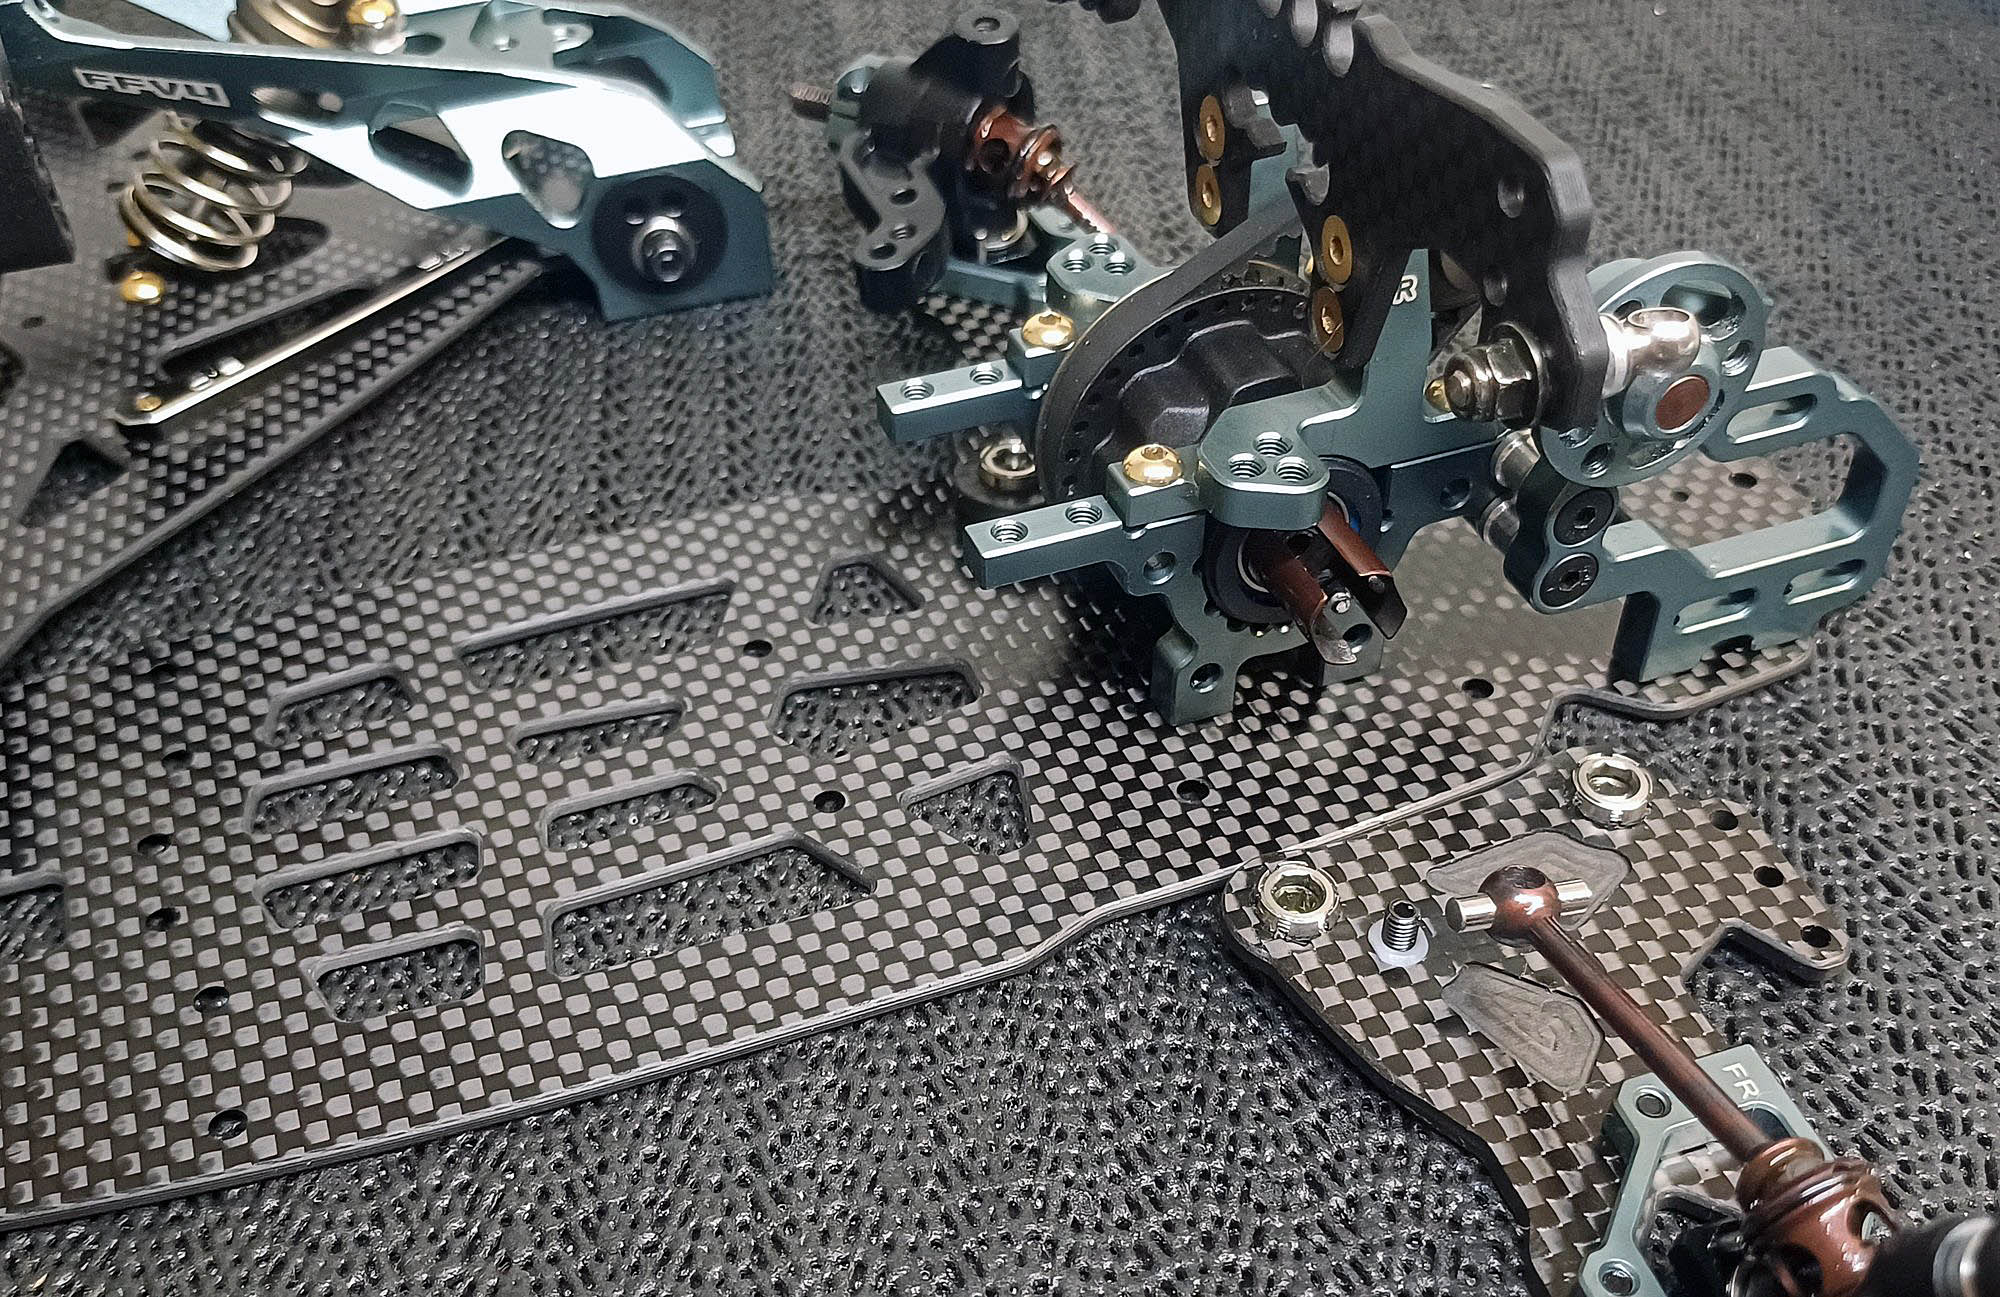
Aside from a few small revisions, the front componentry is legacy from the FFV3 - FFV2. Just the motor mount is more offset for optimal balance.

Motor mount bulkhead utilises 3 motor screws to maximise durability.
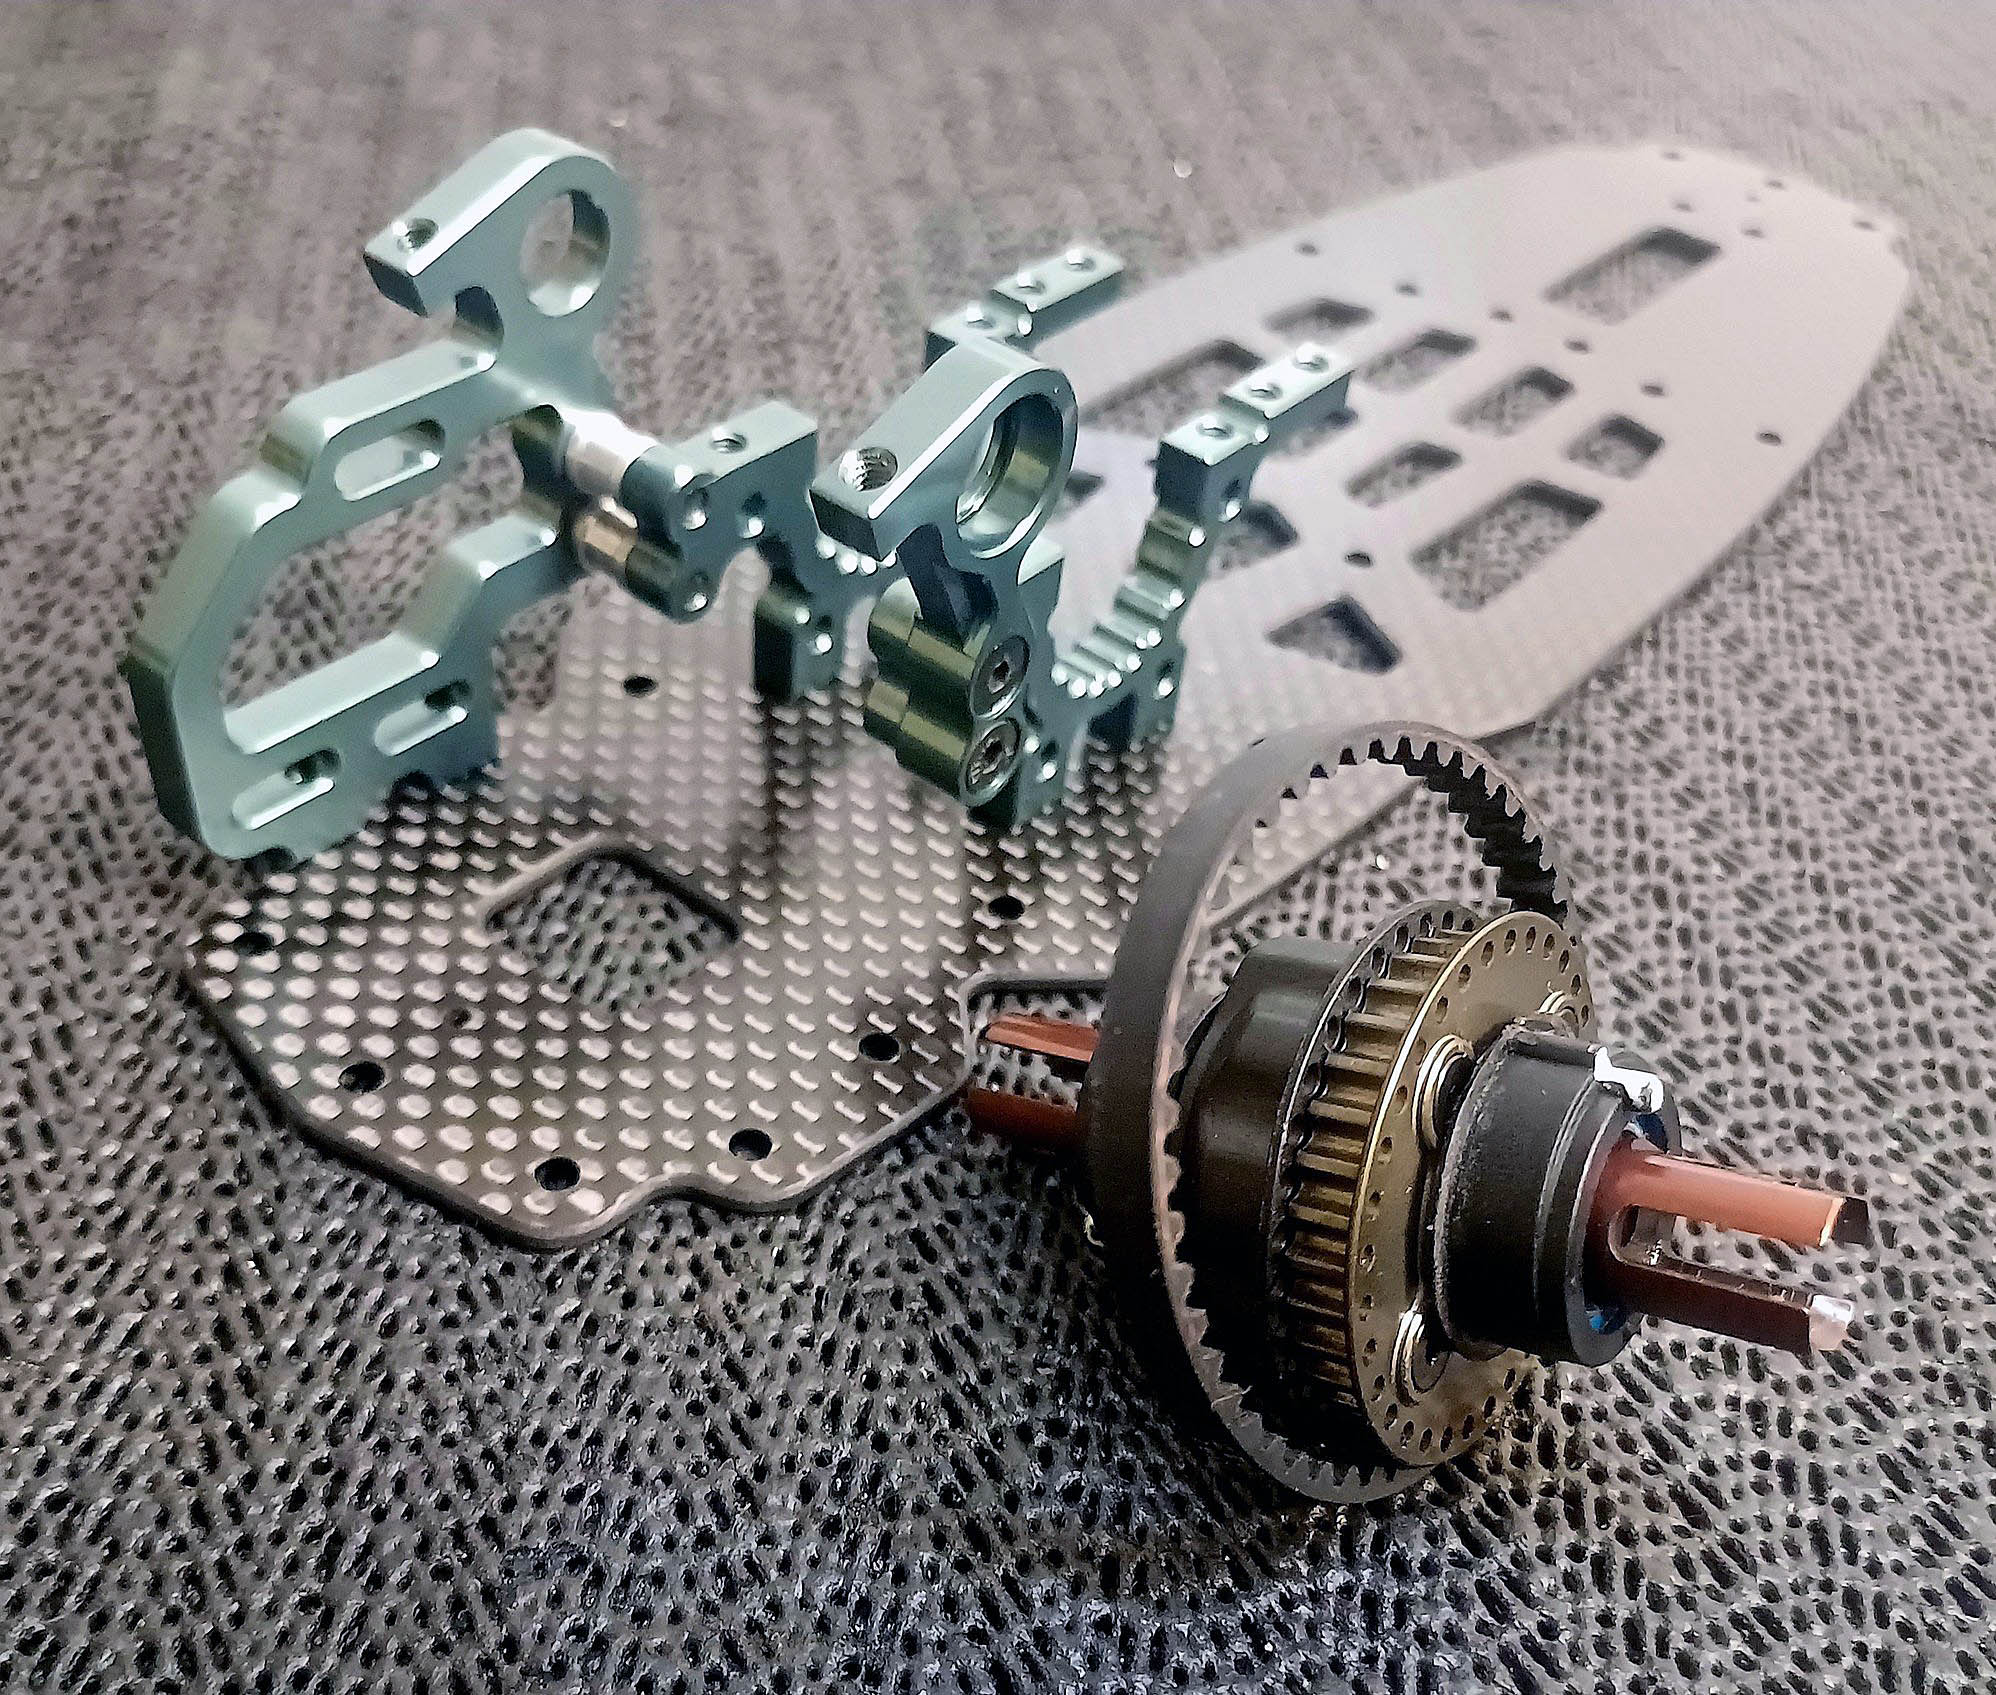
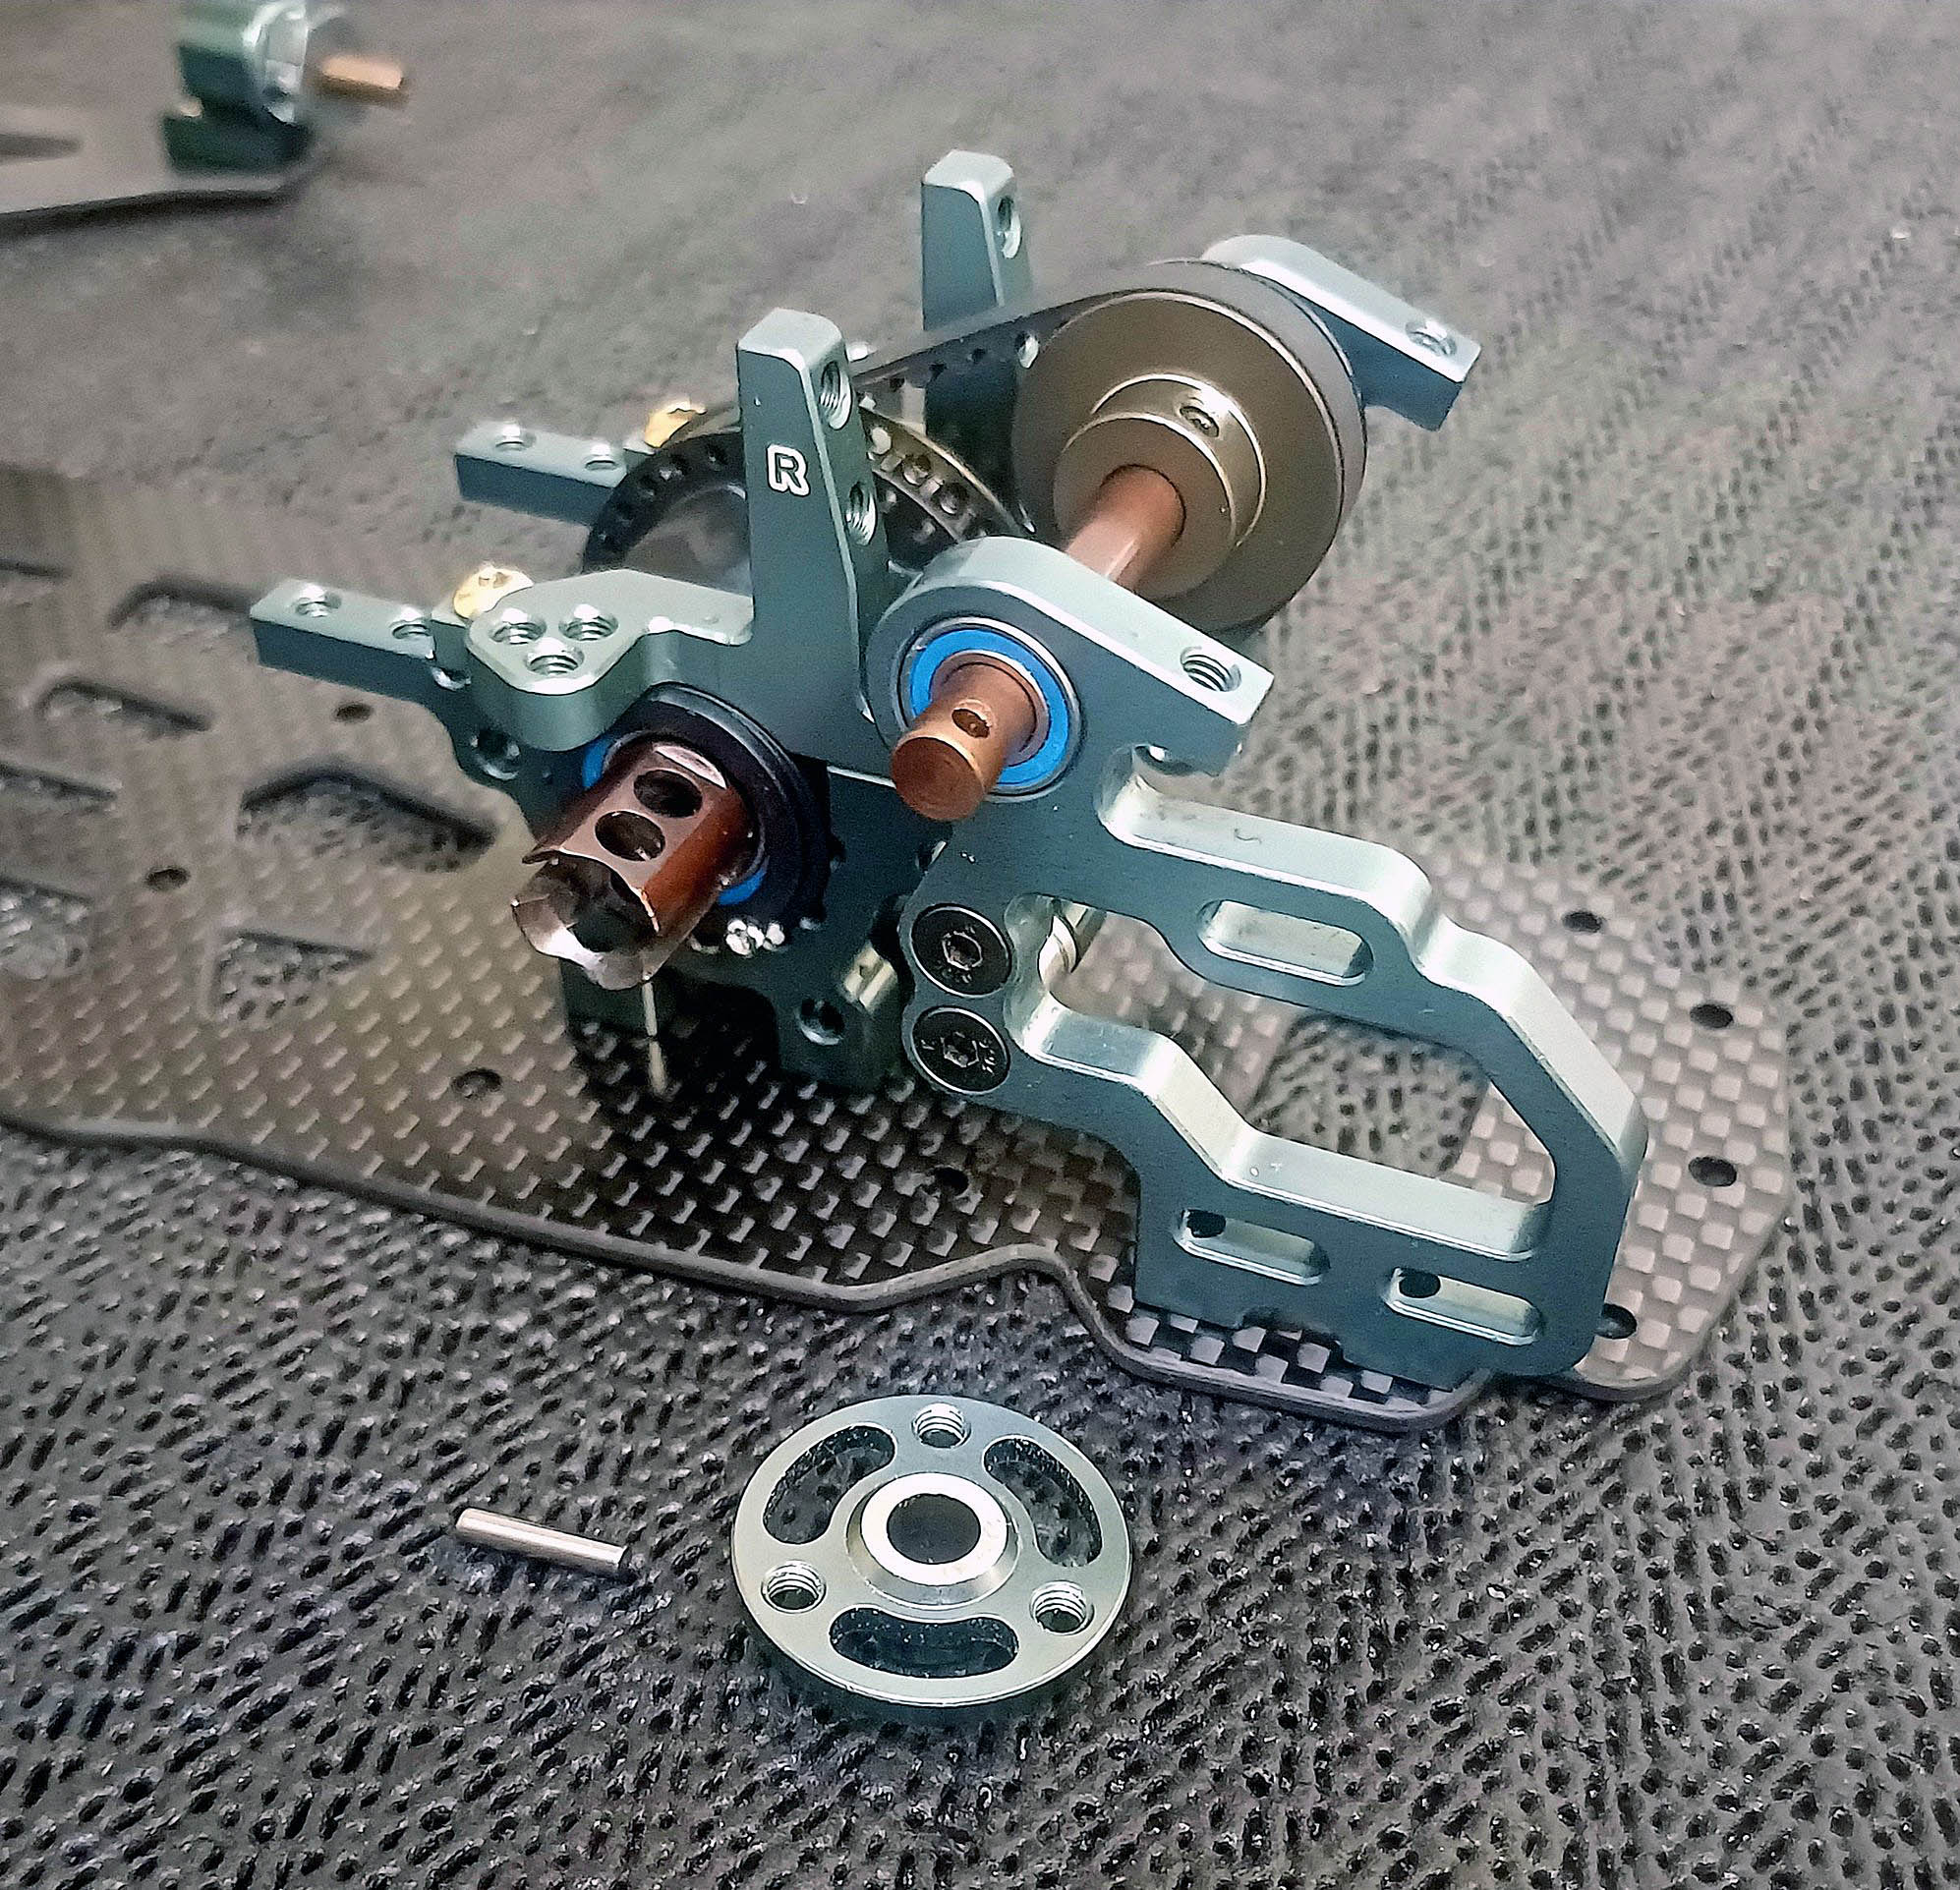
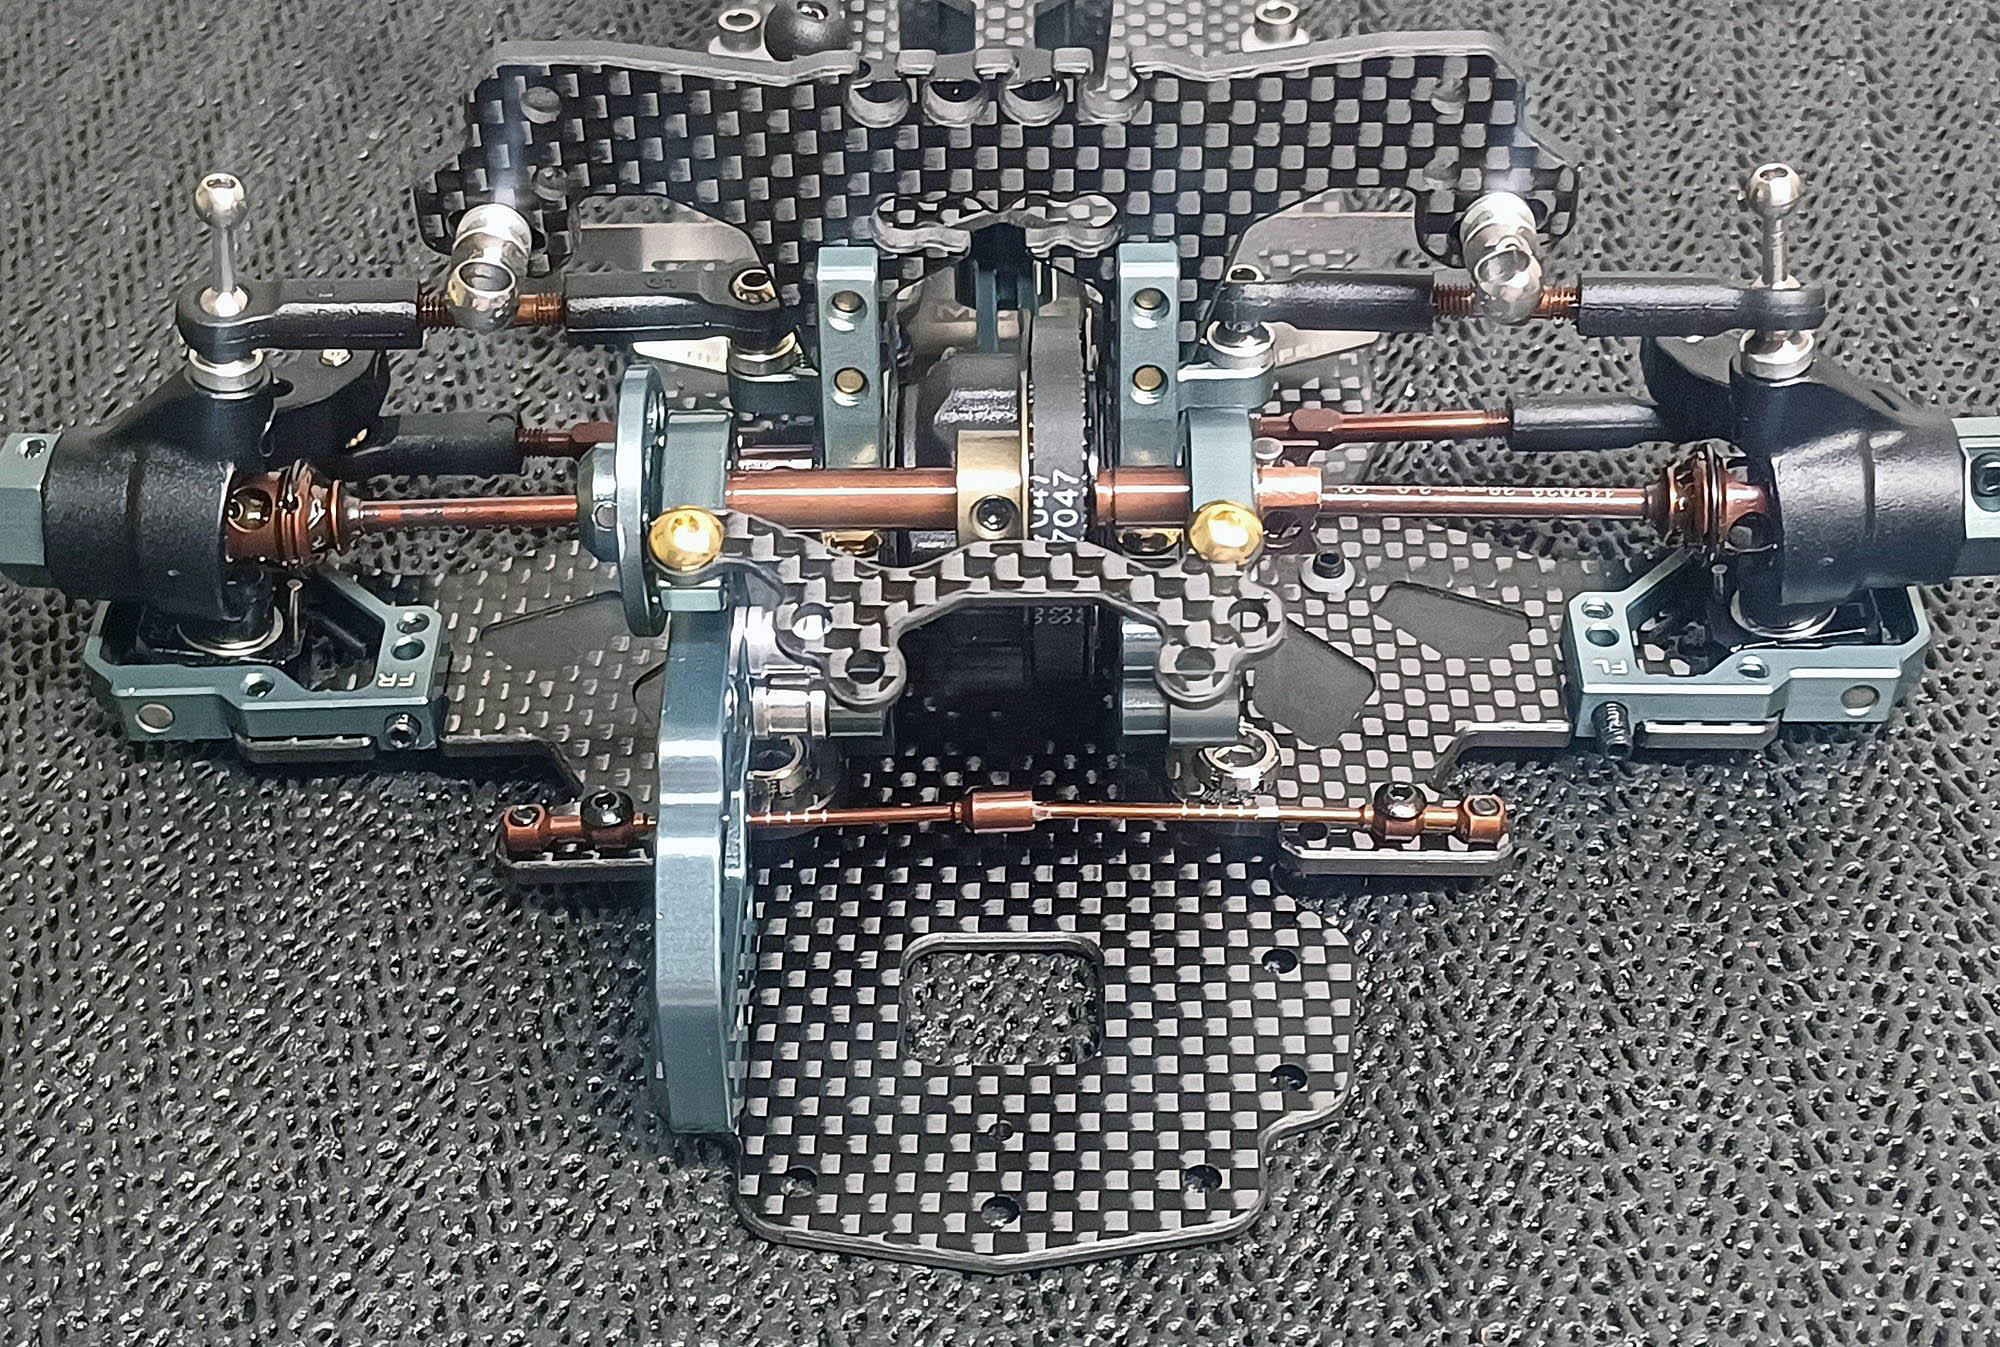
I "tuned" the diff by gently filing the contact faces of the diff casing and bearing cams. This ensures the bearings are fres and smooth and allows the diff to have about 0.1mm of side play. Supplied belt is a quality "Bando" unit.
Ready for layshaft installation.
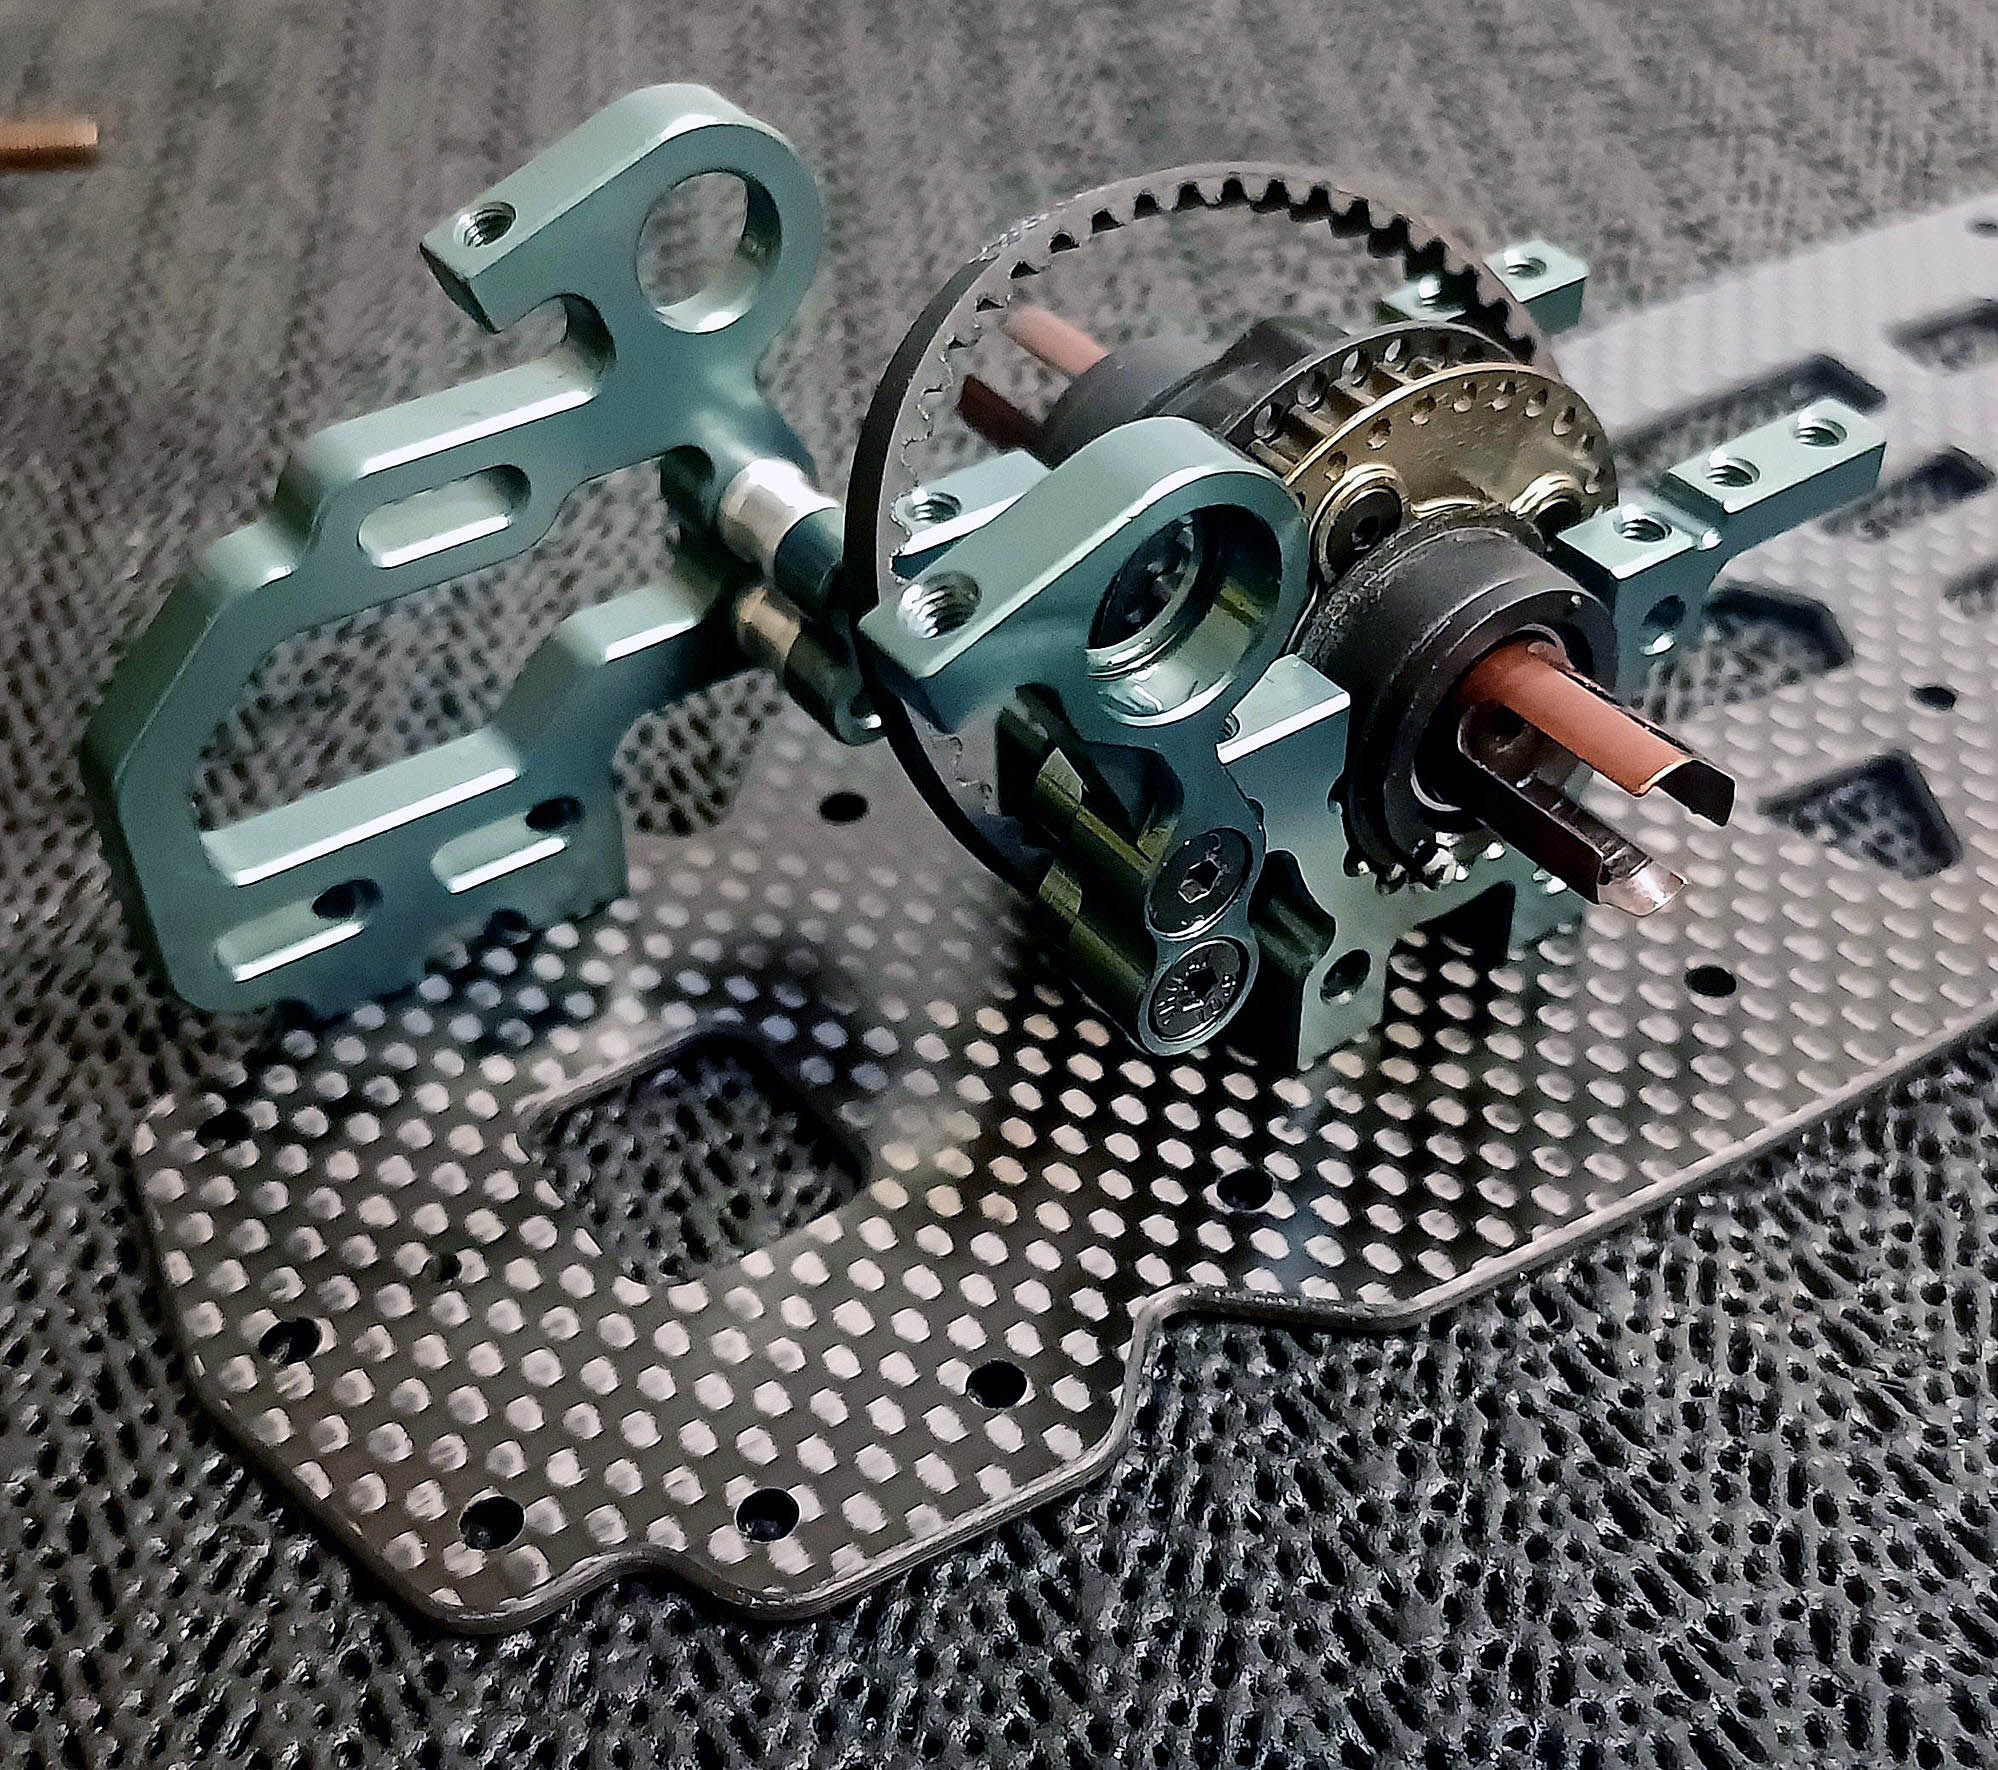
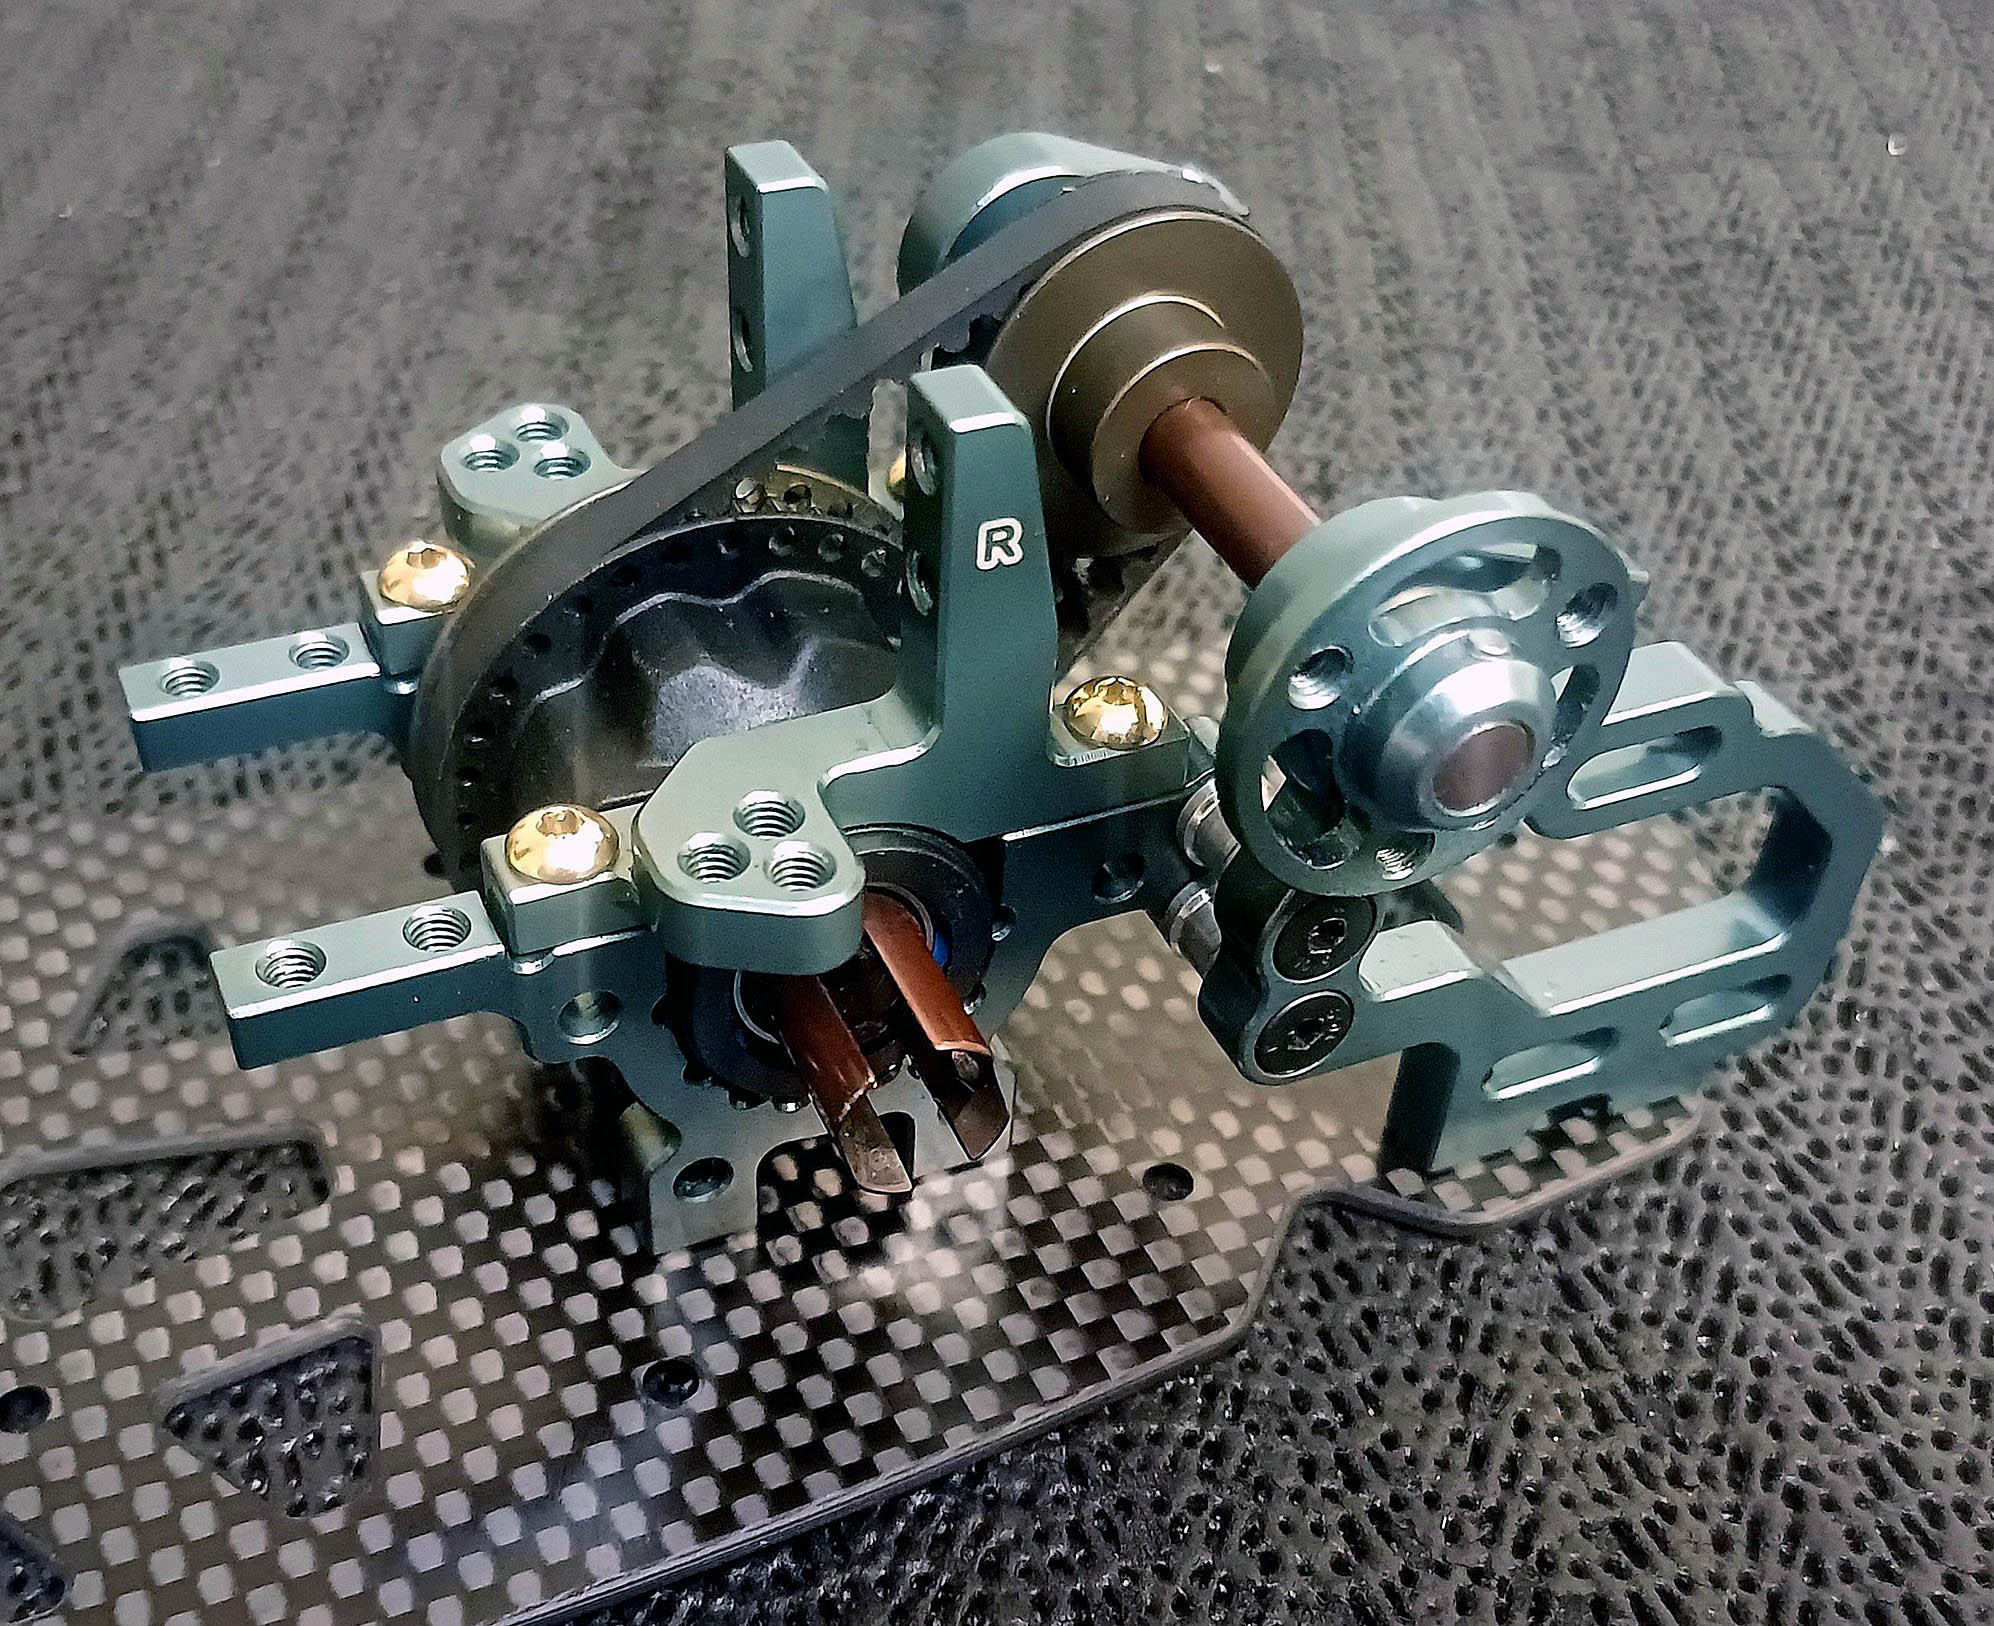
Insert the layshaft through the bulkhead/bearing. Alternatively you can assemble this with the bearing support bulkhead off the car. Use loctite on the grub screw. Pay attention to the slot orientation and pulley belt alignment. If installed offset, there will be reduced smoothness or at worst the belt will slip.
Installed.
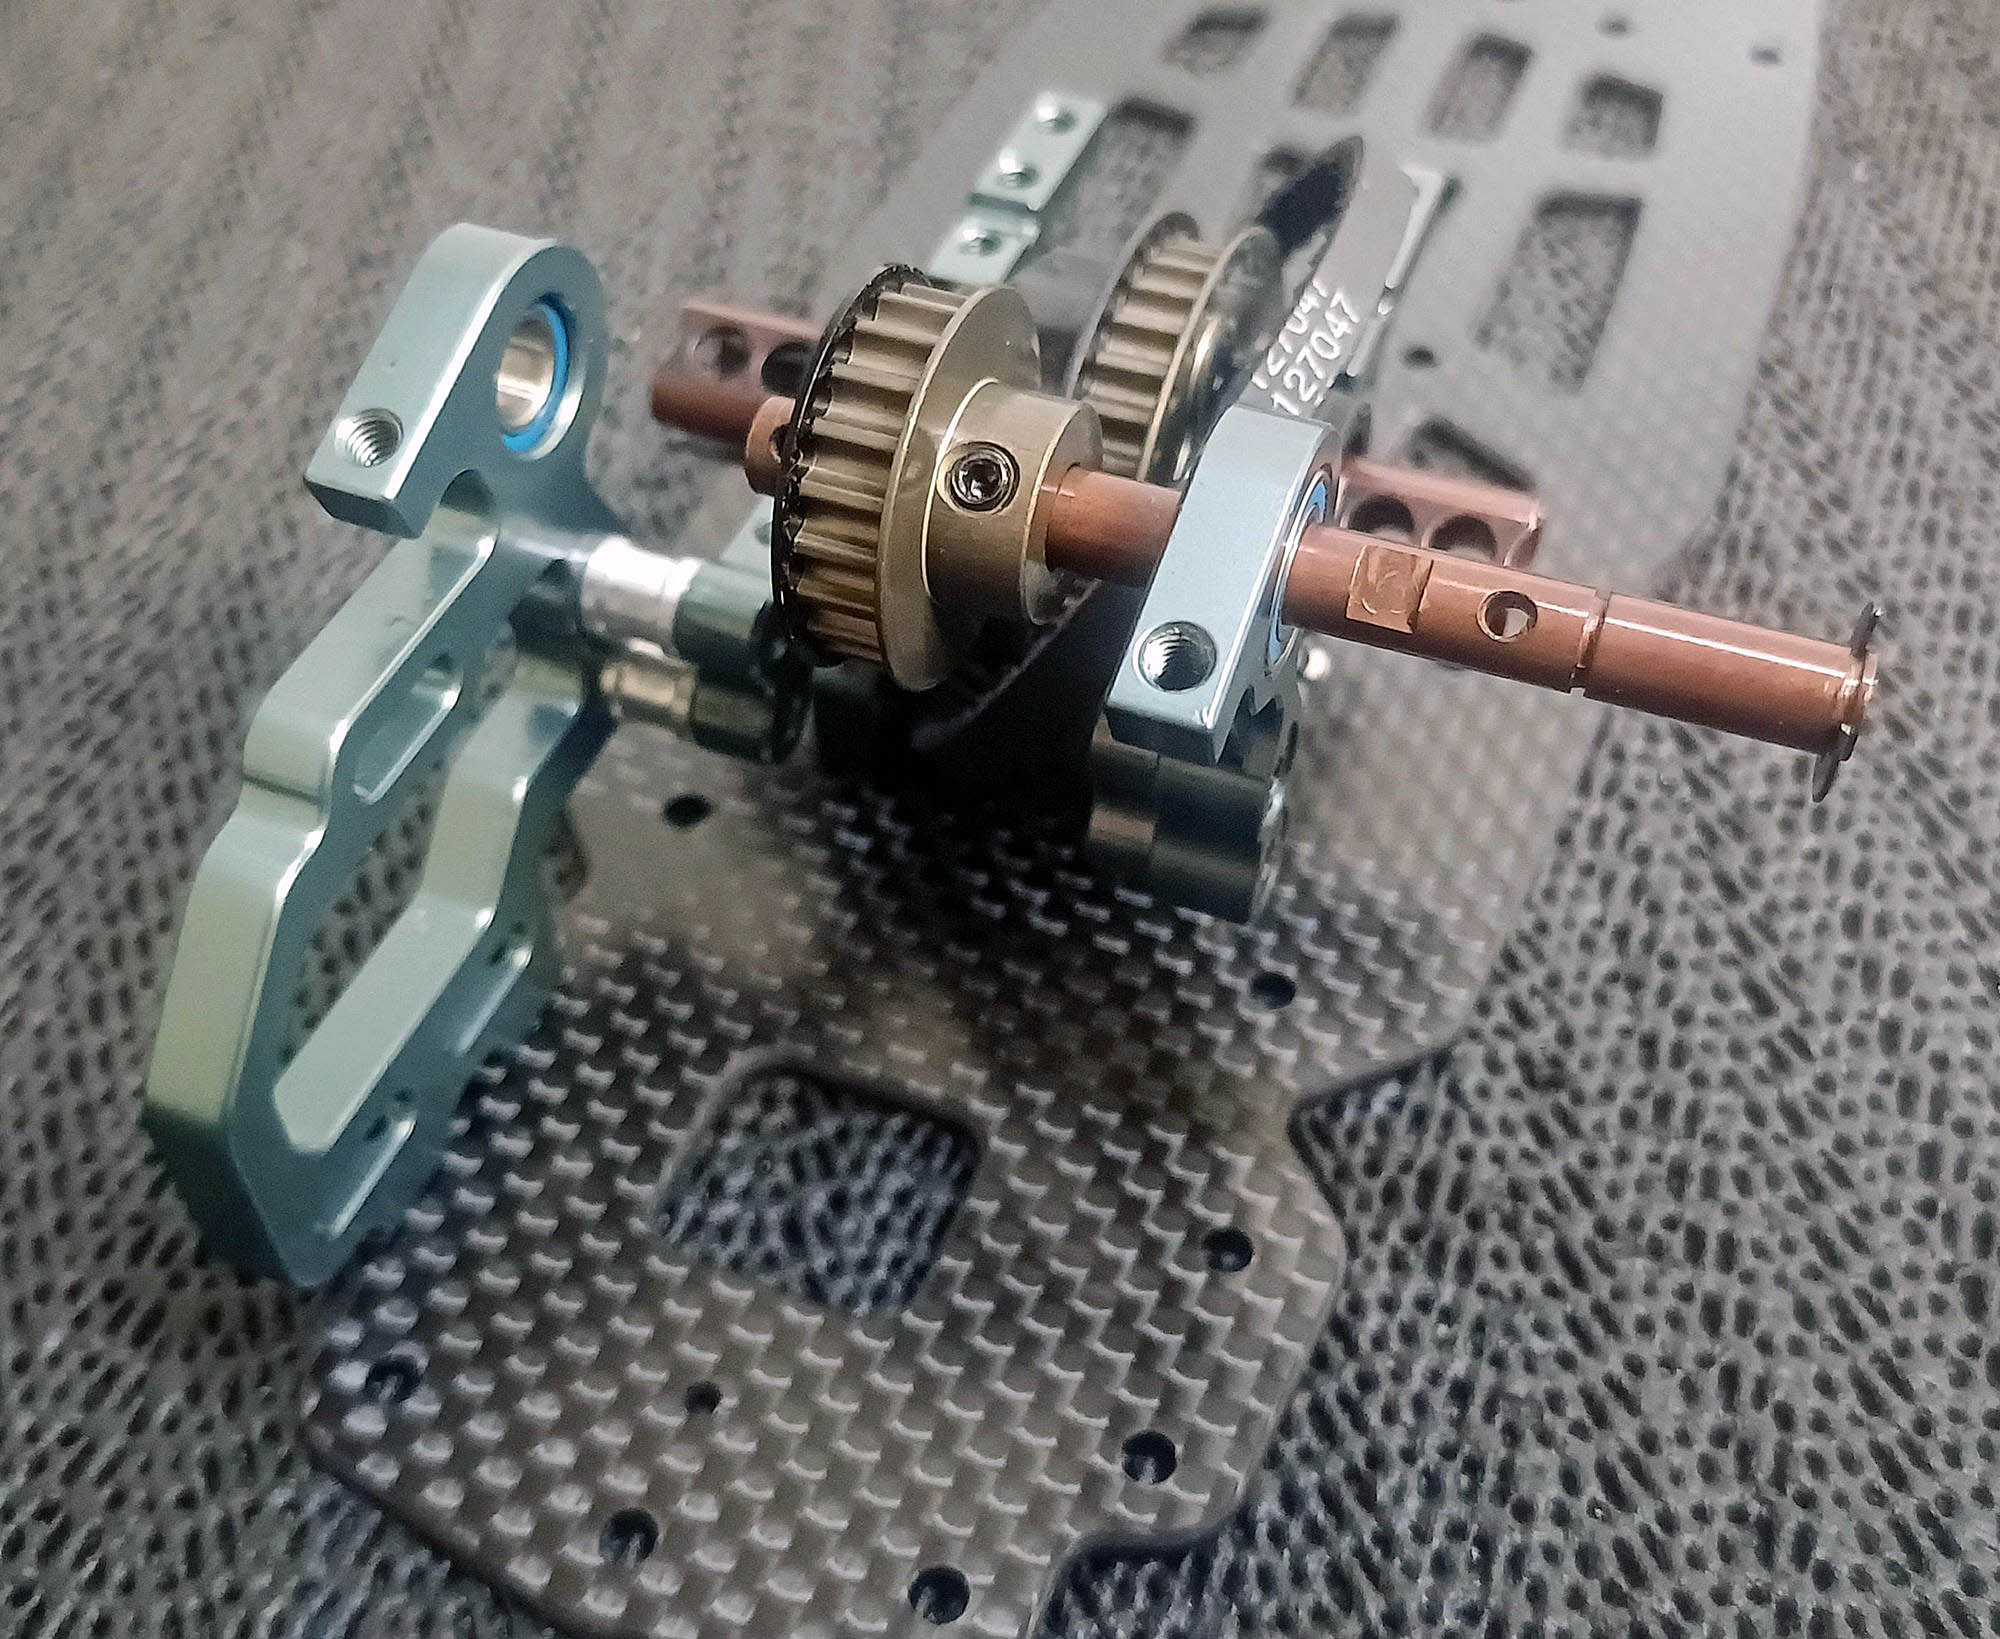
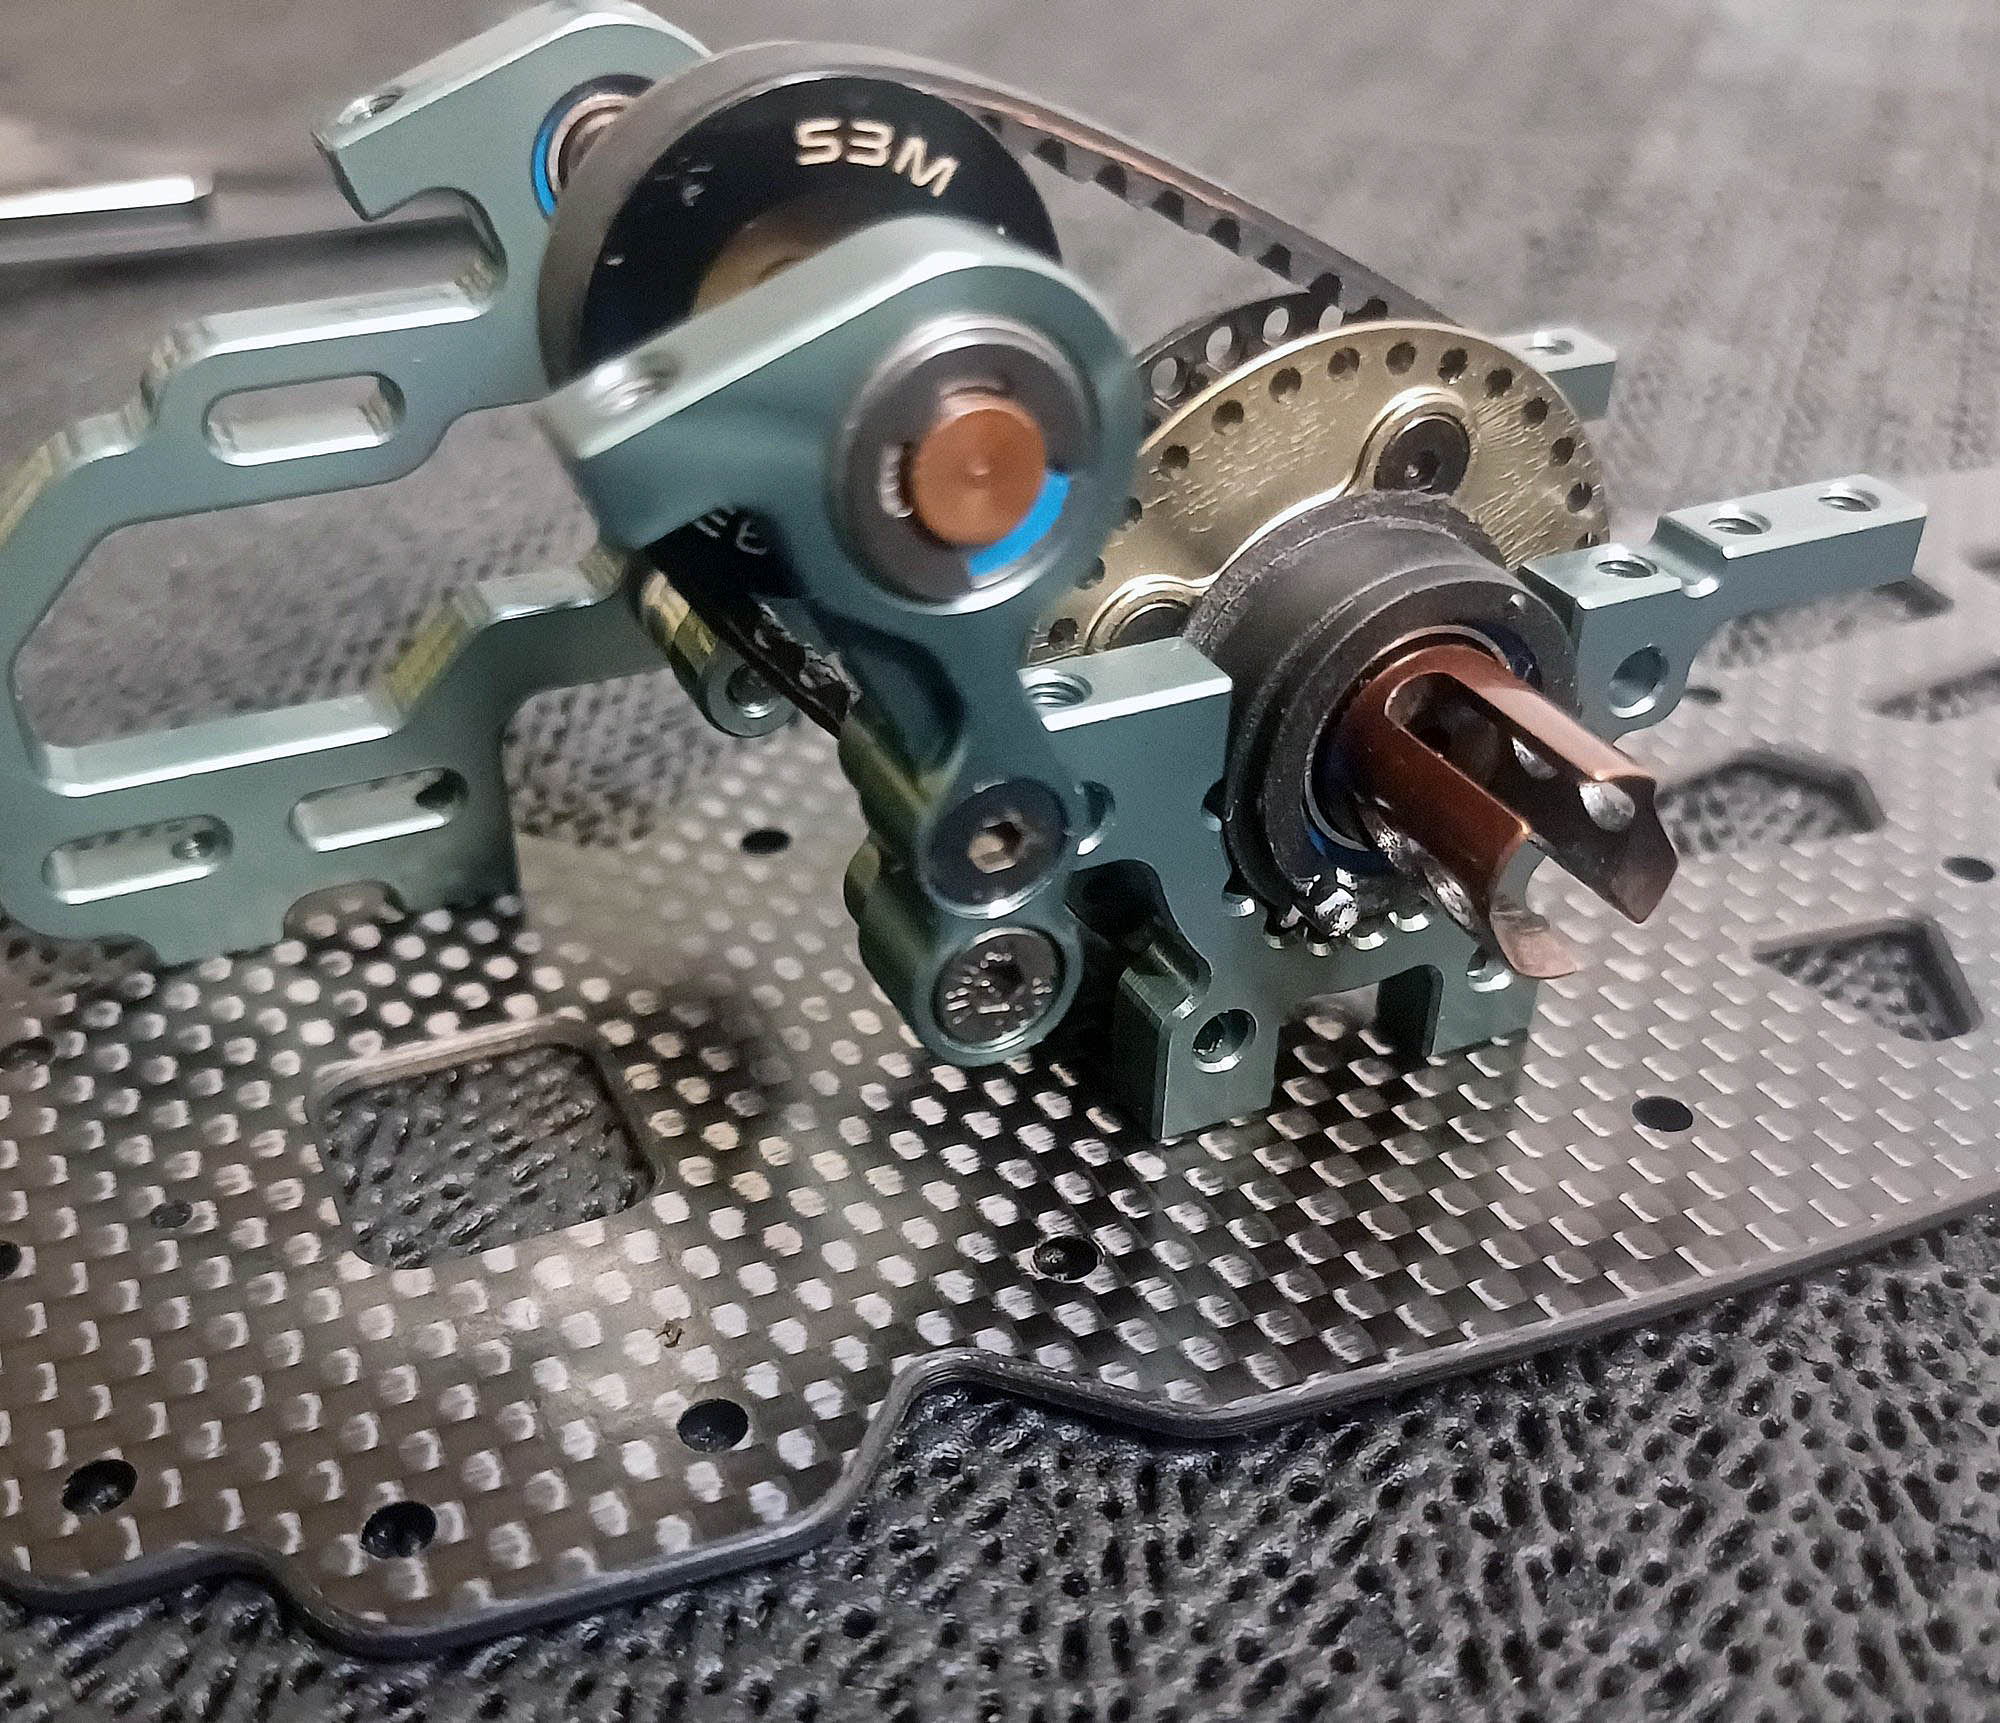
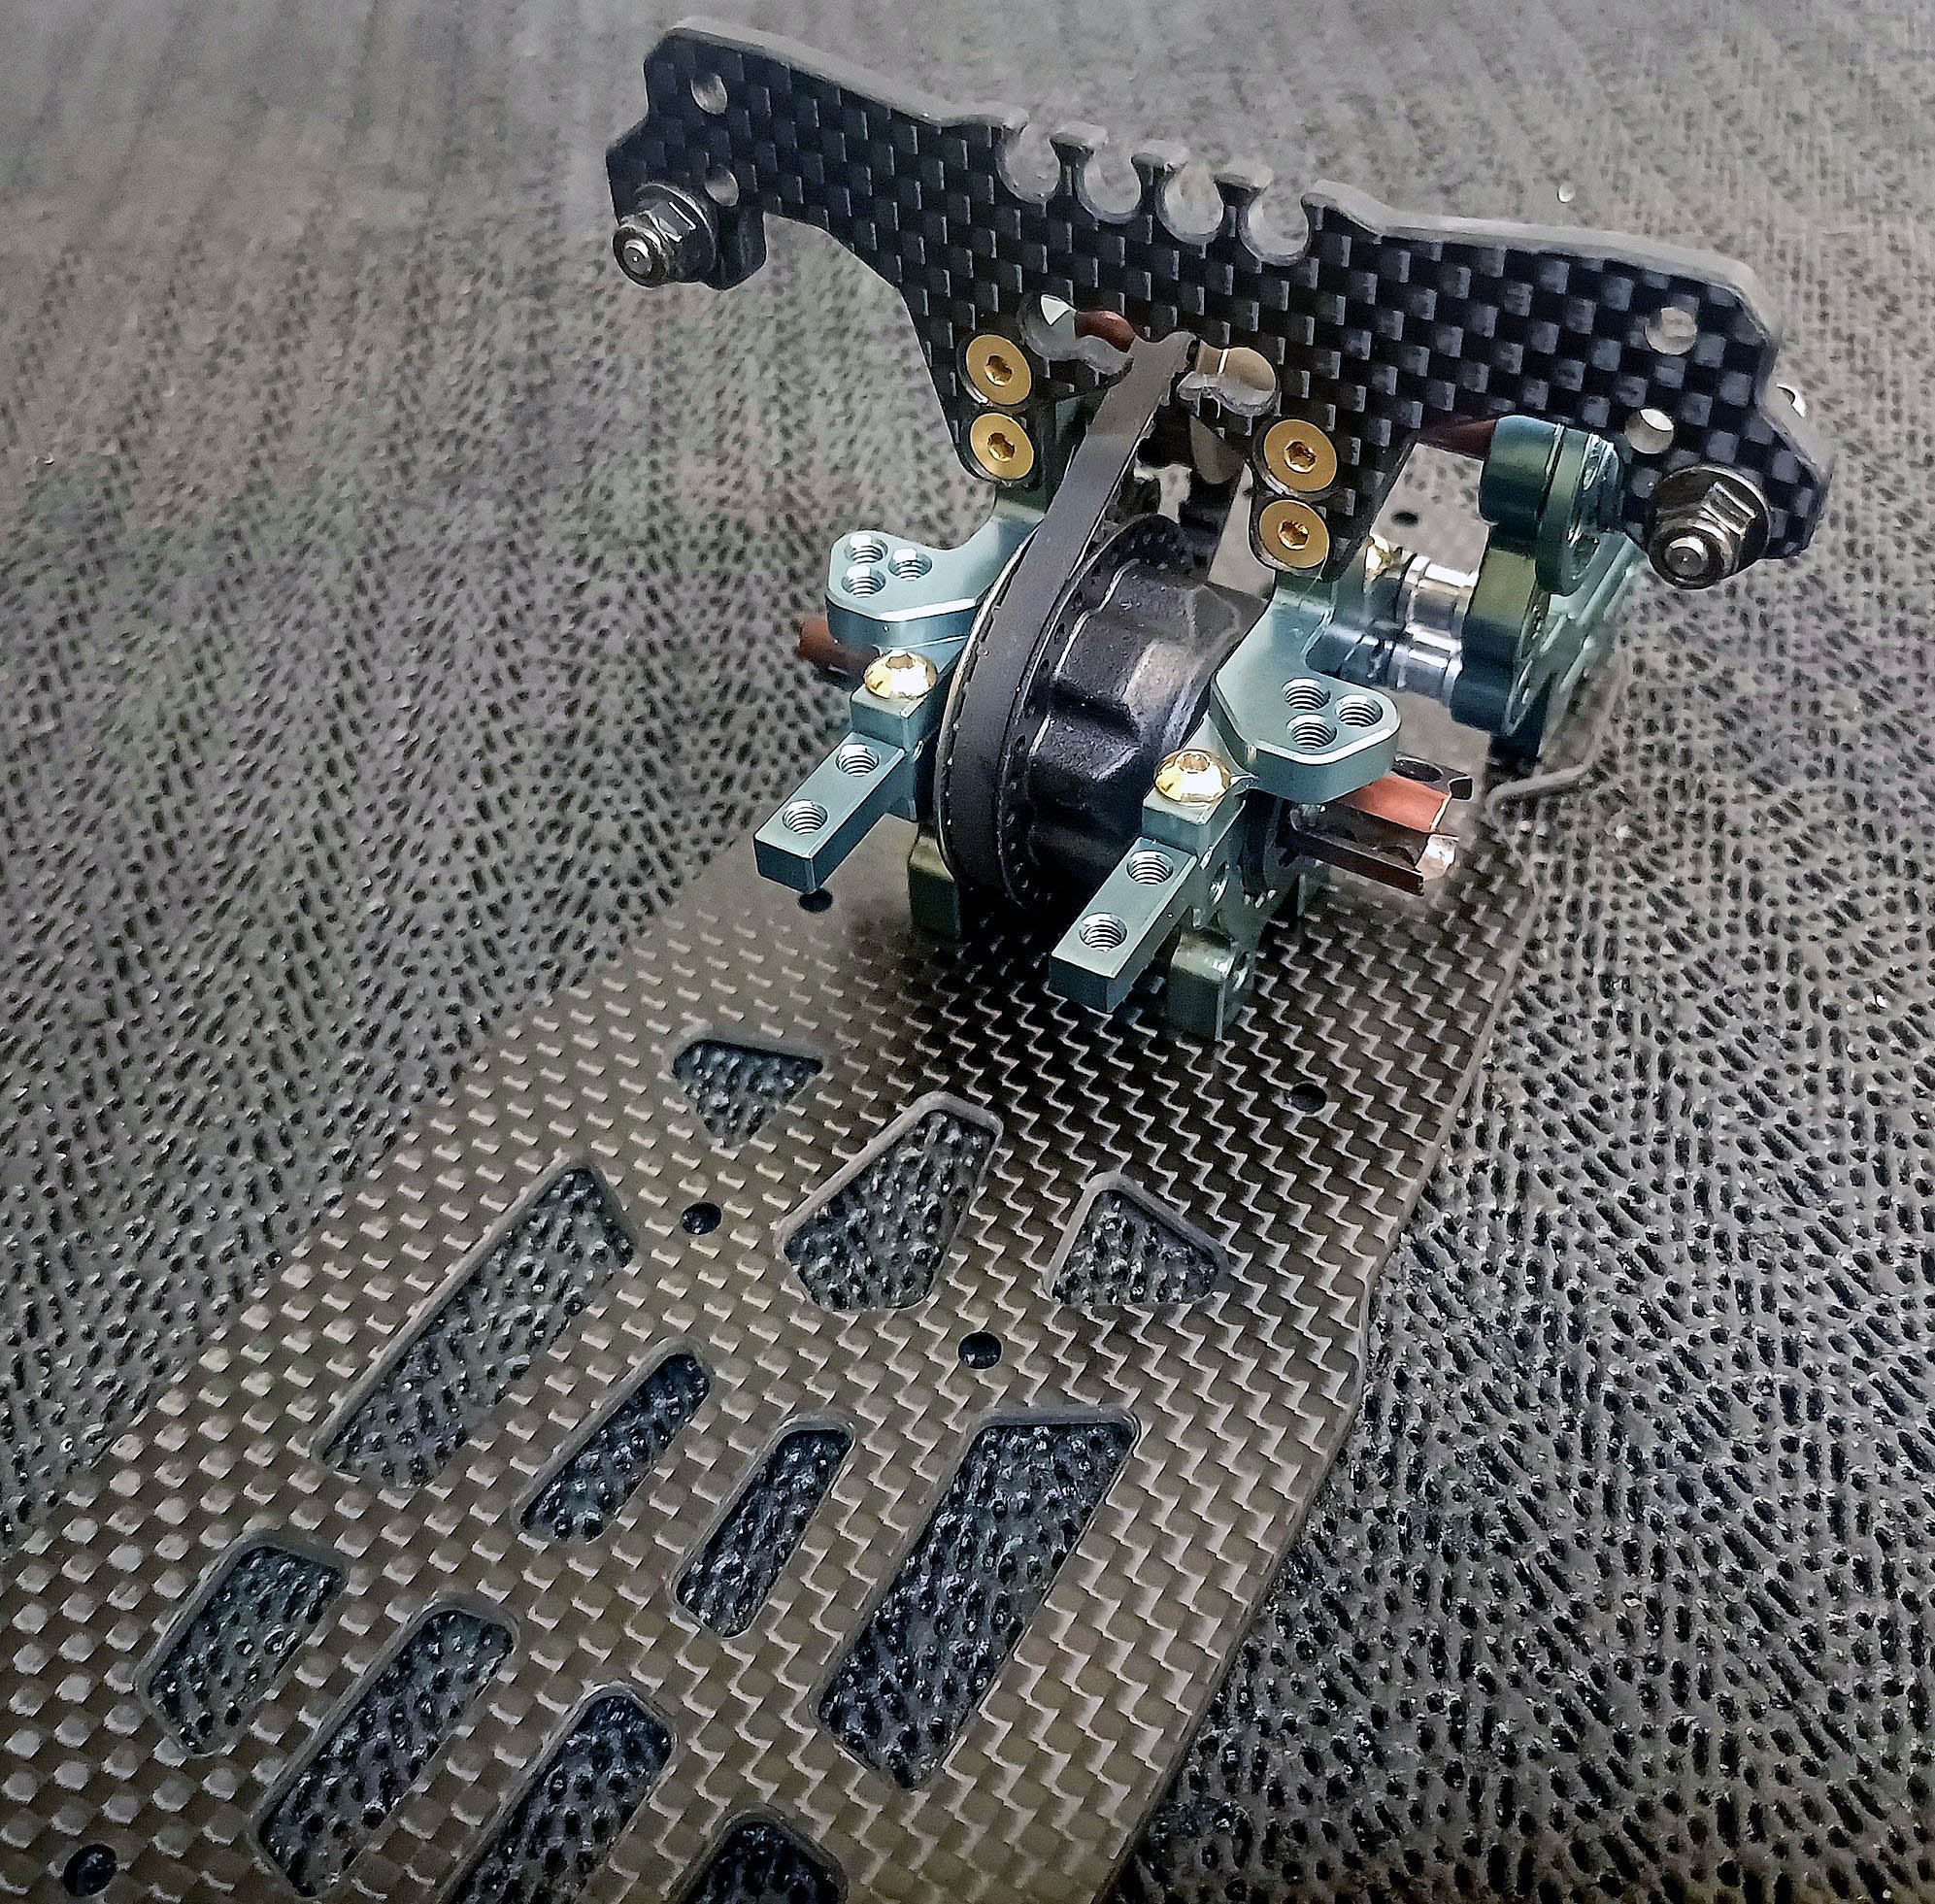
Lightly Sand the anodising on the rear of the spur hub to allow at least 0.05mm side float when assembled. Upper bulkheads fitted. The kit screws are black 10.9 grade steel. I chose to revert to the "gold" screws from previous models. I found a Hiro Seiko gold Aluminium screw kit on special for a discontinued AMX chassis.
Installed ready for the tower. Optional upper clamps from the FFV2 will allow longer upper camber links.
Tower installed. If switching to Linear shocks, you could purchase an additional tower and 5.8mm balls to enable quicker switches between the RAS.

Detail of the arm ball system and 2.5mm carbon arms. Polished chrome steel 5.8mm balls, Polished steel lower cup and Aluminium upper retainer adjustment top cup.
. Here I have displayed 2 of the upper retsiners top and bottom view showing the radius contact face. I've personally used joint grease to lubricate mine. Common sense required here, unless you are driving on a very dirty/sandy track these wont need excessive maintencance. Just avoid driving through sand traps.

Cont.....As the balls are inserted through the top, this allows maximum lower contact area for smoothest operation.
This is something that many other plastic ball/cup systems cannnot achieve as the ball can actually pop oit of ths opening and is contantly under pressure in this area. - This image....Simple outer arm bracket installed. Roll centre changes can be made woth 9mm dia. washers or optional stainless steel 0.5mm flex braces.
2 4 and 6 degree caster blocks are available. The Compoiste hubs feature 8 degrees KPI for increased steering response. This system was first introduced with the FFV3 in 2017. The Kiing pin screw has now been upgraded from .2.5mm to 3mm.
. Check kngpin bearings after large collisions as the press fit can loosen. If so, either score the caster block withh a file or carefully loctite in place.
Hub and caster block fitted
Right side ready to be iinstalled.
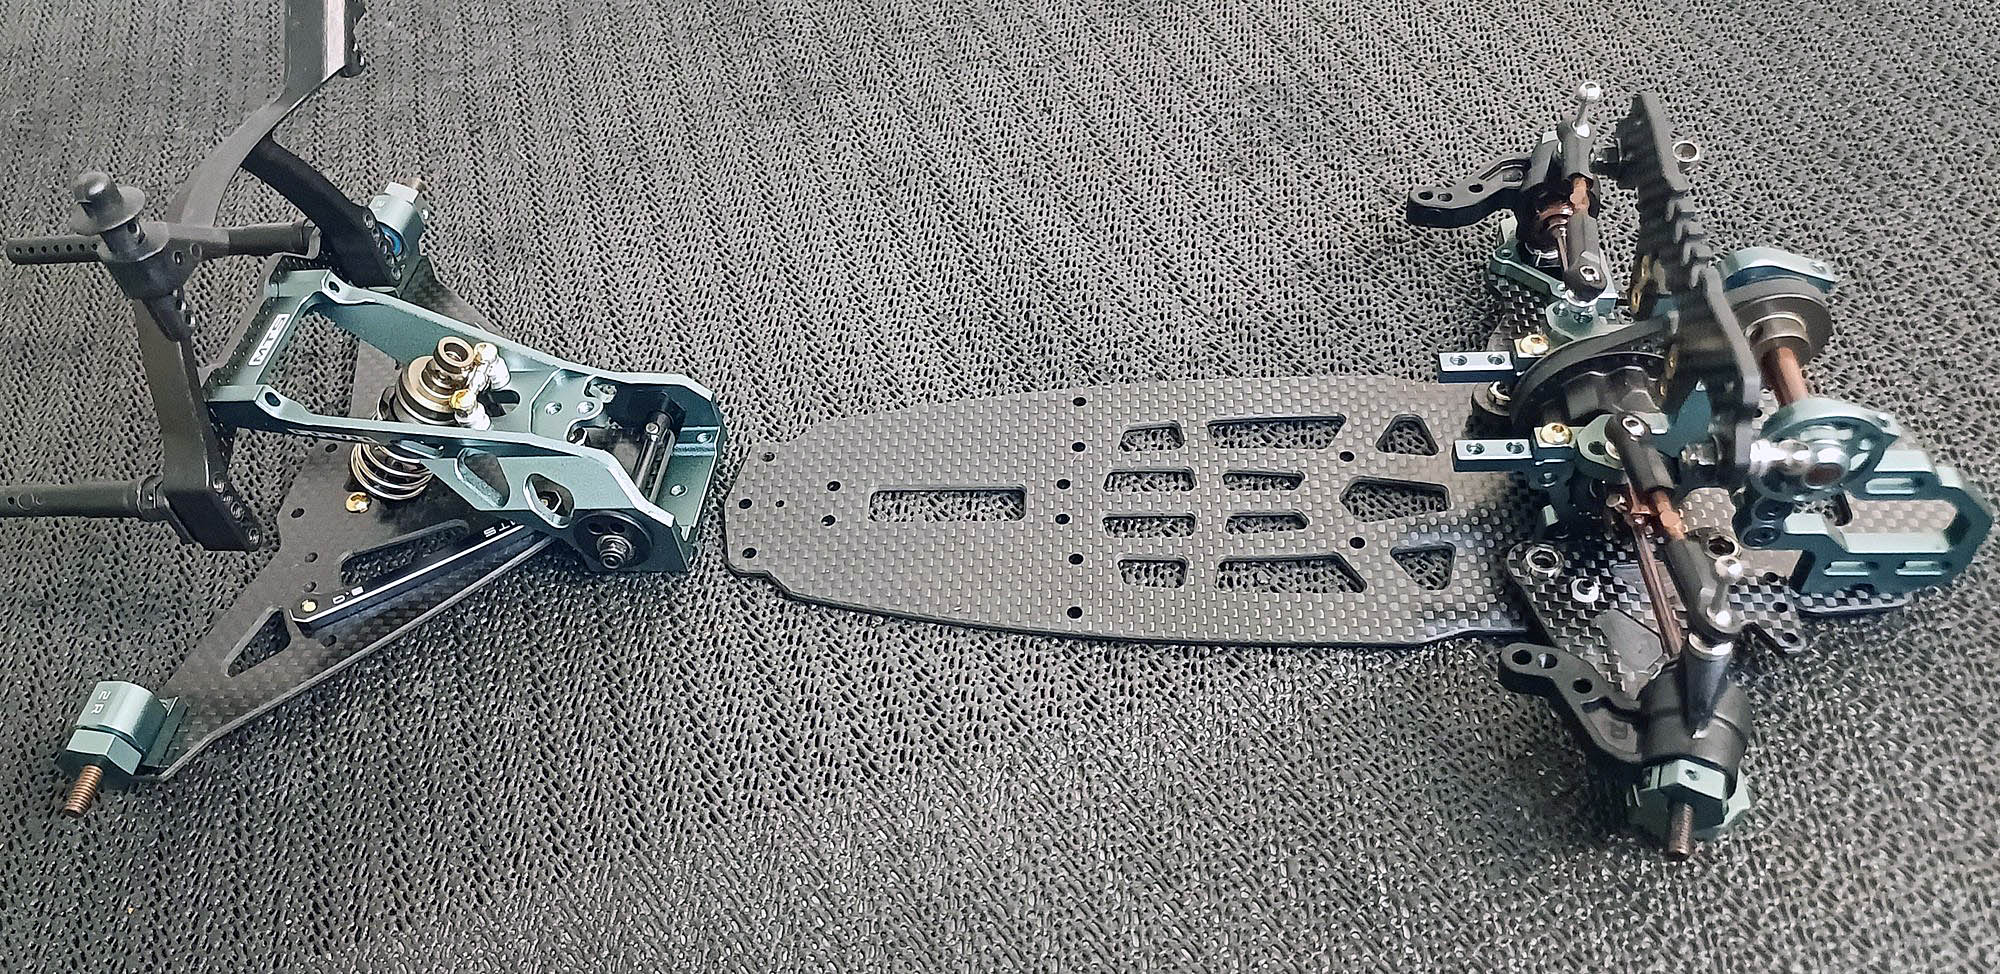
Front suspension installed . Rear assembly is attached by 3 upper and 2 lower screws. DCJ dont specifically ever require disassembly, they can be thoroughly rinsed in a bag with a small amount of solvent, blown dry and lubed with tacky joint. The steel outdrives and 3mm driven outdrive pins very robust and efficient. There is less play than a plastic outdrive and BB system. With correct cleaning and maintenance, the driveshafts and outdrives will remain fresh for a lvery ong time. I add 1 drop of tacky joint lube to each drive pin prior to every race meet.
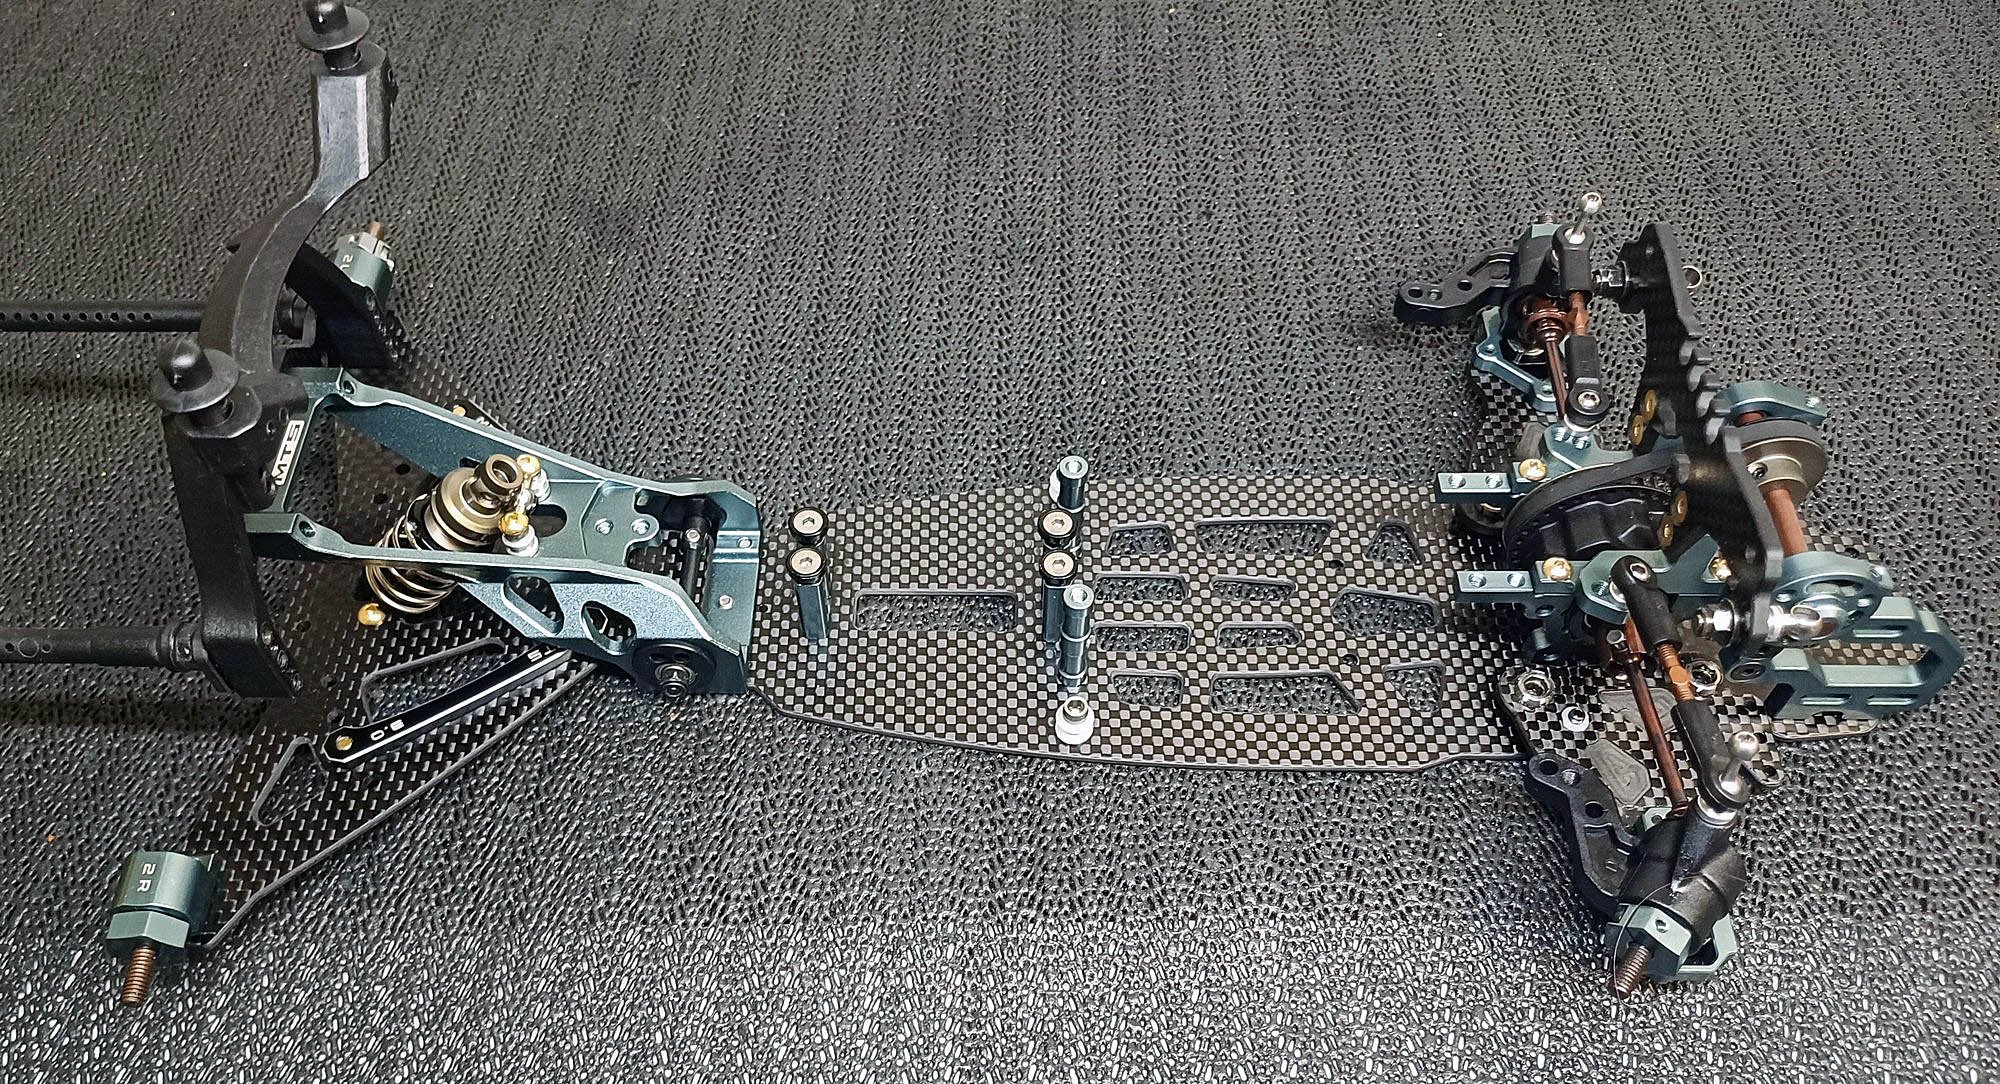
Rear assembly, centre posts and servo mounts installed.
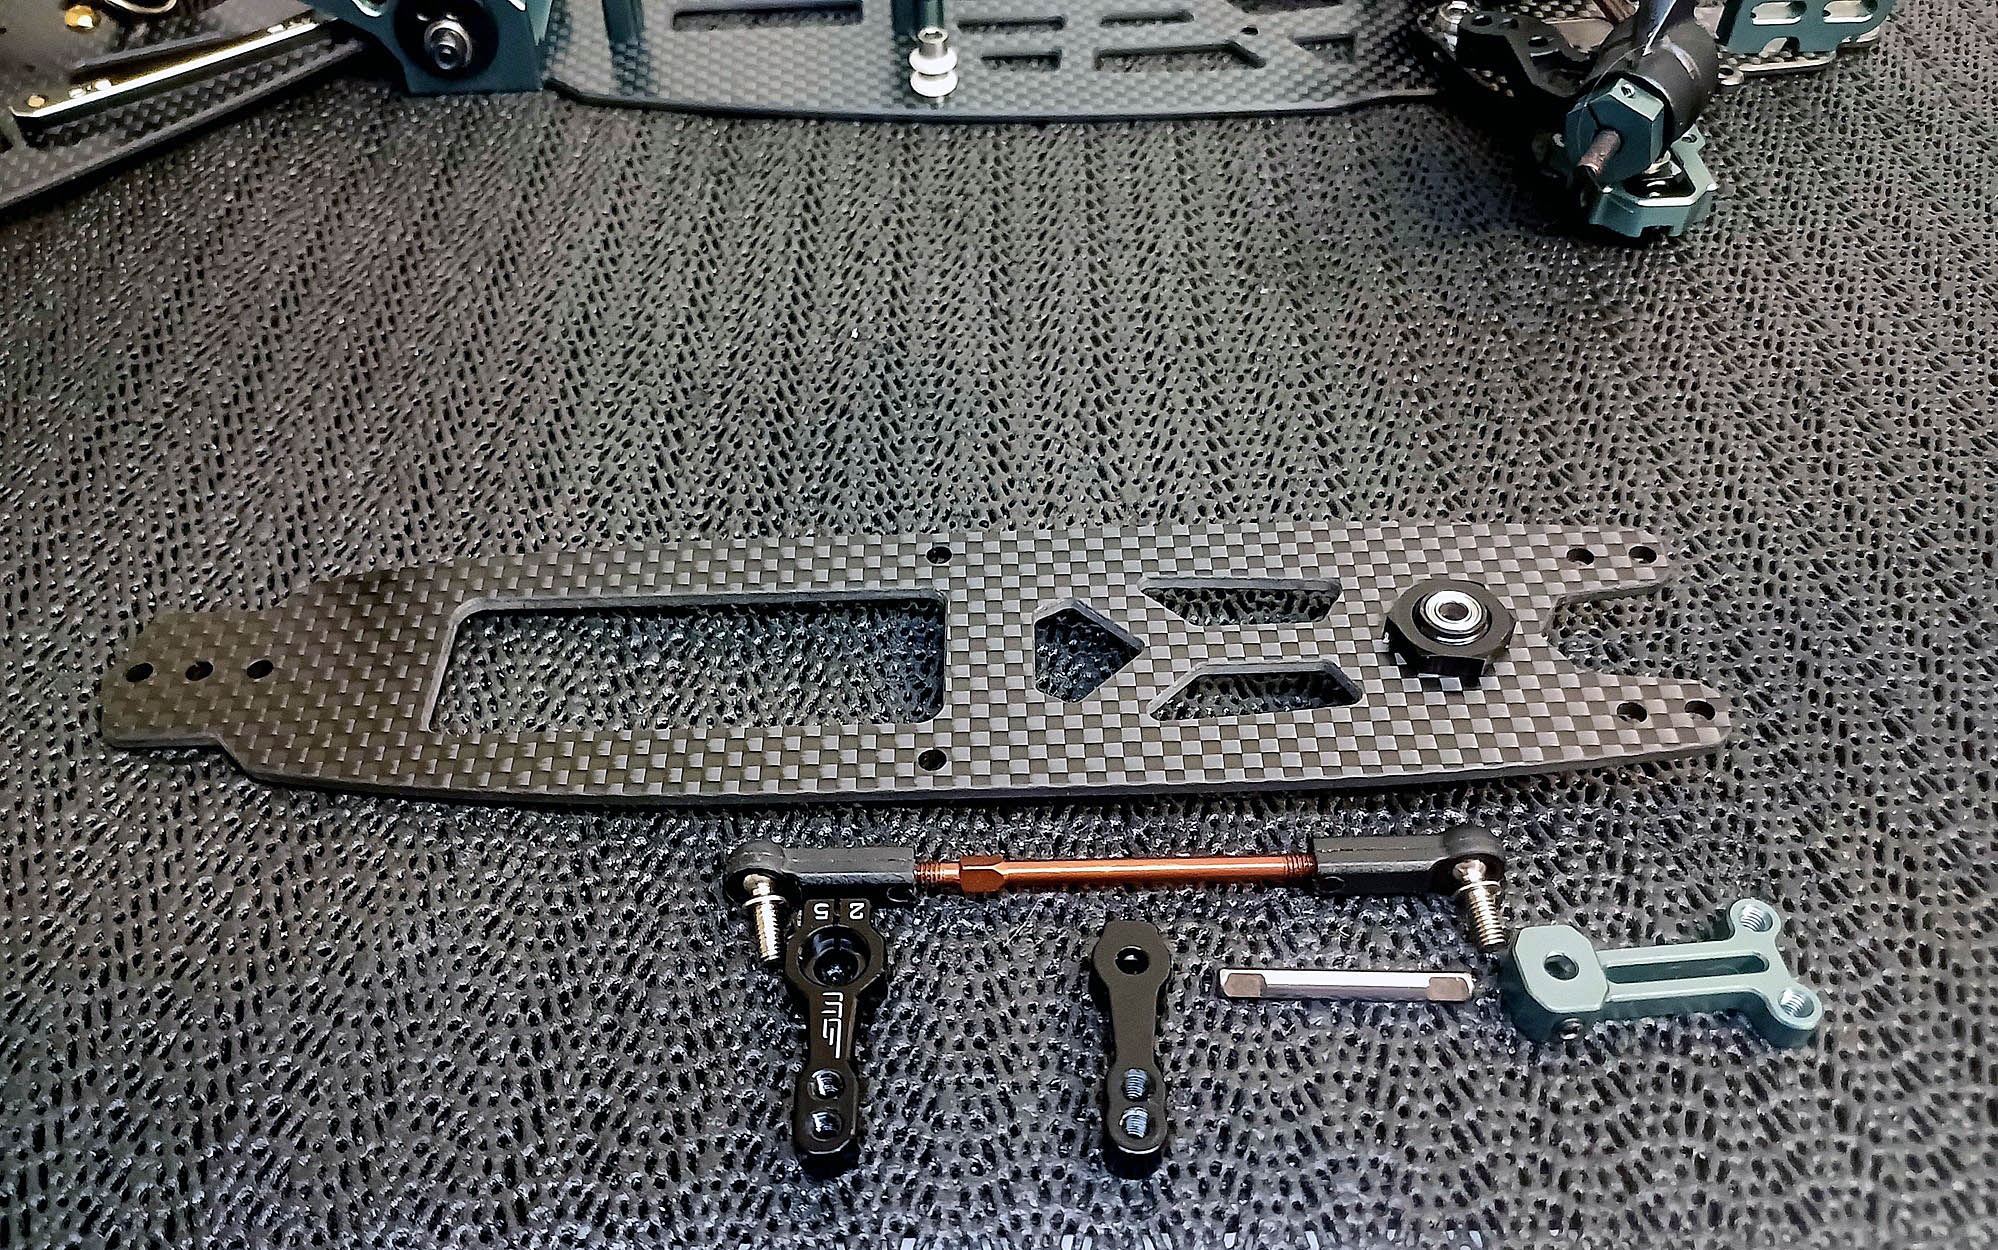
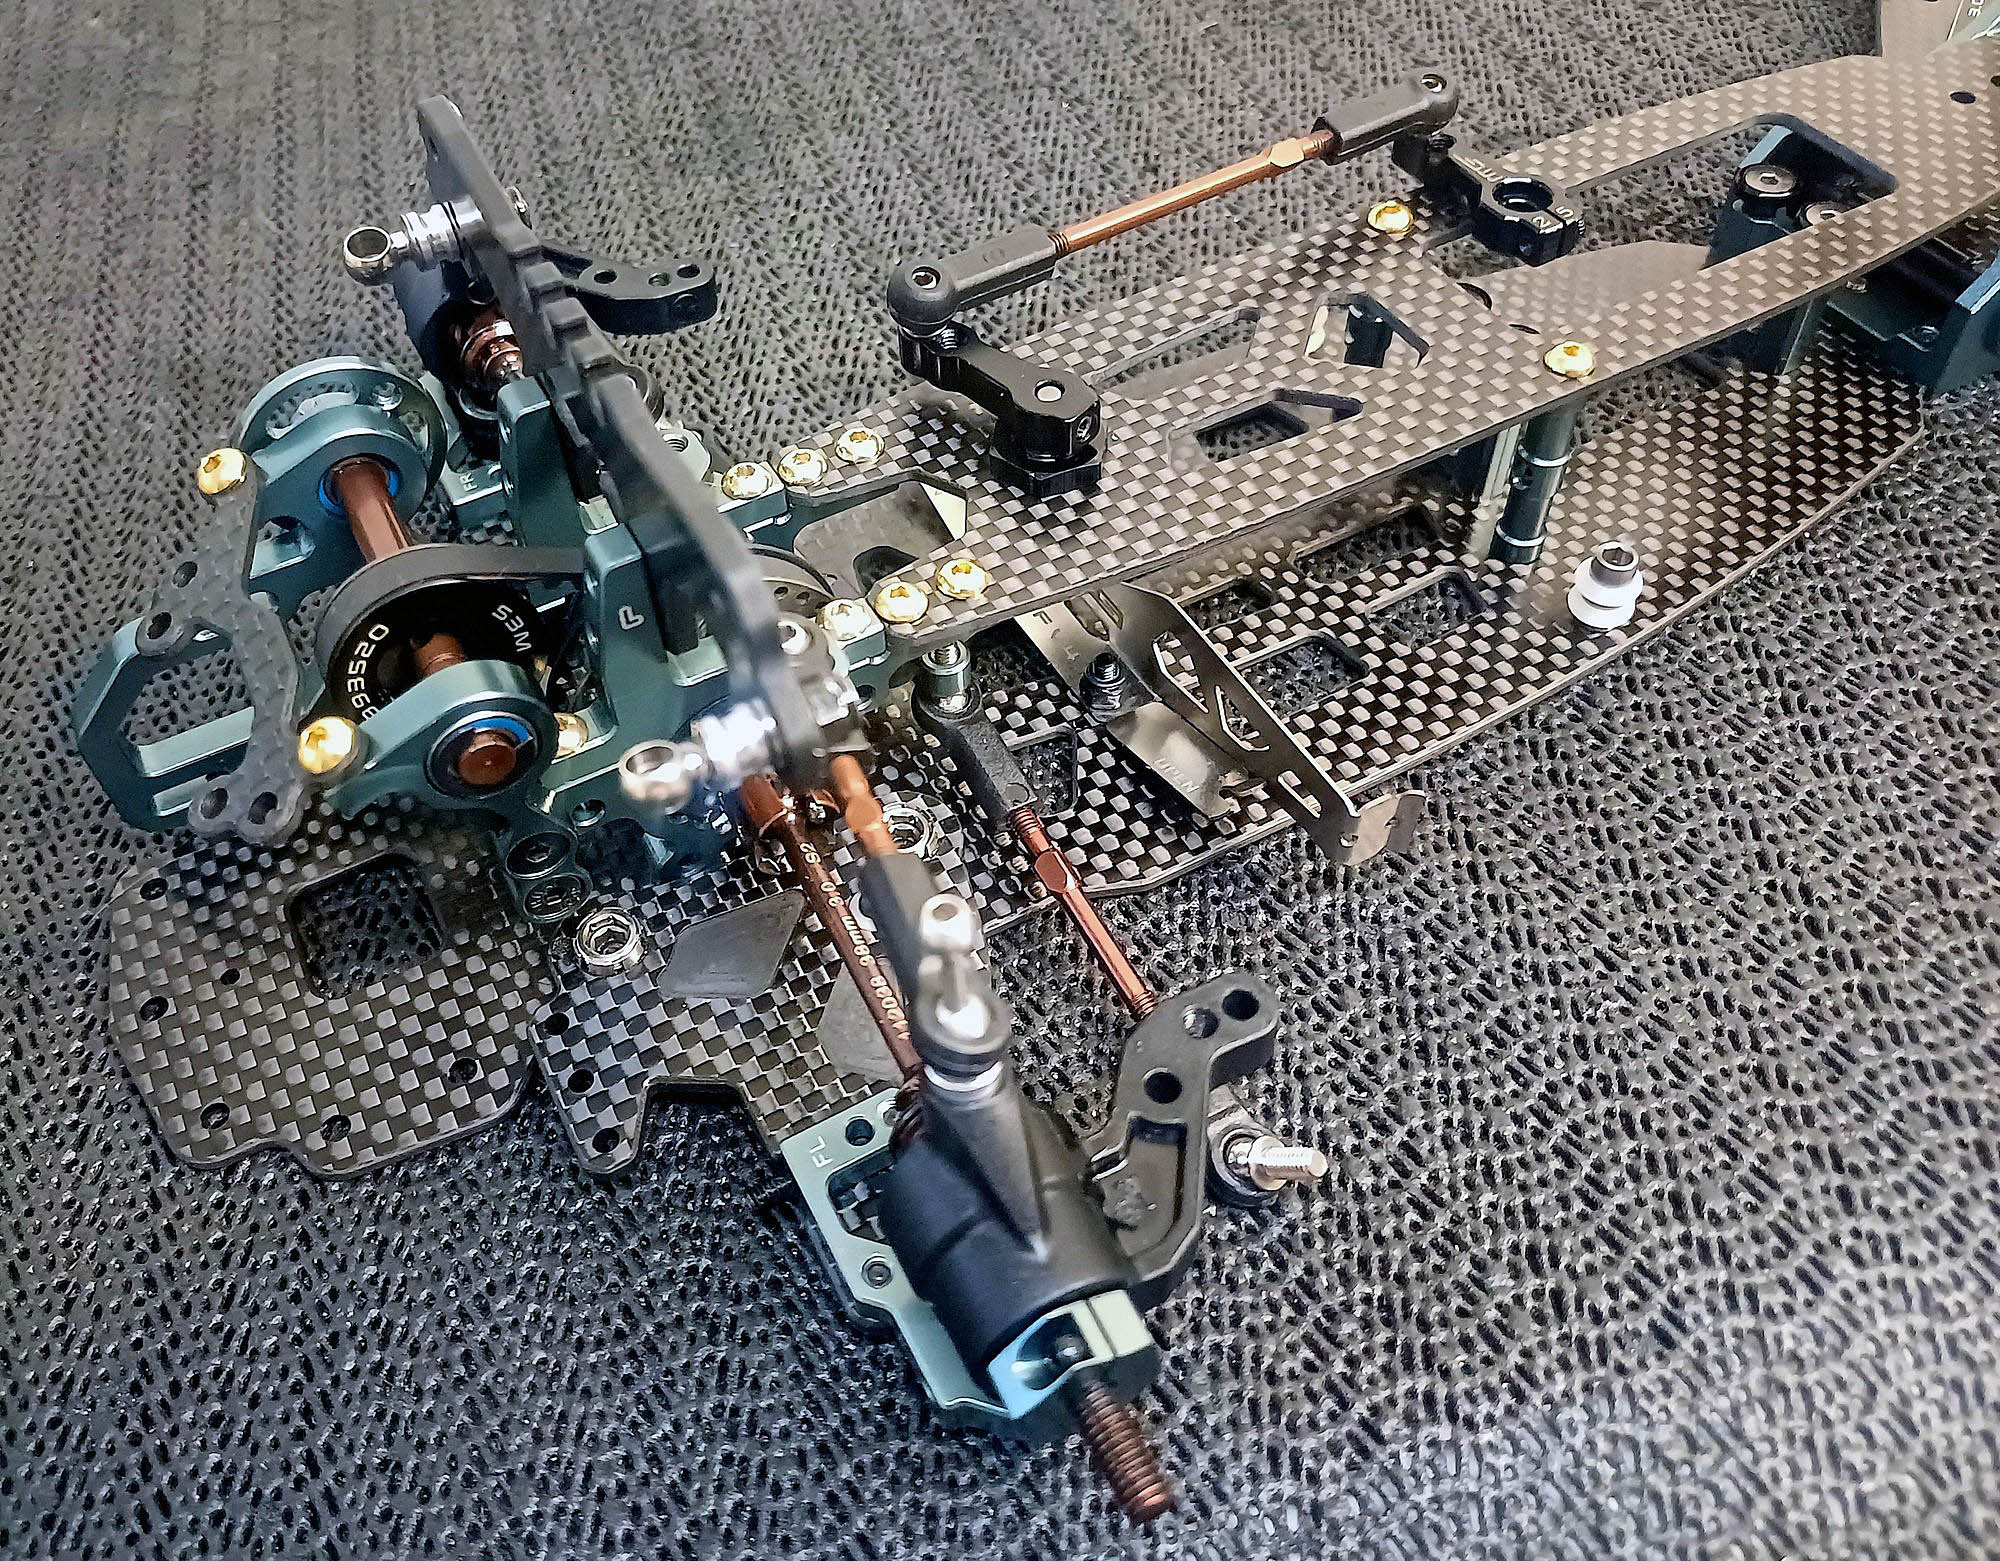
Upper deck and single bellcrank steering assembly is nice and simple. Very accessible. The upper horms and bearing mount are CNC black aluminium. Considerable flex adjustment is possible.
Upper deck fully assembled. The 4.9mm balls are quality 4.9mm polished chrome plated steel
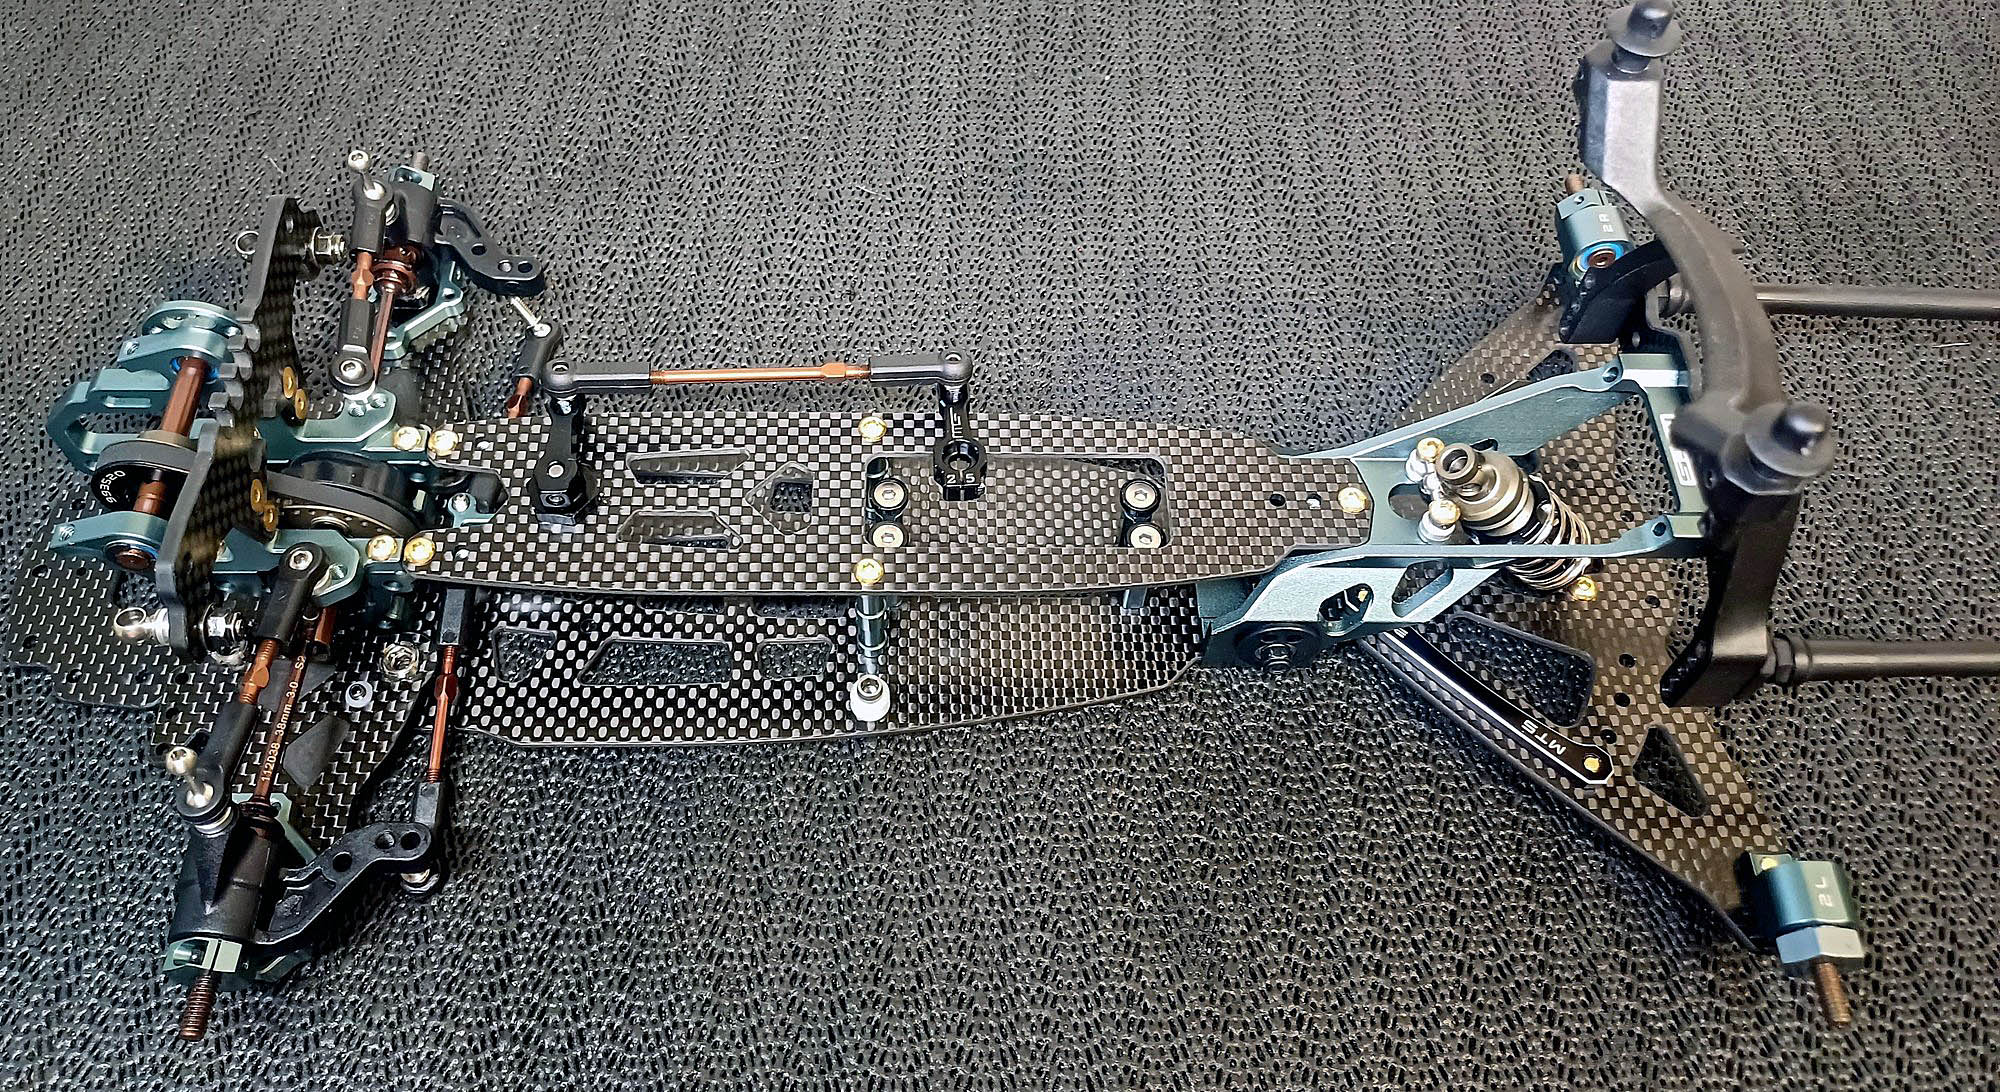
Tope deck fitted.
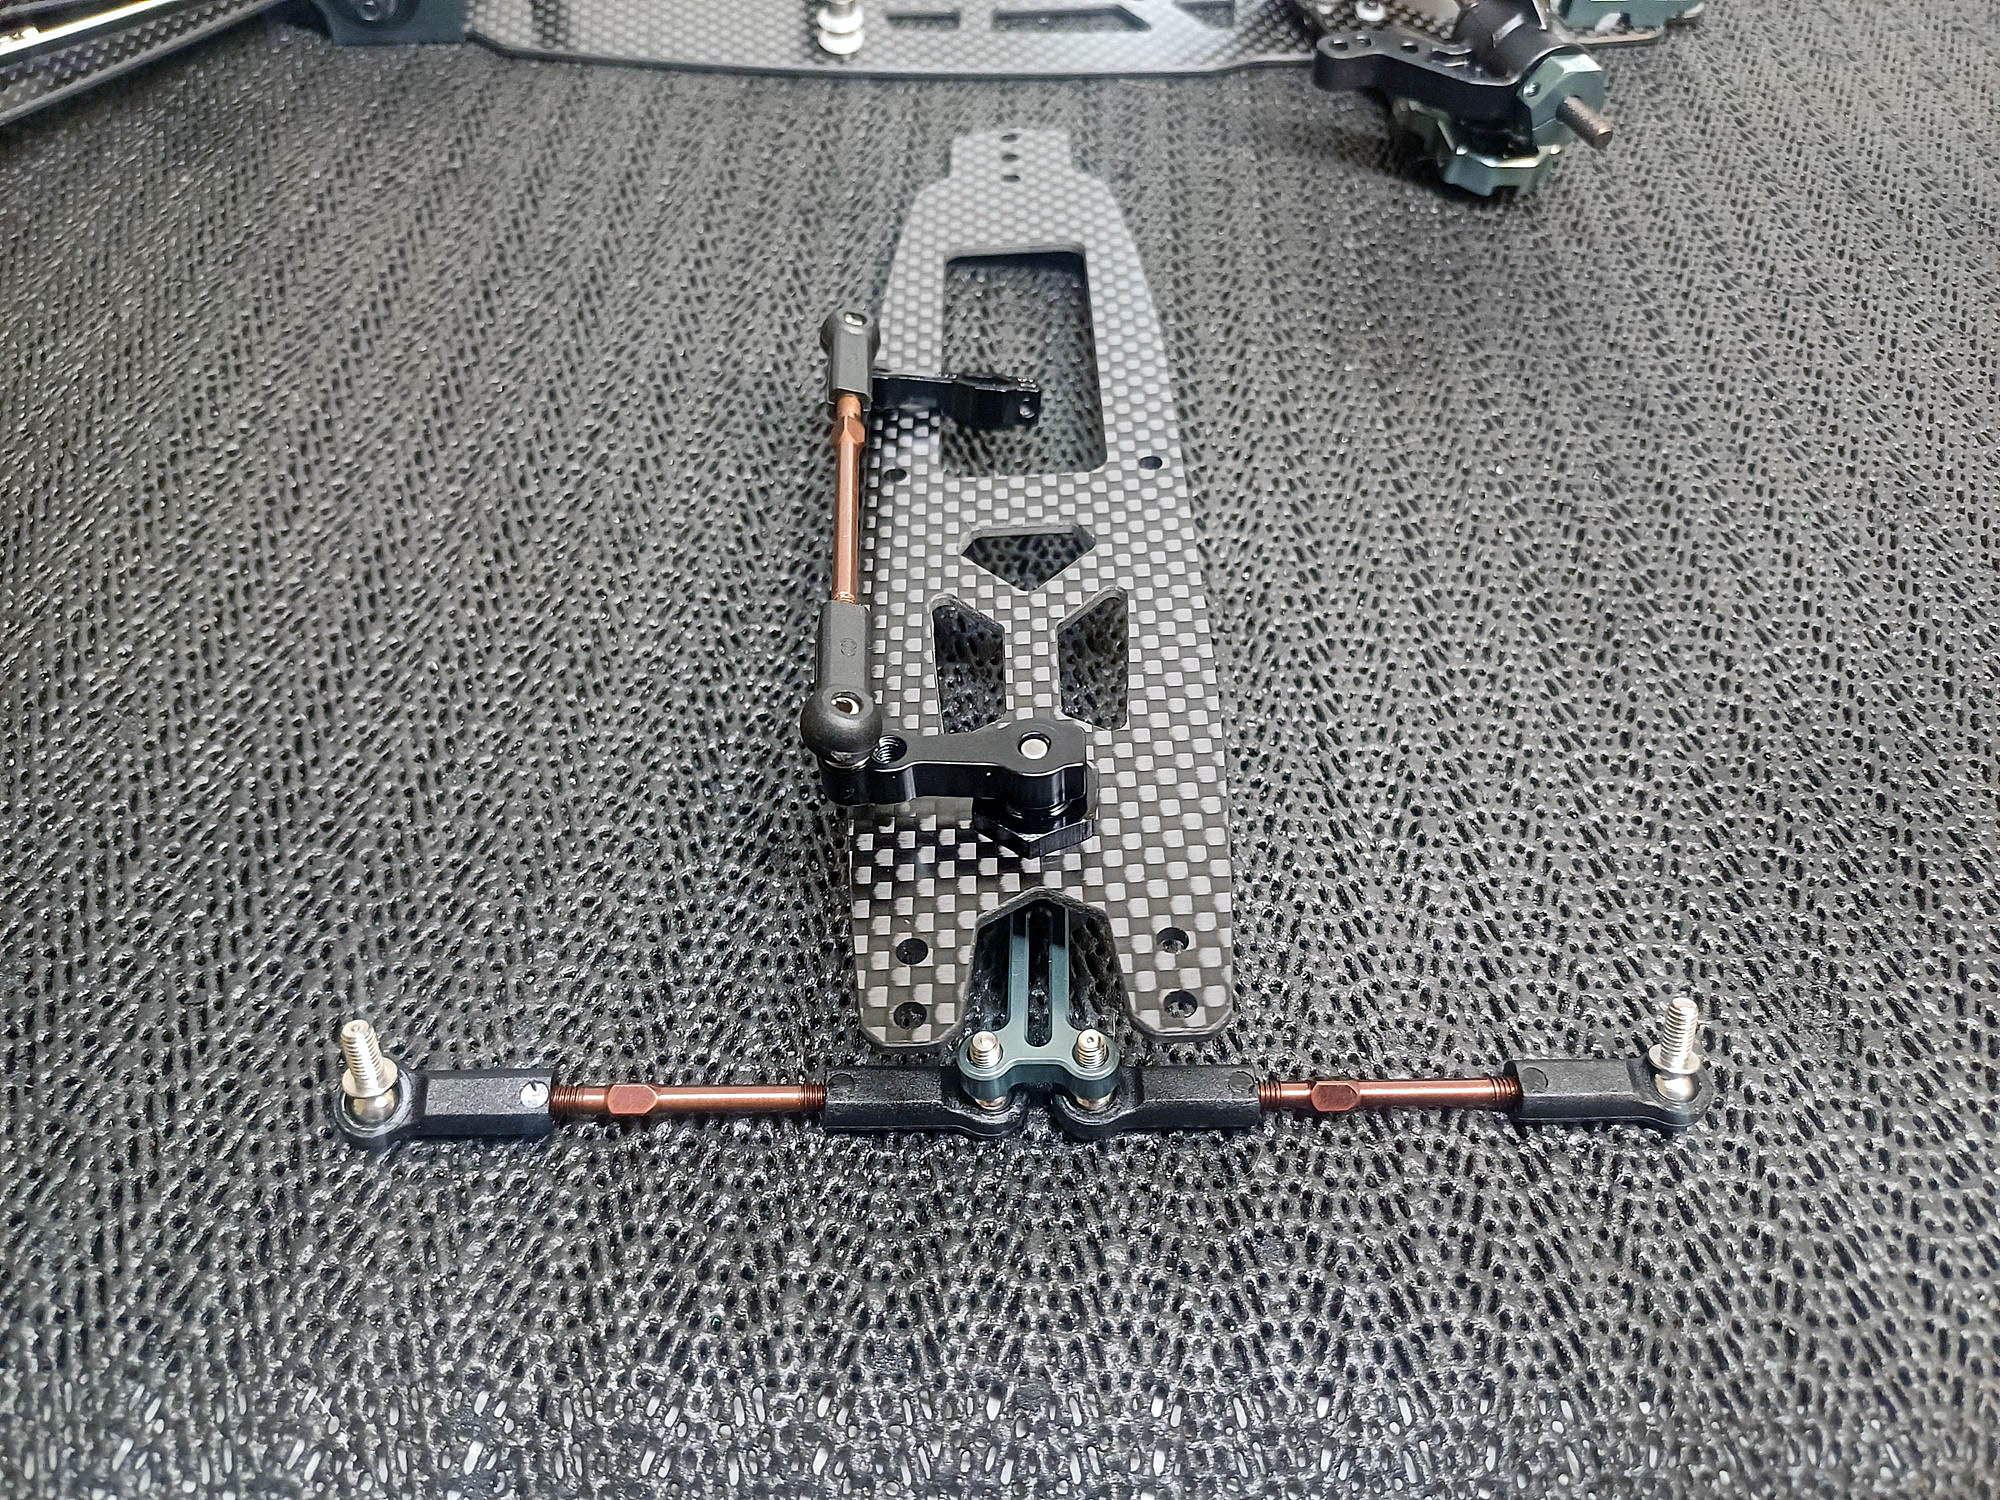
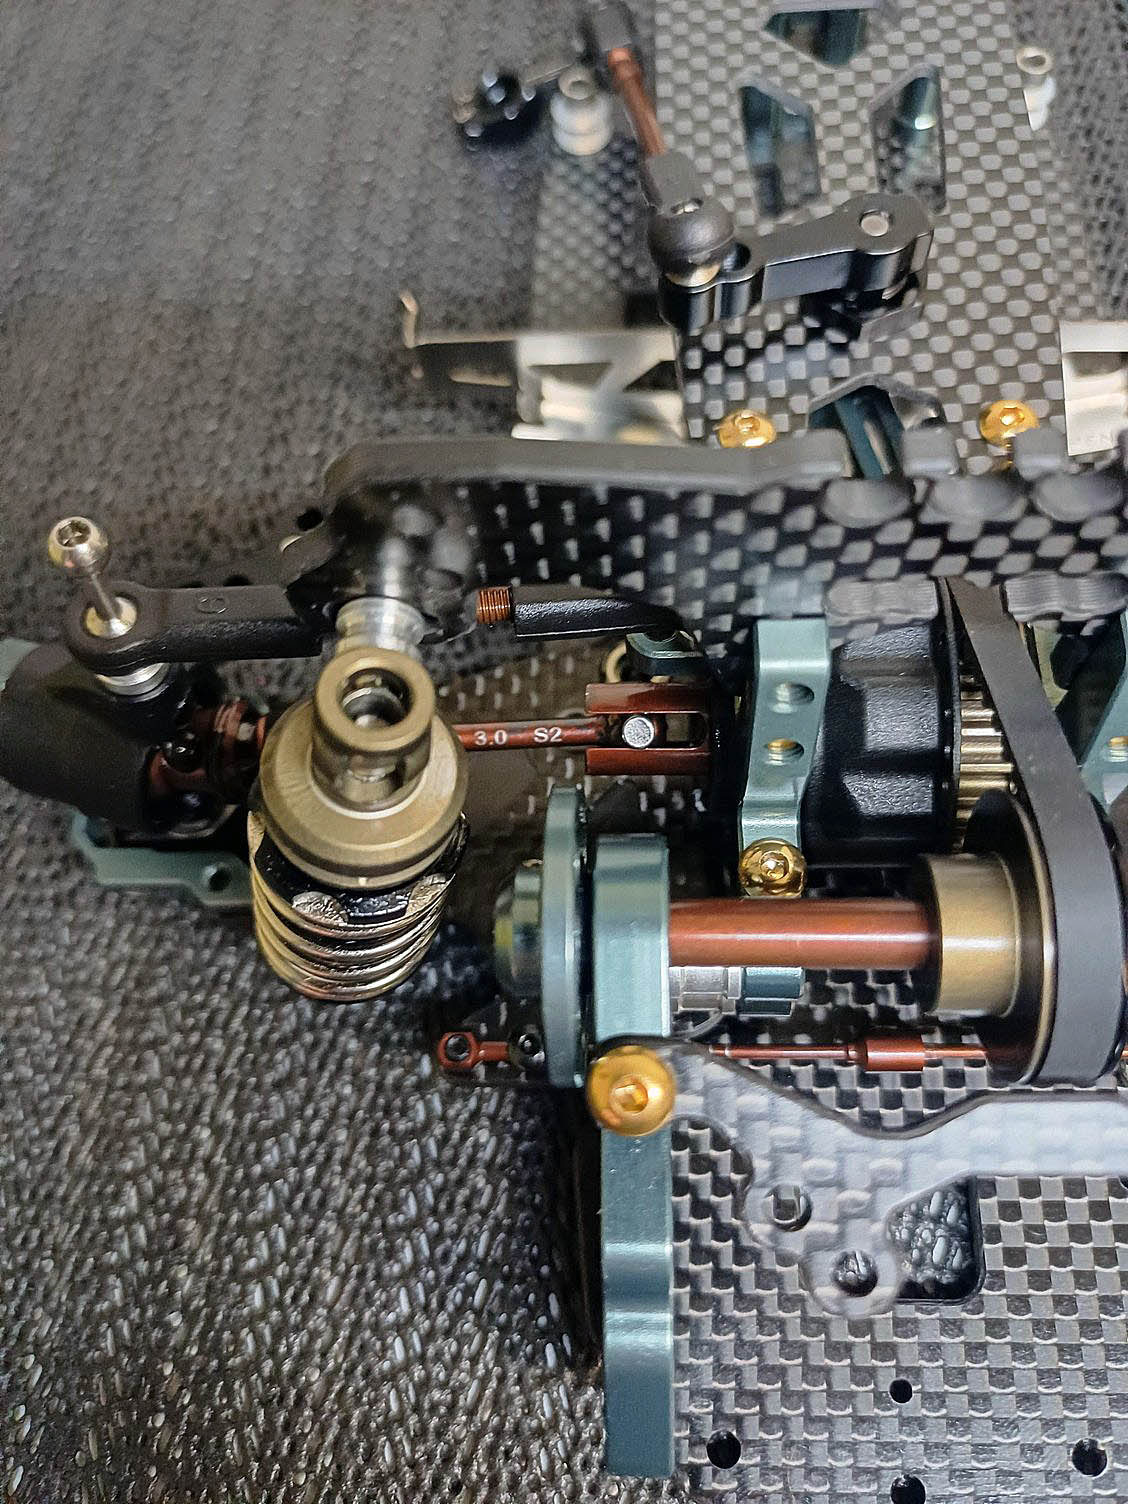
Use loctite in the lower shock mount grub screws. The direct anti-roll bars are very efficient. They can be tuned using 1 or 2 screws. Any balance issue can be rectified by flipping them or general de-tweak adjustment. Left to right balance proceedure is unchanged. Long bars are available from 1.2mm. It is also possible to further fine tune by using alternate diameter left/right. This does not effect balance.
Install the RAS dampers onto the ball. Loosen the locknut and use the included ALU installation tool to guide the damper and eyelet hole. This ensure the shock shaft wont be damaged.
. If the lower eyelet 5.8mm balls are binding slightly, you can use a reamer it squeeze the eyelets with pliers (ball installed)
Aligned upper ball.

Nearly there.
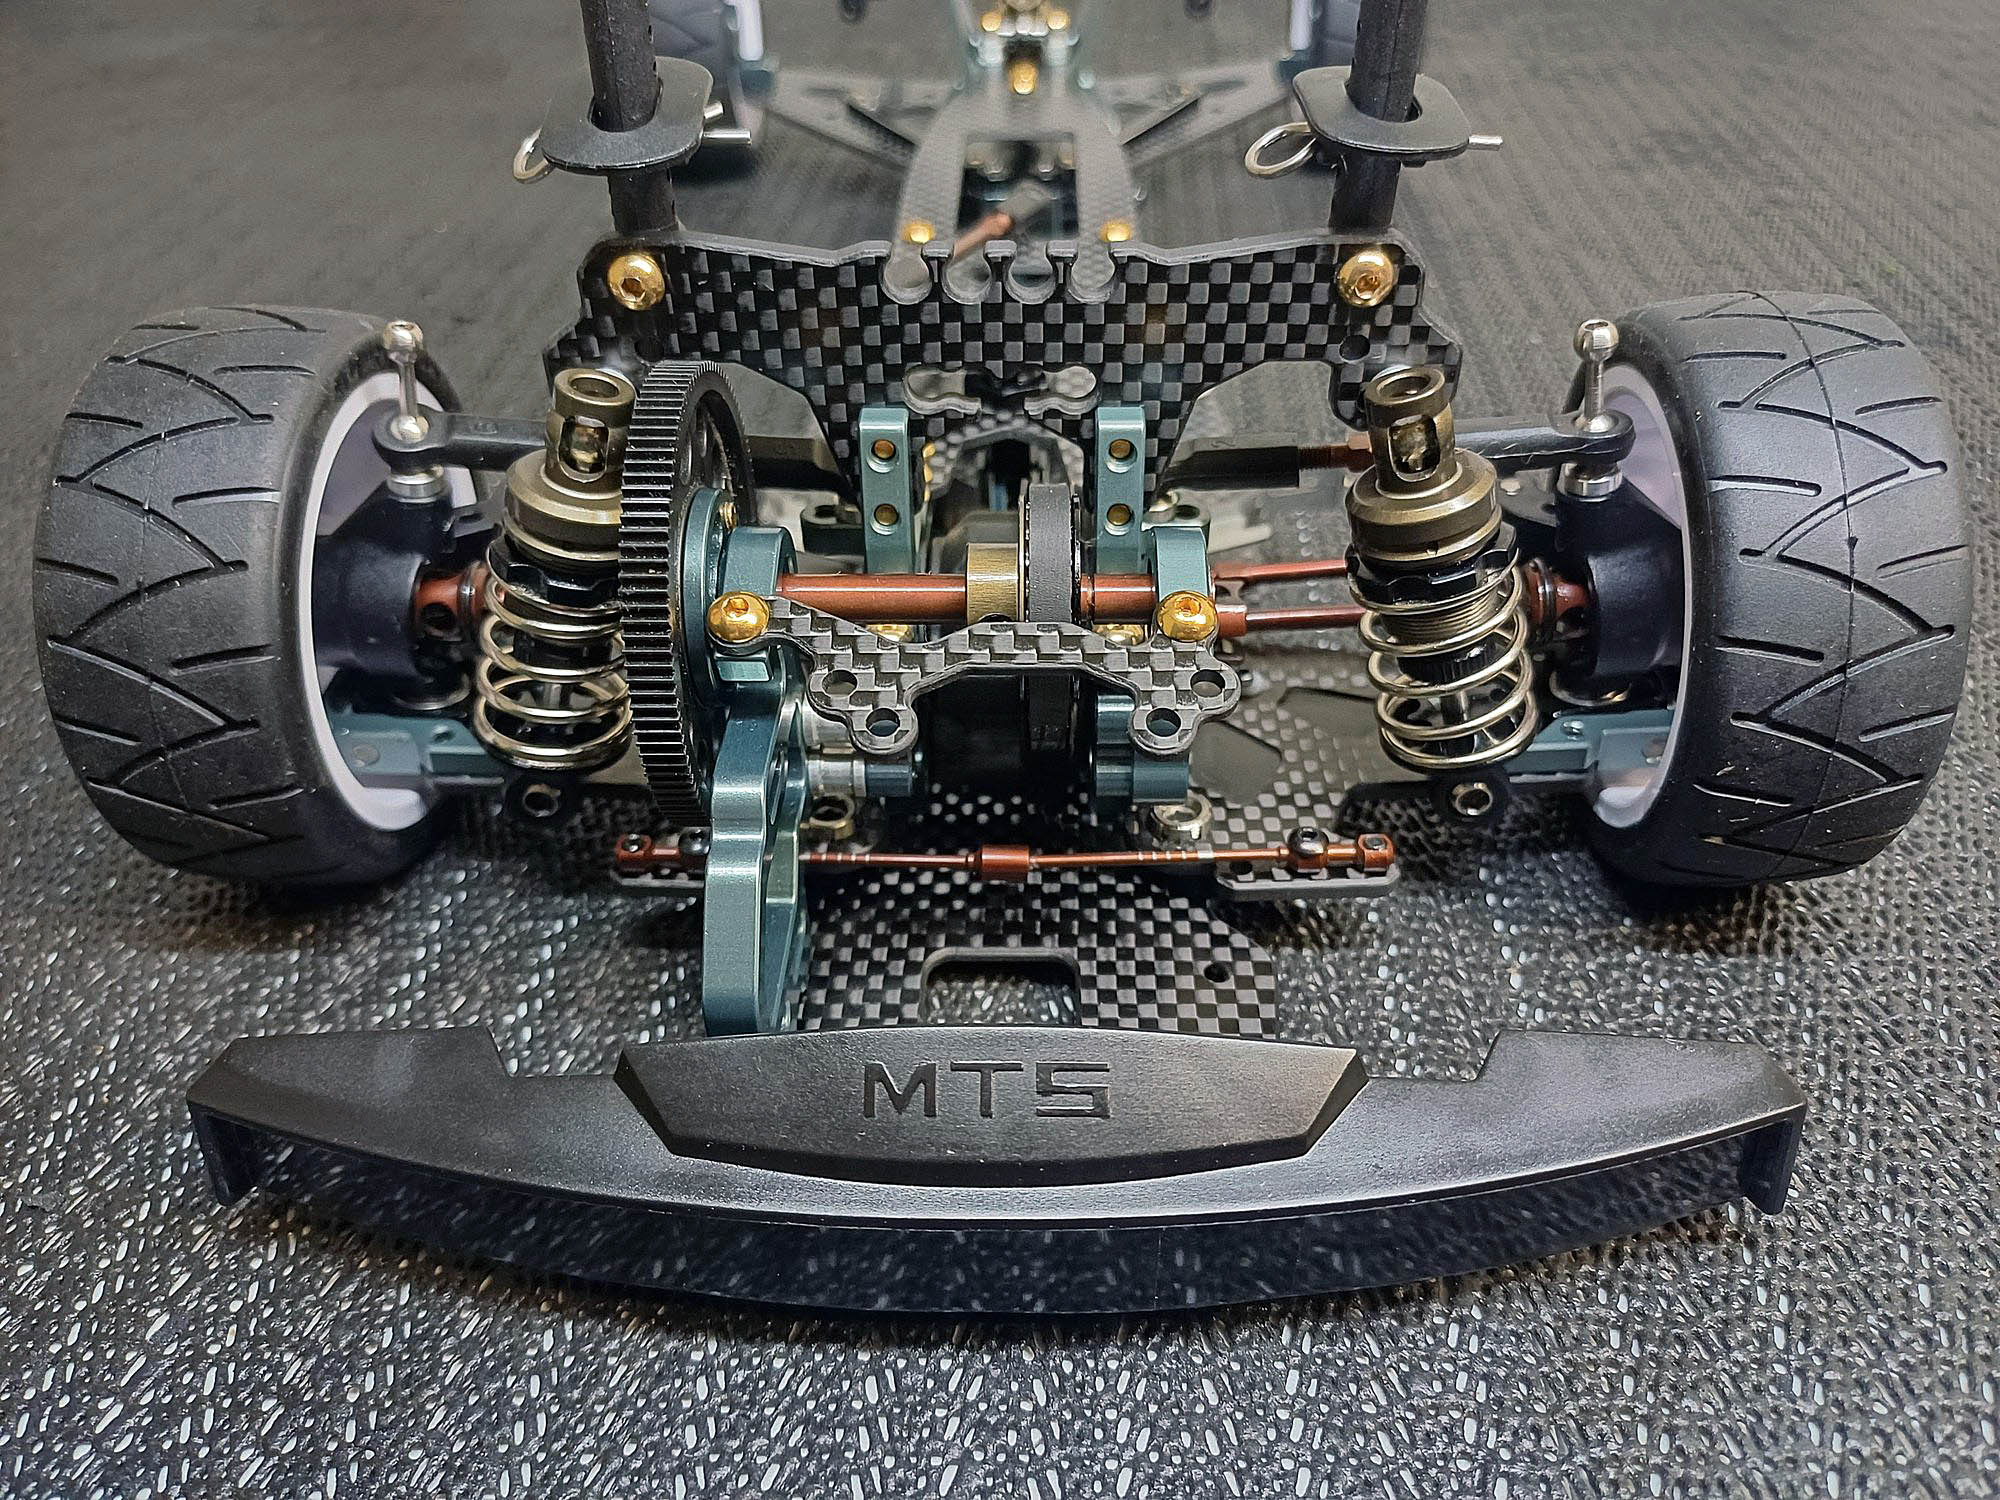
Bumper plate fitted. Some bodies will require trimming of the bumper plate ends. Adhesive foam is included for support.

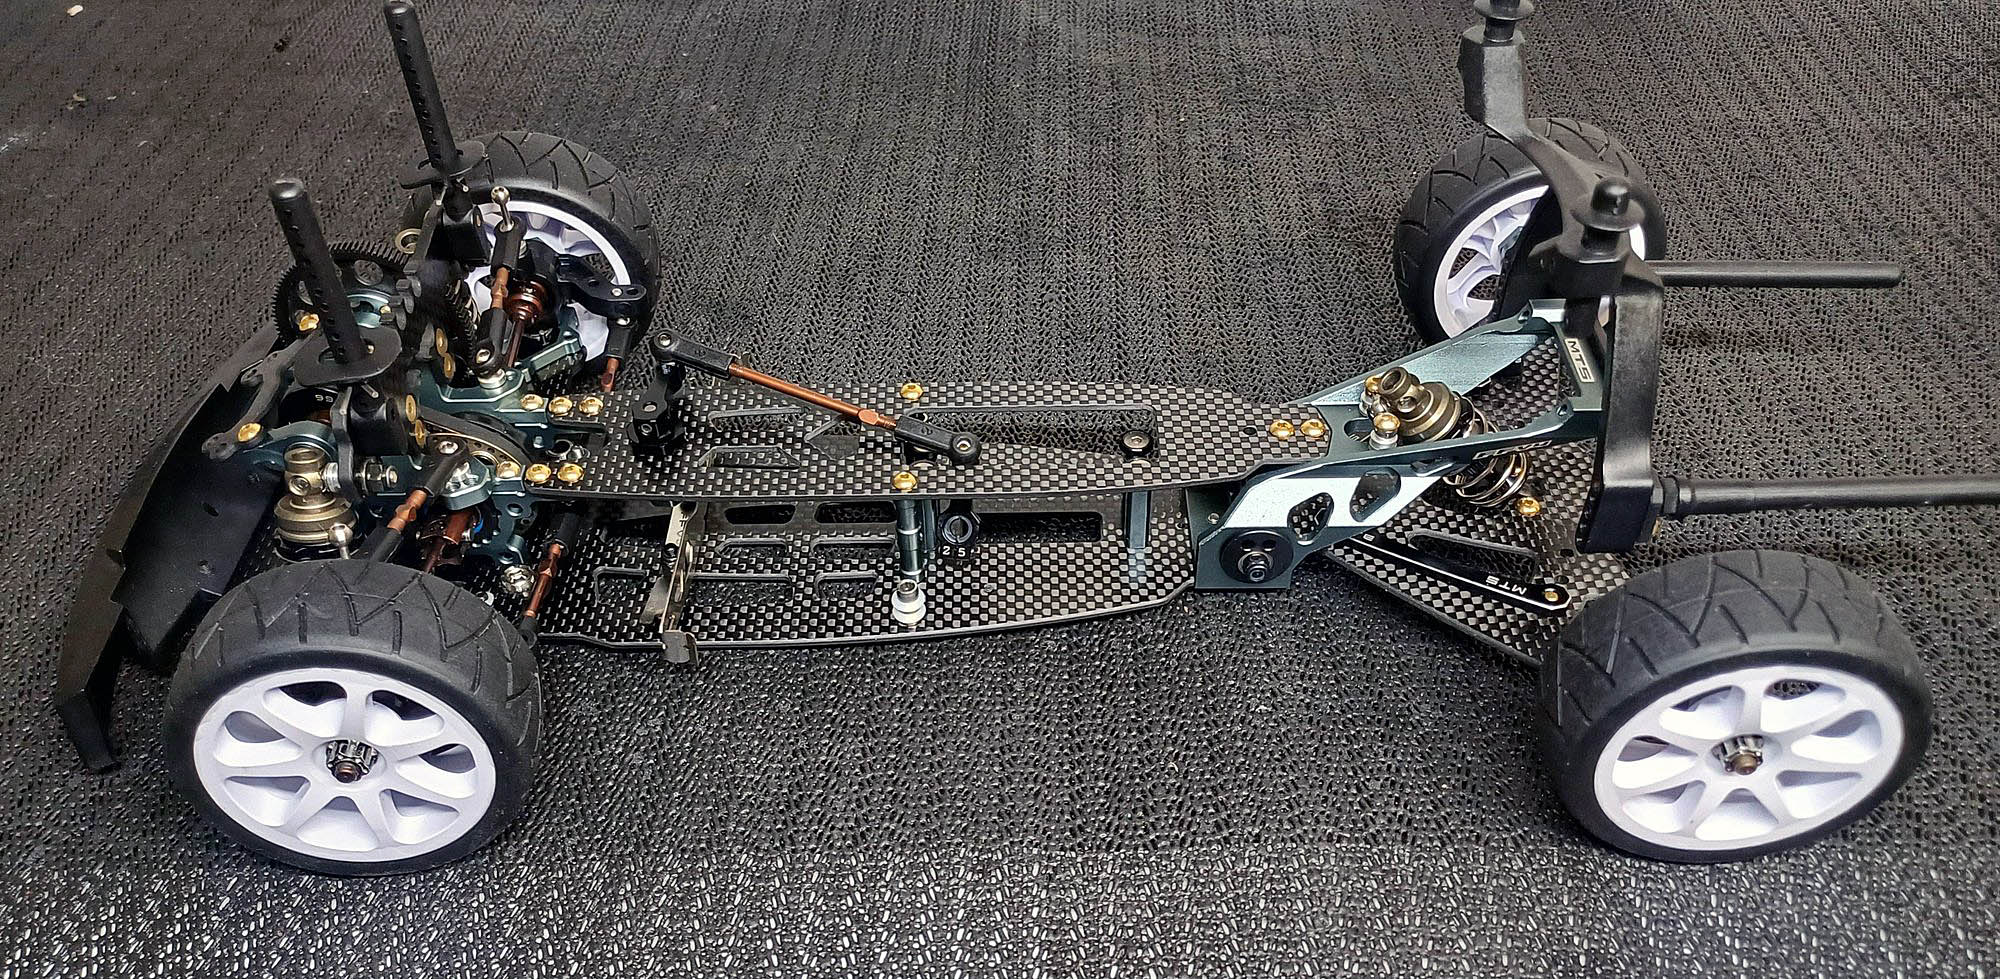
TfFV4 with Team Power Radial tyres


|
