🔴 IRIS Racing ONE from RC MAKER 🔴
I've had this new-to-market touring car for a little while now, but I didn't really get the chance to get on track and gain a feel for how it drives until last Friday night
I'm thoroughly impressed with this car!
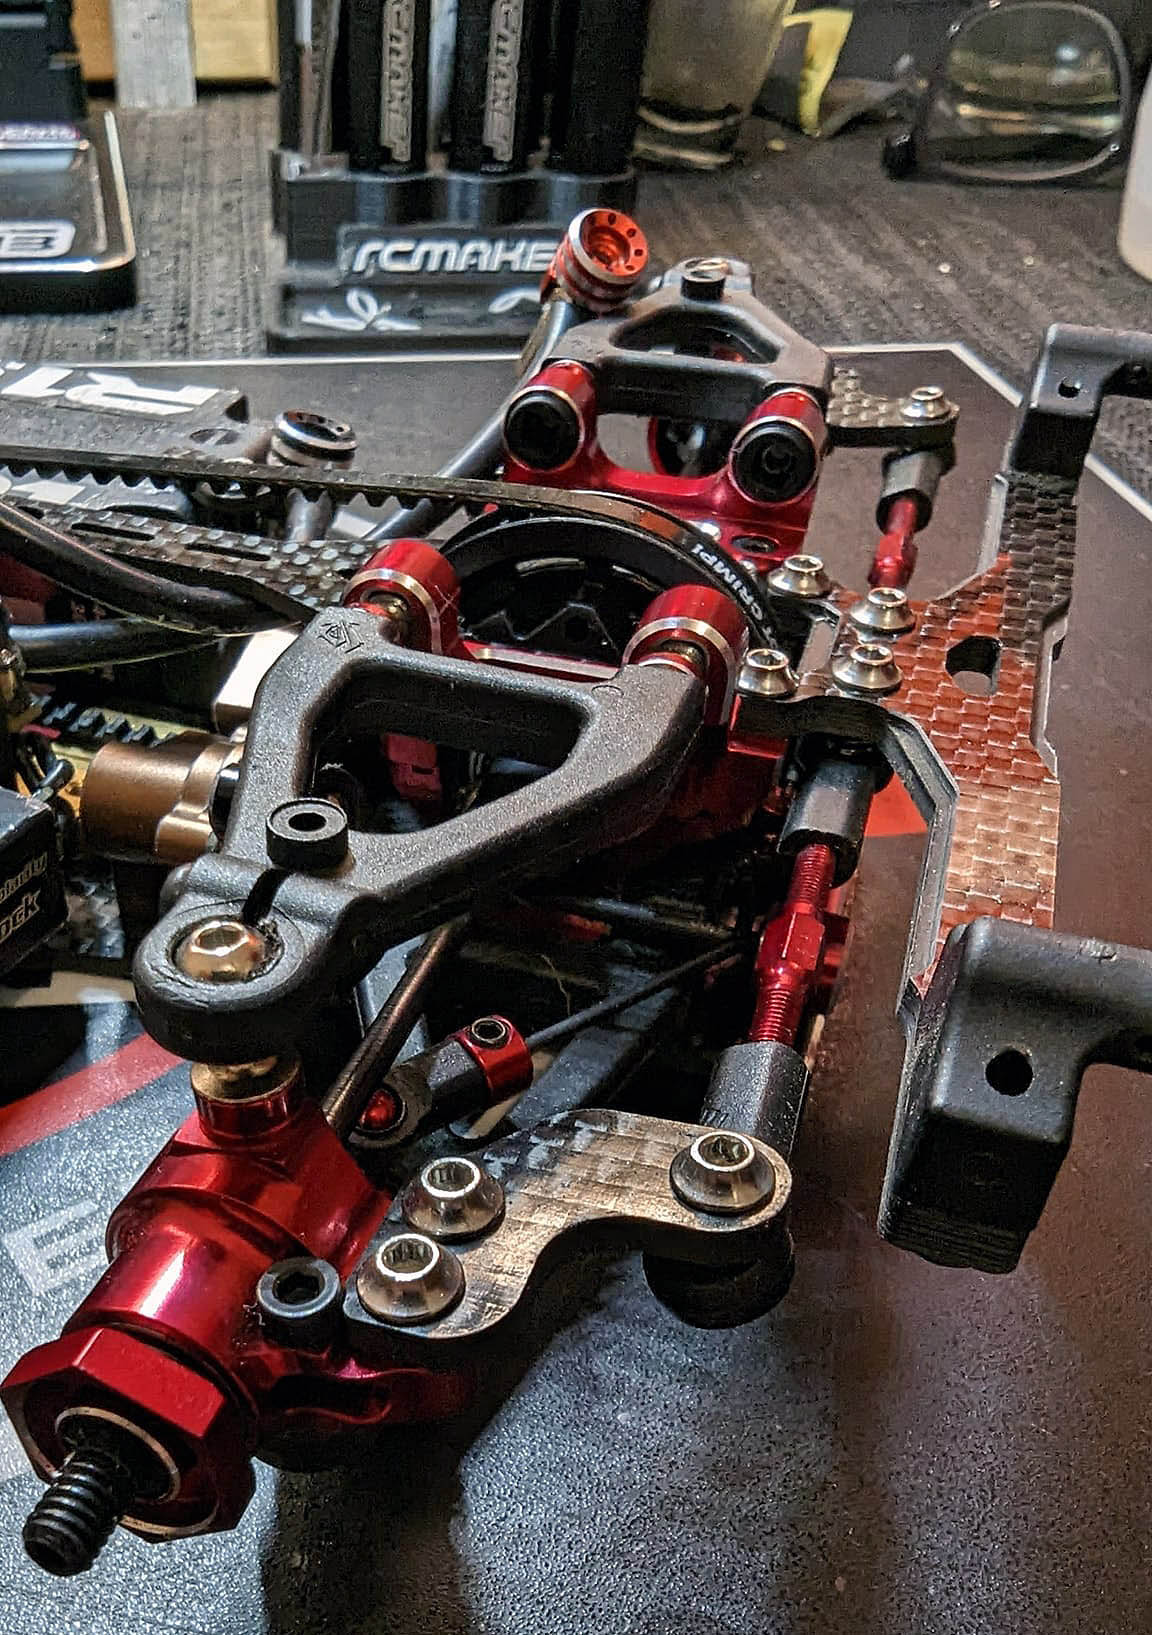
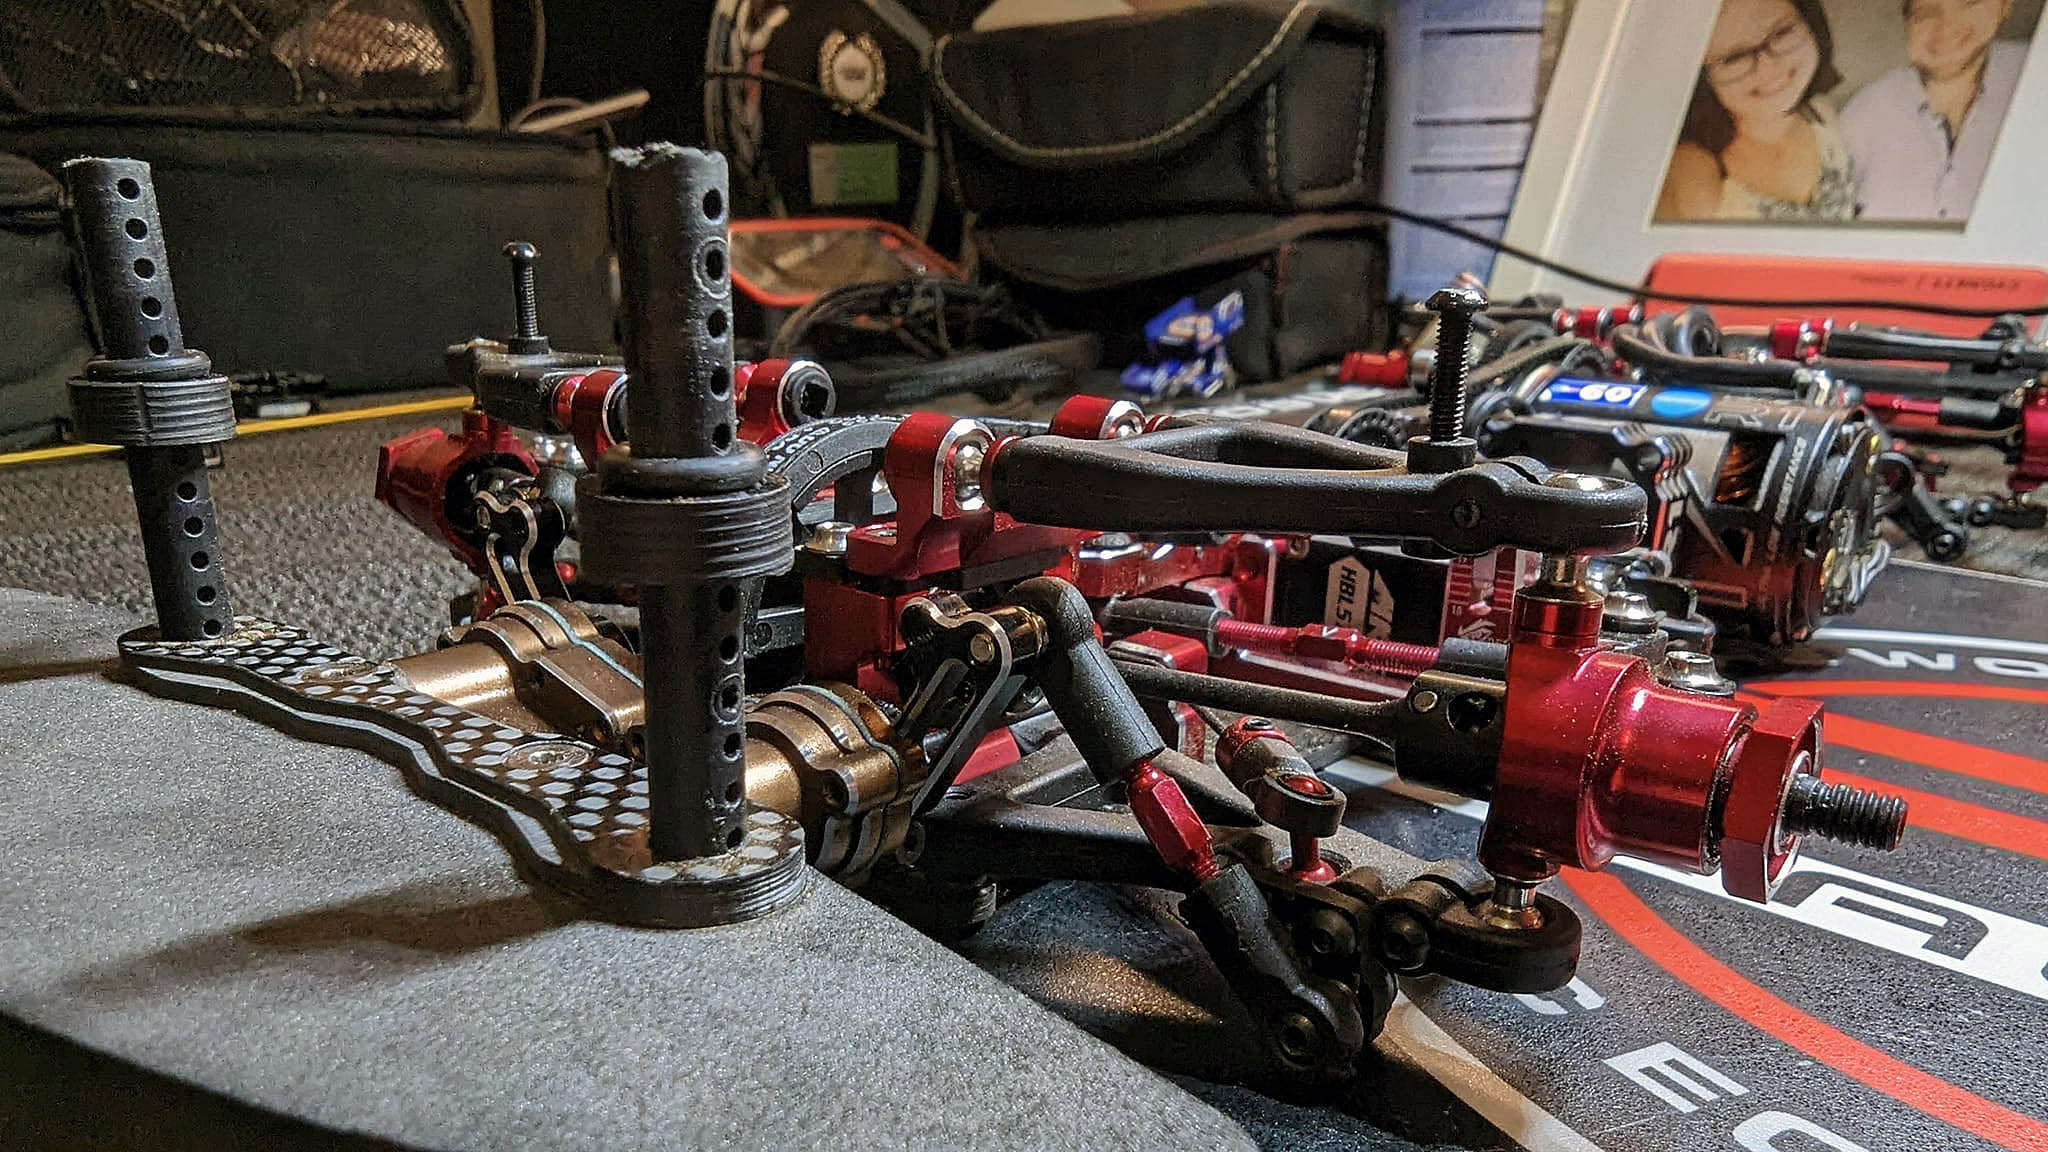
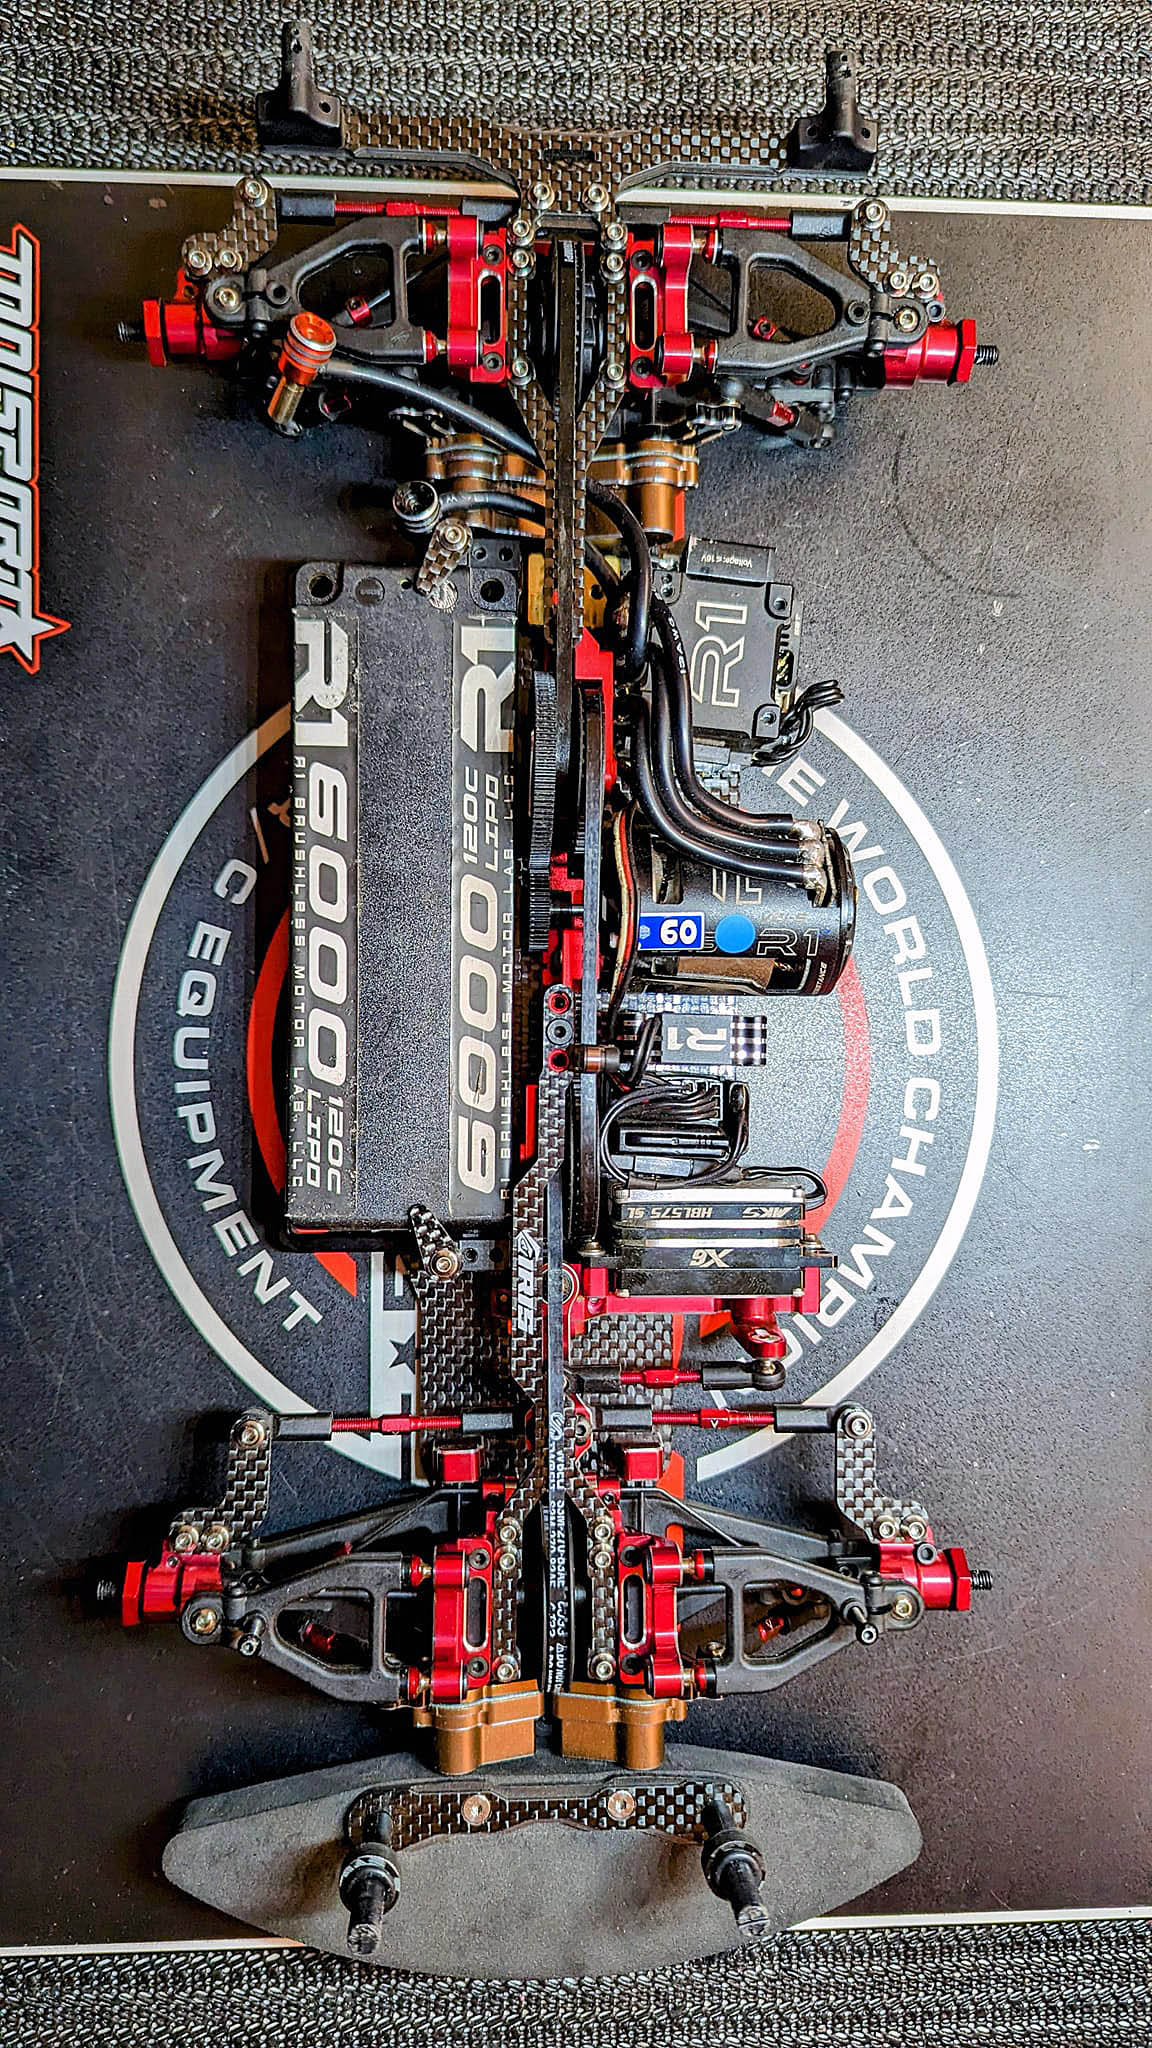
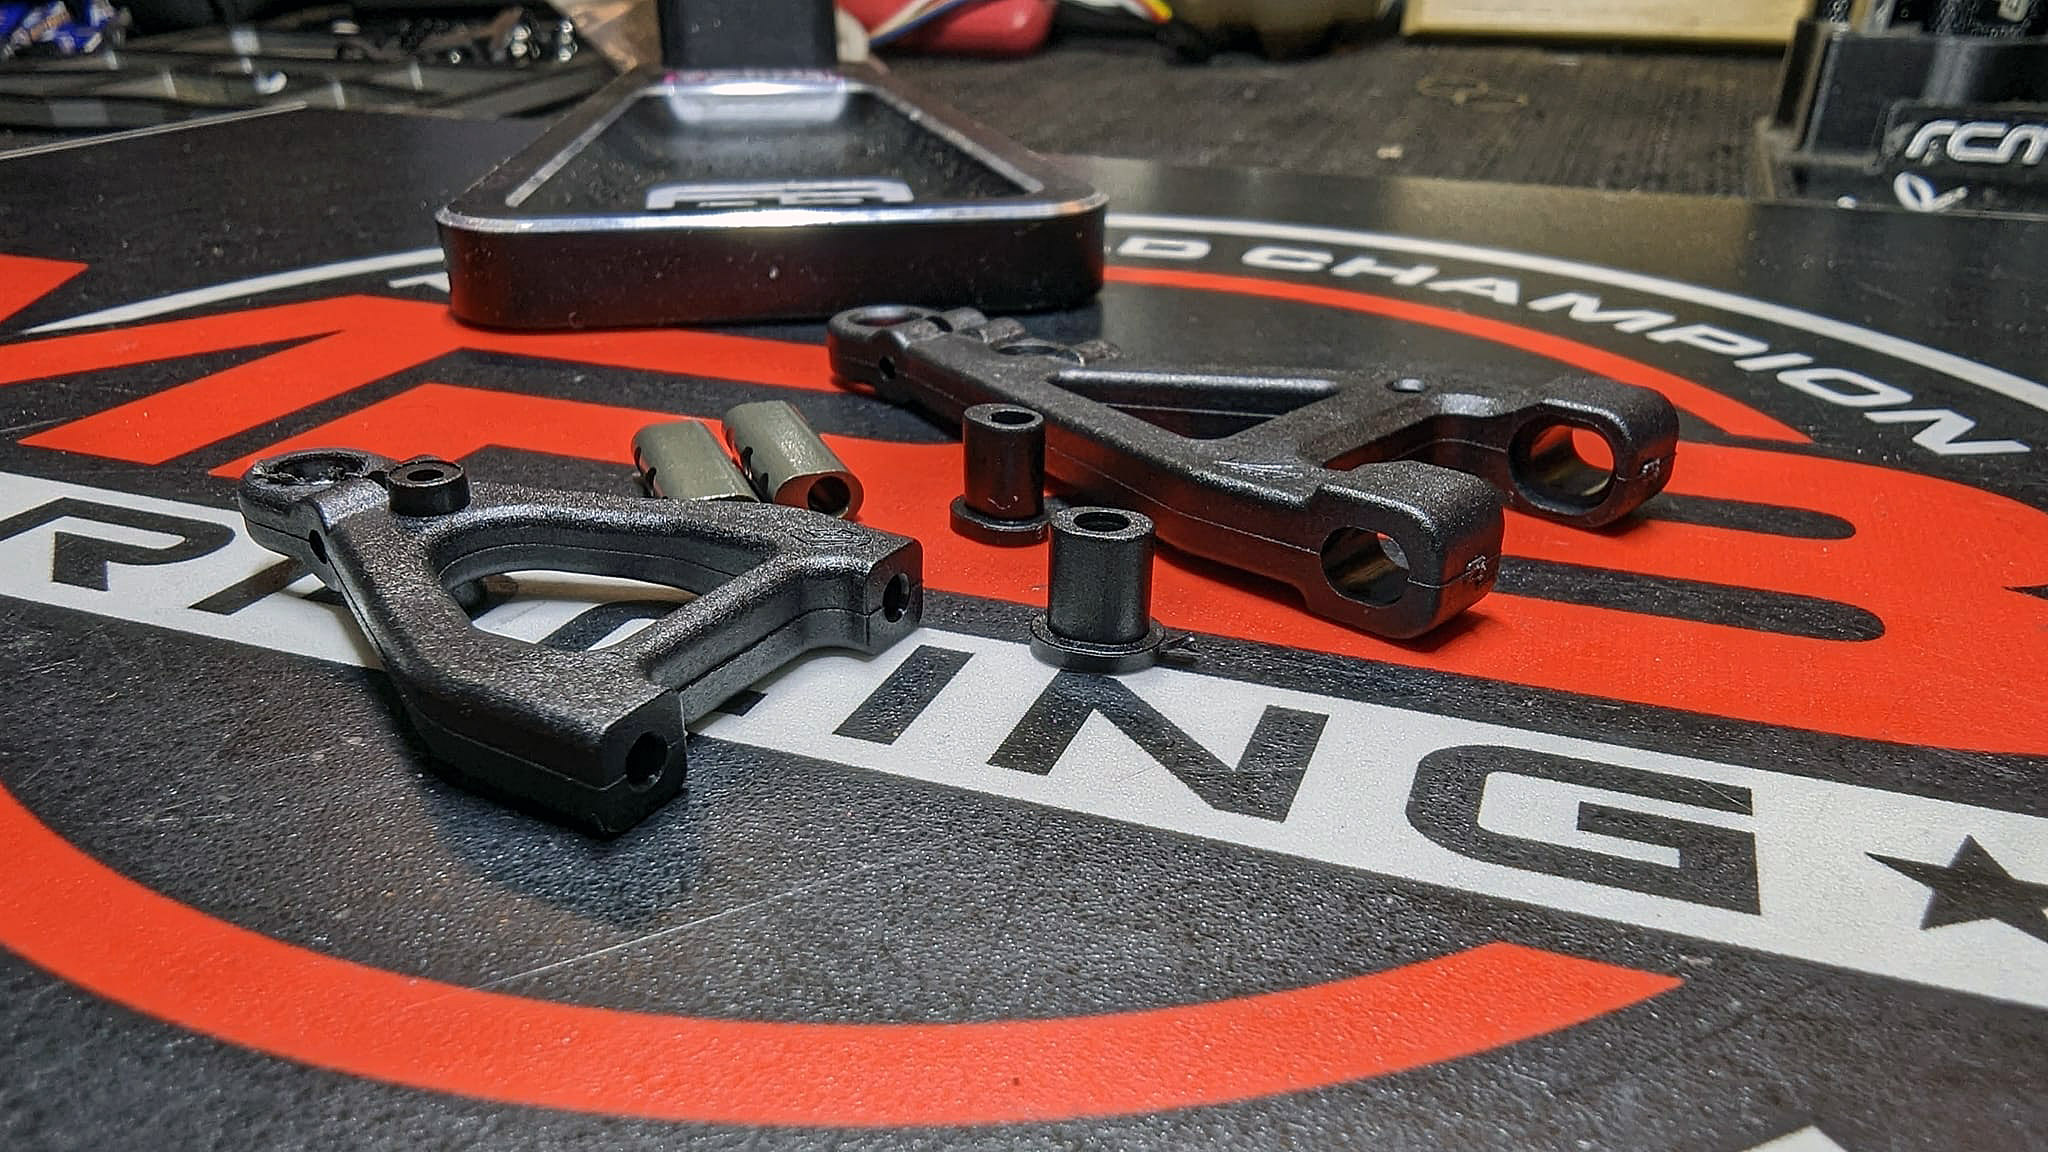
The torsion bar suspension, Roll Dampers and overall neat & tidy packaging is awesome, I love the design concepts for the way the suspension works and the packaging for the arms & hingepins, using an Aluminium insert for Roll center, plus modular lower & upper arms for the whole car, using arm inserts for track width
Kudos to Andreas Myrberg for designing such a great car and for Ruddog Distribution getting behind it to make it happen and get to market
🔴 FIRST IMPRESSIONS 🔴
Now, it's a first generation car - so there's bound to be some little issues here or there
We've already seen from the team and base setups provided, that the 5th damper concept doesn't seem to have worked out as intended - but maybe it'll make a comeback sometime soon?
Great work from the IRIS team to rectify the issue with the original DJC Driveshafts too, providing a free replacement for all original kit buyers, that's a great way to keep your customers happy!
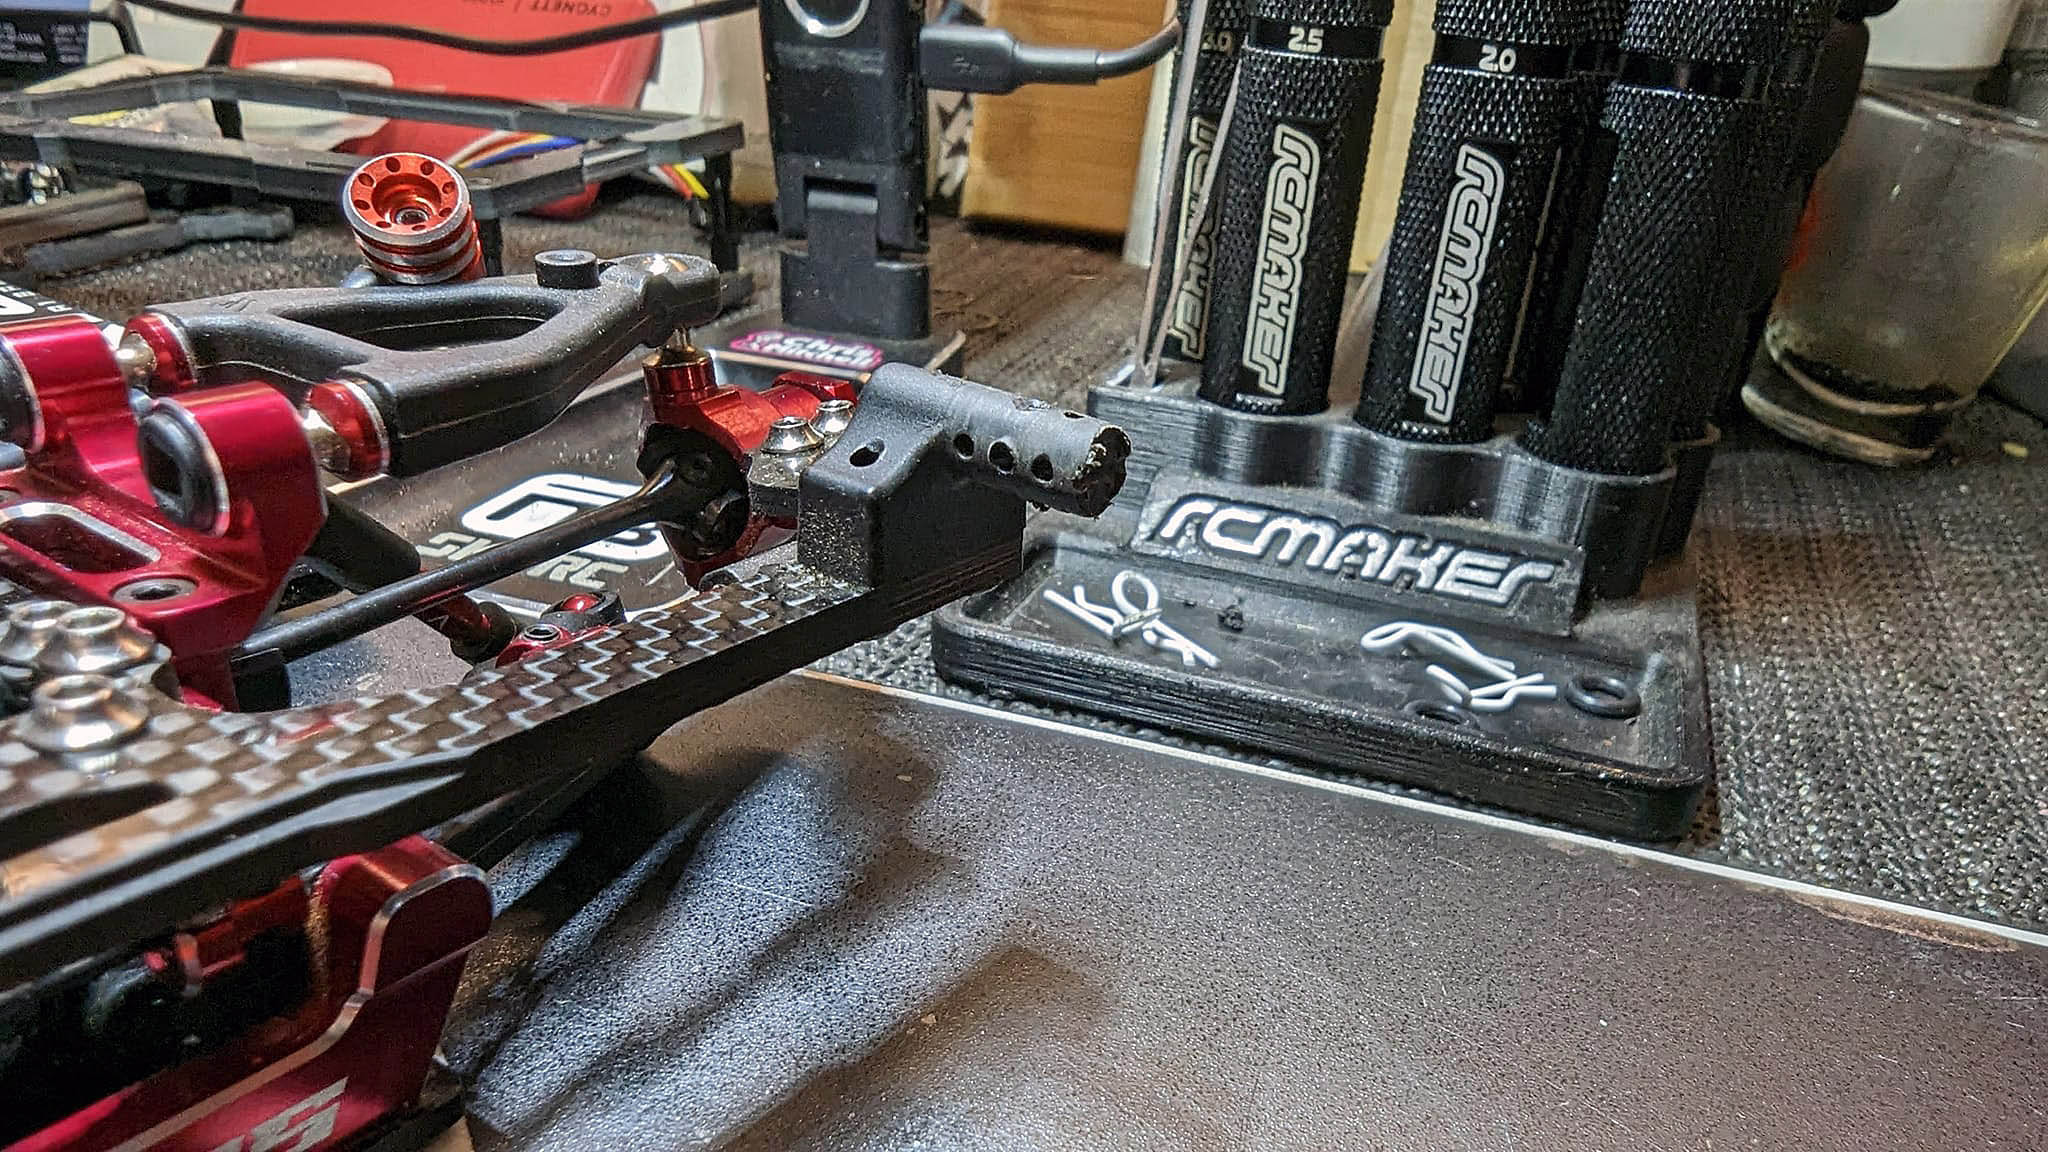
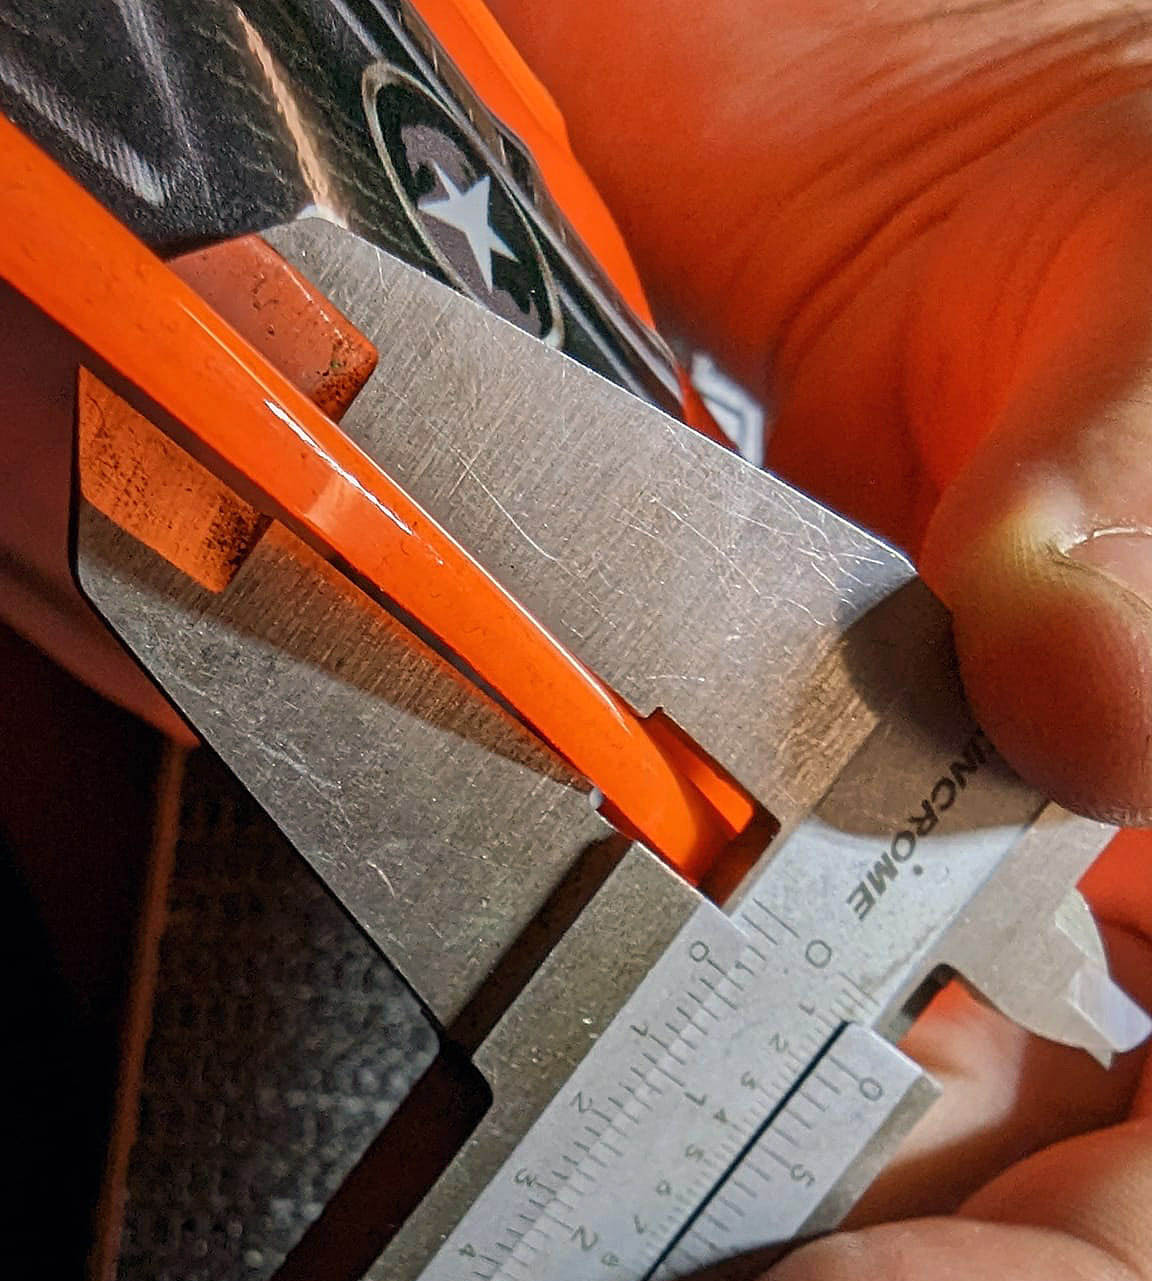
There's a minor issue using a wide spur gear- if it's got a flange deeper than 1mm, it will rub the rear belt, but simple to either sand it down or get some narrow spurs like RW, Axon DTS or even the IRIS spur gear are fine
Packaging your electrics is a little tight, but it works, to get the weight balance of 51% to the rear, you may need a little bit of weight under the rear belt...I just snuck 10g in there and it only runs a tiny tiny little bit - we need a purpose designed weight there it seems
building the dampers to be air free can be a little tricky at first, maybe a bleed port would be nice to allow the air bubbles out...that said I have air in my dampers and they work just fine
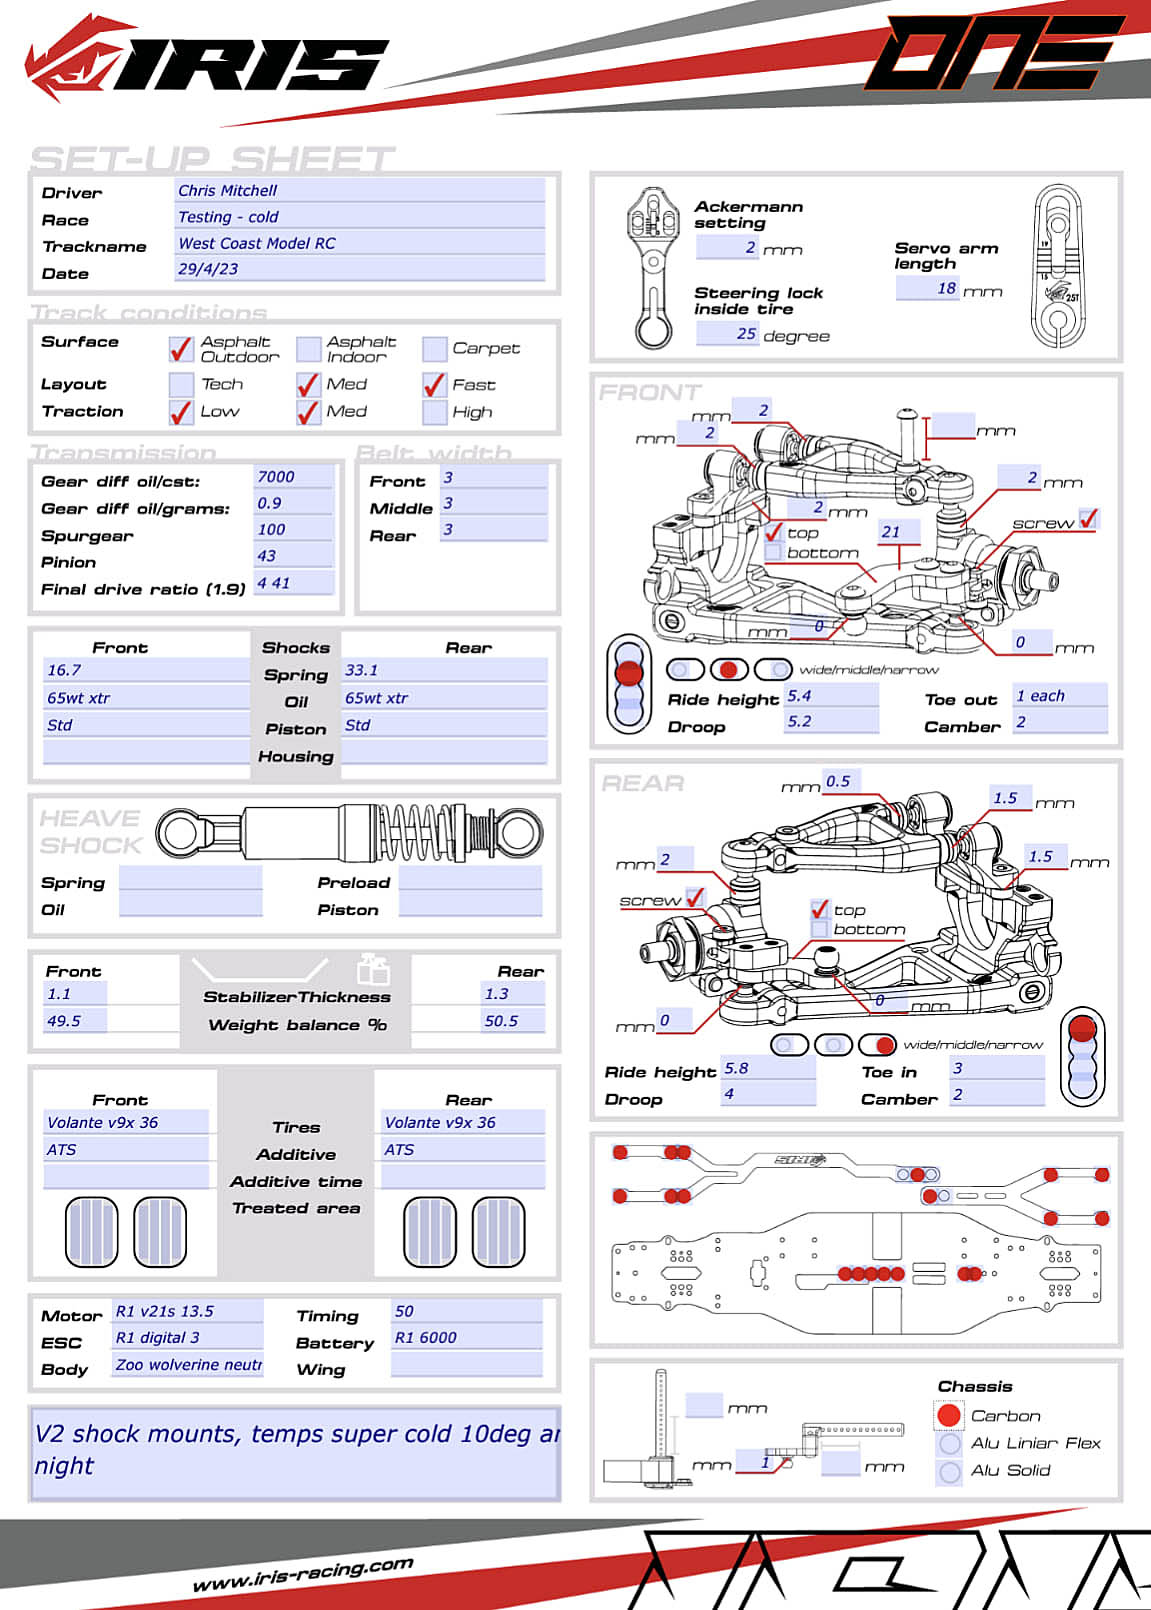
the original suspension pushrod mounts weren't working in all conditions, so the team came out with the V2 mounts that move the pushrods alot further in on the arm, they seem to wake the car up ALOT and make it quicker to drive, definitely the top option to get for the car
🔴 SETUP 🔴
As far as setup, my current asphalt setup so far is attached below (above), it's based of the Alex Kunkler Turkheim base asphalt setup posted a short time ago, it's really good! Immediately on pace with my regular practice times coming from my trusty Awesomatix A800MMX which has been so reliable and successful for me the last few years
‼️3 key things you might need‼️
#40008 V2 Shock mounts as mentioned above
#21004 Option 0.75mm Roll Center inserts, using these in the rear at the moment
#42000/1/2/3 maybe an optional sway bar for the front or rear to meet your conditions, I'm using the 1.1mm front bar right now for low grip and slightly bumpy conditions
#73000 / #73001 Servo horns, they're adjustable...shiny and red, get one to match the nicest anodising you'll ever see
The standard car is VERY flexy, as you can see I'm running all the flex tuning screws IN at the moment...crazy to think it's the opposite to many cars in that respect...if youre running on high grip all the time, maybe think about the Ali chassis option or the HARD top deck parts to make it easier to drive.
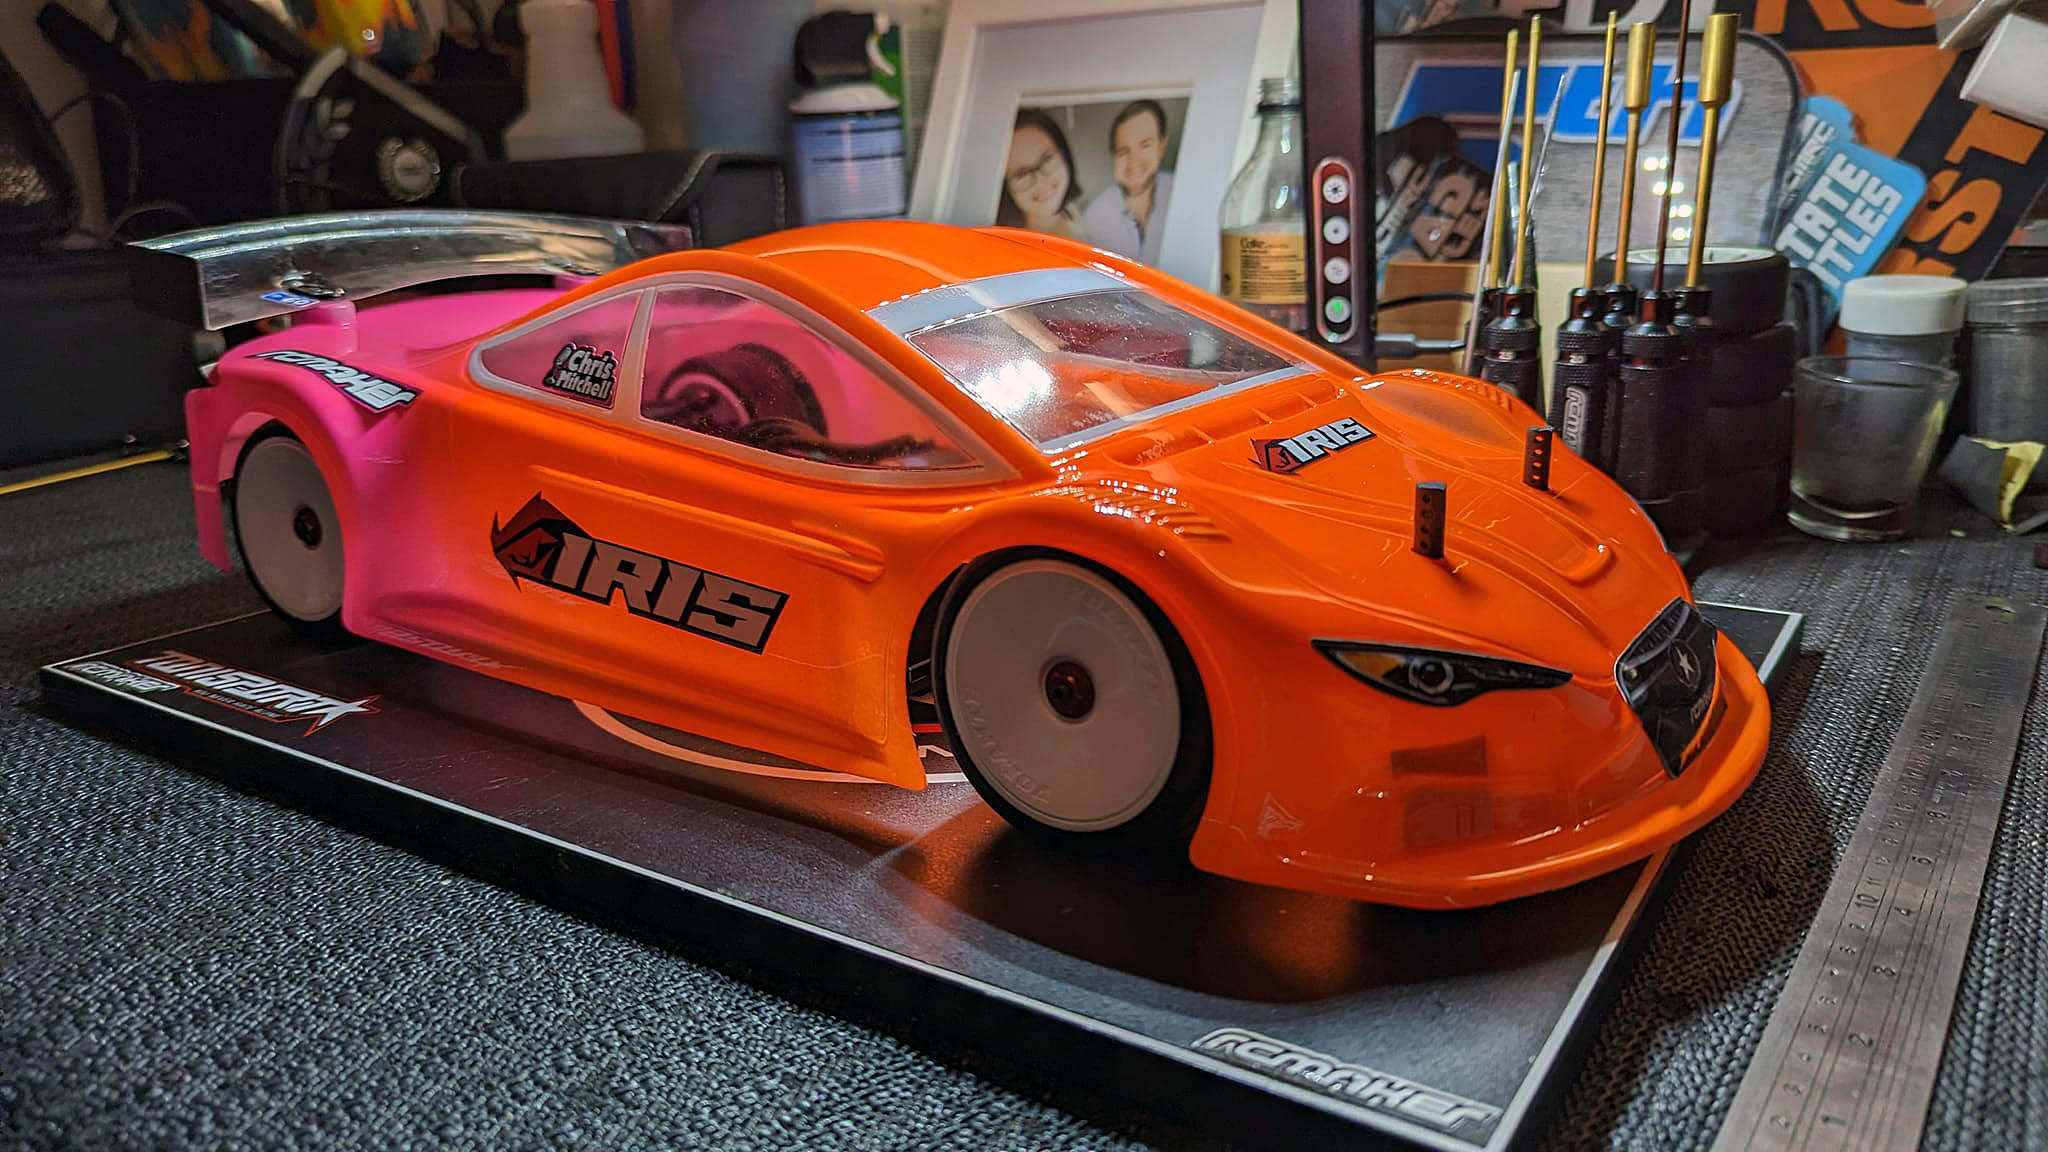
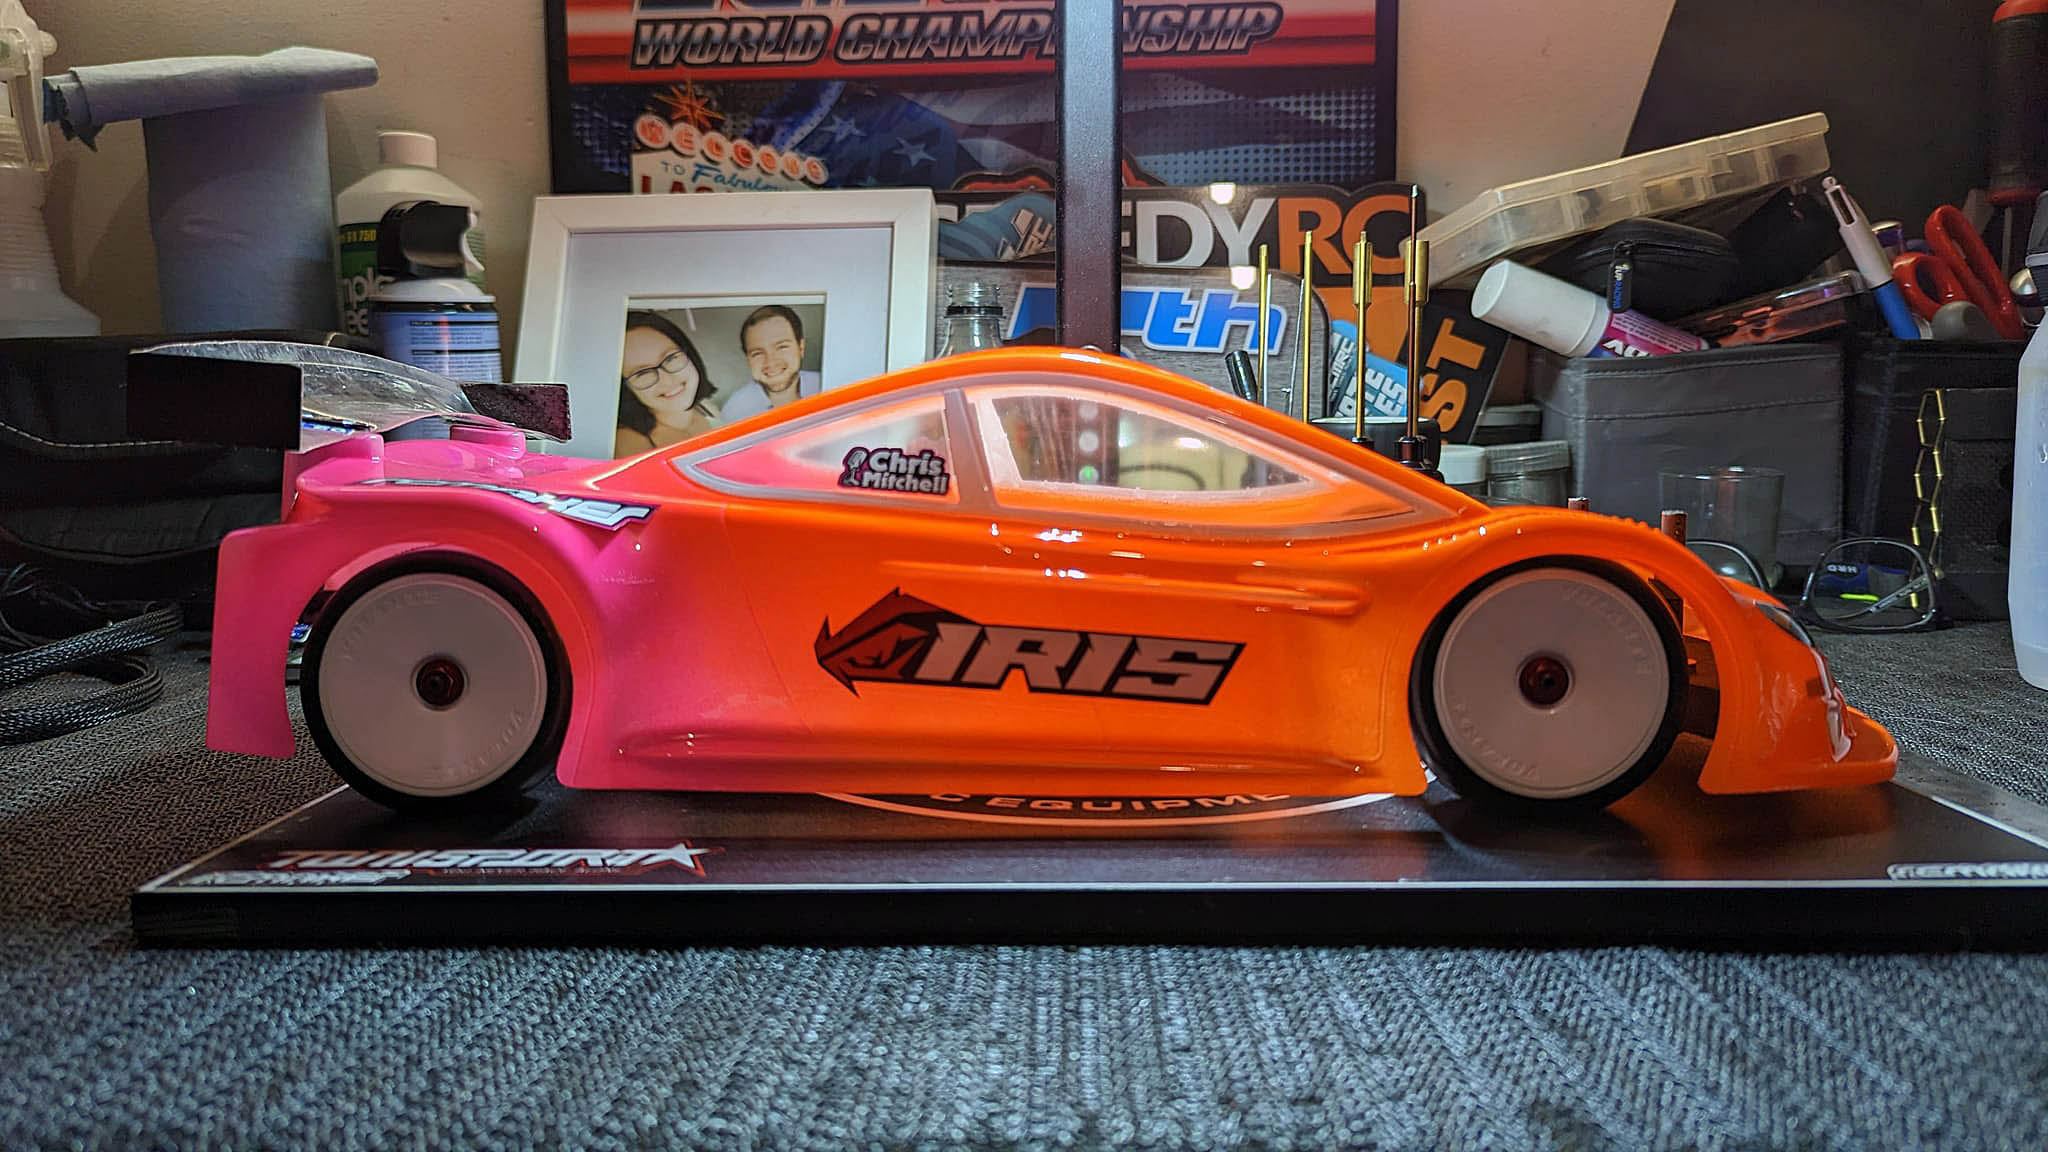
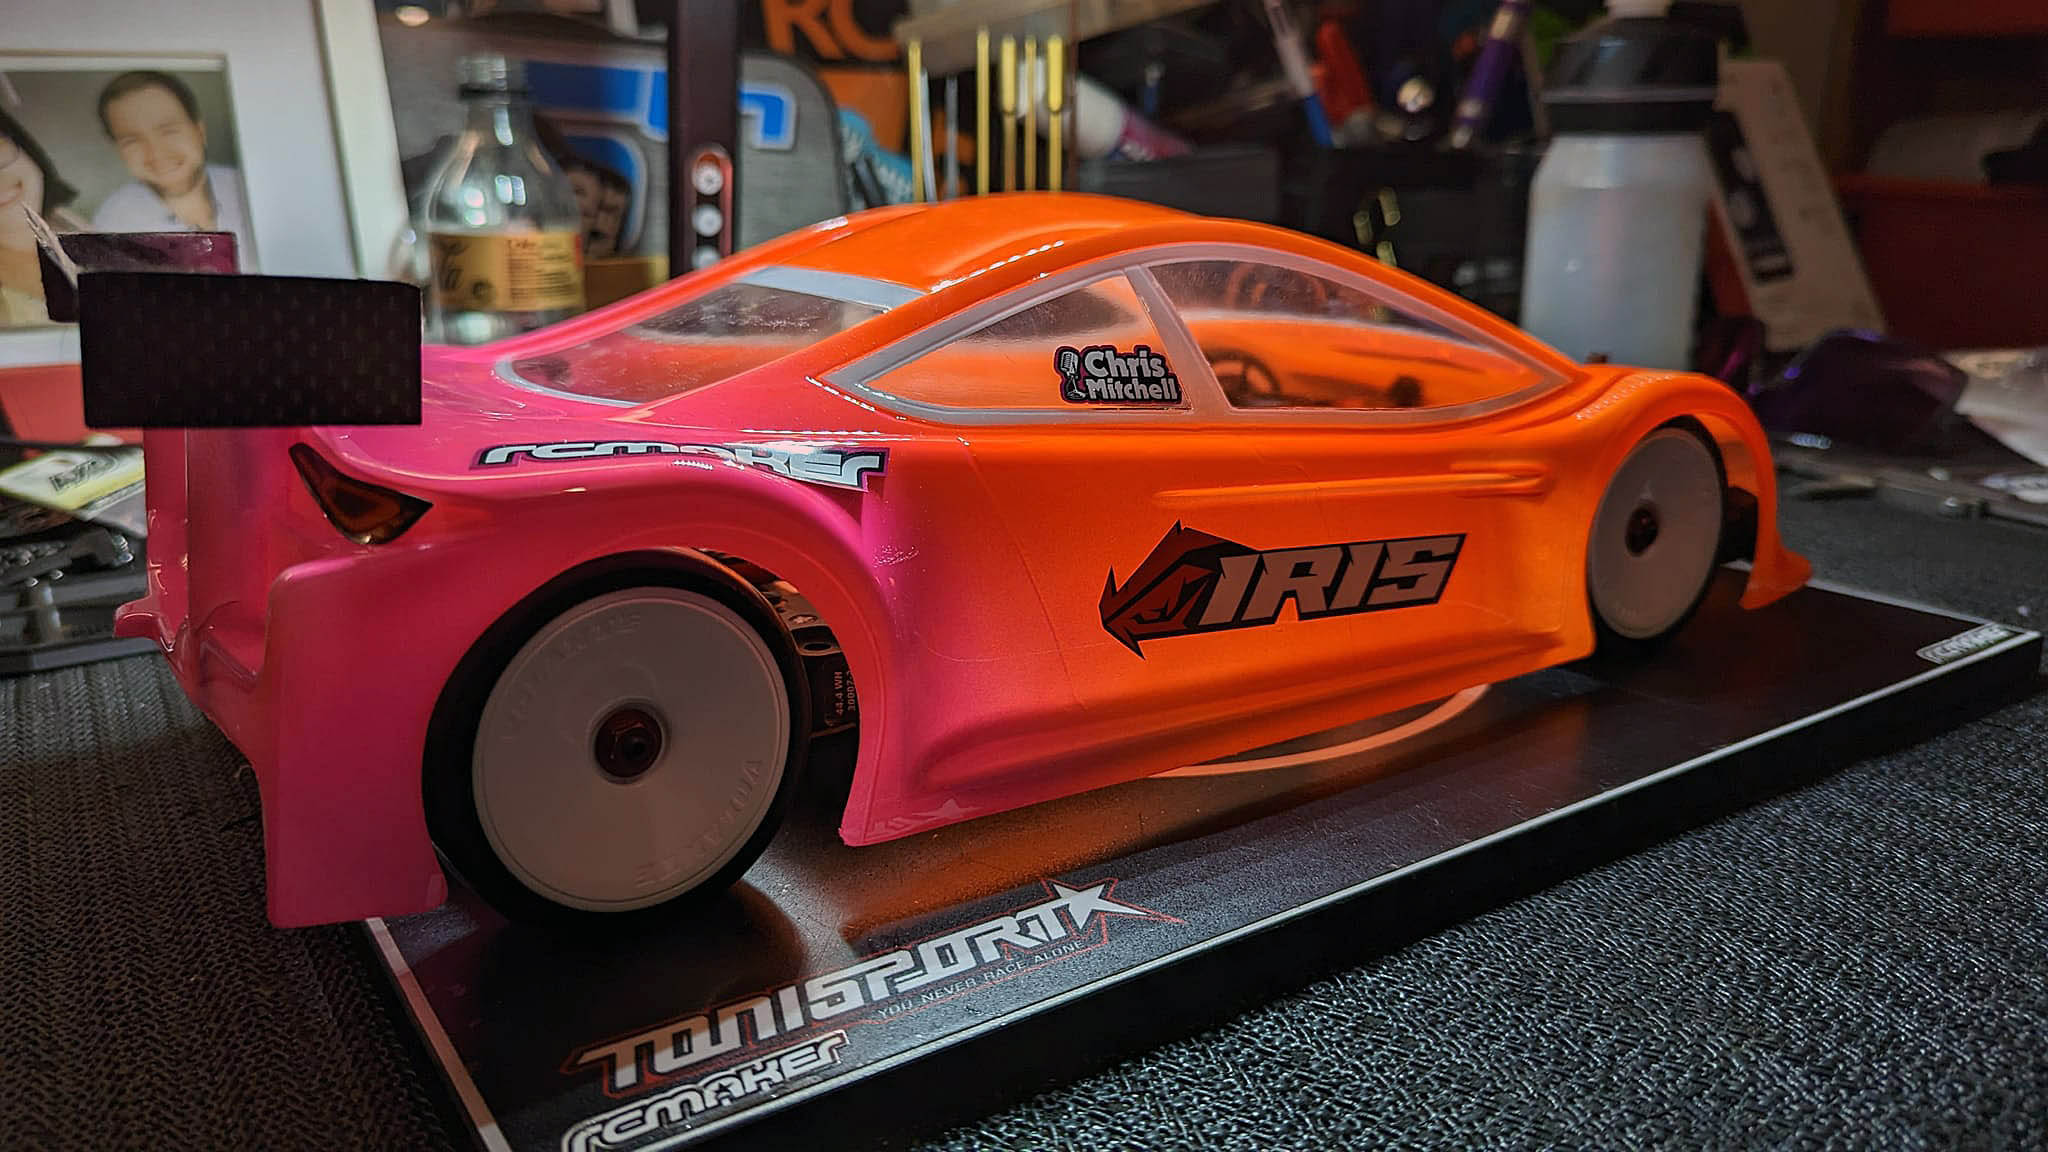
🔴 BODY 🔴
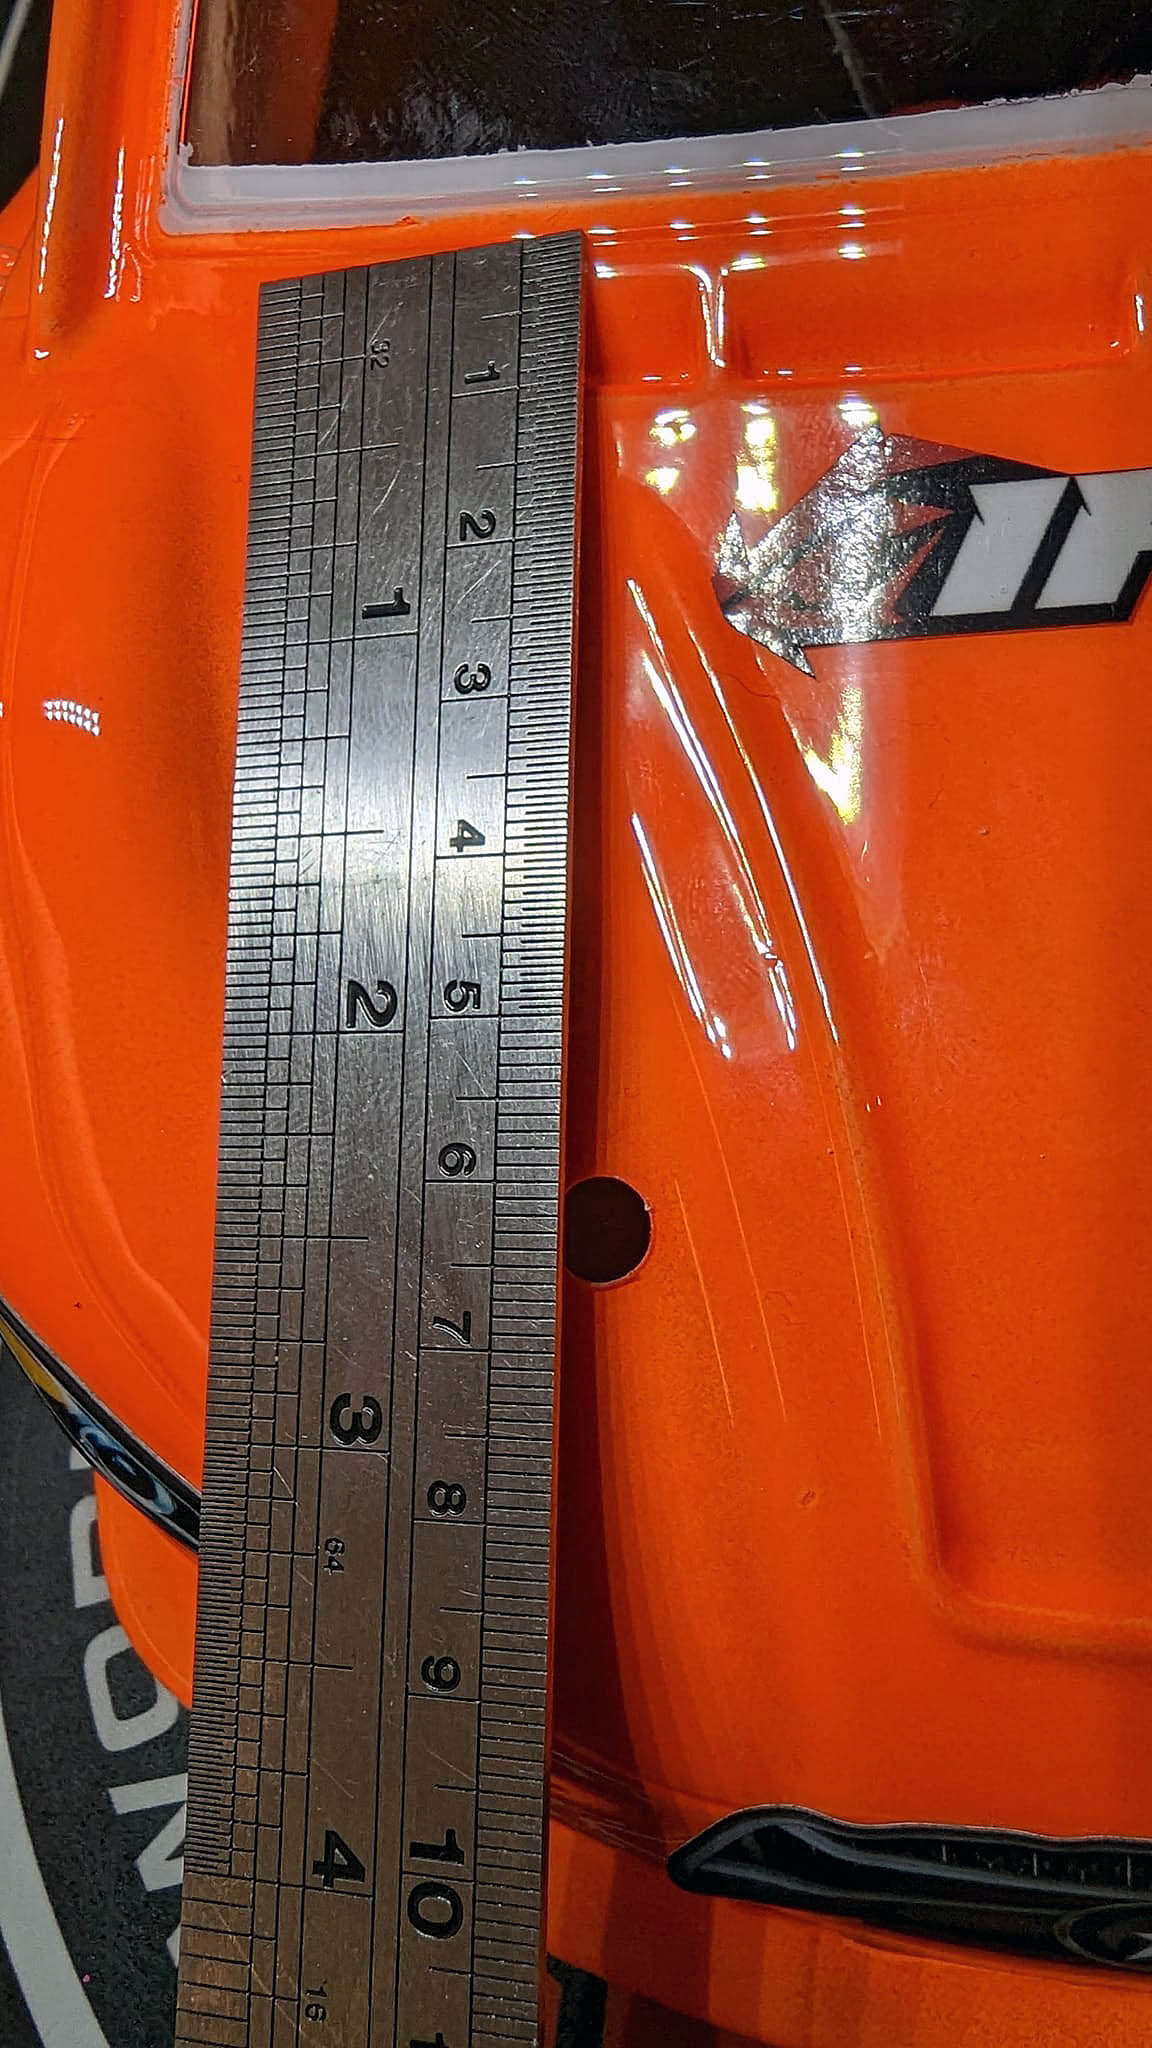
Like almost everyone else in the touring car world, I'm obsessed with the ZOORacing AU WOLVERINE body and this car is no different, I've mounted this 0.7mm thick variant at around a 5mm forward position and running it slammed with the wing back like the cool kids at ETS, see the photos for the details, but importantly the front post holes are about 63mm from the bottom windscreen line, the splitter is 4mm thick and running about 7mm ground clearance on the car, and the rear wing is about 113mm off the ground when fitted.
Body mounting is made way easier using the RC Maker PRO RCM-HRPP-M mounts, with the RCM-HRPP-BD11Z carbon plates for the ZOO body...these mounts are the greatest single aftermarket innovation in touring cars since the TC3, seriously...get some, and experience it for yourself.
This lets me run ultra short stumpy rear body posts, cut through the 4th hole - I could even cut one more hole off. But it's fine as it is.
Front body mounting uses...yep, another RC MAKER Part, this time the RCM-BHA-C body height adjuster, they're carbon fiber!...just save yourself the pain and drill the post holes to 2mm for the tricky little cross pin, I love the fine adjustments to the height you can make just turning the collar to the next notch up or down.
I'm also running some extra RC Maker goodies, because of course I am - the GeoCarbon front bumper plate RCM-IRIS-CBP and Horizontal Body post plate RCM-IRIS-RBM for good looks and strong carbon 💪
🔴 DRIVING🔴
Now, I know alot of people have looked at the 3-belr design and said 'ew, that's alot of friction/mass/intertia'...I did the same at first, but in the driving it's not noticeable at all! First drive it was very tame and easy to push very hard while forgiving and carrying a fair whack of corner speed!
The flex is easy to work with and the car had buckets of mid to exit steering straight away without it feeling 'nervous' and 'twitchy', quite impressed to start and I can't wait to see where we can get it to over the next few months!
I'm keen to keep racing with this thing, and hoping to continue to learn more of what it can do and how I can make it go quicker, improve my own race program and maybe come racing at the RCRA EP OnRoad Nationals again later in the year 😉
Thanks again to Ryan Maker for all his support, and I can't wait
Featuring a hacked together Tworks Ti screw kit

Peep the spur gear clearance, it juuuuust rubs a 4.5mm spur of you don't sand it back

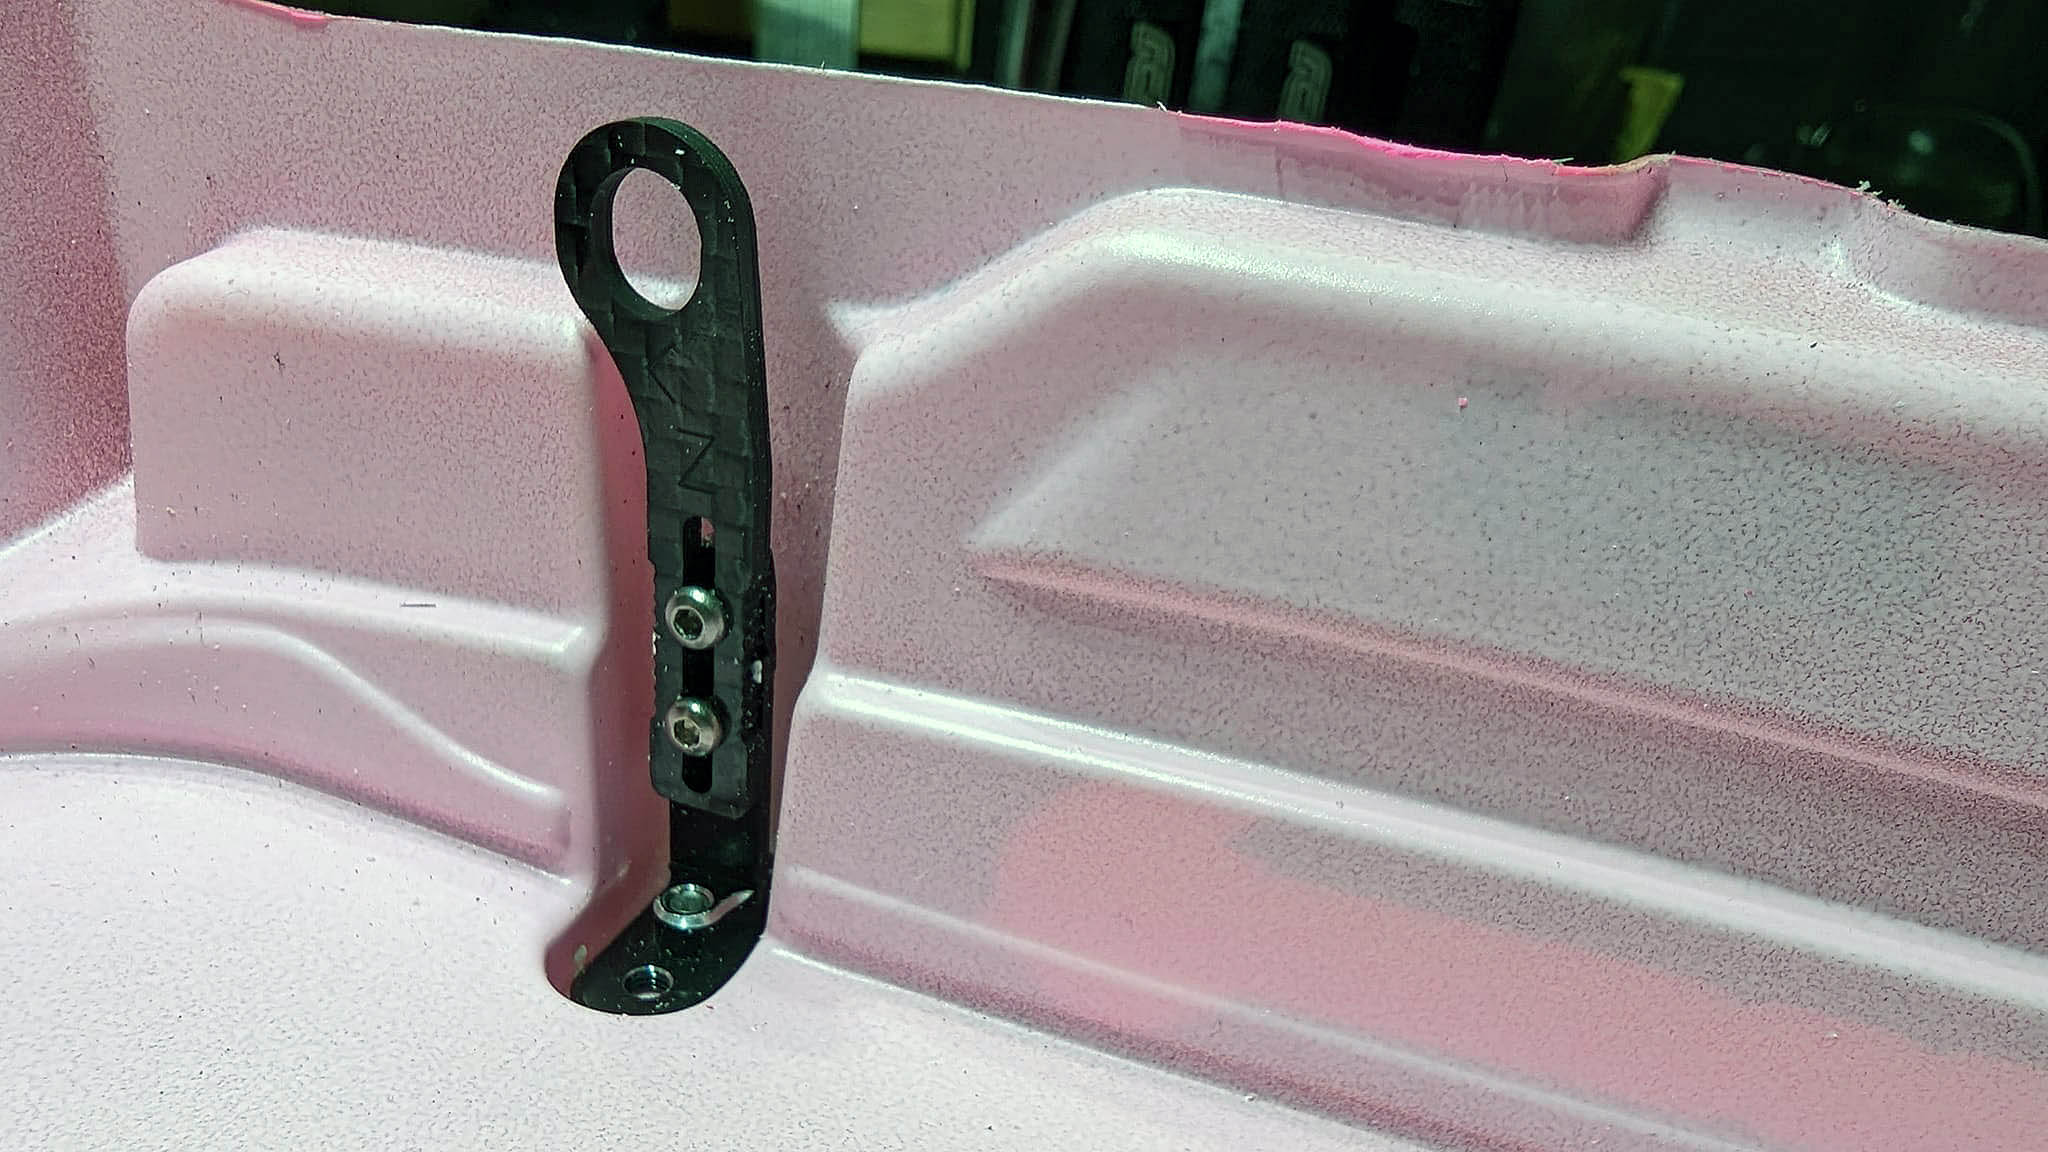
V2 shock mounts are the go
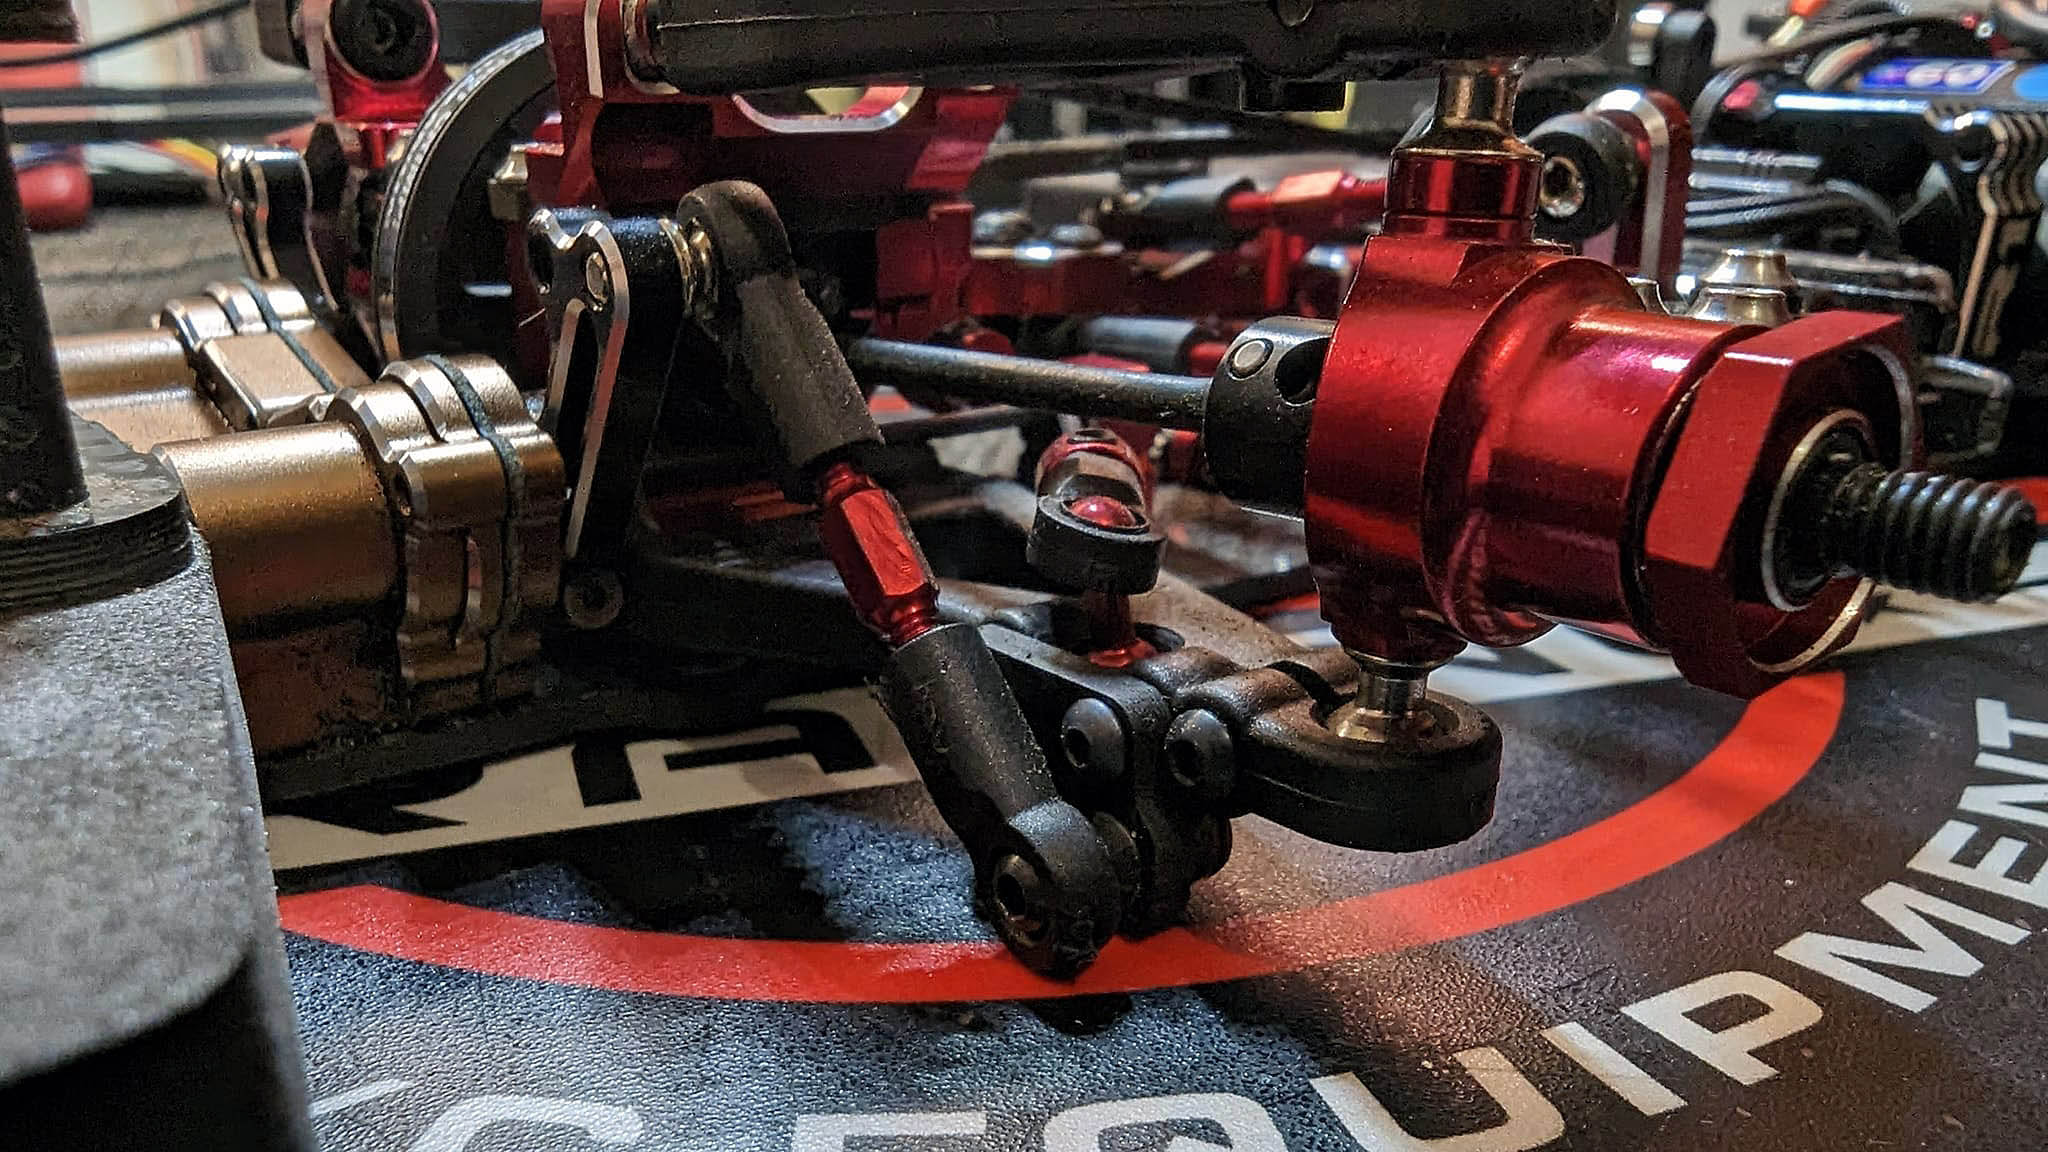
One thing to be mindful of, these shock mounts will hold the chassis off the ground, so using a tweak plate and droop blocks will have to become a regular part of your setup, rather than just the setup board and ride height gauge
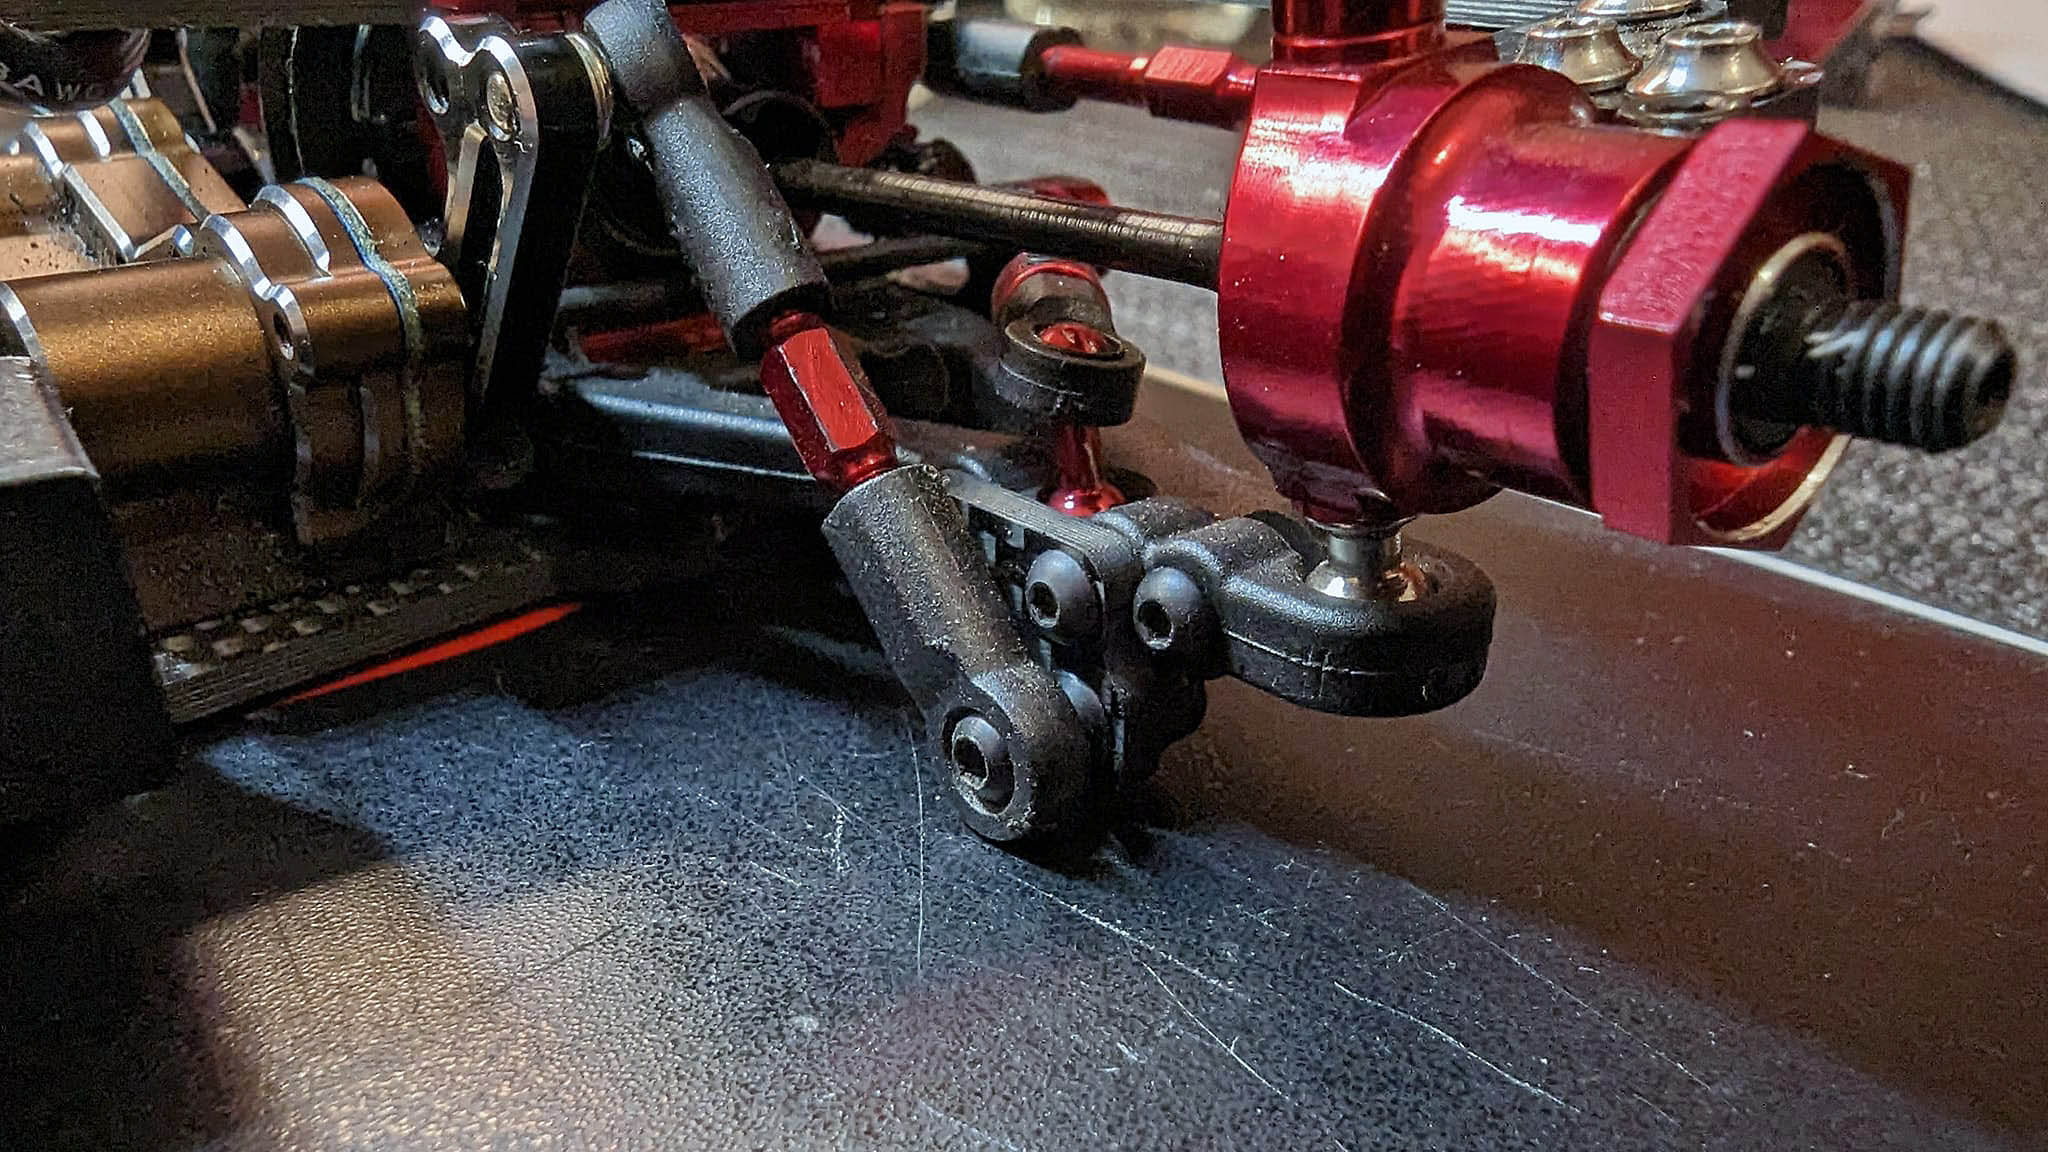
Snuck 10g of. Weight in there, and got my ESC crooked in the process...if it's stupid but it works...?
Short rear wheelbase seems the go, good thing it's super easy to adjust on this car! And super easy to maintain consistent camber when doing so
Short rear body mounts...I thought I was smart drilling a vertical hole to make it easier to get the pins in and out - but it still didn't work. Just mind your fingers when installing the body
Flex screws IN, yes...all 7 of them
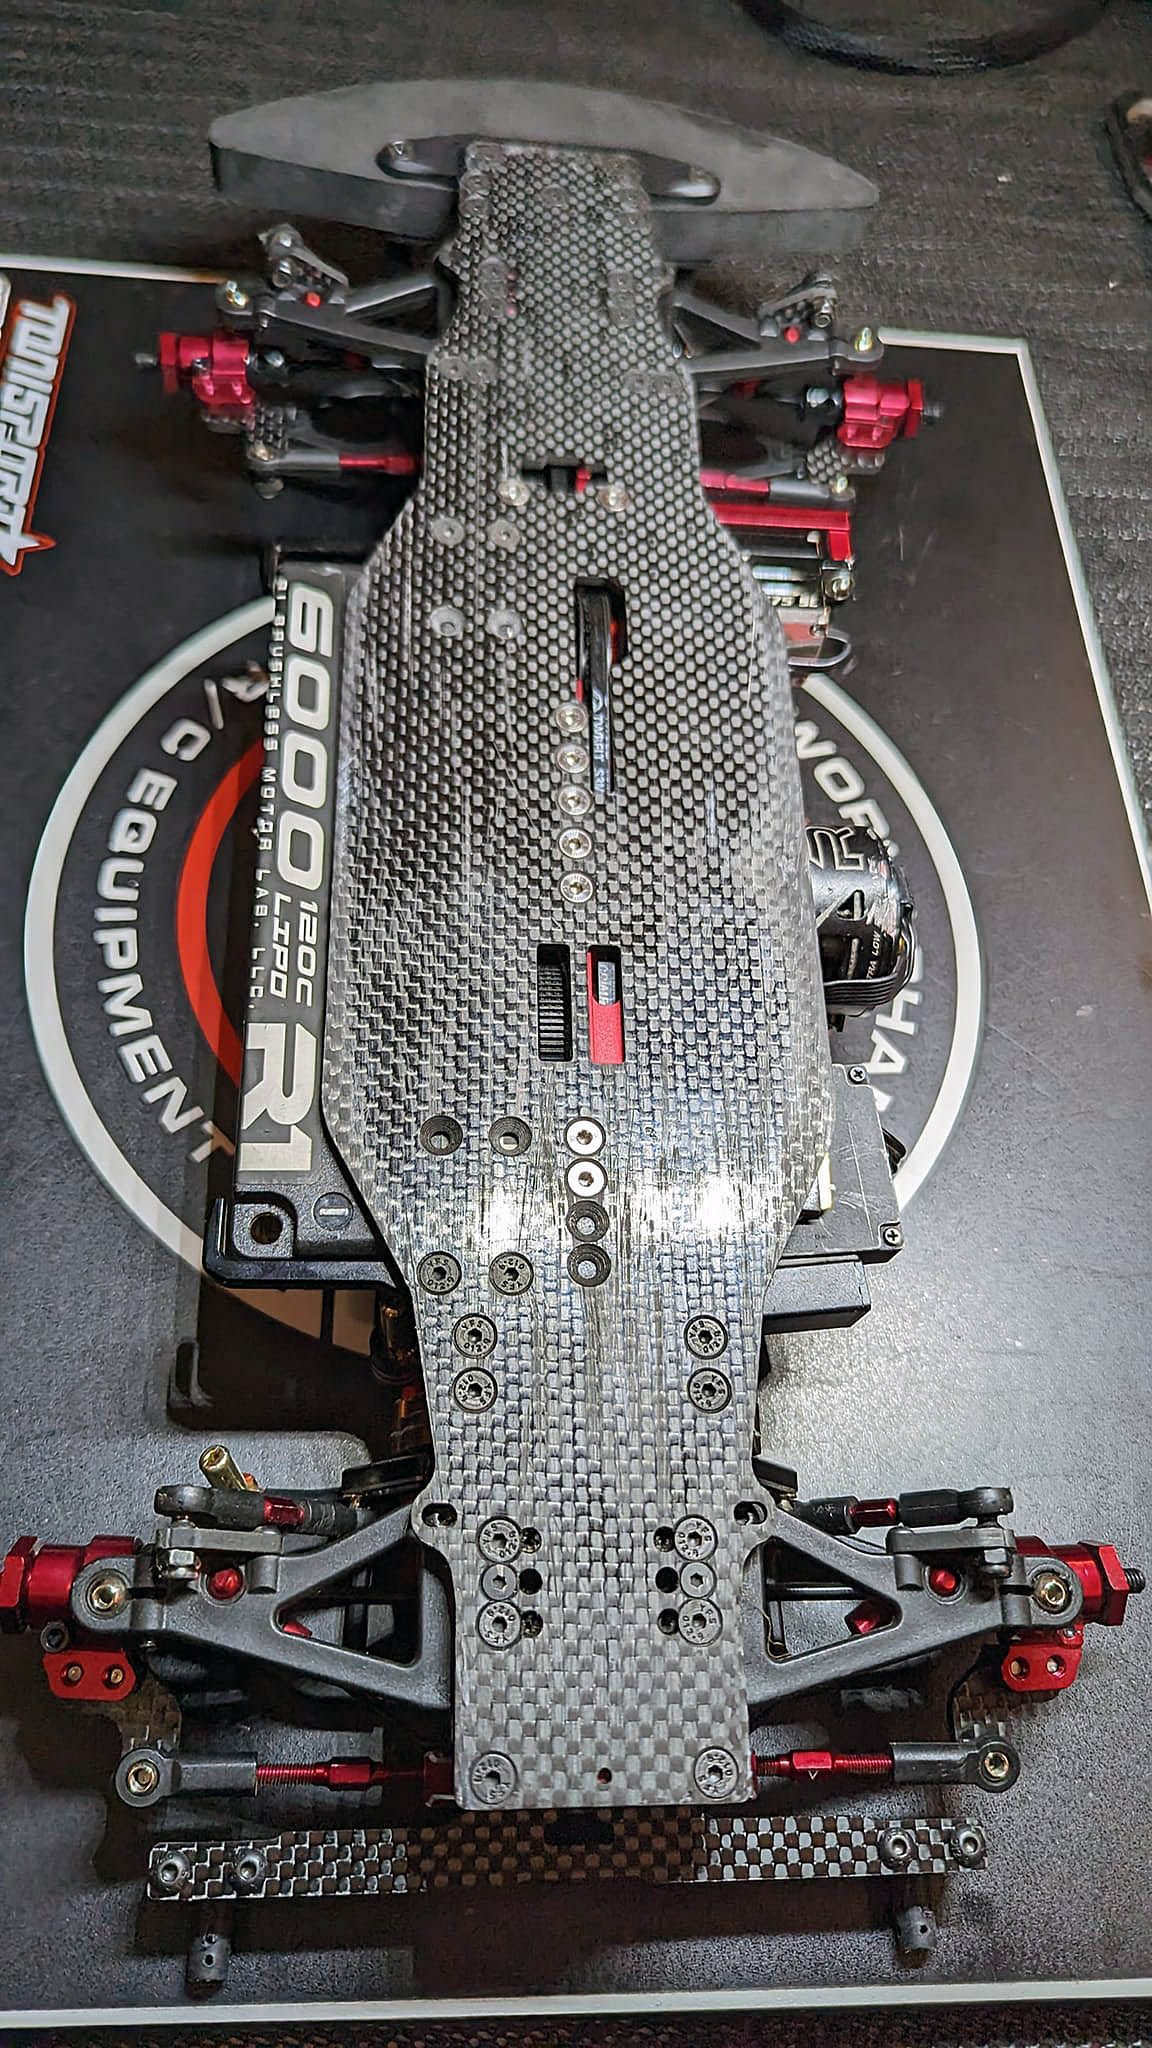
Top down view
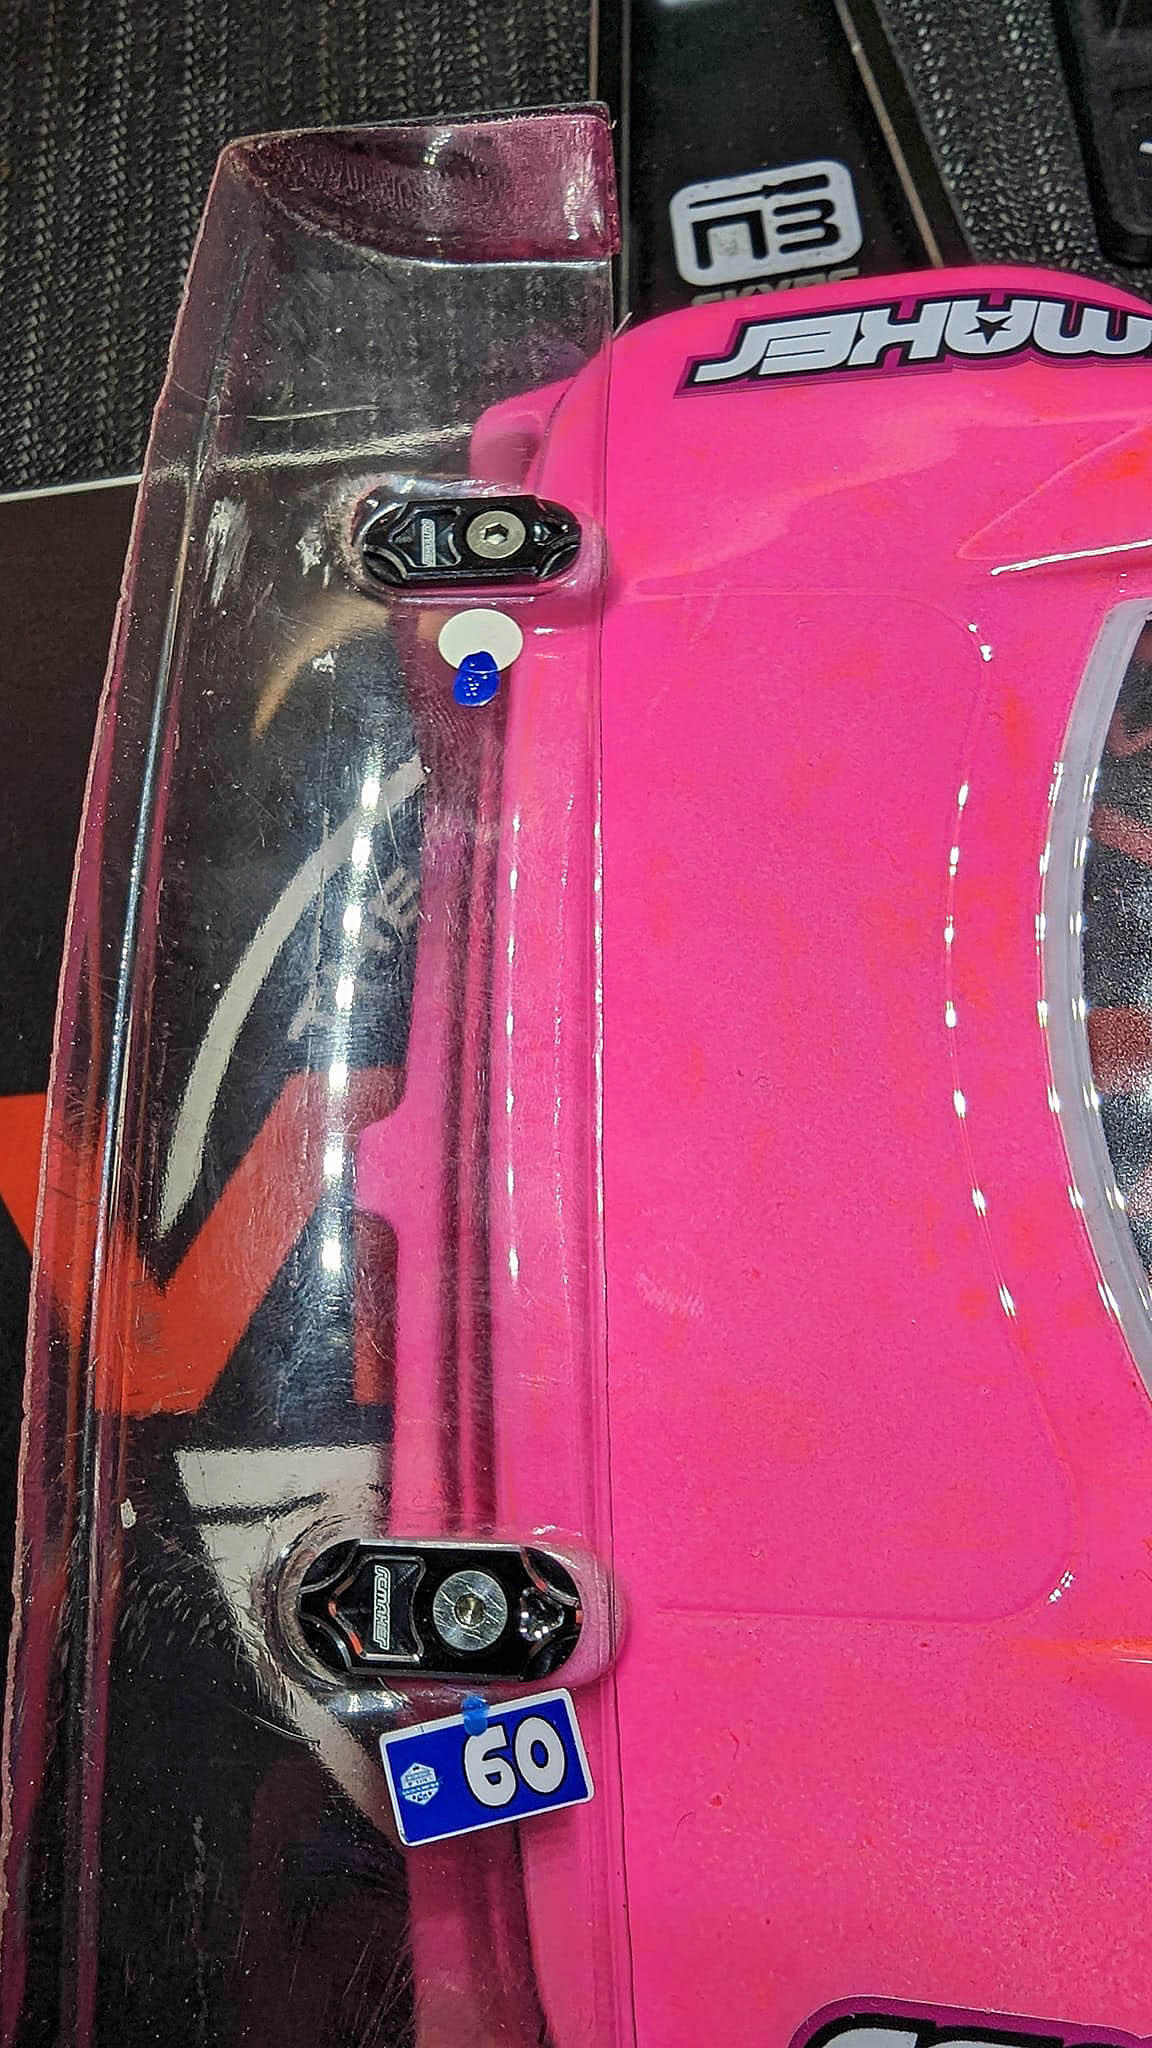
Pro rear body mounts, set to the 5th notch from full 'long' here
A drop of Loctite on the screws helps save them from backing out, just don't get any on the lexan
Rear wing flush with the mounts, easy as using the RC Maker RCM-TCWB wing buttons
Slam that thing, bodies are consumable items these days, run it into the ground!
63mmm...ish if you like your steering nice and punchy
Modular arms, inserts and pills...it's not a new concept, but it saves on carrying spares - the ultimate for a club racer or anyone keen to KISS (keep it simple, stupid
|