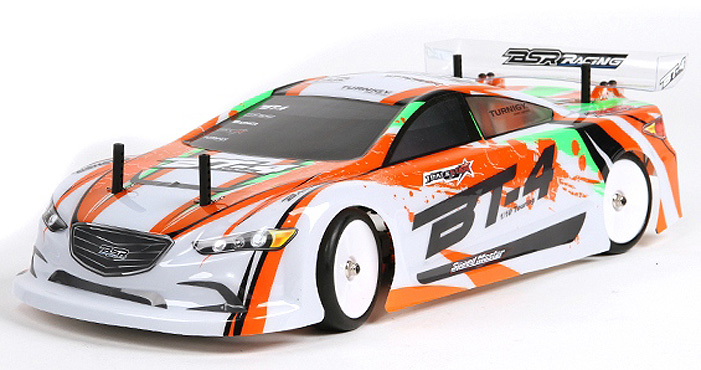
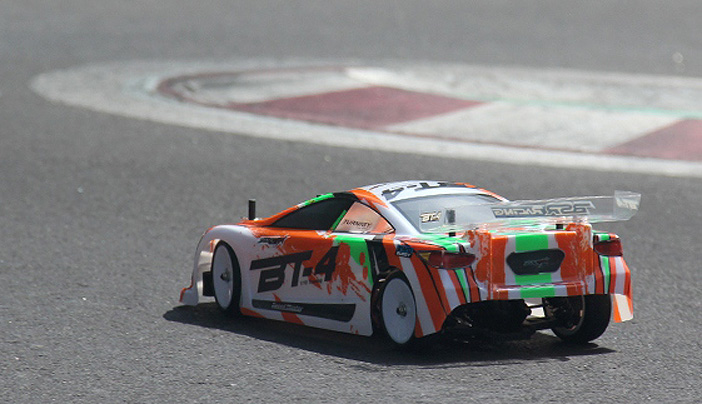
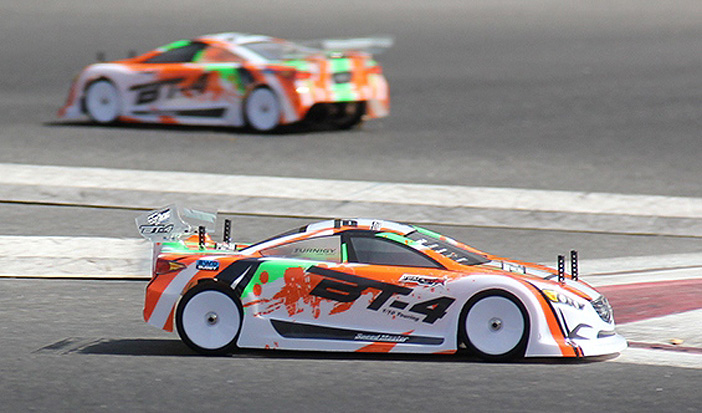
More Hobbyking stuff! BSR or Basher are a new-ish HK brand, offering kits in the budget segment which up to now has been fairly unusual. So here we go with another of my monster reviews, allow me to present…the BSR BT-4 1/10th belt driven touring car (sedan).
Features:
• Double deck structure fiber chassis
• Aluminum adjustable oil filled shocks
• Fully adjustable wheel alignment
• Oil filled rear gear diff
• 24mm slick tires and dish wheels
• Belt drive 4WD layout
• Manufactured by Team C
• Comes with a clear body, masking tape and decals
When was it that this hobby changed from attracting mainly those who are technical and a little bit nerdy, due to the requirement of understanding the cars and related ancillaries, to one where the best-selling products are those that provide instant gratification? Is this a good or a bad thing? Well, apart from the fact that it seems that everything in life is moving in that direction slowly, I guess it depends if you are one of those who likes to deal more with the ‘hobby’ side of the hobby, or the instant gratification ‘driving’ part. Or does it?
Truth is we all benefit from more people being introduced to the hobby. Even if they are shallow ‘run it until I break it, then give it to my Dad to fix’ types, they are still ‘RC Consumers’. RC is and probably always will be, a niche hobby. That means less people doing it and less people supplying items for it. More sales equals more profit, which equals more development and more new products. Don’t judge the way others enjoy the hobby, as long as they are spending money and supporting it as well as having safe, constructive fun of course. Kits have largely been the domain of the serious hobby types, not just due to the desire to painstakingly build them, but also cost, kits are traditionally at the high end and are pricey, requiring all ancillaries to be bought separately. This is the first of two BSR kits I’m reviewing that look set to change all that.
For me, it’s all about the nuts and bolts, so I am absolutely thrilled to see any new kit hit the market in these days of RTR being King of the Hobby (see wut ah did thar? :-) ), whether it’s a new $600 race chassis or in this case, probably the single cheapest 1/10th touring car chassis for sale today.
Note that the price I’m using for this review is based on what I see at hobbyking.com, which is 83 euros, due to the fact that the site can detect that I am in Europe and serves me prices in euros. A rough conversion at the time of writing is $94. Interestingly, before I received the product for review, it was available slightly cheaper still, make of that what you will. As is usually the case with most Hobbyking items, if you stare at the page long enough, you are offered a small discount, usually in the region of 5%, which (probably coincidentally) would work out at $89.99 exactly, based on today’s conversion rate at google.com
Let’s put that price into perspective… This is a fully competent 1/10th race car, fully outfitted with fiber chassis and alloy shocks, for $90! How do I know it’s competent? Well, apart from having one in front of me, Hobbyking freely admits to using the TeamC TR10 chassis as a base for this car. The TR10 was no Worlds winner, but it wasn’t bad for what you paid.
Let’s be clear though what that means…it means this is a cheaper clone of a cheap clone; historically, not a great start, but I’m willing to give it a chance. The TR10 was a mix of two generations of a certain premium brand’s race cars incorporating features of more than one model, and this BSR car is an evolution of that, and actually has a lot in common with the Xray T4, some parts are even interchangeable. Make no mistake here, this is not an Xray T4 or even close to it, but there are definitely worse cars to take one’s inspiration from.
So it’s not quite a genuine pro race car, but it bluffs its way in pretty well, and does borrow from some of the best in terms of design (and geometry) which can be no bad thing. I already mentioned that this model features carbon fiber and alloy and I’m gonna say it again…carbon fiber chassis decks and shock towers as well as alloy shocks and steel universal joints all round, for 90 bucks! I could say I don’t even care how it drives at this point, that’s already incredible value.
We all know that racing and particularly on-road racing, has a high cost of entry. You need expensive batteries to compete, a good radio, good servo, good tires, tire additives (aka juice), lots of sets of tires, lots of juice, setup tools, a good charger, paint for the body, as well as motors and ESC tuned to the track and class you are running. So, to get this car down to the track and competitive will definitely run you more than $90, however, when you consider that for me, the cost of my racing chassis bought in the first few weeks of release was around $600, you’ve saved over 500 right there!!
Hobbyking supplied Trackstar and Nanotech ancillaries for this review, which I will talk about briefly in their own section, but basically, when assembled and ready to race, if I had bought all the parts myself, this car will have cost me around 250 bucks. That includes ESC, motor, servo, tire additive and paint, but not including battery, transmitter, receiver, charger and setup tools. I have never, ever heard of any trackworthy car being built for such a low outlay at any level, least of all on-road. Even if you currently have no RC kit at all, factor in a cheap radio with independent EPA, throw in a cheap 6A charger and camber gauges and you’ve spent another 100. 350 dollars for a race-worthy electric car from total scratch? Could be the first time in the history of RC.
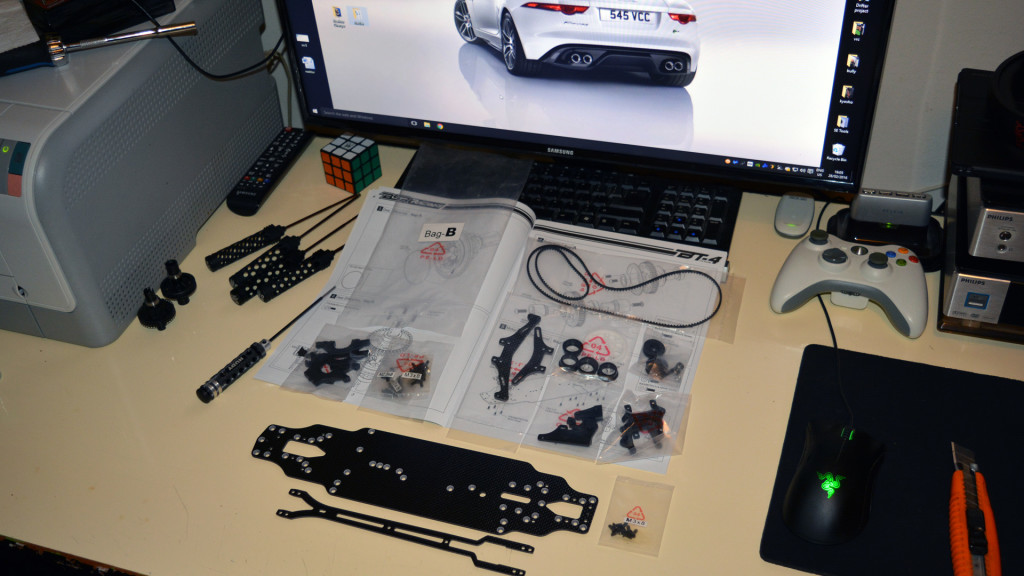
Right, let’s build it! My favorite part!
The build…
Traditionally, with ‘cheap’ kits, the build is often where the lack of budget and/or production values really shows. Either between non-intuitive design or bad manuals, it is rarely a joy to build a budget kit in the same way as it is to build, say, a Tamiya or Xray model. I’m pleased to say this model does not fit into that category. The manual supplied with the BSR isn’t bad. Note my diplomatic choice of words, it’s not great either, but nothing is actually missing in terms of steps (except one which is included as a floating page, no doubt an omission which was realized after the main print run). The step order in places is curious, for example, around 1/3rd into the build, the manual instructs you to insert the axle cross pins and push on the hexes. Since the hexes are not held by anything, if you follow this advice, every time you turn the model around to work on it, the hexes fall off and the pins fall out. I lol’d. All around the manual is ok. I wouldn’t recommend a first timer try to build this car without help, as it is a little low on detail and with the soft plastics, its also easy to over-tighten something and either squish the part, or strip the hole.
There was only one mistake in the whole thing, and this is the suggested position of the ball joint on top of the rear hubs. The manual suggests to use the hole nearest to the chassis, but it must be an oversight. I built my turnbuckles with a caliper to the lengths specified and when I put them on the inner hole of the knuckle, I had about 6 degrees of POSITIVE camber, rather than the usual 2-2.5 of negative. Moving that turnbuckle out to the outer hole immediately caused the geometry to return to what it should be, so I expect that the turnbuckle length was revised to meet a specific roll center setting and someone simply forgot to change the CAD drawing for which hole to use (or vice versa). No biggy, there is no way you’d fail to notice this when building, and the solution is obvious. Alternatively, you can use the inner hole and shorten the turnbuckle appropriately.
You can also tell that this car has been designed to hit a specific geometry, by the use of unusually small spacers in certain places, to raise or lower a turnbuckle ball joint only 1mm for example. This is a good sign as it means that someone has tweaked the design at some point, so that the non-adjustable parts of the geometry are good out of the box.
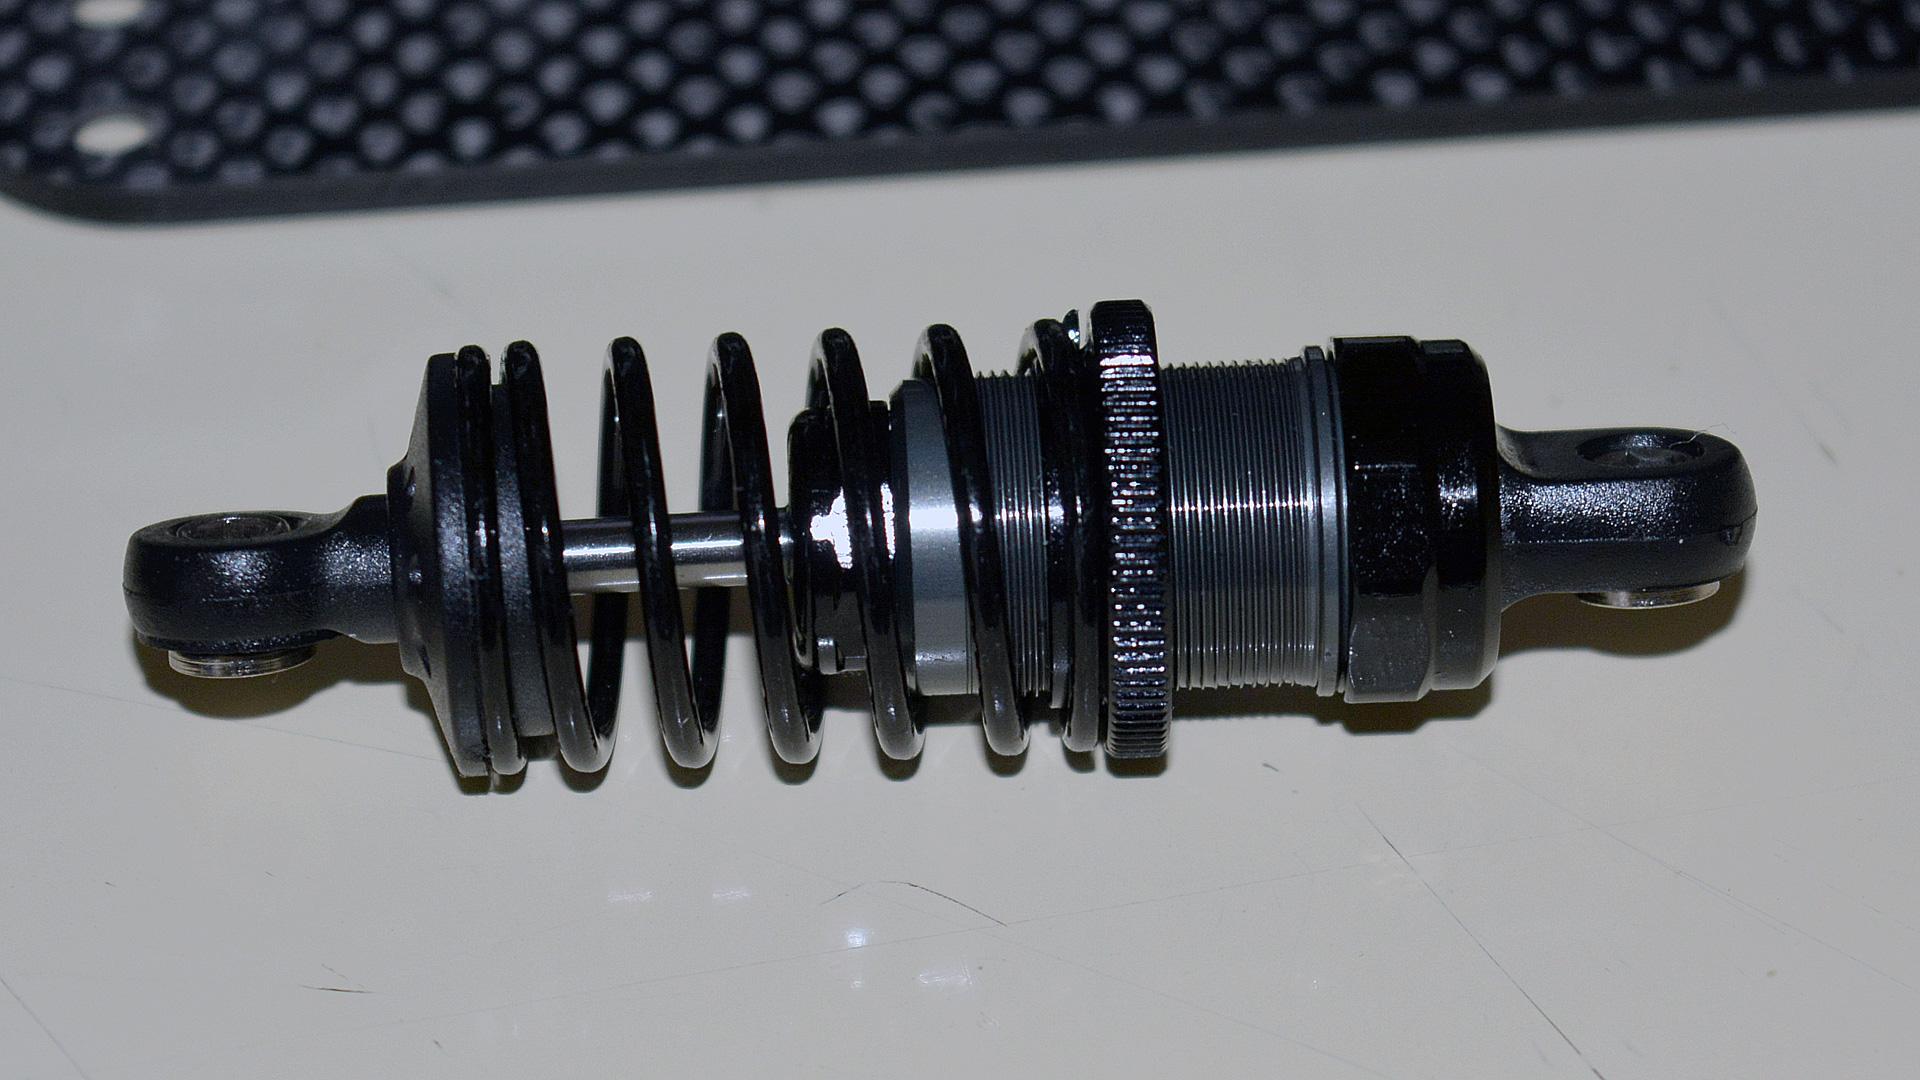
The fit and finish of parts is excellent, better than I expected. Everything lines up perfectly, the carbon is all cut straight, though the edges could have been smoother (I wouldn’t bother supergluing the edges of the fiber on a model this cheap, but you can if you want). The shocks are particularly nice, no discernible difference between these and any other full price premium touring car shock. In fact, many premium brands use plastic shock bodies stock, so this BSR is already ahead of the game. They are double o-ring, all metal, threaded body shocks, they were a joy to build and perform excellently; very, very smooth.
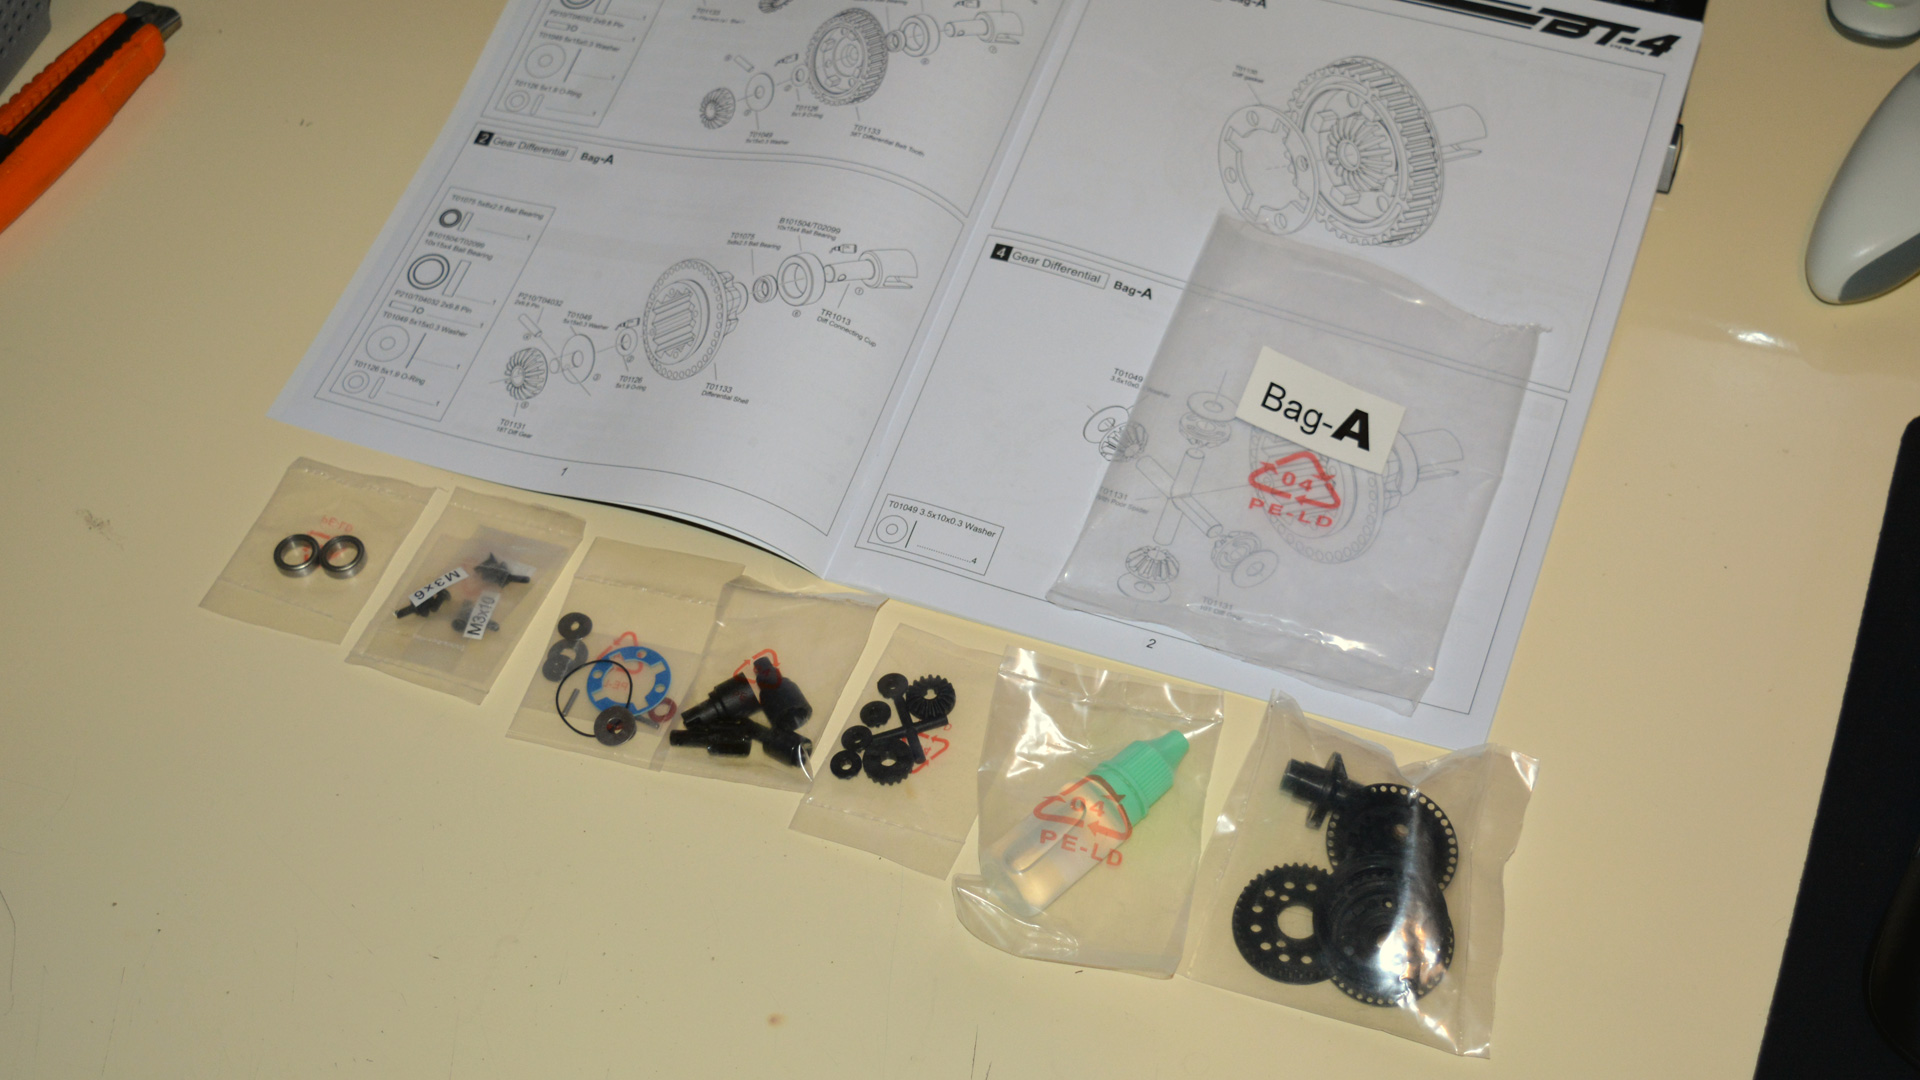
My biggest complaint about the build of the model is the number of plastic bags employed. I realise that this has been done on purpose, so that the bags precisely follow the manual steps and you have no left over parts after completing each bag, but did that really have to extend to the screws!? In several lettered bags, there is a bag of screws, with the actual screws of different sizes all in their own bags too! There are even bags with one M3 screw in them. I feel sorry for the environment when I see things like this and start to wonder when human beings are going to learn that filling our planet with unnecessary, un-biodegradable rubbish is not in our own best interest. I wanted to take a picture of the MOUNTAIN of plastic bags on my office floor after the build, but unfortunately, our cleaner got there first. It was quite staggering. The easy solution to this would be to include a screw box with all the hardware (screws, nuts and bolts) in its own compartments. As well as making the build easier (imagine cutting open a bag to get a single screw out, and not just once!) I honestly believe that this would be more cost effective, as I’m sure the net weight of plastic used to make the number of bags that hold the screws is more than that of a small hardware box. Anyway, this doesn’t have much to do with the model, so let’s move on…
Features in detail
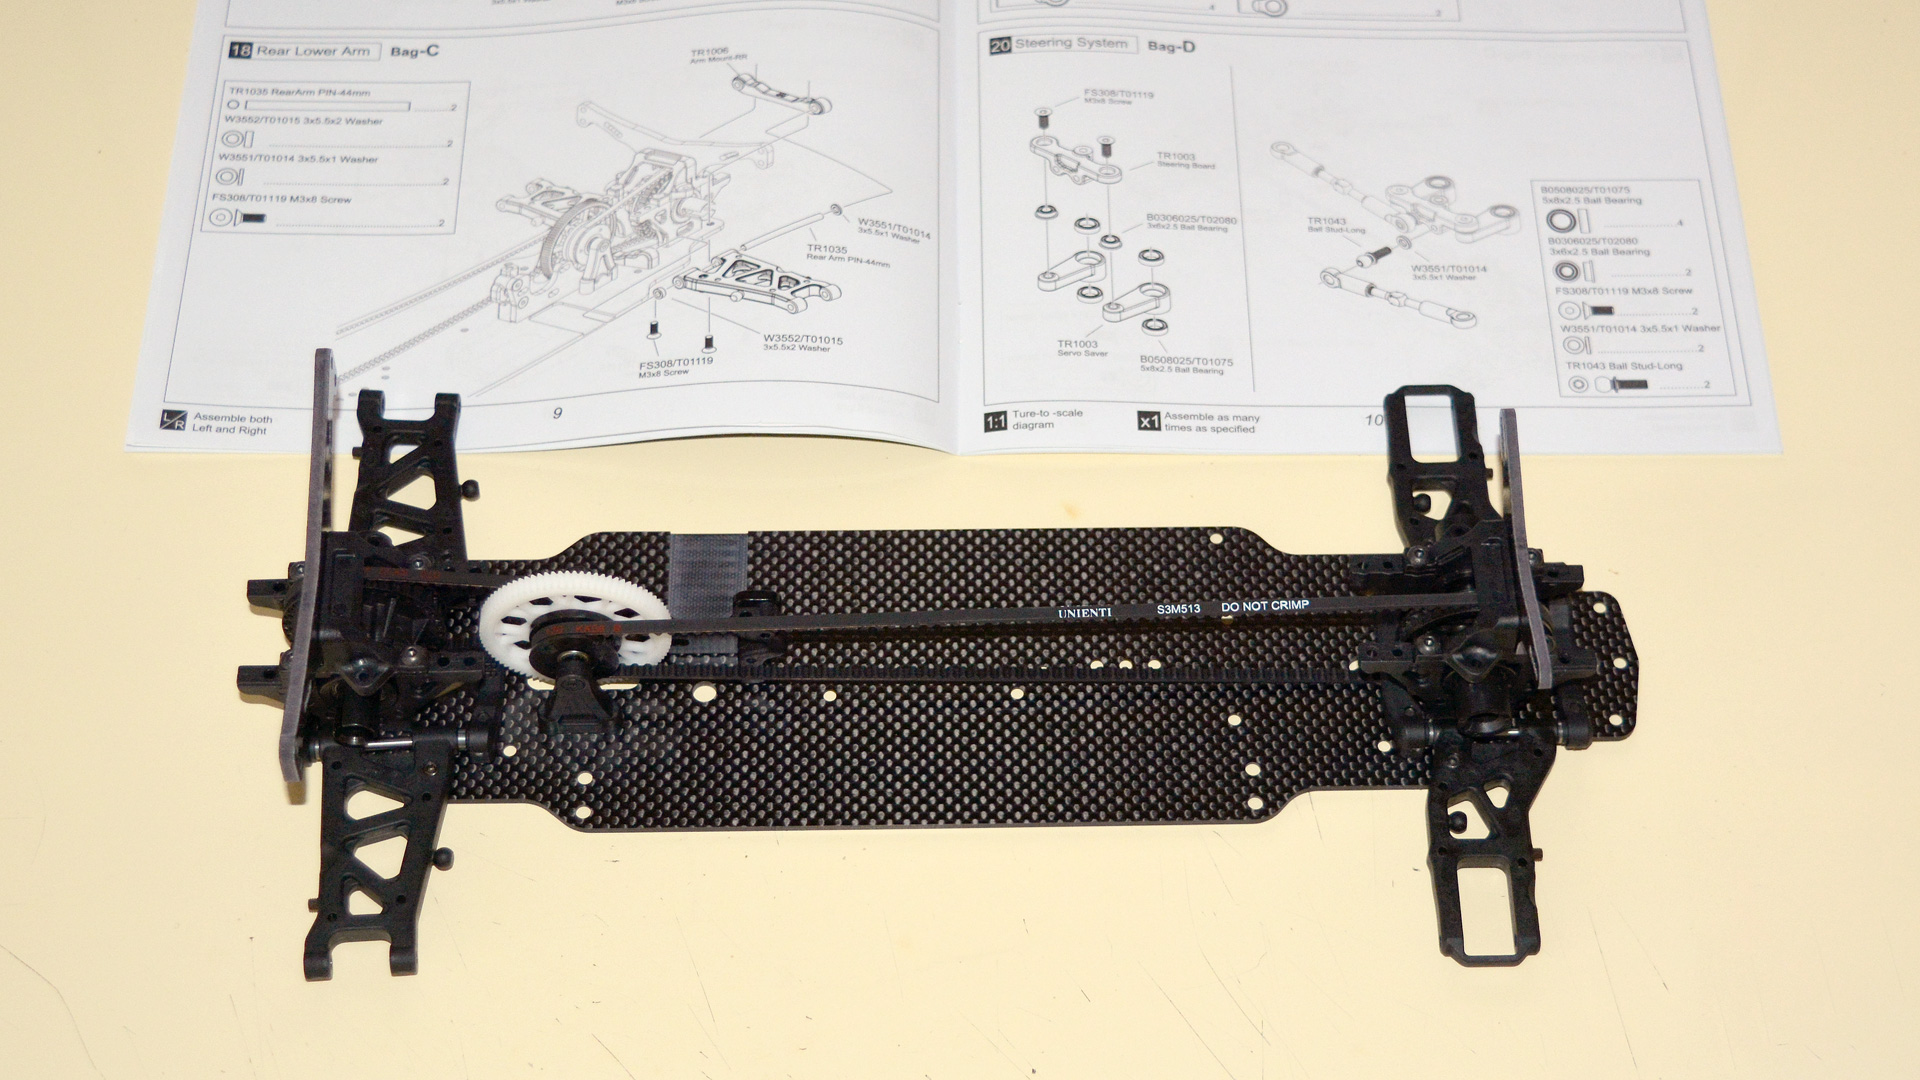
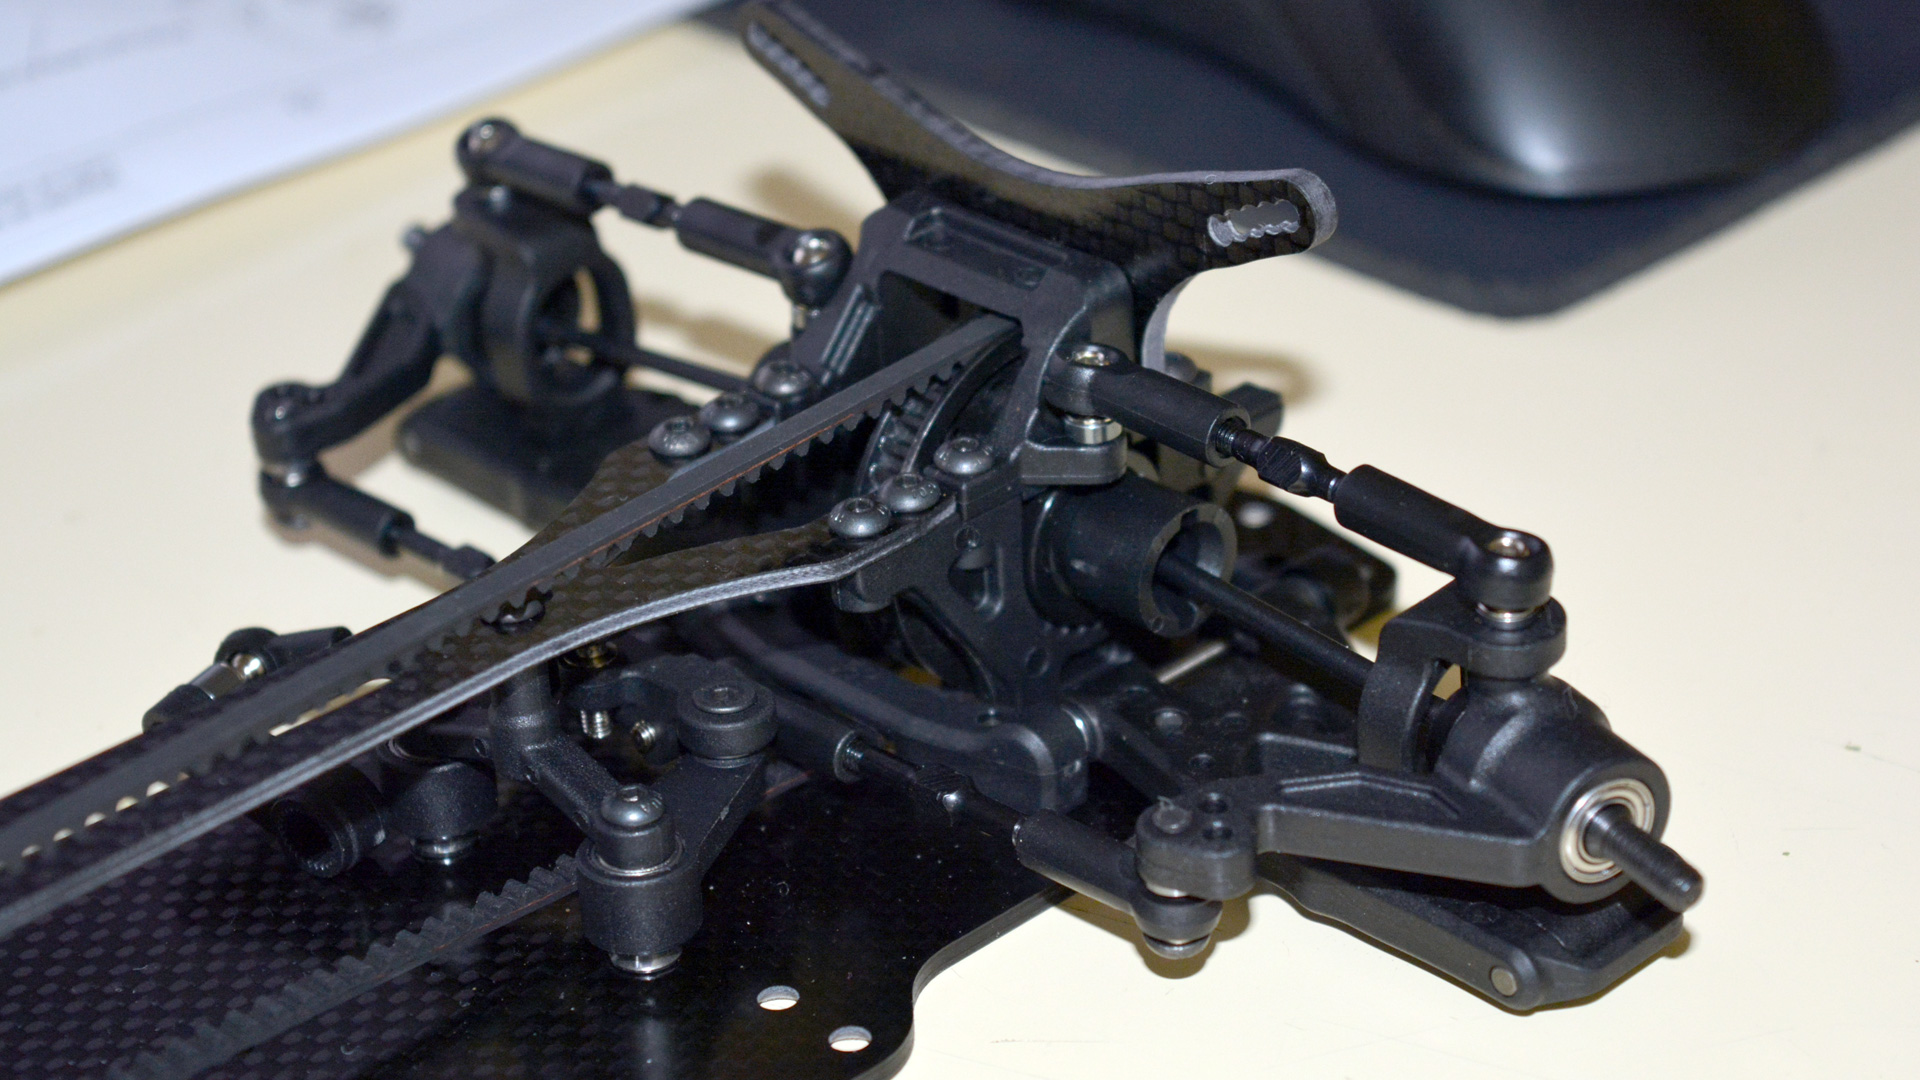
As regular readers of mine are no doubt getting used to, here I go with my usual full front to back chassis and features review. Some of the details I refer to can be observed in the build photos right at the bottom of this article.
Starting at the front, we have a giant foam bumper, par for the course for all touring cars, protecting that all-important front end geometry from racing incidents and careless driving, as well as providing some front-body rigidity so the aero can do its thing. Sensibly, the front body posts rise out of the bumper (basically as far forward as they can be, again this helps in allowing the lines of the body that generate front downforce to be held more rigidly by the body clips).
Due to the fact this is a belter (belt driven 4wd), the bulkheads front and rear are open. The bulkhead pieces are a relatively soft composite plastic, where high end examples of this type of car are almost invariably CNC billet aluminum. Sitting between the bulkheads is the front differential. It’s not a differential, it’s a locker (aka spool or solid diff); it has no differential action. I run a spool of a similar design in my Xray T4 (and did in my NT1 as well) by choice, so this is hardly a point for complaint. A one-way at this price point would be unexpected in the extreme, and in any case, most beginners and also many experienced drivers prefer the feel of a locker (I do).
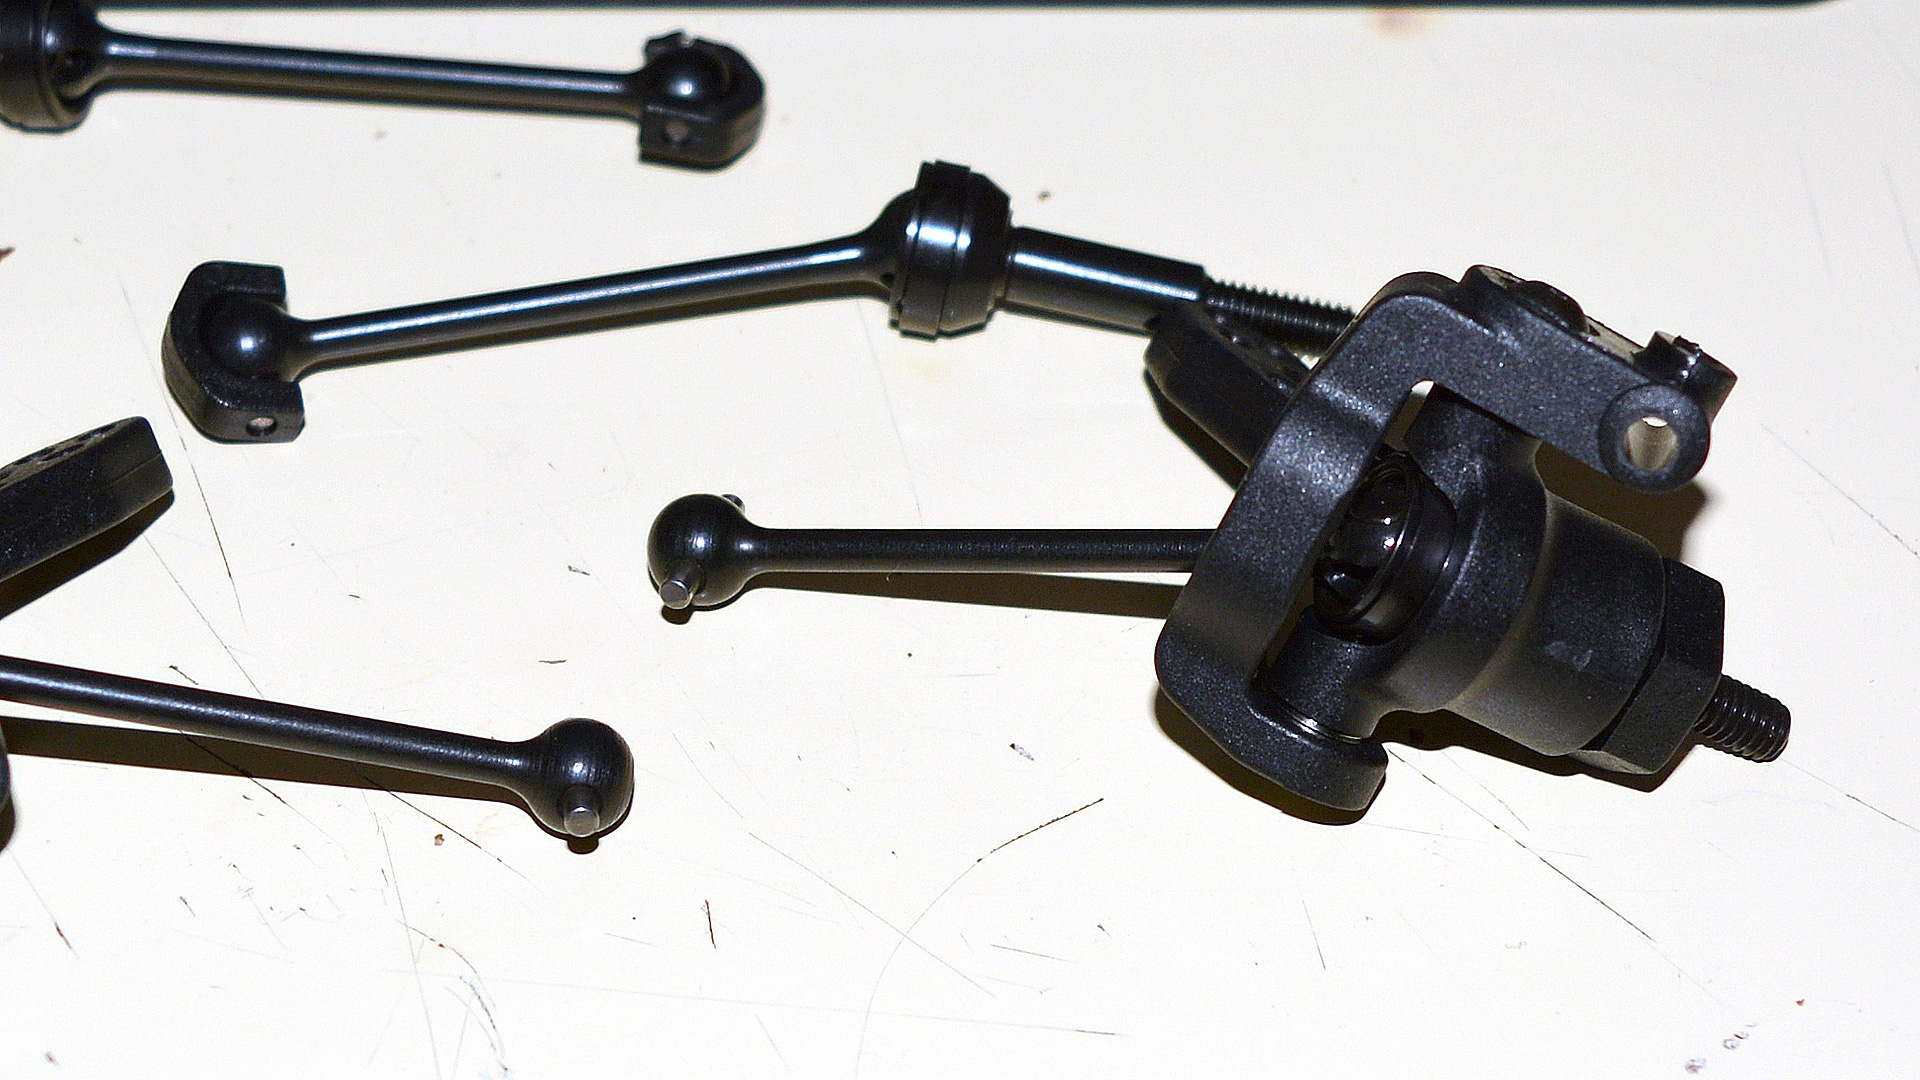
The driveshafts I mentioned already above… Steel universals all around! Of course this is a must for any sedan to call itself ‘trackworthy’, but once again, at this price, it’s a seriously impressive inclusion. I remember when a set of universals for a Tamiya cost nearly as much as this entire model. During the build, be careful not to mix them up. There is 1mm difference in length between the rear driveshafts and the front driveshafts. This is such a small difference that it is almost undiscernible with the naked eye unless you have the visual acuity of a fighter pilot. The manual describes assembly of the universals, however, the shafts and joints themselves were already fully assembled. They only required the plastic bushings clipping on to the cross pins for the rears and they were done (fronts do not feature these plastic drive cup bushings so once you put them on the rears, it is clear from then on that those are the rear items and the potential for confusion is negated). The front knuckles are highly reminiscent of those found on many other touring cars, and are basically a classic c-hub; they could use a little more steering lock, but they’re fine.
The lower A-arms are again, typical; nothing to write home about there. They do feature droop screws, which is a very important adjustment for racing and often omitted from budget models. They also feature mounting points for sway bars, as does the bulkhead, though there are no sway bars supplied (not entirely surprising, though for serious racing they represent an important and effective tuning option). I don’t actually like having the ball end for the lower sway bar mount as an integrated part of the moulded arm (as opposed to a metal ball-end you screw into the arm). Plastic is notoriously more sticktion-y than metal, and these will wear very fast, especially at dusty circuits. Personally, if they were to wear to the point of the ball end popping off regularly, I would slice the whole molded ball off, drill a 3mm hole and use a threaded metal ball. I might even consider doing that from the start instead of using the molded ball at all; free movement of ALL moving parts, particularly those relating to suspension geometry is absolutely critical in on-road racing. Though of course, since no sway bars are supplied, this is somewhat moot.
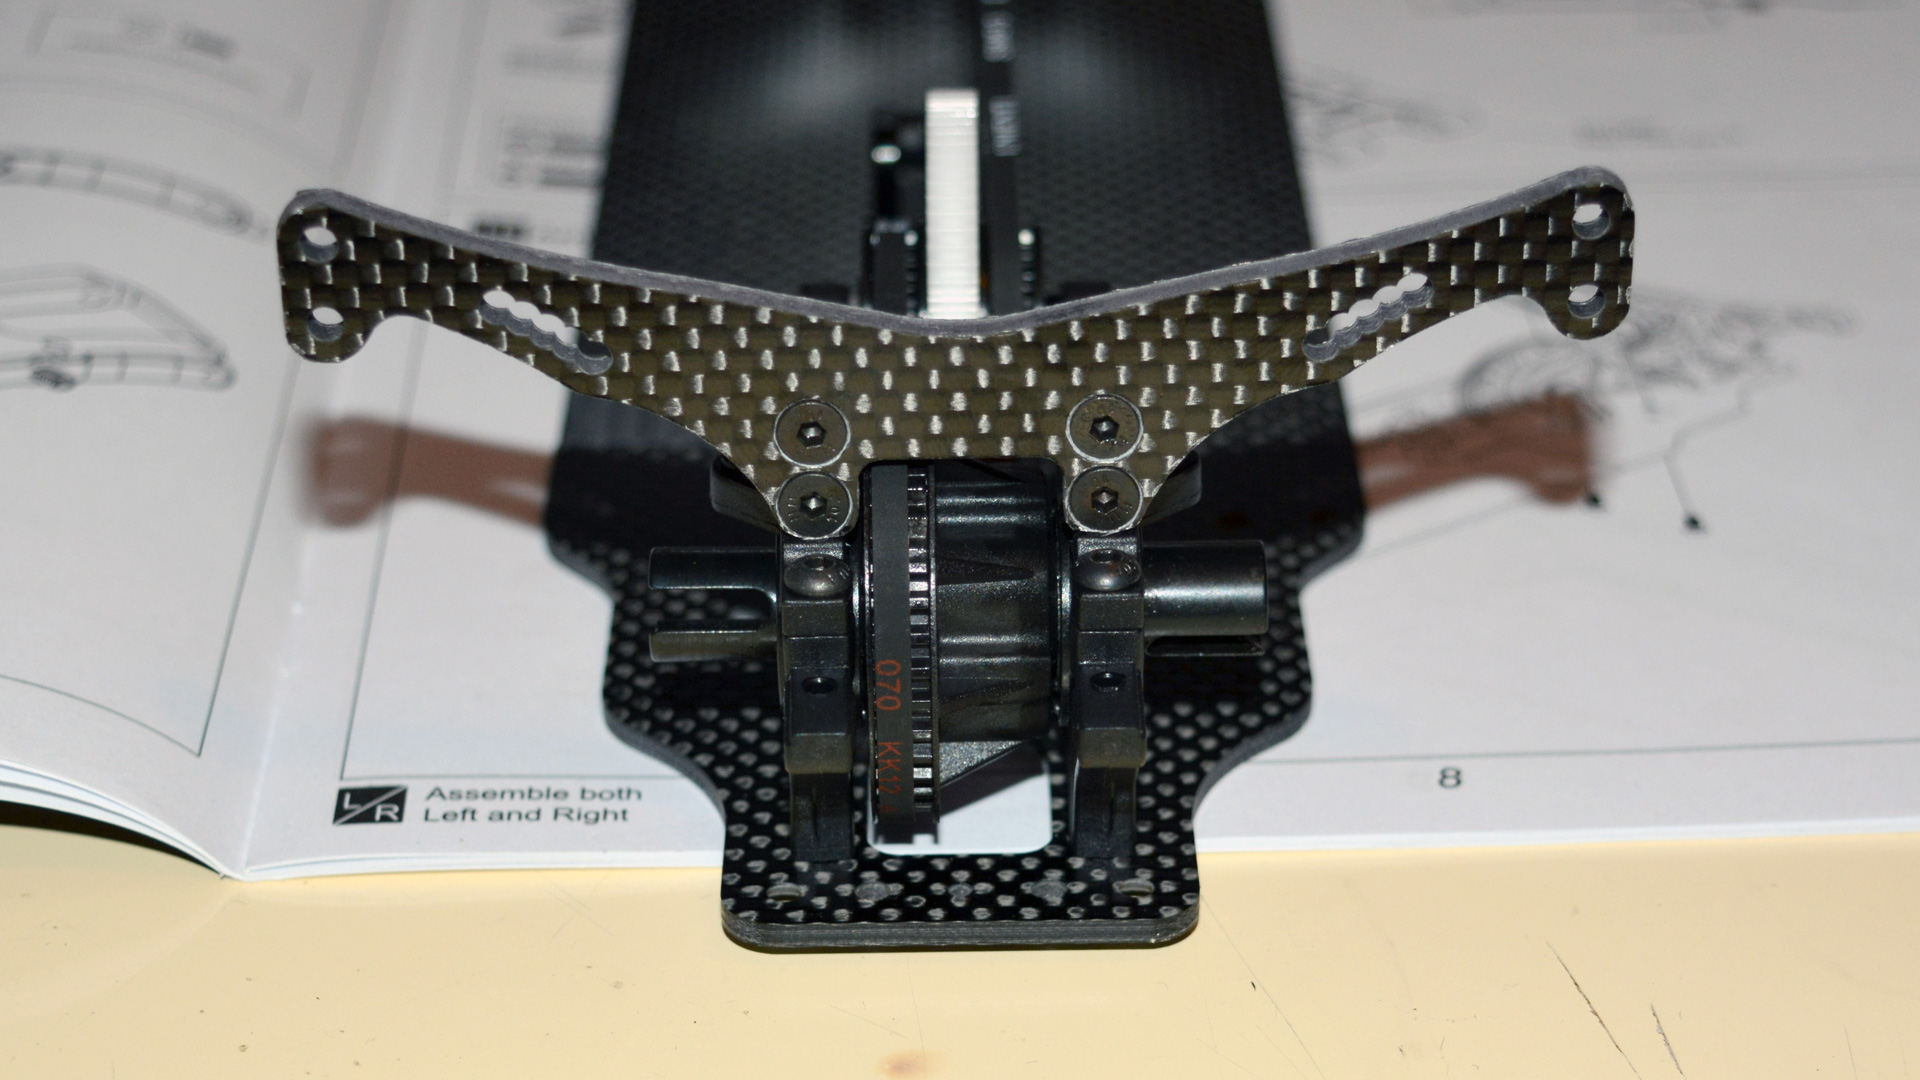
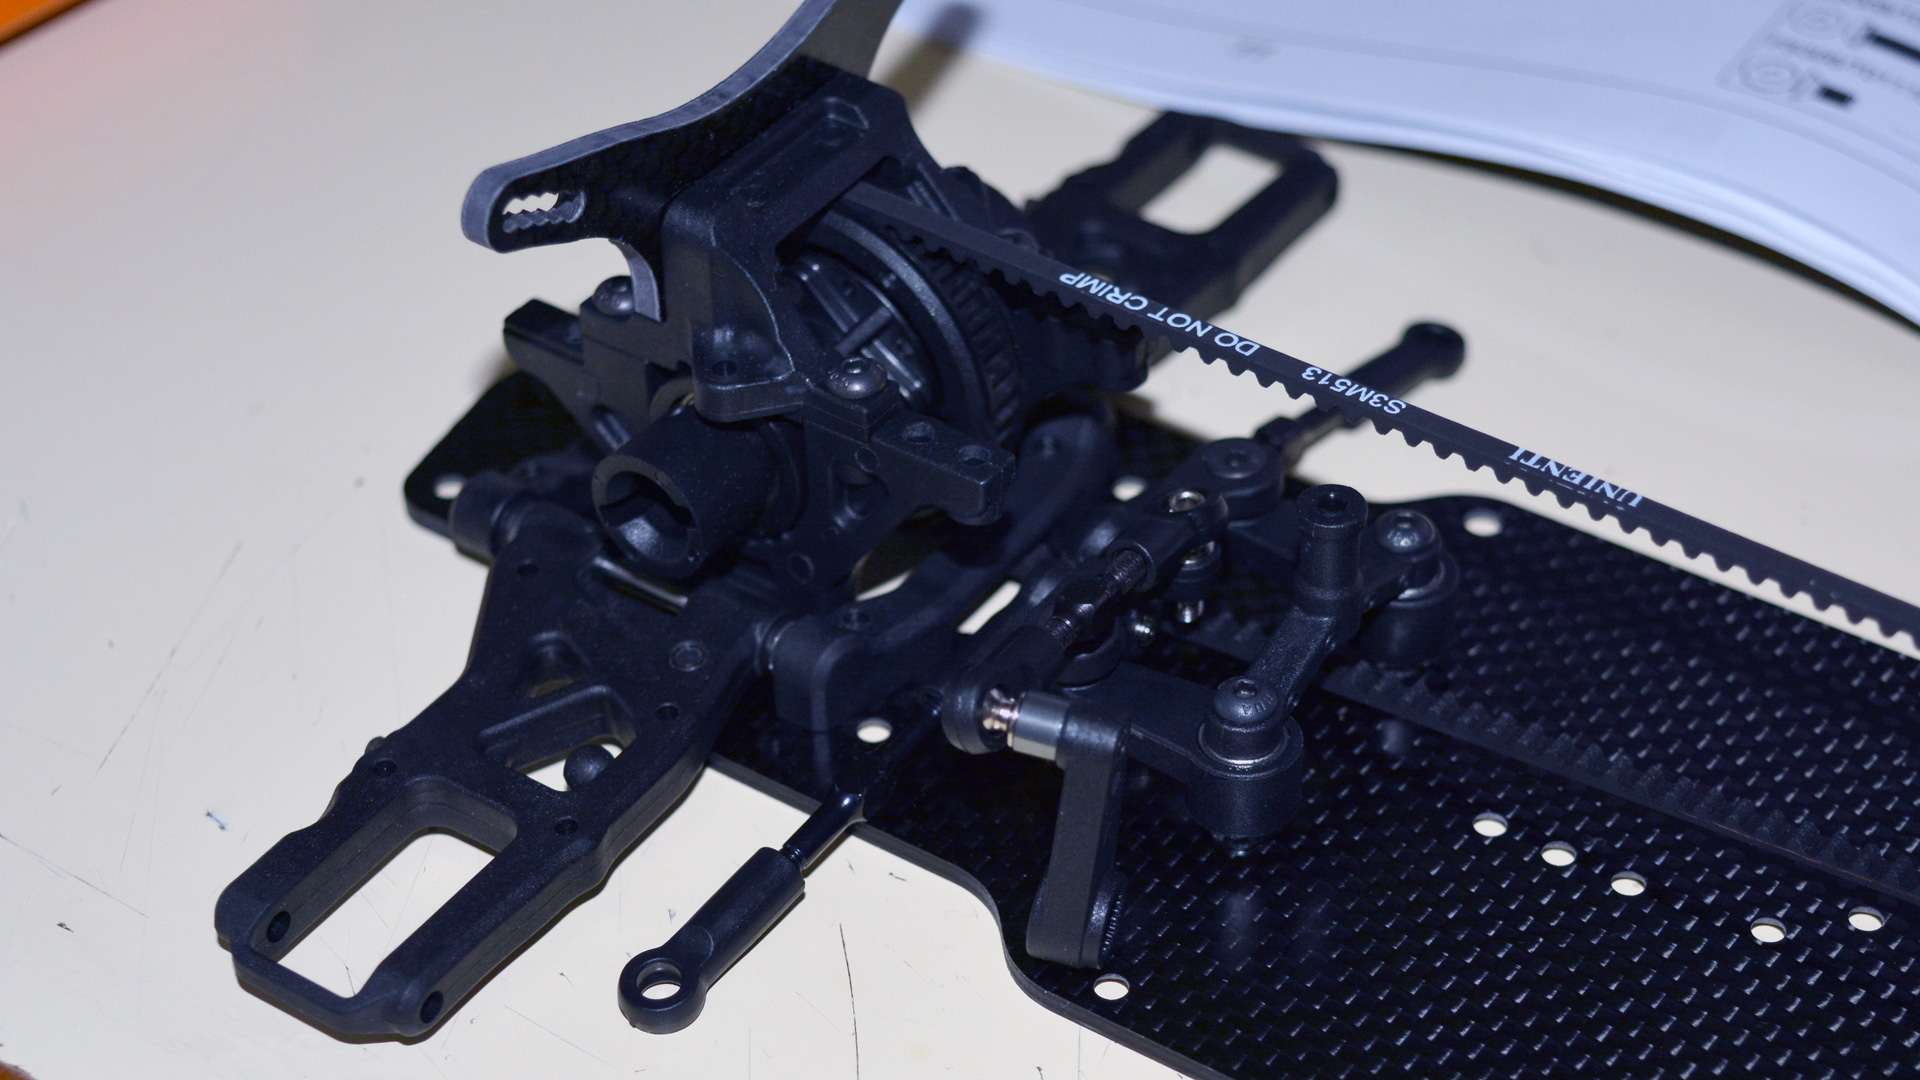
Speaking of geometry, the shock towers offer a number of upper shock mounting options and the upper arms are reverse threaded turnbuckles, giving immediate access to camber. More reverse threaded turnbuckles are employed for the steering arms. Again these are necessary if the car wants to call itself a racer, but are still a great inclusion considering the cost of the model. Speaking of the steering system, it’s fully ballraced (steering posts have bearings top and bottom).
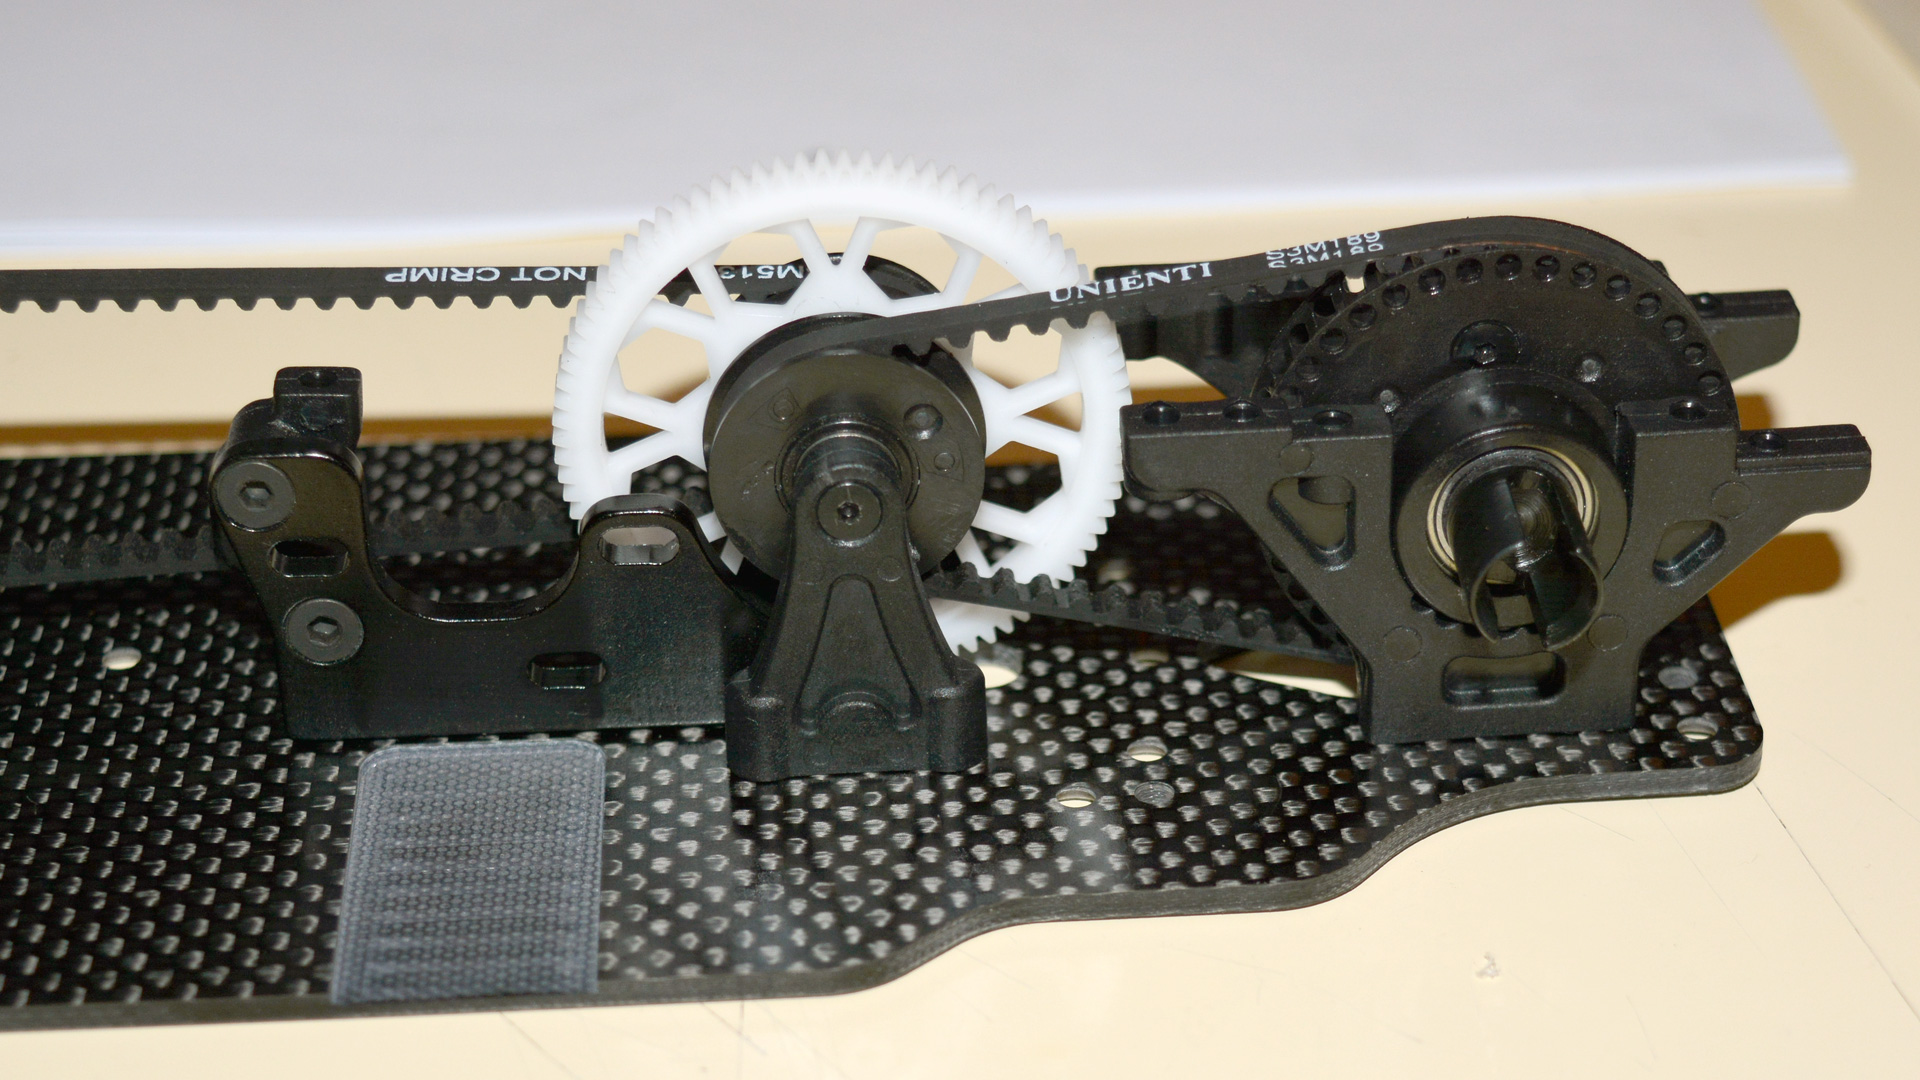
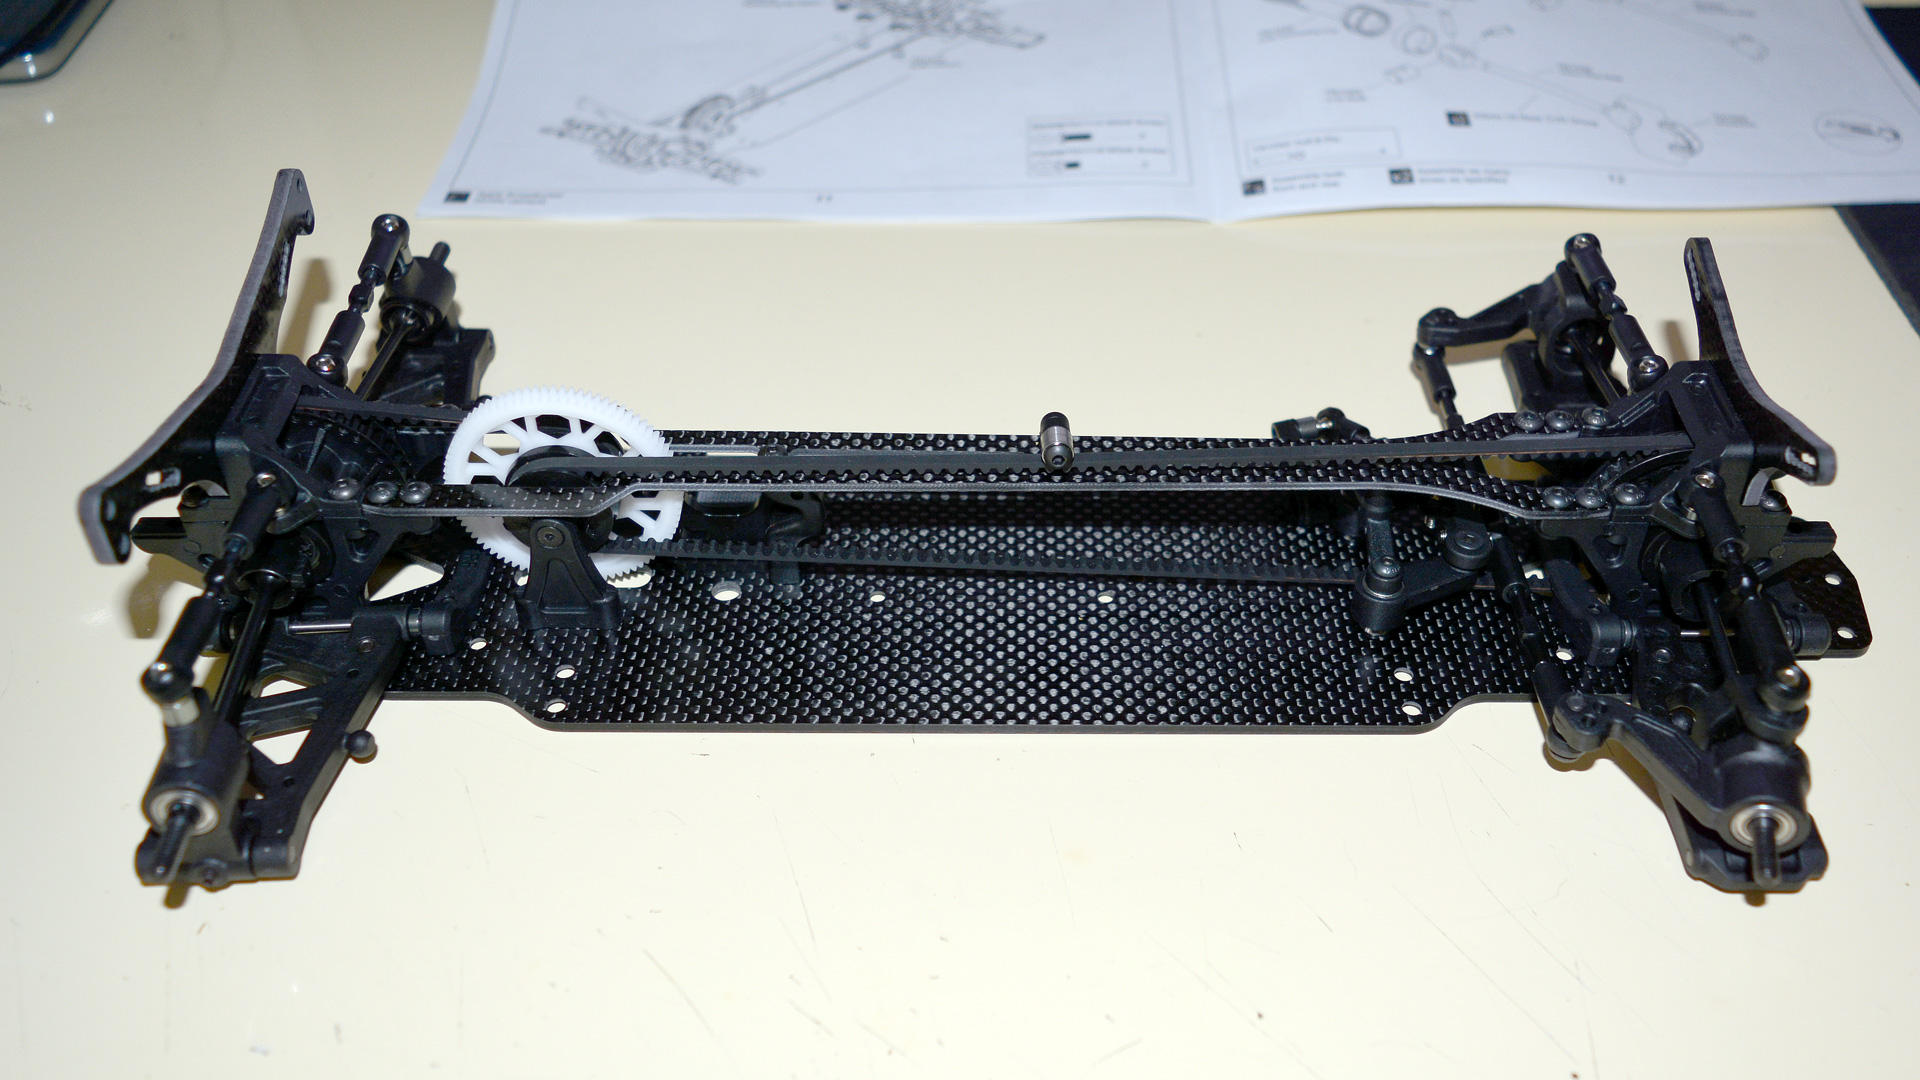
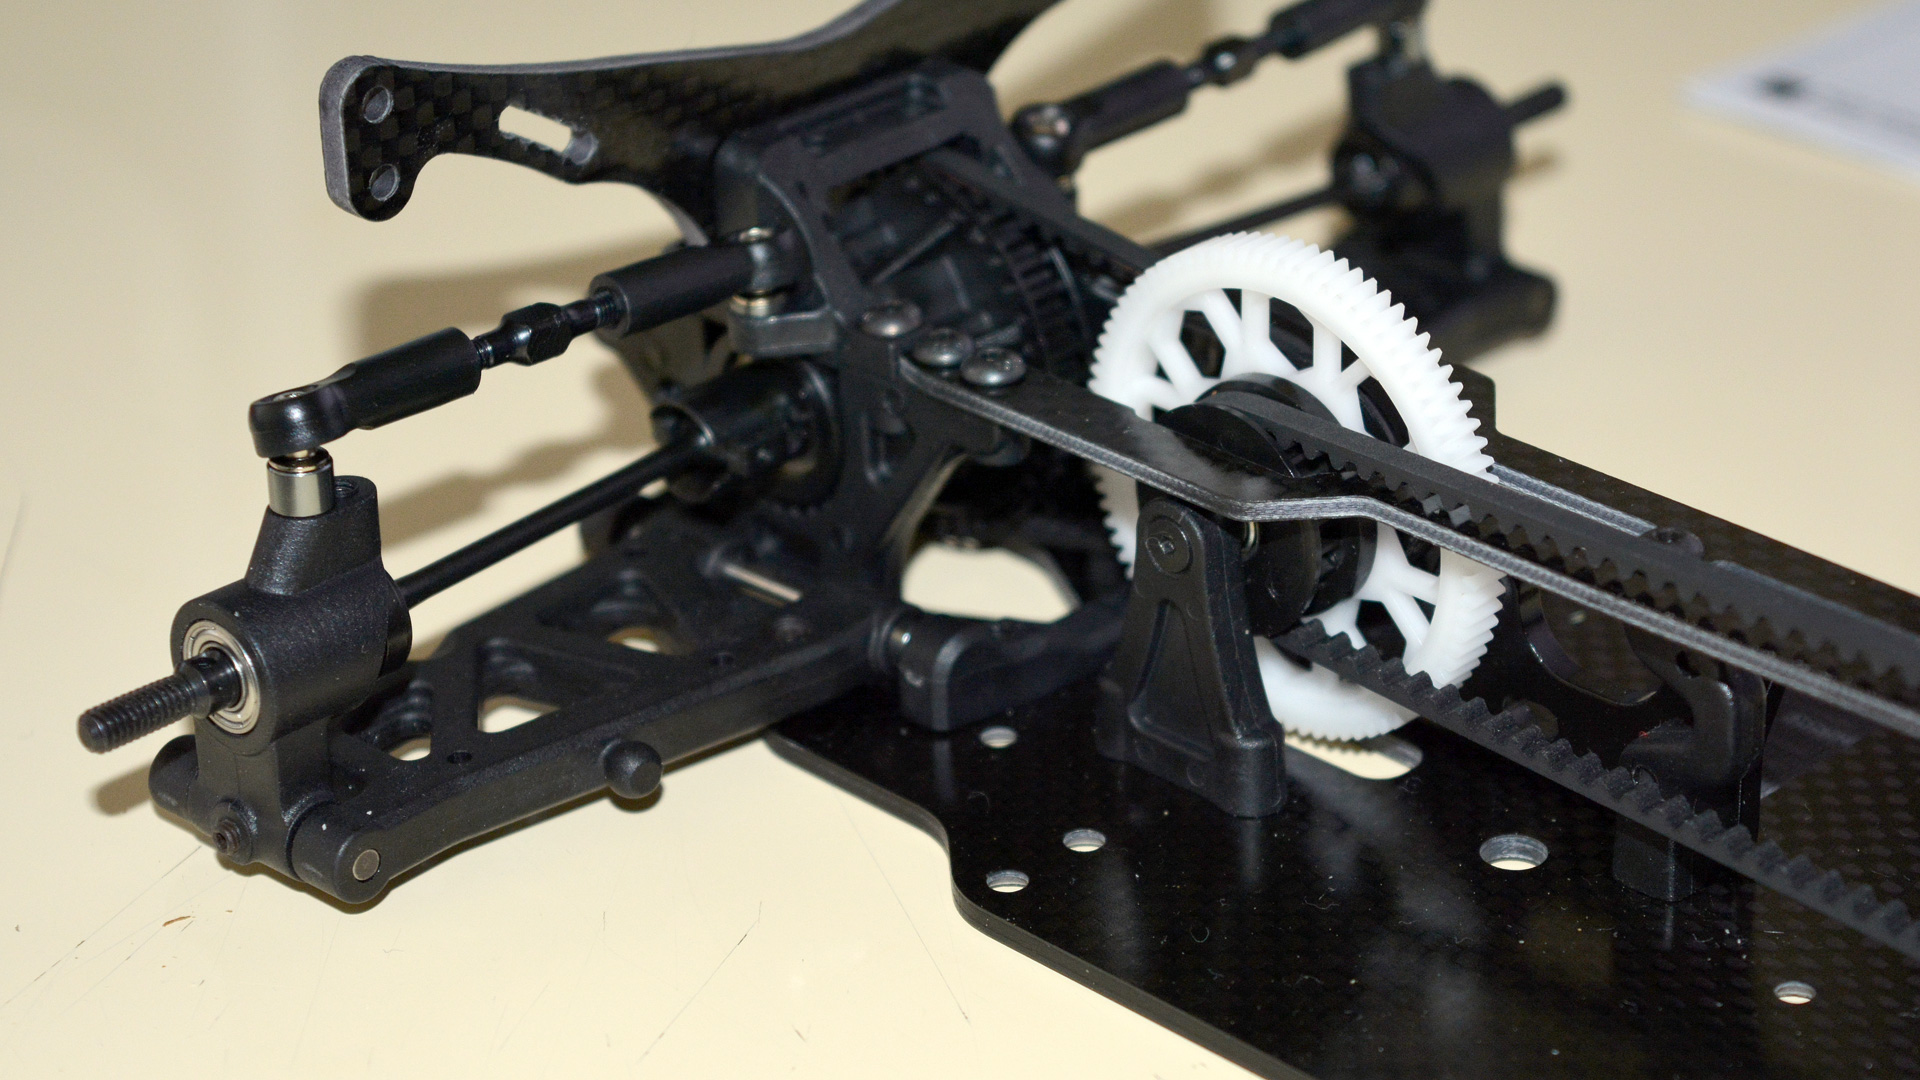
The nature of on road cars leaves little to discuss in terms of the chassis area, a nice quality carbon fiber main chassis and top deck give the car the look and feel of a much more expensive product. The servo is mounted on the left in a lay flat position and the geometry is standard for the type. Shorty servos are recommended, though I don’t really see why. A regular servo would fit in there without causing a placement issue of ESC and receiver. A generous helping of double sided servo tape is included for mounting the receiver and ESC to the chassis (though if you have your own good quality servo tape, use it, the supplied stuff is pretty bad). Behind that, the motor sits mounted transverse, which is the main advantage of a belt driven drivetrain (all moving parts rotate in the same direction, reducing torque handling effects to almost nil).
On the other side of the chassis sits the battery, held by a length-ways Velcro strap. I really like this, in fact I prefer it to the professional battery tape solutions. The battery is held in laterally by stoppers screwed to the chassis. These are an unusual design, their nature as two pieces joined by screws means that they shift around with the weight of the battery going back and forth during running, so they don’t stay the same shape as when you assembled them for long. This is hard to explain, but it will become obvious what I mean to those who build the model. These battery stays (I guess that’s what I’d call them) need looking at in future iterations of the product, as they are a notable weakness; even after screwing the aforementioned screws down to the point where they were squishing the part below, they still moved a little during running.
The motor mounts up to one of very few metal pieces, a small stamped alloy plate, which is in turn mounted to plastic parts which screw to the chassis (there’s a good close up of this in the build pics at the end). The spur gear is held by plastic pieces on both sides, kinda like a ferris wheel at the funfair but due to the flexibility of the material, it is difficult to get consistent mesh. This is addressed in most other models available, by having the motor mount and spur gear carrier machined from the same piece of material (usually billet alloy), ensuring that the distance between spur and pinion can never change, barring bearing failure. This is the worst design point on this model. Torque effects will pull the spur away from the pinion on acceleration and braking, and even if it’s only a little, this will contribute to spur gear wear and affect gear mesh on the fly.
Speaking of the spur gear, it is of surprisingly soft material, very flexible. This means you need to be VERY careful during the build not to overtighten a screw, as I did while attaching it to its spindle. Doing this has caused a very slight eccentricity of the gear. It’s not enough to affect running or performance, but as an experienced builder, I was disappointed firstly that I allowed this to happen, but also that the gear itself was not made of more rigid material to start with.
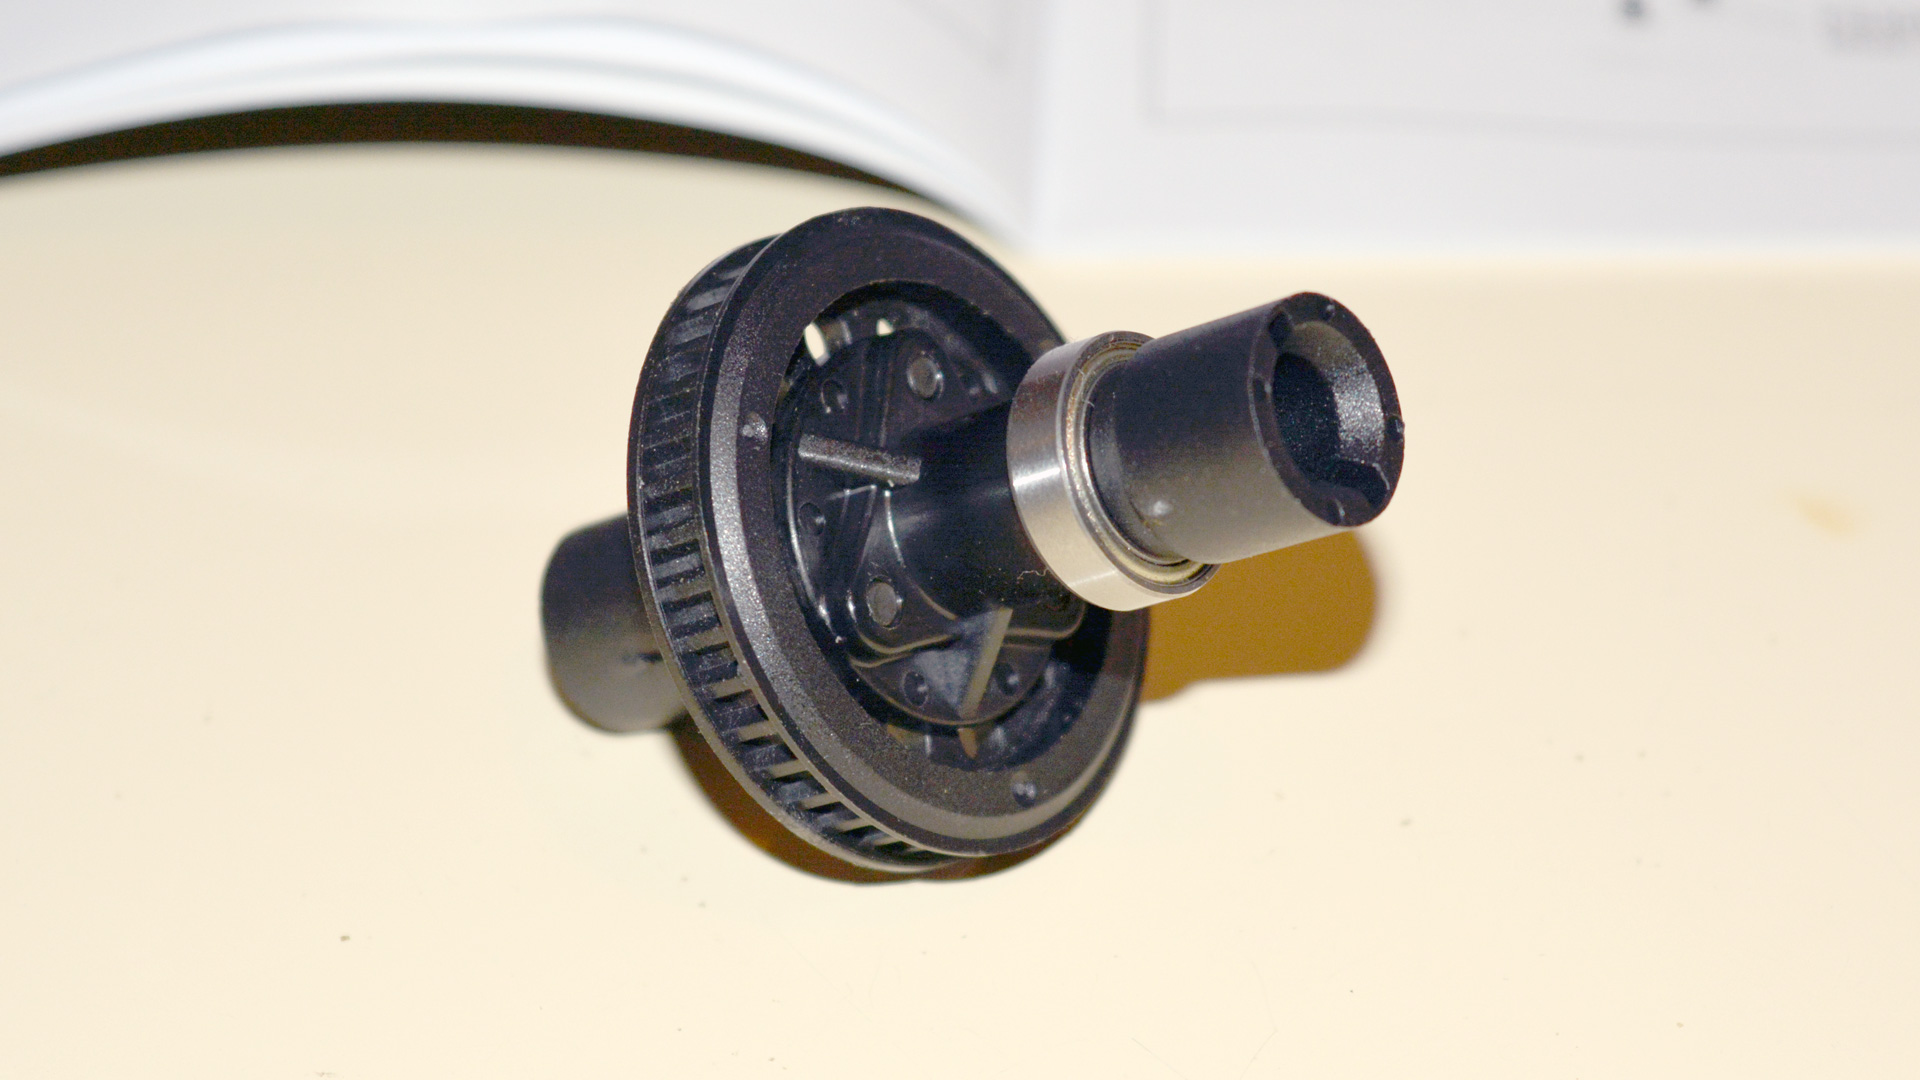
The rear of the car is analogous with the front, with the exception of the differential which is a classic planetary gear type diff (as opposed to the spool seen up front, or ball diff found in most other cheaper touring cars), this features four planetary gears and is a ‘good thing’. Gear diffs have become preferable in the electric on road segment in recent years, I suppose because they’re just more consistent than ball diffs, so this is a nice inclusion. The internal gears are plastic, not metal (again common in on-road applications), so differential action should be checked after each major run to make sure these gears aren’t wearing. Appropriately weighty (viscous) silicone oil is supplied for tuning the diff and in fact, the kit oil selection was perfect for the track.
A side note: You can make this car a world class drifter right out of the box, by installing the spool in the rear and the gear diff up front, basically swapping the diffs between front and rear (don’t forget to move the plastic ball-cup spacers from rear to front driveshafts at the same time).
So overall, and again you have to keep in mind the price of entry, this is a surprisingly well featured package with a few unfortunate (but no doubt necessary to reach that low, low price) compromises.
Before we go out onto the track, I’m going to take some time to cover the Trackstar electronics that HK sent me for use in this car. These include a shorty servo (aka Low Profile servo), a competition ESC and a sensored 10.5t modified motor, as well as a really nice Nanotech 6.6 ROAR approved racing battery (currently the nicest 2S battery I own, thanks guys :-D ). Due to the relatively low kv (motor speed), I am using a very large 30t pinion, our track is wide and fast for 1/10th, due to the fact it also hosts 1/5th cars, so I would normally have used a much faster motor. No pinion is supplied with the model, which is fine, as pinion choice for a car like this is very subjective. If you don’t know what pinion you need for it, inquire at your local track what MOTOR class you want to enter, then ask for a pinion recommendation based on that. For what it’s worth, 30t seems to be pretty much the usable limit of pinion size (without also changing the spur gear), I wouldn’t have wanted to try to set the mesh of something larger, it would have been very tight. Also, larger pinions will require removal of the top deck to actually fit, which is mildly inconvenient. Once in place though, no problems.
TrackStar ancillaries…
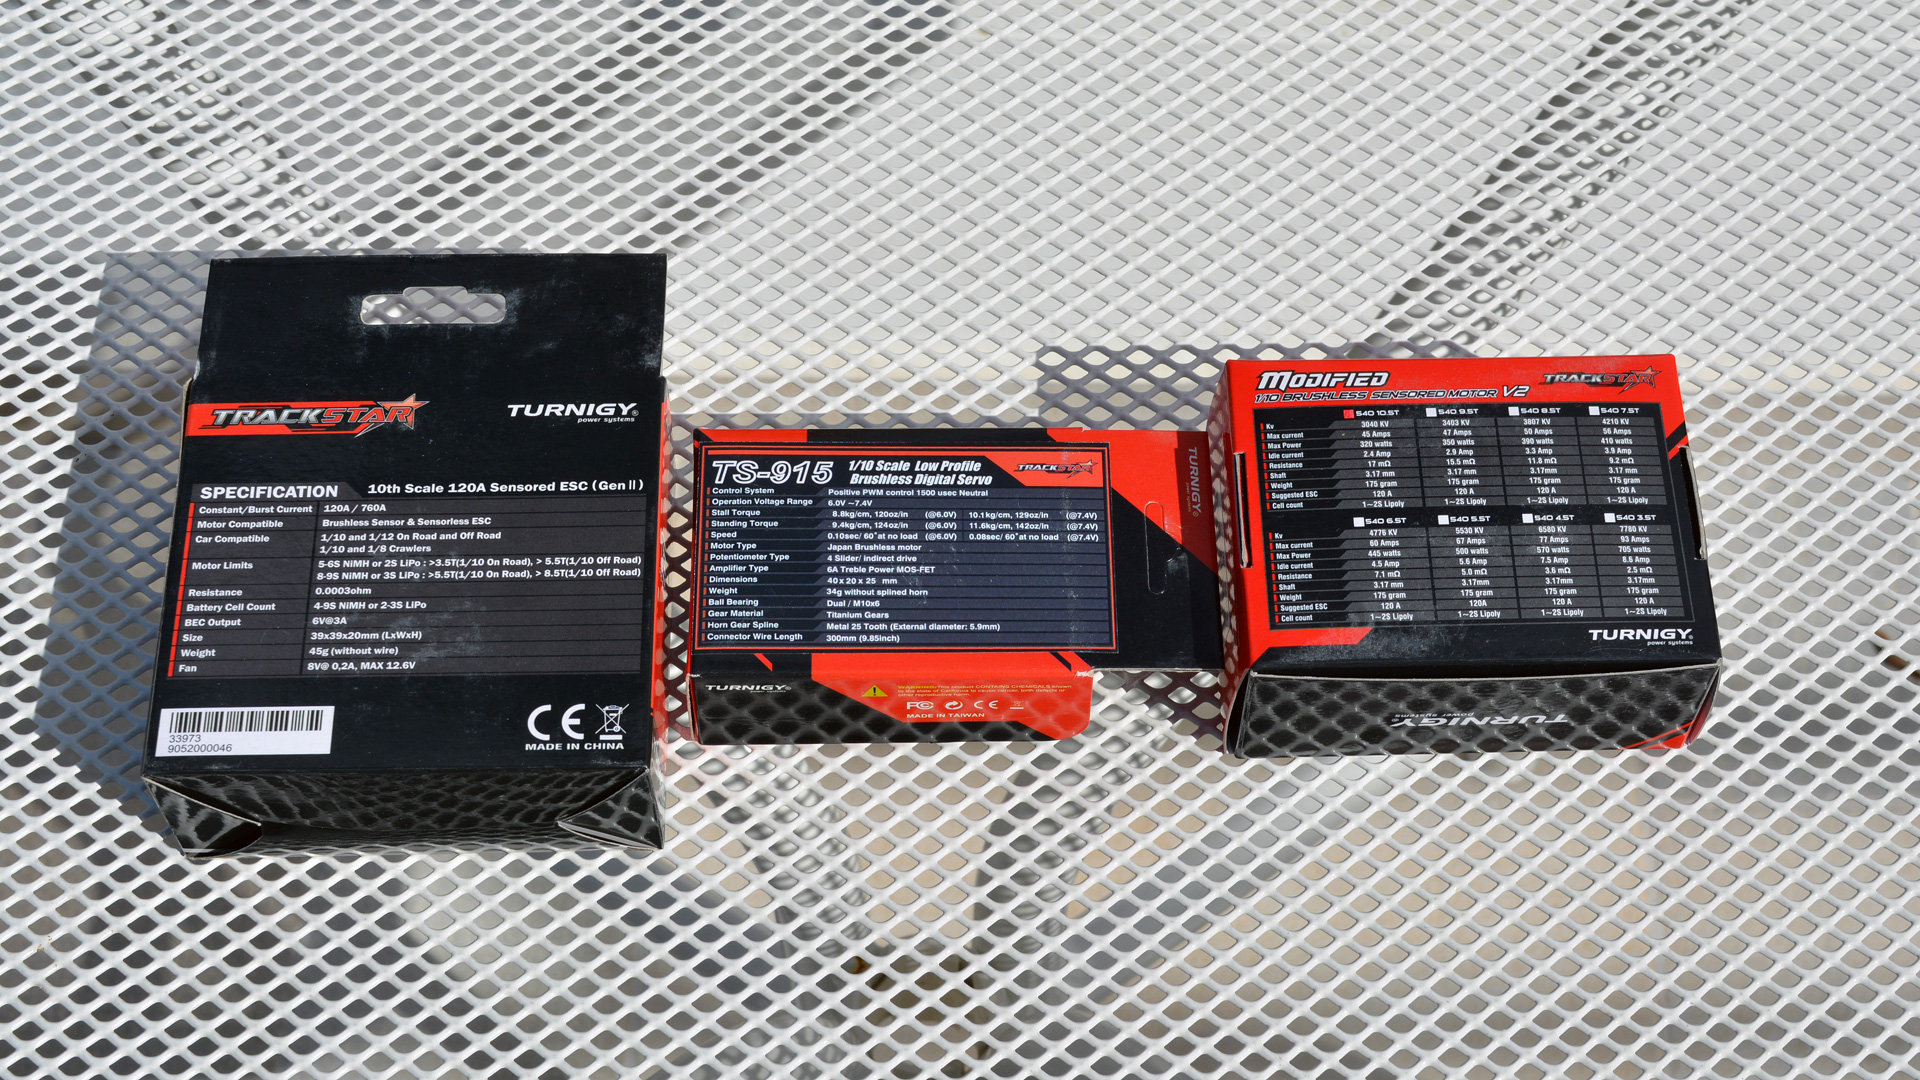
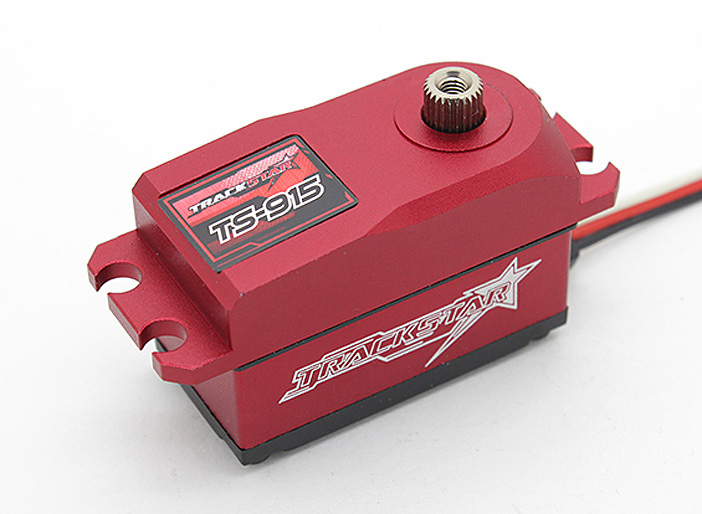
Servo: Trackstar TS-915 low profile, high voltage.
As mentioned, while the model seems to be able to accept full size servos, HK supplied a low profile or shorty servo for use with the car; the manual also recommends a low profile item. This is only my second low profile servo, after a Spektrum one I had in a Losi 22, the specs are kinda similar, mid-range torque and high speed, so it’s a fair comparison. Although Spektrum servos seem to get a lot of criticism, I never had any issues with the one I had in the buggy, it was a fine servo. The claimed specs on the Trackstar are 0.10 sec to 60 degrees at 6v and 120oz-in of torque and I won’t argue too much with that, I don’t think the speed is quite 0.1, probably more like 0.12 based on the way it feels. The Trackstar servo is very stiff when unpowered, it must have a long ratio gearbox (not surprising given the lack of room for a larger gearbox inside). On power it is fast and smooth without an external BEC which is a relief; many modern servos require a battery voltage regulator, aka BEC or Battery Eliminator Circuit, in order to get consistent performance or even work properly (I’m looking at you, Savox), none of that here. Oh and of course it also looks great with its red alloy case.
While it’s nice not to need a BEC, it’s worth mentioning that in all RC applications, and especially when racing, it is always worthwhile to take the strain of powering the steering servo off of the ESC and give it to a BEC, even if you don’t have power or consistency issues, it’s just good practice. The other advantage this offers is consistent voltage which can be an issue with many older ESCs and/or receivers (don’t forget that without a BEC, the power for your servo also depends on the receiver’s handling capabilities) which sometimes supply only 4.8v or 6v. This is also a high voltage servo, so you can use a programmable BEC to feed it 7.2v if you wish, enhancing the performance further. Trackstar’s signature red finish gives the unit an attractive bold touch. I’ve got no complaints at all about this servo so far. Even if it’s not quite up to the stated speed, it is definitely fast and strong enough for any level of club racing.
ESC: Trackstar GenII 120A sensored
The ESC review will have to be somewhat limited, as I don’t have a programmer for it! I only have myself to blame, I’m sure if I had checked the stuff when I received it, before starting the review, HK would have sent me one, so my personal apologies to all on that front. This review will now be out before they have time to send me one, so that’s that.
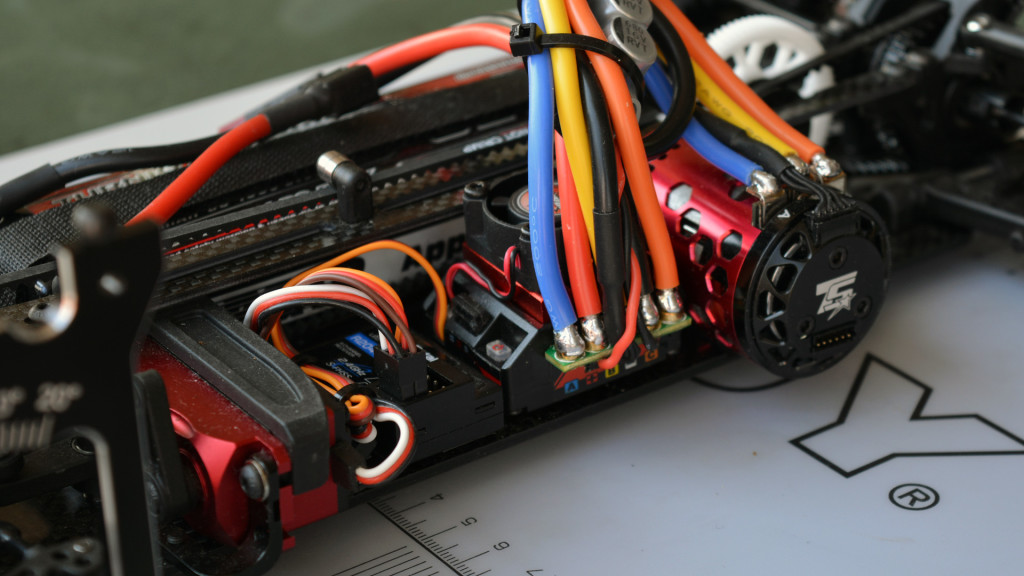
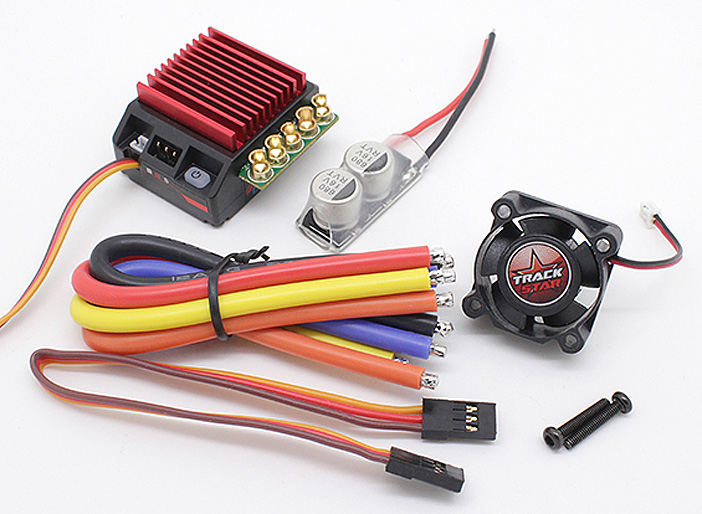
What I CAN say about it though, is that it is a nicely polished unit, the heatsink is in a striking red to match the servo and motor. As racing ESCs go, it’s quite a compact unit. Perhaps if one were to use a larger footprint ESC, the shorty servo would be a requirement, but as it is, this is a good size for its ratings and has a small footprint. The usual gold plated terminals are featured on the electrical side of the ESC, and are nice and fat. This is actually a double edged sword, as there is so much heat dissipation when you add solder to these large terminals that they act as a heat sink, requiring me to increase the temperature on my soldering iron much more than I am used to. Work quickly if you’re going over 450*C on your soldering iron, otherwise you could damage the ESC internally! Underneath these beefy gold terminals are the sensor port and a useful sticker identifying the wiring order (A-B-C).
On the perpendicular side of the unit we find a fan port (fan supplied in the box, unattached), a programming header (looks like a regular servo connection but is for USB programming of the unit, though as I mentioned, no programming method is supplied, kinda surprising for a racing item with a ‘pro’ moniker attached, but not an outrageous omission, many ESCs are supplied like this), and a very nice ‘on/off’ switch integrated into the ESC. It has a rubbery button with a very positive feel, there will be no mistaking when you have activated it. I’ve said before how much I like it when the on/off switches are integrated, the last thing you want, especially in on road cars where all wiring is permanently exposed, is extra wiring making a mess everywhere.
Speaking of exposed wiring and integrated/non-integrated things, I don’t like it when the capacitors a) have to be soldered by the user, and b) are not integrated with the ESC. Once again here, the cap pack (intended to combat glitching and generally ensure that all things run smoothly on the ESC at times of sudden power draw), is a loose unit. It needs soldering to the positive and negative terminals by the user and tucking up out of the way somewhere. Personally, I soldered it to the underside of the board under the terminals, you may be able to see this in one or more of the photos, but you can put it anywhere as long as the caps sit between positive and negative on the battery connection to the ESC. Then of course you have this quite large cap pack flapping around on a short cable, I just zip tied it up to the other motor wires, but the tidiness freak in me hates this, if an ESC needs caps, they should be in the ESC to start with. Grrr.
I attached the fan to the ESC (not always necessary with motors of more than 10t) as with such a large pinion, I’m expecting things to get a little warm. It attached perfectly and easily using the supplied screws which tapped their way happily into the red alloy heatsink. If I was running a genuinely race optimised setup I would potentially not need the fan, though it weighs very little, so it’s hard to say that it would make a difference. It does make a hell of a racket though, so if you can do without it you might want to.
I don’t know whether this is an omission or not, but in the manual there is no mention of any method of adjusting settings, other than with USB connection or programming card. There appears to be no way to program it using a ‘one button’ method that many other ESCs have. This (morse code as I like to call it) is a horrible way to have program an ESC, but its better than nothing, which is sadly what you get here. If there genuinely is no other way to program this ESC than with an external device, that is a big fail in my opinion, as it renders the unit ‘not fit for purpose’ (this is a racing ESC remember) without spending extra. In this case, it would be better to include the programmer and charge more for the unit.
In the box you’ll find the ESC, a manual, freshly tinned, appropriately fat wires in the correct ABC colors for the motor, red and black for the battery connection, the fan, screws for mounting the fan, capacitors, a female to female servo type cable (why?), the manual, a sticker, and that’s about it. Would it really have been so hard to throw the USB cable in…? Anyway…
At the end of the day, I’m actually really happy with the ESC and its default settings (reverse is disabled by default, as it should be on a racing ESC) are perfect for club racing. Even if I had the programmer, now that I’ve run the car, I wouldn’t actually change anything. I’m particularly pleased with the default braking level, it is absolutely perfect. What I would probably do is add a little drag brake if I could, but as I say the brakes are so good, I don’t consider this an issue at all. Lastly, of course, the calibration procedure is described in the manual and is easily performed.
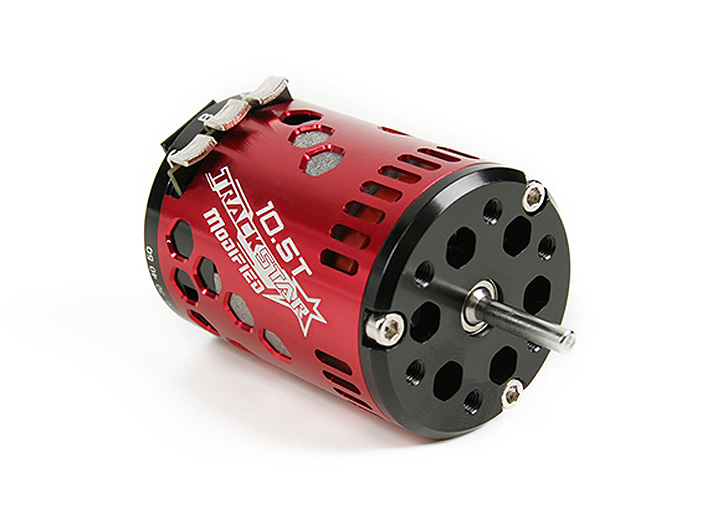
Motor: Trackstar 10.5T sensored V2
Anyone else remember when it was obvious if something was a premium product or not, just by how it looked? This is possibly the best looking motor I’ve ever seen, whoever does the design for Trackstar deserves Employee of the Month. Matt recently performed a review covering the internals of Trackstar motors, so there’s no need for me to recap that. It’s got magnets and copper wires inside, turned 10.5 times. What more do you need to know?! ;)
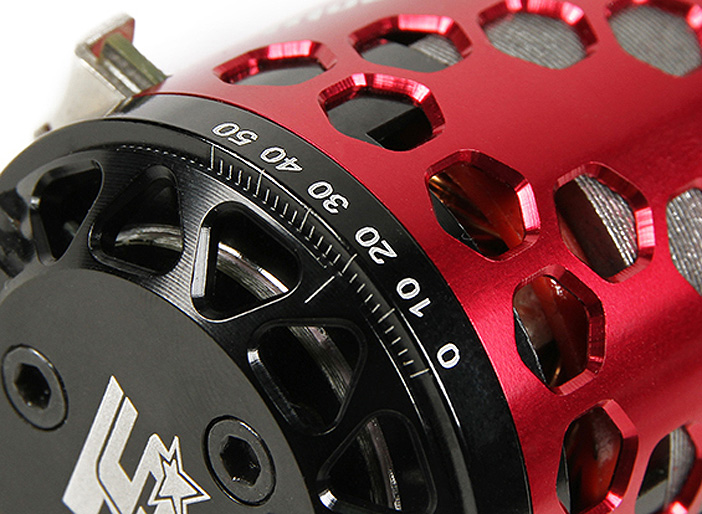
Everything is finely machined and nicely finished on this motor, the timing markings etched clearly and painted vivid white for contrast against the black end cap. The sensor housing is also alloy (many premium motor brands feature plastic end caps…is this for weight reduction or for manufacture cost? I’ll let you decide), which further enhances the impression of high quality. There are also two sensor ports on the motor so you can use whichever suits your cabling layout; one is on top just behind the ABC terminals and the other is in the usual place; offset in the middle of the sensor housing. Another first for me, having a choice of sensor port, very nice.
I run several premium motors in other electric models and the Trackstar matches these motors equally in terms of operation. Aesthetically though, it blows them all away. Again, it responds to the ESCs braking instructions really nicely, it’s super smooth on the brakes.
Unfortunately, I’m not so serious an electric racer as to be able to ‘feel’ the nuances that separate two motors, I use layman’s terms like ‘it feels smooth’ or ‘it feels peaky’. I’d describe the TrackStar 10.5t as a very smooth motor. It’s not grabby, it feels very progressive. I’ve seen it said in the reviews on HK’s site, that with Trackstar motors you either get a good one or a bad one (rare) and if you get a good one, there is nothing to choose between them and any other motor. Now that I’ve tried one, I’d have to agree with that statement. Since HK is generally ok about warranty issues, this seems to be good news. If you get a bad one, get it changed. A good one will serve you well. Very happy with this 10.5 and let me say again how impressive looking it is with its sweet red honeycomb motif and fine machine work.
Finishing up the build…
Last mention before we start running it…the body. I expected to hate it, but I really like it. Again this is a typical area of heavy compromise on cheap cars, but no compromises here, I would even say it’s quite thick lexan for an on road body (again ideal in a beginner car, though racers tend to prefer thin ones for the weight savings). As with most kits, it needs painting by the hobbyist, which is something I usually enjoy doing. As a sedan body, its attractive, it’s very ‘pro-looking’, somewhat reminiscent of the classic Dodge Stratus lines. It has overspray film, clearly marked dimples for required holes, accurate for this model. The wheel wells aren’t quite a perfect match to the wheelbase, but they’re very close. In order to avoid looking weird, cut the front wells where the lines are on the body, then fit the body on the car to mark up the rears.
The sticker set supplied is excellent, pre-cut, exactly as many as you need, without spoiling you for choice. I used every single one (except full window stickers, I think they always make RCs look like toys) in an appropriate place and never wished for more or less. Despite being nice, the stickers are the only thing that gives away the fact that this isn’t a genuine Proline or other premium body, as always, the devil is in the details; the headlight stickers are not quite the same shape as the headlight mouldings on the body, and the big front grille sticker is just a bit too big, the edges will lift after only a few runs, which will affect front downforce and aerodynamics. Apart from those very minor things, it’s pretty much indistinguishable from a premium racing body.
My paint, I’m sorry to say, went horribly wrong. Nothing to do with the body, I grabbed the wrong masking tape and accidentally used a roll that could be 50 years old. The paint bleeding was so severe, I could have probably gotten away with saying I did it on purpose! I managed to slightly correct it, though I had to abandon my planned stripes. Another reason to kick myself, but it actually looks fine at anything more than a foot away. That’s why there are no close-ups of my body in this review. ;-)
I went with red and white to match Trackstar’s branding and do honour to Honda Racing (Honda love :-) That was random wasn’t it? lol). Overall I’m very pleased with the look of the car, I think it looks both pro and cool in equal measure. Again, you’d never guess that this wasn’t a full-fat premium race car from the way it looks.
Running review…
Right, time to run it…but here I have a dilemma…do I run it on a track and compare it to cars which cost literally 6 times as much? I guess I have to, but will it be a fair comparison? It has no sway bars…hm…let’s go see, but first, the name is Basher, so how does it bash?
It bashes very nicely (see final section of the video at the bottom), BUT, it carries the same caveat that all belted sedans have; it’s the unavoidable nature of belt driven on road cars. It’s very low, so it scrubs on every little rock, and its exposed drivetrain is susceptible to ingress of debris (little rocks getting stuck in the pulleys and throwing off the belt). Many who mess around with belted on road cars will sweep an area of all debris before running. This is certainly something you’d want to consider doing, though I must say I had no belt damage as a result of a few tiny rocks in the pulleys, it seems to be a decently strong belt, which is good. As such, if tearing up and down a car park at crazy speed is your bag, you’re probably going to like this model, just take a broom with you. The balance is really, really good, when it steps out, it’s easy to collect and drifts extremely predictably.
So, down at the track…I didn’t even have to assemble the setup tools to realise that the geometry specified in the manual (the manual doesn’t actually suggest specific geometry as such, it just provides guidelines on the lengths of the turnbuckles in millimeters) is way off what is needed for racing; the front wheels had no negative camber for a start. So the first job was putting the car up on the setup tools and adjusting all the basic geometry. Unfortunately, this highlights the need to own ‘some’ basic setup tools, as the out of the box geometry is going to help you achieve nothing; make a few friends at the track who will let you use their setup tools if needed, as good tools are not cheap. For those who just want a one-time setup based on measurements, I’ll provide my final turnbuckle and shock measurements at the end of this article, this should get you pretty close to my final setup, which drove well.
So, is an a-main win possible on a $90 chassis? That depends on the driver of course. ;-) What I can say is that it is definitely not 6 times worse than cars that cost 6 times as much. Will it allow you to be competitive at your local track? Maybe… if you have an undulating or slightly bumpy track, the lack of sway bars will help you, if you have a smooth track and you are competing against other cars with sway bars fitted, this will be an issue. the lack of one piece spur/motor mount is worrying, but had caused no problems after a good deal of running, no noticeable wear on the spur gear yet.
The shocks are really excellent, so good I almost forgot to mention them (to quote the matrix, those things that work well and do what they are supposed to, are invisible), the stock spring rates and oil viscosity is literally perfect, at least for my setup and track. Very, very impressed with these.
The body works well, its downforce is average both front and rear, which is ideal for a kit supplied body; it will work OK on both short/technical and wide/sweeping tracks as well as looking good; after the shocks, it’s one of the best features of the car actually. I did manage to destroy it though, see the video. ;-)
Wheels and tires are supplied, the wheels are typical dish type and require the hobbyist to glue on the tires. They have a good bead for gluing, which is always nice to see, however, the supplied tires are…how can I put this…not very good (there’s my famous diplomacy again, lol). After only a few laps (unjuiced, I admit), they were already going off and getting a texture. Not very impressed. I quickly switched to a set of pre-juiced HPI tires that I use on my Xray and things improved dramatically. Tires are so important in on-road electric sedan racing, the car was transformed by this change.
Power transfer is excellent, the car feels super smooth to drive, though this is always the main advantage of a decent belt driven car. Even smoother than much more expensive cars, partly because there’s a little more flex in everything due to plastic parts instead of alloy. I’ve mentioned before, flex is very desirable in making a car easy to drive, only the very best drivers will want twitchy knife edge performance, as it can be very punishing when you make a mistake. As such, this easy handling propensity does make the BT-4 very forgiving to drive.
Once the setup was finalized, with a good set of rubber on the car, it drove superbly. I can’t really pick any specific faults. It’s not as fast as my T4 (thank God!!), but it’s a lot, LOT faster than any other budget sedan I’ve ever driven (and that’s quite a few, ranging from early Tamiyas through Kyosho Pure Tens as well as Thunder Tigers and LRP’s rebadged Taiwanese cars under various guises).
In fact, when you look at any on road electric RTR at this cheap a pricepoint, you are looking at something that is invariably totally unsuitable for racing, typically shaft drive ‘fun-runners’. When you consider that this will do anything they do (as long as you are careful about looking after the belts), as well as provide an acceptable race track experience, you might wonder why anyone would ever consider anything else.
The motor and ESC were also brilliant, even with that monster pinion and a lot of WOT running on our huge track, they took several hours of stop-start use in their stride. Kudos, these will definitely get recycled into another project someday, I like the combo a lot. The choice of a 10.5t for the review was also a good one, despite it not being well suited to my specific track, it provides exactly enough performance to enjoy the car without giving you enough rope to hang yourself.
So this sounds like a totally glowing review, right? It is. I’m so super impressed with what you get for your money, but is that the be all and end all? Can BSR pat themselves on the back and say ‘job well done’? Let’s step back and take an objective look.
While there are several niche areas that will make this an excellent choice for someone looking for a cheap car to dive into a new project…a belted drifter for $90? Awesome. A speed run car that you don’t really mind crashing as its parts and even cost of total replacement is so cheap? Again, it’s awesome. As a car park basher? Yeh, ok, it’s good for that too. But does it fulfil expectations on the track?
Yes and no. It depends on your skill and adaptability I suppose. Personally, I’ve spent more time at that track running nitro sedan than electric, so my muscle memory isn’t quite right for the electric car yet, which left me struggling a little to get consistent lines, however, I never felt that the limiting factor of my lap times was the car, I was getting steadily better throughout the day as well. With more practice, I’m sure I could get very fast with this car. The fact is that its on-track performance is ‘adequate’ at any level, and incredible for 90 bucks. In the hands of a good pilot who knows his track well, a good finishing position would definitely be achievable. It sure would be fun to wipe the smug grins off the RC snobs’ faces one day, something that you could definitely do with this car and a bit of practice.
Where this car will surely succeed, is in providing a ridiculously cheap entry point to on road racing for someone who wonders if they may or may not take to it. It offers a fine analog to any premium race car, meeting every single standard for the class, something which shouldn’t be taken lightly, as most budget sedans are not only unsuitable, but not legal for sanctioned racing either.
The Verdict:
I am staggered that you can get something like this for the price. It’s a new benchmark for the low budget touring car scene and is without any doubt whatsoever, the best value belted sedan available today. For someone wanting to take a dip and see if they like on-road racing, it’s absolutely perfect. You can get started with the minimum possible outlay, and all the extra spent on ancillaries and accessories is not wasted, they can be transferred later to any other sedan when ready for a step up, or any lightweight 1/10th buggy too, if you decide sedans aren’t your bag.
Regarding the ancillaries, I also have to say I’m very impressed, they are also more than adequate items at great value prices. Apart from the fact that I’m not convinced that the servo is doing what it says on the tin (I think its a tad slower at 6v than advertised, but not much). The motor and ESC are very, very good, I really have nothing to pick between them and several much more expensive analogs that I own, and I really love how cool the motor looks as well as the integrated on/off switch and high current handling of the ESC.
Final note to HK/BSR/TeamC/whoever…as mentioned above, these things need a one piece alloy motor/spur mount and sway bars, and then it would be truly race ready. I don’t expect these things in the box for 90 bucks, but they need to be available as hop ups to give this model the ability to really compete with the premium models, which is what we all want, right? If on road is something you think you might like, but don’t want to spend a grand only to find out that you don’t, this is the model for you.
TrackStar 10.5T Motor V2: http://www.hobbyking.com/hobbyking/store/uh_viewItem.asp?idproduct=80142
P.S. Setup measurements…
To be honest, I decided that providing my final turnbuckle measurements provides very little value. It is such an unreliable way to set up a car, which absolutely must have correct geometry in order to work properly, so I’ll simply describe my starting setup in terms of settings, and allow you to find your own ways to achieve that. Suffice it to say that the turnbuckle lengths supplied in the manual will not provide a race-ready geometry (might be ok for car park bashing though), so you will need to buy or borrow some setup tools to get satisfying on-track performance. A set of camber gauges and a caliper will allow you to adjust the most important things, camber and ride height (even droop with a little creativity), and they aren’t expensive.
I went with -1 degree of camber front, -2 degrees of camber rear, 3.5 degrees rear toe in (not adjustable), and 0.5 degree of toe out on each front wheel (1 degree total between the two wheels). I left the droop screws high for plenty of down-travel and recommend you do the same, no real need to measure that. I also set the ride height at 7mm for testing, but would go a fraction lower once I’d gotten more confident. Hope it helps!
A few build pics…
Due to the fact that my office at home isn’t very well lit, some of these have been artificially lightened just to pick out the detail.