|
- Team AWESOMATIX - Bodyshell Positions -
By Max Machler
Team Awesomatix want to share information's about the "Bodyshell Positions" which are used by their Team Drivers. The markings and measurements always done at the trunk of the Bodyshell. A caliper and Pencil with a narrow tip is needed for exact markings.
-> NOTE: These positions are for the std. Body post positions on the A700/A800/A800X!
If you use ABS (Adjustable Body Shift set) you probably need different sizes!
Please always re-check the marked positions suites your Car before Drilling!
If your Body posts are bent, the sizes can vary.
Check all the trunk lines of symmetry before drilling! Sometimes they can vary. AWESOMATIX assumes no liability or guarantee for Bodyshells / Positions!
This info's are only "recommendations" and should be an assistance for every Awesomatix Driver, to allow to use same Bodyshell position which are tested used by the Team Drivers. |
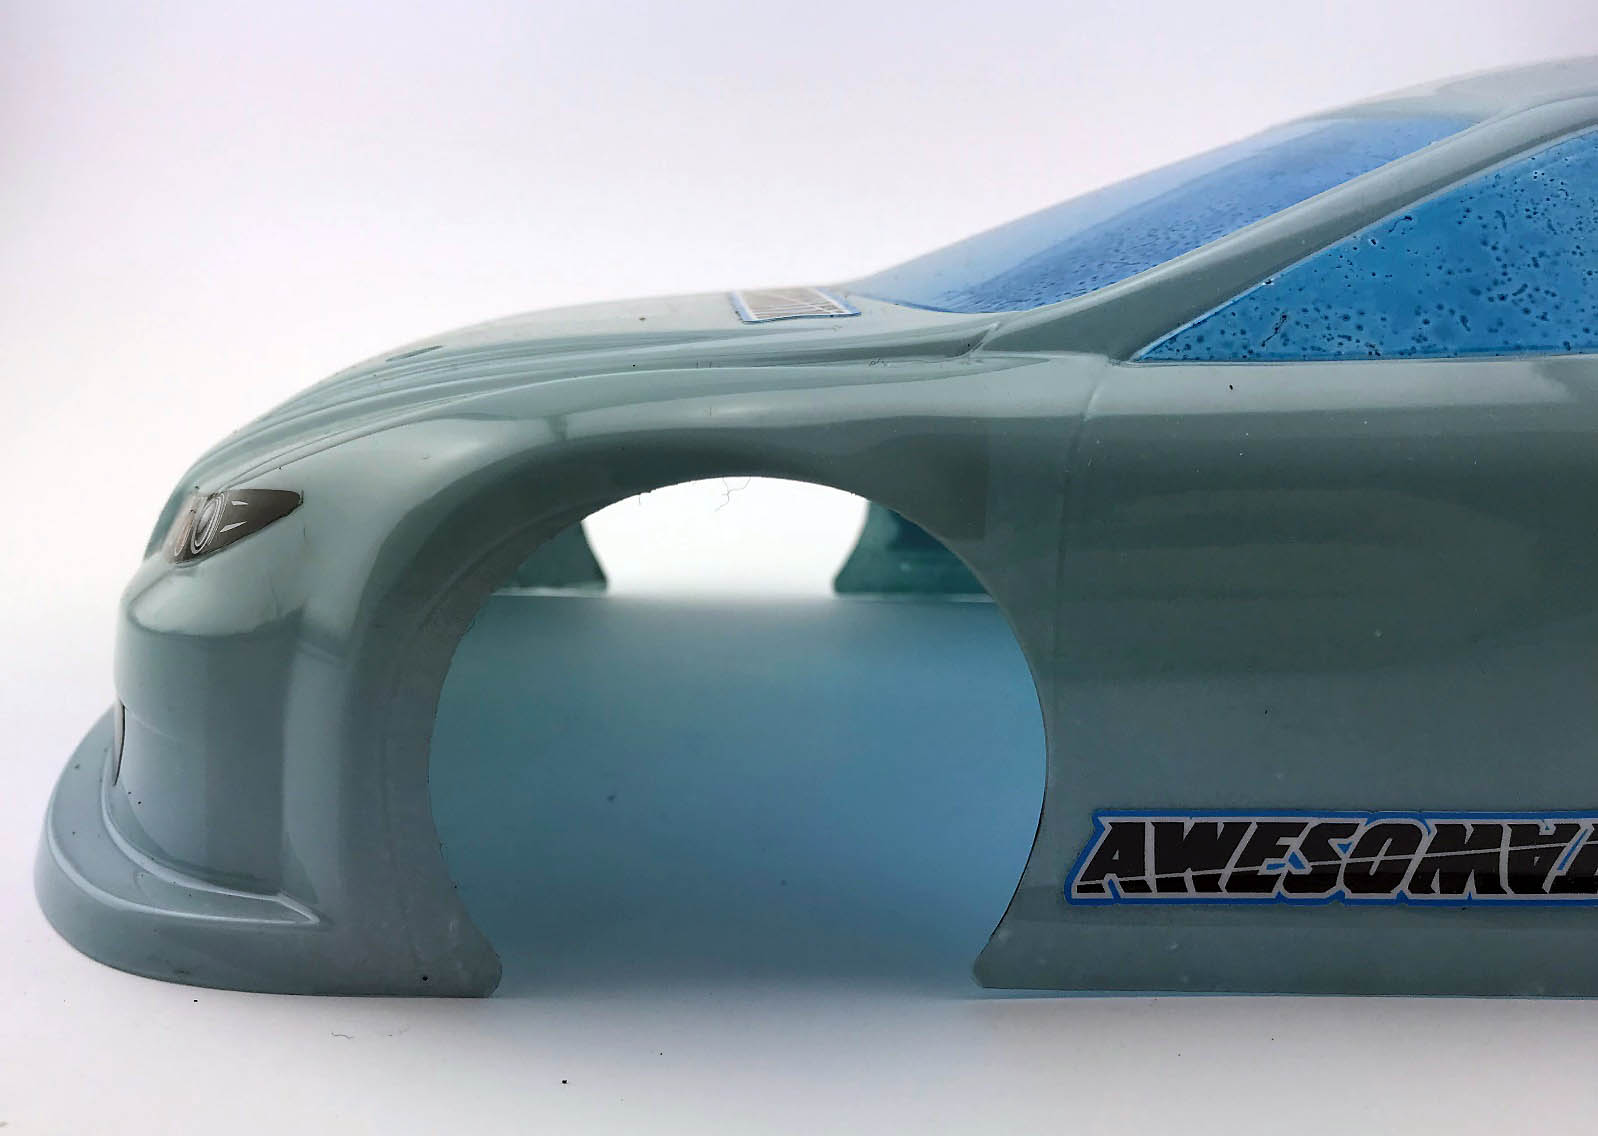
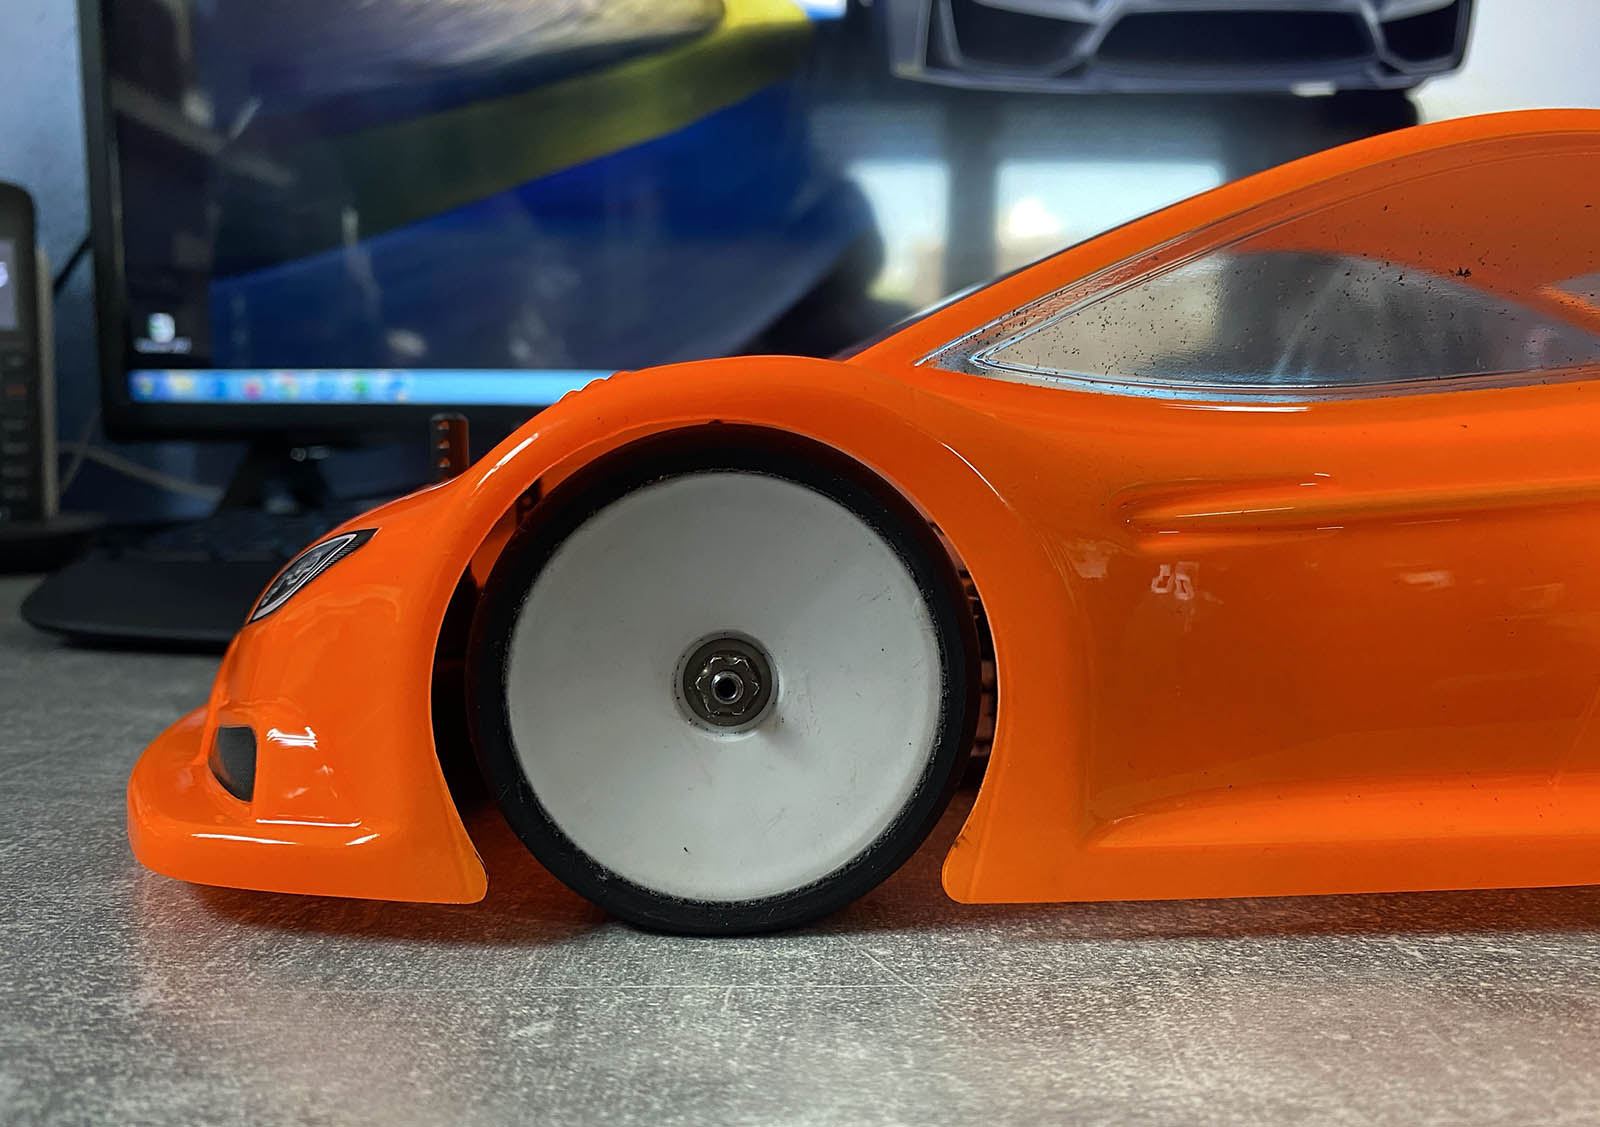
Example for the measurements:
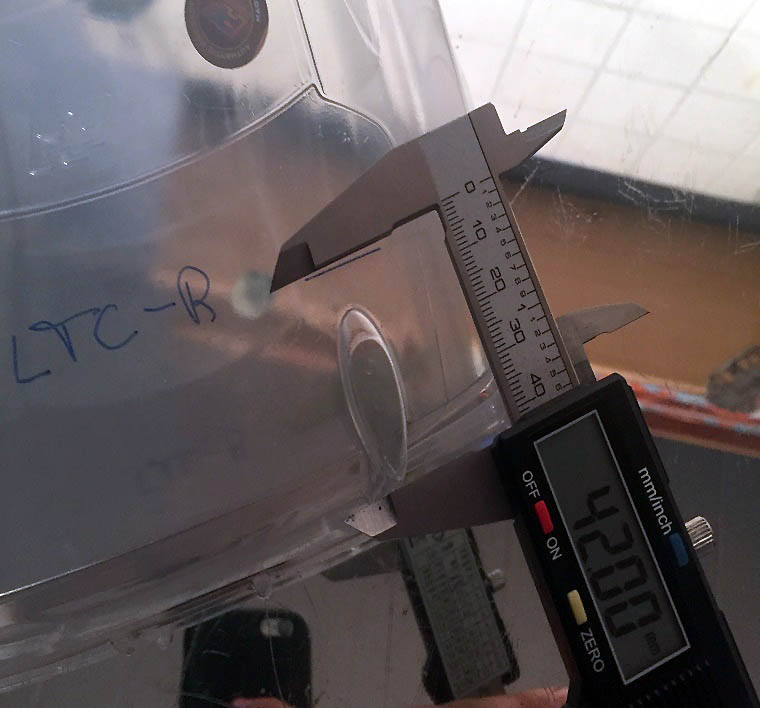
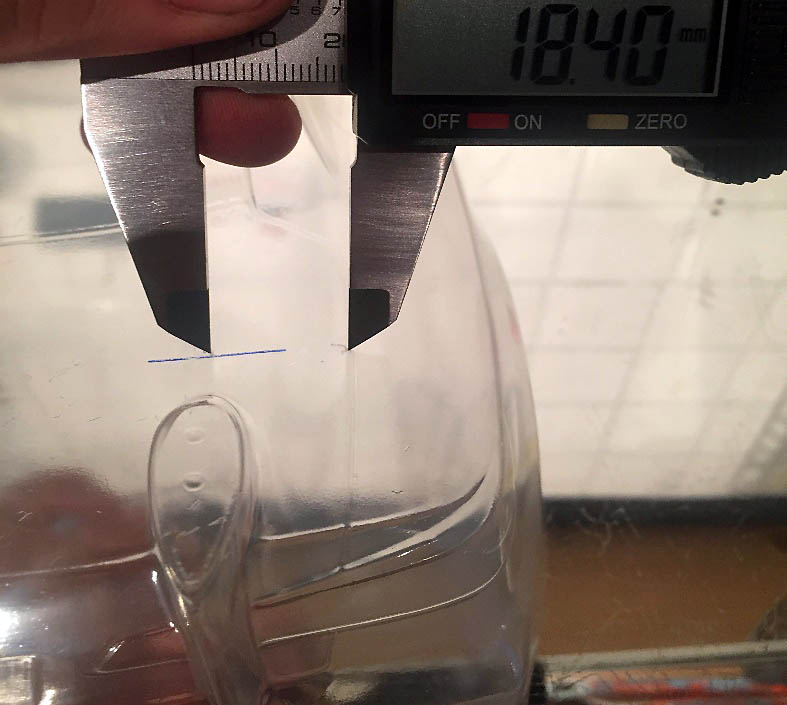
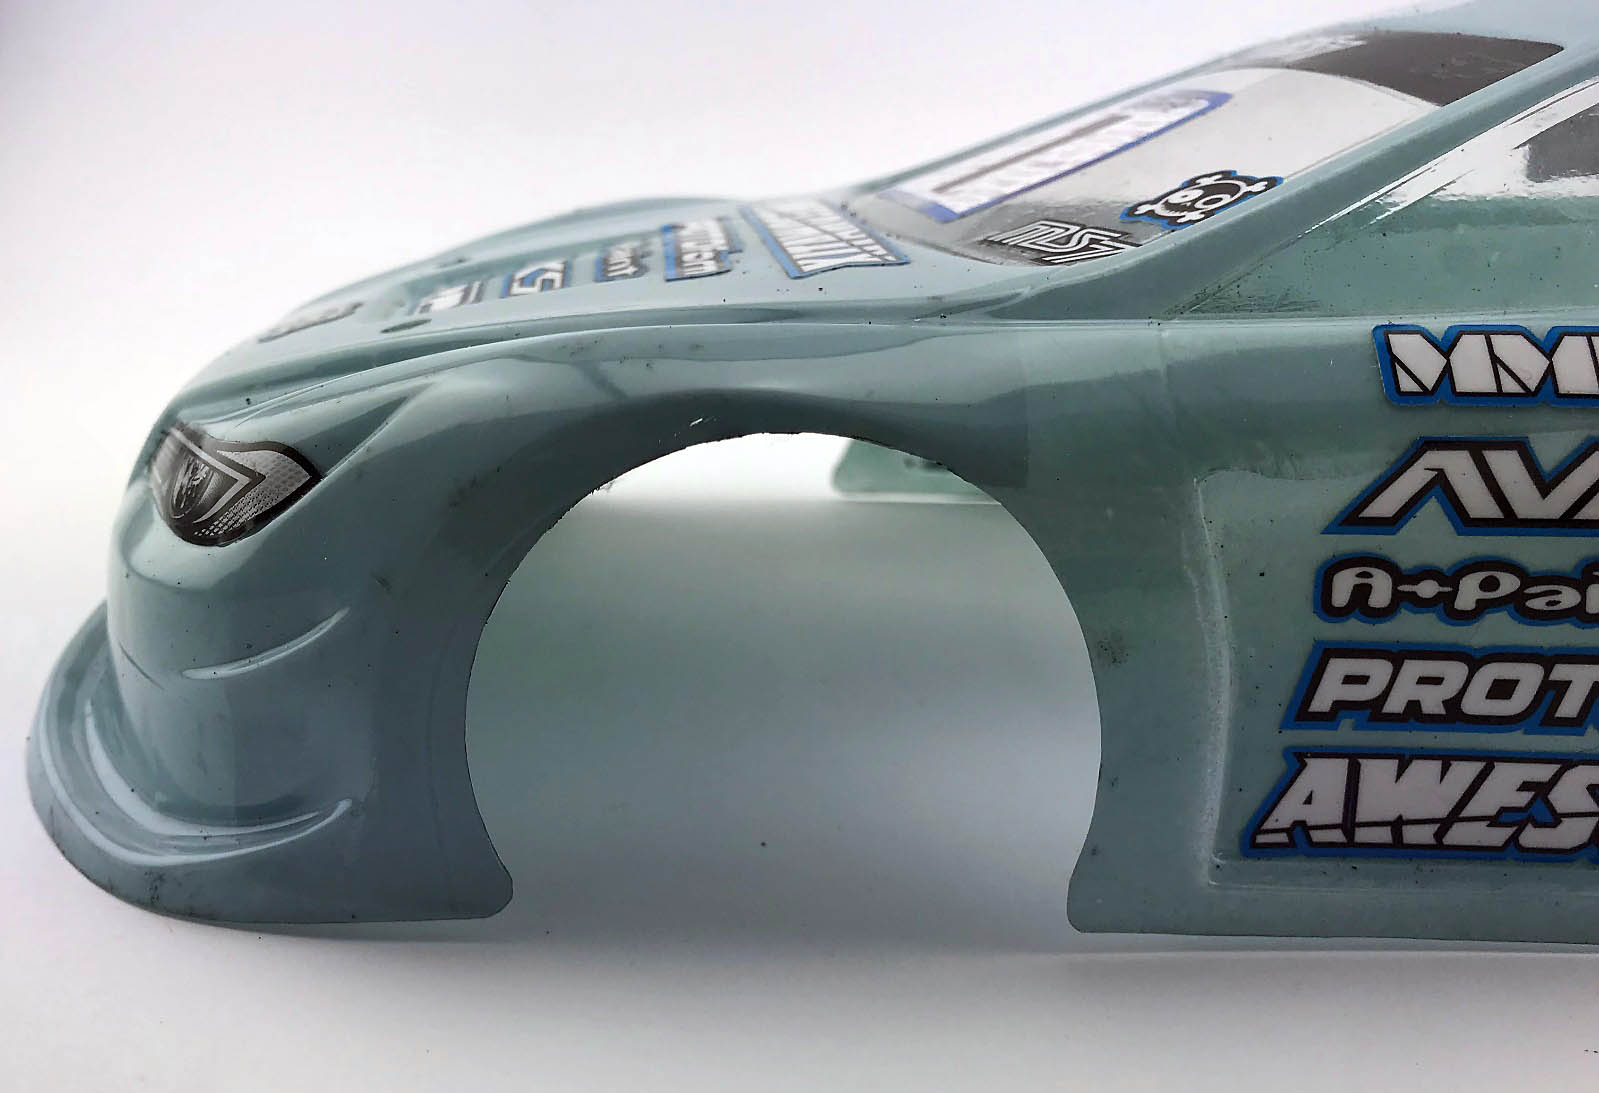
In the photos below is showed how to measure the positions on the trunk of the Bodyshell.
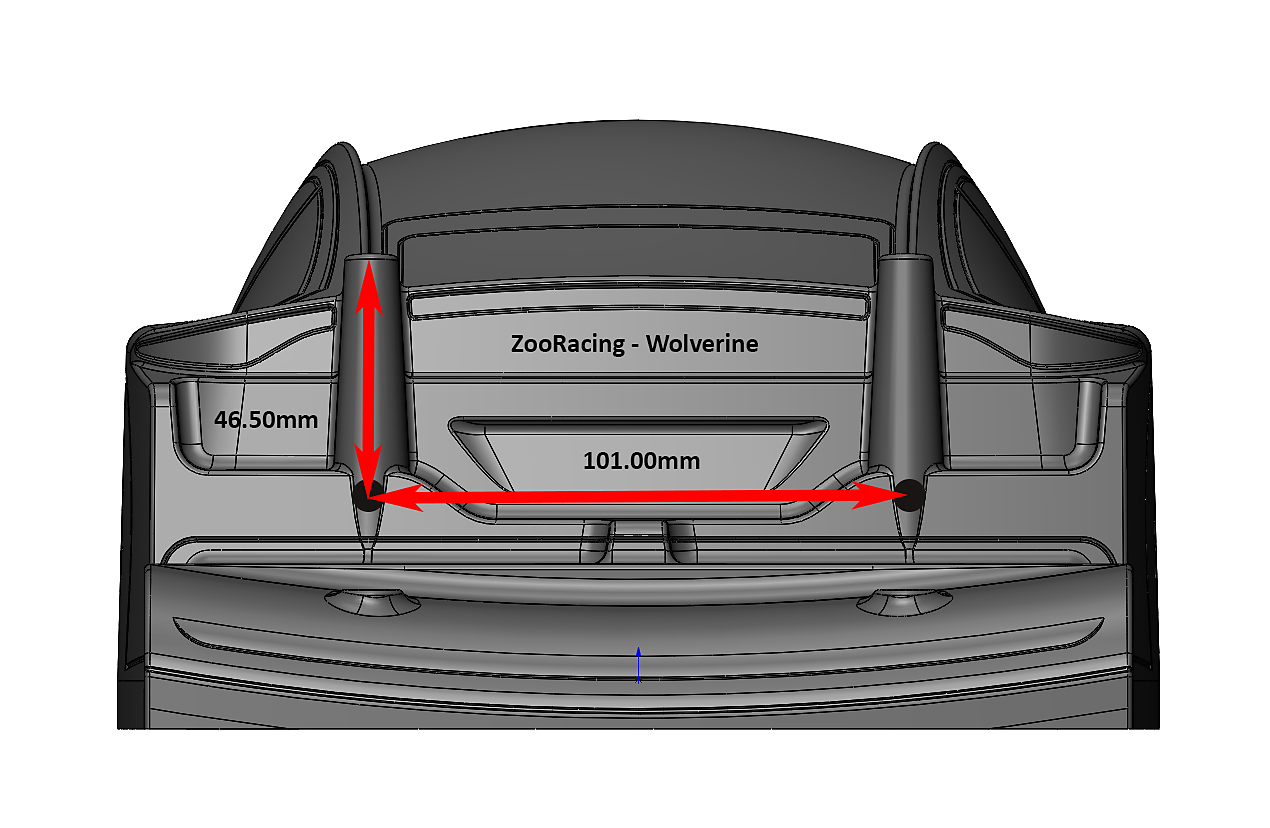
From the back of the wing mount to hole middle.
|
|
From the trunk line inwards.
|
Note on 2020.02.23: For some shells I also added the recommendation for the HRB mounting holes. IMPORTANT, see the notes below:
The initial position for HRB with my given measurements is with 1.75mm shim under AM126 (HRB Mount), and C05A (Carbon Body Holder) in the lowest position.
This give the chance to easily adjust the bodyshell height up and down!
Down -> remove shims under AM126
Up -> move C05A up
The position of the bodyshell is an BIG part of the setup! Many may don't know, but it has actually a big affect on the handling.
Basic rules are:
-> Bodyshell more forward (shifted to the front) = More initial and overall steering. Generates a more twitchy feeling and the rear end will be more loose. Can be sometimes "hard to drive", especially in long corners.
-> Bodyshell more backwards (shifted to the back) = Less steering but way more calm handling. Generares more rear grip and stability. Can be VERY usefull for low grip surfaces.
For the list I use always the "most liked" position from the Team. This means it's may not exactly the position of Racer XX, because he may prefer a bit more forward for his own driving style. The given positions are a good STARTING point for everyone, which means there can be further adjustments for your own driving style.
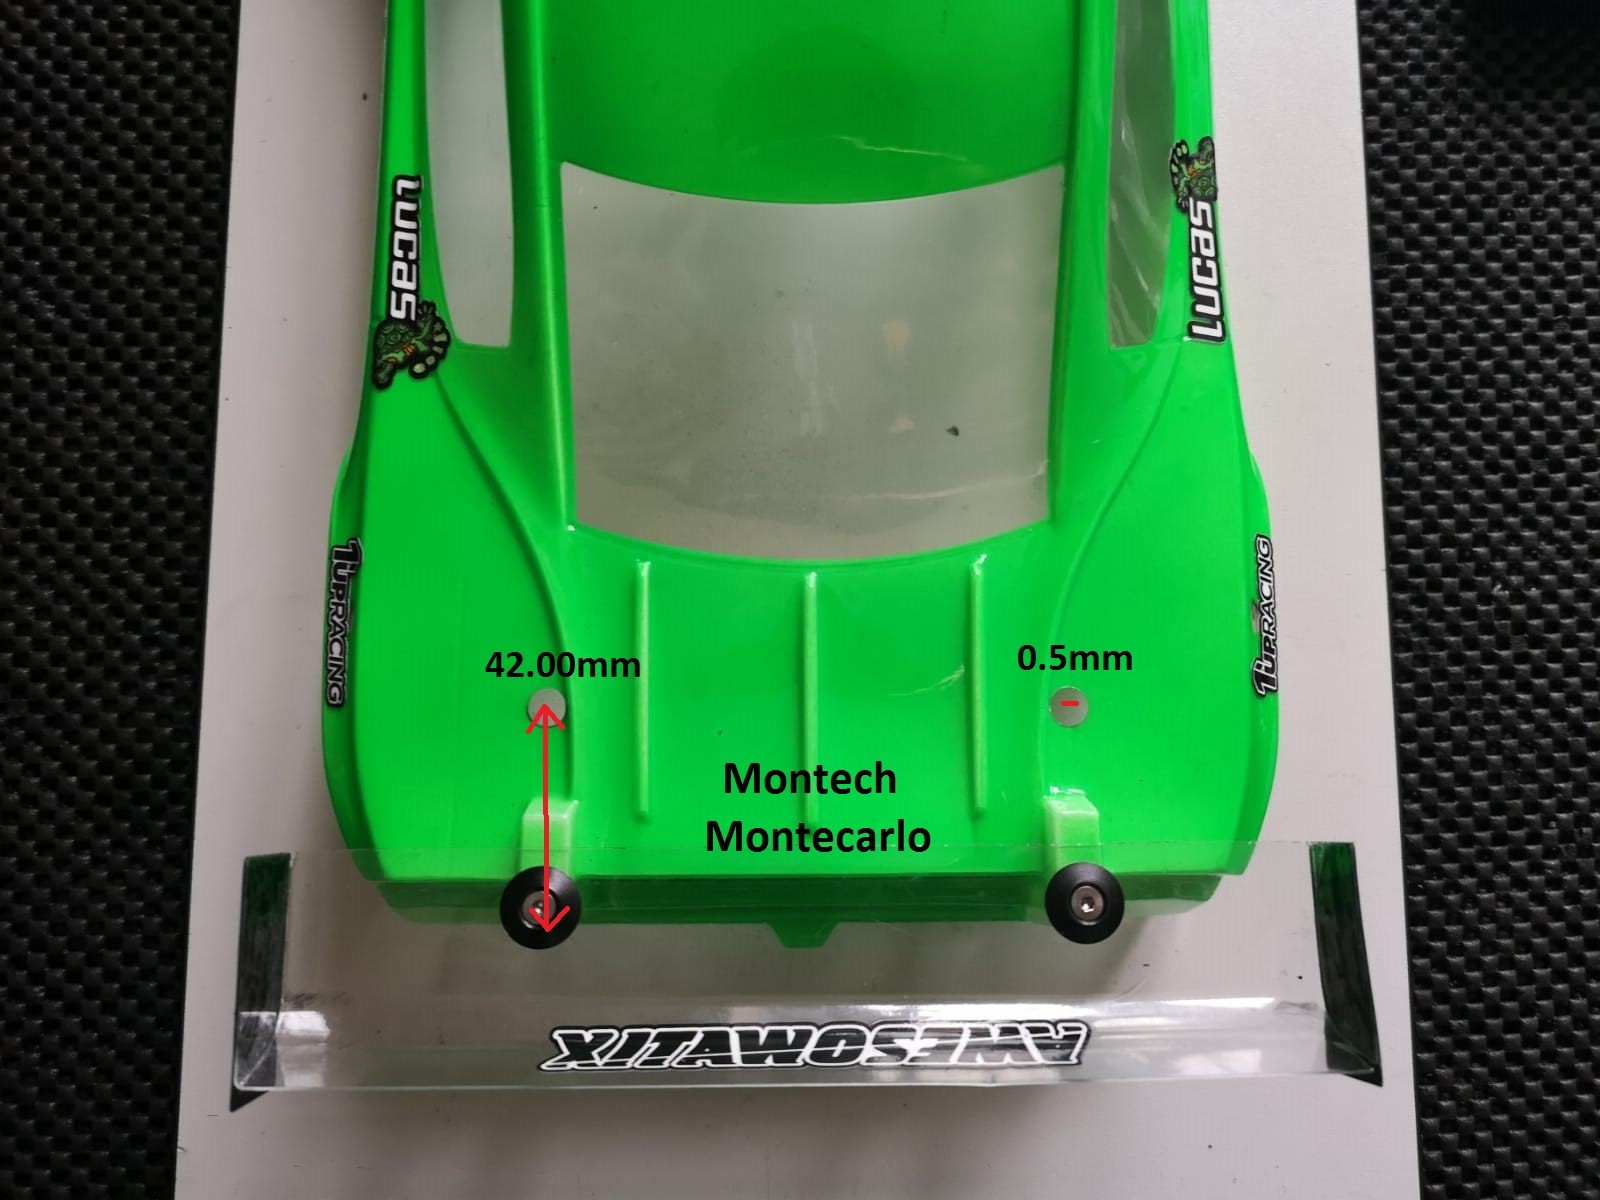
Montech Montecarlo - Top
From the back of the wing mount to hole middle: 42mm
From the "mounting help" line inwards: 0.5mm
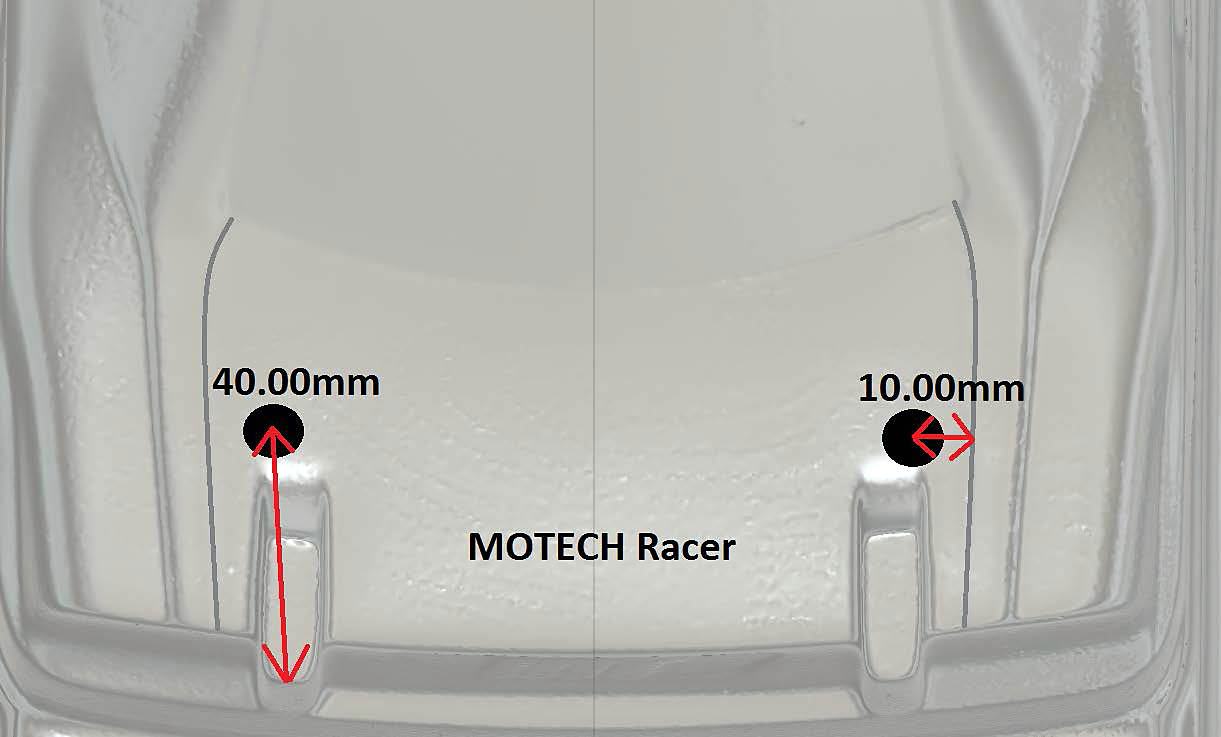
Montech Racer - Top
From the back of the wing mount to hole middle: 40.00mm
From the trunk line inwards: 10.00mm
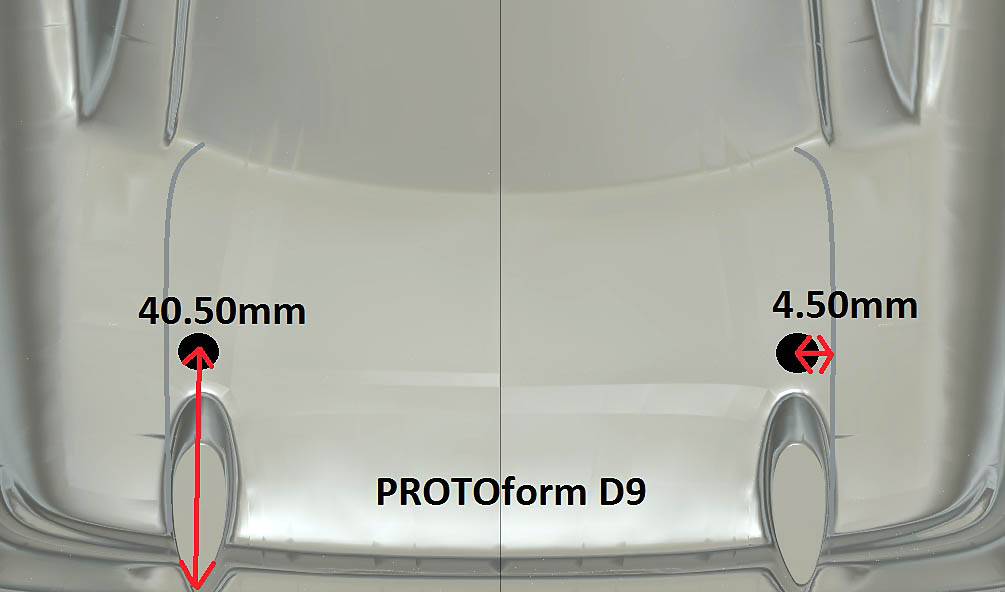
PROTOform D9 - Top
From the back of the wing mount to hole middle: 40.50mm
From the trunk line inwards: 4.5mm
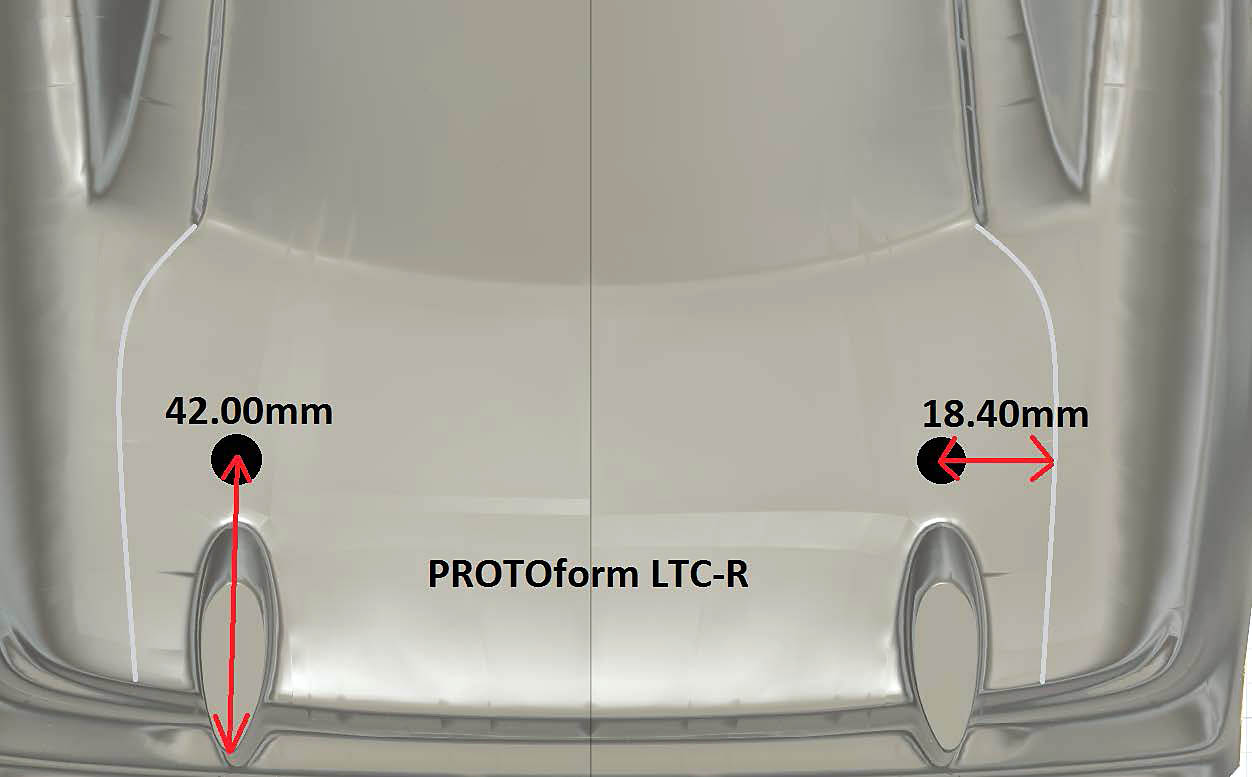
PROTOform LTC-R - Top
From the back of the wing mount to hole middle: 42.00mm
From the trunk line inwards: 18.40mm
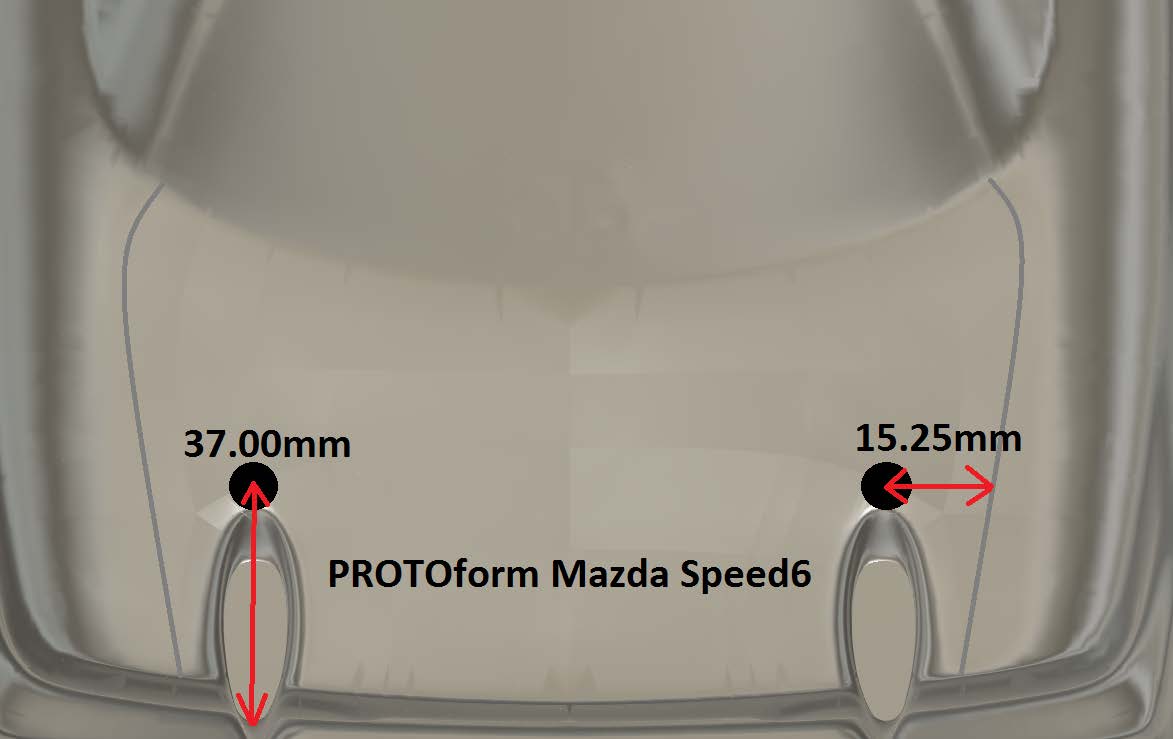
PROTOform Mazda Speed 6 - Top
From the back of the wing mount to hole middle: 37.00mm
From the trunk line inwards: 15.25mm
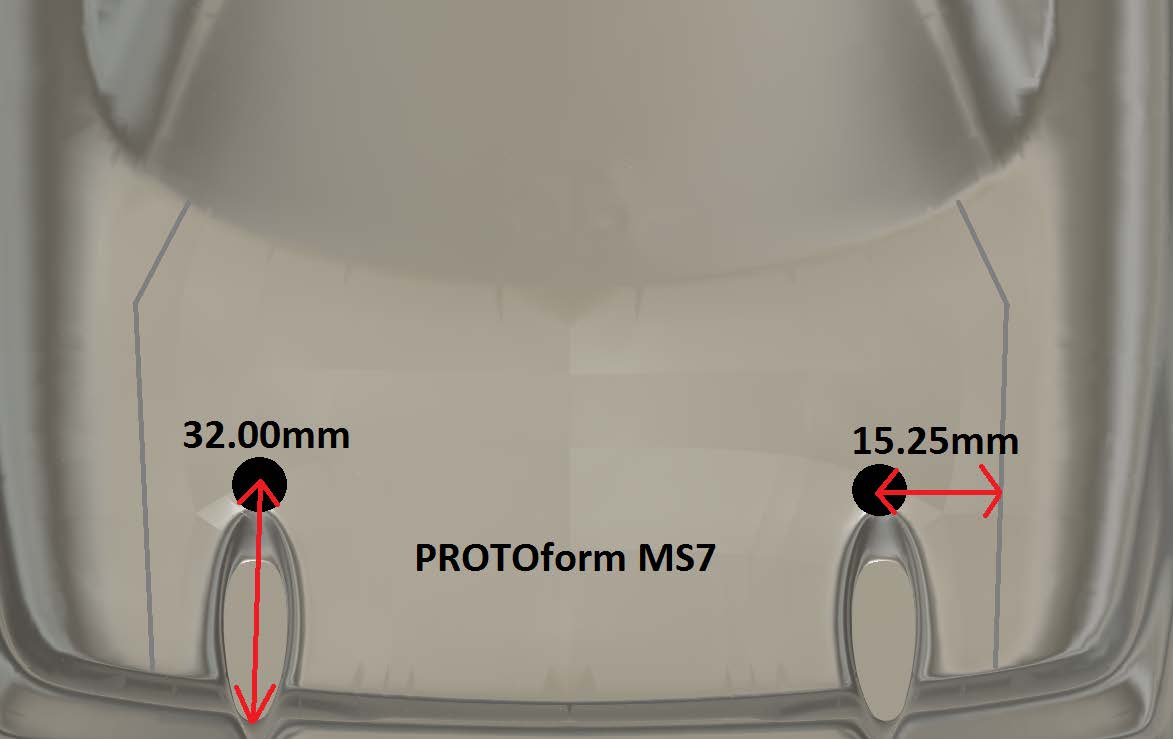
PROTOform MS7 - Top
From the back of the wing mount to hole middle: 32.00mm
From the trunk line inwards: 15.25mm
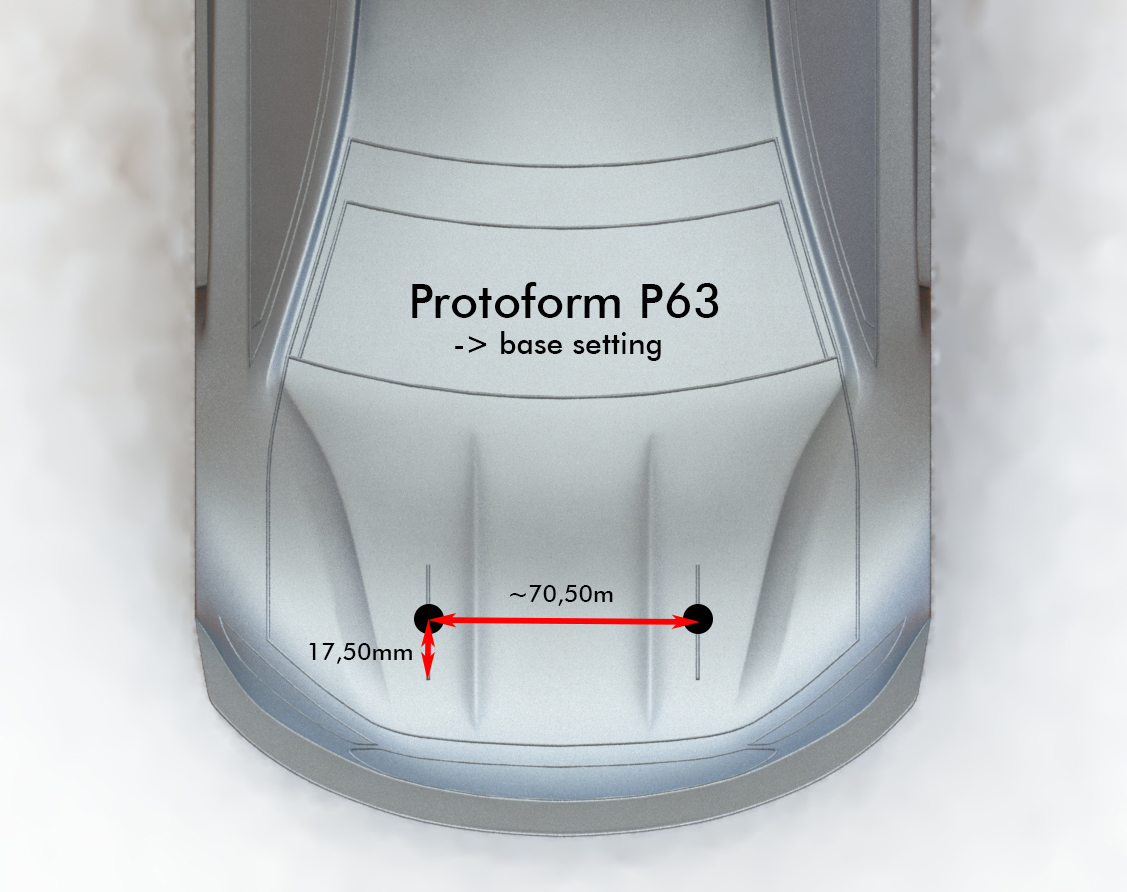
PROTOform P63 - Top
For HRB mount: 0mm under AM126 / HRB mount – C05A in lowest position.

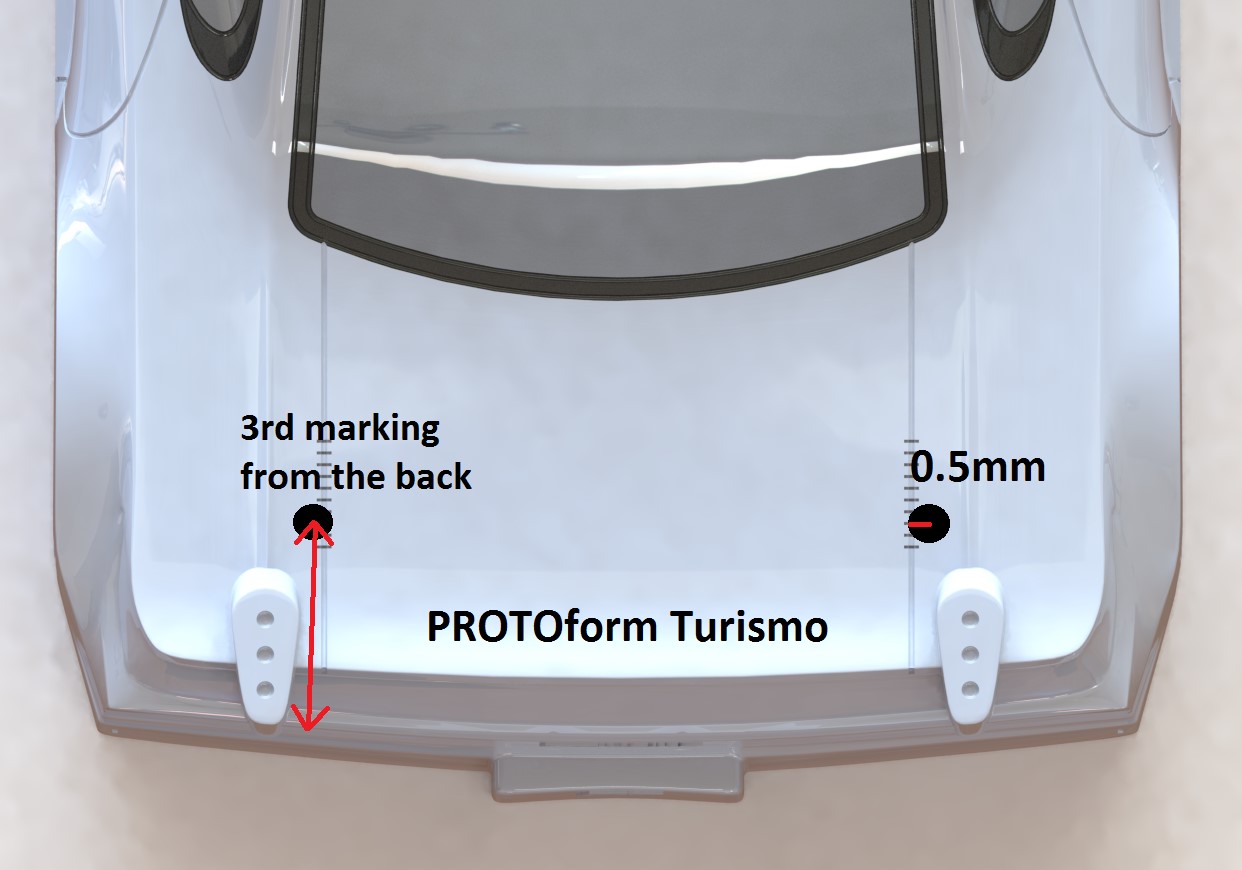
PROTOform Turismo - Top
From the back of the wing mount to hole middle: 3rd marking from the back
From the "mounting help" line outwards: 0.5mm
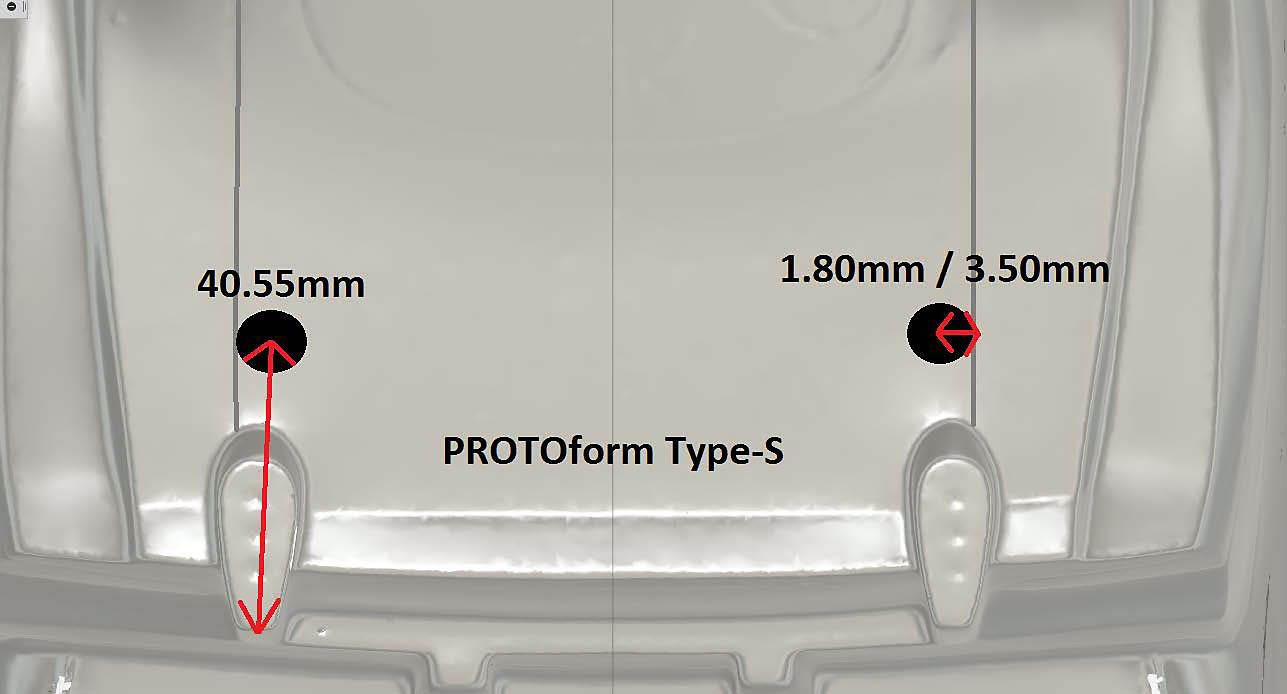
PROTOform TypeS - Top
From the back of the wing mount to hole middle: 40.50mm
From the trunk line inwards: 1.80mm or 3.50mm (Please note, two Different Molds of Type-S exist. They ONLY differ at the rear trunk line. ALL other is 100% same. Please check to choose right size!)
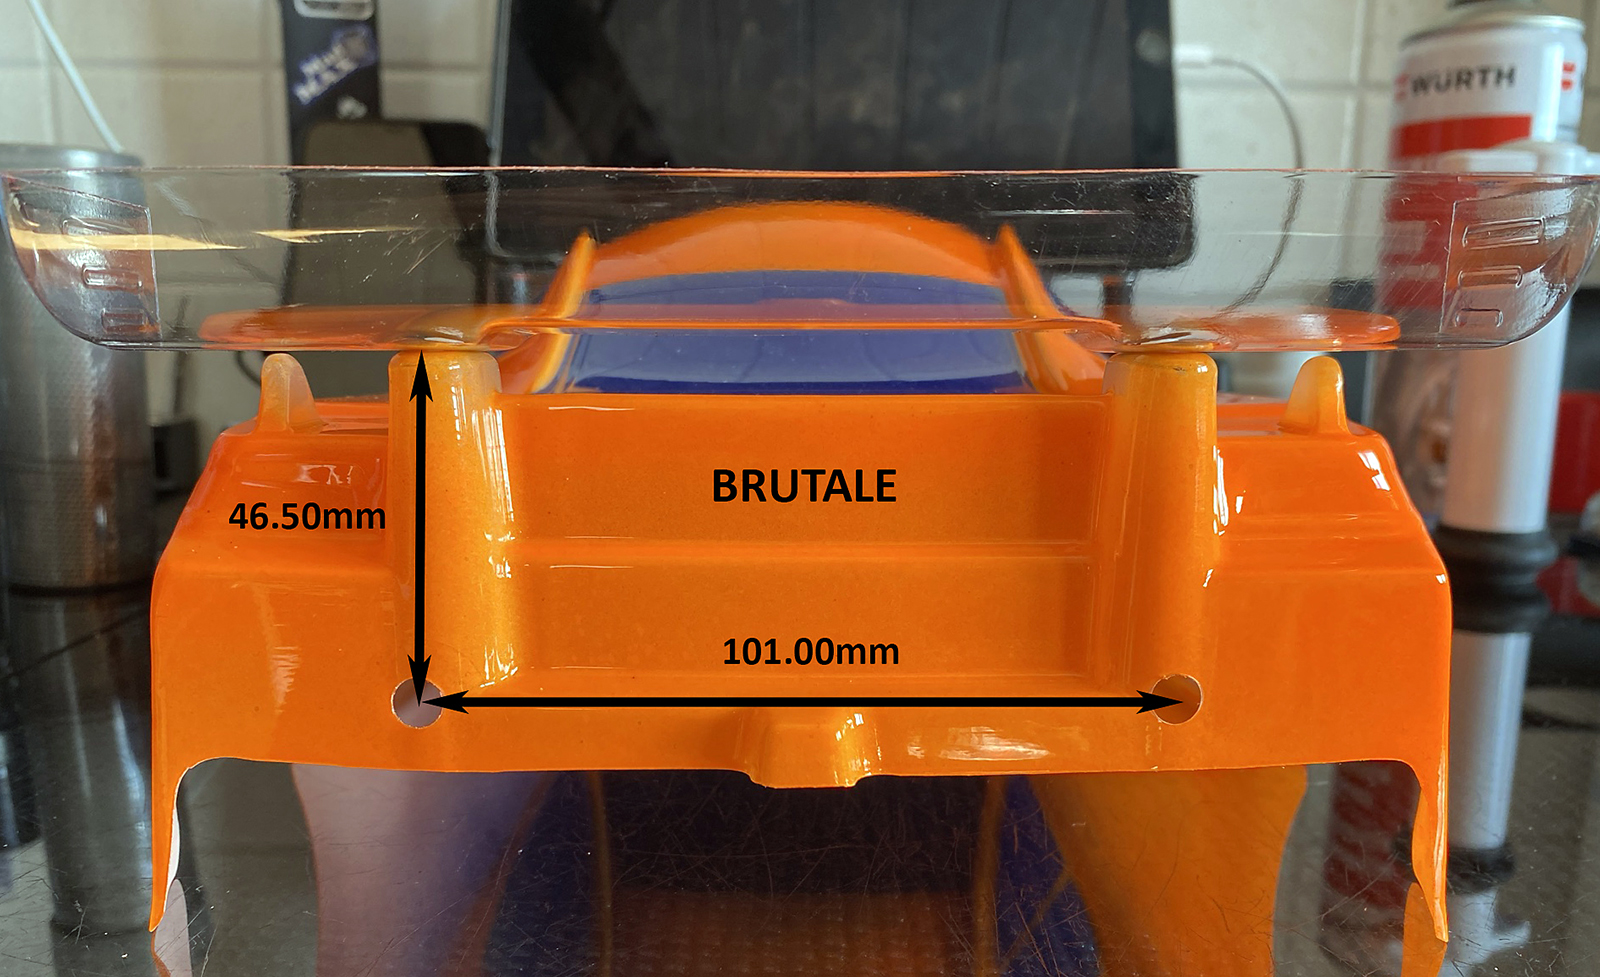
Xtreme Brutale - Top
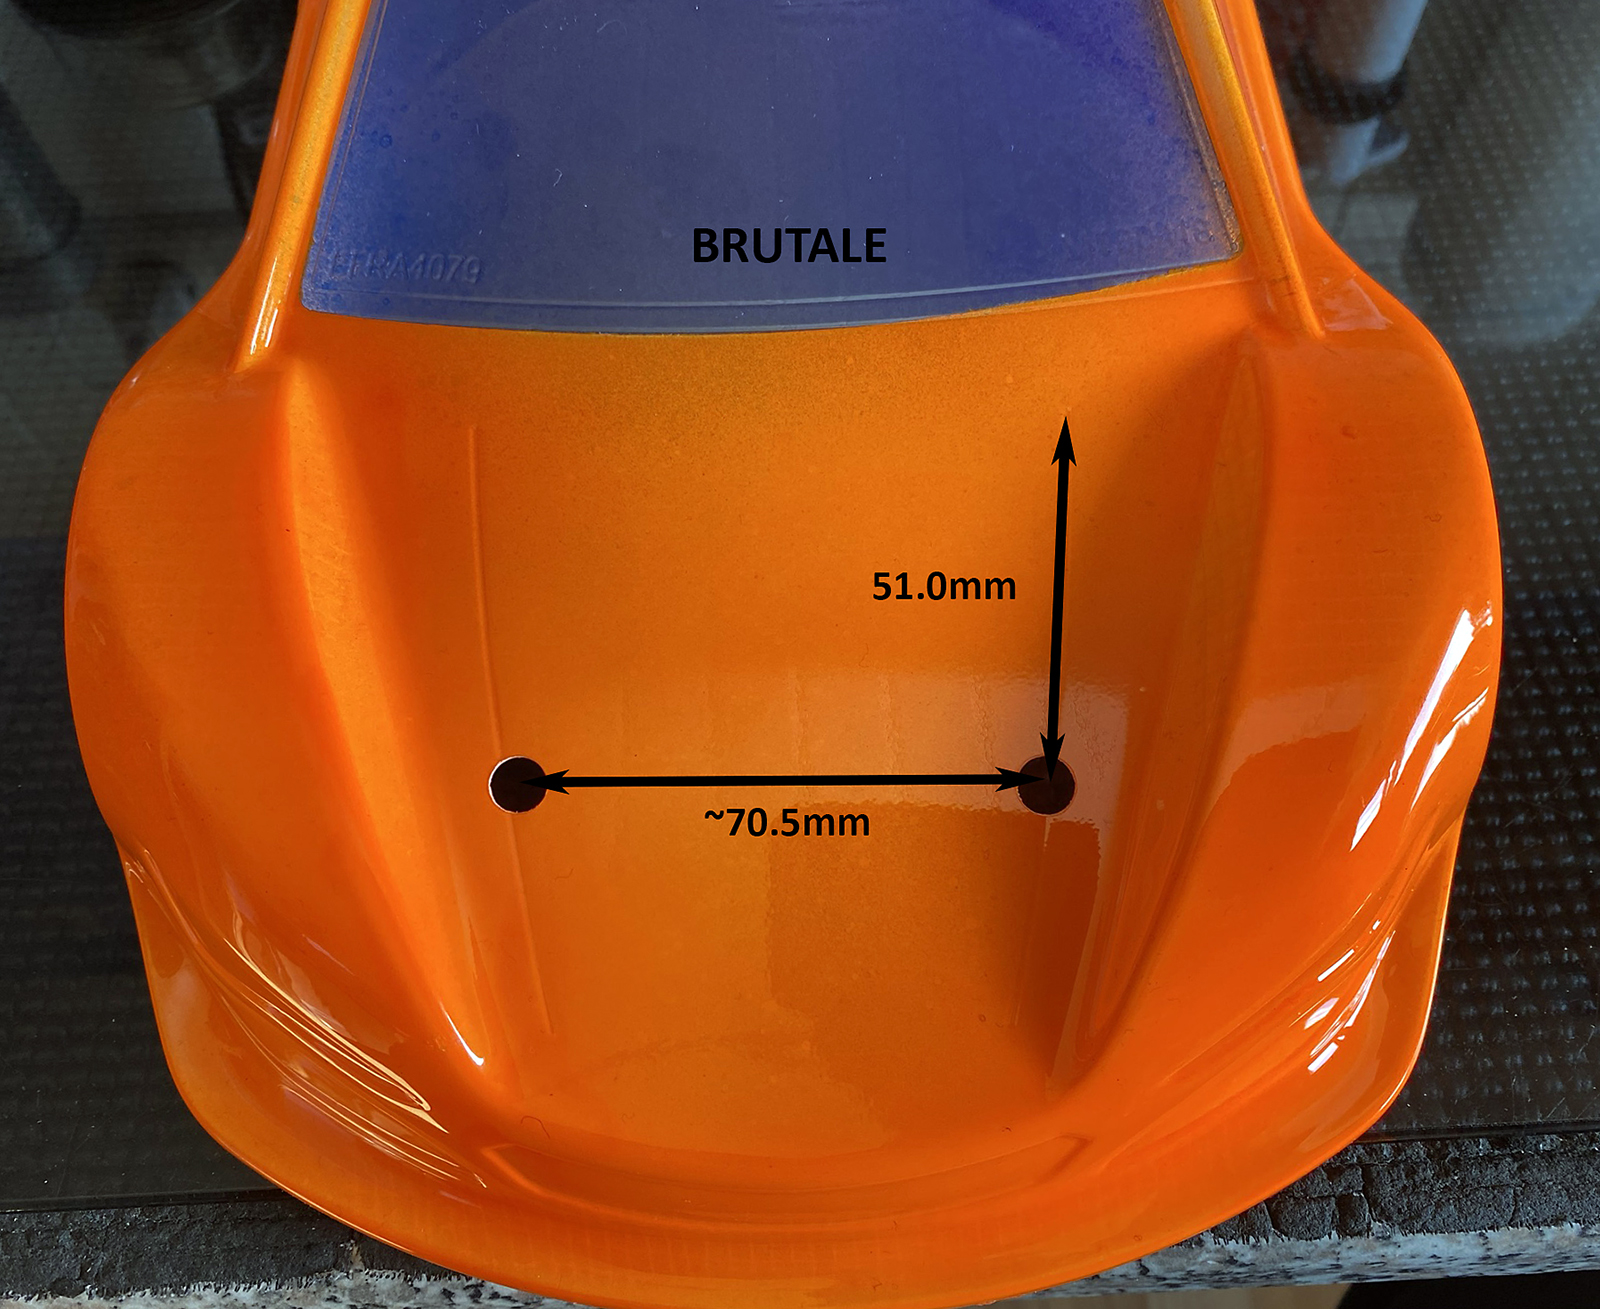
For HRB mount: (Shimmed AM126 / HRB mount 1,75mm up - C05A in lowest position = to have room for up and down adjustments)
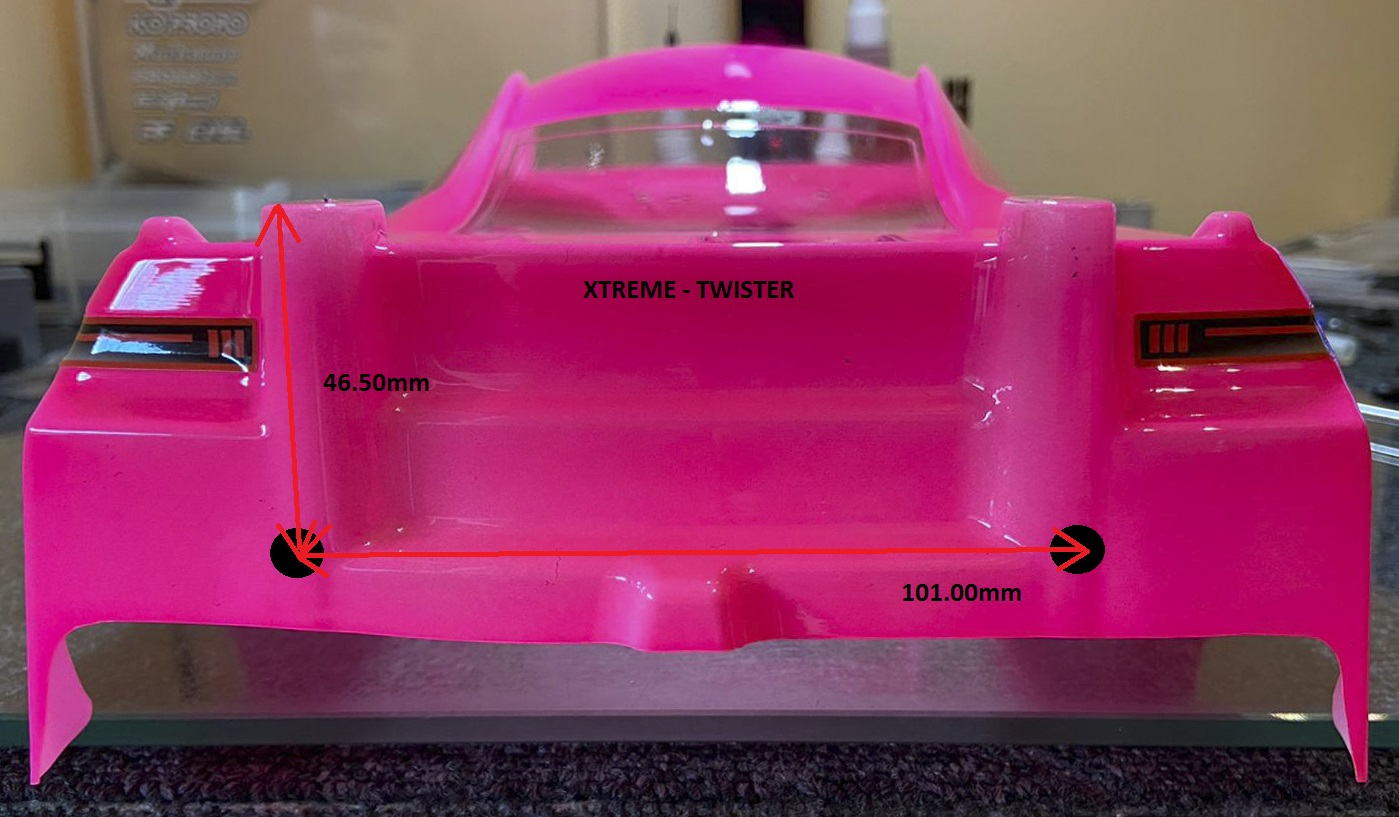
Xtreme Twister - Top
From the back of the wing mount to hole middle: 32,50mm
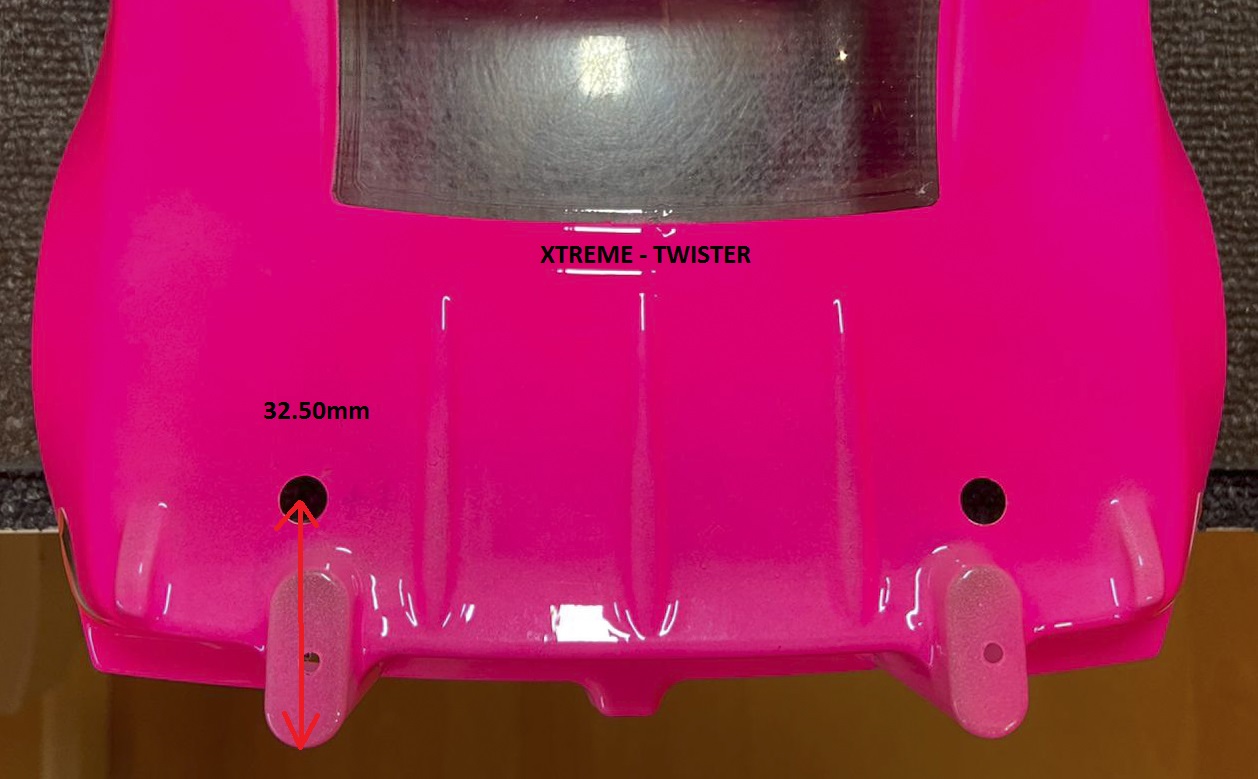
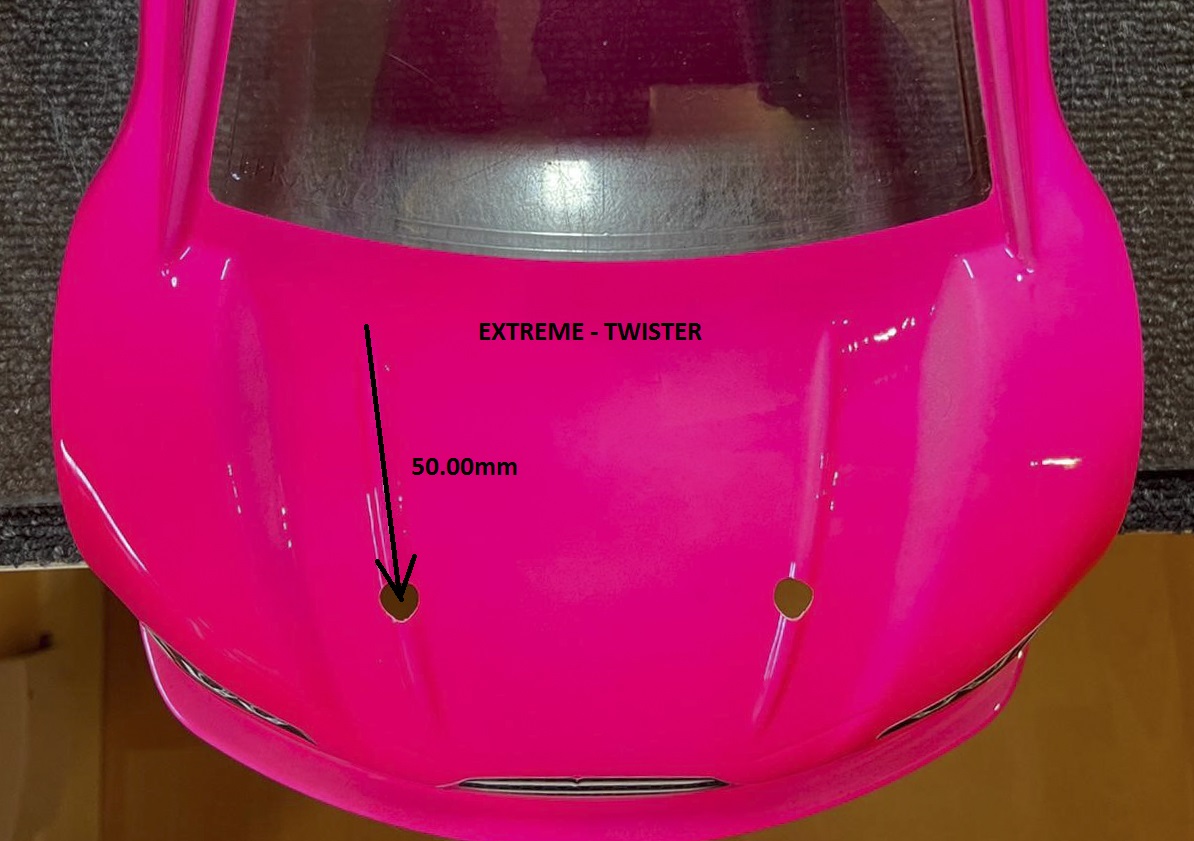
For HRB mount: (Shimmed AM126 / HRB mount 1,75mm up - C05A in lowest position = to have room for up and down adjustments)
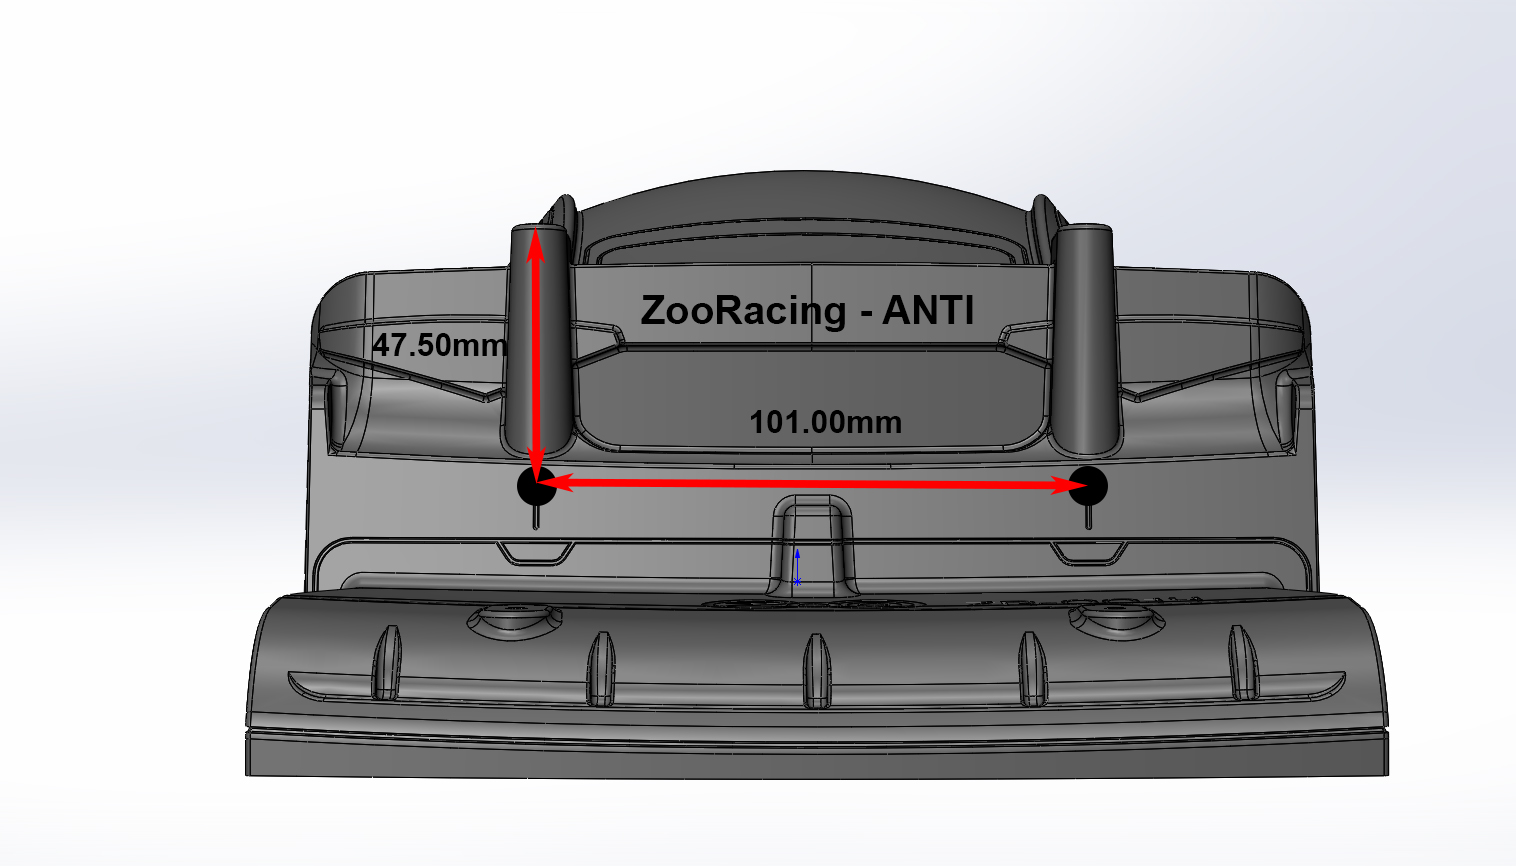
ZooRacing Anti - Top
Two versions to mount: "Base" and "more forward"
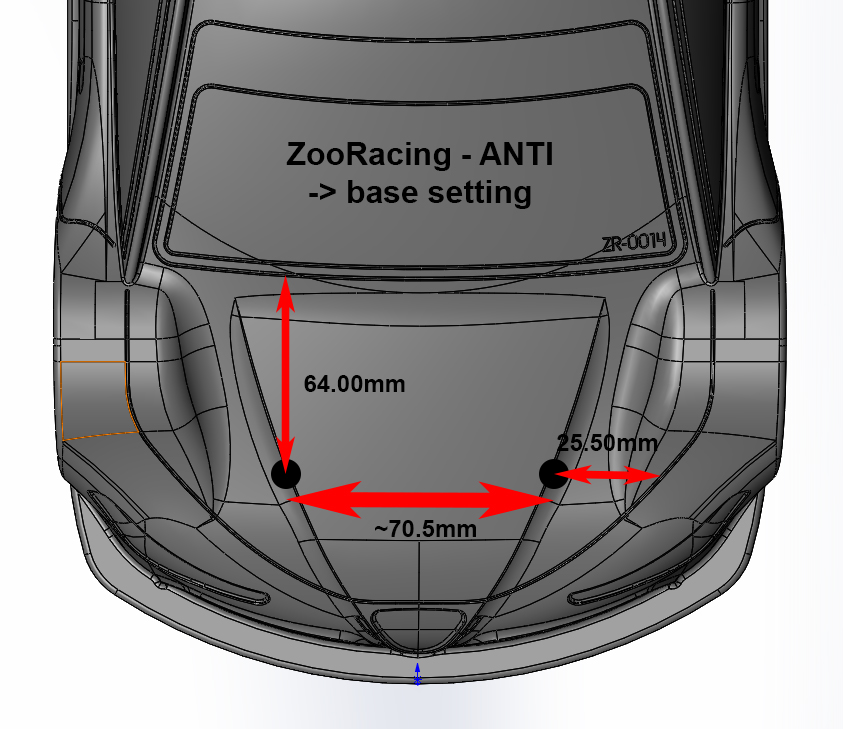

For HRB mount: !!!NO SHIMS under AM126 / HRB MOUNT!!! - C05A in lowest position = to have room for up adjustments.
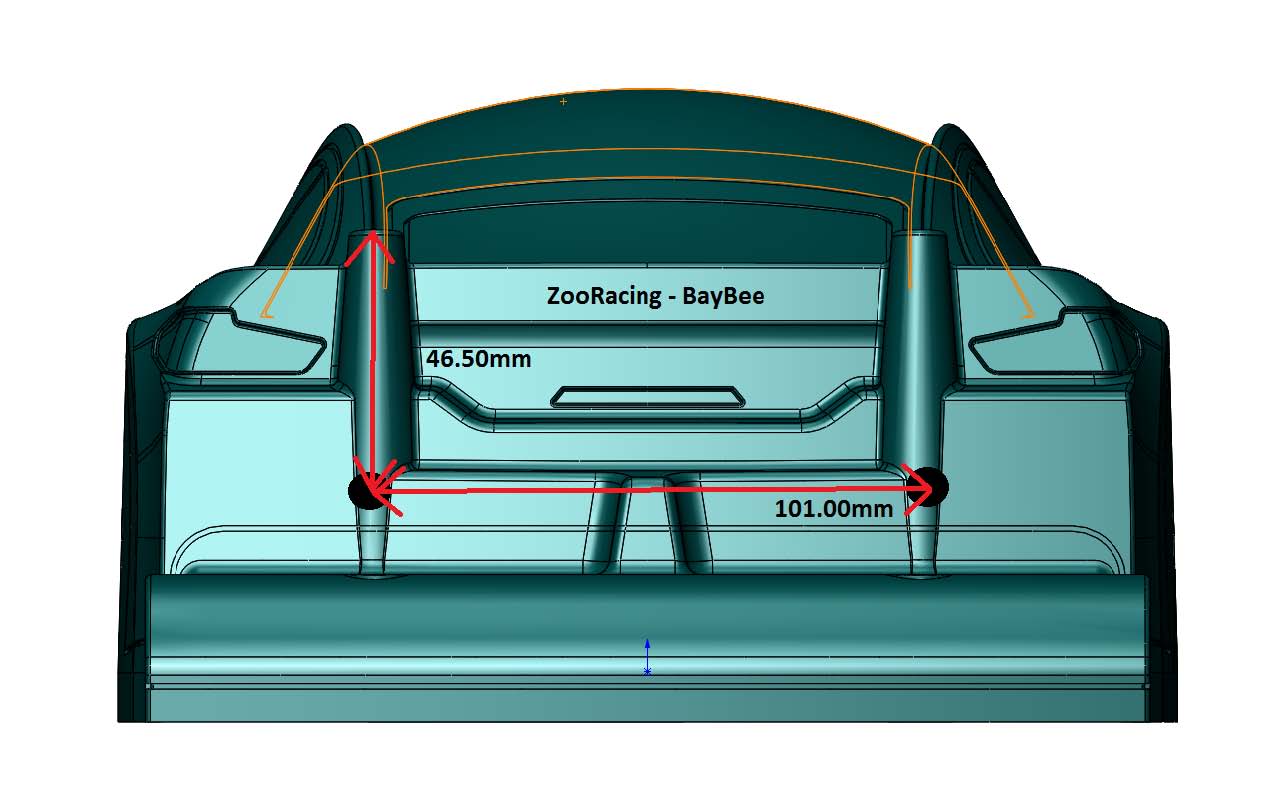
ZooRacing BayBee - Top
From the back of the wing mount to hole middle: 36,50mm
From the "mounting help" line outwards: 0.5mm
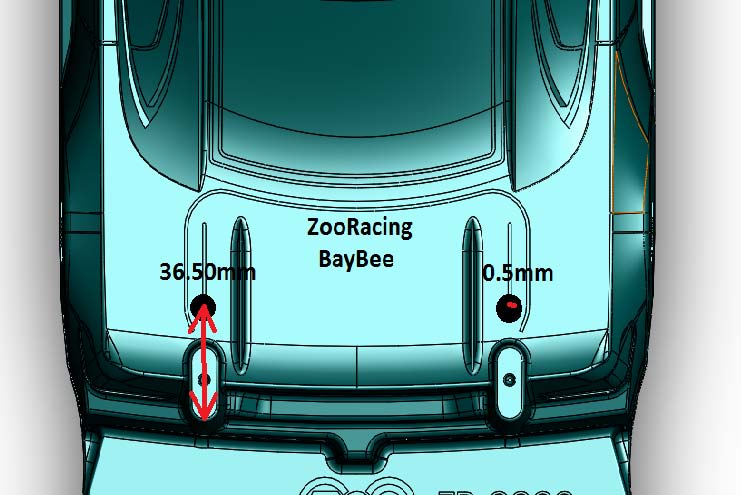

For HRB mount: (Shimmed AM126 / HRB mount 1,75mm up - C05A in lowest position = to have room for up and down adjustments)
ZooRacing DogsBollox - Top
From the back of the wing mount to hole middle: 36mm
From the "mounting help" line outwards: 0.5mm
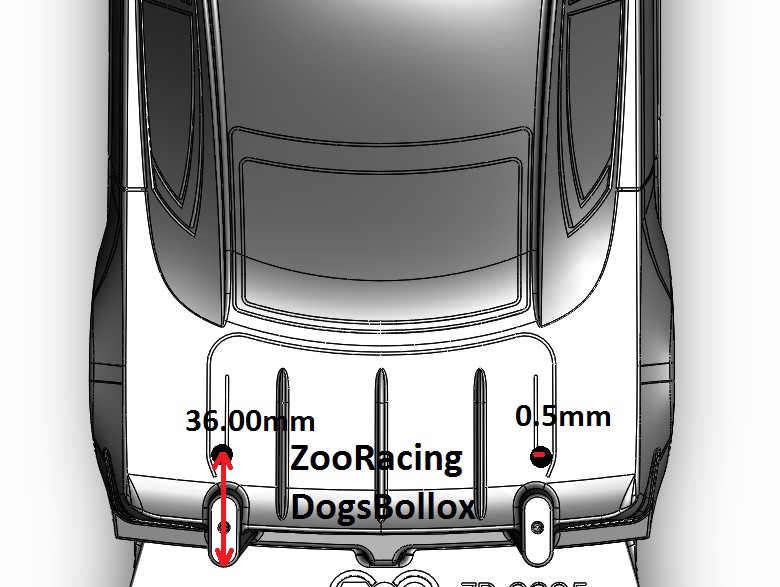
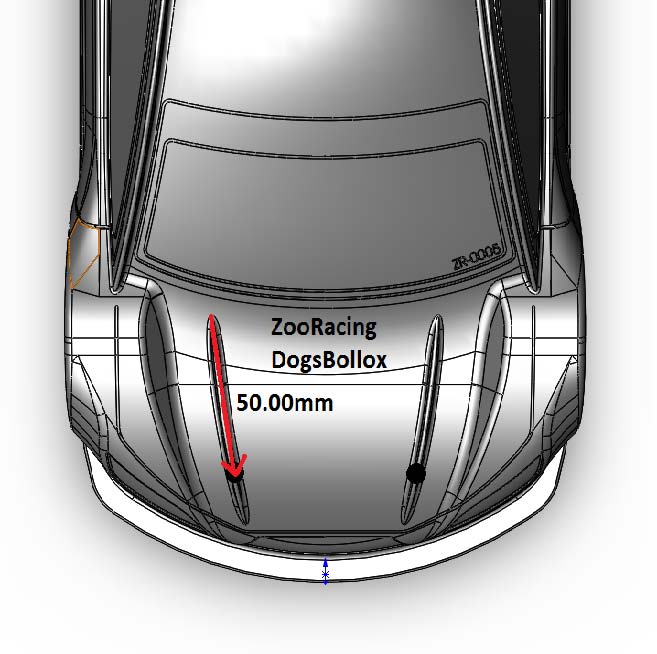
For HRB mount: (Shimmed AM126 / HRB mount 1,75mm up - C05A in lowest position = to have room for up and down adjustments)

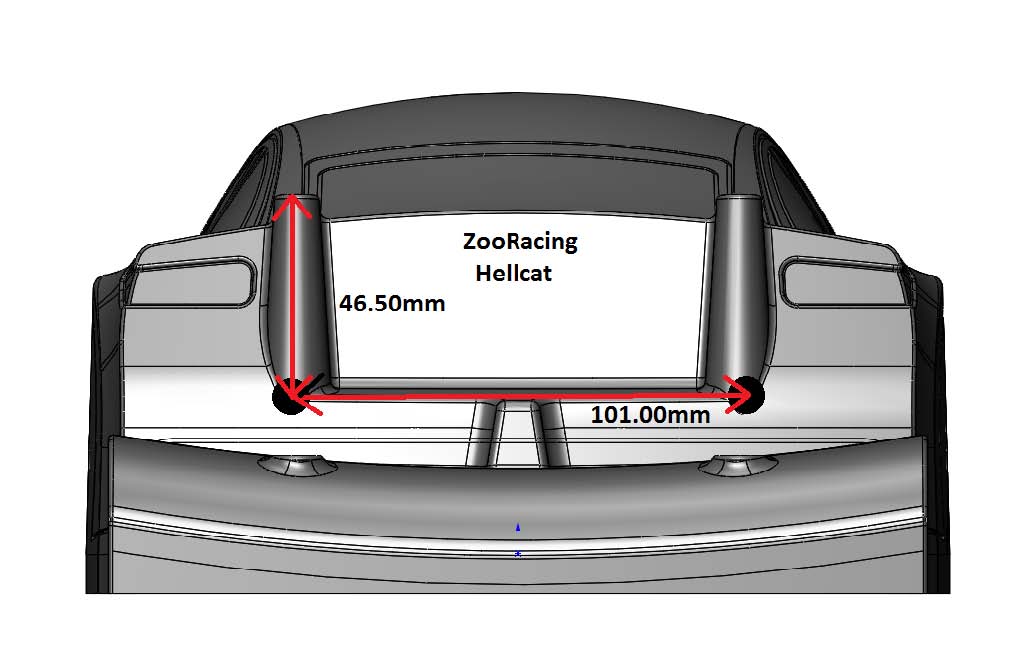
ZooRacing HellCat - Top
From the back of the wing mount to hole middle: 37mm
From the "mounting help" line outwards: 0.5mm

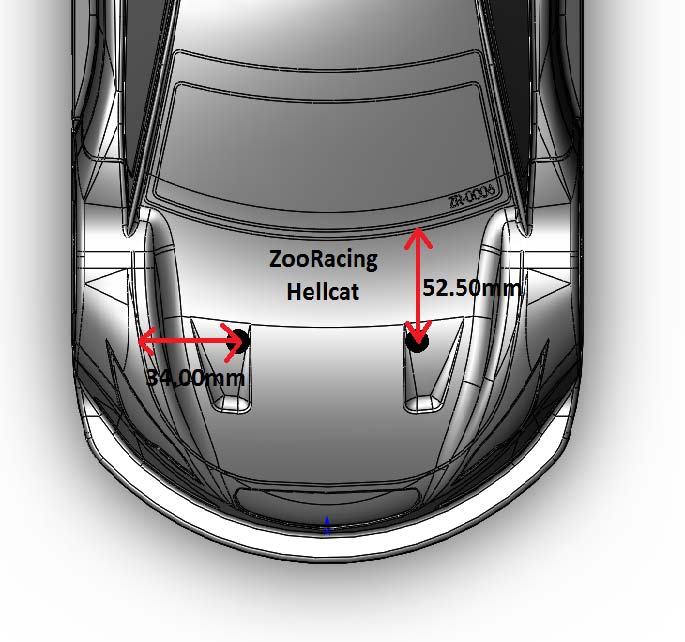
For HRB mount: (Shimmed AM126 / HRB mount 1,75mm up - C05A in lowest position = to have room for up and down adjustments)
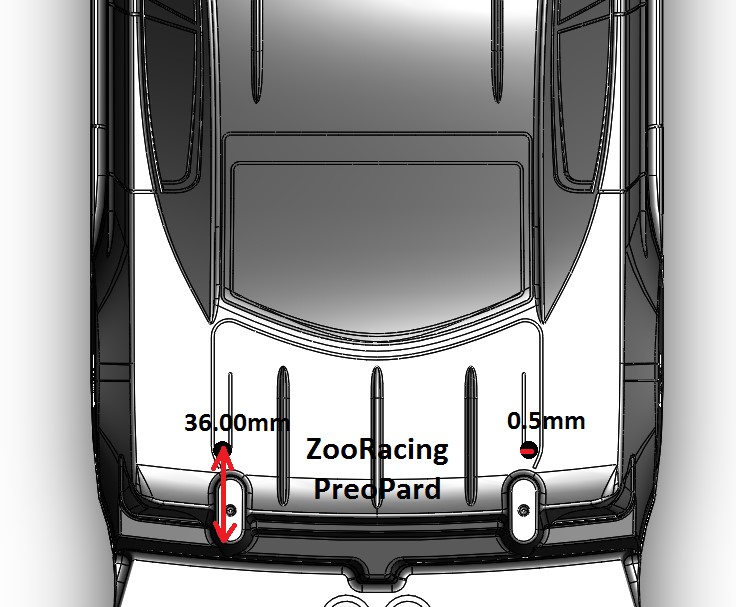
ZooRacing PreoPard - Top
From the back of the wing mount to hole middle: 36mm
From the "mounting help" line outwards: 0.5mm
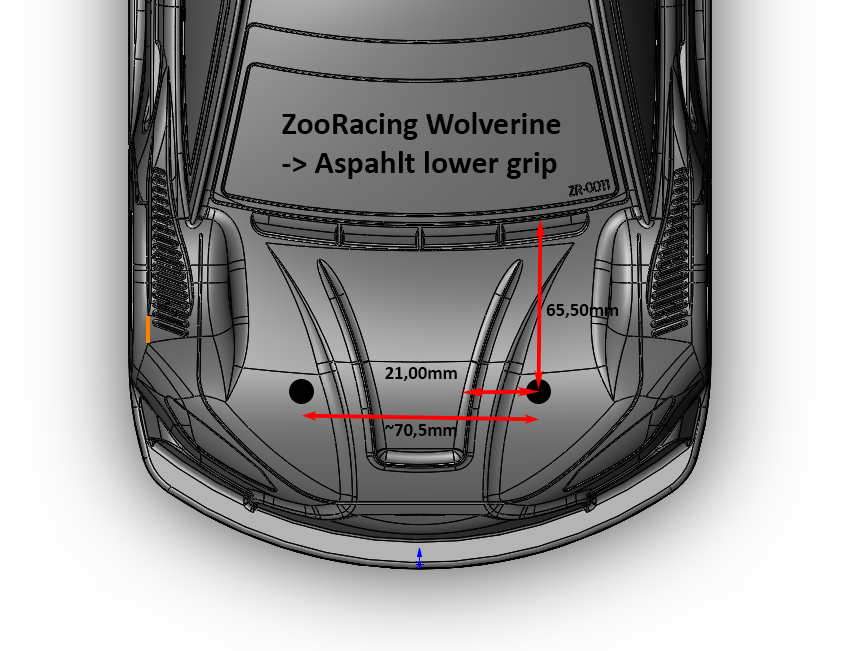
ZooRacing Wolverine - Top
Three versions to mount: "Base", "more forward", and "Asphalst Low Grip"
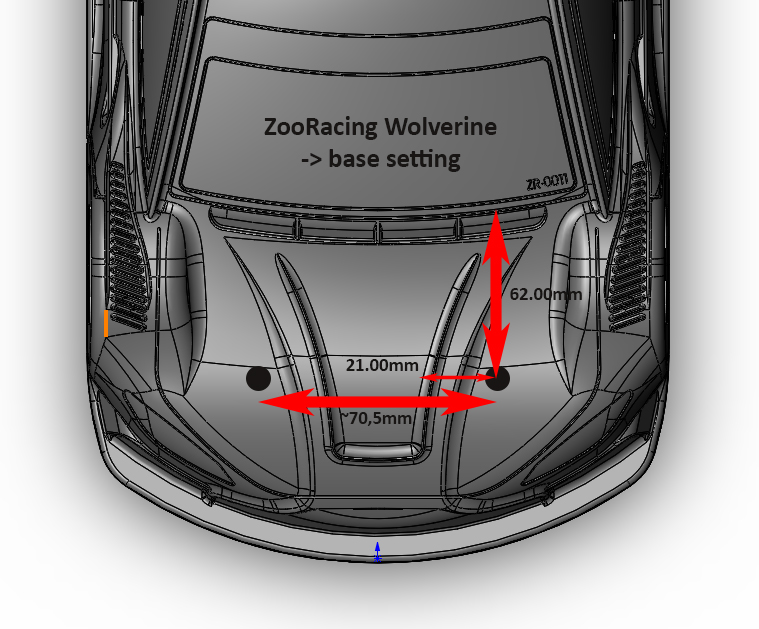
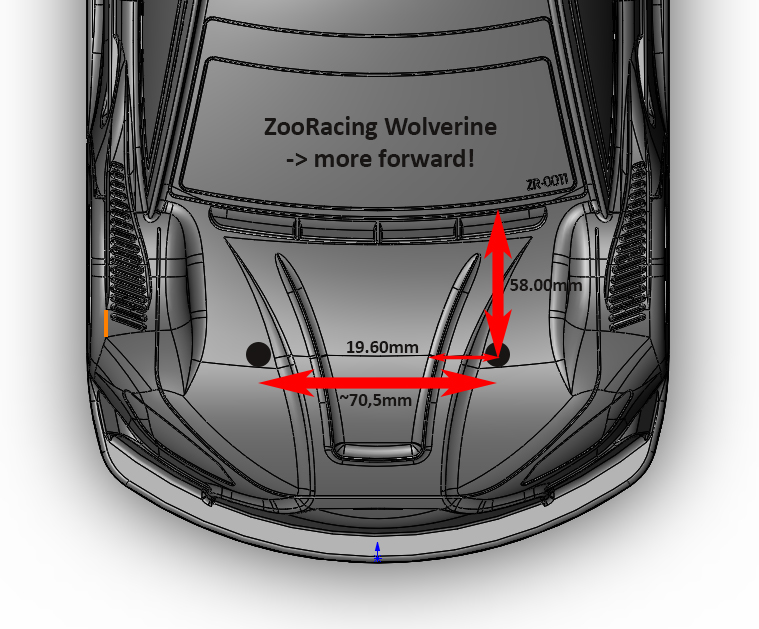
For HRB mount: (Shimmed AM126 / HRB mount 1,75mm up - C05A in lowest position = to have room for up and down adjustments)
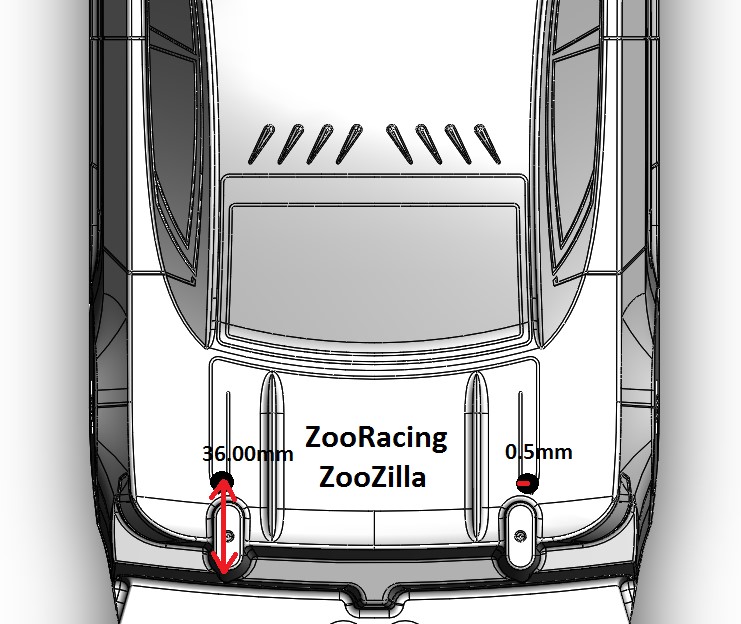
ZooRacing ZooZilla - Top
From the back of the wing mount to hole middle: 36mm
From the "mounting help" line outwards: 0.5mm
|
