Carbon fiber parts preparation
The first step before assembly every element with other on the main chassis is to prepare this major piece. This is not a mandatory step.
The idea here is to "break" the chassis' edge, like so that will reduce some risk about battery envelop cut - and so short cut - or fingers damage as carbon fiber on a sharp edge tend to cut. Also, the chassis will be more resistant in case on contact with track border for example.
Different techniques to prepare a carbon fiber chassis exist, we show one here, just remind that a long process!
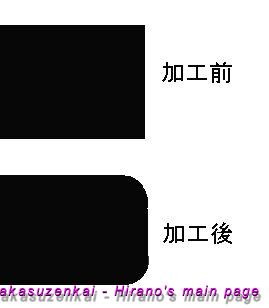
The principle is illustrated here:
| Square edge |
|
| Round edge |
If you move into this process of carbon fiber chassis preparation, be sure to get some protection:
-
Protective mask to prevent breathing carbon fiber particle
-
Glasses in case of projection
-
Glove (thin ones) but not mandatory
Important note: during first square edge breaking with the mechanical round file, be careful with the carbon fiber dust, use a protective mask to do not inhale the dust. Also, working outside or in a ventilated room help to reduce the amount of dust.
|
Advanced Carbon Fiber Chassis Preparation Words: Team CRC
The chassis in your kit is very strong and ready for use right out of the box. However there is an easy way to significantly extend the life of your chassis, it will also actually feel nicer to the touch. The reason this tip can extend the life of your chassis is that rounded corners are much more resistant to chipping, breaking and cracking than a square edge like the one on your stock chassis. In addition, the last step of this process involves sealing the edges of the carbon fiber with Cyanoacrylate (CA) glue which further helps to prevent the separation (de-lamination) of the many layers that make up your woven fiber chassis.
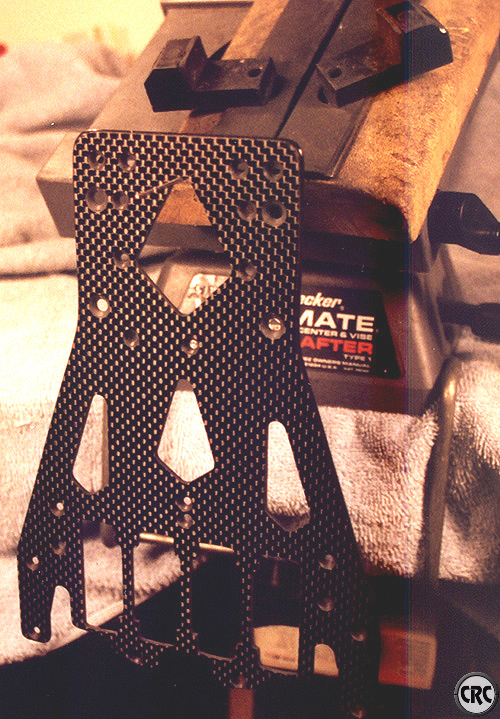
Notice the square, sharp edges of the stock chassis.
We are using a carpet knife V3 chassis for an example.
You will need the following:
Another 'before' shot
of the knife chassis.
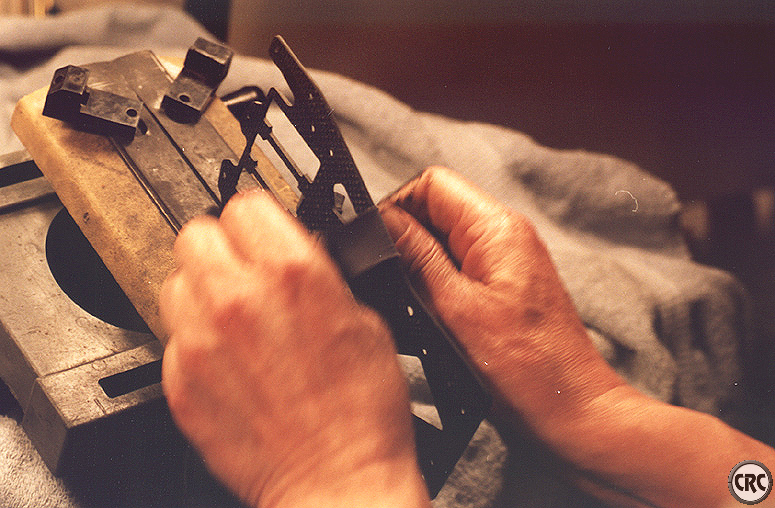
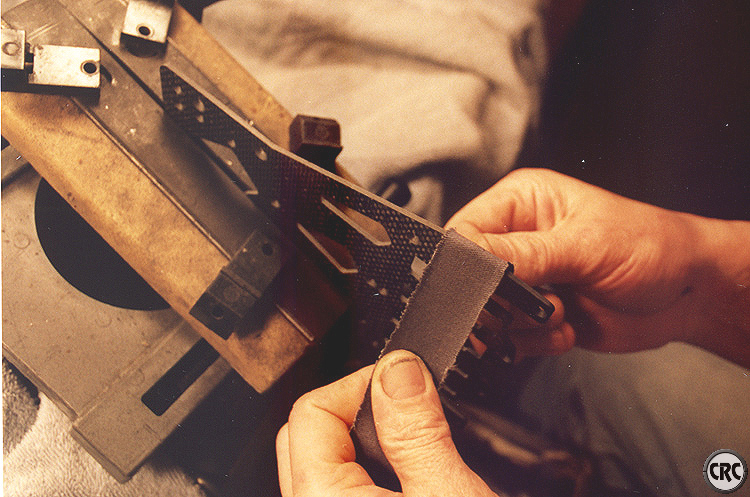
Sand across the grain just until the edge is nicely rounded.
Hold each end of the strip of emery paper and sand back and forth across the grain. Continue just until the edges are completely rounded. Try and remove only the amount of material required Do both sides and the front in this manner. Move the chassis around in the vice as you move to different parts and sides of the chassis. Remove the chassis from the vice and now sand with the grain as shown in figure four. Sanding with the grain gives a smooth finish. Place the chassis back in the vice front end first so the rear of the chassis is extending upward As shown in figure 5. Now sand again by pulling back and forth across the chassis, but this time do it very lightly... just enough to slightly round the edges, this area of the chassis has the least amount of material and should be treated gently. This end of the chassis is also less likely to take direct impact, so a completely rounded edge is not as important as the front and sides of the chassis. Also sand inside all the holes back and forth lightly. Since there are a couple of different holes in a couple of different orientations, move the chassis around in the vice so each surface you are sanding is more or less parallel to the ground. This just makes the job easier. These inner holes are also not as easily damaged as the rest of the chassis so again, they do not need to be perfectly rounded like the sides and front do. Sand with the grain up and down the length of the chassis to give a smooth finish
Be careful sanding the edge of the chassis.
You don't need to remove a lot of material here
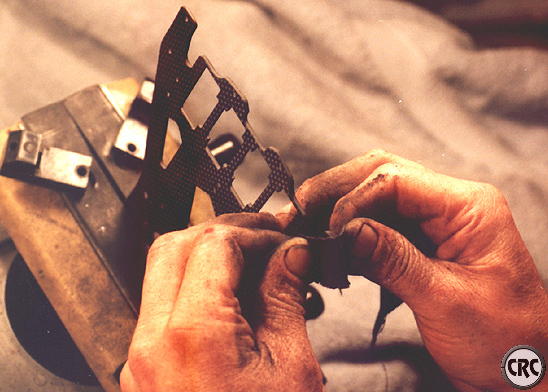
Sealing the chassis edge Use thin CA as it is less viscous and will work best for the method we use to get the glue all the way around the edge of the chassis.
The CA should run around the edge of the chassis.
Don't hurry, but work with a bit of a sense of urgency.
If it runs off onto the  front or back of the chassis just wipe it off with a damp rag
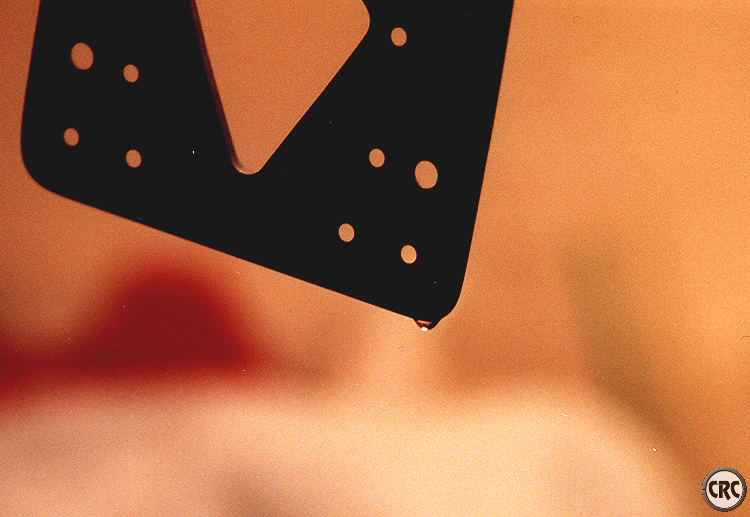
Hang the chassis to dry
That's it! A bit of work but well worth it.
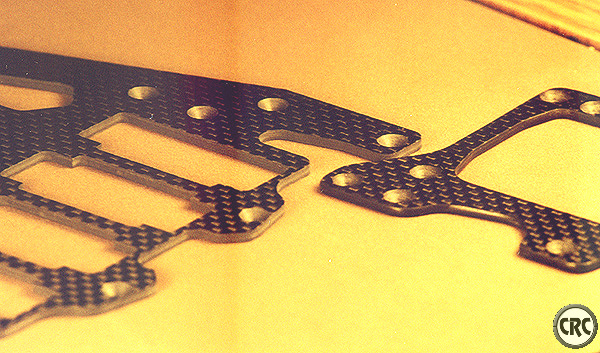
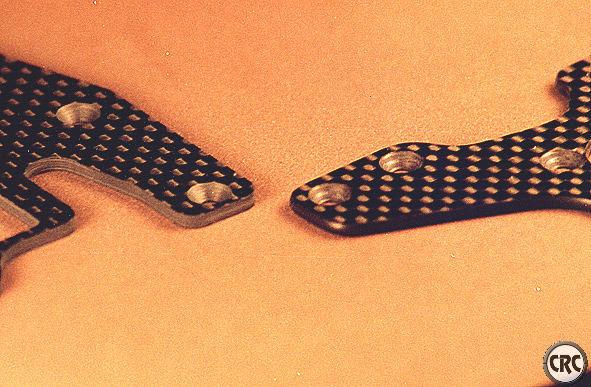
A comparison of an unfinished piece on the left and a finished one on the right.
Another comparison of an unfinished piece on the left and a finished one on the right.
|
That's the "basic" principle in carbon fiber chassis preparation! The same can be apply to all carbon fiber components of your car and particularly the under brace (under part of the pod). When you are over with this process, wash your hand with soap and cold water, hot water tend to expand skin holes and facilitate carbon fiber dust to get in!!
To make the job faster, you can use a mechanical round file as shown.

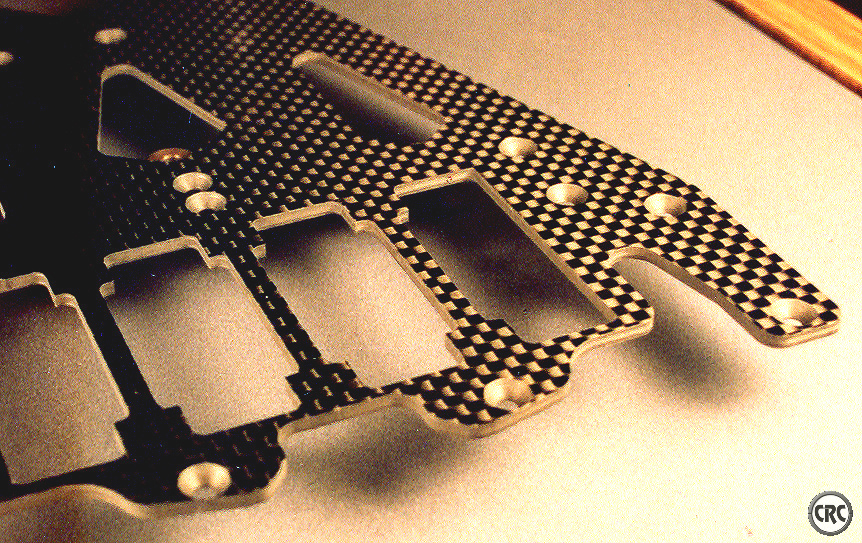
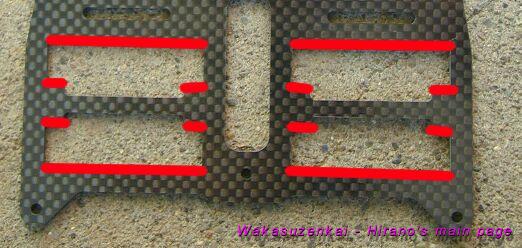
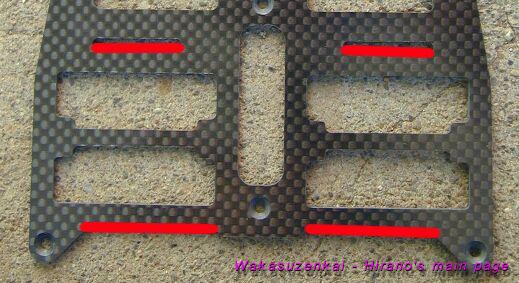
You can process the edge are shown below in red on the first and second picture. The first picture show the edge you must do at least during a carbon chassis preparation. Yellow areas must not be processed because that match with holes dedicated to screws or elements' locating. For the cells' slot, see a little more further or all details.
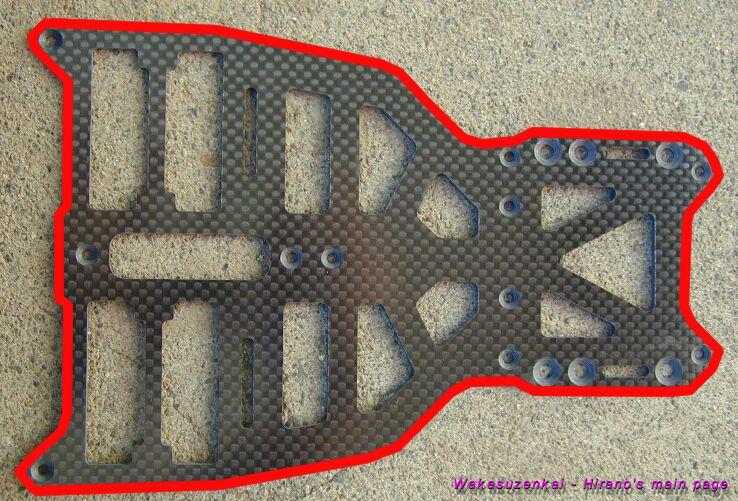
Edge you must process if you want to round edge
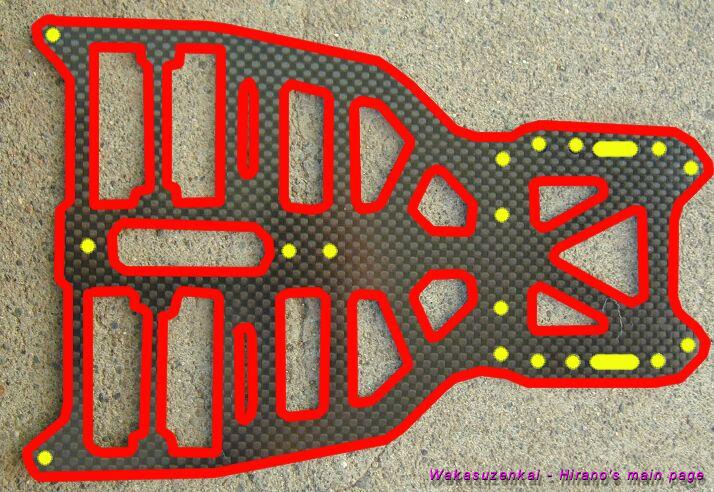
Top side (battery, electronics devices will sit on that side)
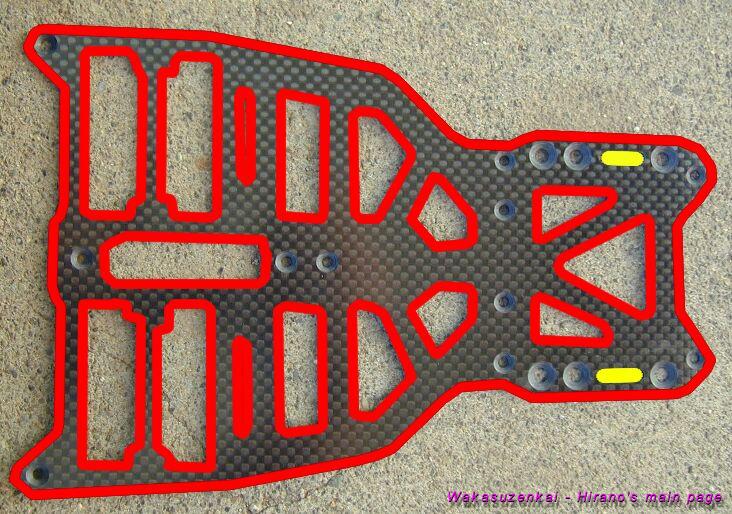
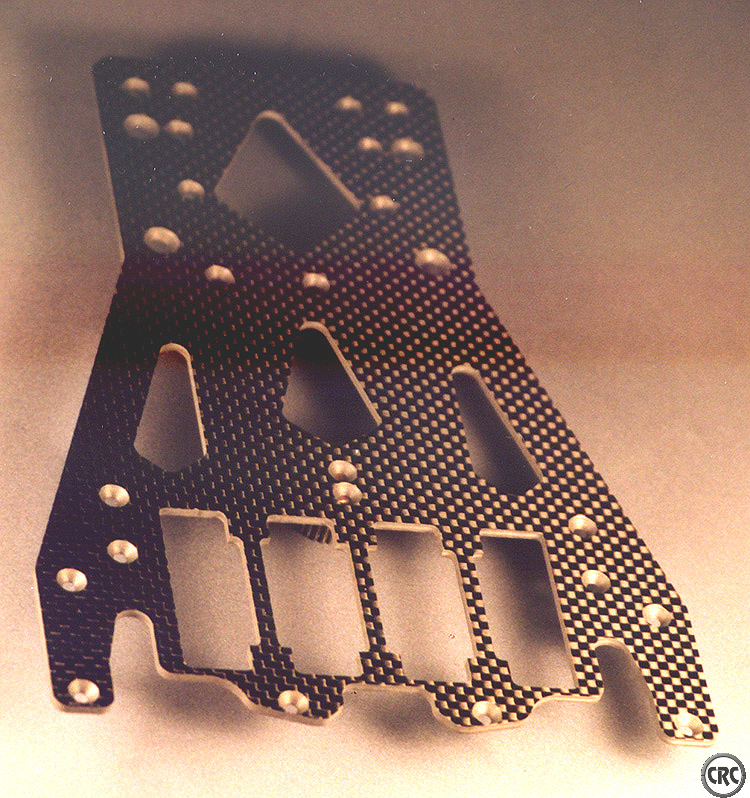
Bottom side (facing ground)
Important area where you may focus in the front and of the chassis. This is the most exposed part of the chassis in case of crash!!
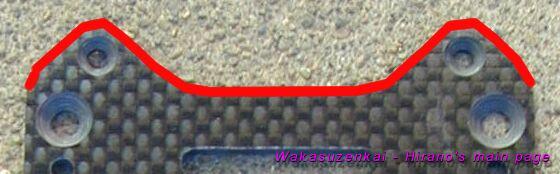
Also, DO NOT process the T-bar, any change of the geometrical characteristic of this part will change the way the T bar deflects and so the car behaves!
Now, let's have a look to the cells' slots!
|
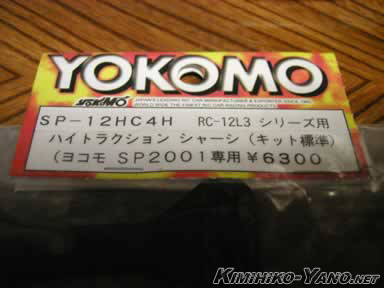
Carbon Fiber Chassis Preparation - Focus on the cells' slots Words: Kimihiko Yano Translated from Japanese This is a main chassis preparation of my love car Associated RC 12L3. This method could be applied to other scale than 1/12 scale car. The skill developed here has not been written on the instruction manual. As for the method introduced here being not to be something which you were taught to someone, you think that a certainly there is better method. If you knows a better method please let me know on the propriety bulletin board. Associated RC 12L3 according to the instruction manual assembling, shows sufficient performance, but in order by his to be able to agree upon, being to adjust you explain concerning this point. If the car this way does not rework, there is no intention, useless. So applying time and time, assuming, (it compared to the car which you complete and it was possible and considered as the person that was bad) the attachment which does not have expression boils, don't you think?. This time 4 cell chassis which are sold from Yokomo were used. When you compare with the time before, if price of the carbon chassis becomes rather cheap and the better seed, is delightful is. The chassis of kit standard somewhat hard has become the め in comparison with the chassis of option.
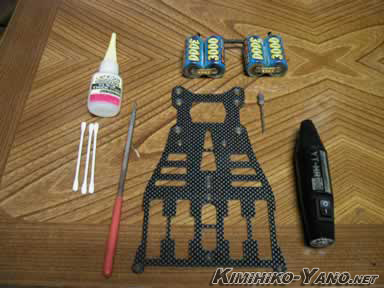
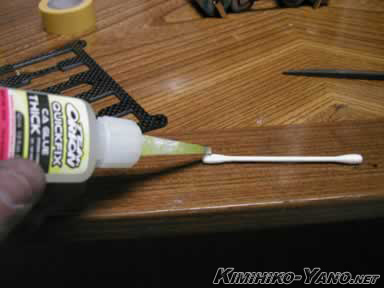
It is the tool which is used in chassis processing. The cyanoacrylate (CA) glue, cotton stick, metal file, battery and high speed rotary tool like Dremel do. It can substitute the high speed rotary tool even with the metal file.
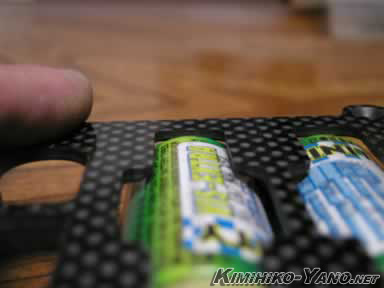
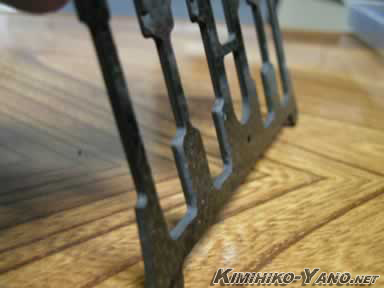
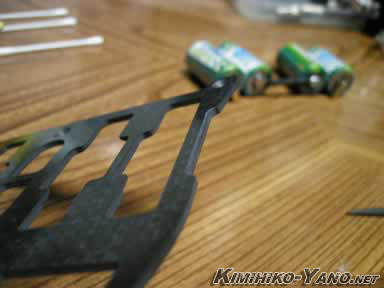
First shaving the angle of the battery slot in beginning, it lowers the helicopter loading site of the battery. The photograph below is the place where the battery is put on the chassis before the processing. Still, it may it be possible the fact that already a little the battery is lowered is. Center of gravity goes down due to the fact that the battery goes down, it is possible to make the car stabilize. In addition when crashing it is possible to prevent the trouble where the battery comes off.
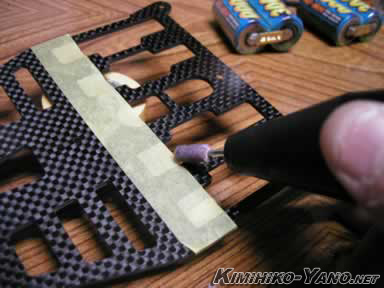
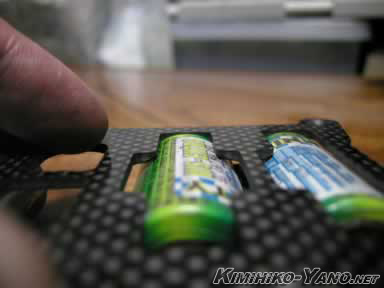
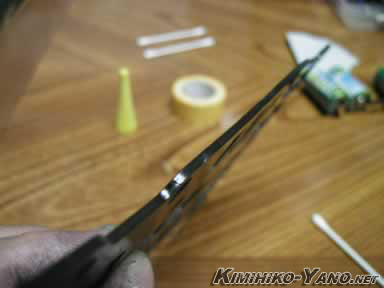
Putting the battery on the chassis, the marking it does the size of the cell with the masking tape and the like, with the chassis of YOKOMO the battery slot in lengthwise is made in the long め. As for this by the fact that helicopter loading site of the battery is inverted quality of the car it has tried to be able to change, you think that it is. In the SANYO cell and the PANASONIC cell being to be different, adjusting to the cell of larger one with the stock battery, the marking it does the size of the cell single unit.
The battery rear section leaves this way exactly together.
Using high speed rotary tool next, it shaves the angle of the battery slot. The neighborhood where the marking it does in order secure to put out angle, pays attention. In addition protruding from the marking, that it does not shave, you note
The neighborhood where the marking it does puts out angle securely with the file. Like this by the fact that it does the battery slipping when crashing is gone.
Shaving it is the battery slot which is ended. When it shaves too much, it meaning that the battery protrudes from chassis lower part, when it shaves a little, placing the battery, while looking at circumstances, when you work, you think that there is no failure,
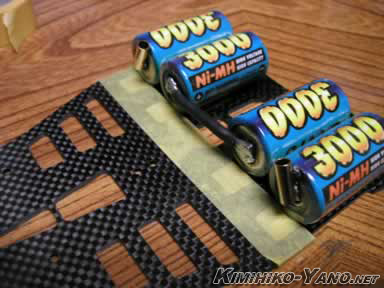
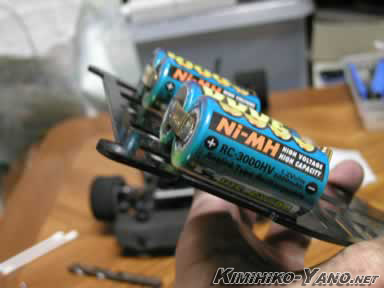
It tries placing the battery in the chassis which it processed. This way the battery cell that tries becomes identical with the chassis surface.
Before processing the battery slot this way, the battery directly slips (picture below).
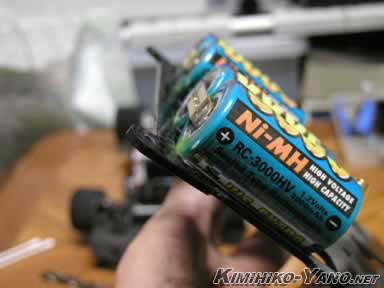
Secure when angle is put out, the battery being able to tilt to here, it does not slip.
It shaves also the angle of the photograph central this part. Unless angle is shaved, the tape which locks the battery being cut off while traveling, there are times when the battery comes off.
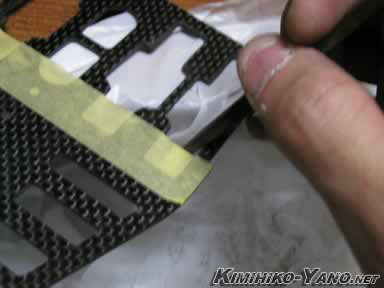
Chassis section coating is done next with the instantaneous adhesive agent. Like this, it is possible to prevent the trouble where the chassis frays by the fact that it does. This way when the cotton stick is used, it can do job simply, like this it had teaching this method to the ぐ ち. As for the quantity of the instantaneous adhesive agent what is made the little licking is the point, it is many with protruding, you see and prospering becomes bad. In order to stretch the instantaneous adhesive agent which the cotton stick is attached first little by little, it keeps painting.
When to be good job is possible, this way chassis section becomes ピカピカ. The う - it is, (oneself) the instant of satisfaction. Also angle of the battery slot paints the CA glue in the same manner
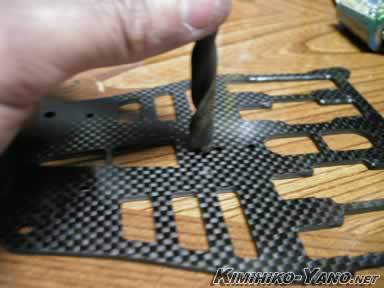
The part of the screw hole the plate っ て is put in place next lightly thickly with the drill blade of the め. Looking, when the hole protruding, you think that also the fashion て is good,
Processing the main chassis is end with this.
|

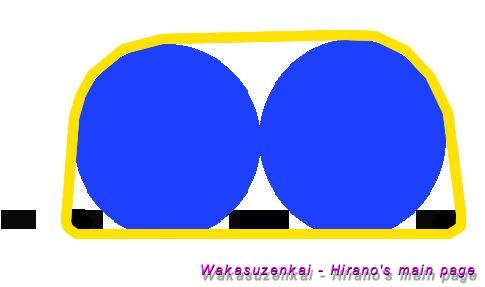
The cell slot can be longitudinally or perpendicularly orientated relatively to the front-rear line of the car. For the cell with a perpendicular orientation, the picture below show edge you have to process. Here no trouble about slot longer than cell as describe above.
In both case, be sure to get the cell slightly higher than the bottom of the chassis, simply to avoid damage of the cell. Remember those cars run low, very low compared to other type of car and contact with the ground may occur from time to time.

Cell slightly above the bottom of the chassis
Last area you have to process is the tape slot, slot use to secure cell during your ride. Sharp edge will cut the tape, round edge not. So, you may process the bottom and top side of your carbon fiber chassis.
The following draw gives an idea of what you will have at the end of this operation.
Here it is for the carbon fiber parts preparation! The next step is the front end assembly or the rear end assembly, depending manual or personal choice.