After more than a decade of Associated RC10B4 domination, the TLR 22 brought excitement back into the 2WD off-road scene, and since then more and more competitors have entered the market. Following the trend of high-grip tracks, most offer at least the possibility to convert their kits to mid-motor configuration, and some manufacturers even offer dedicated hobbyists several to provide the optimum piece of kit for various conditions. With their very first off-road model, VBC Racing do not tread the path of TLR, Yokomo or Kyosho, but instead follow the Team Associated or Serpent route of offering a fixed configuration. During more than a year of development, several prototypes were handmade and extensively tested around the globe. Various materials were scrutinized to make parts as lightweight and bulletproof as possible. For example, more than five different plastic compounds were tested for the A-arms until the development team was satisfied.

VBC Racing was founded in 2010 by a bunch of RC enthusiasts, some of them having been avid racers for more than twenty years, and gathering a vault of experience by driving anything from Mini-Z to 1/5th scale at a highly professional level. Products benefit from the input of nationally and internationally successful RC legends like Jamie Booth and Surikarn Chaidajsuriya, while the engineering team bring along an extensive knowledge in the plastics production and the CNC milling sectors. Until the Firebolt DM appeared, VBC Racing's product range was limited in various touring cars, Formula 1 models. pan cars and accessories for on-road vehicles by other manufacturers. With a short course truck and 4WD buggy currently in development, VBC Racing cleary are determined to become an established part of the off-road scene.
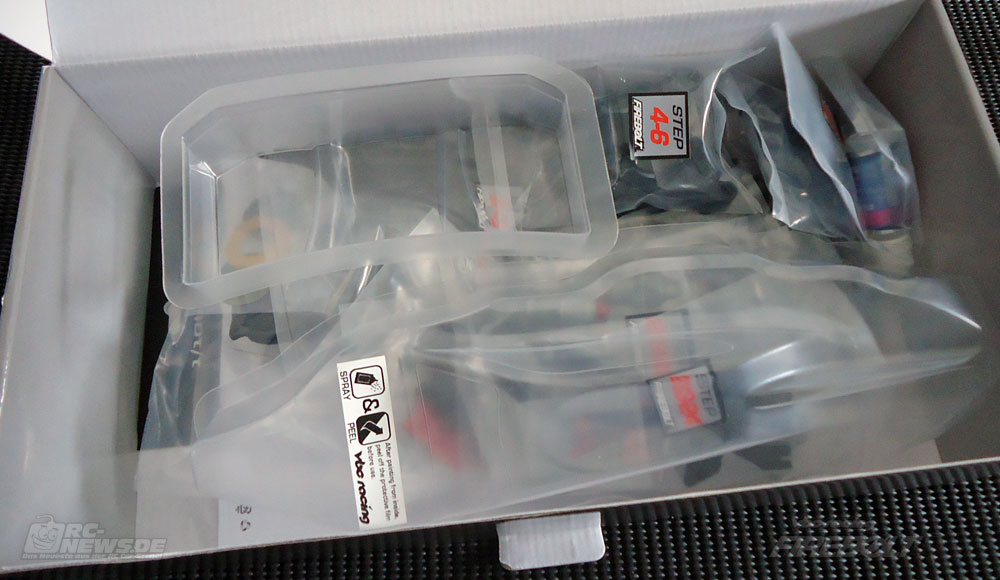
Kit contents
Just like the X-Factory X6, the first modern mid-motor buggy, the Firebolt DM is not intended exclusively for European-style artificial turf and carpet tracks, instead VBC Racing want to provide driver's with a universal vehicle for various conditions. Mid-motor buggies are actually quite well suited for slippery surfaces, as long as a racer manages to adapt his or her driving style. While rear motor buggies provide better acceleration out of the turns, mid-motor buggies carry significantly more speed around the corner. As the Firebolts also aims at clay and dirt surfaces, a traditional ball differential is included in the kit, which makes the car much easier to handle at low grip than a gear differential. A gear differential option is already included on the set-up sheet and expected to be released soon. Like the recently released front brass bulkhead this can probably be attributed mainly to the input of European drivers such as. Sven Rudig of Ruddog / Vampire Racing.

Otherwise, there are no big surprises at first sight. A narrow chassis plate and threaded shock bodies made of aluminum, carbon fiber shock towers and battery brace, durable plastic A-arms, hex hubs, spring steel turnbuckles and drive shafts, dual-disk slipper clutch, all of this has been seen before in one kit or another. The nice thing is, however, that the car looks original, and is not another case of "Attack of the Clones". Some racers may be surprised by the lack of wheels in the kit. As a wide range of wheels is available in different colors from many manufacturers this is not much of an issue. The kit fortunately comes with standard-sized of 12 mm plastic wheel hexes, and accordingly rims intended e.g. for the popular B5 or RB6 buggies are a direct fit.
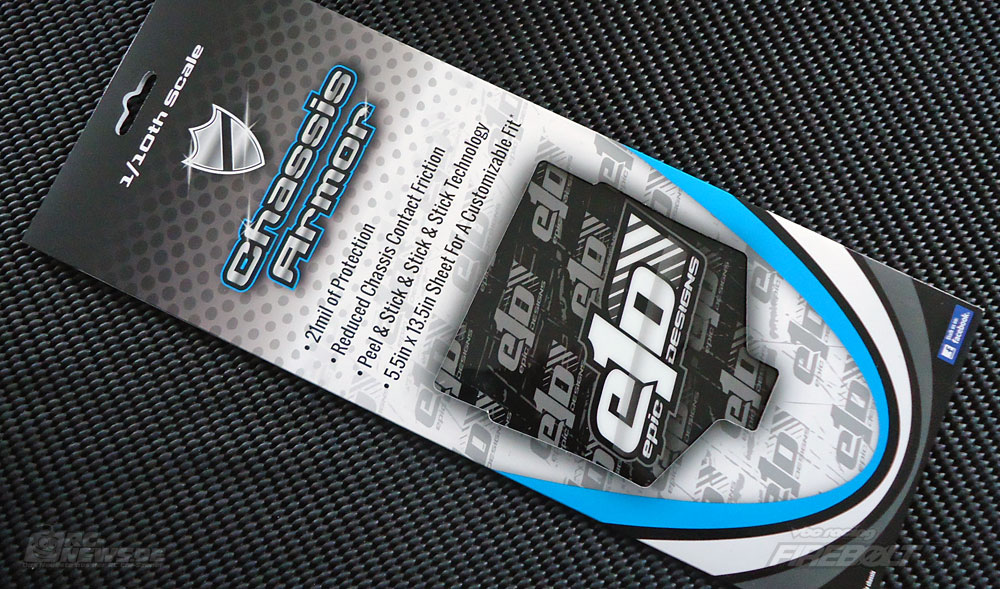
Buyers of the first series are rewarded with a nice addition that is likely to make a difference especially when used on rough tracks: a sheet of the of epic1Designs' Chassis Armor. In addition to its pleasing appearance and the high degree of protection it provides to the chassis plate, the Chassis Armor has another impressive feature. After removing the sheet, for example to access the screws underneath, you can simply press it on the chassis again and continue to use it. Epic1Designs gives you some useful tips for assembly and long-term use in two very nice videos.
Kit assembly
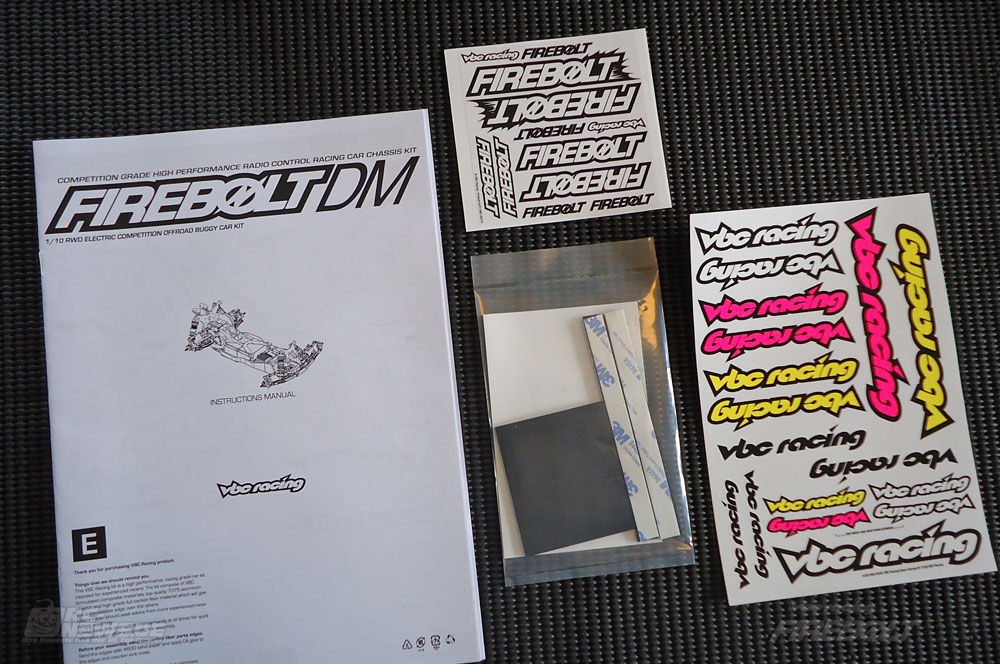
First things first: Before hitting the track, like almost all competition models the Firebolt DM has to be assembled. As many others out there, I consider building a new, well-designed vehicle one of the highlights of our hobby. Spoiler: Even connoisseurs who will not buy anything but high-quality Japanese or Slovakian kits will not be disappointed. The English-language instruction manual does not target inexperienced users e.g. as Tamiya manuals. There are no tips included but to smooth the edges of the carbon fiber parts and to seal them with CA glue prior to assembly.
In addition to the included greases and shock oil, the usual tools are required: screwdriver for the differential screw, 1.5 mm and 2 mm hex drivers, 5.5 mm and 7 mm socket wrenchs, tire glue, thread lock, sandpaper and a 4 mm tie rod wrench. Depending on your preferences you may want to get an antenna tube. Unusual for an off-road kit is the lack of wheels. But as racers are divided into two camps when it comes to wheels, this may be a wise decision indeed. Since white wheels make you go slower, as everbody knows, my Firebolt DM was fitted out with yellow wheels... ;)
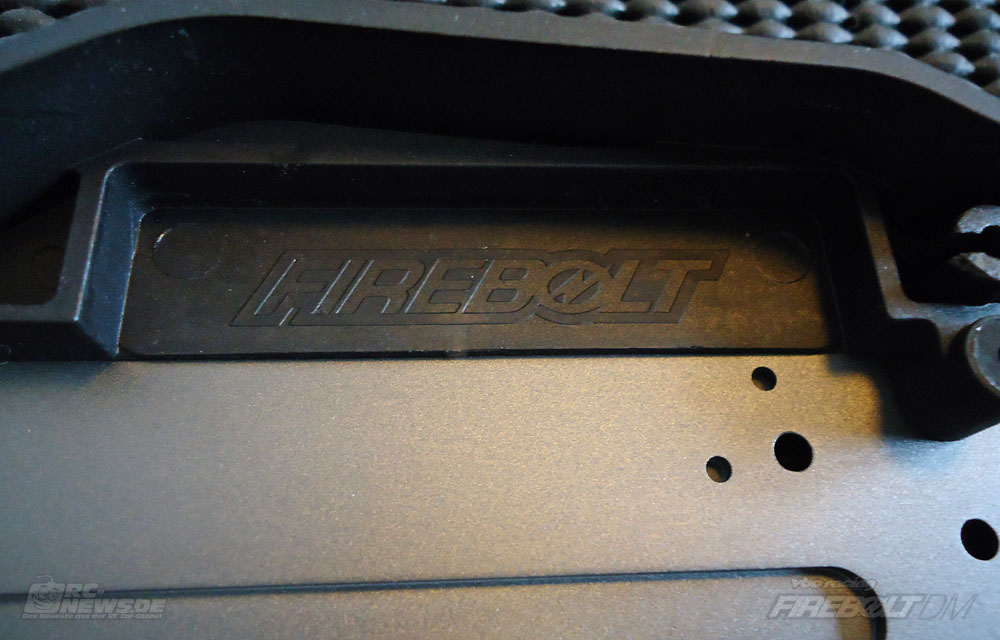
Assembly begins with the chassis. All components are packaged according to built steps, and plastics except for a few small parts have been seperated from the frames, which limits the heap of plastic waste to a minimum. Even in the first step, the production quality is evident. The 7075 aluminum chassis is milled perfectly. Unlike my RT6, therere are no sharp edges at all. More or less subtle details remind you of the name and manufacturer of the model you are building wherever you look, for example here in the battery space in the side pod...
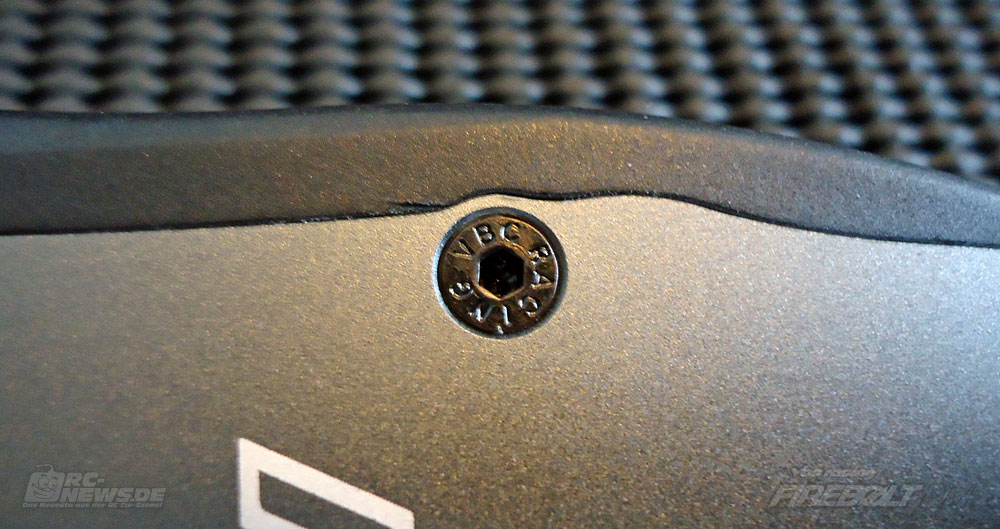
... or on the screw heads. Screws and plastic compounds are beyond reproach. Screws go easily into the plastic, which gives you the right amount of feedback so you do not run the risk of stripp ing any threads or screw heads. When attaching the screws to the nuts of the lower front bulkhead , the manual recommends using thread lock. This should also be used for every other metal-metal screw link, even when not mentioned in the manual.
Nothing unusual at the front: Similar to the well-known Kyosho design, A-arms are mounted to a plastic bulkhead reinforced by an aluminum brace. Pins are secured with set screws. By rotating the bulkheads, you can choose between kick-up values of 25 ° and 30 ° to influence steering characteristics. A-arms are a little tight at the beginning,but when complete with hub carriers, they fall down under their own weight.
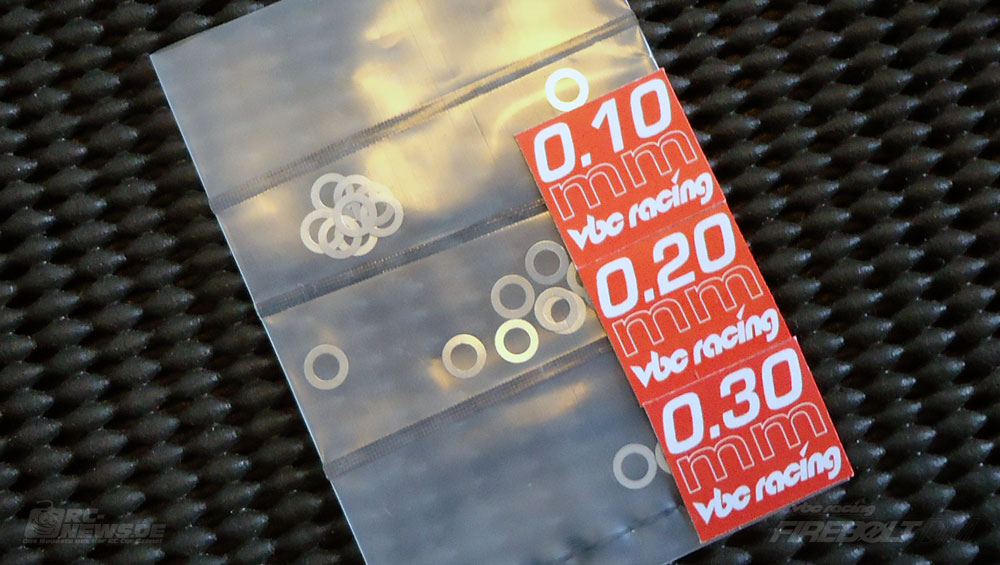
In order to compensate for any axial play on the suspension, VBC Racing includes a bag of various sized shims. I did not have to use a single washer.
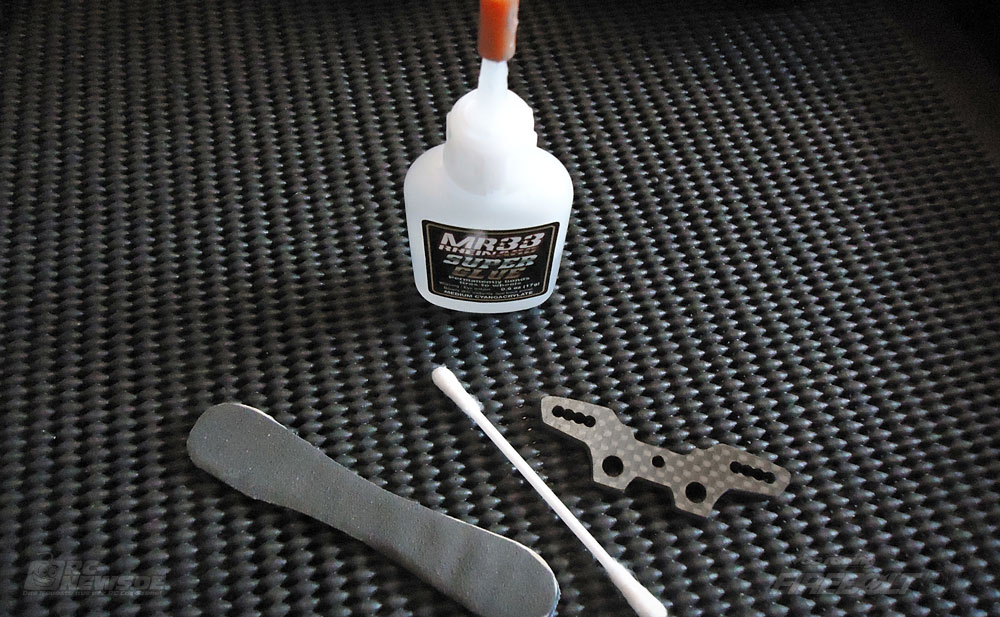
The first carbon fiber part! To seal the edges after sanding, take a cotton swab soaked in superglue and run it along the sides. Do not inhale any vapors or carbon fiber dust in any case!
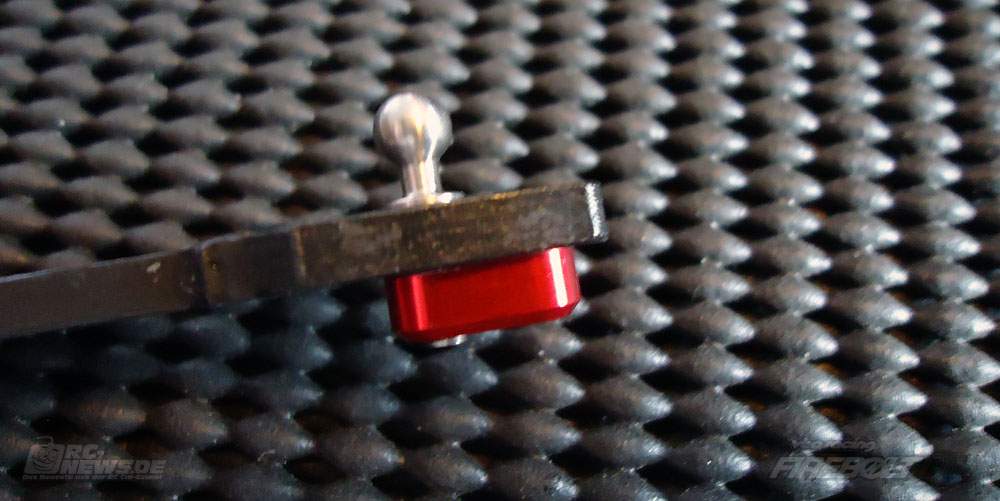
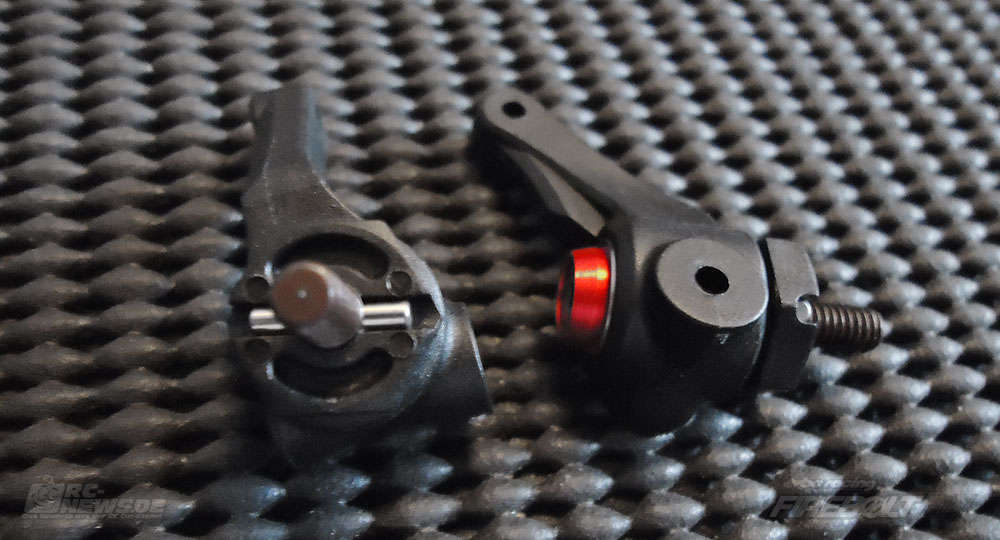
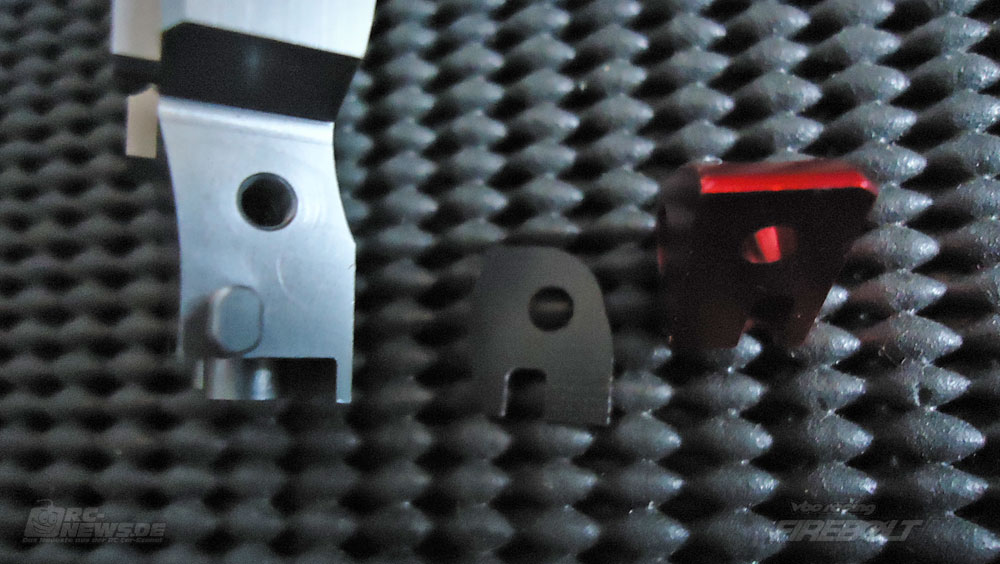
Clever ball stud mount design: Slipping is prevented by an integral pin, which is inserted into an unused hole, and the large surface provides good support.
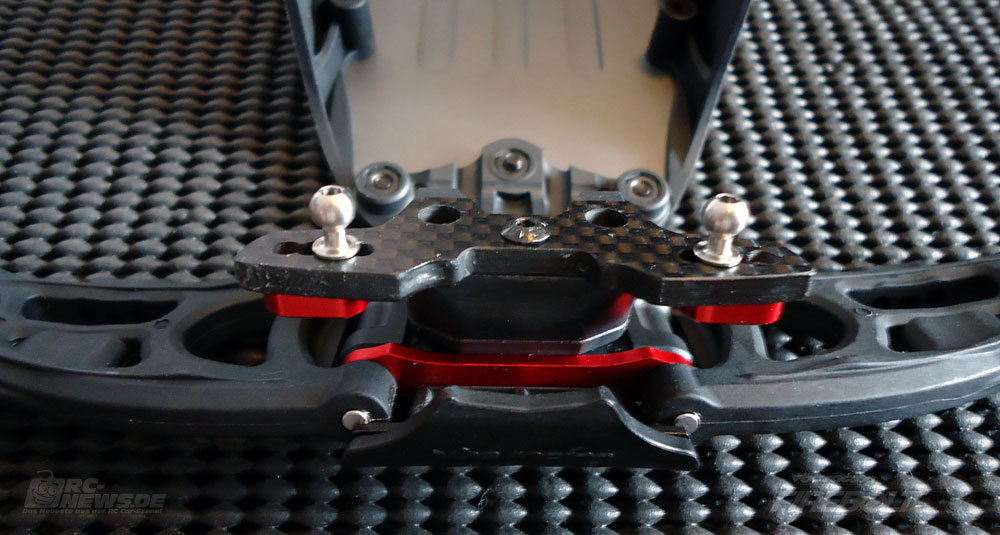
The use of a central bulkheadsmay seem unusual at first, but increases the ease of maintenance.
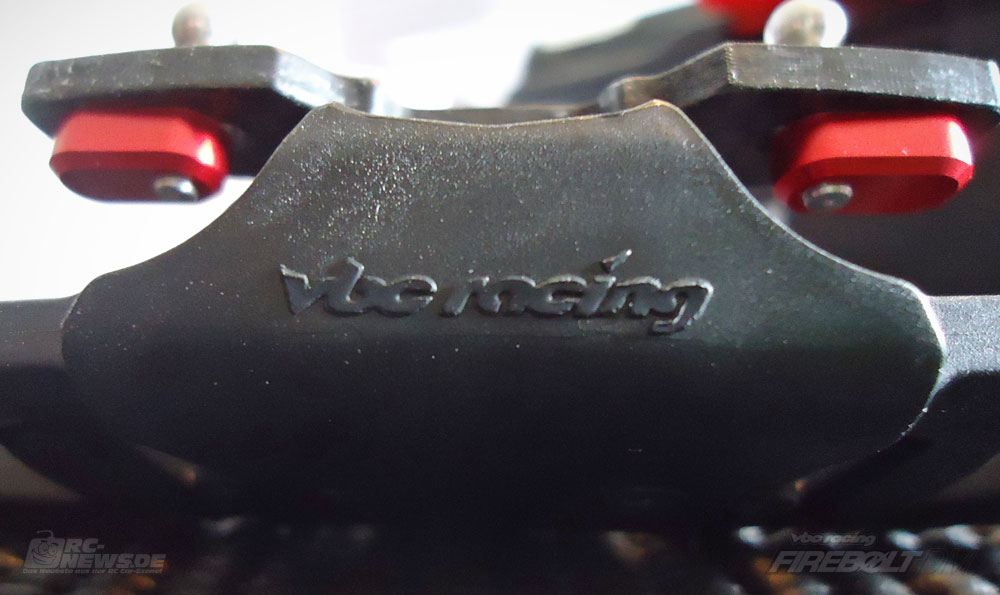
Who made this car again? Yeah, right!
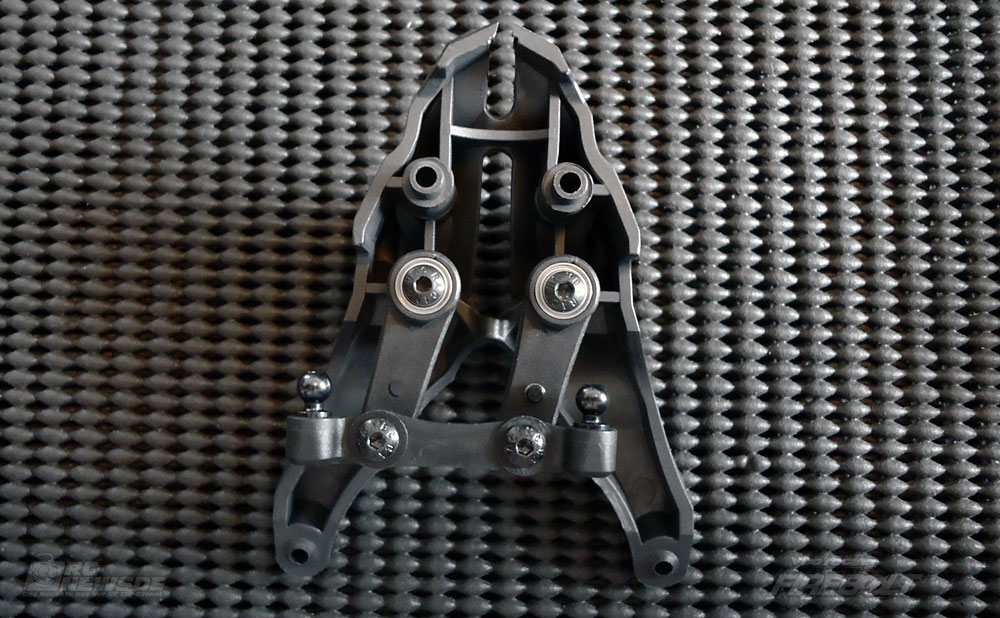
The steering unit once again reminds you of Kyosho. Unlike the plastic parts of the RB6, these steering arms make a very good impression, so I do not think I'll ever need the spare ones I ordered with the kit. Speaking of parts: Dealers will be happy about the visual distinction of spare (silver wrapped) and option parts (golden). Customers, on the other hand, will be delighted by the low prices, probably the lowest in the competition sector. Back to steering: There is no slop at all. If you want to do something for the looks of your car, consider getting the recently released aluminum steering parts. In the long term, the ball-raced steering rack may be a nice addition.
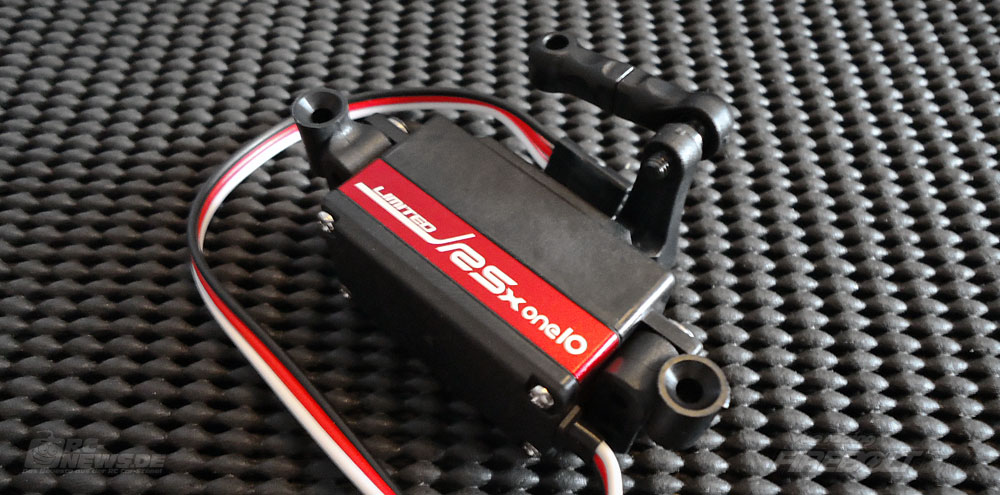
Servo installation: Depending on your servo, this may take some trial and error. I mounted my Kopropo servo with the rubber it came with and moved the ball stud on the servo horn forwards with a plastic spacer. Servo position can also be adjusted by switching servo mounts A and B - A smart solution that unfortunately is not mentioned in the instructions.
Before mounting the upper bulkhead you should check if the servo horn can move freely. In the case of my servo, I had to remove some material with a hobby knife to prevent the horn from rubbing against the bulkhead. The upper bulkhead is attached to the chassis with four screws from the top and can be easily removed, e.g. to install the new aluminum steering arms.
Similar to Team Associated, shocks are mounted behind the shock tower. The small-Associated nut driver is doing an excellent service here.
For the mounting the front wheels 12 mm hexes are used. Similar to Kyosho and Serpent these are very narrow, so I had to remove some material from my Avid wheels that originally had been intended for the B4. According to information from US-team drivers on rctech metal hexes will be available in various widths shortly. Tentatively I bought some touring car hexes that were of no use neither on the front nor in the rear. However, the plastic hexes did a pretty good job. Assembly of the steering knuckles: Again, there is the possibility to change the caster angle. The inserts again have no slop at all. Very user-friendly on the Firebolt DM are the hexagon socket screws used to secure the various pins on the suspension. Turnbuckles are made from spring steel and look similar to their from Xray and Serpent counterparts. For making adjustments, a 4 mm wrench is required, which is not included in the kit.
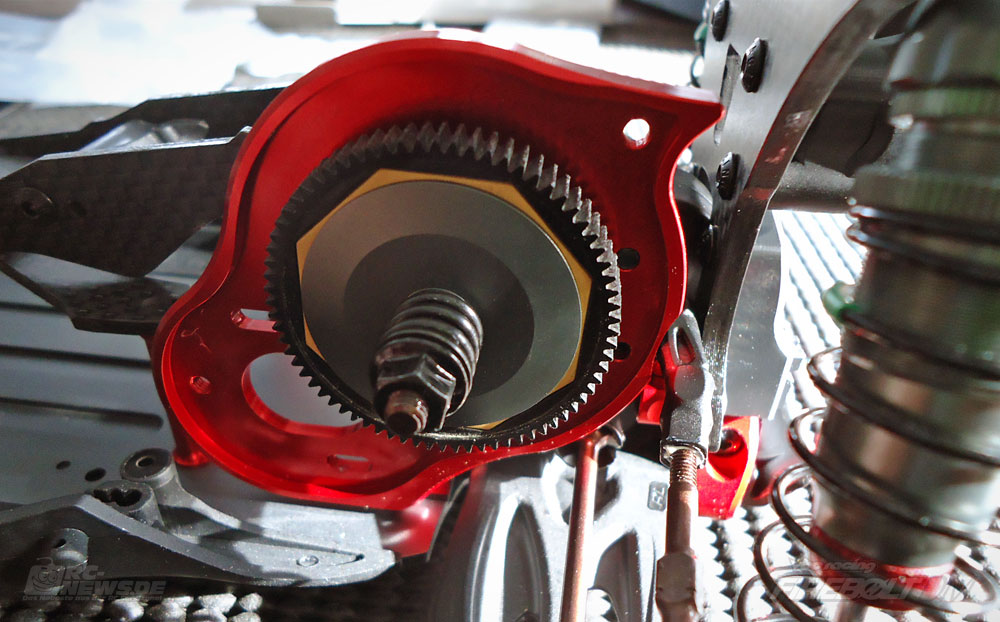
The diff is a conventional ball differential. Since the dimensions of the outdrives coincide with those of the Yokomo B-Max2, it is possible to use the Yokomo gear diff until the VBC Racing gear diff is released.
VBC Racing include a "real" thrust bearing, thus saving modelers a lot of trouble. If you ever chased some tiny thrust balls on the floor, you will know what I mean. In order to break in a ball differential, you can clamp it in the chuck of an electric drill and rotate in both directions for several minutes. You will be rewarded with a smooth differential from the very first battery.
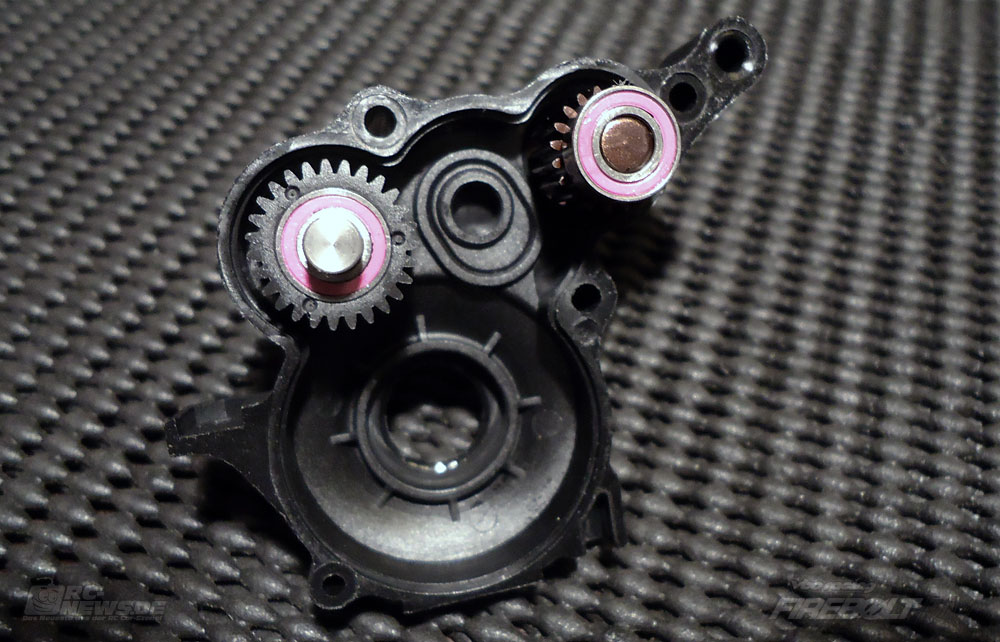
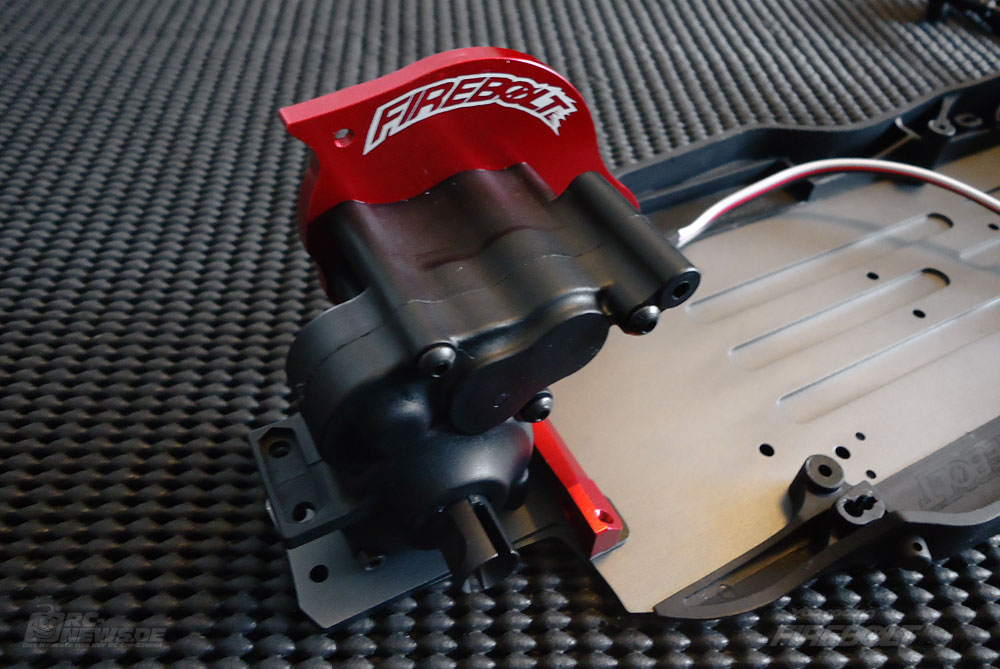
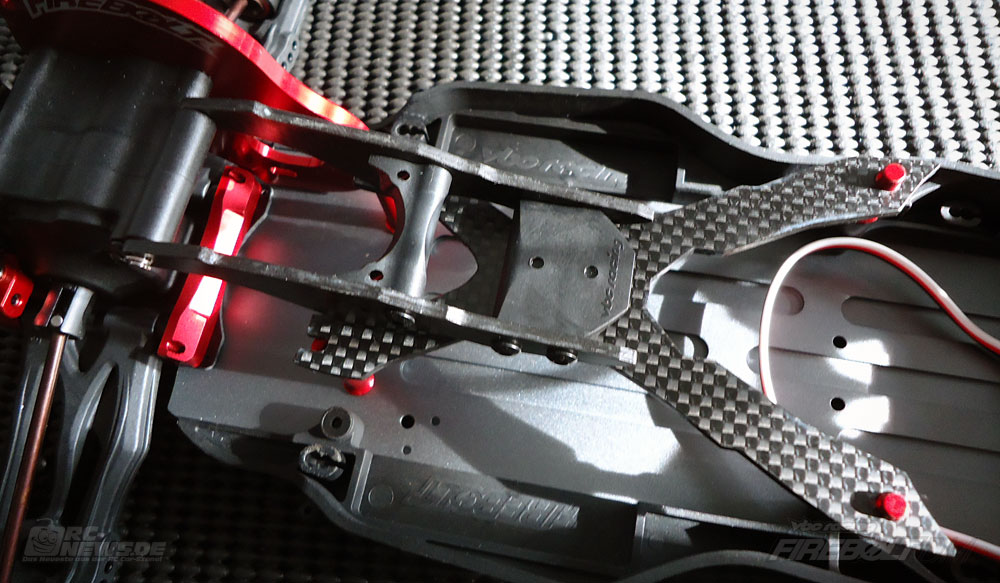
Inside the transmission case idler gears are surprisingly mounted on eccentric spacers. Probably it is possible to configure the transmission for rear-motor use by using other spacers.
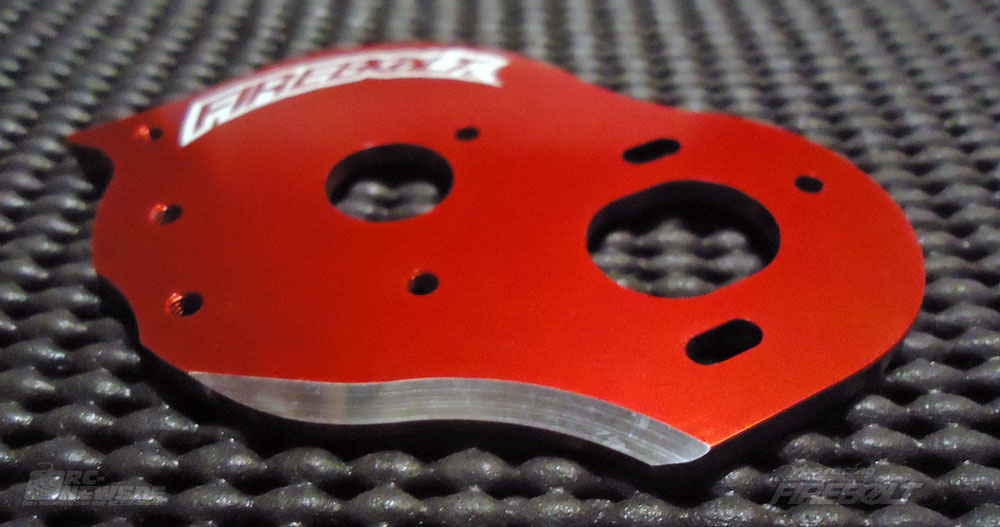
The motor plate is milled (on the other side) to accommodate the gear cover. Again, it reminds you of the model's name.
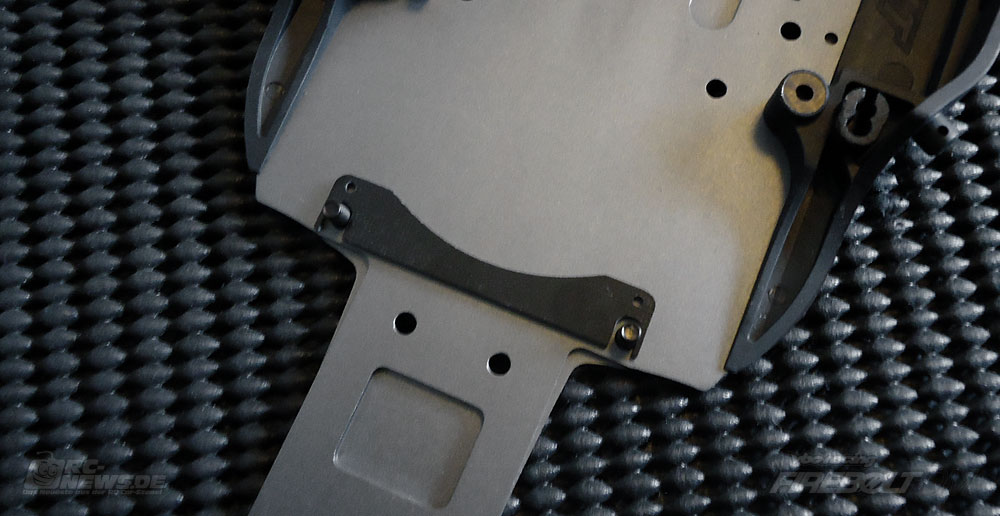
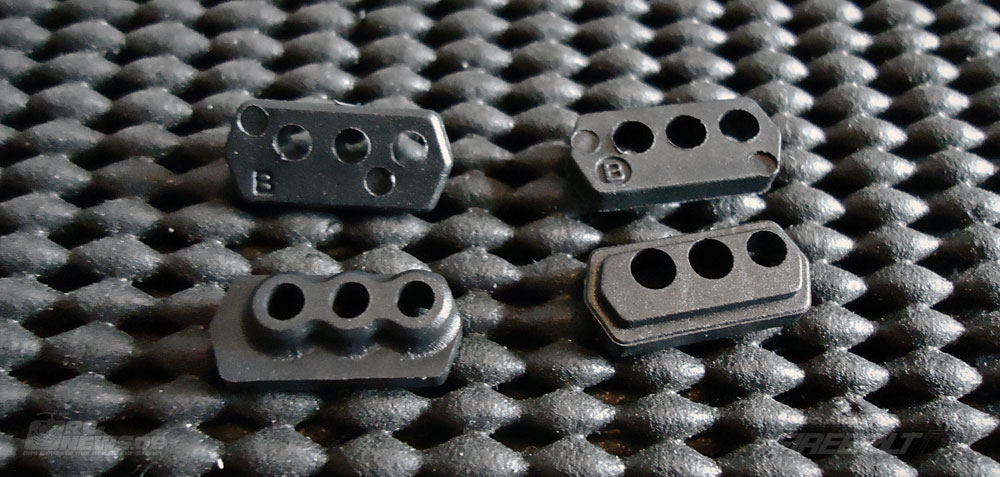
Like the toe-in plates, anti-squat plates are made of fiberglass. Thanks to their slotted design, it is not required to completely remove the forward rear arm mount to make anti-squat adjustments. Small holes are provided to facilitate removal. Additional shim sets are already available, but adjustments possible by using or omitting the included spacers should be sufficient for most tracks.
Ball stud mounts on the rear suspension are similar to those of the front, and just as adjustabie. Also the rear rear arm mounts are pretty smart. Thanks to a keyed design they are prevented from rotating.
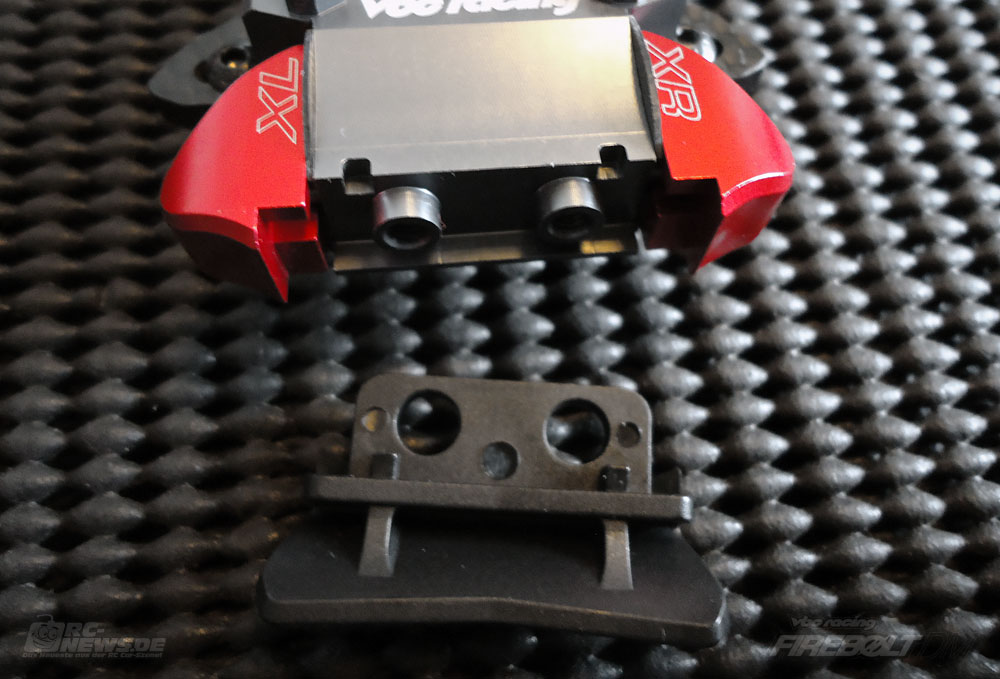
A touch of Lego: The rear-bumper can be easily attached to the assembly.
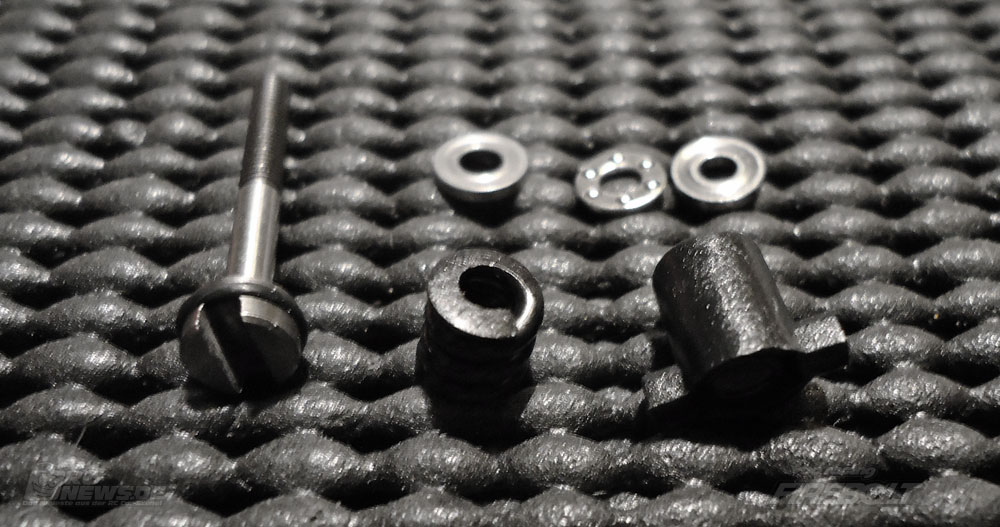
At first glance. the purpose of the gearbox mount spacer is not quite clear, but thanks to this little piece of aluminum, removing and installing the gearbox is a breeze!
The inserts of the rear hub carriers allow for several ball stud positions. Again, the plastic makes a good impression.
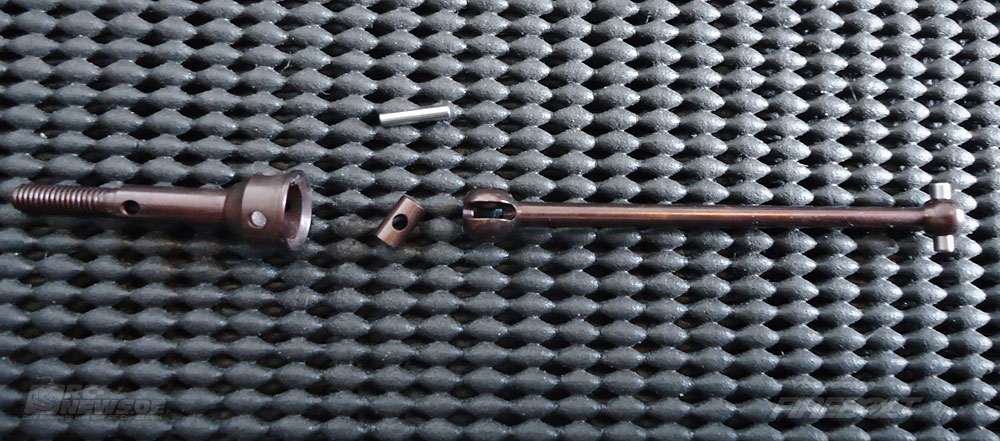
As originally seen on nitro cars, drive shaft pins are held in place by oversized rear axle ball bearings.
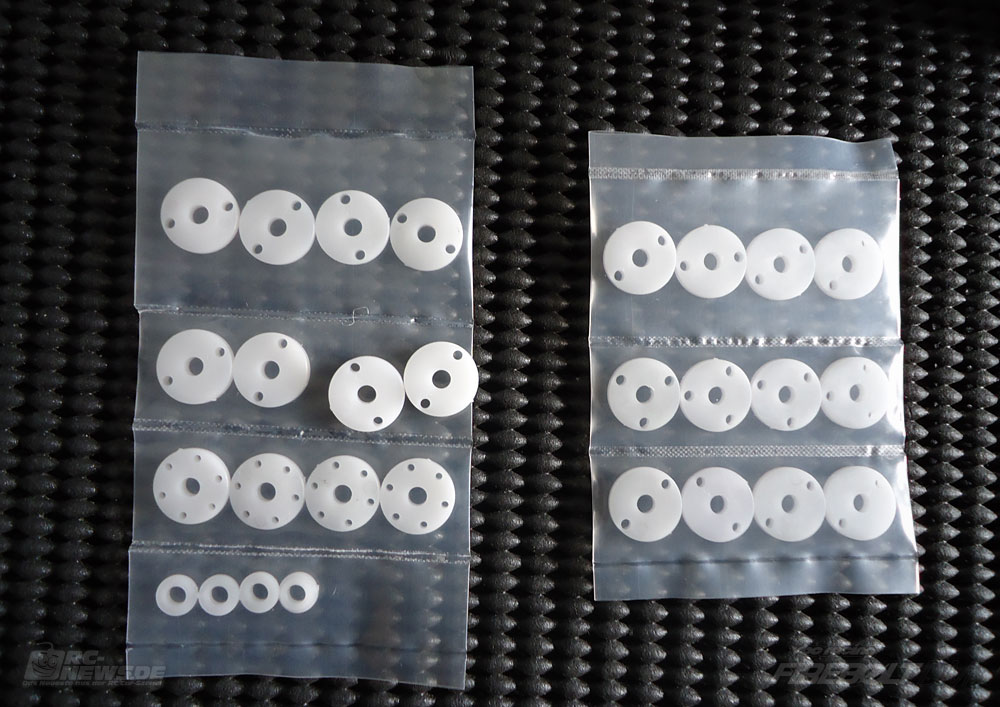
It is quite obvious that VBC Racing has spent some time on the shock absorbers: Aluminum caps with vent plug and precisely fitting O-rings on top, plastic guides on the bottom and six different piston plates for adjustment, there should be something for everyone! My preferred combination of 1.6 x2 front and 1.7 x 2 is also included, and even part of the kit set-up. Since the piston plates are cast and not milled, you should file down any molding residues to ensure smooth operation.
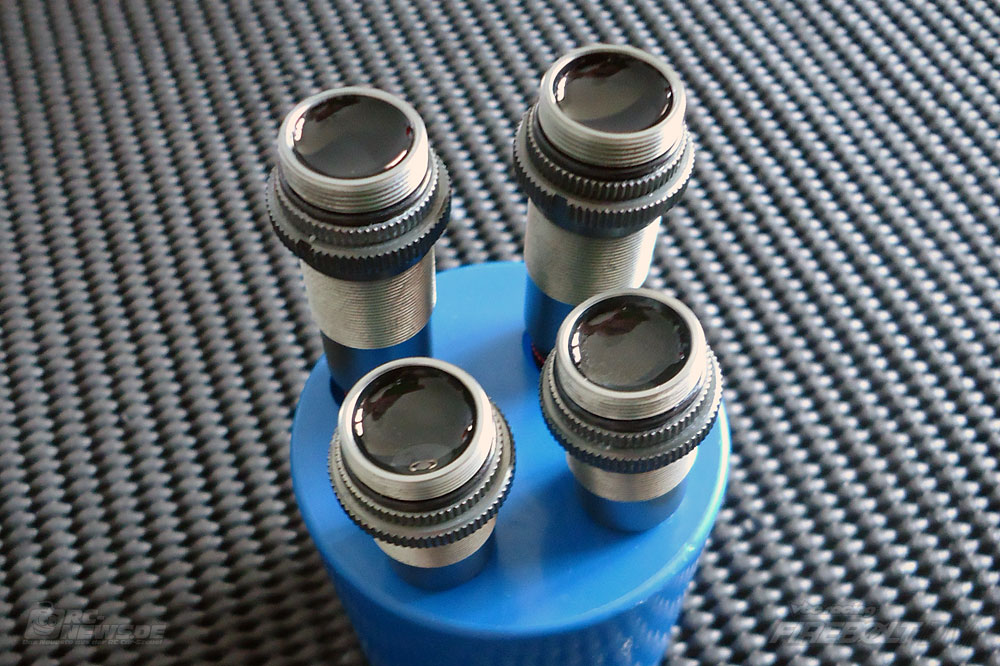
Piston rods are not coated, TiN versions, however, are available in inexpensive four-packs. The white O-rings make a good impression and remind of the RDRP seals. The included 350 cst oil by MR. Roche is more than enough to fill the car's big-bore shock absorbers.
After filling the shocks, put them in a spray can cap with appropriately sized holes and wait until there are no more air bubbles in the oil. A body reamer is quite useful for preparing a makeshift shock stand.
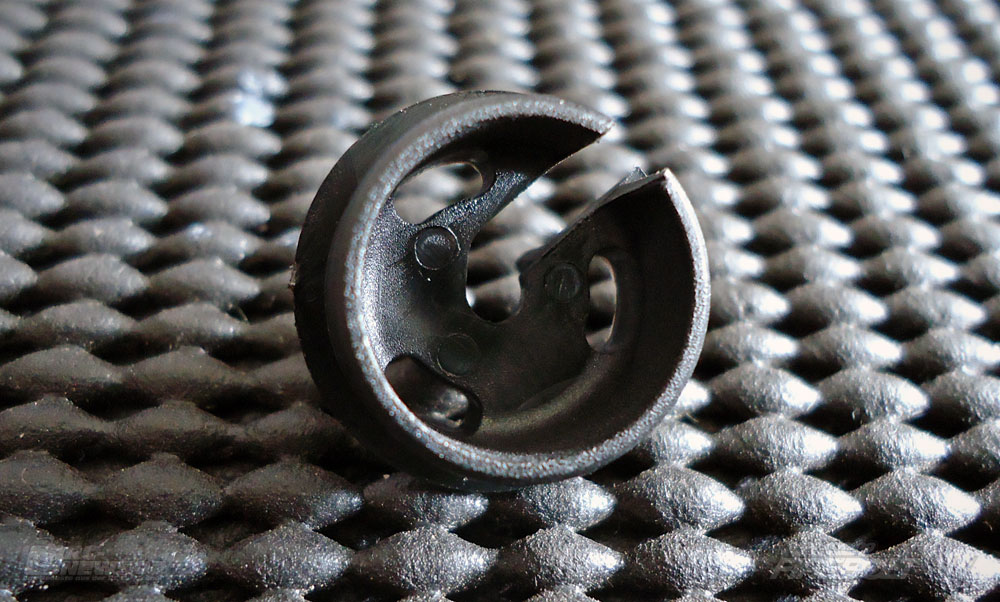
Practical: Transversal mounting slits in the spring retainers to secure them against loss.
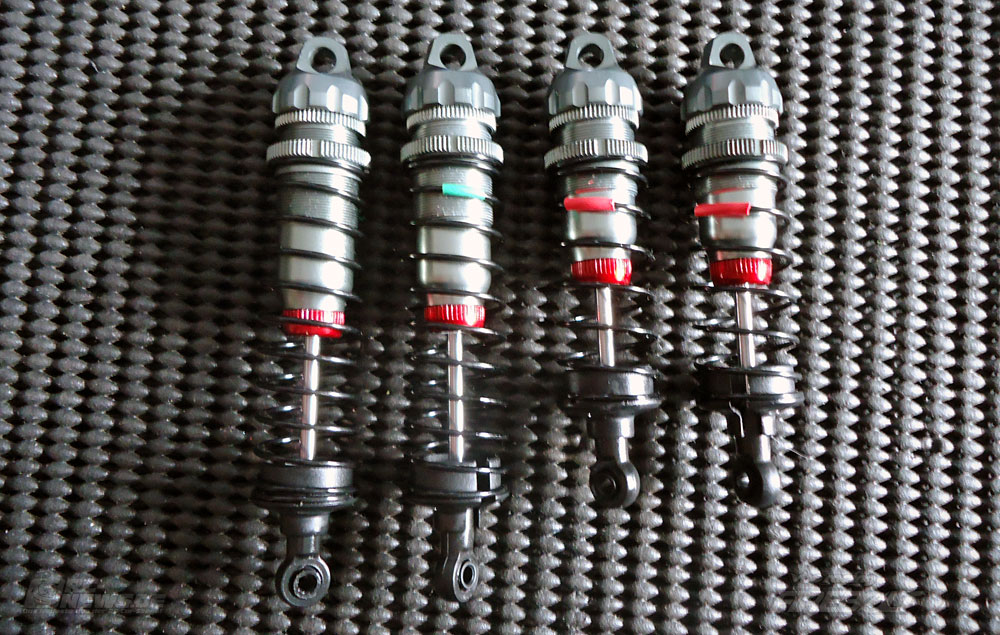
A very nice touch is the notch on ride height adjusters, making balanced adjustmens a very straightforward affair. The aluminum parts of the shock absorbers come pre-assembled, so you can remove the parts easily from the bag and do not need to search the components of an individual shock before building.

As I intended to run the car on dirt first, I installed the medium-soft green VBC Racing springs in the rear. Damper mount bushings are made of plastic, and work perfectly with the top aluminum caps. Plastic nuts are used, which in the case of a crash will give in before bending a piston rod.
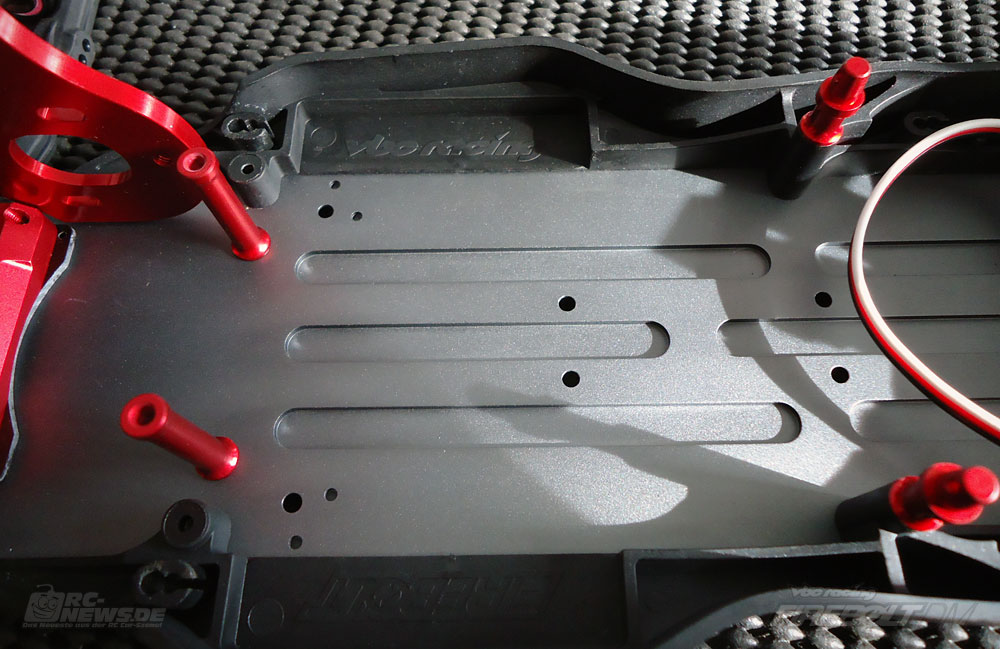
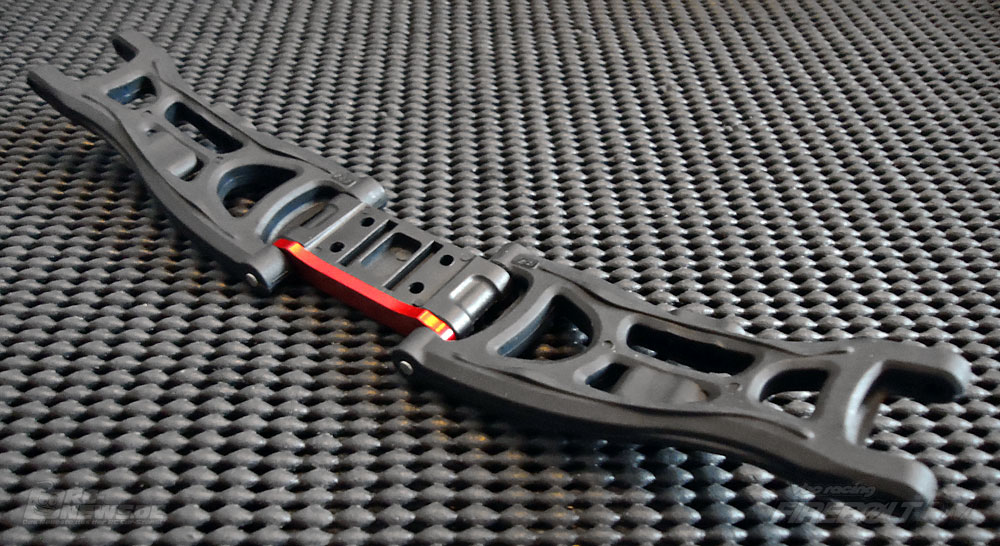
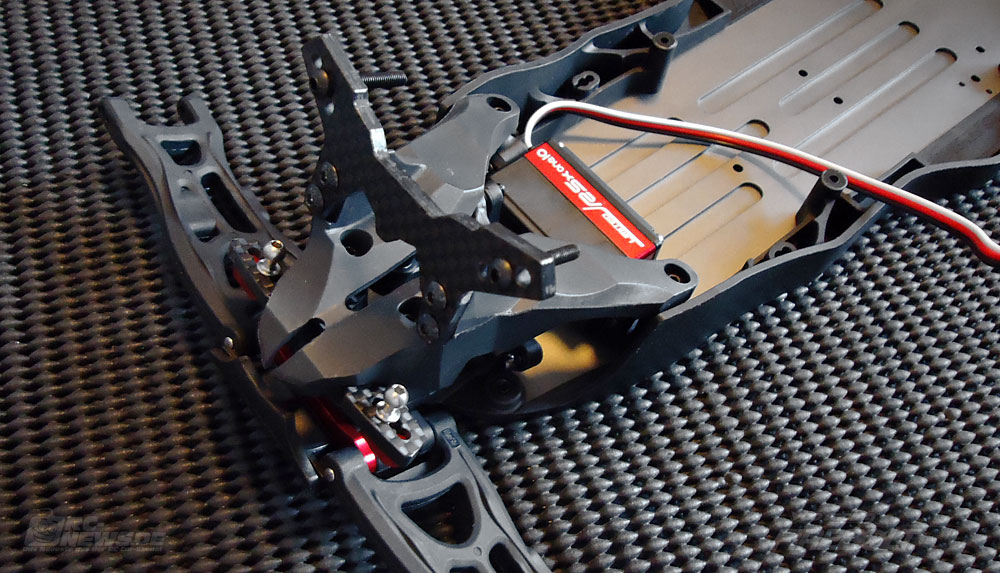
Red aluminum is also found on the battery brace posts.
The multi-part carbon fiber battery brace incorporates several special features. Firstly, it includes a fan mount, for which I will be grateful in the upcoming indoor season. Secondly, torsional stiffness of the chassis, in short chassis flex, can be adjusted by adding or omitting screws in the rear. As a more flexible chassis will provide more mechanical grip, so I will do without those screws for the car's maiden run in Duisburg.
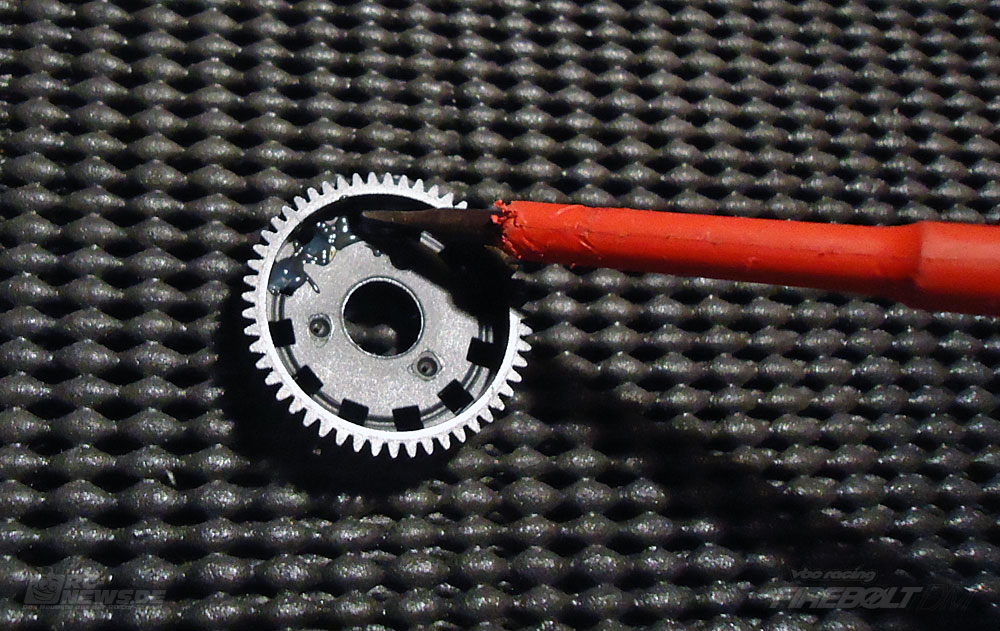
Quite a familiar sight is the slipper clutch. The octagonal slipperpad design has been known since the B4, and accordingly the popular spur gears are a direct fit. I chose a 72 teeth Associated spur gear for gearing my Orion VST2 10.5 turns motor according to the manufacturer's specifications. The slipper nut is identical to the serrated wheel nuts. Since the serrating can not dig into the slipper spring like into the wheels, I used a drop of thread. Even before the first ride the gear cover convinced me that it would be up to its job: The precisely milled motor plate held it in place even before I attached any of the screws.
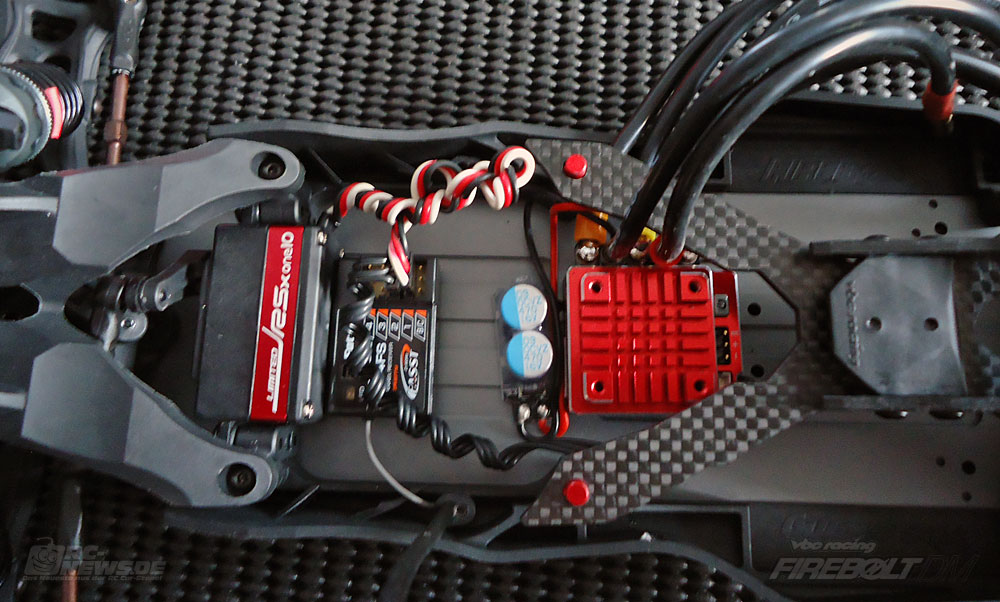
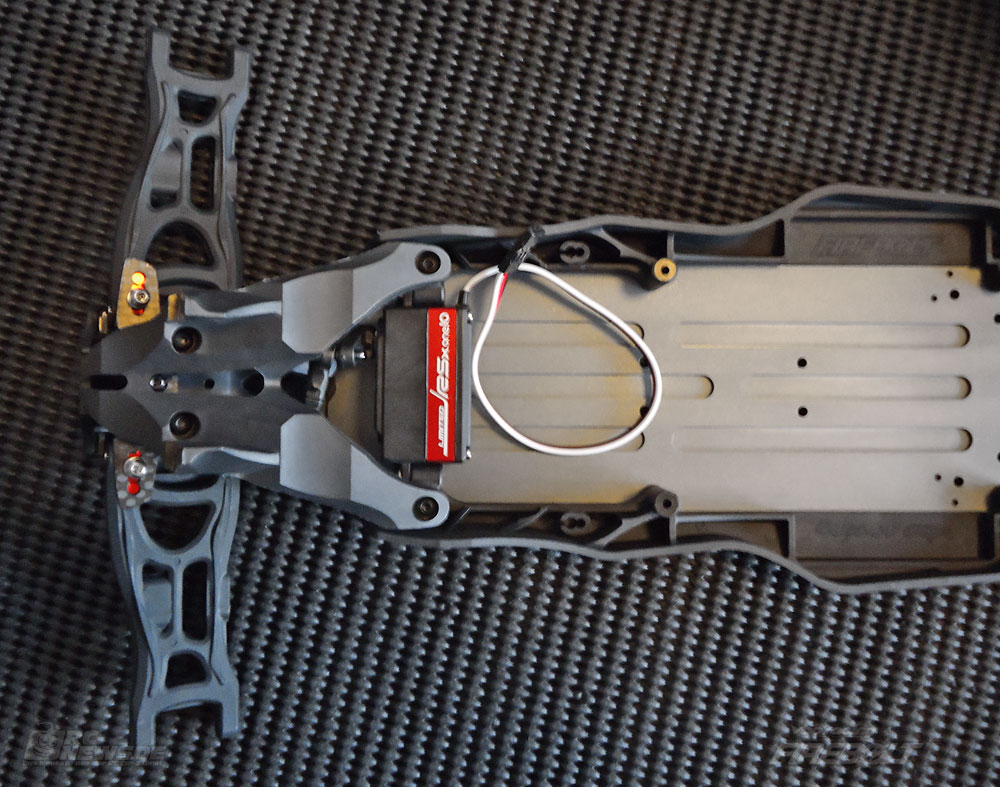
For mid-motor buggy standards, space for electronics installation is to be considered as downright generous. When using normal-sized components a low-profile servo should not be necessary. According to the manual and the included battery stoppers (supplemented by a large piece of foam tape) the car is compatible with shorty and square-pack/saddle block batteries. Using a modified battery brace, it is also possible to use saddle packs. With an LPF servo and a narrow receiver and speed controller it might even be possible to fit a fit a full-length LiPo battery. To shift weight towards the center, I chose the backward horizontal battery position with the ESC mounted directly in front of the shorty. Unfortunately, my Hobbywing V3.1 had to be replaced due to a switch problem, which made it impossible to calibrate it to my new transmitter, and therefore was posted back to my dealer even before the first test drive.
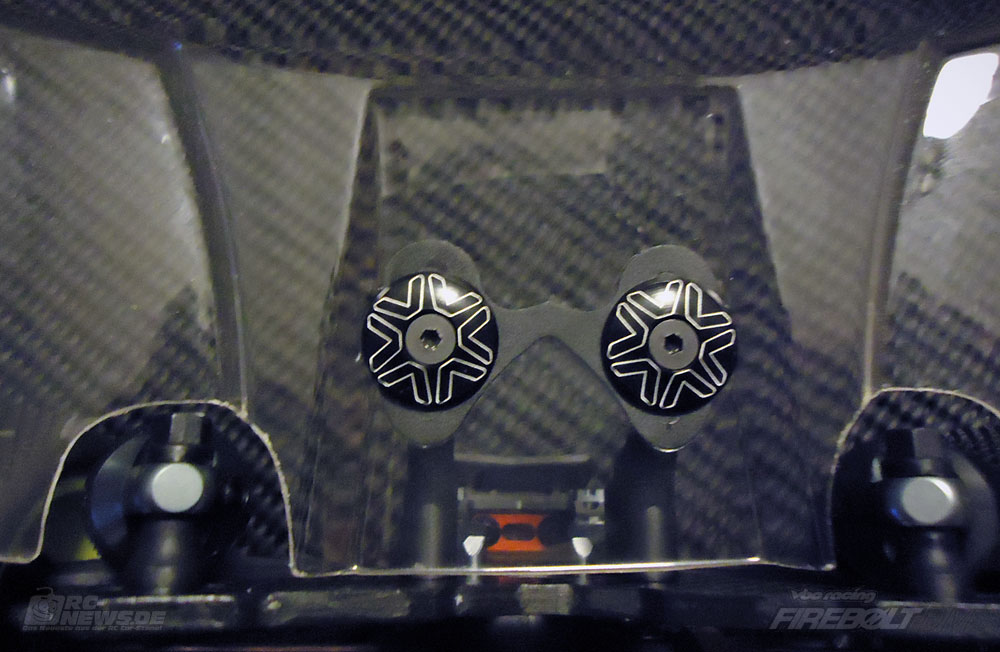
The included rear wing is made of normal thickness polycarbonate, and as in the case of on-road 1/8th scale cars is bolted to the wing mount. Two special shims are included for adjusting the wing's angle of attack. Avid RC offer some nice wing buttons for 1/8th and 1/10th scale vehicles that provide more surface area than the original plastic parts. Although it is rumored that their lower profile improves aerodynamics, I bought them just for looks. ;) With the body waiting to be painted, I was eagerly anticipating the first outing at the NRW Offroad Masters '14.
Test run

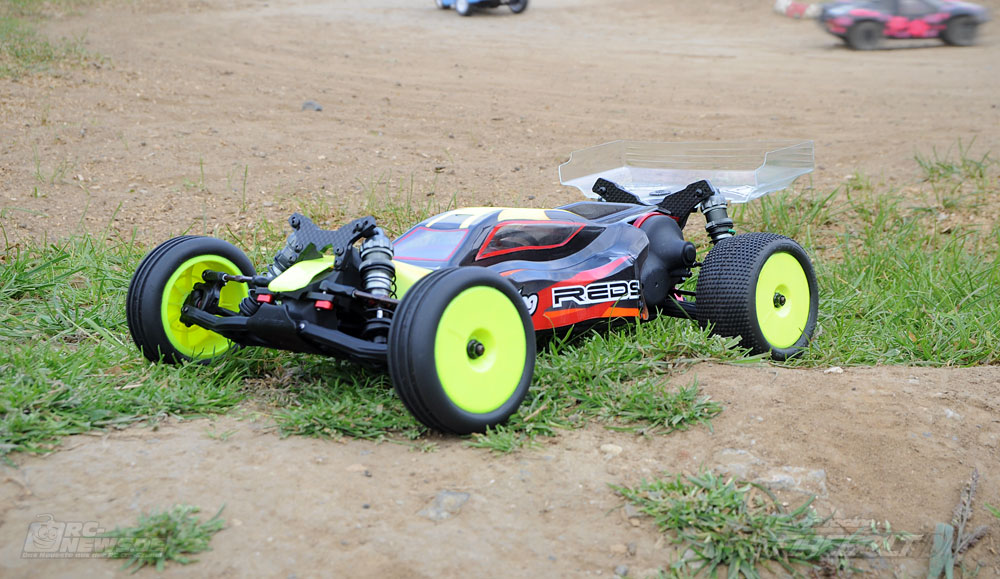
Even though I had recently competed in our fun class using weaker 17.5 turns motors due to time constraints, the Firebolt DM was to undergo thorough testing with more power. Accordingly, I chose a Reds VX Racing 540 8.5 motor, for which I mounted the standard spur gear together with a 25 teeth pinion. In absence of the red Hobbywing ESC, I installed my trusty Vampire Racing SR1.
For a quick and precise steering I chose a red Ko Propo RSx one10 Response low profile servo. Grippy Pro-Line 4-Rib M3 tires were used at the front and Holeshots in the rear, also in M3 compound. Both were mounted to Avid RC's Satellite Wheels, the fronts of which had been dremelled as described.
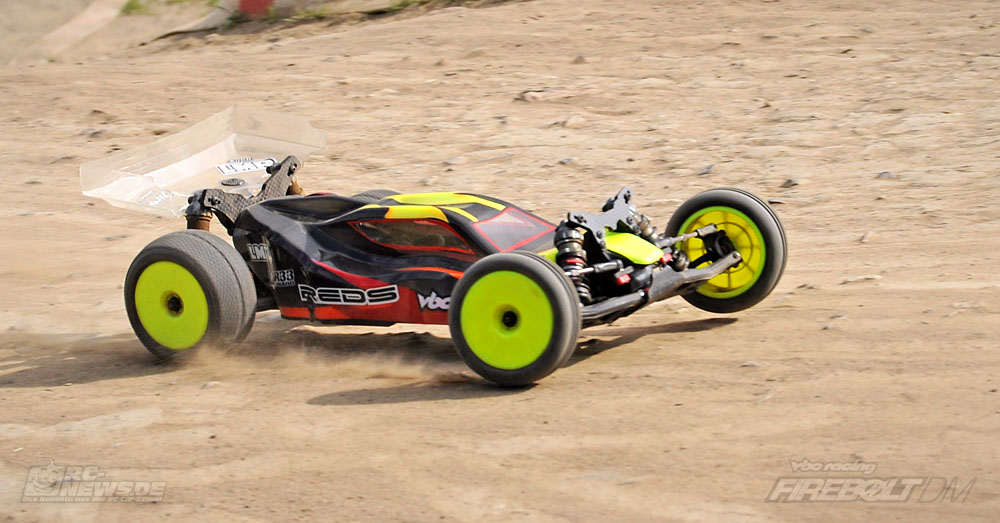
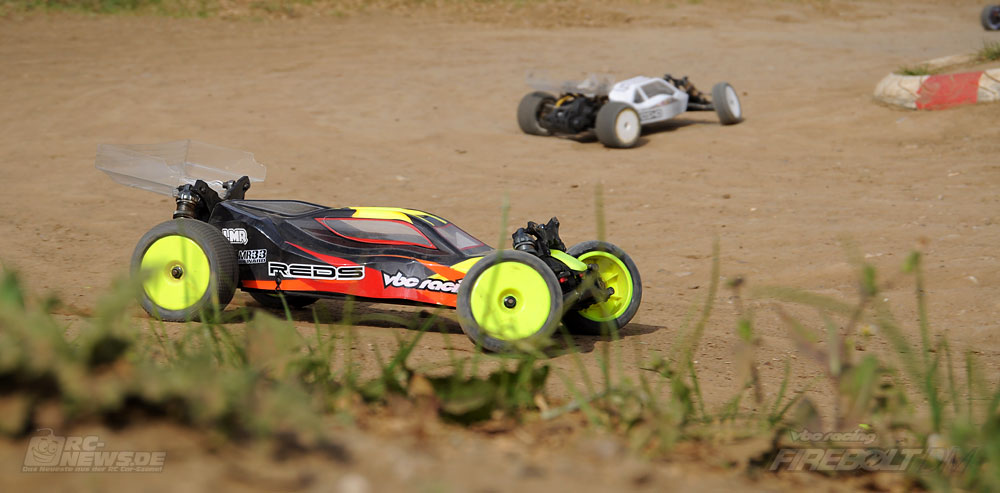
During the first practice laps, I somewhat restrained my trigger finger; mid-motor and a dusty track, how does that go together? To make it short: Very well indeed! With the working-bench set-up devised in the living room, the car felt pretty from the beginning, so I did not change anything for leg 2 of the NRW Offroad Masters '14. The ball differential was extremely smoothly after the first battery, the slipper clutch worked without any adjustments during the whole weekend, just as it should. The more confident I became, the more the potential of the car became apparent, even though an average driver like me cannot hope to exploit it to its full extent.
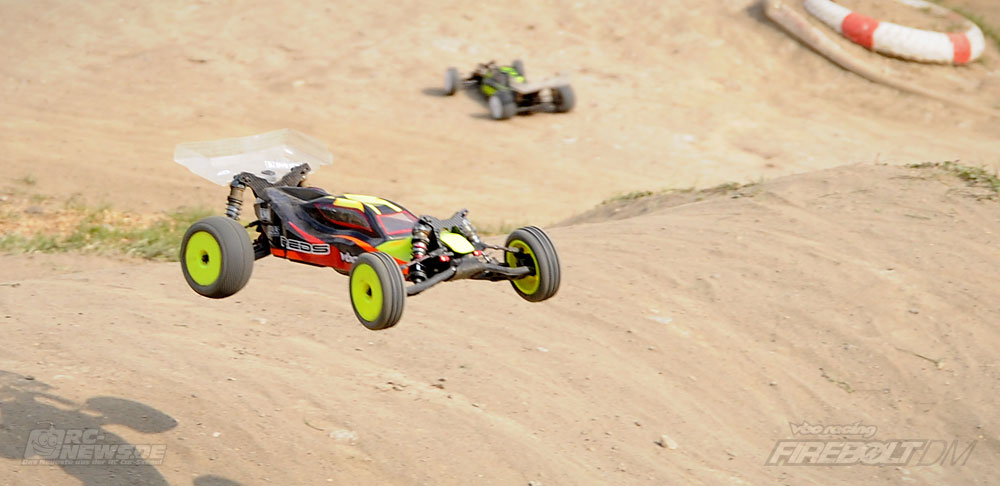
However, with the right set-up changes the car helps an average driver to drive his or her laps with more confidence and more consistently. In the course of the weekend, heavier shock oil on the front, spacers on the steering bridge (1 mm), and compared to the starting set-up lower inside ball studs on the rear camber links improved the cars handling even more. In the penultimate leg, I was able to move up to 2nd, and finish 4th after some bobbles, and in the last leg the car was outright amazing, before a ballstud came loose and ended my run. Still, I achieved my personal fastest lap on the rocky and dusty track in Duisburg before the failure. I will not conceal the small defects I encountered during testing: The plastic servo horn stripped, as I had expected in the absence of a servo saver.

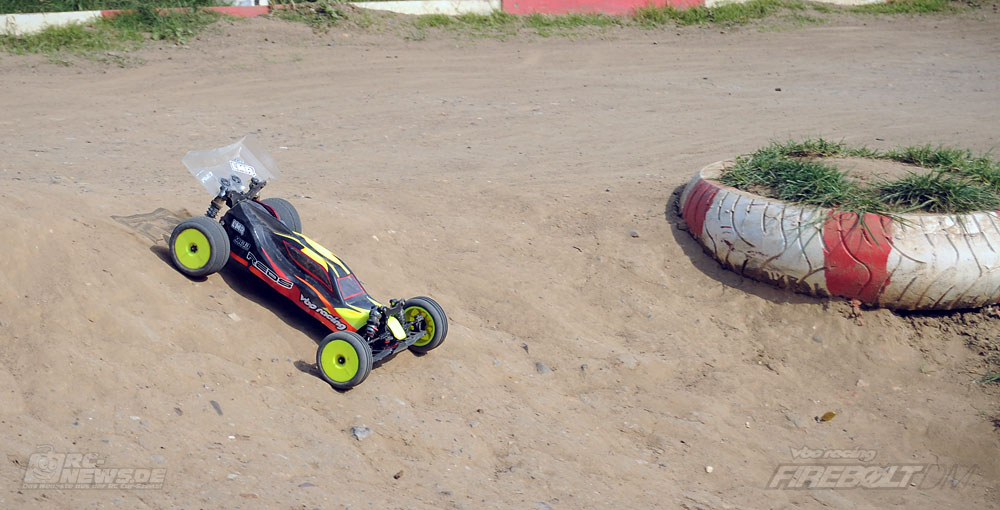
Another, rather superficial damage ocurred on the front bumper. After the Firebolt DM had sunk its teeth in a competitor, the marshal had to resort to the use of force to separate the two vehicles in the heat of the moment, and something had to give. Epic1Designs' Chassis Armor protected the aluminum plate excellently, and even a nasty-looking scar that was caused by one of the numerousrocks protruding from the rough track surface did not penetrate the protective sheet.
Both the pleasant, fresh design of the Firebolt DM, the original body shape as well as the suspensions smooth operation on the track were subject to many conversations in the pit area. On its first outing the Firebolt DM was fun an fast to drive, making the weekend much more enjoyable than my last race on the RCRT Duisburg's Südring.
Conclusion
From front to rear the Firebolt DM's is thoroughly designed and has a ton of state-of-the-art features including a slop-free steering rack, adjustable chassis flex, oversized ball bearings, captured CVD pins and an easily adjustable rear suspension: To adjust anti-squat and toe, it is not necessary to tear apart half the vehicle, great! Right out of the box, the car is equipped with a plethora of high-quality parts. Also when it comes to good looks, VBC Racing has managed to hit the nail upon the top: Red aluminum parts are used in the right spots without visually cluttering the car. To conclude this review, I recommend the car to everyone looking for something special, and say thank you Guido Kraft for the great paint job and Sven Rudig for making me a good price on the test car!