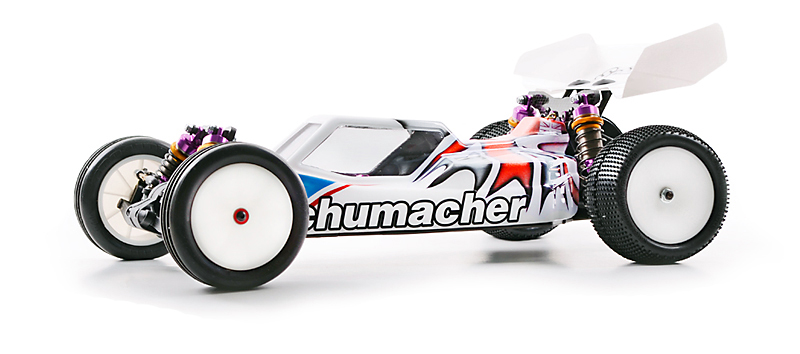
Welcome to the first installation of the Schumacher Cougar SVR build along. Schumacher’s rather unique approach to design has always set their vehicles apart and the SVR appears to be cut of the same cloth. It was designed in line with the rest of the Cougar lineup but has been massaged for lower traction dirt applications so it’ll be perfect for testing here in Connecticut. First up and aluminum chassis plate is included but not in the sense we’ve grown accustomed to seeing lately. This one is a standard plate style similar to graphite chassis of the past. The kit comes with a set of pin drive rear and bearing support front wheels vs. hexes all around but no tires are included so you can mount up whatever treads work best for your track. The body is a cab forward style with some nice styling cues.
First thing I did was send the body out to be painted by Larry Genova of Kustom R/C Graphics. If you’re not familiar with Larry you’ve surely seen some of his work; Cody King, Ryan Maifield and other pros all use Larry to lay down their schemes. Can’t wait to see what he has in store for us!
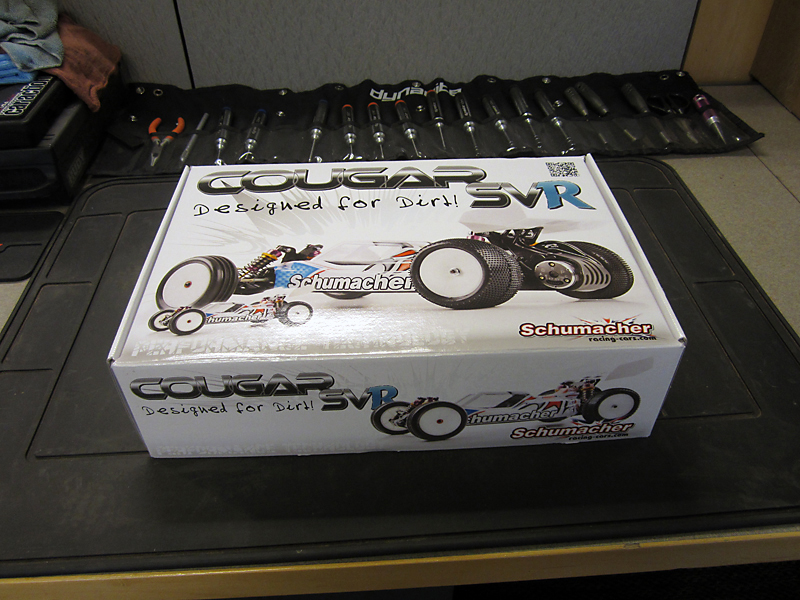
Unboxing the Cougar SVR You can see that Schumacher takes things to the nth degree when it comes to organizing. Each section of the build is in it’s own back with two bags for carbon parts and bumpers bagged up separately.

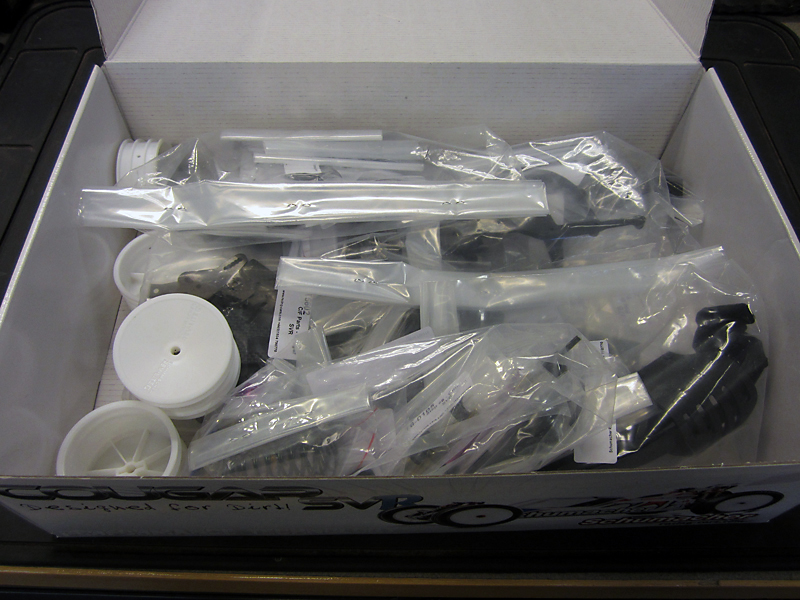
You can see by the labels that each bag is broken up into the steps. Putting them in order off the bat will eliminate having to dig through to find the next set of parts. As you build the SVR you’ll find that everything for a given step is in the bag you open so you only need to open them one at a time. Very organized.

Before I start any building, I always like to take everything out and put it in logical order to make sure everything is there. The last thing I’d ever want is to get halfway through building a vehicle and find out I’m missing something.
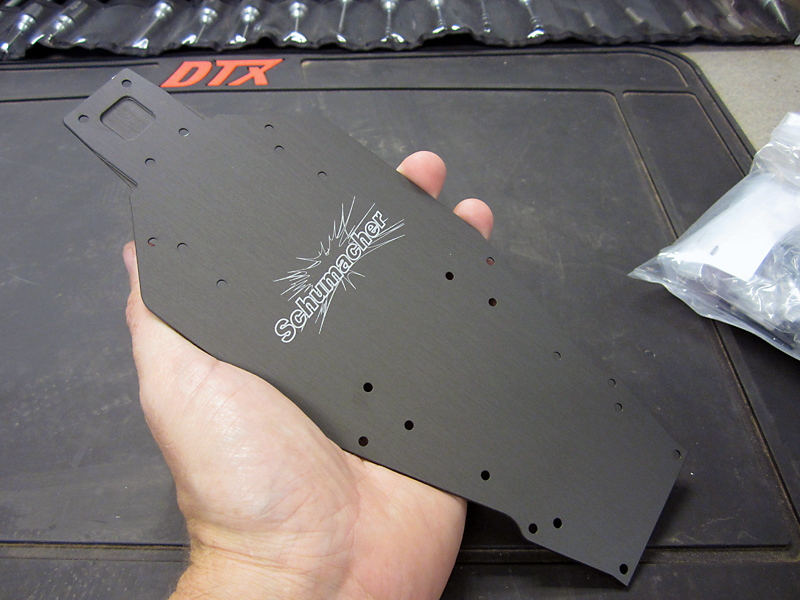
The first part up is the chassis. As you can see it’s an aluminum plate but unlike other modern buggies, Schumacher has opted to go with a flat plate rather than one with raised edges. The flat plate style allows the car some extra flex for low traction surfaces. The piece is very nicely made and has a Schumacher logo lazered into the top for a nice touch.
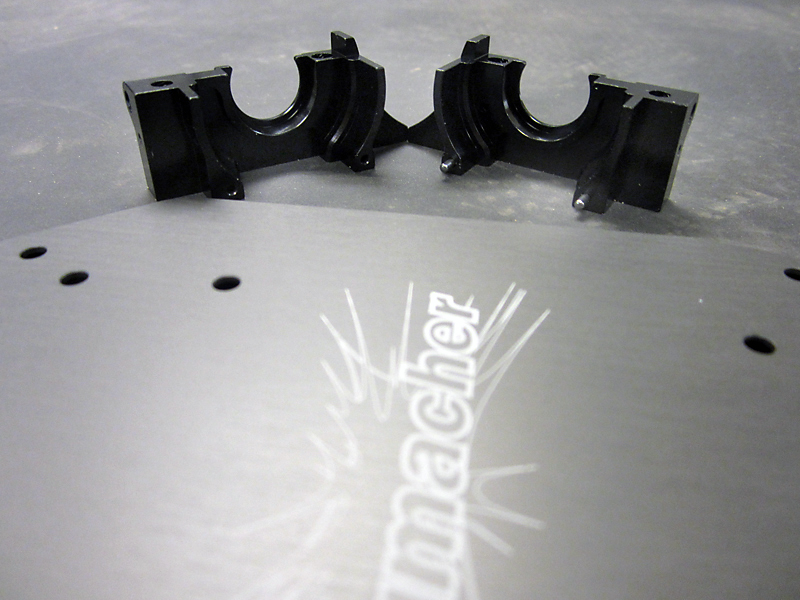
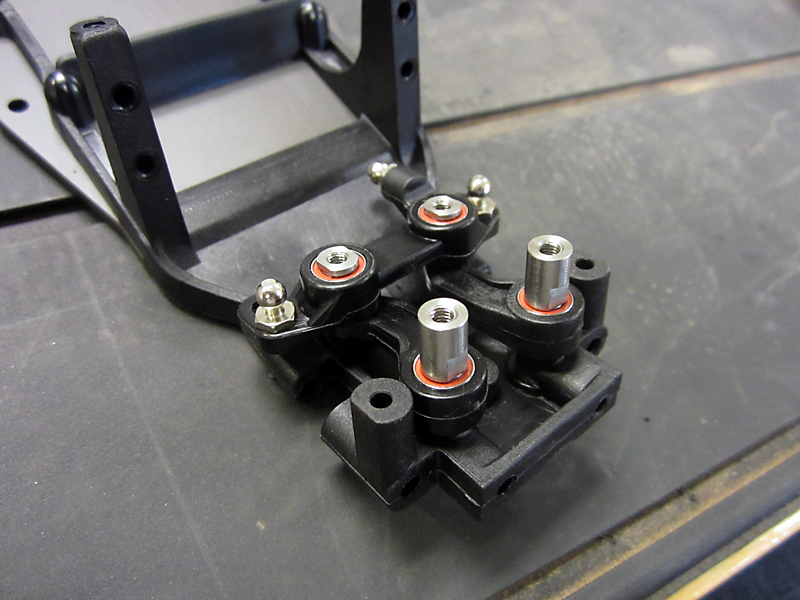
The first parts up for assembly are the rear transmission housing/bulkheads. They’re made out of 7075 aluminum and are pinned for a precise fit. I’ll start by inserting the pins and then putting the two halves together before mounting them to the chassis. Don’t forget the thread lock, their mounting screws come from the bottom of the car so they’re sure to take a beating and you don’t want them backing out during a race.
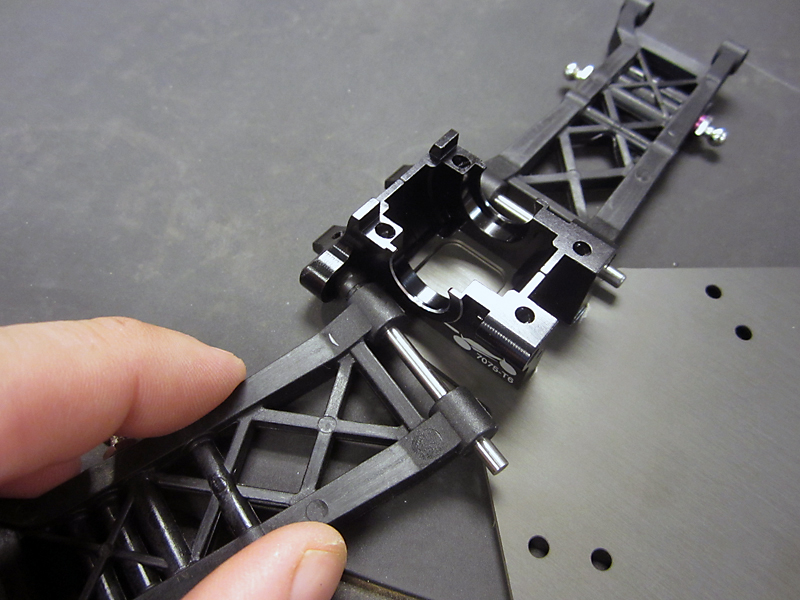
Next up I’ll assemble the rear suspension arms. These arms are mounted to the rear mounts via pivot balls which allow the arms to be moved for various toe and anti-squat adjustments. It’s a good idea to take a little extra time here and shim the arms properly so there isn’t a lot of slop but so they also don’t bind. Taking the final assembly apart a few times to get the right fit may be needed but it’ll make all the difference down the road.
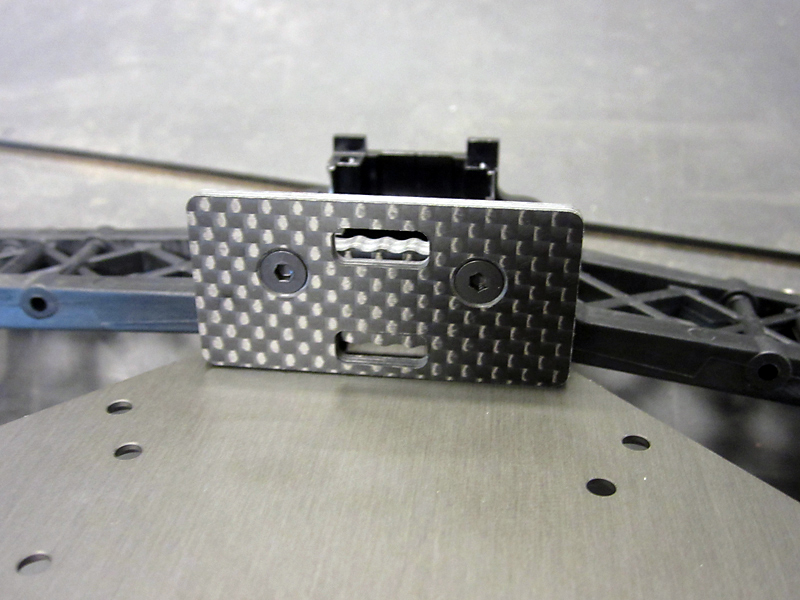
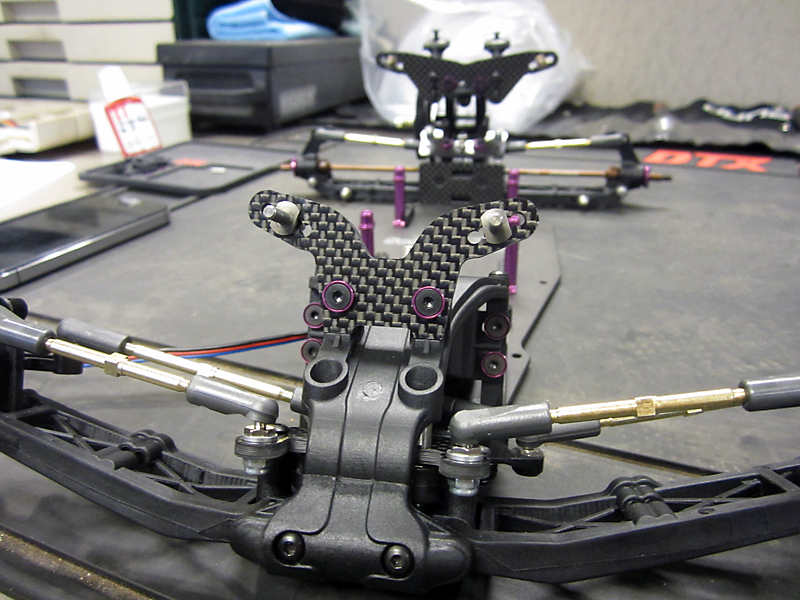
The final part of the rear end is a pair of graphite plates. The first of which mounts to the pivot balls on the front of the arms and the second holds the assembly in place to the bulkheads. The cut outs shown here allow you to quickly note how much toe and anti-squat you have set; each notch represents one degree, toe is down below and anti-squat is up top.
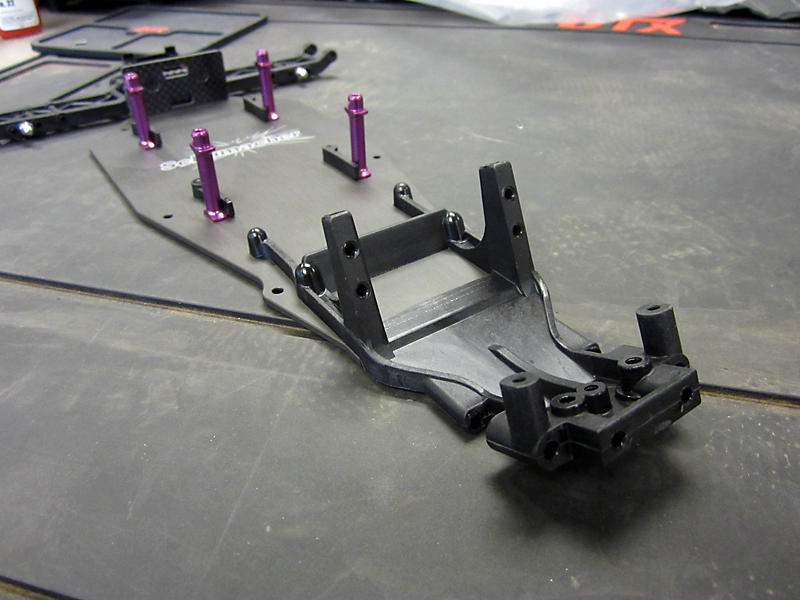
After installing the battery guide and mounts down the center of the chassis, it’s time to start on the front end. The nose of the car is all one molded composite piece that mounts to the front. It will house not only the steering bellcranks but the servo as well. The back of the servo mounting area features an angle piece that helps support the servo so it doesn’t tweak the nose of the car.
The steering rack is up next. The entire system is built of singular parts that are held together by the steering posts. The entire system is supported by ball bearings and it goes together in a matter of minutes.

Who else includes a carbon fiber turnbuckle wrench? Nobody love ya more than Schumacher baby!
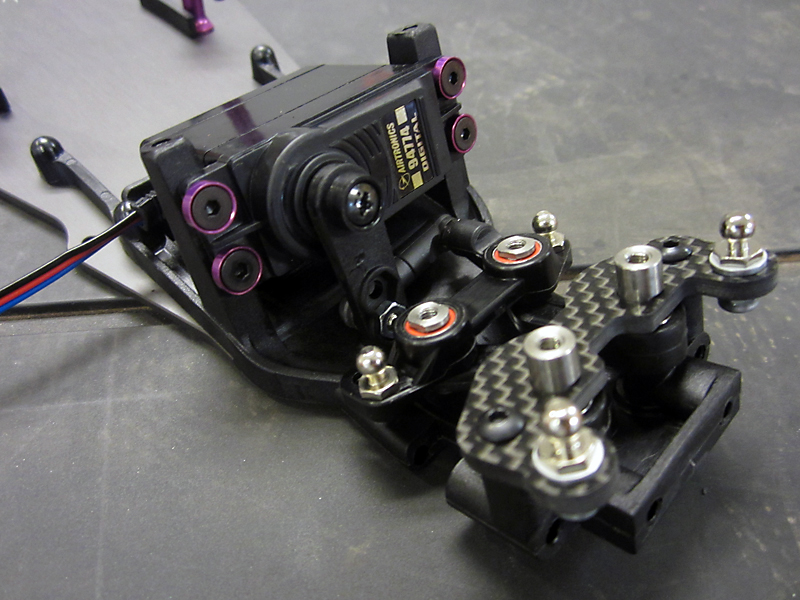
When installing the servo, be sure the bottom/back of it is as close to the rear support as possible if not resting on it. The SVR comes with a full set of shims to get the servo position just right. With the servo in place, the steering side of the front end is complete.
I have to say so far I’m pretty impressed with how the car has gone together. I’ve built a lot of Schumacher vehicles in my time and the fit and finish on this one is miles ahead of anything I’ve seen before. The pinned bulkheads were an impressive touch and it shows an attention to detail and accuracy that you come to expect from a top notch manufacturer.
Now we’ll be adding the front suspension and building the transmission. Some pretty cool little designs in here so without further delay.
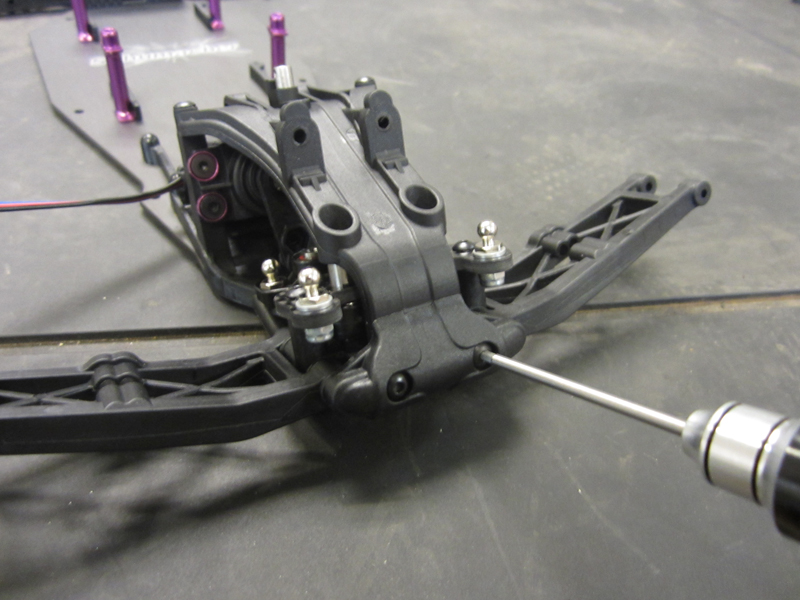
First things first, a set of all new longer front arms are held in place by the front hinge pin brace. The screws in the brace should be tightened evenly and then backed out a little bit to let the arms move freely. The arms themselves are new for the SVR kit; they’re longer to drop the roll center down and give the buggy more high speed steering.
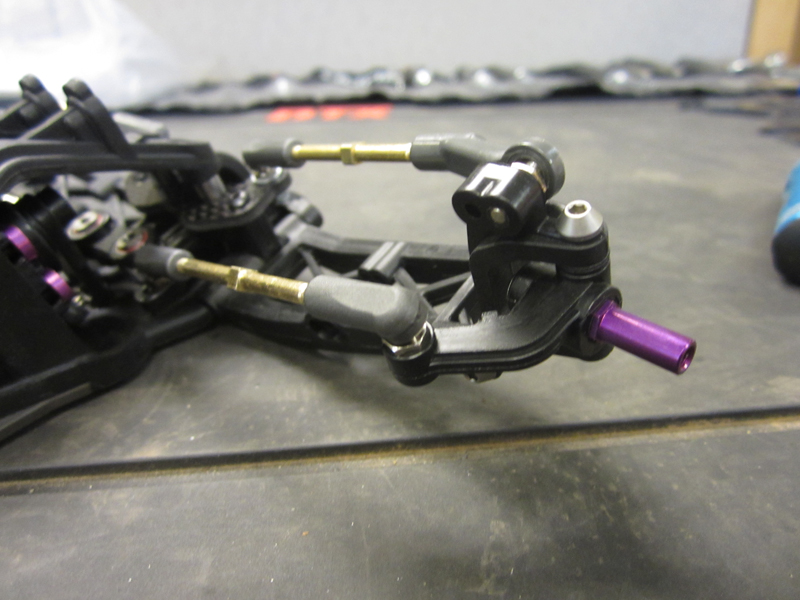
Anyone that knows me knows I HATE building turnbuckles but Schumacher made this as painless as possible by including a 2nd turnbuckle wrench. With one on the linkage and one holding the ball cup, things went together very quickly. Notice the offset cup on the camber link. this allows the linkage to be in front of shocks yet reach in to the center of the arm to hold the caster block. Also, check out those beefy kingpins; rather than have them held in place with e-clips that can fall off during a race, these pins are threaded into the block. Finally the axles use a low profile screw to hold the front wheels in place rather than a lock-nut.
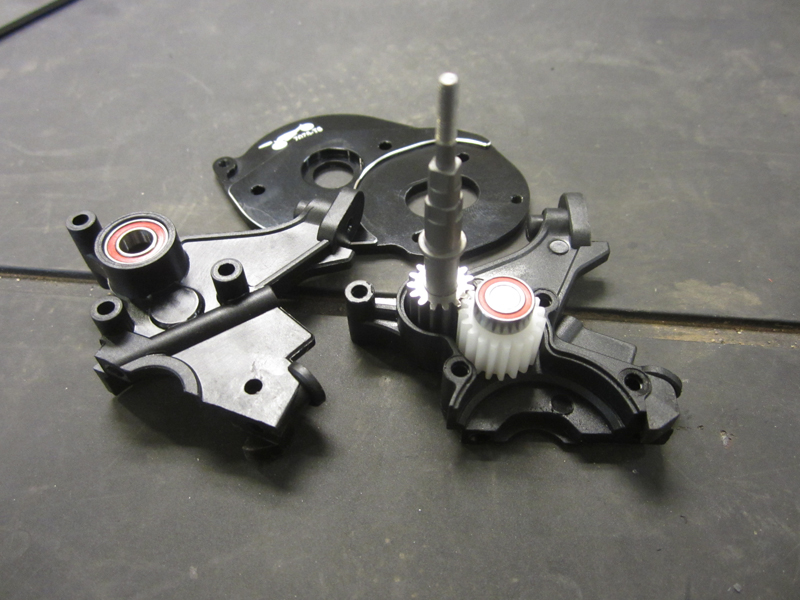
The lower half of the transmission was mounted to the chassis in the last part of the build so now we’ll focus on the upper half. A molded case houses the top shaft, idler gear and motor plate. This entire assembly then mounts via four screws to the lower half (with the diff installed) to complete the transmission. This is a great design because it allows quick access to the diff for rebuilds; simple remove the four screws and the entire transmission moves out of the way. A 7075 aluminum motor mount draws heat away from the motor to keep things cool.
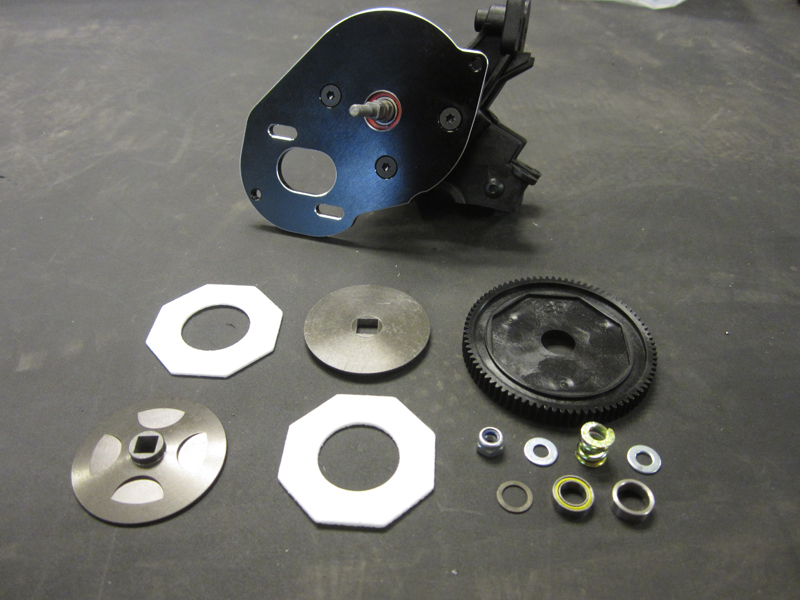
With the upper half of the tranny put together, it’s time to build the slipper clutch. The clutch itself incorporates a pair of hex shaped pads that are made of a high temp material so they’ll last a long time. Other than that it’s pretty standard stuff for slipper parts.
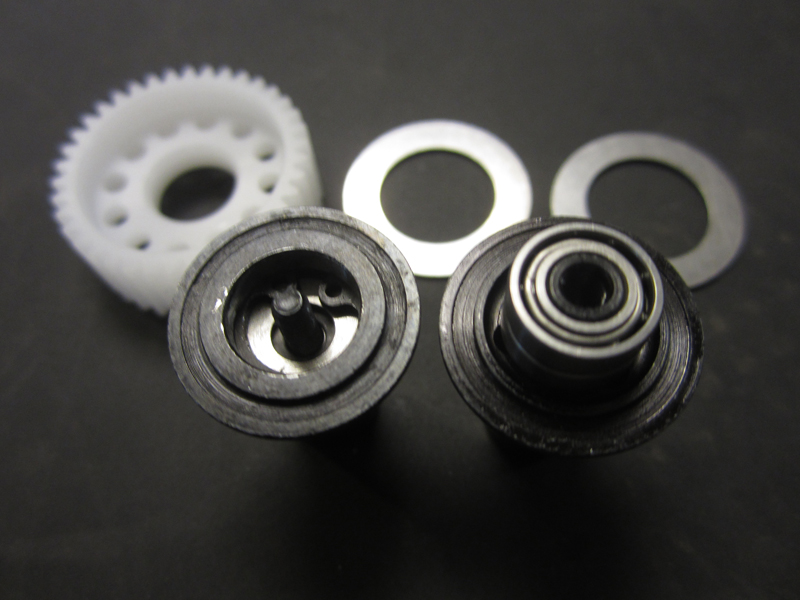
The differential is up next. Did you know that Schumacher invented the ball diff for RC cars? Yep! This diff has some interesting design features to it. Rather than using a screw and thrust bearing assembly in one outdrive and a locking nut in the other, Schumacher uses a C-clip to hold the thrust bearing in place allowing the screw to be removed while keeping the bearing secured in the outdrive. No more lost ball bearings here!
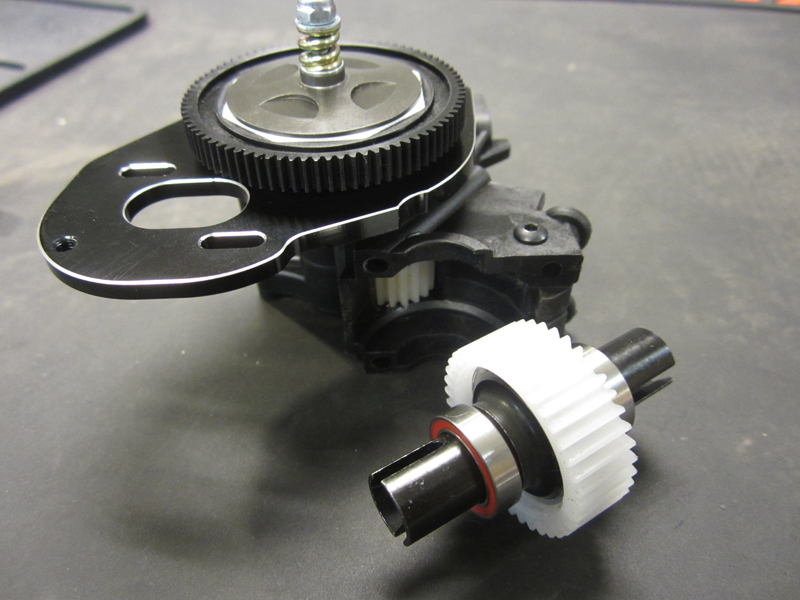
Now we’ll install the diff into the lower transmission half and mount the upper half to the buggy to complete the drivetrain.
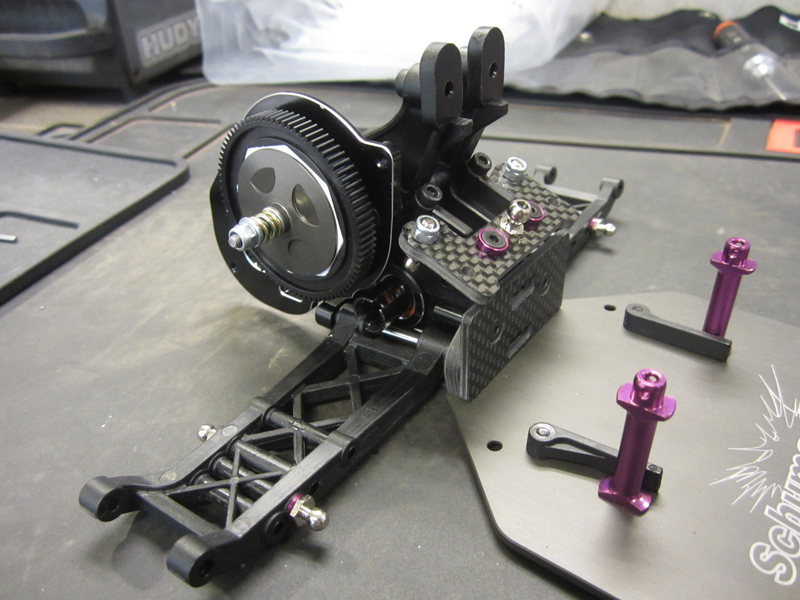
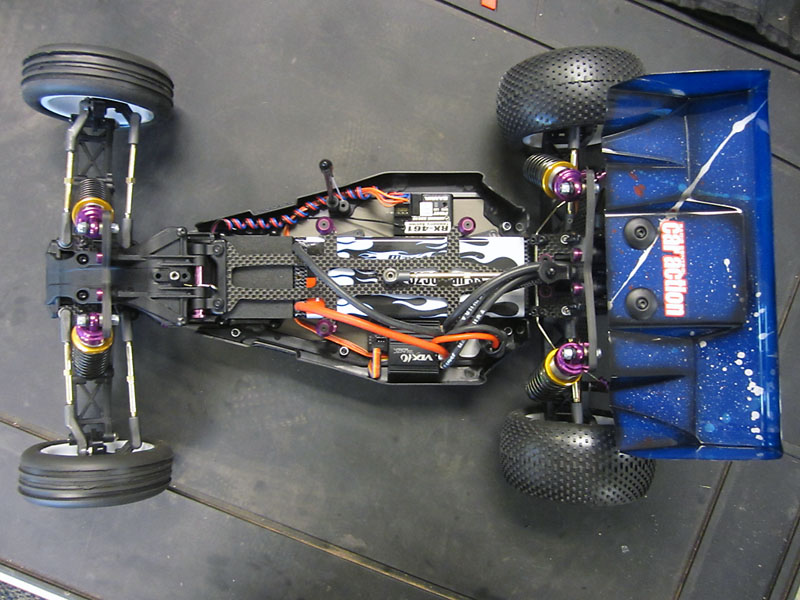
And there she is! The transmission housing plays double duty as the rear shock tower mount. Although this buggy is rear motor vs. the mid motor layout of the SV2, the buggies share the same suspended shock tower design; at quick glance it looks as if its just sitting there not attached to anything. Just a cool little thing about the car I noticed.
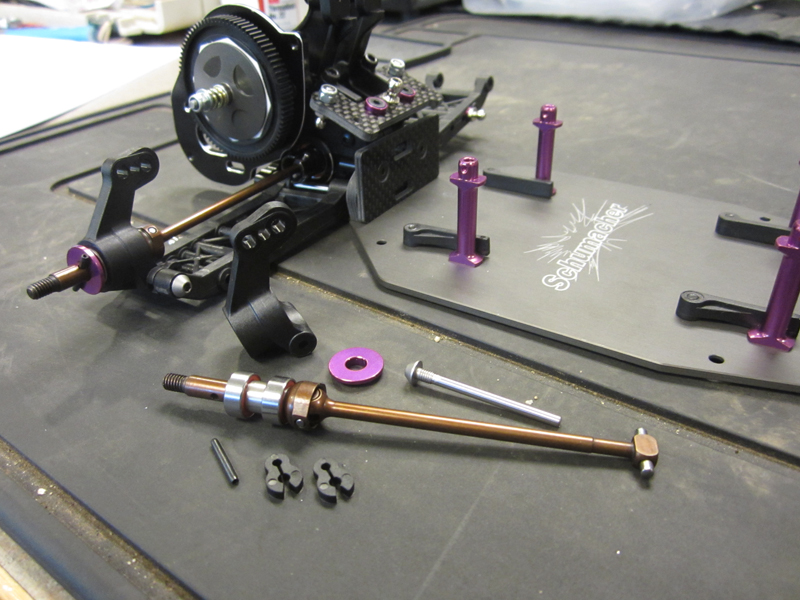
The CV’s are made of a super strong spring steel type of alloy to handle any amount of power you attempt to put down. They come pre-assembled to save time on the bench; simply install your bearings, slide them into the hubs and put drive pins in place and your done. Urgh well that is until you need to assemble two more of those dreaded hingepins… oh wait!
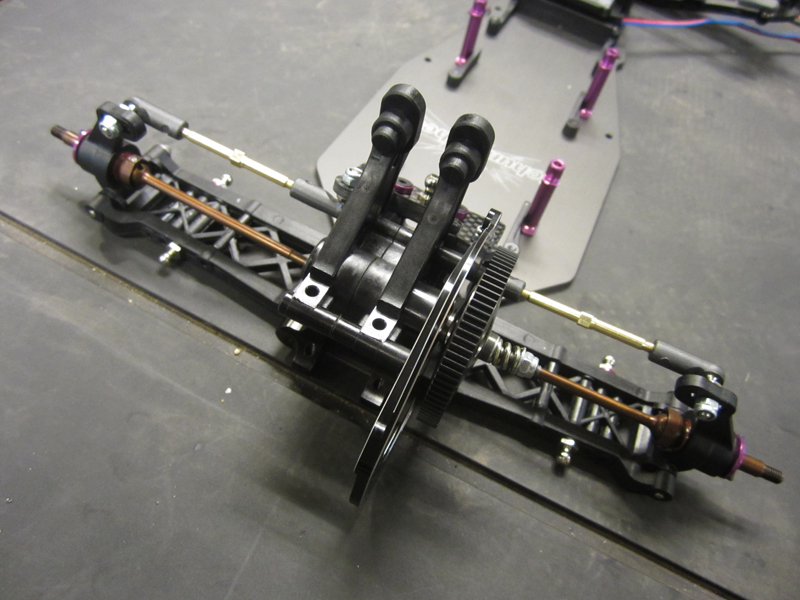
Ya I just remembered that whole second turnbuckle tool thing. I was done building the rear end in a matter of minutes. With the suspension components in place, it’s on to shock towers, shocks and finishing touches…
…which we’ll save for next time. The buggy is coming along pretty smoothly and I’m honestly pretty impressed at how fast it goes together. I’ve built a lot buggies in my life and for about an hour’s worth of time, stopping for photos included, I’m pretty much done with all the big stuff. The transmission features CNC machined gears that mesh very smoothly and the entire assembly spins very freely. The suspension tolerances were a little on the tight side but with a little extra attention they move nice and free as well. I have to admit that for a vehicle with an alloy chassis I thought by now in the build the car would be a lead sled but it really don’t feel any heavier than if it were made of graphite.
This is the third and final part of the Schumacher Cougar SVR. In the last part, we covered the final assembly of the transmission and front and rear suspension pieces. The buggy was coming together quicker than I’d expected and I couldn’t wait to get it out on the track. Designed as an along-side version to the SV2, this version is optimized and reconfigured to perform on tracks with loose conditions like many of the outdoor tracks we have around most of the country. My local track, The Bethel Racearena in Bethel, CT, is a dusty clay track that has a very dynamic track surface. While it’s clay and is very hard packed, the sandy content in it dusts up on top making it a challenge to put power down. The track is also shaded on one side more than the other so it holds more moisture for longer. This varying surface proves a challenge for even the best drivers and the constantly changing rhythm of the course should provide a good meter of the SVR’s abilities. Here it is, Part 3 of the Schumacher Cougar SVR.
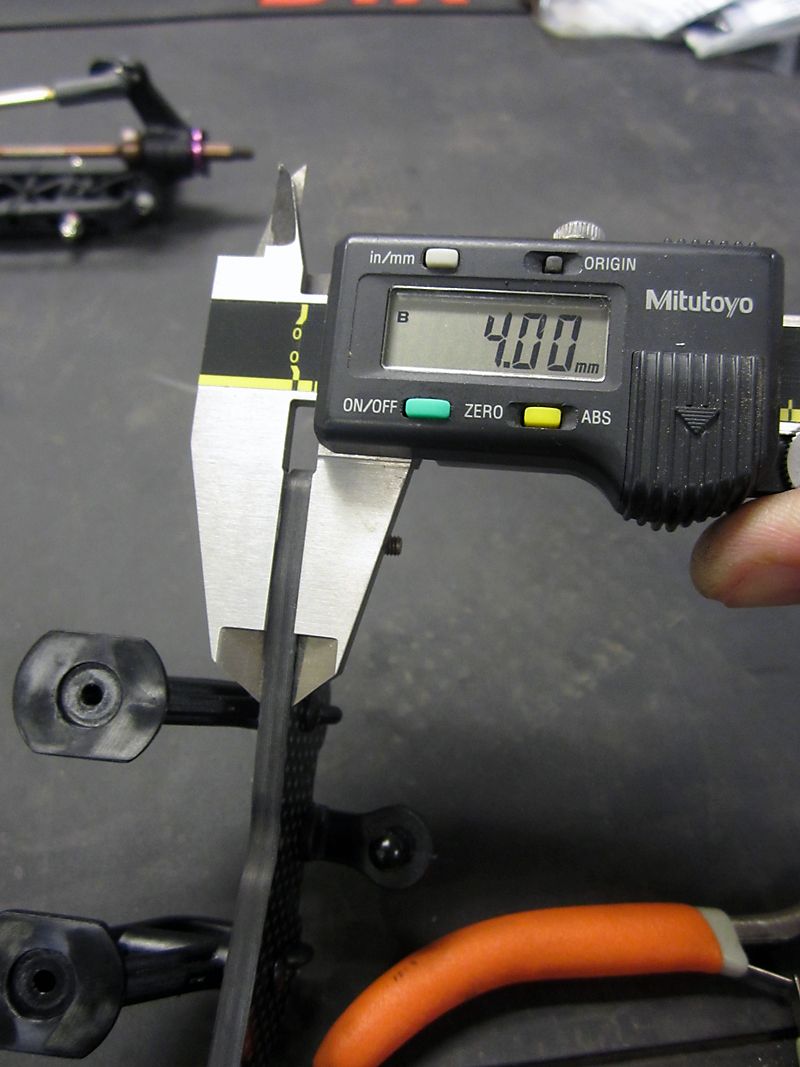
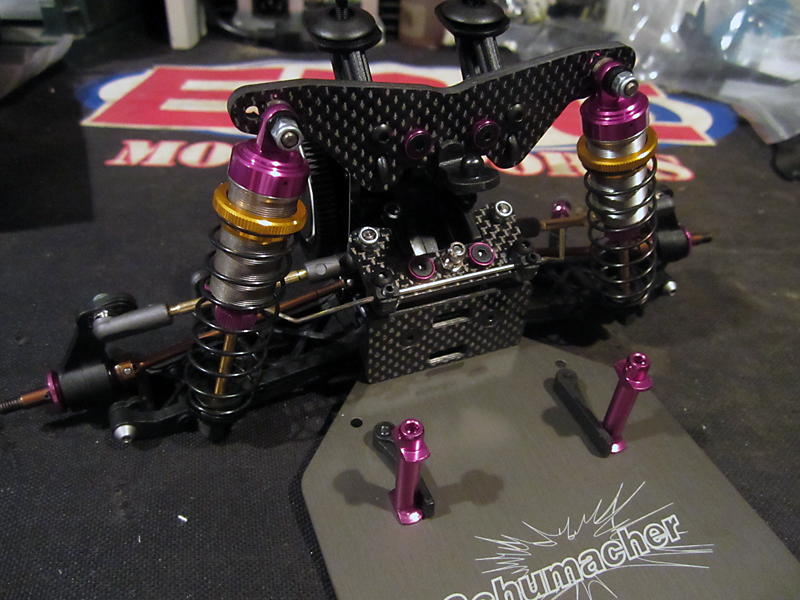
The first parts to go on the car for this build are the slab like shock towers. This is by far the thickest graphite I’ve ever seen used in an electric buggy, measuring in at 4mm thick, and are clearly going to be very strong. Although they’re very thick, the overall size of the towers is smaller which helps reduce weight, especially important as these are the two highest points on the car.
The shock towers are installed on the bulkhead up front and transmission housing out back. Front mounting steel posts are used for upper shock mounts rather than screws and are held in place with a lock nut on the backside of the tower. This makes for a very quick and easy way to remove the post without needing to take the entire tower off.
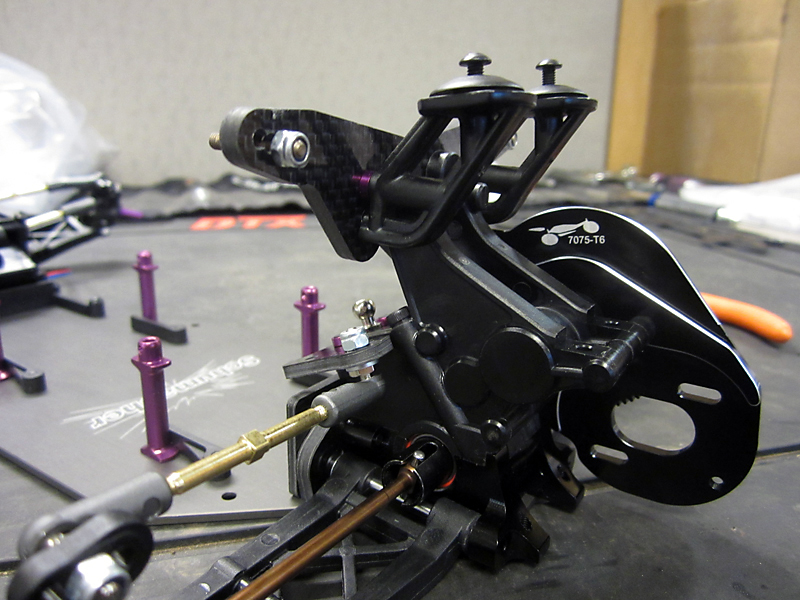
Here’s a better look at the rear tower. From here you can see how it appears to be suspended. Nothing up my sleeve, just a simple mount off the front of the tranny holds it in place solidly. Definitely a very unique design. You’ll also note the wing mounts are attached to this same assembly. Having all of these parts connected means they all move out of the way when you’re accessing the diff.
From this front view, you can get a better look at the graphite plates that make up the rear bulkhead. The lower plate with the two windows allows you to view both the toe and anti-squat settings for the rear suspension. A simple set of notches indicate these settings which as a standard in the kit come set to 3 degrees of toe and 2 degrees of anti-squat. Schumacher sells optional plates for different settings although given that I’ll be running this car on some pretty slick surfaces, I don’t think I’ll ever want to decrease either setting. The ball stud on the angled plate connects the rear end to the battery brace using a linkage.
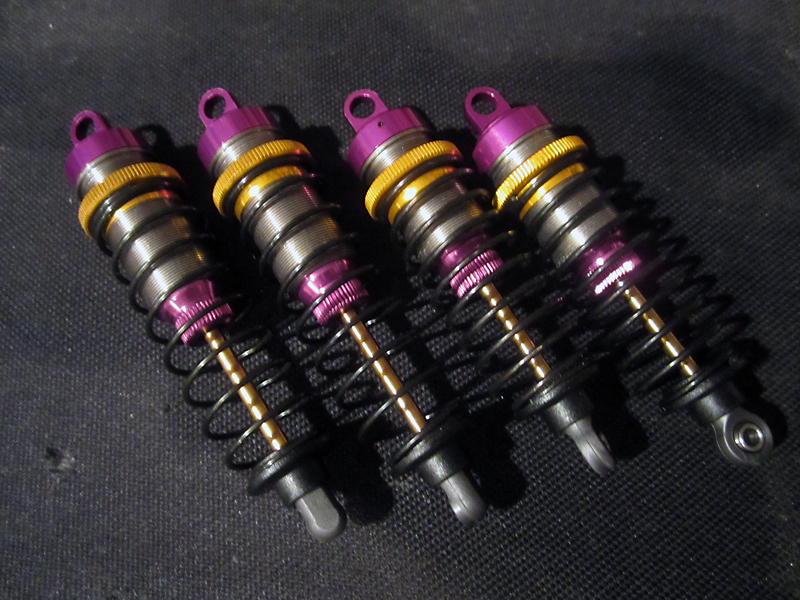
Shocks are the other thing I just don’t like building. If it were up to me every car ever made would come with all the linkages and shocks prebuilt from the factory. With that said, Schumacher once again comes through with some very easy to build shocks. These 13mm, teflon coated big bore shocks have a simple seal design that load from the bottom and is held in place by a threaded cover while a bladder takes care of any pack you may end up with if you rush on building your shocks. Simply fill the shock up nearly to the top, lay the bladder on and thread the cap on a turn or two before pushing the shaft in. The excess oil will work its way out of the bleeder hold in the side of the cap and your all set, four perfect shocks in no time.
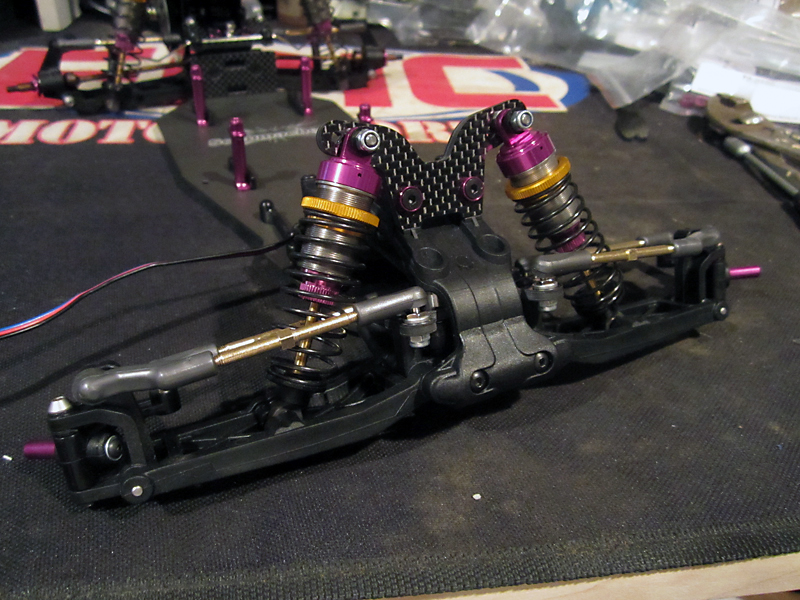
Man those really are some big shocks! I’ve been racing since a time when oil shocks in general were an option part so to see how big 1/10 shocks have gotten really catches me off guard. These bad boys feel like they’ll do just fine soaking up the bumps.
I always set the spring collars to just barely compress the spring when the shock is unloaded. This gives all four shocks and equal setting to start; from there I set the ride height front and rear using a ride height gauge to make sure the car sits level with the rear axles just below level to the ground.
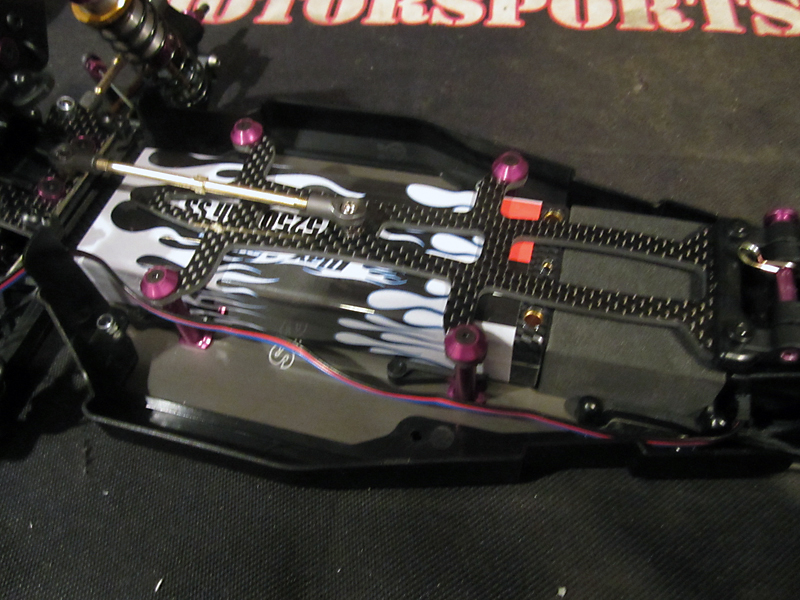
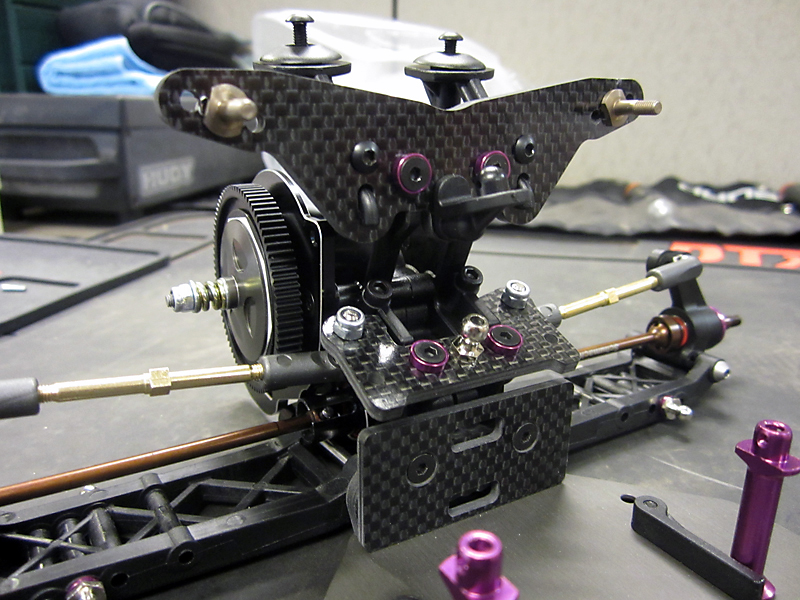
After the shocks, the battery brace goes on with a set of 4 screws and cap washers to hold it in place. A linkage helps support the load of the rear end and put some of the weight transfer down to the center of the chassis for more neutral balance. For the test I’ll be using a MaxAmps 5250mah 7.4V LiPo pack along with my trusty Airtronics MT-4 radio system and steering servo.
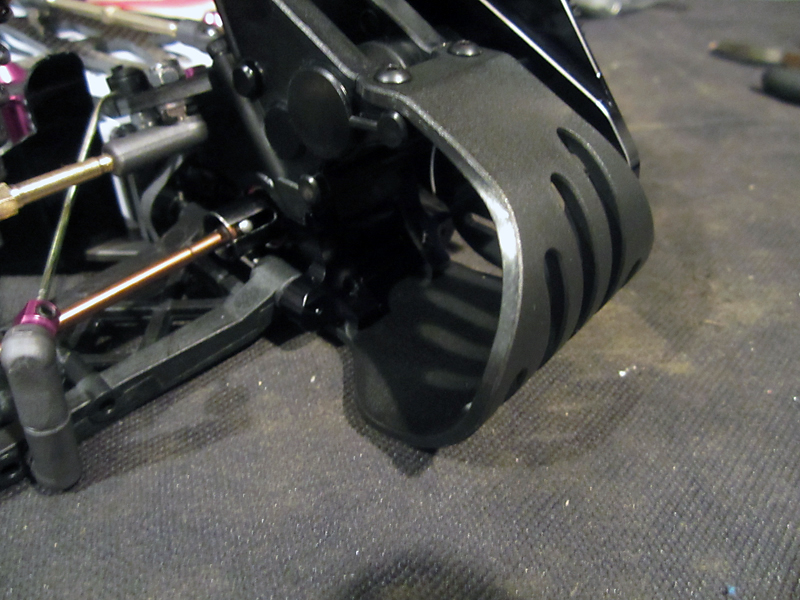
The second to last step in building the car is to install the motor guard. It attaches four screws and protects the motor in a crash. For power in the SVR I’ll be installing a Viper VTX10 Black Edition speed control and 17.5T motor set up for stock racing.
And the buggy is all done! Well almost, still need to show you that body Larry from Kustom RC Graphix painted up for us. As you can see the layout has a decent amount of space for mounting the receiver and speedo but not a LOT. I actually had to put a little spacer plate under the esc because it was a little wider than the metal area. No big deal, a little scrap of lexan taped to the chassis gave it enough height to sit on and reach over the side pod.
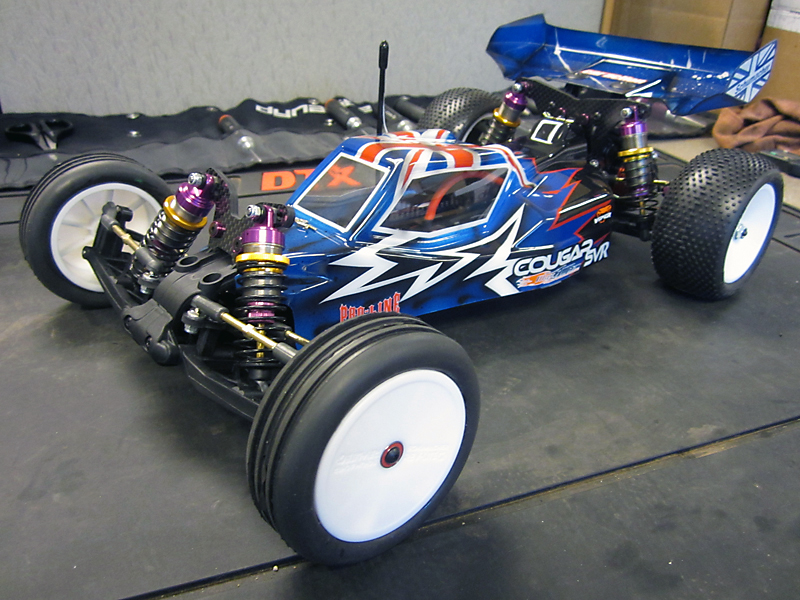
Yes sir! That is one slick looking paint scheme. Larry whipped up a sweet Union Jack scheme with some throw back paint splatters on the wing. To finish off the car and prep it for testing I mounted up a set of Pro-Line Tazer rear and 4 rib front tires with stock inserts. The car looks awesome and we can’t wait to show you how it turned out. Check out the January issue of RC Car Action magazine and keep an eye out for our video review on RCCarAction.com as well!


