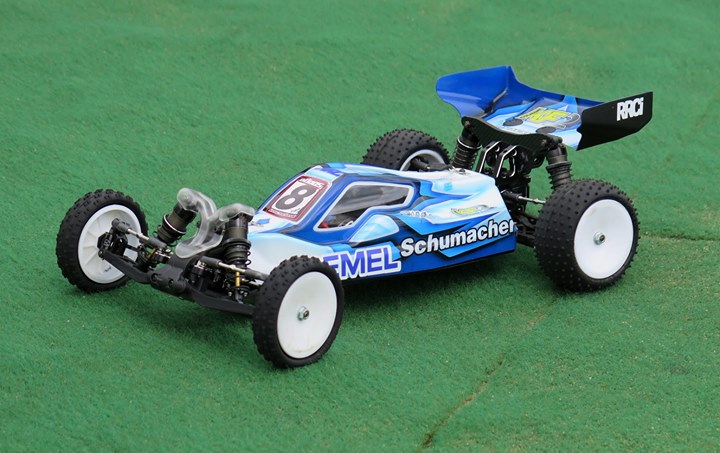
Schumacher KF2: The Art of “Adjustable Optimization”
Words and Images: Mark Christopher
Manufacturer: Schumacher Racing
UK RRP: £310 (Kit Only)
When Schumacher released the original KF two wheel drive buggy I don’t think they realized how popular it would be and after taking the 2014 off-road two wheel drive national championship title in the hands of Darren Bloomfield, the KF had received some little tweaks and some development by the team drivers. The main development was low grip conversion that moved the motor forward and allowed a short stubby 2S pack to be fitted.
After the usual rumors around the Internet, Schumacher announced the release the new KF2. This was not a new car but an update and revision of the extremely successful KF. Instead of listing the changes here I’m going to go through the build process and highlight the changes team Schumacher found beneficial. Some are performance; some are for easier maintenance, and some reliability.
So, What’s In That Box?
The kit is supplied in Schumacher’s usual high standard printed box showing the features of the built-up car. Inside is an A4 manual which uses CAD drawings and is extremely clear. Plastic bags contain the parts bagged in build stages. As always you should have a quick flick through the manual to familiarize yourself with any abbreviations and the order of the stages you will be assembling the KF2.
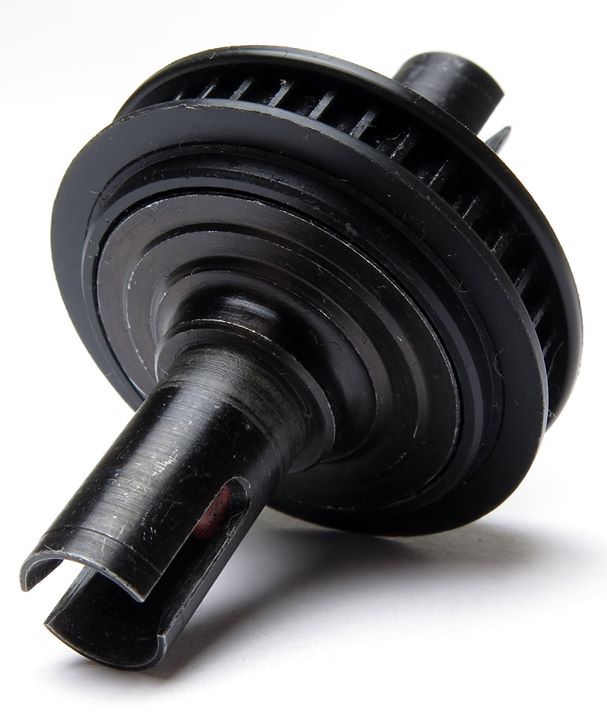
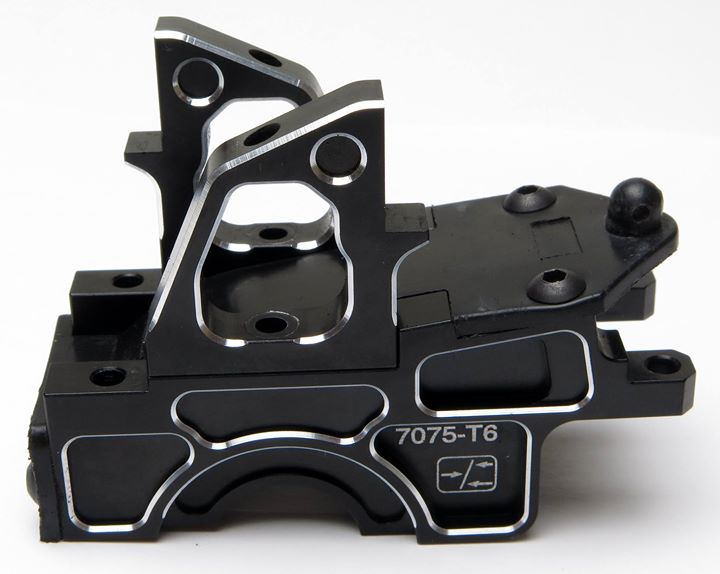
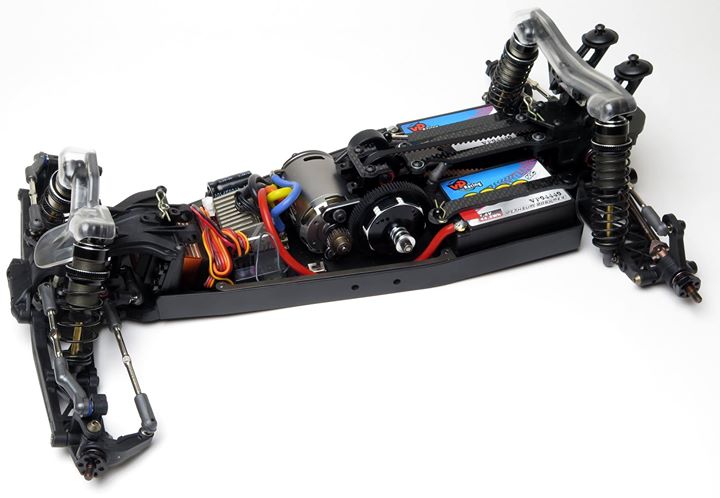
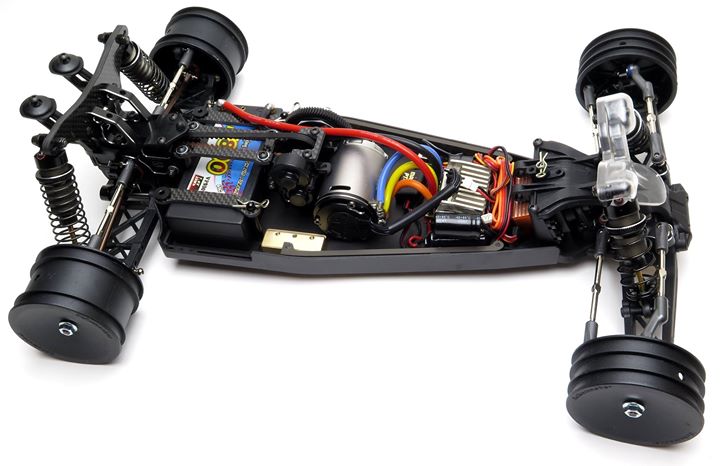
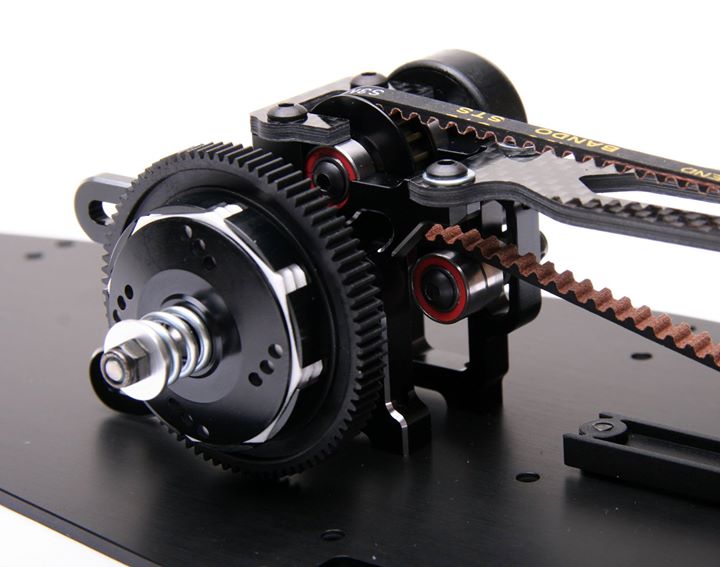
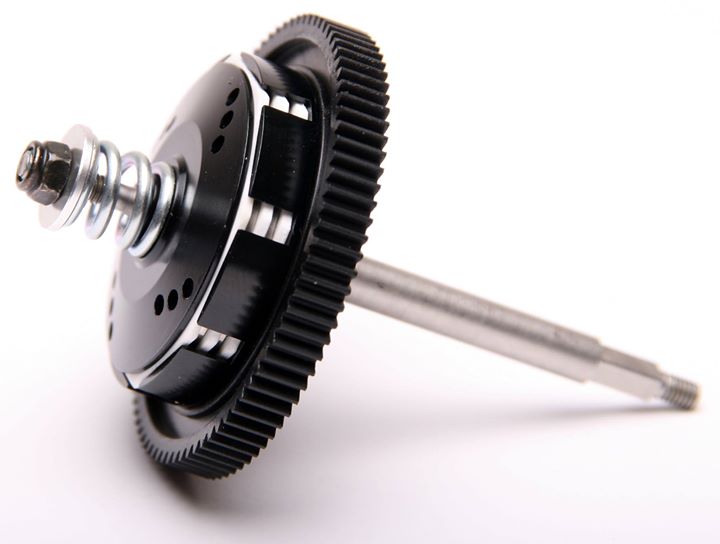
The first part of the build is a new central transmission housing this has a more conventional motor plate which the motor bolts on to and gear mesh is adjusted by sliding the motor on the plate. The motor plate is secured to the transmission housing and clamps the lay shaft bearing in place this helped to eliminate any play in the bearing/housing this then bolts onto the new aluminium chassis which is 2.5 mm thick and is anodized black to give a harder surface. The rear lower gearbox housings also attaches to the chassis. This is different in the fact that the pivot blocks no longer mount to the bottom of the gearbox housing. With the motor mount in place the next step is to build the layshaft assembly, this uses a ventilated slipper plate coated with a white friction material and holds an 83 tooth spur gear. On the outside of the slipper shaft is a flip cage which carries three slipper pads and plates and a larger adjustment spring which is adjusted by an M3 not with the slipper. Having more teeth and pads a fine adjustment can be made yet is less susceptible to heat and friction causing changes in the settings.
Once assembled the other half of the central transmission housing can be installed. Schumacher have revised the layshaft pulley which has more durable side fences which help guide the belt better. To aid belt changes the layshaft is held in place by a small carbon plate and two M3 screws. This enables it to be just lifted out of the top of the housing. Schumacher’s intermediate side gears which allow the motor to rotate the same direction as the drivetrain are used and options are available to change the internal ratio of the drive. Make sure you apply a small amount of the axle grease to these gears this will ensure they bed in correctly and remain quiet in use. Also bolted to the central gear housing is a small belt tensioner which allows the belt tension to be adjusted to the correctly to prevent slipping and excess wear. A central brace /spacer is bolted to the chassis to keep the saddle packs apart and allow the belt to run unhindered.
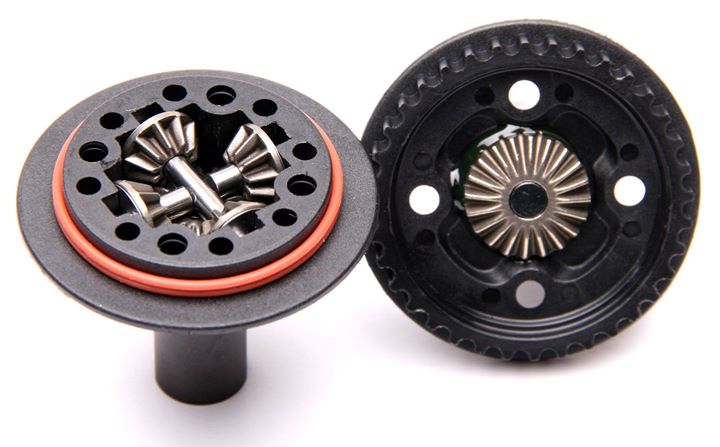
Gear Diff
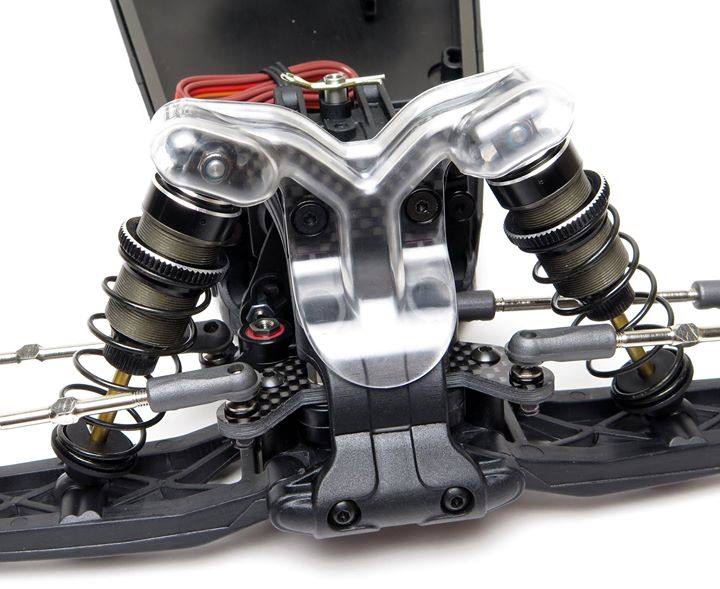
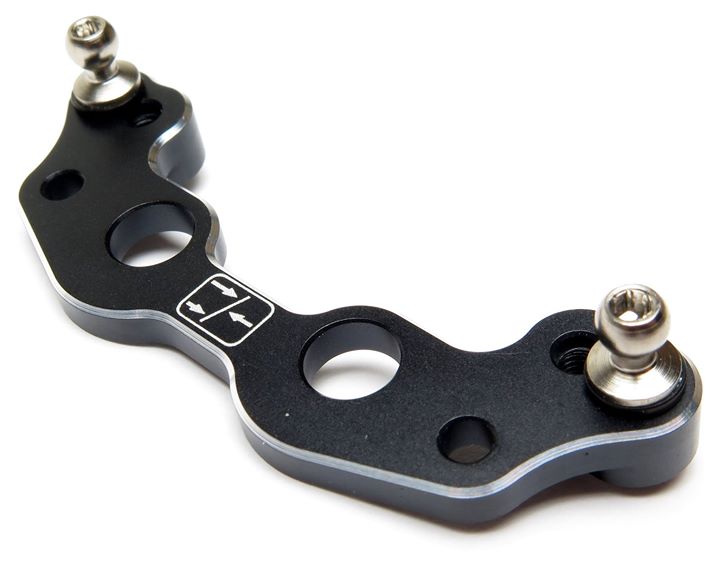
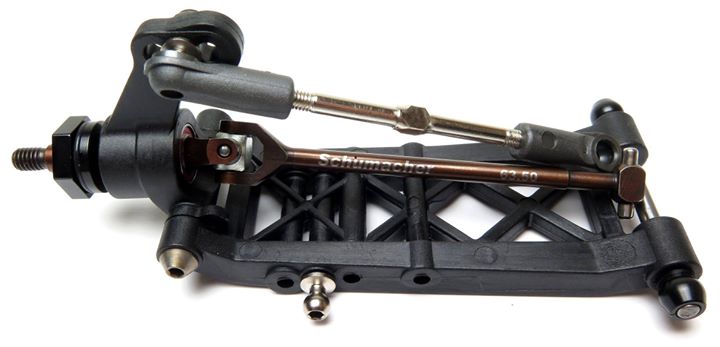
A geared differential is used in the rear to transmit power from the motor to the axle/wheels these have now been well proven in previous KF and the K-1 range and once built are very maintenance free and reliable and can be finely adjusted by changing the silicon oil they contain inside. Make sure you lubricate the outer O-ring as this will help prevent it snagging which can create leaks. Pay attention when you fill up the differential not to fill it higher than the cross pins again this will prevent excess oil leaking out during use. Finally tighten the four screws that clamp the two differential hearts together and do not overtighten them. Shims are used to locate the differential in the centre of the transmission housing and large 10 x 15 bearings support and allow free rotation. The differential is held in place by a composite transmission upper half and a carbon fibre top deck prevents any rear chassis flex. A composite shield is fitted over the housing to prevent debris ingress and a carbon fibre rear camber strap is used, options are available to adjust the position of the ball in and out and spaces are reduced to adjust the pivot ball height. Schumacher’s adjustable wing mounts attach to the carbon fibre rear shock tower and in turn this is bolted to the gearbox housing top and uses a shock forward position.
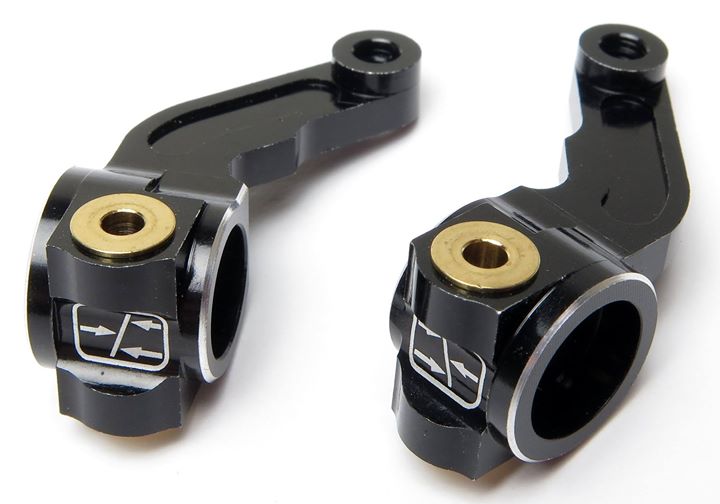
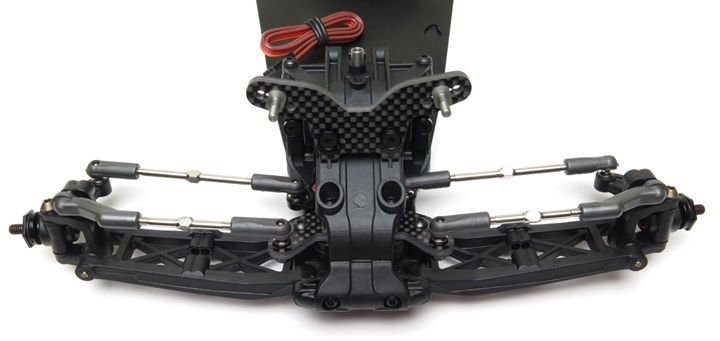
New to the KF two are the inner wishbone pick up points. These are bolted to the chassis and are machined from aluminium and anodized black. Composite spacer blocks are provided to adjust anti-squat these go from 1 to 4° in one degree increments. When selecting the pivot blocks pay particular attention to which part has the flat side, with the flat part pointing outwards you have 3° of rear toe in and with the flat part facing in you have 2.5° of toe in. Now to the rear wishbones the KF2 uses the wishbones from the SV2 as these allowed outboard wheelbase adjustment. The inboard adjustment is no longer there. Schumacher’s unique pivot pins secure the composite wheel hub to the arms, these have a threaded end and then the pivot pin. Spring steel universal joints are used which terminate in the industry standard 12 mm wheel hexes. Steel turnbuckles are used throughout and it would be hard to tell they were not pertaining other than obviously using a magnet. The inboard pivot pins run on steel bushings which allow angles to be changed without binding on the pin and the rear pin is held in place by a machined alloy block which attaches to the chassis. This can be moved up and down by different shims or spacers again to alter the anti-squat or roll centers.
At The Front
Moving to the front Schumacher have retained the now tried and tested and successful two-wheel drive front end with only minor tweaks being made. The first minor improvement is the steel steering posts which hold the linkage arm now have a crush spacer and a hexagonal head to enable a 5.5 mm driver to be used on tightening them previously they just had two flats in them. The next part is that the steering rack has had the steering arm pivot positions changed as the team used to add washers under this pivot ball to give a linear steering response so you no longer need to add spacers. Schumacher’s pro ball studs are used throughout these have holes in the ball cups and by inserting an Allen driver you can remove them without un-popping the ball which can cause excess play.
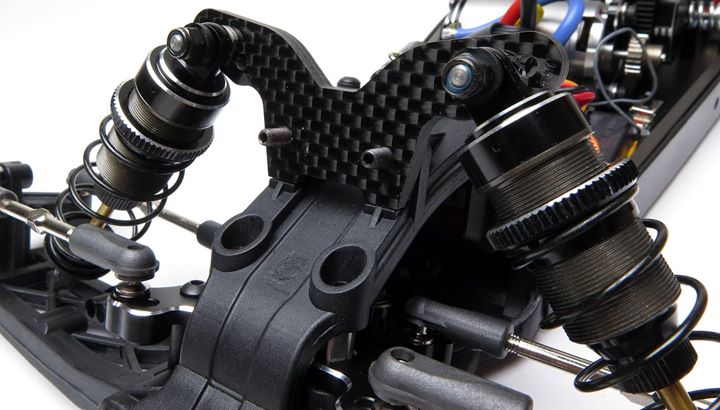
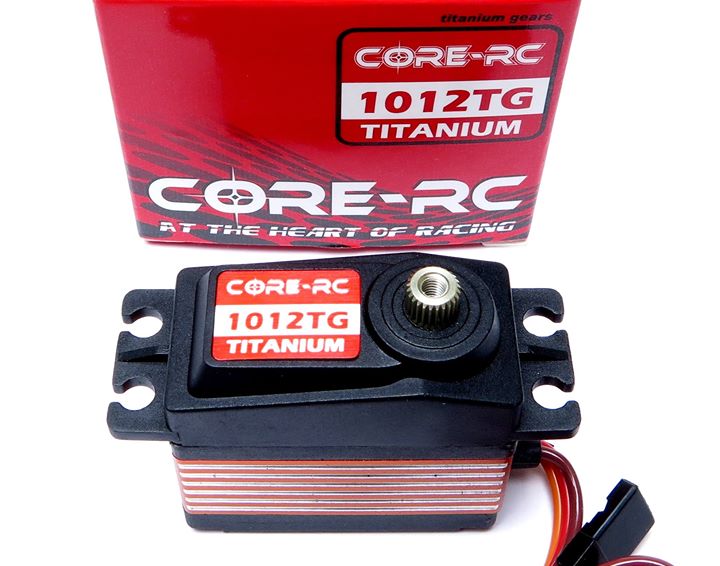
Once assembled the steering offers a smooth precise operation. As part of the review Schumacher kindly supplied one of their new core 1/10th scale servos the 1012 TG which has titanium gears 10 kg of torque and a transit time of .12 seconds this uses the 25 tooth servo spline. Testing will prove how good these are compared to other servos. Pay attention to the servo mounting position shown in the manual too ensure you get the correct linkage position. A front camber plate is attached to the lower plate again options are available to adjust the ball position in and out and washers can be used to raise or lower the ball studs position. Finally a top plate fits over the steering servo to give a rigid and strong front suspension mount this assembly is then bolted to the chassis with four screws. A carbon fibre shock tower bolts to the top plate this has five adjustments positions for the shock absorber top mounts and Schumacher’s quick release shock absorber locators are used throughout.
TOP TIP: Instead of using the two M3 by 12 bolts and countersunk washers to locate the shock absorber carbon fibre mount I used two M-16 grub screws wound into the front top plate, fit the shock tower and then use two M3 lock nuts to secure the tower in place. This will allow you to undo the nuts and remove the shock absorber guards without the front-end slopping about when you want changed shock absorber positions for shock absorber settings.
Suspension Arms
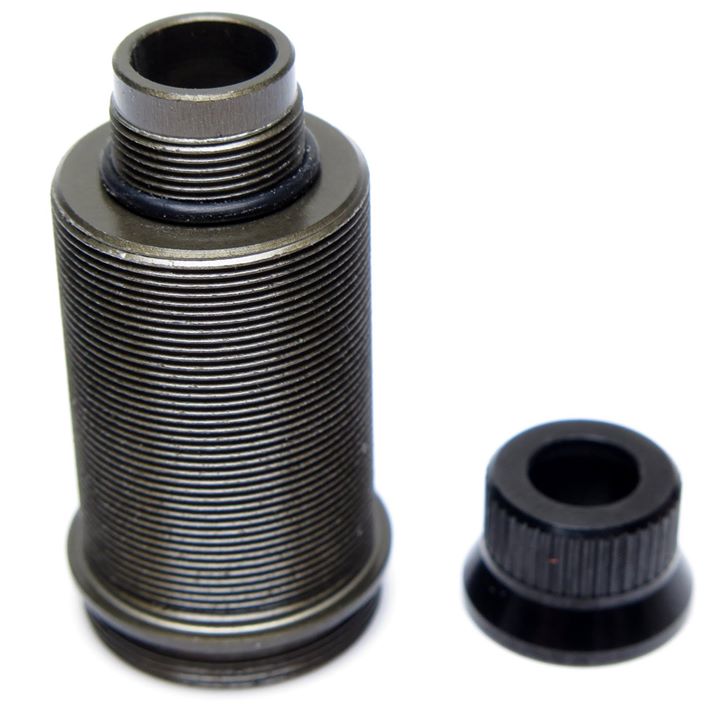
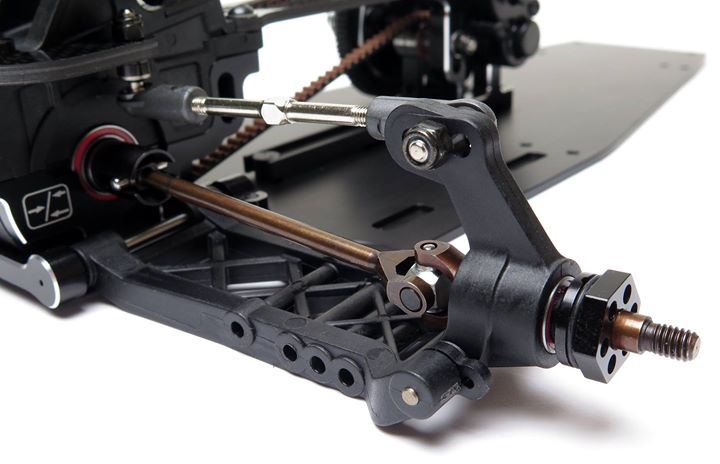
Schumacher’s long suspension front arms are used in a hard plastic and have C type castor blocks and composite steering hubs. The steering hubs have inboard bearings and the wheel use the now common 12 mm wheel hexes. Spacers are used between the hub and caster block this allows the steering hub to be moved up or down to aid fine tuning. Again turnbuckles are used on the steering and camber linkages with the pro ball studs. The only thing here different to the original front end is a small blue O-ring is placed between the outer ball stud and camber link cup this helps prevent popping off and gives a more secure fitment. Finally hinge pins hold the wishbones to the front lower plate and the front bumper secures them in place. To control the suspension Schumacher’s big bore shock absorbers are used these are now proven to be very efficient and effective.
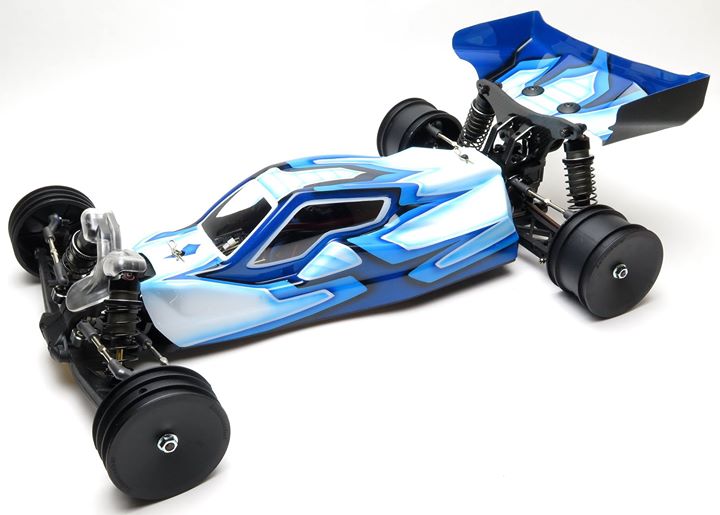
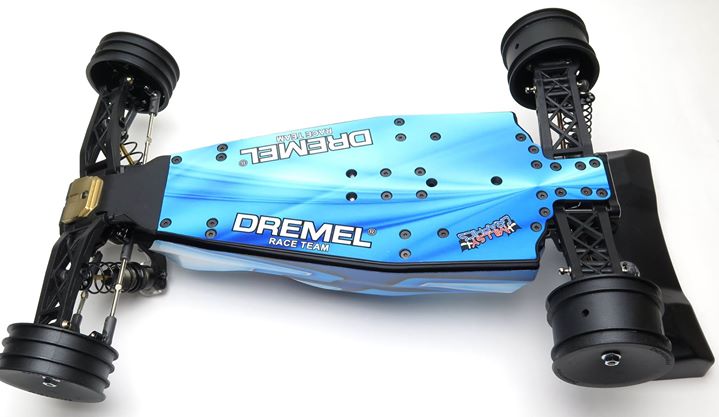
A new lower O-ring helps prevent the seal leaking. The shock shafts are titanium nitride coated to give extra life and wear rate. Three-hole 1.6 mm diameter Pistons are supplied for the front and three-hole 1.5 mm Pistons for the rear shock absorber and come with diaphragms for the top. Schumacher now include a core red spring for the rear and a core black spring for the front. The springs have proven to be more consistent than the original Schumacher springs. Once topped up with the supplied 35 weight oil and the spring tension is adjusted the shock absorbers are very smooth and leak free units. With the front and rear shock absorbers mounted to the car shock towers the rears press onto the lower ball studs and the fronts are screwed in place with bolts. To power my KF two I chose to use my trusty Dualsky 8.5 motor and 850 speed controller. These have proven to be ultra-reliable and fast. The motor is held in place by two screws and gear mesh is easily adjusted. The next parts to be fitted are the moulded chassis side plates these are the same as the KF but now have aluminium braces which go from just in front of the battery position to the front bulkhead. These are used to stiffen the front of the chassis as the top deck is no longer used. The Vapextech saddle pack LiPo are held in place and secured by carbon fibre straps onto aluminium posts and a small clip holds down the strap. Fitting the motor speed control and receiver is a little tight but with care and attention a neat installation can be achieved and on the left side plate provision is made for the aerial tube which is located and secured by a grub screw. To top off the chassis Schumacher have remoulded the KF body to allow extra room round the slipper and battery area yet it still retains its Forward and cool looks.
Schumacher also provide a high downforce wing, both the body and wing were sent to my friend and painter extraordinaire Michael Parker at Number5designs who did his usual clean stunning job. Black wheels are provided in the kit and may not be to everybody’s taste. You are left to choose your own tyre combination I fitted Schumacher yellow mini spikes rears and cut stager fronts onto Schumacher’s new slim wheel. The rear had medium inserts and the front had no insert, these seem to be now the standard tyre for Astro track which is what I tend to use my car on. Finally protectors are fitted onto the shock absorbers towers. These might not look particularly pretty but they will stop you from buying an awful lot of shock towers from those inevitable inverted landings.
The rest of the manual covers settings and adjustments and gives a description of what they will do. It also shows some of the accesses and options available from Schumacher and setup sheets which have been filled by the team for various services and finally a blank one for you to copy and fill in.
Time to Test
To test the car I decided to run it in the oOple series and its debut would be at the Bury model car club which is an Astroturf track. I took the car in its saddle pack configuration and the rear shock was mounted to the rear of the car using the kit springs oil and Pistons in the shock absorbers and the kit suspension angles. During practice the car handled superbly and to be honest I did not feel the need to change anything, the following day on Sundays qualifying and finals I had a chat with Ben Jemison who is one of Schumacher’s star drivers and he suggested altering the rear roll centre slightly this involved fitting the 4 mm front shim to the rear pillar box and adding 2 mm of rear spacers to the rear pillar box, this in effect give the same setting as the KF in high pin position.
The changes made to the car enabled me to make it to the next lap from 11 to 12 it stops the backend wallowing as much and made it more responsive in fact doing that made the car do it everything I could ask for I did not want or need to do anything more the car simply worked perfectly out of the box. With a vast range of adjustments available this car can be tuned to different conditions giving the driver a wide platform of set ups.
I would like to thank Schumacher Racing for the car, Trish bits weights. Michael Parker at number five designs for stunning paintwork and the Ed for the chance of reviewing such a competitive car. My first off-road meeting for 2015 saw me make the C final which I was more than happy with.
Finally I’d like to dedicate this review to Jimmy Storey (Mr oOple) who had taken some action shots for me at the meeting, unfortunately he passed away after the meeting and they didn’t make it to me…huge respect goes out to an extremely nice & talented guy who I, and the whole of the RC community will miss deeply.
For more on the whole Schumacher range head to: www.racing-cars.com