|
- Team Losi Double X4 - Tips & Tricks -
A few of the tips and tricks (I said I was gonna do this a while back so here it is finally)....
1) The B2/3 brace if you can find them. If not you can use a XXX brace or even whatever Thunder Tiger is calling there new electric buggy as it’s literally a re-released B3 and has that brace. There really is no need for the Trinity front bulkhead if you run something like the B3 brace. Another thing that sucks about the Trinity bulkhead is that many of them that are left out there are the crappy ones build after Trinity stopped having Titan do all their machined aluminum stuff. The material is lousy and the fit is poor.
2) Jesse Robbers developed the trick for running the caster block screws. X-Factory sells a nice little kit that includes a bit and the screws. I just make mine out of shouldered Du-Bro 1" screws. This ties the front and the back of the arm together through the castor block, greatly increasing the strength of the arm (we always used to break of the back half of the arm on the outside).
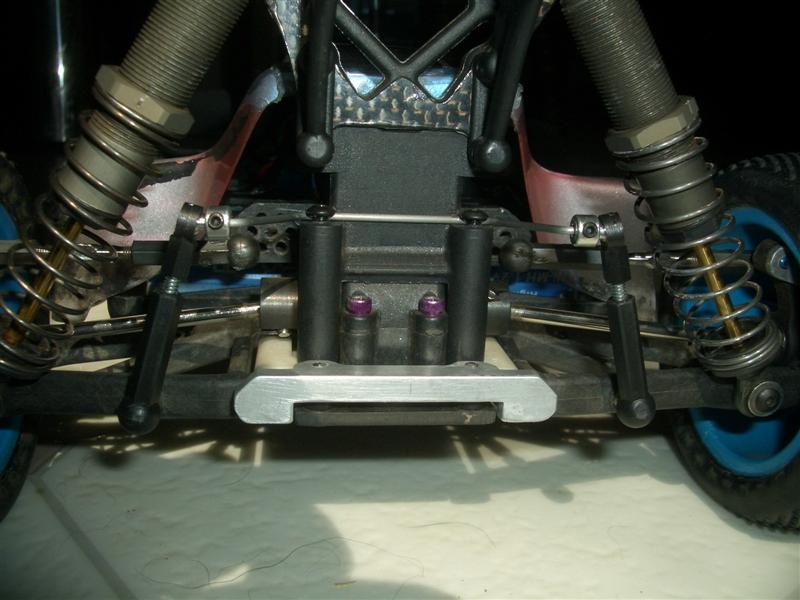
3) Don't cut the chassis cover to make getting at the Spur easier. It’s a great way to break a chassis and if nothing less lets the chassis flex.
4) LCD's are great (increases steering and efficiency), but they're failure rate is kinda high if they are not built right. I have found building them dry, let the lactate dry and then soaking them in a thick synthetic oil over night, then wiping them off keeps them lubed and together. I am sure others can chime in about how they build them.
5) Trinity motor clamp. If you can find it, it’s a great help. If not there are a few people that make good facsimiles. I have heard of a few people saying they're having no trouble with the stock motor clamp and brushless as the heat does not soften the brace and let the motor move.
6) If you run brushed and you want to run a heatsink Tamiya makes one that fits very nice and resembles the old Trinity unit. I think it’s for they're TRF- 415 (I may have the letters wrong but it’s something "415"). All you have to do is flip the servo arm upside down so the ball cup is not above the servo horn. It still clears the body and motor fine provided you run the lowered motor cam.
7) 86 tooth spur helps smooth out the power on the car (not such an issue if running brushless) but you must CAREFULLY dremel out the channel that is already there to clear the 84T spur. It will take some work and you have got the area very thin. If you go through the bottom you can use some good chassis tape over the area or CA glue a thin piece of graphite and shape it so it does not tear out. This is not the most necessary mod in the world, just one that gets done to add a little more to the car.
8) Setting the slipper is crucial on XX-4s. To loose and it cooks the slipper/motor, and can ruin the big roller bearing in the end of the slipper. Too tight and it tends to break the rear belt. I start with the factory setting (it’s usually a bit loose) and basically waste a pack tuning it in. The nice part is once its set it will pretty much be good anywhere within a half turn or so.
9) On the subject of belts. Fresh belts are important but good pulleys are the often forgotten component. Greg Hodapp recommended to me to run the rear belt tensioner full back and I have not had a problem since. SMCPot is right on when suggesting the replacement of pulleys when replacing belts. If you choose not to replace pulleys when belts fail then just be sure to check the pulley runs true and the teeth are not rounded off or worn down. I posted my experiences about belts here:
SMCpot is right on the money about possible belt issues. What can sometimes (not common in my experiences but it has happened) happen is when the belt breaks it warps the pulley. Another possibility is that the pulley has just rounded off to a point that they skip (most likely). The main reason for rear belt skip is the slipper is too tight. I experienced this alot at SoCal because of the choppy square edged bumps would shock load the drivetrain. I managed to get a few minutes with Greg Hodapp to ask him how he did things and he told me to run the rear belt as tight as possible, carefully set the slipper and adjust it as needed. I posted this a while back around Christmas and just cut and pasted it here. Some of it may not be relevant to your issue but at least its all there if you want to look at it.
"So I am bored here on Xmas eve and the whole belt issue finds me with the time to discuss some of my observations about the belts. So anyways here we go......As for the whole belt debate, as a matter of experience, I save my XX-4 for mainly racing but still practiced about 5 packs a month and raced it 1-2 times a month at SoCal (RIP) with a very healthy Checkpoint 10x2 and have yet to change out a blue front belt in 6 months. This probably totals 60+ packs on a track that is notoriously hard on drivetrains and a good deal of motor with no issues. I have been told for years the blue belt is too weak, swap it out immediately or run it as the side belt because it takes less load then. I personally (this is my own feelings here so I welcome others experience to both the contrary and in support of the issue!) feel it has less to do with the belt as it has more to do with a few other factors.
#1, I personally think part of it is in the slipper setting. Getting the slipper set correctly takes alot of the harshness out of the drivetrain and I think gives the belts something to take up the shock loading which is what usually breaks the belts (any of the 3). Most if us that break belts have broken them clean, rather than shelling out the side of them and/or having them "unravel".
#2 is dirt in the pulleys. This leads to two problems, it keeps the teeth of the belt from biting into the pulley making it skip and again shock loading the belt. Dirt can also round off the tips of the pulley's teeth giving the belt less to bite into. This again can lead to skip and ultimately failure.
#3 has to do with the chassis itself. If the front of the car is allowed to come loose around the front top cover, bulkhead and chassis then it can allow for minor flexing in the front end. This can directly affect the length the belt must travel. This would not be a problem except for the blue and green belts have very little ability to stretch without failing. On big hits it can also compact the nose of the car slightly allow the belt to go slack and again skip. This was happening with my girlfriend's XX4 when she would land too nose down and get on the throttle. We would hear a click when she got on power at the point of impact. She took the car in and checked the front end and found the the 4-40s that go into both the top and the bottom of the inserts to be loose as well as the two front screws that go into the white bulkhead. She tightened them up and the click went away.
10) Often overlooked is the fact that the steering servo arm and bellcrank is keyed (badly I might add). If you don't line it up properly it will strip and ruin the steering bellcrank.
11) The XXX-CR rear end is becoming a popular mod. All you need is the arms and the hubs. You will probably have to grind a channel for the turnbuckle to clear the hub on full compression. If you want to convert the car to that setup but don't want to change the original worlds geometry, run the outer VLA on the arm and on the hub run the center row of holes, outer hole, no washers (you will need to dremel a channel for the hub in this case). The only issue with running this setup is it moves the sway bar holes in about an .125" and it makes what bar you run engage later and with less leverage.
12) Run a thin mini 4-40 (locktite as needed) on back of the front, inner camber link ball studs. It has a habit of coming loose and ruining the tower.
13) Pretap everything with the tapping tool provided or a 4-40 tap. The aforementioned front shock tower loves to split if you just thread the ball stud into it.
14) Carefully mount and set up your sway bars. The bar should be parallel to the rear arms for it to work properly. Additionally the bar itself should be the same length on both ends and the vertical links should be as well. Most hobby stores sell piano wire in .036, .047, .055 and .063. Those are the most common sizes. I have never needed anything but .047 or .055. Bending them up is easy, just make sure the bar lays flat. If its not reasonably so, chuck and bend another one up. Piano wire is cheap and comes in like 3' pieces so you will have plenty if you mess up.
15) If you want to run the JConcepts rims you need the B44 front Hexes.
As for setups:
If your running the car with XXX-CR rear arms and hubs here is Jesse Robber's setup. It is an excellent setup that alot of fast XX-4 guys are running.
Front Shocks: Green spring / 32.5wt / molded 57s / .090 internal limiting (I personally found this to be too much on a bumpy track so I run .030 limiting on a rougher track) #2 position (from inner) on tower, #1 position (from inner) on arm/ 21mm ride height (on a rougher track I got to about 23-24mm).
Front Links: #1 position (from inside) on the tower, grind carrier flat 1-2 gold washers under carrier ball stud, inner ackerman, standard lenghth link.
Rear Shocks: White spring / 22.5wt /molded 56s / .170 internal limiting (I personally found this to be too much on a bumpy track so I run .060 limiting on a rougher track)/ no external limiting/ #4 position (from inner) on tower, #2 position (from inner) on XXX-CR arm/ 22mm ride height (on a rougher track I go to about 24-25mm)
Rear links: 5.5 on tower (outer most hole, middle row)/forward row, middle hole on XXX-CR hub (I believe Jesse refers to this as 5-b) with 1 washer under balls stud (be sure and grind away a small amount of the corner of the hub to allow the link full range of motion or at full compression the link can hit the top of the hub)/ hubs back
Misc:
Front- LCD shafts /steel outdrives /clicker locked down, direct drive /-1* camber, 0* toe.
Rear- Long wheelbase arm config / Steel Dogbones / Inner VLA on XXX-CR arm / Hubs back / 2* anti-squat / steel outdrives / 1/2* camber / .055 rear bar mounted off of the 2.5 (upper outside) holes on shock tower from the front side.
Drill and install sway bar link ball stud 1.320 from inner hinge pin center point on XXX-CR arm (this moves the lower sway bar mount out, making it engage earlier).
According to Jesse you can run the stock mounting but you will need to run a .077 bar and it has a tendency to strip out of the tower and will still engage later.
Here is the link to a photo of Jesse's car so you can see the sway bar setup better.
Getting the sway bar right is pretty important by what we've learned by running this setup. It was not hard to do but with bar mounted as such makes the car very responsive and very stable.
If you're running the standard worlds rear end (or XXX-CR in the stock config) this is another Jesse Robbers setup. I prefer this one myself as I like the clicker on turn in and in the air. Seems better on rougher tracks but alittle less stable under braking, just as much steering and also very fast:
Front shocks: orange spring / 27.5wt / molded 57s / .090 limiting / #2 (from inside) on tower / #1 (from inside) on arm / 21mm ride height (23mm-24 on rough tracks)
Front links: #2 (from inside) on tower / grind carrier flat, add 2 gold washers under ball stud / inner Ackermann / standard length link
Rear Shocks: Pink springs / 35wt / molded 55s / .060 limiting / #2 (from inner) on tower / #1 (from inner) on original edition XX-4 WE or BK-2 arms/ 22mm ride height (24-25mm on rough track)
Rear links: #8 (lower outer) on tower/ #3 (from inside) on hub (also known as the "C" position)/ 2* anti squat/ hubs full back position
Misc: steel outdrives on both ends / LCD's in front / universals in rear / clicker loose to very loose (kit setting works good as a starting point) / 1.5* camber in front / 0* toe / 1/2* camber in rear / .055 bar mounted off of tower (filing out of the bar's groove will be needed) with the sway bar parallel to the sway bar (this is important for the sway bar to be effective) / battery in forward position.
At SoCal a few friends (FNCuda, straighaway, my girlfriend) ran this setup minus the limiters / silver front spring/ battery in the rear position / 32.5wt with molded 56s in the rear / .047 bar. It works nice at Pegasus and I imagine it will at OCRC as well.
This is my personal standard setup (modified 6-4-08):
Front shocks: silver spring / 27.5wt / molded 57s / 0 limiting / #2 (from inside) on tower / #1 (from inside) on arm / 21mm ride height (23mm-24 on rough tracks)
Front links: #2 (from inside) on tower / grind carrier flat, add 2 gold washers under ball stud/ inner Ackermann/standard length link
Rear Shocks: Pink spring/ 32.5wt/ drilled 5-6-6s / 0 limiting / #2 (from inner) on tower/ #1 (from inner) on XXX/BK-2 (not CR as I early stated, there is an odd difference in the way the arms sit that I need to sort out the downtravel before using the CR arms)arms (rear arms in long wheelbase config)/ 22mm ride height (24-25mm on rough track)
*a note about limiting. I start at 0 limiting at both ends and go from there. On high bite or smooth tracks I will usually run limiting at .060 in front and .030 in the rear and leave things at that.
Rear links: #8 (lower outer) on tower / E hole (center row, outer hole) in rear hub, 0 shims (will have to dremel channel for turnbuckle) on XXX-CR rear hub (you will have to mill the material that ties the arm together at outer part near the outer hinge pin to clear the XXX-CR hub)/ Trinity XX-CR 0* pivot blocks, 2* shims under front of block/ hubs full back position/ standard length VLA on arm
Misc: steel outdrives on rear, plastic front with Trinity Ti outdrive savers / Front diff tighter than rear / LCD's in front / CVDs in rear / clicker loose to very loose (kit setting works good as a starting point)/ 1.5* camber in front/ 0* toe/ 1/2* camber in rear/ .047 bar mounted off of #4 camber link hole using Trinity XXX rear sway bar kit (this makes the bar go between the belt tunnel and the tower so a minor amount of filing will be need to make the bar pass thru)/ mounted lower link on inner BK-2 sway bar hole/ Sway bar parallel to the rear arms (this is important for the sway bar to be effective)/ battery position optional (I change this first if I have too little or not enough steering)/ 17/86 gearing on Checkpoint 10x2
I said I was gonna do this a while back so hopefully this will kind of compile most of what I know and have learned. I am sure others know other things as well but I think this should get you started. I think I said this a couple of posts back but XX-4s can be one of the most rewarding cars to drive but if not properly setup and maintained they can be the most aggravating to live with so be sure everything is right every time you drive. Feel free to bug me if something does not make sense.
Source:


|