By Kraig OBrien
As most of you already know, the racing community was taken by surprise when 2015 IFMAR Off-Road World’s was actually going to be held on a surface other than dirt. I am not here to open up old wounds, for some individuals, but rather to discuss the Kyosho Lazer RZ6 which ended up TQ’ing the 2wd portion of the event with Jared Tebo behind the wheel. Jared would go on to finish second overall.
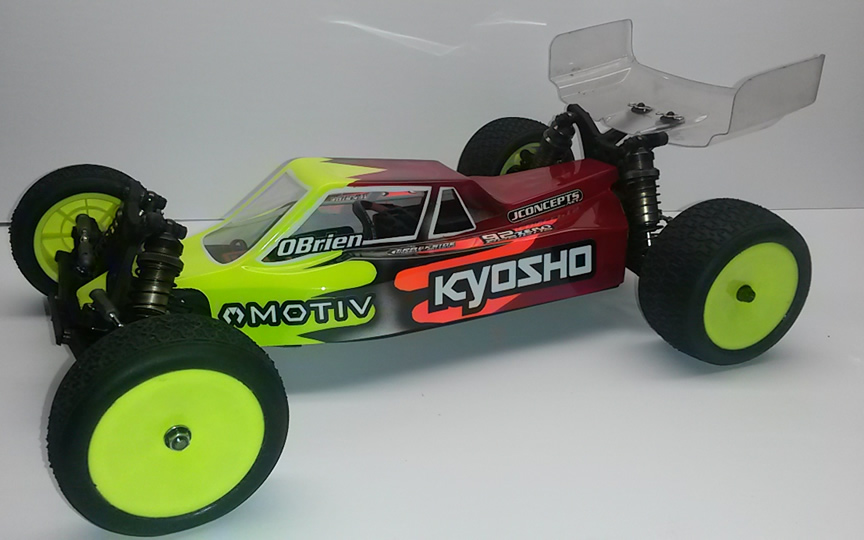
A combination of the ZX6 and the RB6 make up the RZ6
The Kyosho RZ6 is not a complete kit but rather a conversion for the 2013 IFMAR winning car the RB6. In this day and age, it seems like a company cannot win if they offer a conversion kit because people will want the whole car and then if they offer the whole car people will want a conversion kit. If they offered both, that just increases the costs because of the extra packaging, manuals, and stocking of parts which would be passed along to us to pay for. Ok, enough of the opinion and let’s get to some facts.
To help you visualize what it looks like, take the Kyosho Lazer ZX6 4wd rear and mate it to the front of the RB6 and you pretty much have the RZ6. Now, Kyosho wasn’t the first to come up with this combination but they are the first to offer it for commercial sale in the United States, at least as far as I know. So if you haven’t figured it out by now, you will need a donor car a.k.a. Ultima RB6 for the remaining parts.
RZ6 Overview
Hopefully you are able to visualize what I explained above because now I am going to move on to the unique items of the conversion kit. While the ZX6 kit comes with ball differentials the RZ6 includes a gear differential. It is my understanding that when racing on carpet or high traction surface the gear differential is preferred. Since I am going to try this out on the dirt, I will eventually install a ball differential in it in the future but I want to try it out as it comes for now.
In addition, you also get a new chassis that has a longer wheelbase than the RB6 which should make the car more stable over the rough stuff. Because of the long chassis and the shape of it, a new body and side guards were necessary. Everything else in the conversion kit is pretty much standard items from the Lazer ZX6.
Let’s get started with the conversion.
One quick comment. When you a see a part in the manual with an “X” pointing at it, that is not included in the conversion kit.

The parts marked with an “X” are not included in the conversion kit.
I am going to build the rear of the car first because it will be easier to handle the chassis, for me, since the front of the car won’t be on it. If you haven’t built a ZX6 before you are about to get your first taste of building a 4-wheel drive car but it will only be the rear of the car. Don’t worry, it isn’t all that difficult and besides I am here to help you with some pain points that you might encounter in the manual.

The conversion kit. Note: Body not shown but it is included.
Step 4
The rear suspension arm mounts are pretty straight forward. The inserts in the suspension mounts are not quite like the ones found in the RB6 but are pretty close. You will want to refer to the chart in order how to set the rear toe. I myself am going to set it to 3 degrees of rear toe to start. When you look at the chart there are many combinations to accomplish this setting but since I will be on dirt I am going to go with a narrow pivot and use “F” in the in position in the front and “B” in the out position in the rear. If you have plenty of rear grip you can probably go to less rear toe in.
Here is where you are going to need to start robbing parts off of your RB6. In this case, for me, it starts with taking the rear suspension arms off of the RB6 along with the hubs. You will need at least the arms and inner suspension shafts to finish installing the suspension mounts.
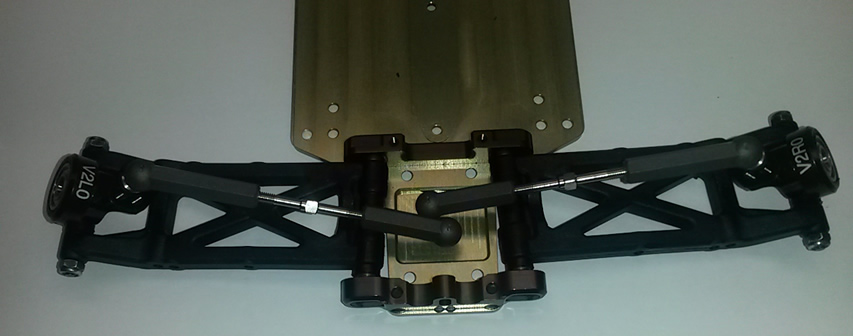
Rear Suspension Arms, Turnbuckles and hubs robbed from the RB6.
Step 6
This conversion kit comes with a gear diff. If you are like me I don’t have a gear diff in my vehicles and therefore I don’t have gear diff fluid. From talking to a few people and what I have read on-line, if you are going to run on AstroTurf or some other high bite type of surface you might want to consider 5000 CST, SIL5000. I filled my gear diff up until the oil was just below the top of the gears inside the case. They say this is 80%. When you tighten the lid down using the 2.6x10mm screws, don’t crank down on them to tight but make sure they are tight. You risk the chance of stripping the holes out and/or crushing the UM611 seal if you go too far. If you don’t go far enough it will leak out on your bench (speaking from experience) or worse yet, all over inside the gear case.
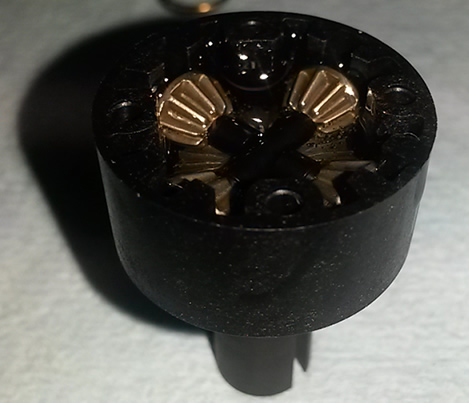
Gear Differential, approximately 80% full.
When you place the gear diff assembly into the rear bulkhead you will need to pay special attention which side the gear goes on. If you are building up your car with the motor on the left side of the car, also known as the driver’s side if you are sitting in an American car, the gear will be on the left side. When you install the ball differential, the gear goes on the same side. There is a supplemental sheet that shows how it is installed.
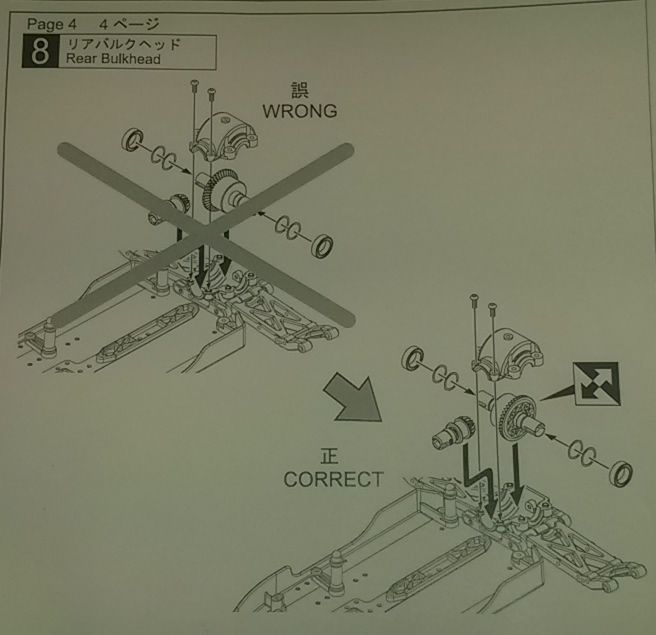
Supplement sheet for installing the Gear Differential.
With the gear diff installed, provided you followed the steps in the manual, you will want to make sure that the gears, ring and pinion, are not smashed together. Thinking of it like setting the gear mesh between the pinion and spur gears. You don’t want it to loose or too tight. You will use the shims, 96647, in order to set this. Like I said, you want just enough play in there so that it doesn’t damage the gears (to far apart) or too close to each other (reduce drive-train efficiency) that it binds.
Steps 17 – 19
I believe completing the rear of the car from here on out to be pretty straight forward. That is until you get to the rear anti-sway bars. This could be almost an entire article itself if you have never used these types of bars before maybe this will help you set it up. What I am going to explain is what I use and some may disagree or some may agree. Either way, use what works best for you because that is the most important thing.
When I install the anti-sway bars on my car I perform a little test. With the shocks removed I push up on the suspension arm and see how much it moves before the other arm starts to move. I usually eyeball it but I can measure the amount of movement if I want to. I then go to the other arm and do the same thing. My goal here is to make sure I have the same range of movement on both sides. In a perfect world, as soon as I lift or raise an arm the other one moves at the same time. In order to get these as close a possible I will adjust the length of the link between the arm and the bar itself and retest. It does take some time and sometimes it will test your patience but do your best to get it as close as possible.
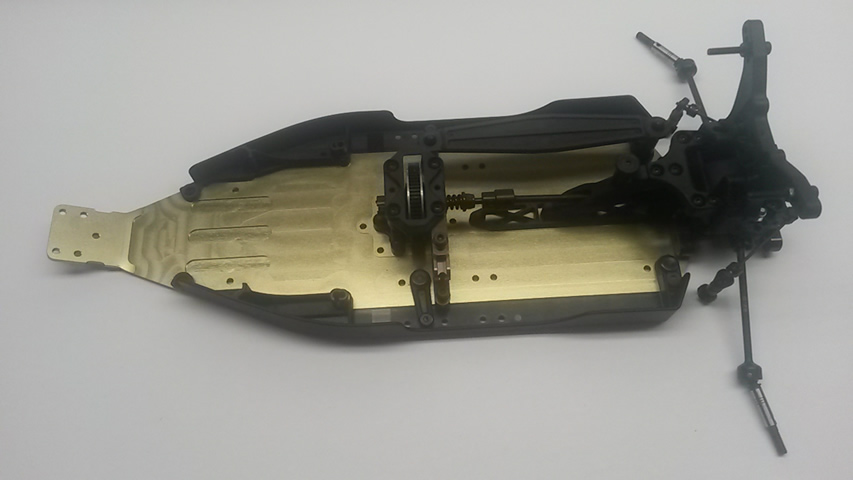
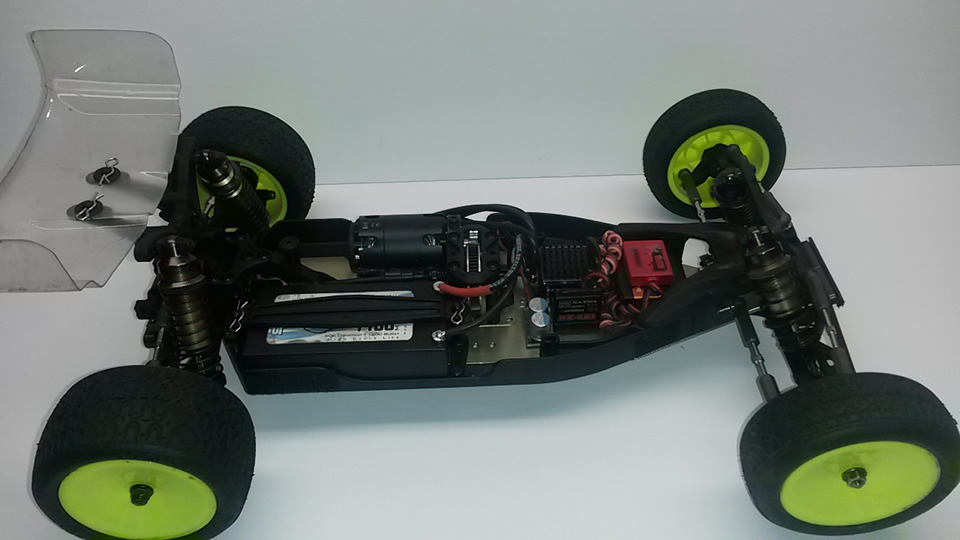
Completed assembly of the conversion kit.
I have decided to sacrifice my own RB6 for the RZ6. The only thing that I am worried about is that I am piecing together a car with used parts on the front and new on the rear. Normally I wouldn’t do this but in this case what the heck. I recently rebuilt my RB6 so most parts are not that old.
So I need to take off everything that is in front of the servo mounts. This is pretty straight forward starting with the two screws in the front bumper. Once that is removed there are two more screws in the kick up block. Before you remove those two screws I strongly encourage you to remove the screws to the side guards and then remove the screws for the servo mount before you remove the screws in the kick up block. I am going to assume you already disconnected your servo from the receiver so that the entire assembly isn’t hanging by the servo wire still plugged into the receiver. Now with all of the screws removed you should have your front end removed from the chassis.
RB6 Front End
As I stated before, this is a conversion for the RB6 to make it suitable for high bite or astro turf like conditions. Unfortunately for me, the carpet off-road track is closed for the summer and there is a new one opening up a couple hours away but they are not open yet. So I am going to take this thing to the dirt off-road track that I call home, Trackside Raceway. You probably have heard of this place once or twice. It hosts the Horizon Hobby Off-Road Championships, formerly known as the Spektrum race in November and the Buggy Off-Road Championships in April.
First Drive Observations
Well I got to the track and as I was unpacking my stuff I noticed I had forgotten my tires and my camera. The hobby shop doesn’t sell camera’s but thank goodness they do sell tires. So I don’t have any action shots to share with you but I can tell you how the car drove for the most part.
You see, tires are 90% of the setup and if your tires and inserts are not broken in you will not be as fast as the fast guys are. At least that is what I keep telling myself. :-) So I mounted up some tires and bolted them to the car to break them in on the track. I could tell right away that the gear diff would not work for my track. I did put in 5k of fluid thinking that would help but it just wasn’t meant to be with new tires and inserts. Lucky for me I had a ball differential available and in that went.
After setting the differential so it would not slip and adjusting the slipper it was off to put some laps in. Even though the tires were new my hot lap was 1 second off of the hot lap for those guys that signed up in my class. I started with a 17.5 because well I am more comfortable with a 17.5 motor at this time than a 7.5. I wanted to bring up the 1 second because before, on this layout, I ran a TLR 22 3.0 and I was at least .2-.3 behind in hot lap with that. So given the condition of the equipment I felt pretty good with the car.
Time to get more specific
One lap wonders are only for bragging rights back at the bench. Let’s get back to how I felt the car reacted. After everything was adjusted it was time to pull the trigger. What I noticed was my car did not squat in the rear when I pulled the throttle. Now this could be caused by a number of things but there are plenty of options available to help it squat if I need it to. I say that because I felt the car only needed a little bit more grip so I could change anti-squat, rear springs, or move the rear springs to the back side of the arms.
The other thing that I noticed was the amount of rear to front weight transfer. What this does is it helps bring the nose down when it is in the air. I could detect a subtle hint of it but then again I am using a 17.5 motor so this is to be expected. I would venture to guess that if I changed my driving style coming up to the face of the jump I could get it to react the way I want it to but I am an old dog and it is hard to teach this old dog new tricks. :-) I will say that I did drive a friends car with a 7.5 in it and I noticed an improvement in this weight transfer so it can be gained.
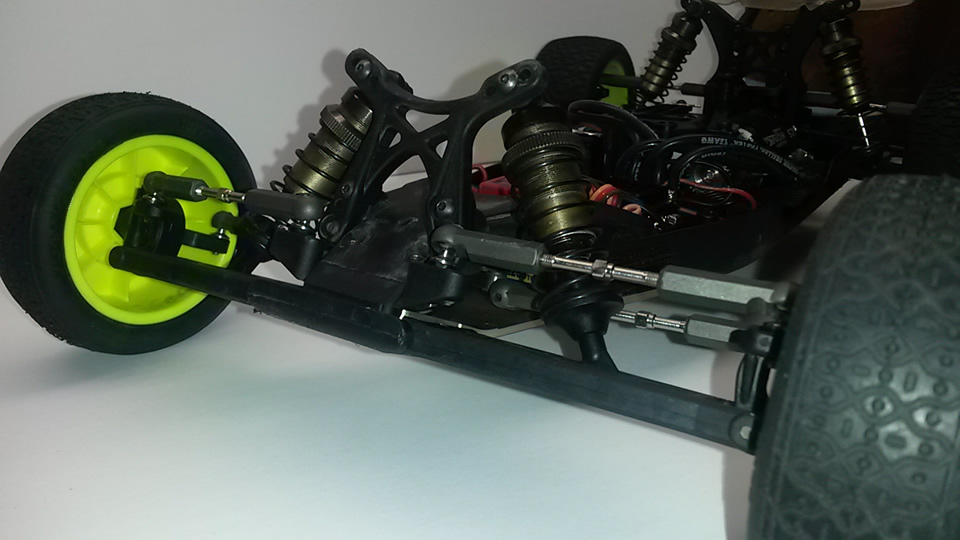
Streeeeeeetched is what I can say about this wheel base compared to other cars. (In the image, the RB6 is maxed out on the wheelbase. The RZ6 still has 2 milli-meters available. Both cars have the same rear toe, my camera angle was off.)Now this car was not made for the dirt but it seems to soak the bumps up quite well. We have a mine field section on the track and if you try and go over the top of them, if you are going to fast, it will upset the car but not this car. Well let me rephrase that. It takes more to upset this car than others. This car definitely is more stable than others that I have driven but one has to wonder if that comes at an expense. Is it an expense on dirt, maybe but not for astro turf type of tracks which the car was designed for. So for me trying it on the dirt, the stability the car provides is a confident booster. So confident that I will be installing my 7.5 turn for the next visit to the track.
RZ6 on the left. RB6 on the right.
Complaints
My complaints don’t deal with anything about the functionality of the car. Rather, they deal with little annoyances that once you sit back in your chair and take a deep breath there are worse things.
First, I could only mount the motor in the position showed in the pictures. I could not get the body to sit on the chassis without being distorted by the motor tabs. I could probably work on it and get it to work out but I really wanted to hit the track so my patience got the best of me.
Speaking of the body, it is thin lexan which is not what I have come to expect from other Kyosho bodies that are not labeled as light weight. Now this could be a blessing in disguise because this body provided more flex than the other one which lends me to believe it will last longer. Plus, a light weight body is probably better for racing. So maybe this isn’t really a complaint but rather an observation.
Third and forth on the list is the packaging of screws and the manual. Having built quite a few Kyosho cars lately I have come to realize that it would be best to dump the screws into a container as I open up their package. The bag may contain screws which are not used in that particular step of the manual but rather in the next couple of steps. I guess you could say that it is what it is and one that I have come to expect so it doesn’t bother me as much as it used to. So get a dish for you to dump the screws in.
Wrap Up
This car is a combination of two cars, the RB6 + ZX6 = RZ6. The combination of the two kits makes for one kit that, from what I can tell, meets the needs of the market it is intended to meet. I am using it for the dirt, which it isn’t designed for but maybe it can work.
You have every adjustment available on the RZ6 as you do on the front of the RB6 and the rear of the ZX6. This makes it a very adjustable car and one that I plan on making it work on the medium to high traction dirt tracks I race on. It will be an adventure and one that I believe is going to be worth it in the long run as being able to make something work that it wasn’t initially designed for.
One last thought. Based on what I have been reading on the web the car is very capable in its native environment. Afterall, Jared used this model to TQ the IFMAR World’s with it.
