|
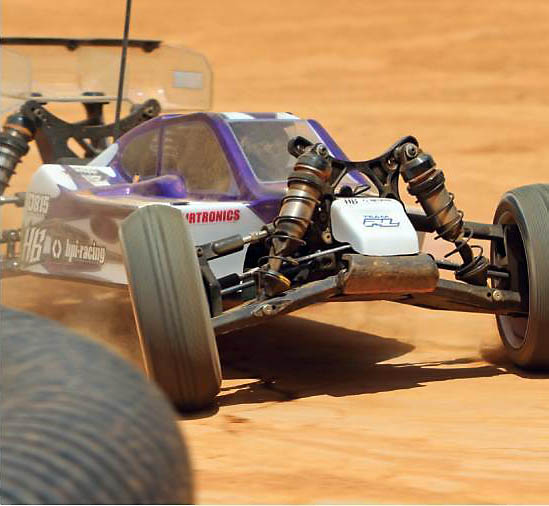
- HB D815 Tessmann Worlds Edition - Review -
WORDS & PHOTOS BY KEVIN HETMANSKI
1/8 4WD NITRO BUGGY | KIT
IFMAR Champ, ROAR Champ, your champ

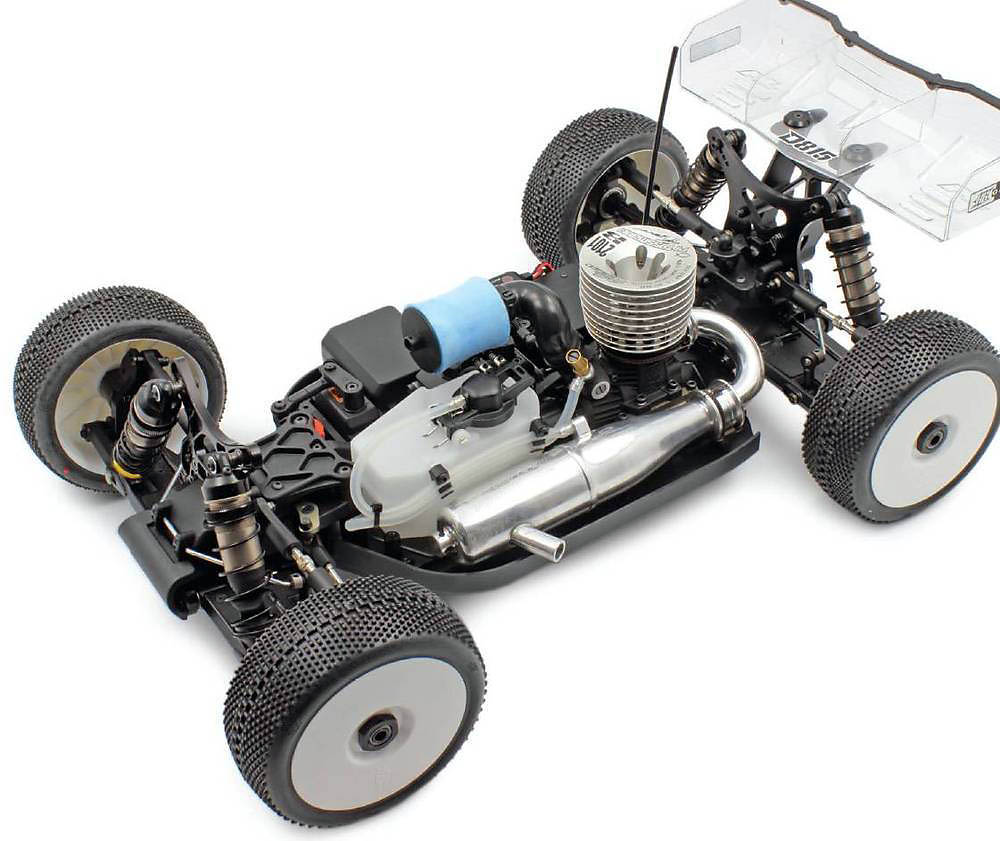
“Win on Sunday, sell on Monday” is as true as ever, but it’s a bummer when the car you buy on Monday isn’t quite what crossed the finish line the day before. If you’re in the market for a 1/8 scale nitro buggy with a legit championship-winning pedigree that really does match the actual pro-driver’s specs, then HB’s latest ride should top your list. Since winning the 2014 IFMAR 1/8 scale off-road worlds with the HB D812, Ty Tessmann’s setup and modifications have become the standard for the new signature-model Tessmann Worlds Edition HB D815. It didn’t take long for the new car to get results, as Ty went on to win the 2015 ROAR Fuel nationals with HB’s one-box racer. The Tessmann D815 includes all the parts Ty counts on to outlast grueling one-hour Mains, and the setup preferences that have earned him RC’s most prestigious titles. I’m very excited to see what the HB D815 Tessmann Worlds Edition has to offera “regular racer” like myself.
MACHINED 3MM 7075 ALUMINUM CHASSIS
The backbone of the D815 is a 3mm black-anodized aluminum chassis plate. Reliefs machined in its top reduce the car’s overall weight and to help lower the differentials and engine a few extra millimeters. To extend chassis life, a removable steel plate is set into the rear of the D815 to reduce wear from scraping. The extra weight of the steel plate also helps lower the buggy’s center of gravity. Molded plastic chassis braces add in-line stiffness but still allow necessary torsional flex. The D815 includes a new one-piece radio tray that puts the weight of the servos and receiver pack up front for improved handling. The receiver pack section has been made larger to allow for a wider variety of batteries to fit and a tray down the middle protects the wires more than most trays. The only problem I have with the radio tray is that you have to remove four screws and the entire cover to get the receiver battery out for charging. Ty runs an external plug for his receiver pack rather than accessing via the lid. He also skips the on-off switch; plugging the pack in turns on the receiver and servos.
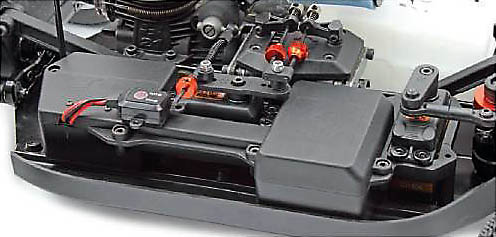
The radio tray is a single piece unit and the wires from the electronics are more protected than what you find in most buggies. Four screws are required to remove the top cover for battery access.
|
|
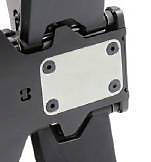
The bottom rear of any 1/8-scale chassis takes a beating and often wears out quickly and you end up having to replace the entire chassis. HB solved that problem by including a steel insert for their chassis.
|
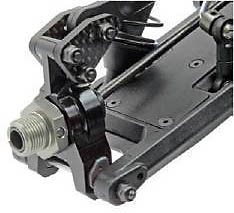
HIGH-STRENGTH, LOW PARTS-COUNT DRIVETRAIN
Starting things off on the drivetrain is a three-shoe aluminum clutch and that is coupled with a steel clutch bell. That clutch bell spins a lightweight spur gear and a sealed gear differential with lightweight outdrives. Steel dogbones are used to get power from the center differential to the front and rear sealed differentials. Dogbones sound like a downgrade, but since the center shafts don’t have to accommodate suspension movement, the plusses of a lower parts count and reduced weight outweigh the negligible loss in efficiency. The diffs use hardened, machined aluminum ring gears for greater precision and longer wear than softer cast-allow parts. Another area where HB saves weight and reduces parts is in the front and rear pinion gears. The gear and drive cup are one piece, unlike other buggies that use a pinion and separate drive cup secured by a setscrew or pin. A rubber boot protects the joint and can be filled with grease to reduce wear. CV-style universal connect the diffs to the wheels are also equipped with rubber boots to keep grease in and dirt out. |
|
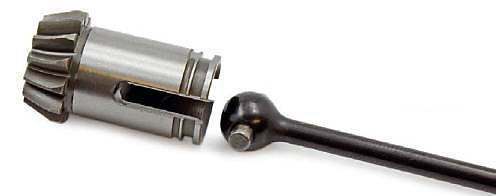
On a standard 1/8-scale buggy you will find a universal center driveshaft and a separate pinion which ends up being up to 6 parts to connect everything together. With the HB D815 you only have two parts.
|
ENGINE ACCESSORIES
A two-piece aluminum engine mount secures the engine to the chassis and allows the engine to be removed and reinstalled without having to reset the gear mesh between the clutch bell and spur gear. Incoming air is filtered by a dual-stage air filter and its mount puts it close to the body’s fuel tank opening so it’s exposed to plenty of cool air. I’m surprised to see that the end of the filter isn’t secured to the chassis to keep it from moving around, but that’s how Ty runs it, and he’s the guy with the World and National Champion titles. Fuel is fed to the engine through a 125cc tank that features a clunk style pick up, splash guard, o-ring seal and fuel line clips.
Fuel is held inside a 125cc clunk style fuel tank and just above that is the buggy’s dual air filter assembly.
The tube puts the filter right at the fuel tank opening in the body so it has plenty of air to grab.
“MONOCOQUE” SUSPENSION ARMS
The suspension arms on the D815 are pretty unique; they feature a smooth bottom with ribbing on the top side and a plastic cover to stiffen the arm and keep dirt out. The outer hinge pins are held in place with nuts and set screws under the front hub carriers ensure that they stay in place even if the nuts happen to come off. Aluminum mounts capture the inner hinge pins and molded inserts all around allow for a wide variety of tuning options. Large 16mm bore threaded shocks smooth the ride and they are mounted to machined black anodized aluminum shock towers. Inside those shocks you’ll find bellows-type bladders and shock pistons that are held in place with small lock nuts. The aluminum caps feature screws that allow you to regulate how much air is behind the bladder and fine tune the rebound of the shocks. The front and rear hubs are machined aluminum pieces which adds durability and carbon fiber steering arms and rear camber mounts reduce some of the weight that the aluminum adds. Large diameter bearings in the rear hubs further increases the durability of the buggy’s drivetrain.
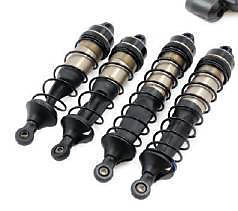
Left: Large 16mm bore shocks dampen the ride. Screws in the aluminum caps allow you to adjust the shock’s rebound
|
|
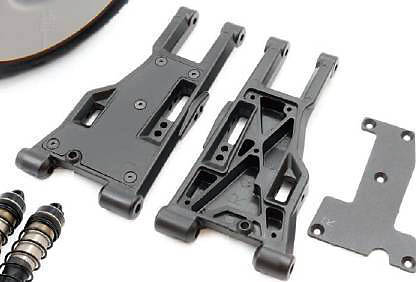
Above: Plastic caps on the suspension arms help keep dirt out and stiffen the suspension arms.
|
|
Right: The front and rear hubs are made out of machined aluminum and the rear hub is outfitted with a large 12x21mm bearing for increased durability.
|
Just following the manual will result in a well-built D815, but a little extra attention to detail will result in a truly pro-caliber buggy. Here are tips from Gord Tessmann (Ty’s dad and mechanic), and a few items I discovered as I built my review car.
STEPS A-01 AND A-02
For smoothest possible shock action, Gord polishes the shock shafts with #6 polishing compound. Make sure you remove the polishing compound before assembly. Make sure the distance between the bottom of the shock and the shock end is 35mm on the front shocks and 44mm for the rear. Some threads will be exposed but according to Gord the shafts will still have plenty of grip on the shock ends.
STEP E-02
The brake pads need to be slightly modified before installing them on the center differential. When you look at the steel portion of the brake pad you will see that one hole has an oval shape but the actual pad itself has two holes. This can cause the brake pads to bind slightly. Run a drill bit through the hole to match the oval shape of the steel plate in the pad.
STEP B-01 AND B-02
The front, center and rear differentials are built in the beginning part of the manual. After you build the front and rear diff, make sure you mark the housings so you know what one goes where in the later steps.
STEP C-01
I found that the lengths given for the distance between the flats on the rod ends for the front camber, steering and rear camber links are off slightly. I used 20mm for the front camber links, 33mm for the steering links and 27mm for the rear camber links as starting points.
STEP F-01 AND H-01
For maximum arm stiffness and best handling, Gord suggests gluing the suspension arm covers onto the arms. Make sure you don’t over tighten them and bind the sway bar. I like to bottom the set screw out, lift the sway bar and loosen the set screw until the sway bar falls under its own weight. Do this for the right side screw then repeat for the left side screw.
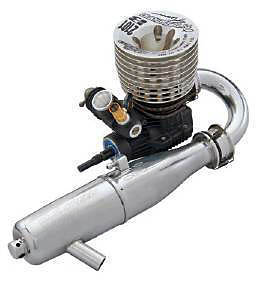
TEST GEAR O.S. Speed B2101 Ty Tessmann Edition
If you’re going to build a Tessmann signature car, it only makes sense to complete it with a Tessmann signature engine. O.S. Engine’s Speed B2101 Ty Tessmann Edition engine has been built to Ty’s specifications and features a low center of gravity heat sink head, DLC (Diamond-Like Carbon) coated crankshaft with tungsten balancing weights and a 21J carb. According to O.S., the Ty Tessmann engine has an RPM range of 4,000-42,000 and a horsepower output of 2.61. An added bonus is that the engine comes with the same pipe and header that Ty used in his buggy. The exhaust exits through a T-2090SC tuned pipe and M2002S header. If you want one of these engines for your buggy, you might want to get moving—it’s limited-edition deal so they won’t be out for long. |
|
|
BEHIND THE WHEEL
I tested the D815 at Henry County Remote Control Racing in McDonough, GA, a track built specifically for 1/8-scale off-road racing. The track was a little rough after a day of competition and had a light coat of loose dirt on top of the surface. The HB tires that I brought for testing didn’t have as much grip as I would have liked for the conditions, and that made the D815 a handful when powering down the straights and out of corners. Though not ideal for best lap times, the reduced traction highlighted the buggy’s excellent responsiveness, as I was able to quickly and easily get the car back on the racing line whenever it stepped out. I brought the buggy in and changed the tires over to a set of JConcepts Chasers, which were a better match for the surface. With improved traction, I was able to hammer on the D815 and see what it could really do. The Tessmann-edition O.S. engine and pipe lay down an outrageous amount of power, which the HB machine poured directly into the track. The car responded precisely to steering inputs as the Savox servo muscled the bellcranks to help me put the D815 exactly where I wanted it. Corner speed was excellent, with a slight push when entering high-speed turns. Before tuning the buggy to reduce the push, I simply adjusted my driving style. Tapping the brakes to transfer weight to the front tires helped the front end dig in and gave me a little more speed at the beginning of turns. In addition to delivering fine partial-braking control, the D815’s discs grabbed well when full application was needed and did not pulse or fade during back-to-back runs. It was a pleasure to get air time with the D815. It flew with a level attitude and responded well to brake and steering inputs. With the D815’s prowess on a large track confirmed, I decided to see how it would do on a smaller and much tighter track. Speedzone Hobbies in Peachtree City, GA is designed and built for 1/10-scale racing, and if you can get around this track with a 1/8-scale buggy you can wheel it pretty much anywhere. A lighter touch was required to thread the D815 through the layout, but the D815 proved highly agile and I had no difficulty keeping the big buggy in the racing line. As much as I enjoyed unwinding full throttle on Henry County’s 1/8 scale layout, I had even more fun wheeling the D815 around the 1/10-scale track. The tighter course was a pleasing challenge and the D815 was more than up for it. |
|
|
FINAL WORD
After completing the D815 build and getting on the track, it was hard to get me off it. The D815 drives just like a World Champ car should. It took minimal effort to get it around the tight test track that I was on and it gave me the confidence that I needed to be able to wheel it hard like it should be. This is a great example of a “win on Sunday and sell on Monday” car, except in this case you actually get the car that won on Sunday. Ty Tessmann, his dad Gord and the gang at HB have done a great job with the design and setup of this car and I look forward to taking it to the track every chance that I get.
+ Worlds-ready performance
+ Lightweight drivetrain
+ Steel rear skid plate extends chassis life
- No easy access for receiver battery
|
|
VEHICLE SPECS
Item no.: 114615
Scale: 1/8
Price: $630
Weight, as tested: 7lbs, 9oz. (3430g)
CHASSIS
Material: 3mm anodized aluminum
Type: plate chassis with plastic molded stiffeners
SUSPENSION
Type: Inboard link positions (F/R): 4/4
Outboard link positions (F/R): 3/3
Shock positions, towers (F/R): 5/5
Shock positions, arms (F/R): 2/2
SHOCKS
Bodies: Threaded aluminum, 16mm bore
Shafts: Steel
Volume compensation: Bladder
DRIVETRAIN
Type: 4WD shaft drive
Differential: Sealed bevel gear
Driveshafts: Steel CV-style
Bearings: Rubber sealed and metal shielded ball
ENGINE & ACCESSORIES
Engine, pipe and manifold: Not included
Fuel Tank: 125cc
Clutch: 3-shoe
TEST GEAR (NOT INCLUDED)
Transmitter: Airtronics M12S
Receiver: Airtronics RX-472 Super Response SSL
Receiver battery: ProTek RC Li-Poly Hump Receiver Battery Pack
Engine: O.S. Engines B2101 Ty Tessmann Edition
Pipe: O.S. Speed T-2090SC
Steering servo: Savox SB-2273SG
Throttle servo: Savox SB-2273SG
Switch: ProTek RC Electronic switch with voltage cutoff
Starter box: Duratrax Kwik-Pit universal starter box
Fuel: O’Donnell 30% Speed Blend
Tires: HB Megabite
SOURCES
Airtronics airtronics.net
Duratrax duratrax.com
HB hpiracing.com
O.S. Engines osengines.com
O’Donnell odonnellracing.com
ProTek protekrc.com
Savox savoxusa.com
Zegers RC Graffixx facebook.com/zegers-rc-graffixx
|
|

