|
- Hot Bodies D4'13 - Torrance Deguzman - Tips -
Build Tip #1
Ty uses Kyosho x-rings which adds smoothness. During testing after the Cactus the AE guys gave us some of their new x-rings to try. They claim theirs work as well without the Kyo price. Haven't tried them yet though.
I do the poor-man method... I use the stock o-rings but replace the spacer between them with a 1.5mm ballstud washer instead (the standard spacer is 2mm). Smoothens the shock action without leaks.
Build Tip #2
The shock can be built bladder style or emulsion style. I think the manuals shows it being built with a bladder. If you choose to build it emulsion style you'll have to trim the bladder and drill the hole through the cap for the bleeder screw. (see picture)
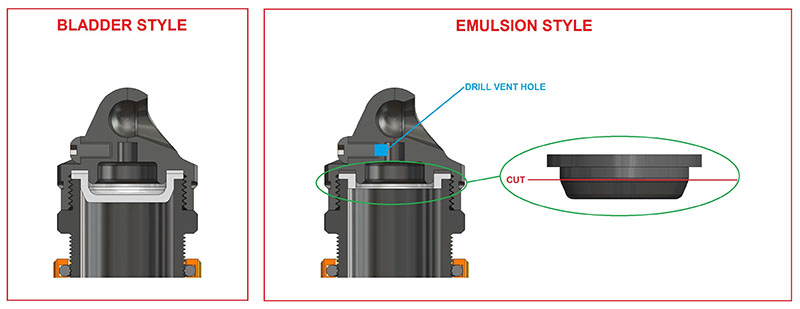
There's also a small dimple on the shock cap that you can ream out. If you build it bladder style this helps the excess oil escape when screwing on the cap. 1/8 guys should be familiar with this feature.
Build Tip #3
I made the spring collar o-rings a little on the tight side in case if some drivers like them tight. If you want to loosen the collar action you can cut off a portion of the o-ring before stuffing it into the collar. For me I use a 3/4 ring (cut off 1/4).
Build Tip #4
During the initial build you pop the shock onto the tower ball stud. However in order to prevent the fit from getting sloppy over time, do not pop it off the ball when removing the shock. Instead used the supplied stamped wrench and undo the nut instead.

Build Tip #5
You can adjust your droop by threading the shock eyelet in and out. The shafts and eyelets were designed for this so you don't run out of thread. The shock shafts already have markings on them.
Build Tip #6
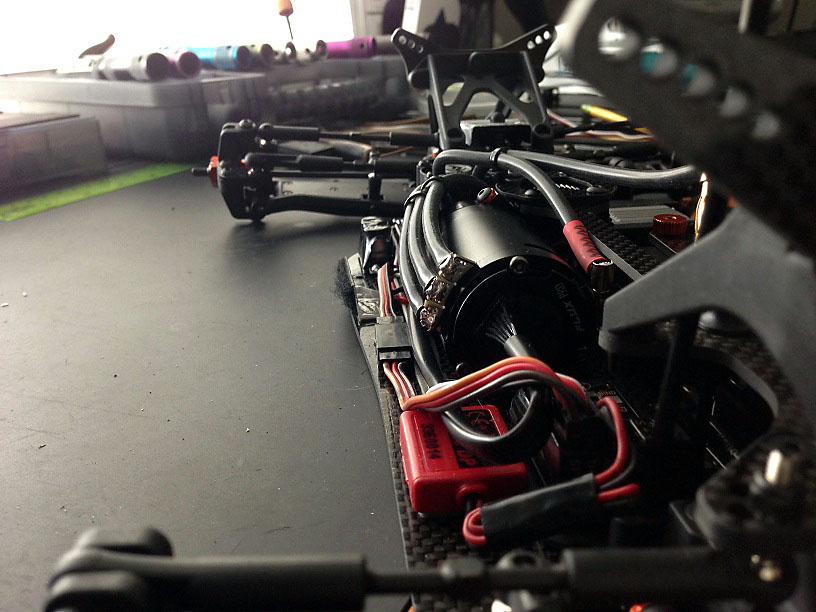
When installing the motor, clock the solder tabs off to the side. If you have it vertically straight up and down the tabs and wires will interfere with the body.
Build Tip #7
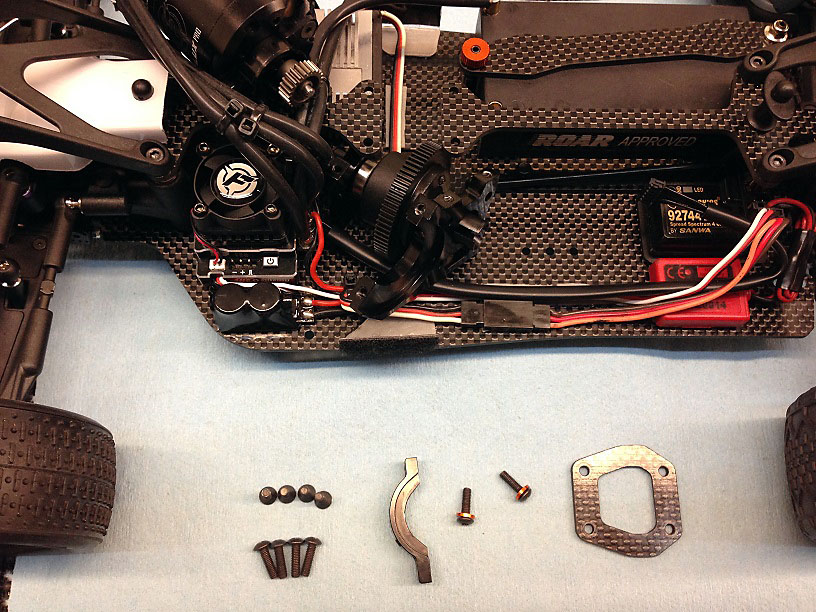
This is more of a maintenance tip but it is useful to know when you are installing your electronics.
The center diff is a very useful tuning item for this car. To access it, remove the motor clamp, the 4 screws on the top plate, and the 4 screws at the bottom which holds the bulkheads.
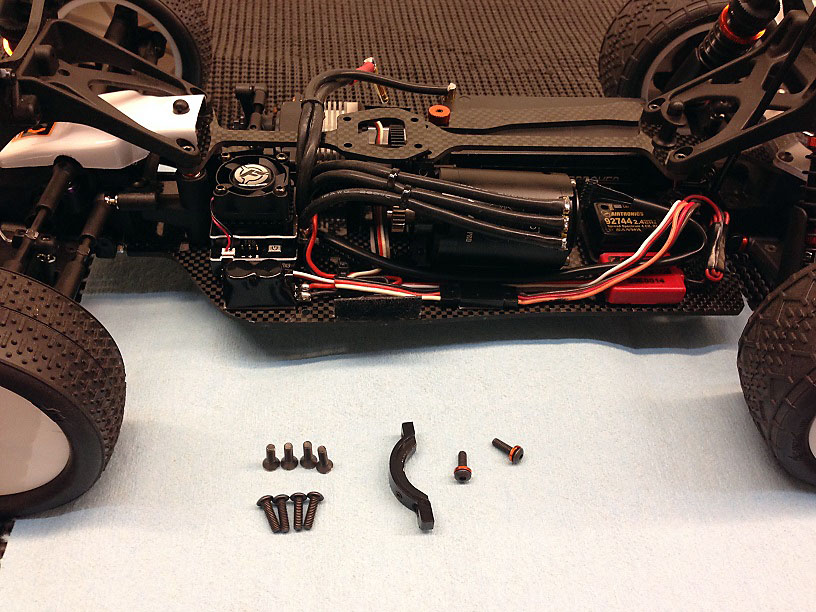
Once those are off you can swing the motor out of the way then you can slide the diff/bulkhead assembly off to the side. When you mount your ESC and receiver make sure you leave room to do this.
Build Tip #8
Use scrap lexan to make 'L' shaped brackets to mount velcro for the body. There should be plenty of usable excess from trimming the wing. When you mount the brackets make sure you have enough room for the battery to be installed in the full forward position, just in case if you want to try that setup.
Build Tip #9
If you look at the battery straps for the saddle pack (the two shorter ones included in the kit) there are two holes on the straps that seem to have no purpose. The spacing between those holes is exactly the same as the servo mounting holes. You can use the strap as a servo centering jig so that it is easier to center the servo between the mounts before you mount the servo assembly onto the chassis. Hopefully that makes sense.
Building a D413 Diff
Source:
T. Deguzman


|
