We’ve seen it performing incredibly well in the (God)-gifted hands of HotBodies’ lead team driver Ty Tessmann, and finally we managed to get our grubby hands on it! We’ve seen Ty and his father Gord hanging around the electric tracks and biggest U.S. Races for a while when they were testing prototypes and other brands cars, in order to put together experience and feedback so that they could help Torrance Deguzman, HB’s offroad designer, to design and produce one of the most innovative 4wd buggies in the 10th scale market.
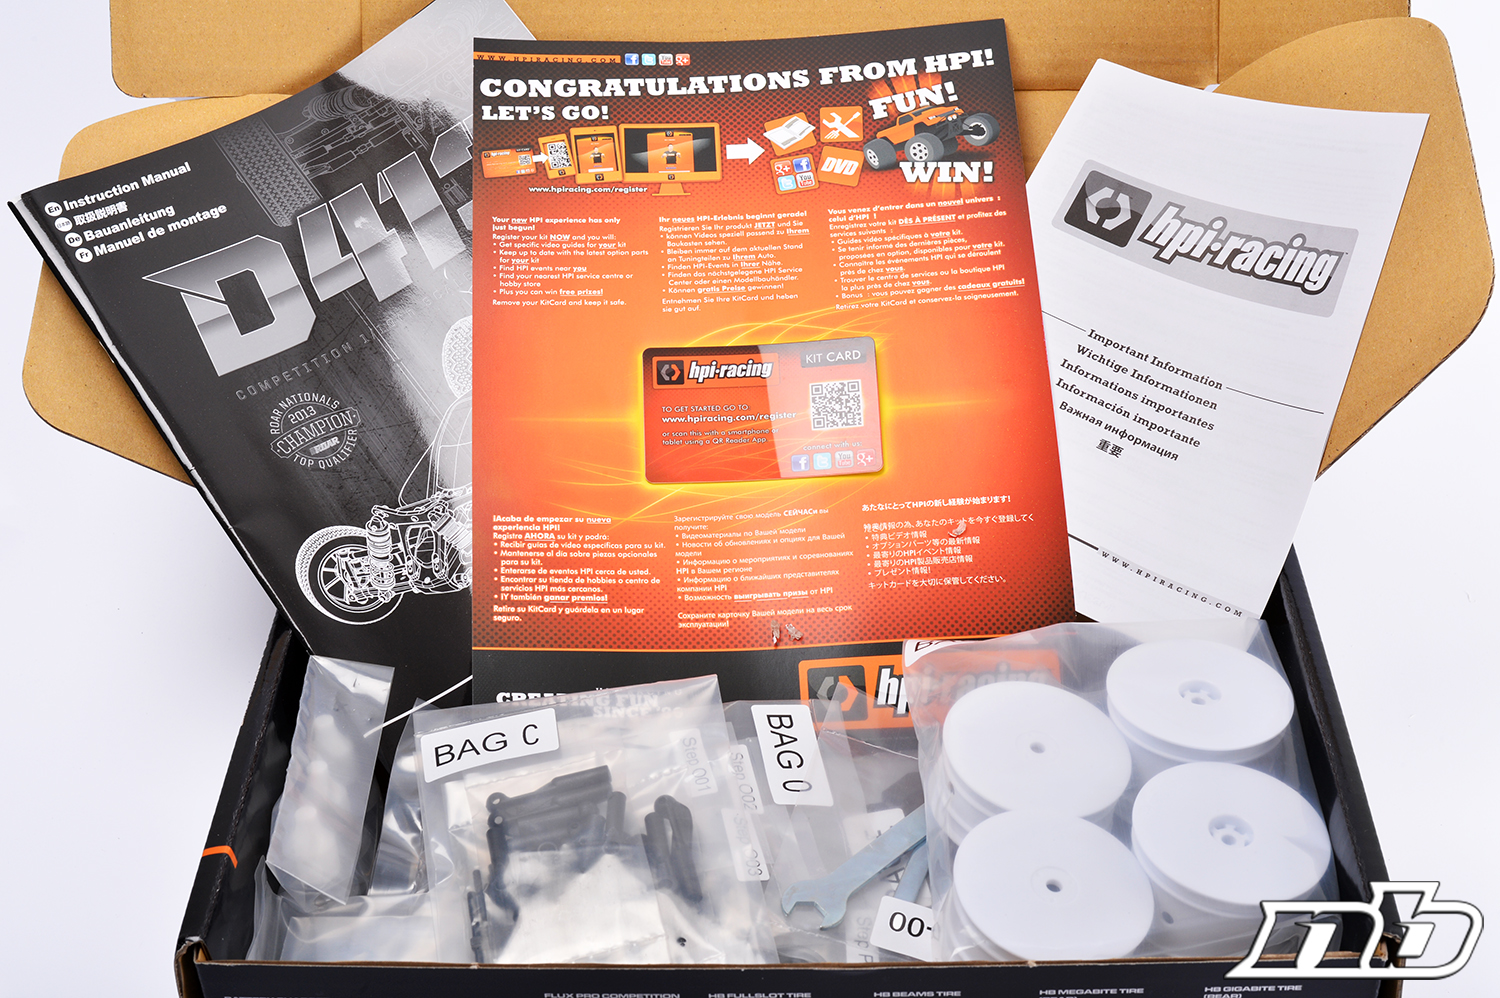
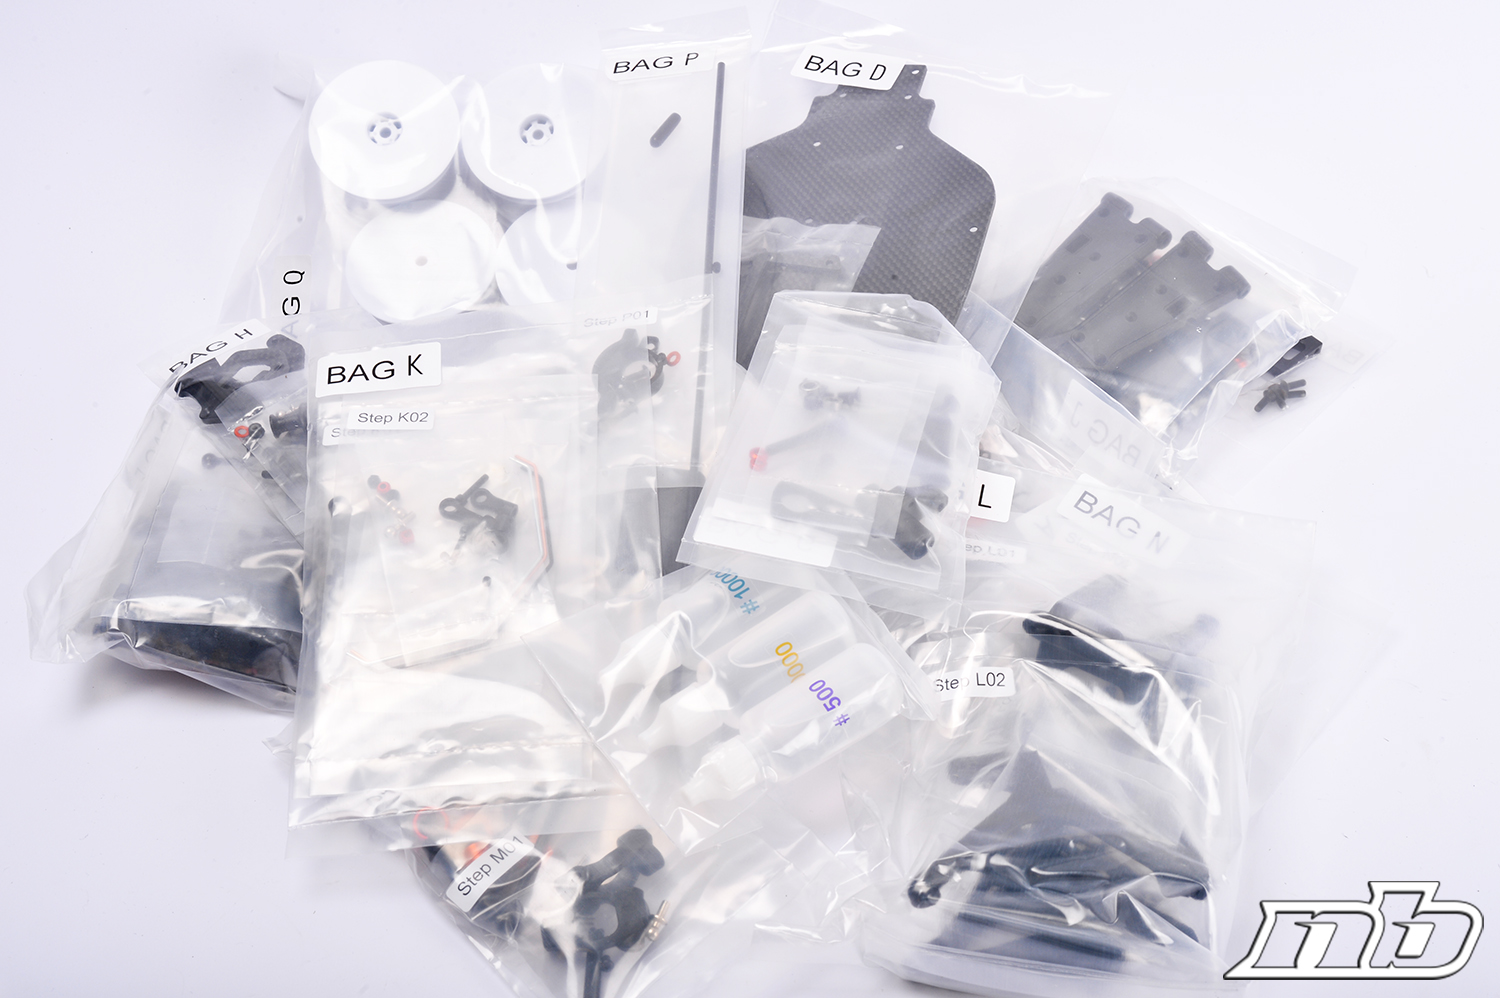
Unboxing the D413 gives a different perspective however, as you know how much work and effort has been put into realizing this car. First thing you see is a membership card that allows you to register your product and access to all the support you may need from HB’s website. Below the included paperwork (manual etc) you’ll find the bodyshell and all the bags that contain the parts smartly divided and marked from A to R.
The first thing you’ll notice is that the body actually consists of three separate parts – four if you also count the nose, to be assembled after painting. First bag to open is the one containing the shocks: very well made, they are quite easy to assemble and seem to be free in their movement even without any break-in.
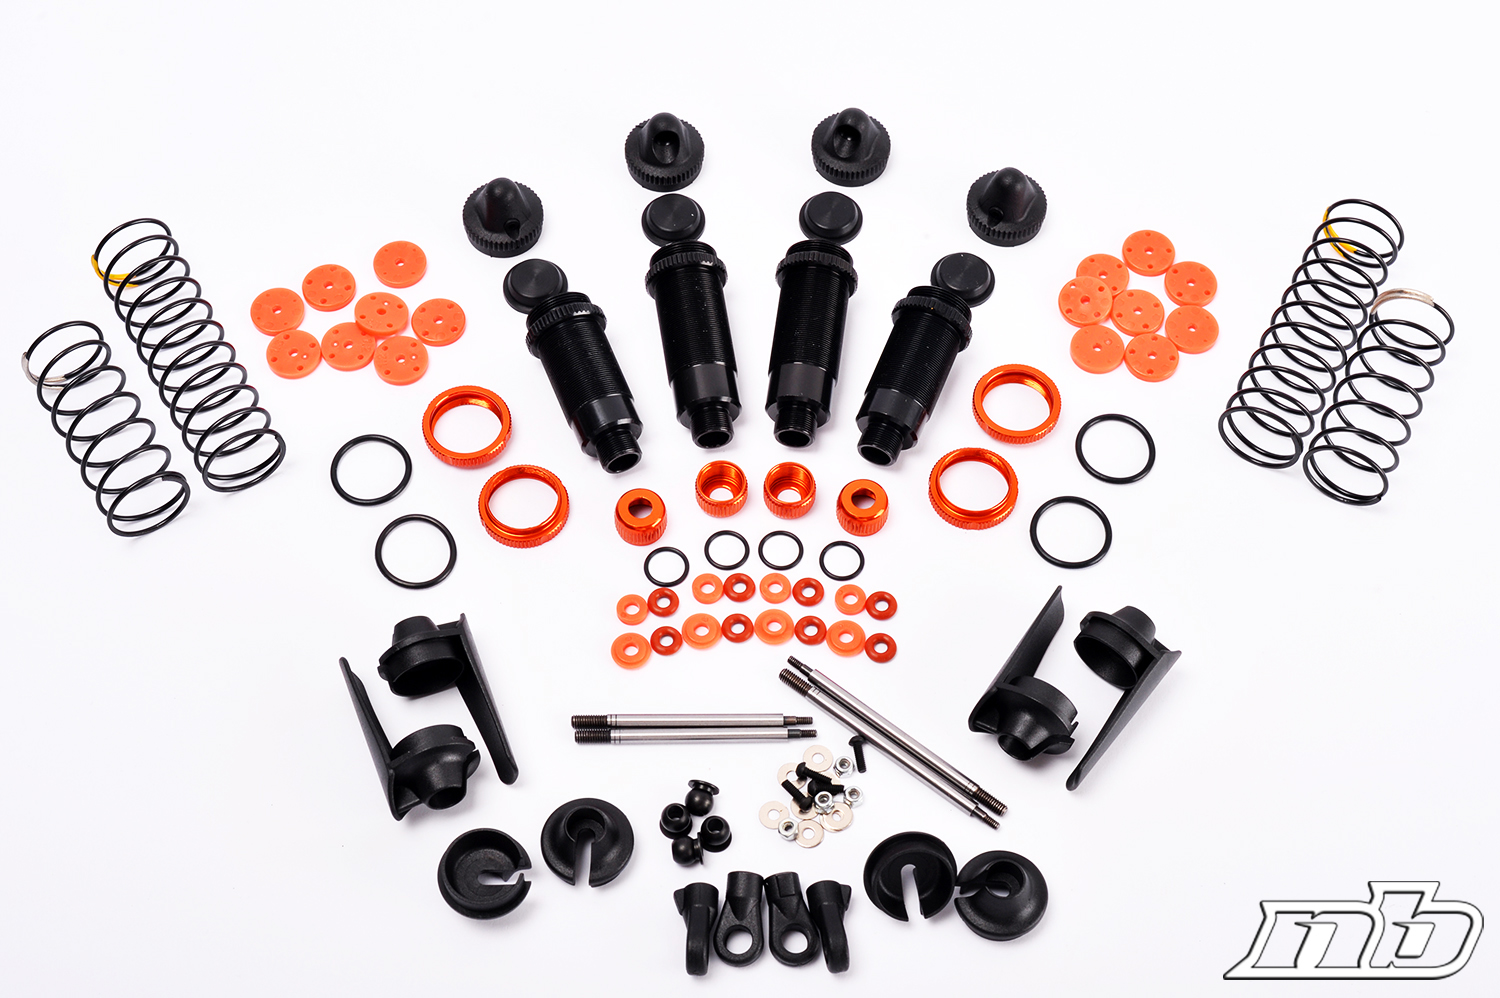
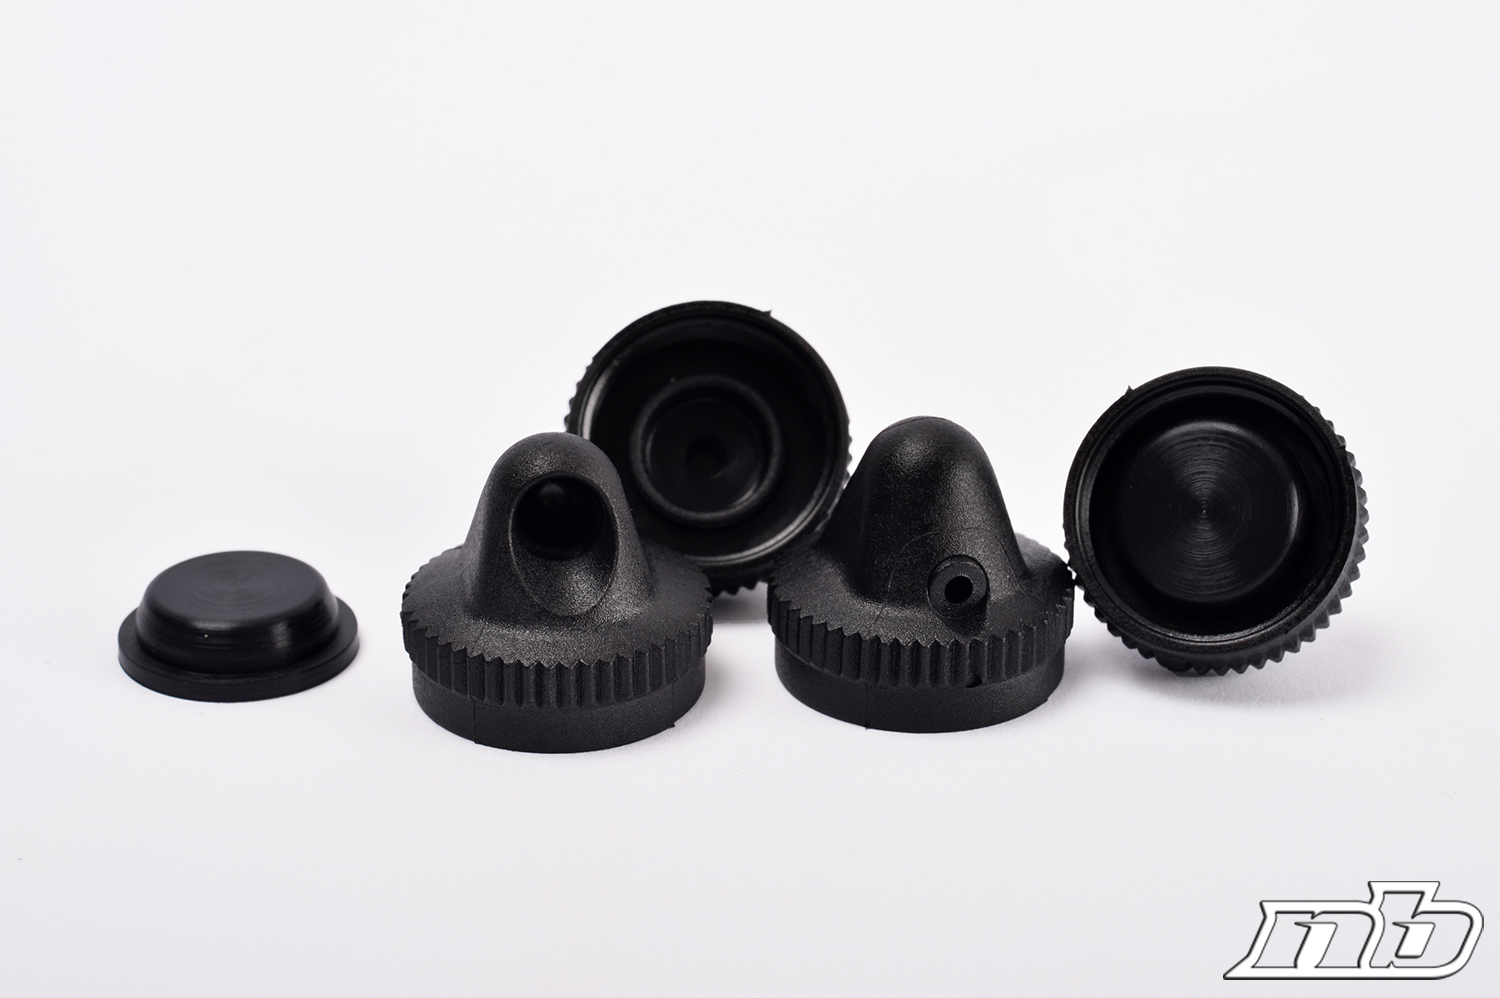
The only downside about them is the snap-on type shock caps, that i really didn’t like much: they could be good, we’ll only find out after testing the car to it’s limits, but in our reviewer’s 20 year experience he learnt the hard way that being too trusting is a bad idea!
Another thing we didn’t like was the size of the cap screws: although the car uses metric screws all over, you’ll need a .050in allen wrench for them – and for the differential screws. So if you plan to buy the car from your local shop and rush to your working table for an overnight build.
Make sure you have that wrench!
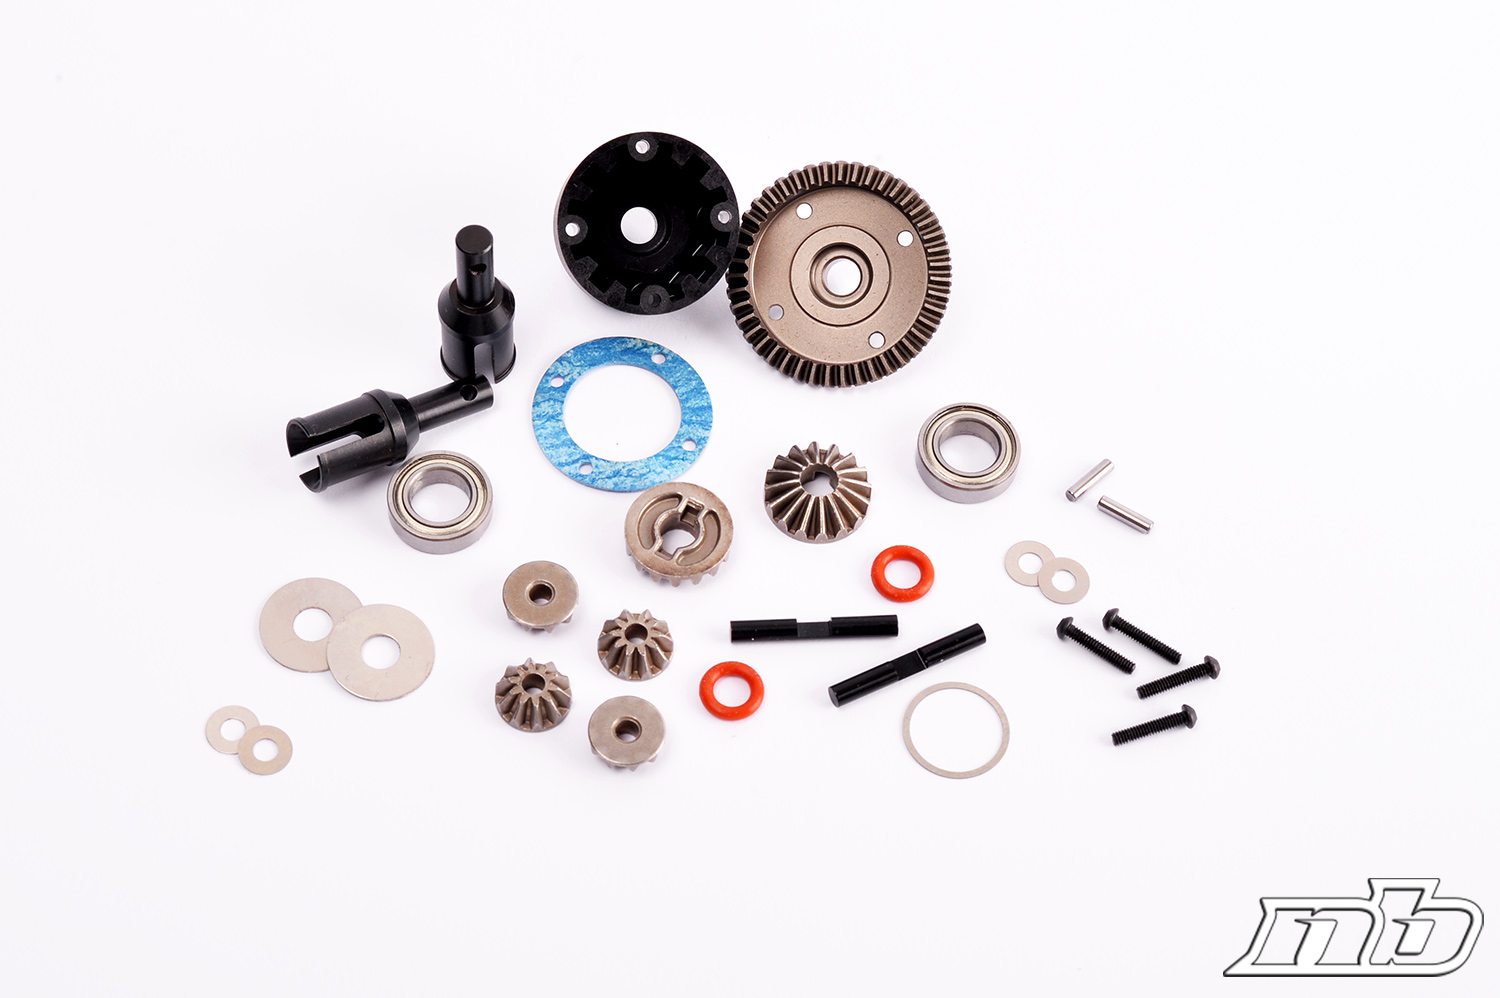
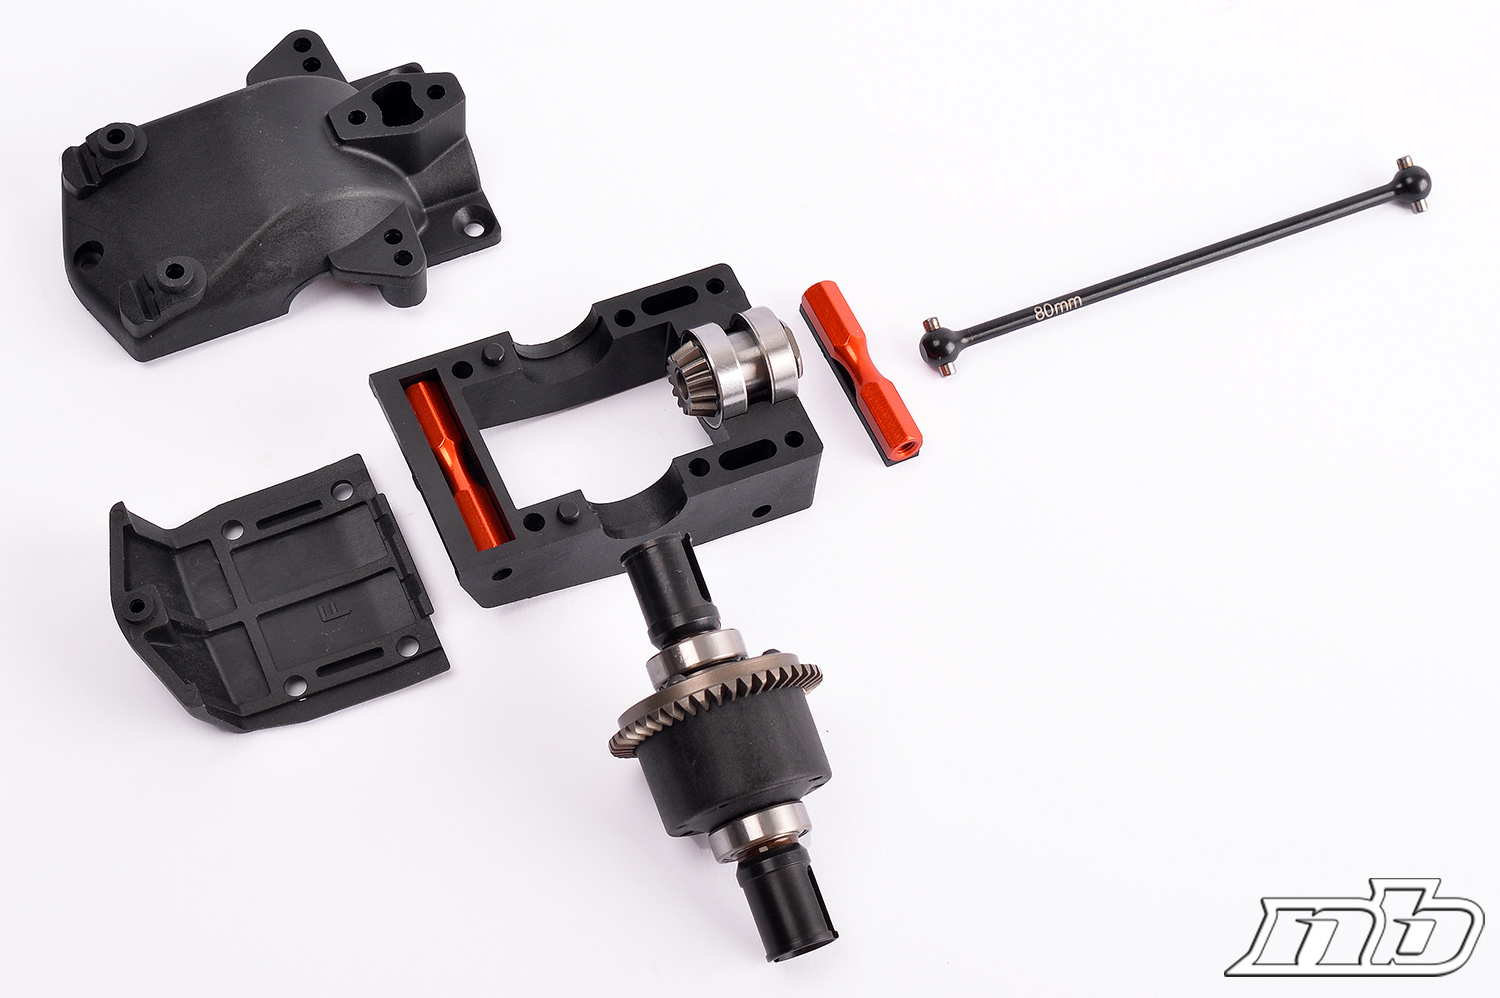
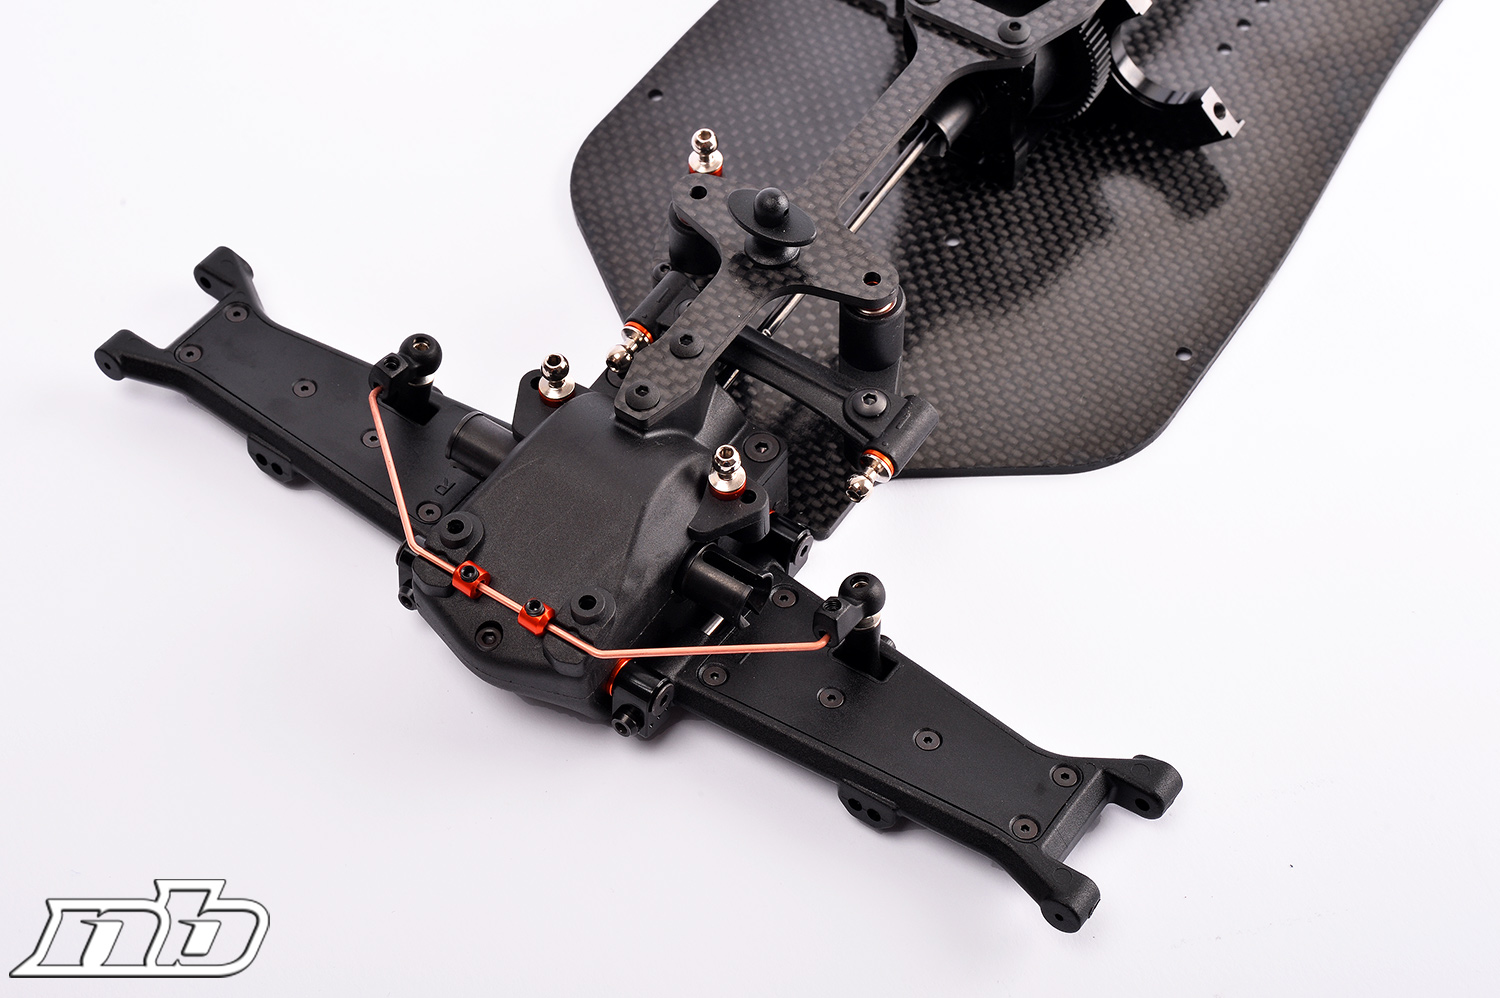
After the shocks, it was time to build the differentials: please note that the front outdrives are longer than the rear ones, so if you plan to build them all together like in an assembly line, pay attention to this. It’s not mentioned in the manual, but we used some copper grease on the outdrives to prevent any friction from affecting the work of our conical gears differential.
The right amount of oil is specified in the manual, and is – as shown in the pictures – enough to cover the cross shafts.
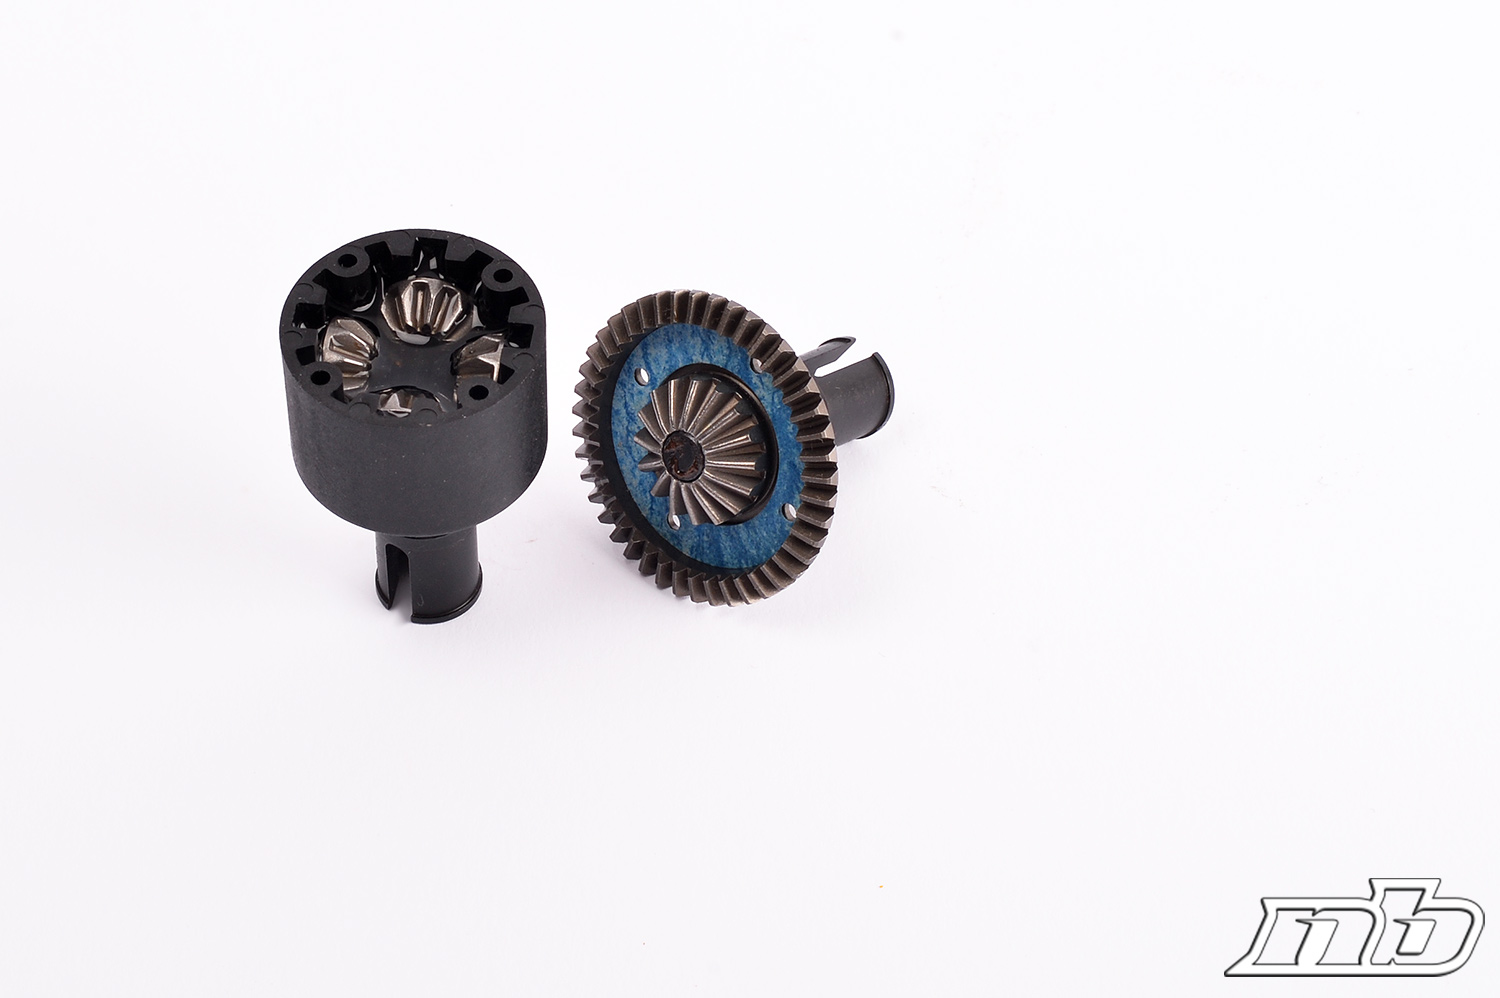
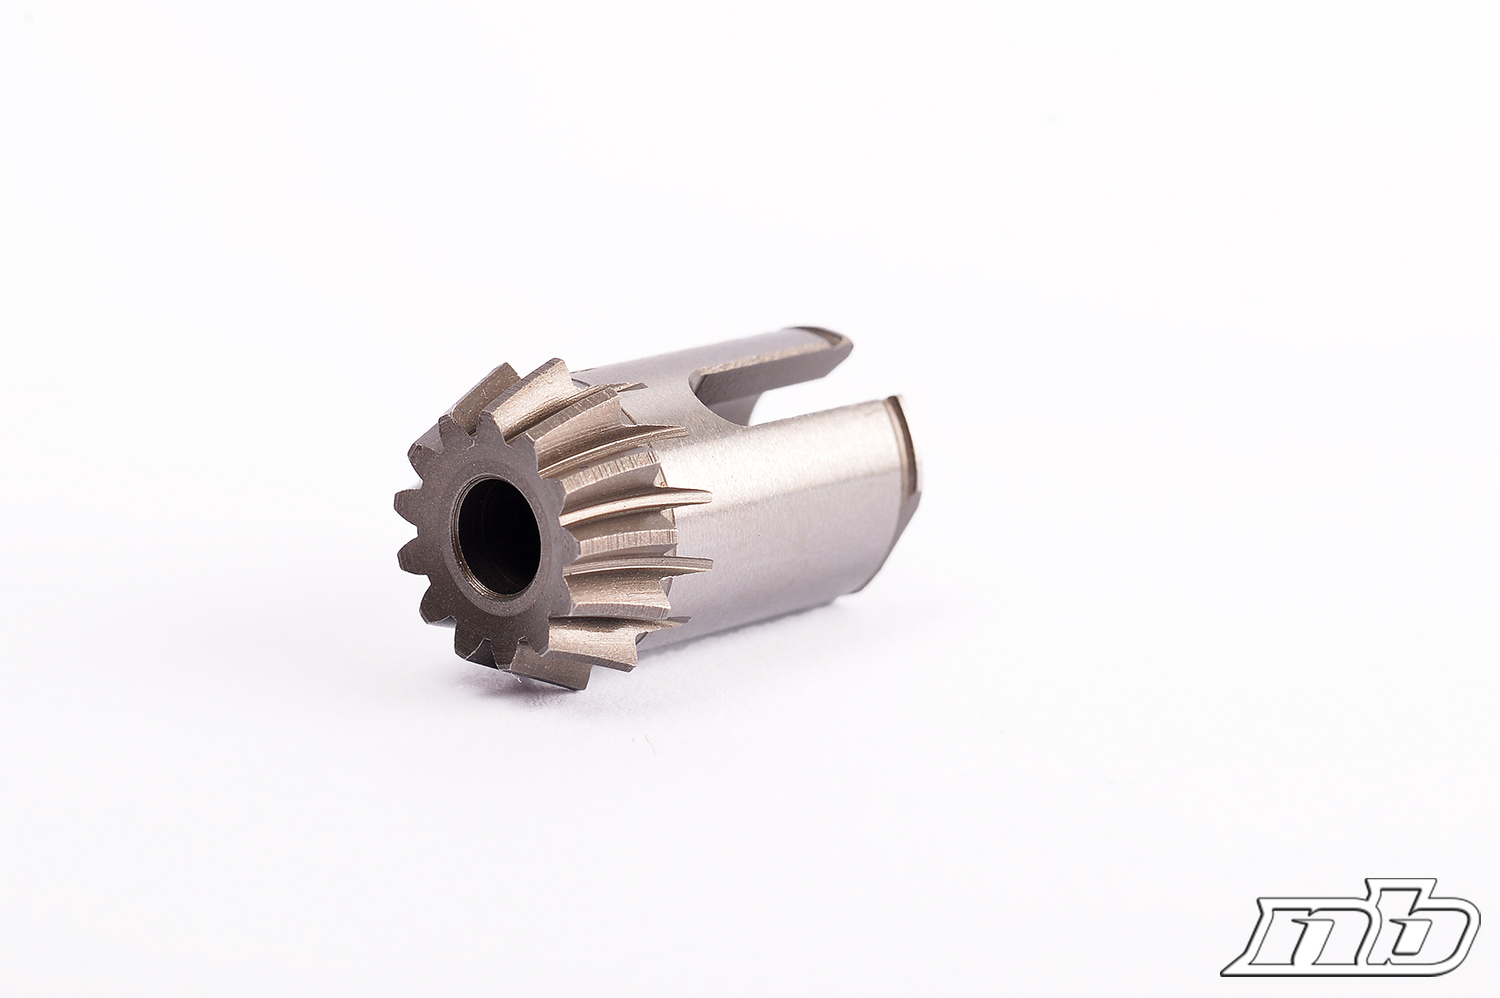
The front and rear diffs feature a slightly helicoidal crown gear, that should transfer more traction to the buggy without compromising the rotation. After assembling the turnbuckles, we turned the page and found out that after page 12 the manual splits in two versions: building the kit with a ‘shorty’ battery pack or ‘saddle’ arrangement – thumbs up there.
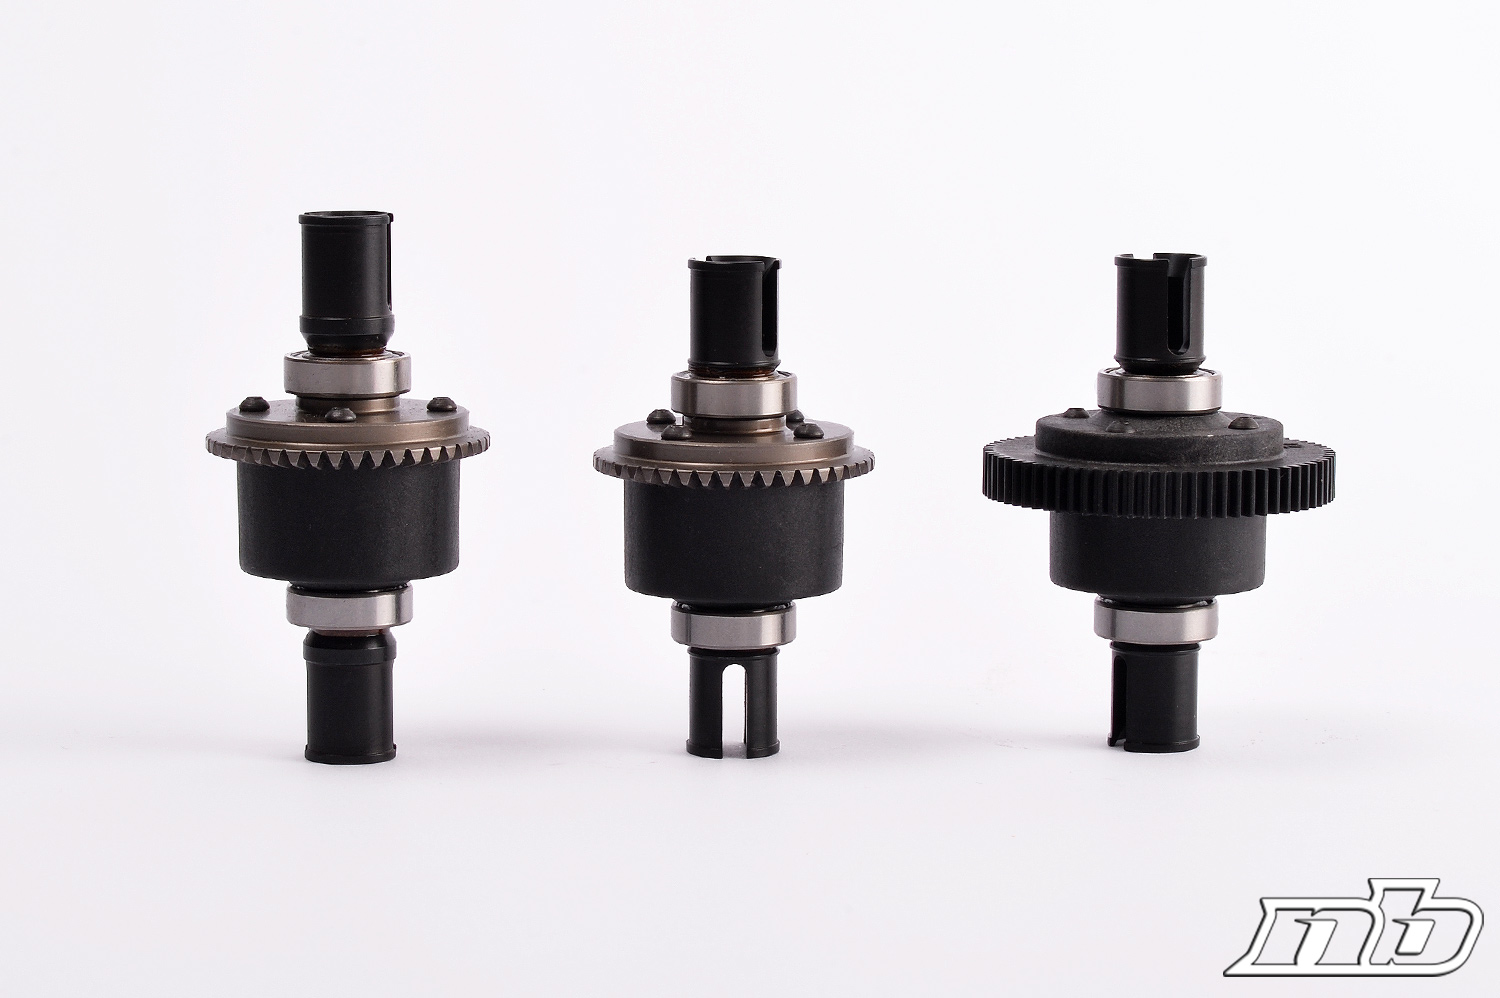
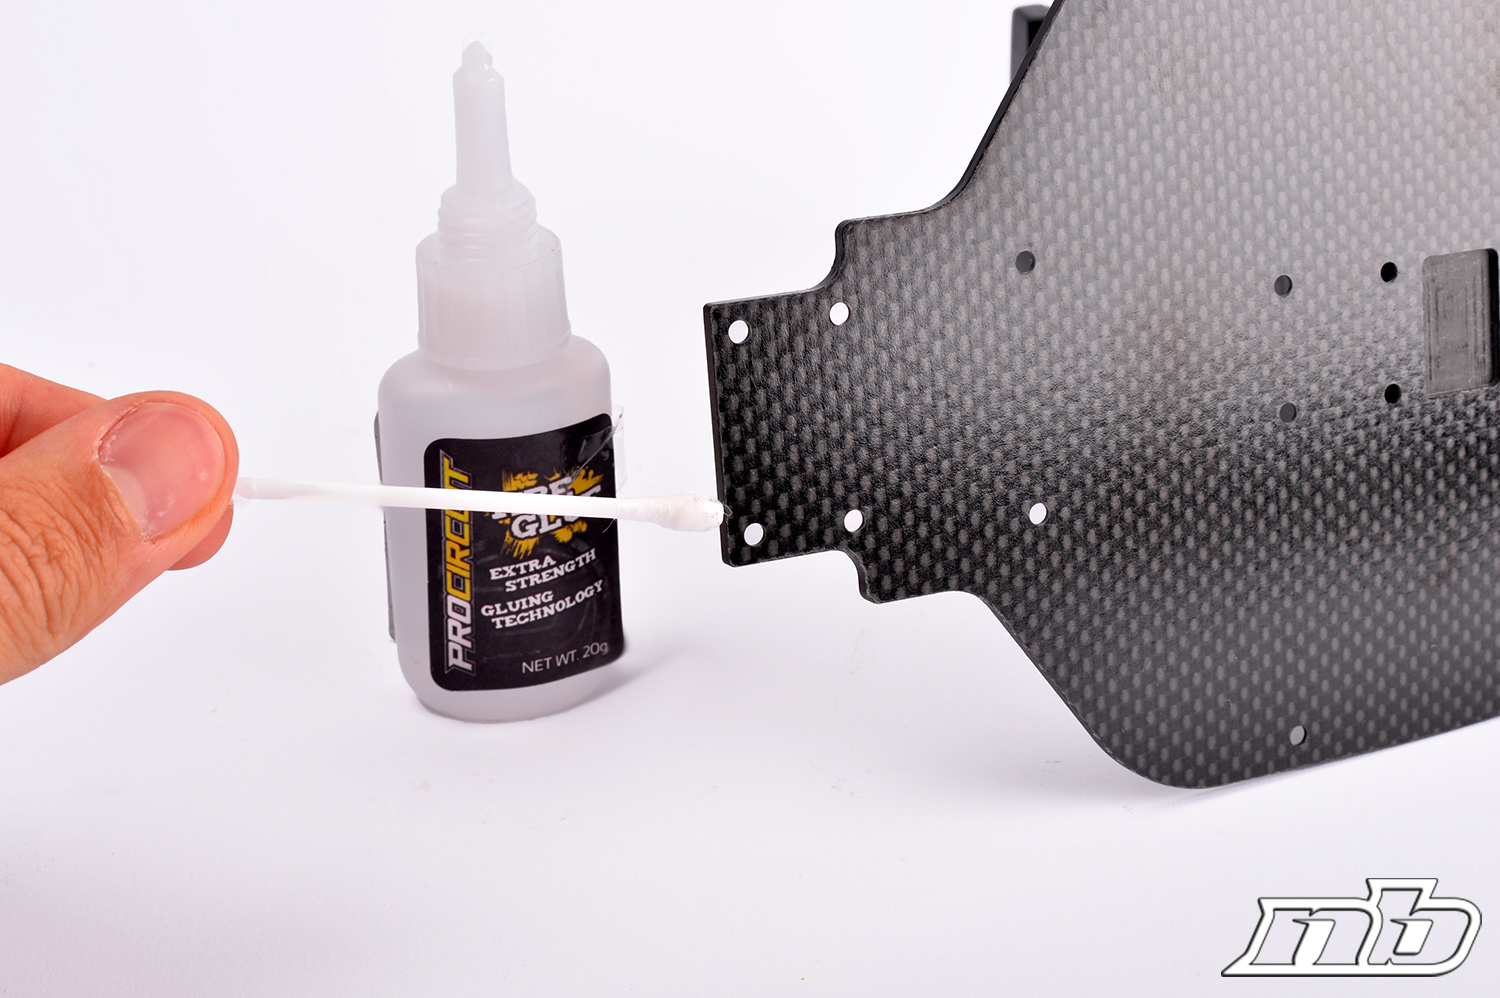
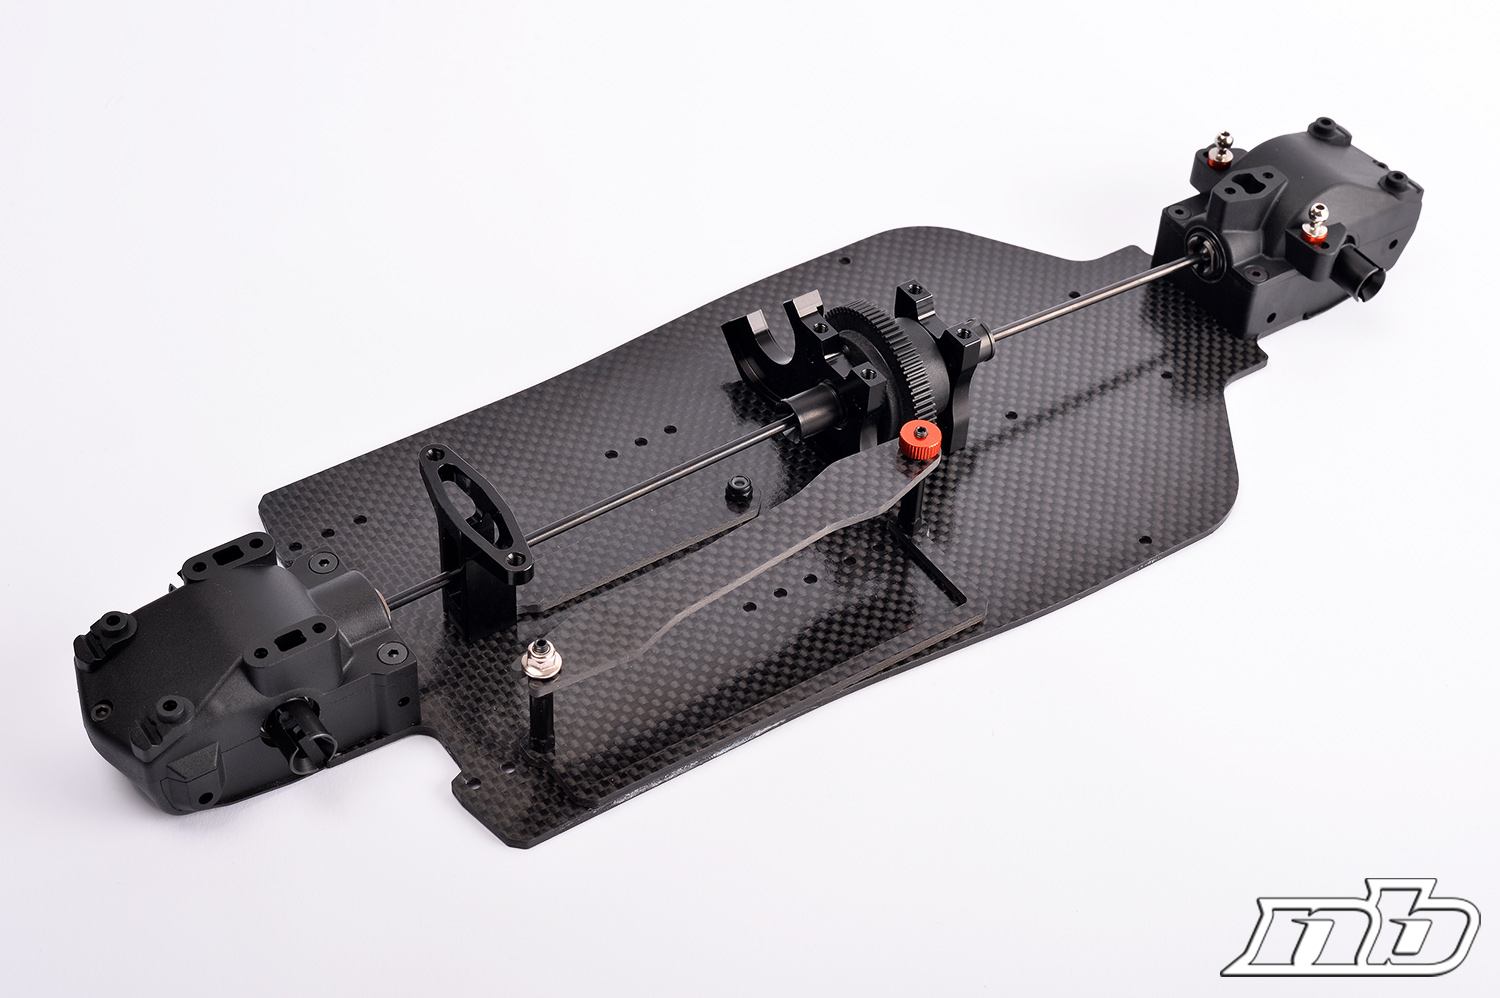
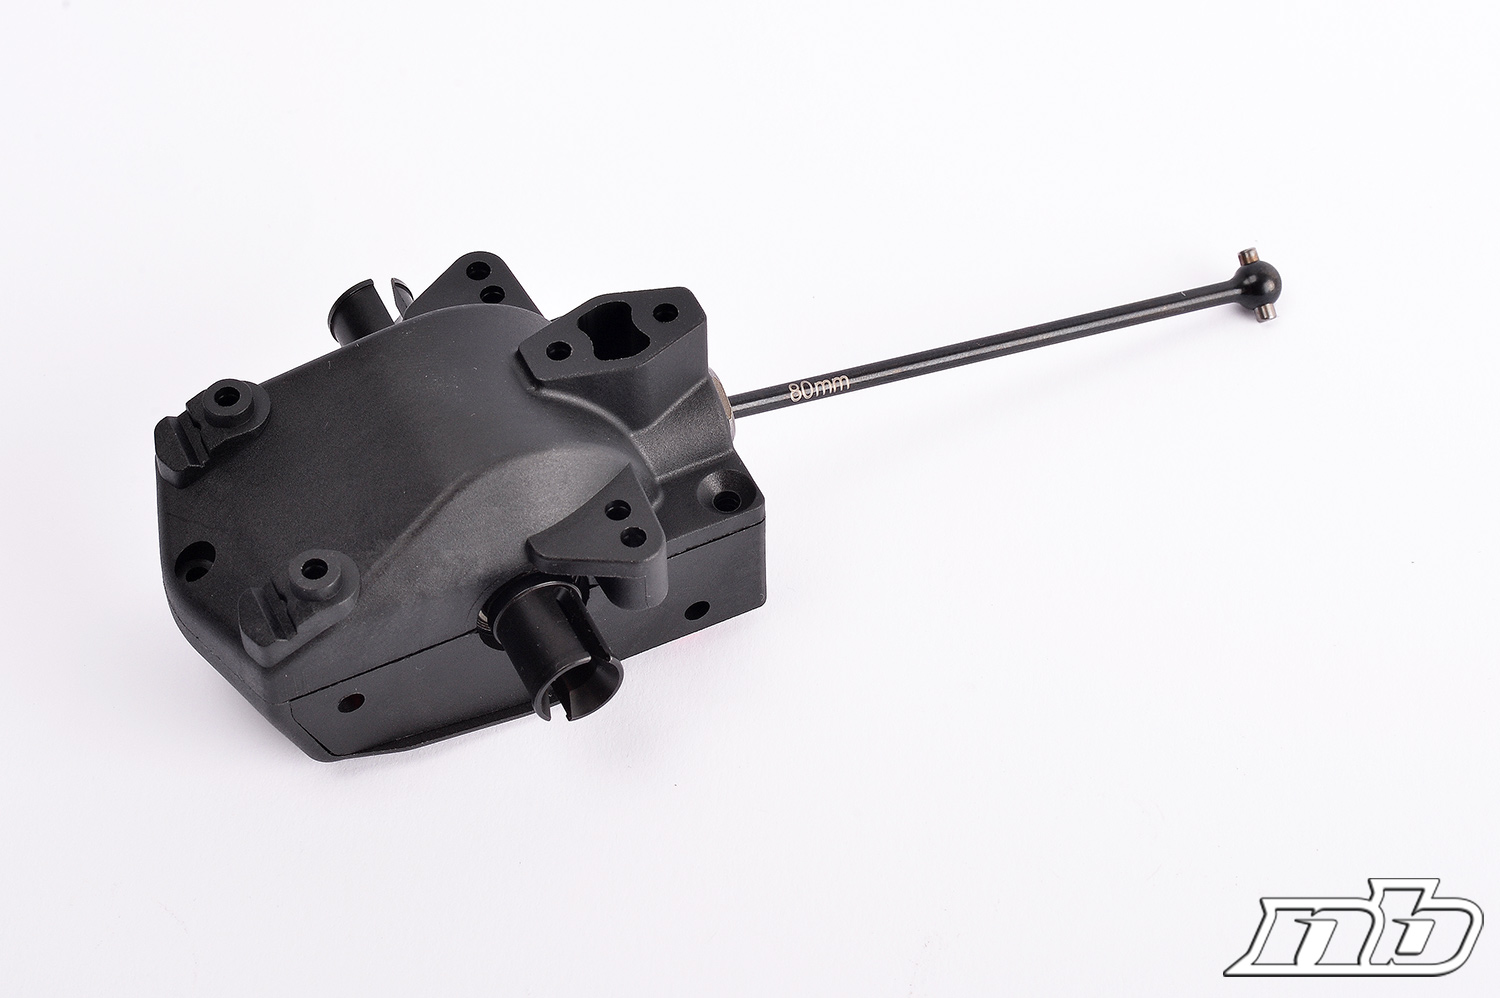
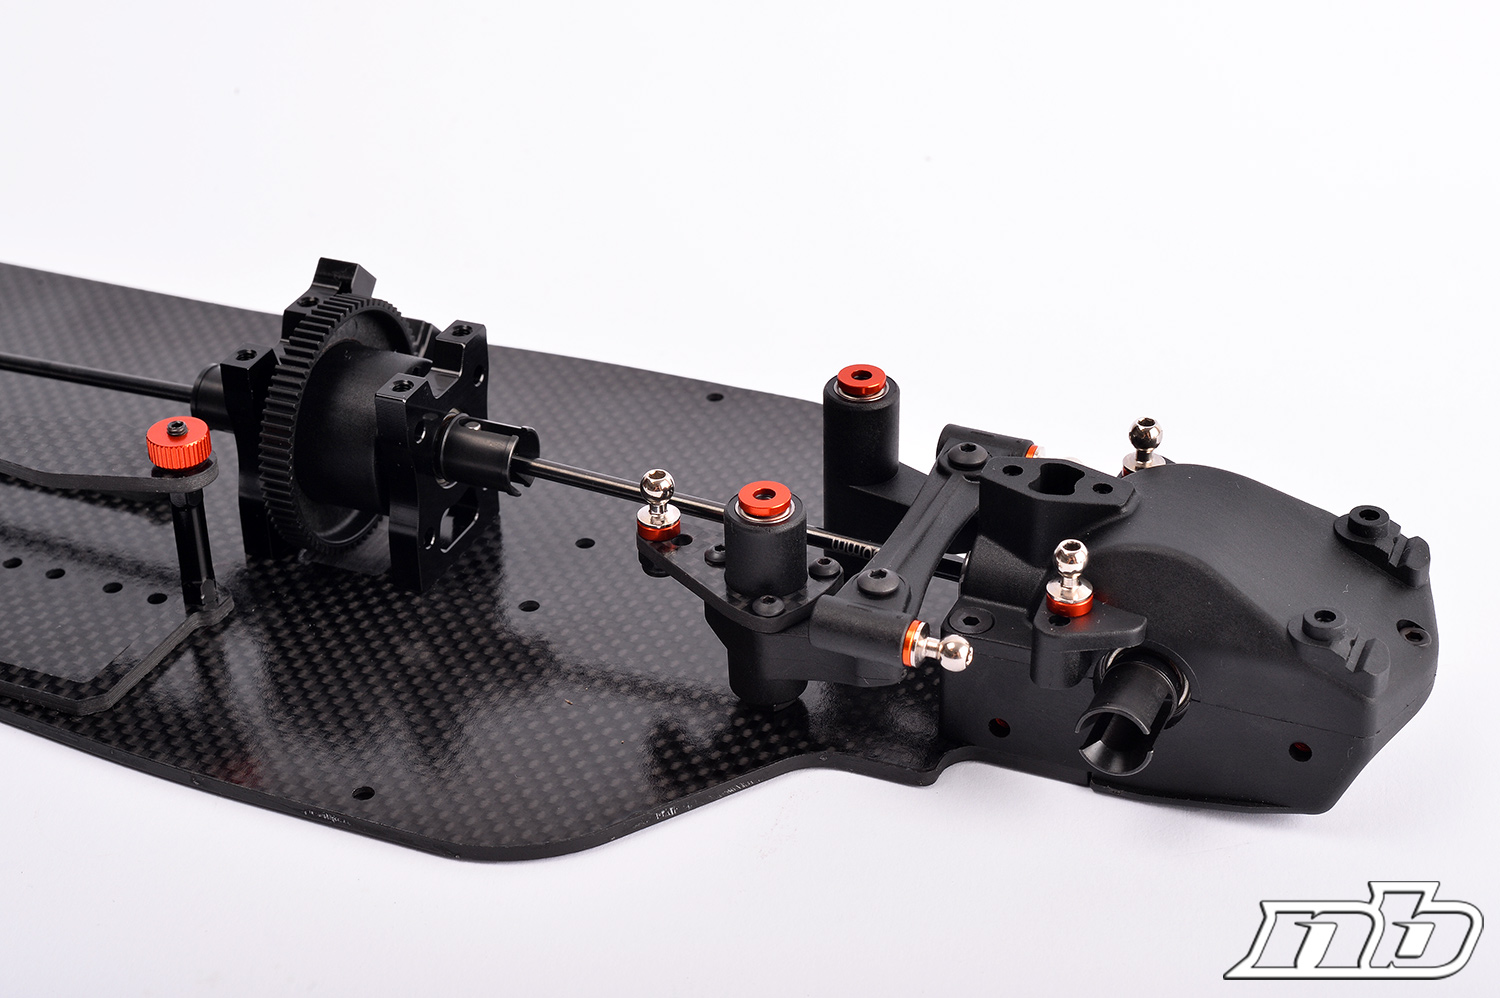
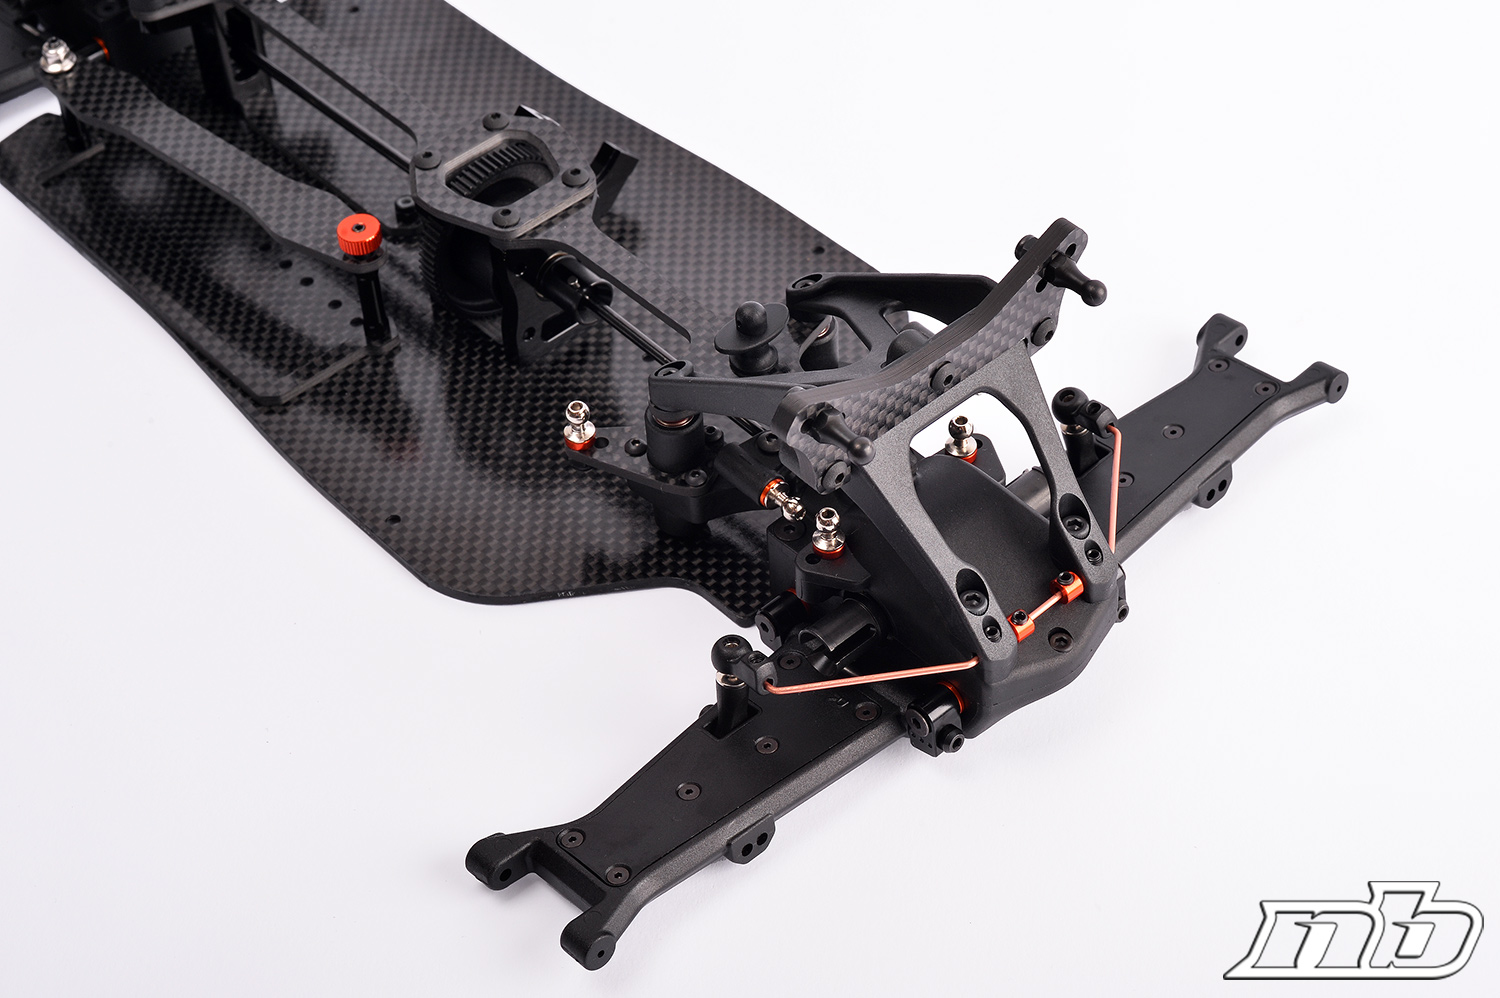
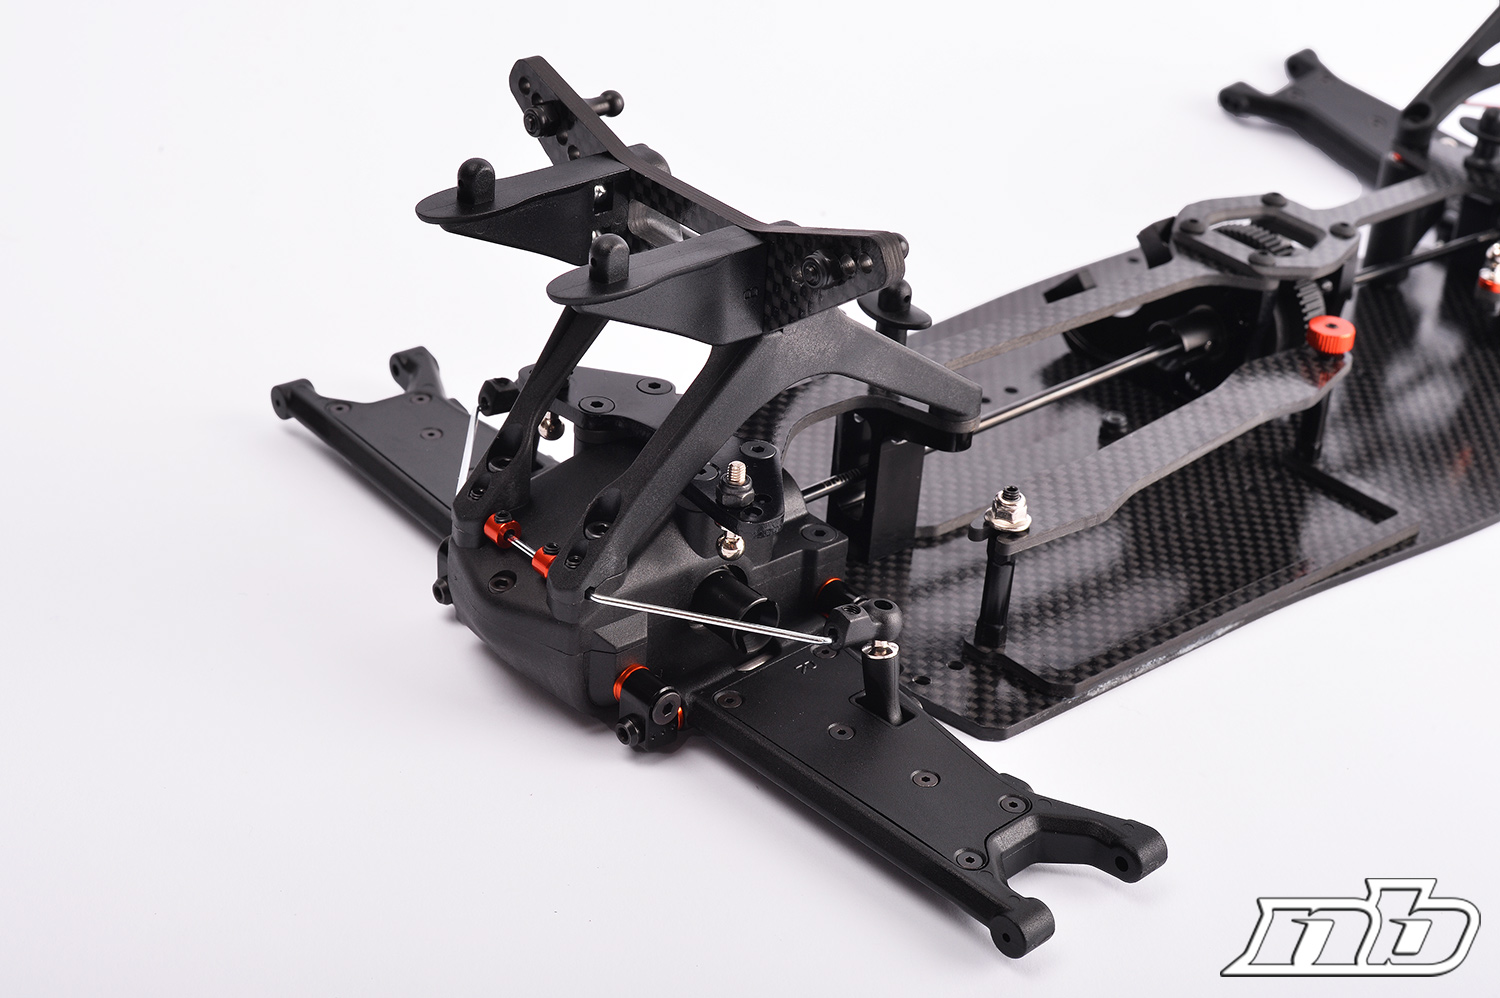
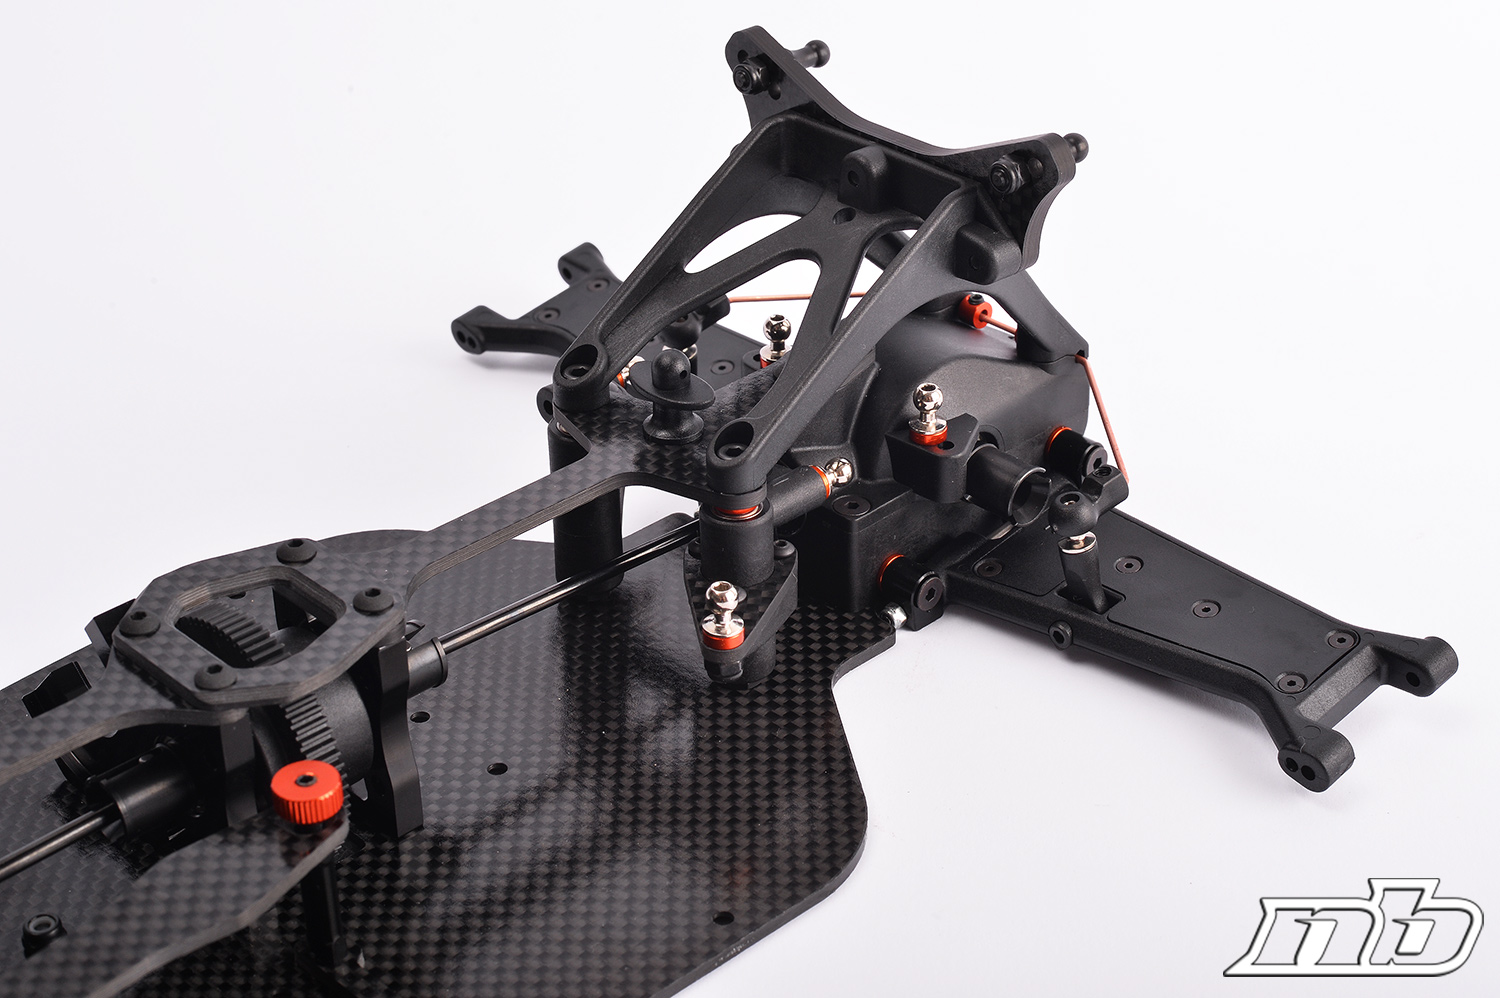
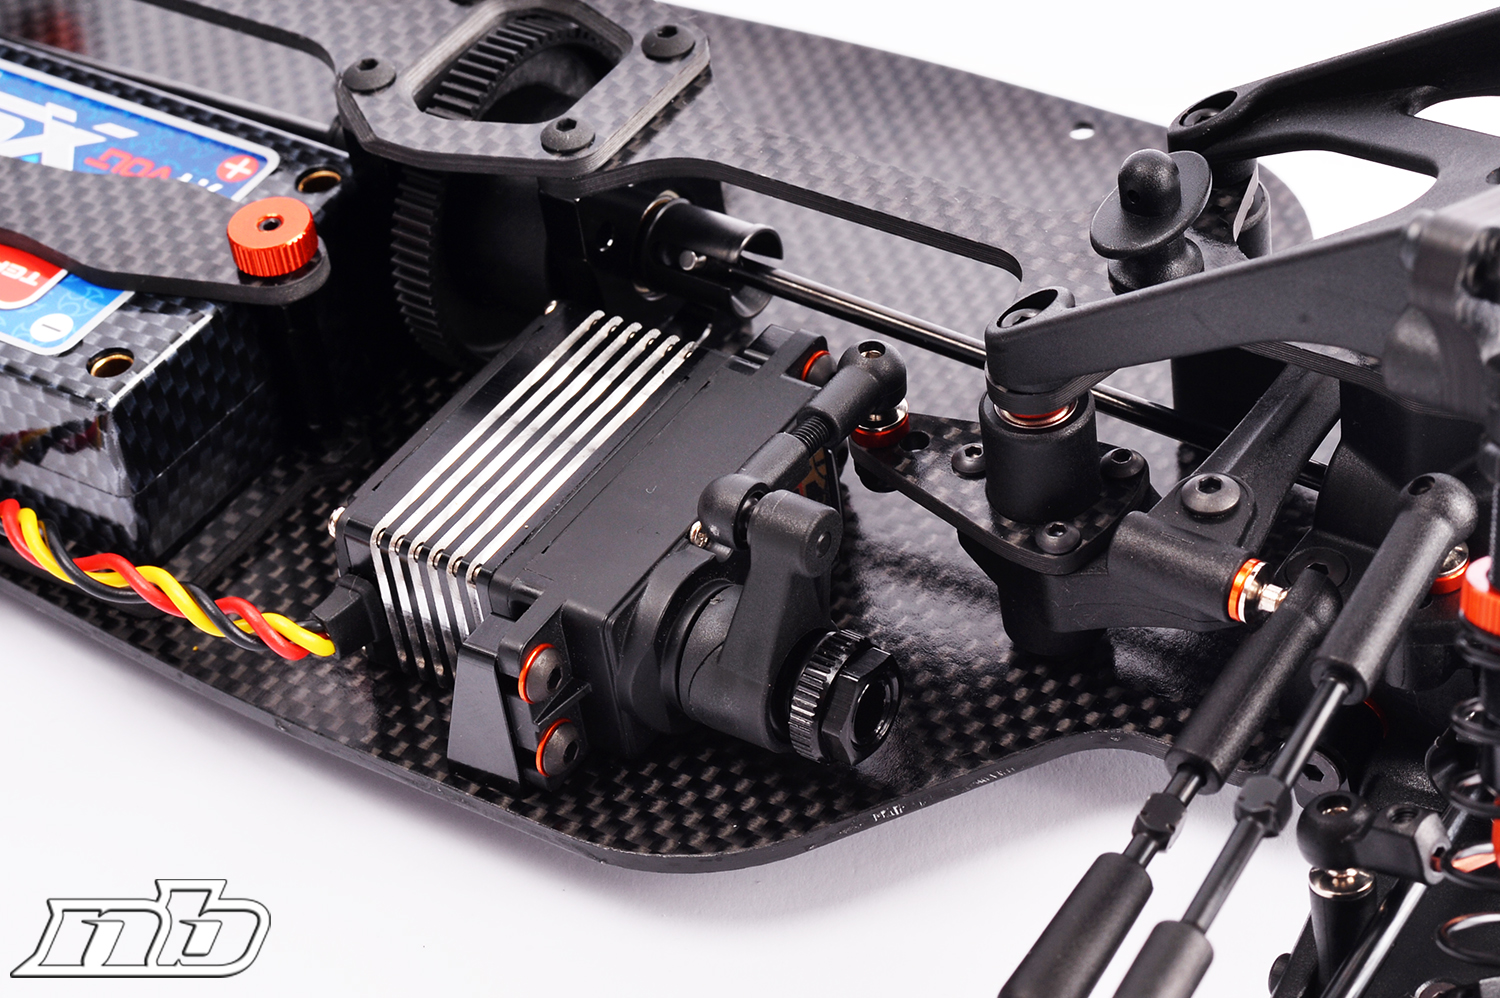
We went for the “Shorty” option, as it seems to be the most popular choice at the moment. First thing to do is seal the well-made graphite chassis edges with some CA glue to prevent it from damage, then installing the battery pack holder and the centre differential, that is mounted within two aluminum parts, one of them also works as motor mount.
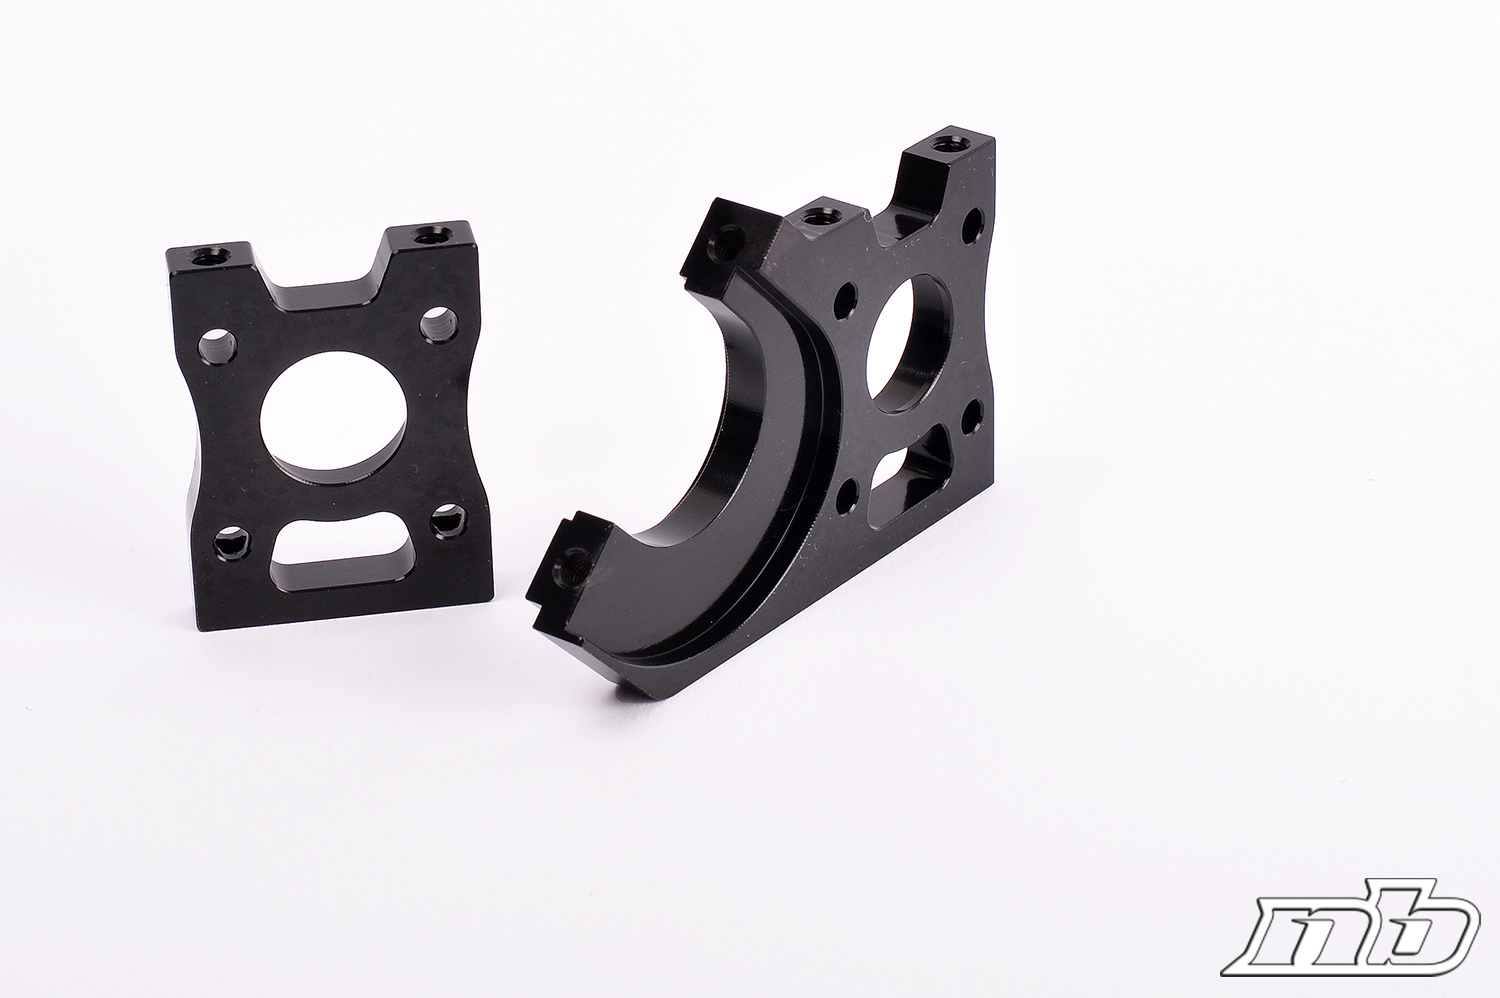
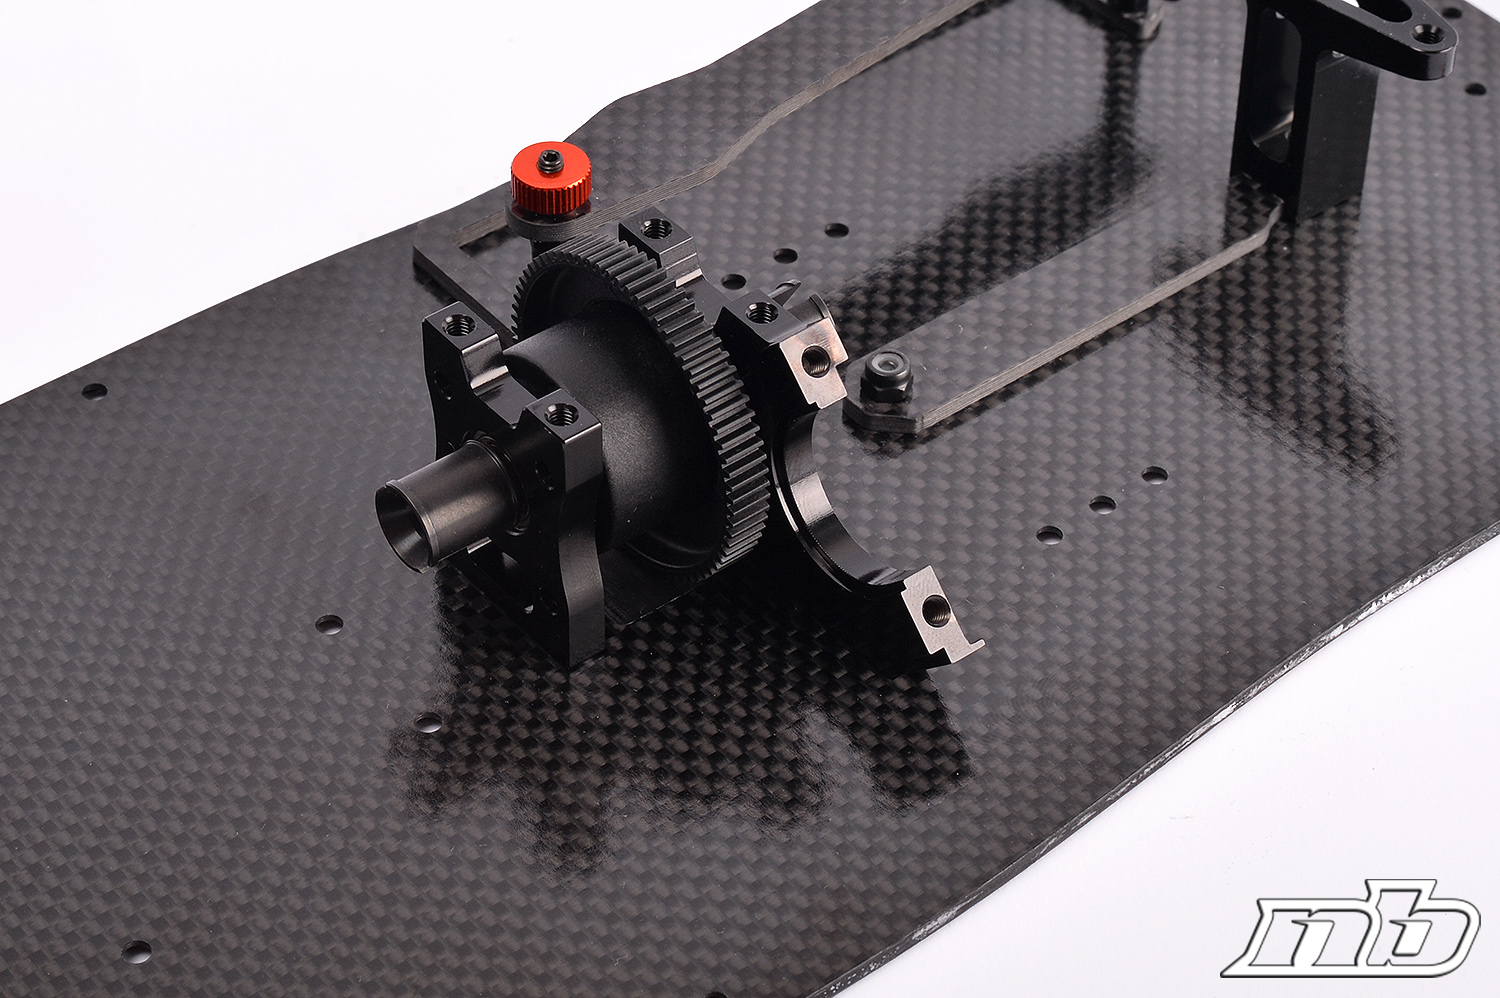
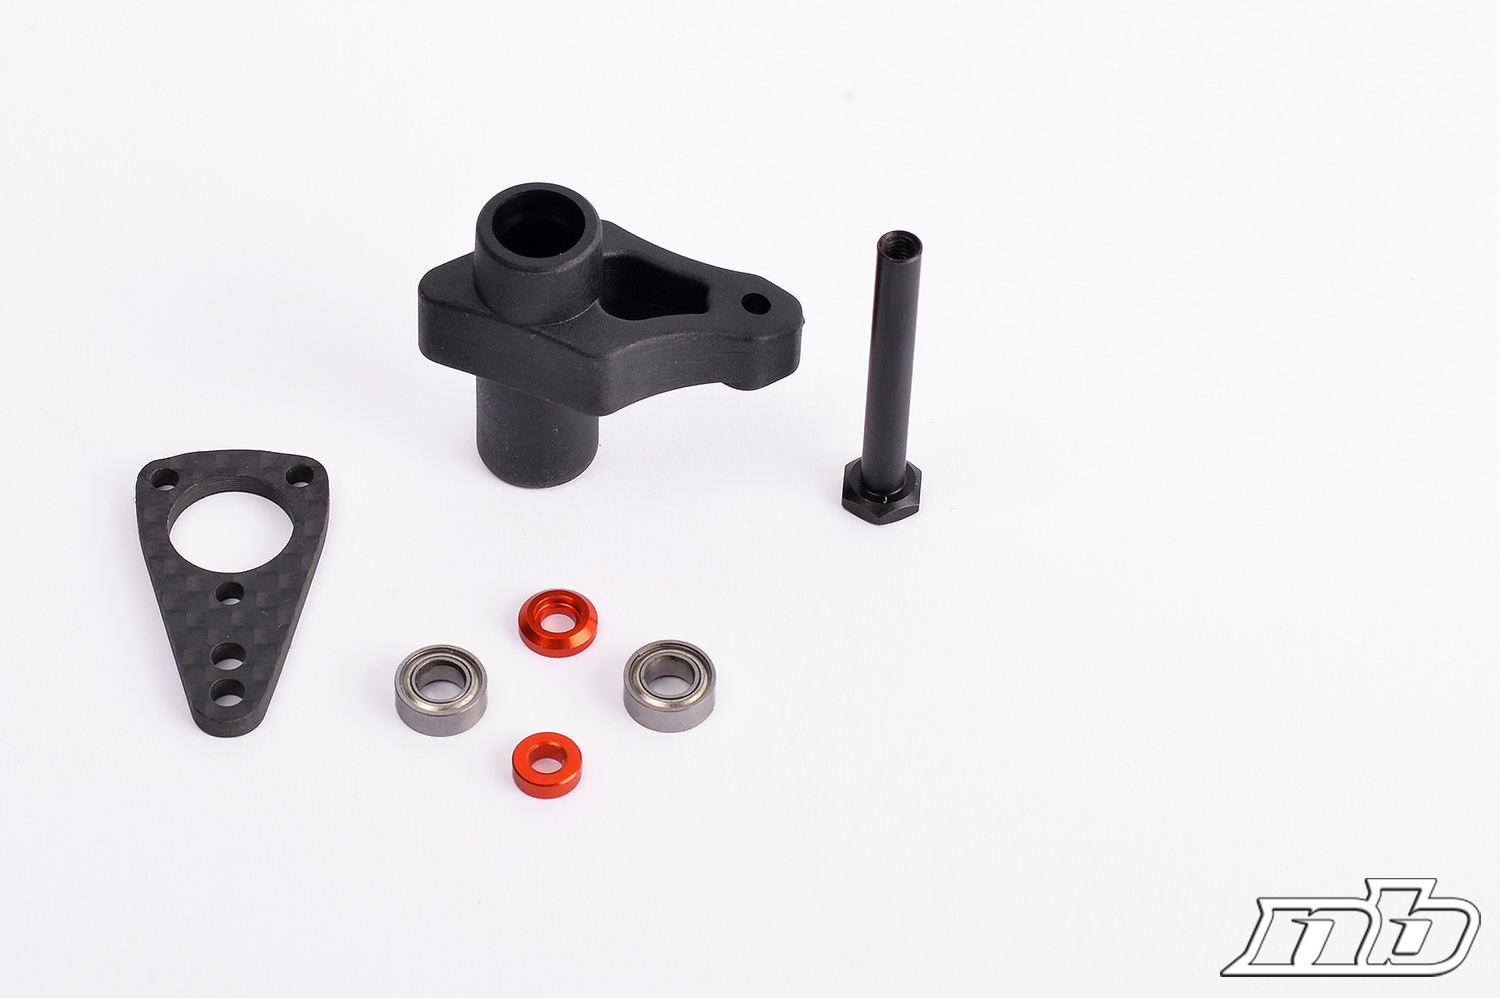
The bulkheads are different between front and rear, and they house the differential, the pinion that is guided by two bearings, and some aluminum hexagonal tubes where the arm mounts will be screwed.
Everything is very easy and intuitive to assemble, so we can speed up to the steering system.
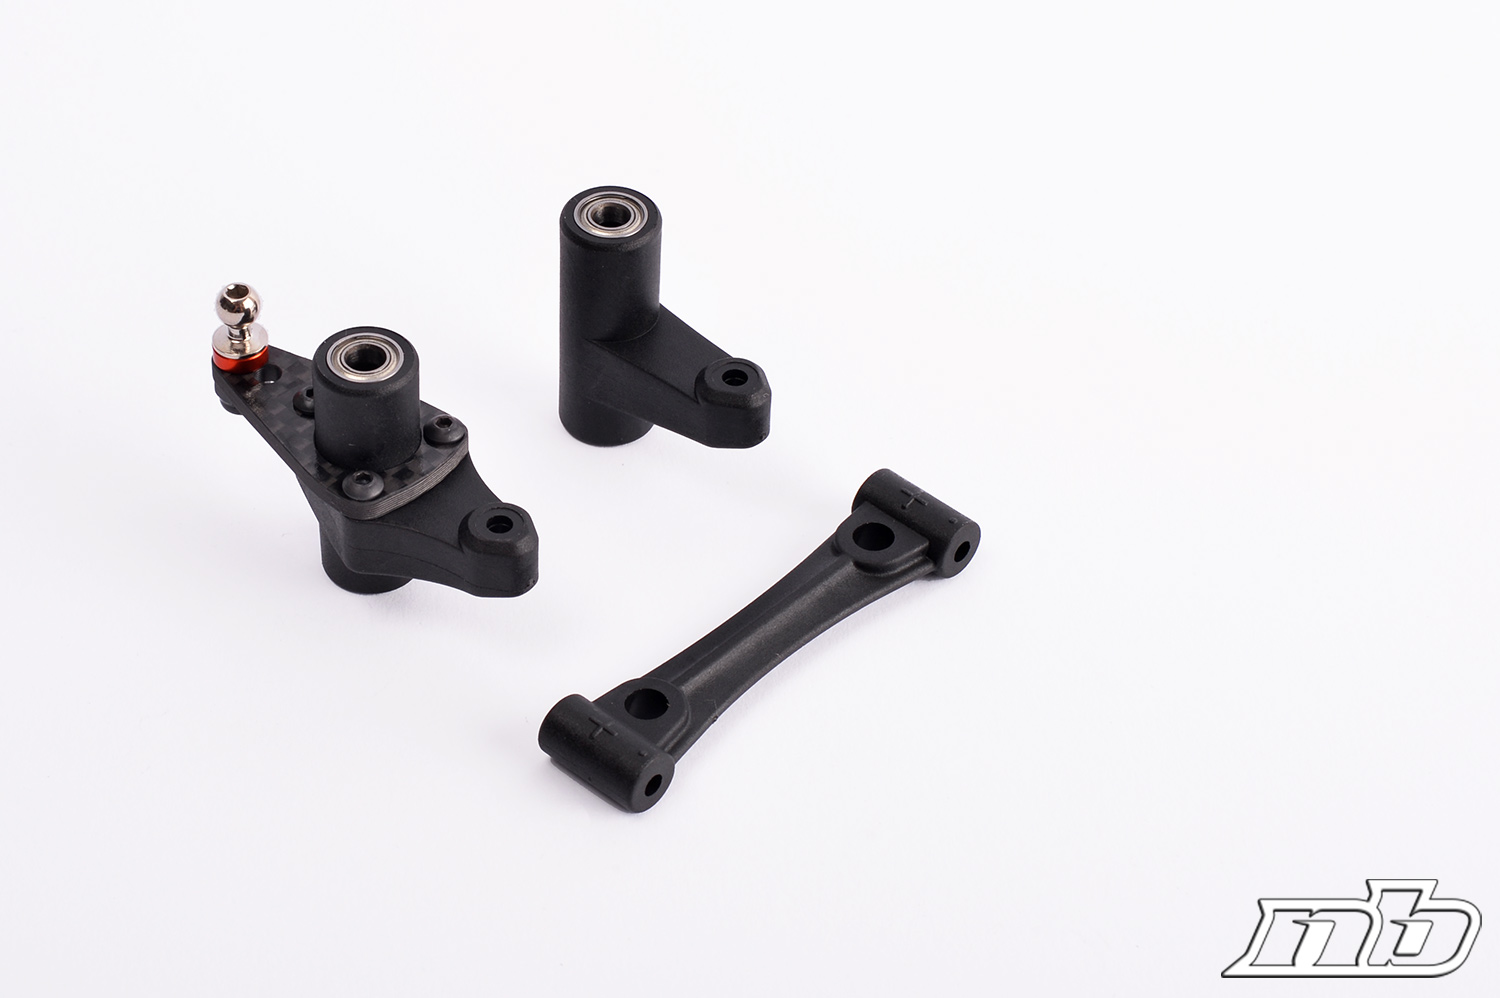
At a first look it would seem similar to what’s used on every 8th scale buggy, but opening the bag we understand the servo saver is actually attached directly to the servo. The steering rack is molded and features two different positions. It has a bit of play already, nothing problematic for off-road but quite evident.
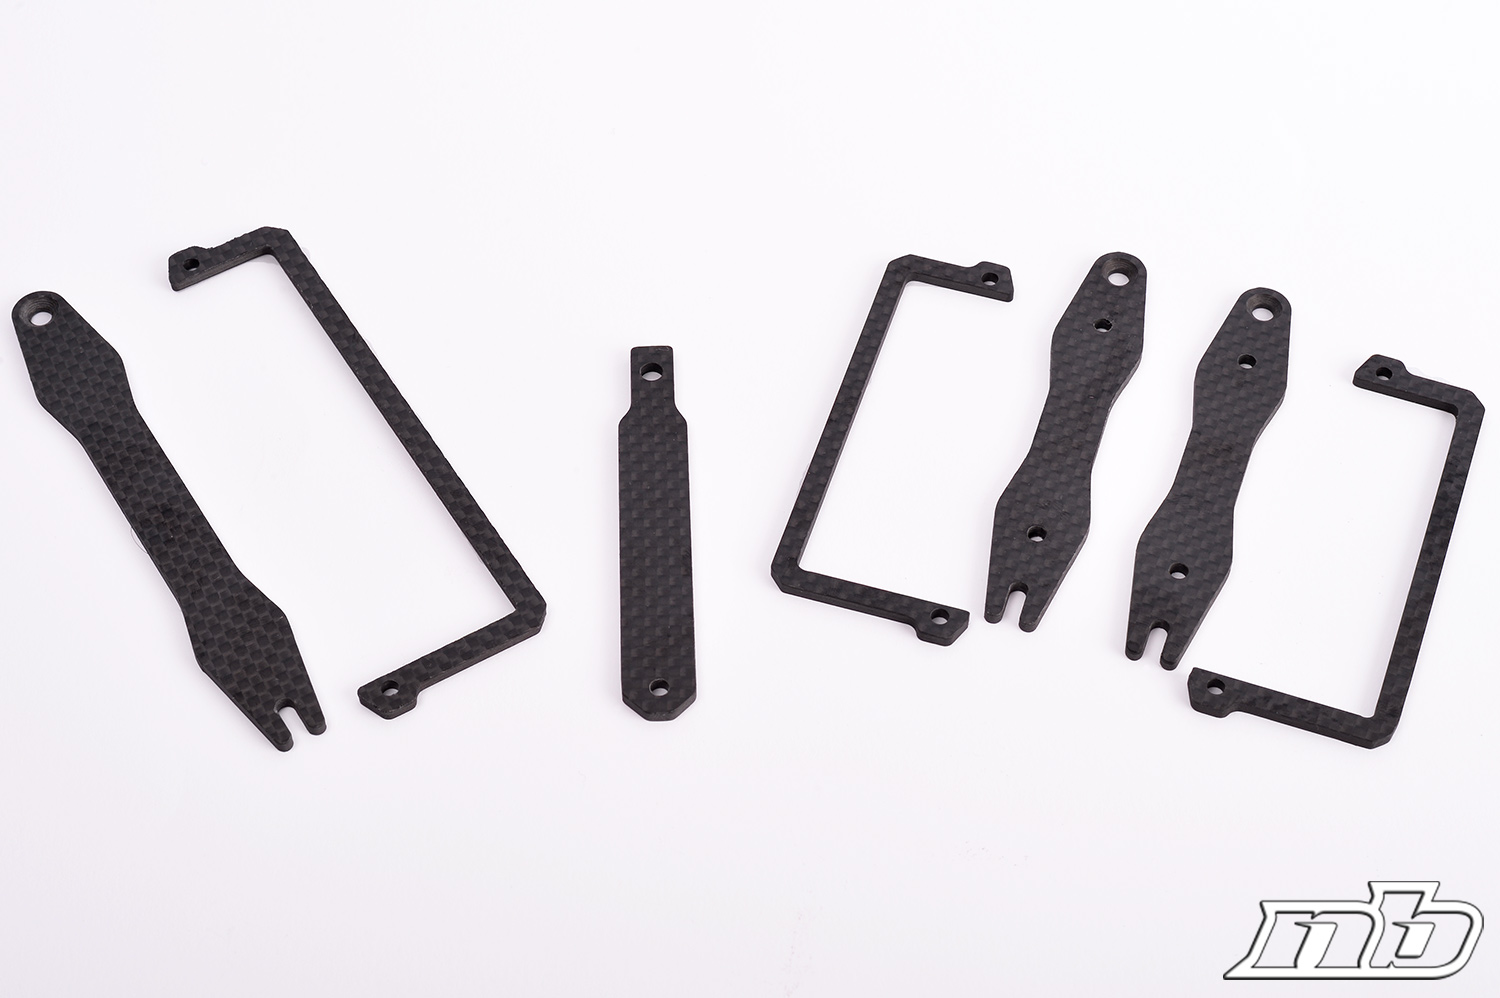
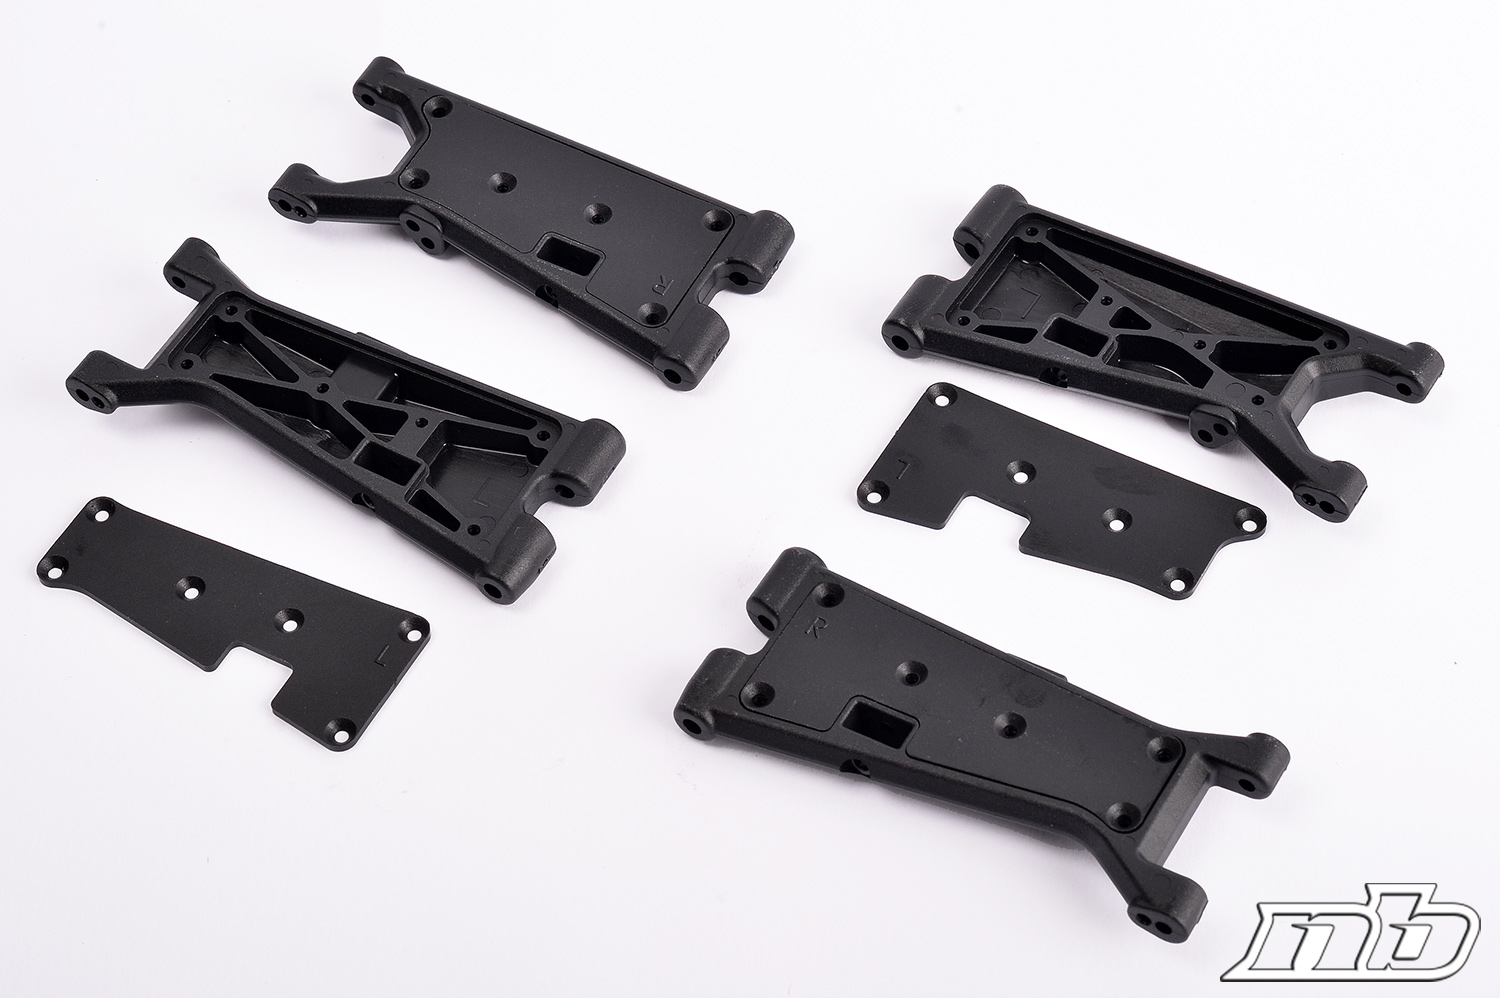
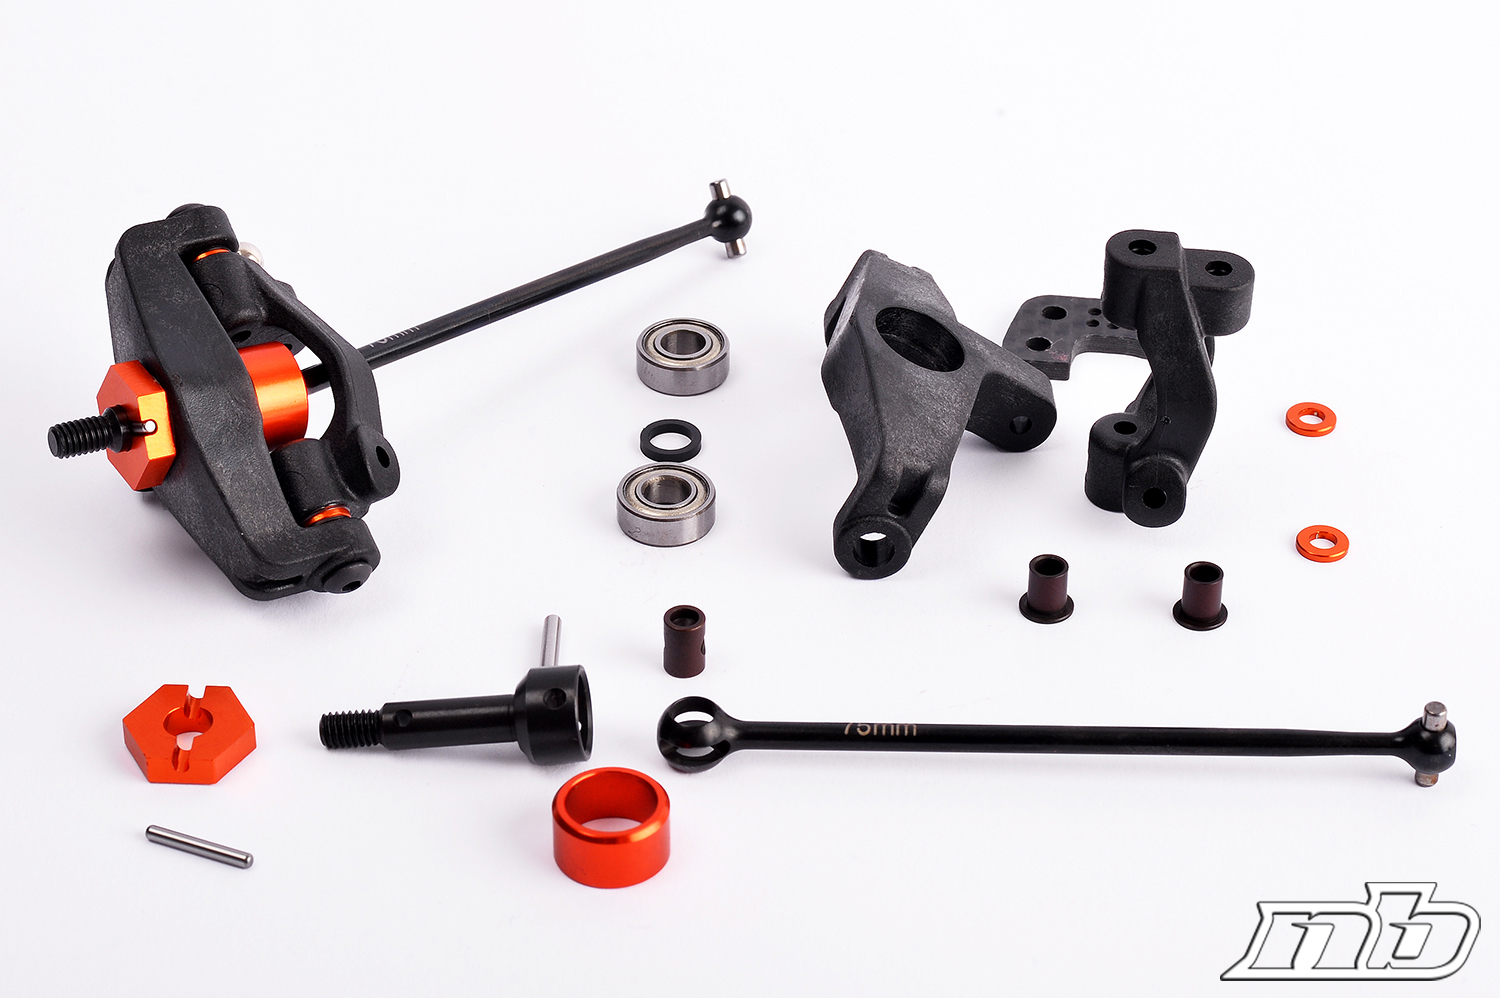
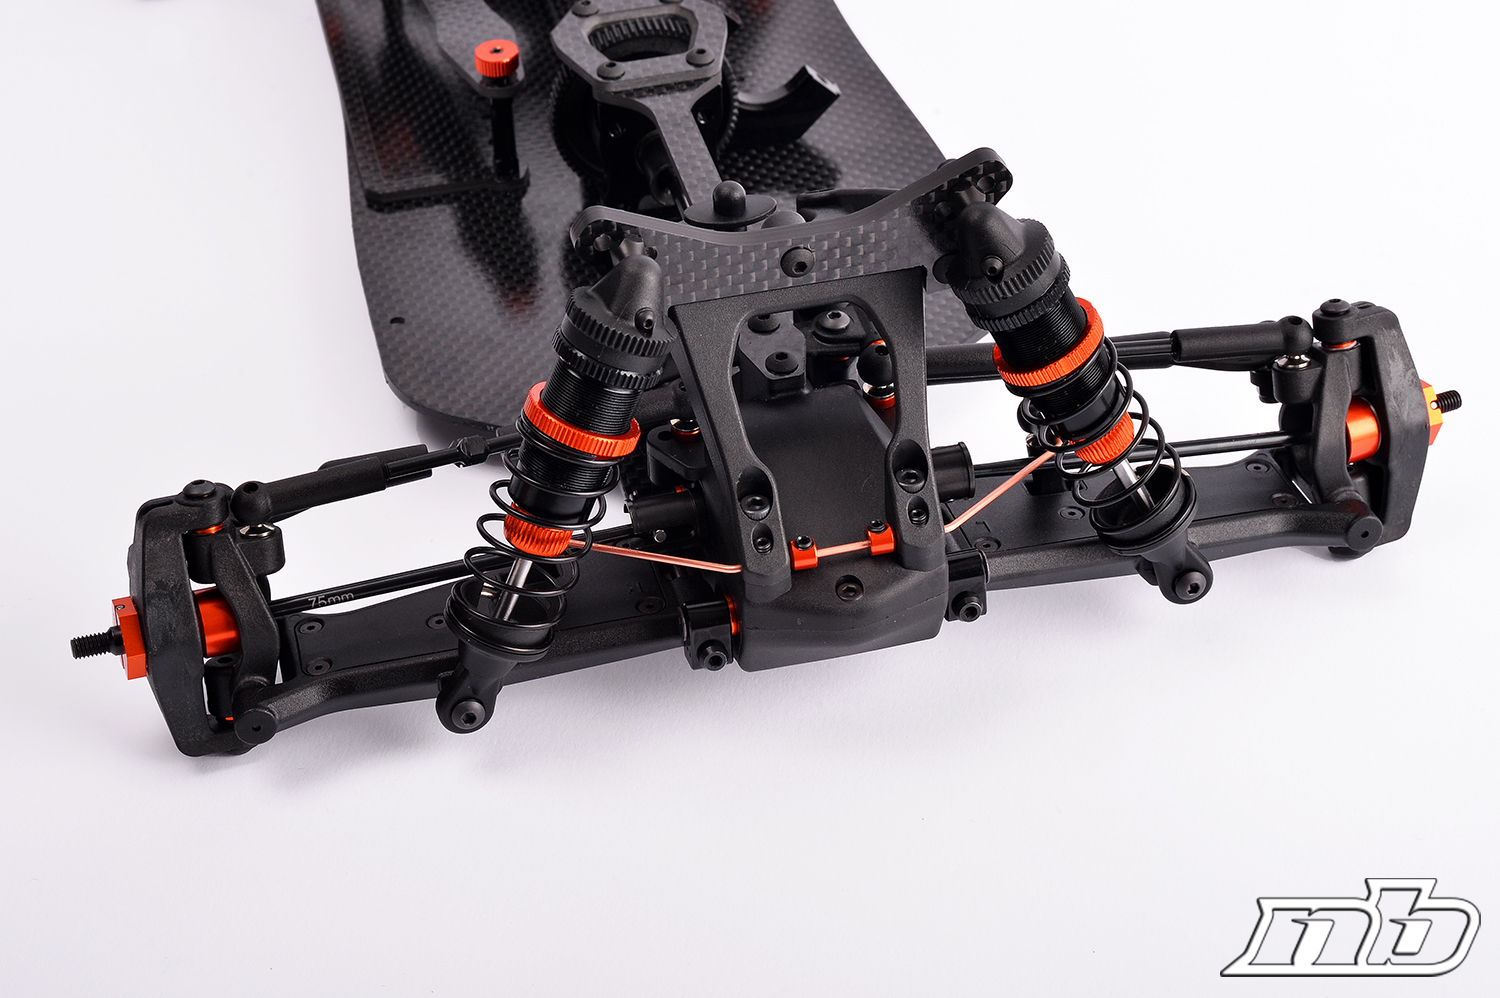
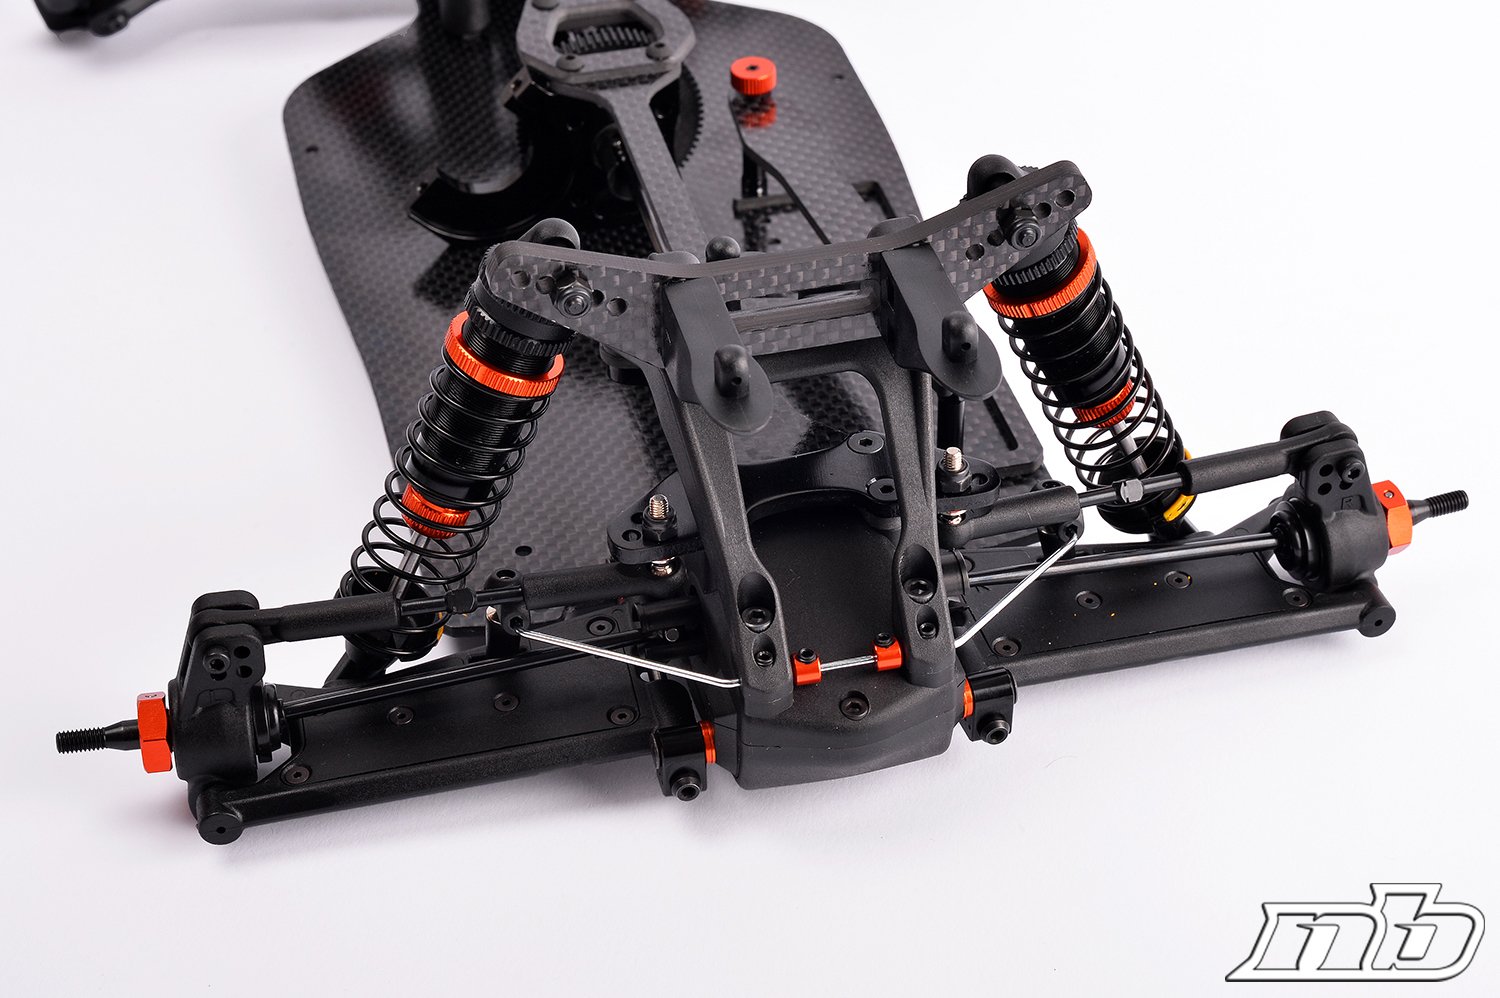
The suspension arms are HB style, so no holes, and look very flexible – maybe too flexible. That improved once we screwed the plastic stiffeners provided in the kit, even if it’s meant for high bite track the optional carbon plates would be the best option.
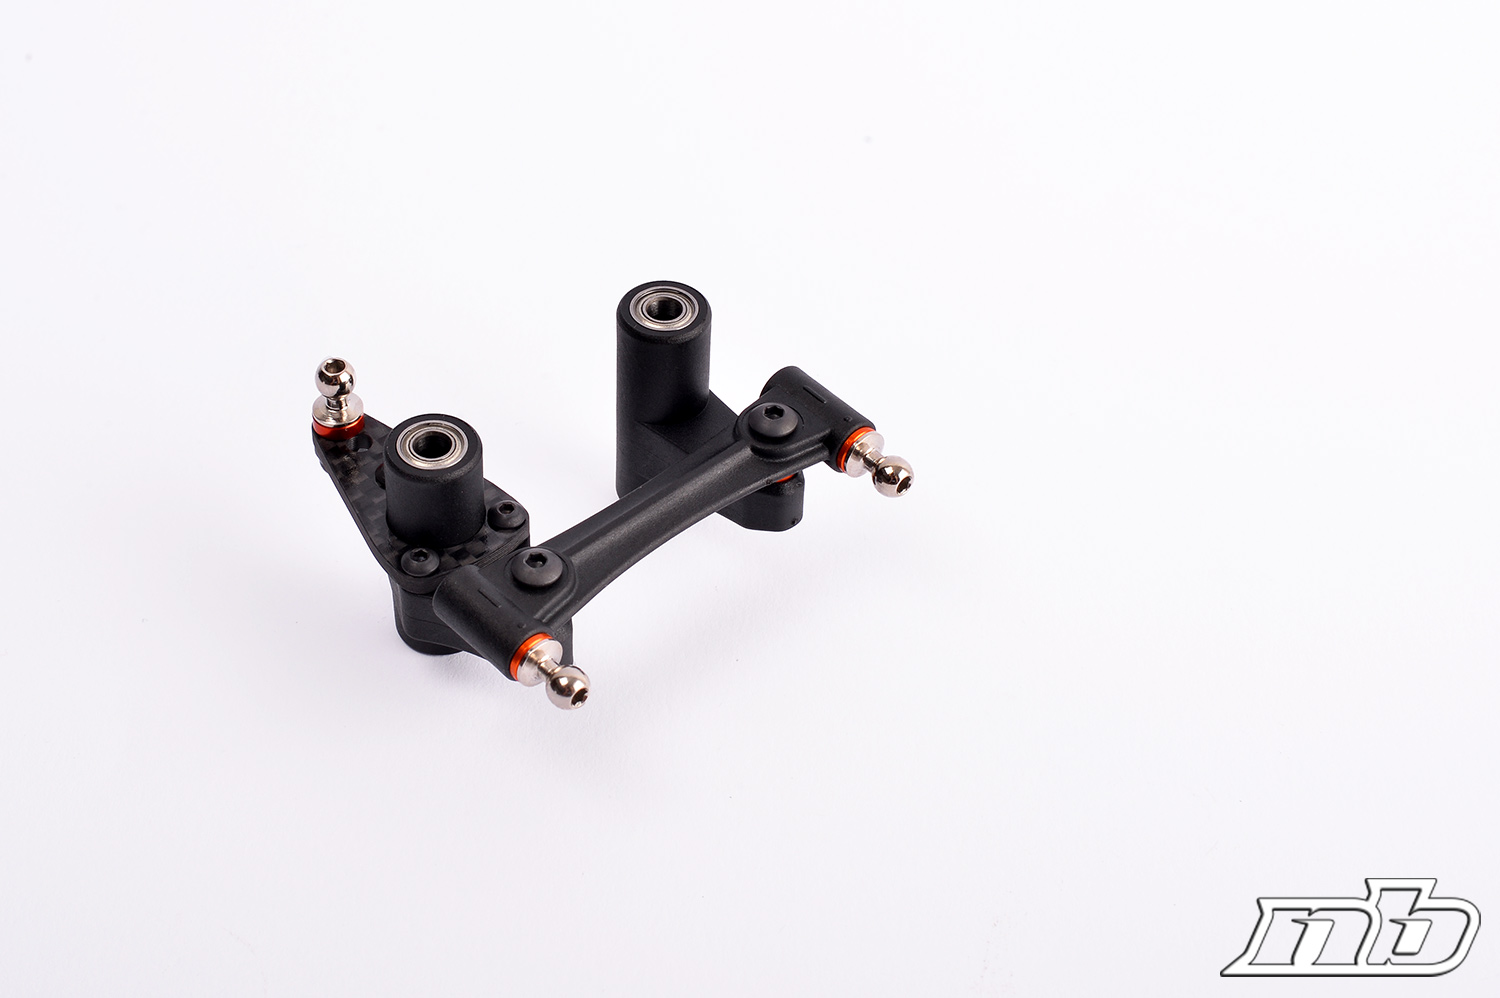
As said, the arms are held in position by two aluminum supports each, that are provided in different heights (distinguished by dots on the side) to adjust anti-dive and anti-squat. You can also adjust toe-in and width by simply adding or removing spacers between these supports and the bulkheads. Thumbs up for this solution!
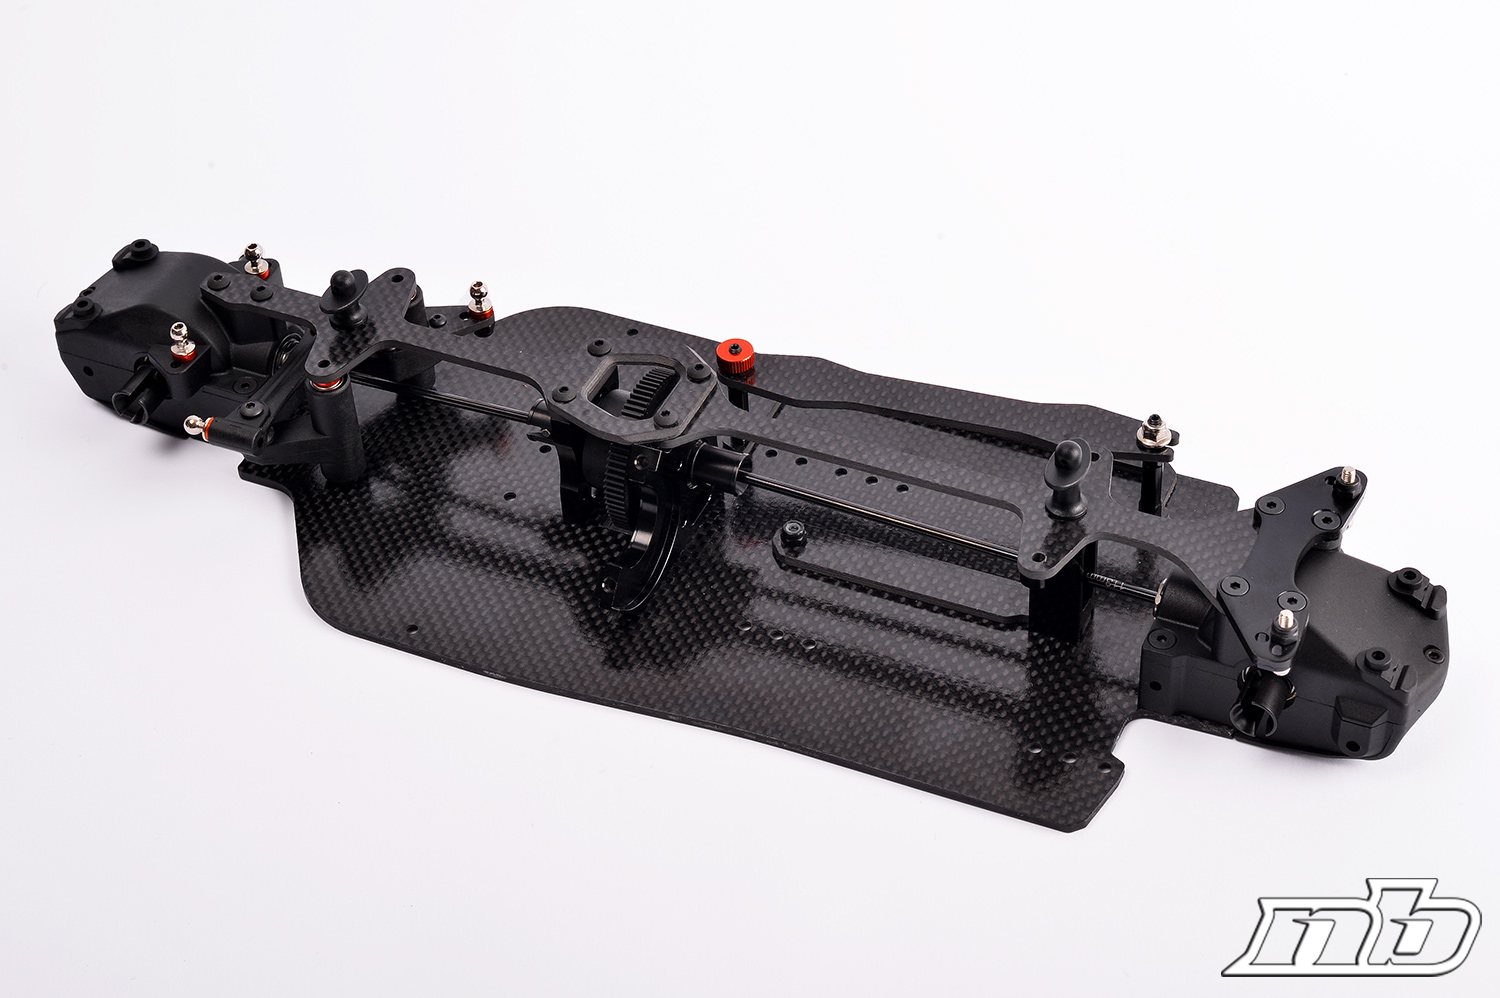
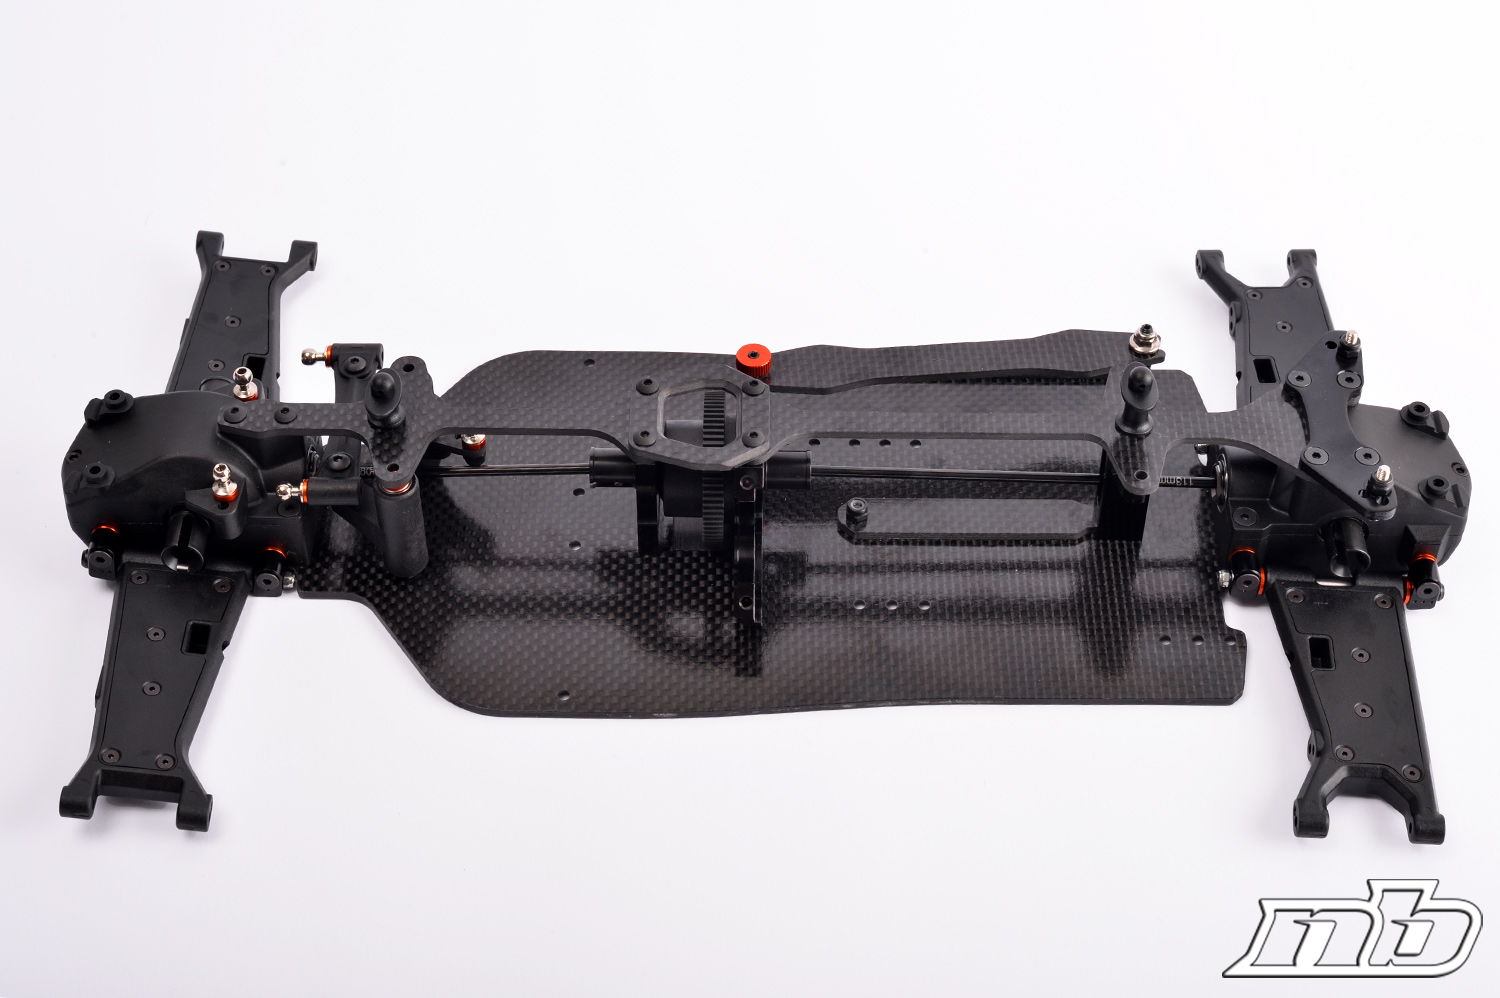
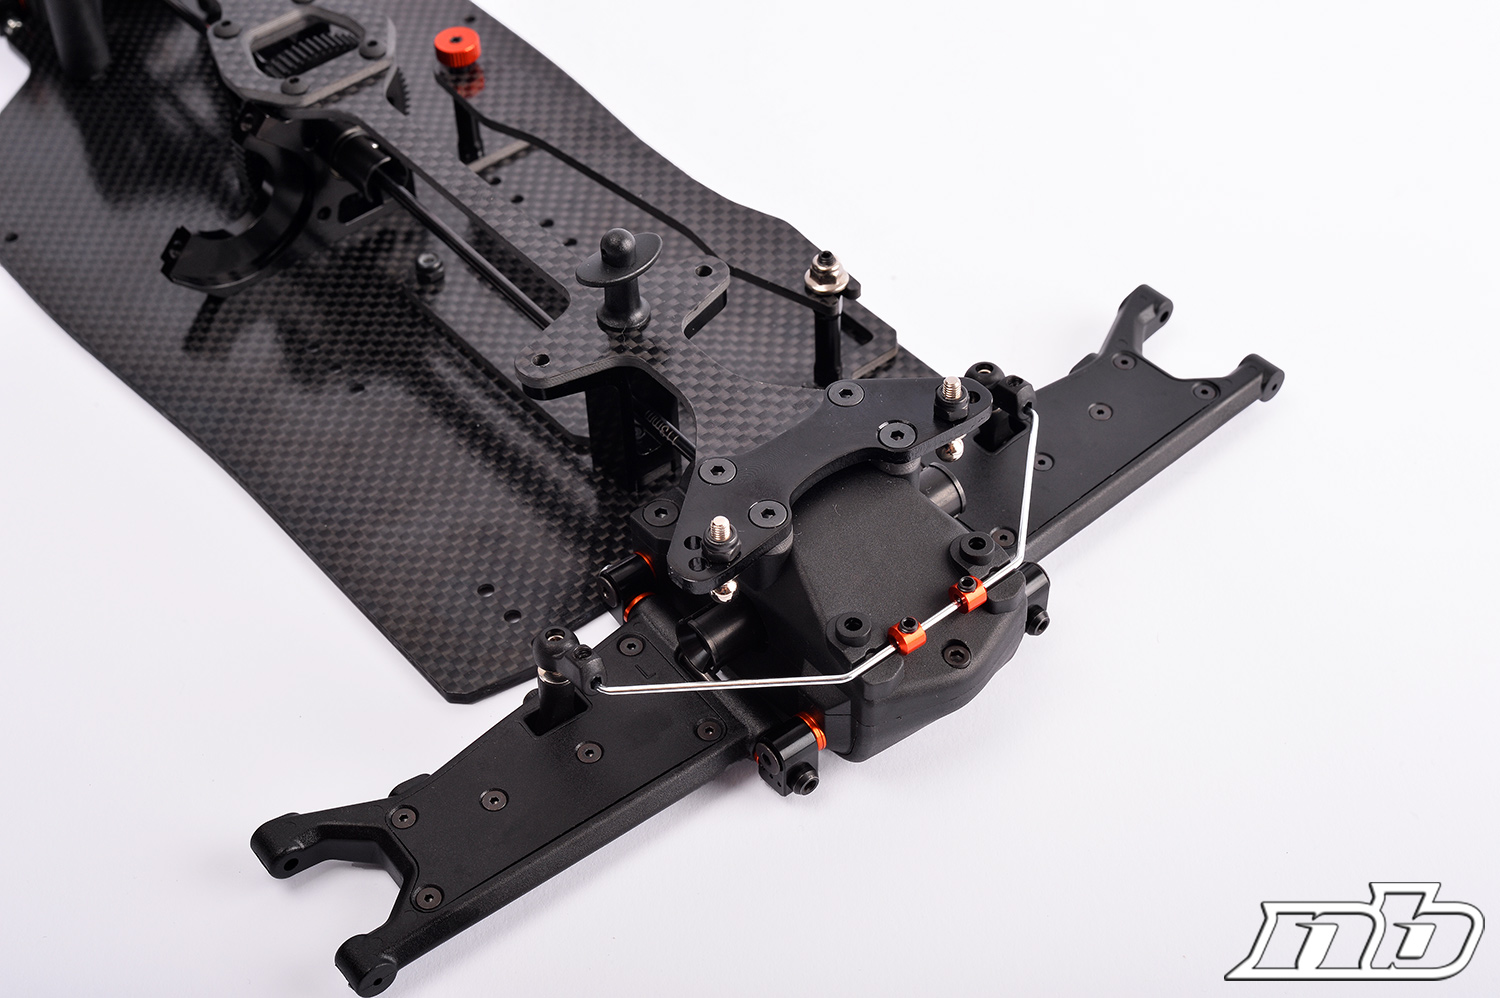
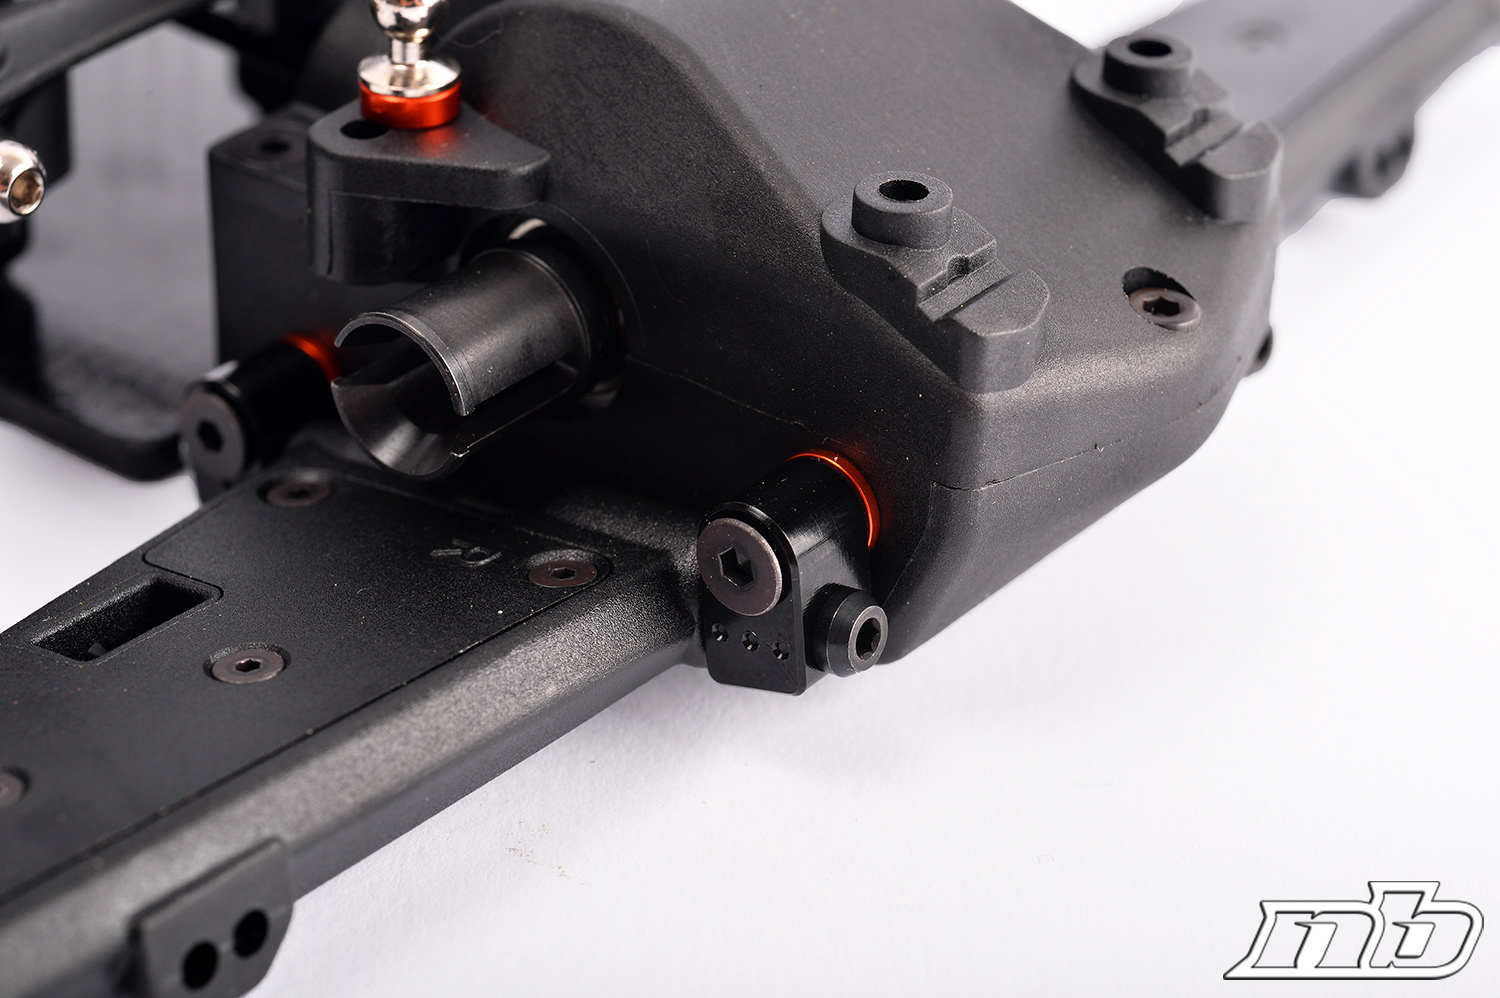
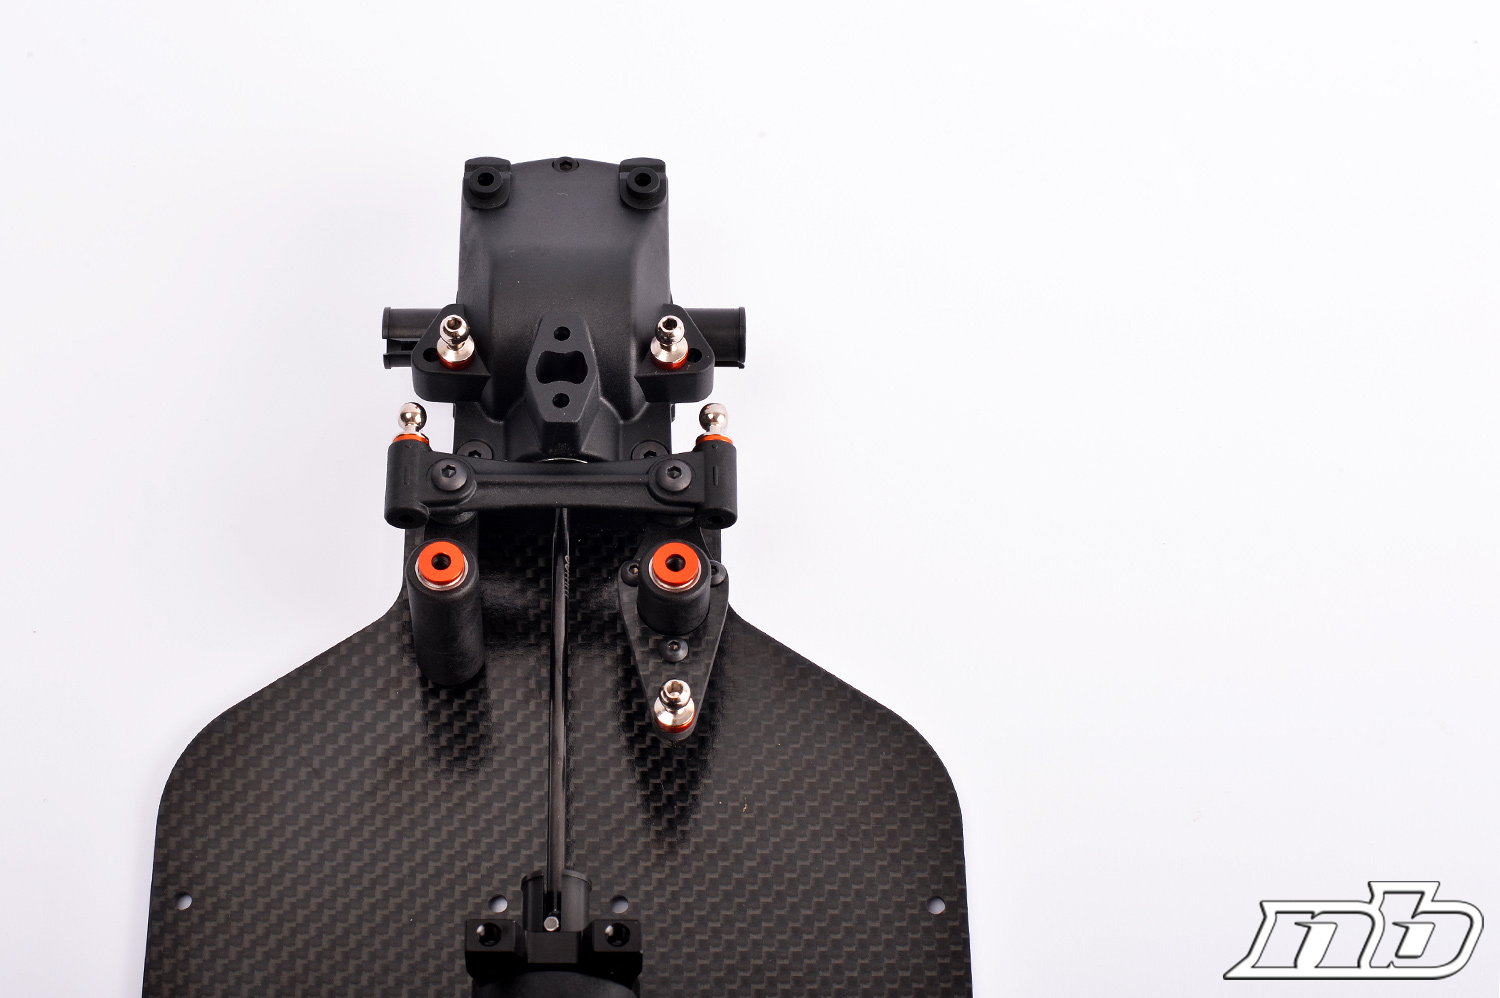
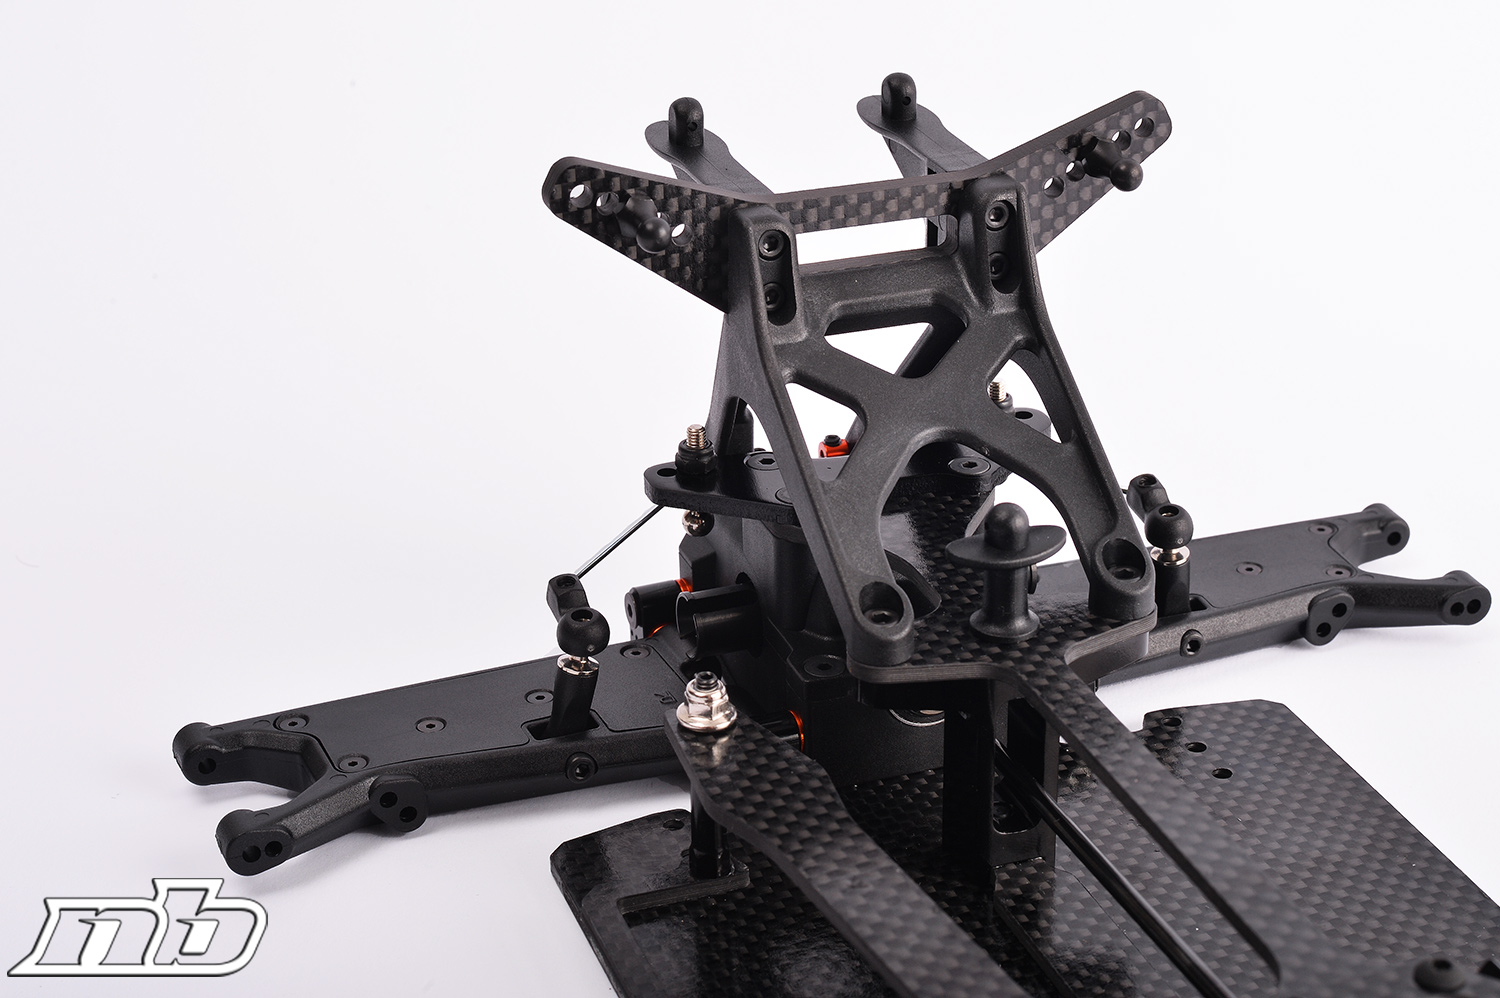
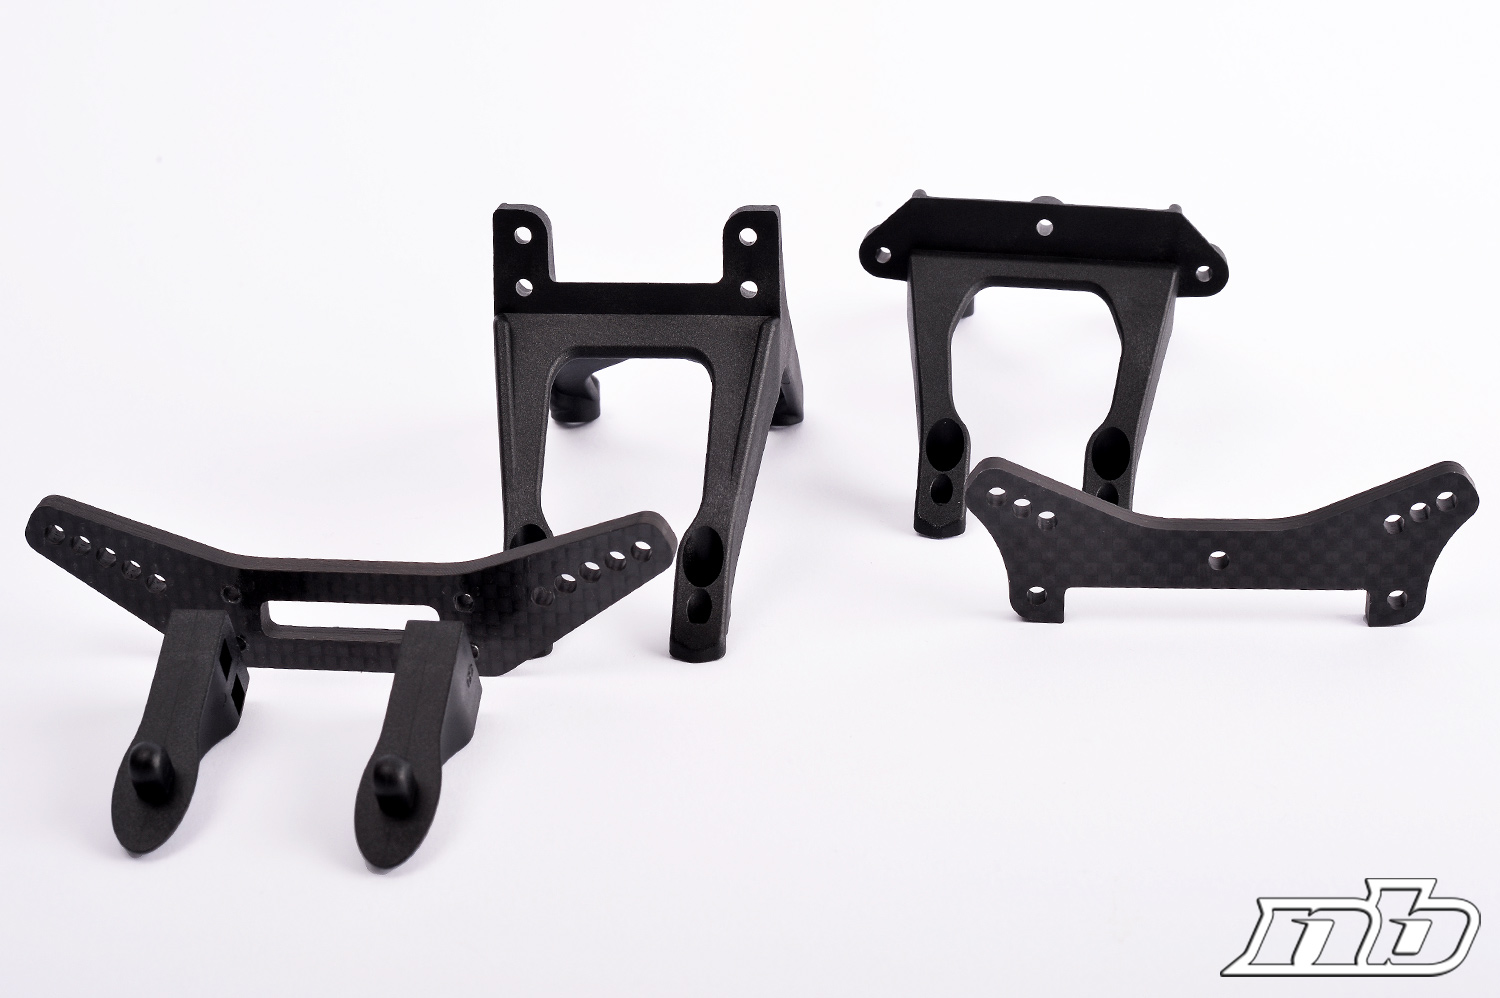
Another peculiarity of the 413 is represented by the shock towers: instead of being attached to the bulkheads, they are to be screwed on a plastic brace that also works as a sway-bar holder in both front and rear and gives a really unique look to the buggy.
The cvd’s are very well made and free in their movement: front and rear differ, the front shaft being 75mm long and the rear being 2mm shorter. In the front, you’ll need to fit an orange aluminum ring to hold the pin in place before passing the cvd into the knuckle bearing, while in the rear the bigger bearing carries out this task. The rubber boot on the rears is just the icing on the cake.
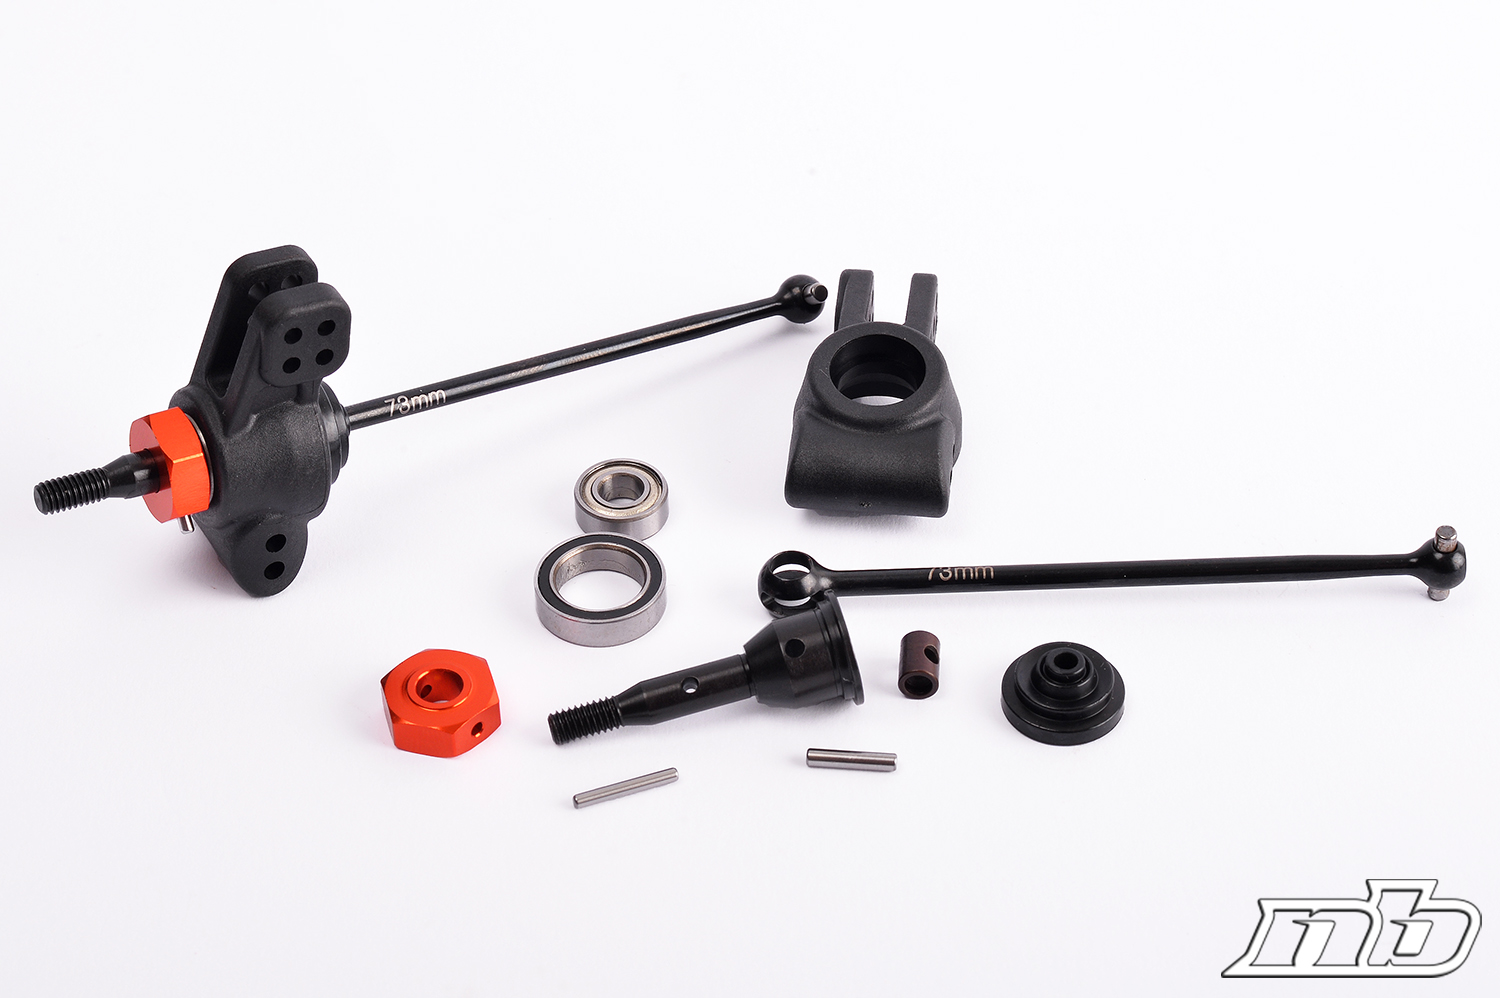
We dislike, on the other hand, the lack of retainment of the wheel hex pin that will fall off every time you pull off your rims. Pay close attention to this!
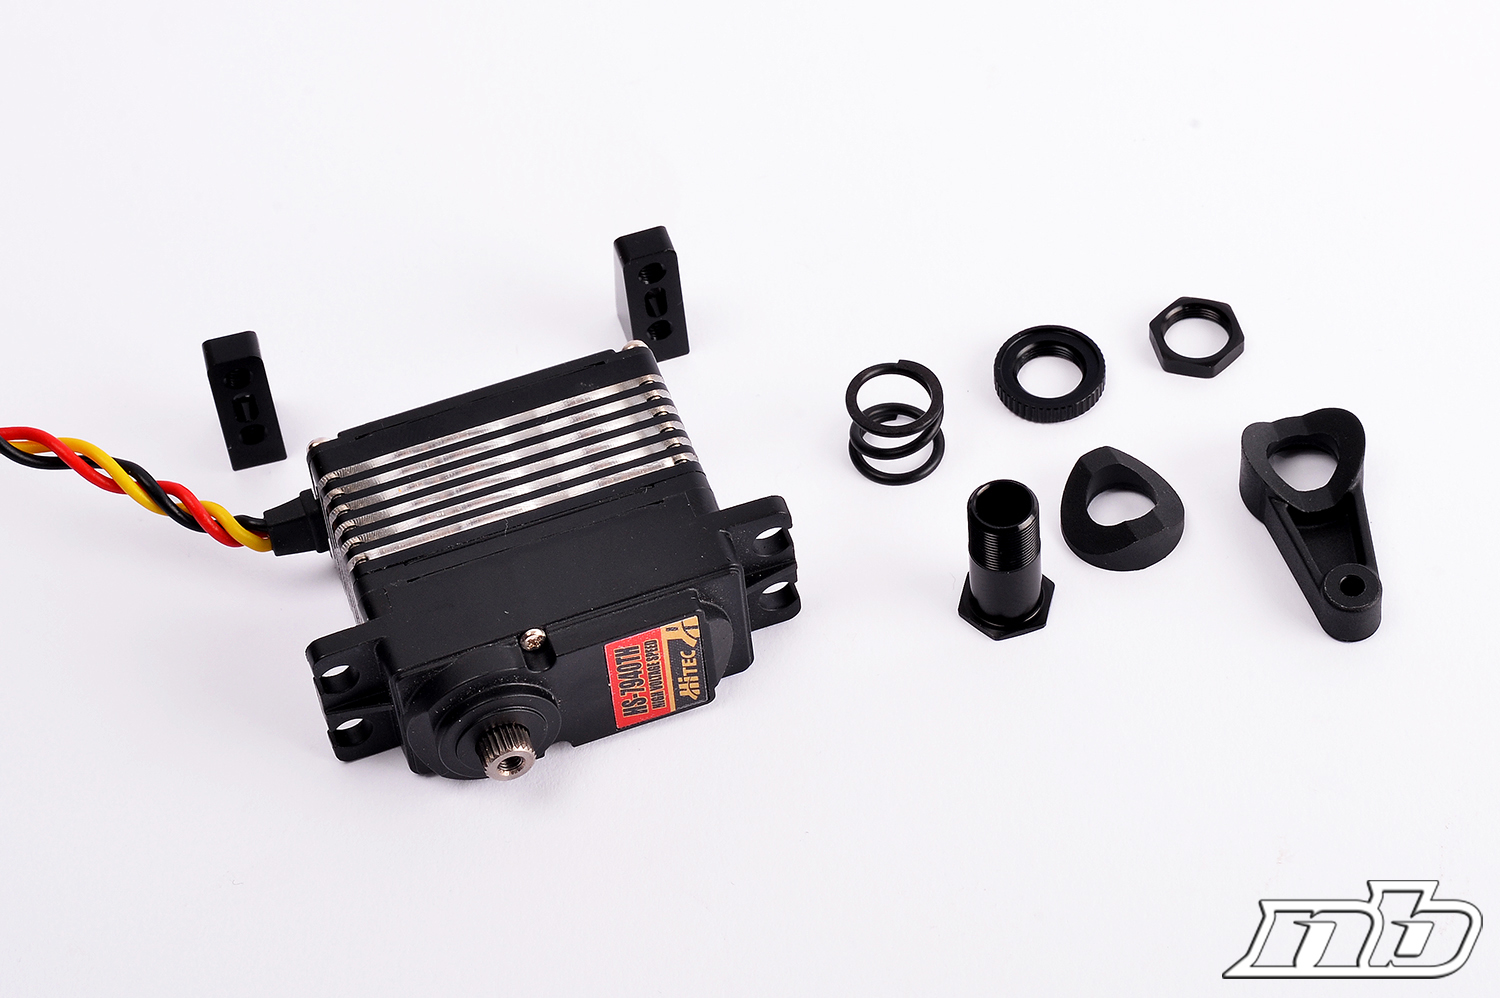
The servo mounts are very simple, with our Hitec HS-7940TH fitting snugly and so does the servo horn/saver. To assemble it was pretty easy, to avoid scraping the beautiful black anodized aluminum, just make sure you place some paper between the parts and the pliers you may want to use.
Snapping on the turnbuckles, assembling the hubs on the arms and adding the shocks completes the work covered by this first part of our HB D413's review!
The fantastic precision of both plastic and metal parts made this car a true pleasure to build, tolerances are pretty much spot on and apart from the steering rack all the play is correct, ensuring the free movement of parts without compromising precision.
No wonder Ty’s been so fast with it so far. And it does look good, even if a bit unconventional in traditional means.
The contrast between the graphite, the black and the orange parts is just right, and the clean and smart distribution of the parts over the chassis make the buggy a pleasure to watch.
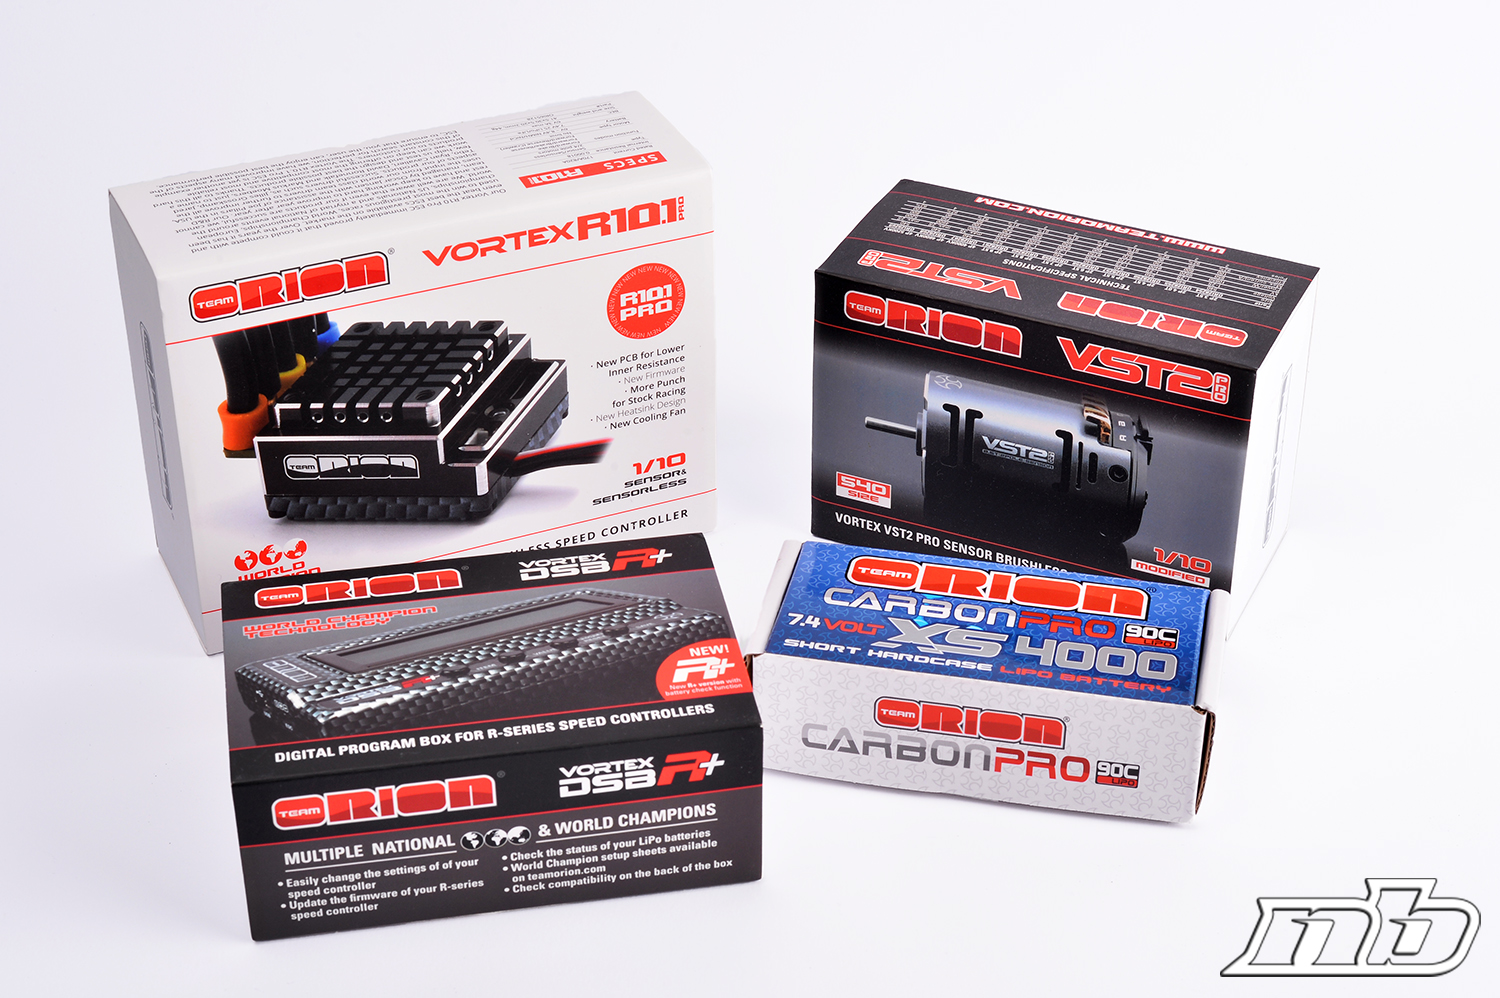
Will it be a pleasure to drive, too? We’ll find out in the next article, when we’ll fit the electrics and battery that Orion kindly provided us – a Vortex R10 ESC, VST2 5.5 motor and XS4000 shorty lipo pack – snap a couple more photos and head to the track for a deep testing session of this sweet looking baby!
Thank you to HB / HPI Europe for kindly providing the car for review.