Anti-roll bars are included in the DEX410 and DEX410 2010 Spec kit. Now available from Team Durango are anti-roll bar sets for the DEX410R. These are part numbers:
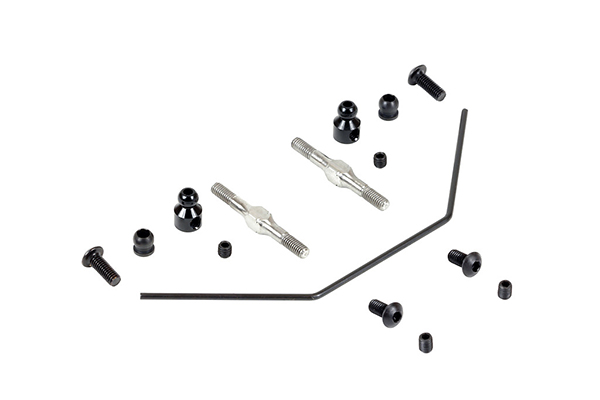
TD230012 – Rear Anti-Roll Bar Set
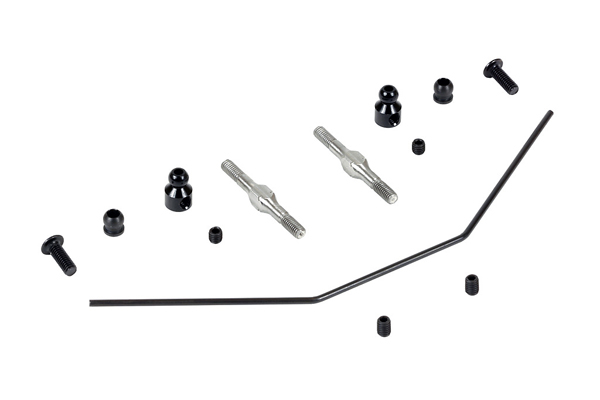
TD230013 – Front Anti-Roll Bar Set
Anti-roll bars are a useful tuning option. They allow you to add stiffness in roll without effecting the stiffness of the shocks over large bumps and jumps where the wheels at the front or rear of the buggy move up and down together. They work by transferring the load from the heavily loaded outer suspension to the lightly loaded inner suspension during cornering. This reduces the roll angle so the buggy corners flatter. In general anti-roll bars are used on smoother, higher grip tracks as they may not work so well on really bumpy or rutted tracks.
A front roll bar will decrease the steering of the buggy, and will make the buggy smoother and more consistent through a turn. It will stop the front end digging-in.
A rear roll bar will increase the rotation of the buggy in the middle of a corner and will help the buggy square-up faster coming out of a turn.
It is important when installing your anti-roll bar to make sure that all the components can move freely with no binding, with the minimum of play.
Here we show you how we recommend installing the TD230012 Anti-Roll Bar Set to the rear of the DEX410R. Fitting the front roll bar is a very similar process, but requires the removal of the front diff cover as this is used to hold the front roll bar in place.
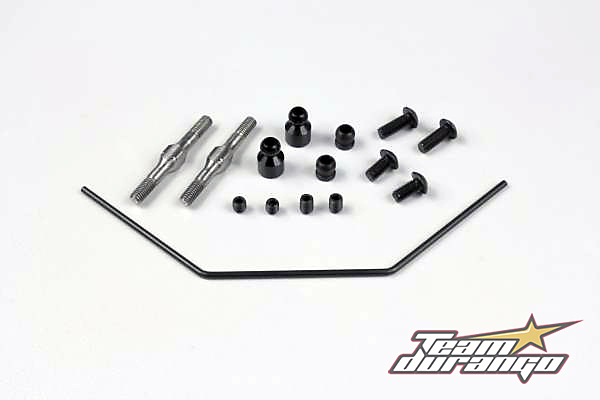
The TD230012 set includes all the metal parts you require.
The plastic parts needed are included with your DEX410R kit. The holders for the roll bars are part of TD330003 parts tree. The rod ends are included on the parts tree TD330001.
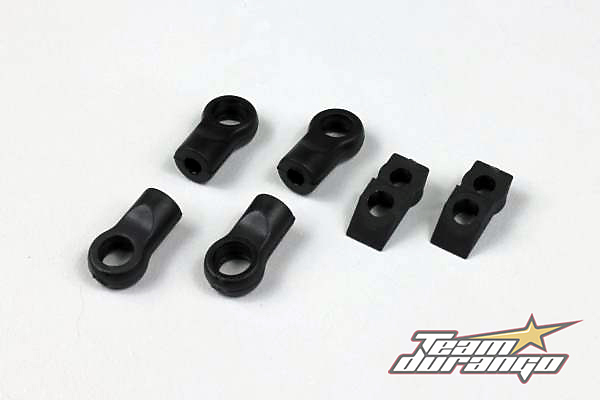
The plastic parts are included in your kit.
The first step is to build the links for the roll bar. You need to build two of these. The gap between the rod ends should be 18mm. It is important to make sure both the rod ends have the same gap so the roll bar works evenly on left and right hand corners.

Ensure both roll bar links are built to the same length.
Now place the pivot balls into one rod end of each of your roll bar links. The pivot balls should pop into place and move freely inside the rod end.
The next part of the process is to put the anti-roll bar pivot balls onto the roll bar. Place thread lock onto the M3×3mm screw and partially screw it into the anti-roll bar pivot ball. Now push the roll bar into the hole in the pivot ball so that the roll bar comes flush with the end of the pivot ball. The set screw should be positioned so that the it is angled slightly upwards when the roll bar is placed flat on the desk. Now repeat this process for the second anti-roll bar pivot ball. It is important for equal roll bar action left and right to ensure that the set screws are both at the same angle as the pivot balls sit off-set on the roll bar.

Make sure the set screws in the anti-roll bar pivot balls sit at the same angle to the roll bar as each other.
Now it is time to attach the roll bar to the buggy. The first step is to remove the wheels and the shocks from the buggy. Now place the roll bar onto the buggy and secure with the roll bar holders. The roll bar holders are held in place by the 2 M3×6mm button head screws included in the anti-roll bar set.
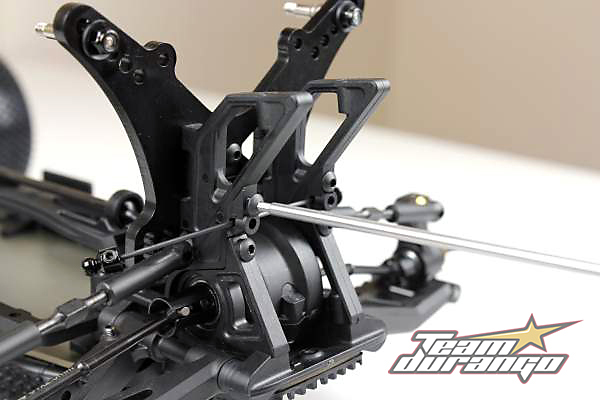
Attach the roll bar to the bulkhead of the buggy.
When you have installed the roll bar holders you need to fit the M3×4 set screws into the roll bar holders. These set screws are there to reduce the free play in the assembly fixing the roll bar to the buggy. Set screws are used as they allow for adjustment for different thickness roll bars. When screwing in the set screw you need to ensure that it is not too tight so that it stops the roll bar dropping under it’s own weight. You should screw one of the set screws in first until you feel the set screw touch the roll bar. At this point you may need to unscrew the set screw a small amount so that the roll bar will drop under it’s own weight. Repeat this process with the set screw in the other roll bar holder.
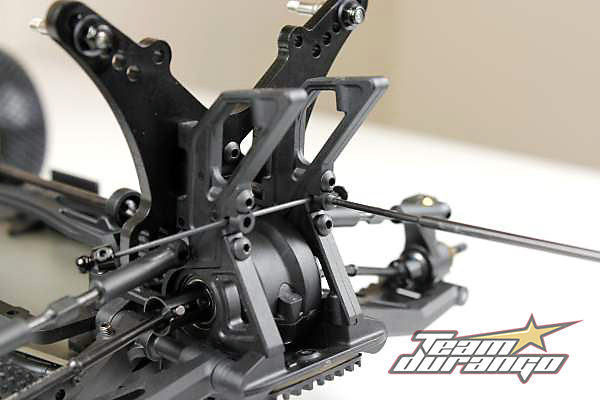
Tighten the set screws to remove free play in the roll bar.
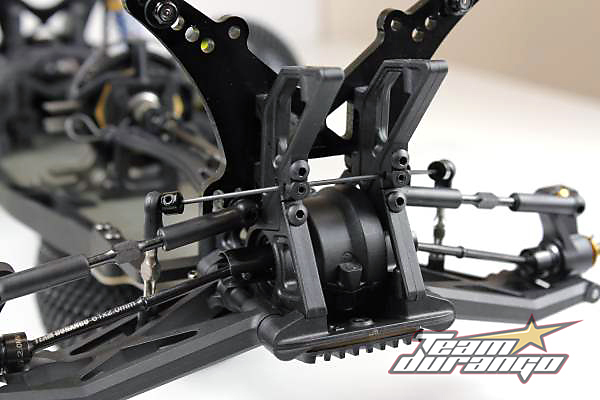
Now it is time to fit the roll bar links that were assembled earlier to the buggy. These are attached to the wishbone by a M3×8mm button head screw. The screw passes through the wishbone and then screws into the pivot ball. It is a good idea to use thread lock on this screw.You can hold the pivot ball with some needle nose pliers when you are tightening up the pivot ball.

Attach the roll bar link to the wishbone.
When you have attached the roll bar link to the wishbone you should attach the other end to the anti-roll bar pivot ball. Make sure that the assembly moves freely at this stage. You can rotate the plastic parts of the roll bar links now so that they sit square with the pivot balls. Repleat this process with the other side.
Now the assembly is fitted it is time to check the action is equal.
If the assembly all moves freely then it is time to check that the anti-roll bar has a equal effect on both sides of the suspension. This can be done by lifting one side slowly and checking at what point the other side starts to lift up.
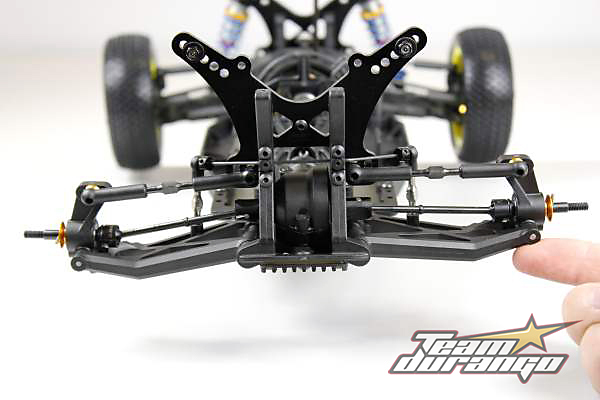
Lift one side and see at what point the other side moves.
You want the effect to be the same on both the left and right hand sides of the suspension
If you find that when you lift one side it has more of an effect than the other side then you need to adjust the length of the roll bar links to equal out the roll bar effect left-to-right.
For example if you find that when you lift the right hand suspension arm the left hand suspension arm moves sooner than the right hand suspension arm moves when you lift the left hand suspension arm then you should slightly shorten the length of the right hand roll bar link. Shorten this in small steps, checking on the effect of the adjustment until the suspension arms lift equally on the left and right hand side of the buggy.
There are a couple of tuning options with roll bars. For fine adjusment of the roll bar stiffness you can move the anti-roll bar pivot ball on the roll bar. Moving the anti-roll bar pivot ball towards the end of the roll bar will have the effect of softening the action of the anti-roll bar.
For a bigger adjustment we offer different thickness roll bars. A thicker roll bar has a greater effect than a thinner roll bar as it will transfer more of the force from one side of the suspension to the other. The roll bar sets come with 1.5mm thick roll bars, we also offer roll bars in 1.3mm and 2.0mm thicknesses for both front and rear. Here are the part numbers for our anti-roll bars.
TD330047 - ANTI ROLL BAR FRONT 1.3mm
TD330048 - ANTI ROLL BAR FRONT 1.5mm
TD330049 - ANTI ROLL BAR REAR 1.3mm
TD330050 - ANTI ROLL BAR REAR 1.5mm
TD330051 - ANTI ROLL BAR FRONT 2.0mm
TD330052 - ANTI ROLL BAR REAR 2.0mm
