|
- Team Associated RC10 World's Build -
Project By Trevor Duncan

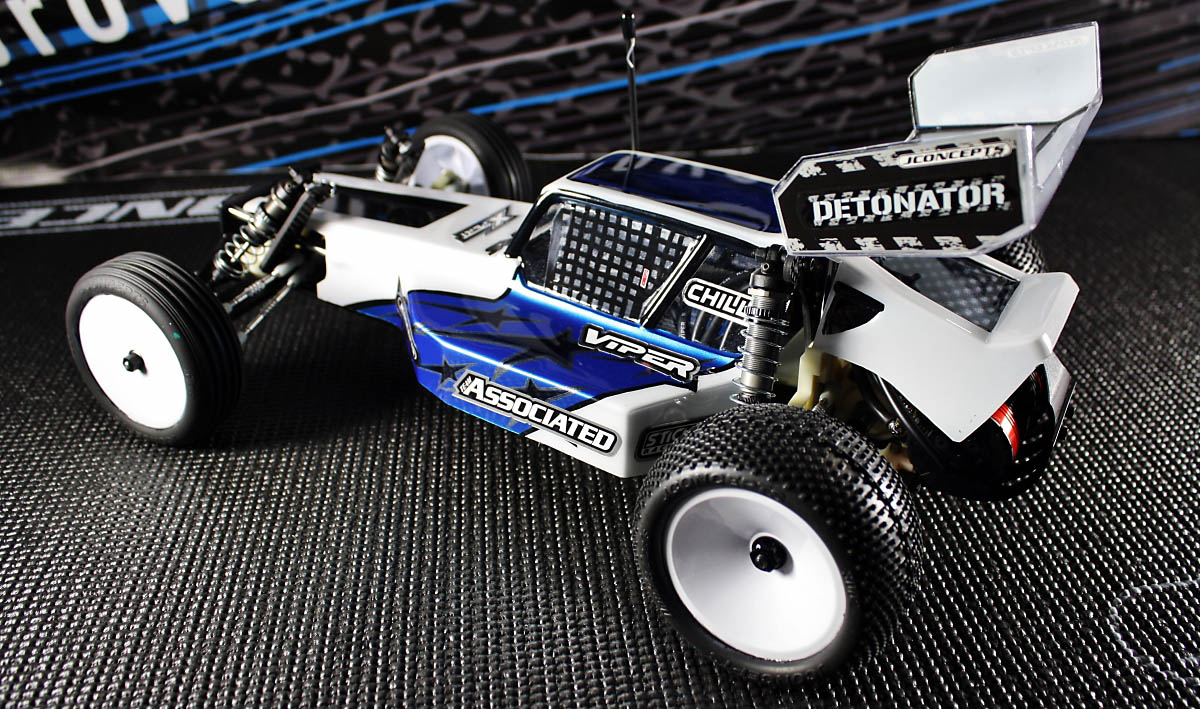
When Team Associated released the RC10 Classic kit in the summer of 2013, the industry saw an increase in RC nostalgia as racers both new and old lined up to get their hands on this limited edition buggy. Soon after that many manufacturers started to release other reproduction kits including Team Associated with their RC10 World’s Car. JConcepts was the first company to develop aftermarket parts for both of these retro RC10 kits, but in this online build we will focus on the option items available for the RC10 World’s Car.

Getting Started
The first order of business was to determine which items I needed for this new build. Many of the option parts JConcepts released for the RC10 Classic kit will also fit the World’s Car, but there are a few that are specific to just the World’s edition. I also decided to use a few extra items that JConcepts developed for other Team Associated vehicles too.
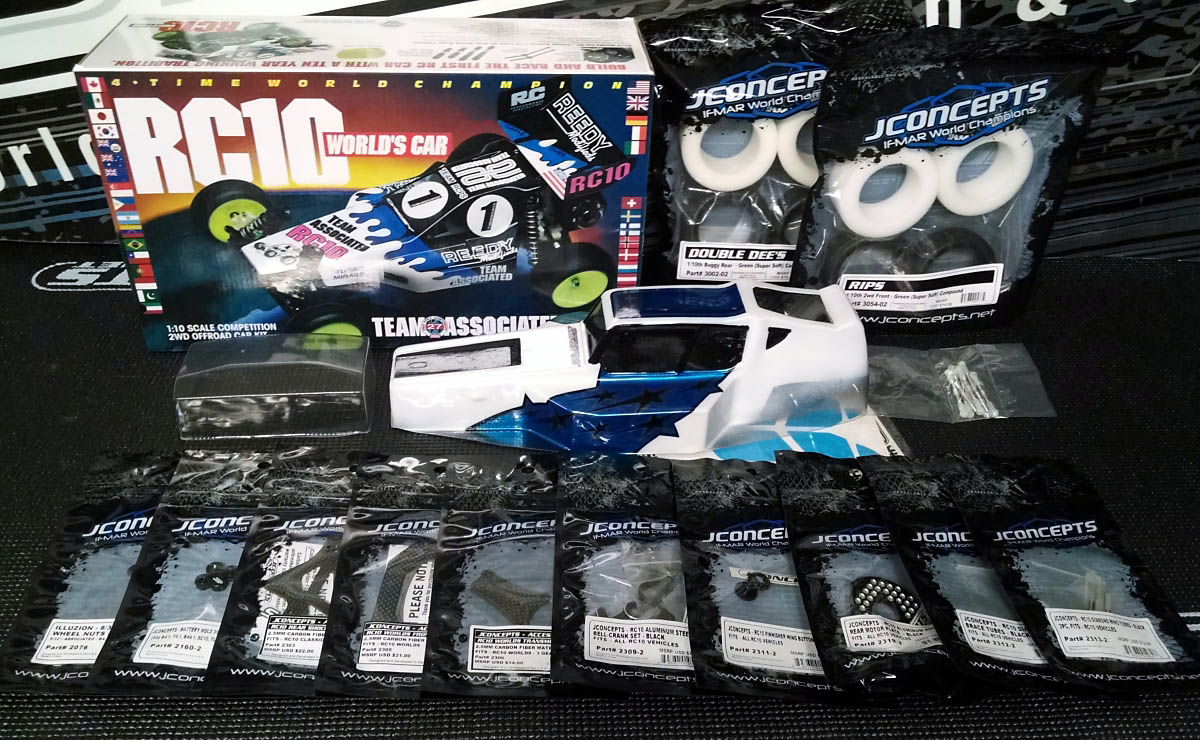
After determining what I would need for this build I had JConcepts send their RC10 Detonator body directly to Zegers RC Graffixx to spray it with my paint scheme. While it was away I cracked open the kit, pulled out the manual, and started to follow the build instructions.
Building A World's Car
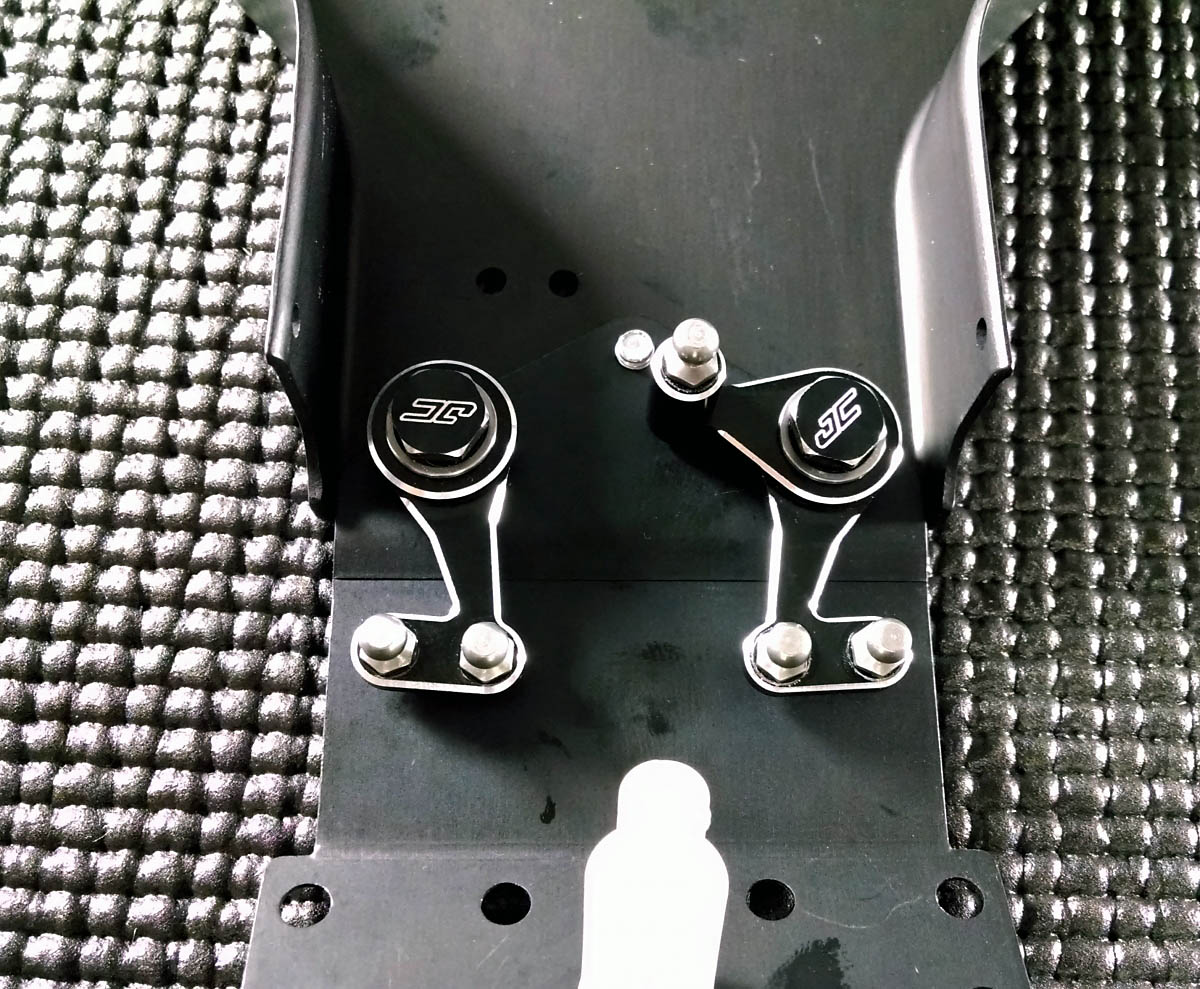
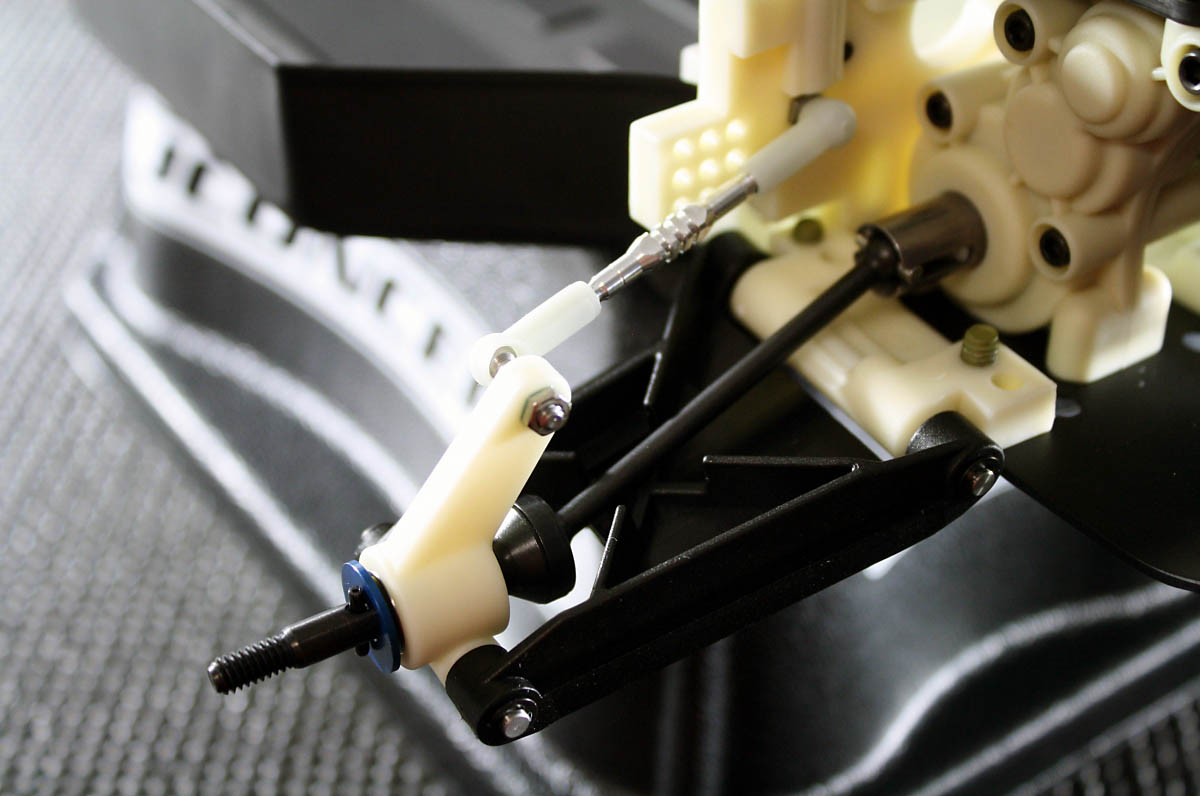
The first stock items I needed to swap out with JConcepts gear was the steering bell-crank set. JConcepts includes everything you need to convert over to their aluminum system, even the gold flathead Philips screws that hold it all together.
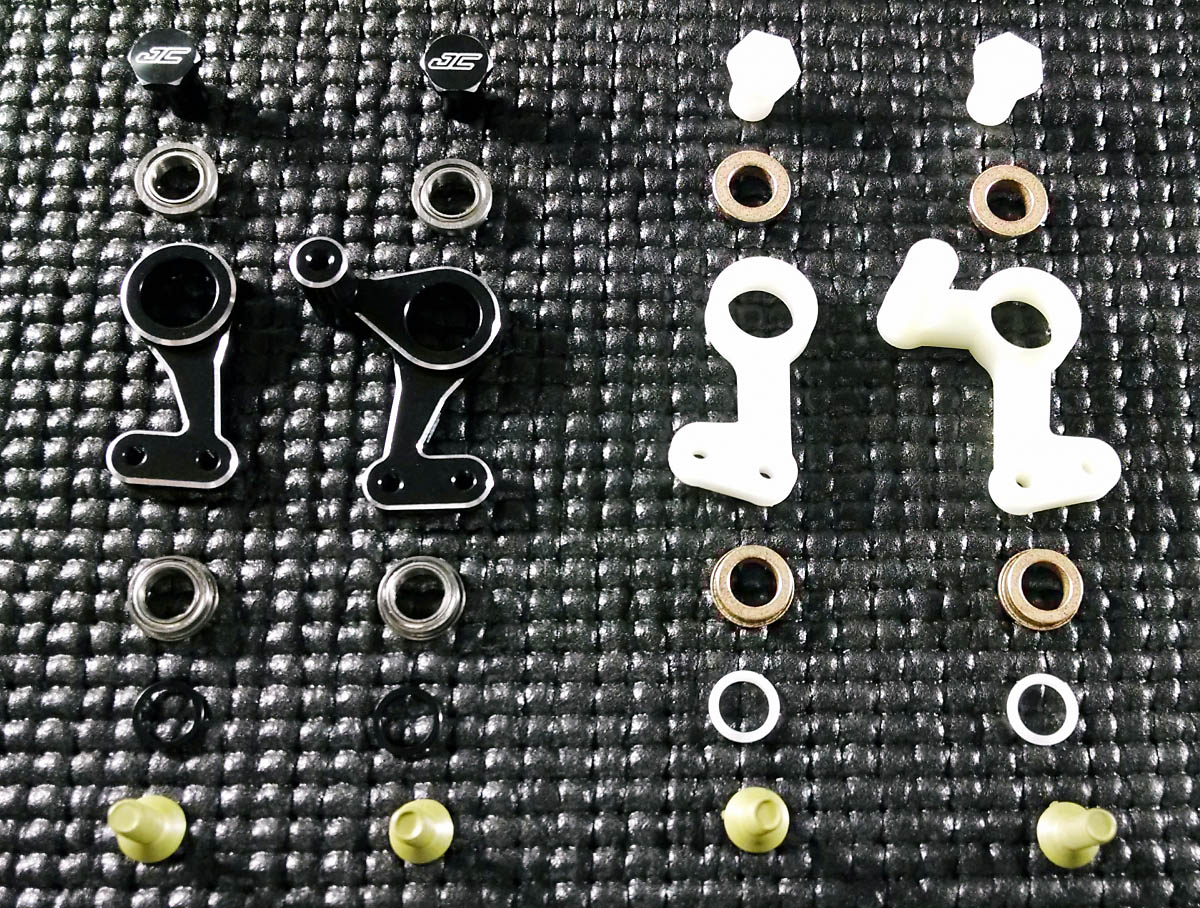
The aluminum bellcrank has many advantages such as increased durability, smother operation thanks to the included bearings, and it is available in either blue or black. Since the bellcrank bushing nuts are made of aluminum, and not plastic like the stock parts, I added a dab of blue thread lock so they didn’t work their way free later on. I also used a small amount of thread lock on the silver ballstuds too.
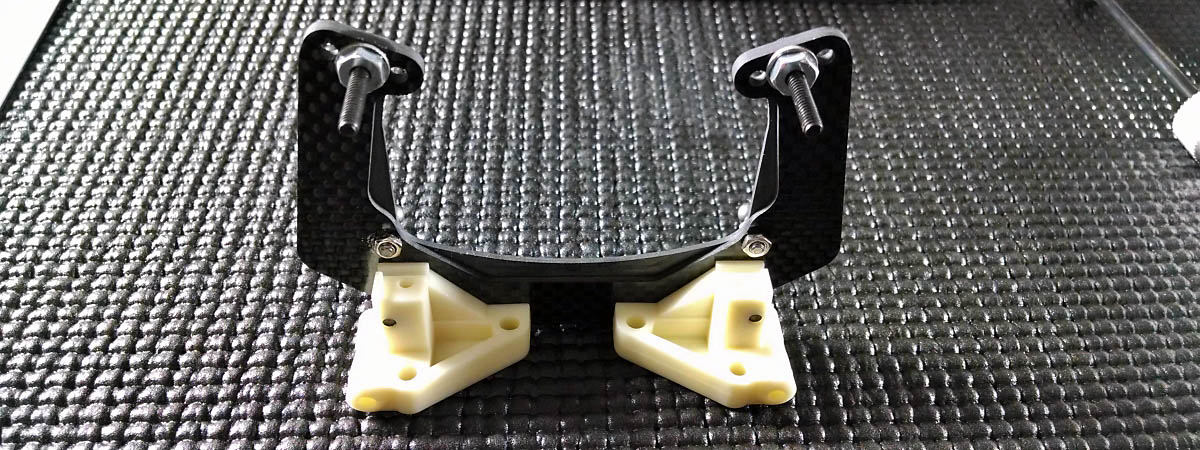
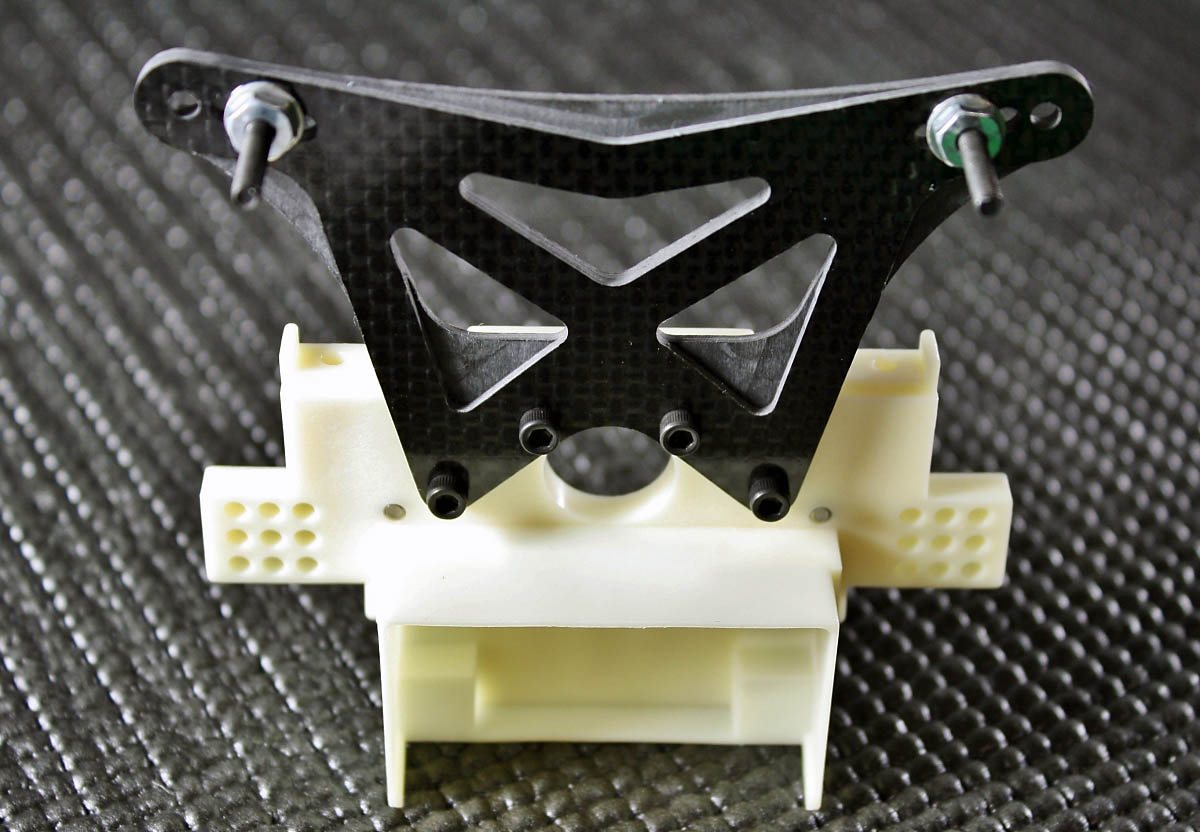
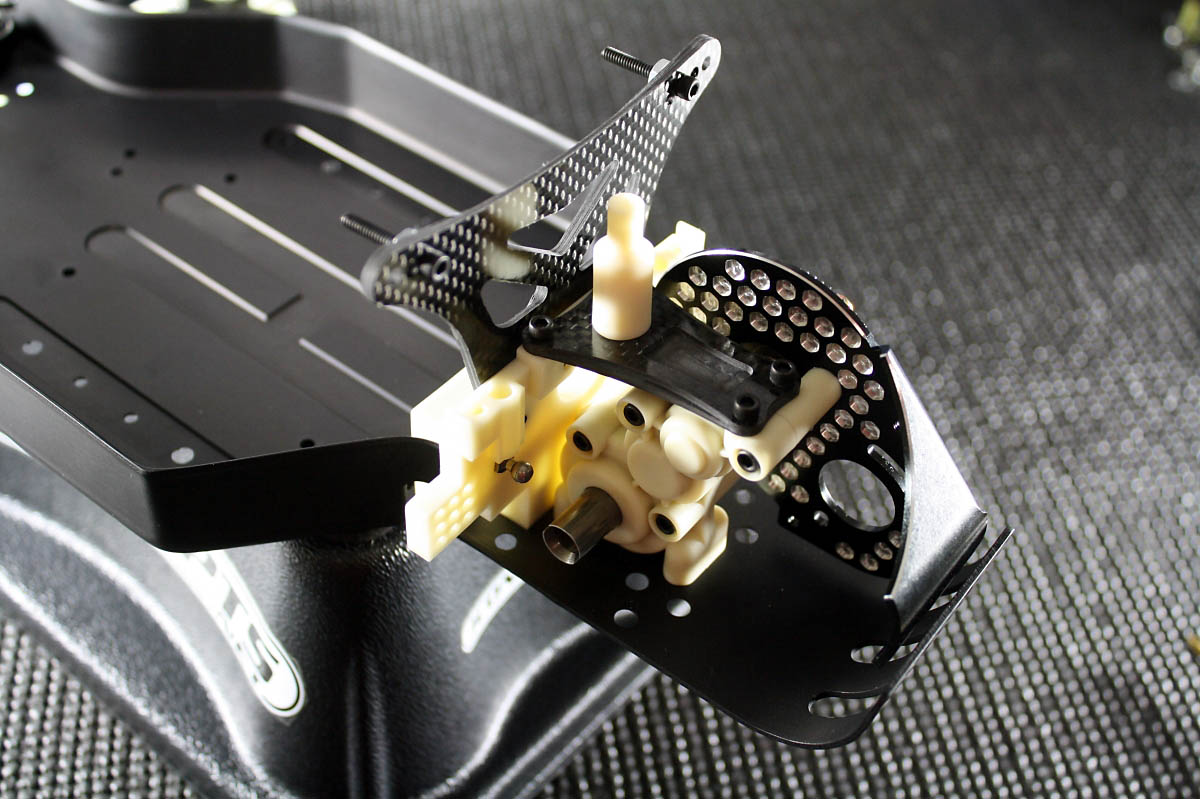
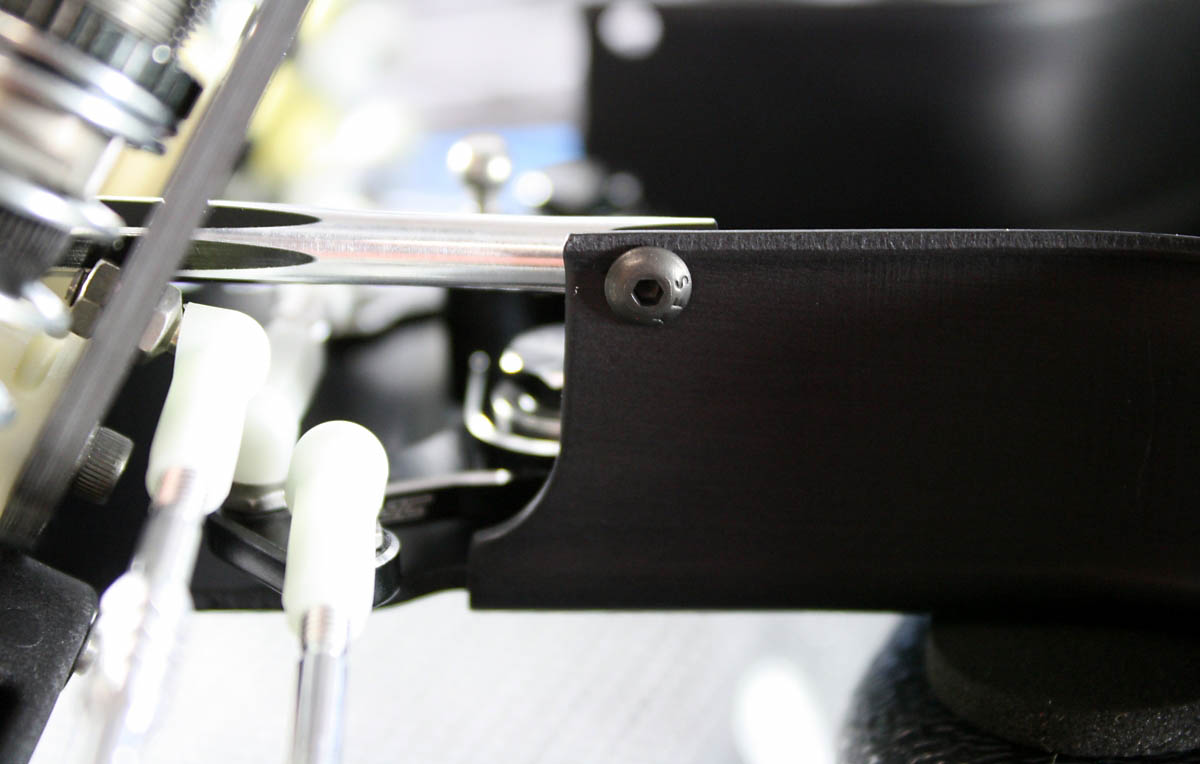
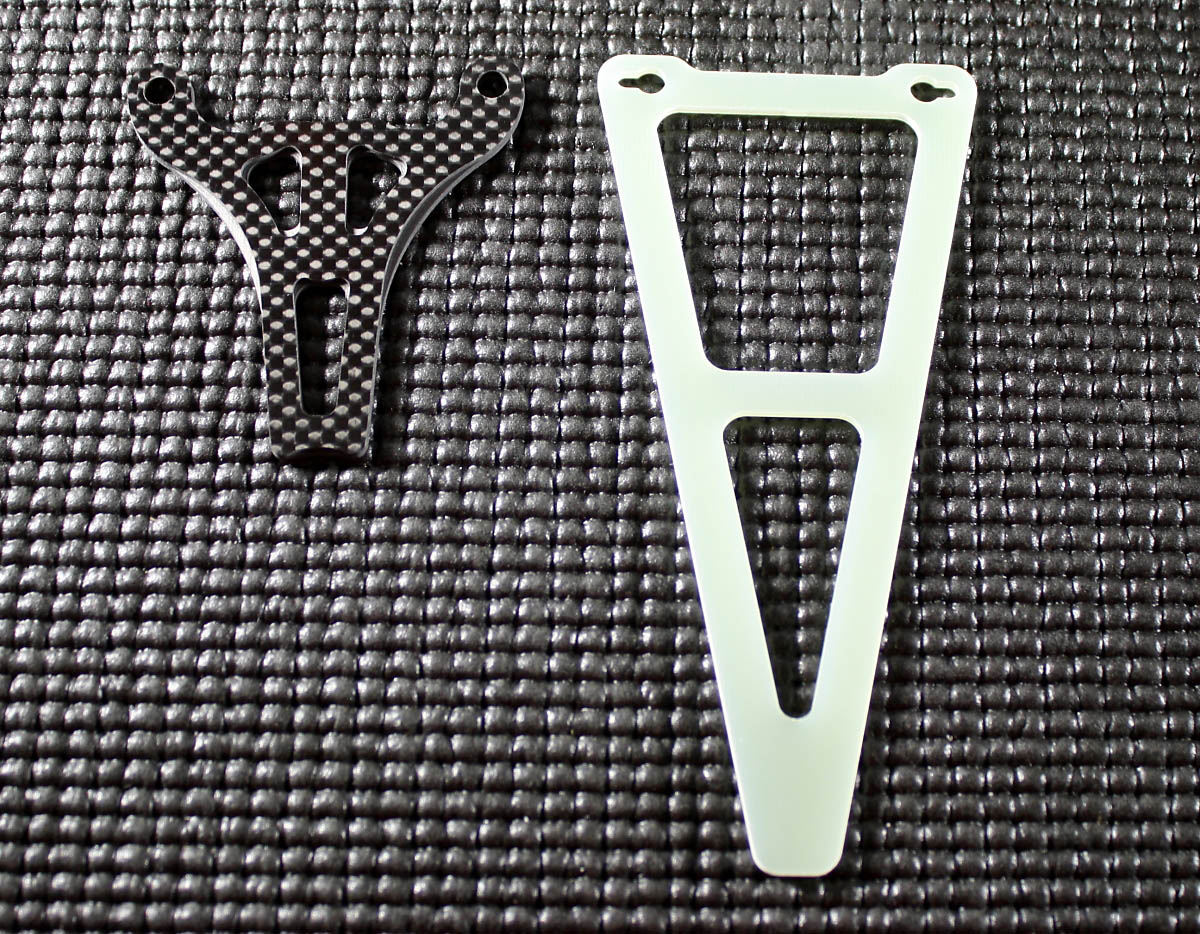
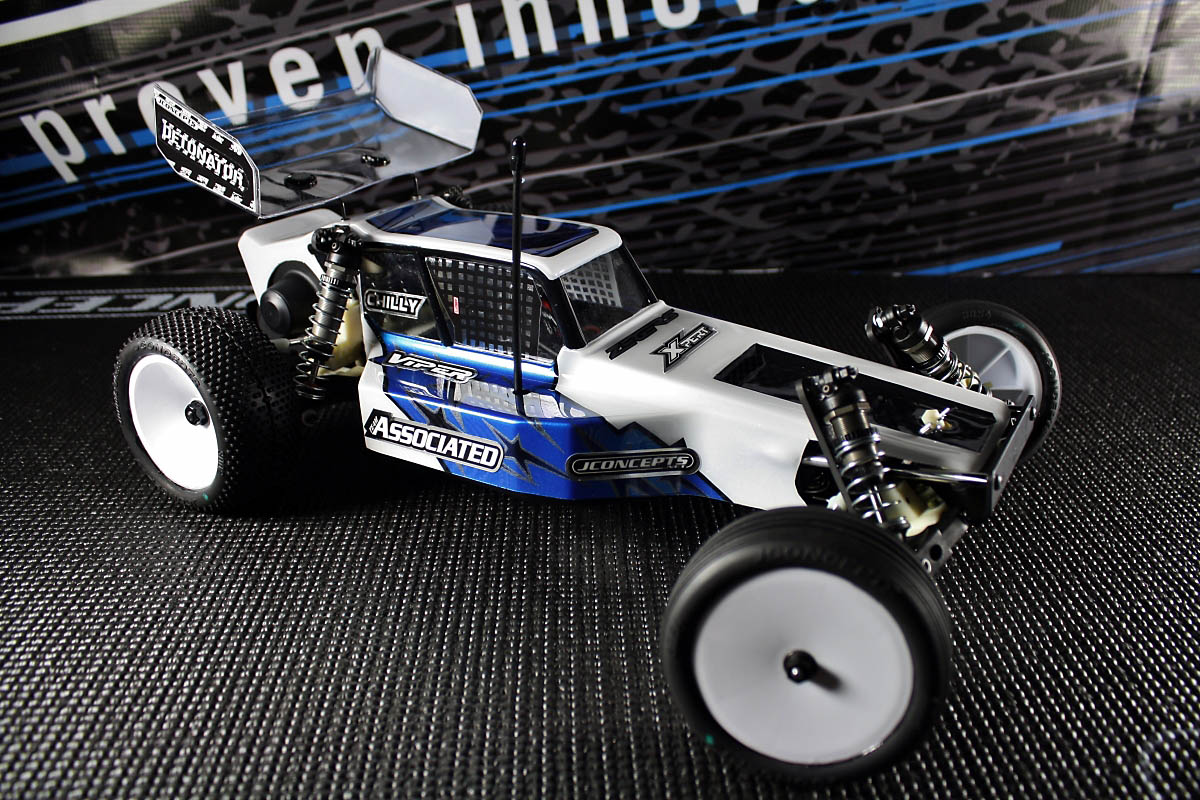
The next item I needed to replace was the front shock tower. The JConcepts front shock tower is made of 2.5mm thick carbon fiber material. This makes it stronger when compared to the stock tower which is comprised of 2.5mm layered fiberglass material.
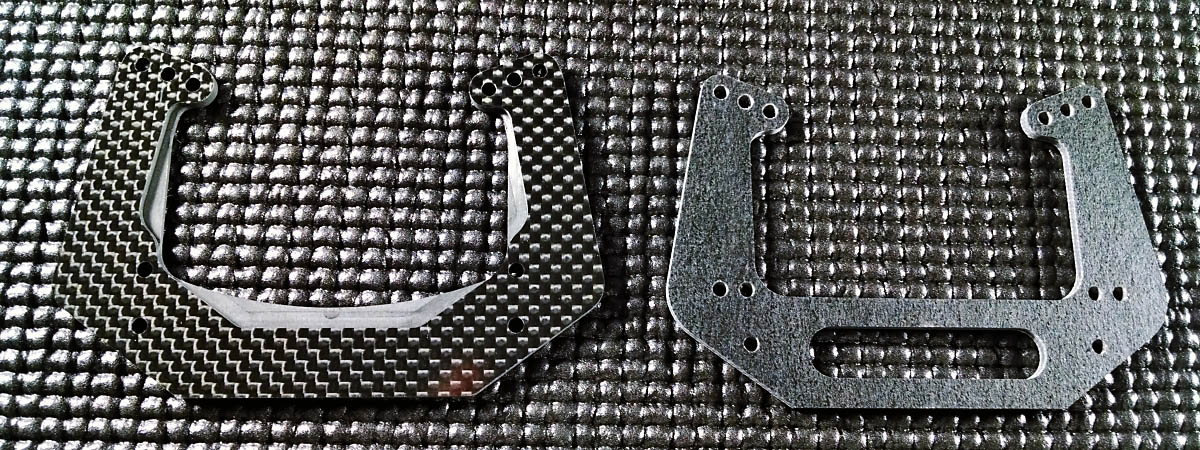
There are also reinforcement ribs added to the JConcepts tower to improve its strength. Also note that the JConcepts tower only includes the inner camber link holes. Since this was the preferred setup for most Associated drivers back in the day, JConcepts decided to make this the standard mounting position for the camber links on their shock tower.
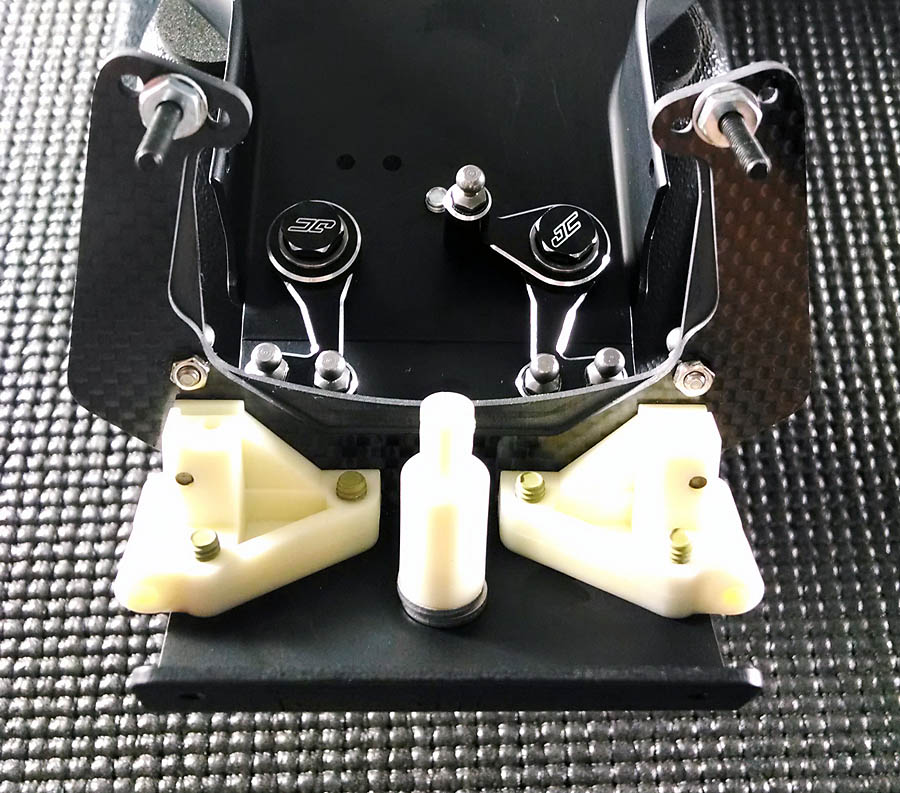
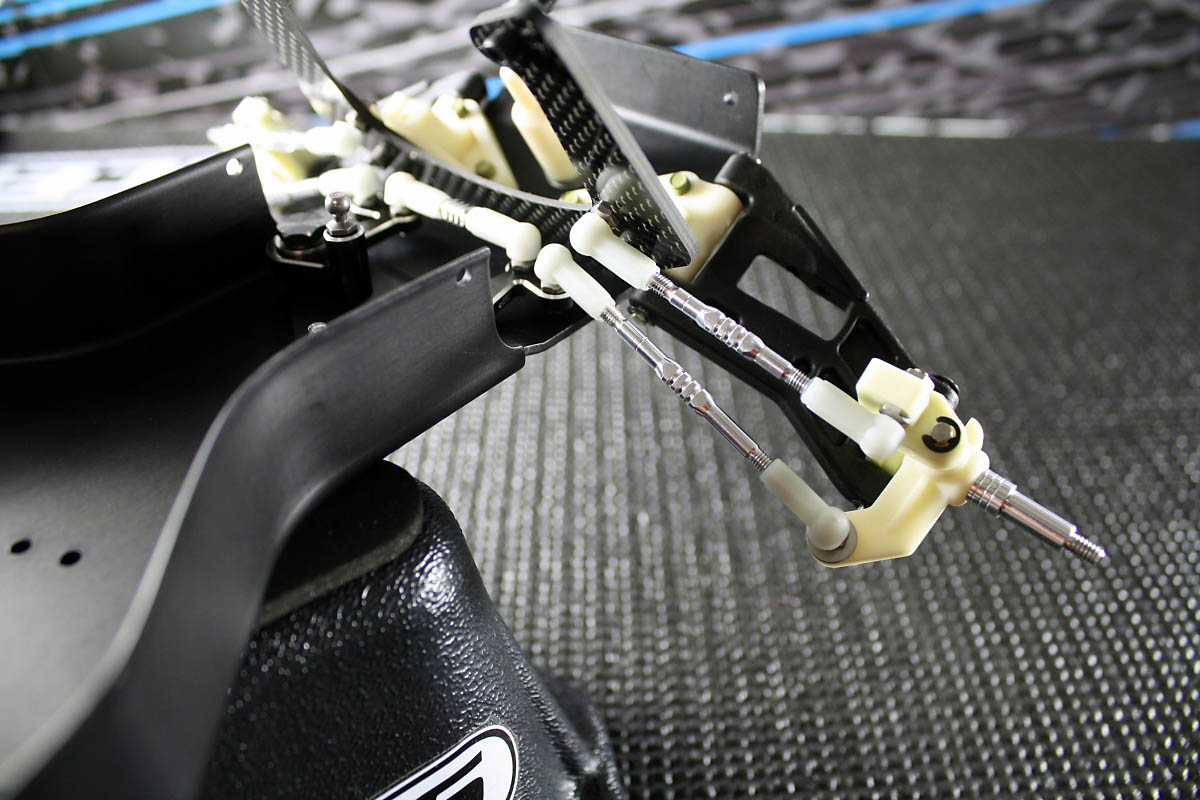
After I had the front tower mounted to the chassis the next item I needed to upgrade was the steering rack turnbuckle. Since I was already working on that I went ahead and built the rest of the JConcepts World’s Fin titanium turnbuckles too.
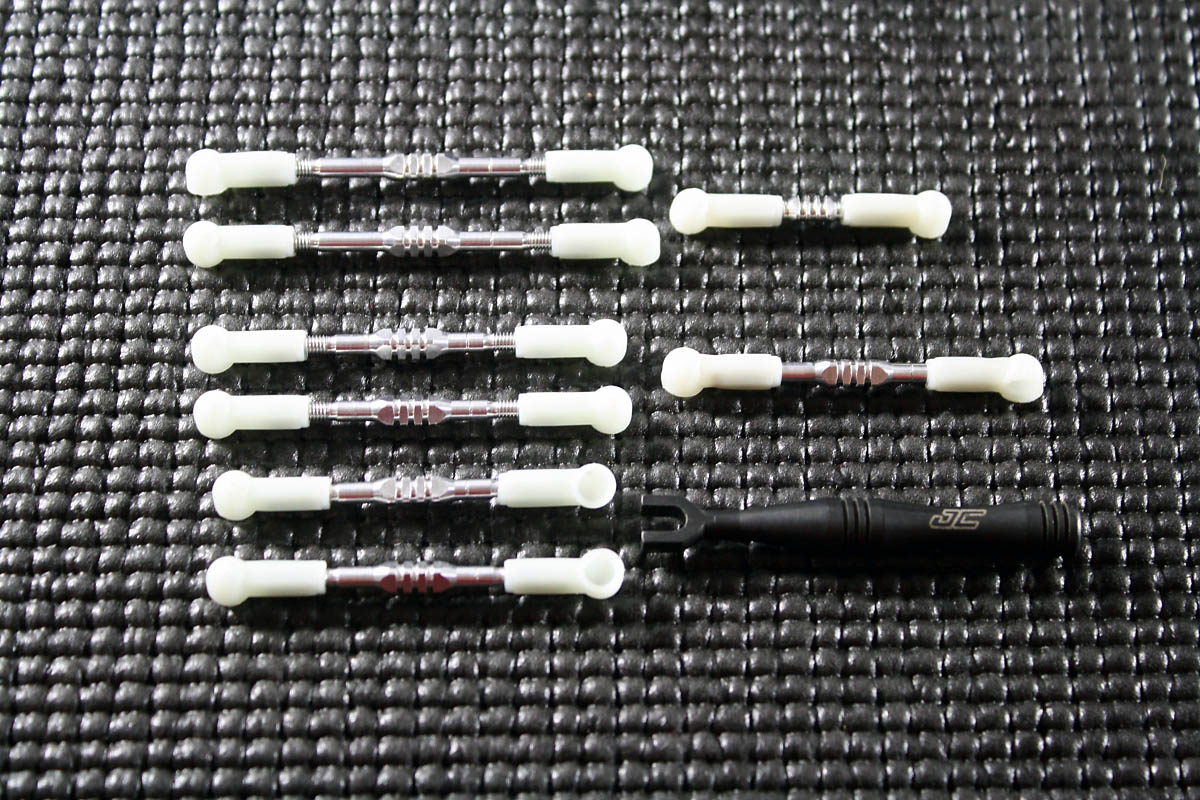
To make the build go smoother I used the JConcepts’ fin turnbuckle wrench which is sold separately. The Fin titanium turnbuckles are made of high-grade, machined titanium material and threaded perfectly into the kit’s white ball cups. The turnbuckles even included a mark of the left hand side to help you keep track of adjustments made to them.
I assembled the transmission next, and then it was time to mount it to the motor plate. I switched out the stock motor plate for JConcepts’aluminum Honeycomb rear motor plate. Available in either blue or black, this motor plate is lighter than the stock version thanks to the milled Honeycomb pattern. It also incorporates nice looking silver chamfered edges, and a raised heatsink“shield” on the back.
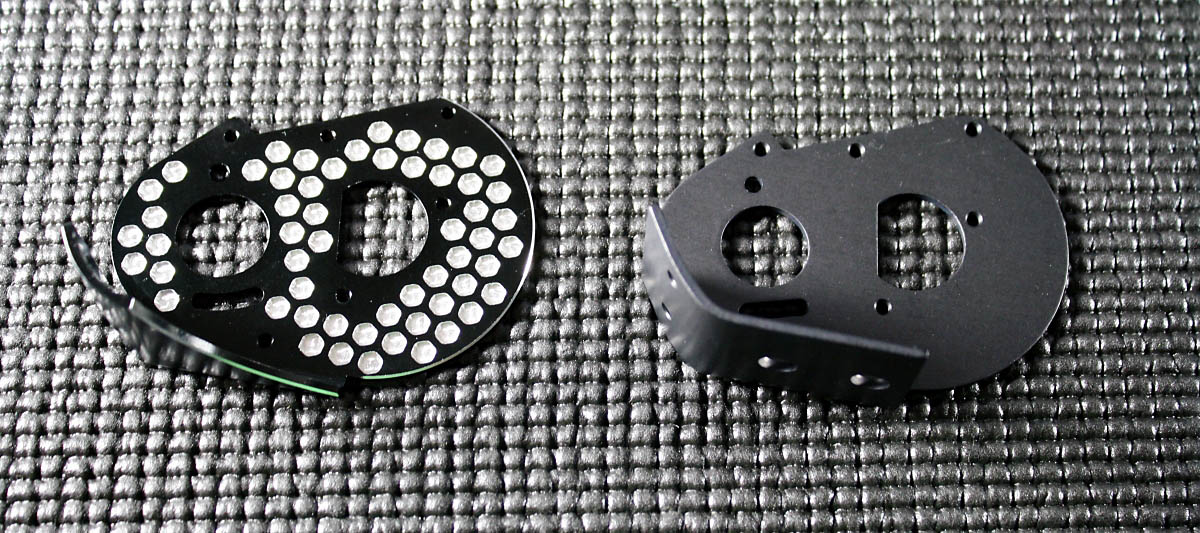
I assembled the transmission next, and then it was time to mount it to the motor plate. I switched out the stock motor plate for JConcepts’ aluminum Honeycomb rear motor plate. Available in either blue or black, this motor plate is lighter than the stock version thanks to the milled Honeycomb pattern. It also incorporates nice looking silver chamfered edges, and a raised heatsink “shield” on the back.
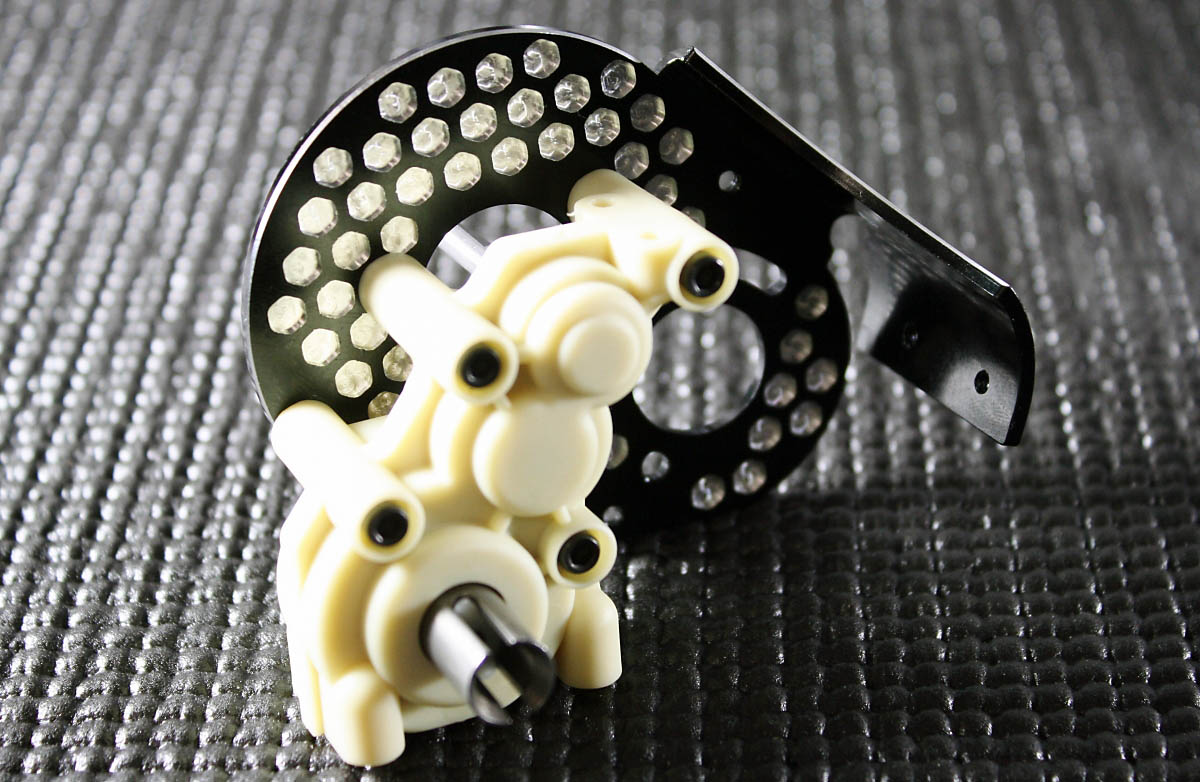
Before I assembled the slipper clutch I decided to replace the stock 81t spur gear with a JConcepts 75t Silent Speed machined spur gear. The spur gear that comes with the kit is a 81t, but since I wanted to set this buggy up for stock racing I thought I would start off with a 75t gear instead.
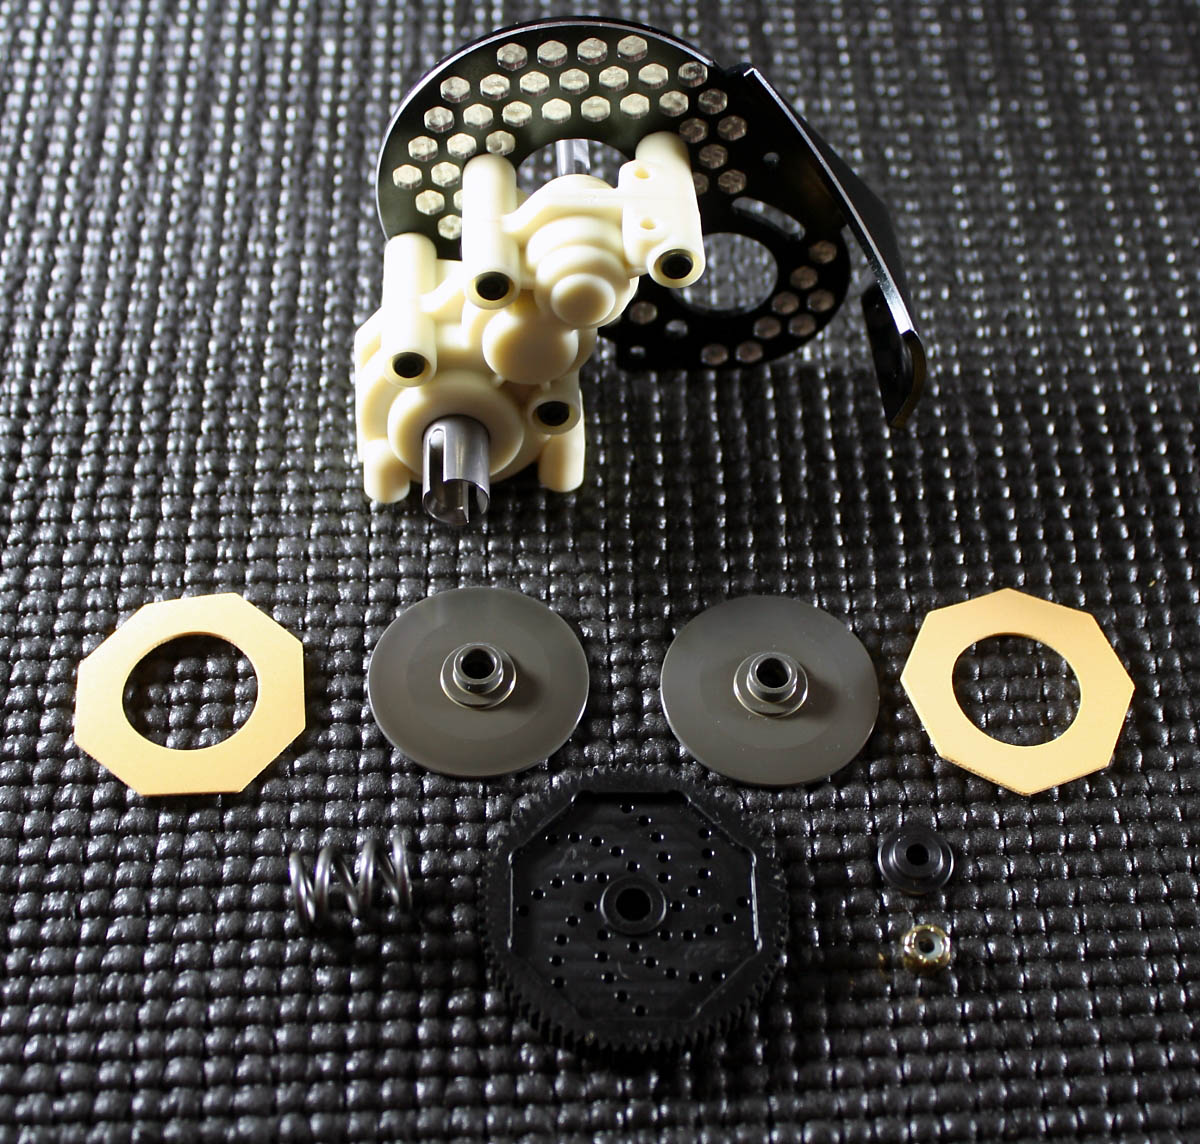
The next item I replaced was the rear shock tower. JConcepts first developed their rear shock tower for the RC10 Classic kit but it will also fit the RC10 World’s. This tower is comprised of 2.5mm thick carbon fiber material and features reinforced areas to increase its durability. The ribs also make the tower more rigid which in turn makes the rear of the car more responsive. After I mounted the rear bulkhead and transmission components to the chassis, the next order of business was the transmission brace.
The stock brace is comprised of graphite, but the JConcepts brace is made from genuine Carbon Fiber material that is 2.5mm thick. And just like their shock towers, the brace also uses reinforcement ribs to increase its overall strength. Flip the JConceptsbrace over you will see that it also features a countersunk hole. This hole is used for the 8-32 x ½“ flathead screw that secures the rear white body mount to the brace. That allows you to fit the body mount more snugly to the brace and gives you an overall cleaner look. I attached the brace to the bulkhead and then went to the next step which was to add the wing tubes.
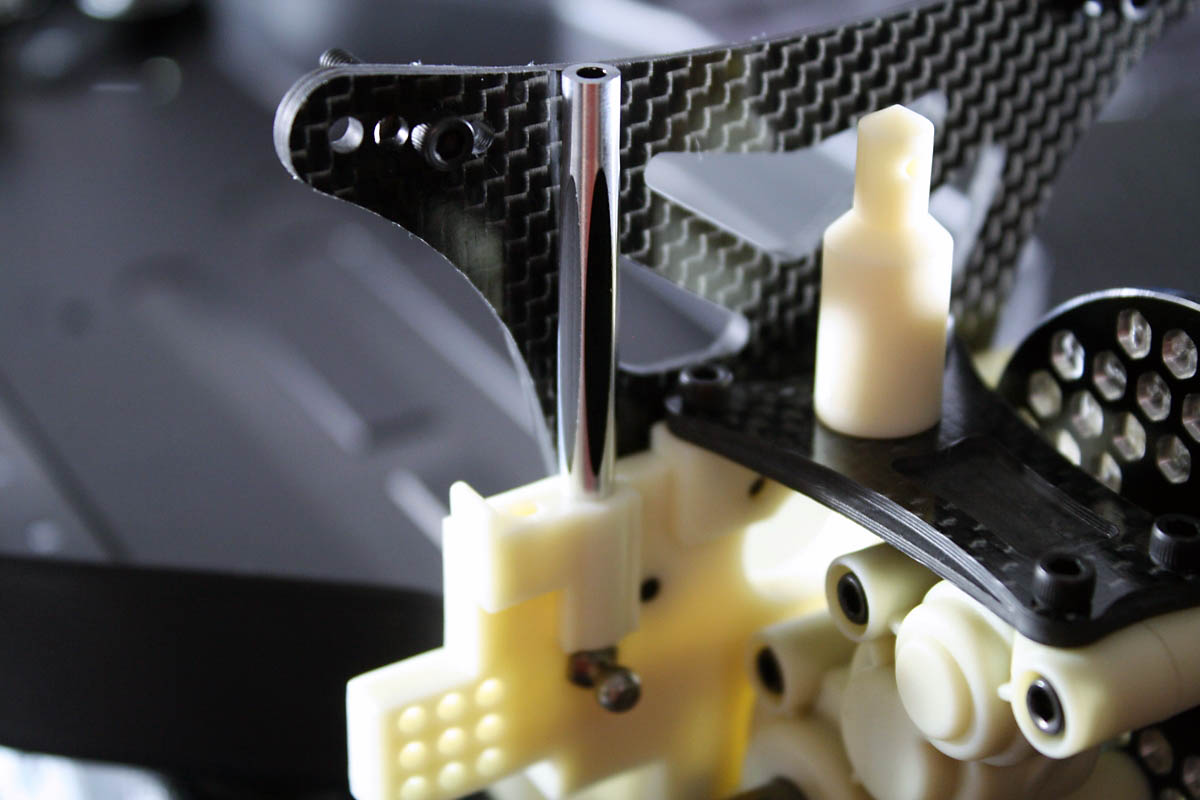
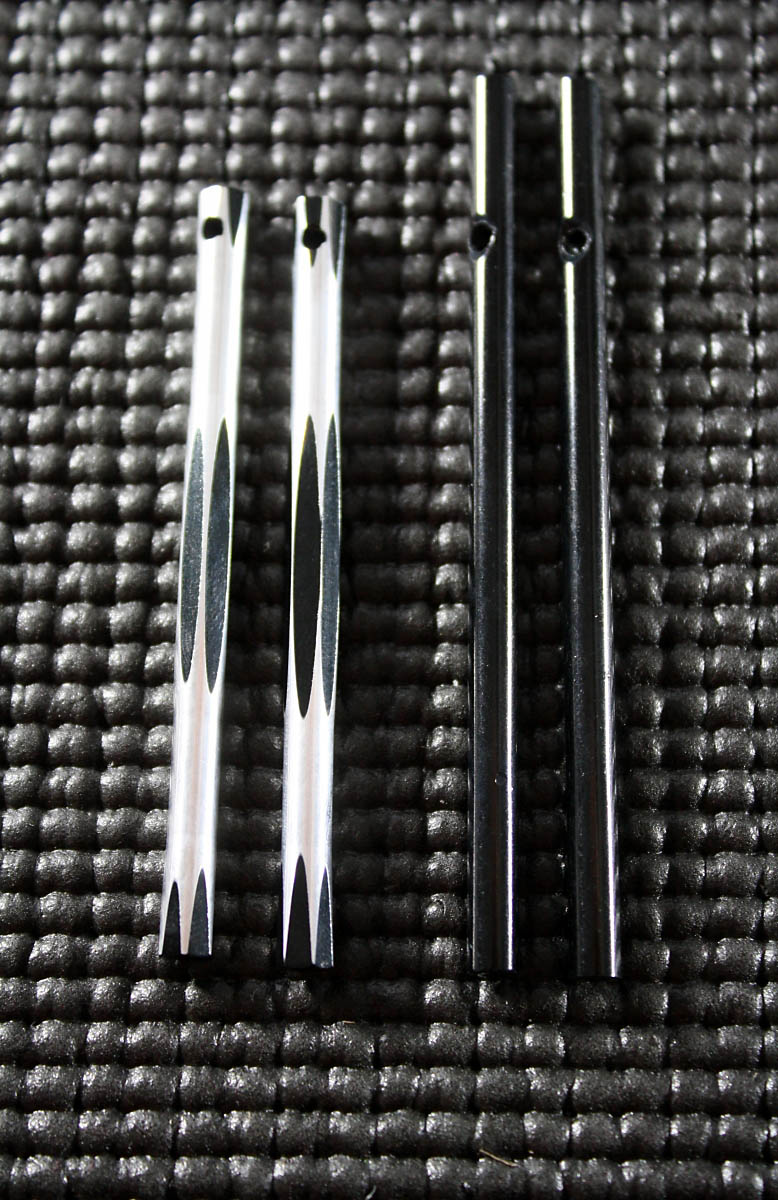
The JConcepts diamond wing tubes are the same length as the stock tubes, and are available in two color configurations, silver or black. Both sets of tubes are CNC machined with a high-gloss finish and feature a unique hex design in the middle with a diamond pattern.
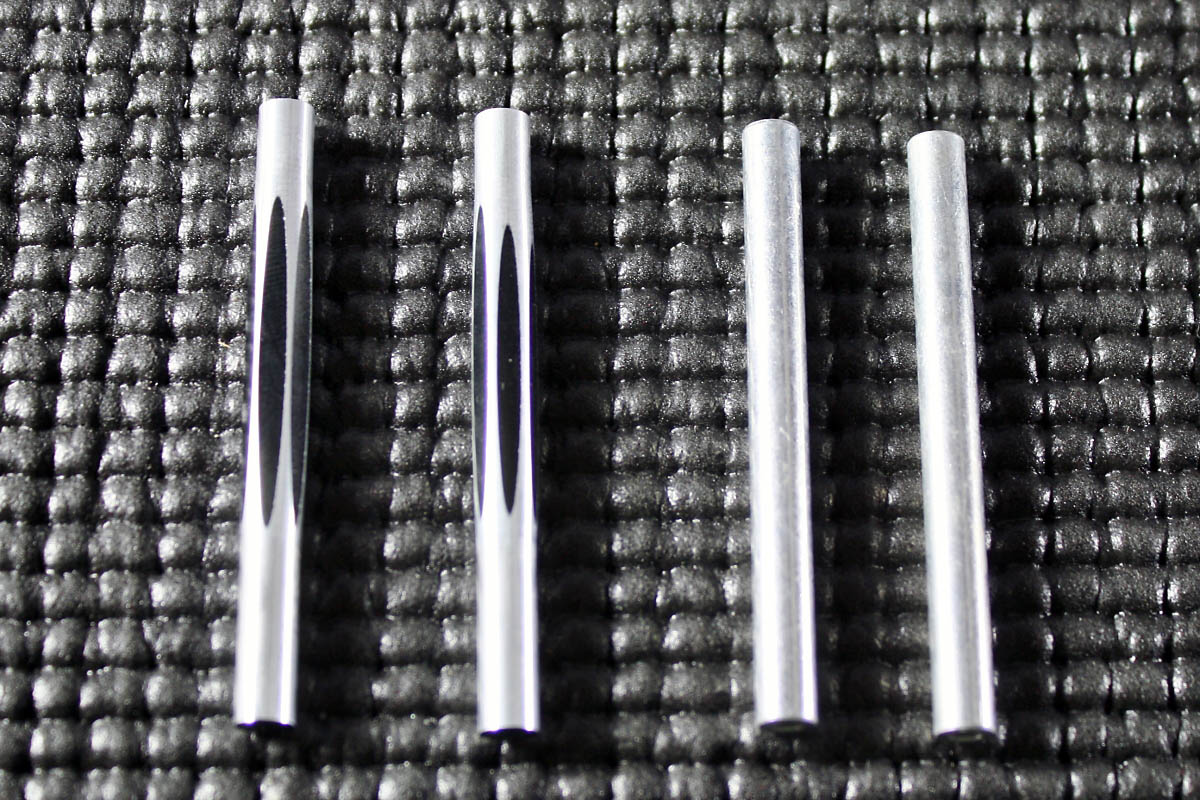
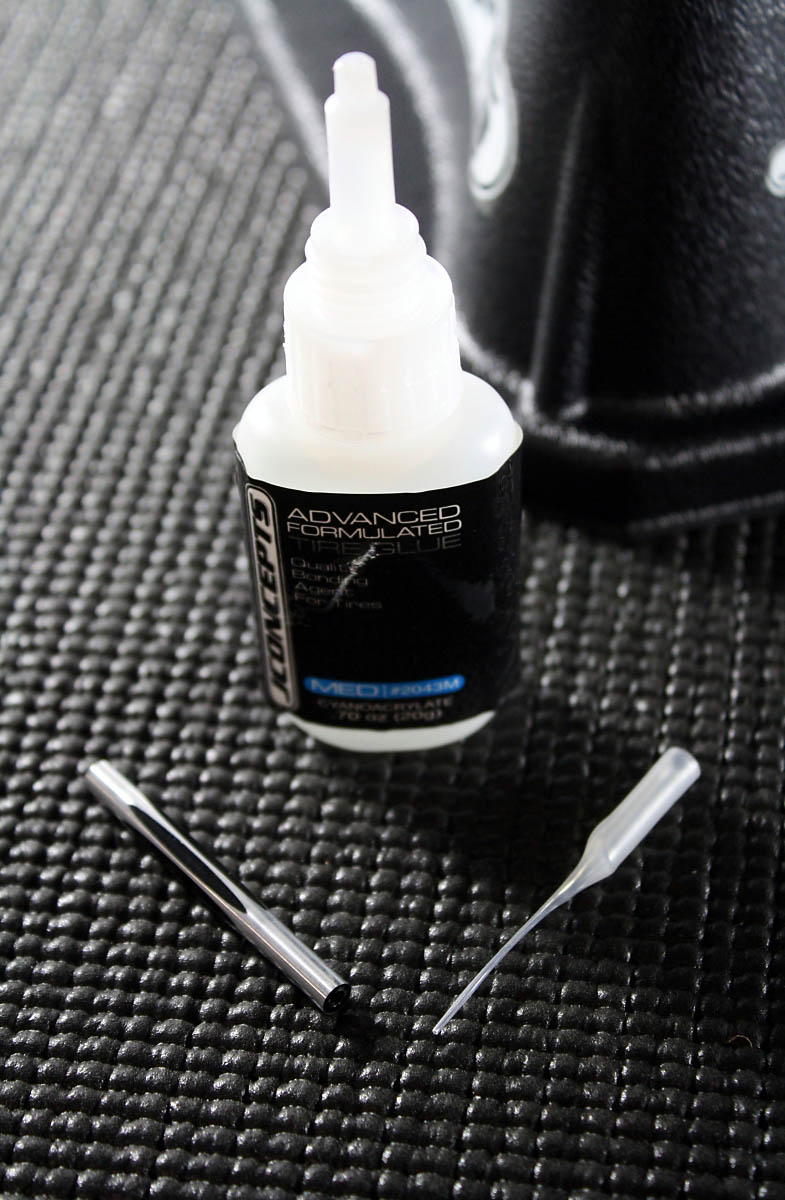
I elected to use the black tubes since they display the diamond pattern more clearly, and it stays within my overall theme. These tubes are designed to install in the rear bulkhead only one way, so make sure you locate the end that is more tapered so it seats properly inside. To help keep the tubes in place I added a small drop of JConceptsMedium Advanced Formulated tire glue to them before installation.
Once both tubes were in place I allowed them to dry while I built the rear a-arms and CVAs.
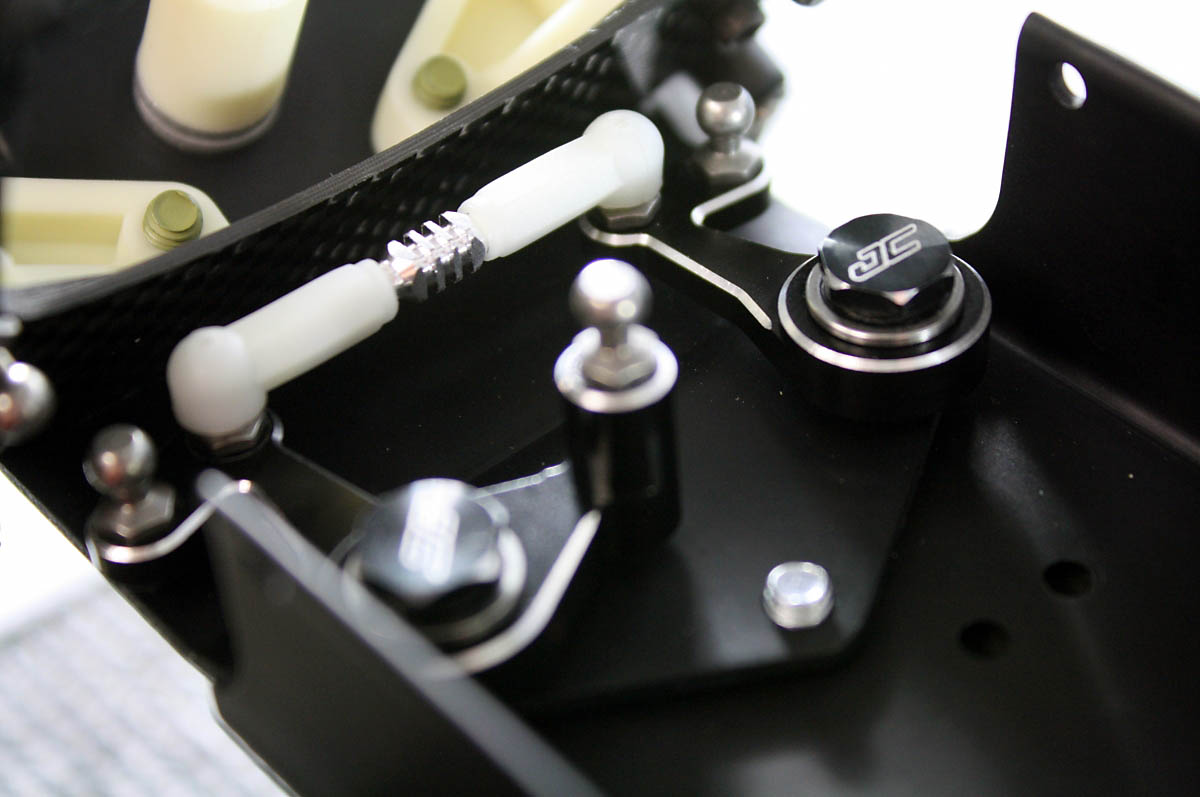
I turned my attention to the rear and front Fin turnbuckles that I built earlier. They installed with ease and the overall look of my RC10World’s was really starting to come together now. I built and installed my shocks, and then the next step was to install the nose brace tubes.
As you can see the JConcepts diamond nose brace tubes are much shorter in length than the stock tubes since those were designed to fit both the RC10 and RC10T. Since only RC10kits have been re-released at this point JConceptsdesigned their tubes specifically for that platform. Like their diamond wing tubes, these nose tubes also use a unique hex design in the middle with a diamond pattern cut into it. Again I opted for the black version to match my color scheme but silver is available.
Just like the stock nose tubes, one end of the diamond tubes have a small hole in it that is used to attach it to the chassis. I suggest attaching the nose tube to the front nose plate first before you attach the other end to the side of the chassis. And for both ends I used a small amount of thread lock on the screws that held them in place.
The next step in the manual’s build process was to install the antenna mount and battery cup. Once those were done I skipped ahead and worked on the battery strap. As you can see the JConcepts Monroe carbon fiber battery brace is much shorter than the stock version. This shorter design increases your options for battery compatibility and mounting locations. The strap is comprised of genuine 2.5mm carbon fiber material and is long enough to secure your pack in place. The stock battery strap was designed to be secured with two 4-40 x ½” screws, but the Monroe brace calls for the use of JConcepts’battery thumb screws. These thumb screws are available in either blue or black colors, and can be easily installed by hand or with an 11/32” hex driver. The thumb screws were first developed as a replacement part for the blue thumb screws that came standard with the older B4.1, T4.1, B44.1 and SC10kits. They are sold separately so I picked up a set for this project. I installed the set screws, placed the Monroe strap over it, and then secured it down with the thumb screws.

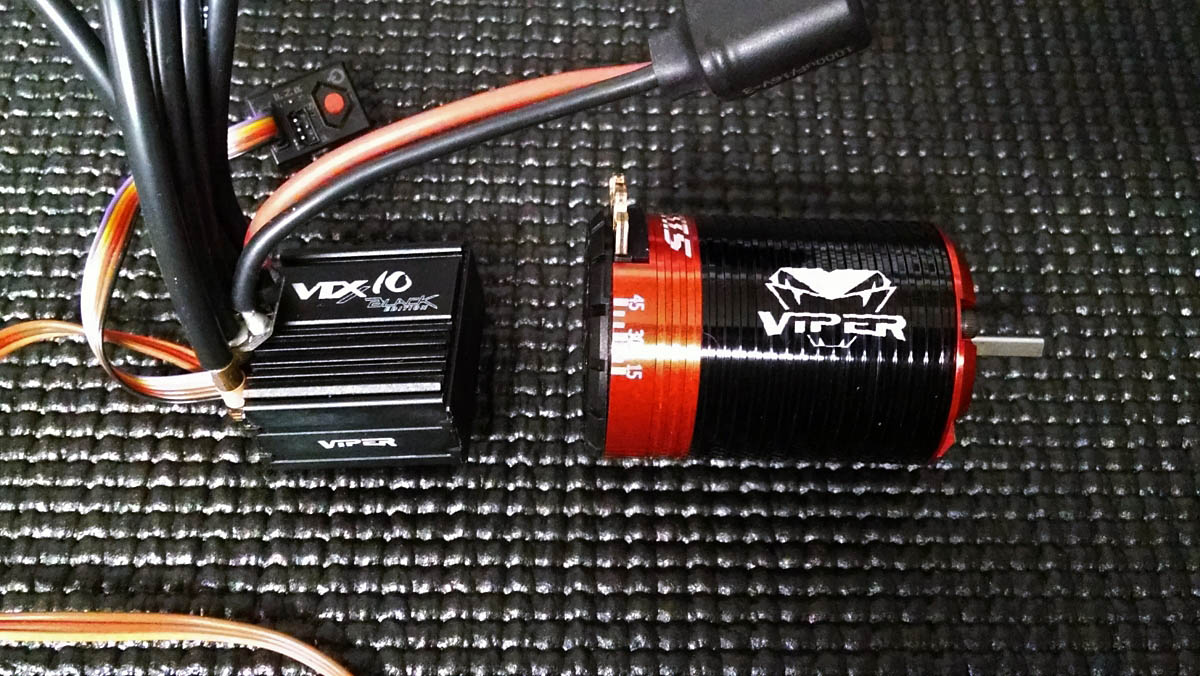
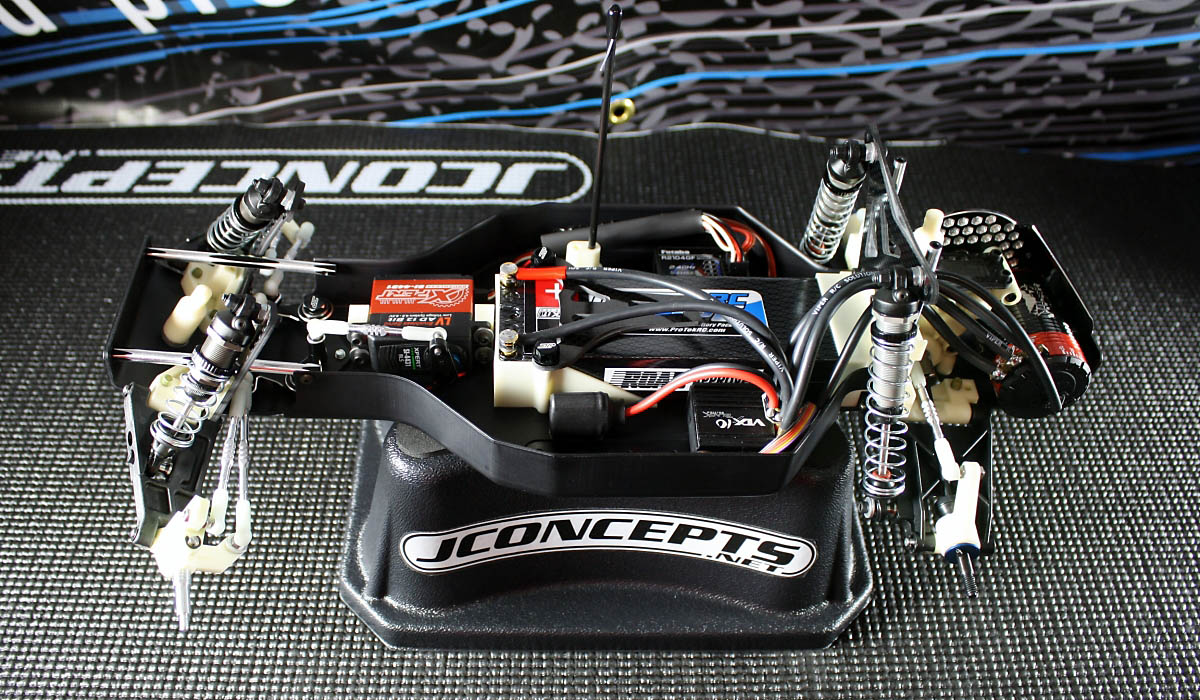
At this point I decided to mount the ESC and brushless motor next. Since the World’s Car featured a black hard-anodized machined chassis, and I used many JConcepts parts that were also anodized black, I wanted to stay with this black color theme for my electronics too. Viper R/C was nice enough to provide me one of their Black Edition VTX10ESCswith a fresh install of their newest A64firmware. The VTX10was easy to solder up and fit nicely into World’s chassis. To power the vehicle they provided me a VST17.5 brushlessmotor. It installed cleanly into the buggy and mounted up perfectly with the Honeycomb motor plate.

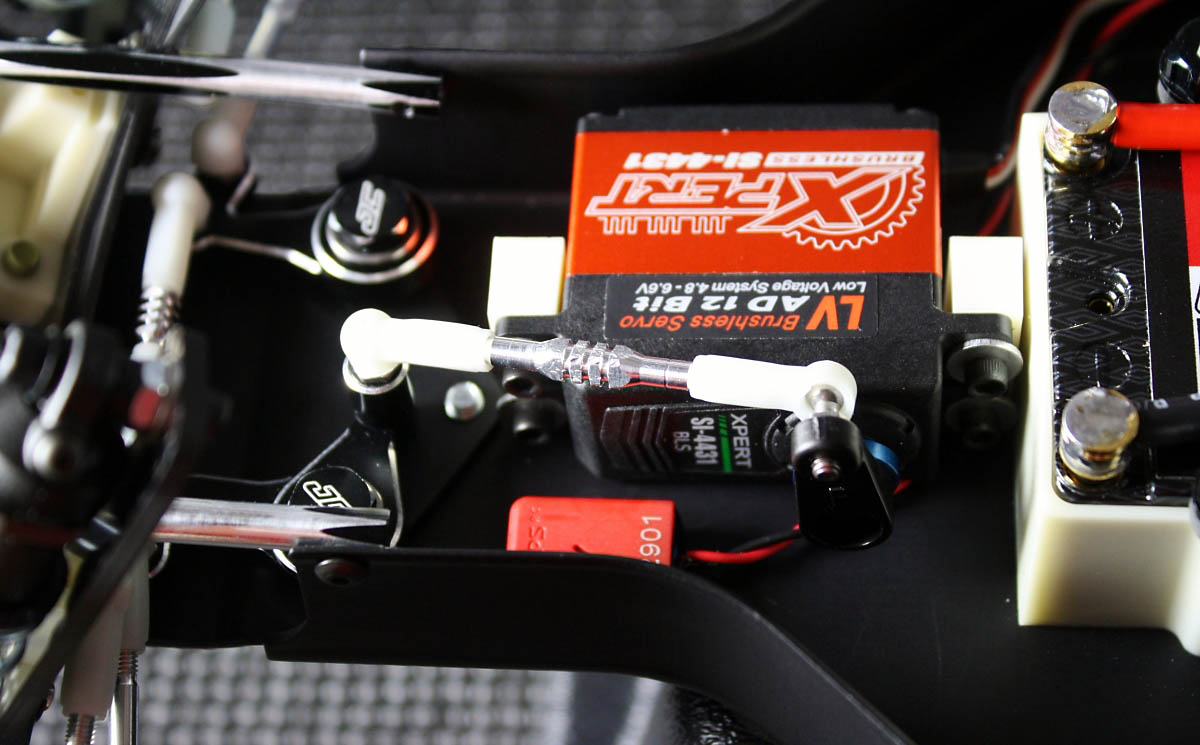
The next option part I needed to install was the servo turnbuckle. Xpert RC supplied me with one of their SI-4431 standard digital brushless servos to help guide this buggy through the turns. I powered on my radio to center the servo, installed the kit’s 25tservo horn and silver ballstud, and then snapped on the servo Fin turnbuckle that I had built earlier.
Now that the buggy was fully built, and the electronics were installed, I needed to mount some tires next.
Since the RC10 World’s is modeled after Brian Kinwald’s 1993 IFMAR winning ride the kit includes neon yellow wheels. I prefer white wheels since it matches my paint scheme better so I picked up some white 2.2” dish style wheels from Team Associated. I also needed some JConcepts 2.2” tires so I selected Rips and Double Dees in their sticky green compound. To help secure the tires in place while mounting them I usedJConcepts’black Satellite tire gluing rubber bands. The “tabs” on these bands made it very easy to peel back the sidewall from the wheels to apply glue, and like manyJConceptsoption items they are available in both blue and black colors.
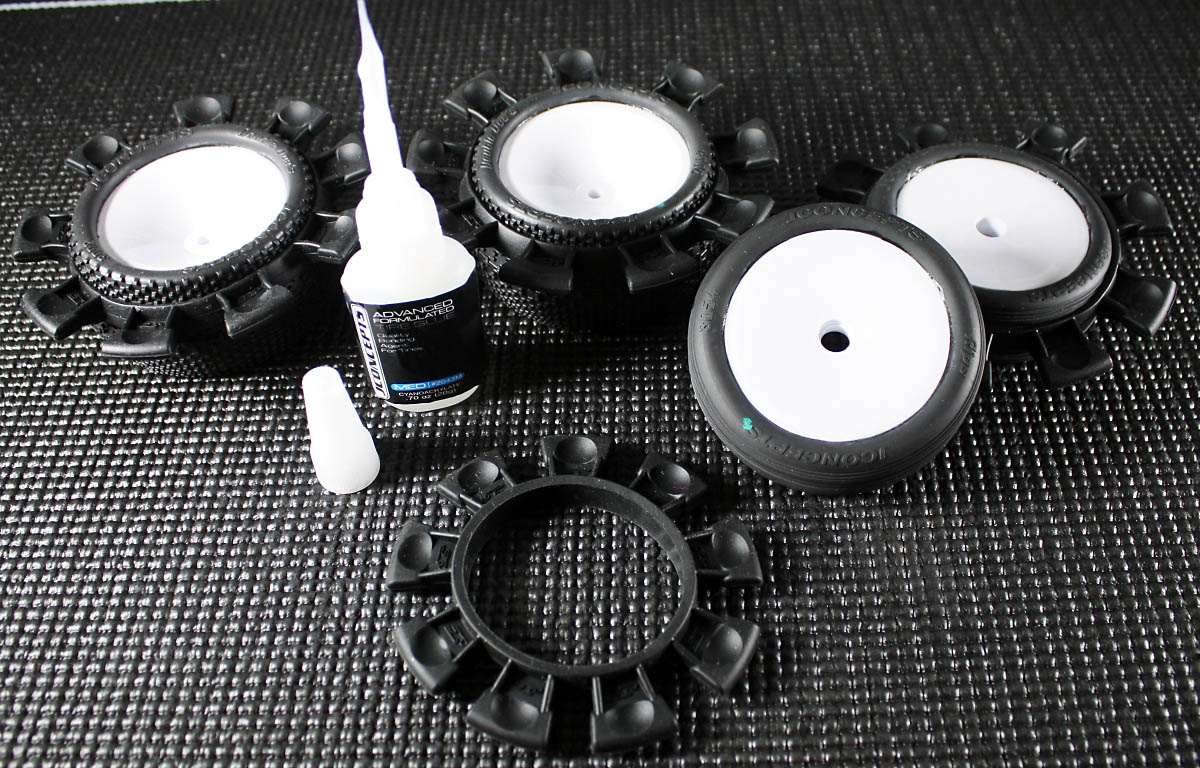
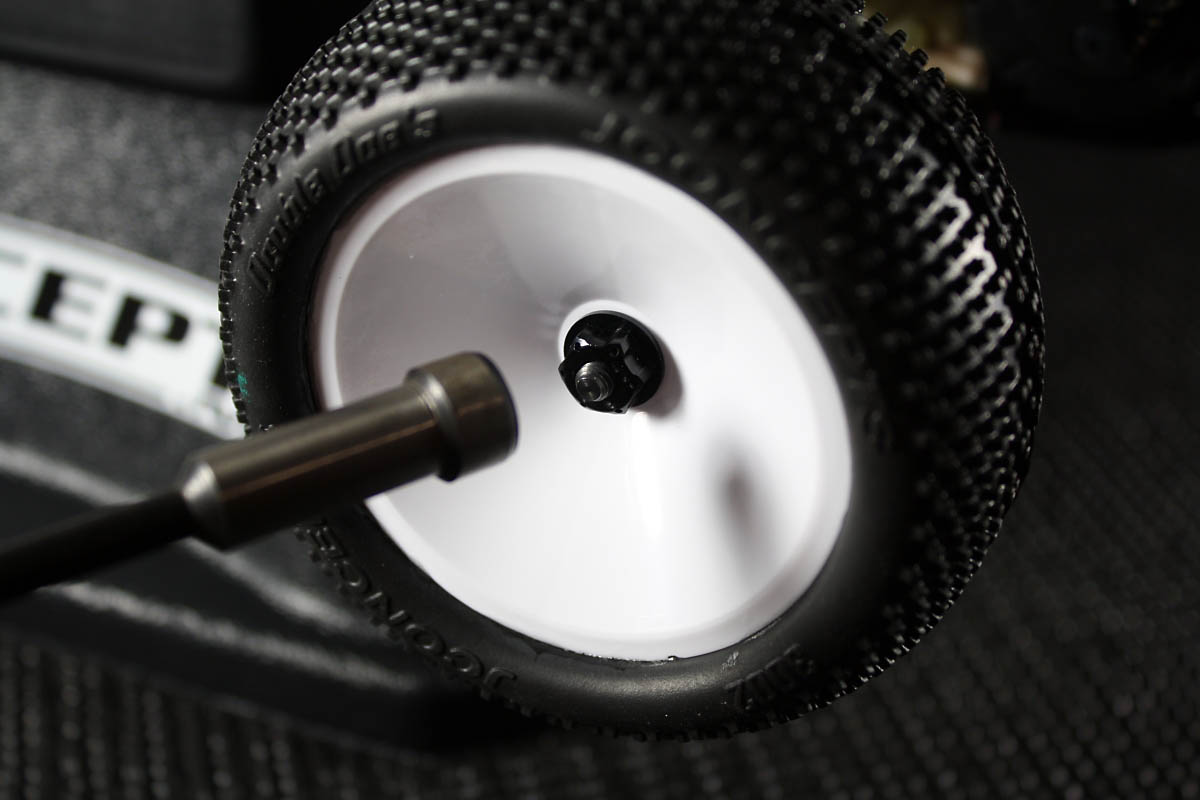
Once the glue had dried I mounted the fresh kicks to the buggy. To secure the rear wheels I usedJConcepts’black 8/32" locking wheel nuts. These lightweight nuts were first designed for the B4.1, T4.1, B44.1 andSC10and thanks to their flanged and knurled design they will help to keep the rear wheels more secure than the kit’s steel locknuts.
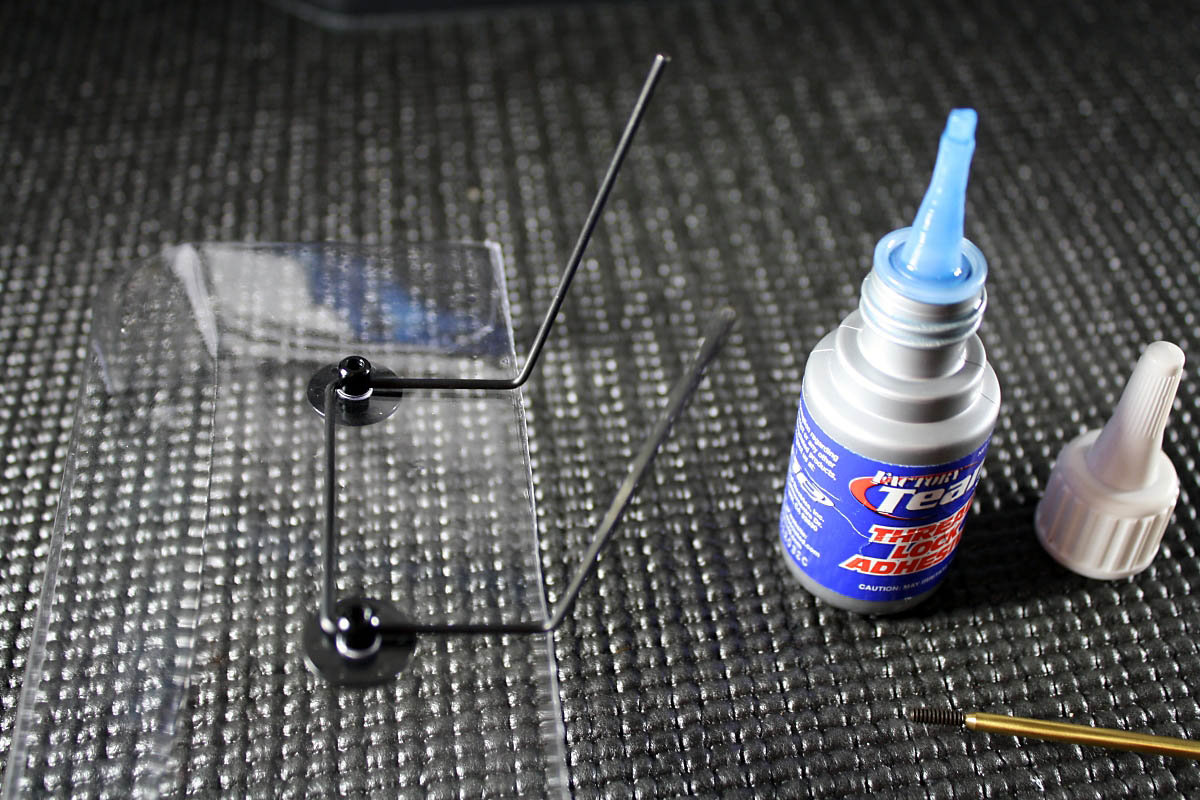
The next item of business was to prep the body. I trimmed it out using the lines molded into it, and then I carefully reamed out two holes for the body posts. Two additional holes were needed for the wing tubes, and once I fitted the body I was able to determine their location.
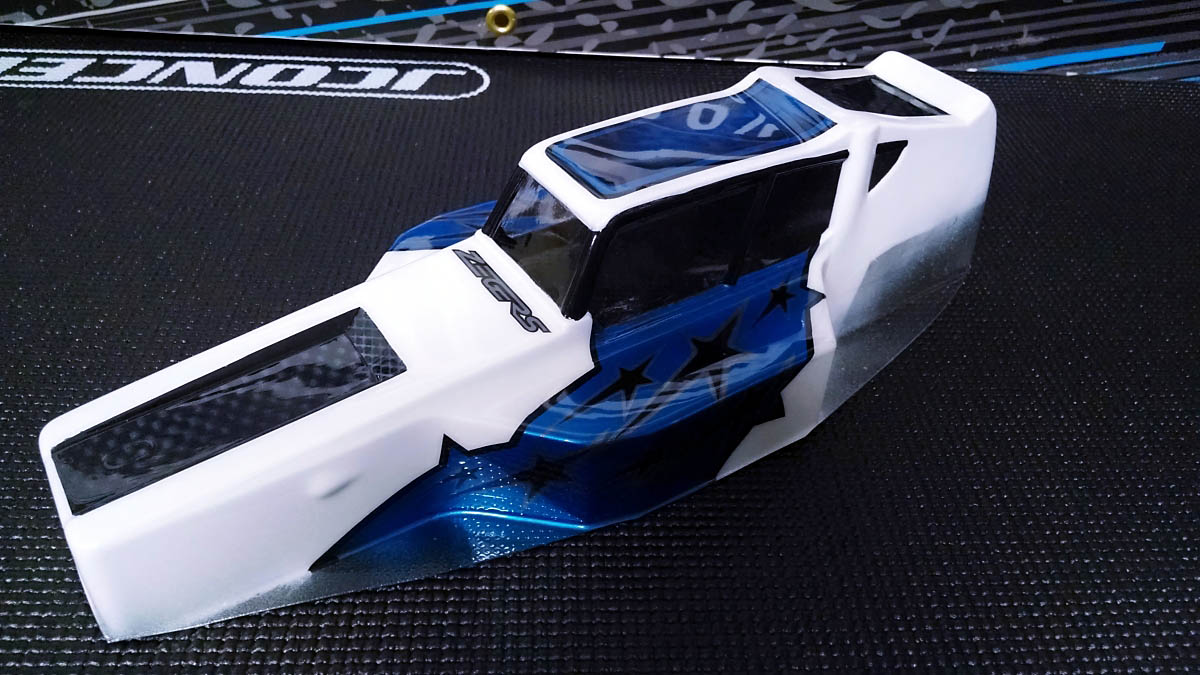
Next, I trimmed out the included 5.5” wing and reamed out two holes for the wing mounts. Instead of using the stock plastic wing mounts I replaced them with black Finnisherwing buttons. Also available in blue, these CNCmachine wing buttons are more durable than the stock mounts, and they have threaded 4-40 holes on the bottom for the kit’s set screws. I pushed the Finnisherwing buttons through the holes I reamed earlier in the wing, and then I routed the wing mount wire through them. Before I threaded in the set screws I applied a little bit of blue thread lock so that everything would stay tight.

Wrap Up
I installed the finished wing into the wing mounts, applied some decals, and now my World’s Car was finally complete! I hope you enjoyed this online build.
Below is a complete list of the items that I used:
JConcepts RC10 World’s Car parts:
- 2229 - RC10 World’s Fin titanium turnbuckle set - 8pc (Fits – RC10 World’s and similar) – MSRP $58.00
- 2305 - RC10 World’s 2.5mm Carbon Fiber front shock tower – MSRP $17.85
- 2306 - RC10 World’s 2.5mm Carbon Fiber transmission brace (3 gear)- MSRP $11.90
JConcepts RC10 Classic | RC10 World’s Car parts:
- 0264 - Detonator - RC10 Classic body w/ 5.5" wing – MSRP $21.25
- 2303 - RC10 Classic / World’s 2.5mm Carbon Fiber rear shock tower – MSRP $18.70
- 2309-2 - RC10 aluminum steering bell-crank set – black – MSRP $28.05
- 2311-2 - RC10 Finnisher wing buttons – black – MSRP $10.20
- 2312-2 - RC10 diamond nose brace tubes, black - 2pc. - MSRP $10.20
- 2313-2 - RC10 diamond wing tubes, black - 2pc. - MSRP $10.20
- 2319-2 - RC10 aluminum rear motor plate - honeycomb – black – MSRP $29.75
- 2329 - RC10 Monroe carbon fiber battery brace (Fits – RC10 World’s and Classic) – MSRP $15.00
JConcepts B4.x parts:
- 2076 - 8/32" locking wheel nut - fits B4, T4, B44 and SC10 - locking / lightweight (black)- MSRP $12.75
- 2160-2 - Associated battery hold down thumb nut - black (fits B4.1, T4.1, B44.1 and SC10) - MSRP $12.75
- 3002-02 - Double Dee's - green compound (fits 2.2" buggy rear wheel) 2pc. - MSRP $11.25
- 3054-02 Rips - green compound - (fits 2.2" buggy front wheel) 2pc. - MSRP $10.50
Team Associated parts:
- 9588 - 2.2" front wheel (white) - MSRP $5.99
- 6805W – 2.2” rear wheel (white) – MSRP $5.99
- 1787 – Factory Team battery strap thumbscrews – MSRP $6.99
Optional Items Shown:
- 2012M - JConcepts - Illuzion - Matte vehicle stand – black – MSRP $12.75
- 2043M - JConcepts - Advanced Formulated Tire Glue - Medium – MSRP $8.50
- 2043-1 - JConcepts - Glue straw - 4pc. – MSPR $3.40
- 2133 - JConcepts - 4' pit mat (textured padded material) – MSRP $17.00
- 2212-2 - JConcepts - Satellite tire gluing rubber bands - black - fits 1/10th, SCT and 1/8th buggy – MSRP $13.00
- 2234 - JConcepts - Fin turnbuckle wrench - .143" open end - MSRP $5.95
- 2096 - JConcepts - 48 pitch, 75T, SS Machined Spur Gear - fits B4.1, T4.1, B44.1 and SC10 – MSRP $ 9.00
- 8VST175001 – Viper R/C VTX10 Black Edition Combo with VST 17.5 Motor – MSRP $209.99
- SI-4431 – Xpert RC SI-4431 STD Digital Brushless Servo – MSRP $79.99
Coming Soon:
- 2318 - JConcepts - RC10 - precut chassis protective sheet – black – MSRP $15.00
- 0279 - JConcepts - Detonator World’s - RC10 World’s Car body w/ 5.5 wing – MSRP $26.00
Sources: www.jconcepts.net | www.viper-rc.com | www.xpert-rc.com | www.teamassociated.com
Source:

|
