|
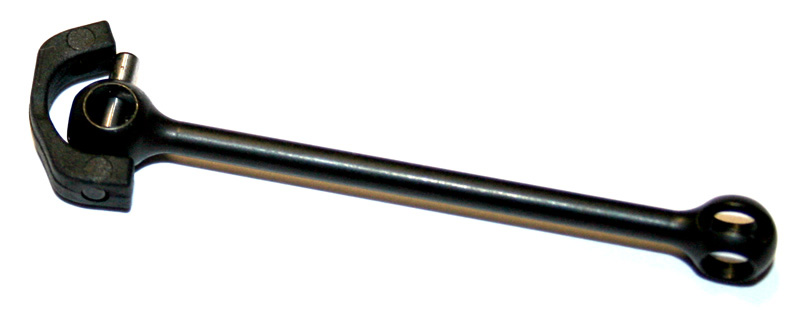
E4RS III / III PLUS - Tip 1: Blade insertion
During the assembly of a RC racing car of many brands, one of the driver’s difficulties is to insert the blades around the driveshaft's balls.
When you now how to do, it’s really easy, but the first time is usually problematic.
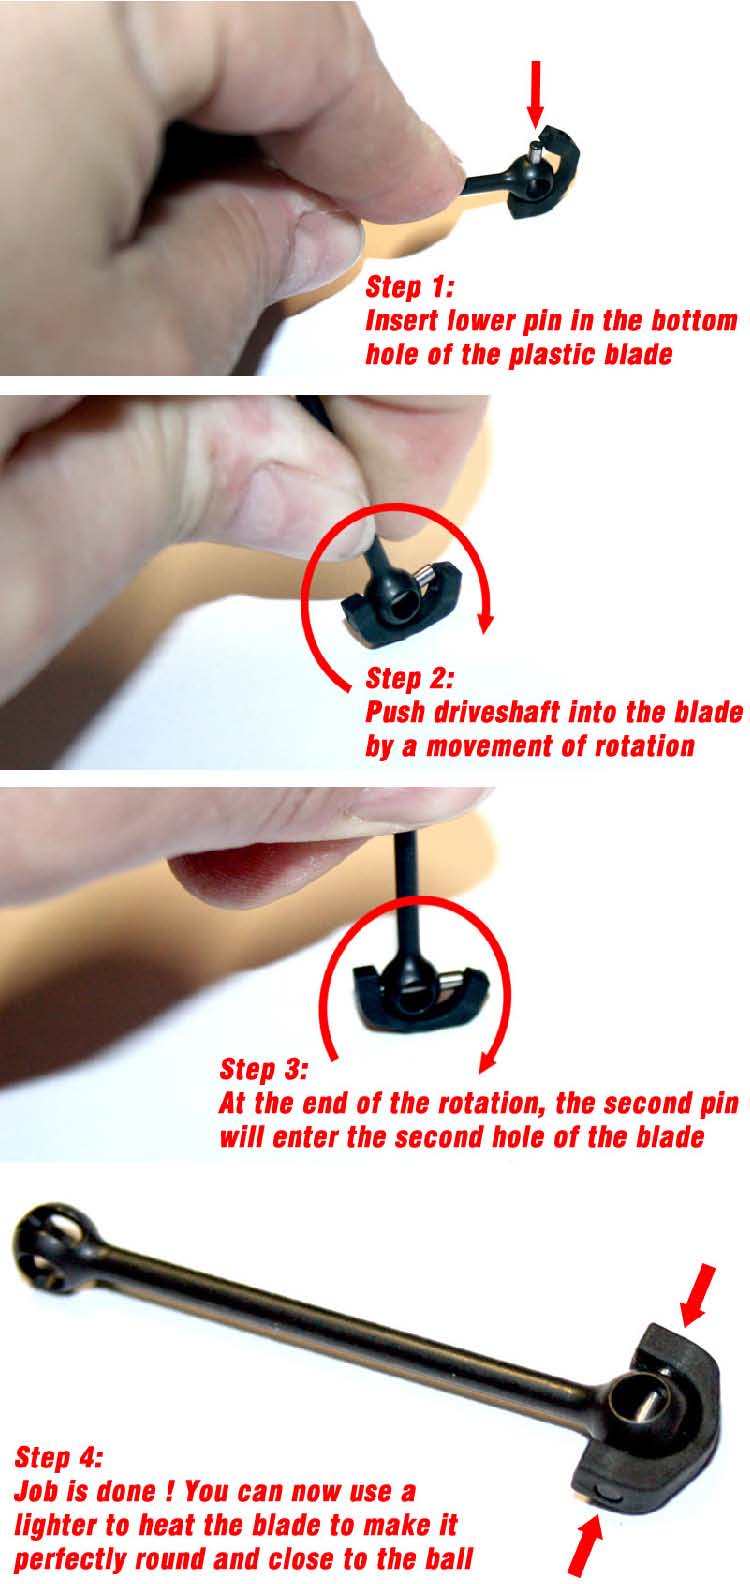
First step is to insert one pin of the driveshaft in one hole of the blade.
Second step is to push the driveshaft into the blade, by a movement of rotation, simply by pushing it down, when backside of the blade is on the table.
Third step is to enter the pin in the second hole of the blade at the end of the movement of rotation.
When the job is done, you can eventually finish by a fourth step: by eating the round backside of the blade with a cigarette lighter. When blade is a bit hot, you can press the two sides of the blade (over the pin), to make it perfectly round and close to the driveshaft’s ball. |
|
|
E4RS III / III PLUS - Tip 2: Driveshafts assembly
This operation is considered by many users of many RC cars brands as THE hardest step of the assembly.
For sure, the driveshafts are more free with a G-clip, and we never lost a pin during a run since we switched from grub screw to G-clip... but it’s less easy to assemble, we can’t have all the advantages !
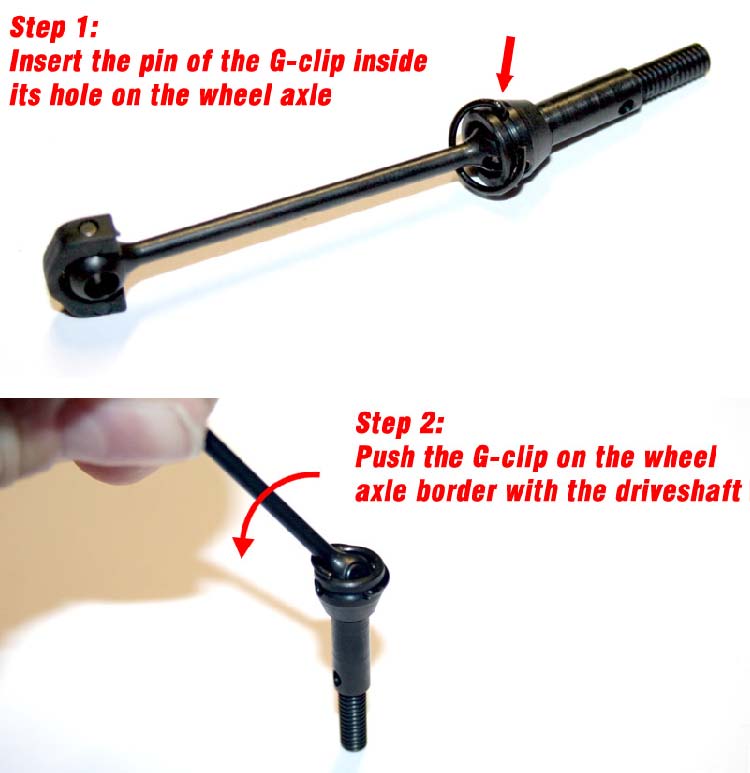
First step is insert the pin end of the G-clip into its hole on the wheel axle.
On second step, you have to push the opposite side of the G-clip on the border of the wheel axle, with the driveshaft.
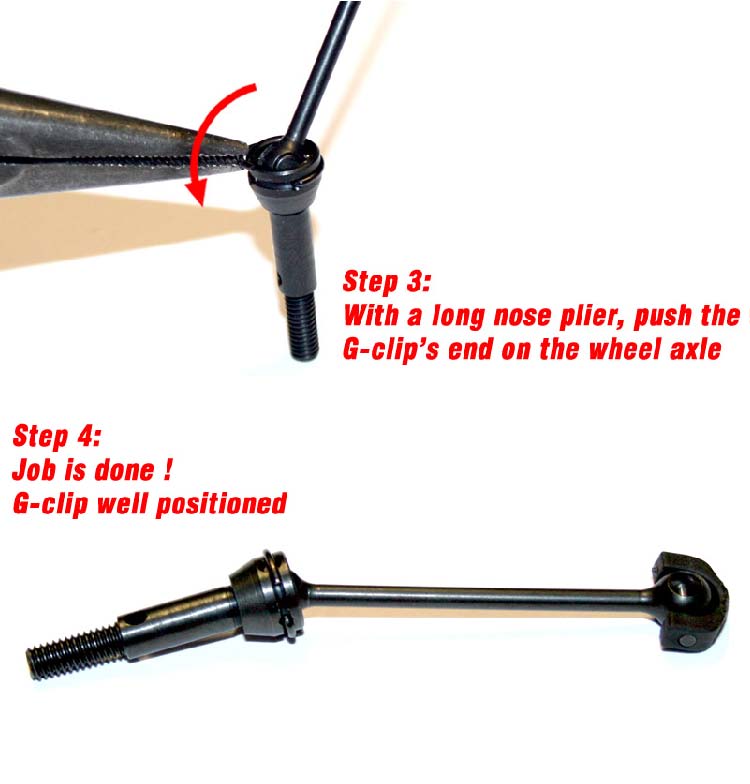
On step three, you have to use a long nose plier to push the G-clip over the wheel axle.
Job is done on step four, you can install the driveshaft on the car; after lubrication (with copper grease by example).
E4RS III / III PLUS - Tip 3: Driveshafts dismantling
This operation is considered by many users of many RC cars brands as one of the most difficult.
For sure, the driveshafts are more free with a G-clip, and we never lost a pin during a run since we switched from grub screw to G-clip... but it’s less easy to assemble, we can’t have all the advantages !
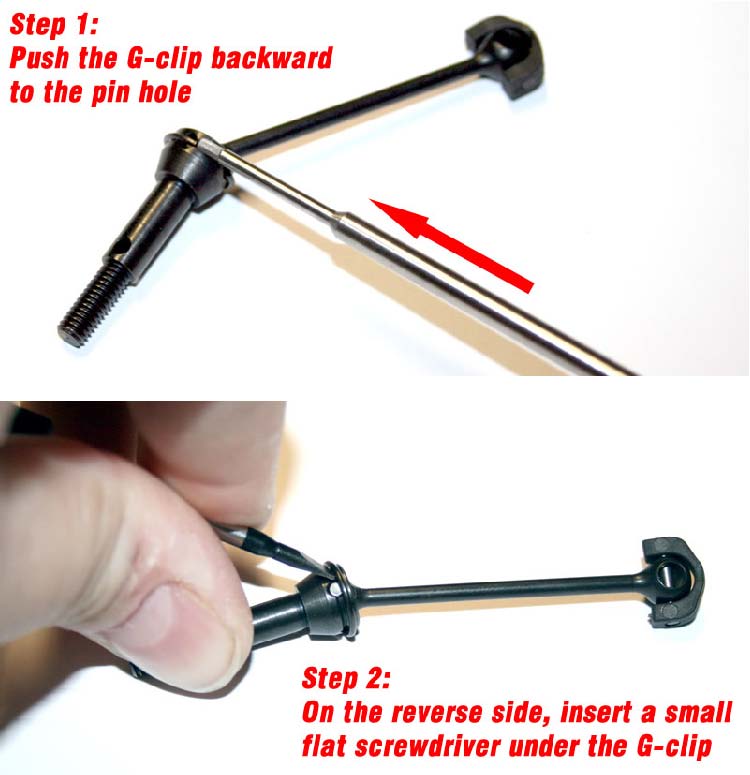
First step is to push the G-clip’s end side backward to the next pin hole. The clip will stay on that hole and create space on the opposite side.
Second step is to insert a small flat screwdriver on the space on the opposite side, between the G-clip and the wheel axle.
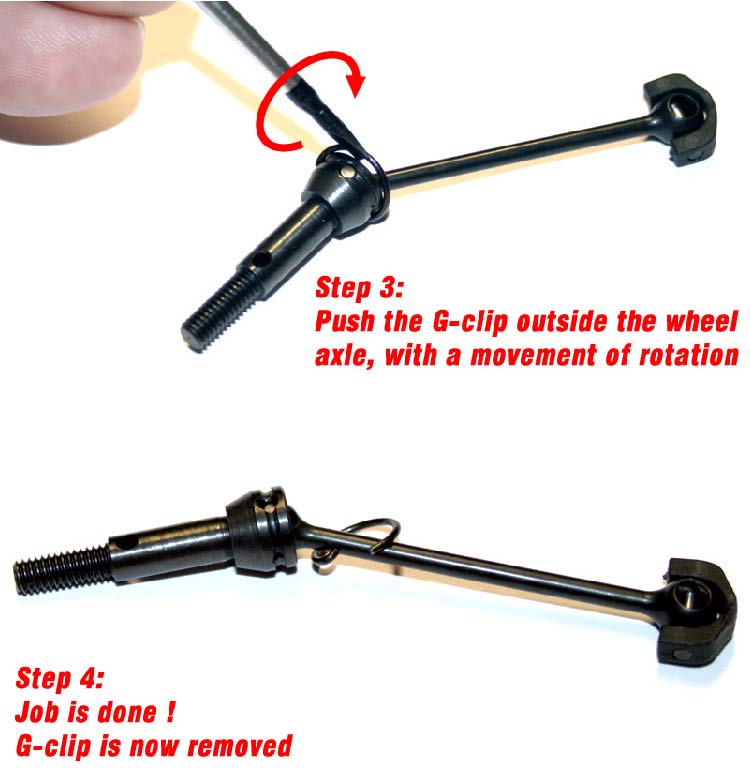
Third step is to push the G-clip outside the wheel axle, by a simple and easy movement of rotation.
On the fourth step, job is done, the G-clip is removed from the wheel axle.
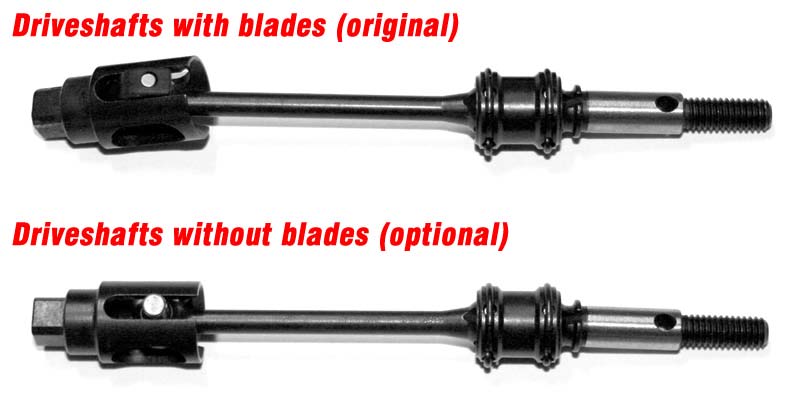
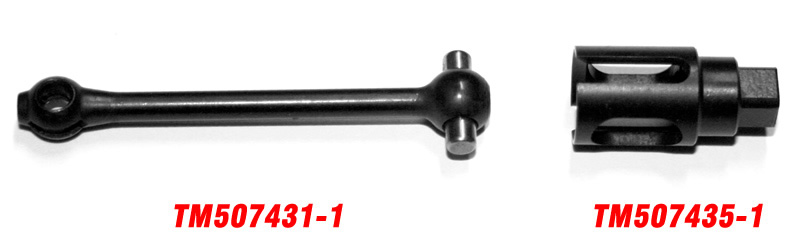
E4RS III / III PLUS - Tip 4: “No Blades” driveshafts
After intensive tests with TM factory drivers, we recommend the use of front driveshafts without plastic blades.
This provides more free movements and increase corner speed.
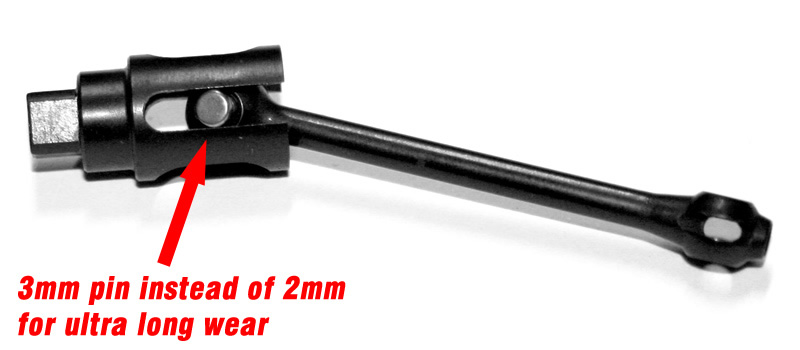
Contrary to other brands, Team Magic choose to not only remove blades of the standard driveshafts by simply creating smaller outdrives, but we increased pin size from 2mm to 3mm, to avoid any problem of wearing.
So, the Team Magic “no blades” driveshafts are perfectly sized to support high power motors and charges.
You can find these items under the following references:
TM507431 Front driveshafts “Nunchaku” without blades - complete set (2)
TM507431-1 Front driveshafts “Nunchaku” without blades - shafts only (2)
TM507435 Front spool without blades - complete set
TM507435-1 Front spool without blades - outdrives only (2)
|
|
|
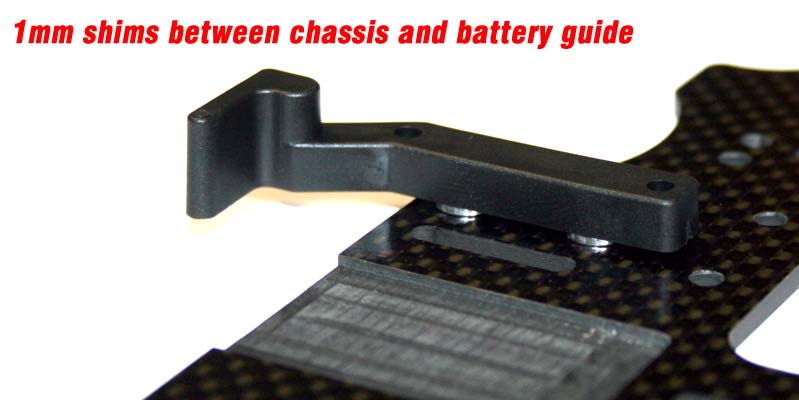
E4RS III / III PLUS - Tip 5: Battery guide’s fixation
To better maintain the battery on the E4RS III and III+ chassis, and to also prevent any problem of flex movement interference due to battery holders, we usually use small spacers between chassis and battery holders.
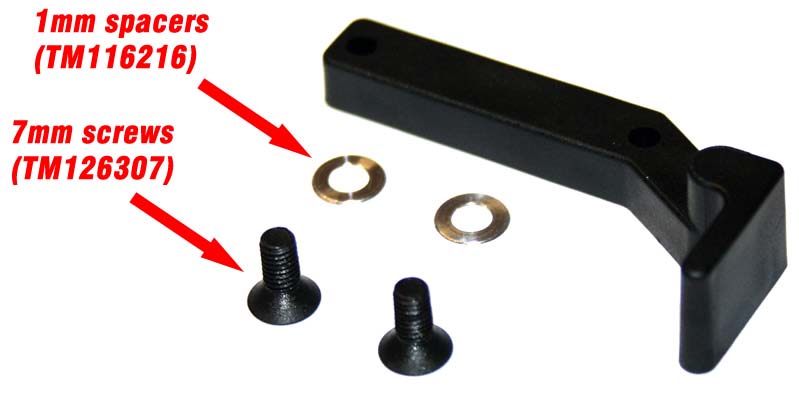
For that, we use 1mm spacers with 7mm screws (instead of the 6mm ones).
This will reduce the contact between the chassis and the battery holder from a large rectangle of 28mm x 6mm (168mm2) to small two circles of 28mm2 each.
The round shape of “feets” will also provide a better liberty of flex movements to the chassis.
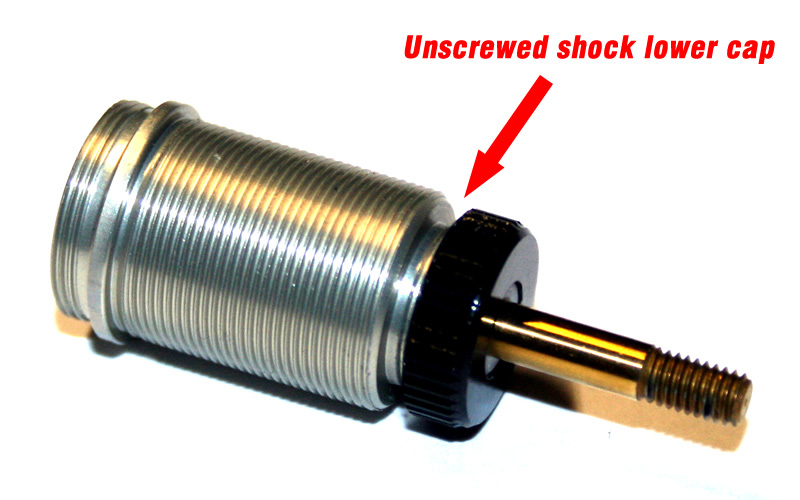
E4RS III / III PLUS - Tip 6: Shock shaft installation
To protect the perfect seal of the shock, we need to prevent the lower o-ring of any damage. For that, we recommend to never insert or retire the shock shaft with the lower cap fully screwed.
In facts, when the lower cap is screwed, the O-ring is under the pressure of the two small plastic guides. So, if you insert or retire the shock piston shaft, you may damage a bit the O-ring with the treaded area of the shaft.
By unscrewing the lower cap, you will radically reduce the pressure on the O- ring to 0, and you could retire or insert the piston shaft without any risk.
For a perfect O-ring lubrication and seal, we highly recommend to use a bit of green slim or equivalent o-ring lube. |
|
|
E4RS III / III PLUS - Tip 7: Split Upper Bulkheads
Past tests
Using split upper bulkheads is something we thought to never see, as we made hundreds hours of test with one-piece and split upper bulkheads with the E4RS II Evo, to determinate if we are wrong or not by keeping the one-piece design, which is a real particularity of the Team Magic E4 series touring cars.
After more than 6 months of test and serious comparison on both asphalt and carpet track, we found the upper one-piece bulkheads provides a slightly better handling on the majority of tracks (higher corner speed and a bit more grip), and at least similar handling on other ones; but we have never been able to be faster with the split upper bulkheads than with the one-piece versions.
But these tests was on the E4RS II Evo, and we didn’t made new serious test again on this point with the E4RS III chassis basis. We probably did something wrong about it, by keeping old feelings and facts as something sure and definitive. Probably the longer bulkheads of the E4RS II series made the split upper bulkheads not better has they are with smaller bulkheads on the E4RS III.
New “real and credible” tests
Rémi Callens and Thomas Vigneron made new tests during first round of French nationals, and they obtained so big di?erence, than there is no place to doubt about the potential gain obtained.
Laps time was for both cars around 0.4s better with the split upper bulkheads. Fast enough to make a TQ run for Rémi, in front of top driver Loïc Jasmin, just after that modification.
So, we have no reason to don’t consider it at it is. We recommend to cut the upper bulkheads, especially for high grip tracks. Be care to use two long enough and correctly tighten screws, instead of the 3 original ones.
How to modify your upper bulkhead
Our recommendation is to keep the overall height of the part, to avoid shock tower bending under e?orts.
So, we recommend to cut the part on the red lines you can see on the right drawing.
An easier way is to simply cut the upper bulkhead on the middle screw location.
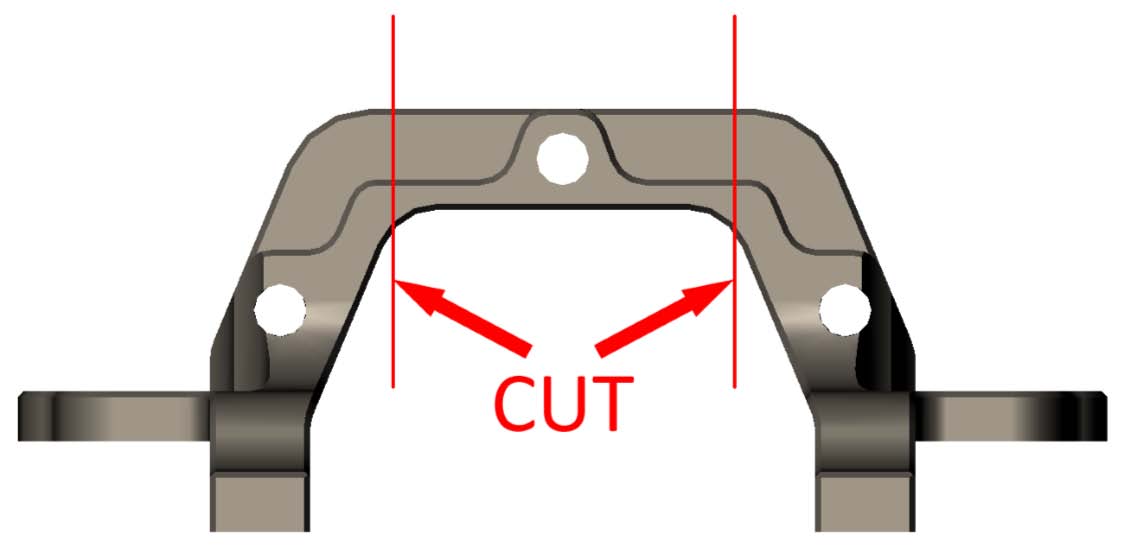
To cut it, you can use a Dremel with cutng disk. Be care and protect your eyes ! Ask somebody experienced if you have a doubt or are not sure to do it correctly.
|