| E4RS4 - Tip 1: Blade insertion
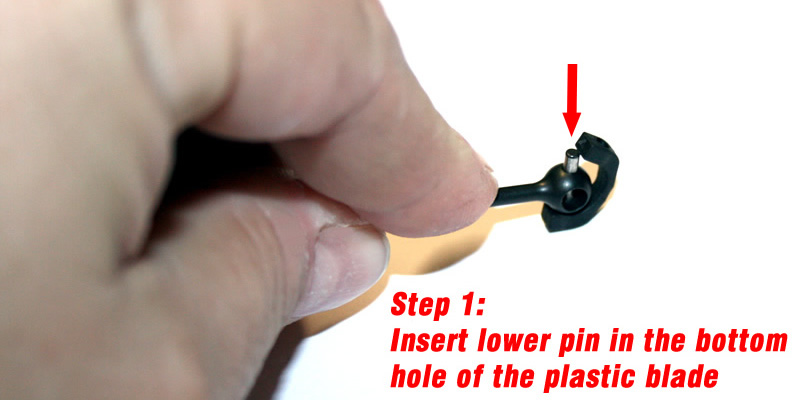
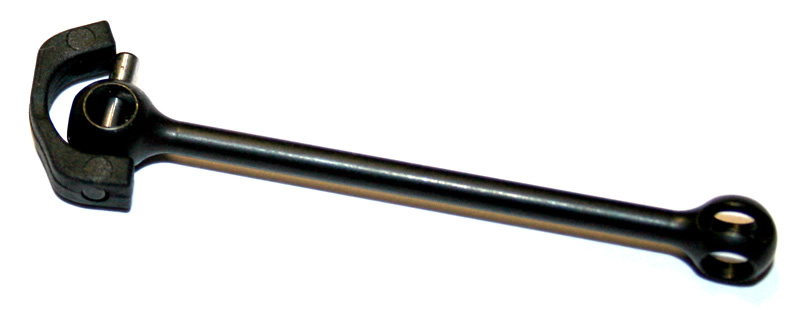
During the assembly of a RC racing car of many brands, one of the driver's diffculties is to insert the blades around the driveshaft's balls.
When you now how to do, it's really easy, but the first time is usually problematic.
First step is to insert one pin of the driveshaft in one hole of the blade.
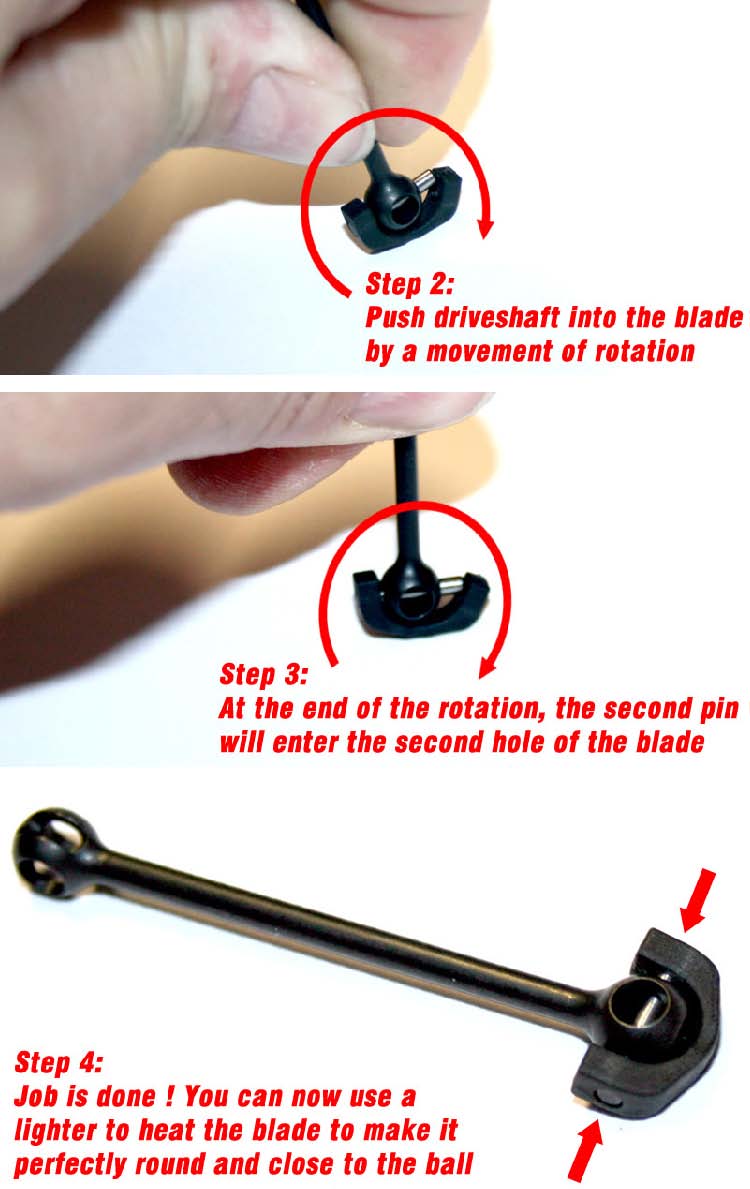
Second step is to push the driveshaft into the blade, by a movement of rotation, simply by pushing it down, when backside of the blade is on the table.
Third step is to enter the pin in the second hole of the blade at the end of the movement of rotation.
When the job is done, you can eventually finish by a fourth step: by eating the round backside of the blade with a cigarette lighter. When blade is a bit hot, you can press the two sides of the blade (over the pin), to make it perfectly round and close to the driveshaft's ball. |
|
|
------------------------------------------------------------------------------
| E4RS4 - Tip 2: Driveshafts assembly
This operation is considered by many users of many RC cars brands as THE hardest step of the assembly.
For sure, the driveshafts are more free with a G-clip, and we never lost a pin during a run since we switched from grub screw to G-clip... but it's less easy to assemble, we can't have all the advantages !
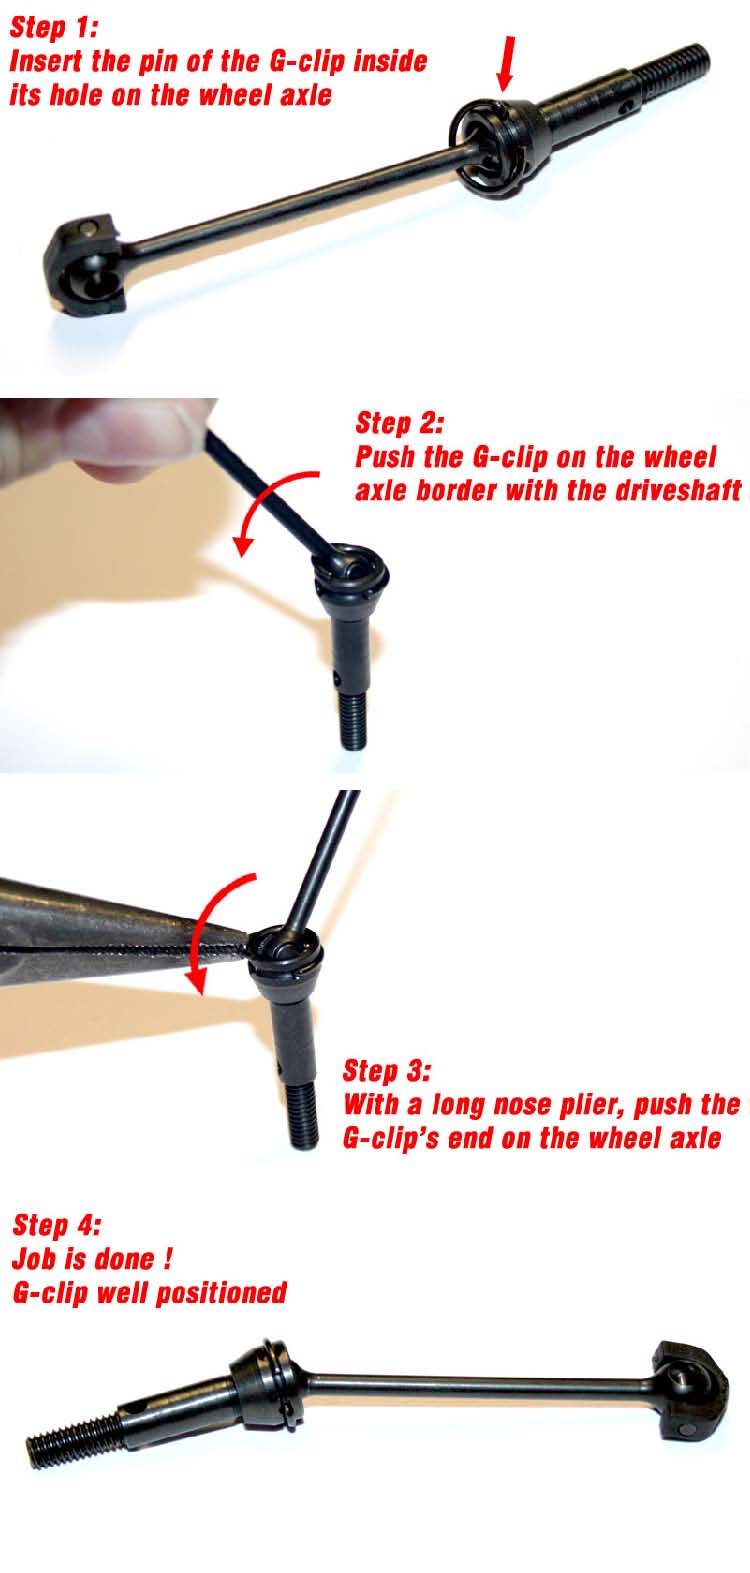
first step is insert the pin end of the G-clip into its hole on the wheel axle.
On second step, you have to push the opposite side of the G-clip on the border of the wheel axle, with the driveshaft.
On step three, you have to use a long nose plier to push the G-clip over the wheel axle.
Job is done on step four, you can install the driveshaft on the car; after lubrication (with copper grease by example). |
|
|
------------------------------------------------------------------------------
|
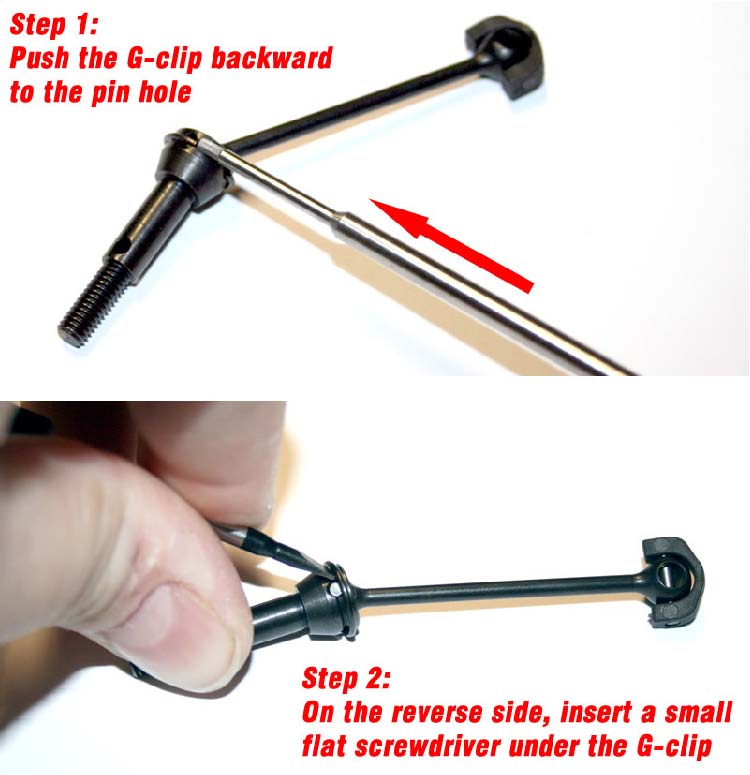
E4RS4 - Tip 3: Driveshafts dismantling
This operation is considered by many users of many RC cars brands as one of the most diffcult.
For sure, the driveshafts are more free with a G-clip, and we never lost a pin during a run since we switched from grub screw to G-clip... but it's less easy to assemble, we can't have all the advantages !
first step is to push the G-clip's end side backward to the next pin hole. The clip will stay on that hole and create space on the opposite side.
Second step is to insert a small flat screwdriver on the space on the opposite side, between the G-clip and the wheel axle.
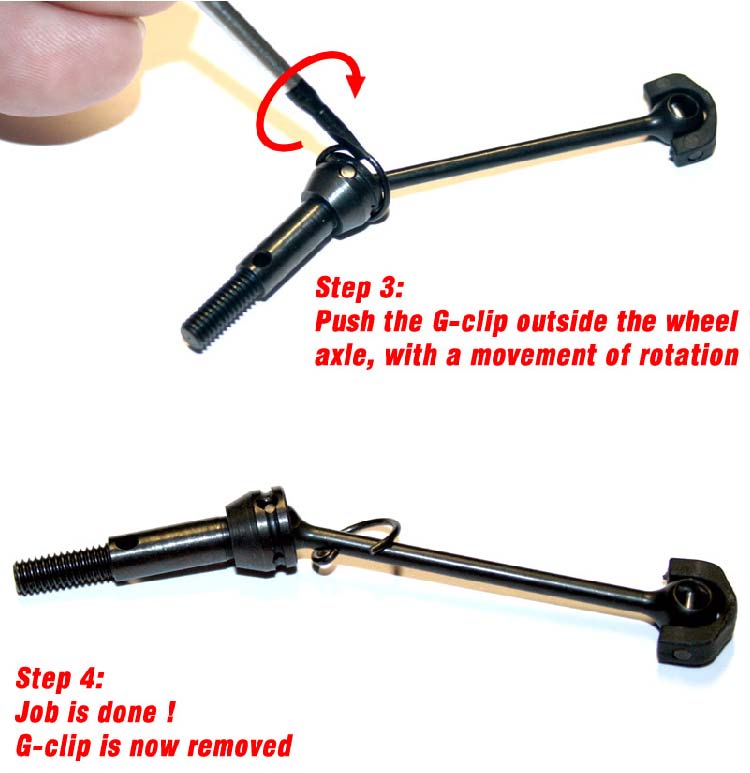
Third step is to push the G-clip outside the wheel axle, by a simple and easy movement of rotation.
On the fourth step, job is done, the G-clip is removed from the wheel axle.
|
|
|
------------------------------------------------------------------------------
|
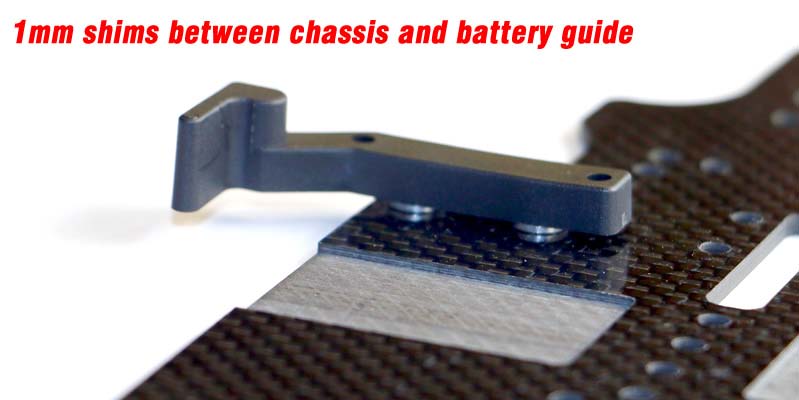
E4RS4 - Tip 4: Battery guide's fixation
To better maintain the battery on the E4RS4 chassis, and to also prevent any problem of flex movement interference due to battery holders, we usually use small spacers between chassis and battery holders.
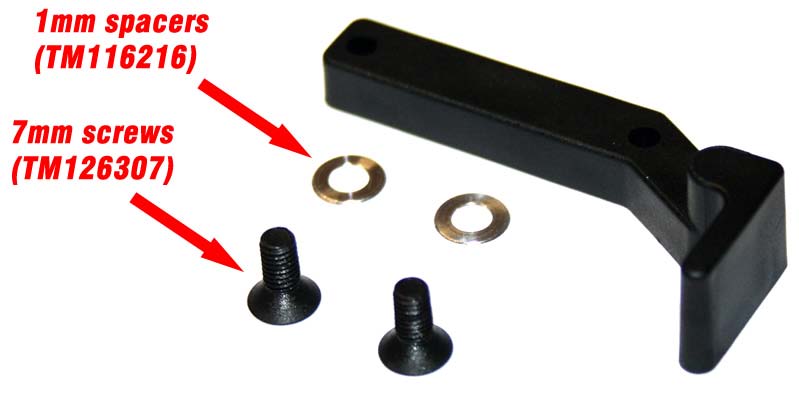
For that, we use 1mm spacers with 7mm screws (instead of the 6mm ones).
This will reduce the contact between the chassis and the battery holder from a large rectangle of 28mm x 6mm (168mm2) to small two circles of 28mm2 each.
The round shape of "feets" will also provide a better liberty of flex movements to the chassis. |
|
|
------------------------------------------------------------------------------
|
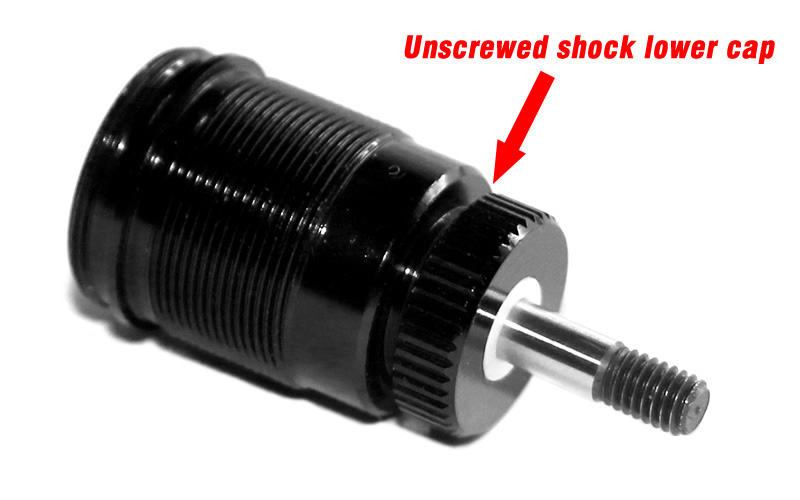
E4RS4 - Tip 5: Shock shaft installation
To protect the perfect seal of the shock, we need to prevent the lower O-ring of any damage. For that, we recommend to never insert or retire the shock shaft with the lower cap fully screwed.
In facts, when the lower cap is screwed, the O-ring is under the pressure of the two small plastic guides. So, if you insert or retire the shock piston shaft, you may damage a bit the O-ring with the treaded area of the shaft.
By unscrewing the lower cap, you will radically reduce the pressure on the O-ring to 0, and you could retire or insert the piston shaft without any risk.
For a perfect O-ring lubrication and seal, we highly recommend to use a bit of green slim or equivalent O-ring lube.
|
|
|
|