|
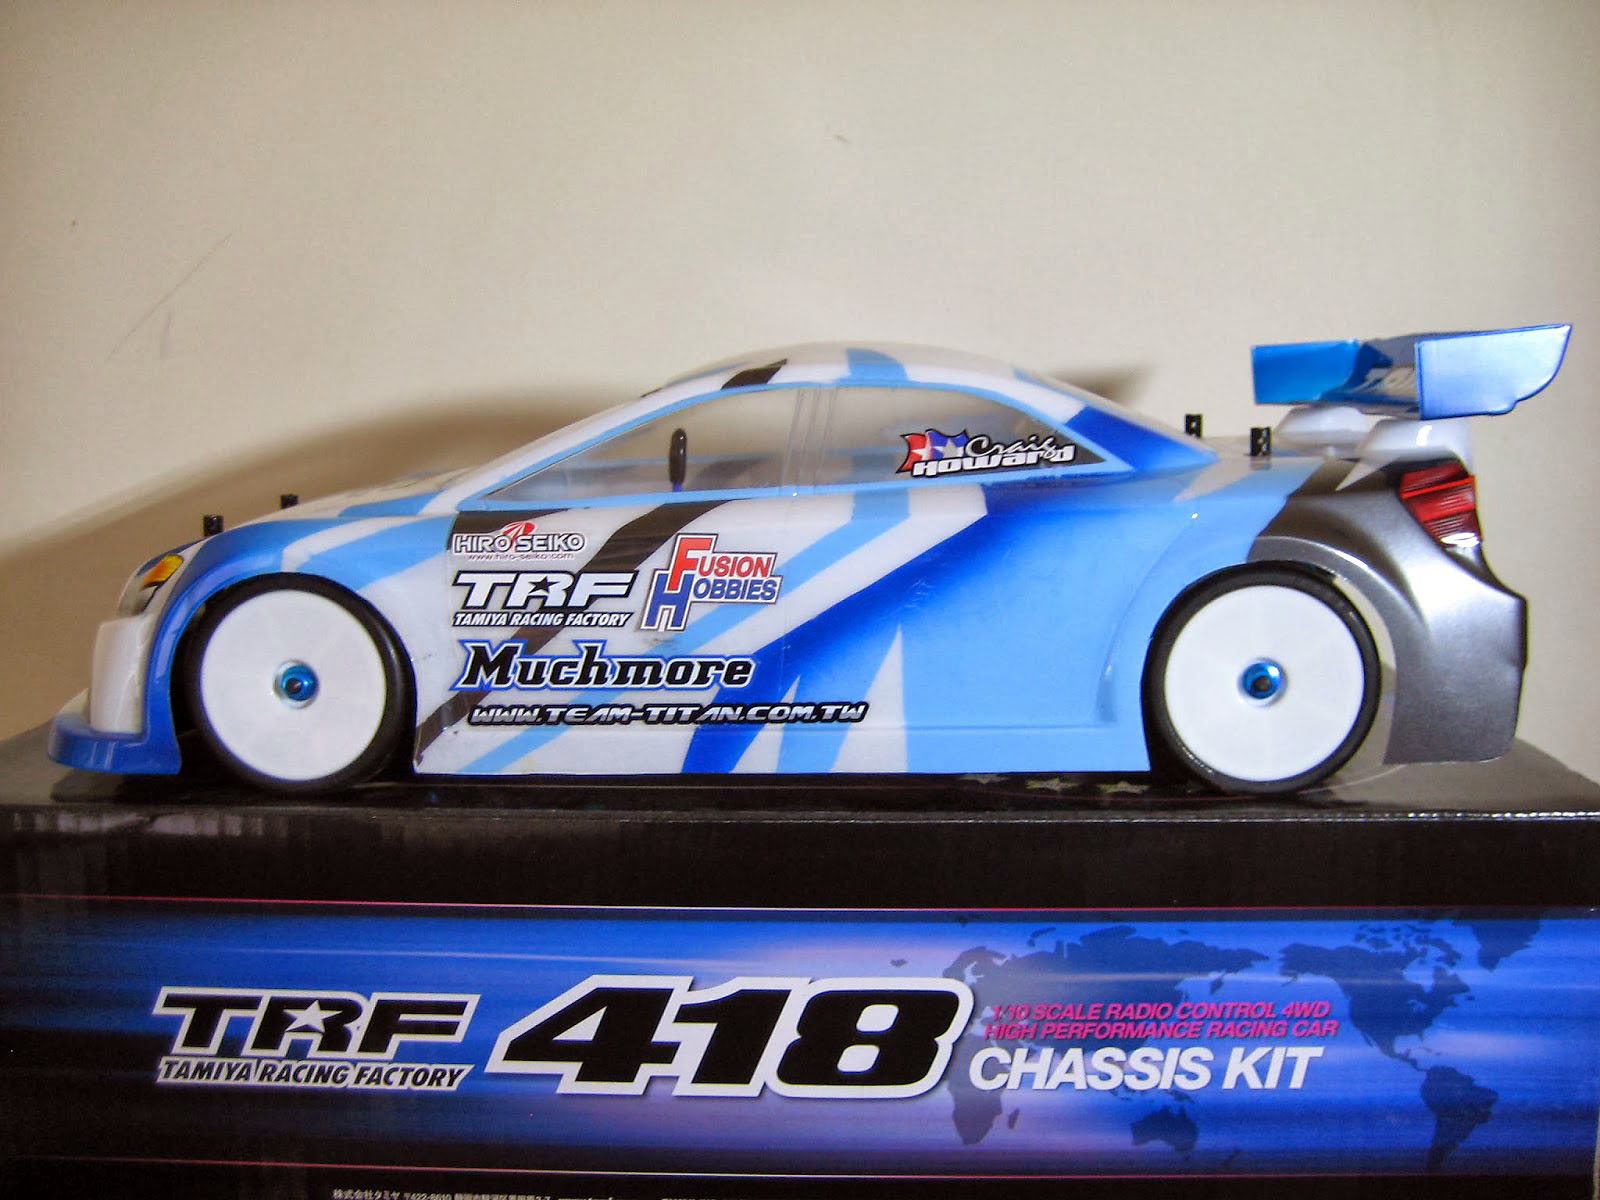
- Tamiya TRF418 - Build & Review -
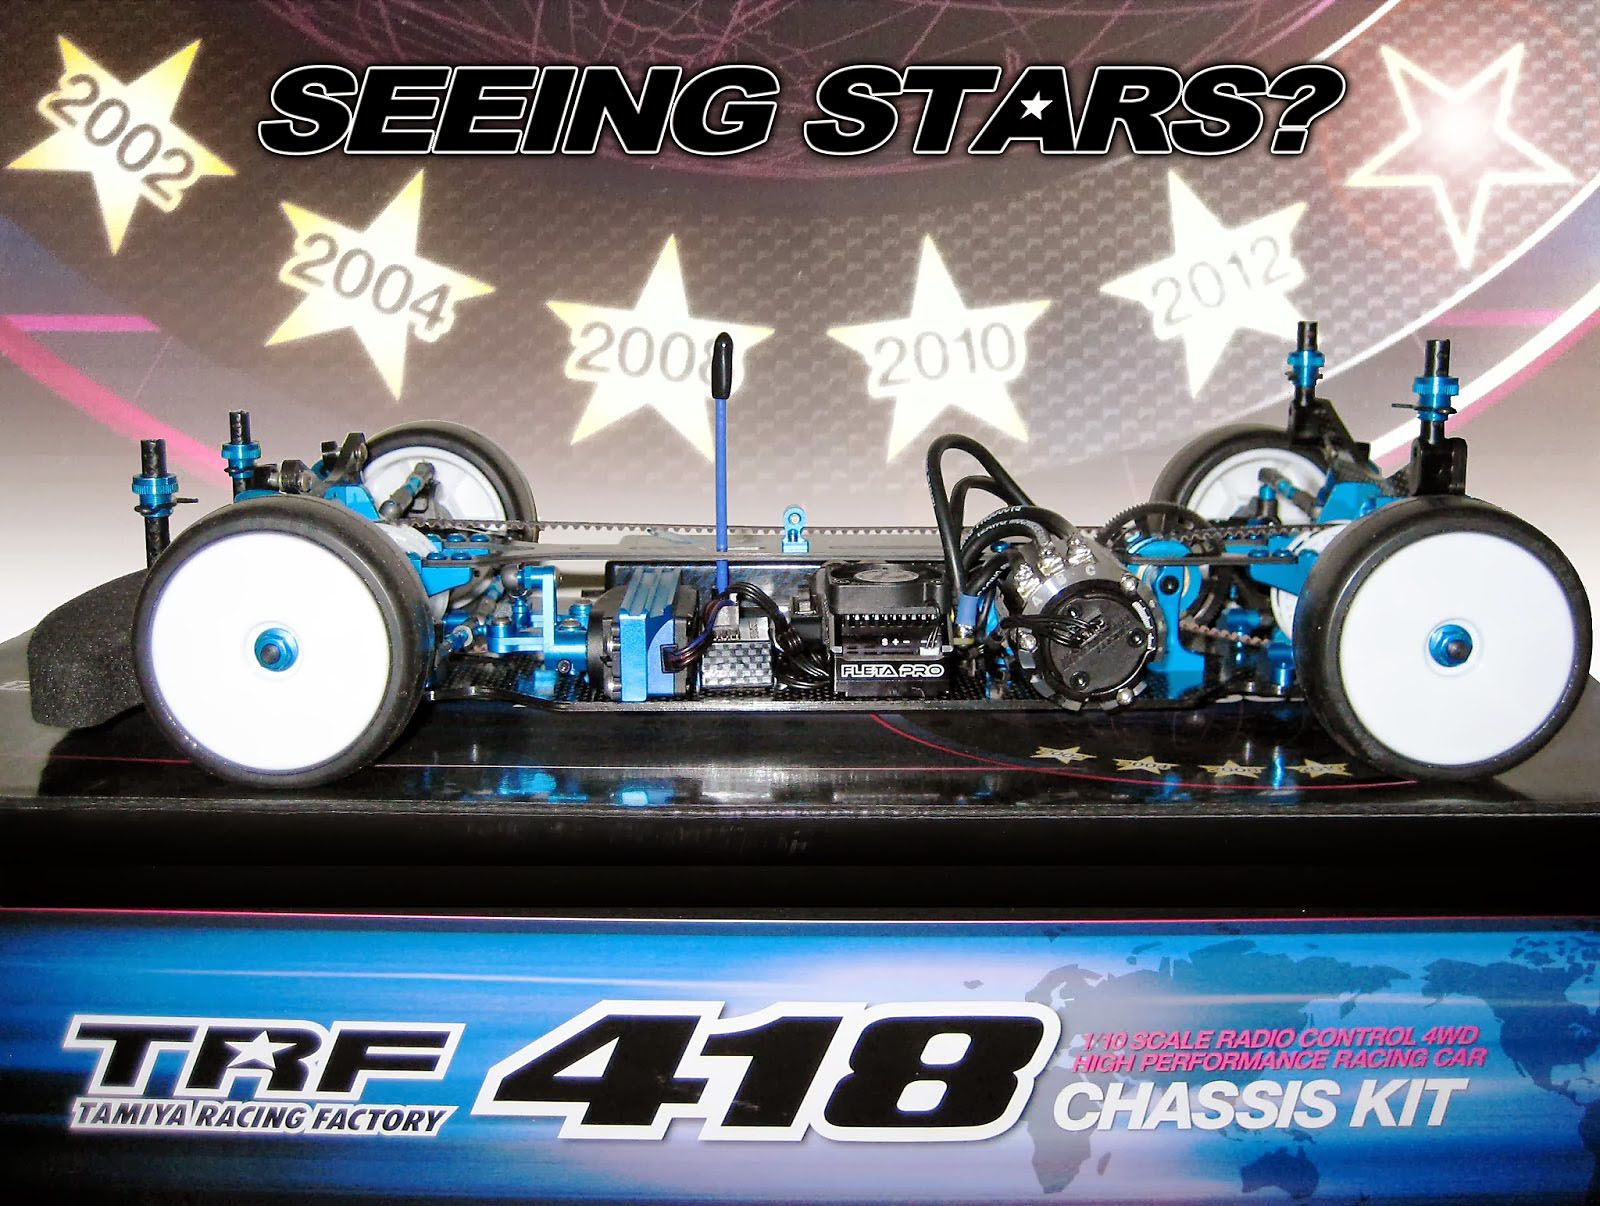
The Tamiya TRF418 is here.
The TRF417 was a great car and it managed to win the worlds for Team TRF with the help of Jilles Grosskamp dramatic on-track antics. However it was a car that some drivers felt was not a big enough step over the well regarded TRF416, with some feeling that it lacked the edge of the previous car against the rival manufacturers. Many also felt that the car was not as well suited to carpet racing as the TRF416.
The TRF418 is being sold as a big jump from the 417. Just about everything has been redesigned for this car making the perceived value of upgrading from the earlier TRF pretty large for most keen Tamiya Racers, and RC Racers looking for a new ride for 2014
So lets start the build
Steps 1 - 3 - Chassis prep and Rear Bulkheads
The new chassis has more cut-outs than the 417v5 but it feels quite stiff, so it will be interesting to see what it's like on the track. I covered the sides with CA glue using the cotton bud trick and started by fitting the new suspension arms.
Any unnecessary of aluminium is removed, showing Tamiya's racing intent from the start of the build
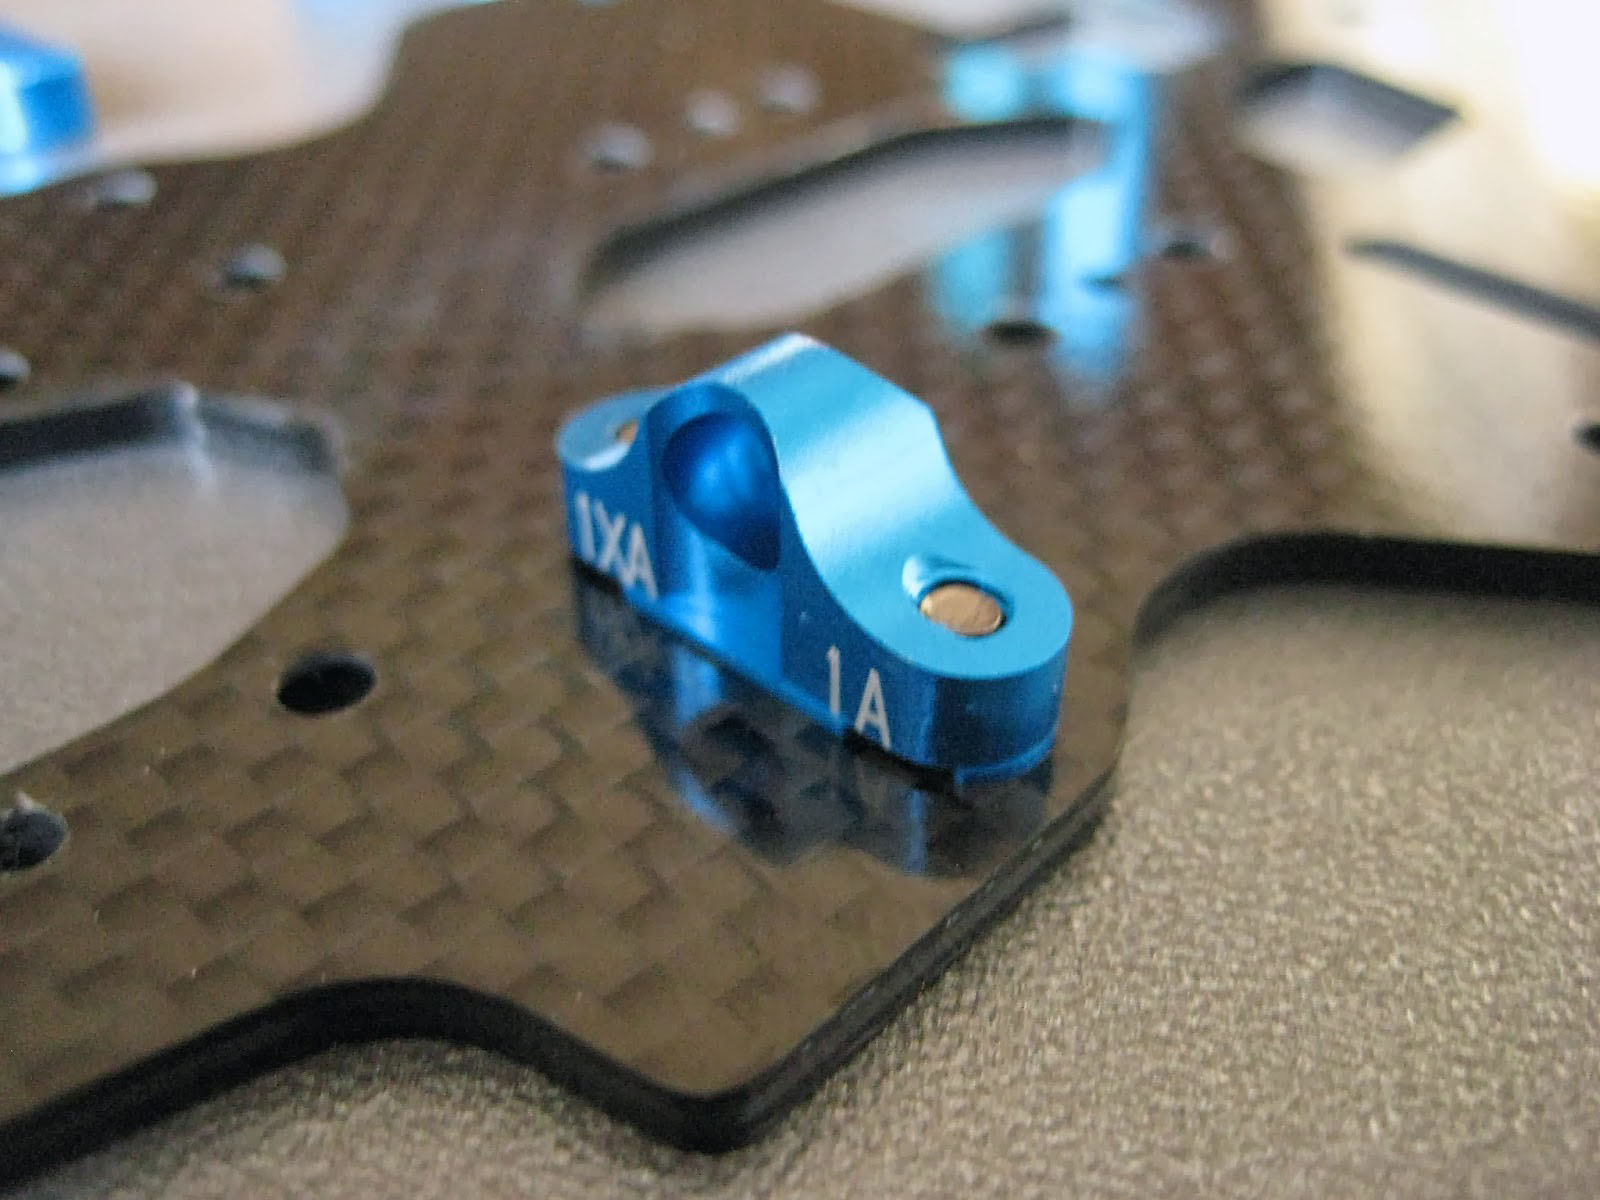
As you can see the split suspension blocks have been slightly tweaked with material removed from the front and the rear to make them even lighter.
NOTE - They are still the same as the std blocks so you do not need to replace ones that you already have in your pitbox.
Also Tamiya has included suspension mount spacers (Covered here) to do away with the shims that we have had to use before.
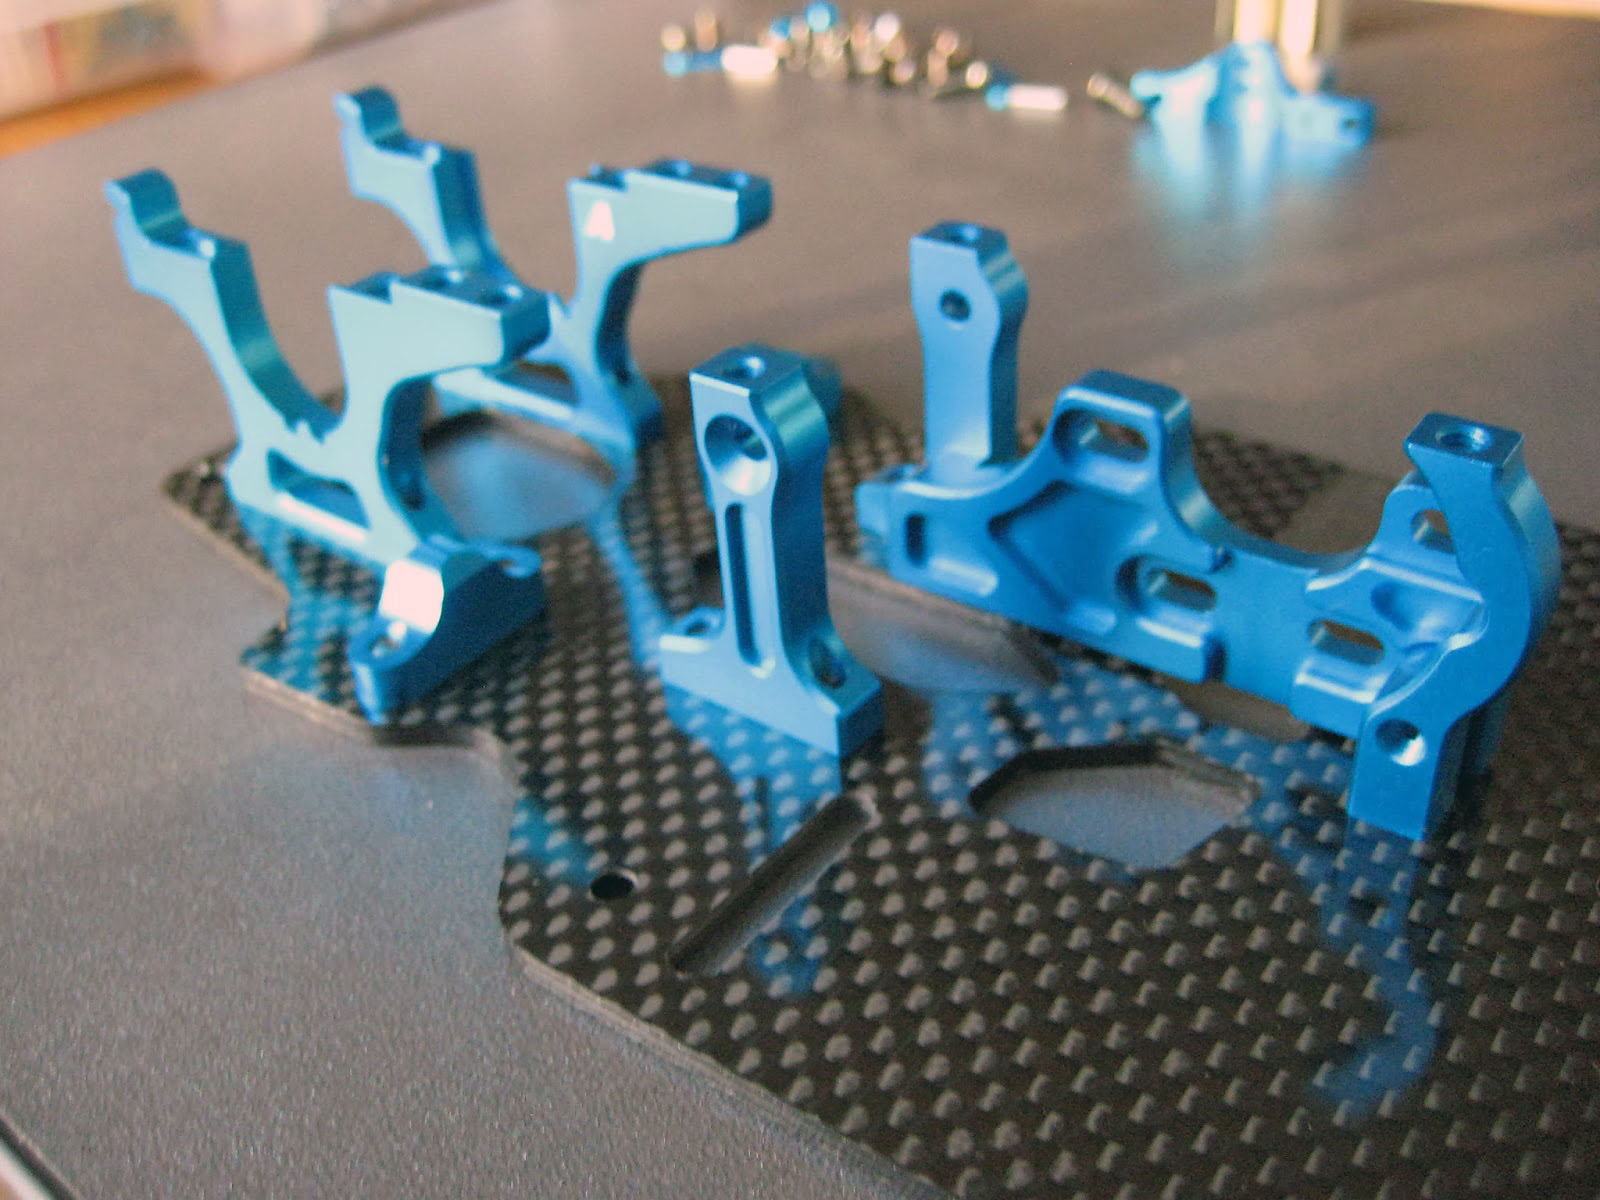
The lower bulkheads are marked A and B and are the same for both front and rear
Next up are the new bulkhead parts. As you can see they have a mounting pin to ensure that they stay true in the chassis, also note the chamfered edges.
Also notice now how the bulkheads now have fitting pins to help stop tweak and bulkheads that are mis-aligned.
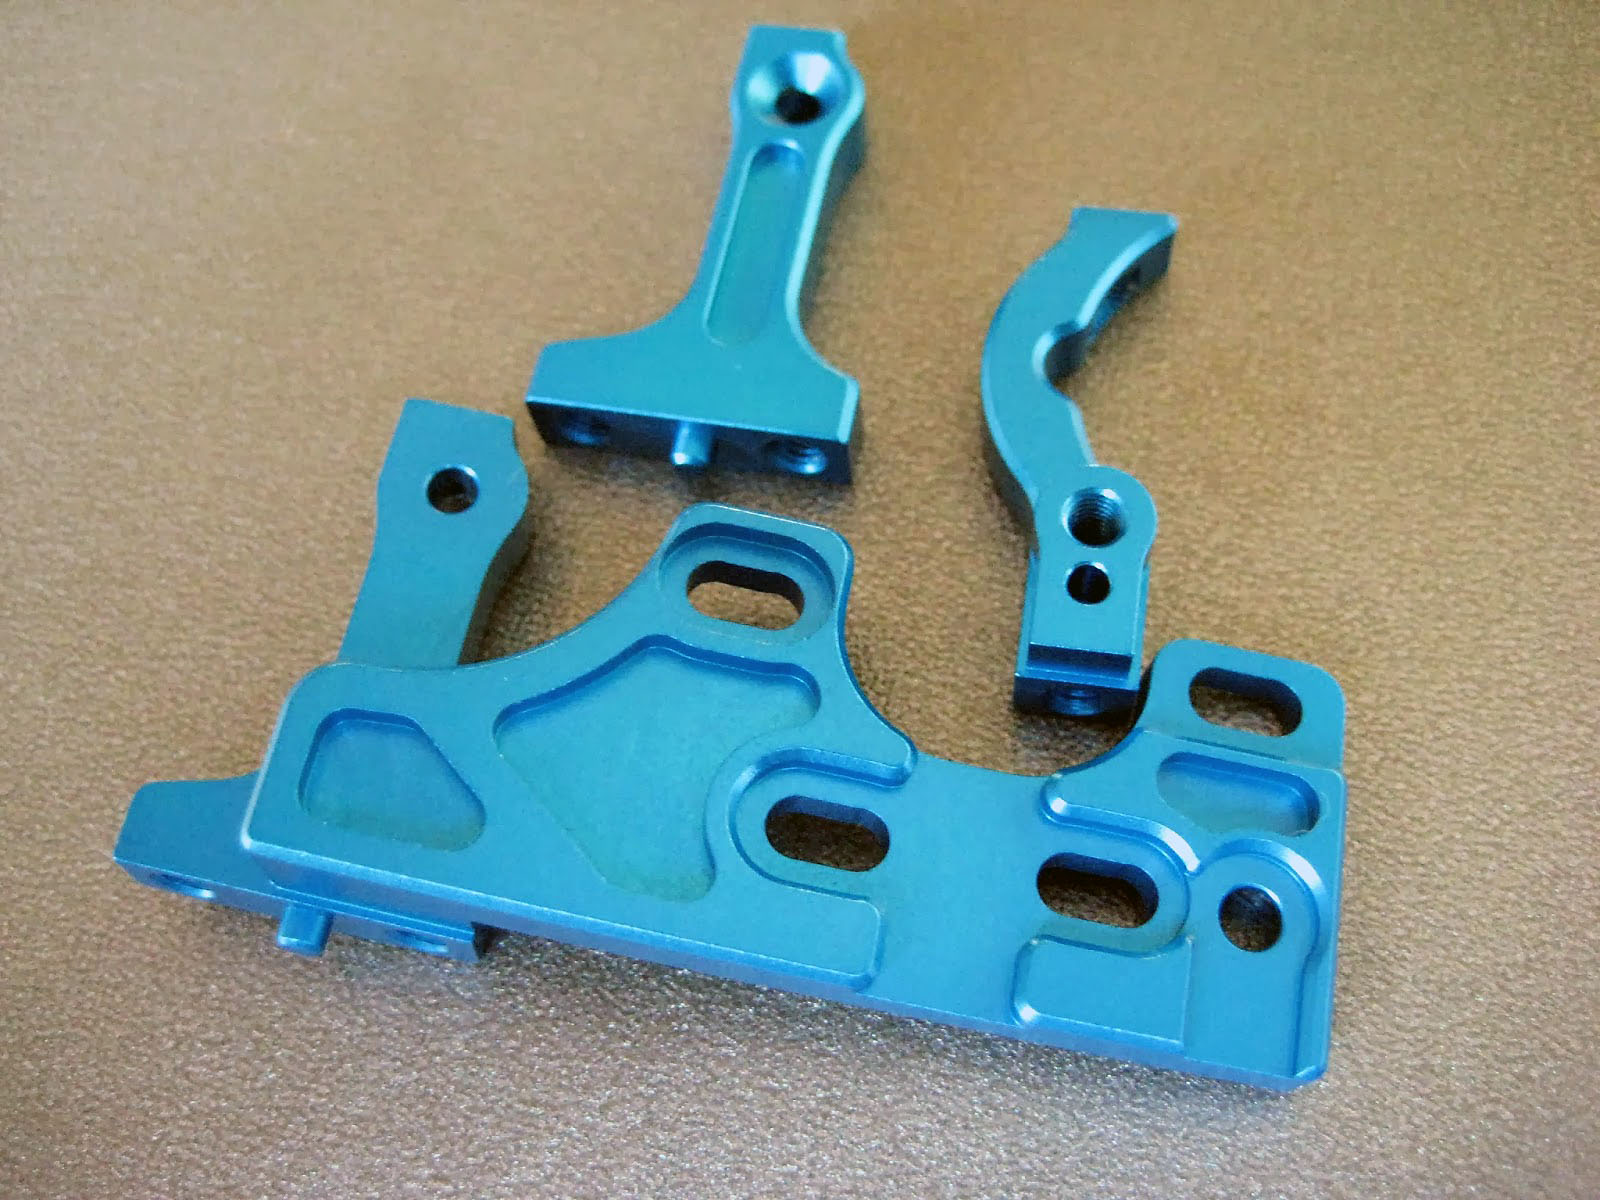
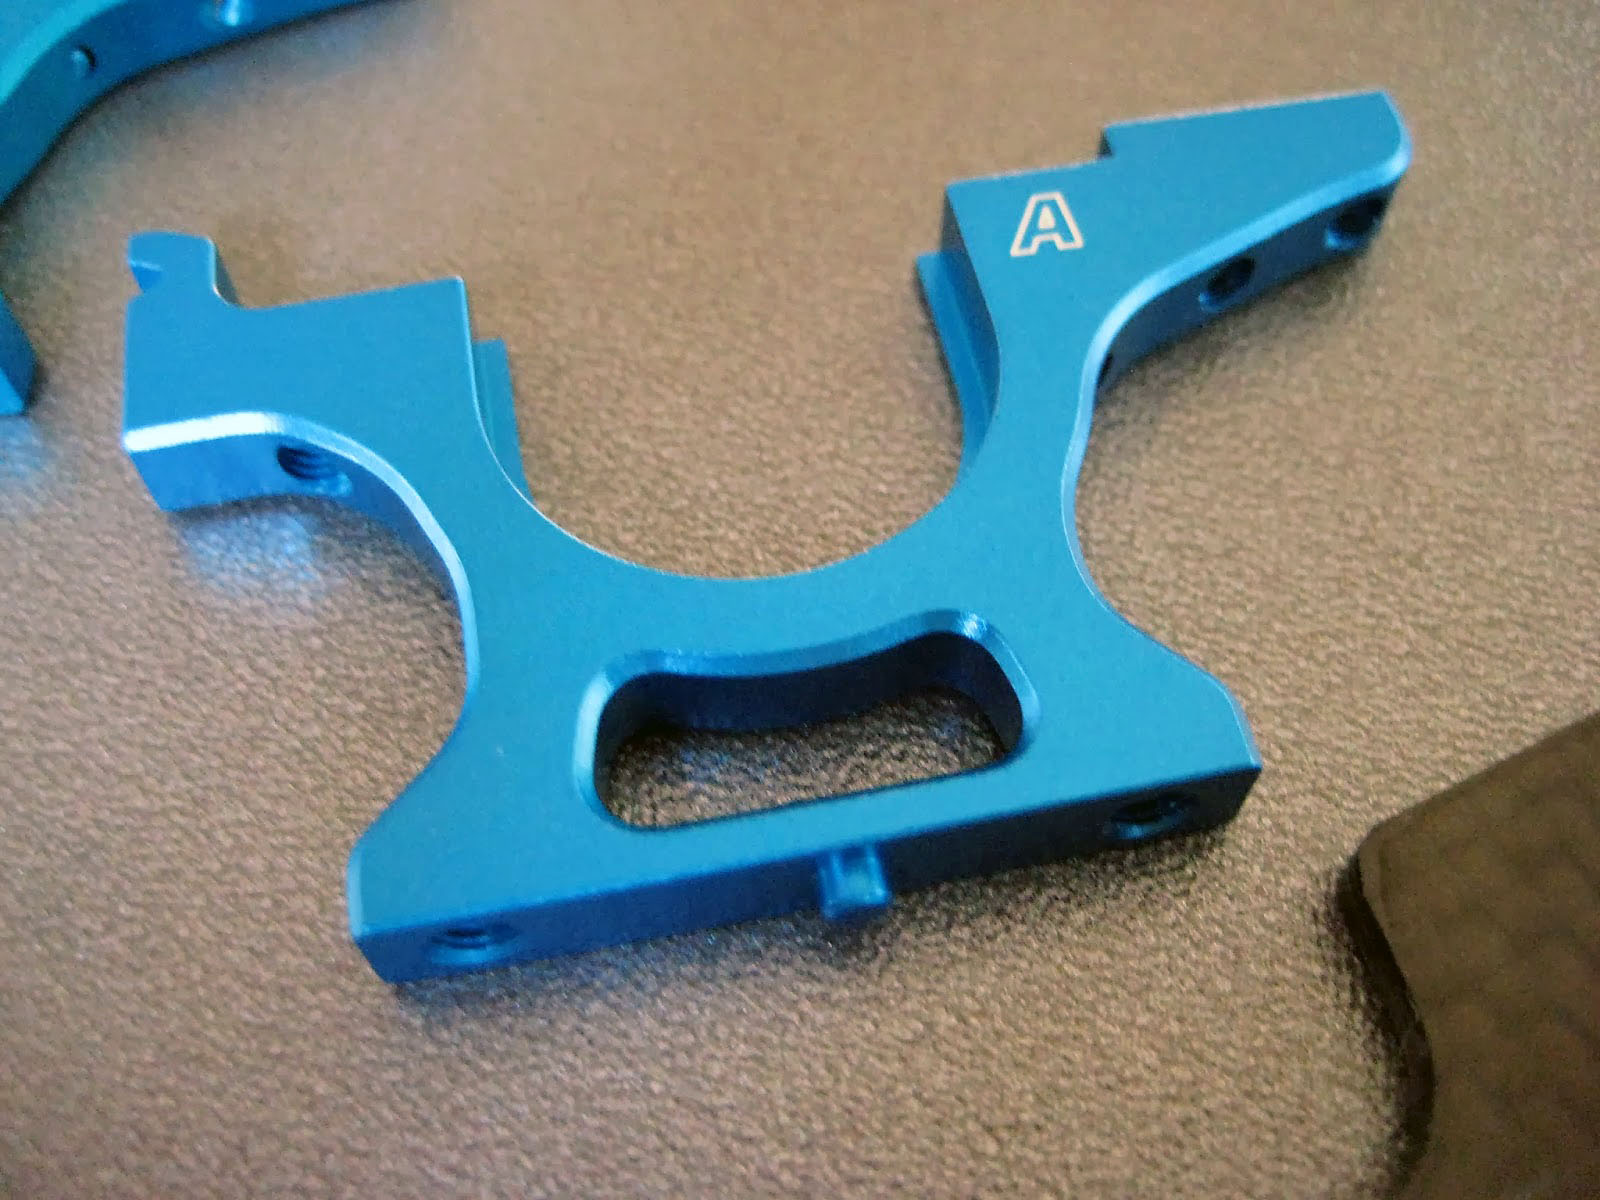
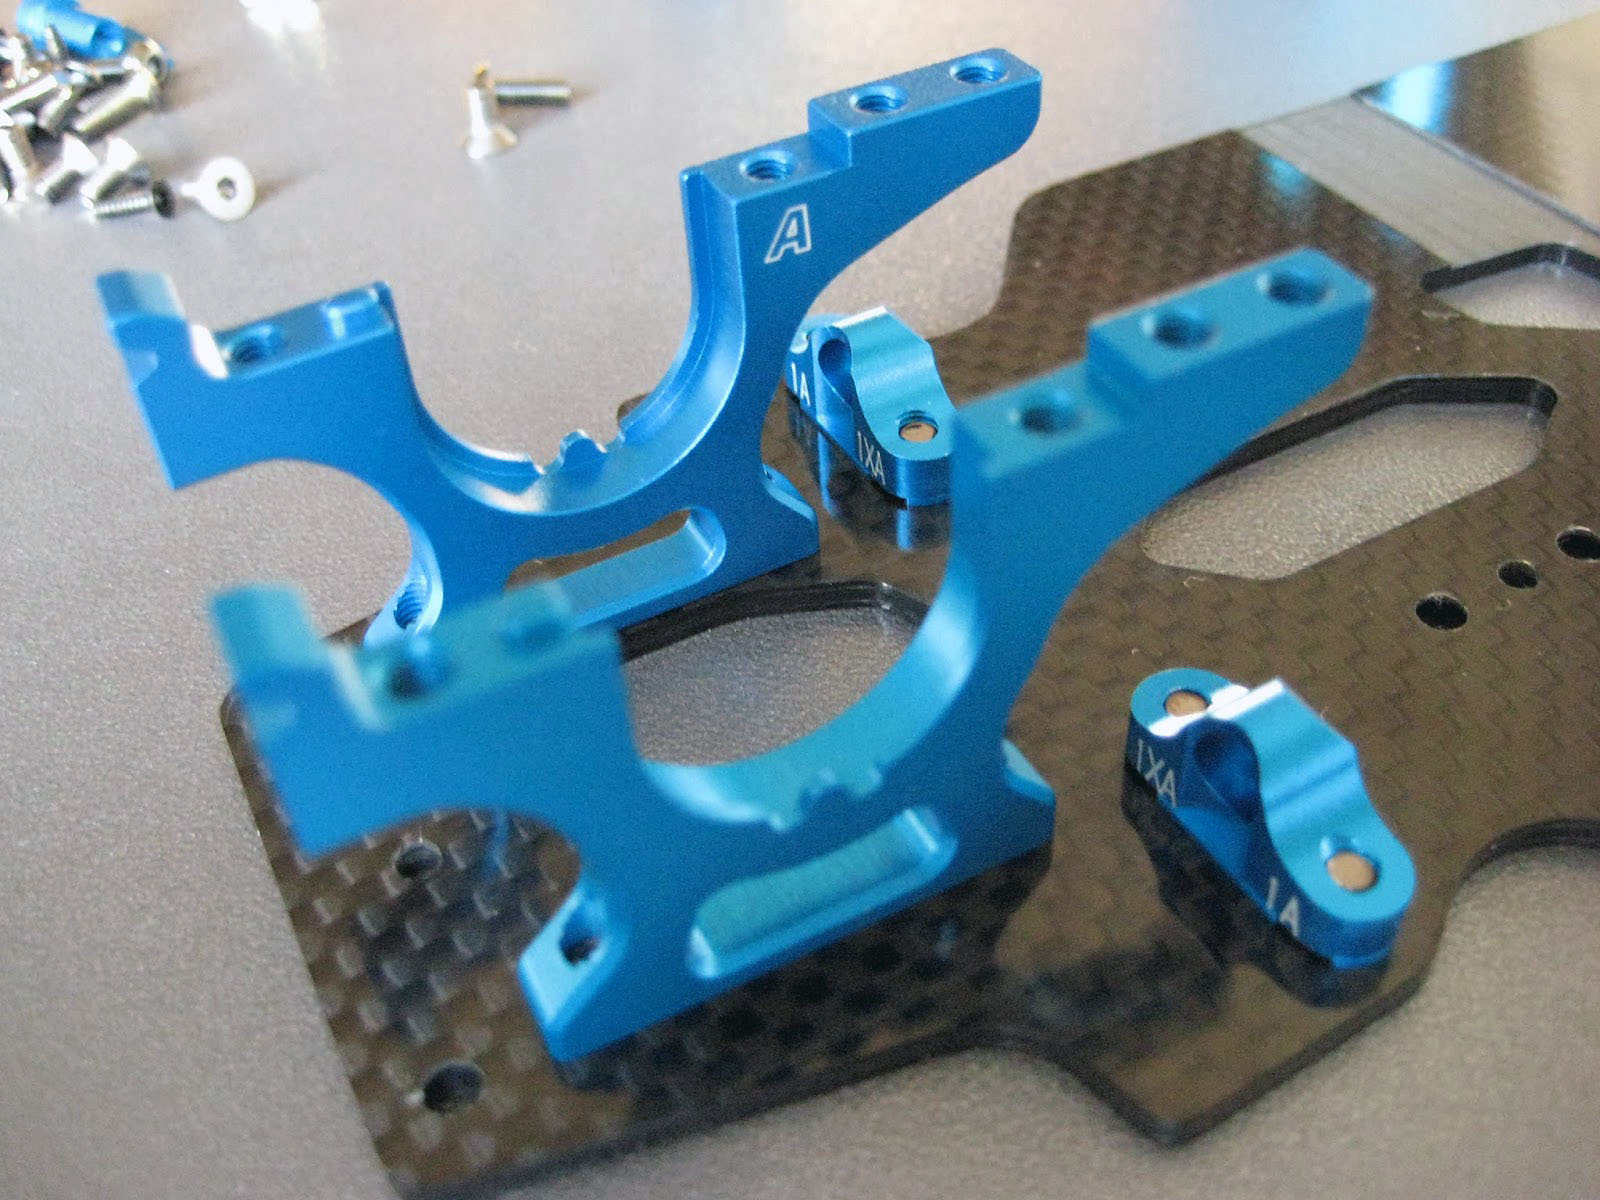
This is almost like a work of art, the new motor mount is very light
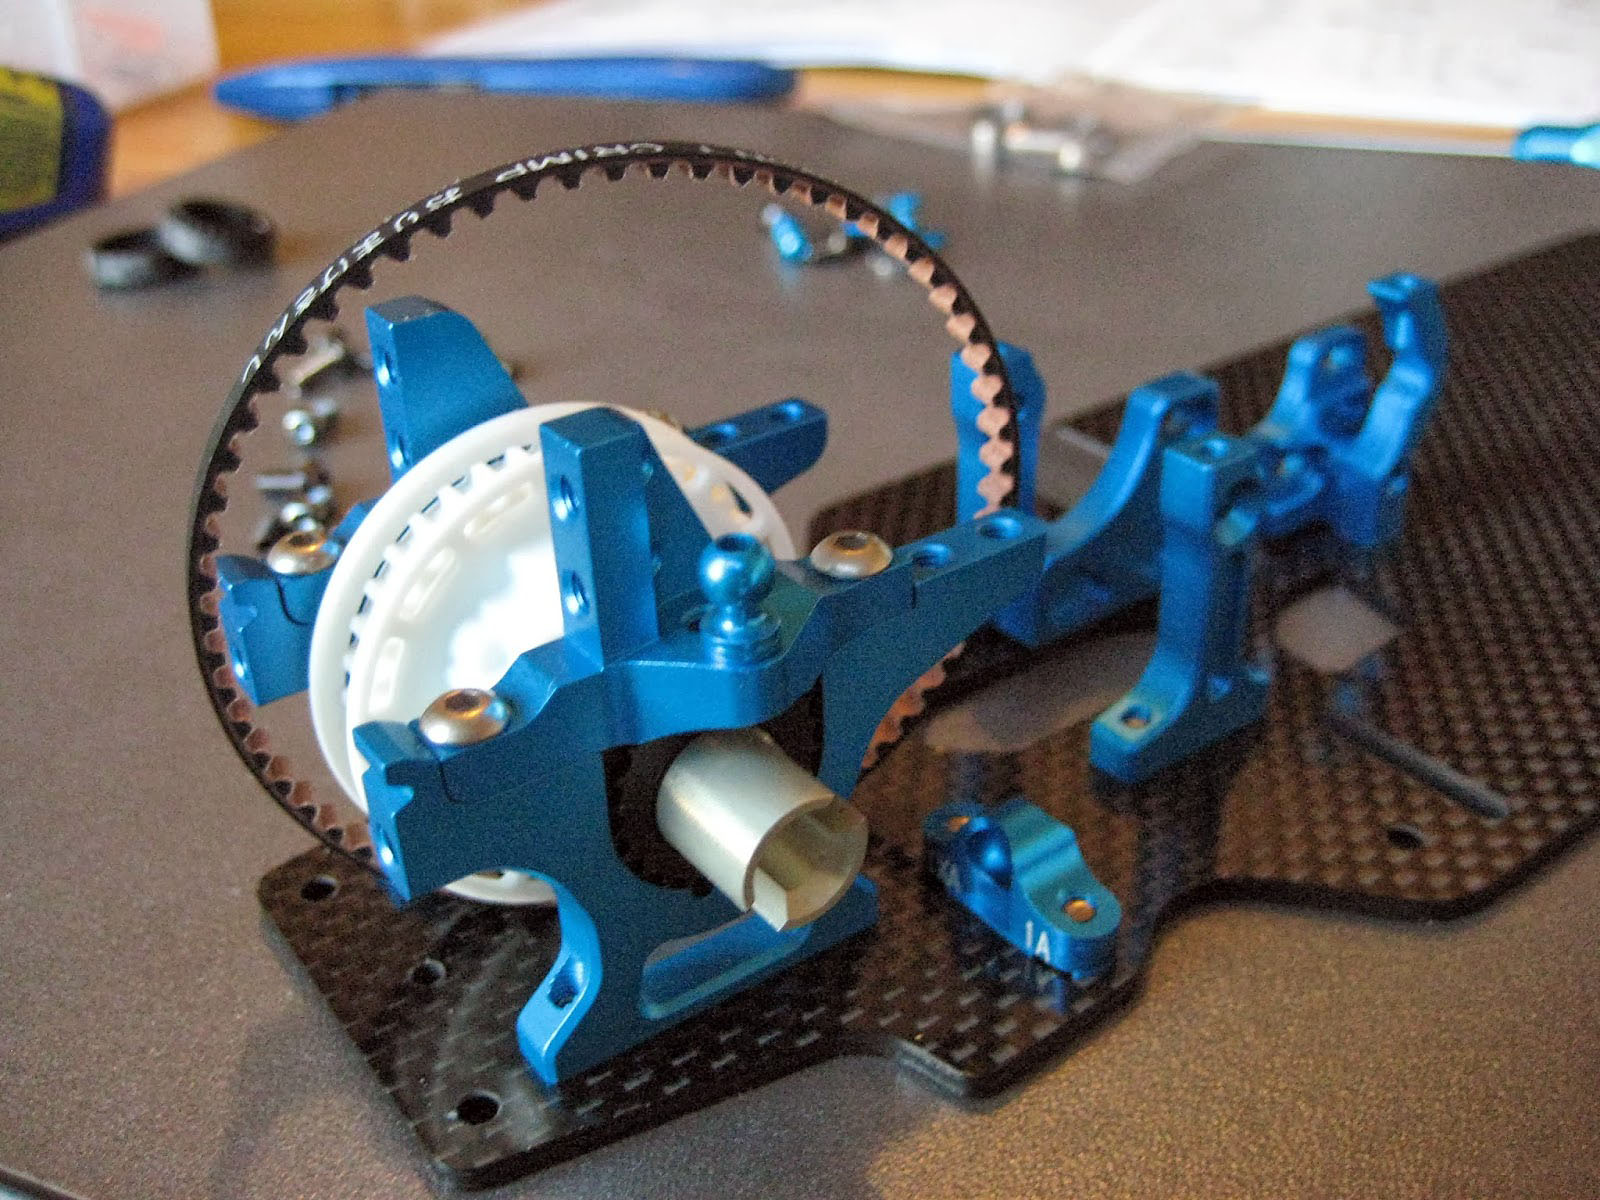
The motor mount parts and centre post are next. Again these parts are a significant change from the TRF417. It brings the motor really close to the centre line of the car, and it also moves the motor slightly forward.
The posts also now hold the centre pulley via a shaft that is screwed in. Allowing for quick access if you need to change a spur gear.
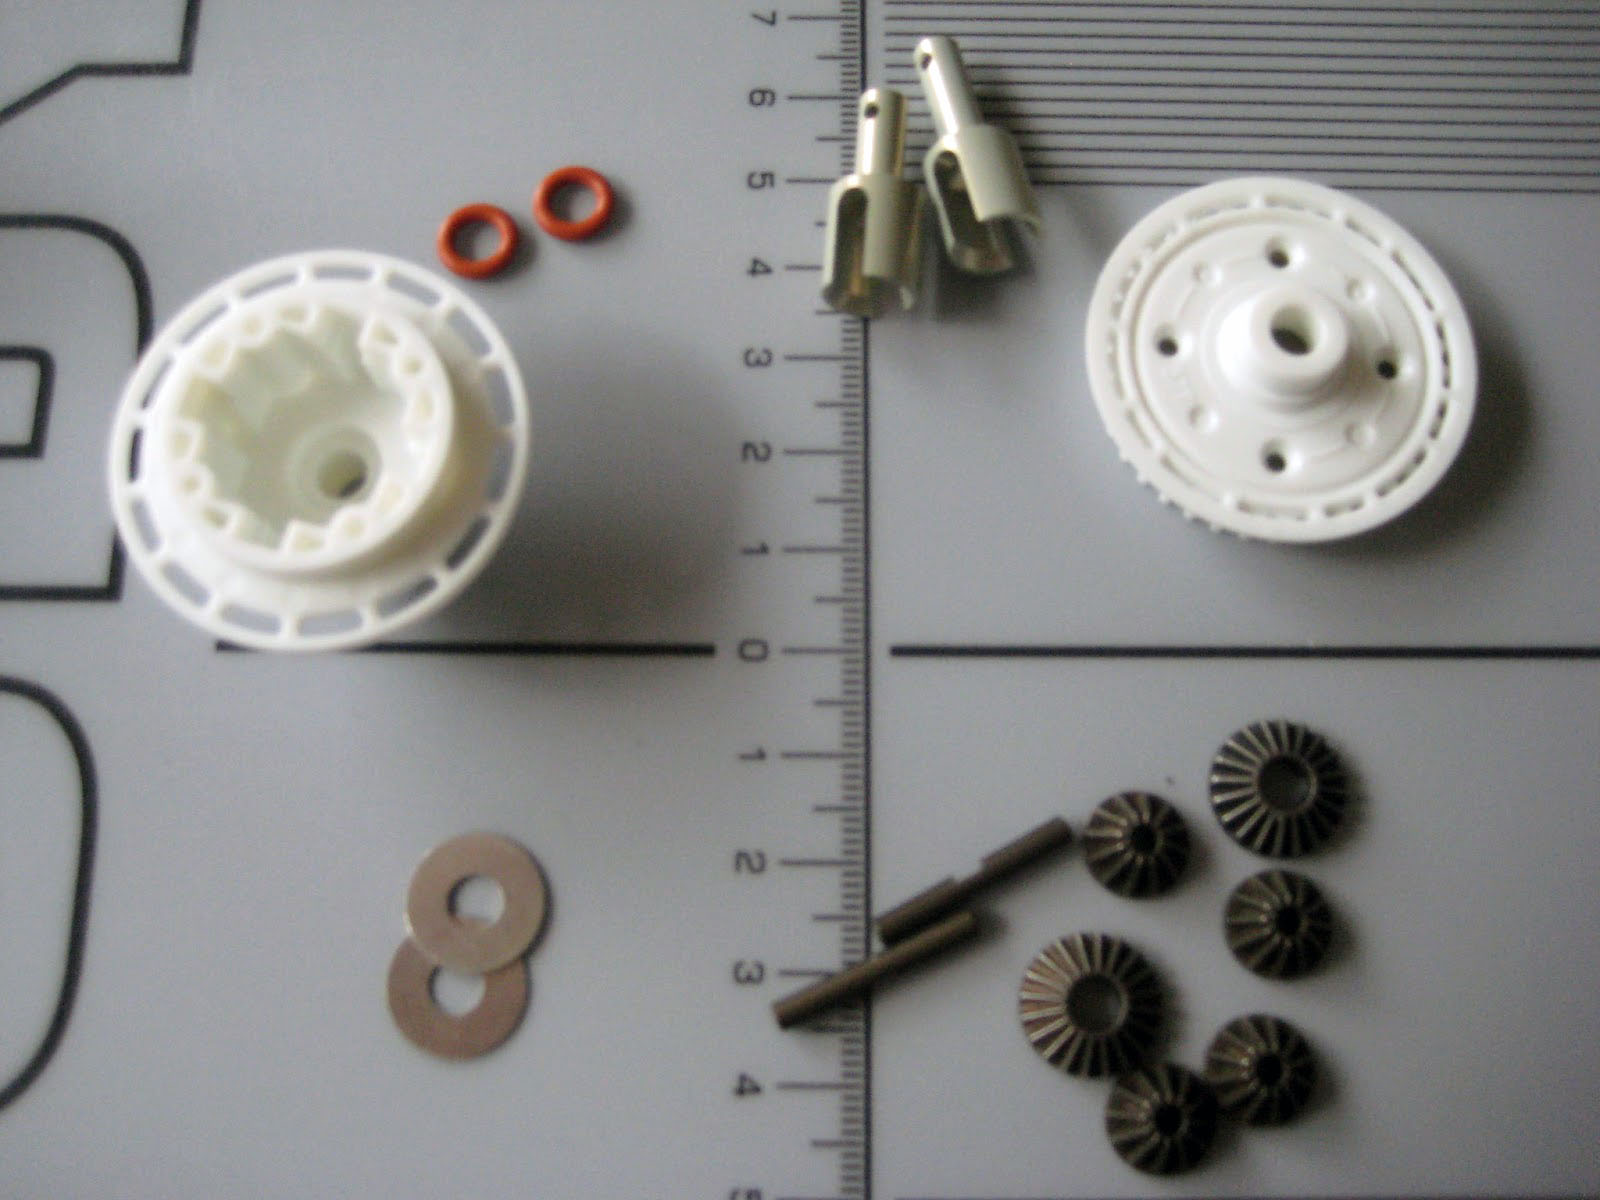
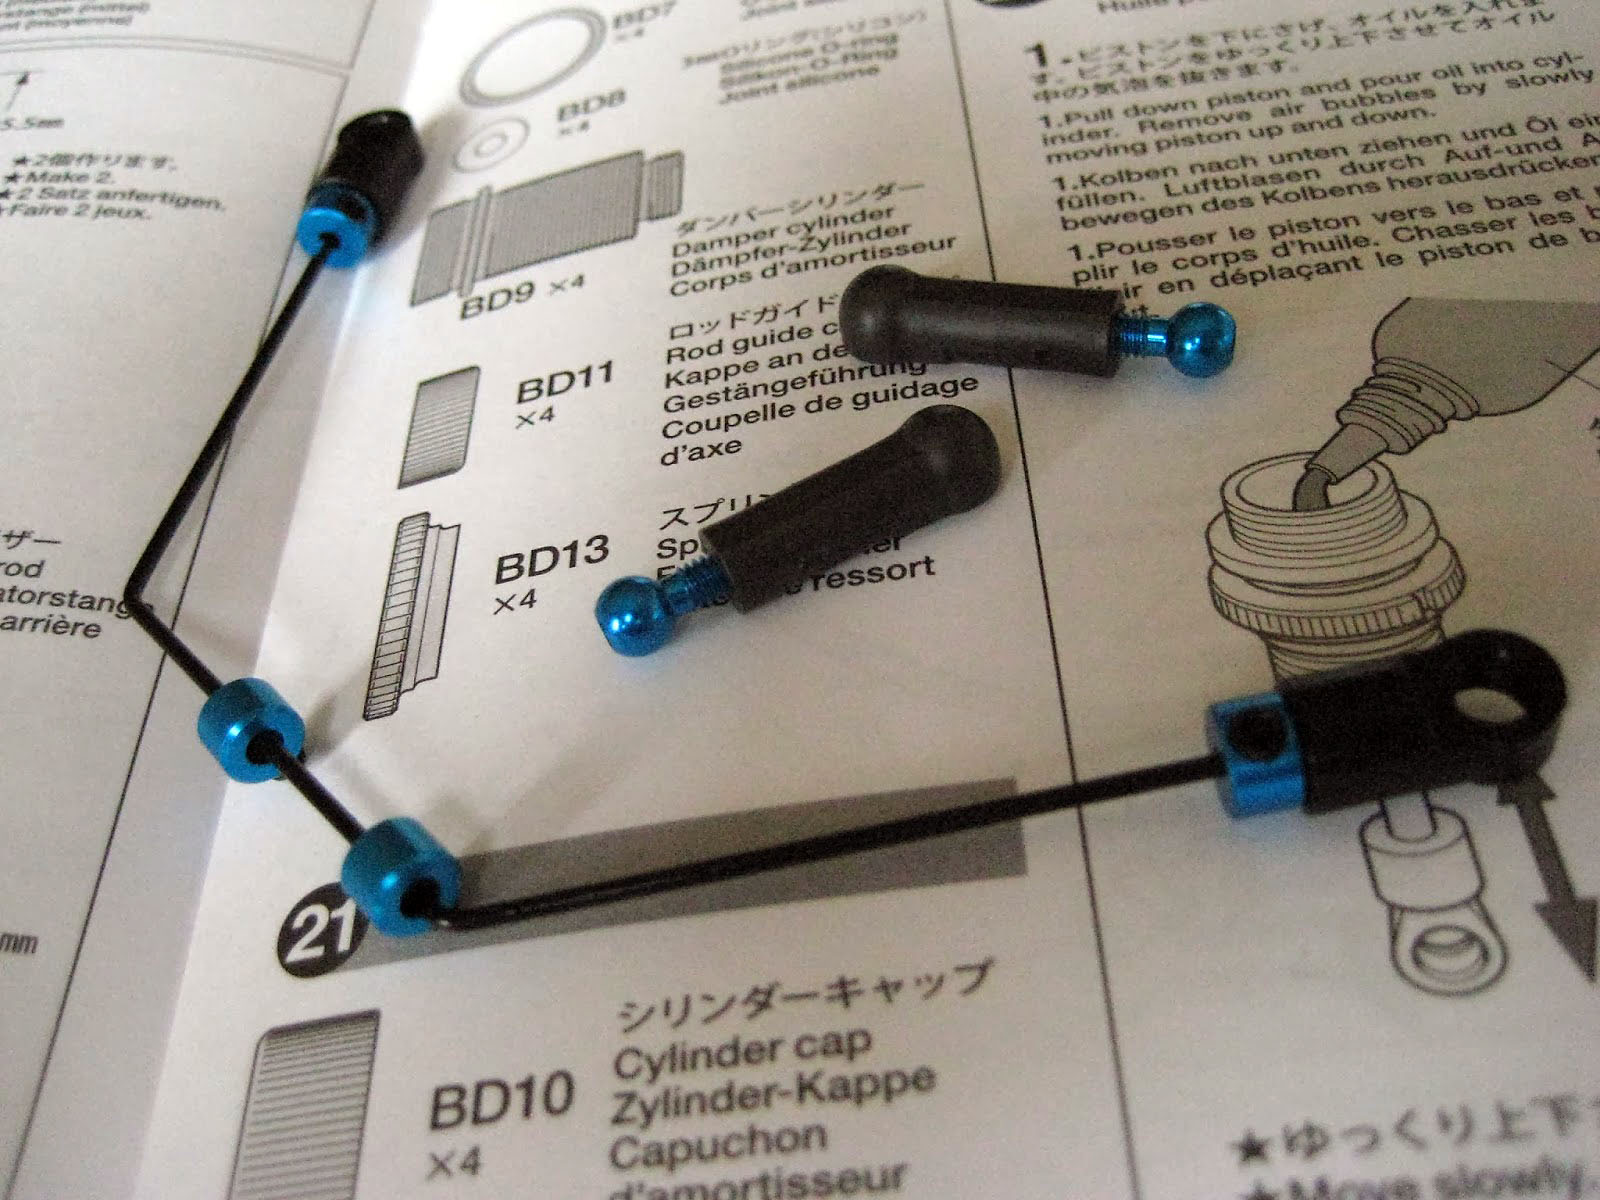
Stage 4 - Gear diff
The kit comes with the V2 Tamiya Gear diff which has been around for some time, these units are very reliable although I do not like the std O-Ring included as it can leak. I use the Tamiya hop-up O-Rings (Part no 42259 )
If you follow the guide below then you will have a smooth, leak free gear diff.
Building the perfect Tamiya Gear Diff
After racing with a gear diff for some time there are some tips and tricks that you can use to build a great Tamiya Gear diff that is smooth, leak free and will last for a very long time between servicing.
Here is what you will need:
- Tamiya 54428 Steel Bevel Gears ** (although the plastic ones are ok, if you do use plastic ones then just cut off the plastic from the sprue, do not sand them down)
- Tamiya 42259 Gear Diff 5mm O-ring (red, 8pcs) or Kyosho ORG05 o-rings.
- TDX AC16003 Smart Shim for Tamiya Gear Diff. 0.3mm (Although the new Tamiya shims are ok as well)
- Associated Green slime
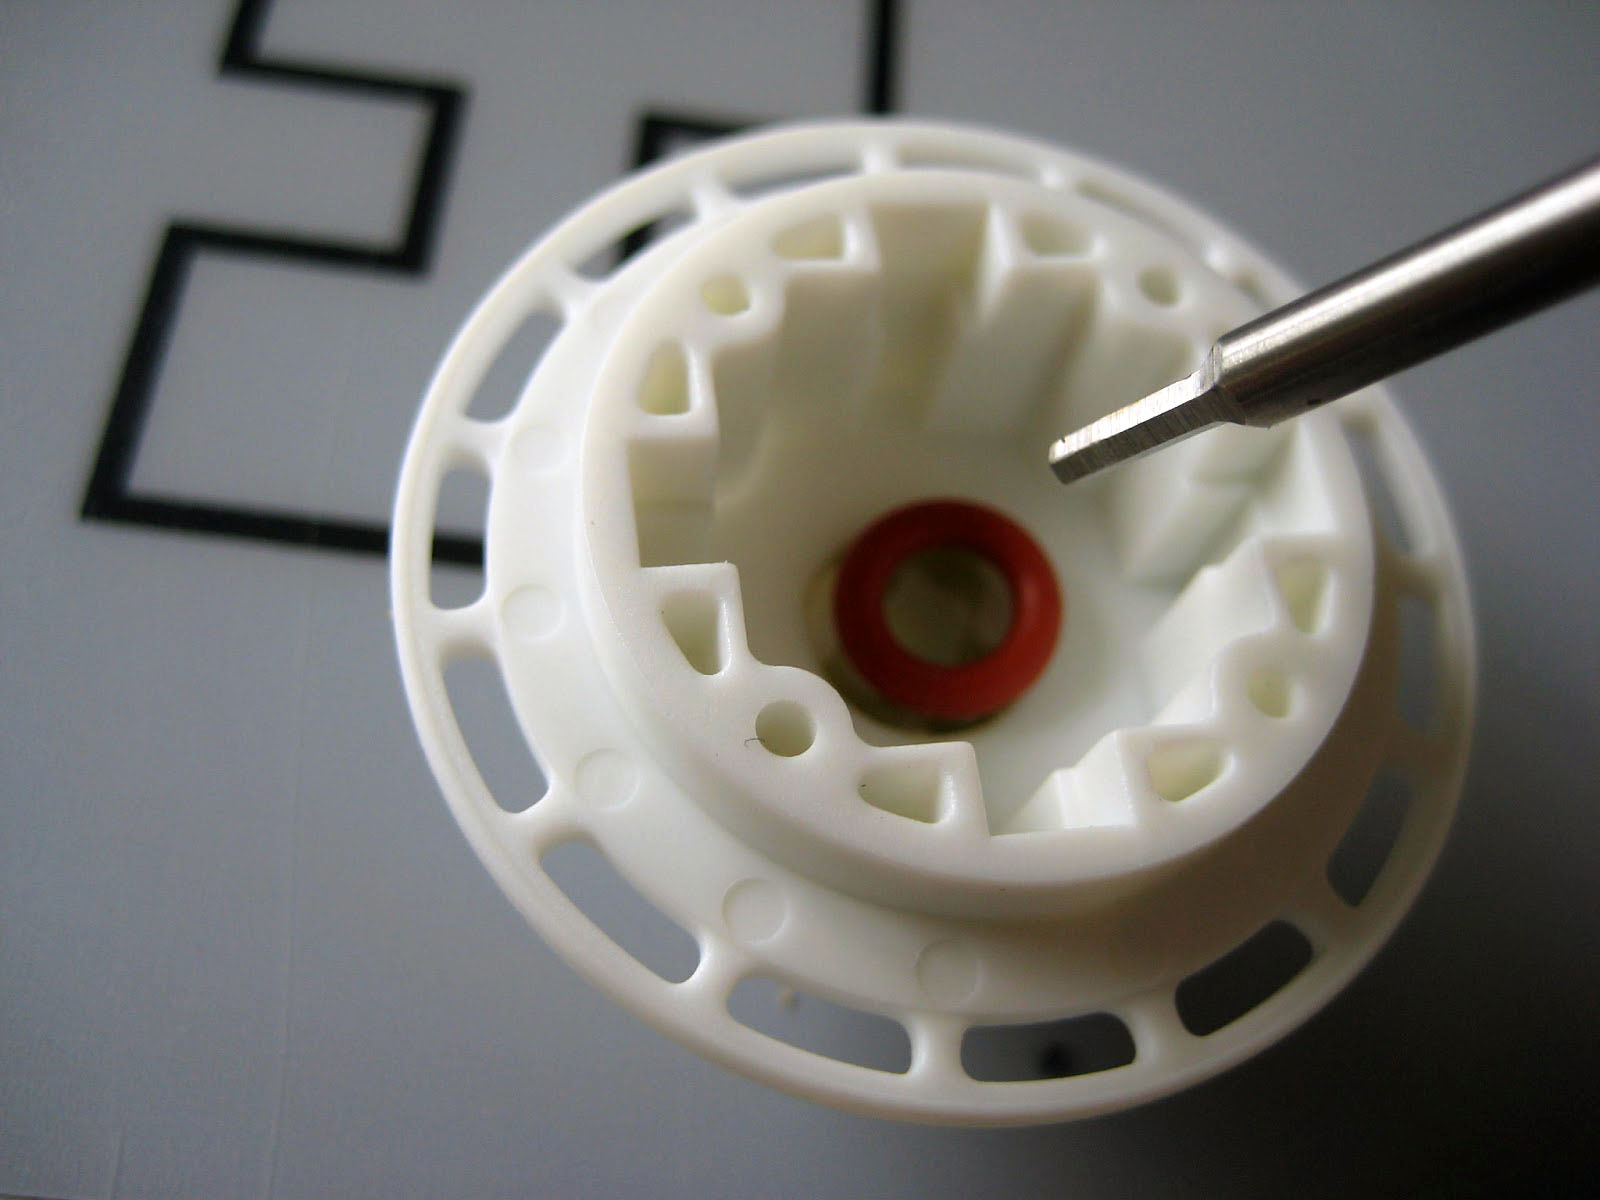
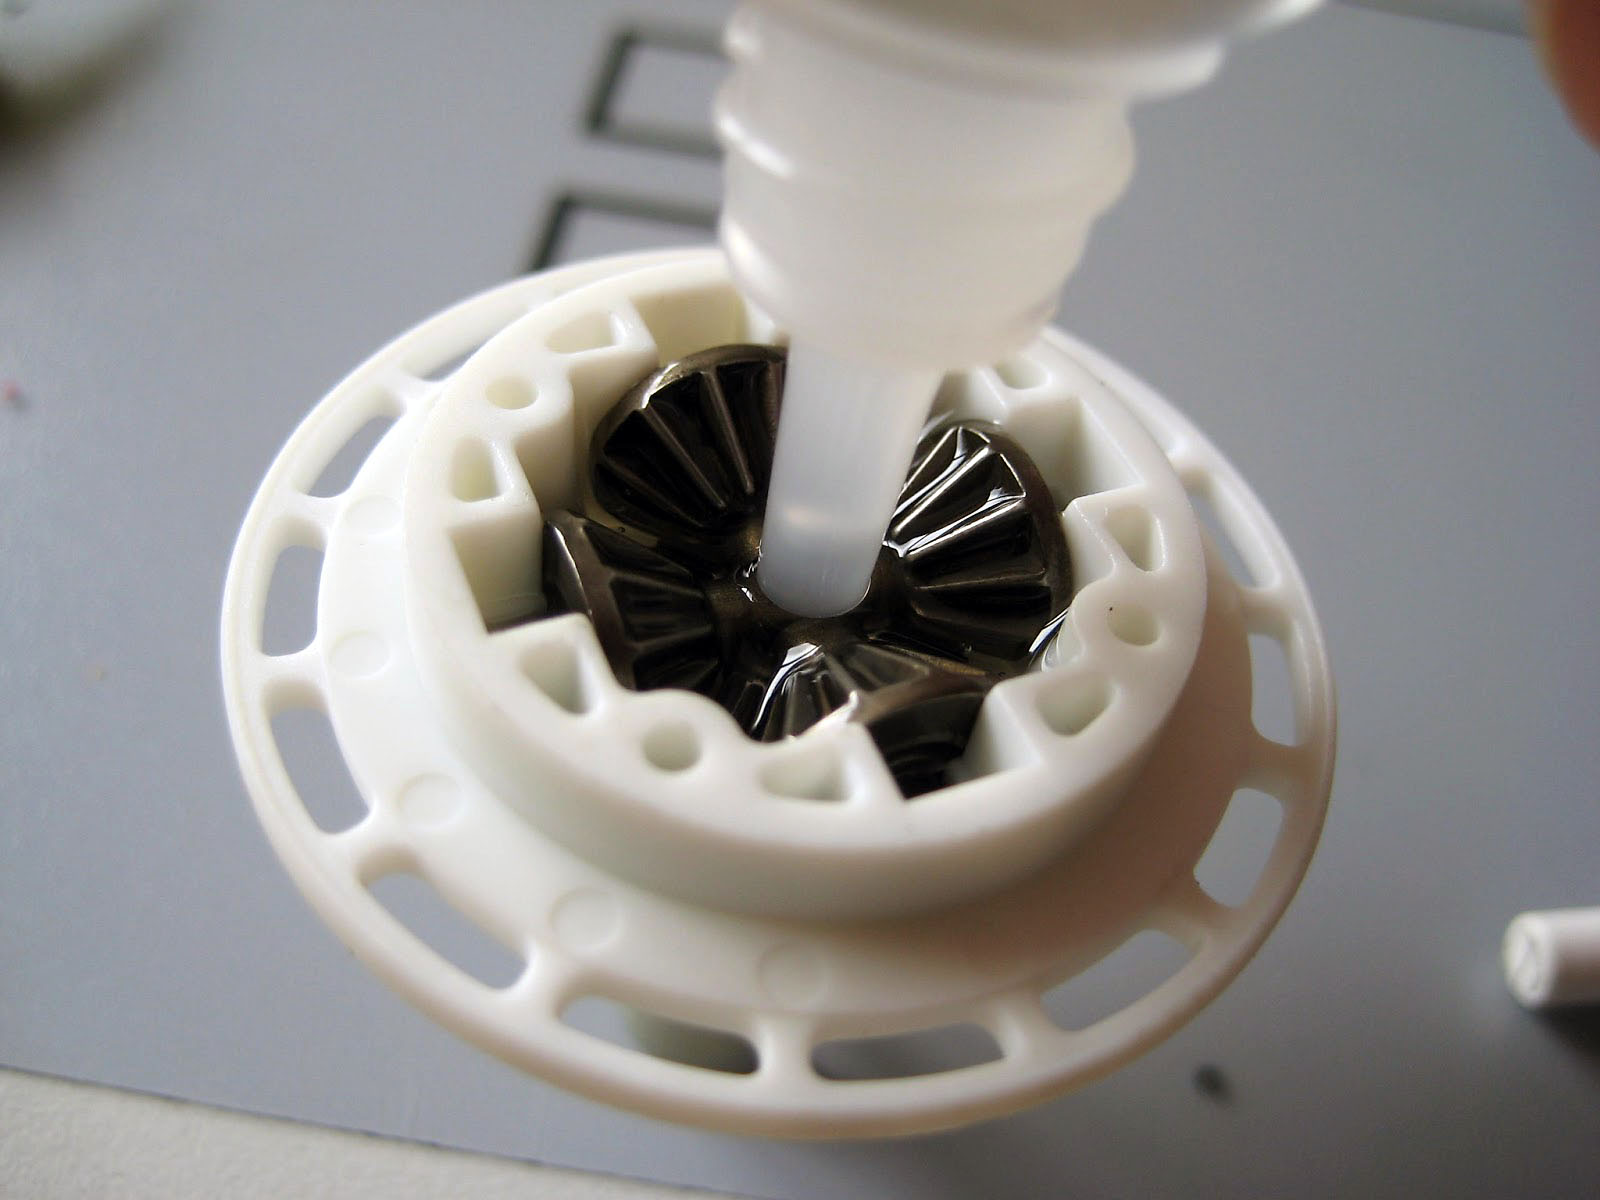
First up, place a little green slime in both sides where the internal o-Rings go.
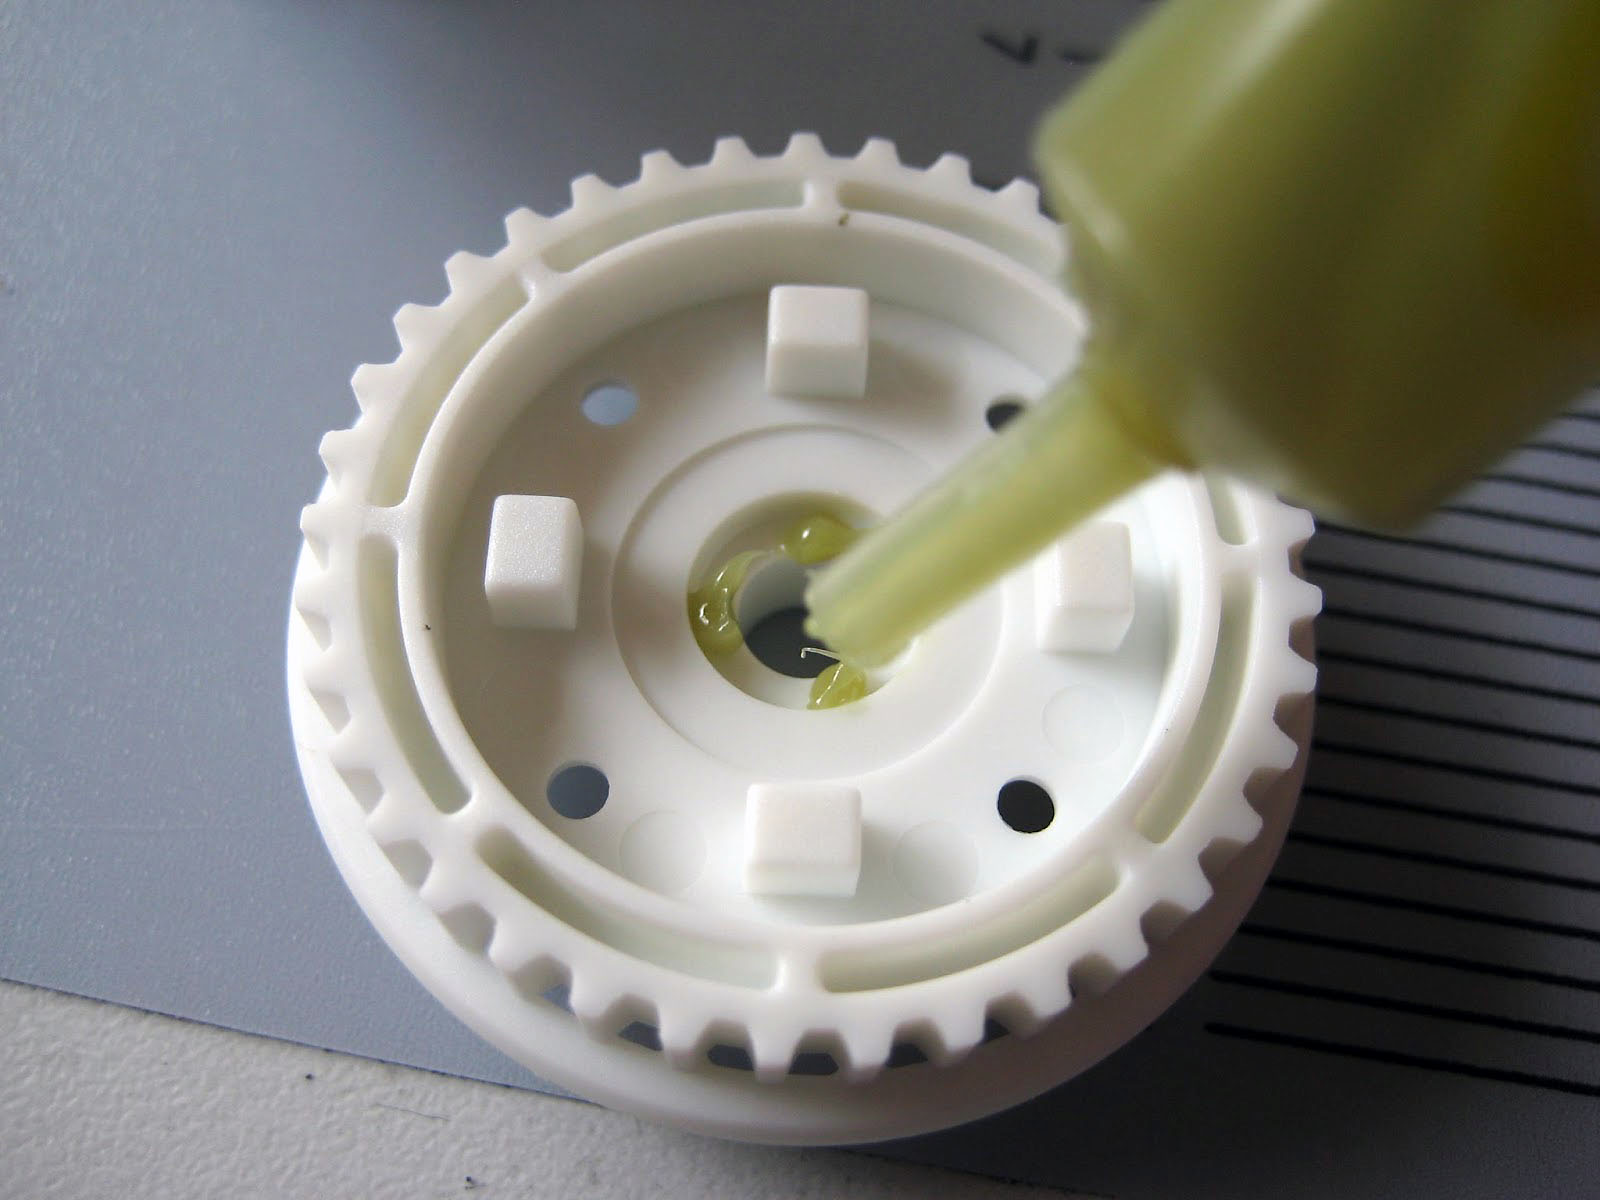
then pop in the O-ring.
Pop a little more Green slime on and then fit the shims
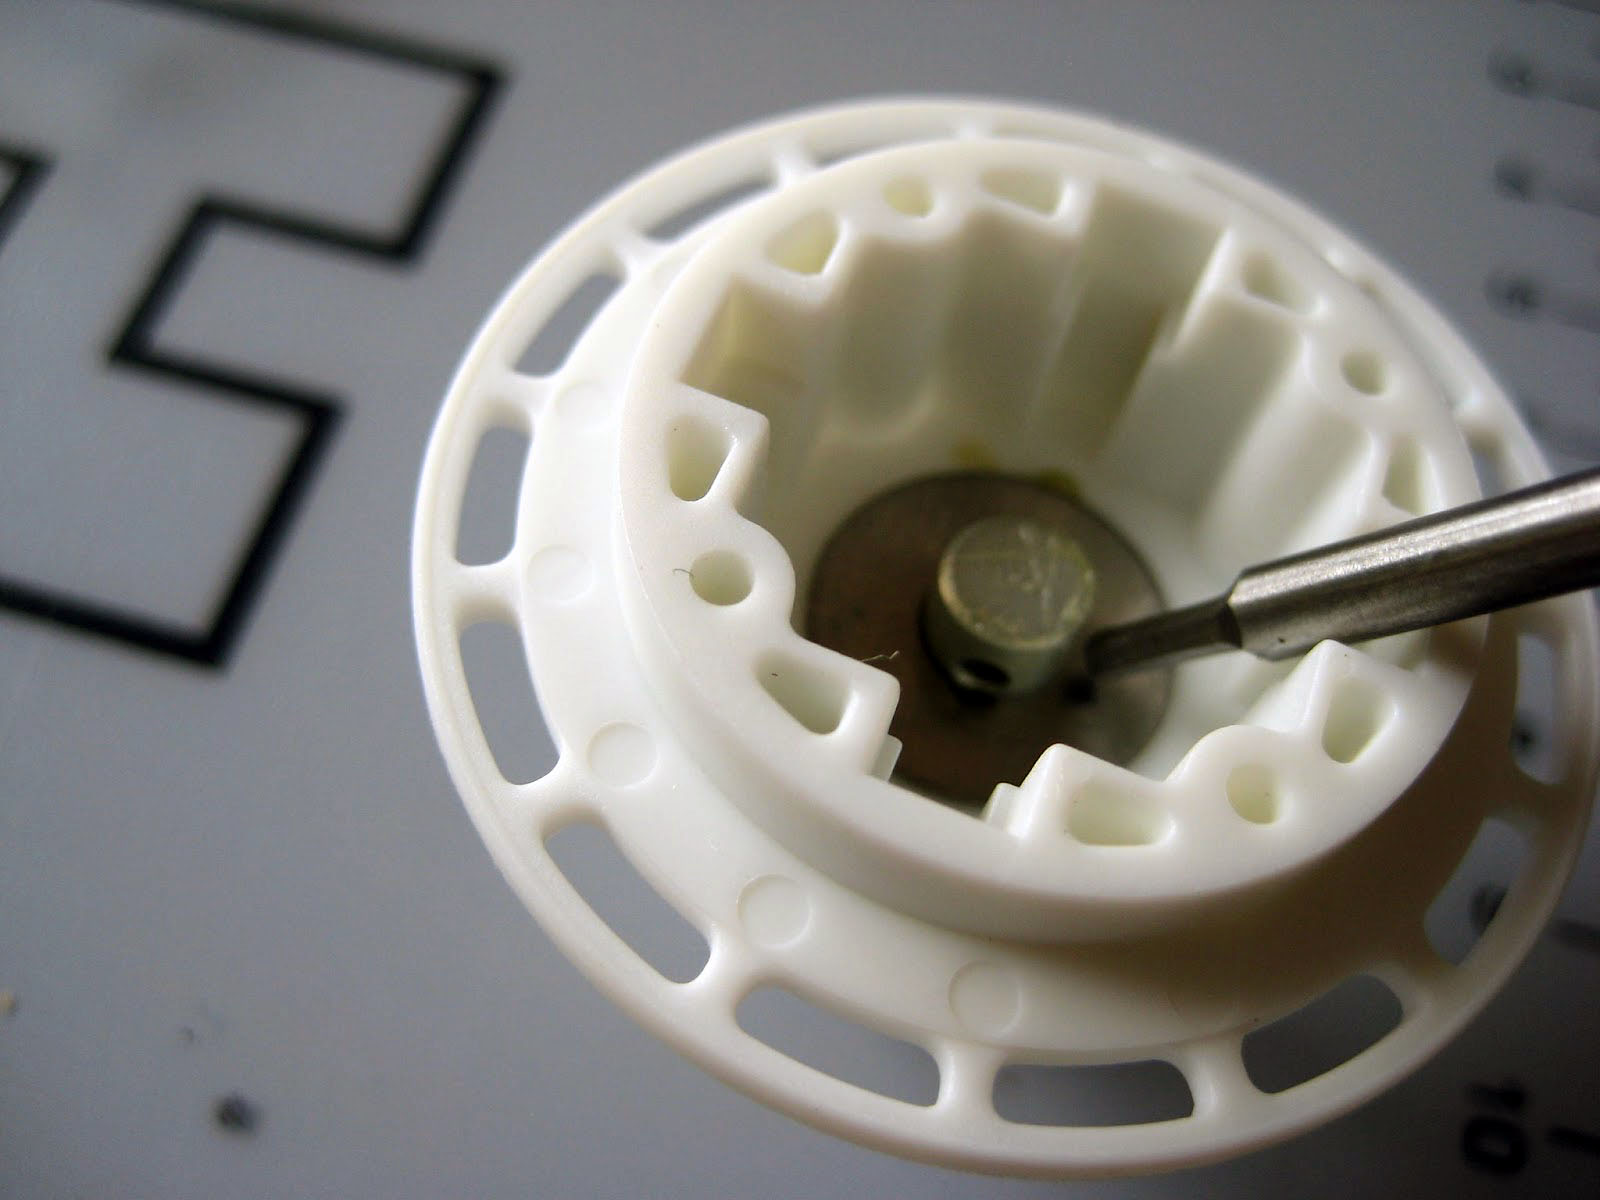
I find that I only need one TDX shim on each side when fitting the steel gears. (0.3mm worth of Tamiya Shims if you do not have the TDX shims)
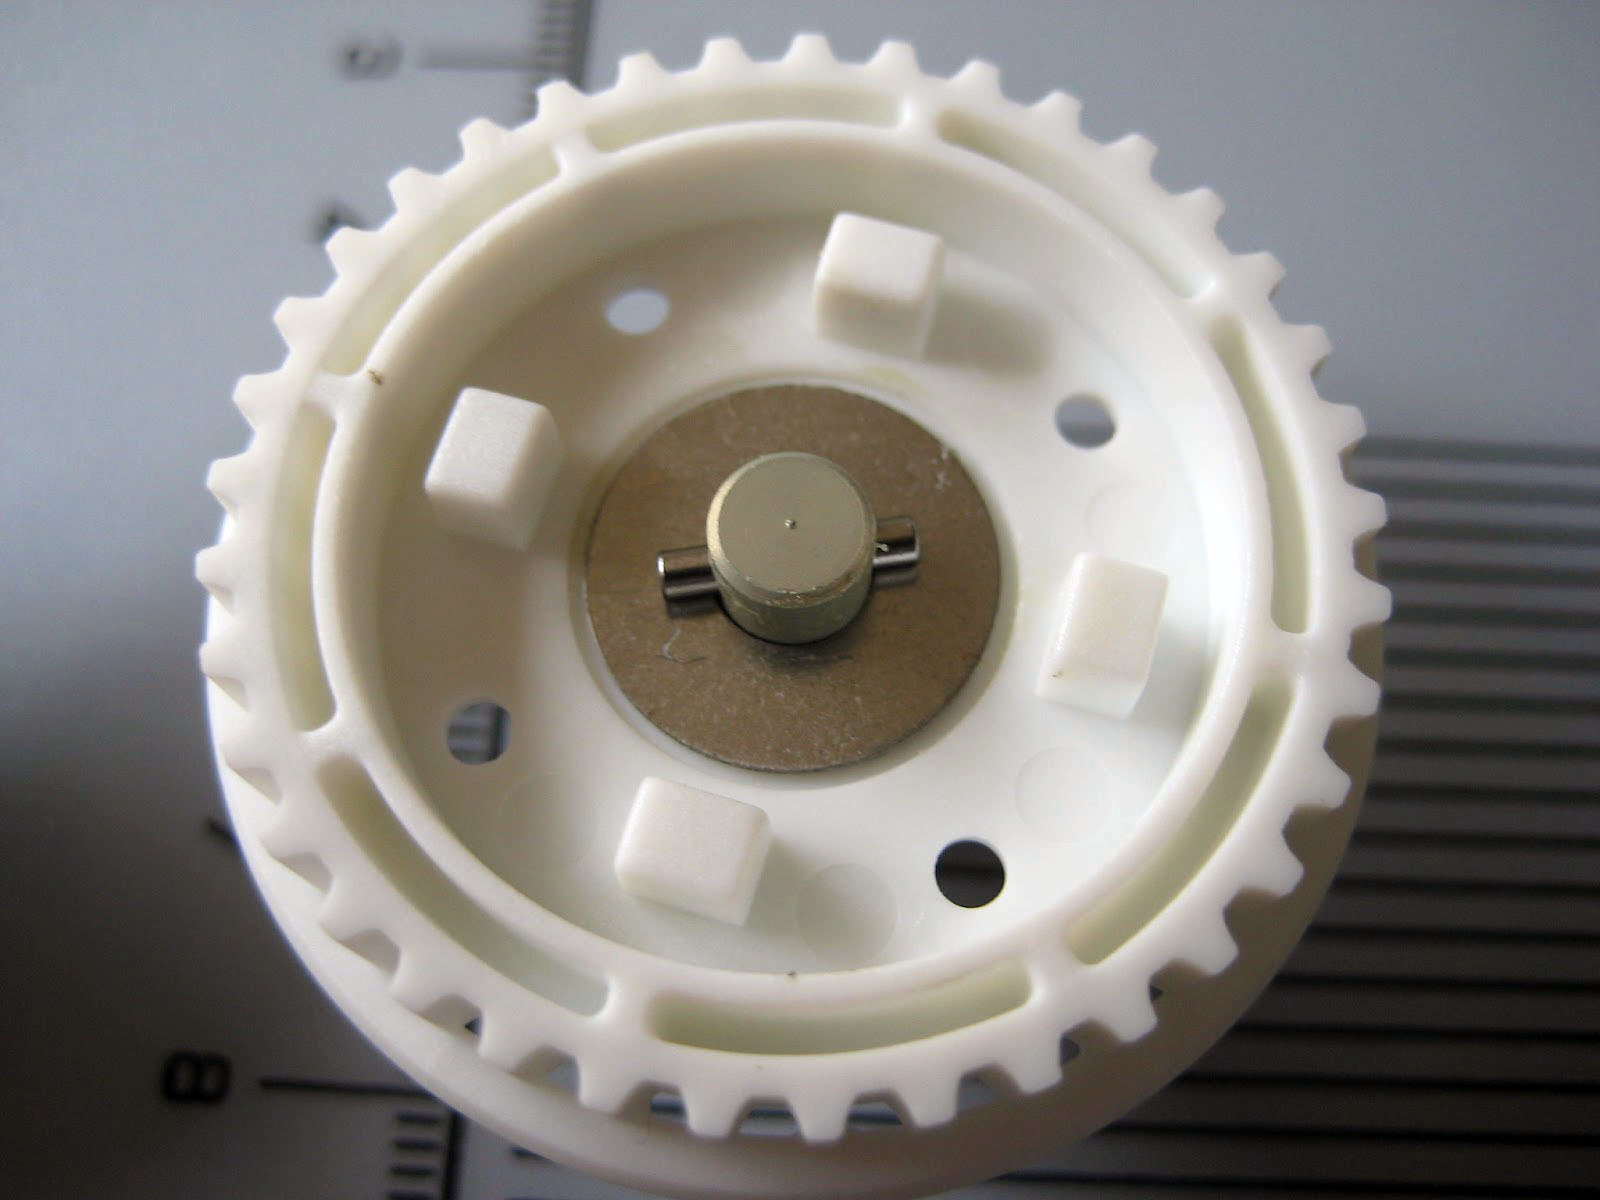
Then pop on the gasket, again I use green slime on this, and then push the gasket on over it. You want to make sure that it reaches the screw holes.
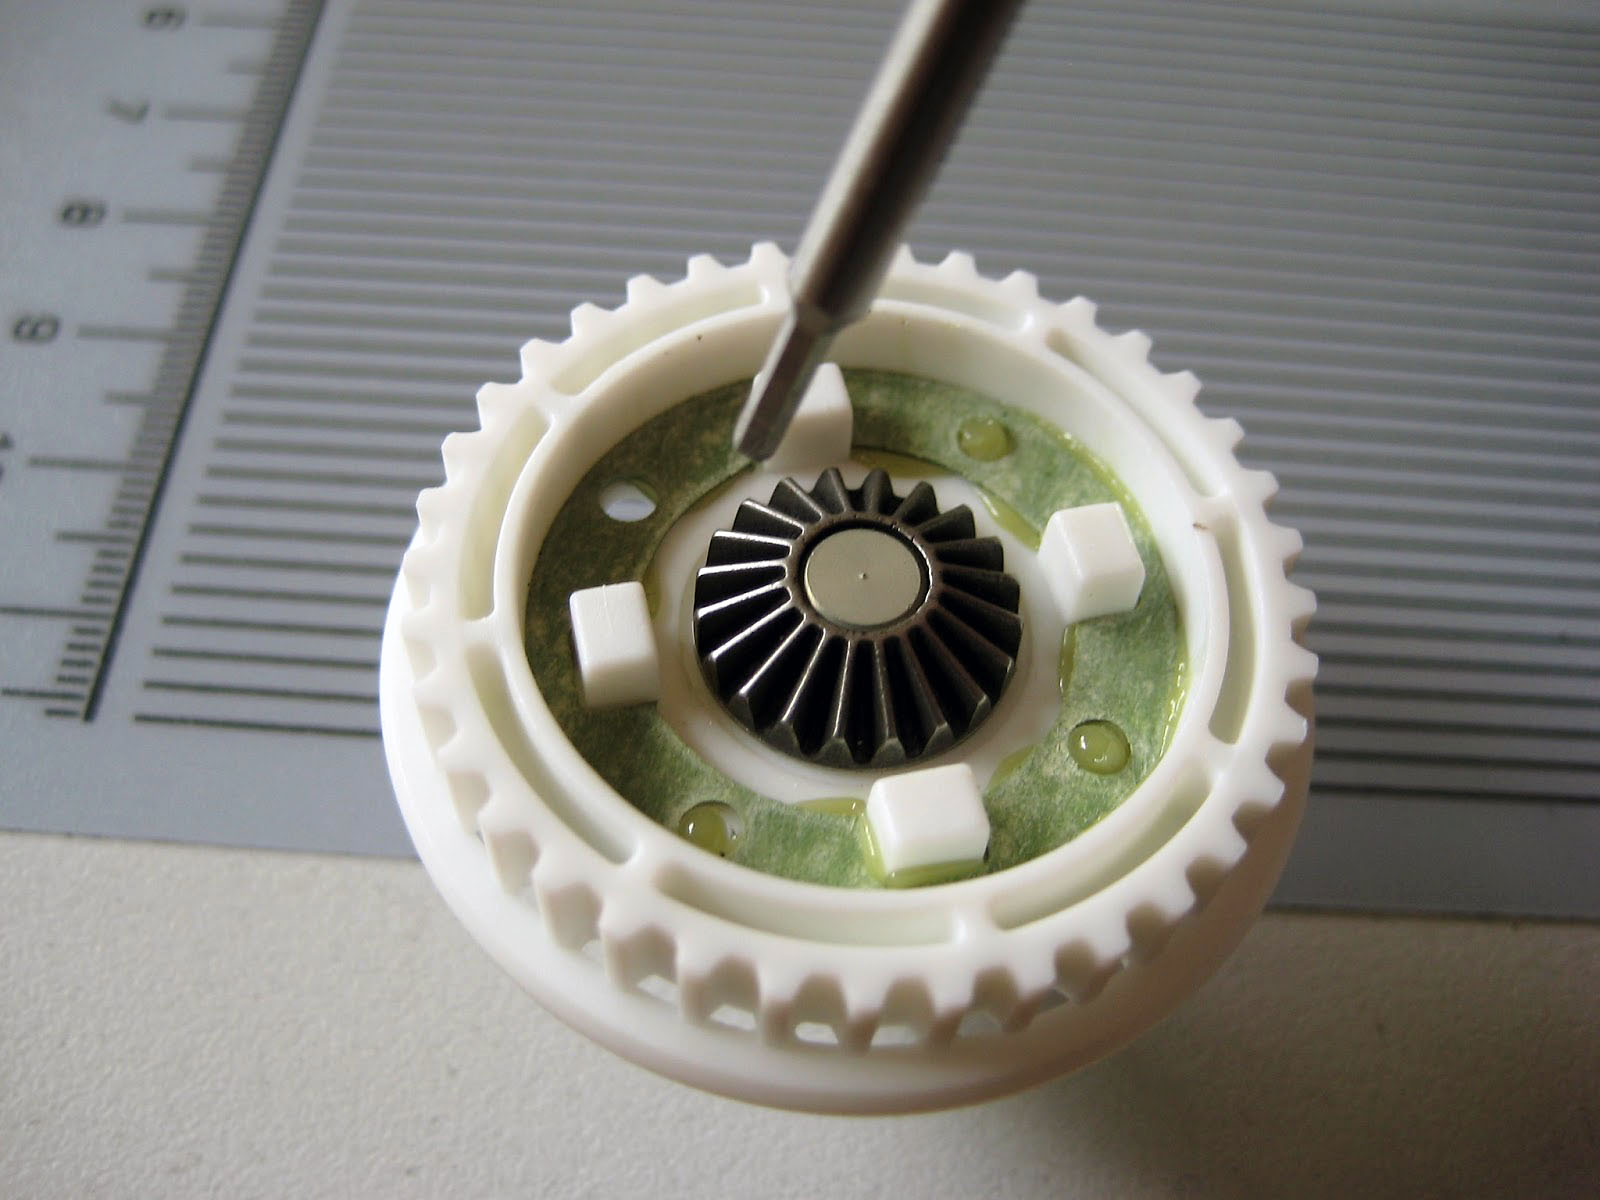
Fit the metal gears. These are fantastic, they are the correct size, no sanding required and they will last a long time before they wear out.
Once you have installed the gears its time to fill the diff with oil, I fill it until the oil floods over the main set of gears. I then let it rest for a while for air to come out and then top it up to this level again if needed.
(NOTE I use 2000wt oil in the diff as a starting oil, I find it works well on carpet with my set-up)
Now I screw it together, take your time and screw the opposite corners in turn to ensure you dont warp the case. Take care not to screw it too tight at first, once all 4 screws are in and seated in the case then do half turns, again with screws in opposite sides until the screws feel nice and tight.

Here is the final result, a smooth ultra reliable gear diff.
Ready for running
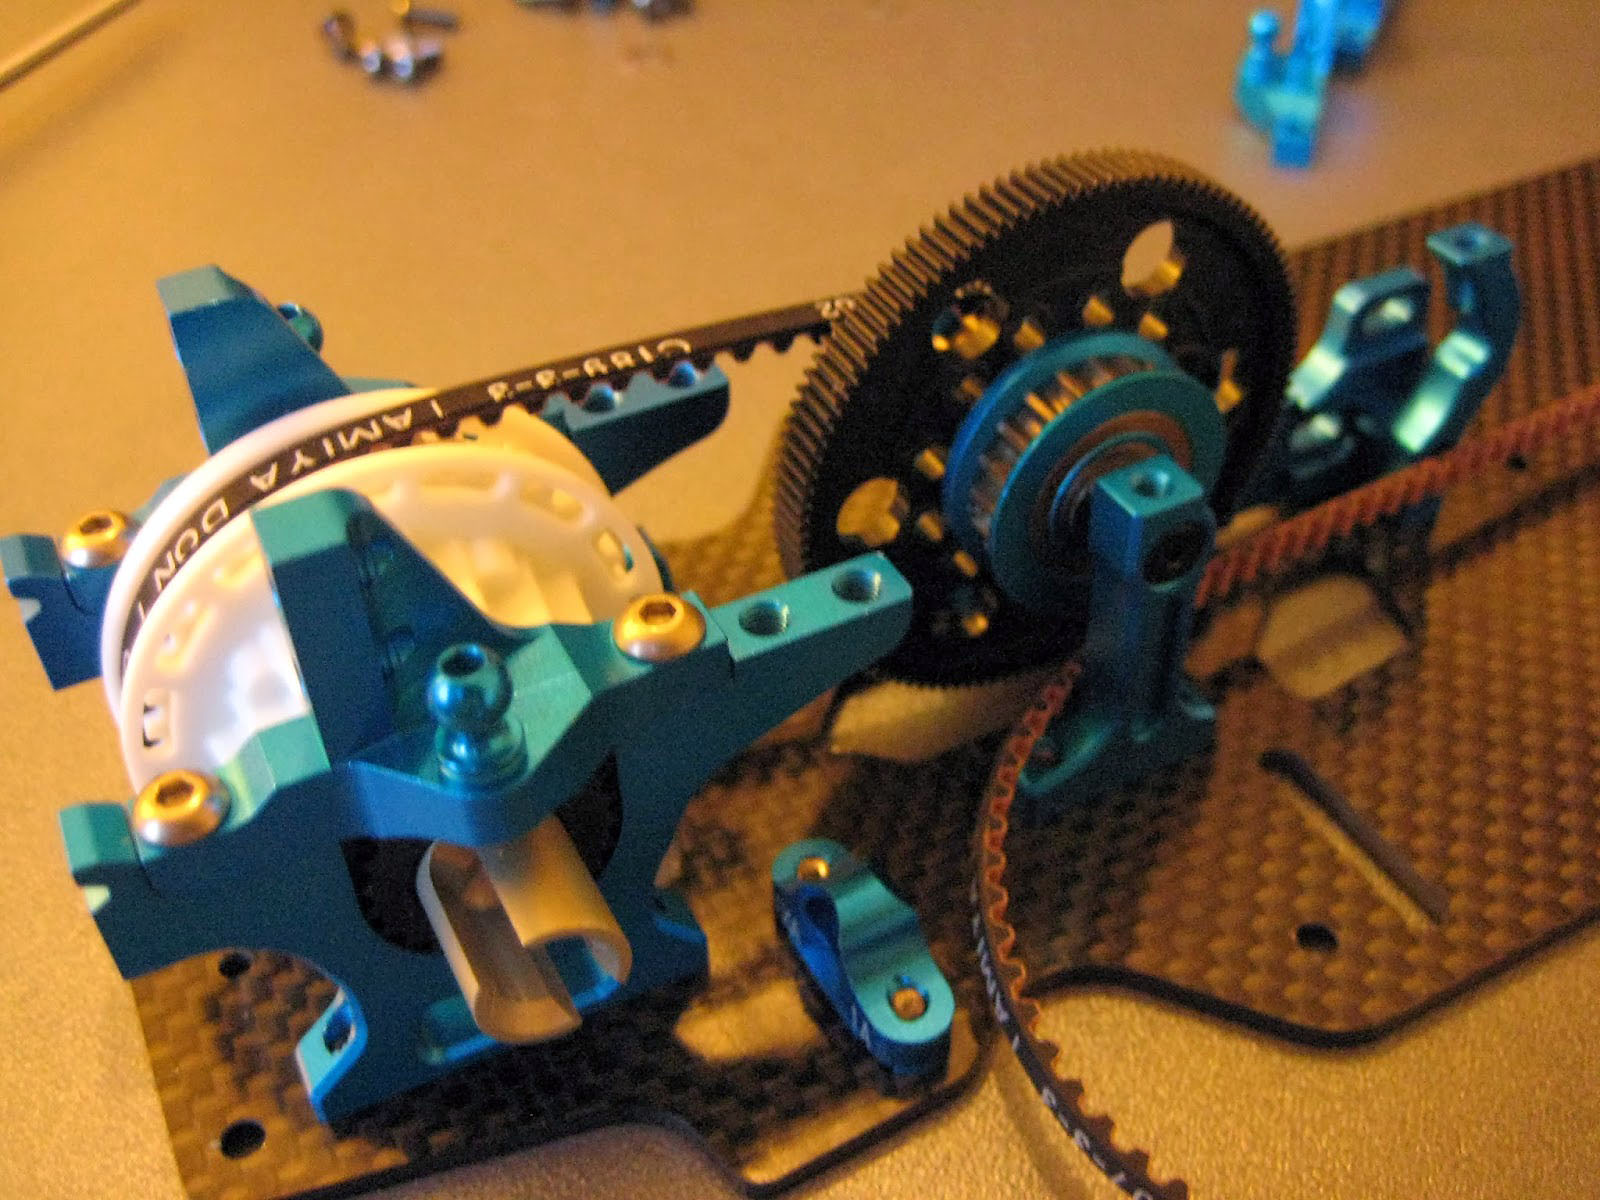
Stage 5 - Attaching the gear differential
Now we need to attach the rear differential and fit the belts.
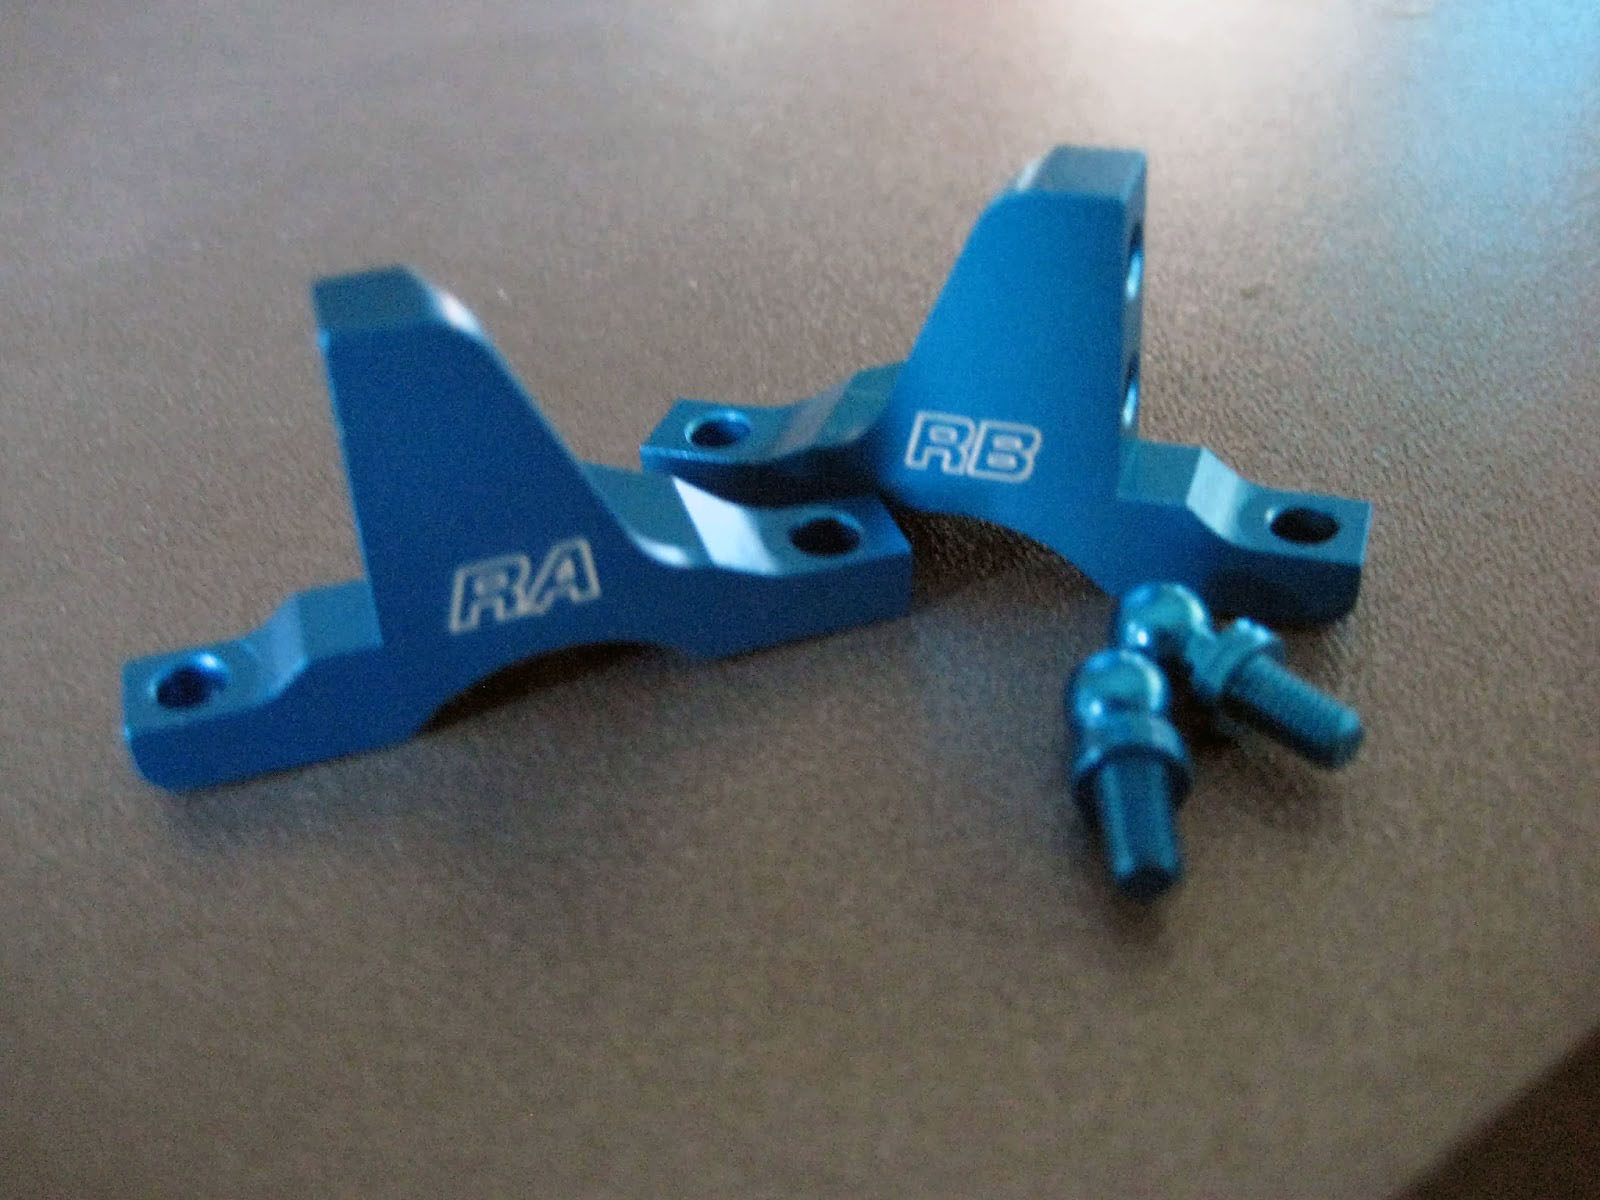
The new upper bulkheads are now labelled as they are different for the front and rear. The main thing is that they are now raised where you would mount the upper camber links. This involves you needing to use less shims to avoid any alignment issues. There is also now only 2 mounting positions for the upper camber link as opposed to the 3 that we have become used to.
Mark the top with a paint pen to easily spot any alignment issues.
The diffs fit on their 1510 bearings and you need to then fit the plastic eccentric belt adjusters over them. Its always a snug fit but they spin freely once fitted.
Tip - When fitting the diff I always make a point of marking the 0 point with a paint pen to make sure its easy to see your settings when making adjustments in the pits.
The fit and finish of the upper bulkheads is spot on, and they drop on perfectly. As expected with the new motor position the rear belt is a new length (63t 189mm)
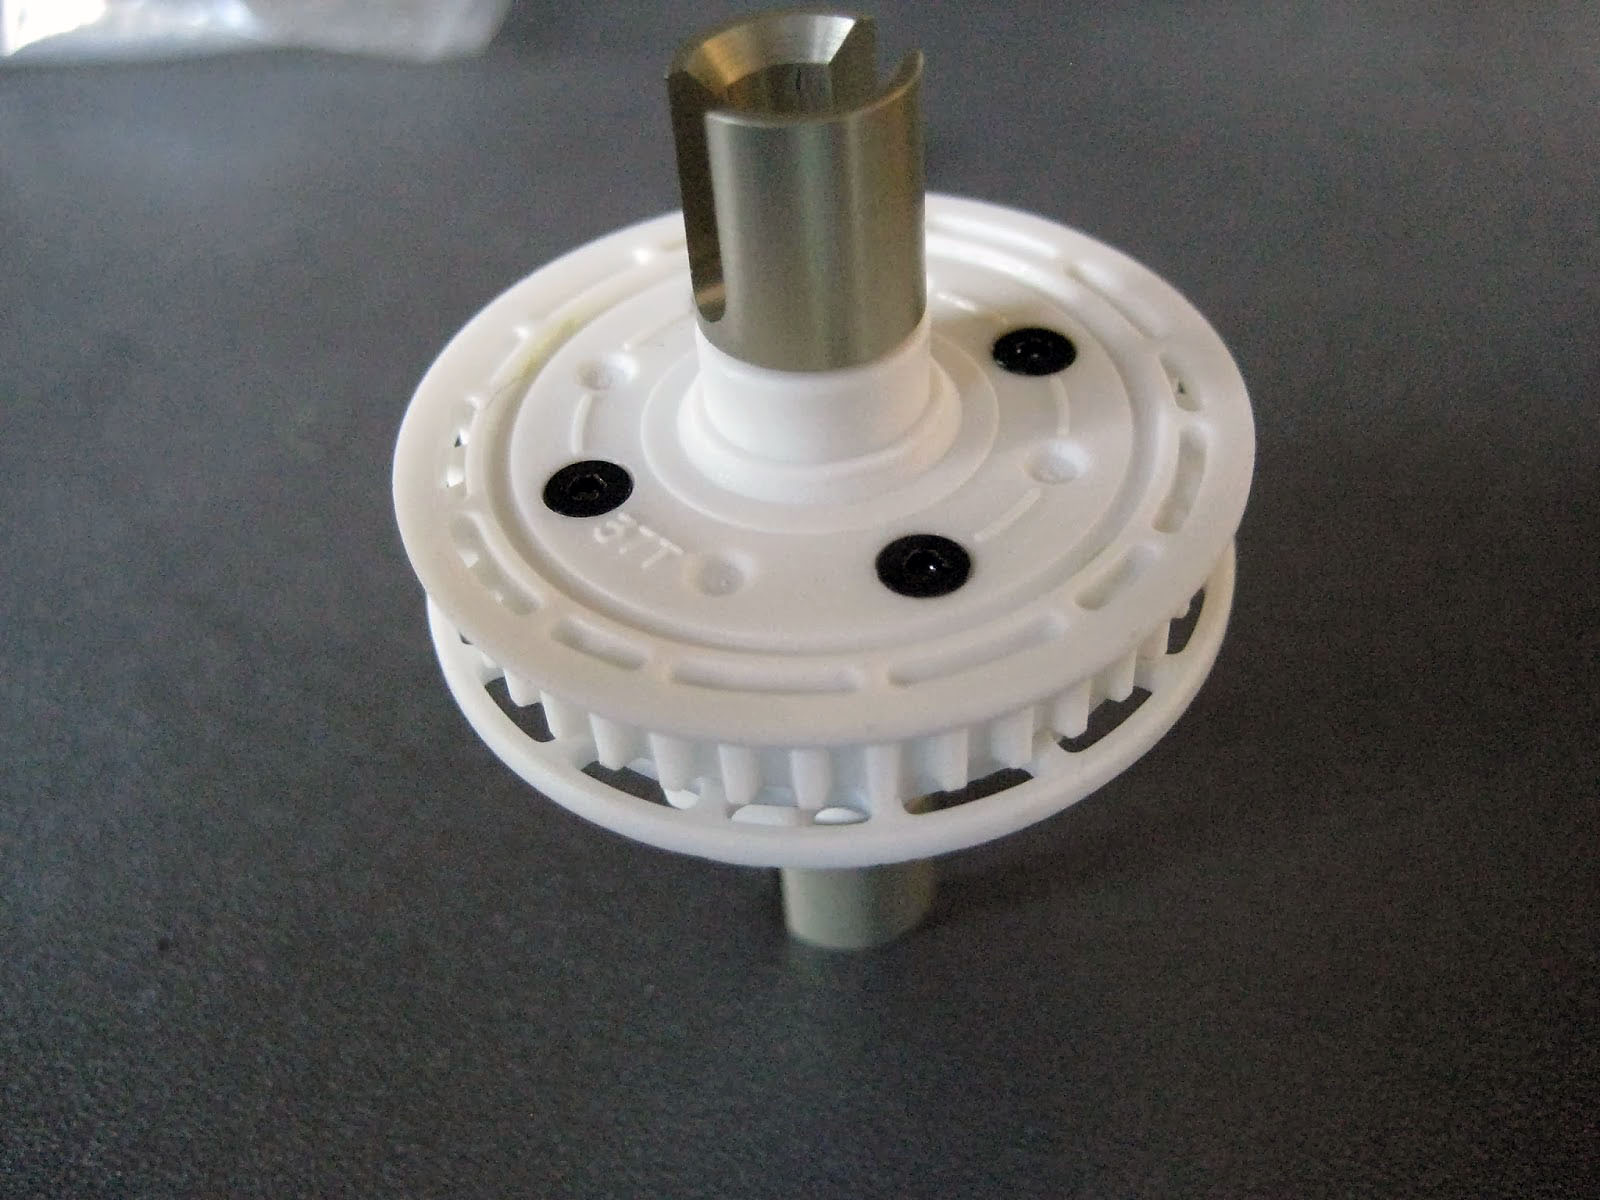
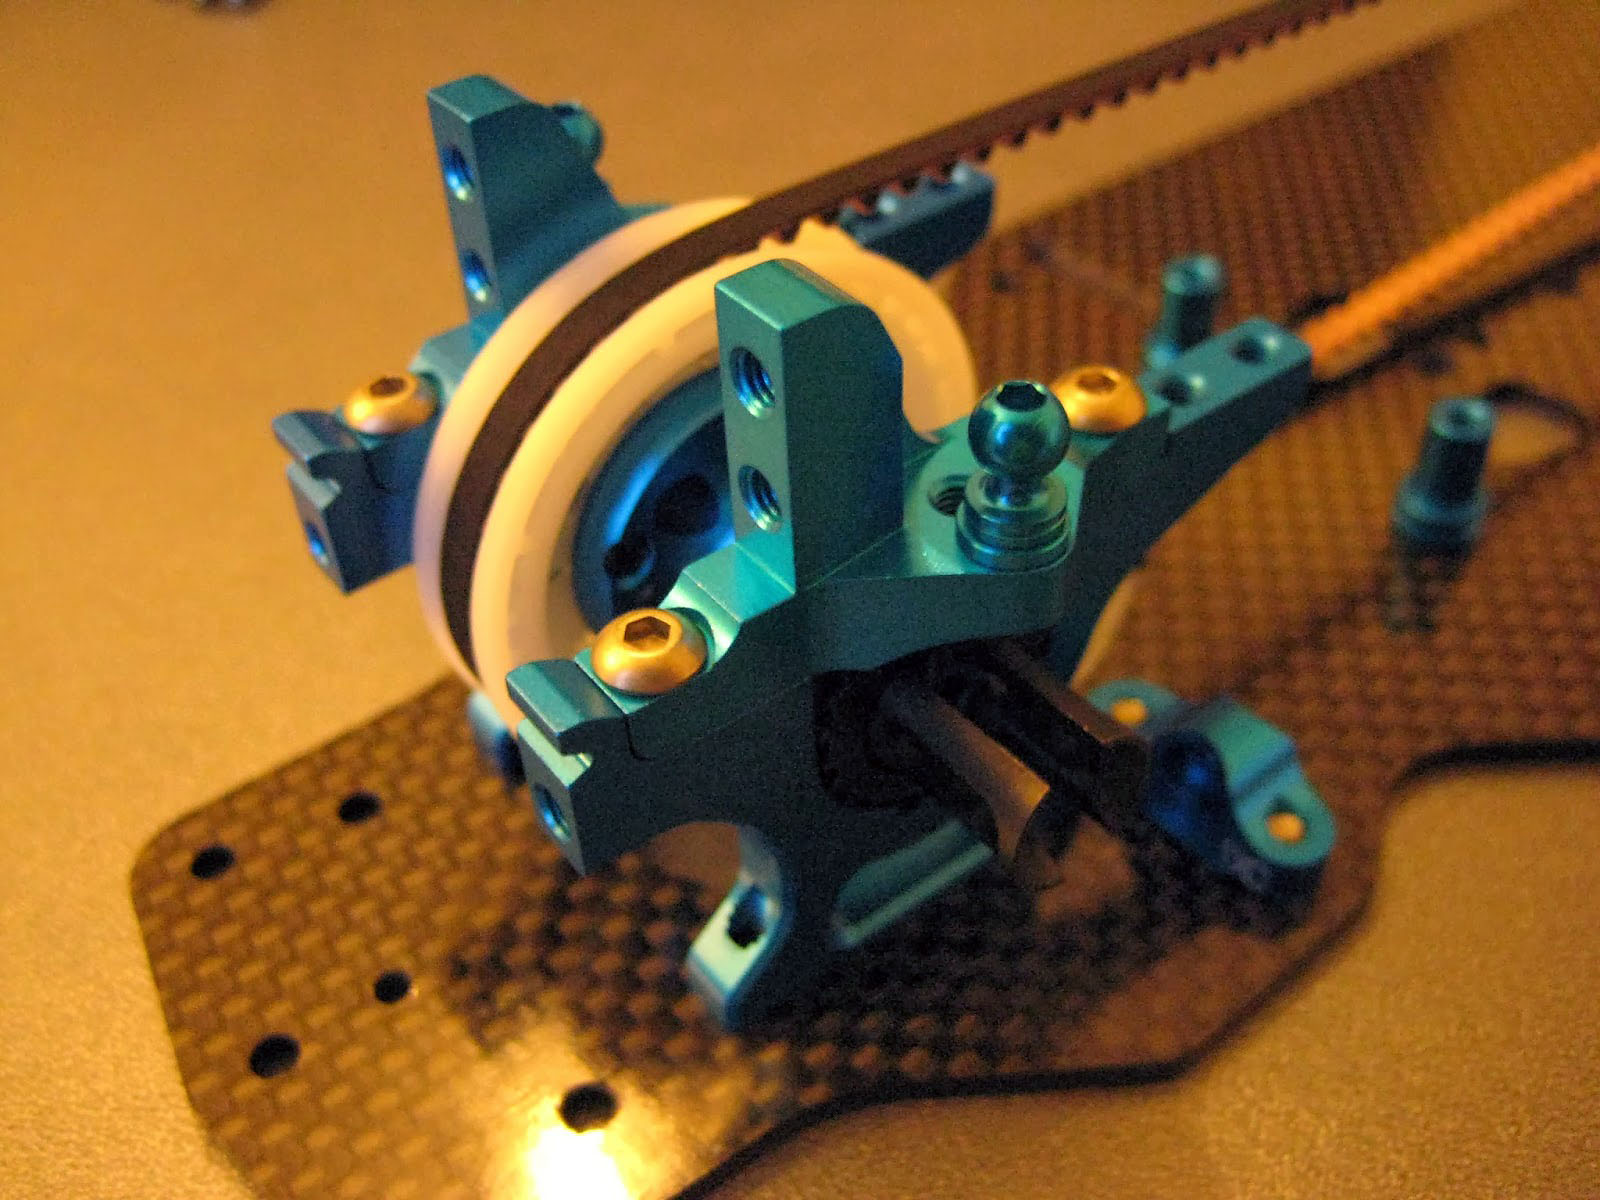
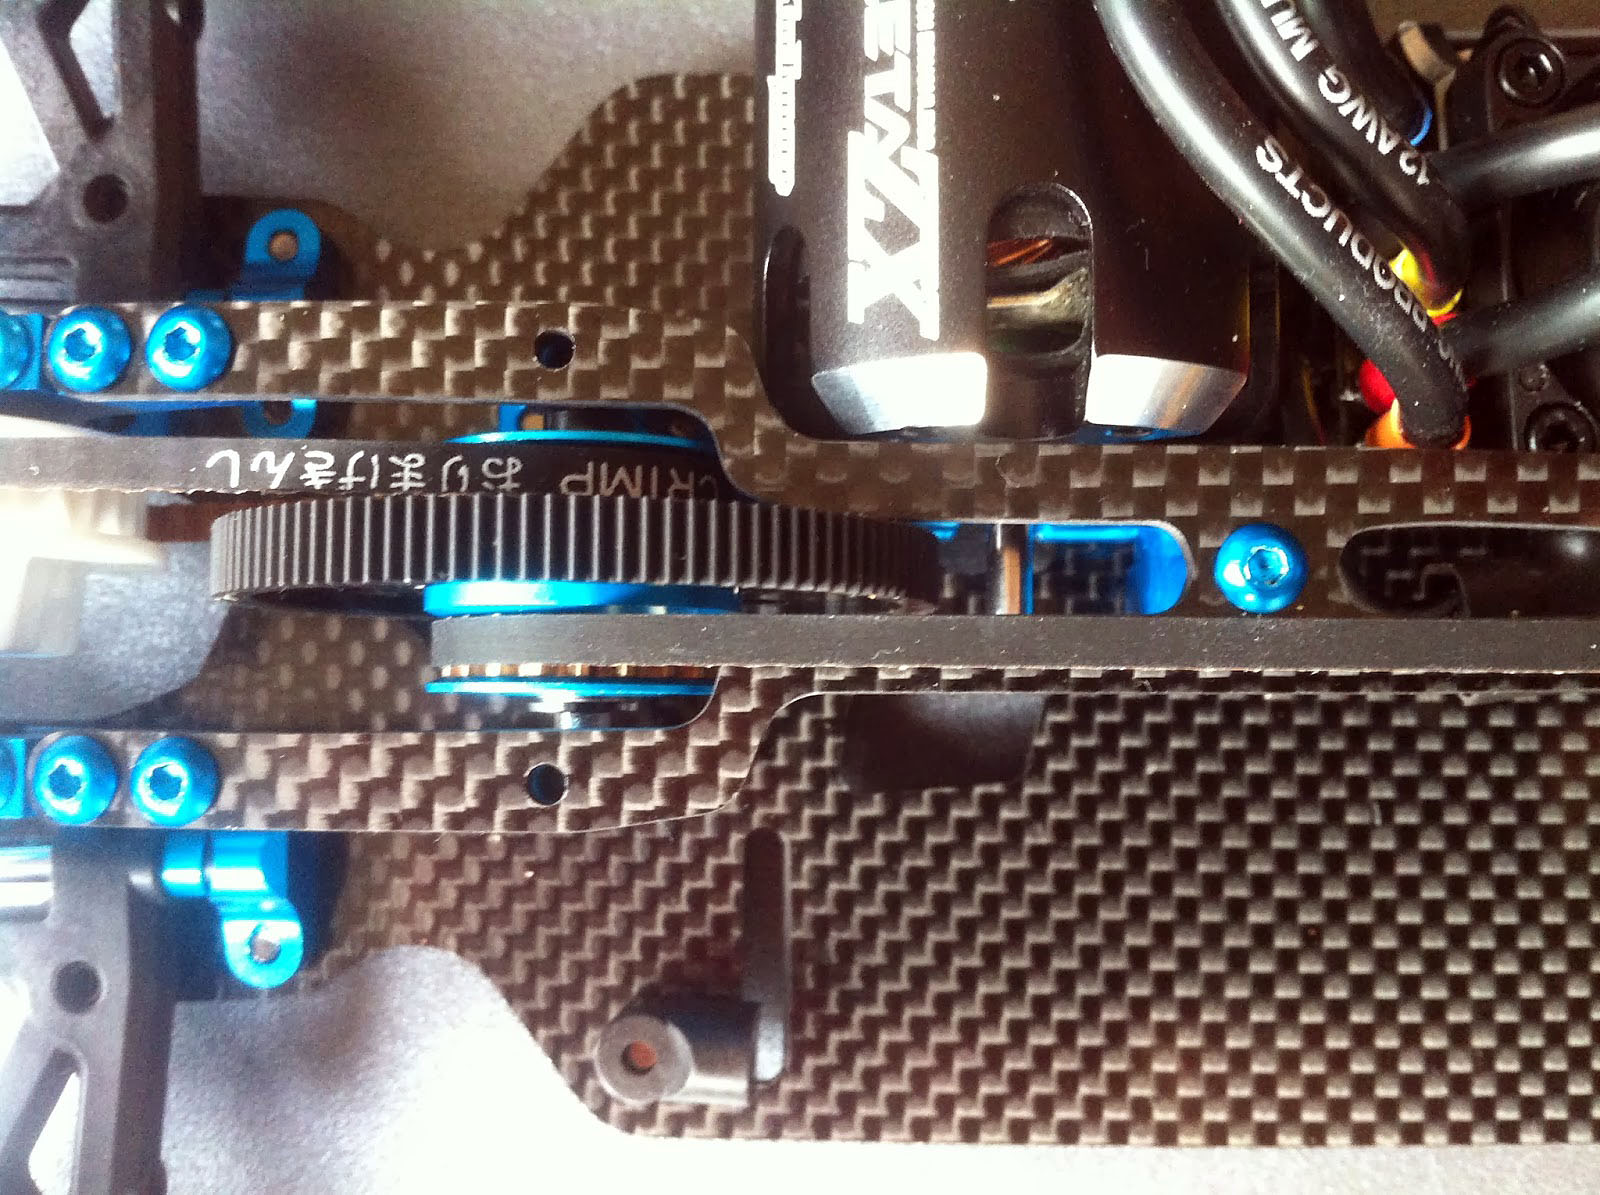
Stage 6 - Attaching spur gear
The whole spur gear assembly is new and its a much better set-up than before.
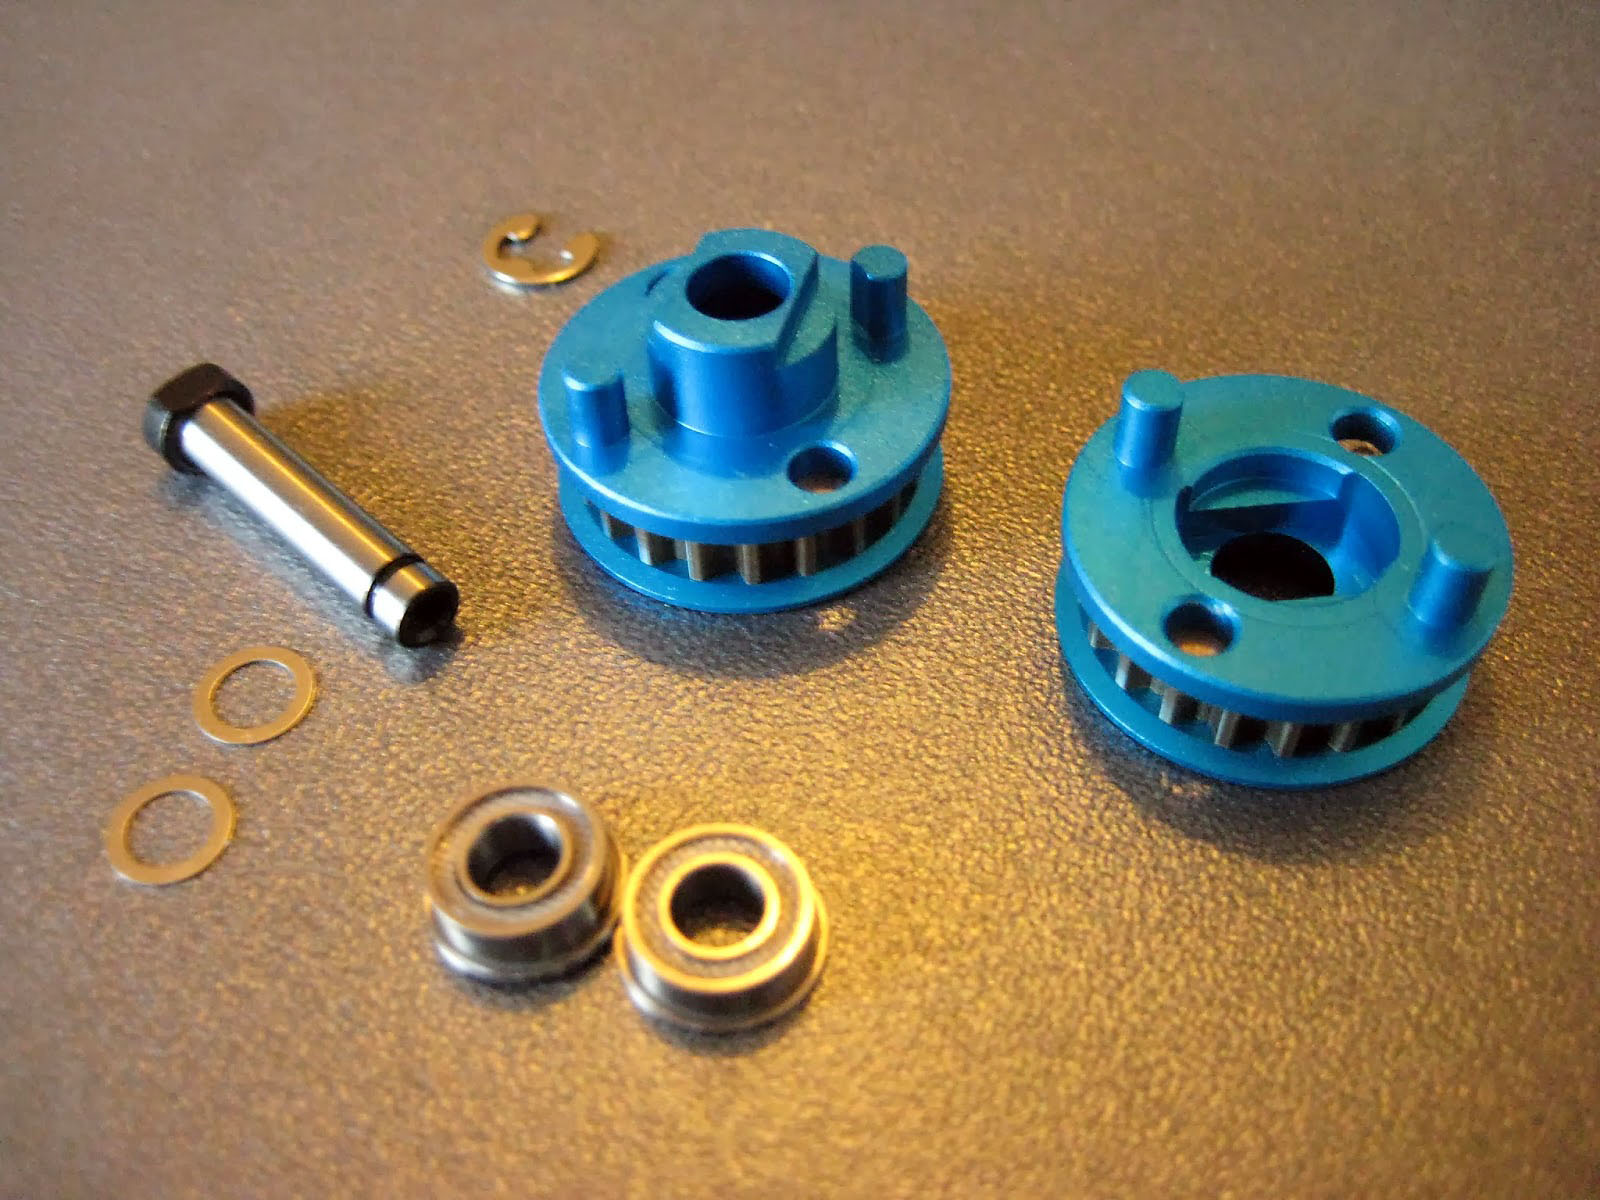
The spur gear holder fits onto the shaft with the flange bearings mounted on each side. This assembly is just held together with an E-Clip and its very easy to change the spurgear. The car also now has 20t pulleys which changes the I.R. to 1.85
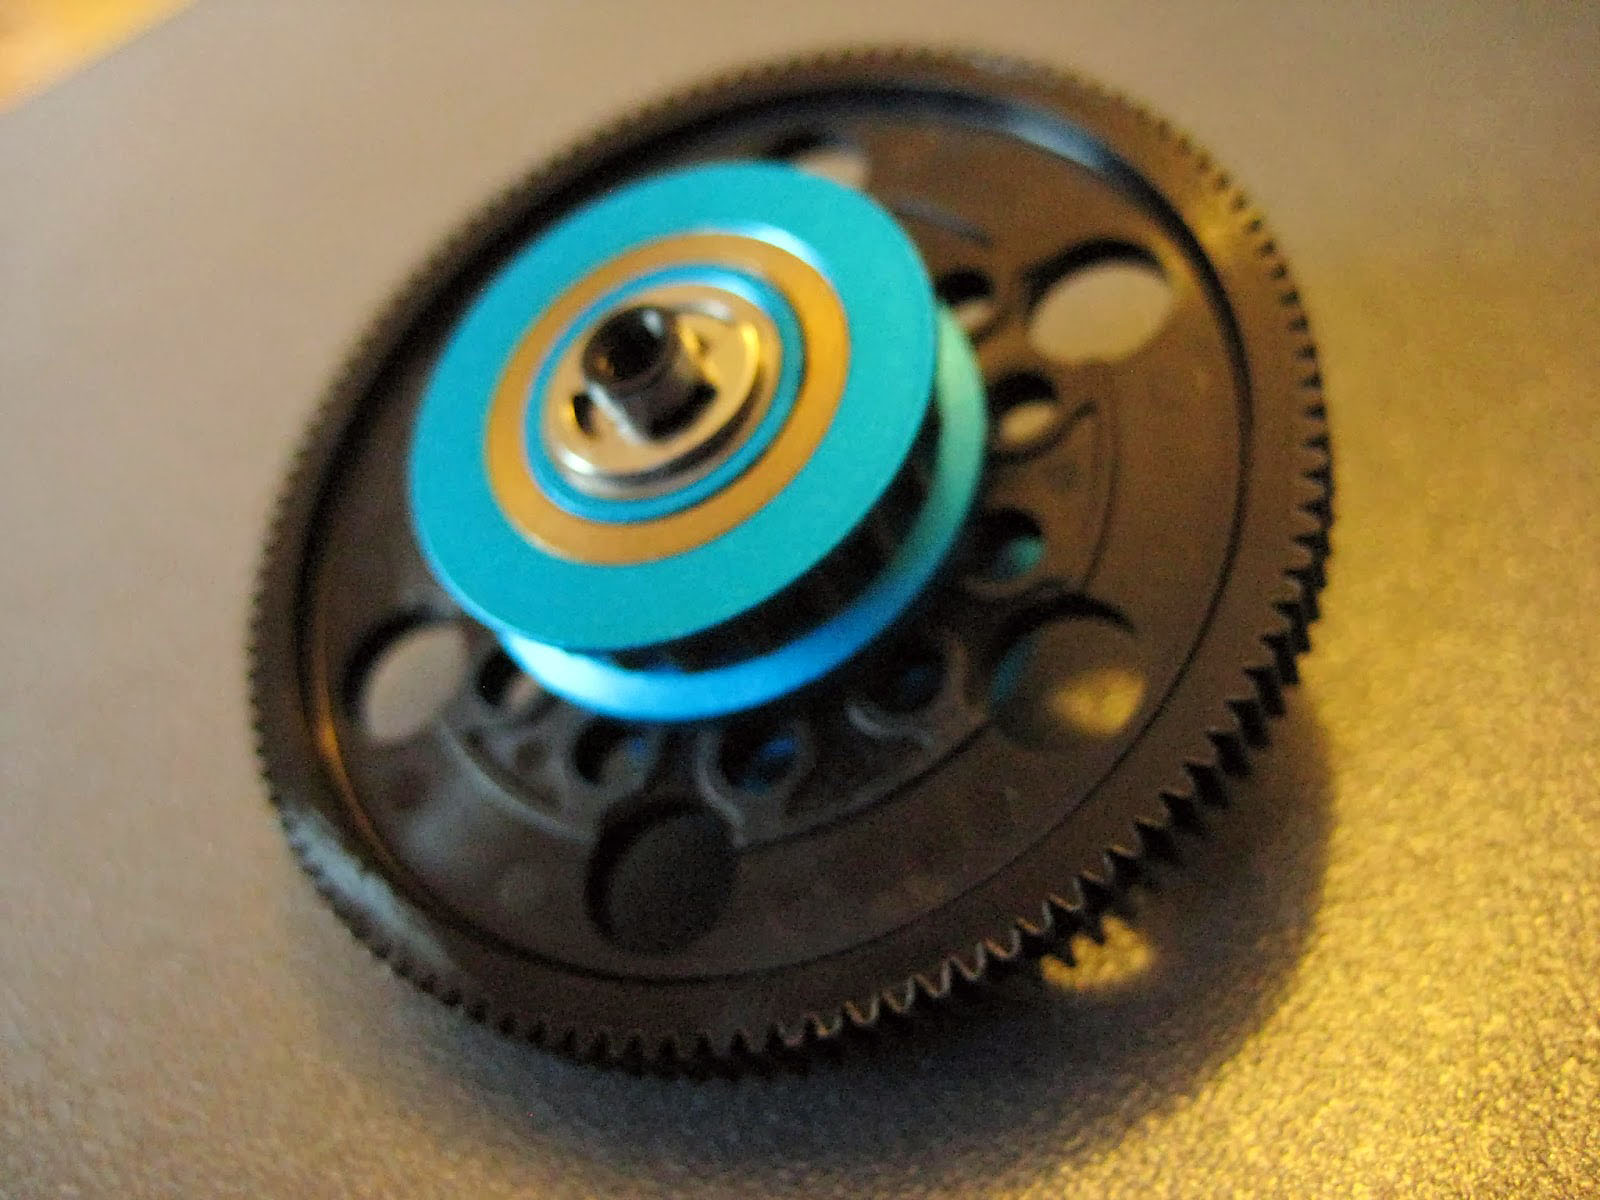
Here is the fully assembled part, ready for mounting in the chassis.
NOTE - Some spur gears are too fat for this spur, I normally use RW racing ones and if you want to use these then you will have to not use the E-Clip and instead shim it with a few extra 4x2mm shim's to take out the movement. Brands that fit, as per the kit instructions are - Panaracer and Kawada Super EX
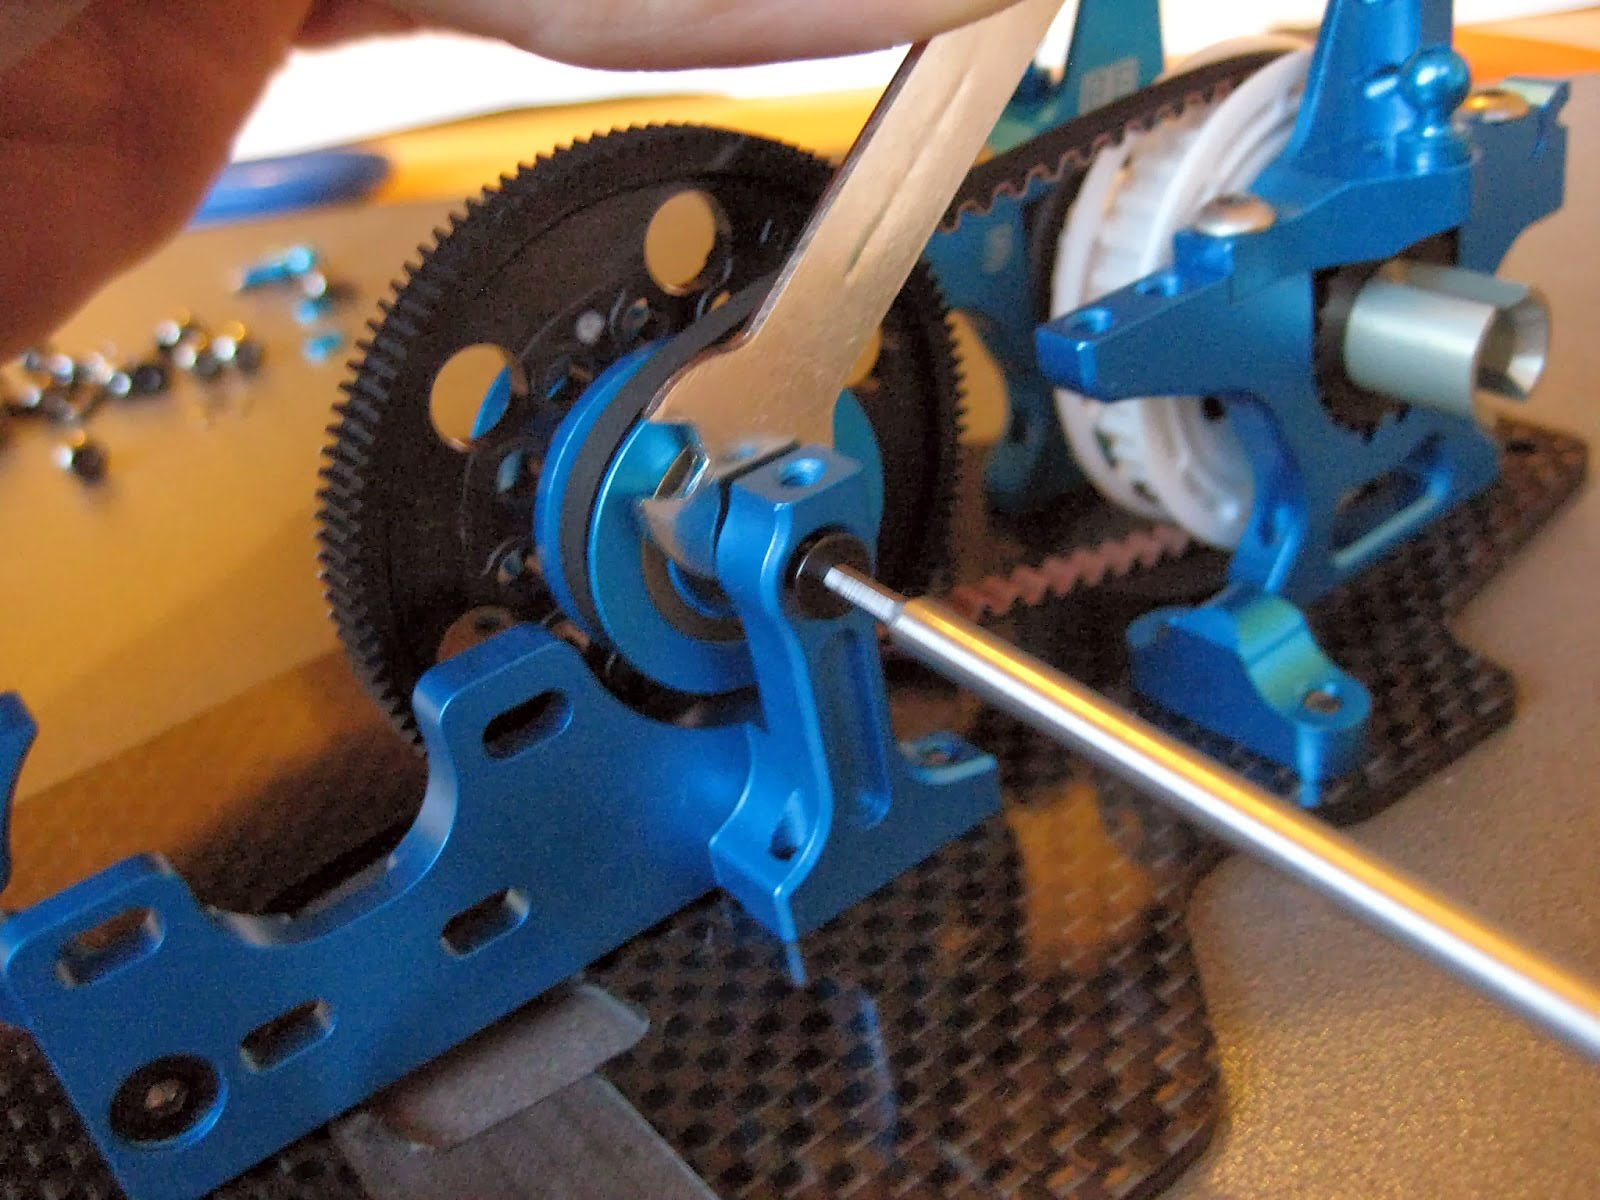
The spur is then fitted into the new motor bulkhead via two 2.6 X 8mm screws. As seen in the picture the shaft has been made so that you can easily attach and remove the spur assembly with the kit included spanner to hold it in place and easily screw it in or out.
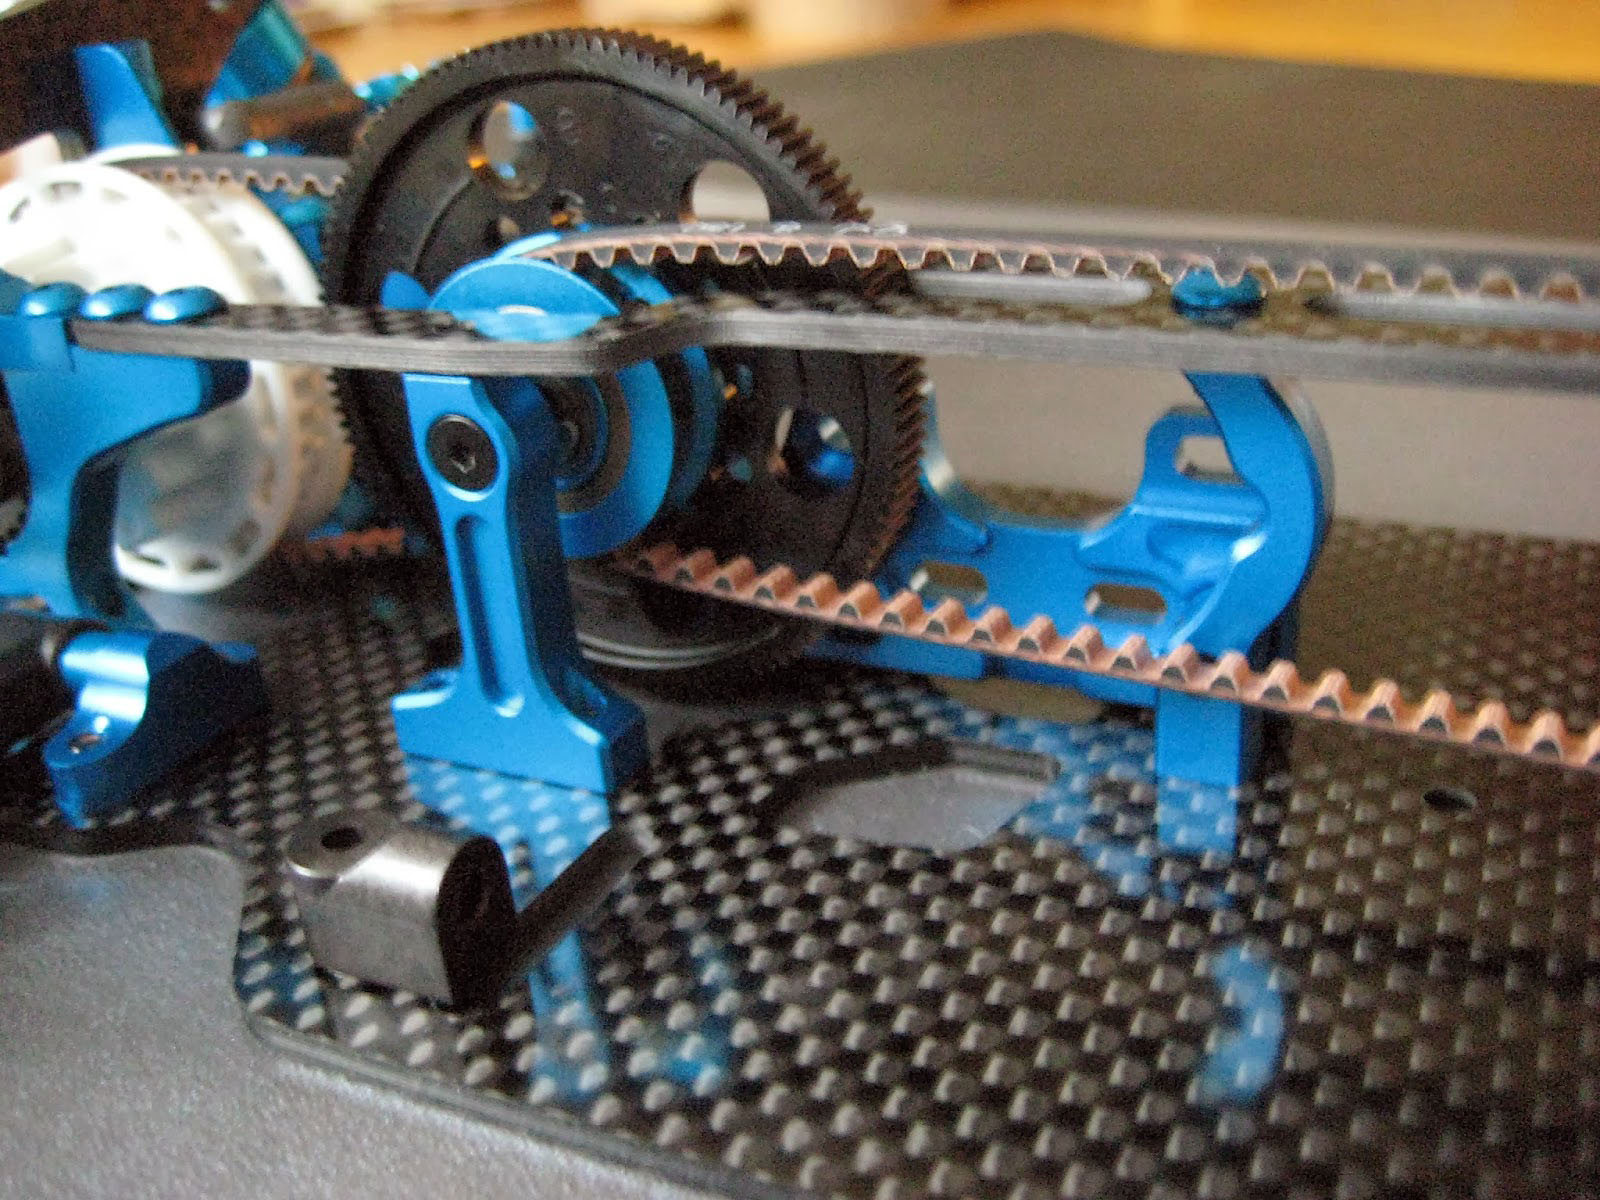
Here we are with the rear assembled, and new front belt (169t 507mm) attached
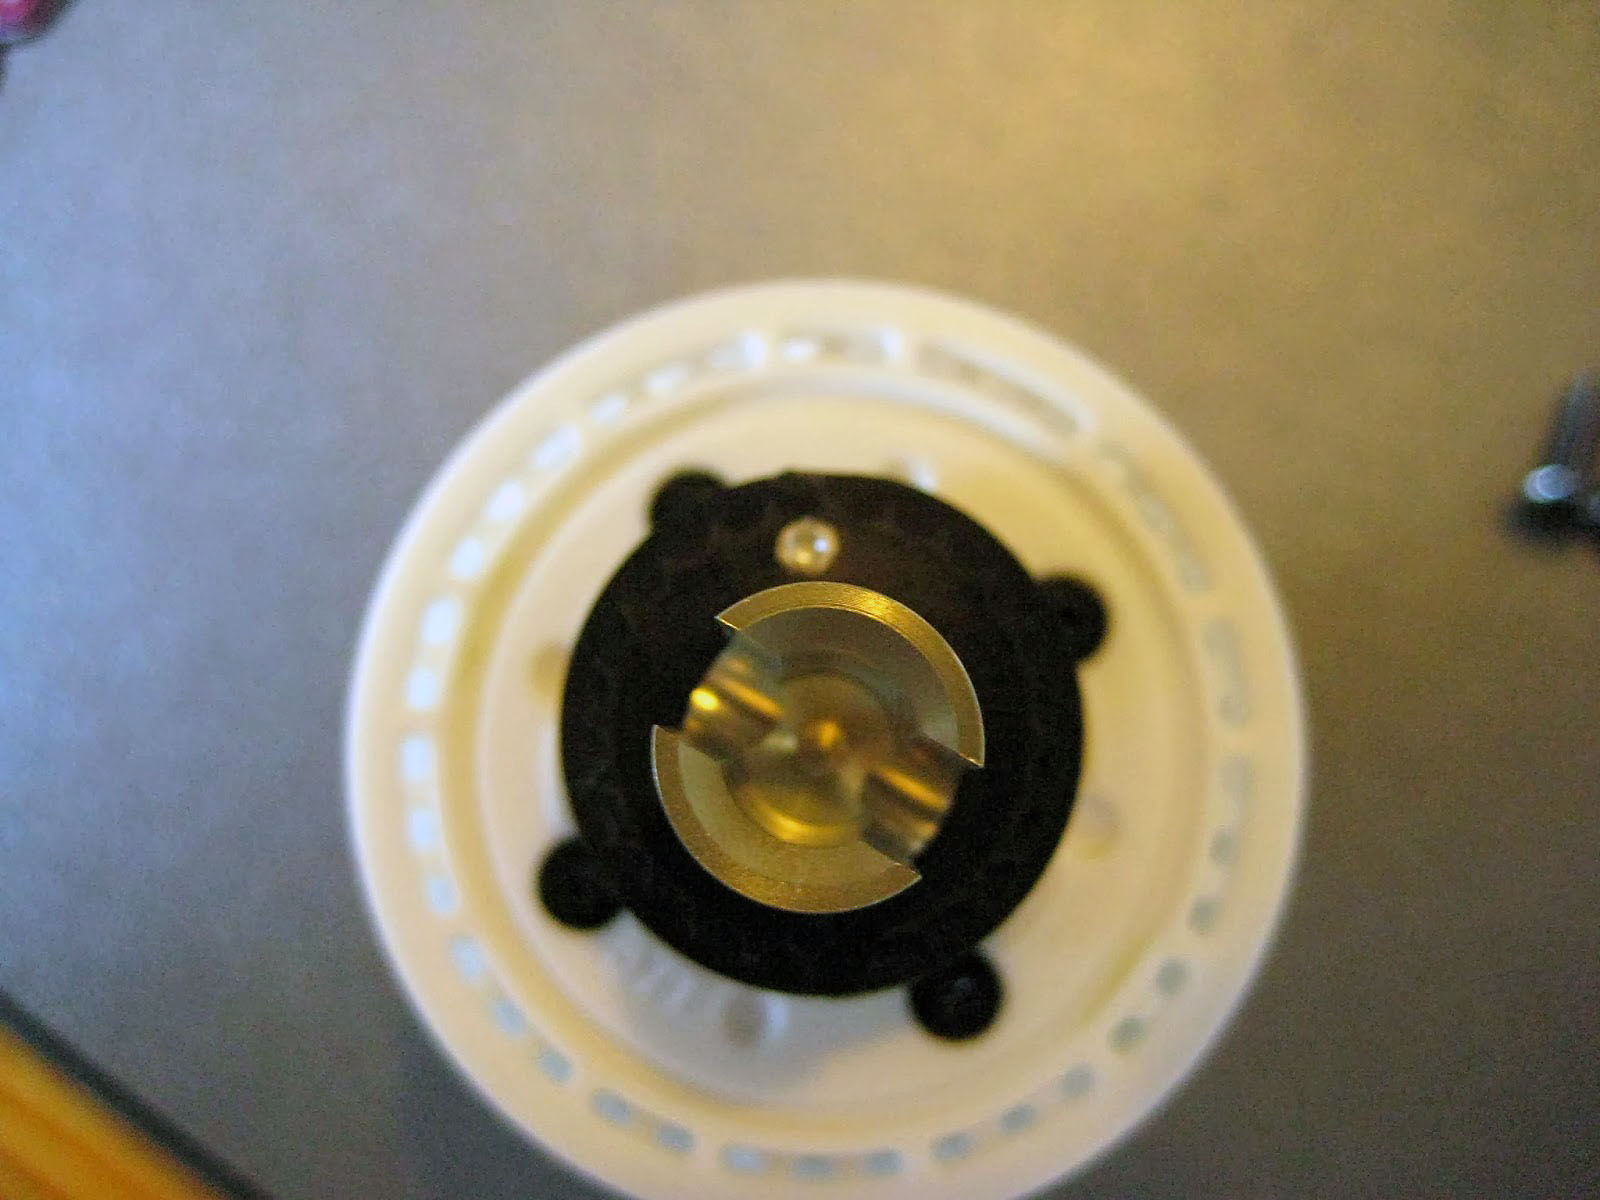
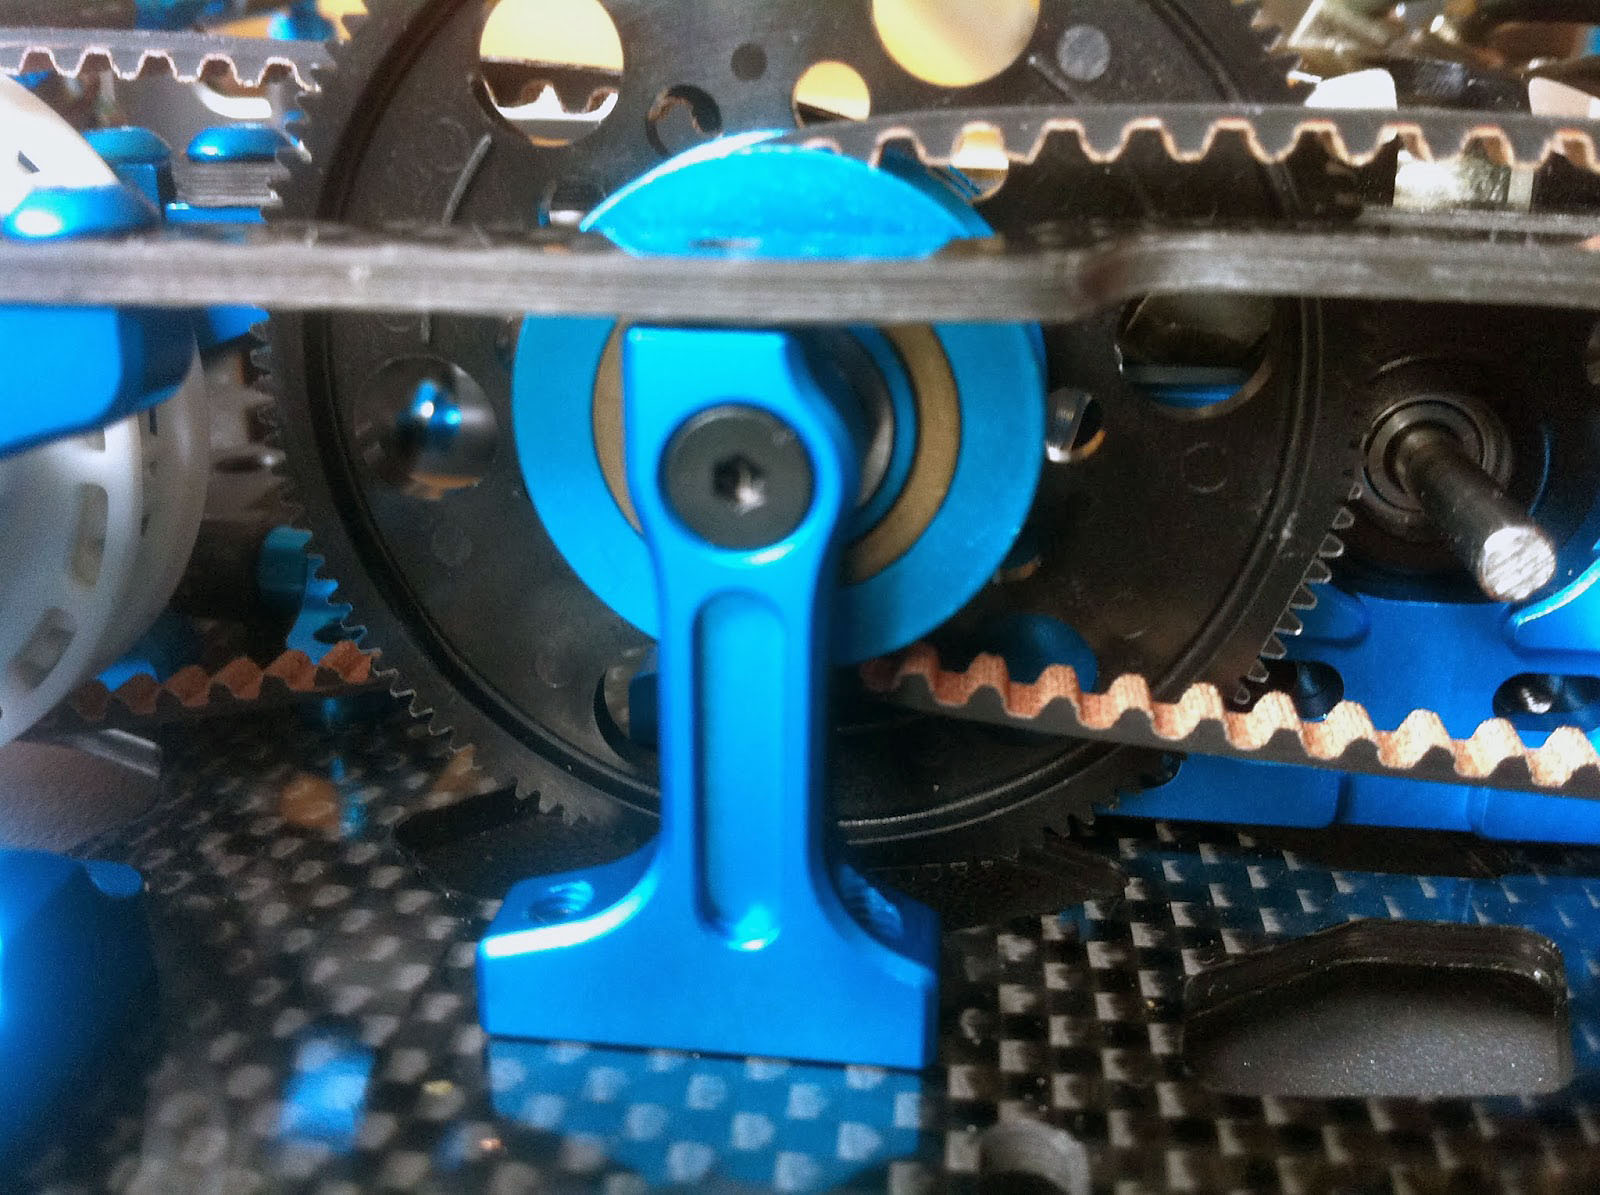
Stage 7 - Attaching front direct pulley
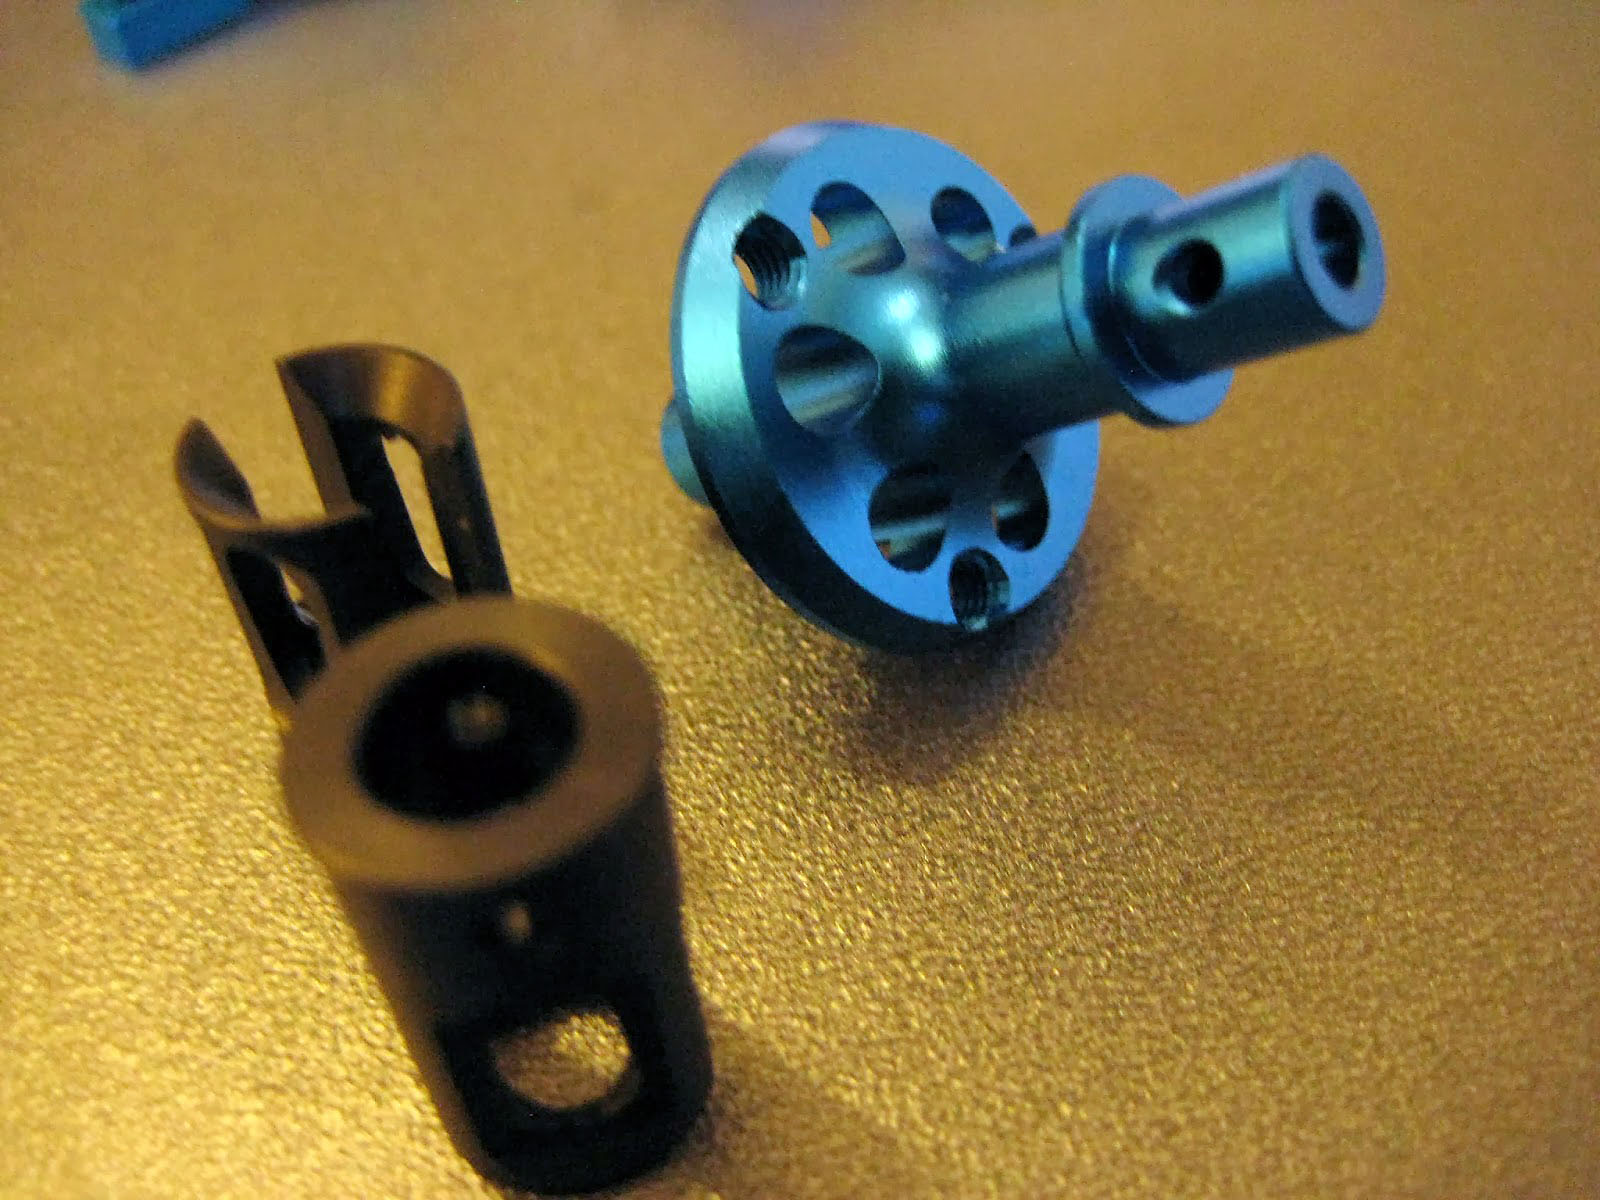
lighter direct pulley, fits into the whole philosophy of this car.
The front direct pulley is a very intricate looking piece and reminds me a little of the Awesomatix version. The cups are also now lightweight, and the combined weight saving is over 7g from the earlier spool.
Note - The new outdrives do require shaft protectors to be fitted, this is fine for out door tracks but when running indoors with boards you may find the shafts can break in a large collision, so be prepared to have some spares in your pit box (They are very cheap).
The upper front bulkheads again just slide on, and the split blocks (1C) have shims fitted.
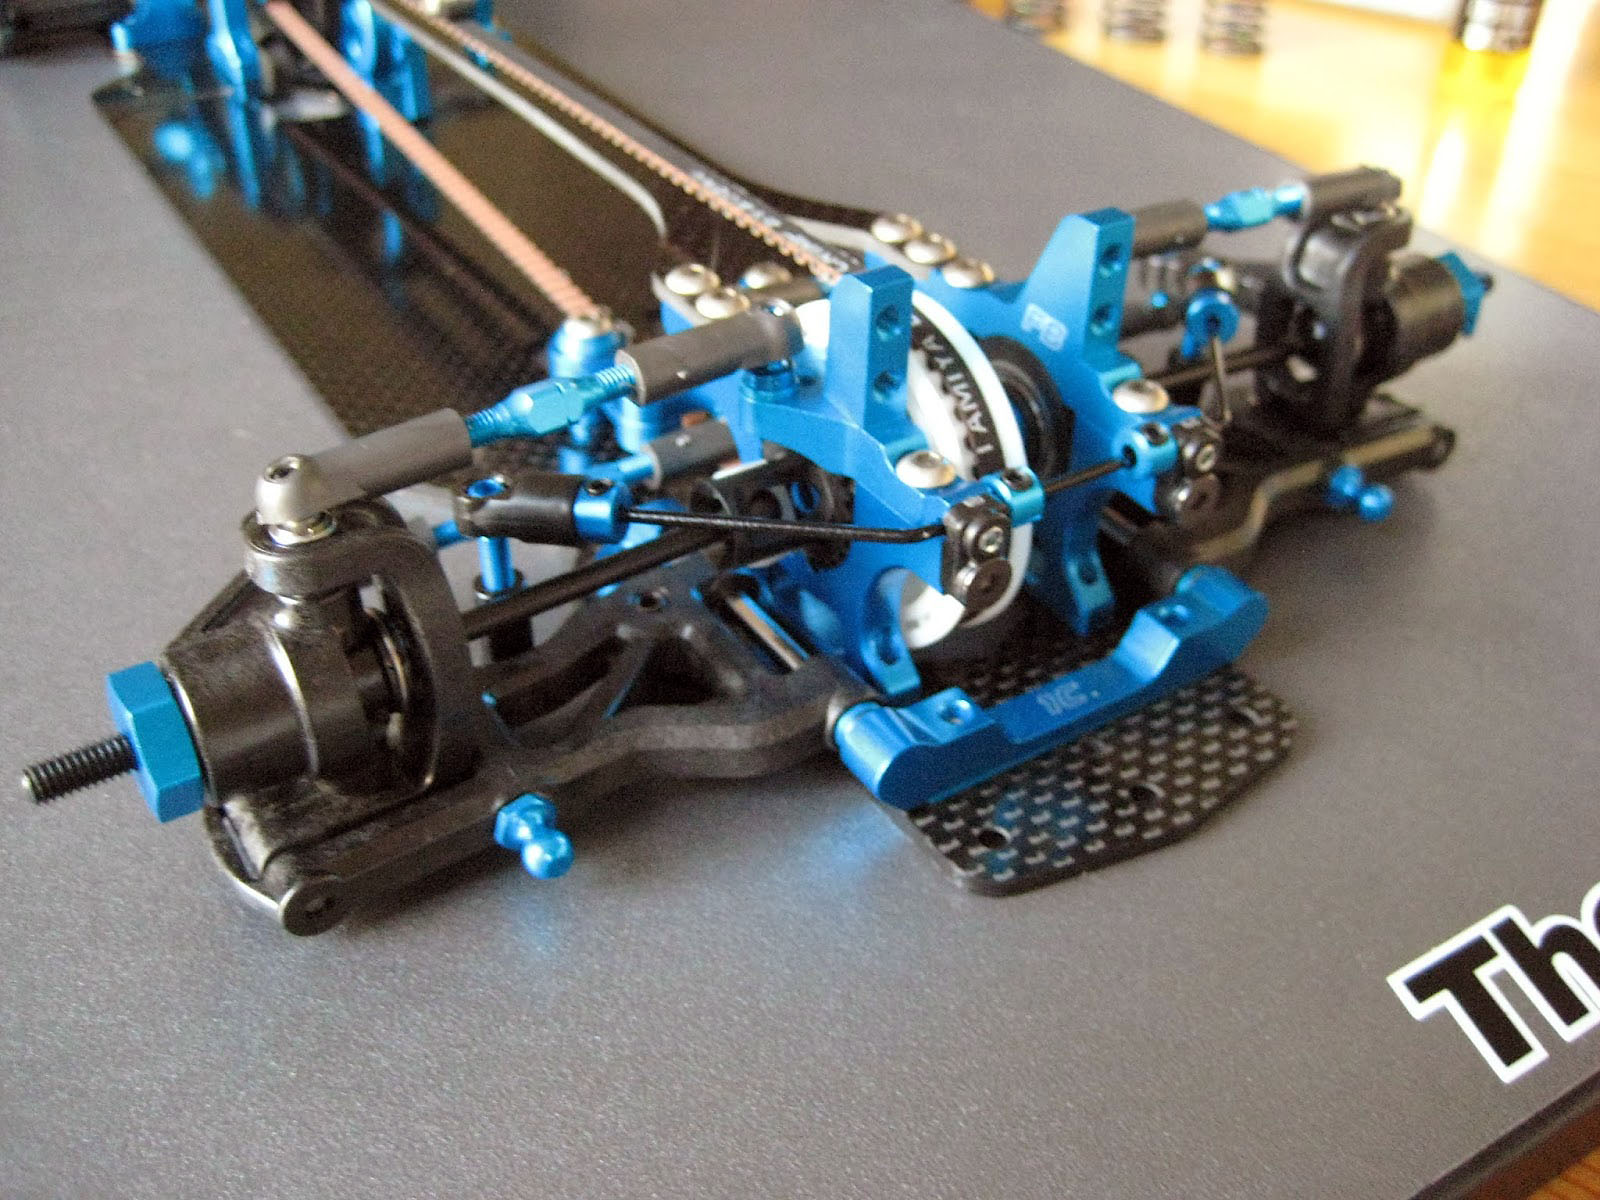
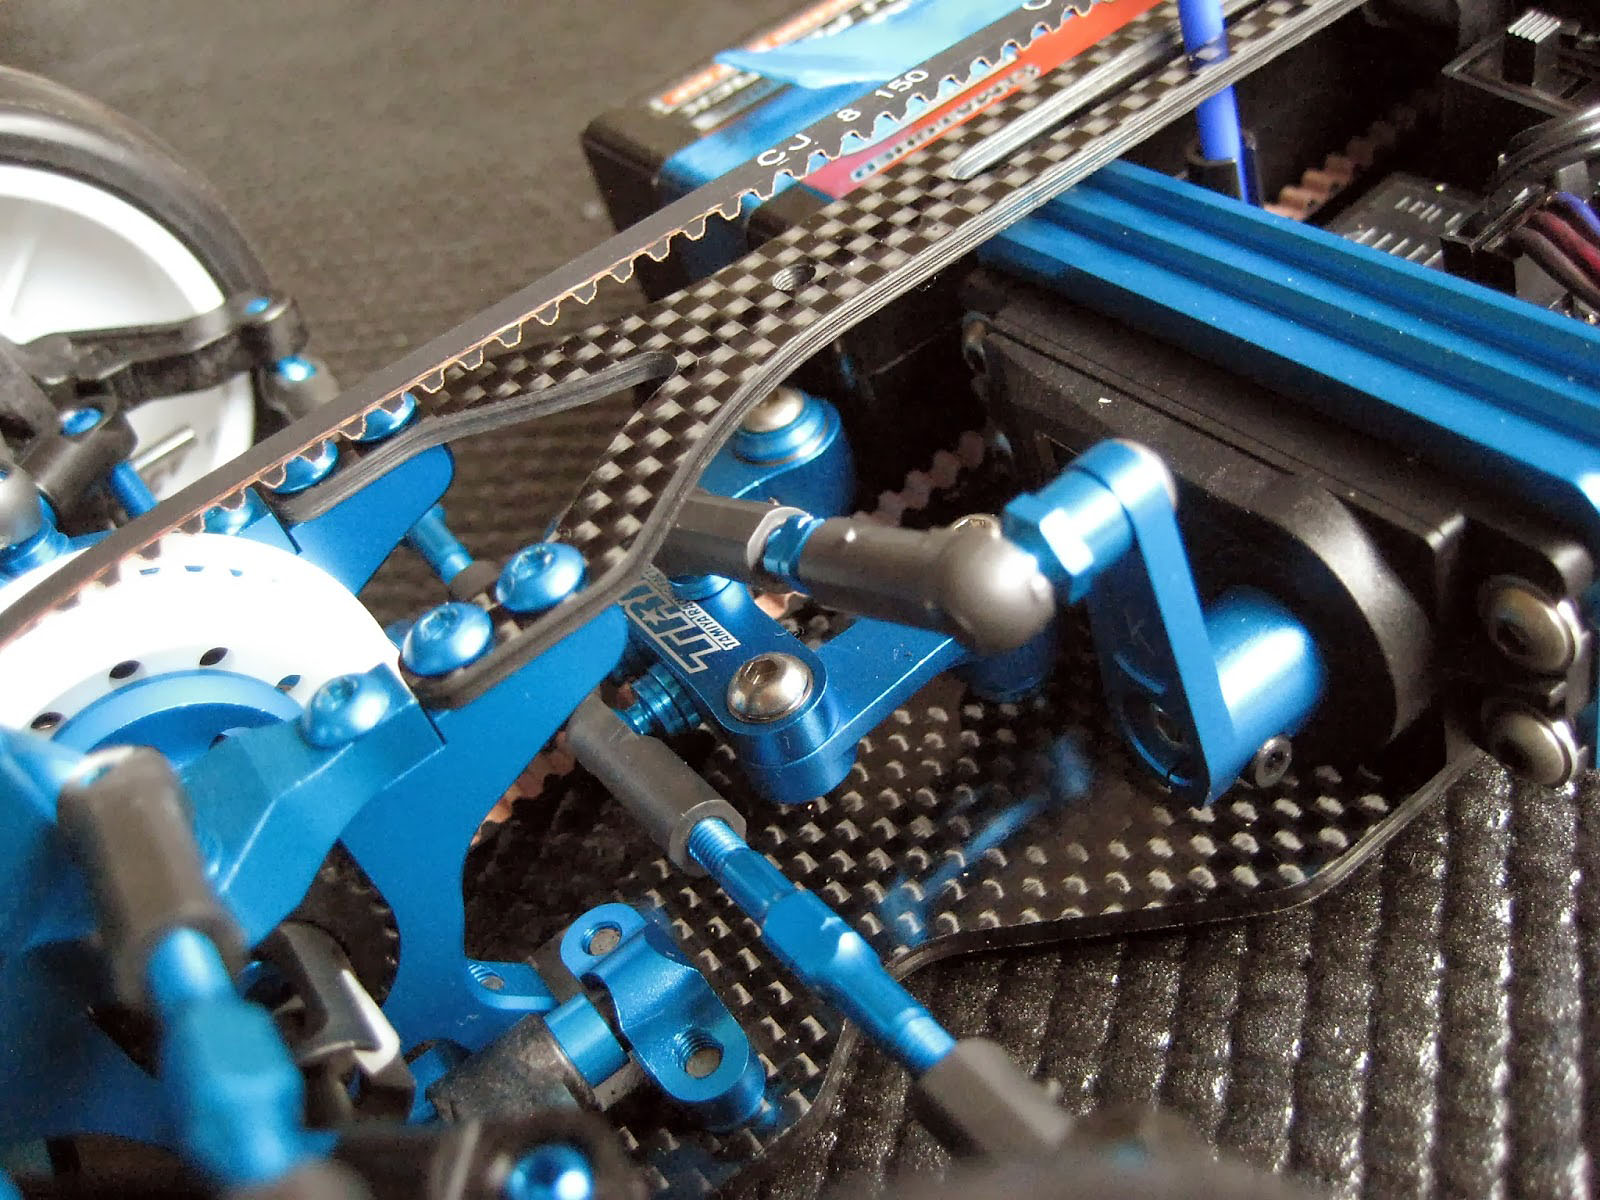
Stages 8 & 9 Steering linkage
Here we have another new part.
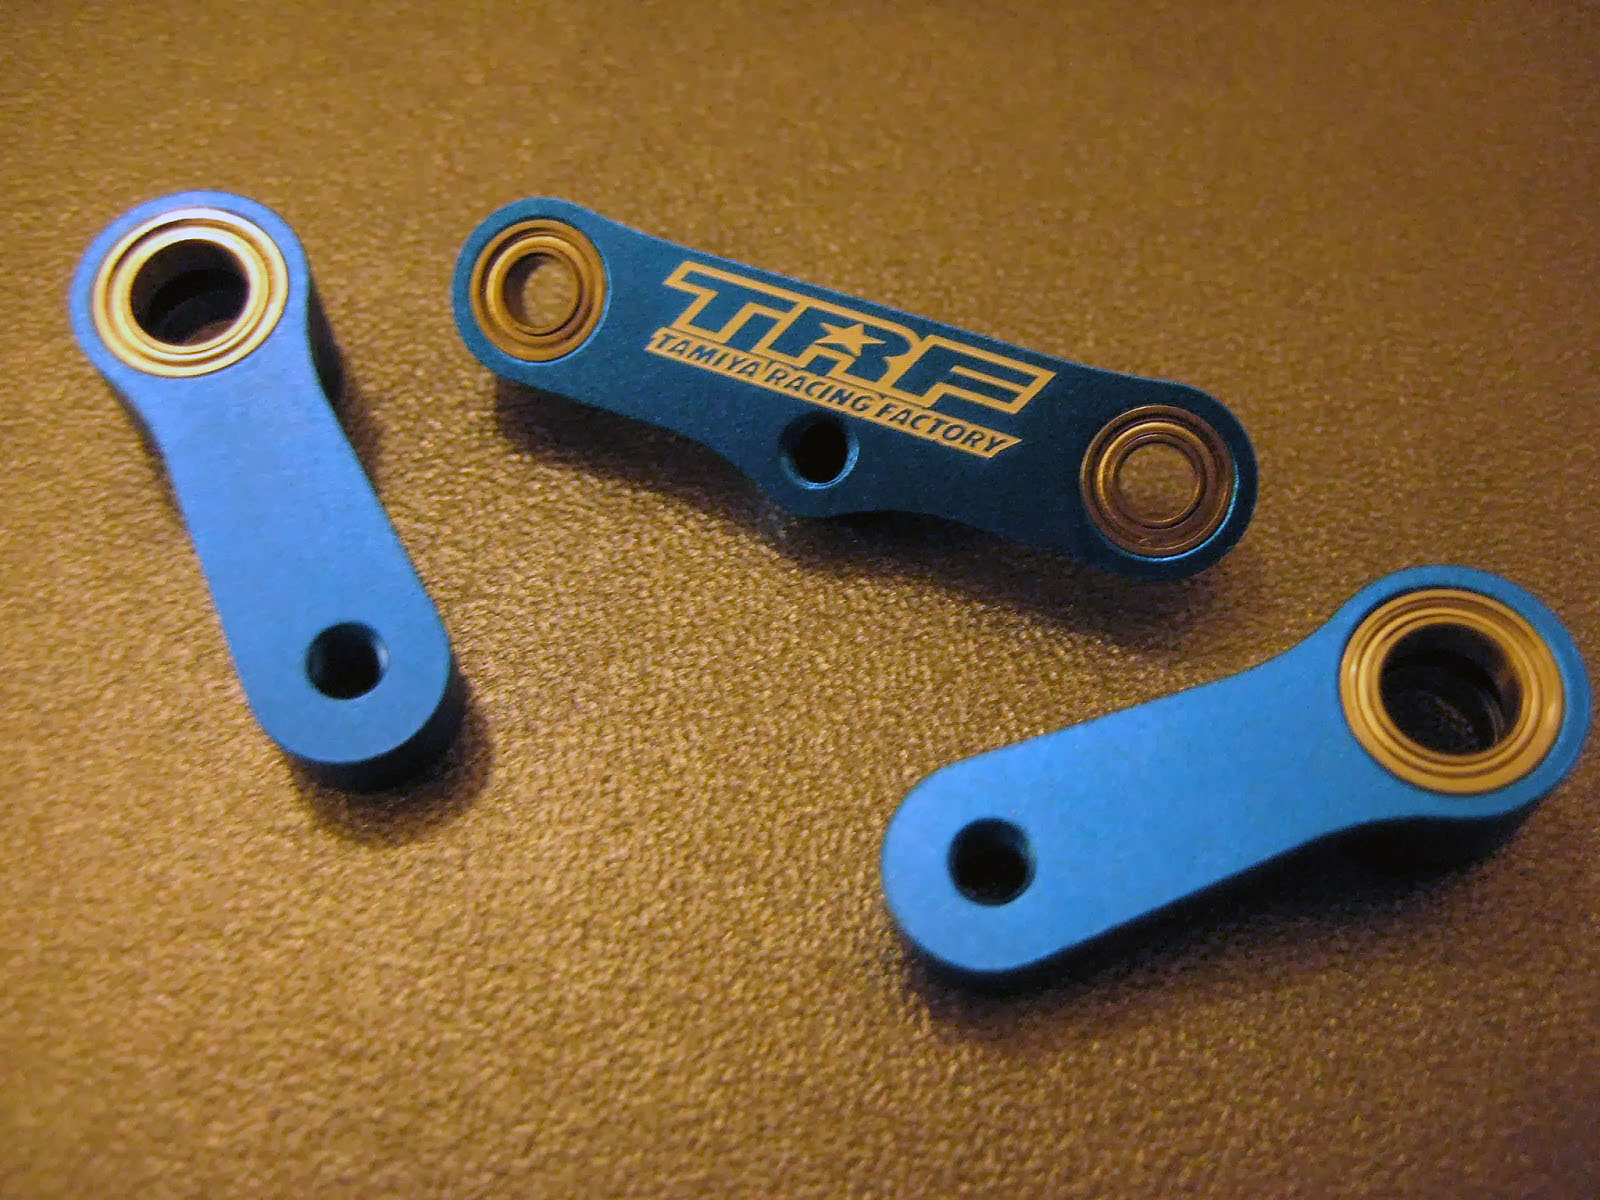
The steering linkage is all new, the new layout provides a more linear steering feel. This should ensure that you can help control your line around the corners.
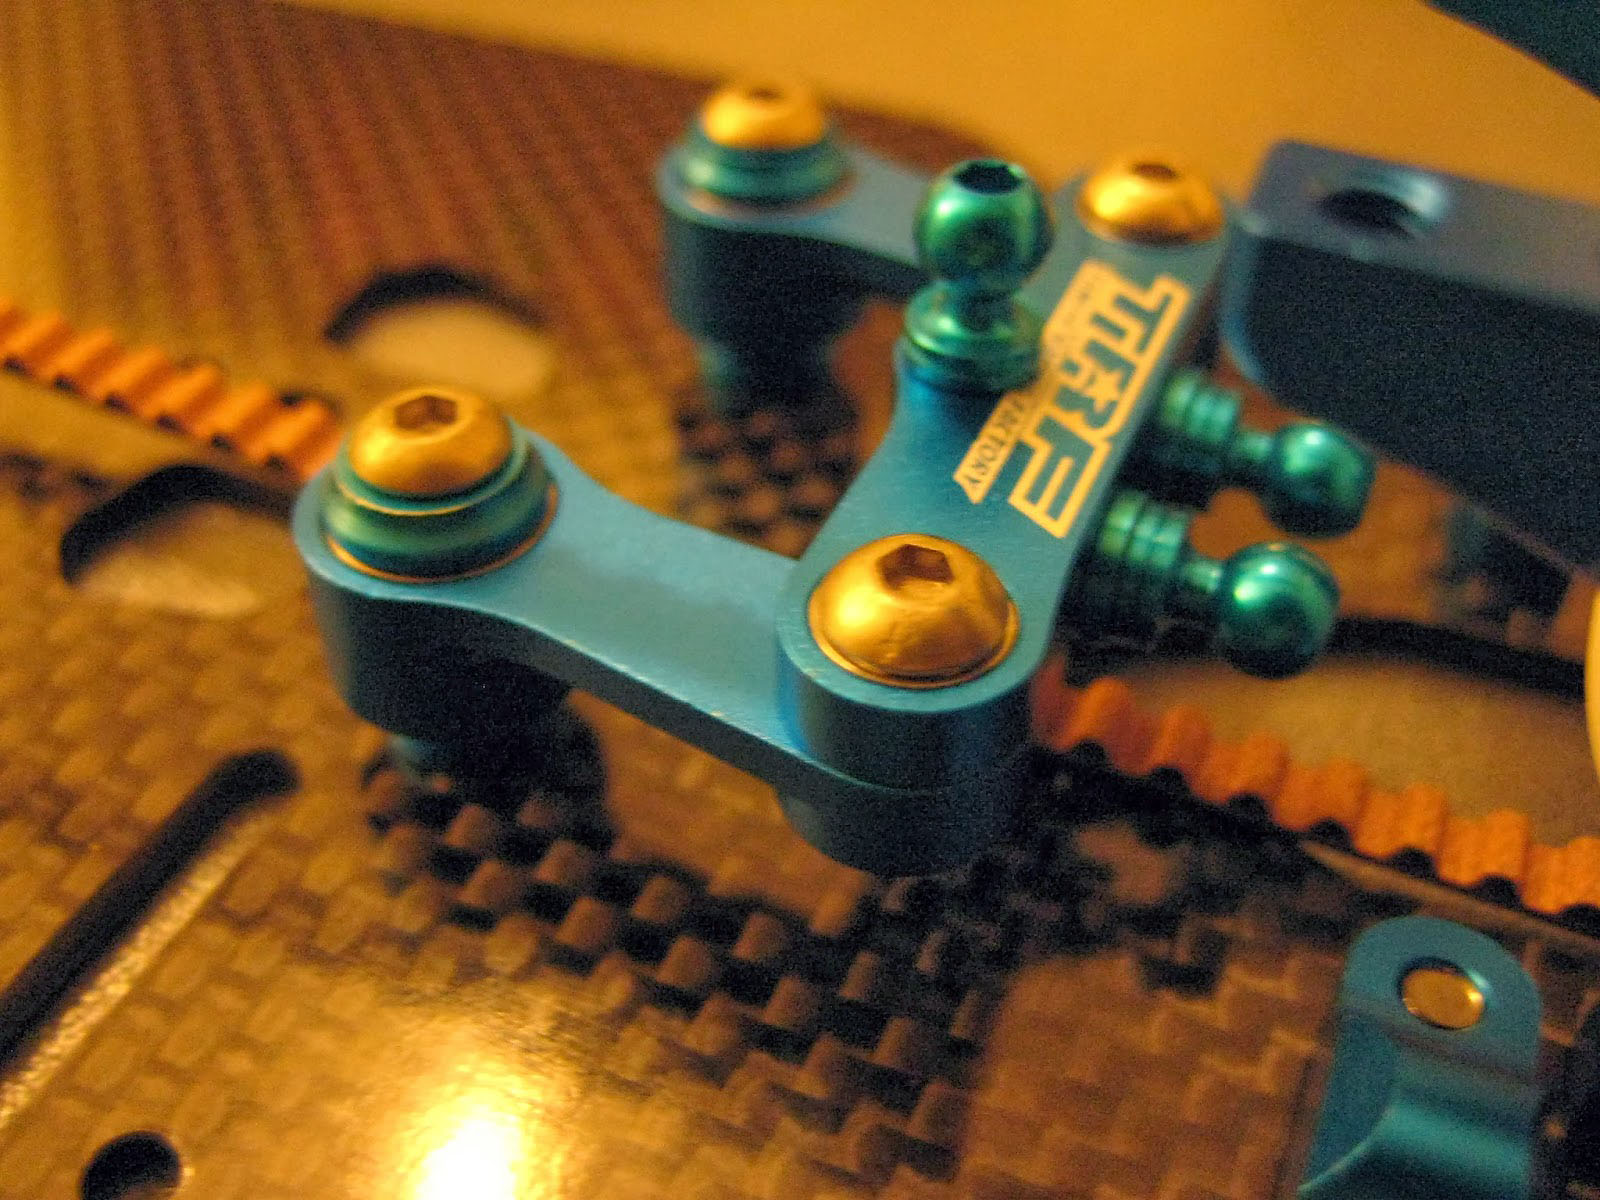
It all fits very well, I used an extra 0.1mm shim on the steering rods to reduce the slop. The whole assembly is very smooth, and there is a lot less unwanted slop than the 417 steering.
Stage 10 - Attaching the upper deck
Again their is a new upper deck, and here Tamiya spoils you with a range of mounting options. You can use the screw attached to the motor mount post to give you quite a lot of steering. You can soften it by using the 3mm grub screw (included in the kit but not shown in the instructions) to give you a floating deck.
You can also add screws to the rear of the motor mount (in the picture above) And the kit supplies you with a pair of 0.5mm shims to fit (one under each side) and a pair of 2.6mm X 8mm screws to fit. I cant see this being used much although on very high grip this could be an option.
You can also fit 2 x 630 bearings to the centre post as a battery stop.
Stages 11-13 Front and Rear Arms
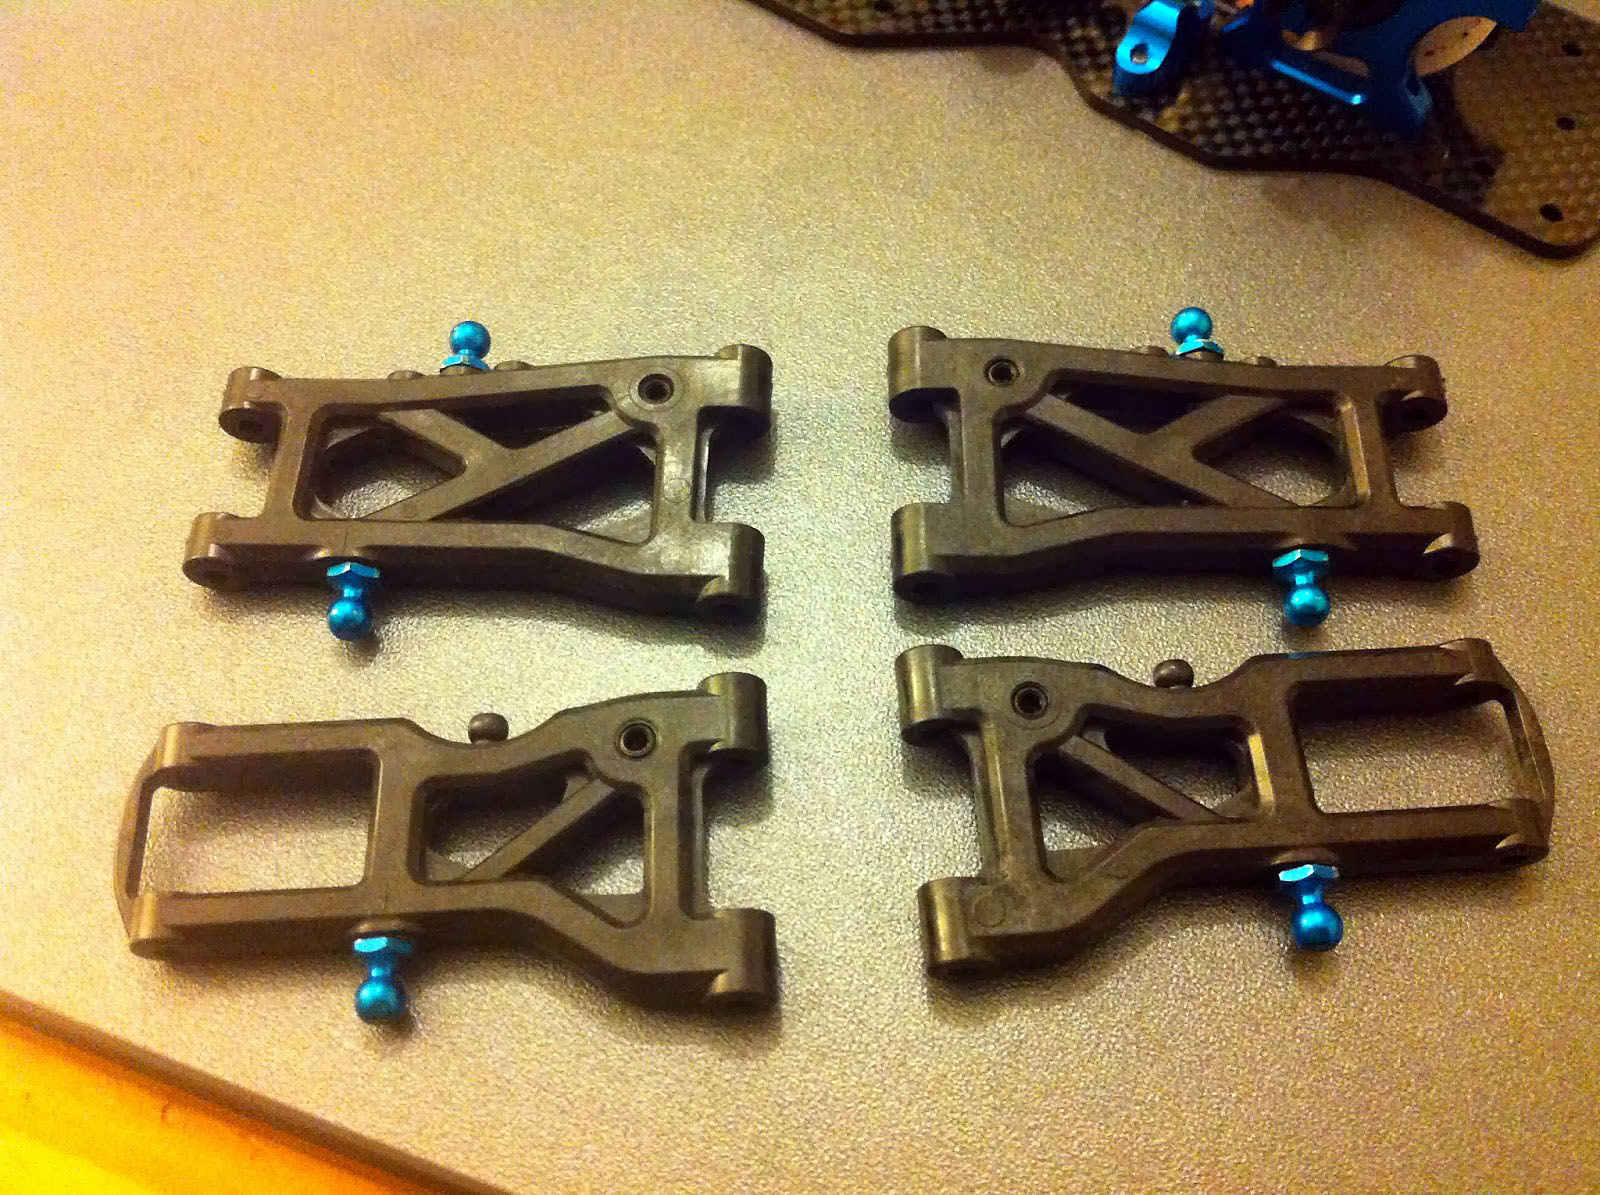
Here are the new suspension arms. They just have one lower mounting hole (Like a TT02!) the reason is that even with the old arms people used to use just the one setting, so they have optimised the geometry of the suspension to work around this single hole.
As you can see the droop screw is now 4mm as opposed to 3mm, this will give better contact to the chassis and will also reduce wear in the carbon.
The arms are also lighter, with around 0.5g taken off each front arm and 1.5g removed off each of the rear arms. This all helps the car and to help it feel nimble and responsive. It must also be noted that the arms feel really strong and chunky, and they are made out of Carbon re-enforced plastic.
Now its time to just fit them onto the chassis.
Arms fit fine, and move freely
The suspension shafts are not fluorine coated as per earlier TRF kits, but they are the same size shafts so you can fit these if you really want to.
TIP - Some people ream out the arms when building so the arm moves freely around the hinge-pin. This is not the way to build TRF's, it just creates slop. You need to fit the hinge-pins in the arm and then ensure it moves freely once you have mounted the pivot balls and fitted the arms in the suspension blocks. This gives you a much more precise handling car (with less service intervals). TRF factory drivers will never ream out the arms.
The shafts are a nice tight fit on the arms and then its time to fit the shims. The front arms were fine with no extra shimming needed, the rear arms required me to take out the 0.5mm shim and replace it with four 0.1mm shims to make the arms move freely.
TIP - When placing the shims on the suspension arms there is a 0.5mm x 0.3mm shim. If your arms bind when fitting, DO NOT shave the arms as per the instructions, instead just use 0.1 x 3mm shims until there is no slop and the arms move smoothly. Shaving arms ruins you suspension geometry as no two arms are the same if you shave them.
Stage 14 - 15 Rear axles
The rear axles are the same as those on the 417 and all modern Tamiyas. They now have a retaining spring clip that holds the retainer in place as opposed to the grub screw that would sometimes fail. These drive shafts have proved to be ultra reliable. You just need to ensure that the clip is facing the correct way otherwise you make find them popping out.
The rear hubs are also new, they now just have one hole for the rear camber link. The hole is roughly in the middle of the position of the two holes that were in the TRF417 hubs.
Stage 16-17 Front Axles
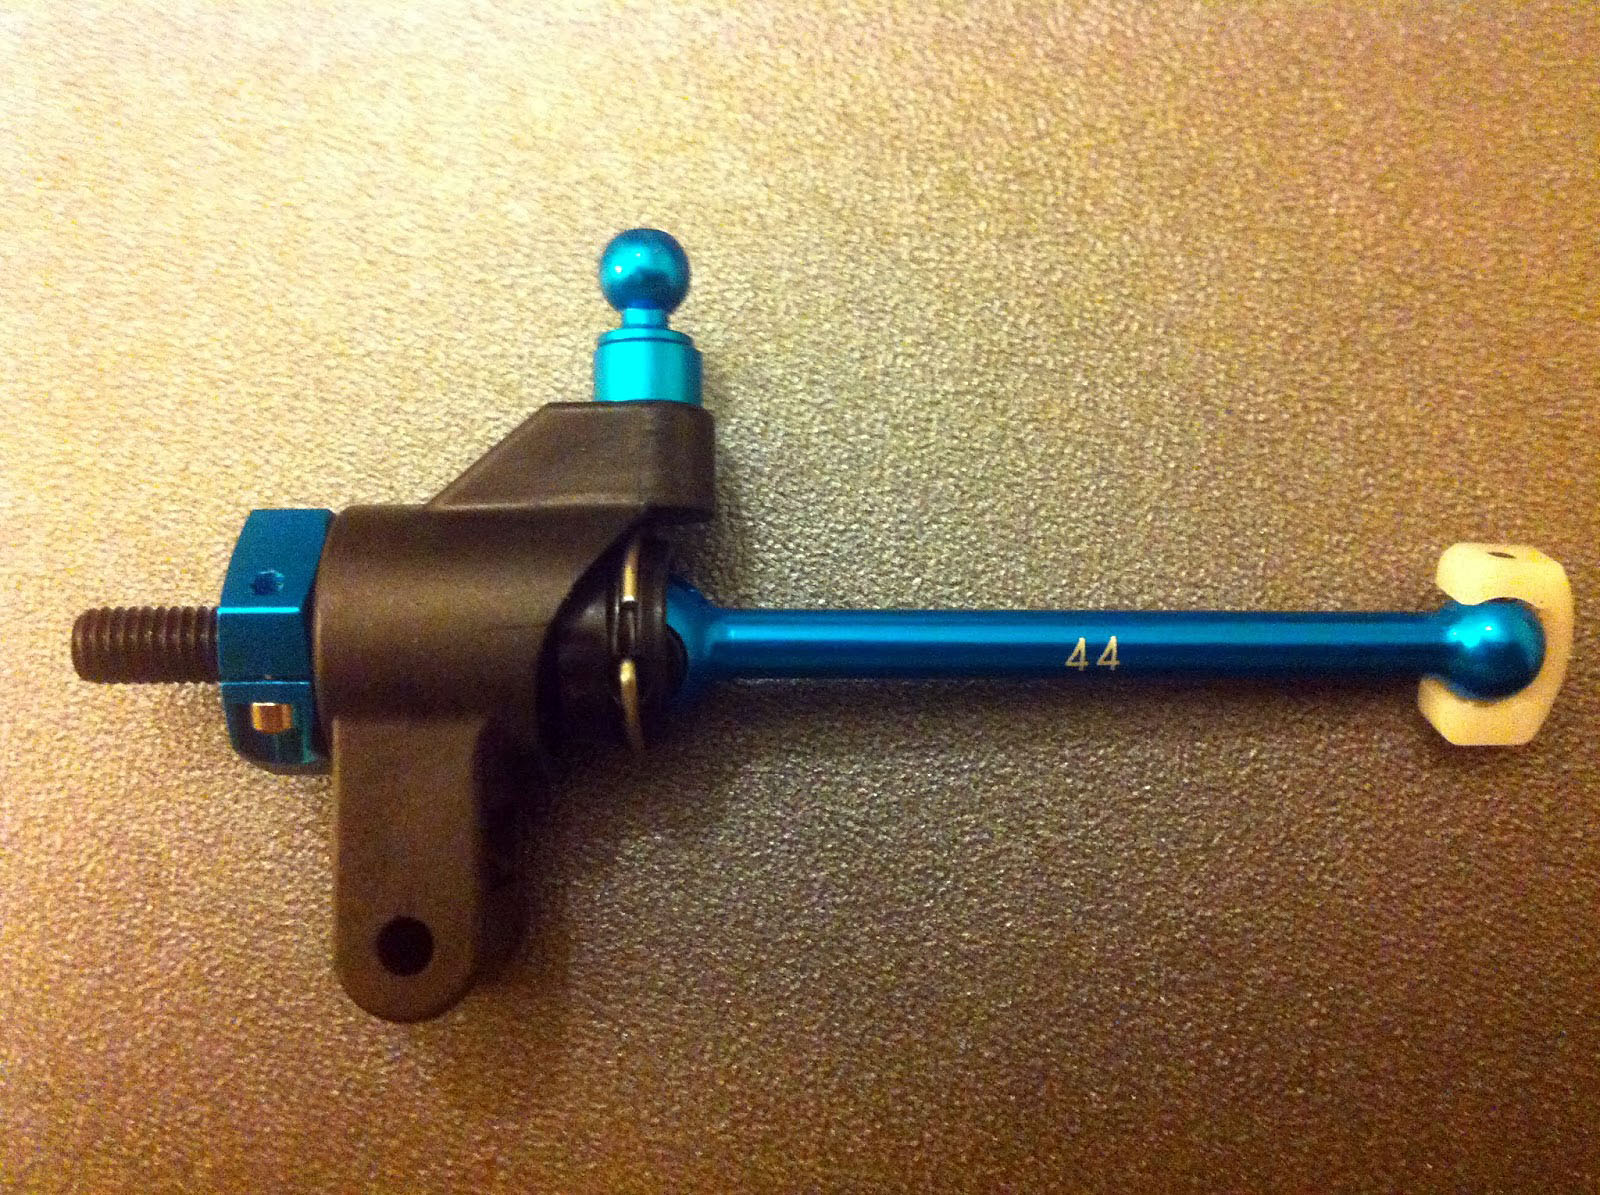
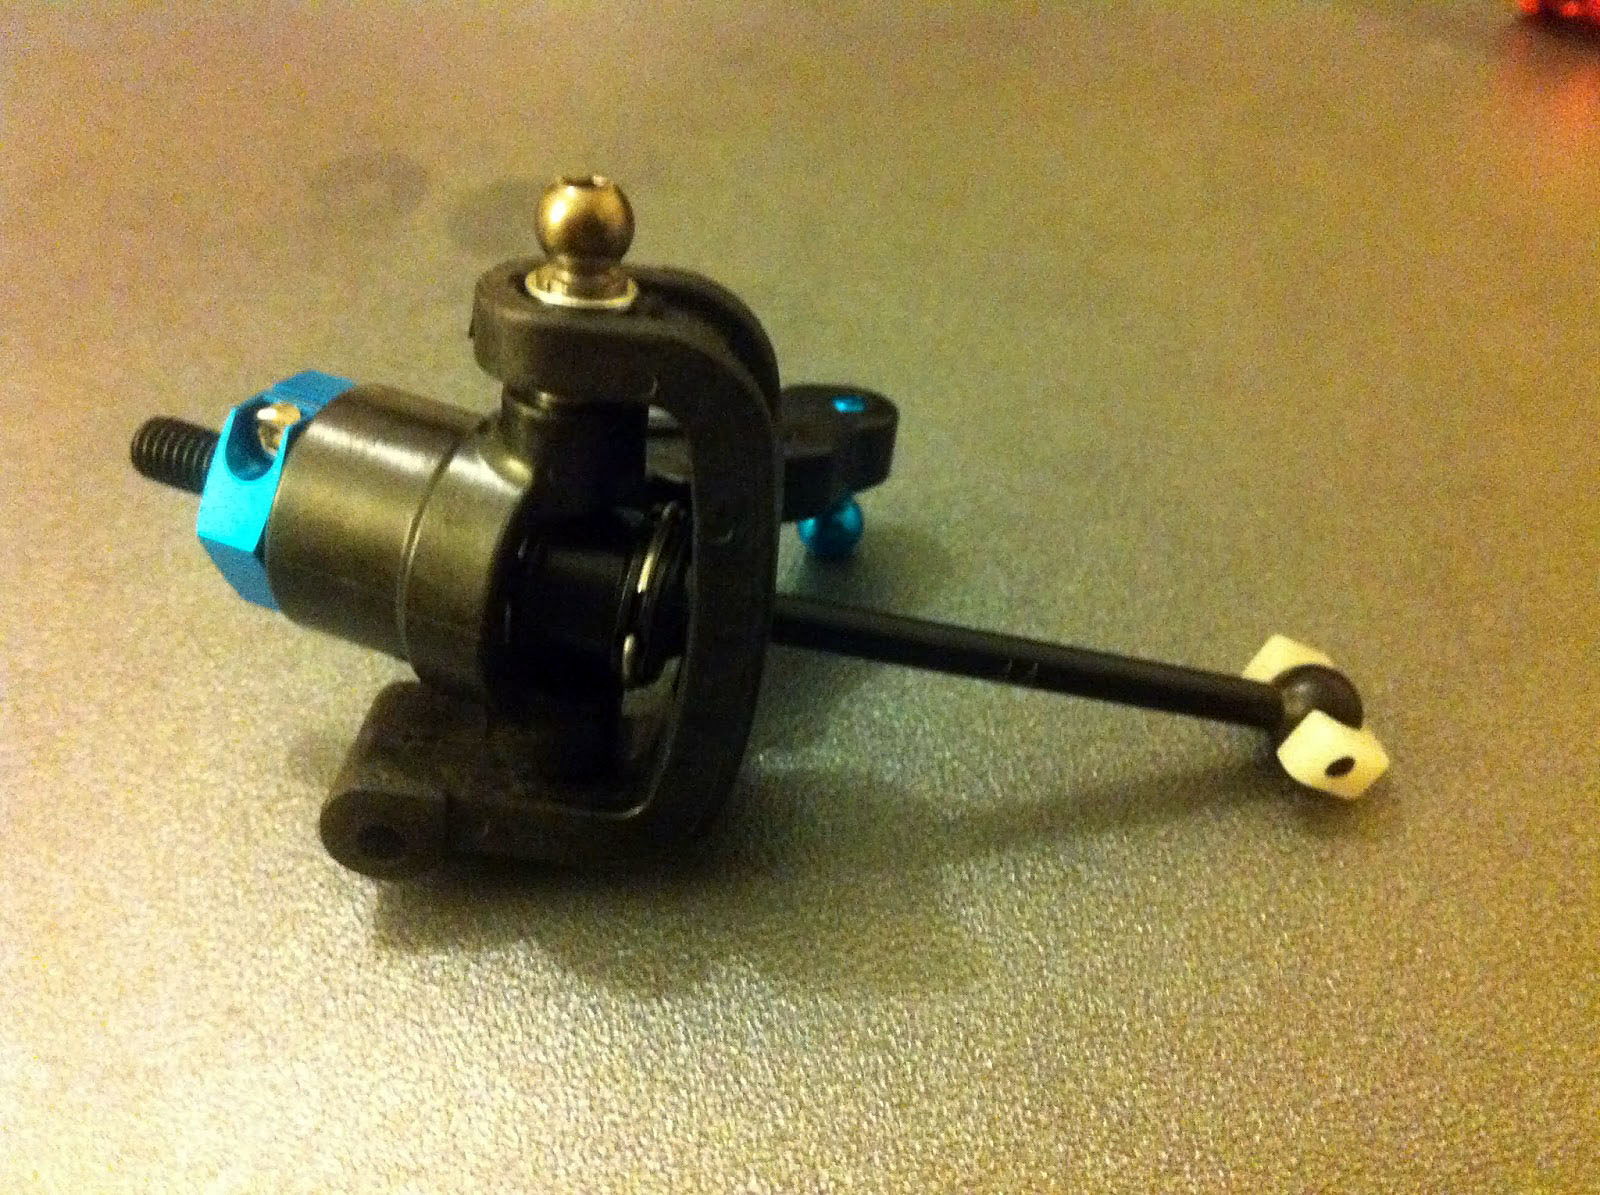
Tamiya has included the double cardan axles for the front of the car. This is a big bonus as it provides smoother power delivery to the front wheels when using a spool. Usually you would purchase these as a Hop-up even for a high end kit, but they are included here.
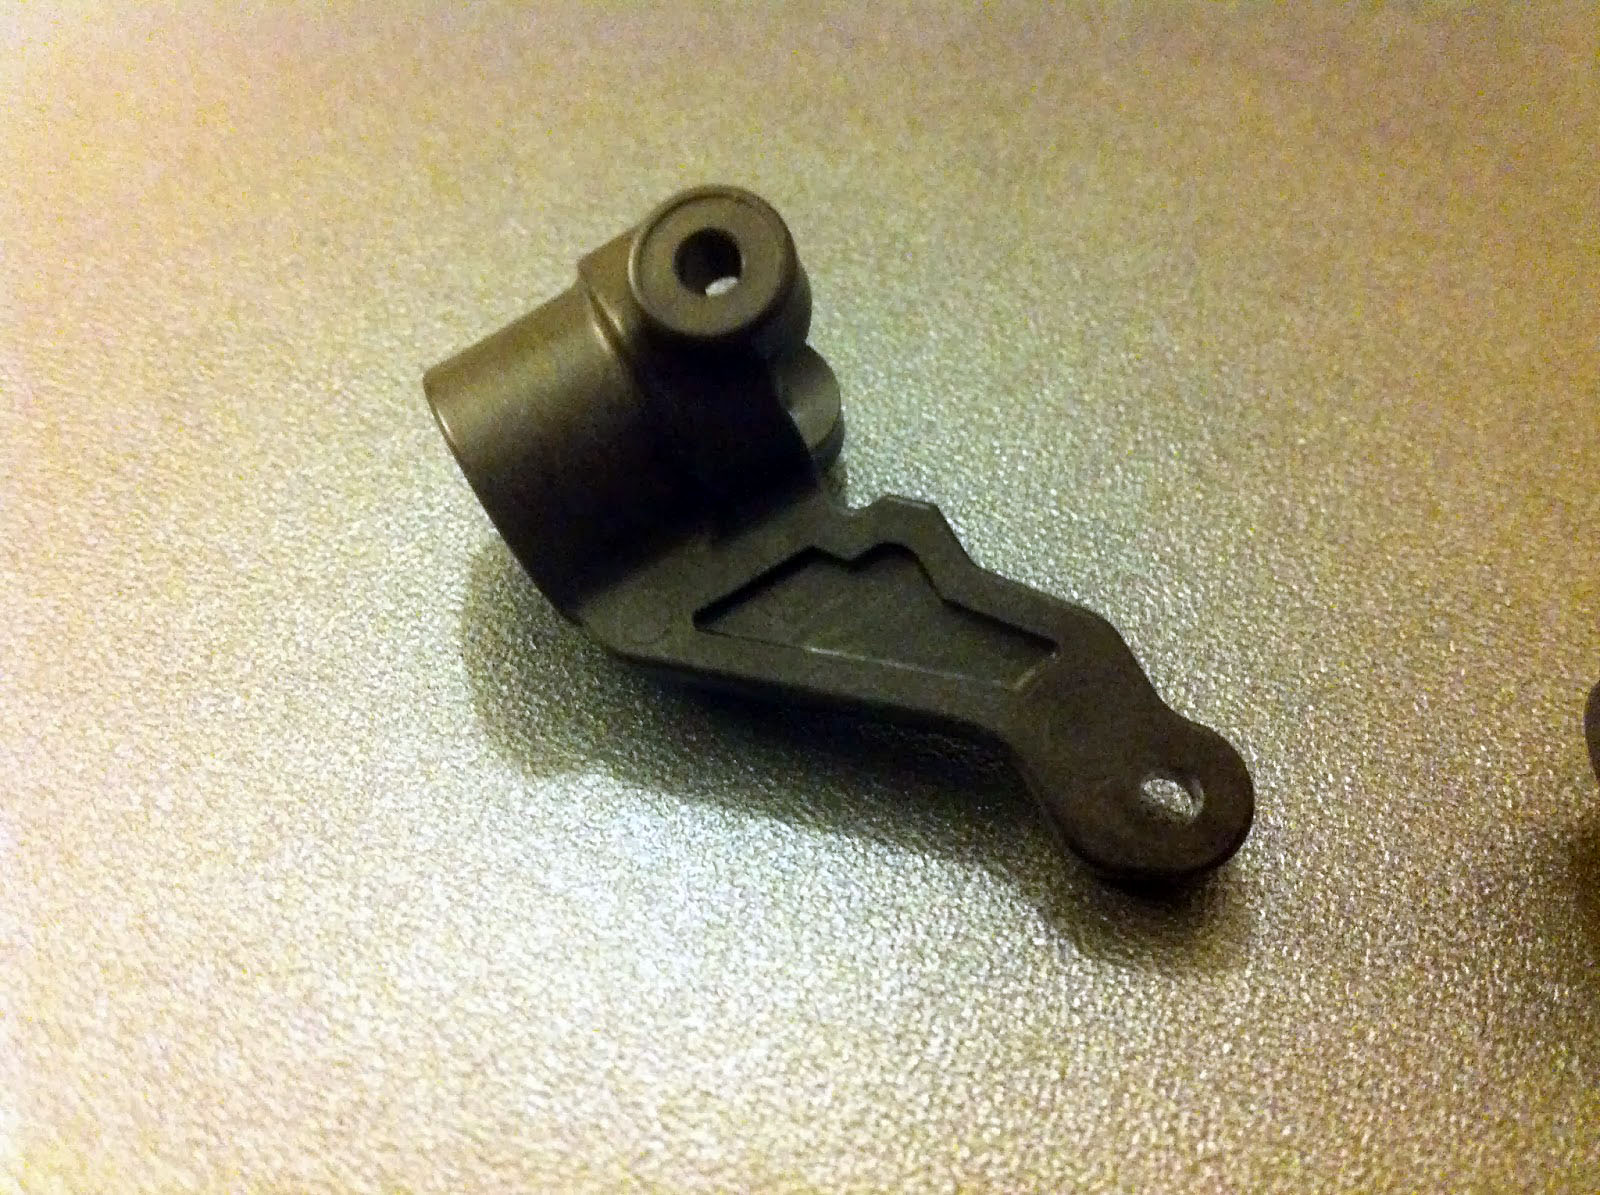
The front upright is also redesigned again with only one setting hole, this is set more inwards than the old upright, with the rest of the upright the same.
The C-hubs are the same as previous kits, its a shame they have not been altered to have more movement for the double cardan drive shafts (Like the option 6 degree castor blocks).
Stage 18 - 19 Stabilizers
The stabilizers are all new on the 418, and they are much easier to build and set-up.
New Roll bar design is a welcome change
The kit included Medium front and Medium-soft rear bars. The bonus parts are a set of soft front and rear bars. They are a different size from the existing 417 so you may need to wait for Tamiya to release the full set if you want all of the tuning options, although many do not change these often.
The new design is much easier to adjust, the only shame is that Tamiya has not re-designed better way to hold the bar on the bulkhead, although the Roche stabilizer holders may fit.
Front end, just missing shocks
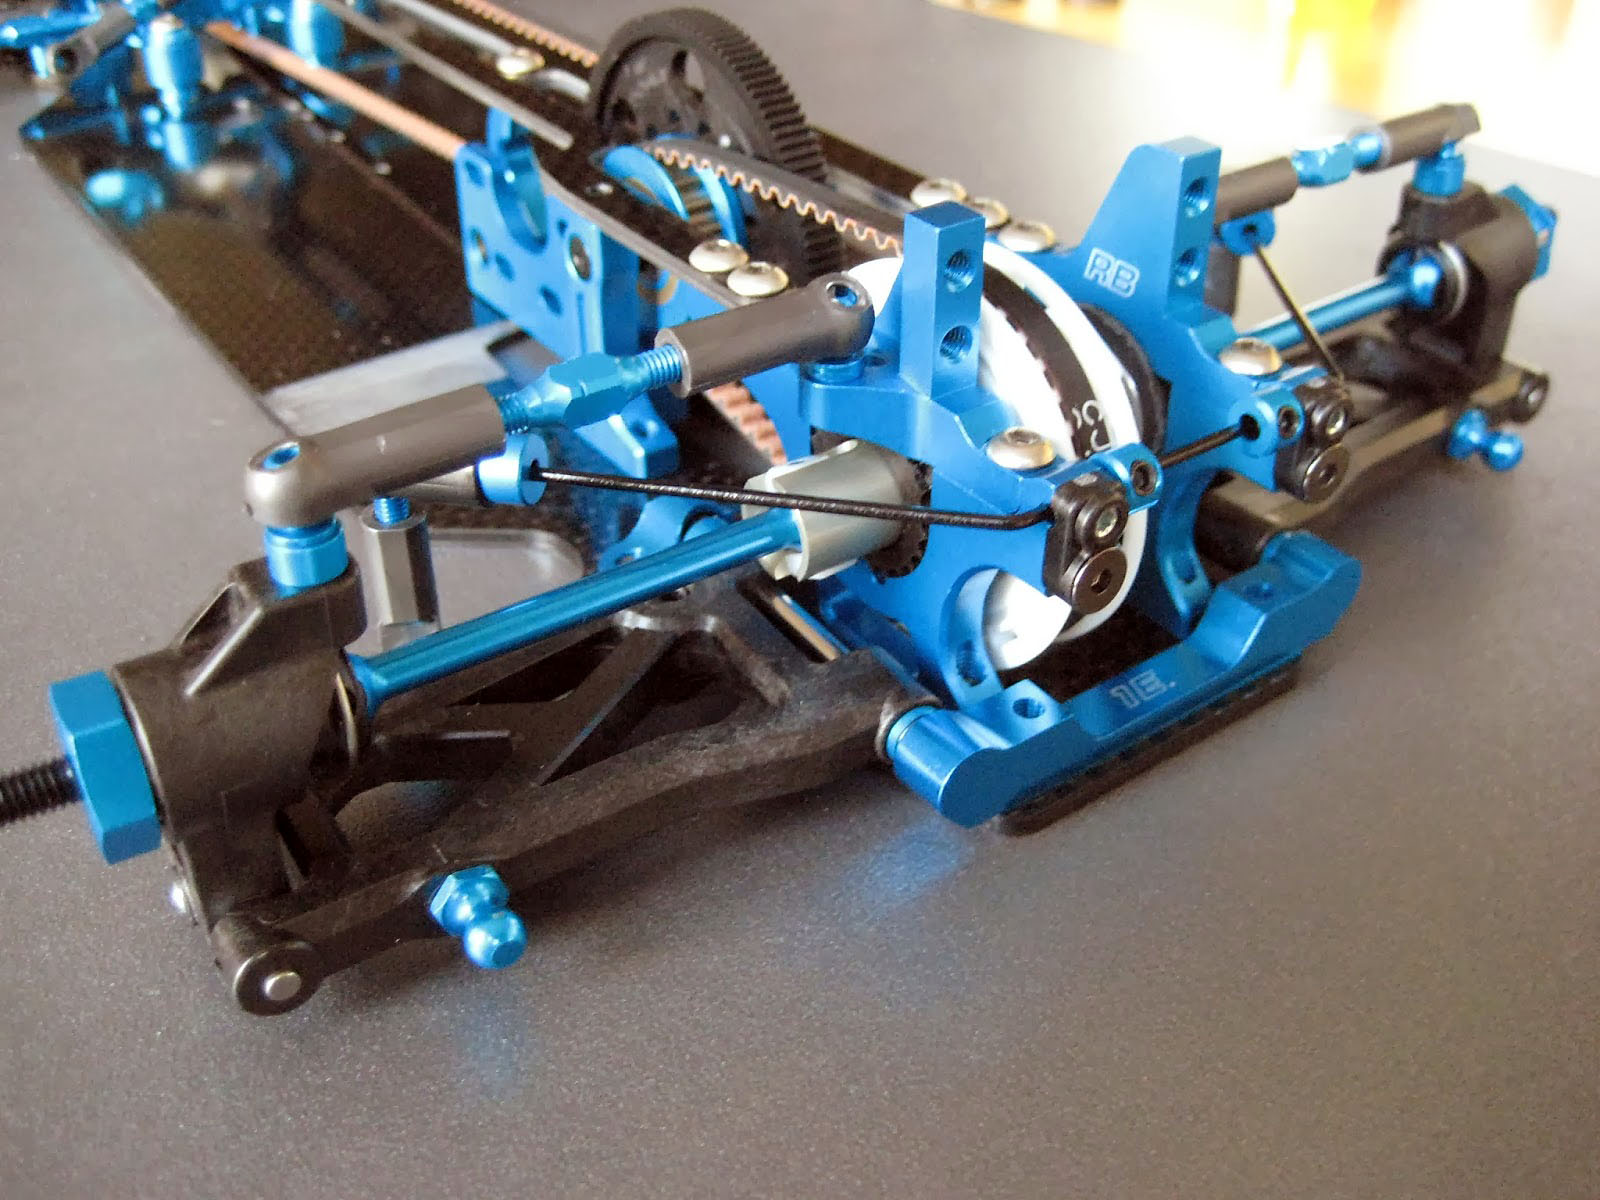
Rear end, just missing shocks and wheels, and electrics
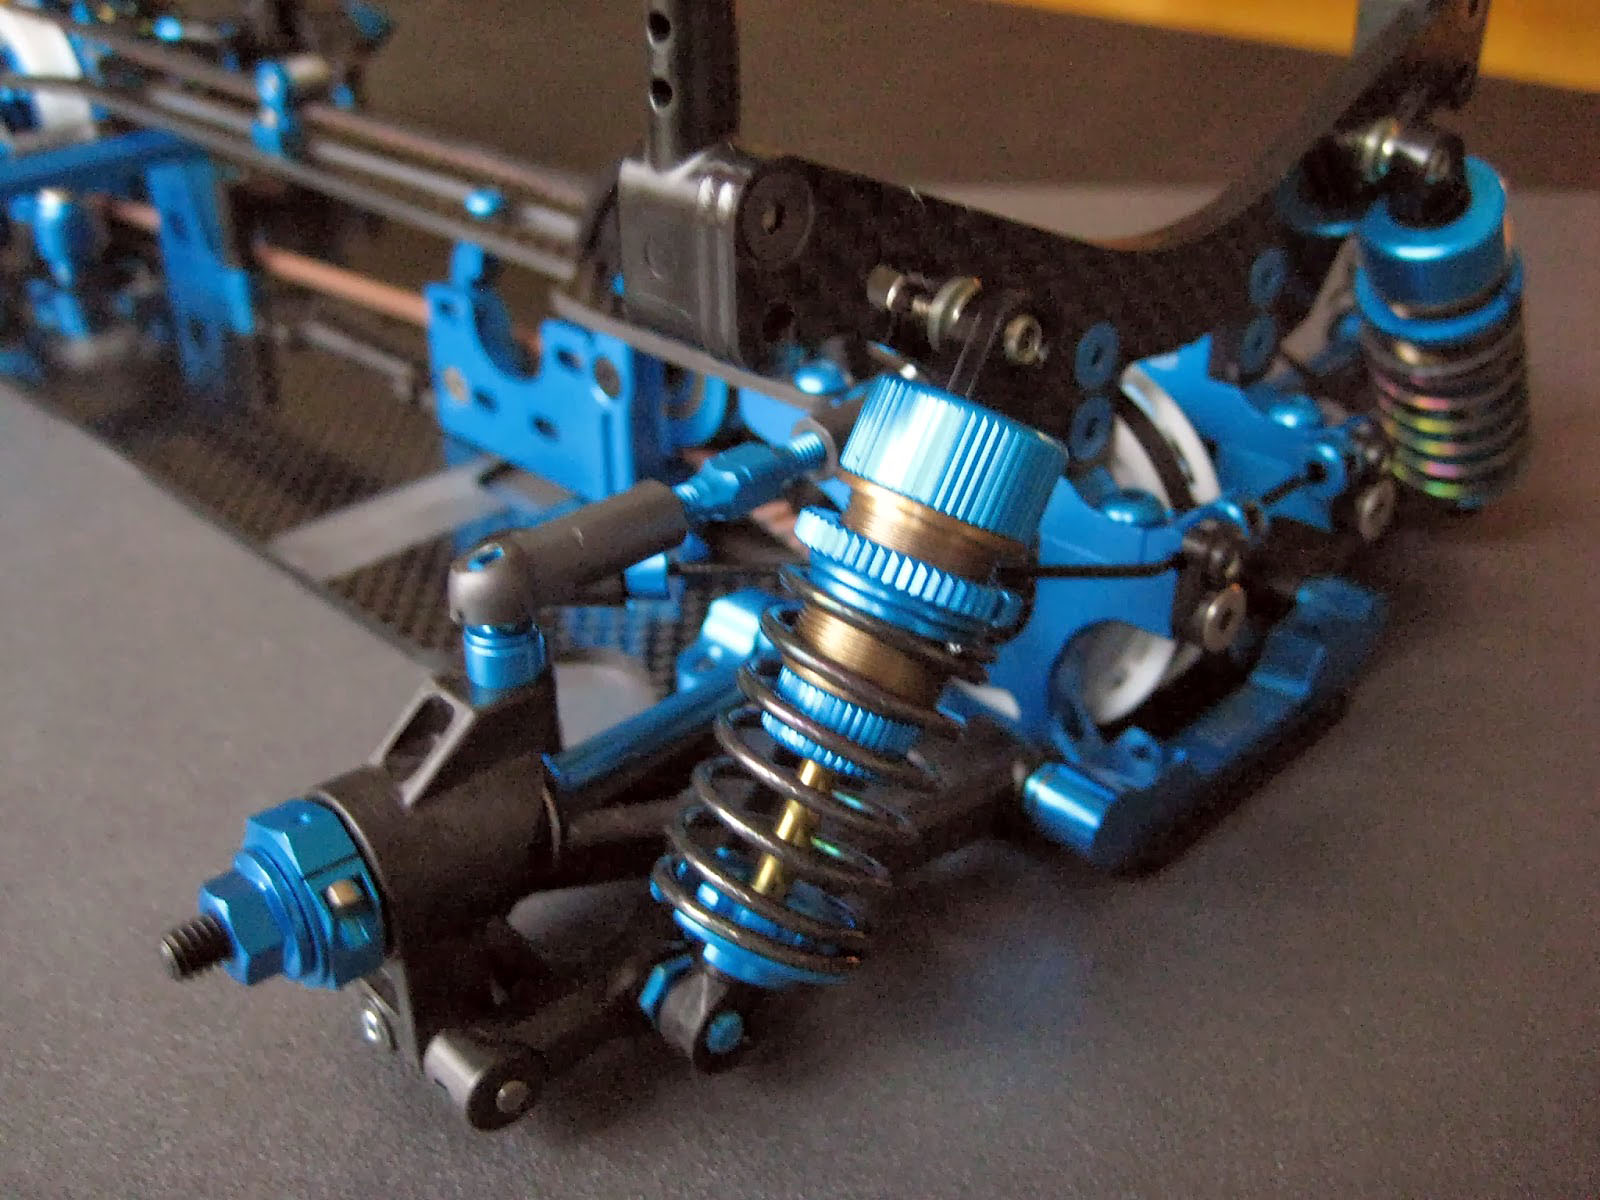
Stage 20 - 24 Shocks and Towers
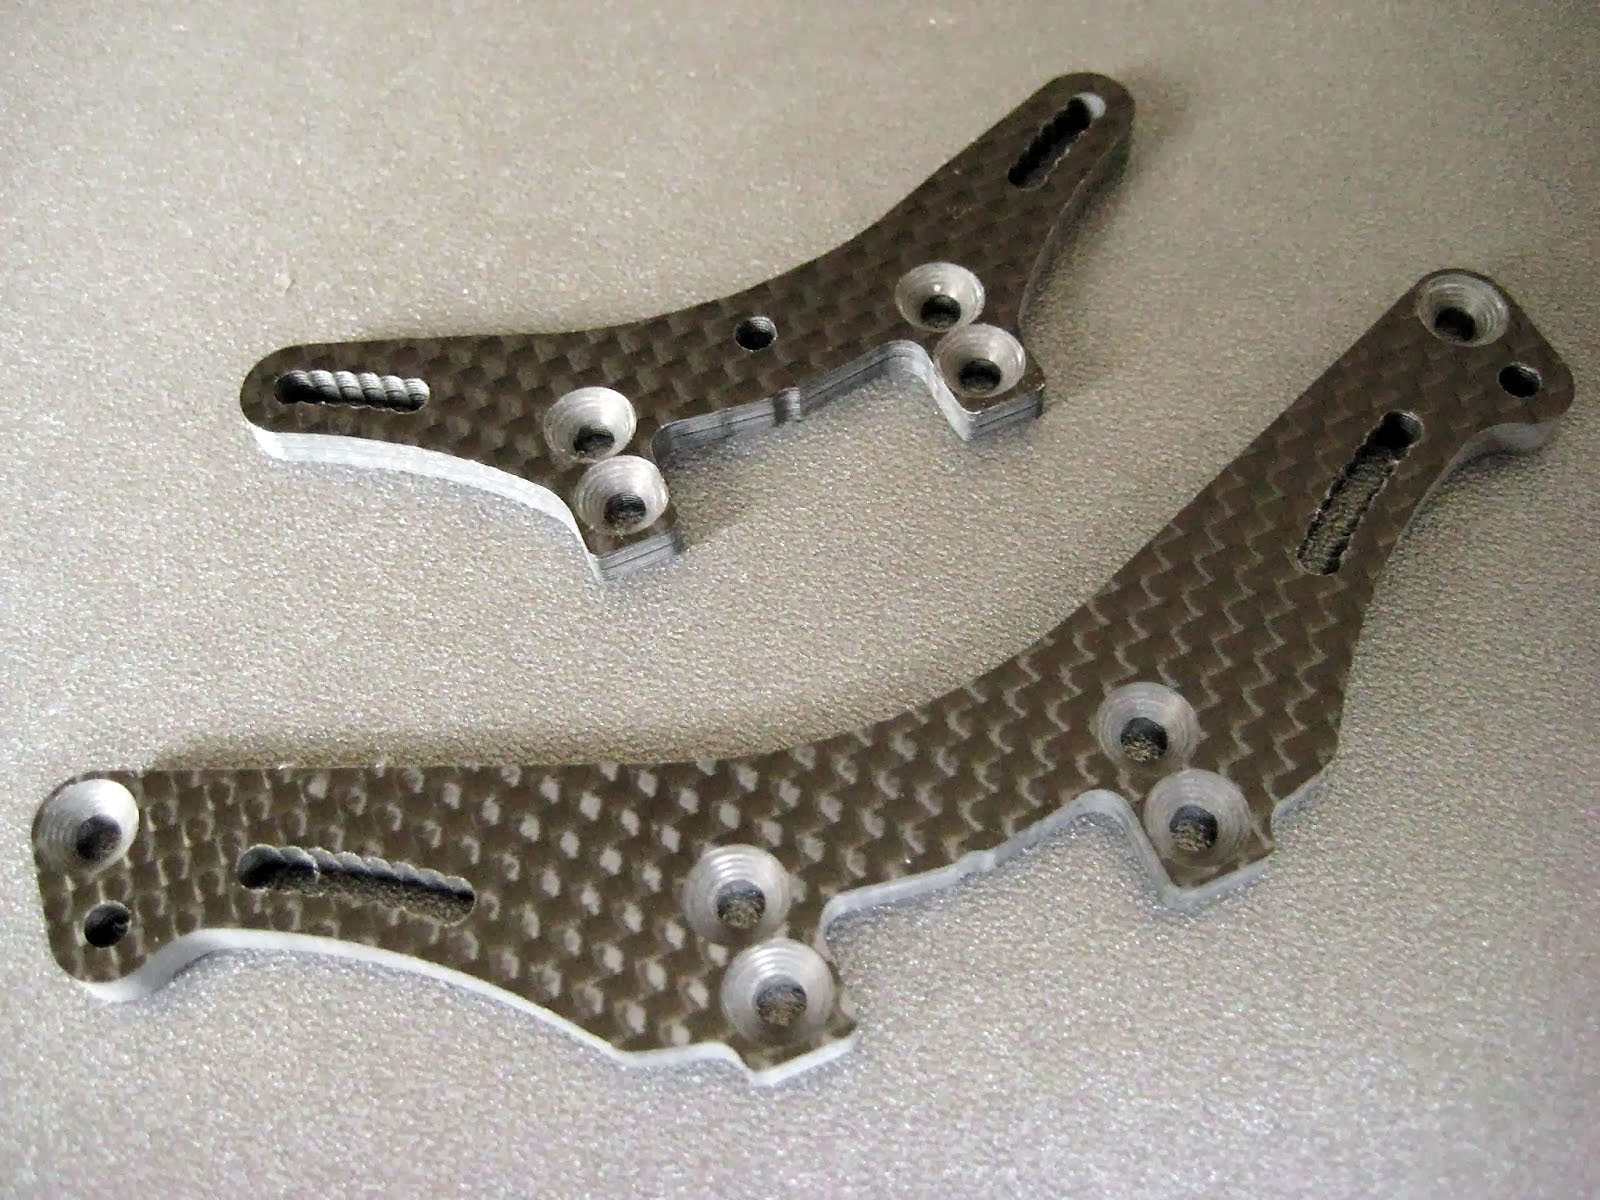
slighty revised top mounts, with a machine screw for the rear post.
The shock towers are new, and maybe surprisingly they are not set for low profile shocks like a lot of other manufacturers, (Or even Tamiya with the TB04 pro) They are very similar in appearance other than you now fit countersink screws to hold the rear bodyposts.
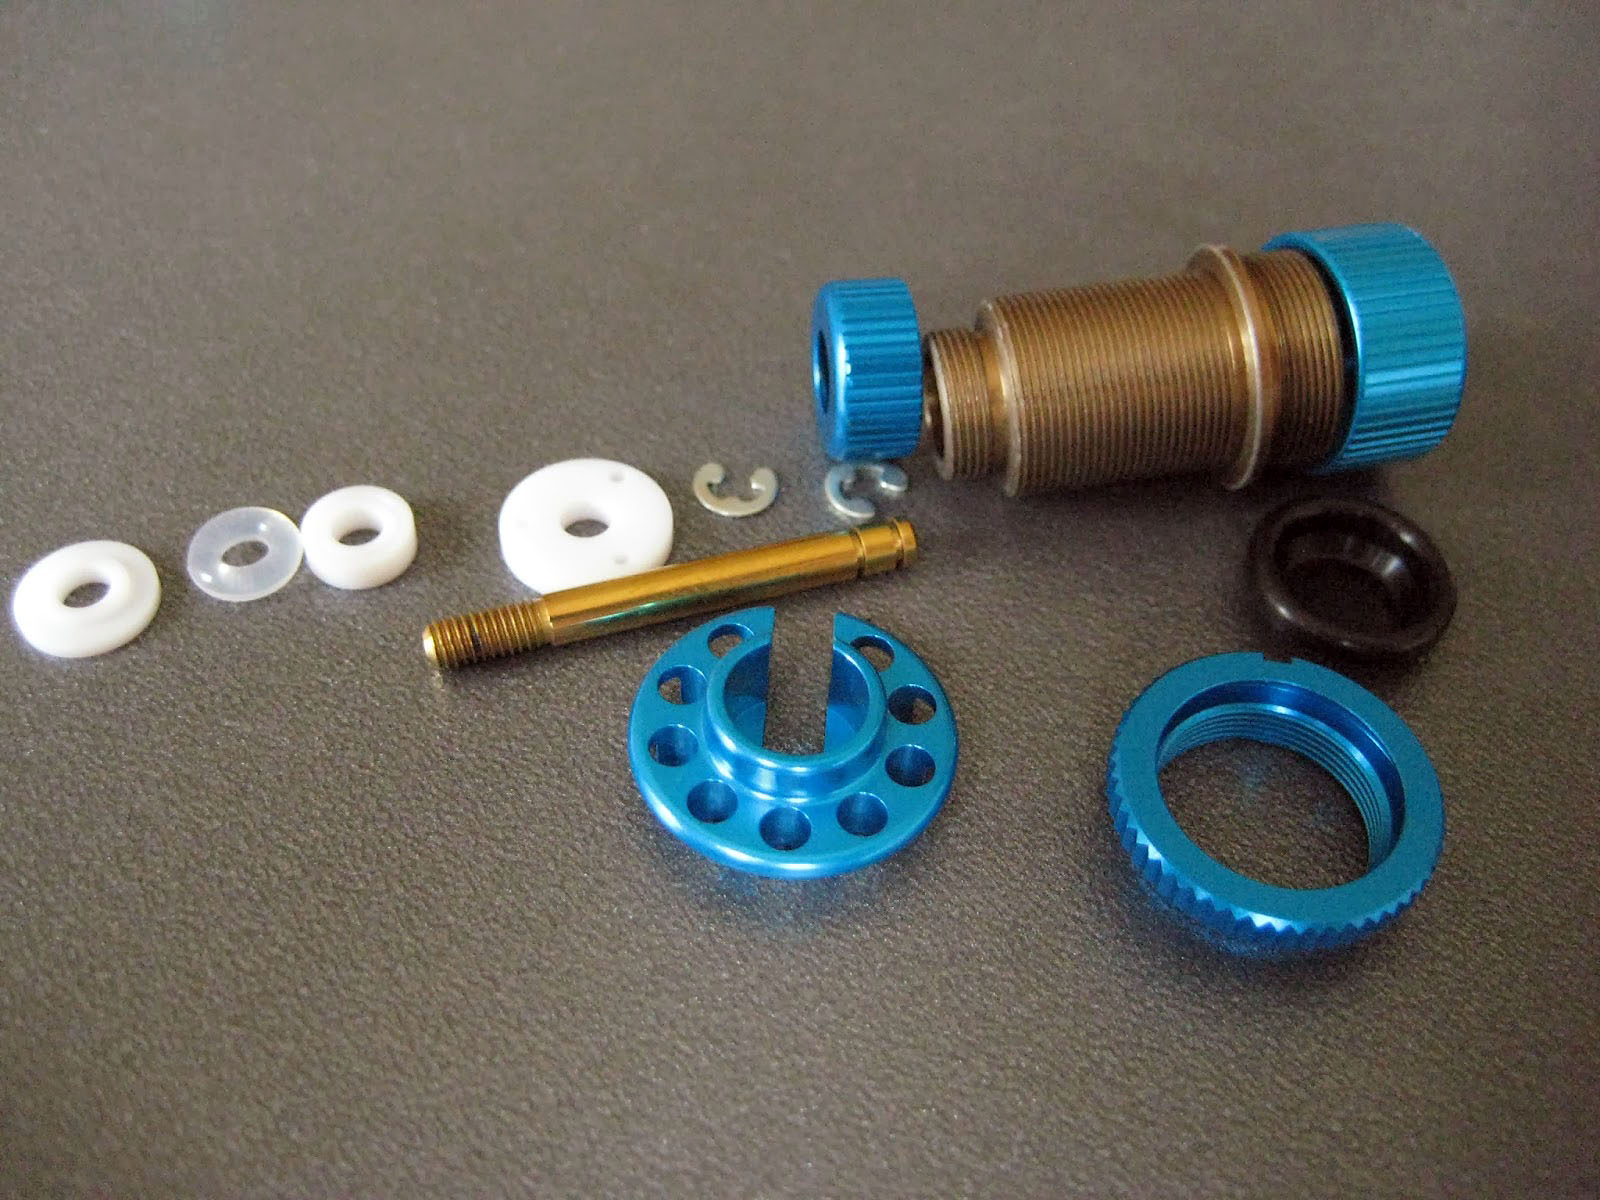
The shocks are the class leading TRF fluorine shocks. They now also come with the Tamiya 42192 TRF Damper Large Diameter Retainer to accommodate the new larger diameter springs included in the kit.
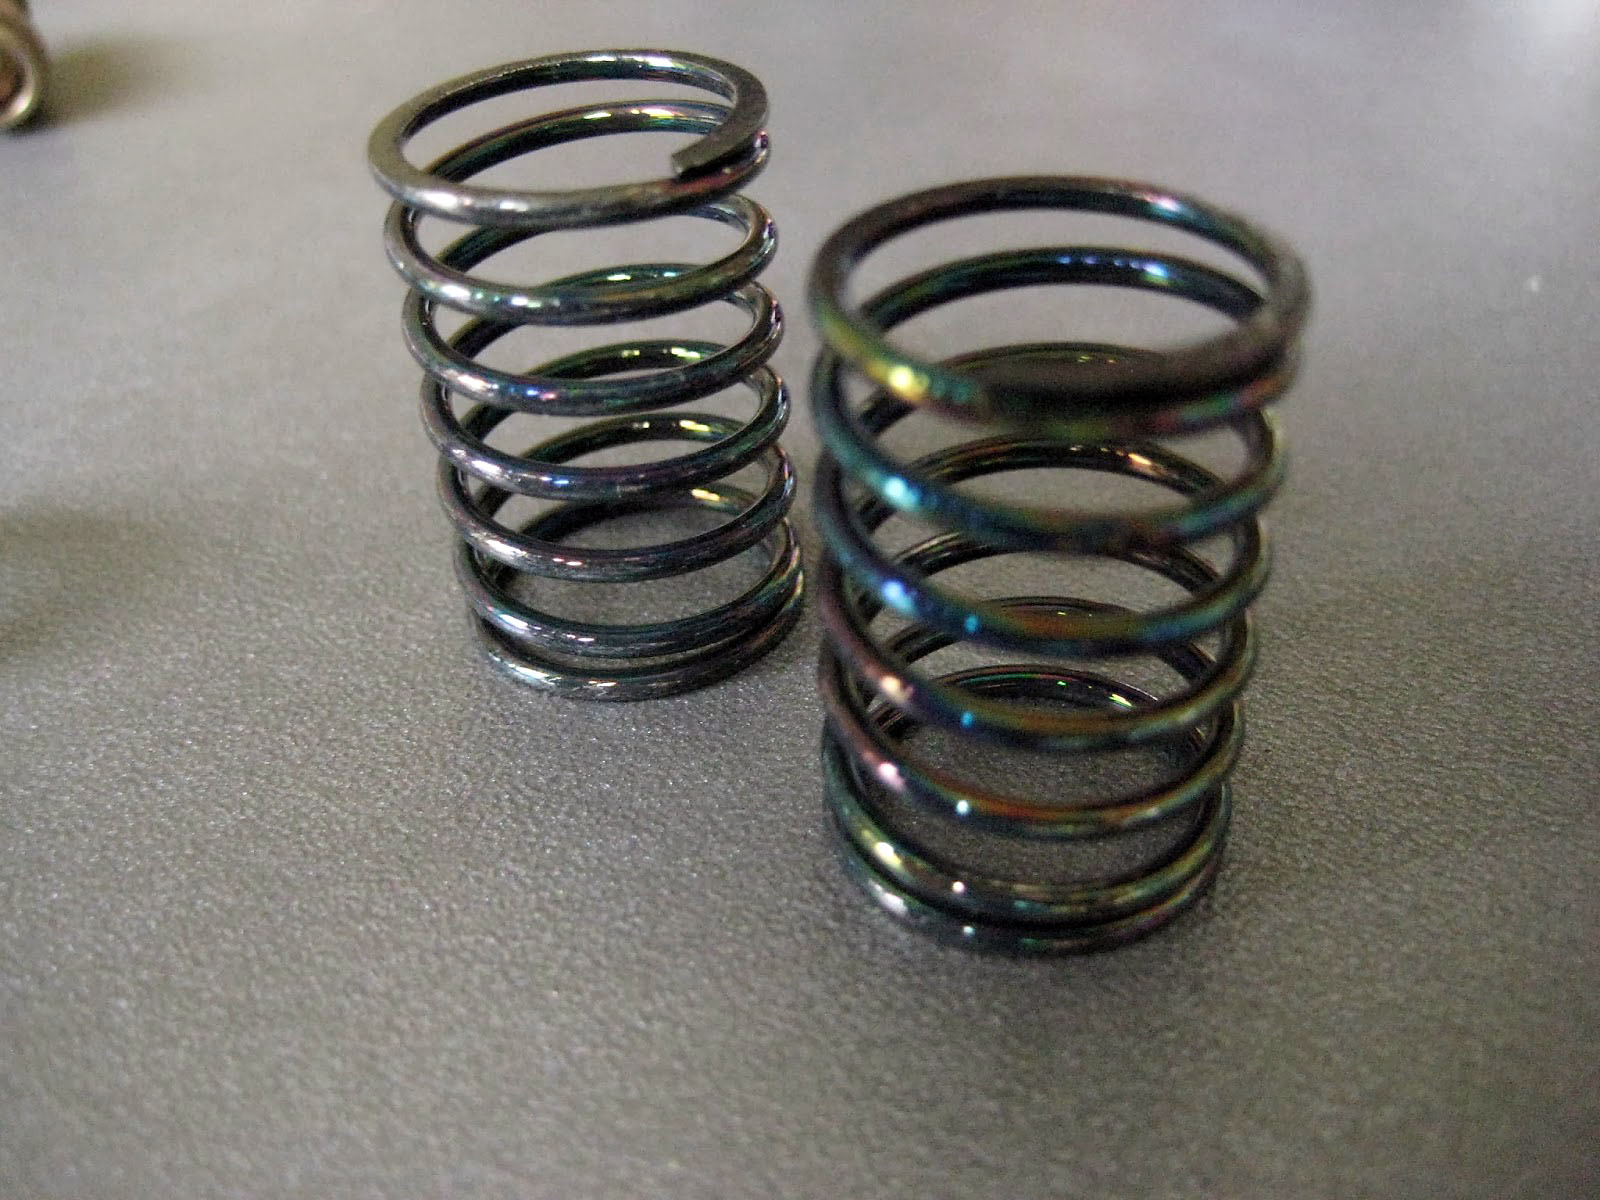
Shiny pearlescent!
The new springs are the same size as the popular Ride / Yokomo / HPI etc springs. Tamiya includes front and rear Medium (Black) springs. The bonus springs are 2x Hard (Yellow) and 2x Soft (red). Quite why Tamiya decided to change its colour ratings is beside me, but as a point of reference the hard springs are similar to HPI silvers or Ride Reds. Personally, I do not know if I will use these springs much.
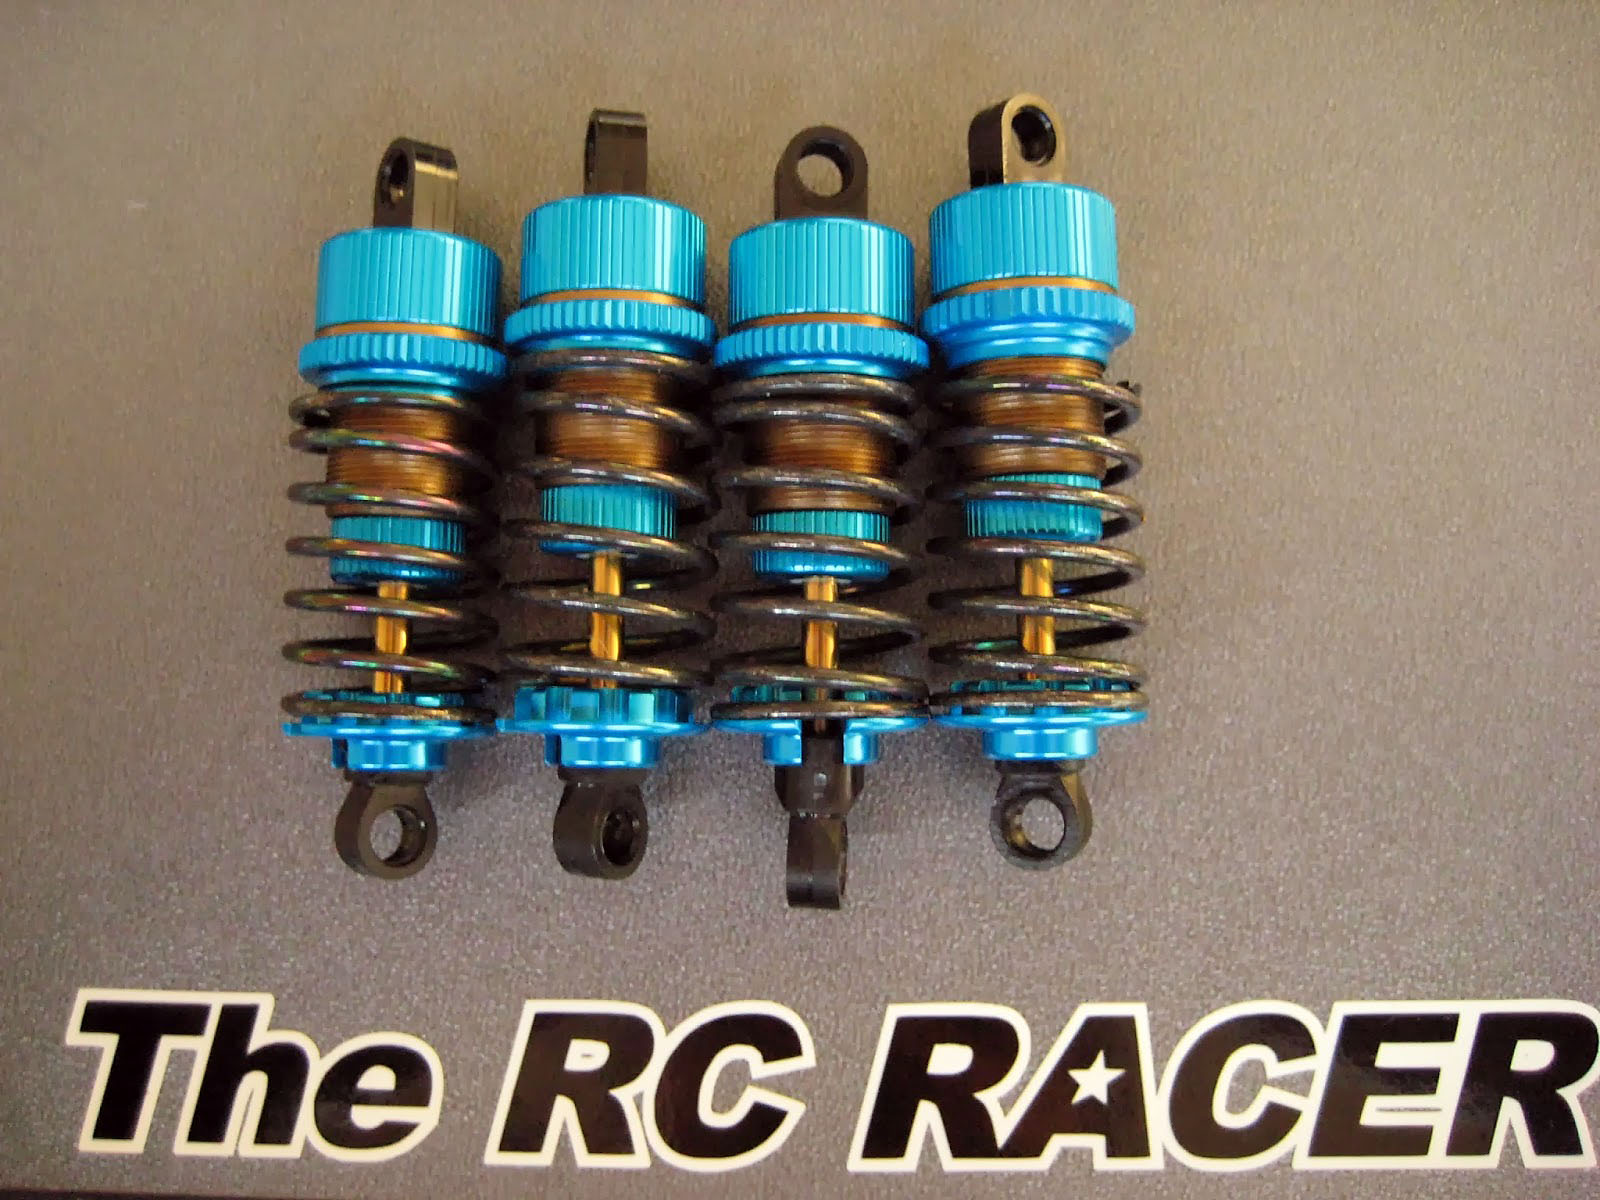
Needless to say, the shocks fit together superbly, and the result is a very smooth set of shocks.
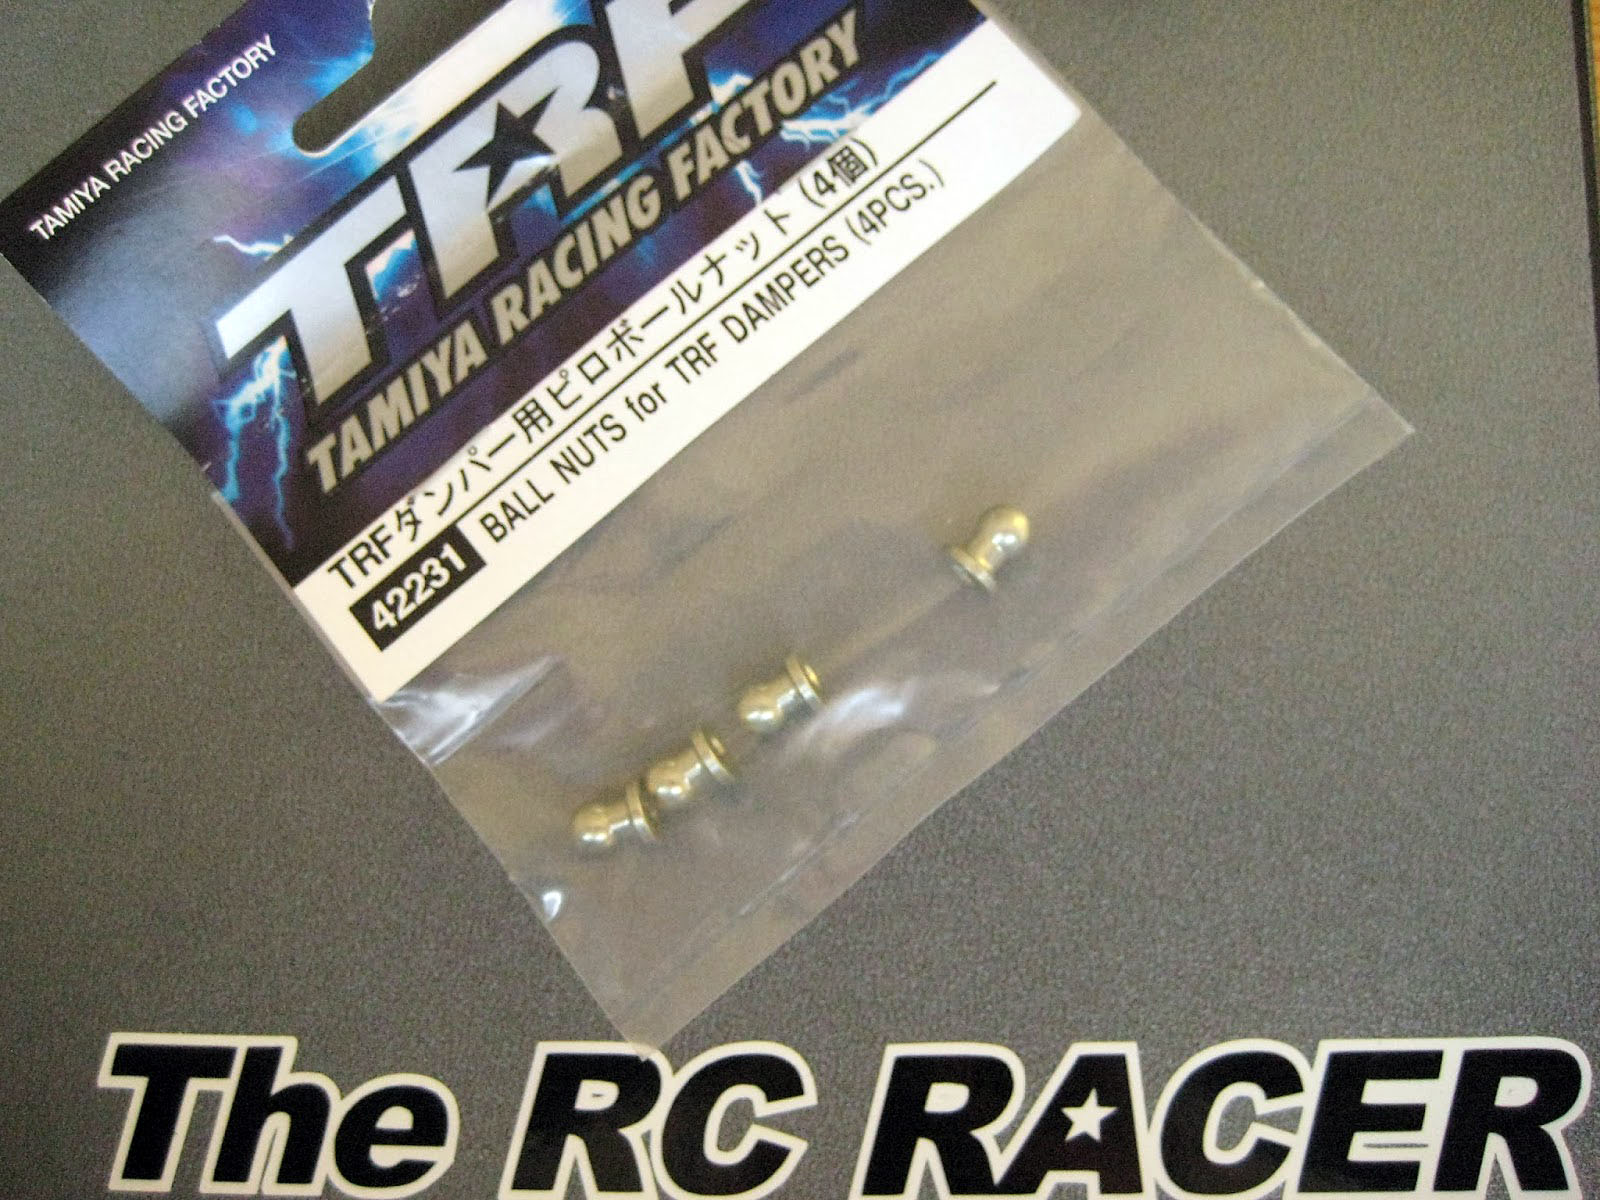
I used the Tamiya 42231 ball nuts to attach the shocks. These provide a smooth action, and you also ensure that you do not need to pop off the top shock eyelet every time you want to change the shock postition, which can in turn lead to slop over time in this part.
Smooth action, the shocks all fitted :)
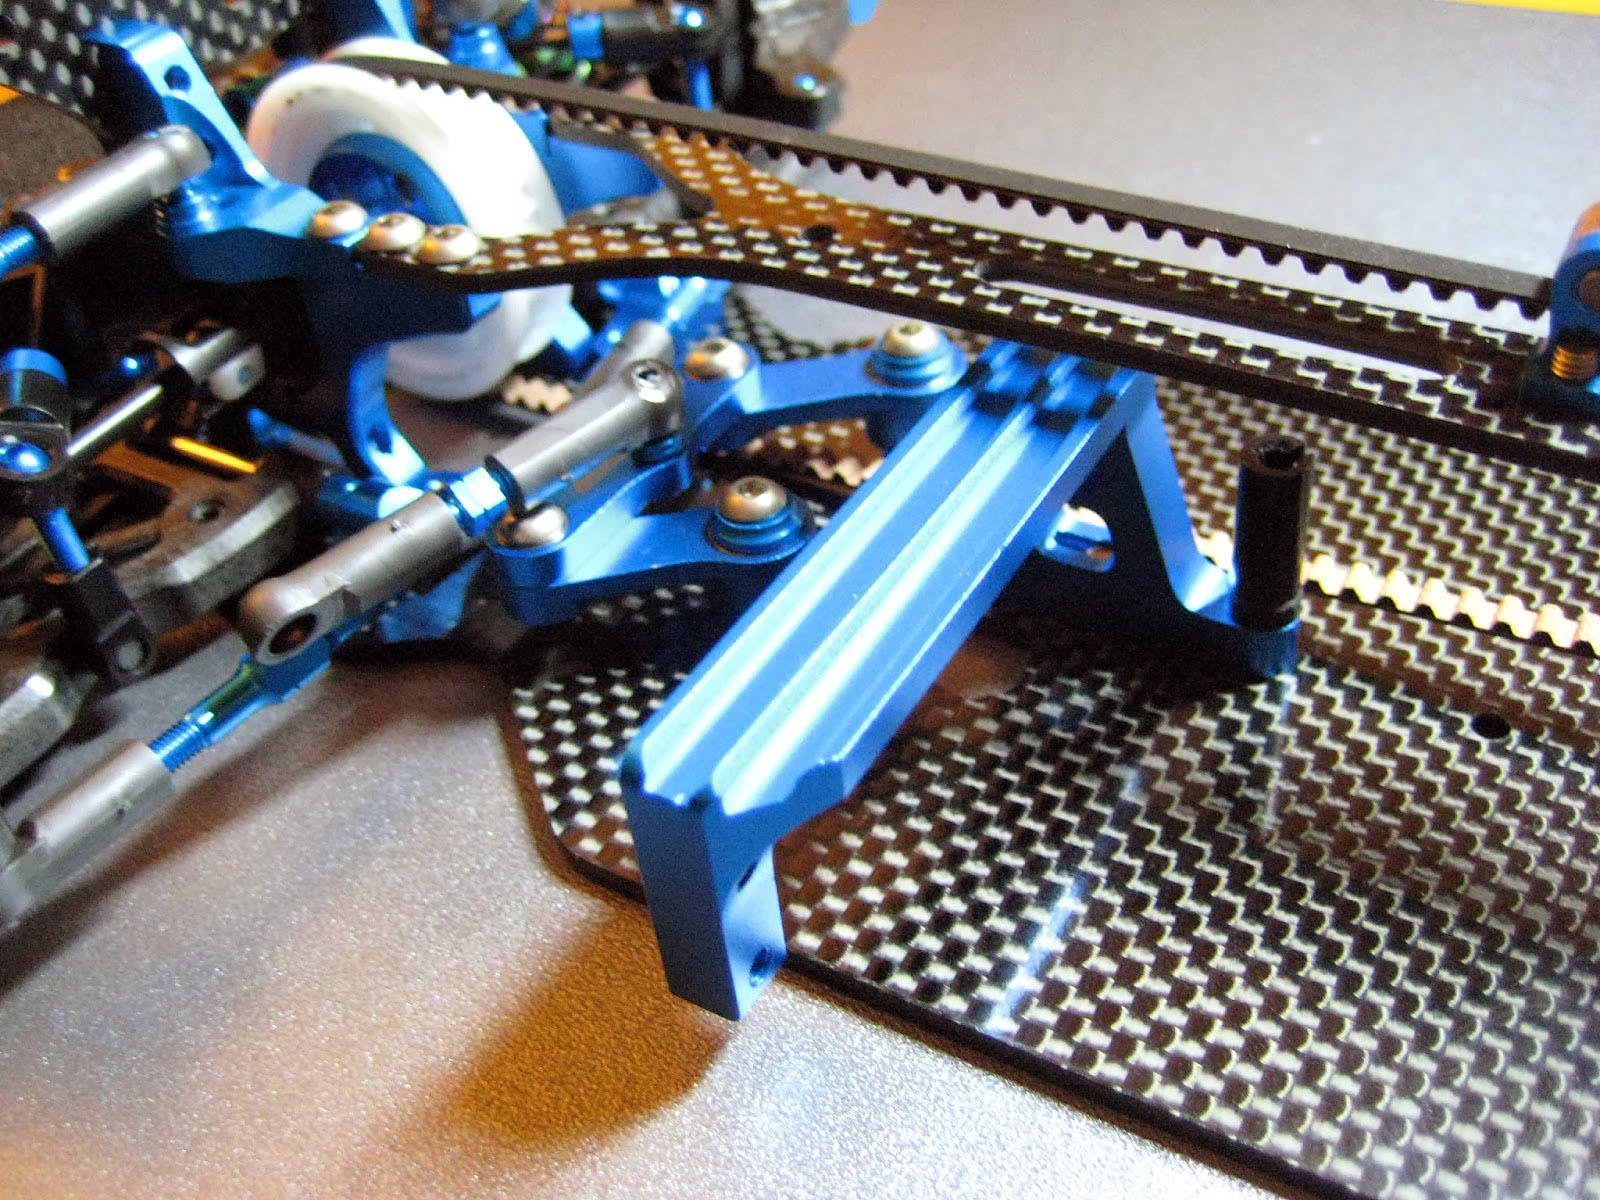
Stages 25 - 28 Electrics
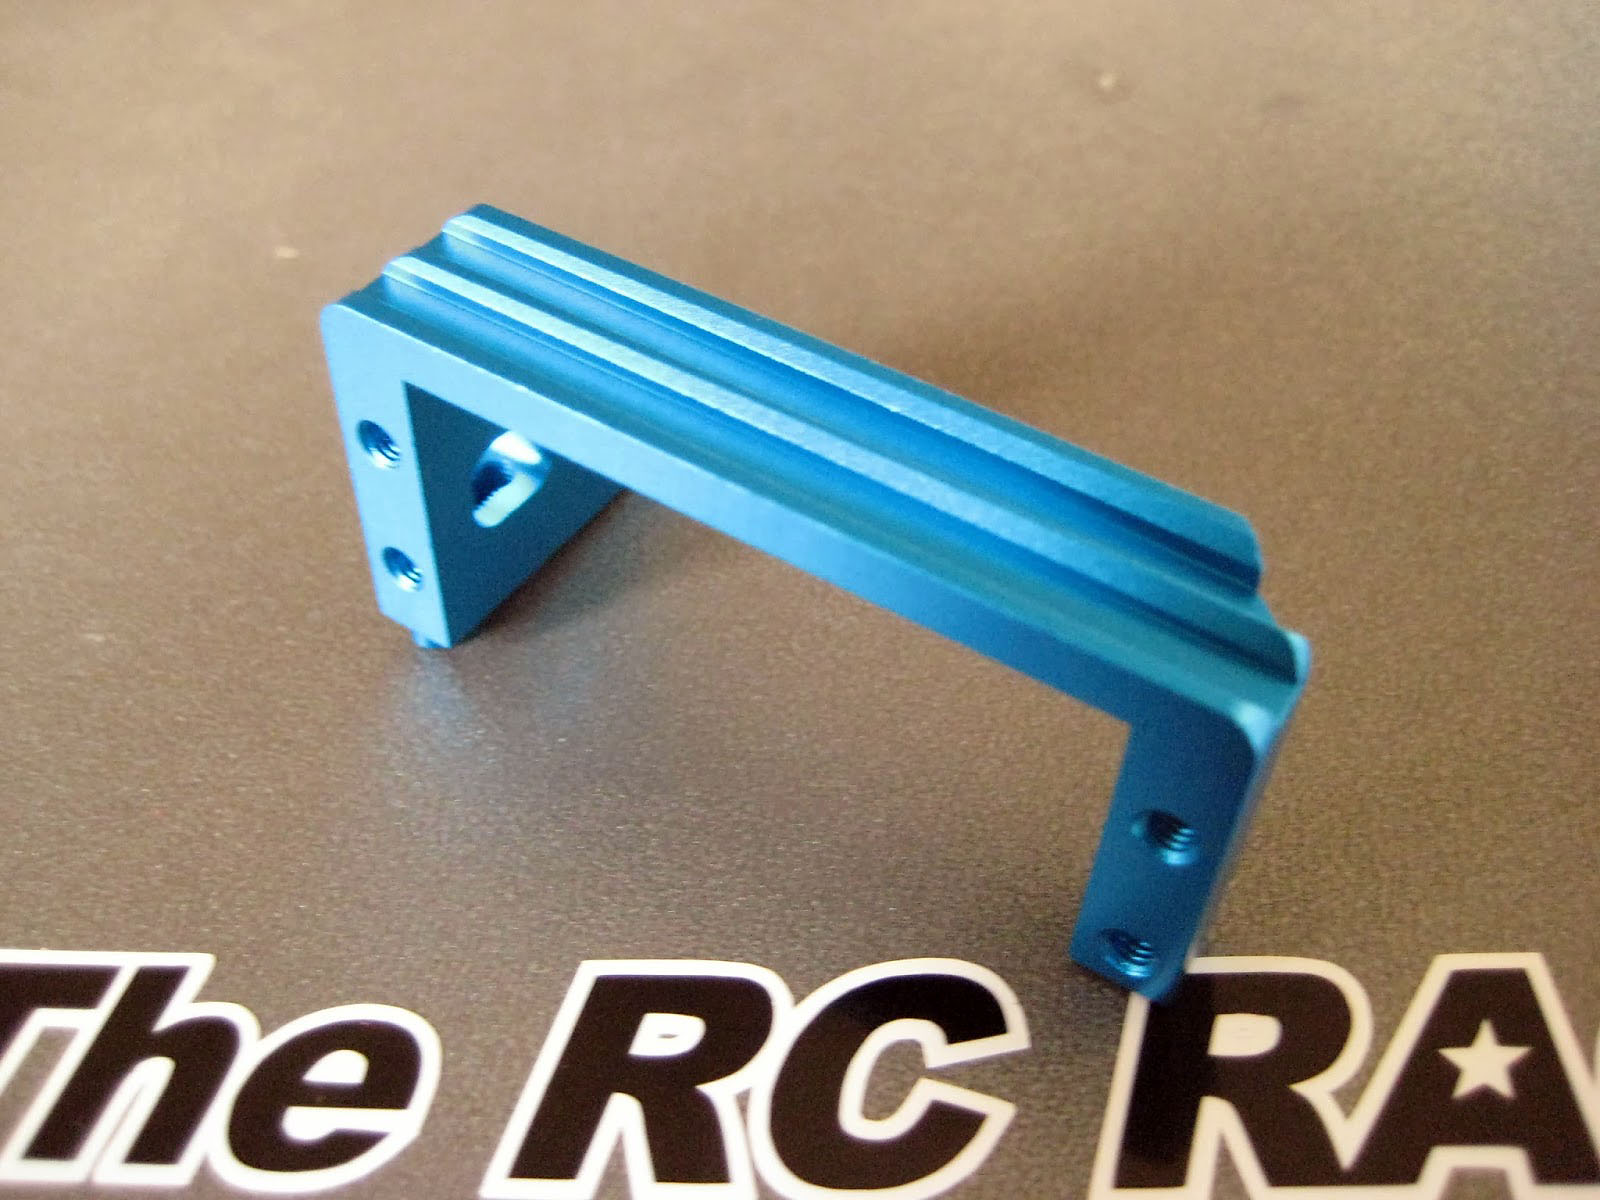
The new floating servo mount is 6 grams lighter than the previous mount, and in fitting with all the other parts of this car any unnecessary piece of aluminium is removed. This does give it a strange ribbed effect on the top section, not nearly as attractive as the mount on the TRF417v5. You can fit that part as the mounting holes are the same (I have a spare, but I will not fit it as I want to see how light the final car is).
With a new car I decided to treat myself to some new electrics
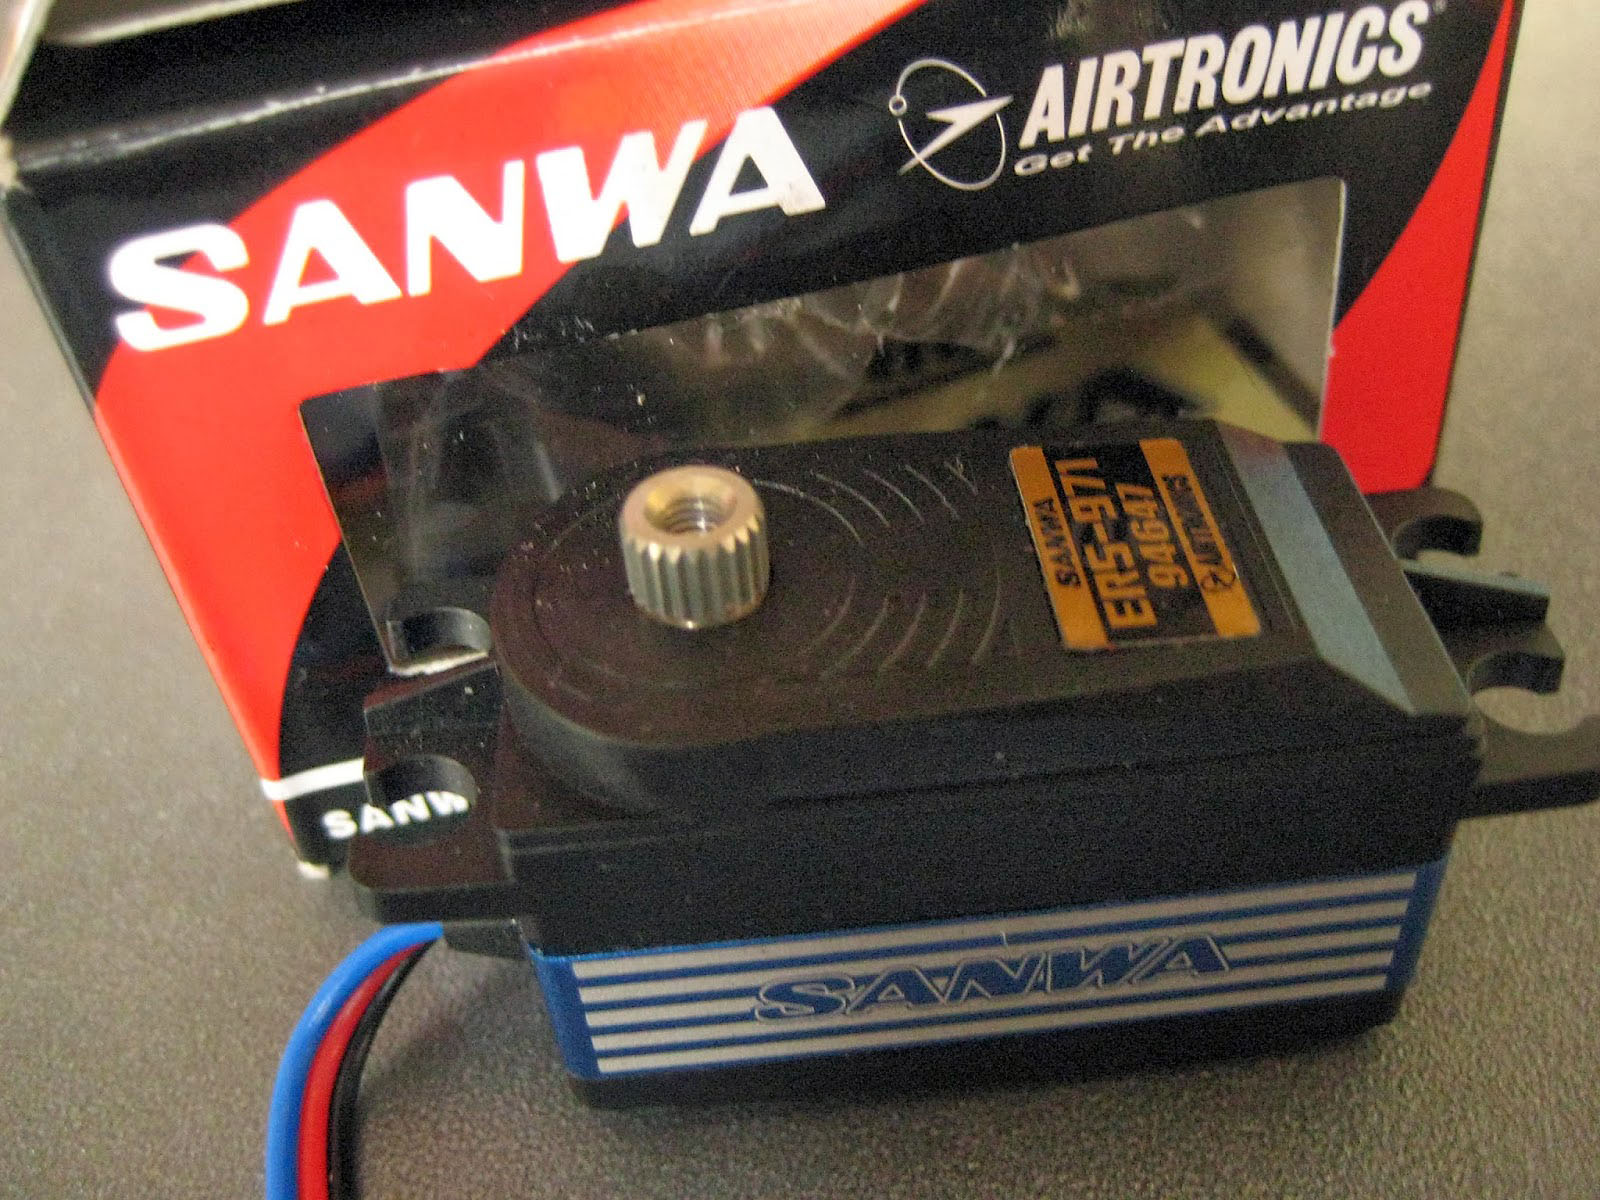
The Sanwa ERS-971 is great for the price, fast, waterproof and also quite light.
Muchmore Fleta Pro. I have been hearing some great feedback on these ESC's and that has been backed up with some impressive results in Rug Racers so I decided to take the plunge.
TIP - Steering Throw
On the servo I used the Tamiya Aluminium Direct Servo Horn #42249. However using the kit included servo saver and mounting it on the instructed hole will give you some trouble if you want maximum steering throw. The hole on the servo saver is 16mm and you need it to be 18mm. As mentioned the horn that I use is 18mm, but if you want to use the kit servo saver to get full lock, you can use the outer hole as that is higher, otherwise or look for the 3 racing aluminium part that will fit on the included Tamiya servo saver (here). As a point of reference I get 40 degrees of steering on full lock. I would never use all of that normally.
I used a3mm shim to extend the arm to make the steering feel more direct
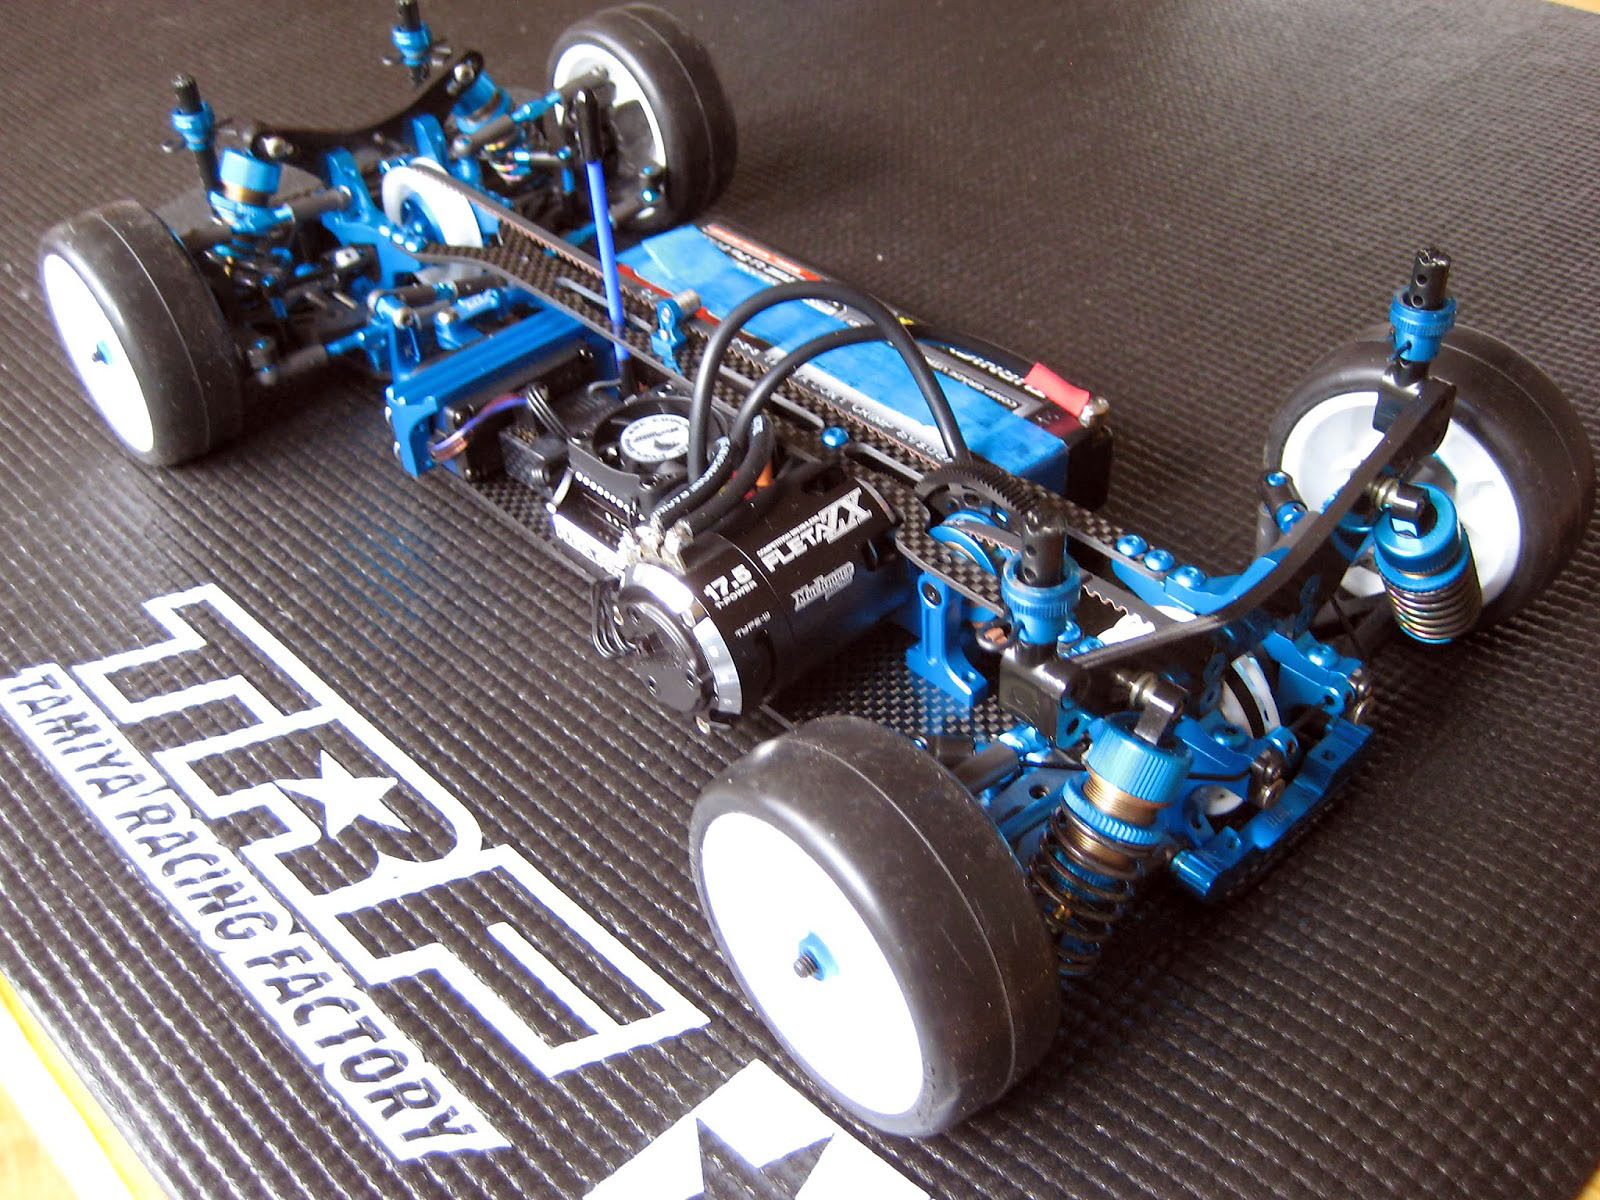
Now before I fit the motor, I just want to let you know how free the drive train is on this car. I have never built a belt drive car that spins so freely. It really is something else, and shows how the tolerances and fit and finish is spot on for this kit.
Lots of motor mounting options
The motor fits fine, and there are a fair few screw holes to mount the motor conveniently no matter what size or type of spur that you use.
Final Stages
Once the motor is fitted, all that is left is to add the bumper and bodymounts.
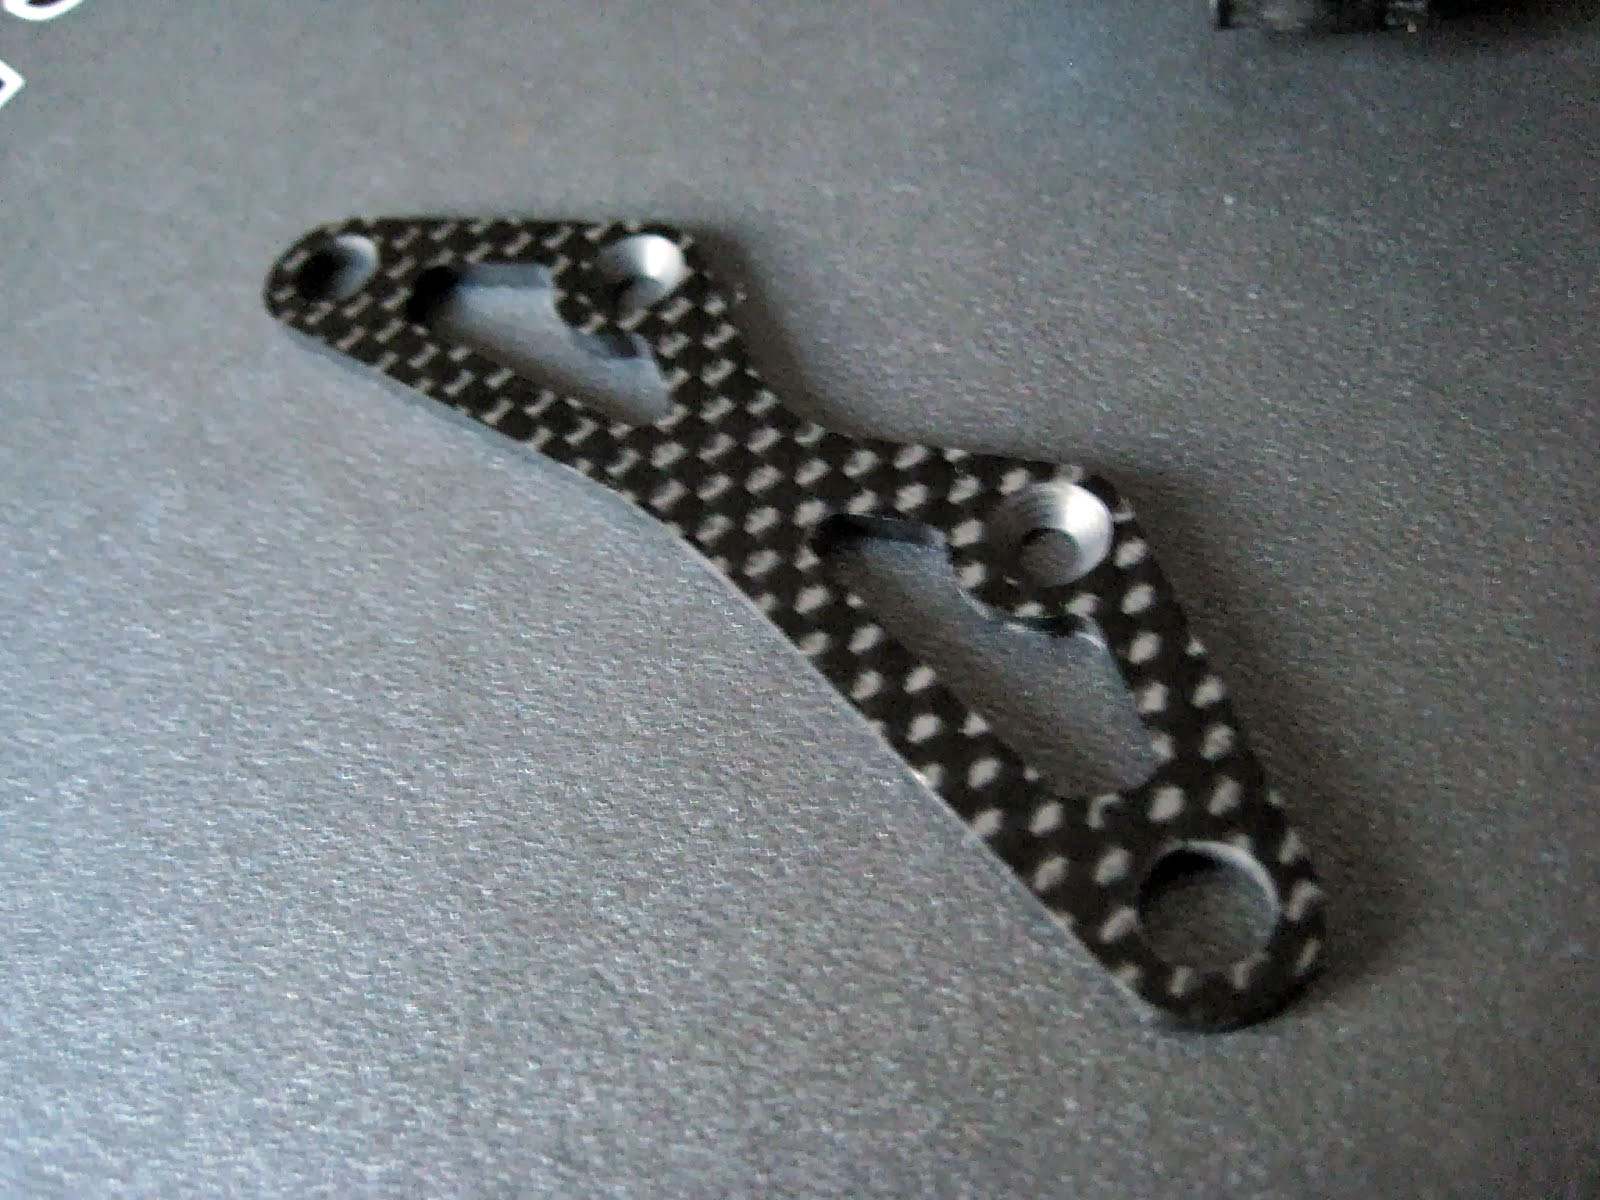
The bumper brace is the same fitting as before, but now with countersunk holes
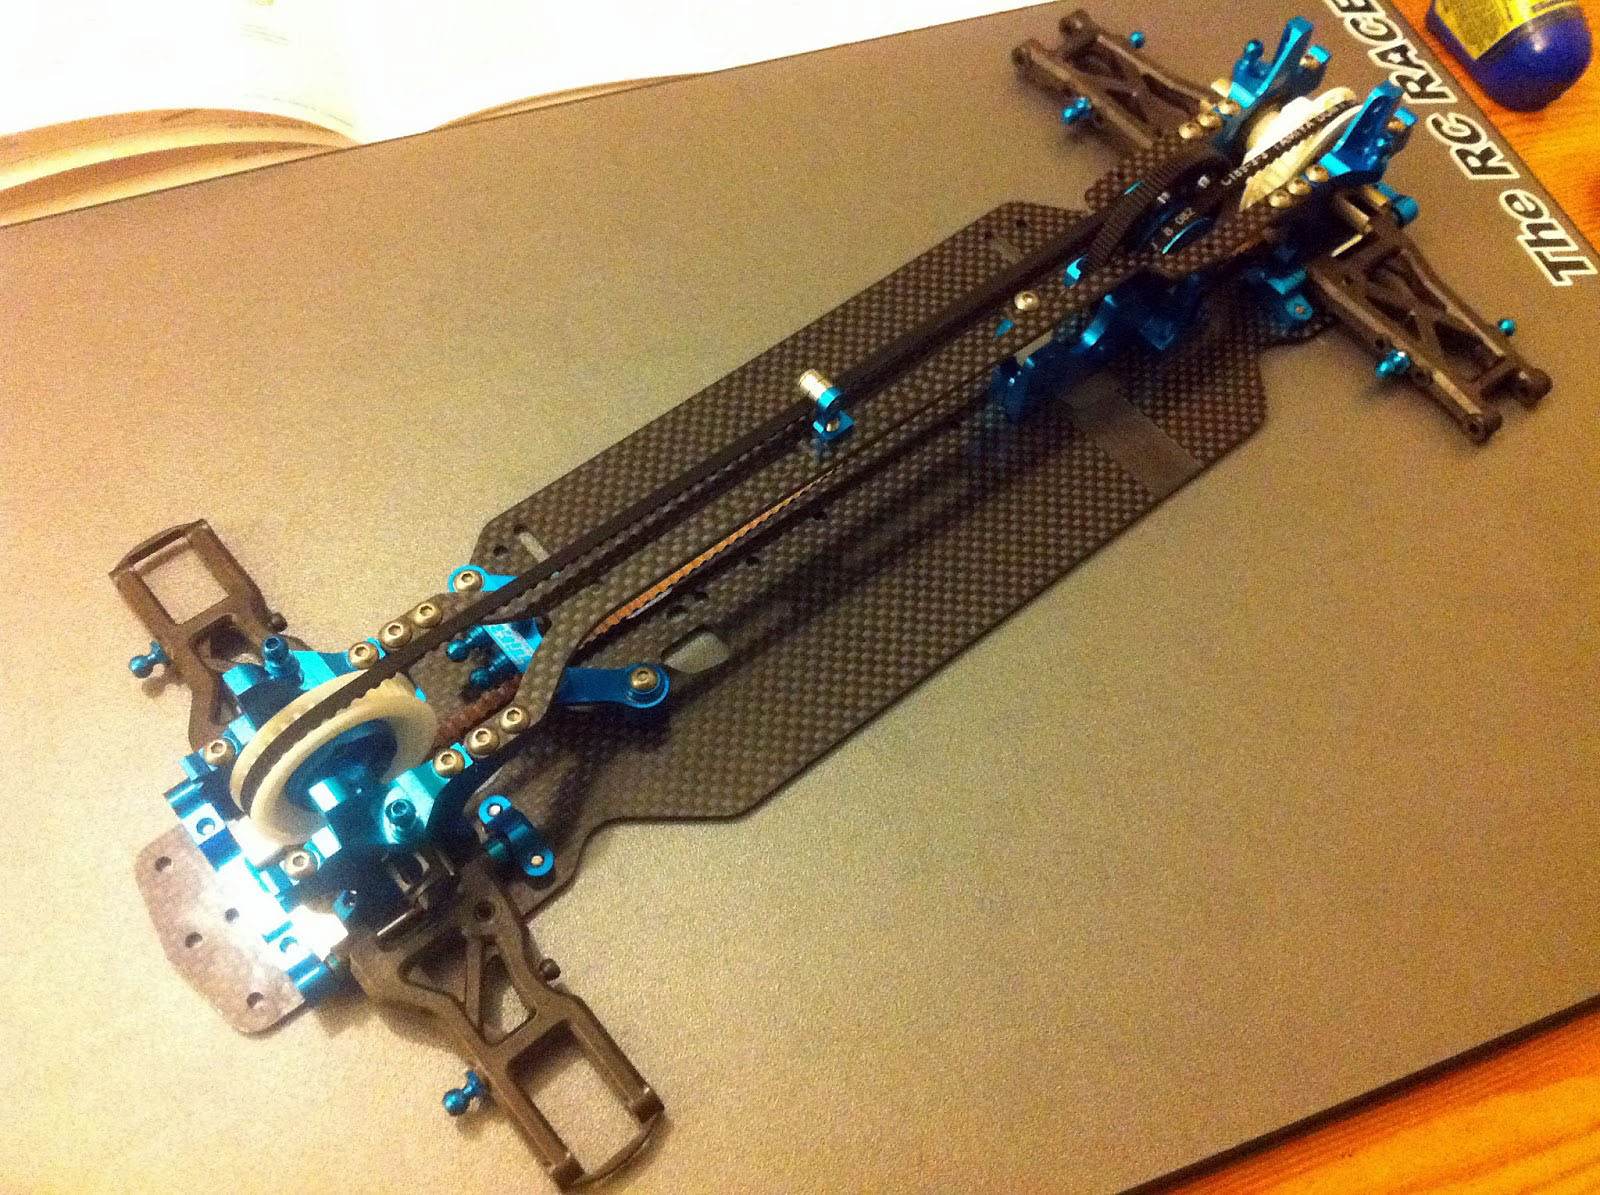
Final Result
Here we are, the final car ready for the Track!
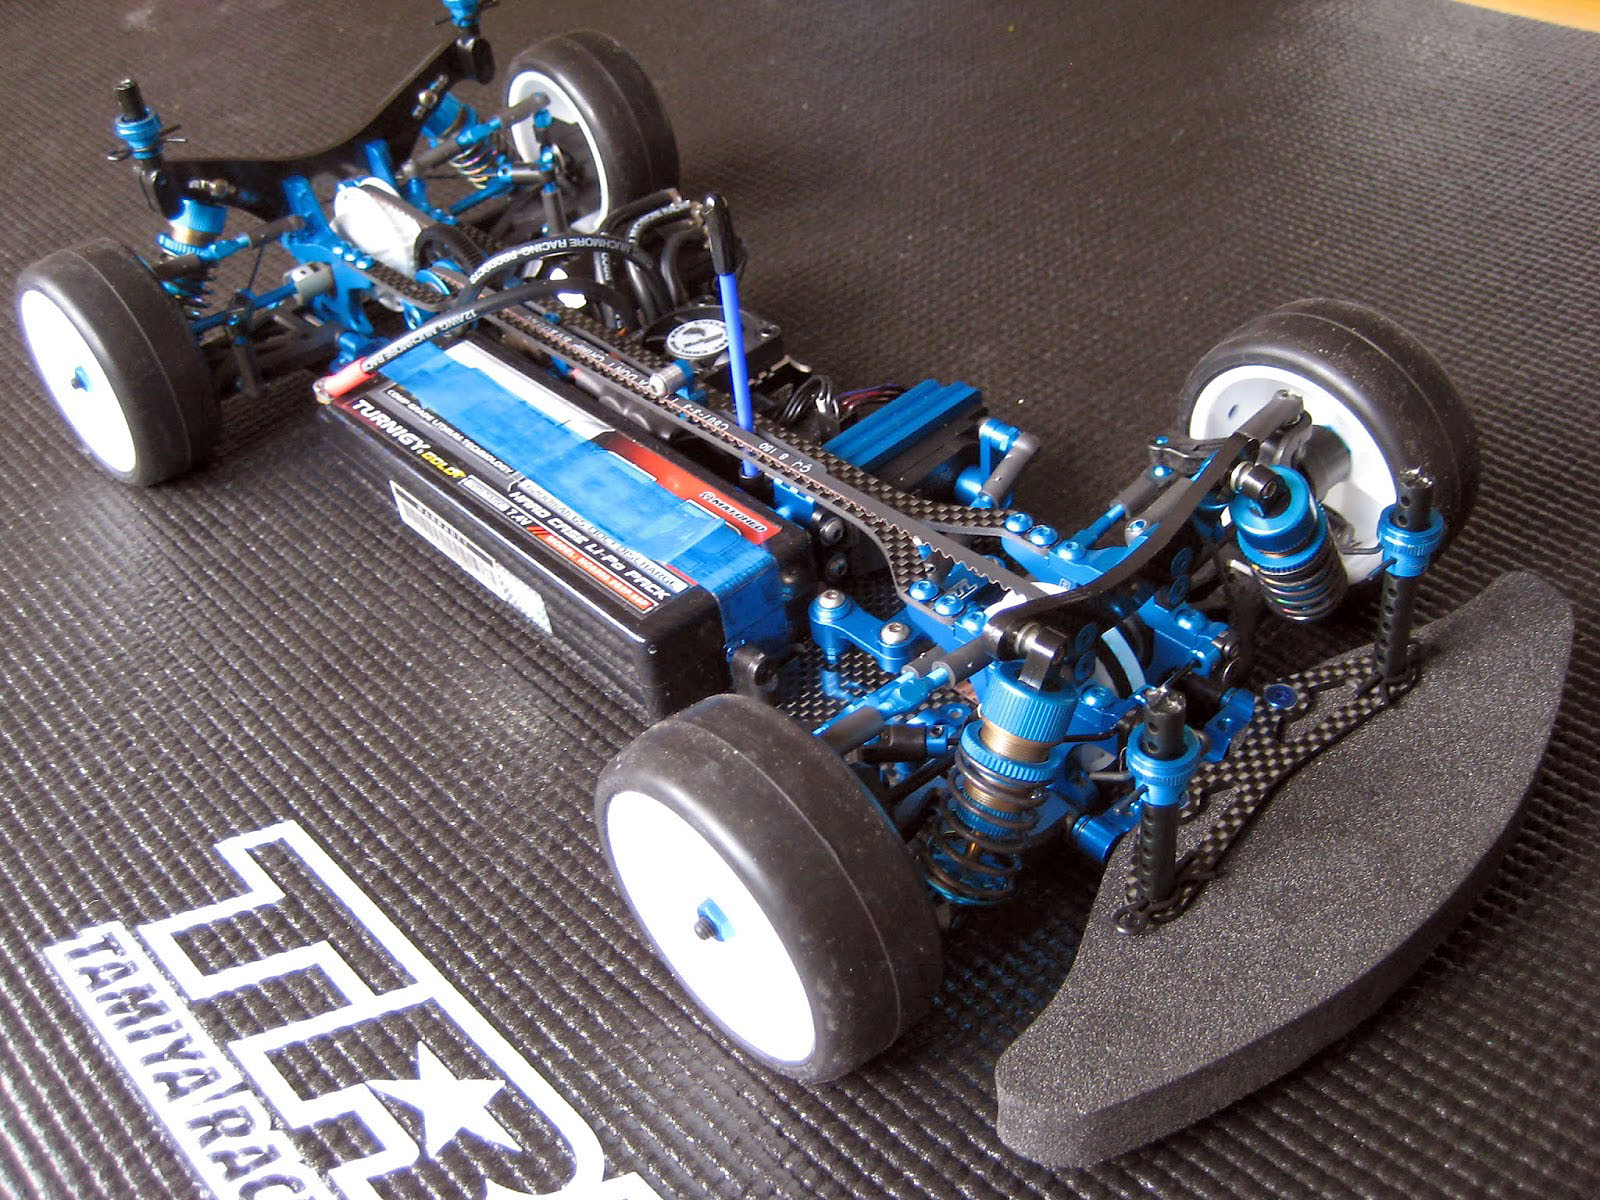
Note mount the battery mount vertically to fit in a lipo (the instructions do not show this)
As you can see I used the Tamiya 42245 Aluminium body mounts
Track Test
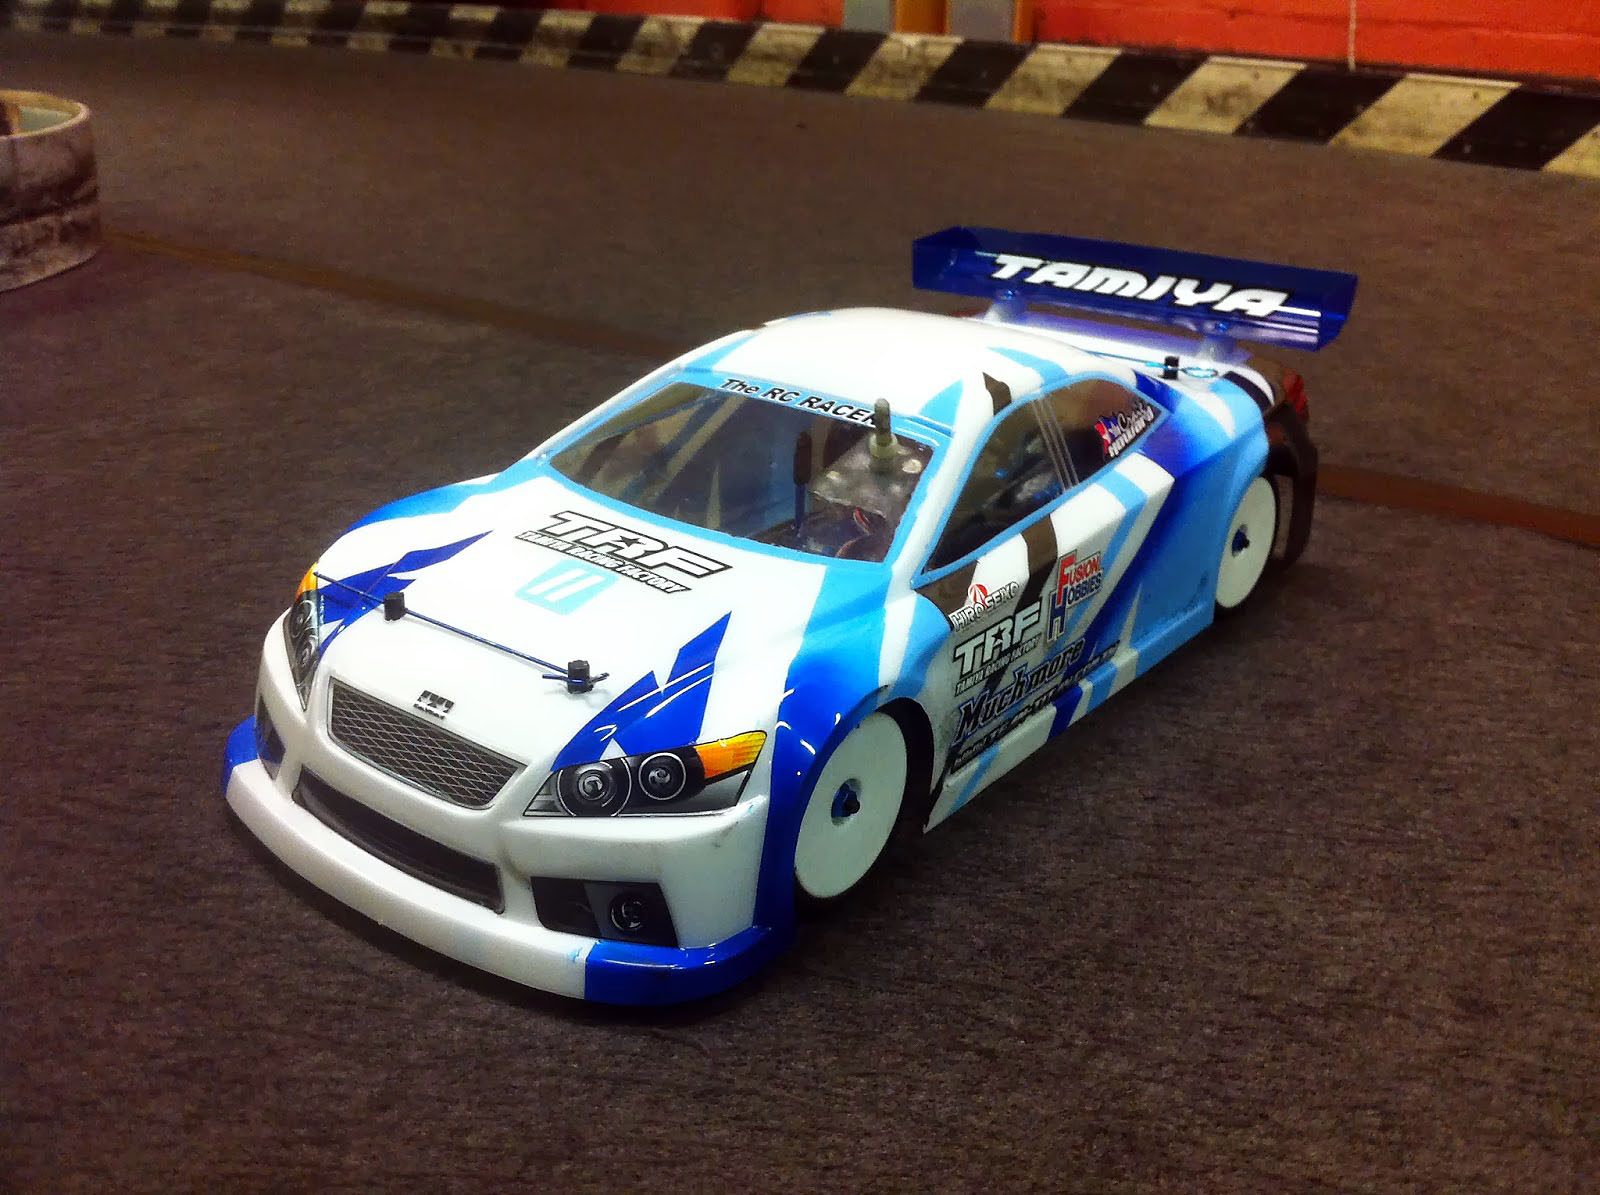
The track was a tight indoor circuit with very low grip carpet. I was running 17.5 blinky against the other top club driver’s all with 13.5 boosted cars.
Ready to race with the Blitz TSX shell
I didn’t have any practice time to even give the car a spin and check everything was ok, so I had to just enter into the first race blind.
As I raced it around on the installation laps I noticed instantly how the car has a much more calm rear end than any recent TRF that I have driven, although it could also have been the minty fresh Sorex 28’s that were also fitted.
I stayed at the back of the grid for the first race, not really confident of what was to transpire in the race. However once the race started the car charged ahead on the main straight and I was already in third. The Fleta was really smooth, and the ZX motor was very punchy.
The first corner was the fastest corner on the circuit and the car was responsive to turn in, however as I was approaching the apex it did want to over-steer a little, which was quickly remedied by gently reducing the throttle and the car came back in to grab the apex.
The steering on the slow corners was very impressive, especially when the tyres started to warm up and become scrubbed in.
I was also running the Tamiya kit springs as I wanted to test the kit set-up first (Yellow front and black rear), I did expect them to be a little soft to what I was used to but they were pretty good on this surface, and the car was really easy to drive, if anything it was too easy as the car didn't have the crazy amount of rotation that I like on my cars.
Trying to keep the car off the boards
The car just cruised on and i managed to finish just one lap down on the top 13.5 driver. That’s impressive for a car that’s running a blinky motor and was literally put down on the track from the bench.
Next up I was able to get to the Blackpool RC car club for some practice and some racing.
The track is an excellent permanent circuit, with a group of friendly guys always willing to help. I had got early for some practice track time. This track has a lot of grip, much more than my regular club night. I was still running the kit set-up and even the kit springs, although I changed my tyres to a set of Sorex 32's.
The car again went very well, and the rotation was actually really good on the car, however it was rotating a little too much past the apex and on the exit of the corner. The car was fast, but this level of rotation can make it harder to keep the car consistent for lesser mortals like me.
I moved to some harder springs, and the car was still able to carry the speed but the rotation had calmed down a little more and I just ran the car around the track, messing with lines and seeing how much throttle I could keep applying to the car until it went over the edge. After running my 6200 mah down I sat down with a big smile on my face, this car didn't feel like an evolution of the 417, it really did feel like a big shift forward.
Now on to the races.
I left the car with the minor changes as I was keen to just race it. The first race went very well, and I comfortably managed to keep my car ahead and get a very consistent race with only 0.4 seconds between my best and average time.
For the next race I was keen to reduce a little more of the rotation. I was still keen to reduce the rotation just a little more. So I played around with the settings a little more (just shock positions).
In the second race, the car was quicker, and reduced the gap a little on my average time, I decided to change the settings quite radically for the last race, to a thinner rear set-up and different roll centers. The car felt a little fuzzy on the initial steering but it was good, but the set-up just didn't seem to feel as direct as I want a car to feel. I still managed to win the race, but I didn't improve my times
For my final I decided to change the settings again (Dangerous I know). So I moved to a different set-up trying to get the car back to how I like it, and hopefully with the potential to brake the 12 second lap that I had set as a goal for the day.
So for my final, the car was ready, and the new set-up had really made the car handle how I like it, I managed to take first in my final, and importantly I had also broken the 12 second lap time that was the goal I had set for the night. Find enclosed my set-up here.
Setup
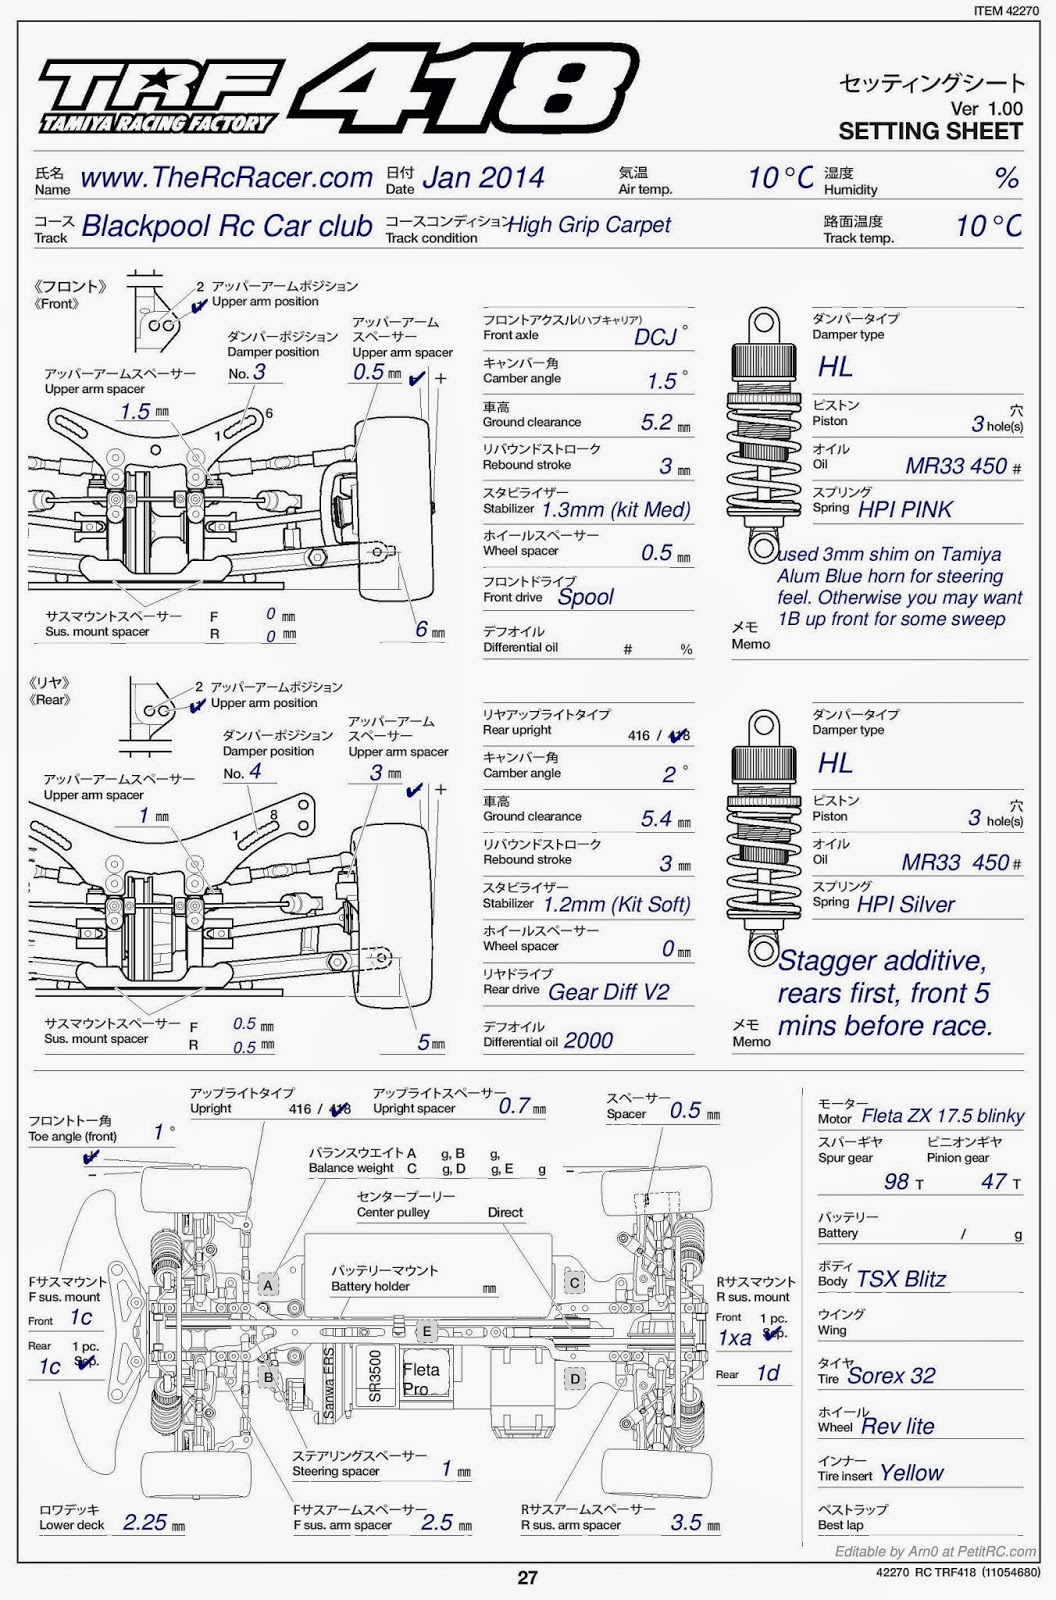
Thanks to PetitRC for the editable sheet
Speaking to Andy Murray at the club, he recommend if I had a thicker roll bar I could also try that if I felt the car was rotating still a little too much, or possibly HPI golds up front. If the grip got higher I would fit HPI silvers to the front as well.
Overall
Here are the pro's and cons
Pro's
- Amazing fit and finish
- Very free drive train
- Strong
- Lots of chassis flex options
- Lightweight and strong
- Double cardans are included in the kit, not an option
- Comes with a range of spares in the box
Cons
- The lightweight front spool uses shaft protectors that can break in a hard collision (cheap part though)
- The shafts are not fluorine coated now
- No detail on the included spring strengths
- Conservative changes compared to some of the competition
The 418 is an excellent chassis, and it handles much better on carpet than the 417 ever did. The car has very positive handling with much more grip than the 417 ever had. Team TRF has delivered a true contender to battle for victory in all situations from local club nights to the 2014 IFMAR worlds title.

TRF418 gets an A*
Source:

|
