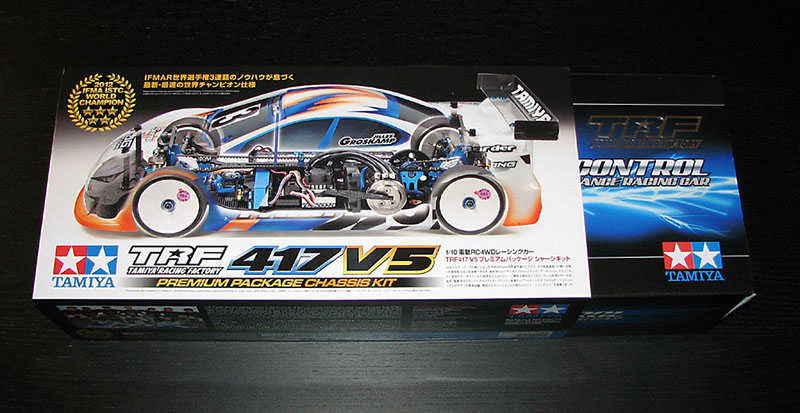
The TRF417 V5 Premium Package Kit started its life named the TRF417WX, but was renamed the V5 about 2 months before its release to commemorate Tamiya's TRF teams fifth ISTC win at the 2012 IFMAR Worlds. This release - the TRF417 V5, is very much the car used at this race to win the World Championship with Tamiya factory driver Jilles Groskamp.
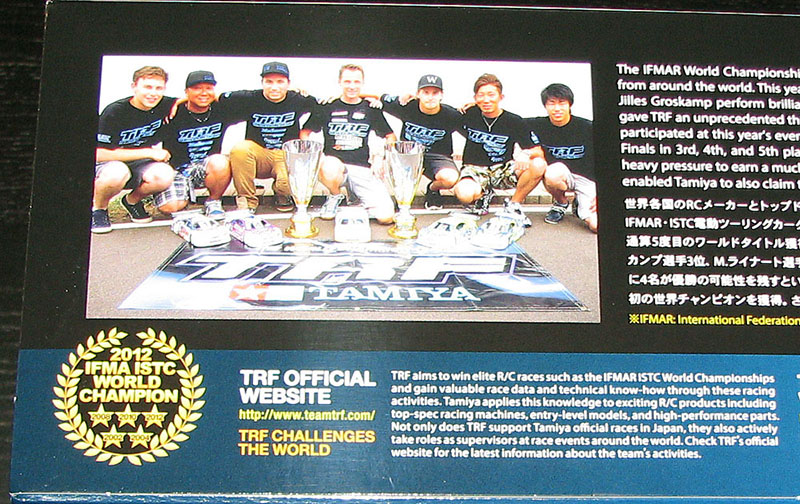
Again to celebrate this fact the kit comes wrapped in a beautifully printed package featuring Jilles Worlds winning car and some nicely written facts about Tamiya Racing Factory and their reasons for racing at this level (see second picture).
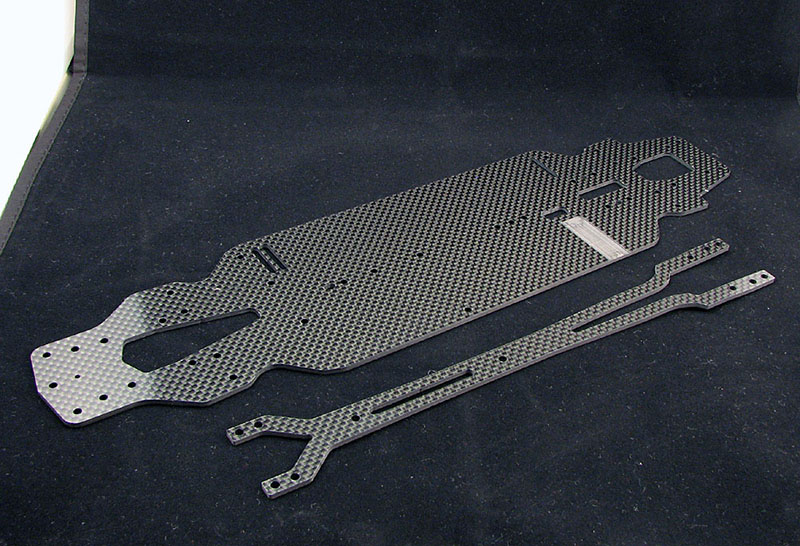
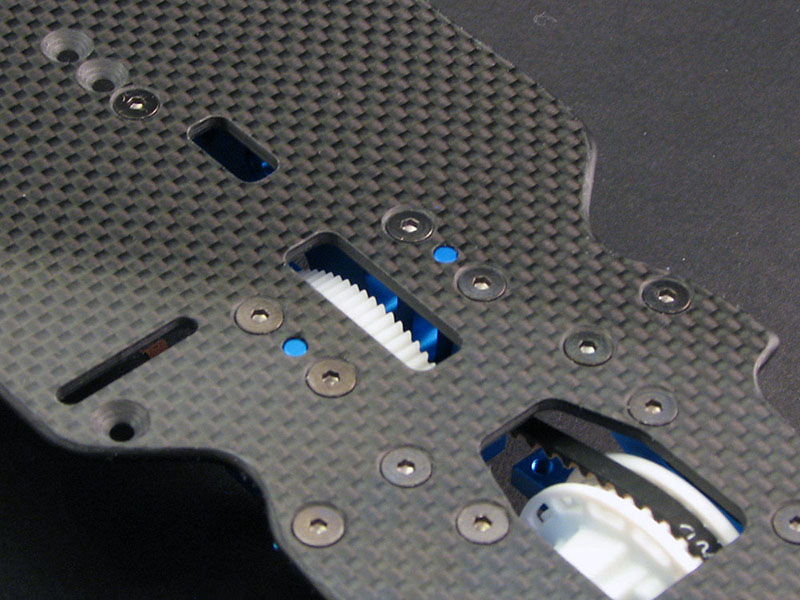
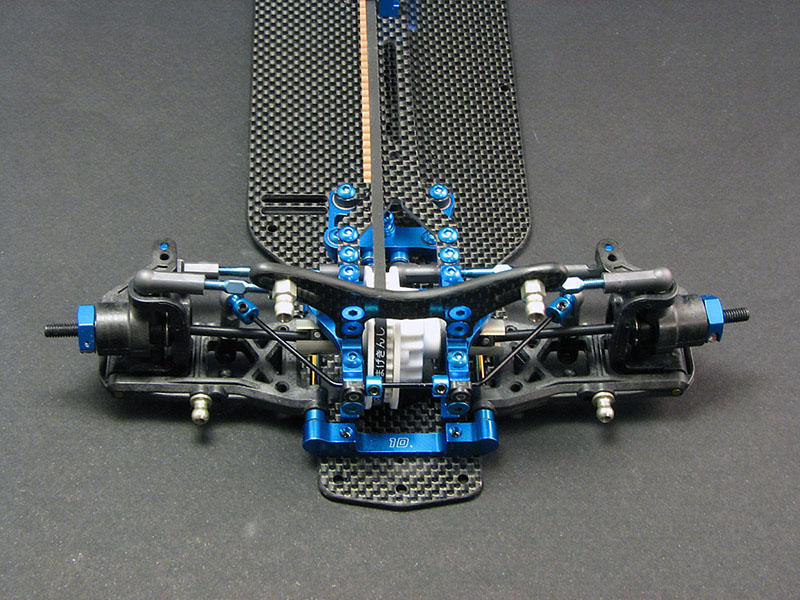
Perhaps some of the main changes made to the V5 version of this successful racing chassis is the new lower and upper deck. Made out of similar 2.25mm and 2.0mm carbon the shapes are new. The new lower deck is now only 86mm wide, made possible by the adoption of a new one-piece servo mount detailed later, but with much less cutouts the new lower deck is noticeably stiffer than the previous TRF417X version. The new upper deck gets a whole new shape towards the front part moving the flex point forward.
For the lower deck I rounded off the edges, especially around the "corners", i.e. in front and behind the battery and motor and servo respectively, to minimise these parts dragging on the ground. I the glued and polished the edges. I did however not make as much of an effort as usual to get the perfect look, this due to the aforementioned lack of time. The upper deck I left as it is, besides removing a bit of material from the front and rear part according to the manual so that there is a gap to the bulkheads. No sanding and gluing of the upper deck to remove chance of glue where it should not be, i.e. on the top and bottom surfaces. This can cause tweak and therefore it's best to leave the upper deck as it is.
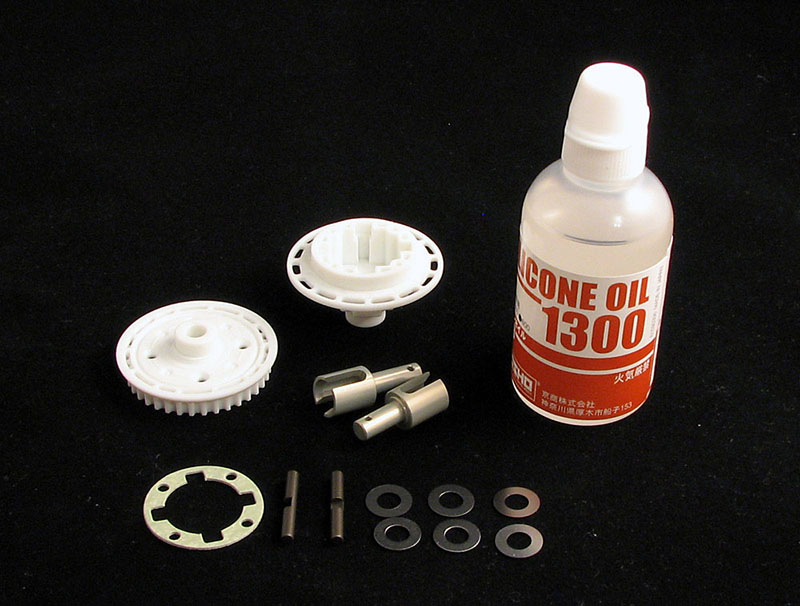
The first component to assemble is the rear gear diff, a part which has been updated with new aluminium (not steel as mentioned in some pre-production info) joints and new thicker shims. I don't know if there are any other small detail changes but it felt that the diff went together better than before with better precision. If this was all due to the new joint and shims, due to more experience building the TRF Gear Diff, or indeeed some small corrections to other parts remains a mystery for me.
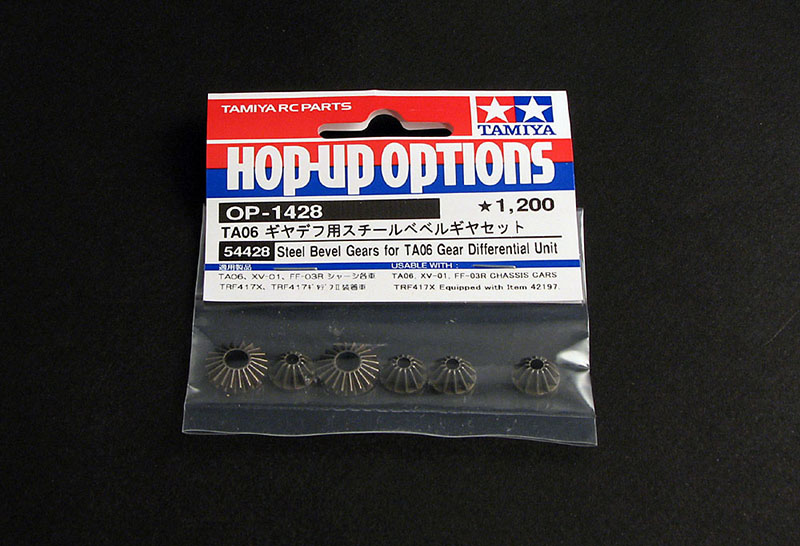
In addition steel gears are now available for the TRF gear diff if you feel the need.
I built the diff with Kyosho 1300 diff oil. Kyosho because it's avilable in 1100, 1200, 1300...
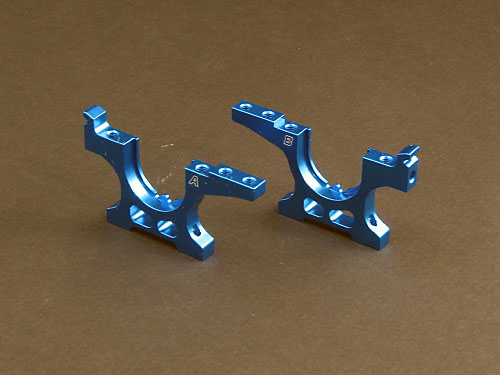
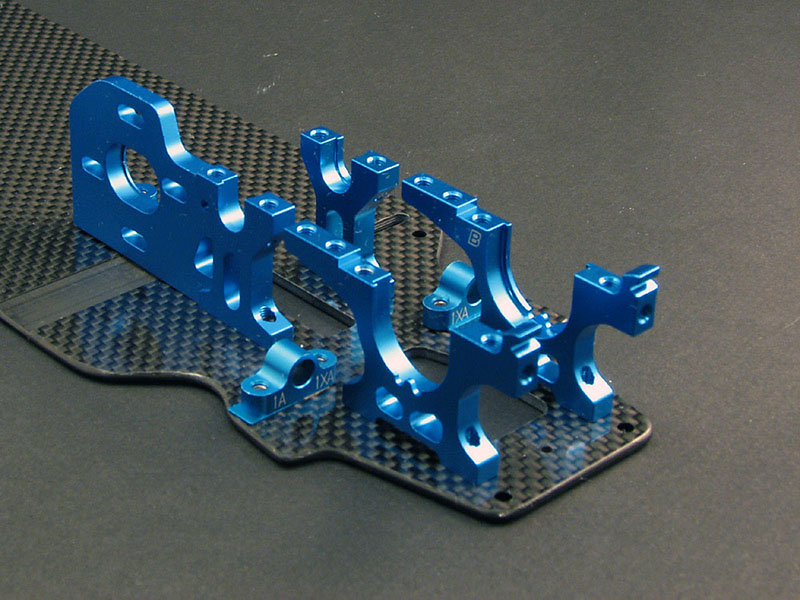
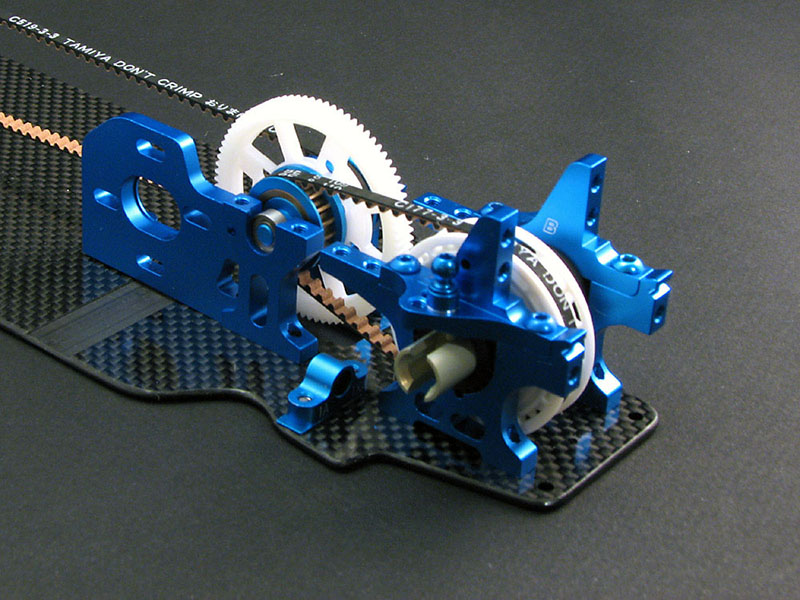
Next up the front/rear bulkheads and left and right motor bulkheads, parts which have all been updated although they might look similar. First the front and rear bulkheads, where you can see that they are indeed different by the 2-part opening under the center of the part. I don't have a 417/417X to compare to but information says the bulkheads are slightly higer which would go along with how Jilles car was set-up at the Worlds.
The left and right motor bulkheads are now pinned to the lower deck to ensure a secure and tweak free mounting despite being fastened to the upper deck by only one screw each side. Again, as I understand, the center shaft and motor was slightly raised according to the Worlds setup.

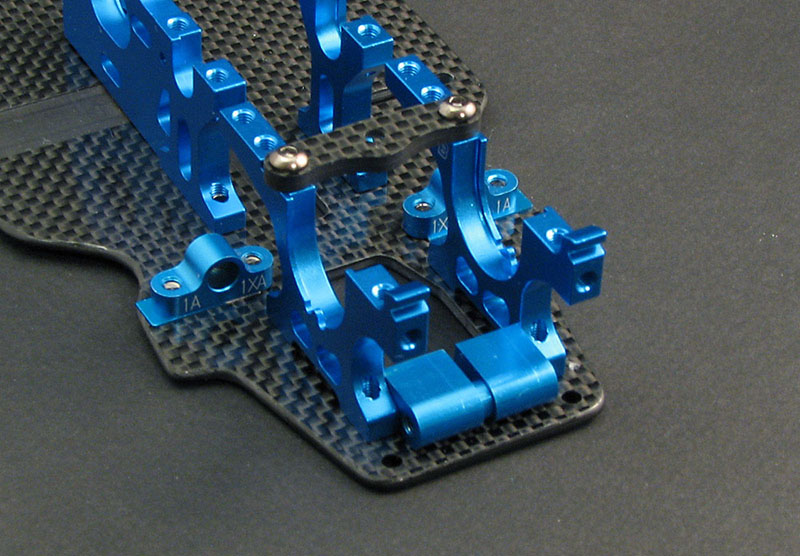
When mounting the aluminium bulkheads to the chassis it is of course important that they are perfectly straight. To help this I made a quick jig out of two old TRF415 servo mounts (#53723) that I later use as battery stoppers. By adding a 2 mm spacer and a grub screw between the 10mm servo mounts the jig was 22mm - the same which should be between the bulkheads front and rear.
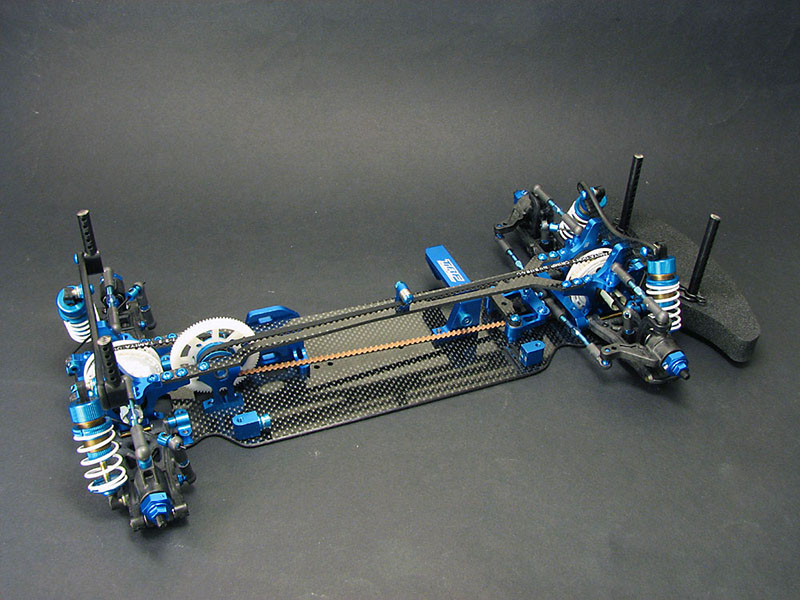
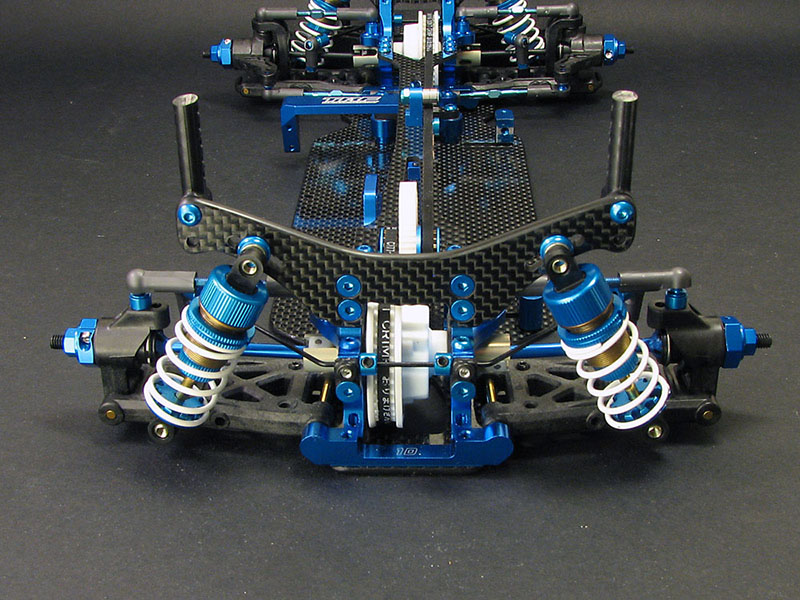
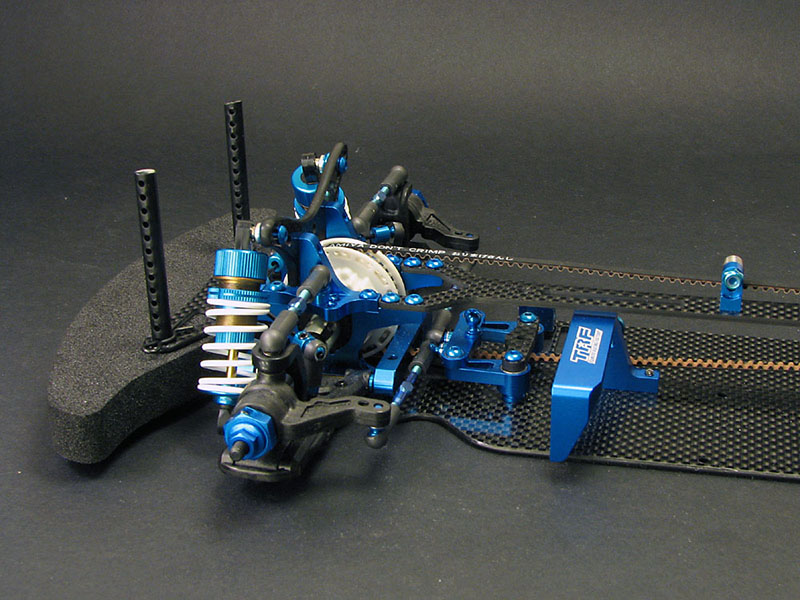
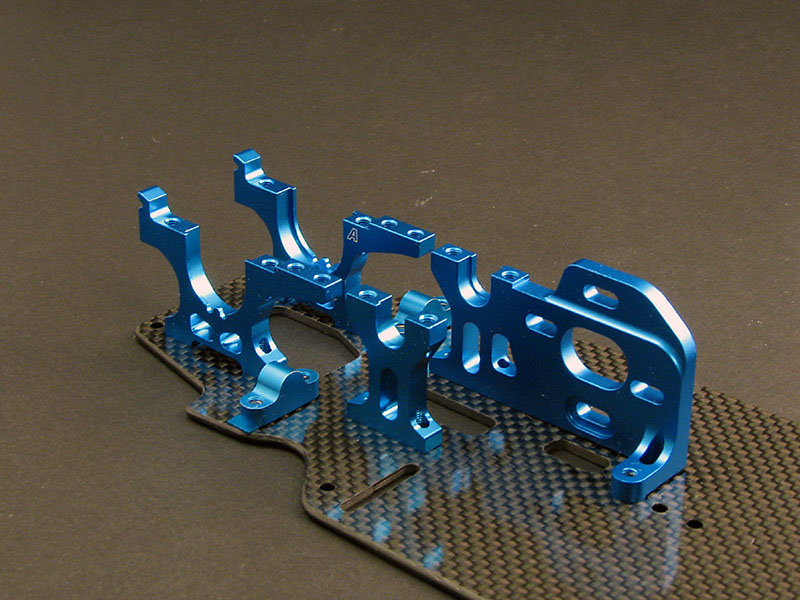
As you can see I built the car with split suspension mounts at the rear instead of the included 1-piece mount. The car was assembled using what I would consider my starting point setup for carpet and therefore these changes.
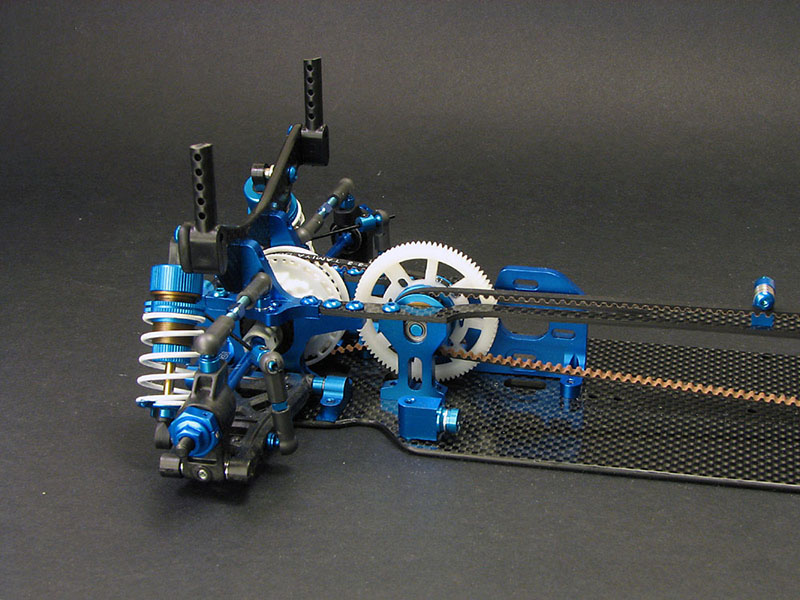
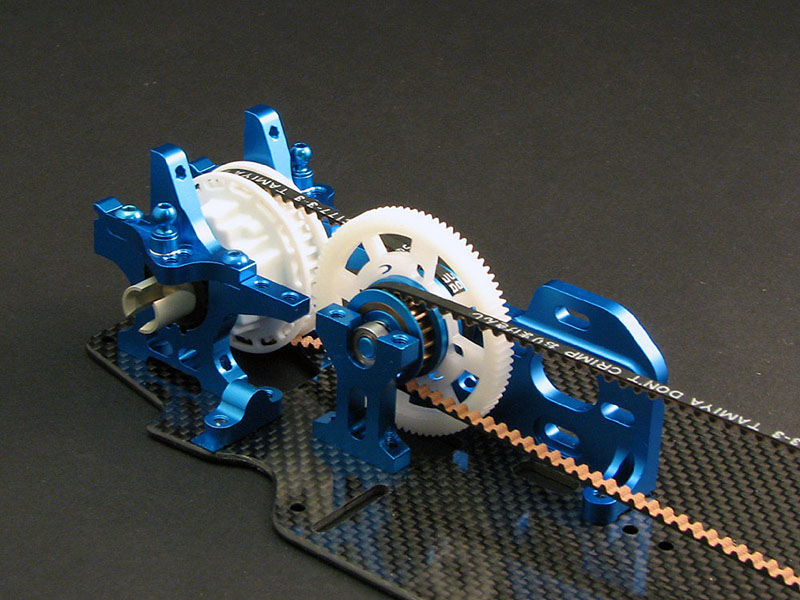
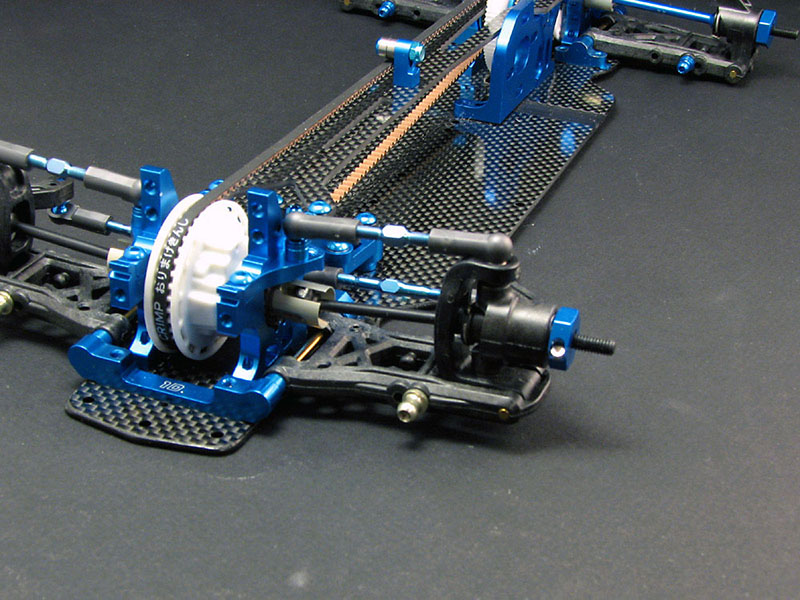
The center shaft and pulleys, as well as belts are the same as on the previous 417's. However the kit setting for the front belt is one step tighter than before, so it's now in the position I usually have run to make sure the front belt is not too loose compared to the rear, as this can make a car tricky coming out of corners transmitting power to the rear wheels earlier.
The spur gear used is a Panaracer 48P gear, also available in 64P. Remember that you need the special Panaracer 417 spur gear spacer for this though (#PRS-SPC).
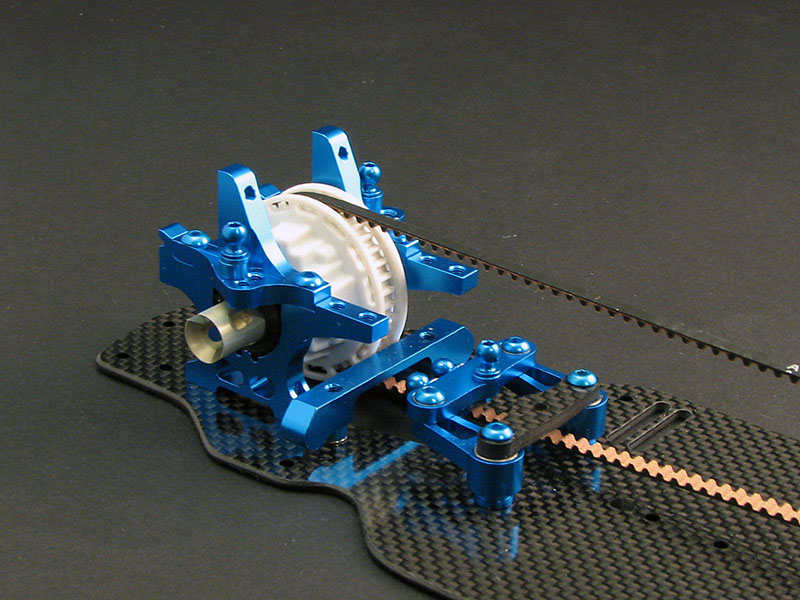
For the front you can see I've installed a gear diff, filled with Ride Gear Diff Putty, as I always find a gear diff more consistent and better to drive. Also changed from the kit setup, a 1-piece suspension bloch instead of the included 2-piece setup, and a carbon steering brace from the original 417, all to make the car easier and more consistent on high-grip carpet. These were all lessons from last winter, if I do choose to run the car this winter I will need to re-check those findings of course.
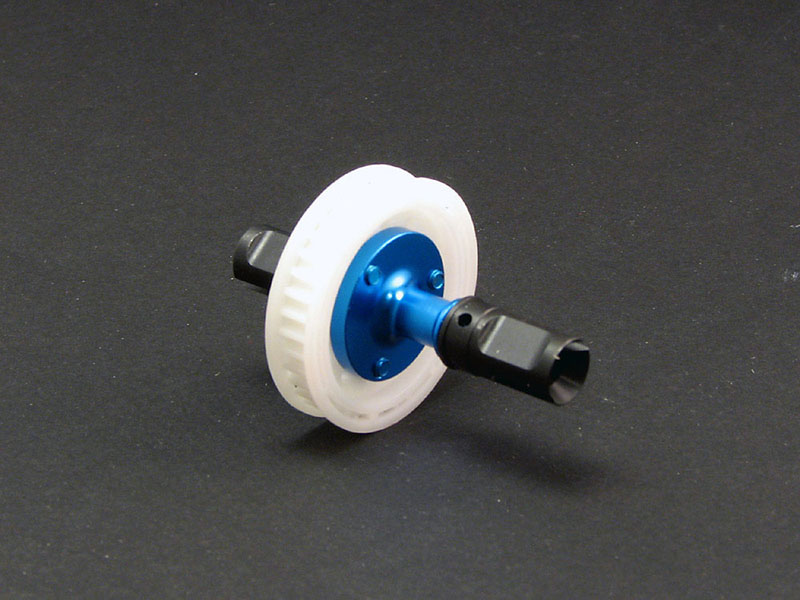
Included with the kit is the normal TRF417 direct coupling or spool, but updated with new steel joints. Previously plastic joints have been prefered to minimize driveshaft chatter but with the new double-joint driveshafts it is now possible to use steel joints for greatly improved durability. Do note when building though that the two sets of pin holes in the joints are at different offset! Follow the instructions closely here.
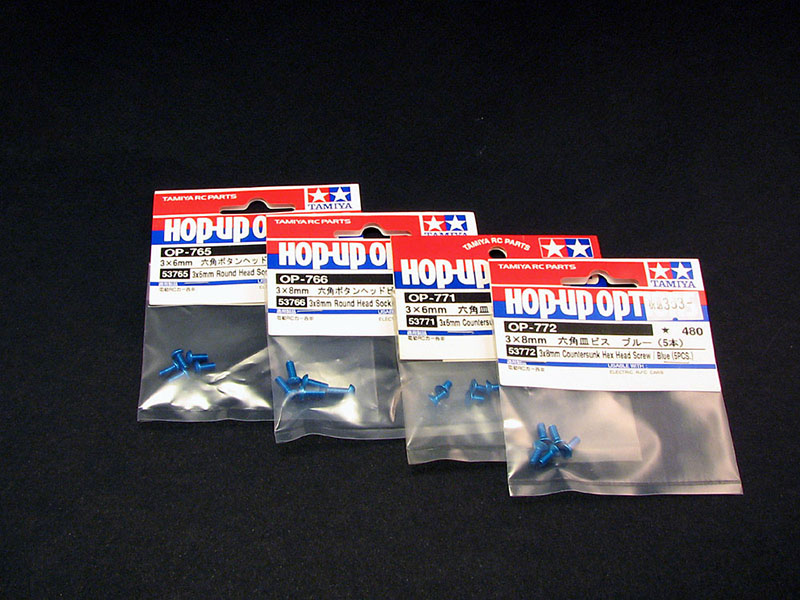
As you can see in the pictures I use blue aluminium screws in many places. These are available from Tamiya for the same colour code as the rest of the car.
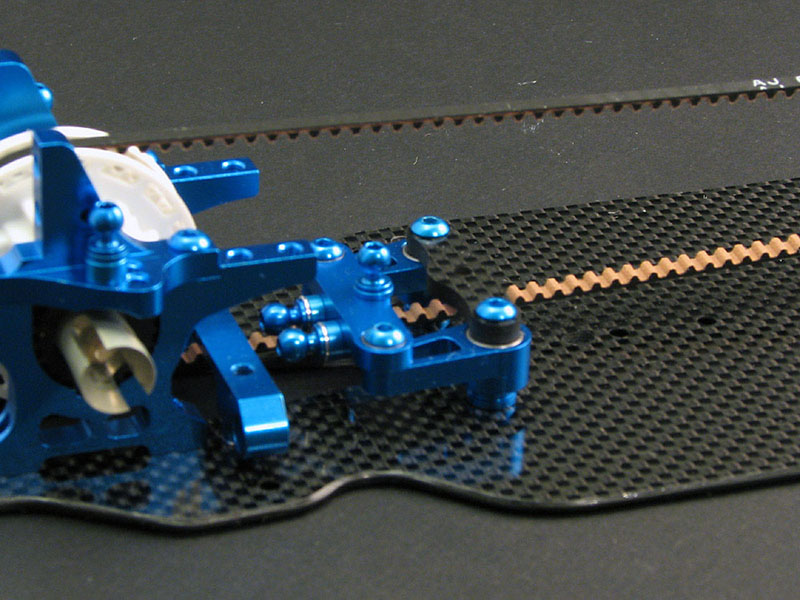
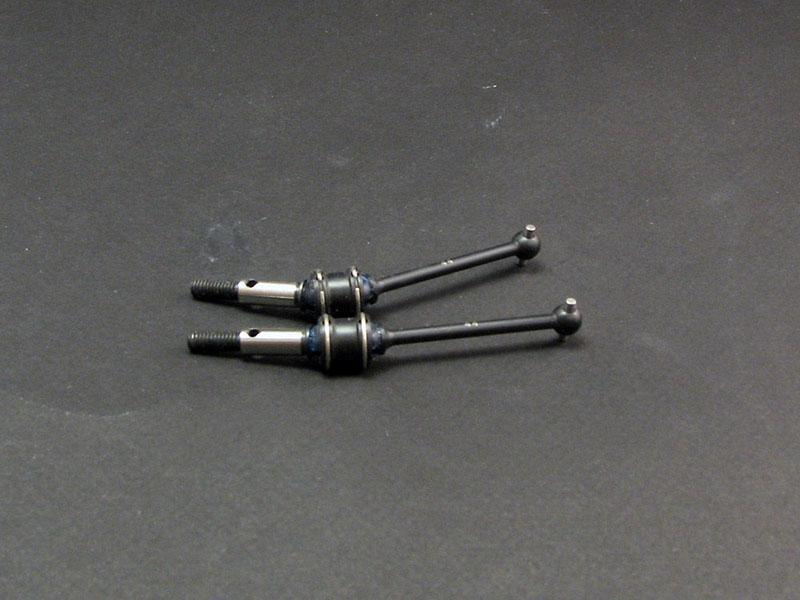
For the rear the same 44mm aluminium driveshafts are included as on previous 417 versions with the exellent wheel axles with ring secured pins introduced on the 417X still there.
Also seen here are the new 3.5mm (previous 3.0mm) blades or pin protectors, a part that has been a weak point on the 417 since the introduction of gear diffs but which has now been updated both in size and material and which now feels very good.
Tamiya is also one of the first and few manufacturers to include double-joint driveshafts in a kit, with the excellent TRF driveshafts released last spring now making their way into the TRF417 V5 Premium Package Kit. A very welcome bonus!
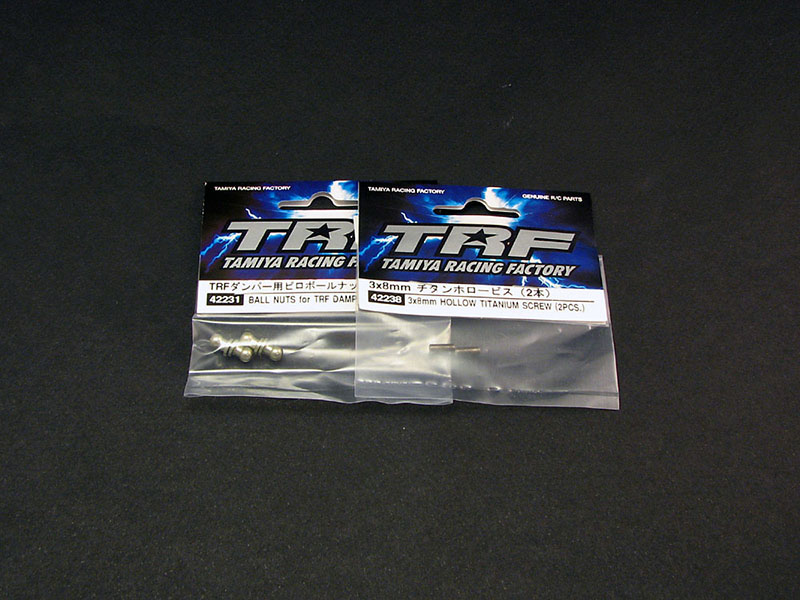
Additional option parts I have used visible here are the Ball Nuts for TRF Dampers (#42231) and Hollow Titanium Screws (#42238) to hold these, and the TRF titanium turnbuckles which improve durability and consistency of settings compared to the original aluminium turnbuckles. I do have to mention though that the anodizing on the 42mm steering alu turnbuckles included was the best TRF anodizing I have ever seen with an absolutely amazing finish. :)
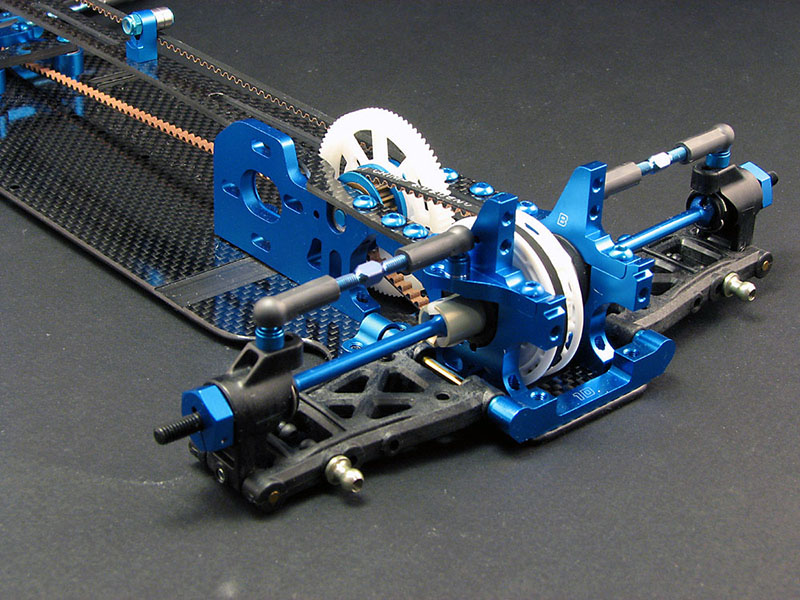
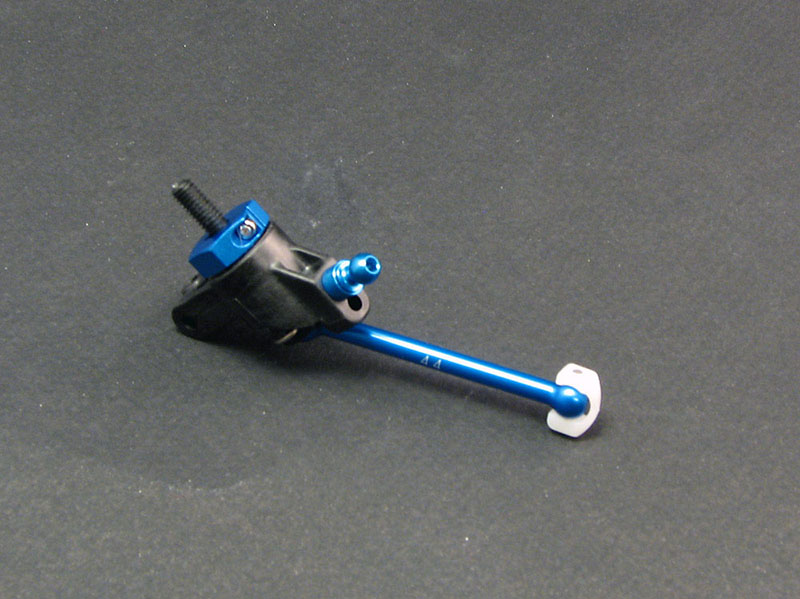
Another major new part for the TRF417 V5 is the new one-piece servo mount that was introduced just ahead of the Worlds in the Netherlands the past summer. Although its influence will be small it allows, as mentioned, for a narrower lower deck. In addition it is a beautiful componenet after the TRF logo was added. Compared to some aftermarket copies that were introduced this one is keyed to the lower deck as well as mounted with two screws making for a secure attachment that will not move.
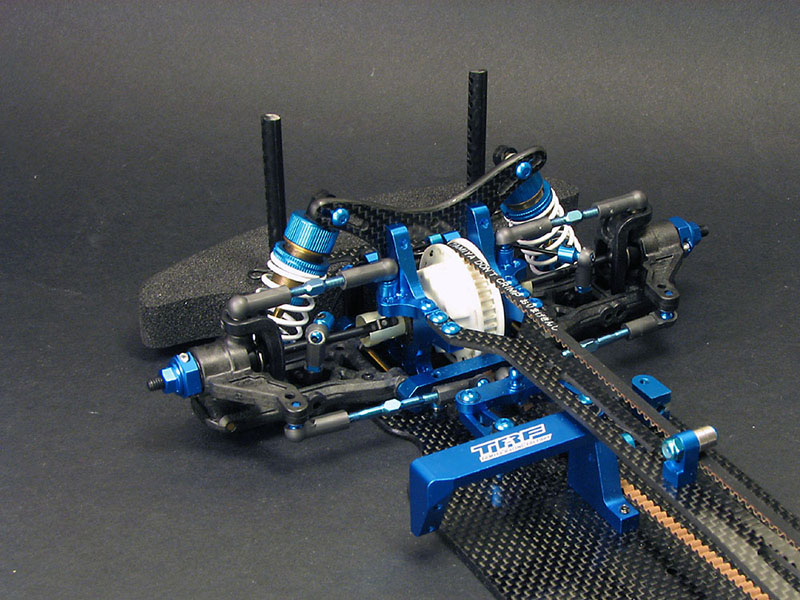
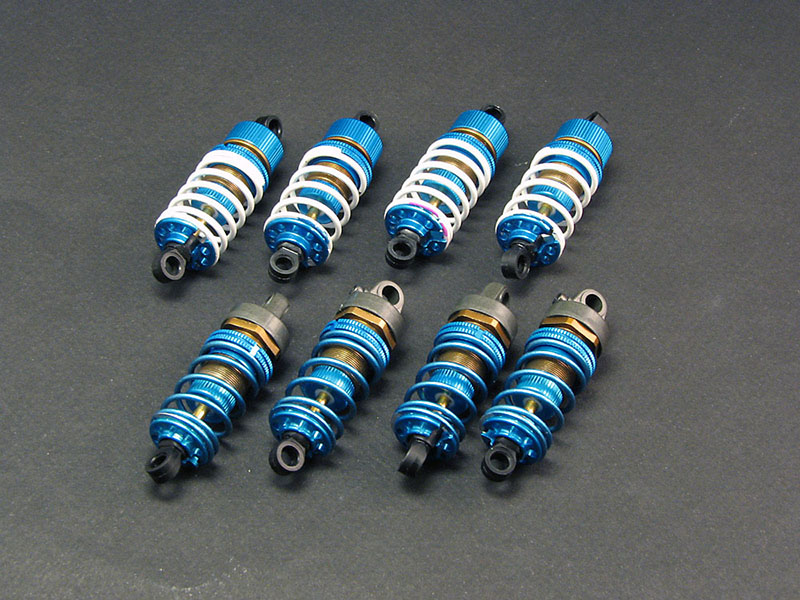
In a bit of a surprise the V5 does not include the legendary TRF dampers but instead the aeration units used at the Worlds. I was a bit critical of these in my report from the Worlds, after seeing how you had to maintain them before each run to get the most out of them, but Tamiya true to their tradition of releasing World Championship winning replicas include the dampers with the V5 kits.
Now, it must be said that when built they went together very well and I was impressed by the feel of them. The dampers feature new cylinders (because the plastic damper tops require different threads) and the top part from the TRF buggy dampers. They are assembled using the same pistons and other parts, but using two o-rings instead of one. This is the kit setup.
No doubt the "old" or standard dampers will still be used in some conditions, mainly on carpet at least, and that's why I have now one set of each ready. The standard dampers and now on the car as I expect to run on carpet first. How well the new aeration dampers work and how much I like them remains to be seen when I get to run on asphalt during summer.
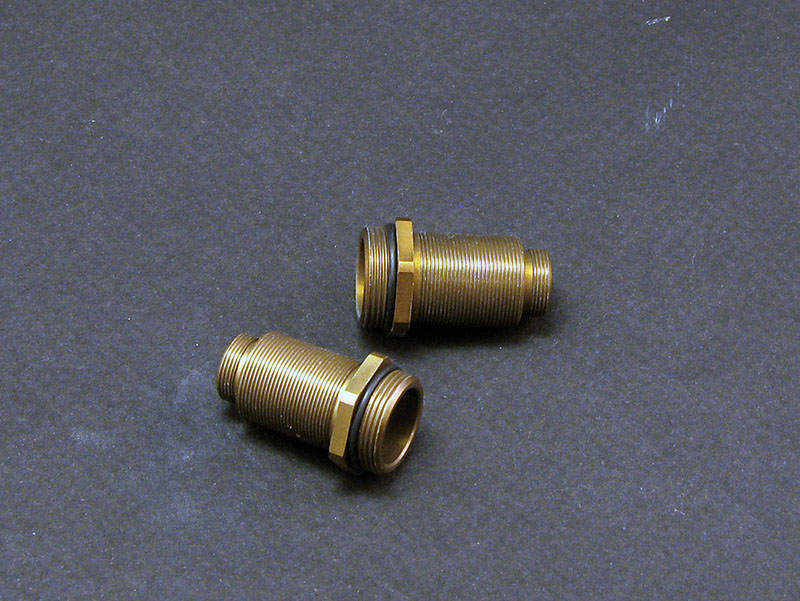
For the new aeration dampers new damper mounts or ball connector nuts are used. These are actually the same as the (#54205) parts available for the buggy dampers but with a different coating for the use on the V5.
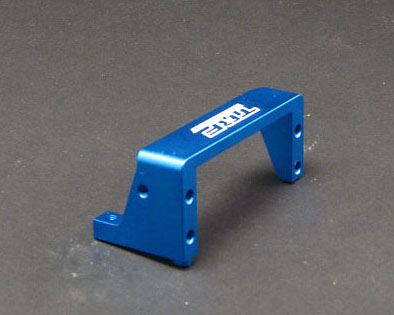
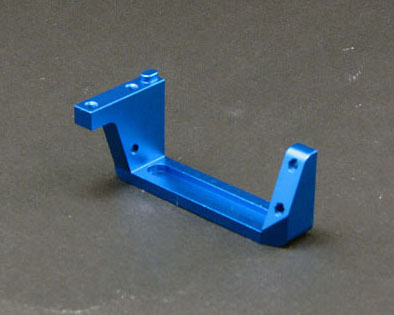
Front and rear damper stays are also updated.
I built the aeration dampers with MR33/Ride springs, although my normal asphalt setup would be HPI Silver springs.
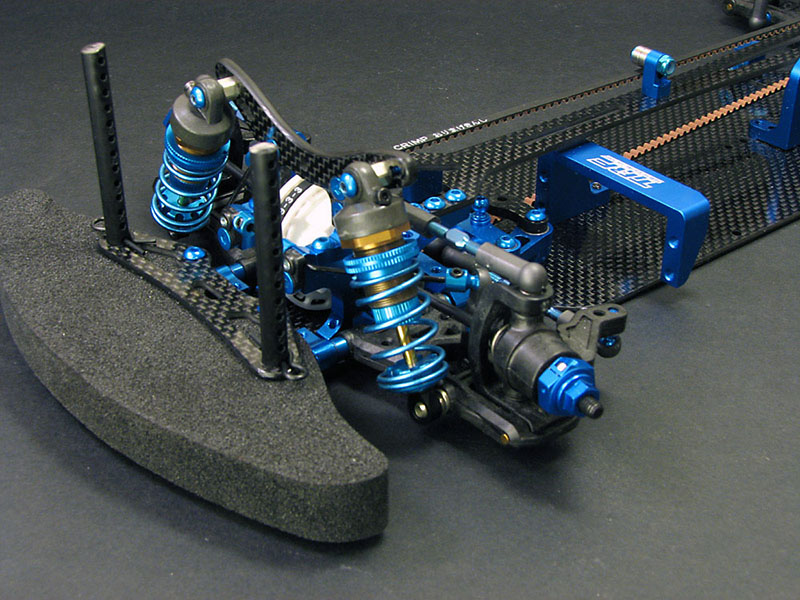
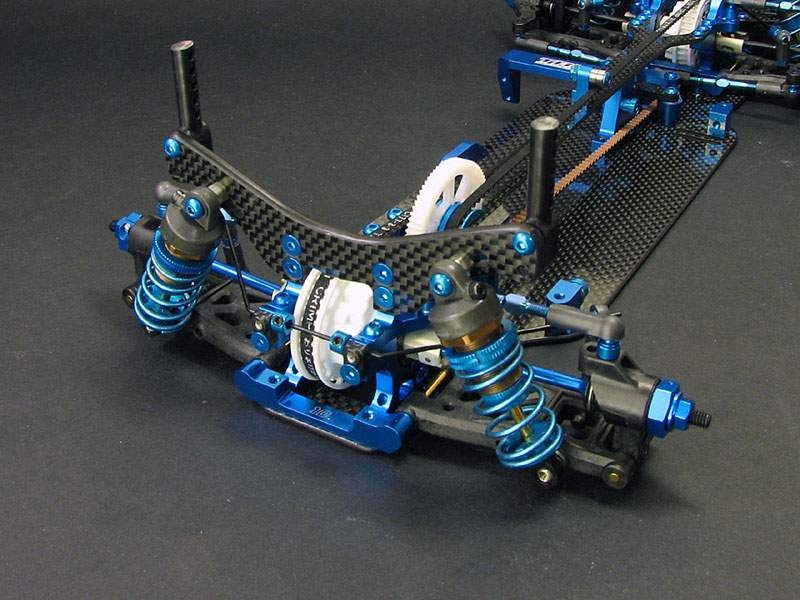
Here's the car completed with the carpet setup I expect to start with (including normal TRF dampers).