SWORKz SMJ CX11 Touring Car Build
• Thursday 16th June 2016
Speedmaster Japan (SMJ) is a Japanese brand led by Masayuki Miura, and their CX11 1:10 scale competition electric powered touring car is a joint collaboration between SMJ and Taiwanese manufacturer SWORKZ RC, who are best known for their popular 1:8 & 1:10 scale off-road buggies. The CX11 has been designed and developed by SMJ who already have a range of high quality springs, anti-roll bars and optional parts for the Yokomo BD7 touring car in their product range.
Featuring a symmetrical chassis, bulkhead mounted suspension, low height shock towers, short big bore shock absorbers, oil-filled gear differential, front DJ CVDs, rear CVDs and an integrated aluminium floating servo & steering mount the CX11 has a very high specification straight out of the box.
Although a completely new car the CX11 has a proven design with some similarities to the Capricorn TE03 and ARC R11 touring cars, including limited parts compatibility. Having previously raced the Capricorn TE02 (and Tamiya TRF418) to some good results I'm eager to see how SWORKz & SMJ have moved TC development forward with their promising new CX11.
Unboxing
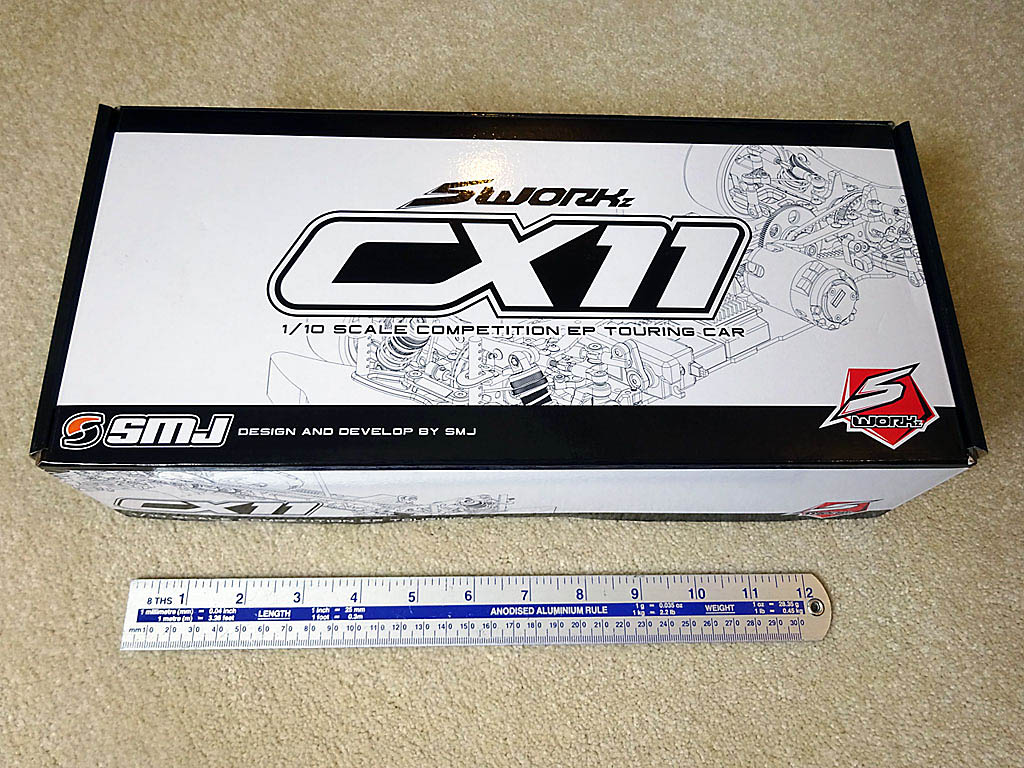
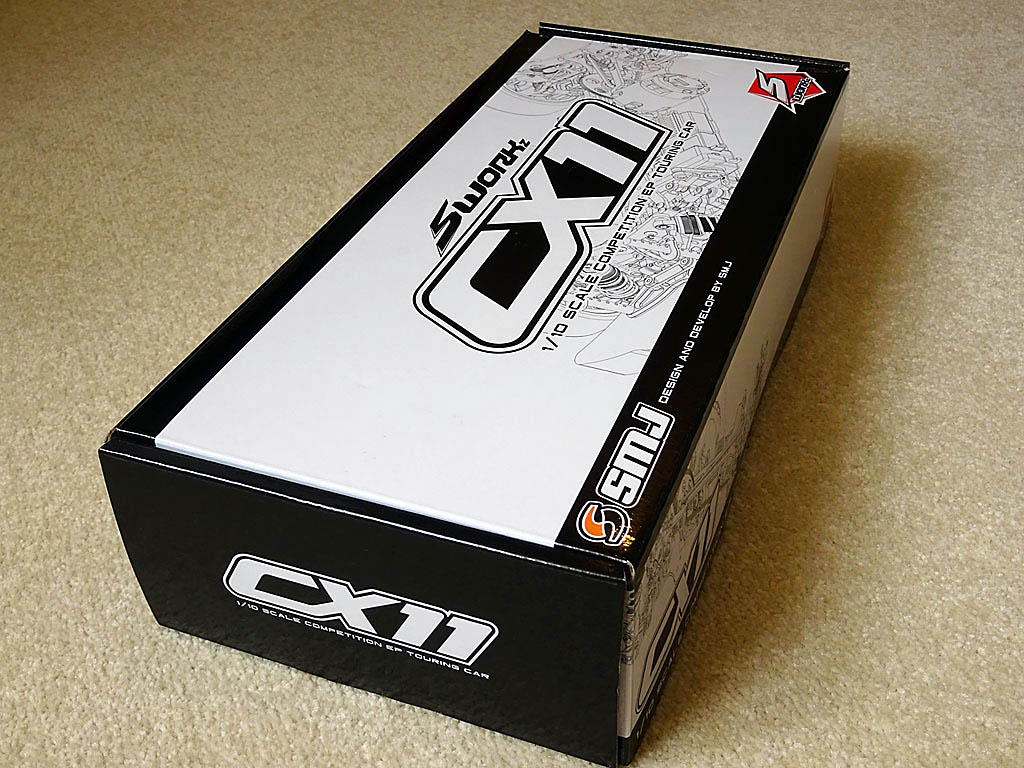
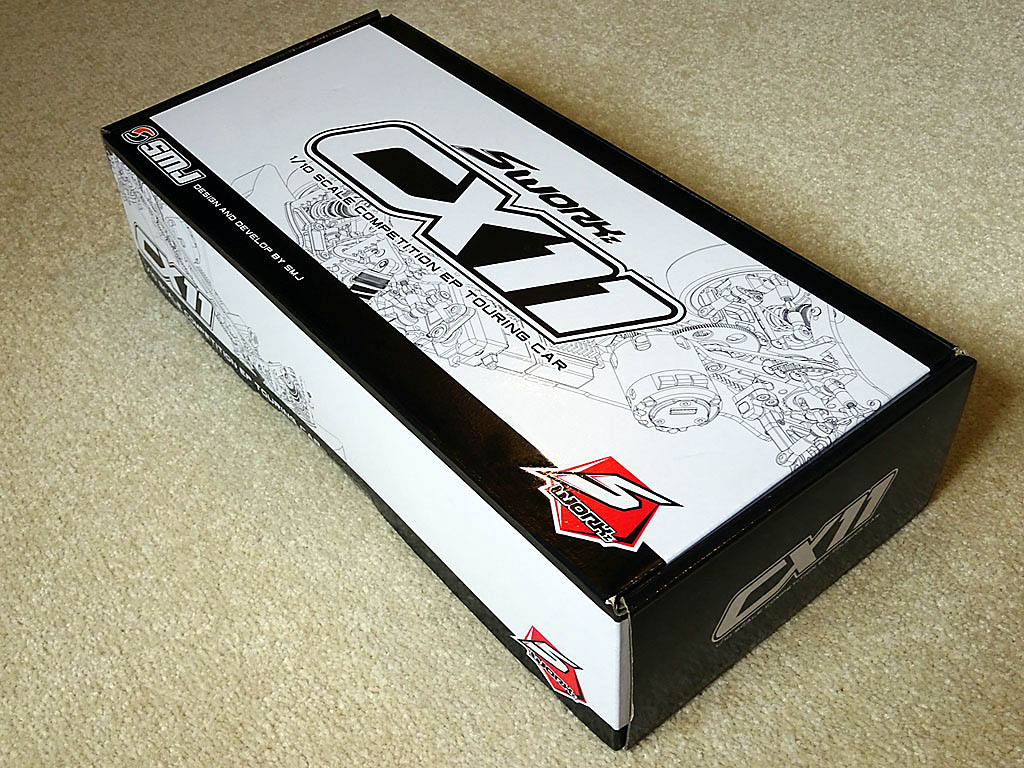
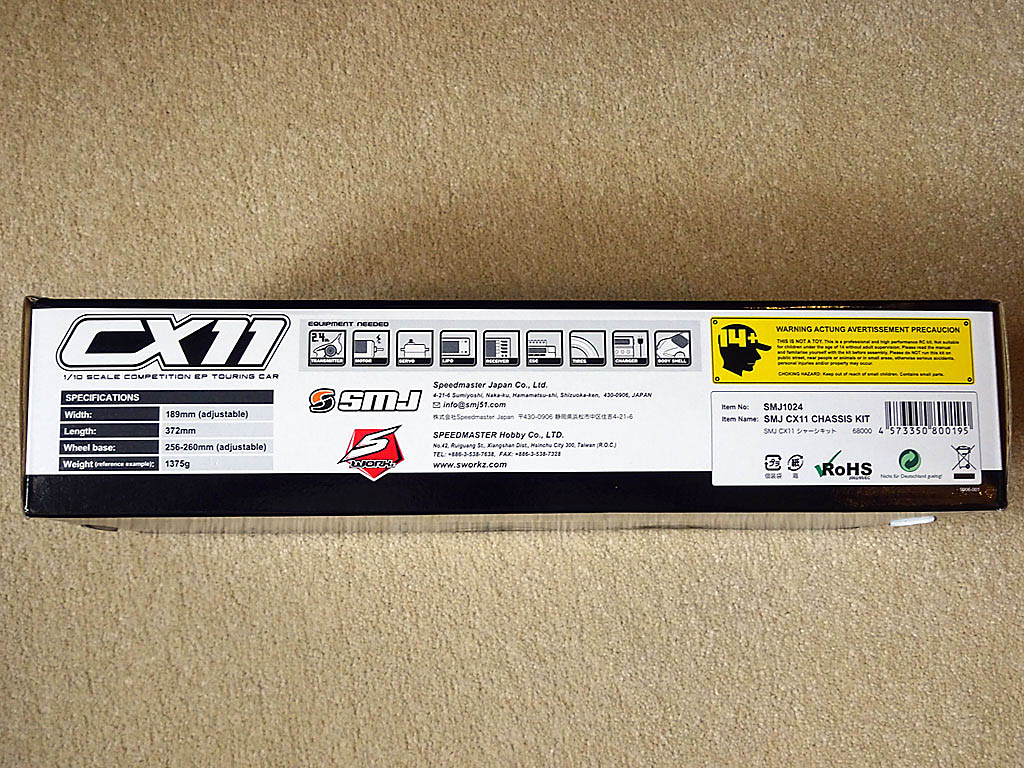
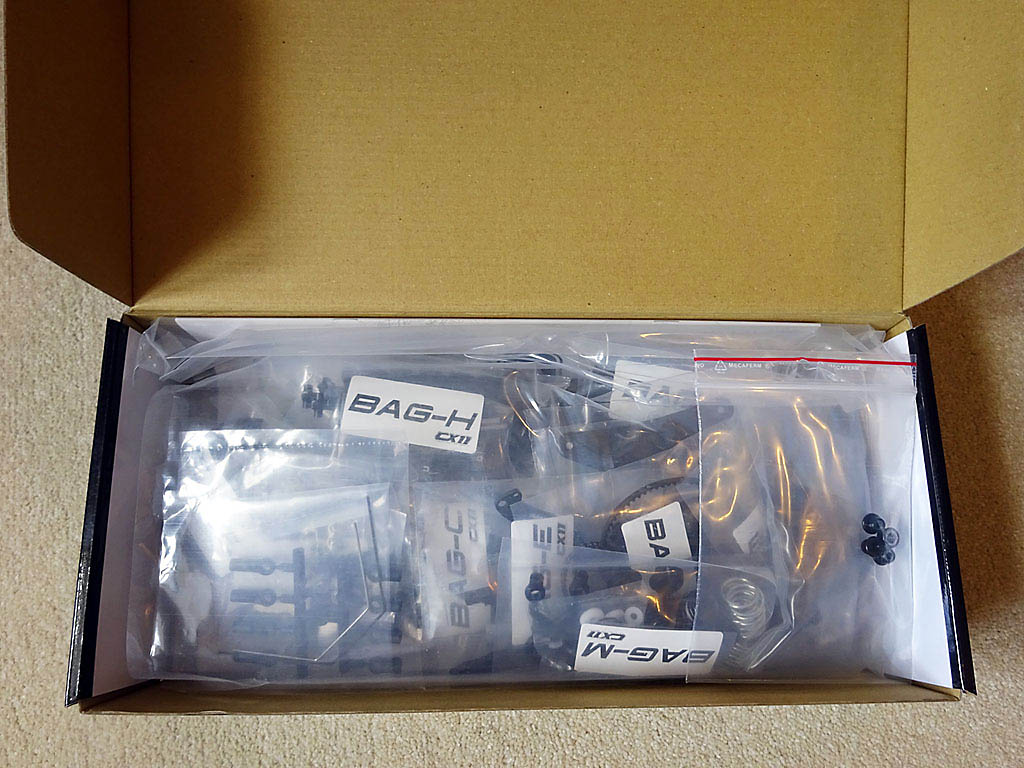
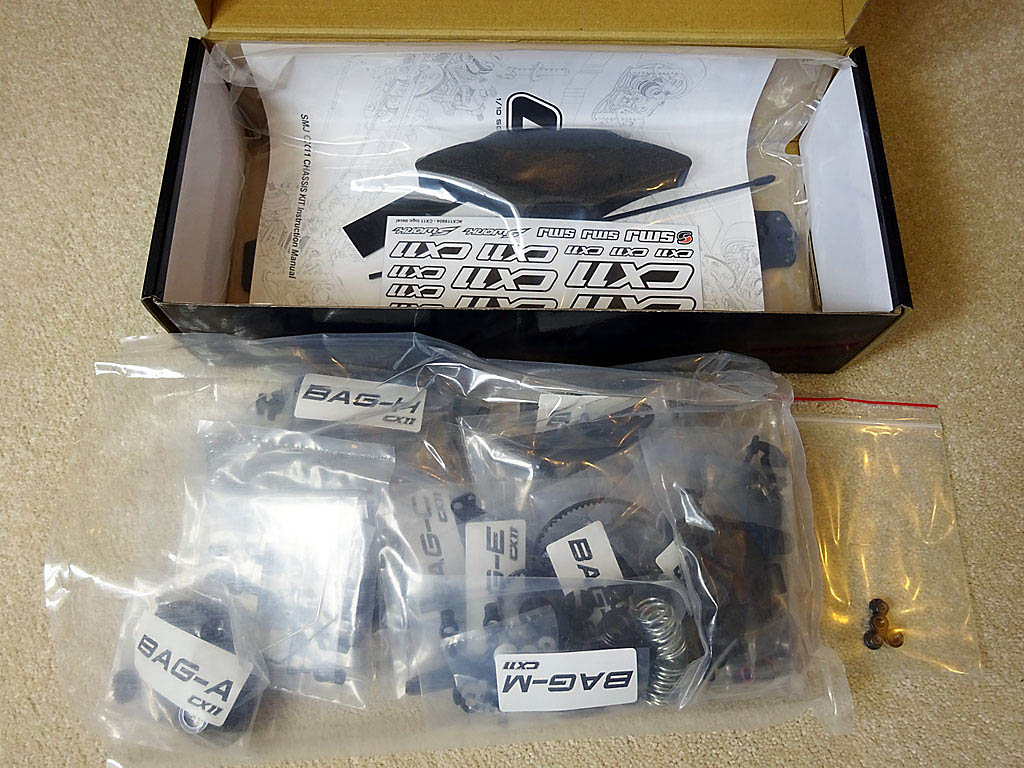
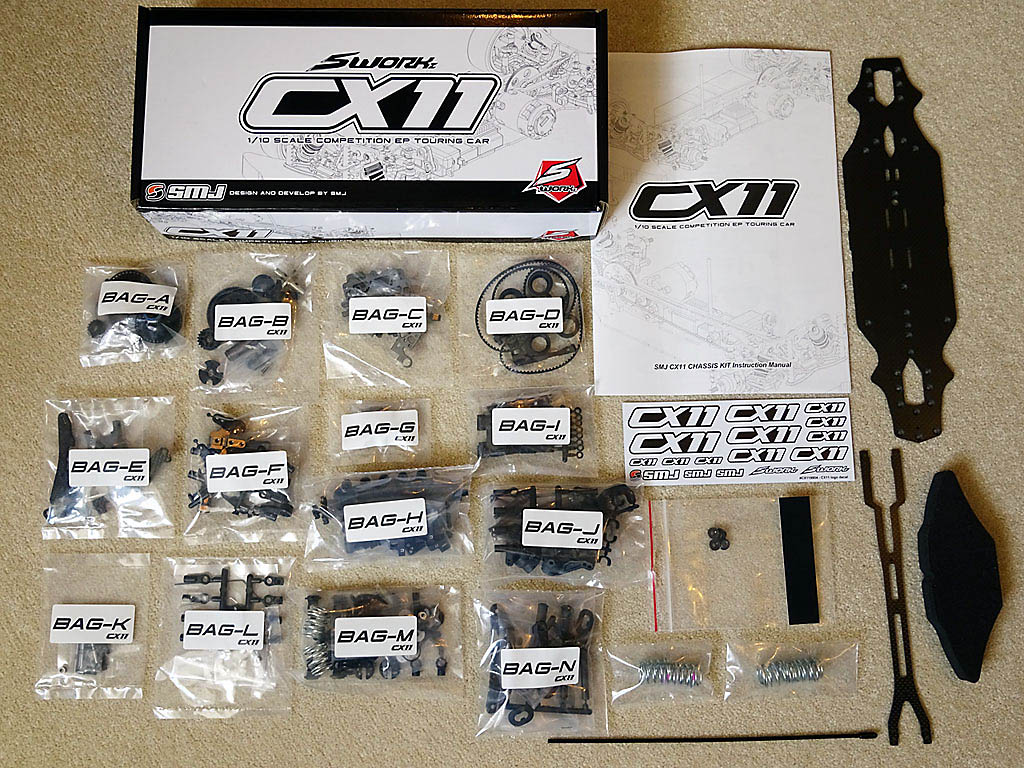
With Japanese efficiency the CX11 comes packaged in a tiny 360mm x 165mm x 80mm box printed with CAD graphics of the chassis and the SWORKz?, SMJ and CX11 logos.
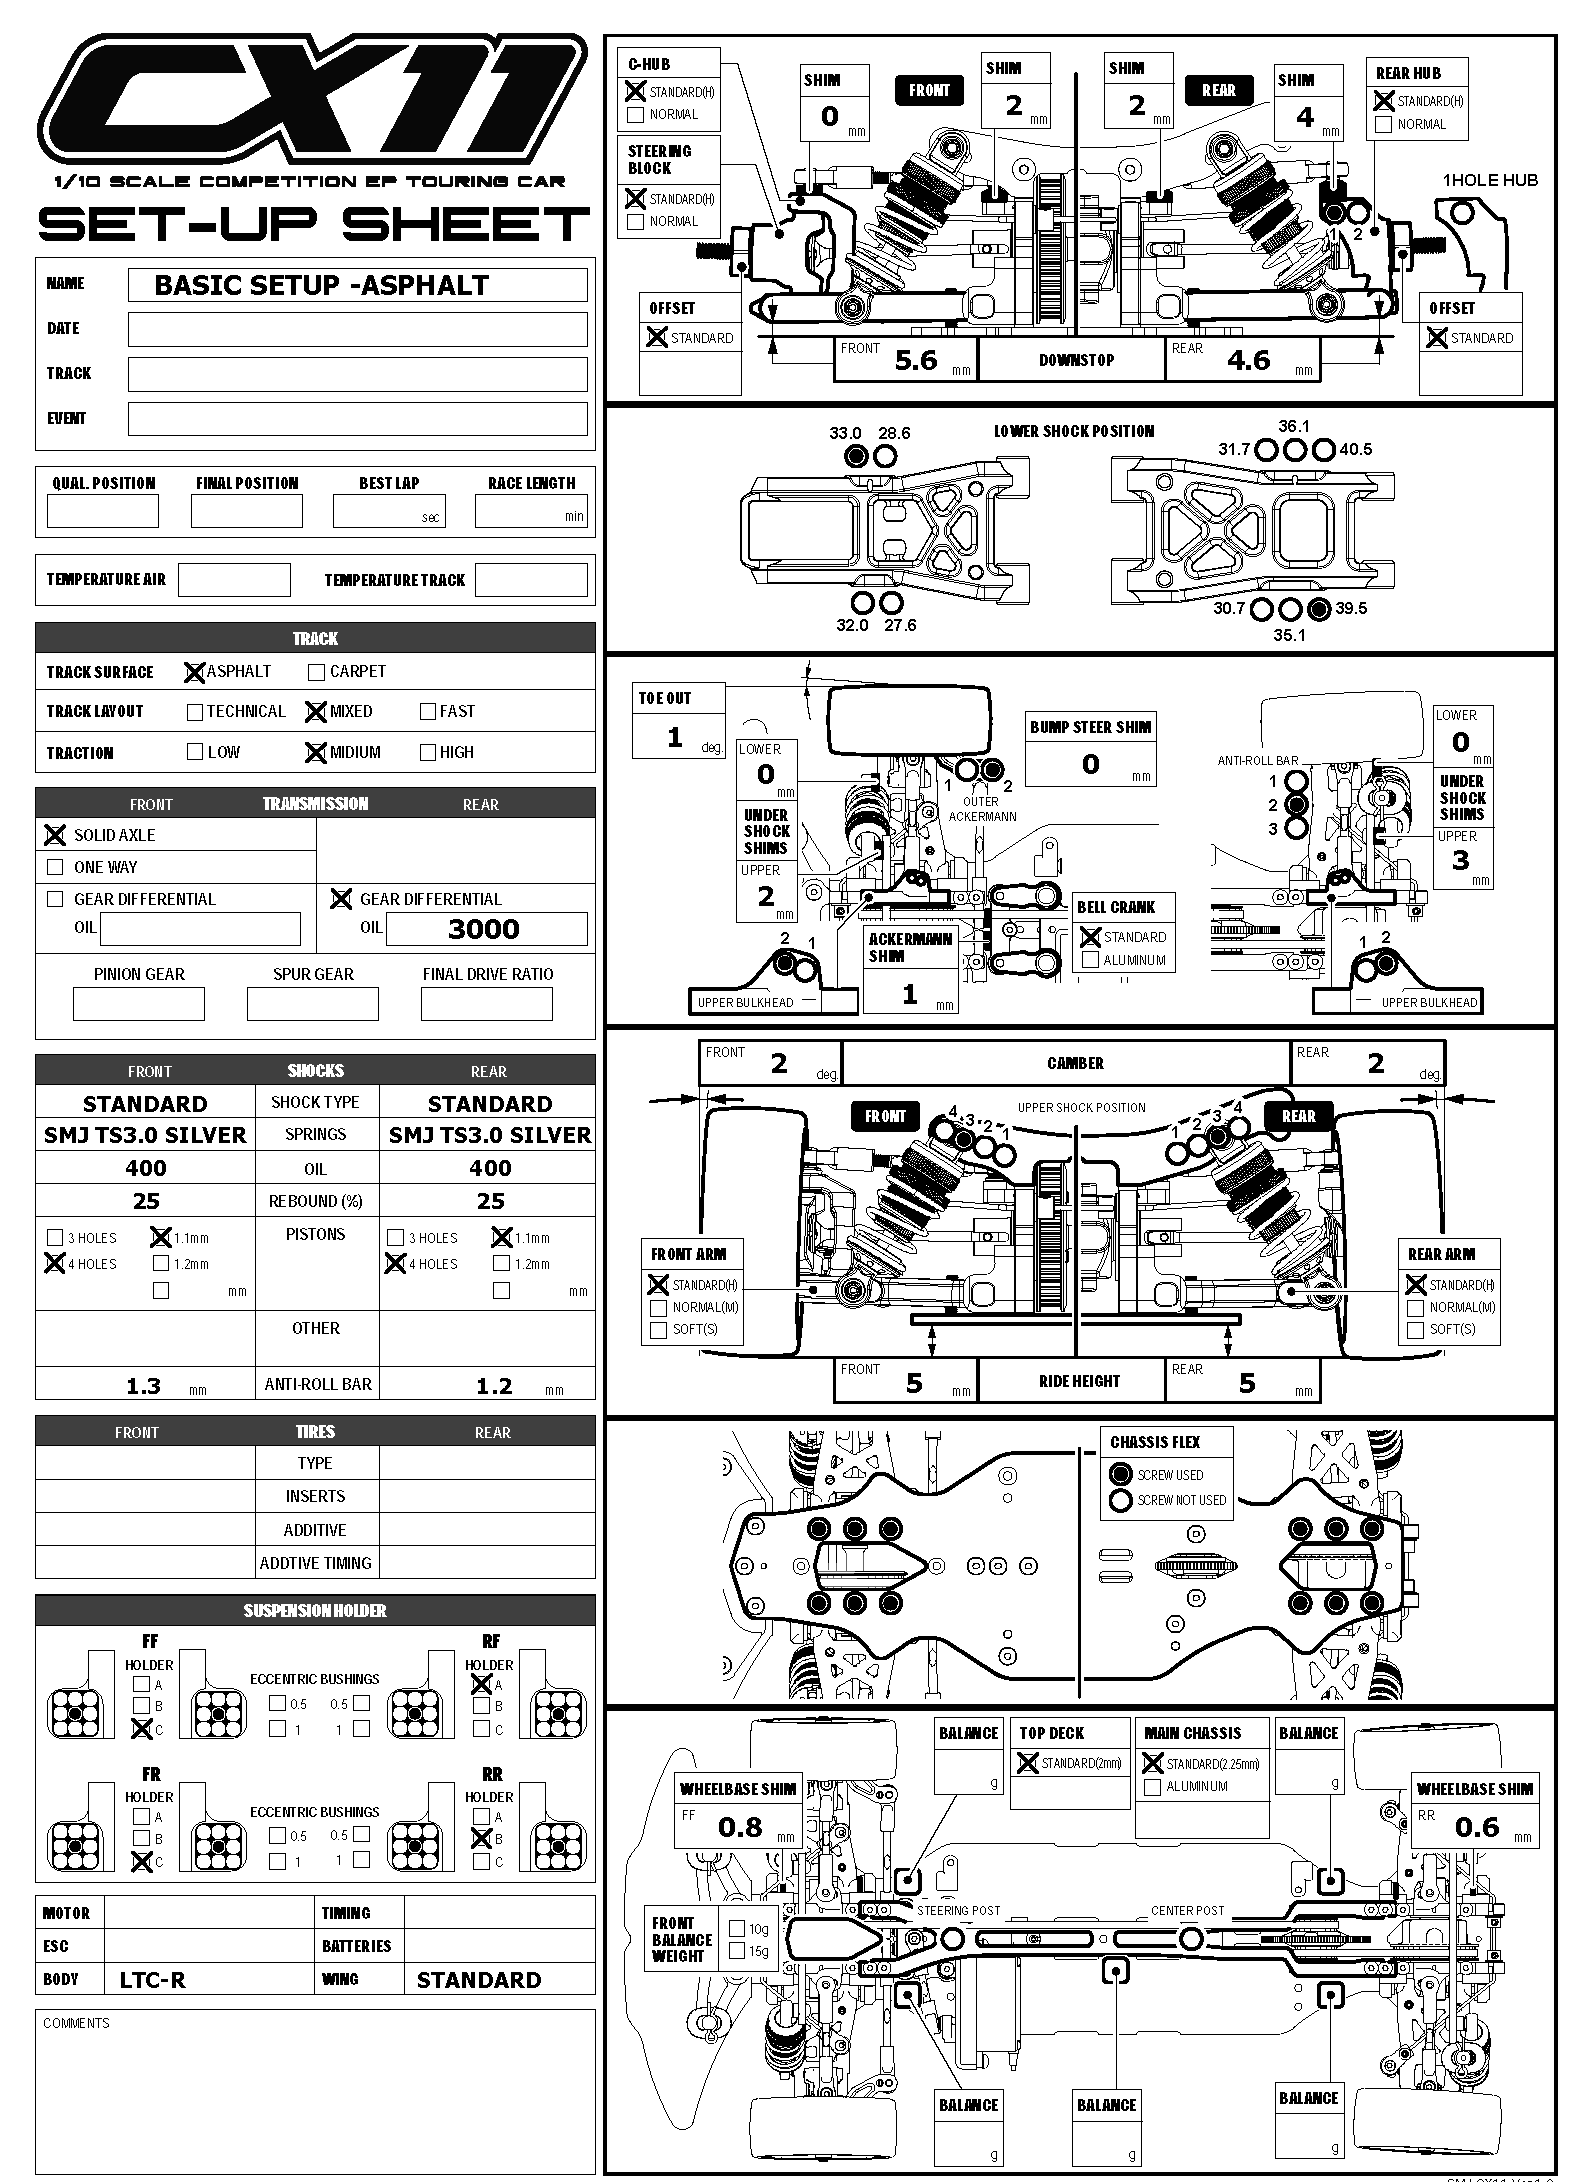
The box lists the equipment needed to complete, but in addition to these you'll also require tools and lubricants. The instruction manual recommends #3000 silicone oil (SW-410014) for the gear differential, #400 silicone oil (SW-410005) for the shock absorbers and graphite grease for the driveshafts.
Minimum tools for construction are 1.5mm (SW-620001), 2.0mm (SW-620002) & 3.0mm hex drivers, 7.0mm socket driver (SW-620010) for the wheel nuts, 3.0mm turnbuckle wrench (ANSTL0000), long nose pliers, metric ruler and vernier caliper for measuring, plus a hobby knife and side cutters to remove parts from the sprues.
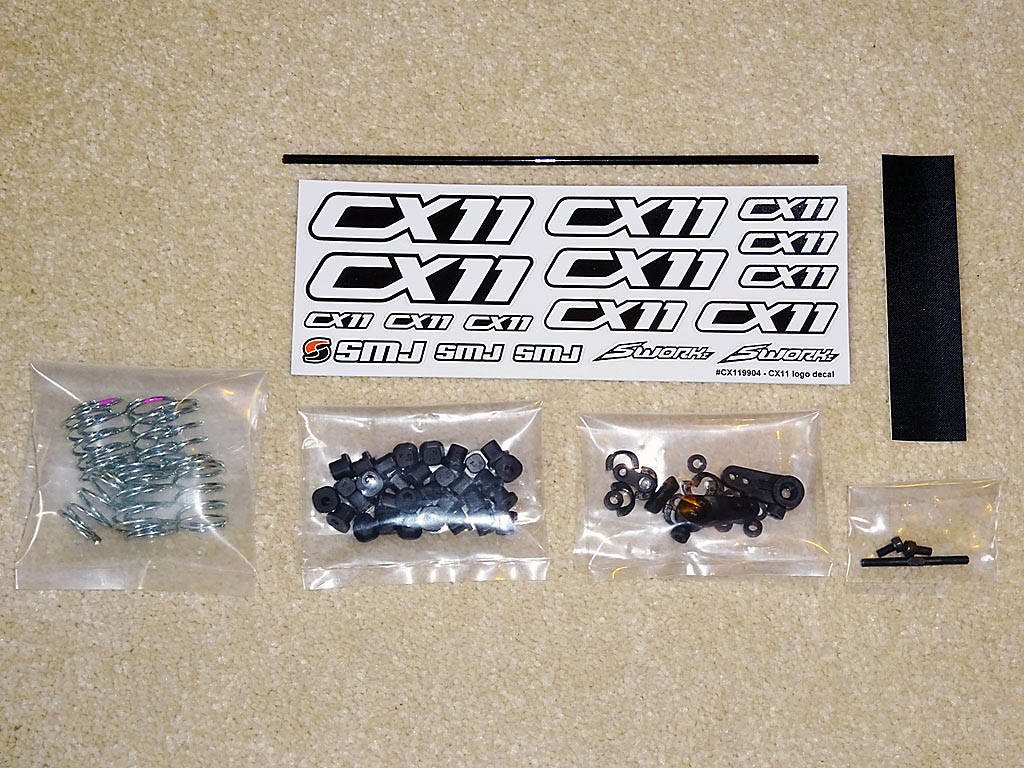
Included along with the kit's SMJ Silver Line TS3.0 Silver (301 gf/mm) short linear shock absorber springs are two additional complete sets of SMJ Silver Line TS3.2 Pink (324 gf/mm) and TS3.5 Gold (351 gf/mm) short linear springs. Another nice bonus is the SMJ non-slip rubber tape to help keep the batteries in place plus a sheet of pre-cut decals.
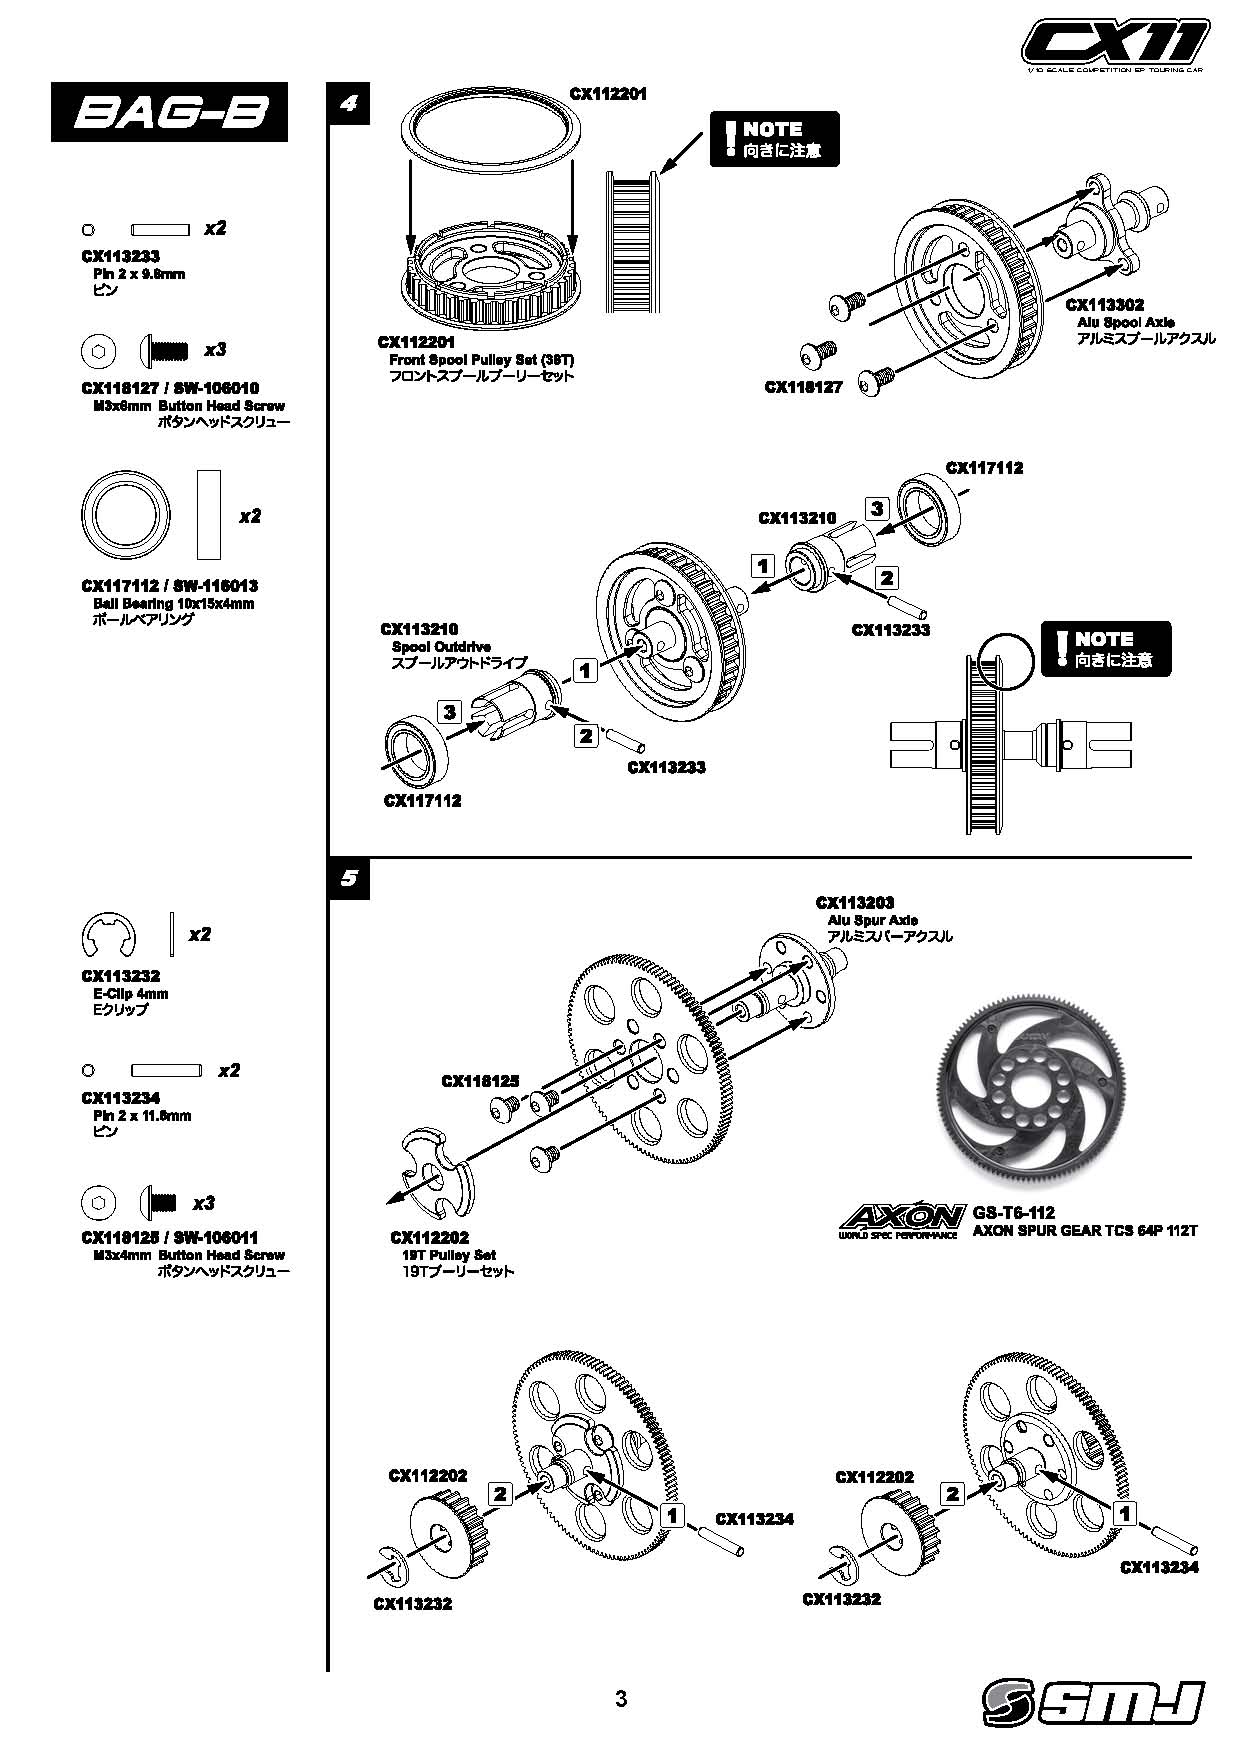
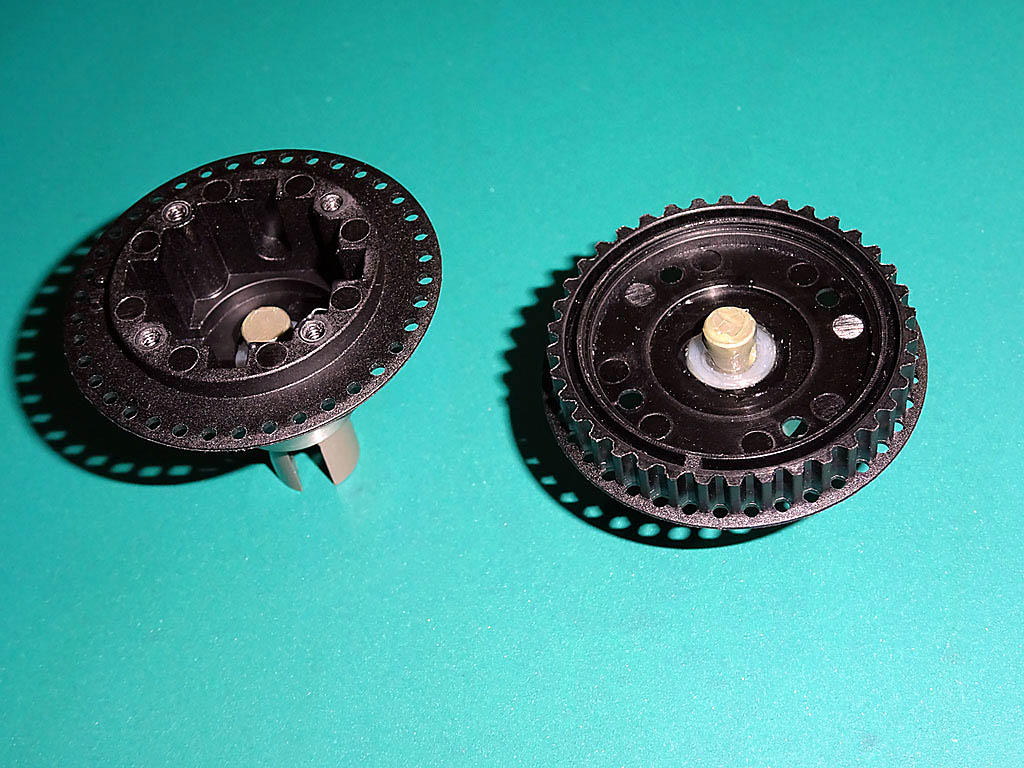
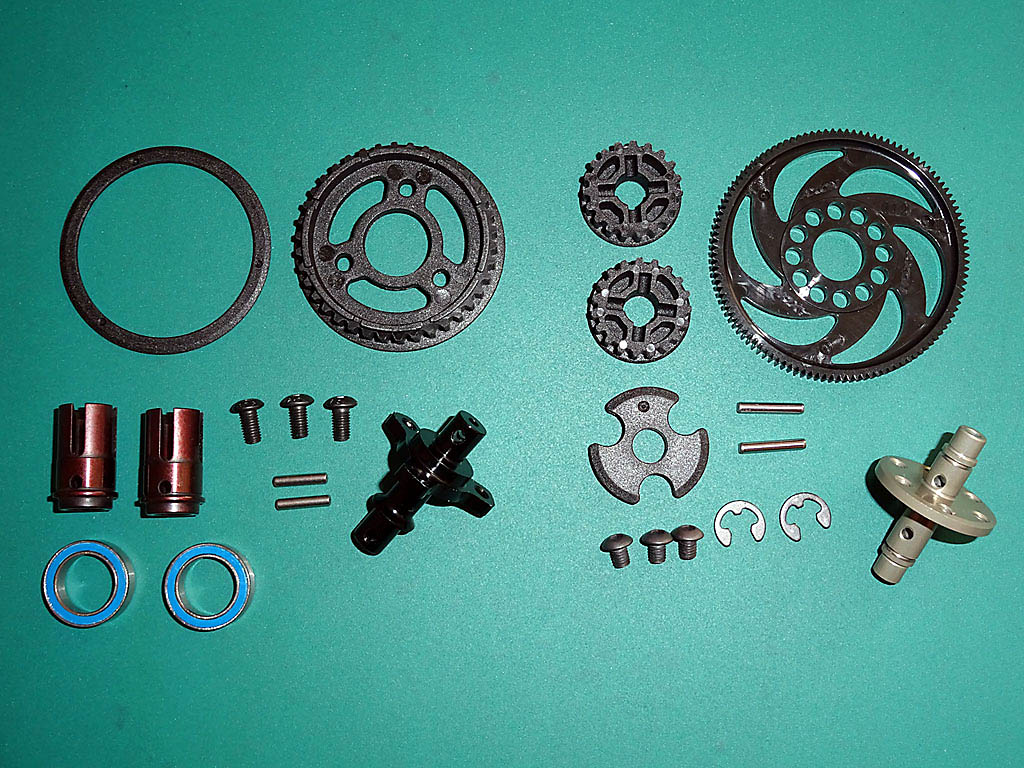
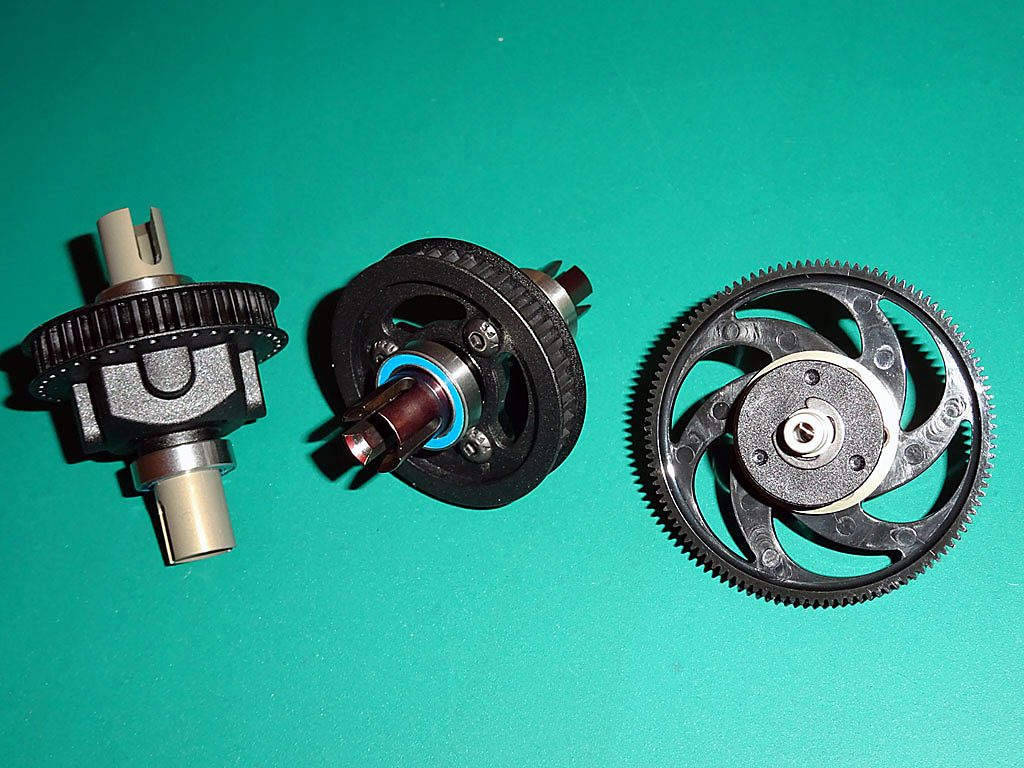
Gear Differential, Front Spool & Center Layshaft
The CX11's assembly starts with the transmission components: a rear oil filled gear differential, front direct drive spool axle and center spur layshaft axle. The plastic diff gears and lightweight aluminium axles have all been designed to reduce rotating mass whilst remaining durable enough for brushless boosted & modified class touring car racing.
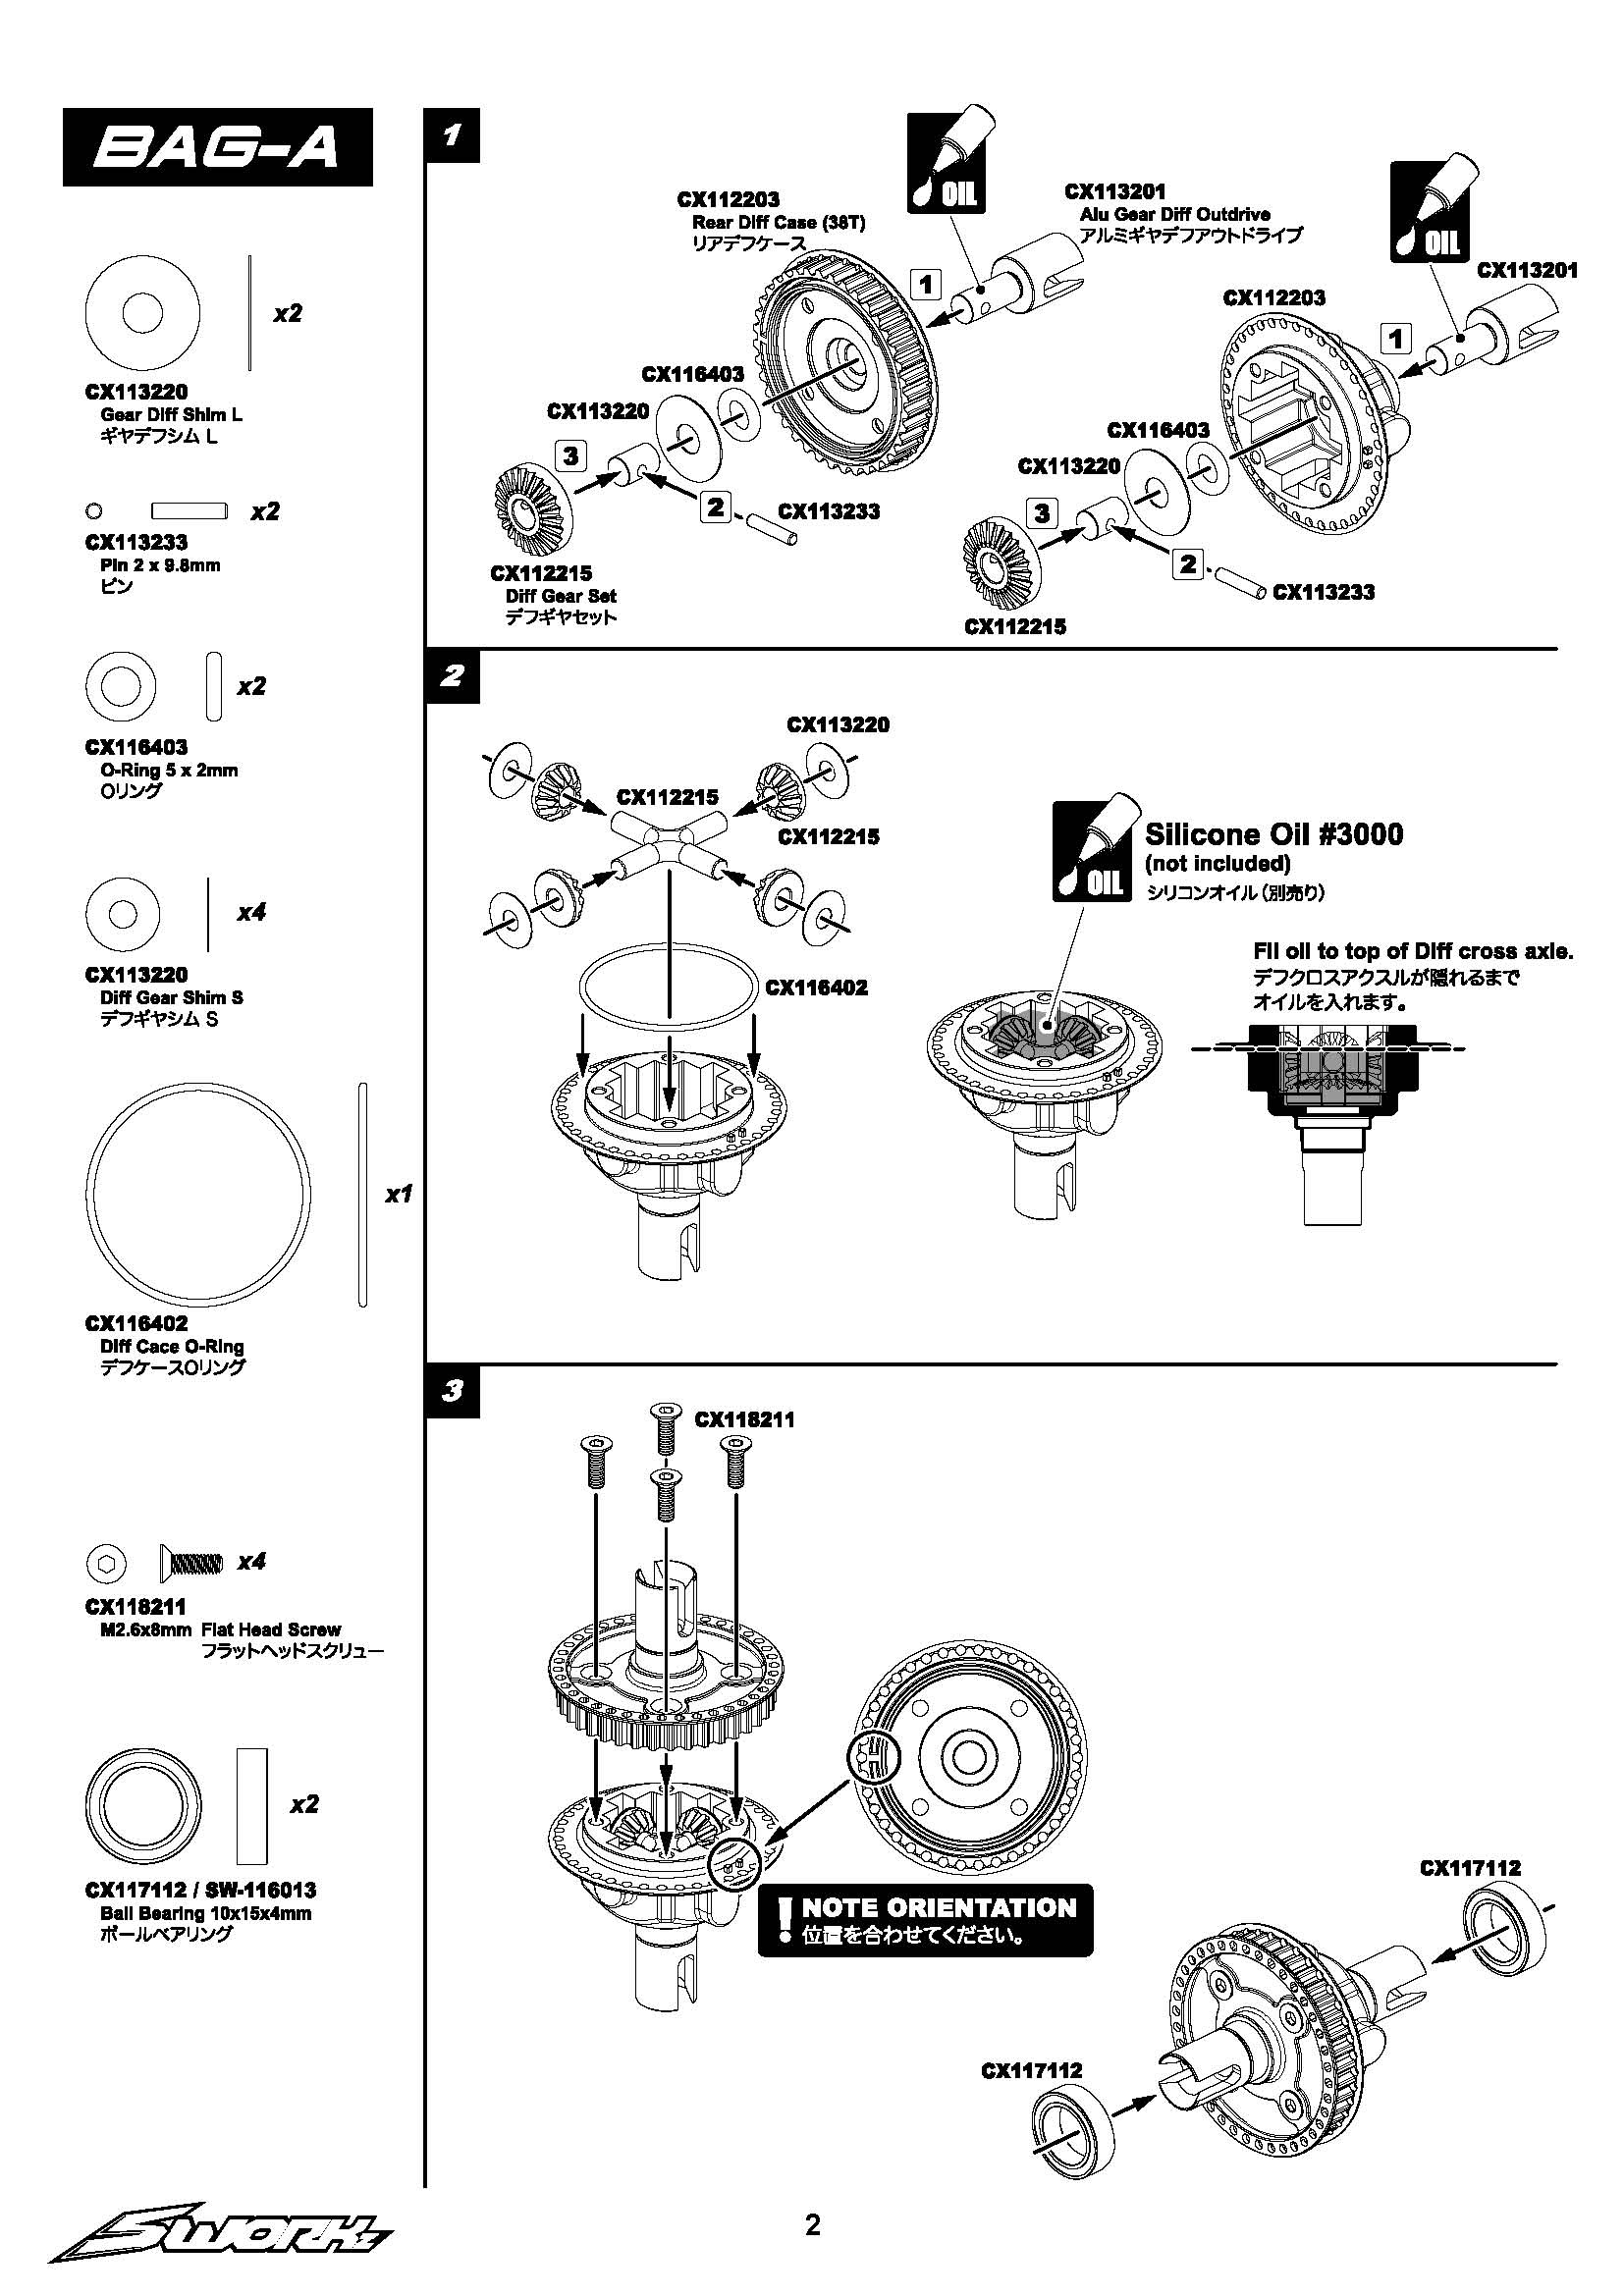
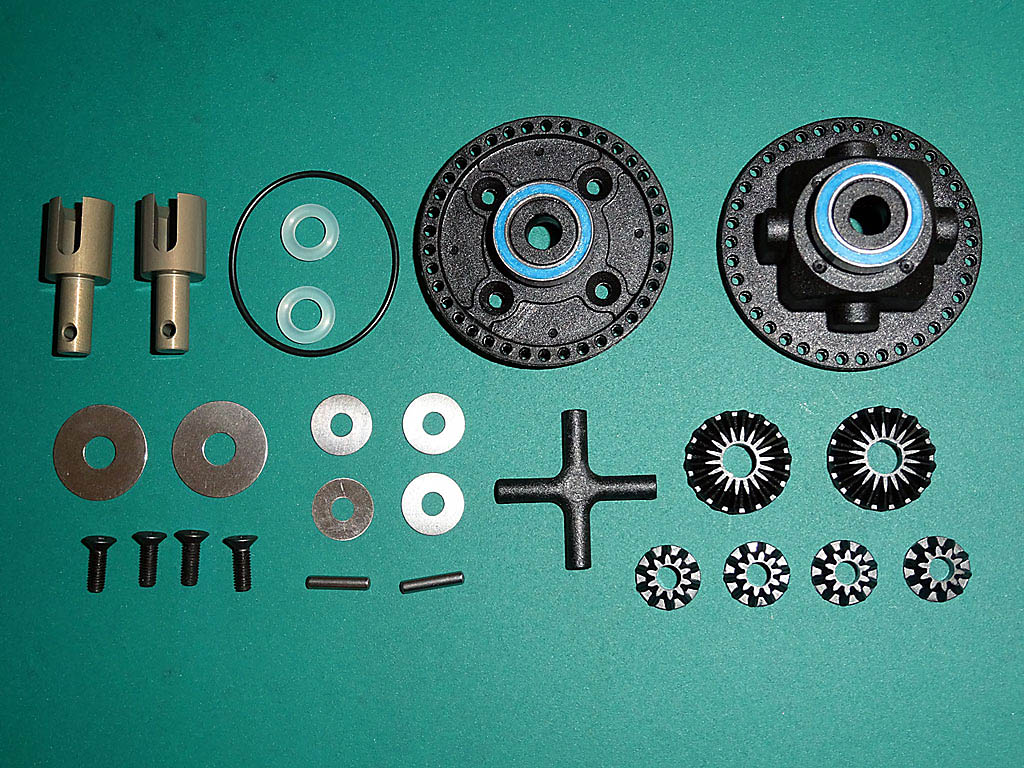
Bag-A contains all the parts needed to build the rear differential. My first task was to pre-tap the diff case holes with a spare screw which I'd highly recommend doing to all of the CX11's plastic components. A small dap of grease on the screw makes cutting a thread much easier! Once the diff case holes have been tapped the plastic around them will be slightly raised, lightly sanding the diff case on a flat surface with 1200 grit abrasive paper in a circular motion will remedy this.
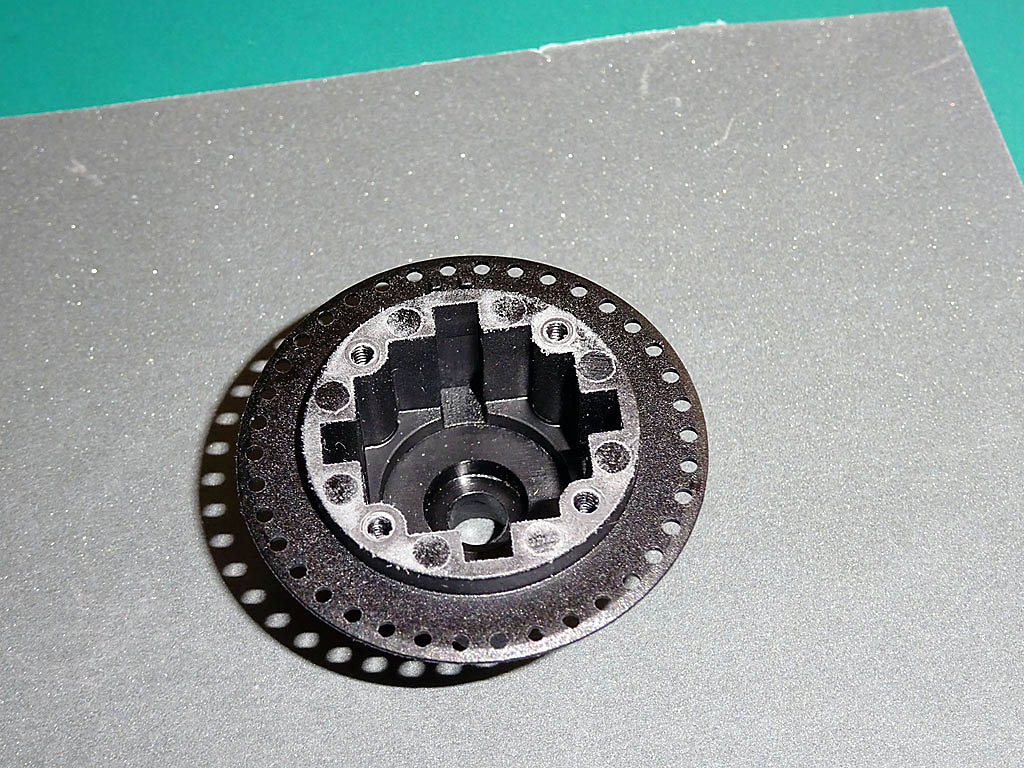
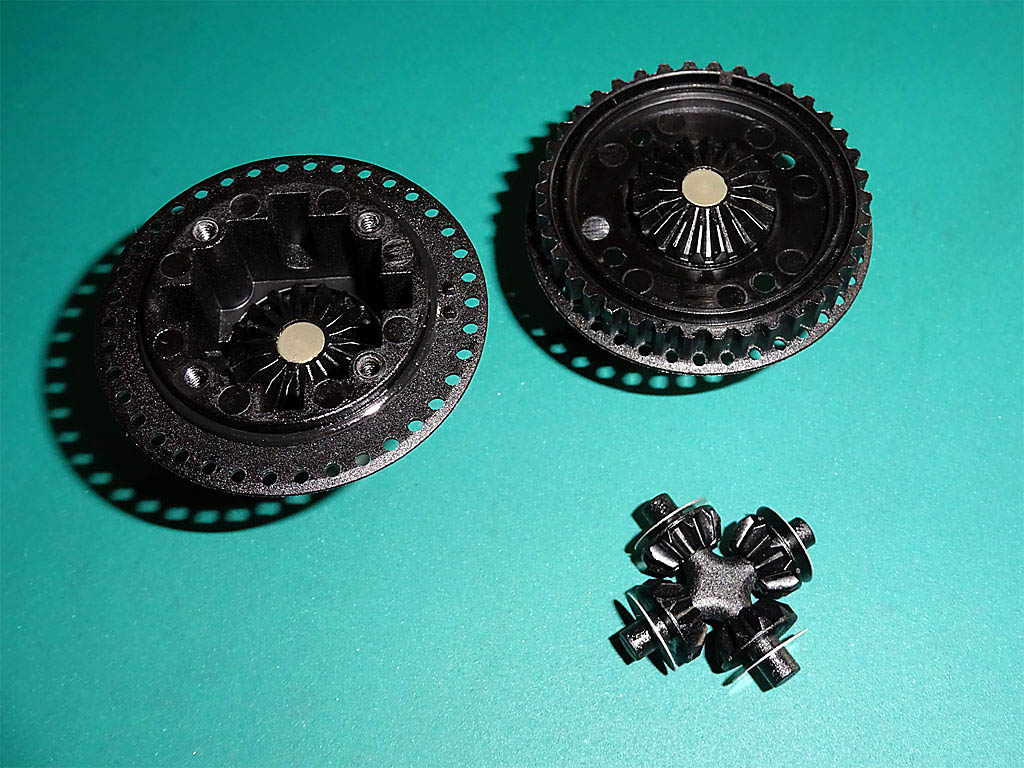
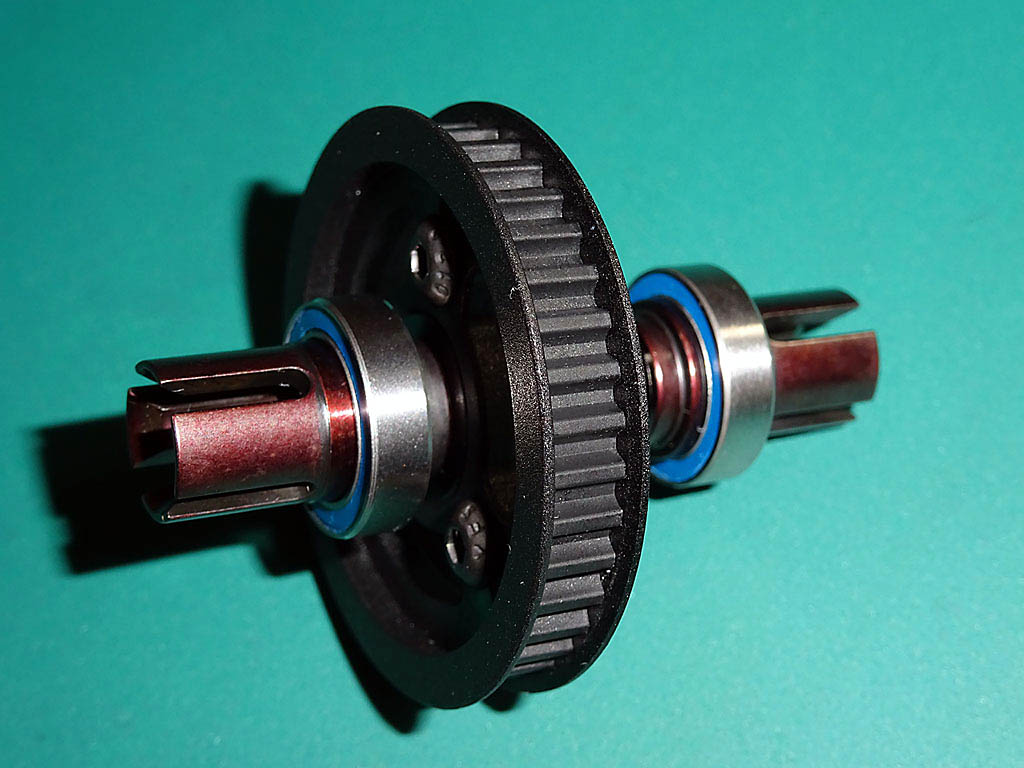
I lightly coated the outdrive shafts with Team Associated Green Slime grease (#1105) which I also repeated on the outdrive O-rings and diff case O-ring. The diff shims have a slight sharp edge on one side due to the stamping process at manufacture; to remove this I gently sanded them with 1200 grit abrasive paper until smooth. After cleaning the shims and diff case I assembled the diff as per the instructions but without any oil to check for any rough spots when rotated.
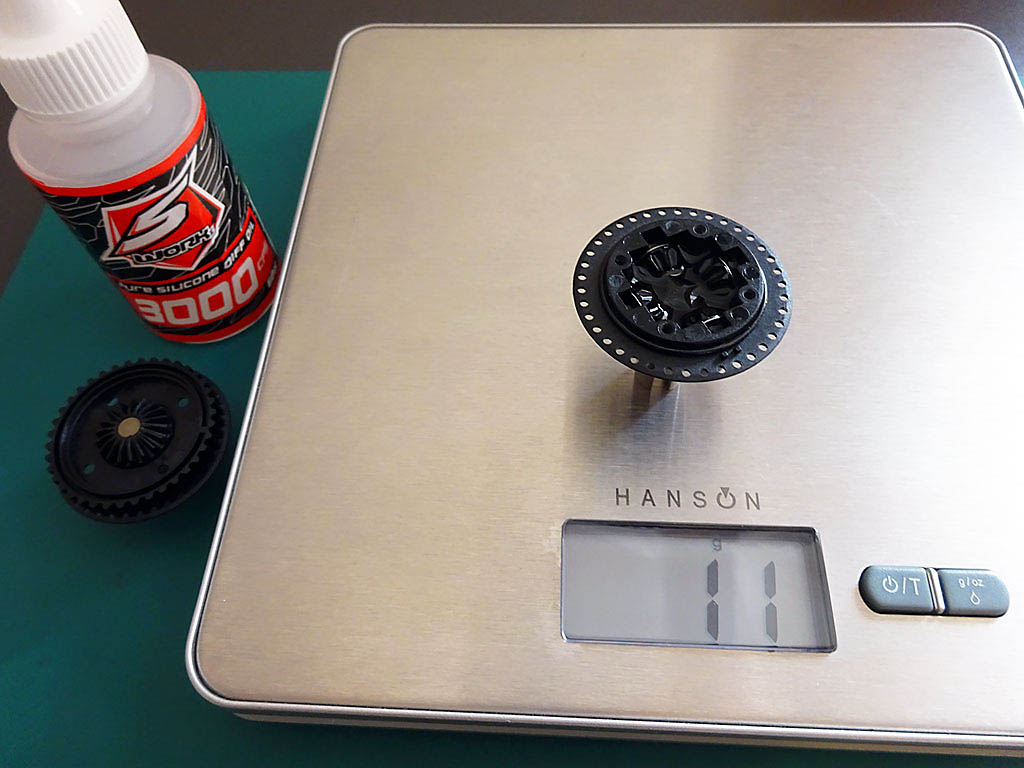
Happy with the diff action I filled the diff with the recommended #3000 SWORKz silicone oil (SW-410014) to the top of the cross axles. A top tip to ensure your differential remains consistent after rebuilding is to weigh the filled diff half (mine was 11g) and then refill to this weight when refreshing the oil. When screwing the diff halves together be sure to tighten the screws in an opposite pattern a little at a time rather than fully tightening each screw in one go to avoid distorting the case.
Following the instructions above you should be rewarded with a smooth leak free differential.
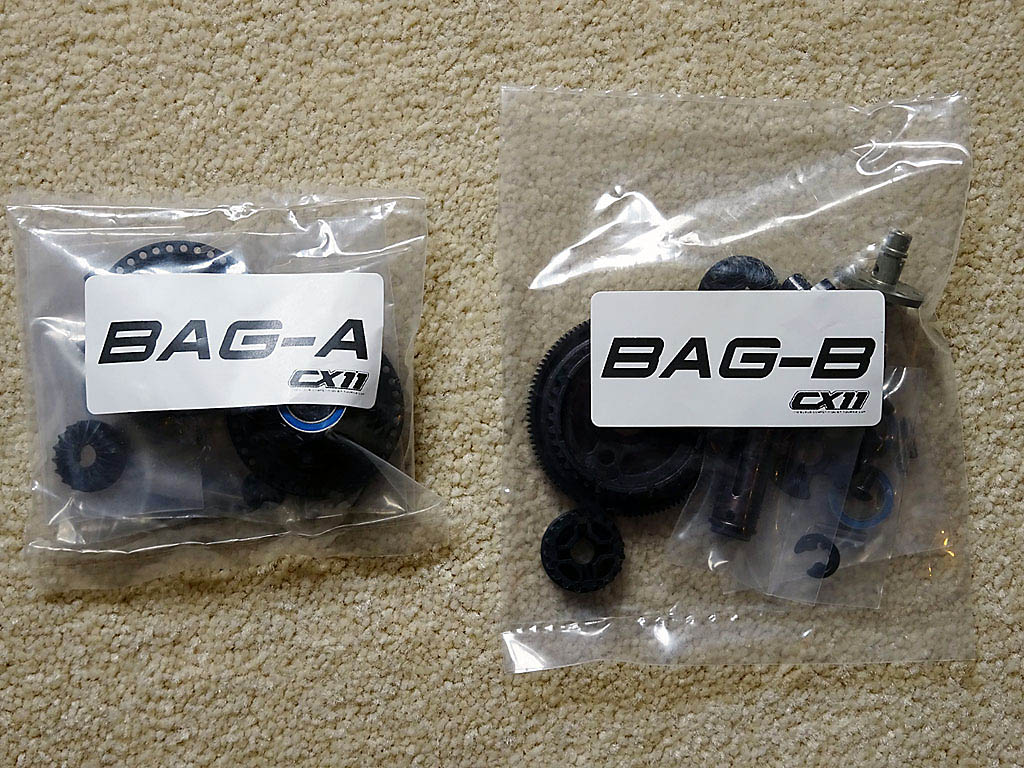
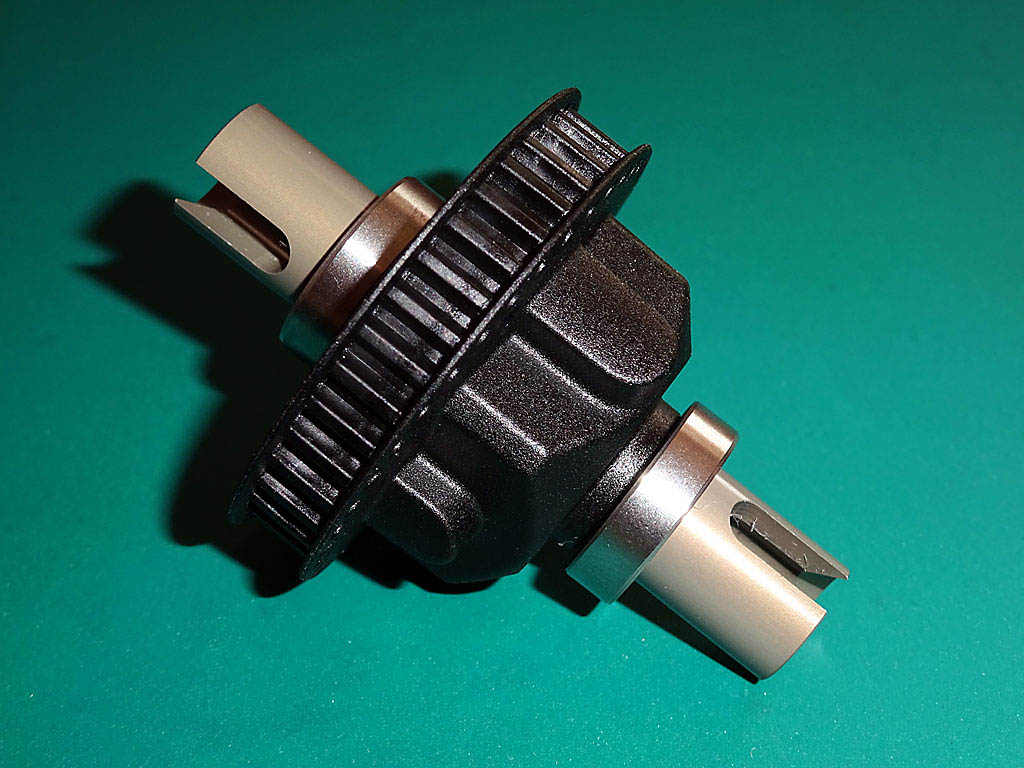
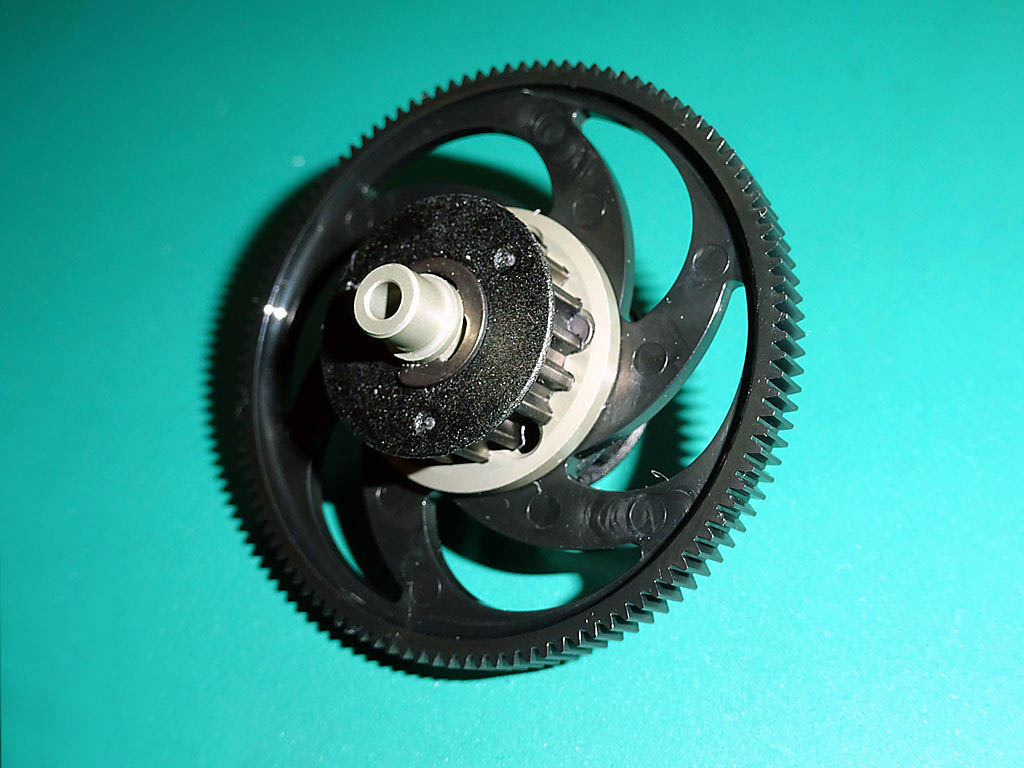
Bag-B's front spool and center layshaft assembled as per the manual. I chose to add a small amount of medium thread lock to the axle screws to avoid future problems. The spool outdrives are machined steel and of a blade-less design for added reliability with high powered brushless motors. Another nice inclusion is the high quality Axon TCS 64 dp spur gear. Spurs from Arrowmax, RW Racing, Panaracer, Xenon, XRay, Yokomo and others will also fit should the need arise.
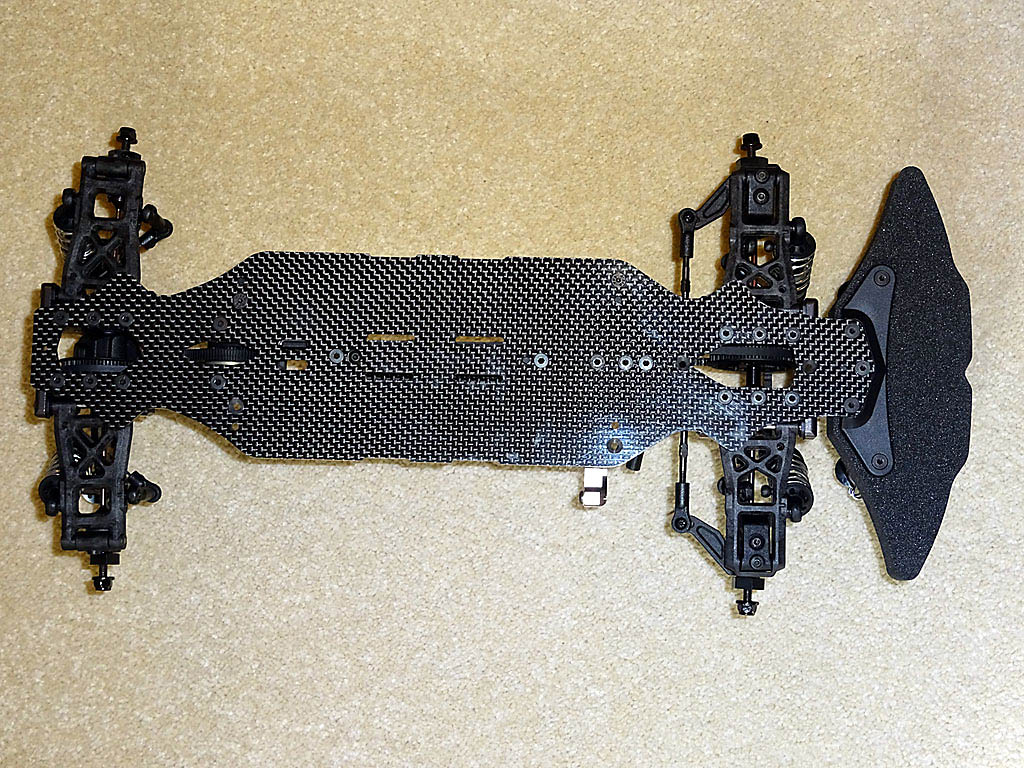
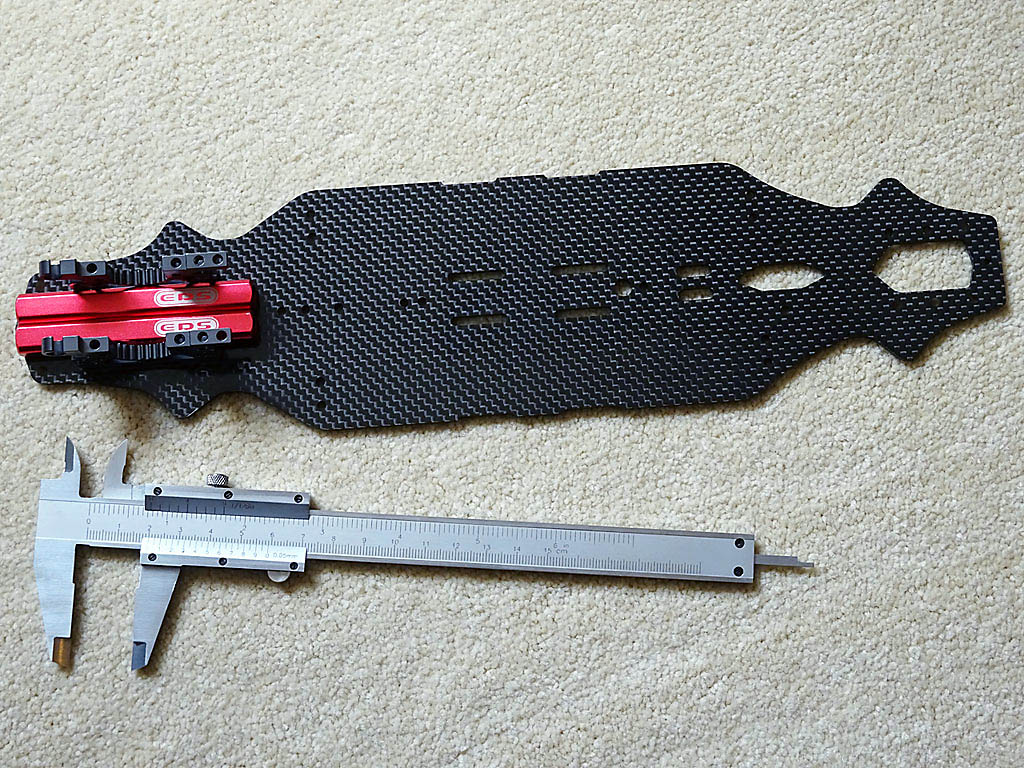
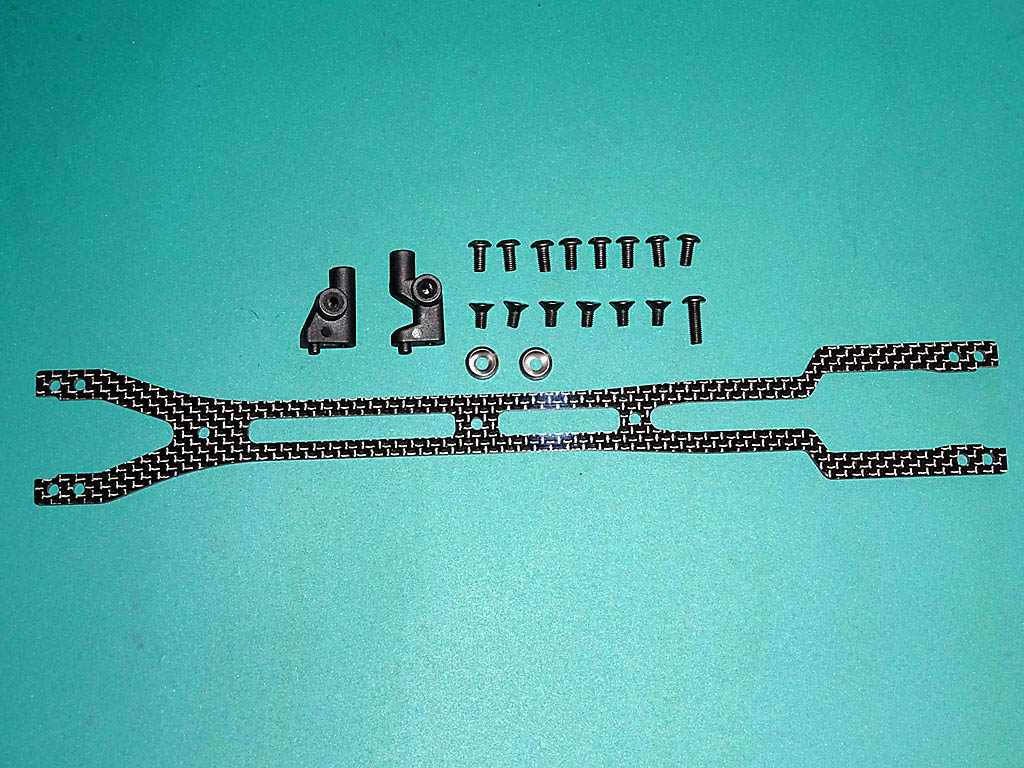
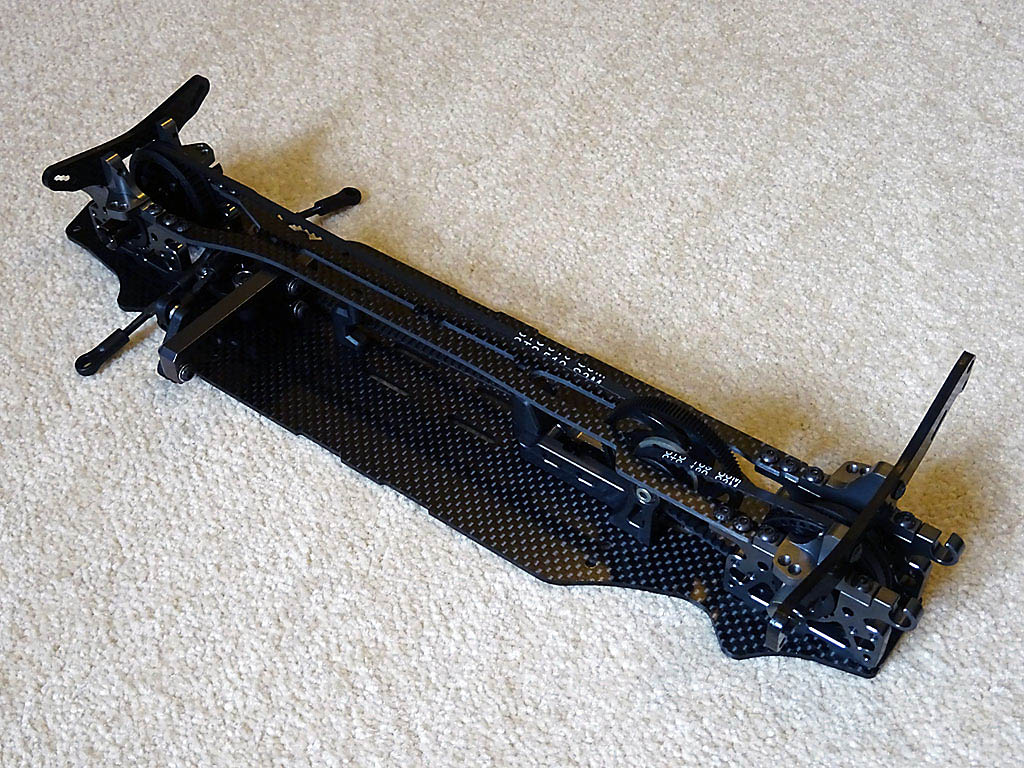
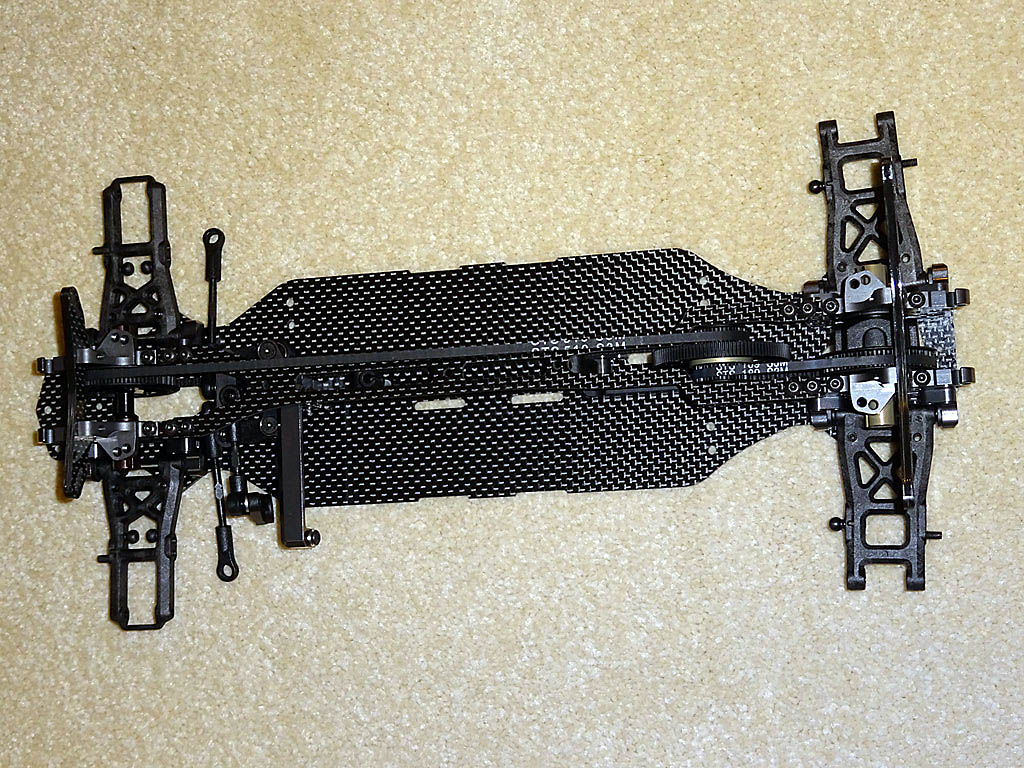
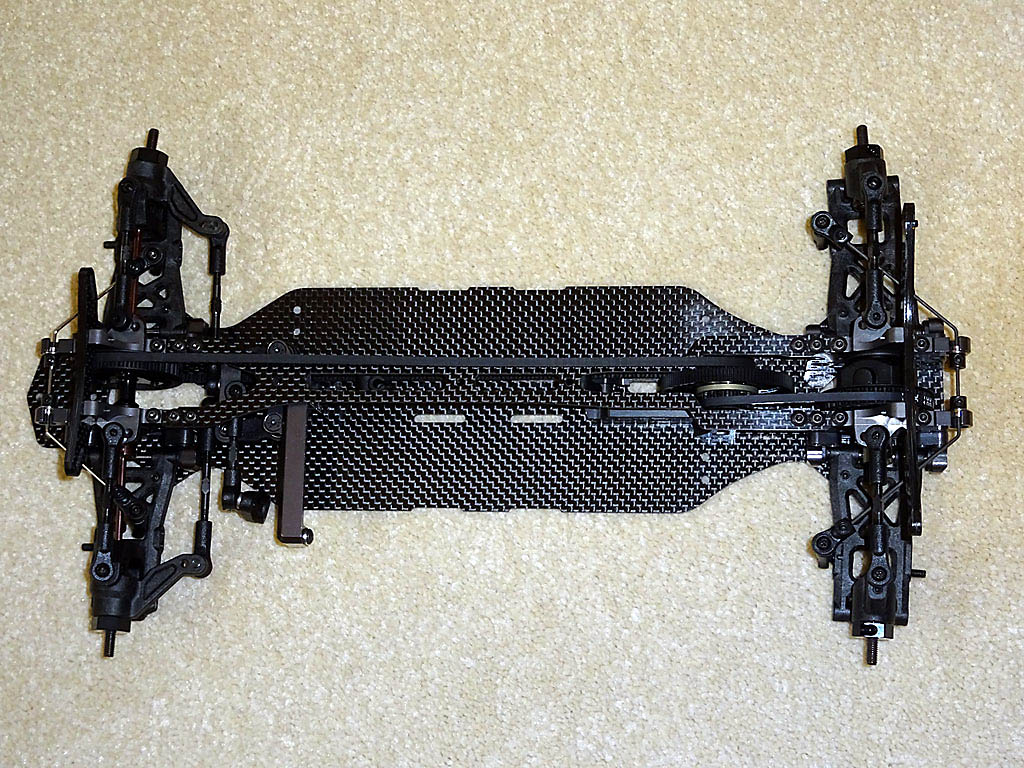
Chassis, Bulkhead, Motor Mount, Drive Belts & Shock Towers
Next is attaching the bulkheads and drivetrain to the main lower chassis plate. Before starting assembly I sealed the 2.25mm thick main chassis plate and 3.0mm shock tower edges using CA/super glue (cyanoacrylate). I was pleased to find smooth edges on the carbon fibre components so omitted sanding them first. If you choose to sand carbon fibre always wear a protective dust mask and disposable gloves, I'd also recommend wet sanding the parts whilst submerged in water to minimise the harmful dust.
When sealing the shock towers avoid the lower area where the towers sit flush with the bulkheads. Sealing the 2.0mm thick top deck isn't necessary due to its more protected location. My preferred method of sealing carbon fibre is using a 'Bostik Super Glu Precision' pen which is clean and quick to use, resulting in a nice smooth even finish.
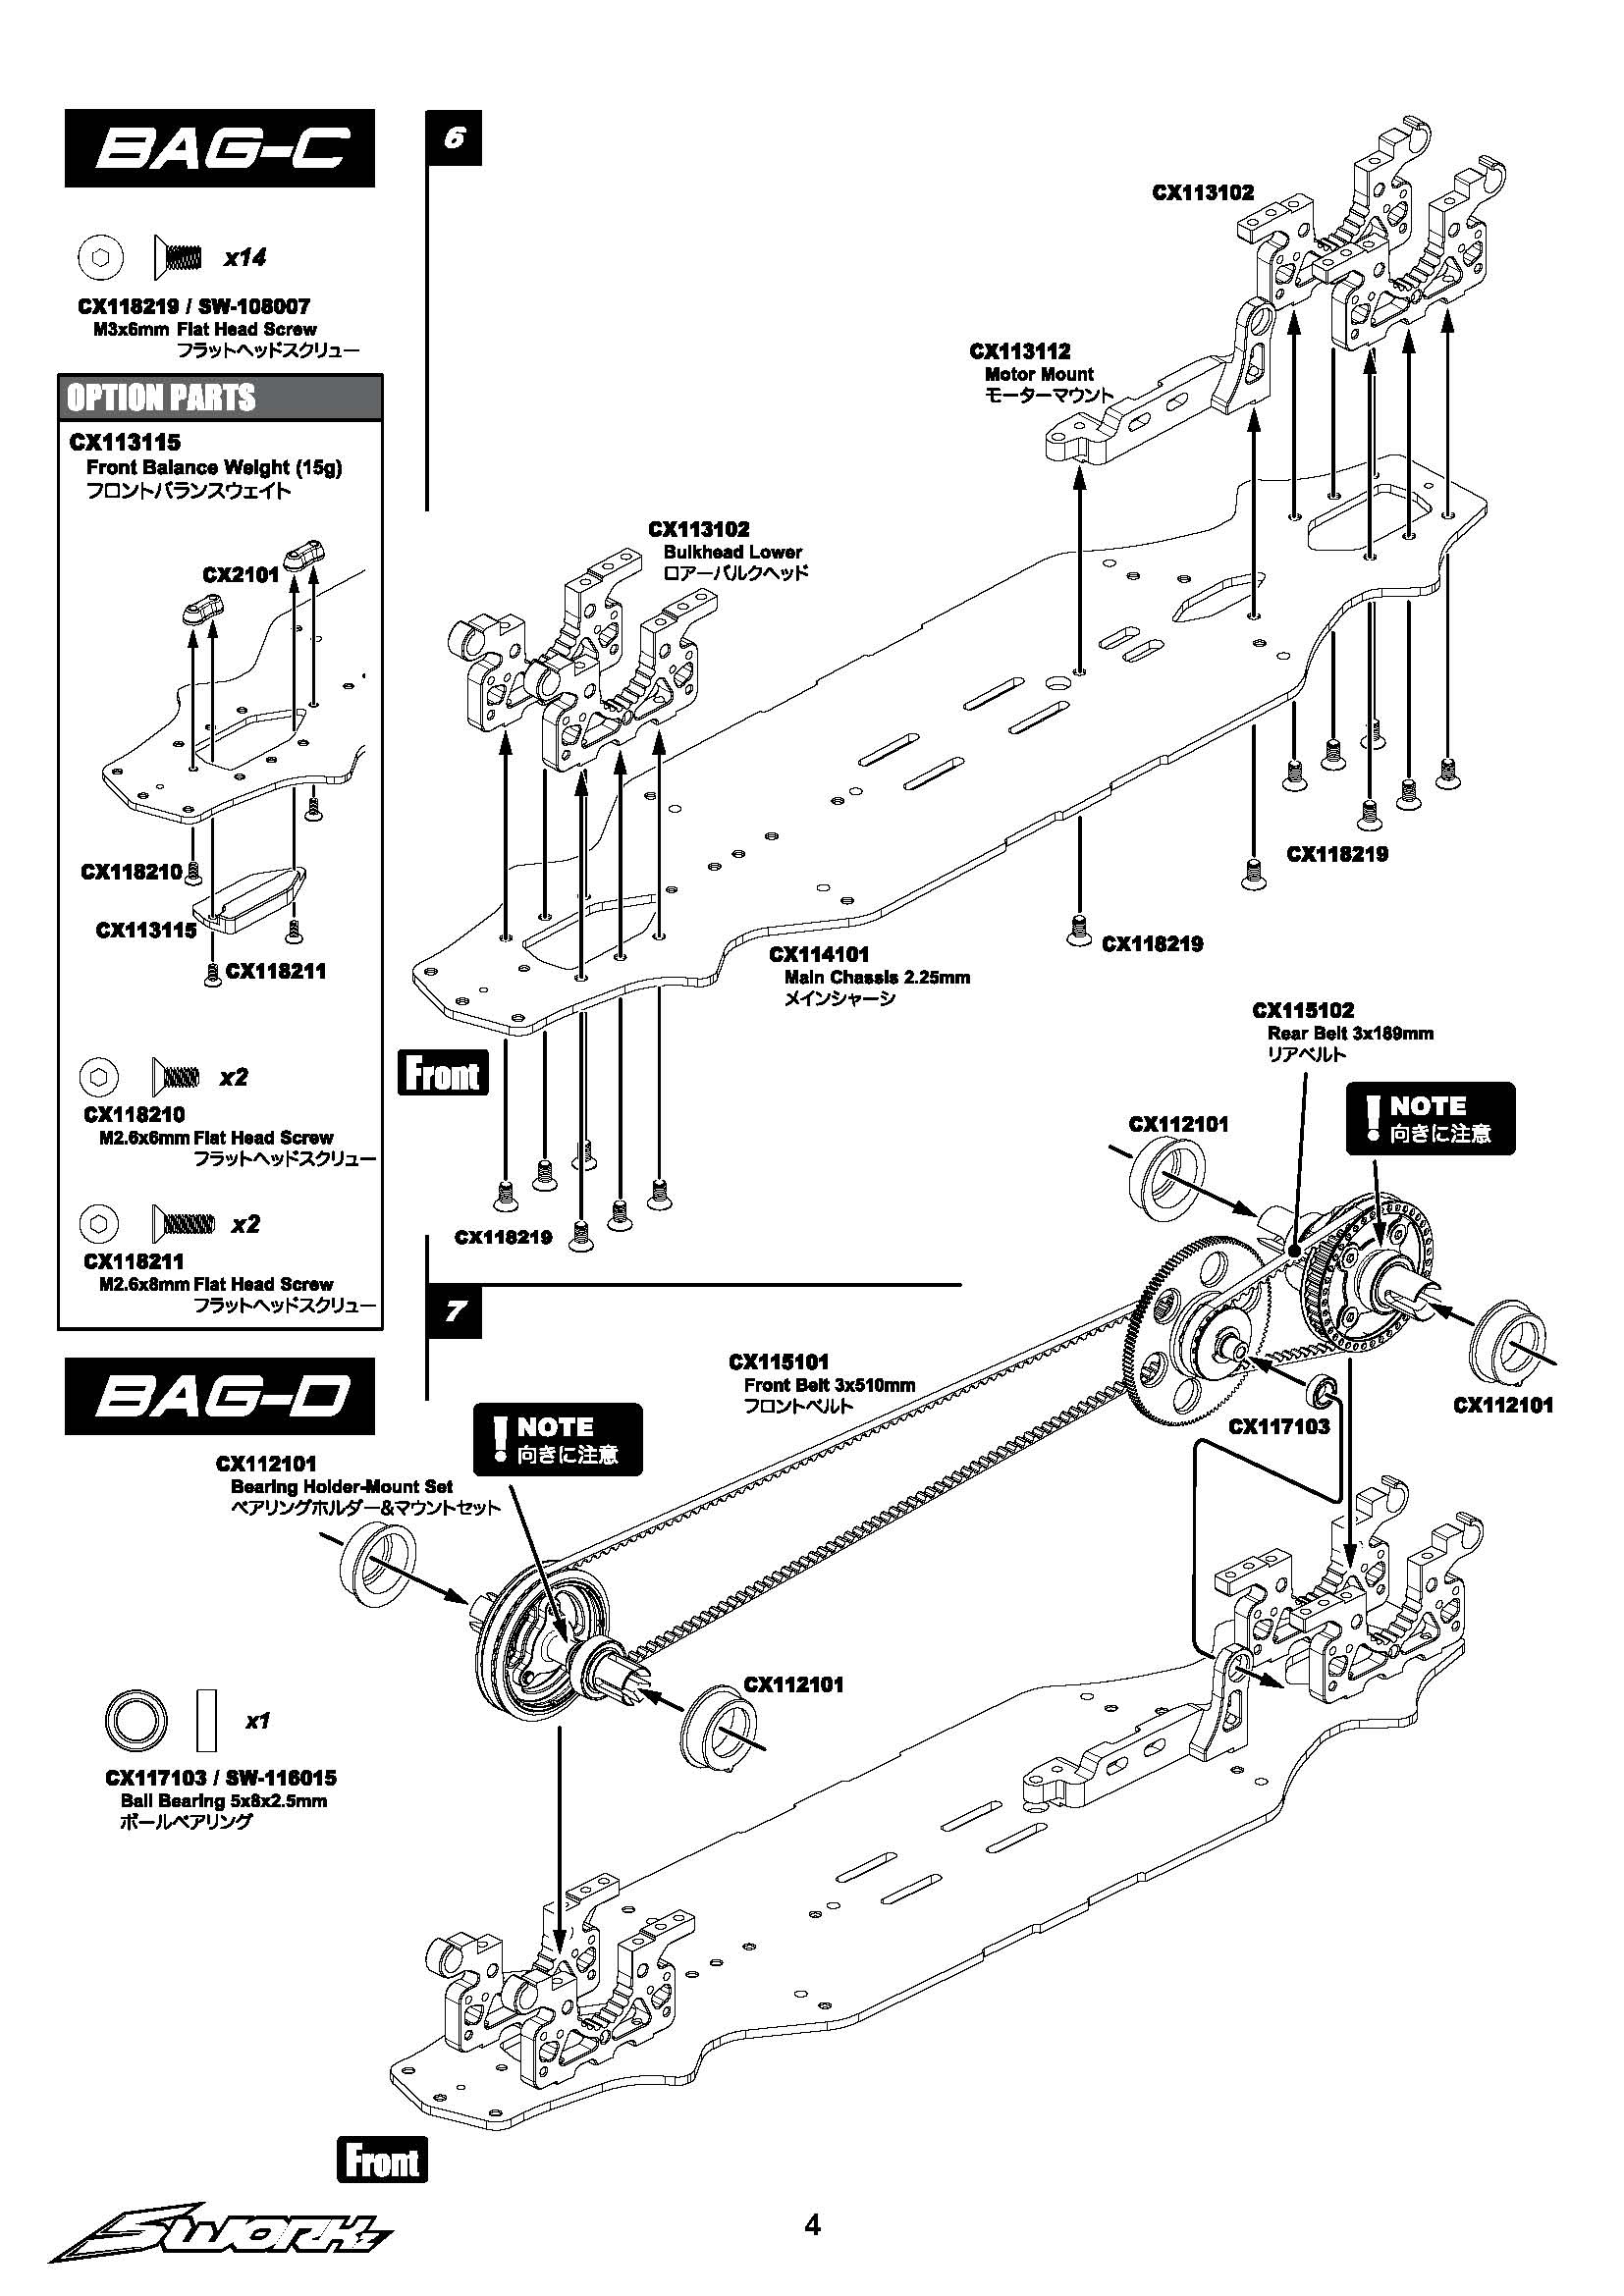
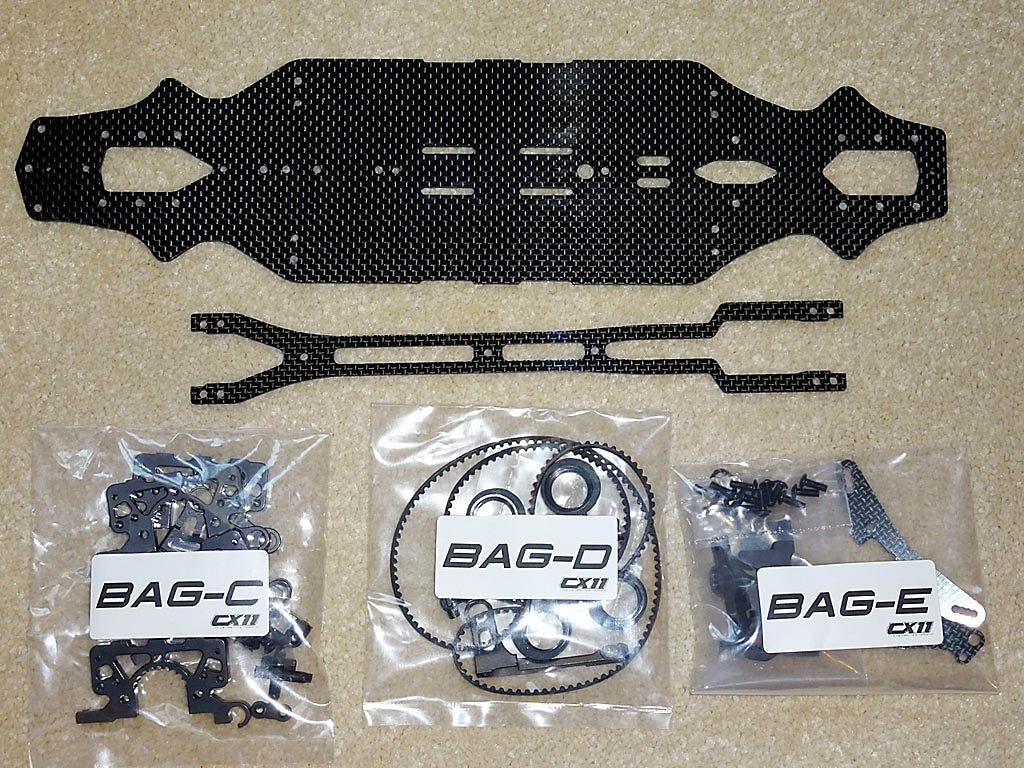
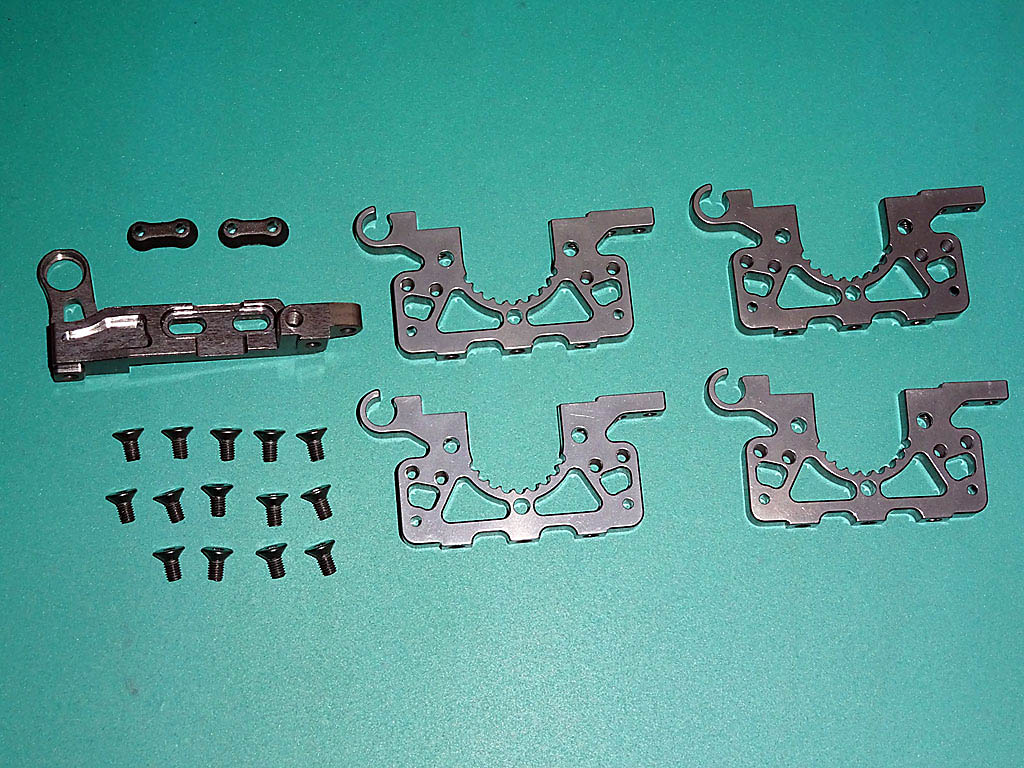
Bag-C contains the aluminium lower bulkheads, aluminium motor mount along and the necessary screws. All four bulkhead lowers are identical, reducing the part count, and like the rest of the CX11's aluminium components are anodised in a cool gun metal finish. I used a pair of 10mm chassis droop gauge blocks side by side between the bulkheads to ensure they stayed aligned whilst tightening the screws, and then double checked the alignment with a vernier caliper.
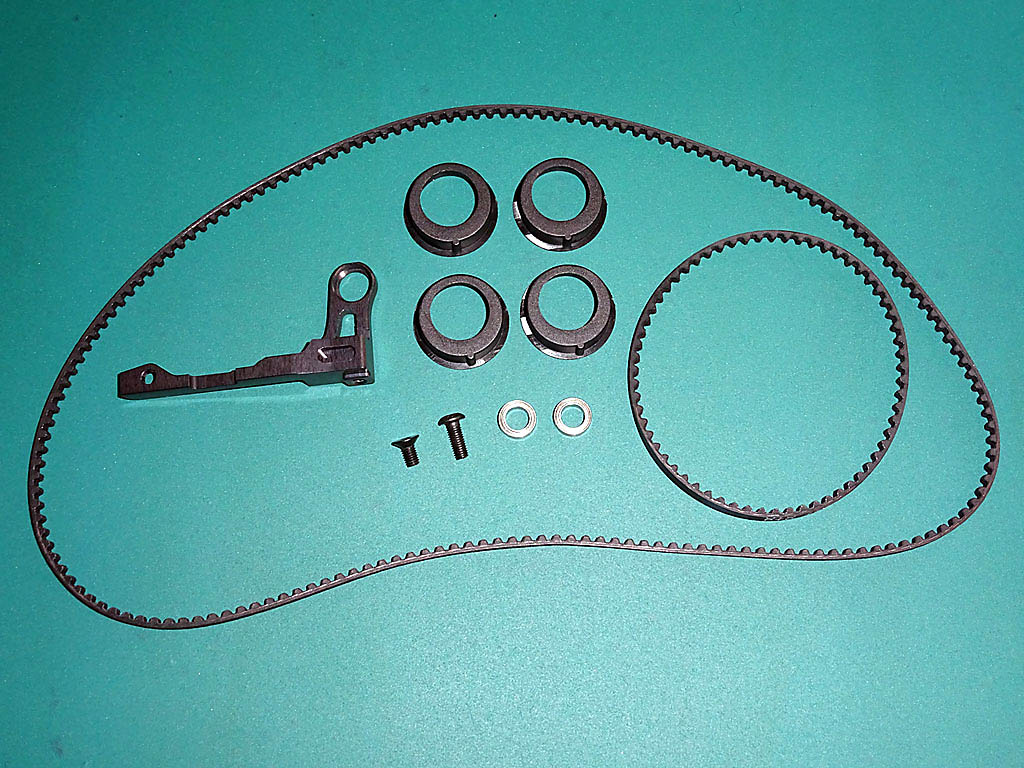
Bag-D has the drive belts, eccentric bearing holders, aluminium centre shaft mount, screws and bearings. All the CX11's bearings are supplied pre-lubricated. For maximum performance you can flush out all the grease with WD40 or automotive brake cleaner and once dry replace with a couple of drops of light bearing oil. This will reduce drag at the expense of service life and increased maintenance.
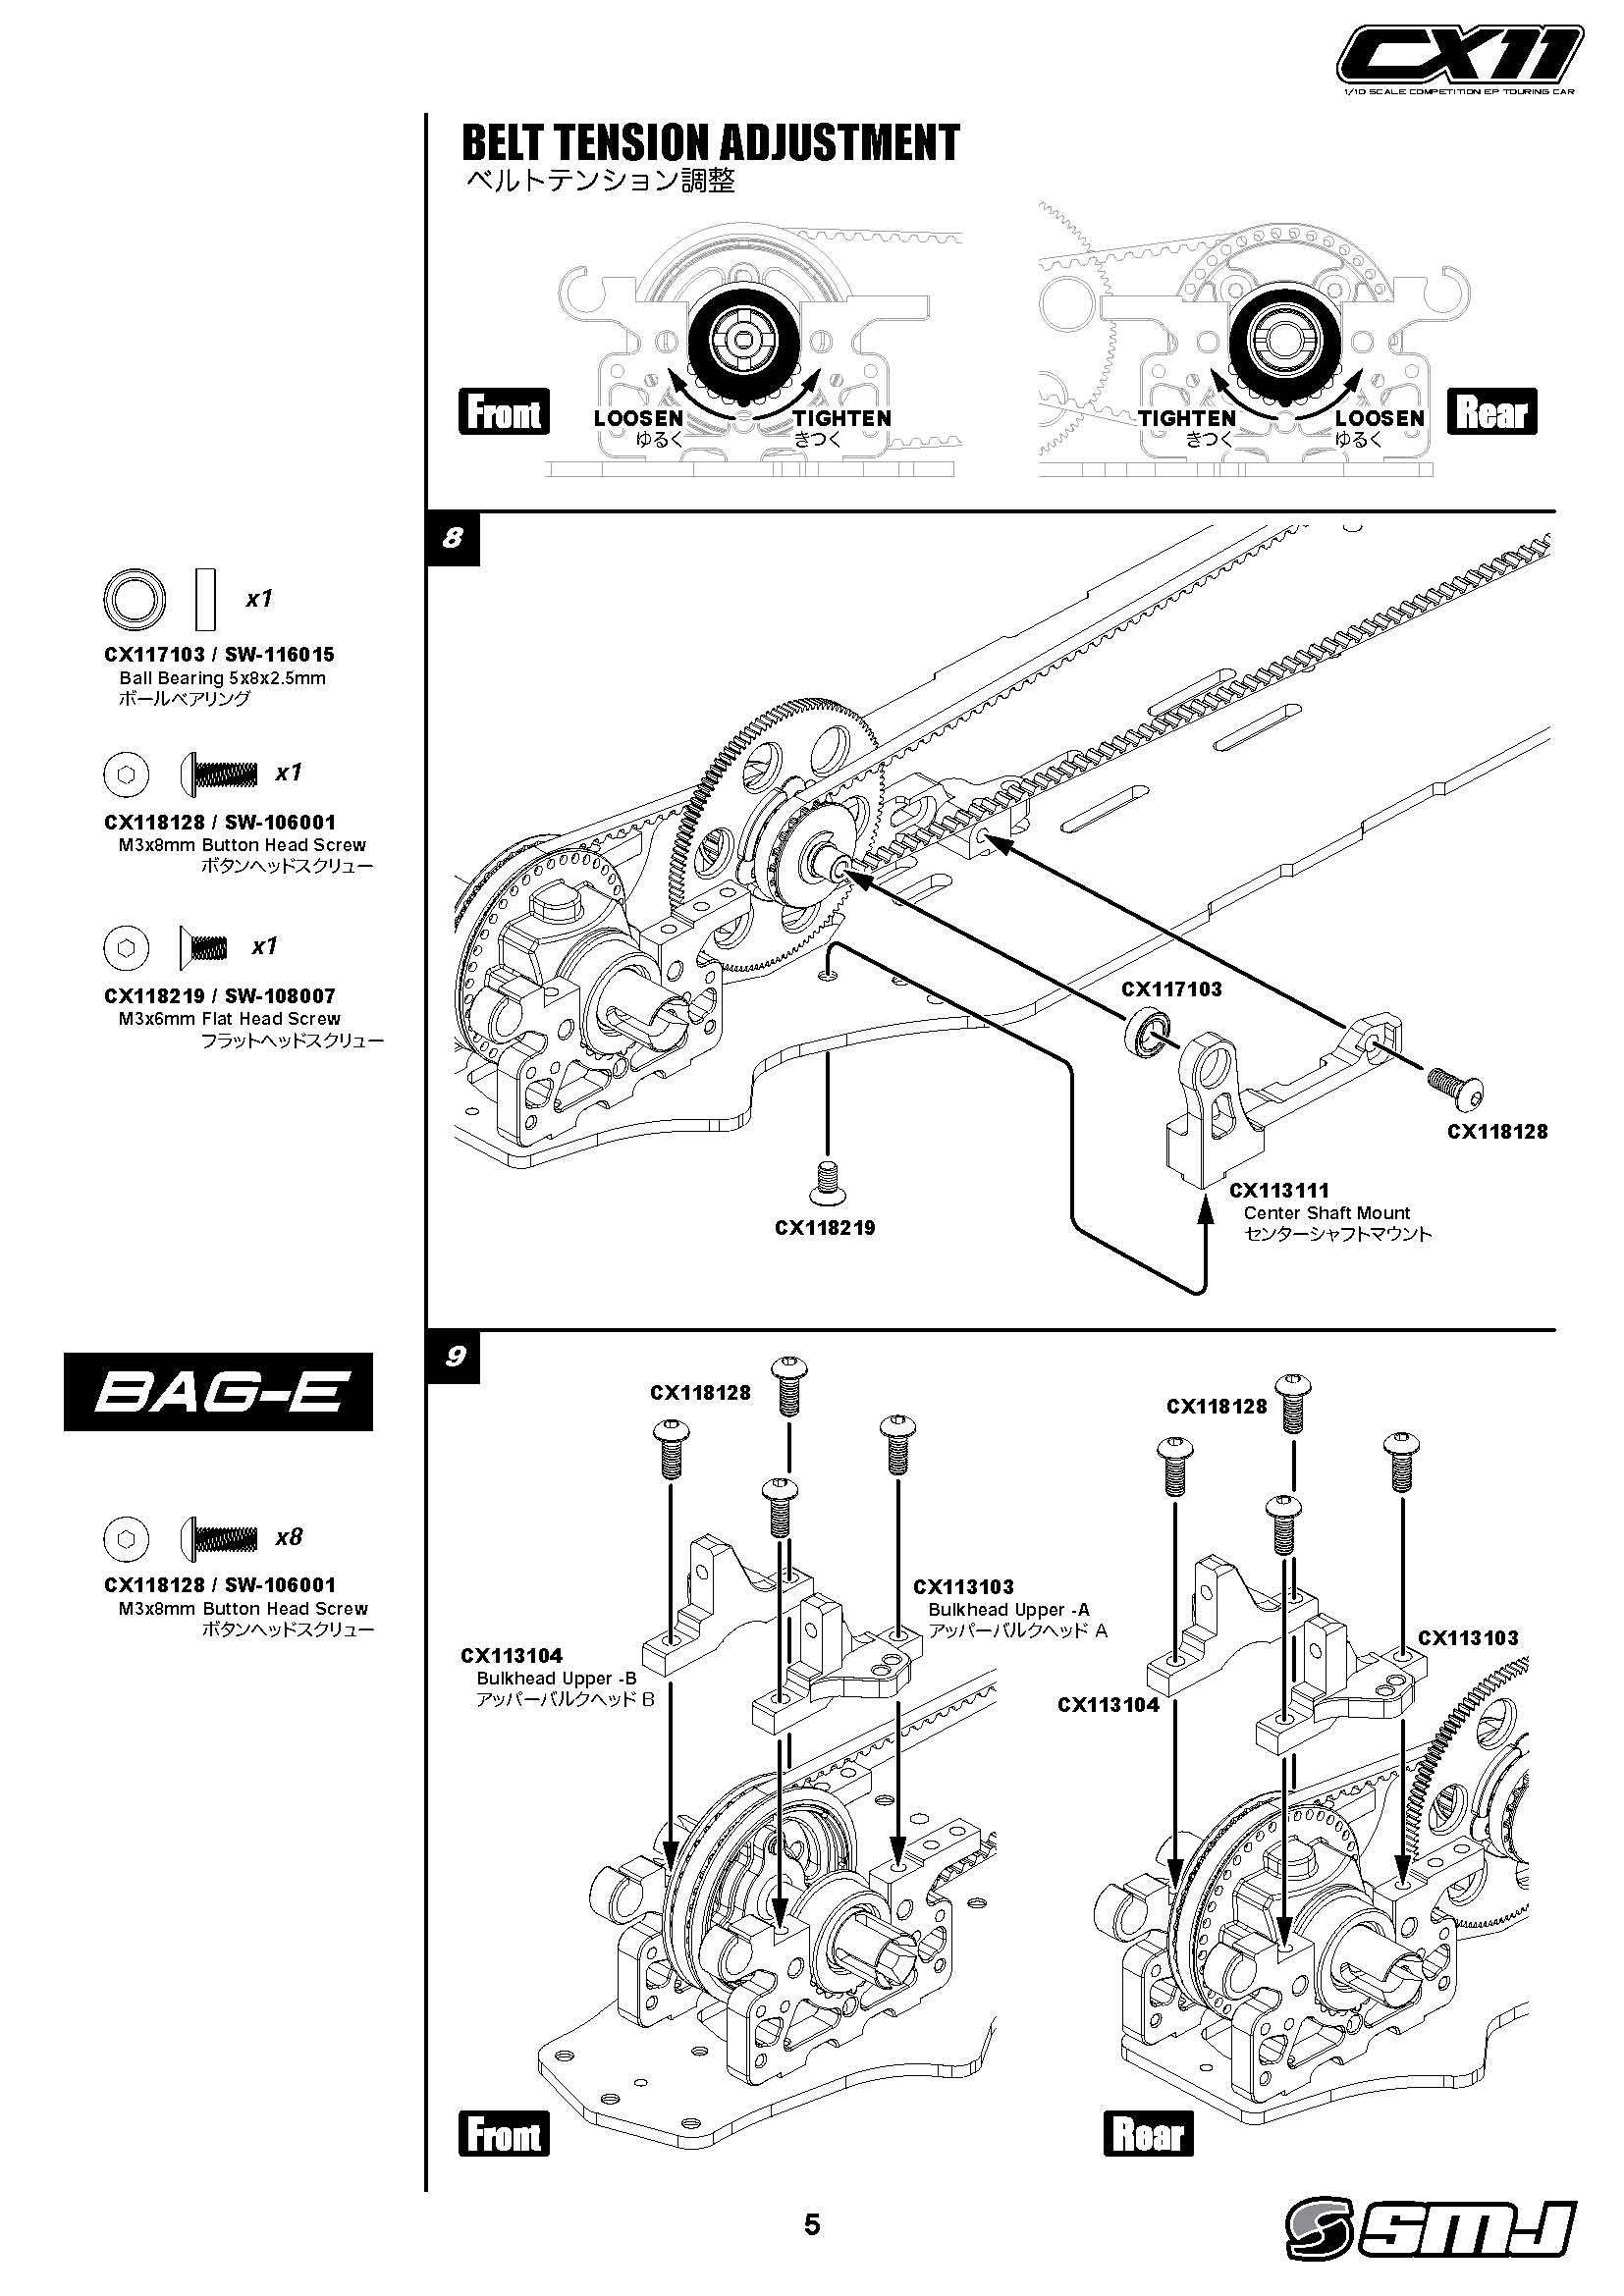
The instruction manual shows both drive belts tension adjustment to be in the centre position. I found the rear belt to be far too tight once assembled (especially for 13.5/17.5 blinky) so I loosened it by two notches with the front belt still tensioned as original.
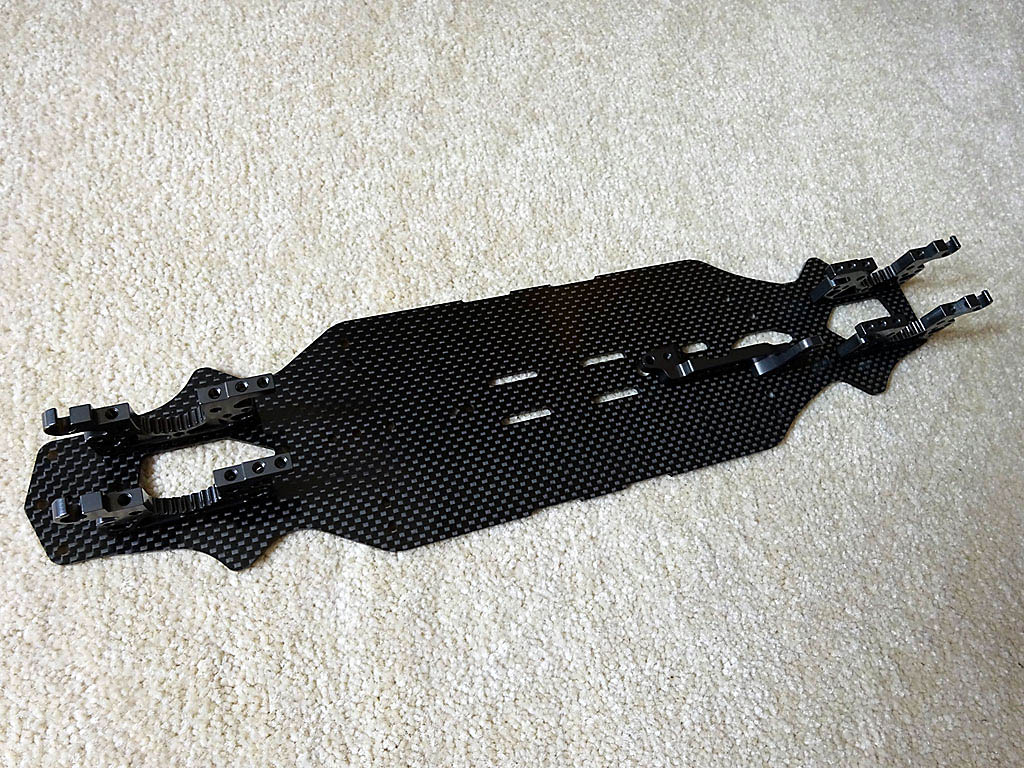
Bag-E contains the aluminium bulkhead uppers, carbon fire shock towers plus required screws and was assembled as per the manual. Each bag having all the parts and hardware for a section of the build is a refreshing change from rummaging through multiple parts bags as in previous cars builds.
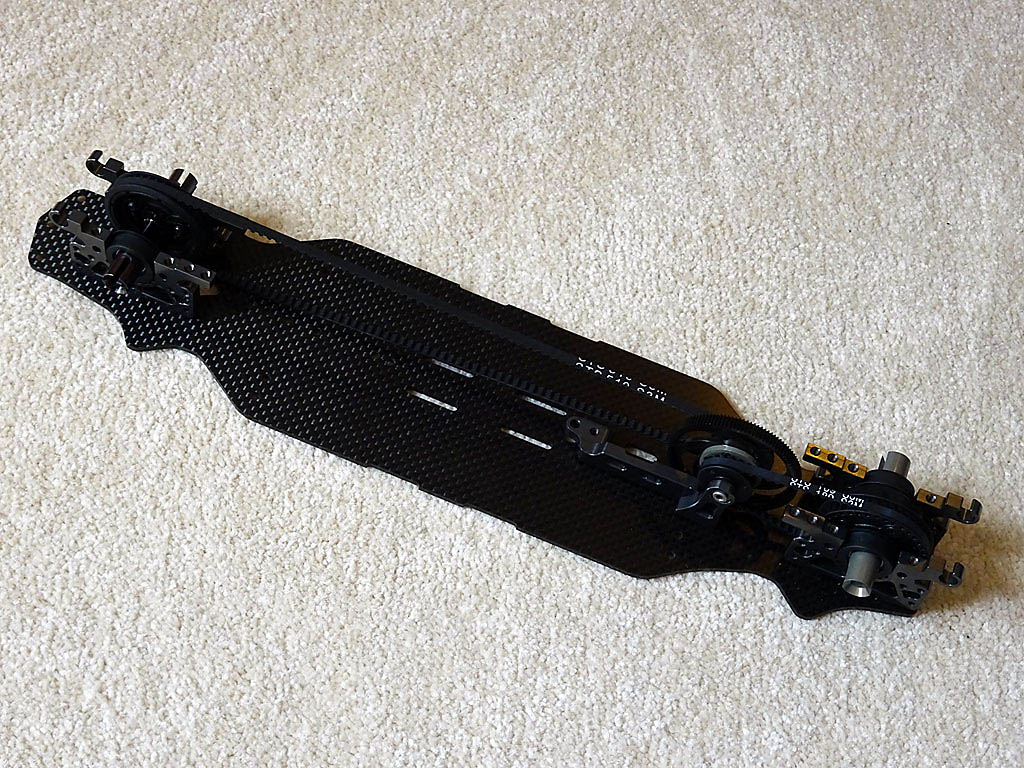
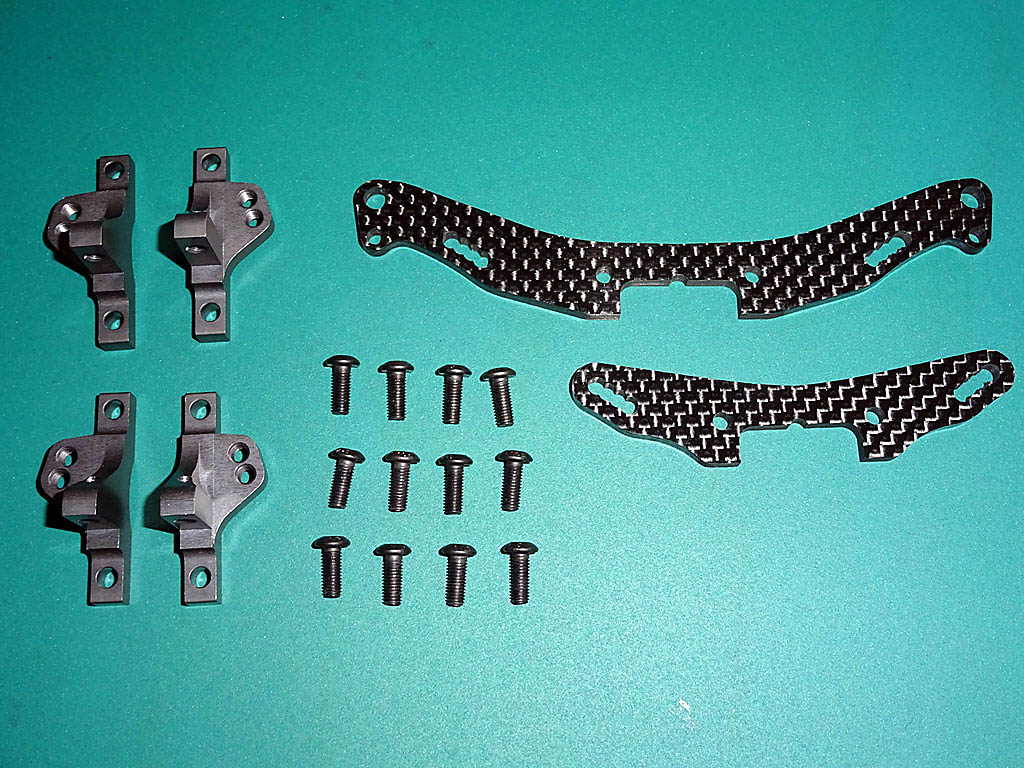
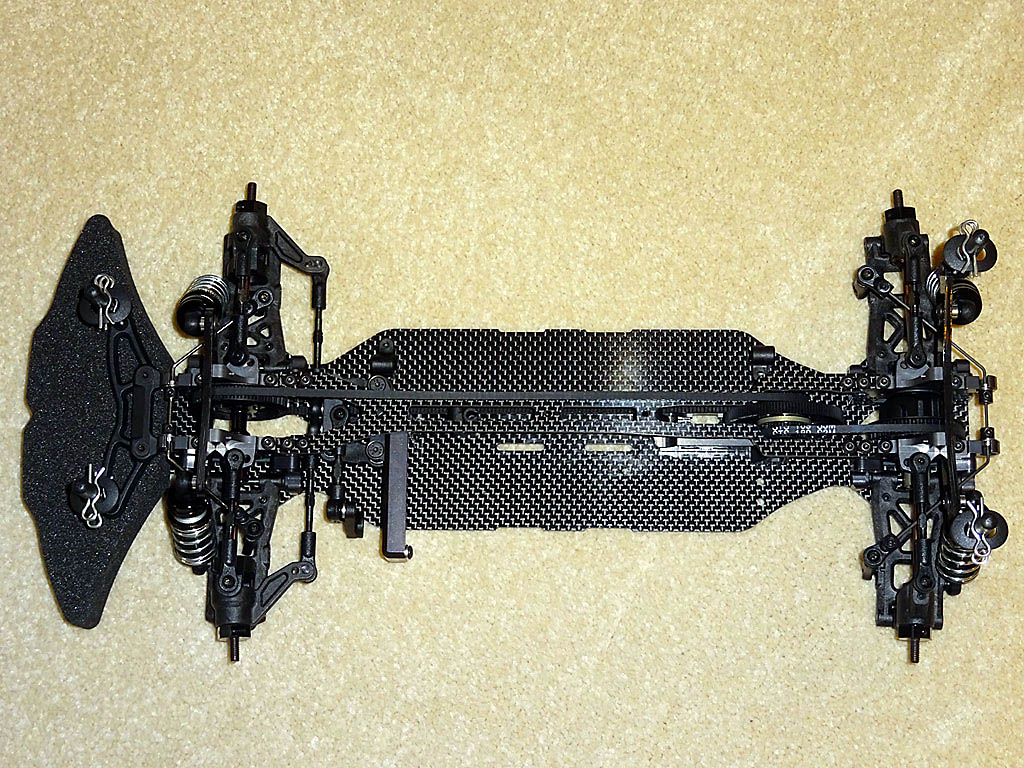
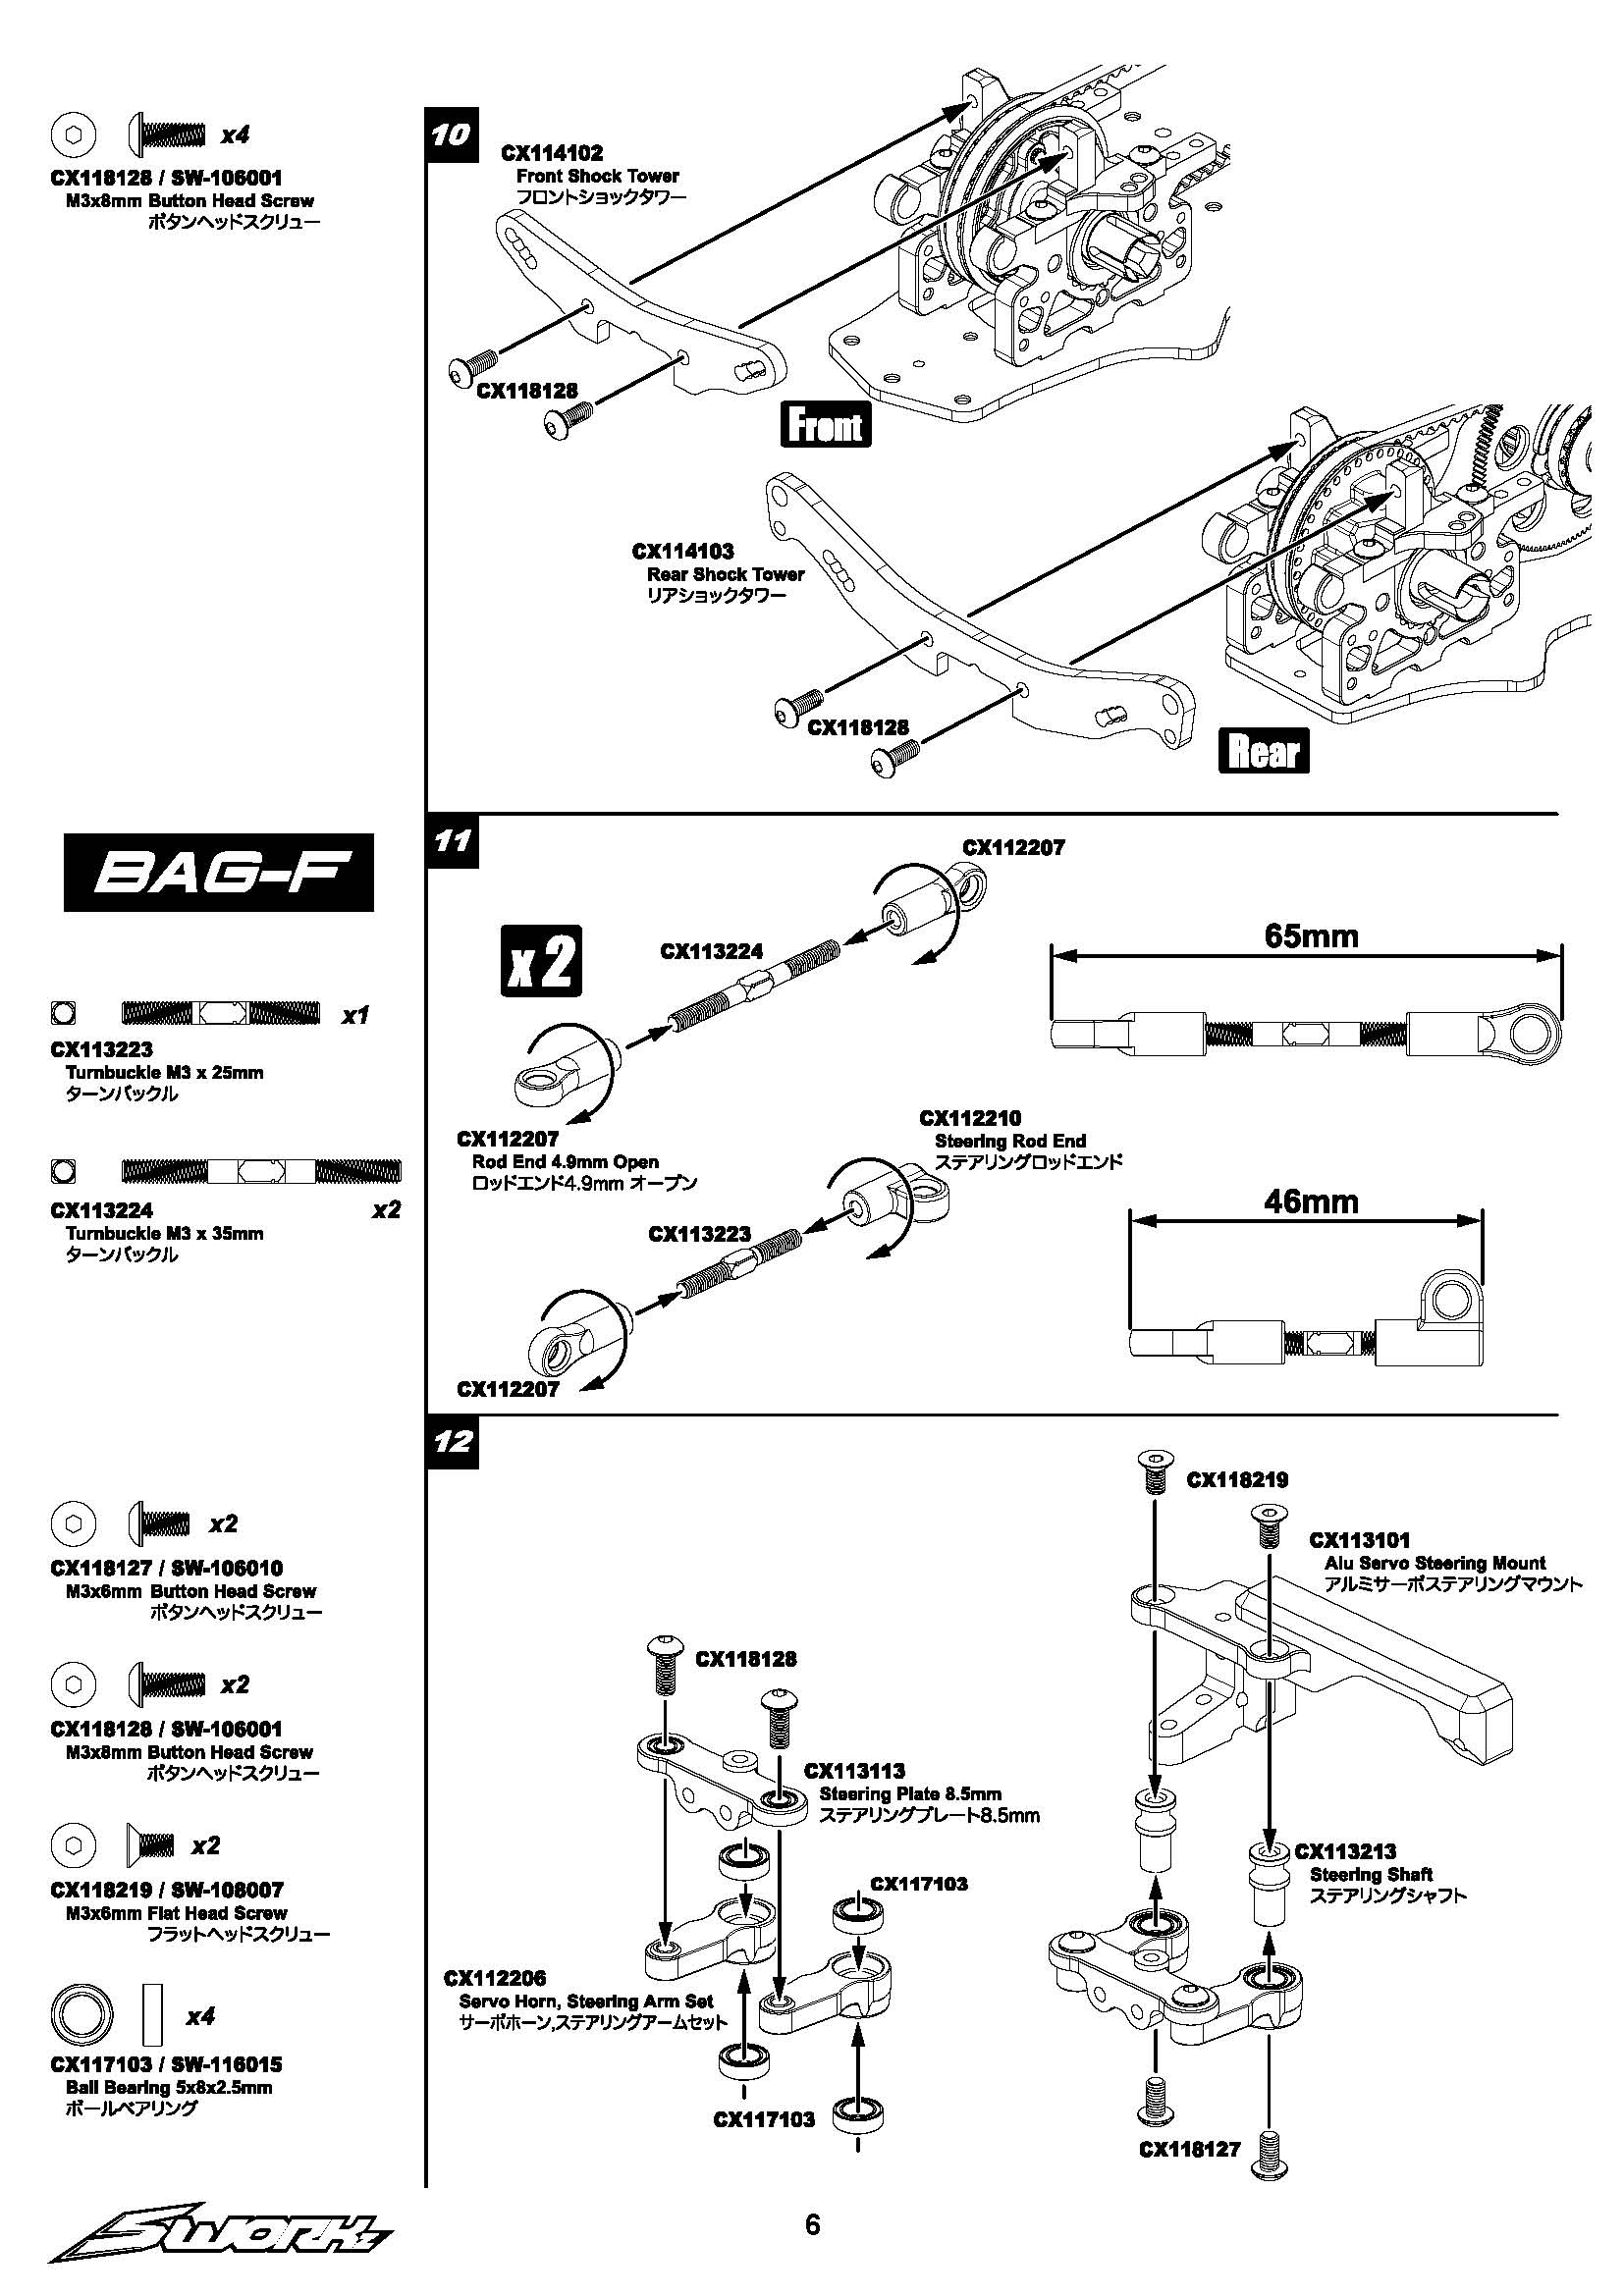
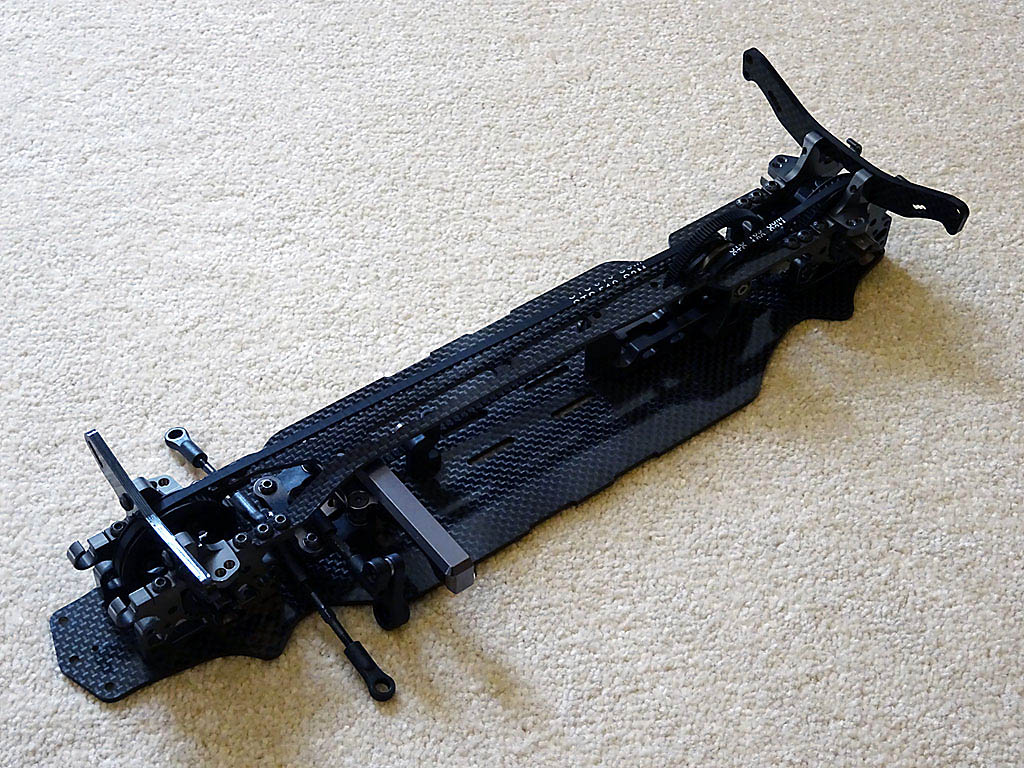
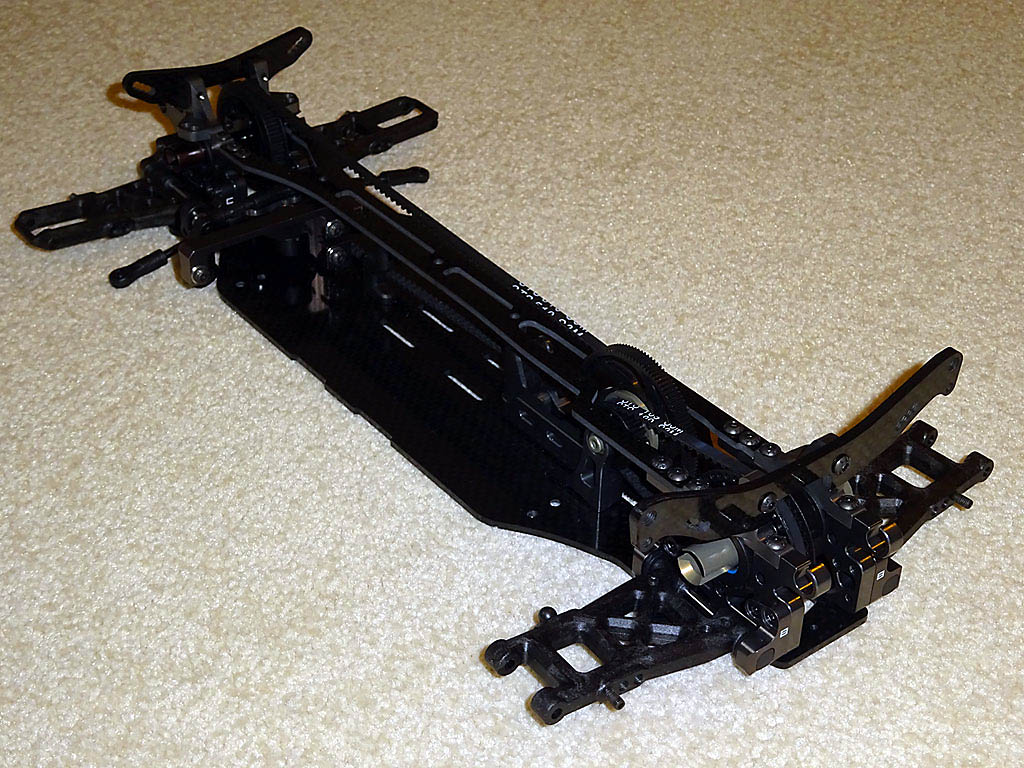
Steering, Turnbuckles, Servo Mount & Top Deck
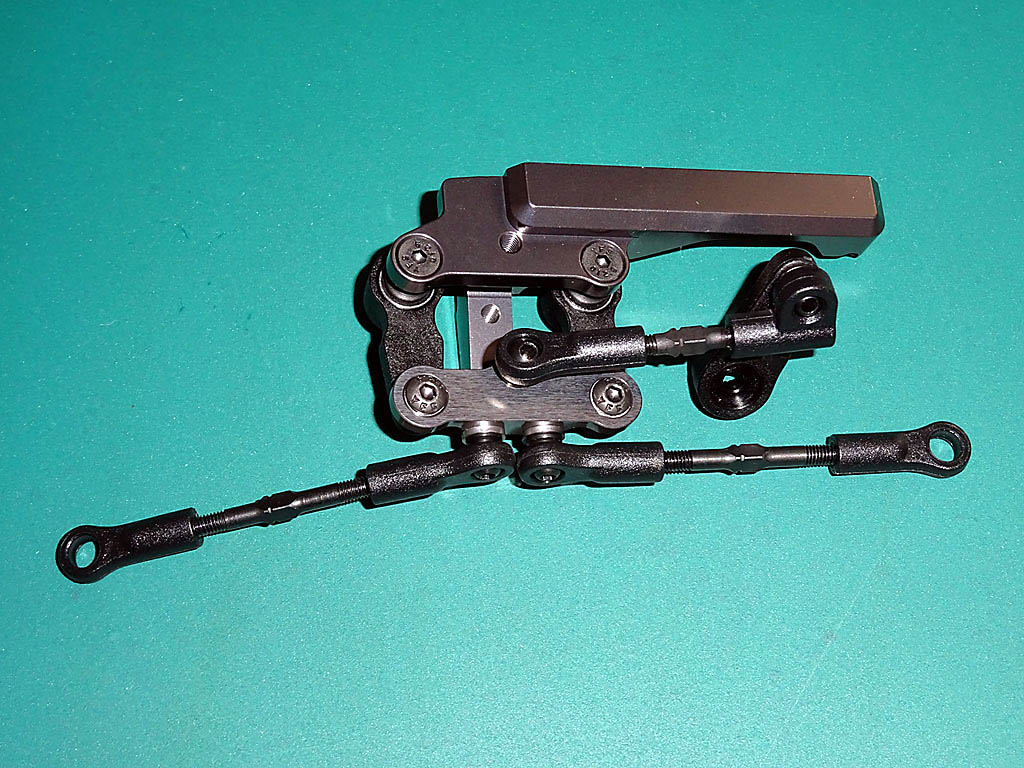
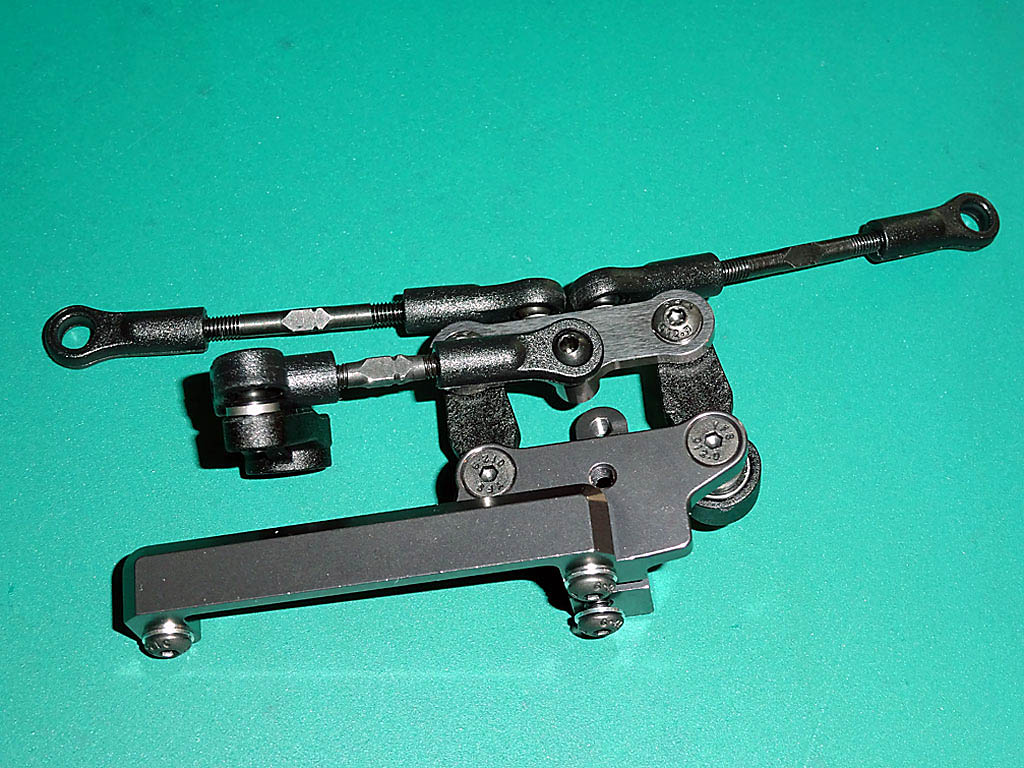
One of the CX11's most innovative features is its combined floating servo mount and steering mechanism. Mounted along the centre line of the 100% symmetrical chassis it minimises the number of screws attached to the main chassis plate, maximising performance by reducing uneven chassis flex.
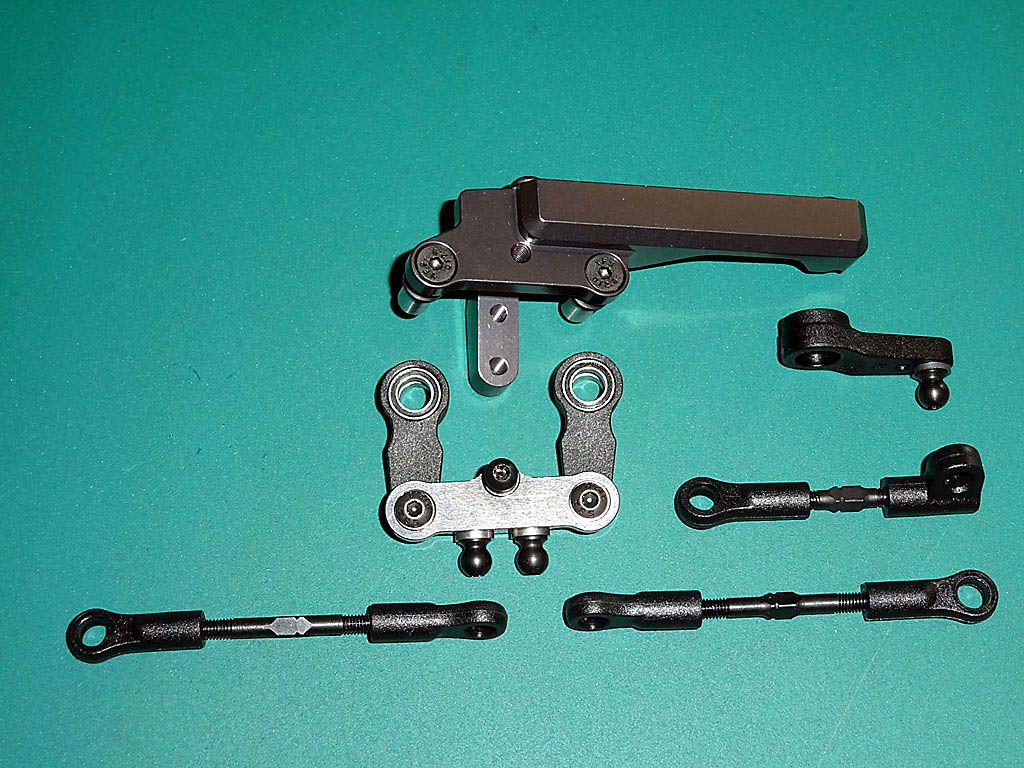
Bag-F contains the one piece aluminium servo steering mount, ball raced aluminium steering plate, steering arms, steel turnbuckles and associated hardware. My kit came with an extra M3x35mm turnbuckle, I'm not sure if this was intentional but something I'm happy to have included.
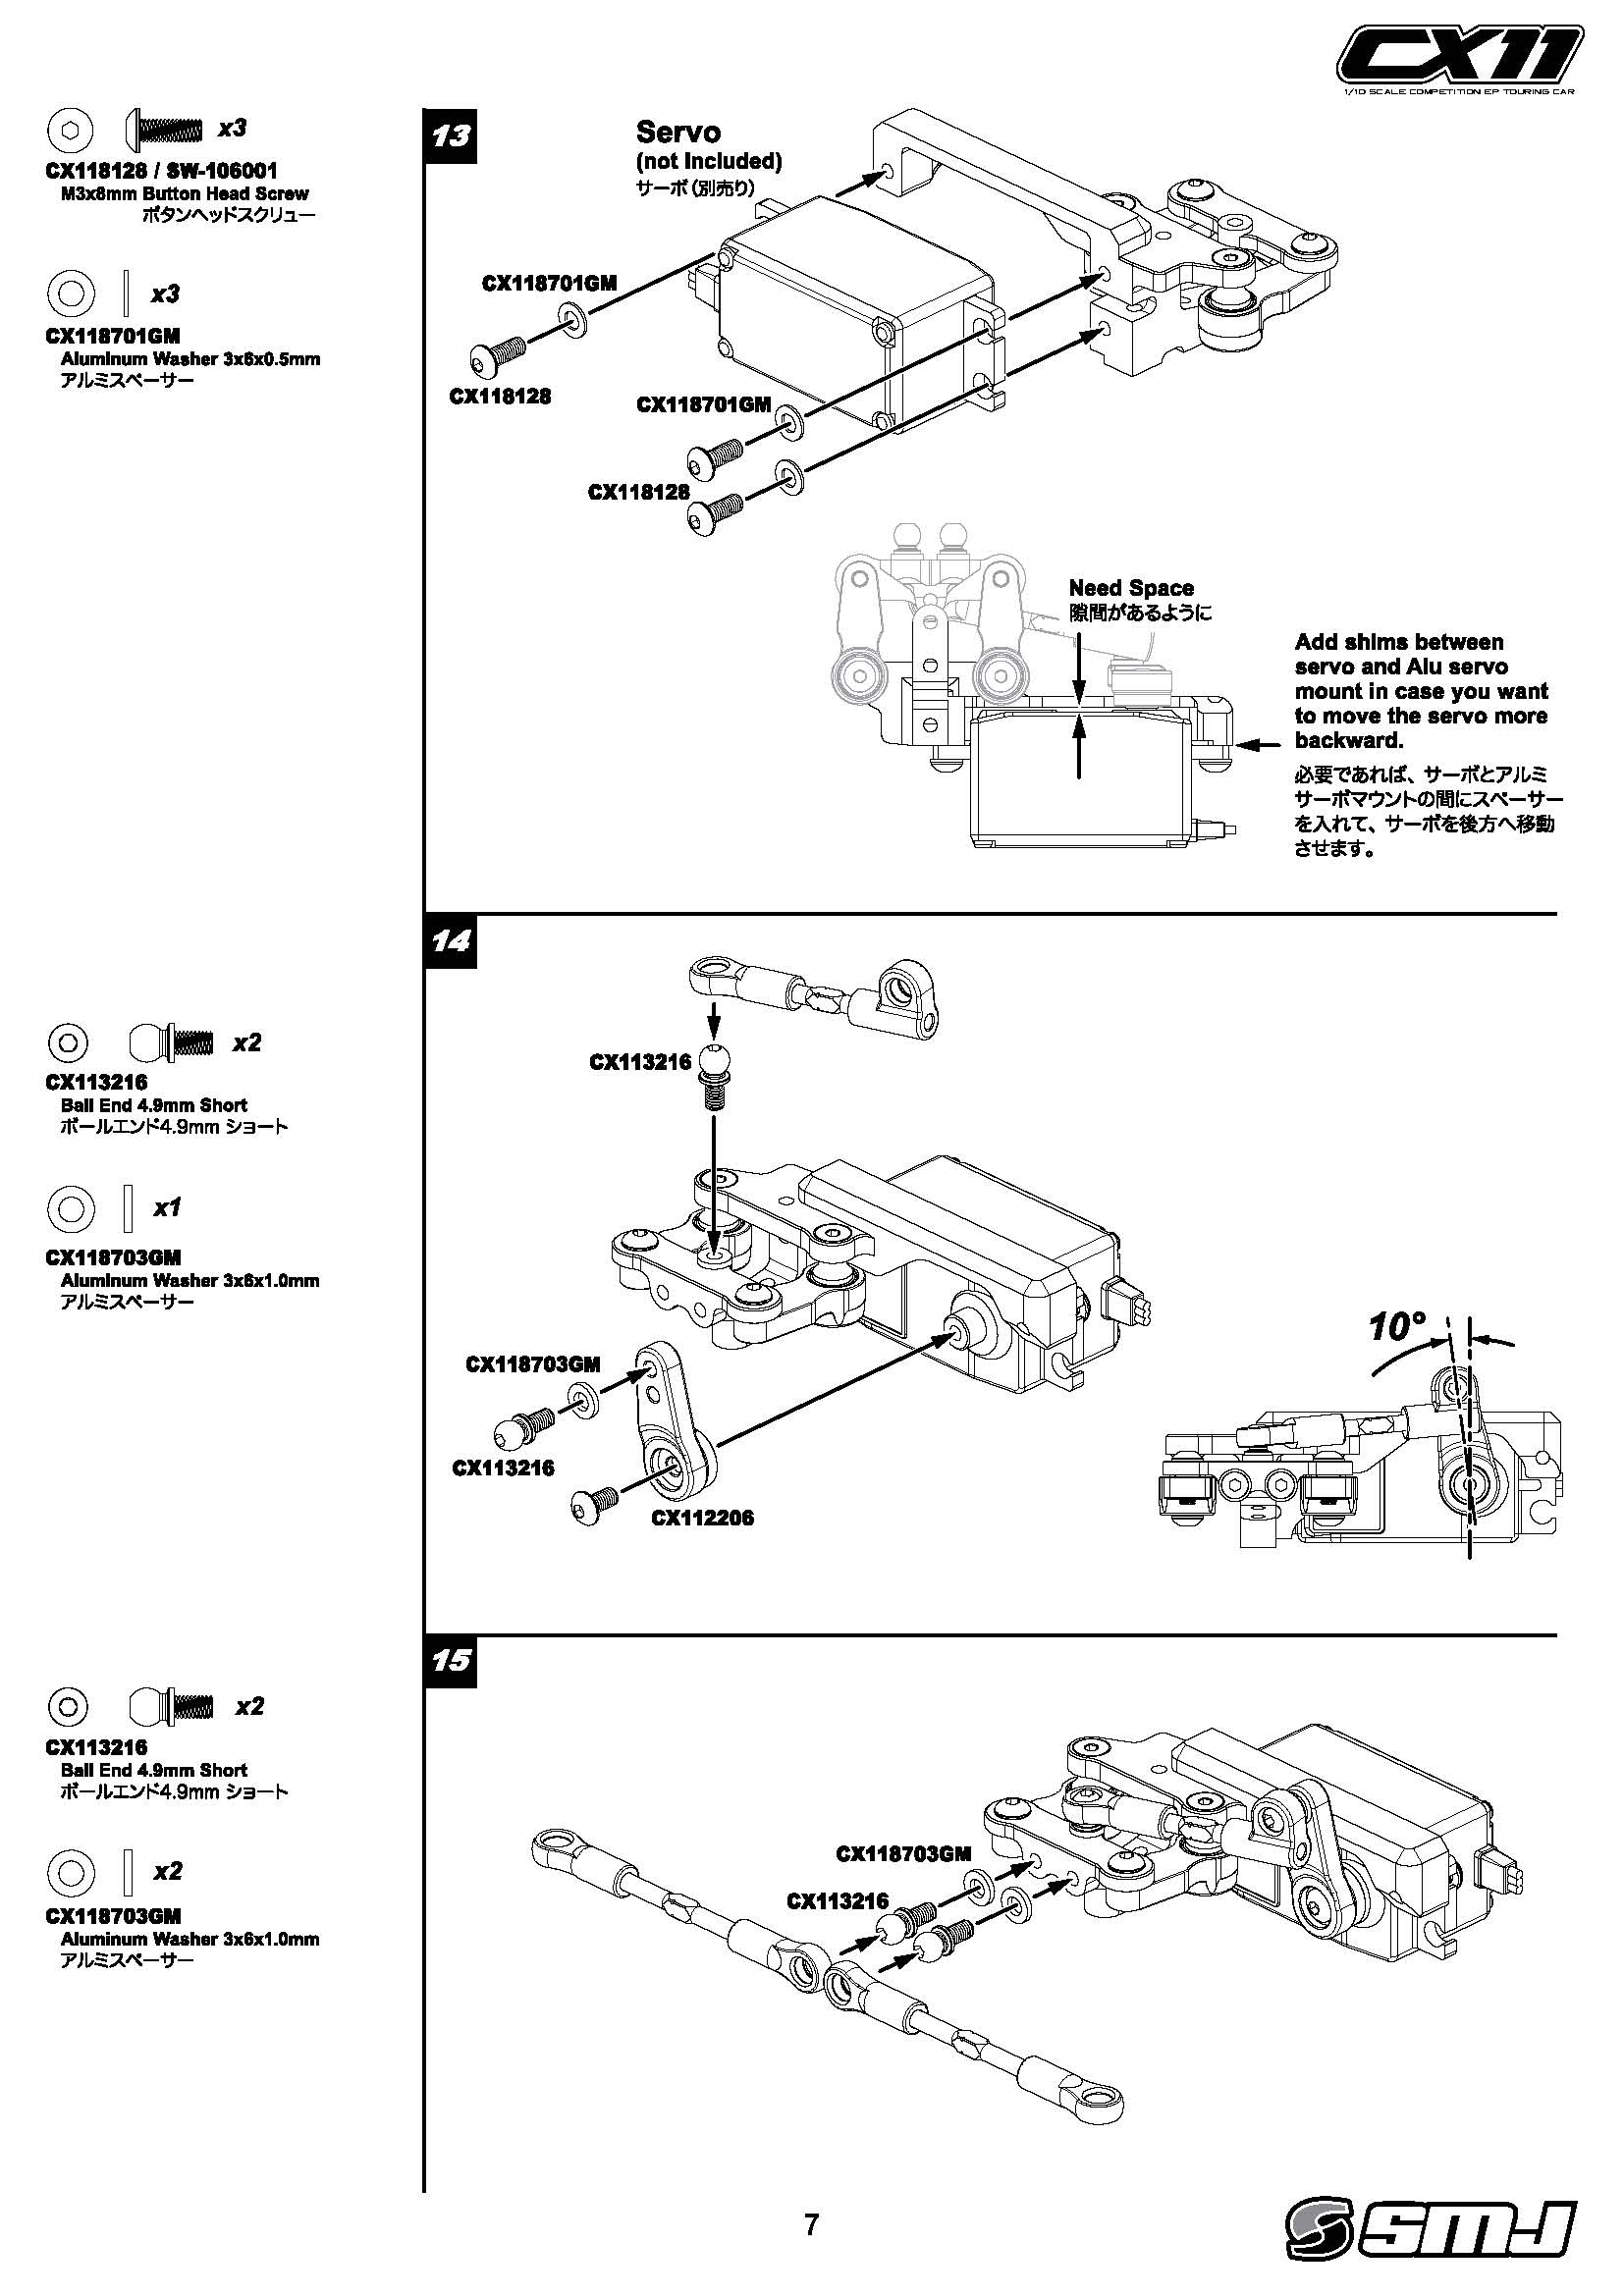
The steering assembly slotted together nicely as per the manual, taking care to ensure that the steering plate and steering arms rotated freely with no binding by not over-tightening the two M3x8mm screws. I've omitted installing a servo as I plan to weigh the completed kit before adding electronics.
A tip for building the turnbuckle steering links is to pre-tap the steering rod ends with a spare screw, this makes lining the turnbuckles up straight much easier. Greasing the turnbuckle threads and winding each rod end fully in an out a few times to chase the threads results in a turnbuckle that's less prone to popping off the ball ends while adjusting due to over tight threads. The rod ends (ball cups) require a good push to locate onto the ball ends but are super smooth once fitted.
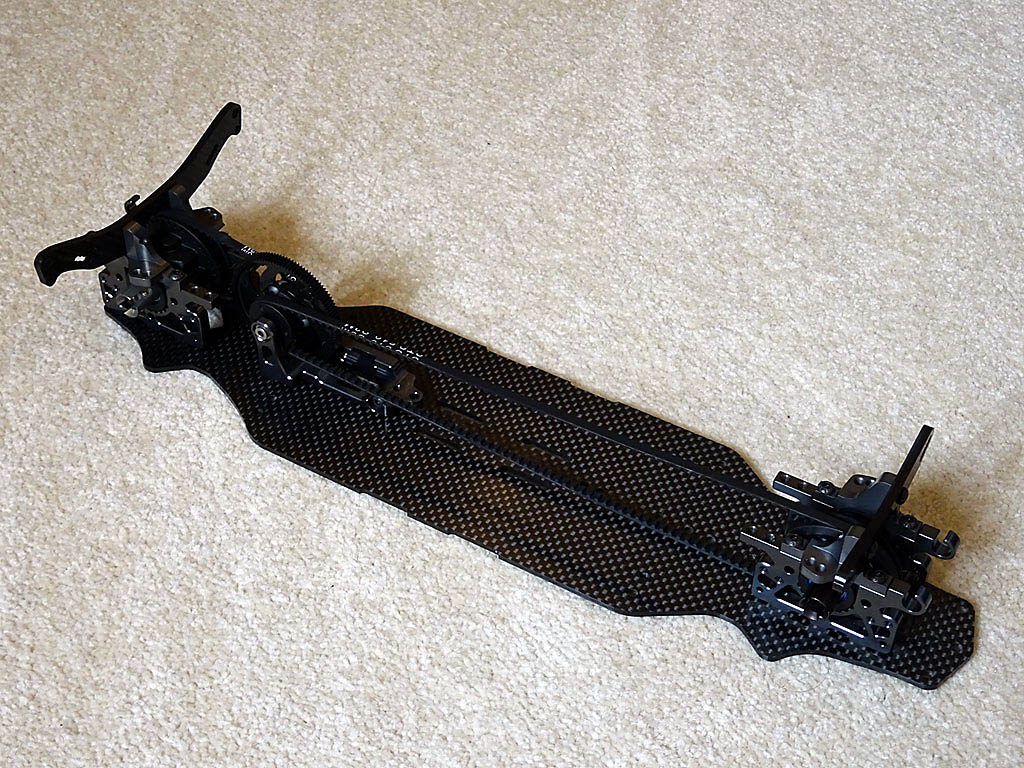
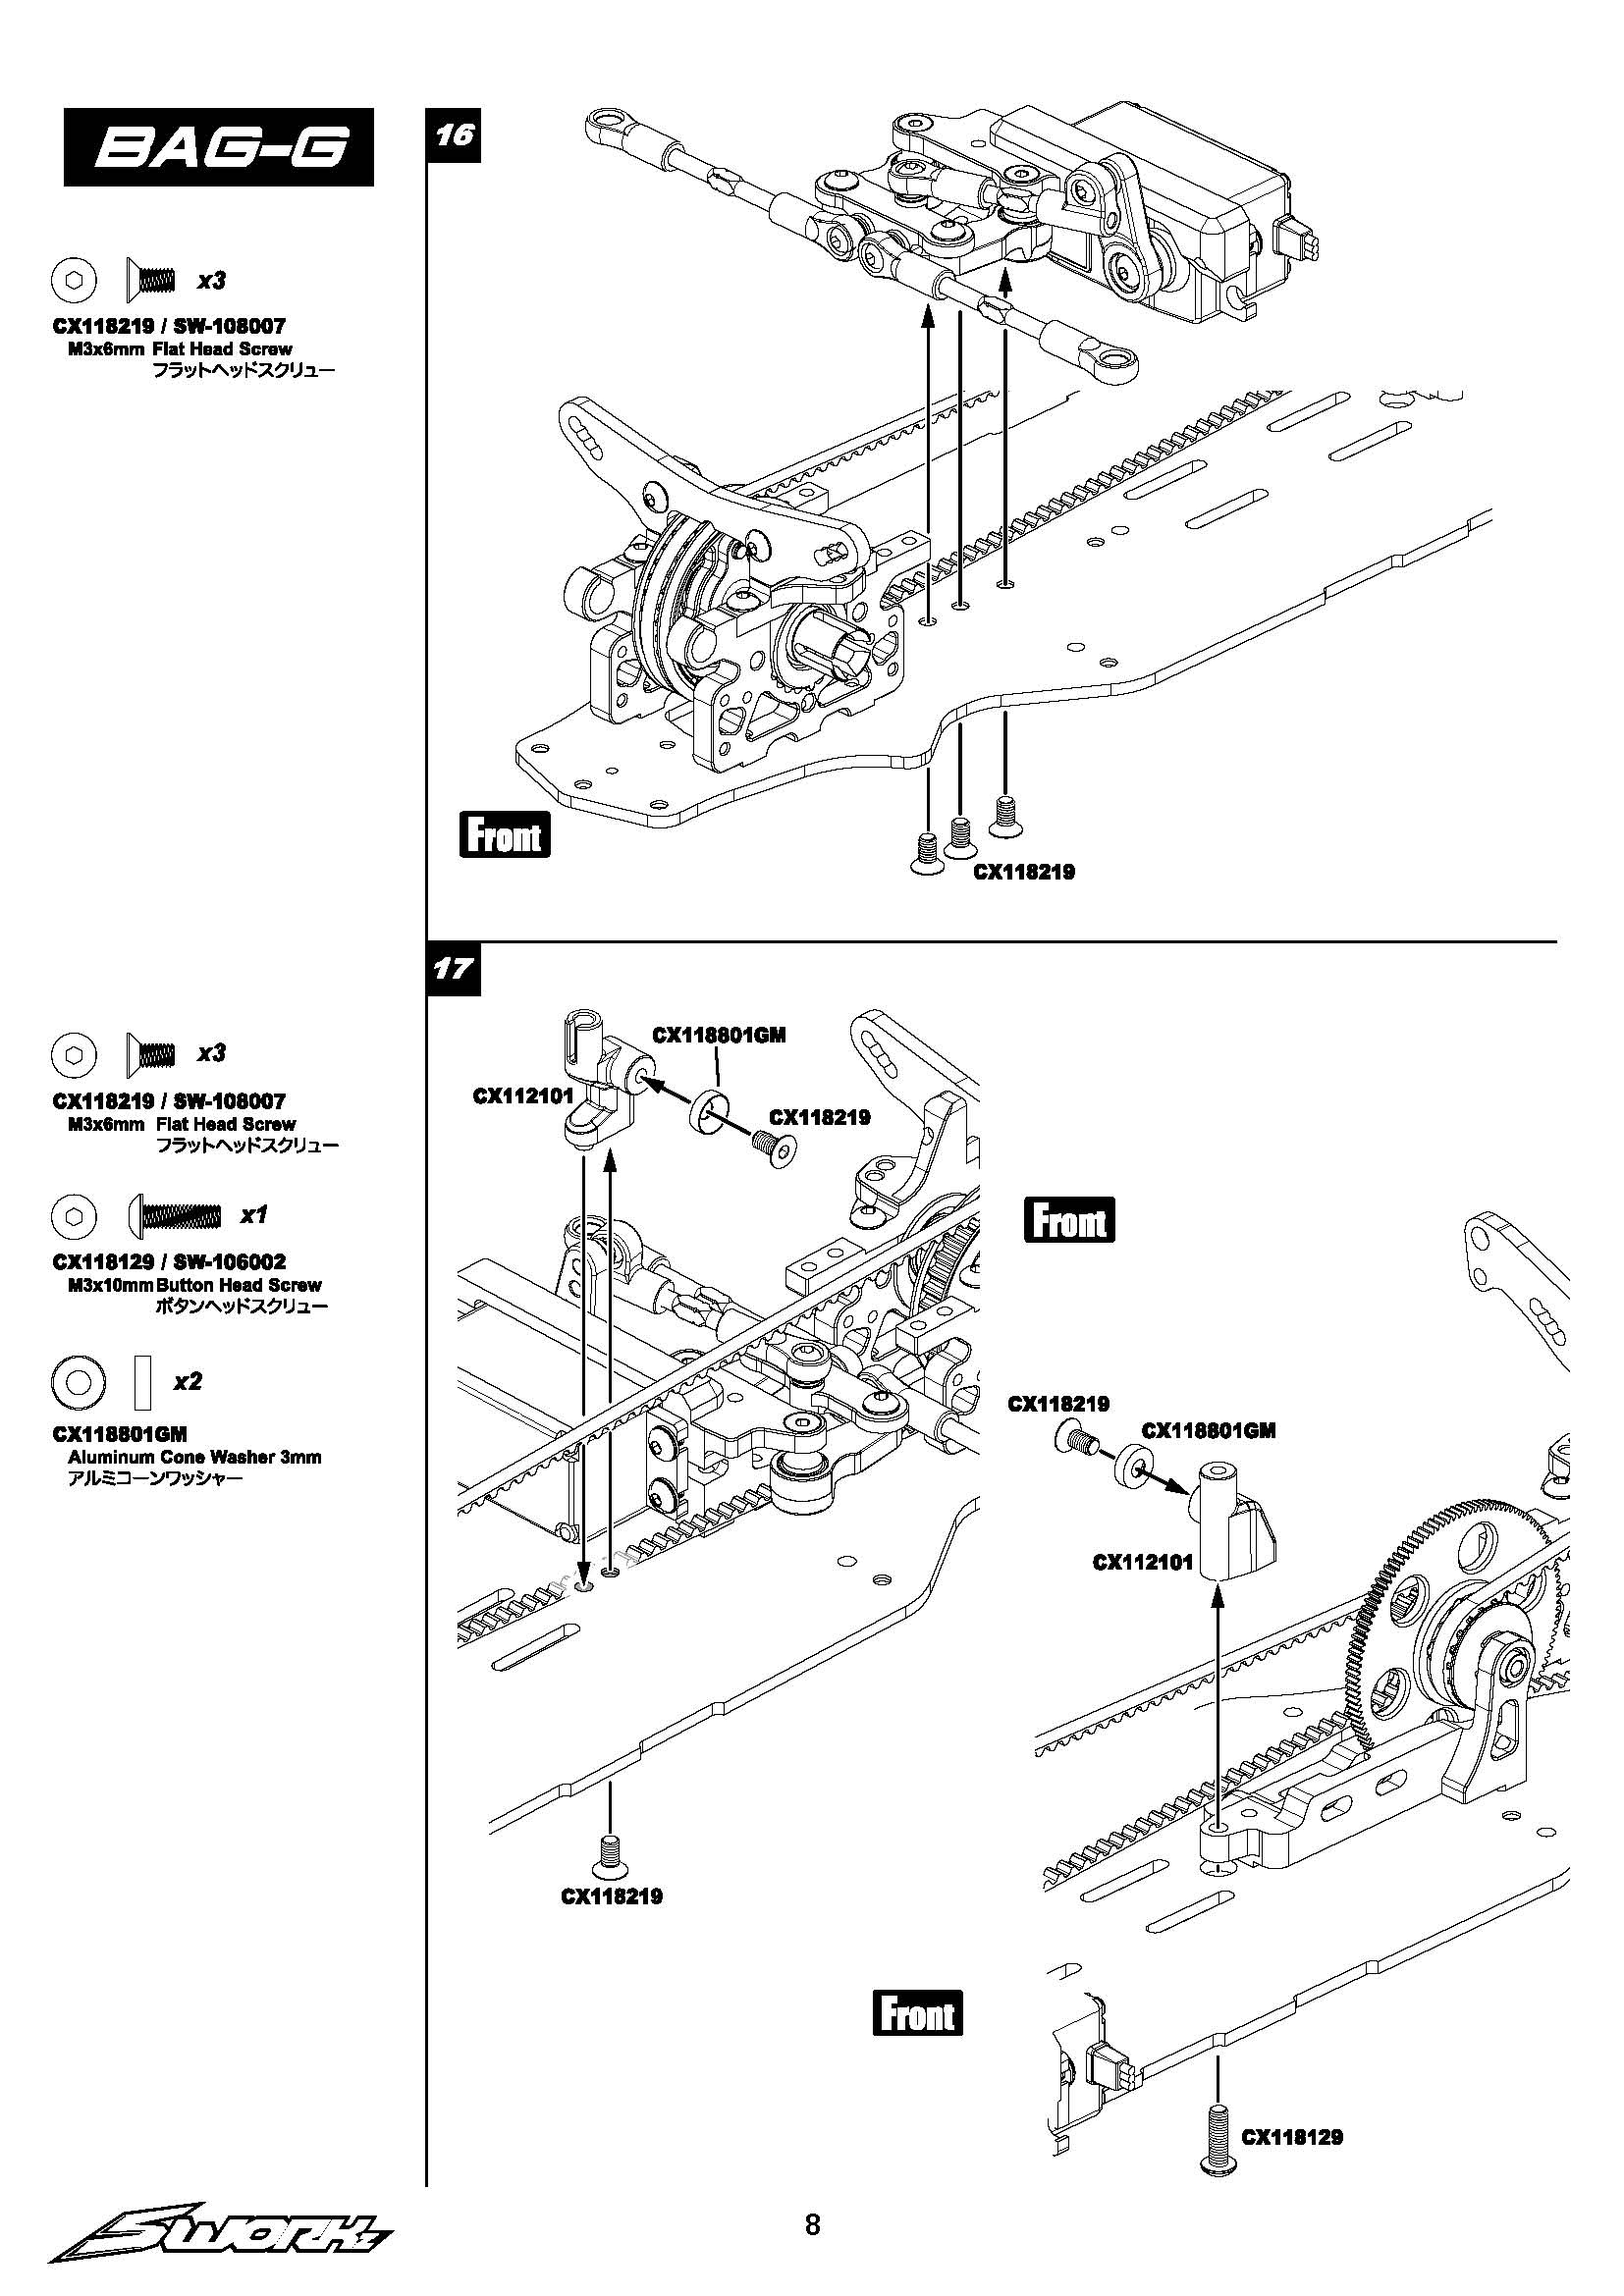
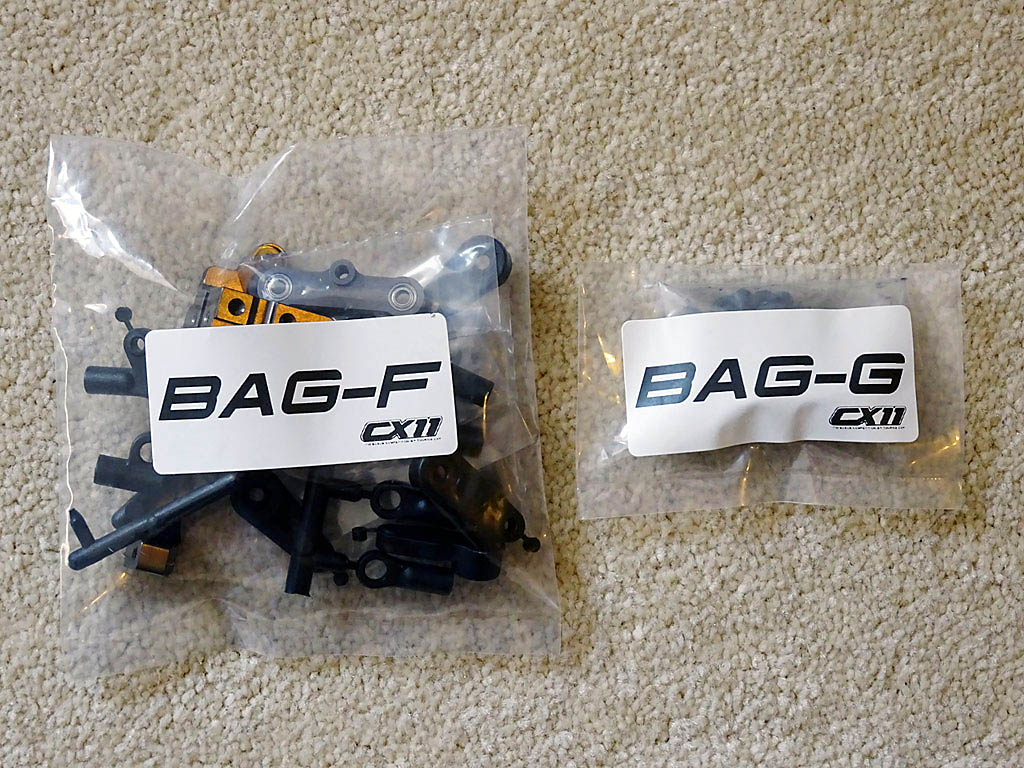
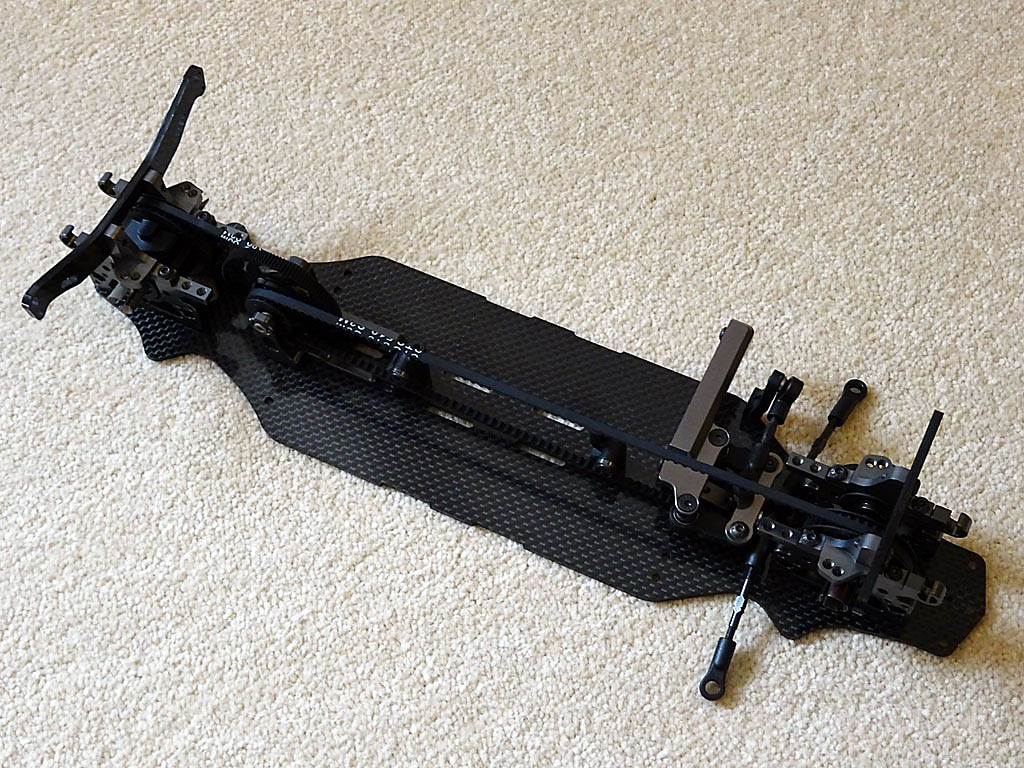
Bag-G has the necessary screws for mounting the steering assembly to the chassis, a pair of battery stoppers to avoid the LiPo pack from sliding into the driveline, plus the chassis top deck screws.
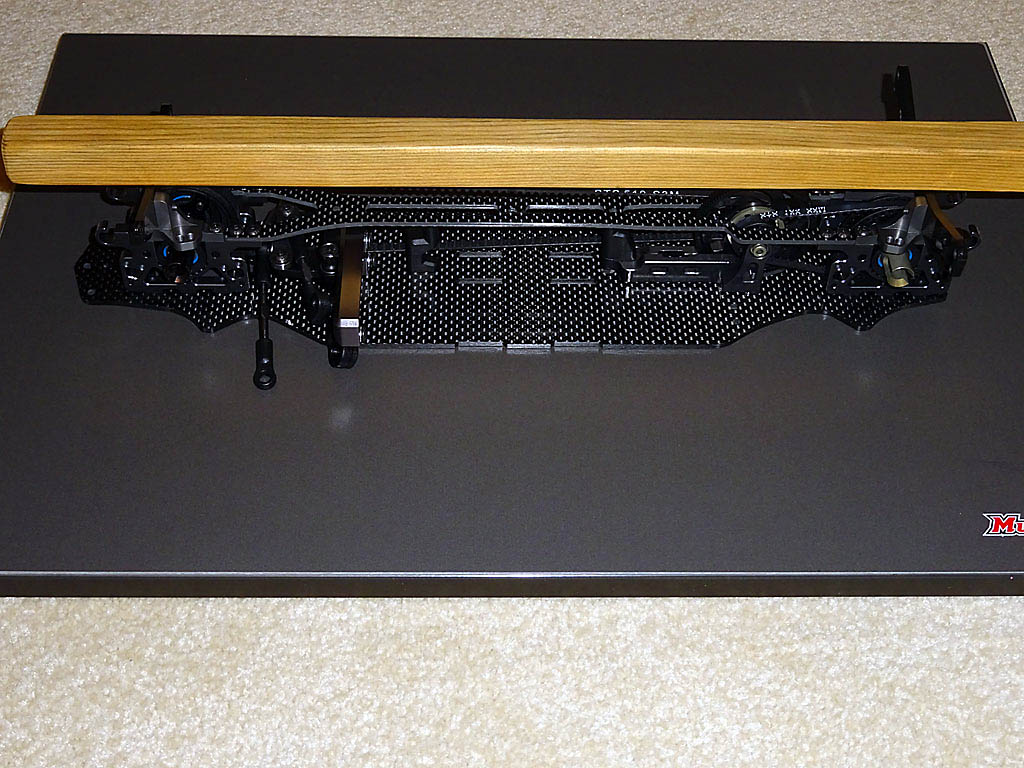
When attaching the top deck it's important that the car is placed on a flat surface such as an RC setup board or glass table. The underside of the chassis should be completely flat with no protruding screws which can be checked by running the edge of a steel ruler along the chassis.
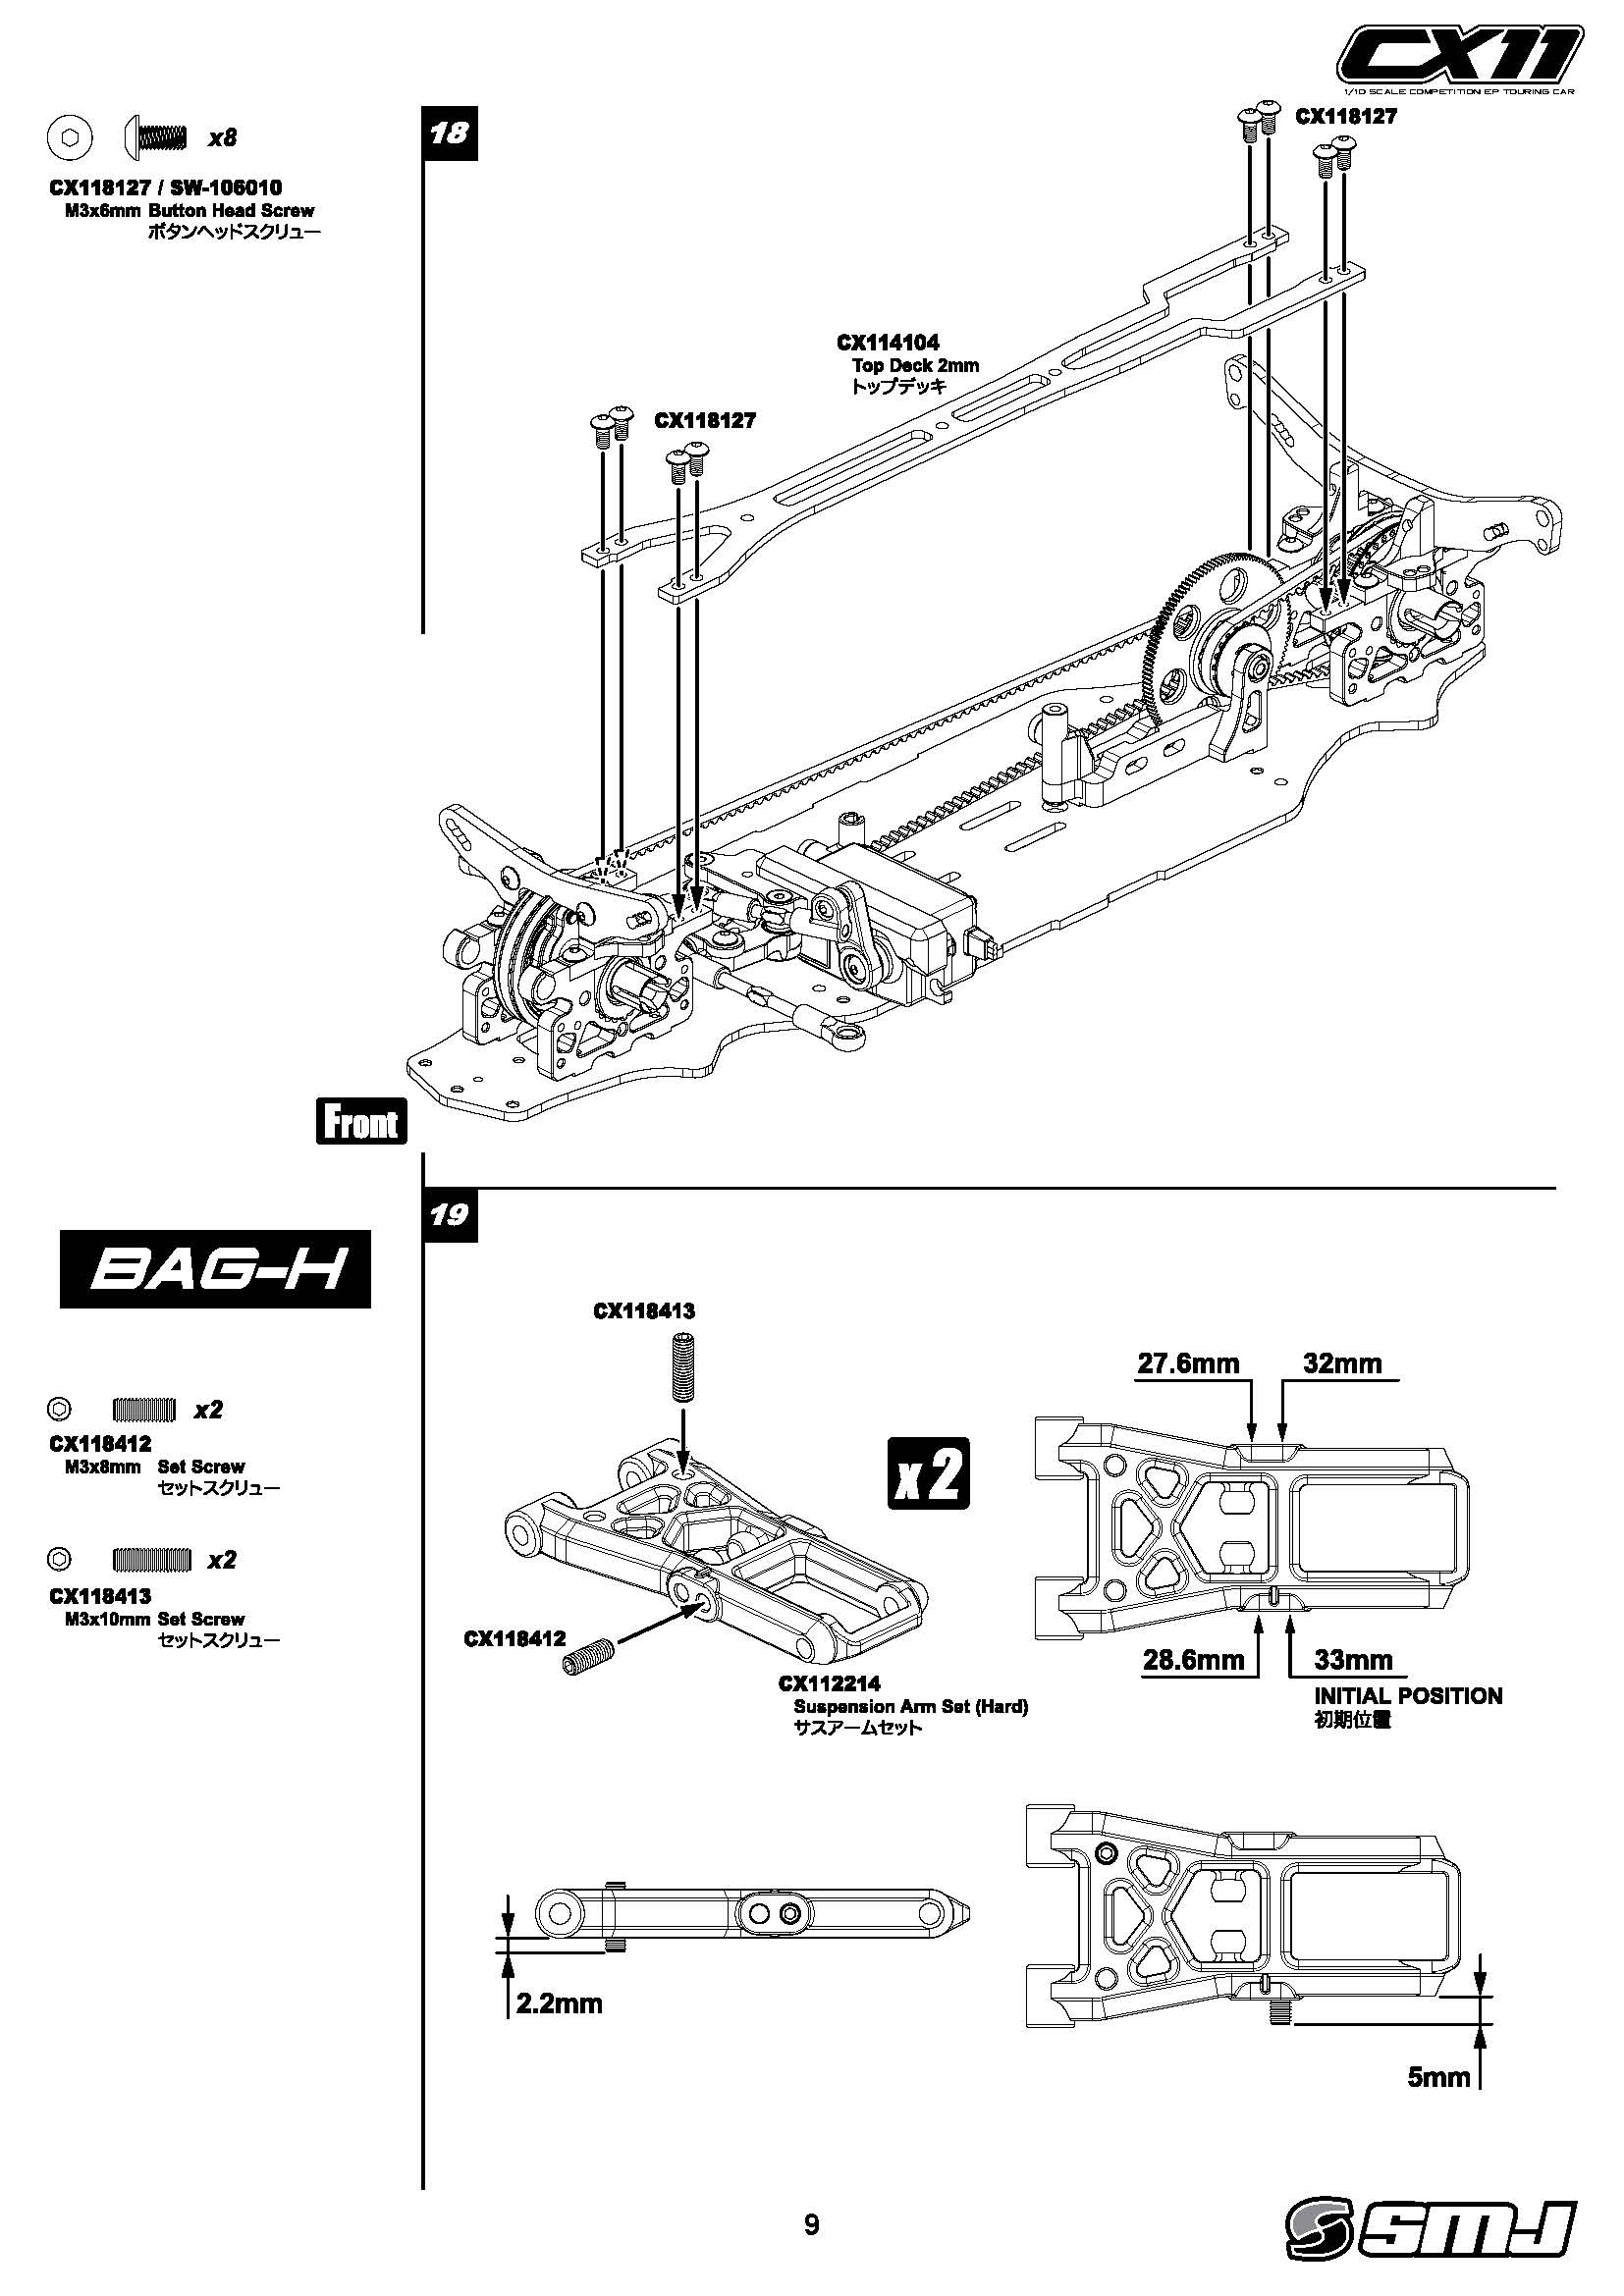
There are many special anti-tweak tools available in the form of carbon or aluminium rods & bars that help to reduce the chance of chassis tweak when tightening the top deck. I haven't got one of these tools so I made my own with a 380x18x18mm piece of wood that I sanded completely flat on all sides. Note: if you're using a spur gear larger than the 112T kit item you may have to cut a slot in the tool to provide clearance. With the car on a flat surface and the top deck in place with all its screws loose the tool is placed on top of both shock towers along the centre line of the car.
With light pressure on the middle of the tool tighten the top deck screws as normal working from the front to the rear of the car. When tightening the top deck once electronics are fitted a battery pack should be installed to avoid the car from being unbalanced due to one side being significantly lighter than the other.
After attaching the top deck check that the lower chassis is still flat and doesn't rock when pressed. If it does, repeat the process above.

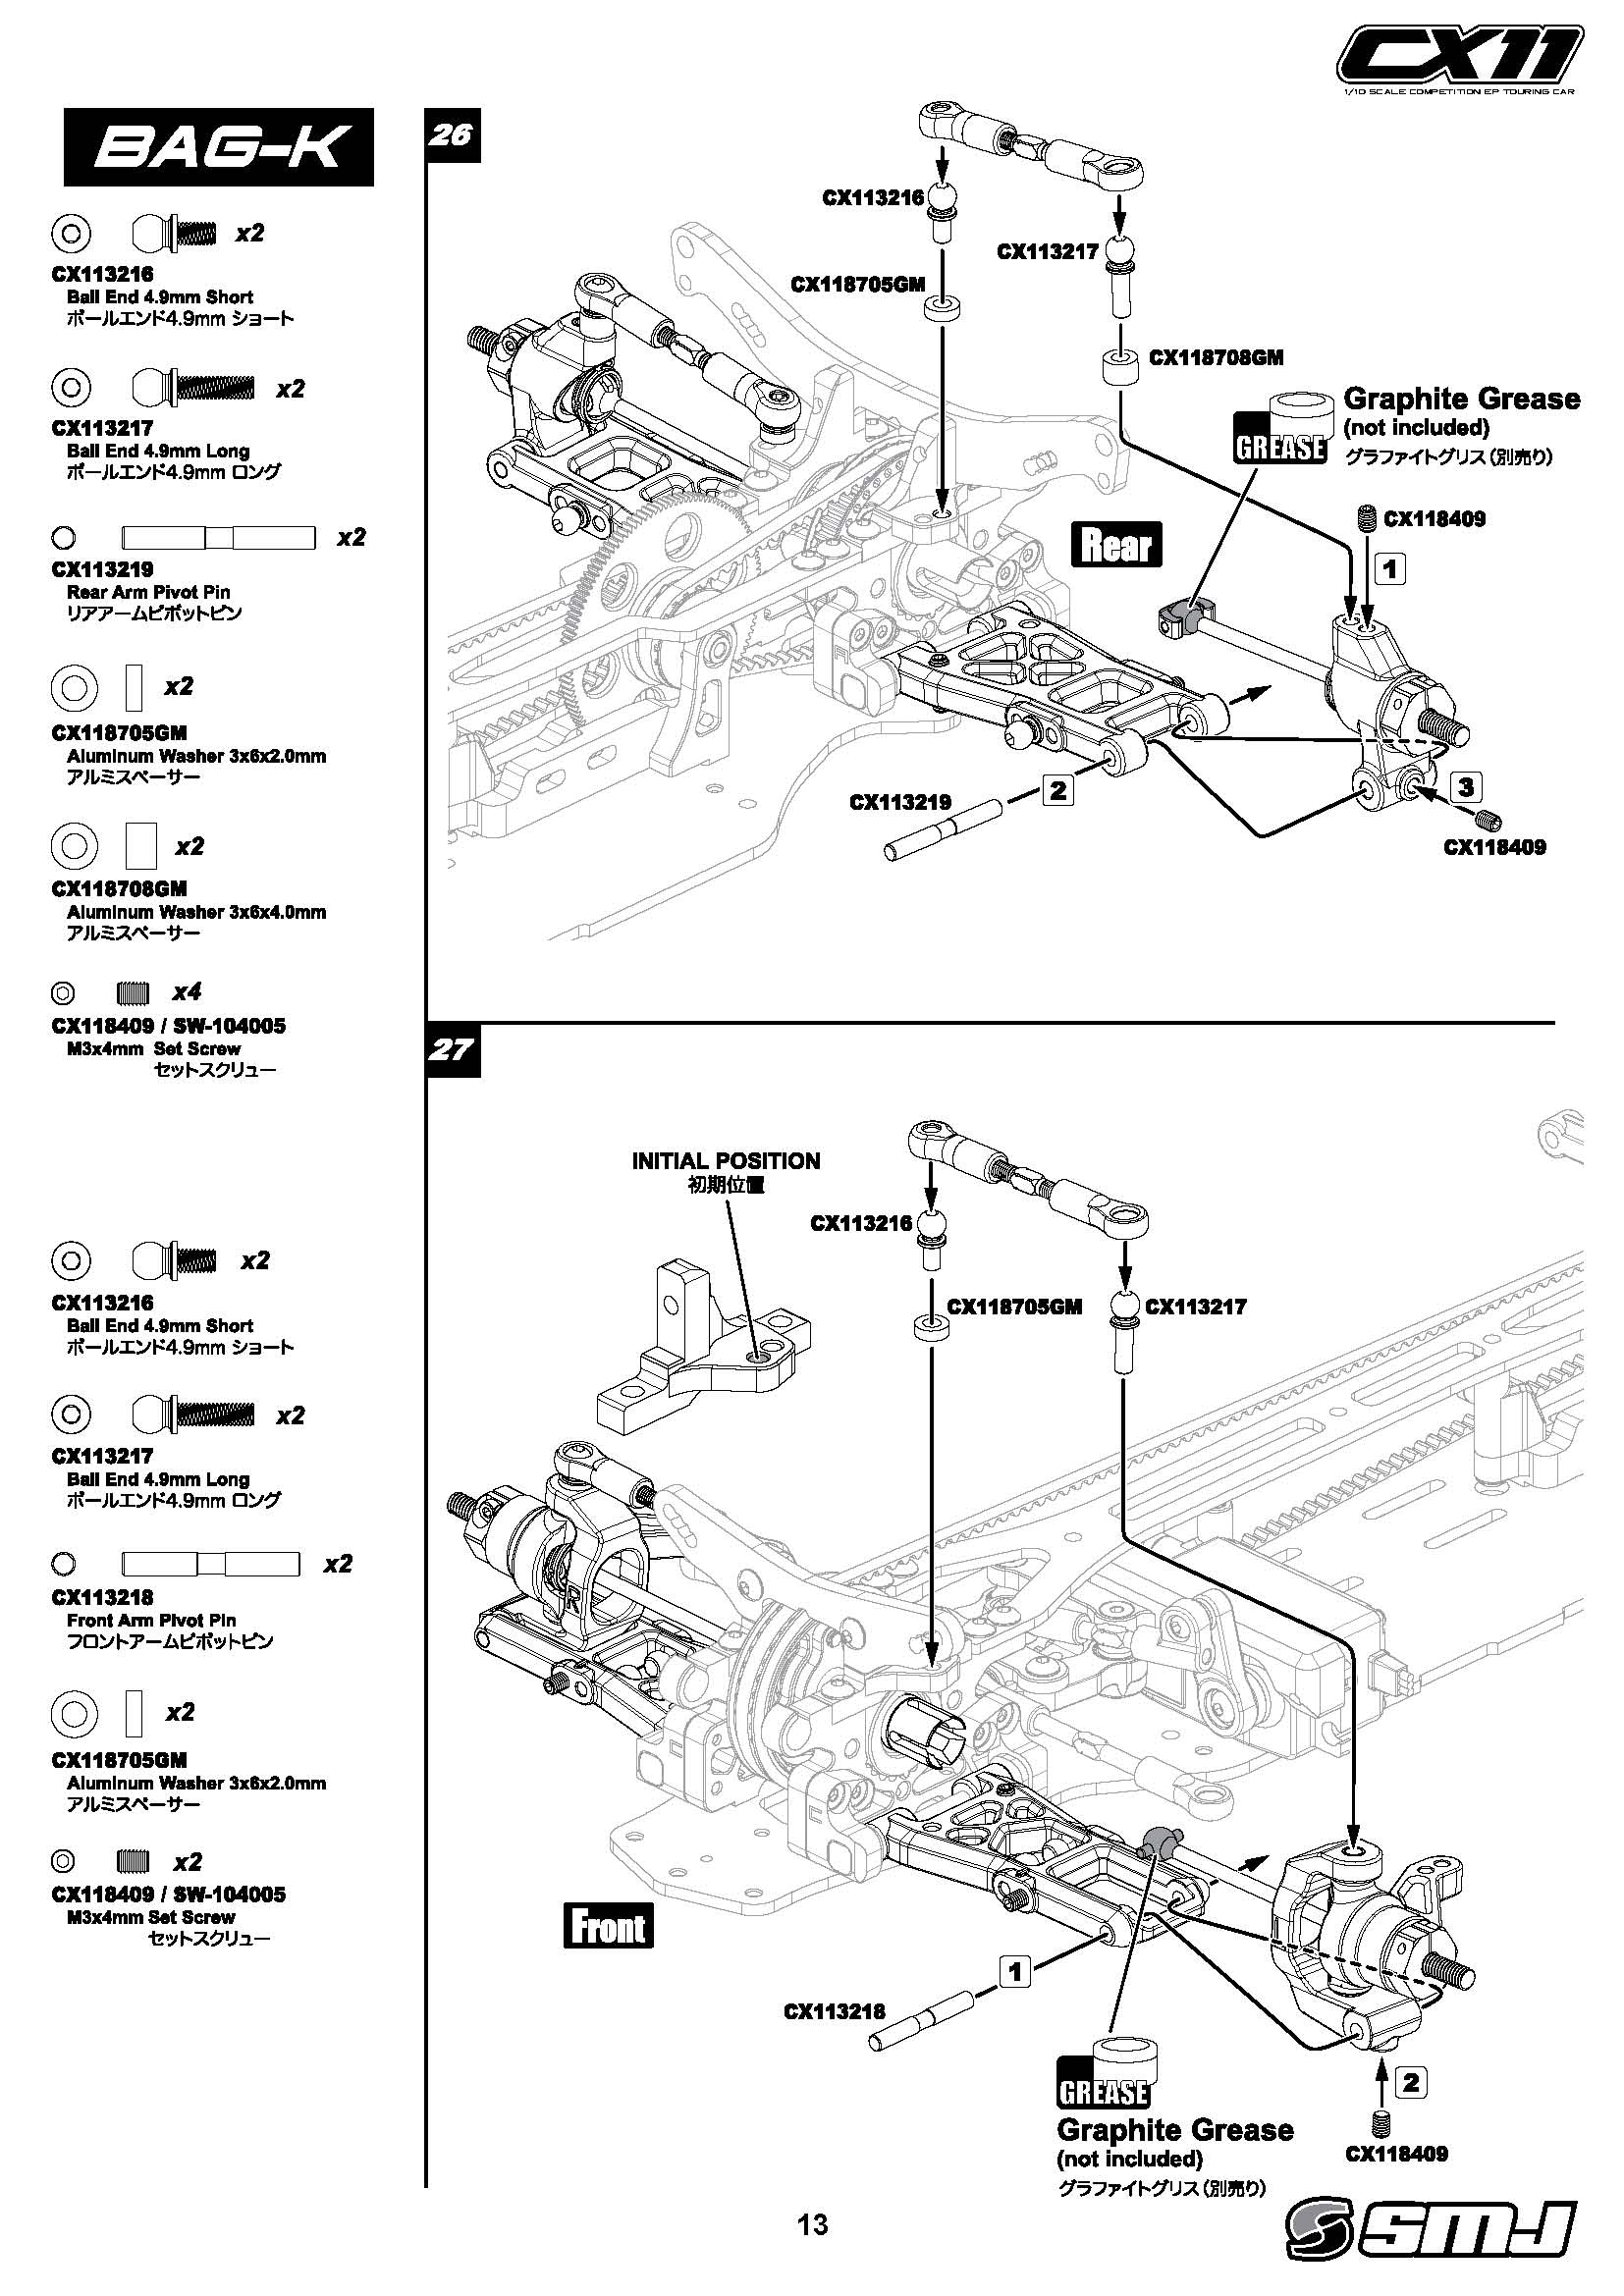
Suspension, Pivot Pins & Wishbones
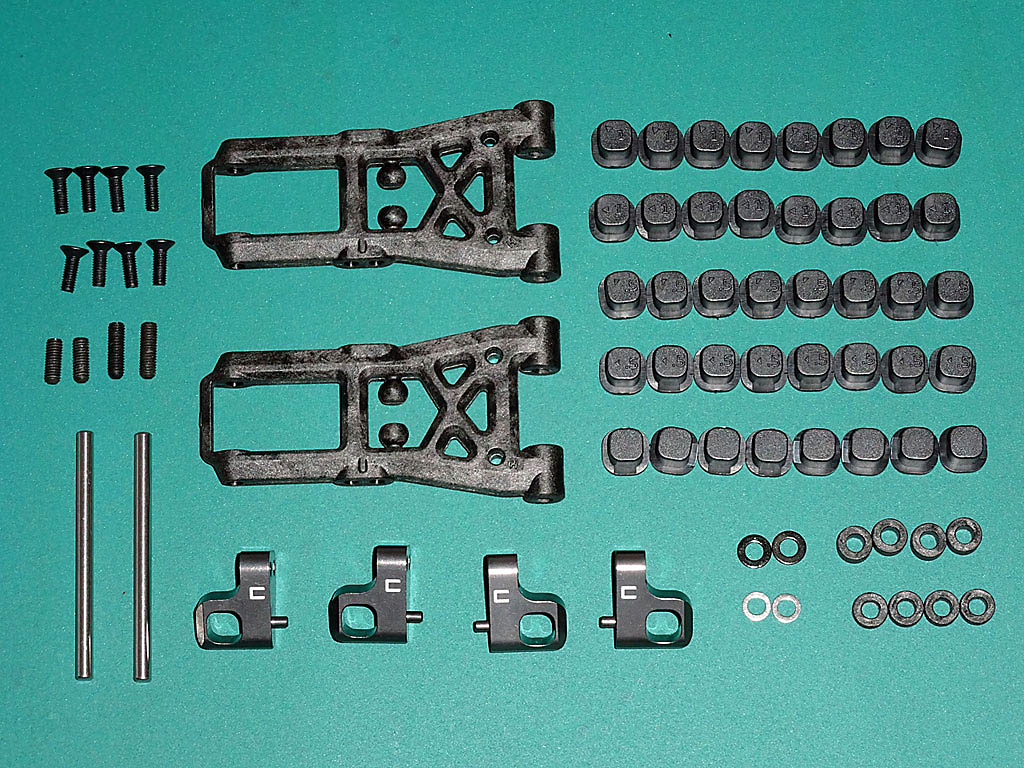
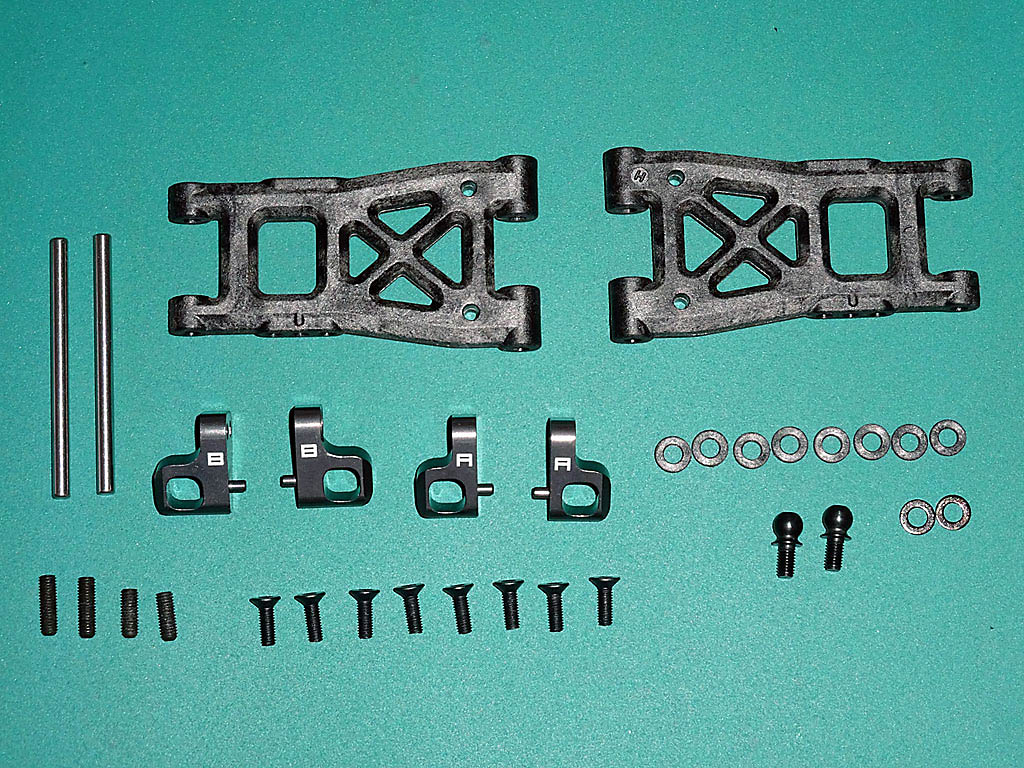
The CX11 features lightweight reversible hard reinforced plastic suspension arms (wishbones) with droop adjustment via a set screw and multiple different shock absorber mounting positions; four (2 each side) on the front arms and six (3 each side) on the rear arms. The use of set screws to attach the shock absorbers enables their position to be changed quickly without popping off any ball joints which would add unwanted play over time.
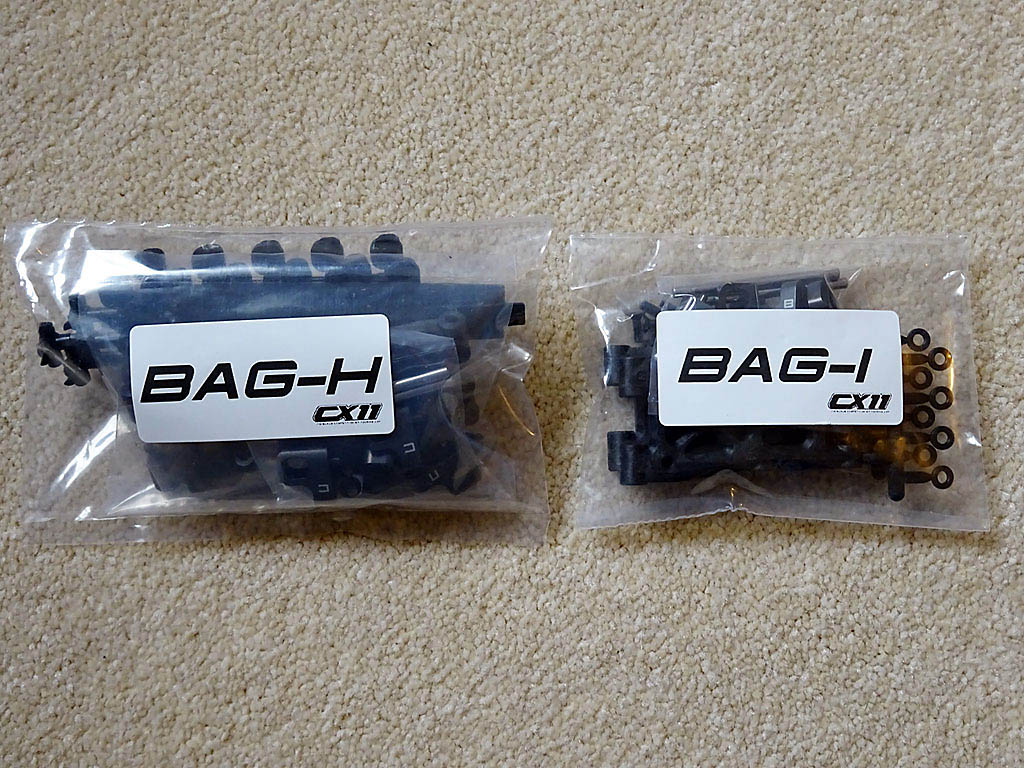
Bag-H contains the front suspension arms, aluminium lower suspension holders, steel pivot pins (hinge pins), screws and spacers whilst Bag-I has the parts for the rear.
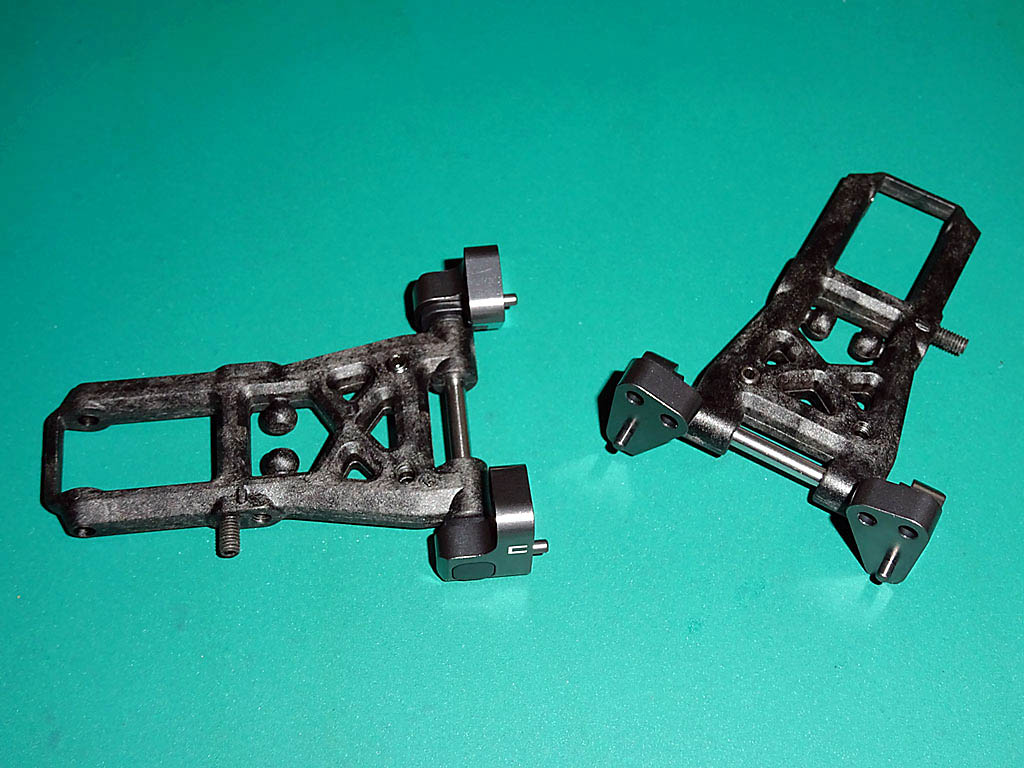
Instead of using suspension blocks screwed onto the main chassis plate to attach the suspension arms the CX11 has aluminium lower suspension holders connected directly onto the sides of the lower bulkheads. The advantage of using this method to support the suspension arms is that it further reduces the number of components directly screwed into the main chassis to better control overall flex.
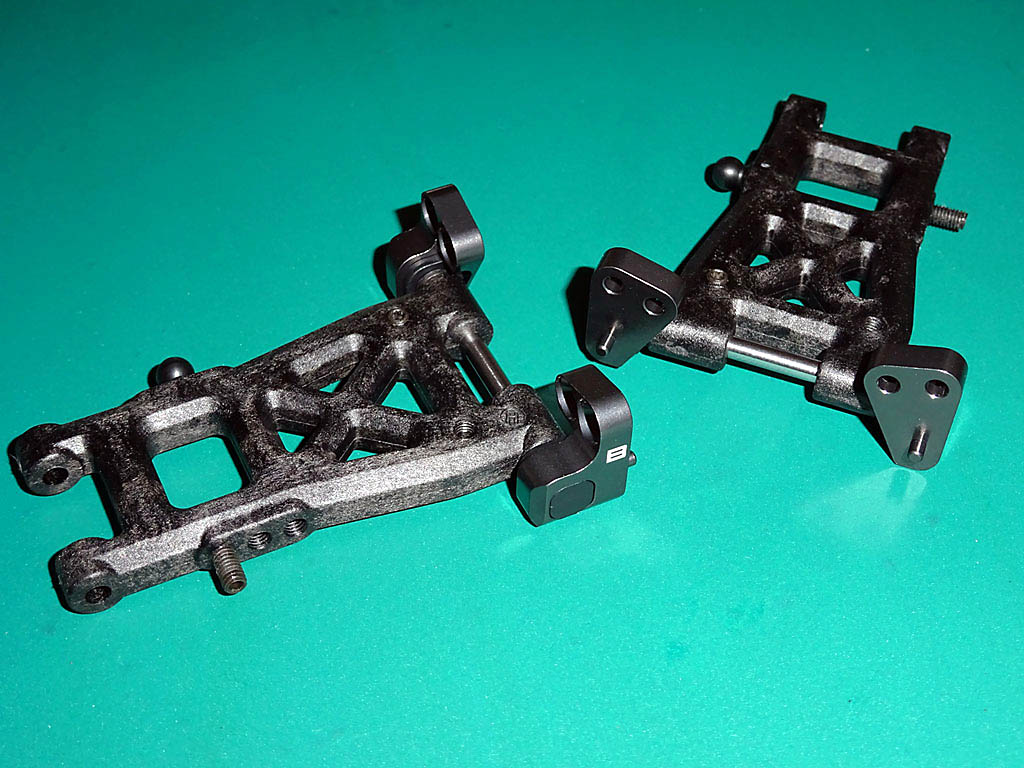
Each lower suspension holder is pinned and attached with two countersunk screws to provide a strong reliable accurate mounting point for the suspension arms. The use of removable plastic eccentric bushings within the suspension holders provides a fast highly tuneable way of changing the toe, dive and squat, without the need for owners to purchase several expensive suspension pivot blocks. The CX11 comes supplied with a full set of different size eccentric bushings as standard.
It's important once assembled that the suspension arms should move freely and drop under their own weight. Before resulting to sanding components or fitting thinner spacers if any resistance is found, first remove and refit the plastic eccentric bushings in their holders. Doing this a couple of times I found will enable them to sit slightly further into the holders which should remove any stickiness and result in smooth free suspension with the kit spacer settings.
The instruction manual has a small error on page 10, section 20 - the 'CX112214 Plastic 1.0mm' spacers shown in the diagram are not supplied in Bag-H, only 2.0mm & 3.0mm spacers are included. Bag-I though does have the 1.0mm spacers for the front and rear suspension arms plus four additional spacers for your spares collection.

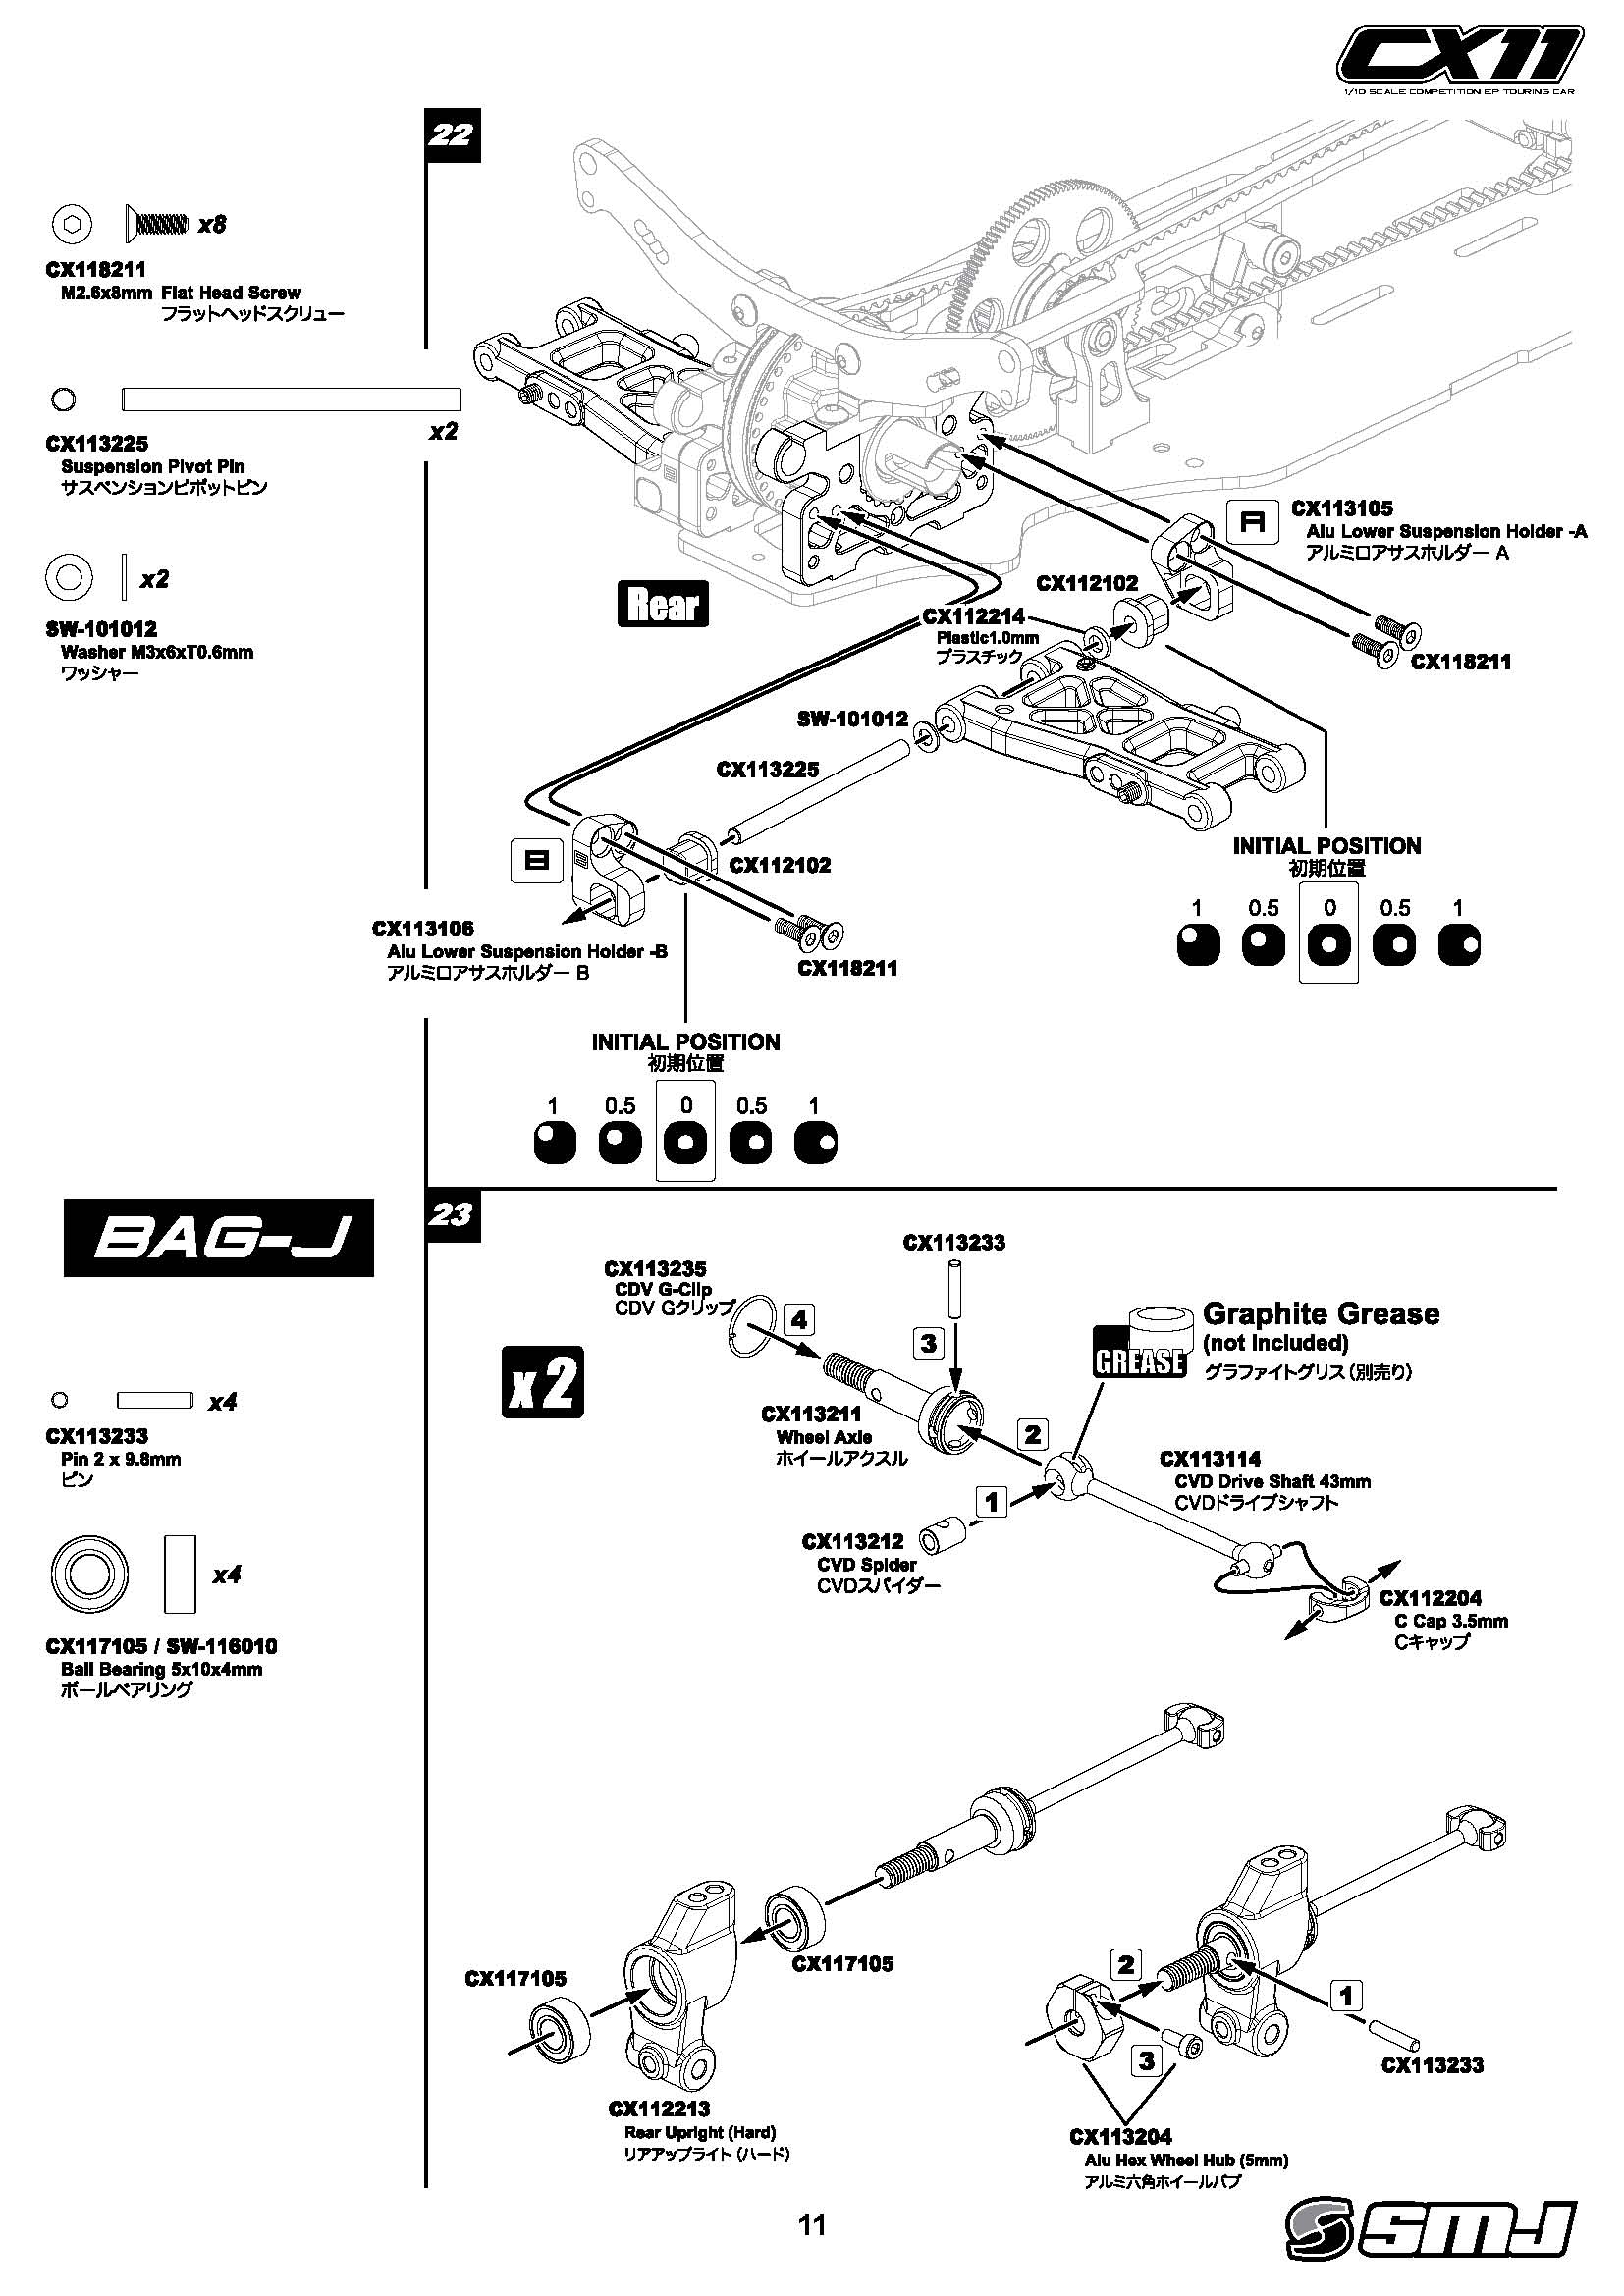
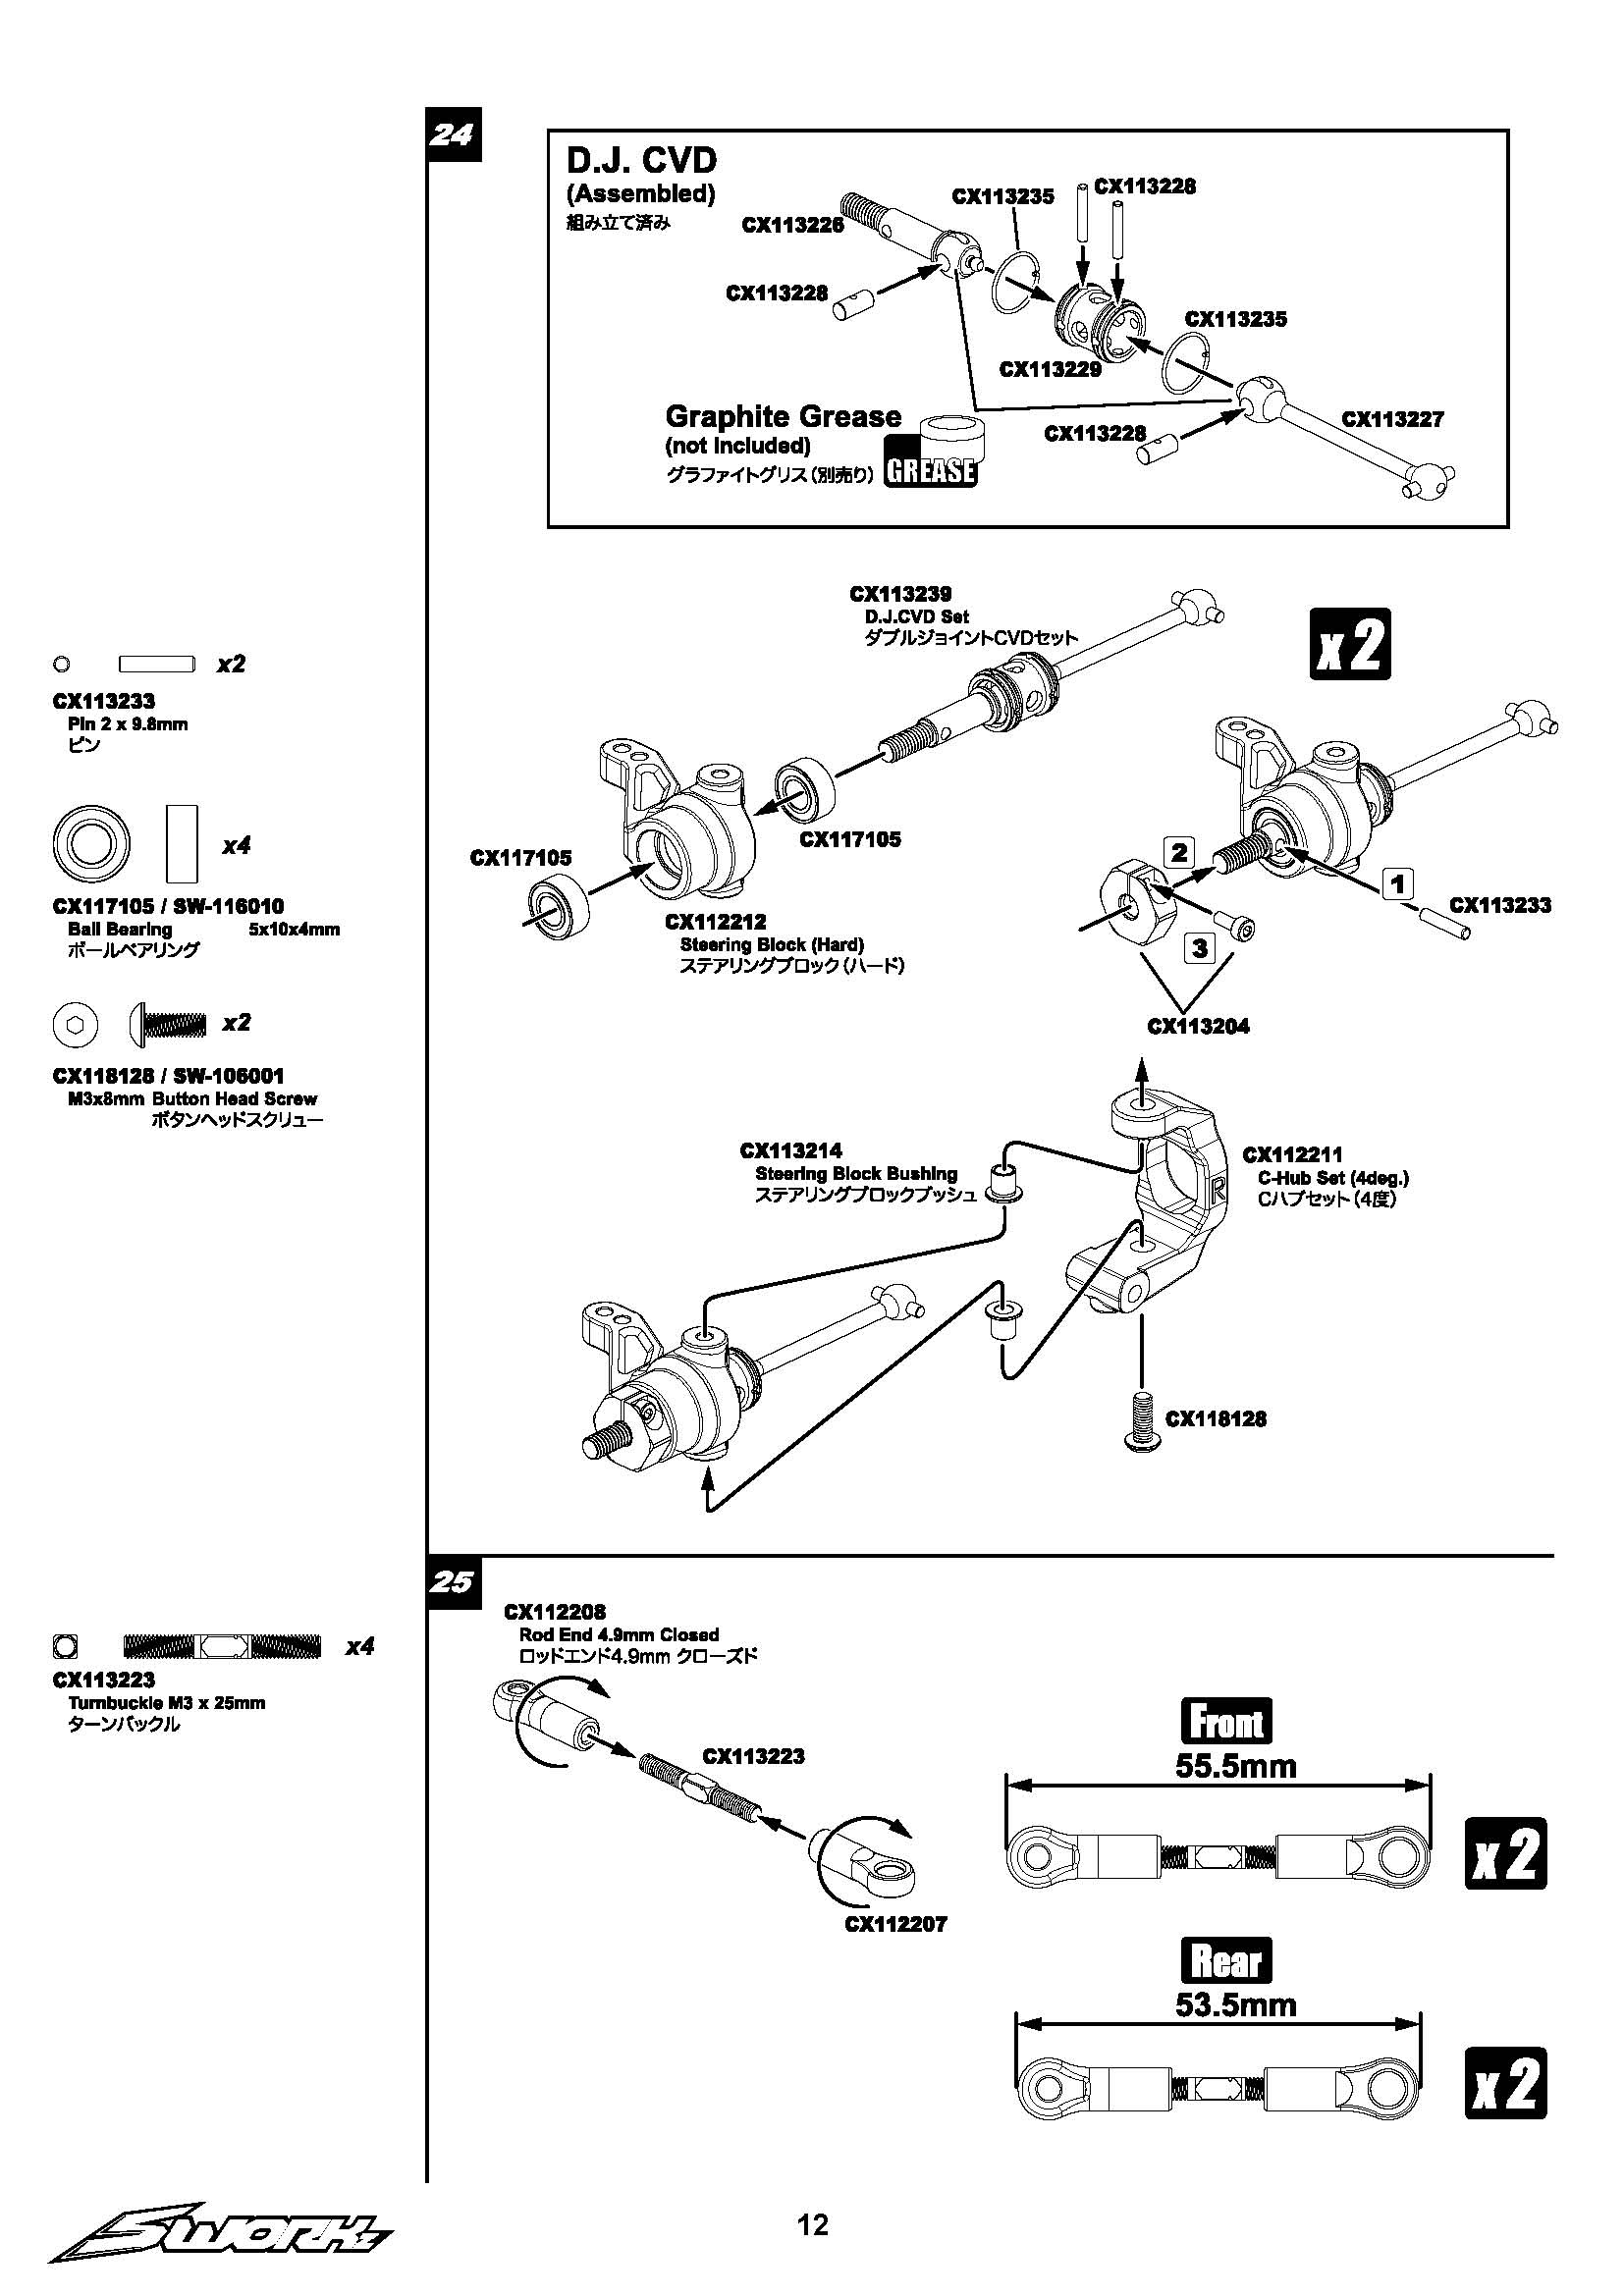
Drive Shafts, Hubs, Uprights, Steering Blocks & Turnbuckles
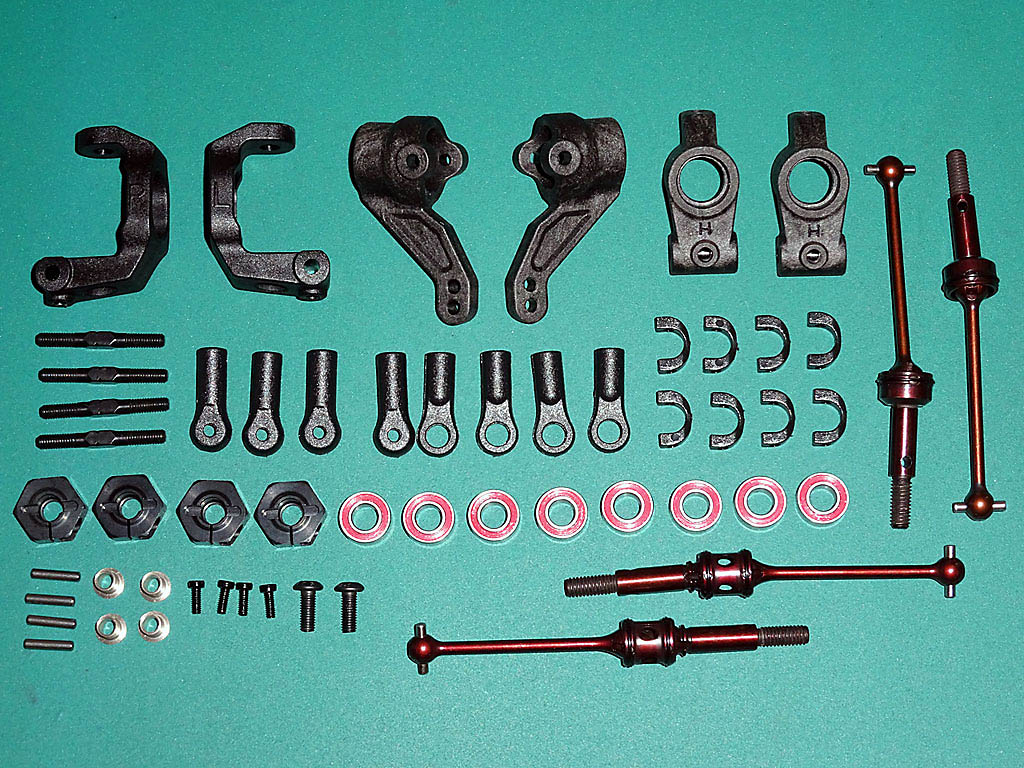
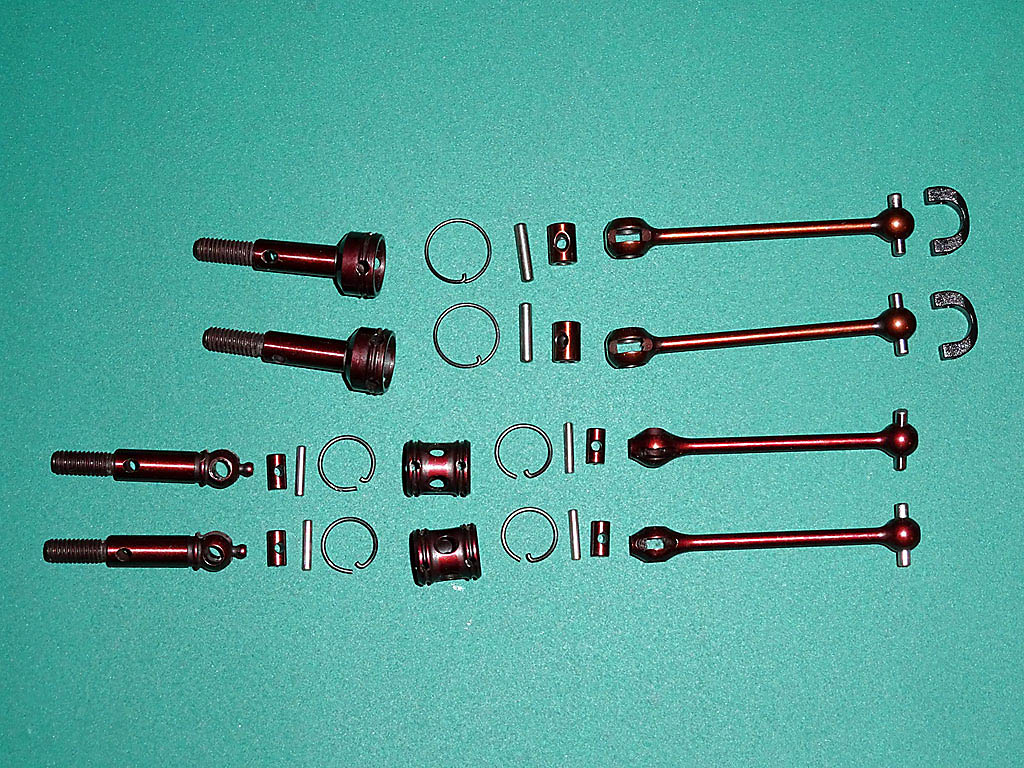
The CX11 comes supplied with rear steel constant velocity drive shafts (CVD) and front steel double joint constant velocity drive shafts (DJ CVD) as standard. The front double joint CVDs help to improve the handling by reducing drive shaft chatter whilst steering.
Both front and rear drive shafts come pre-assembled in the CX11 kit, mine weren't lubricated so required disassembly and greasing before installation. Removing the G-clips can be fiddly, I found the best method is to use a small pick in the wheel axle's pin hole closest to the G-clip's end to carefully lift the clip out of its channel.
After fully disassembling and cleaning the CVDs I lubricated the CVD spiders and pins with graphite grease (Associated black grease). From previous cars experience G-clips may expand slightly with high powered boosted motors so for added reliability I always fit them so the non-pegged end of the G-clip can't lock against the hubs whilst rotating forwards.
The rear CVD C-Caps are made from a durable stiff plastic. The easiest way to fit them onto the CVD drive shaft pins is to slot one side in fully then to push the clip into a hard surface such as a table to locate the other side.
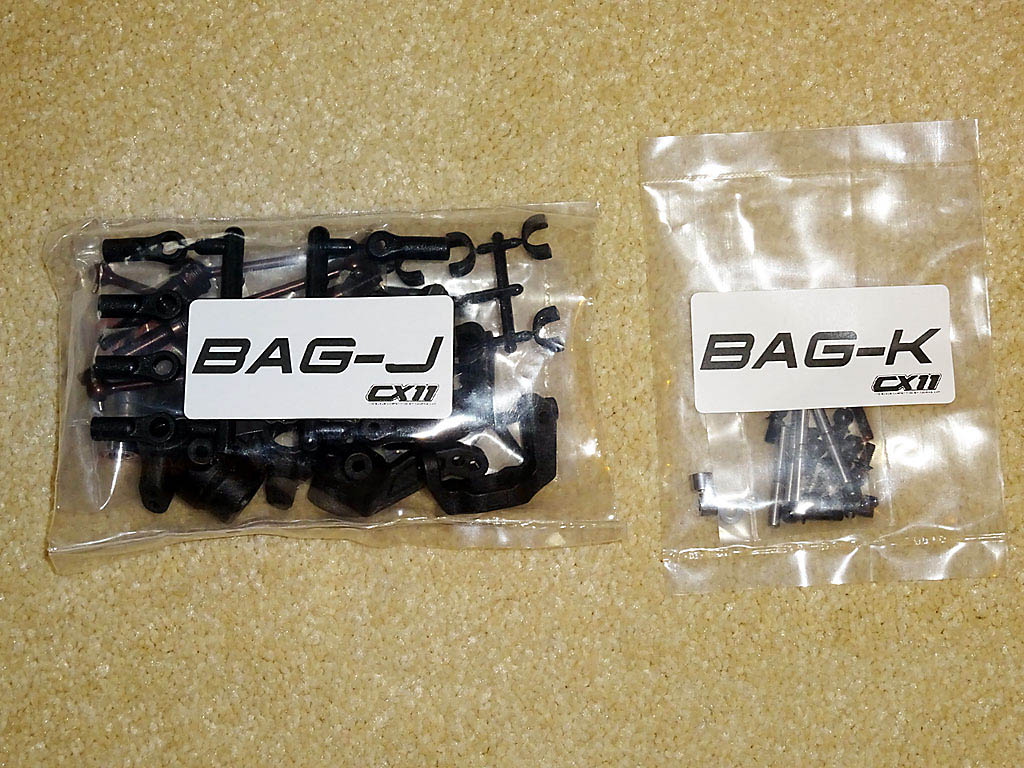
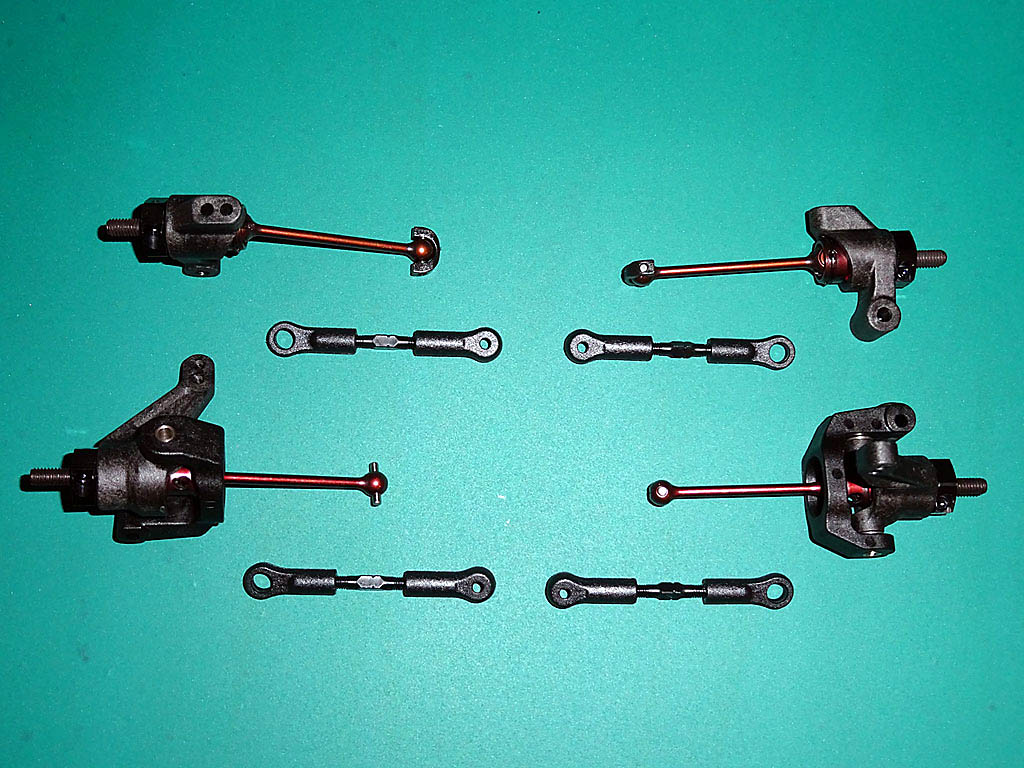
Bag-J contains the drive shafts, lightweight hard reinforced plastic rear uprights and steering blocks, plus plastic 4 degree C-hubs, aluminium 12mm hex wheel hubs, steel turnbuckles, rod ends, rubber sealed ball bearings and fixings hardware.
The C-Hubs handily come supplied with the moulding tree still attached to stop them from closing up before use. I've found using a countersunk head rather than button head screw at the bottom of the C-hub helps to centre the screw in the bushing, and holding the steering block to an outside lock whilst tightening the C-hub screws results in a less sticky smoother steering action.
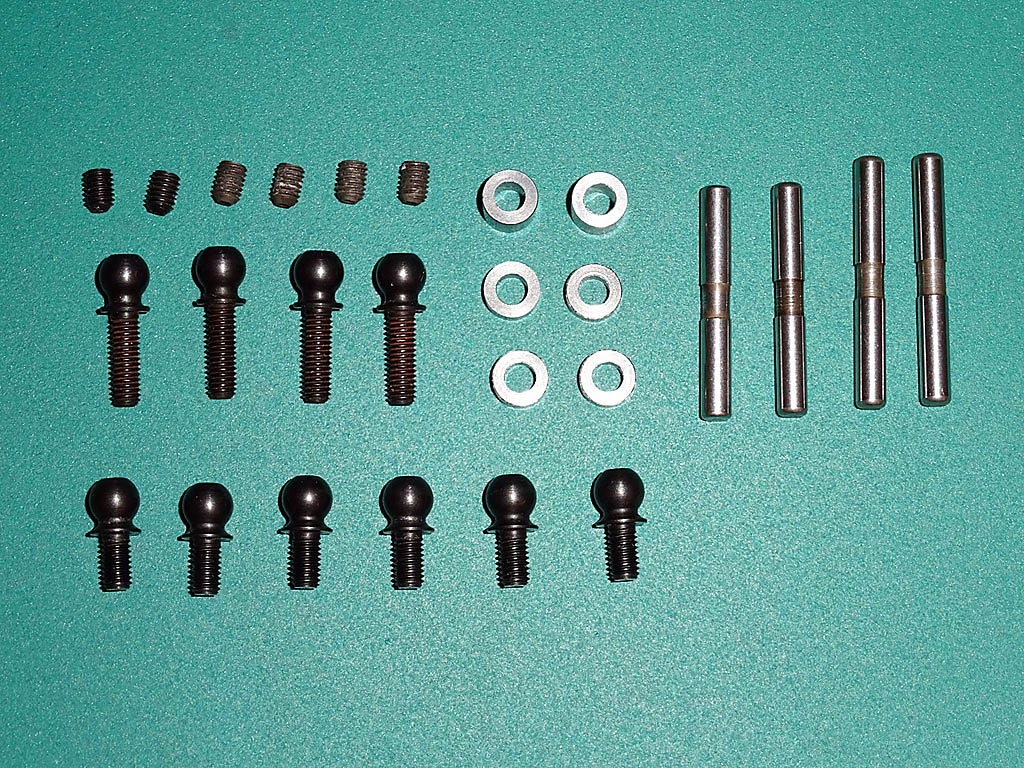
Bag-k contains the steel outer arm pivot pins, steel ball ends, aluminium washers/spacers and screws to attach the hub assemblies to the suspension arms and upper bulkheads. The turnbuckle rod ends are very tight to engage into the ball ends but are super smooth once connected so well worth the effort.
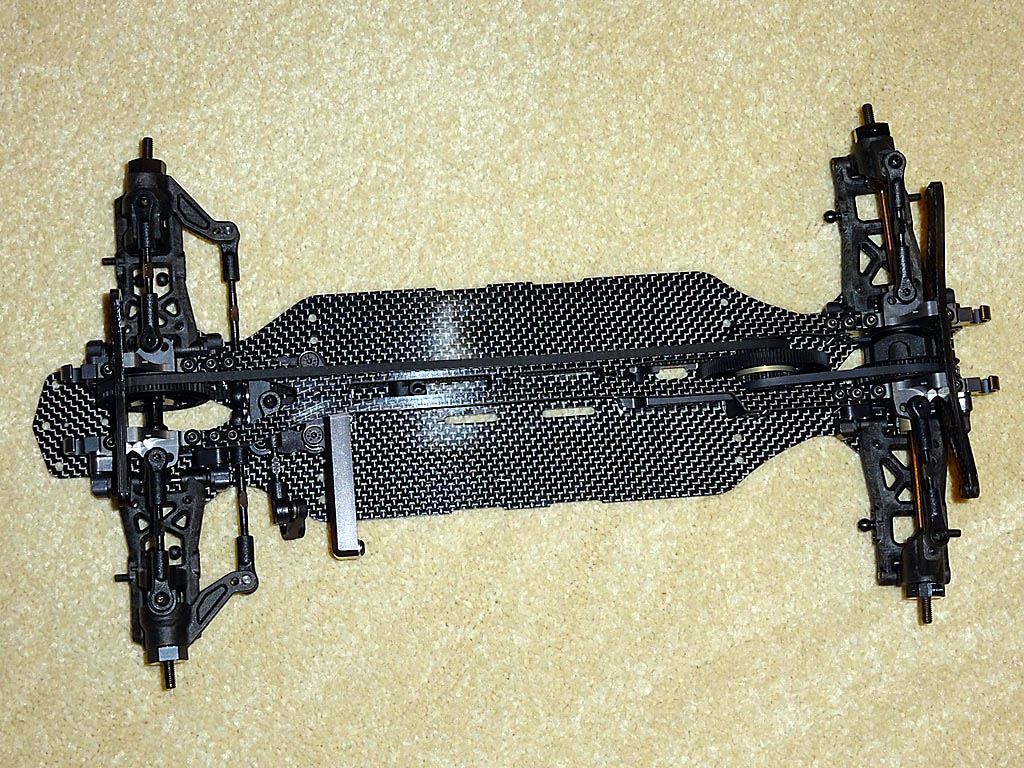
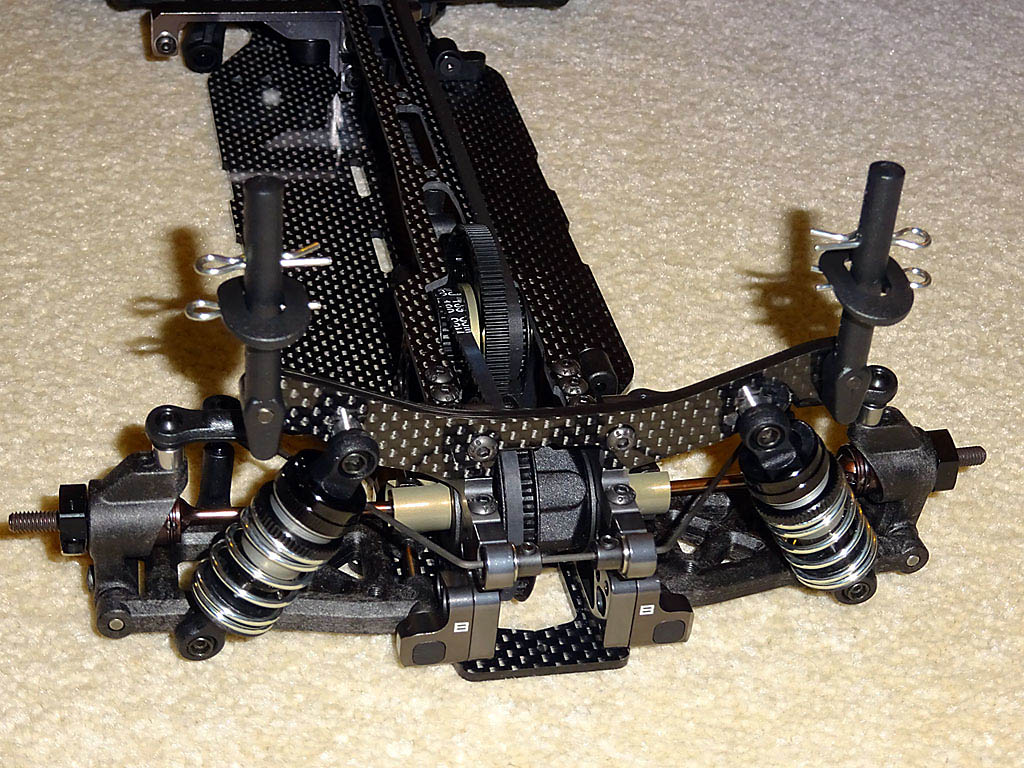
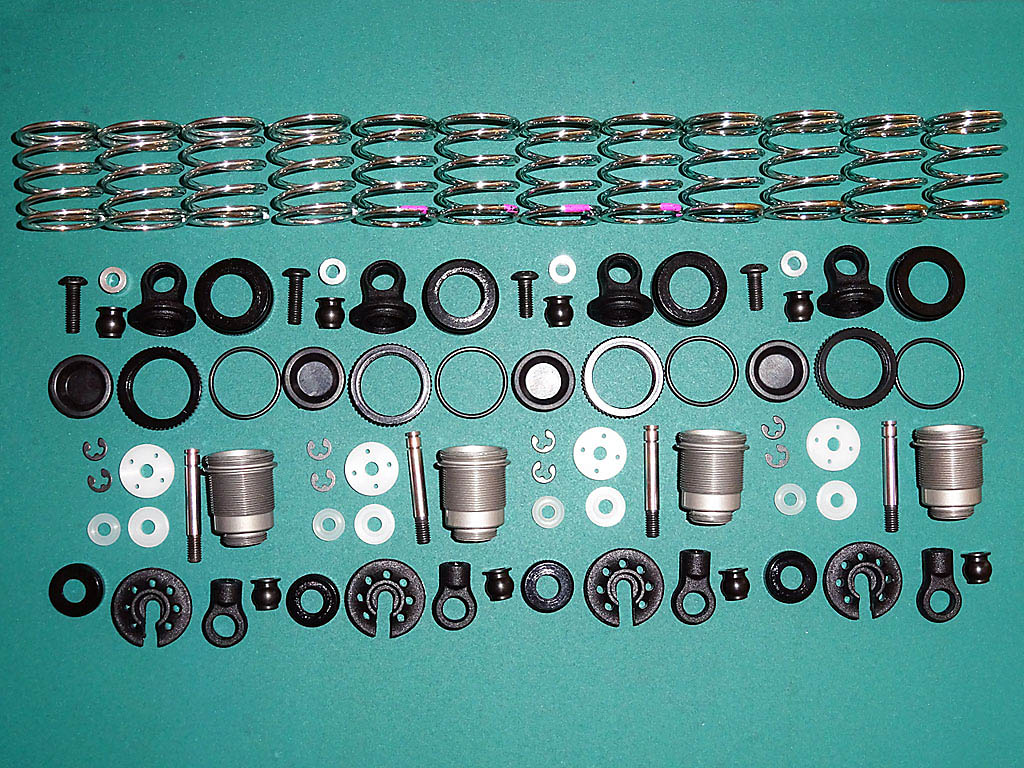
Anti-Roll Bars, Shock Absorbers & Suspension
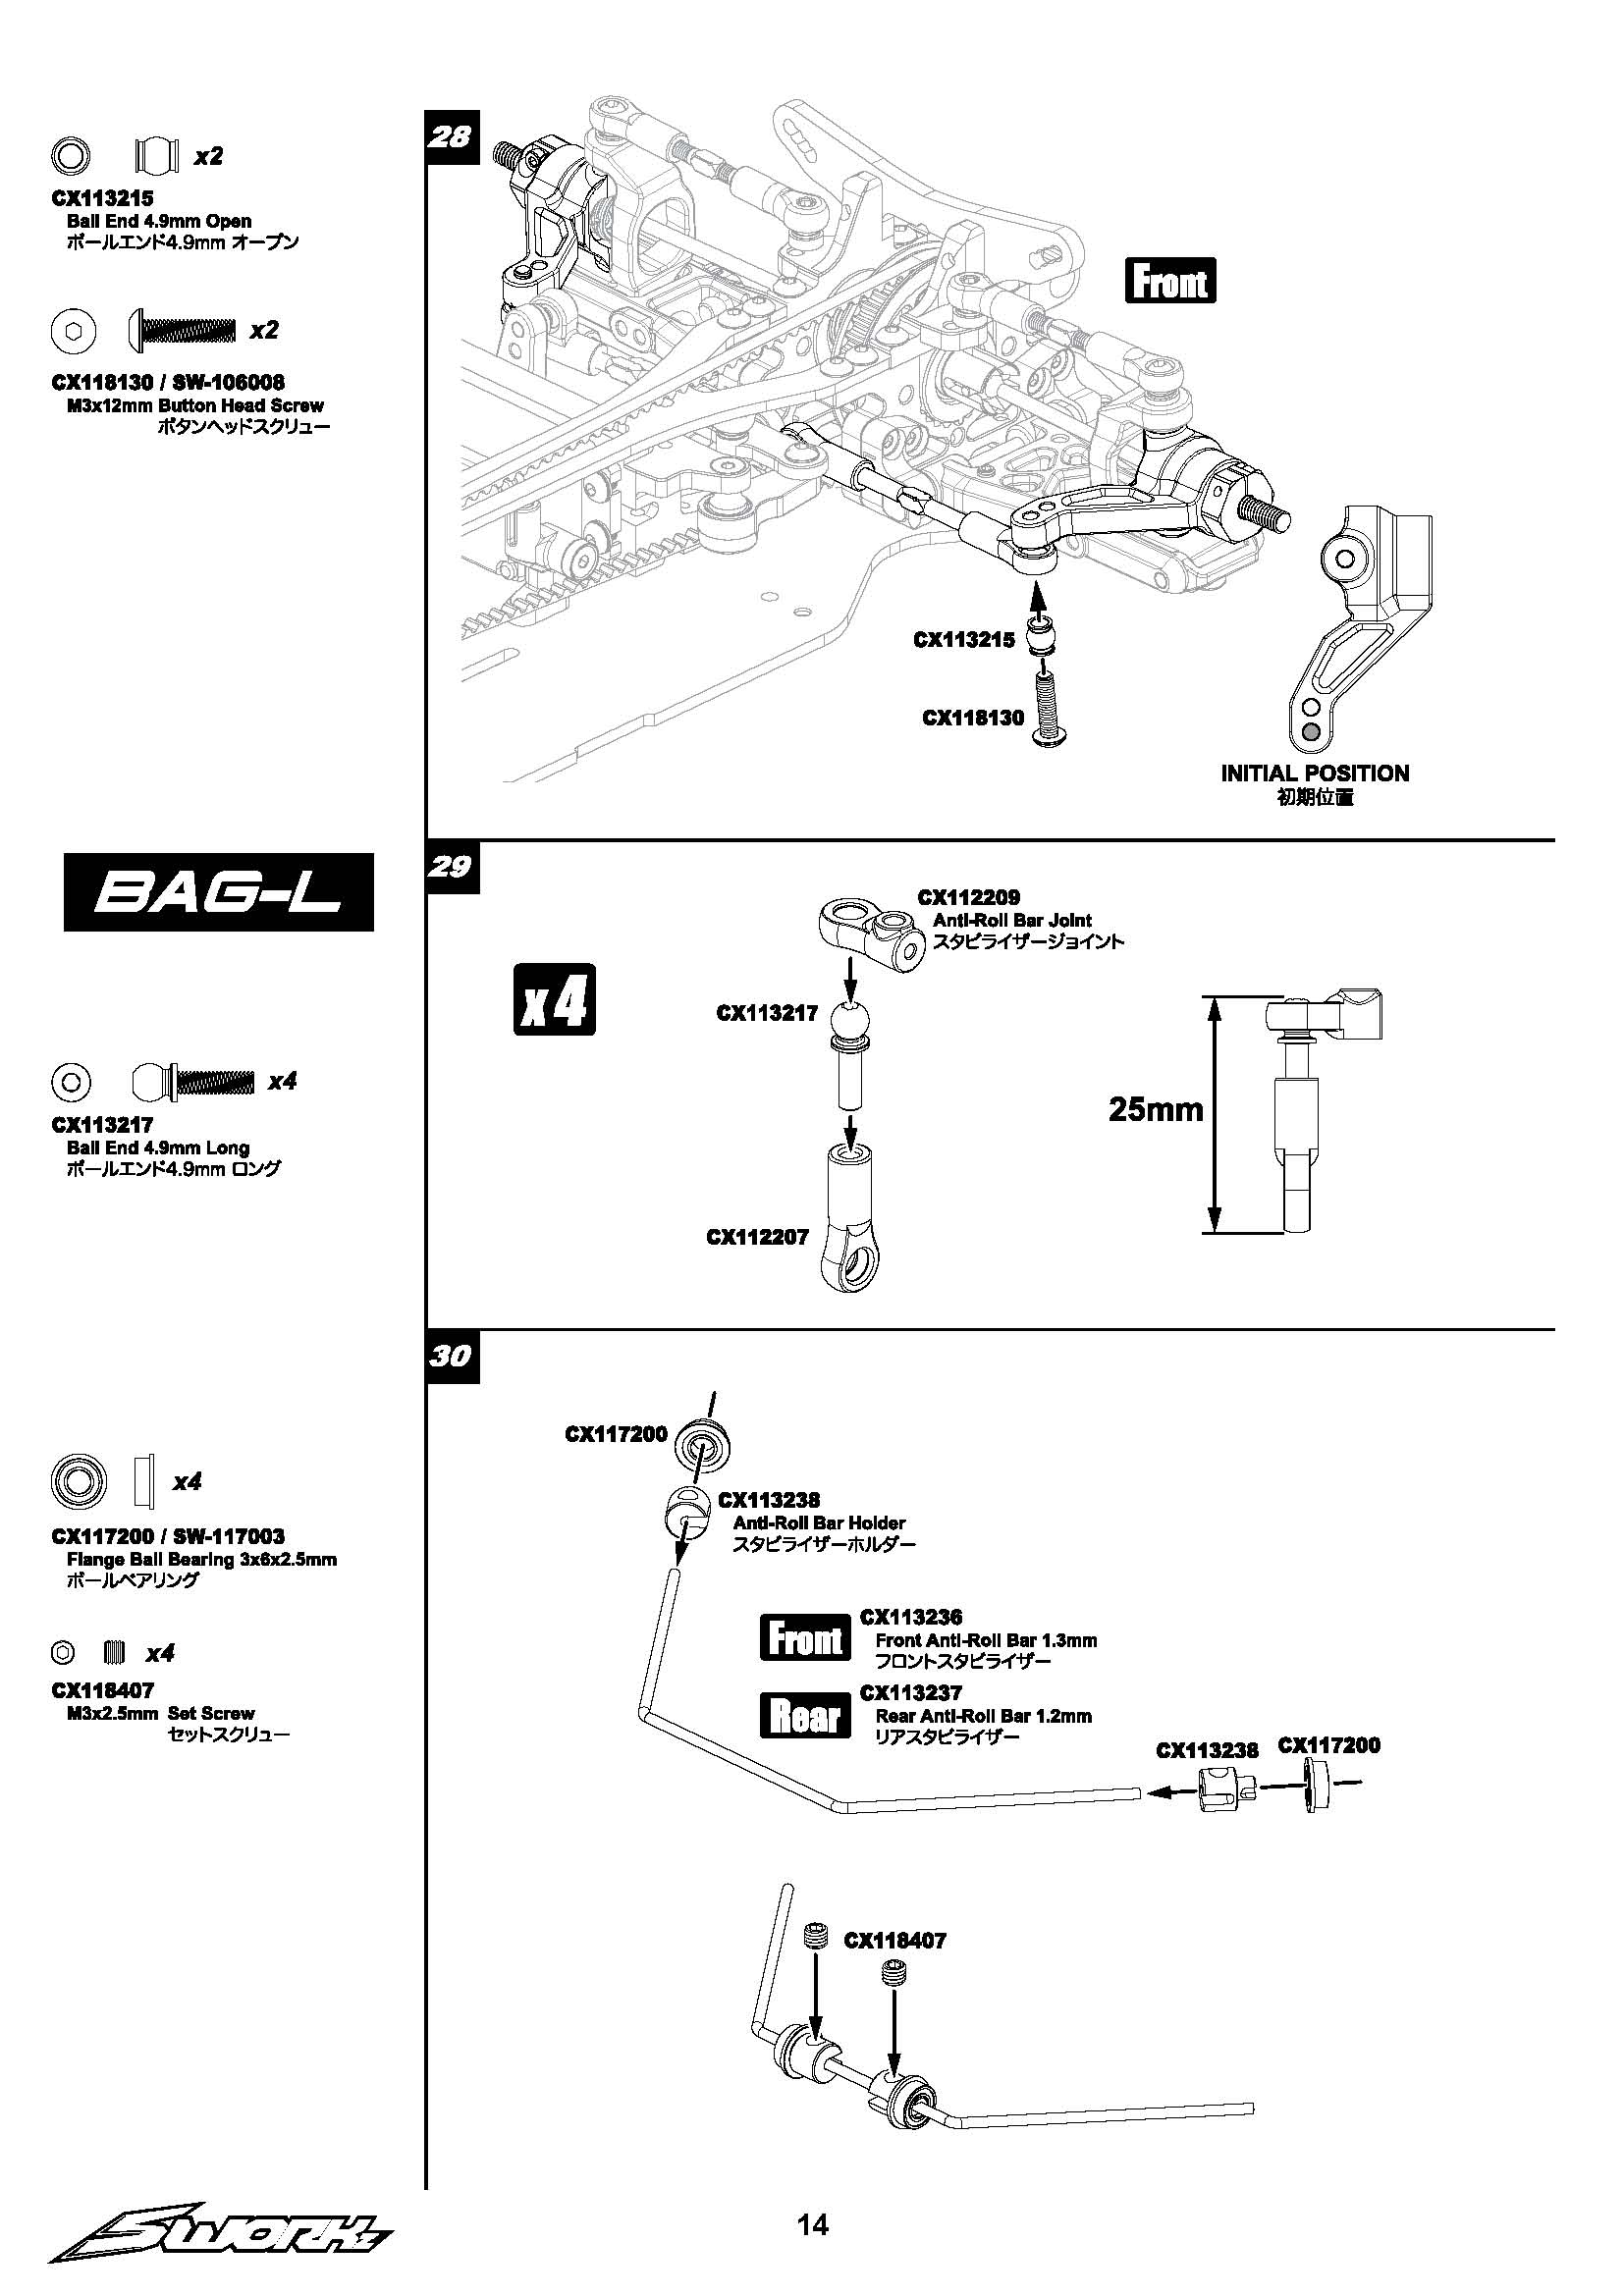
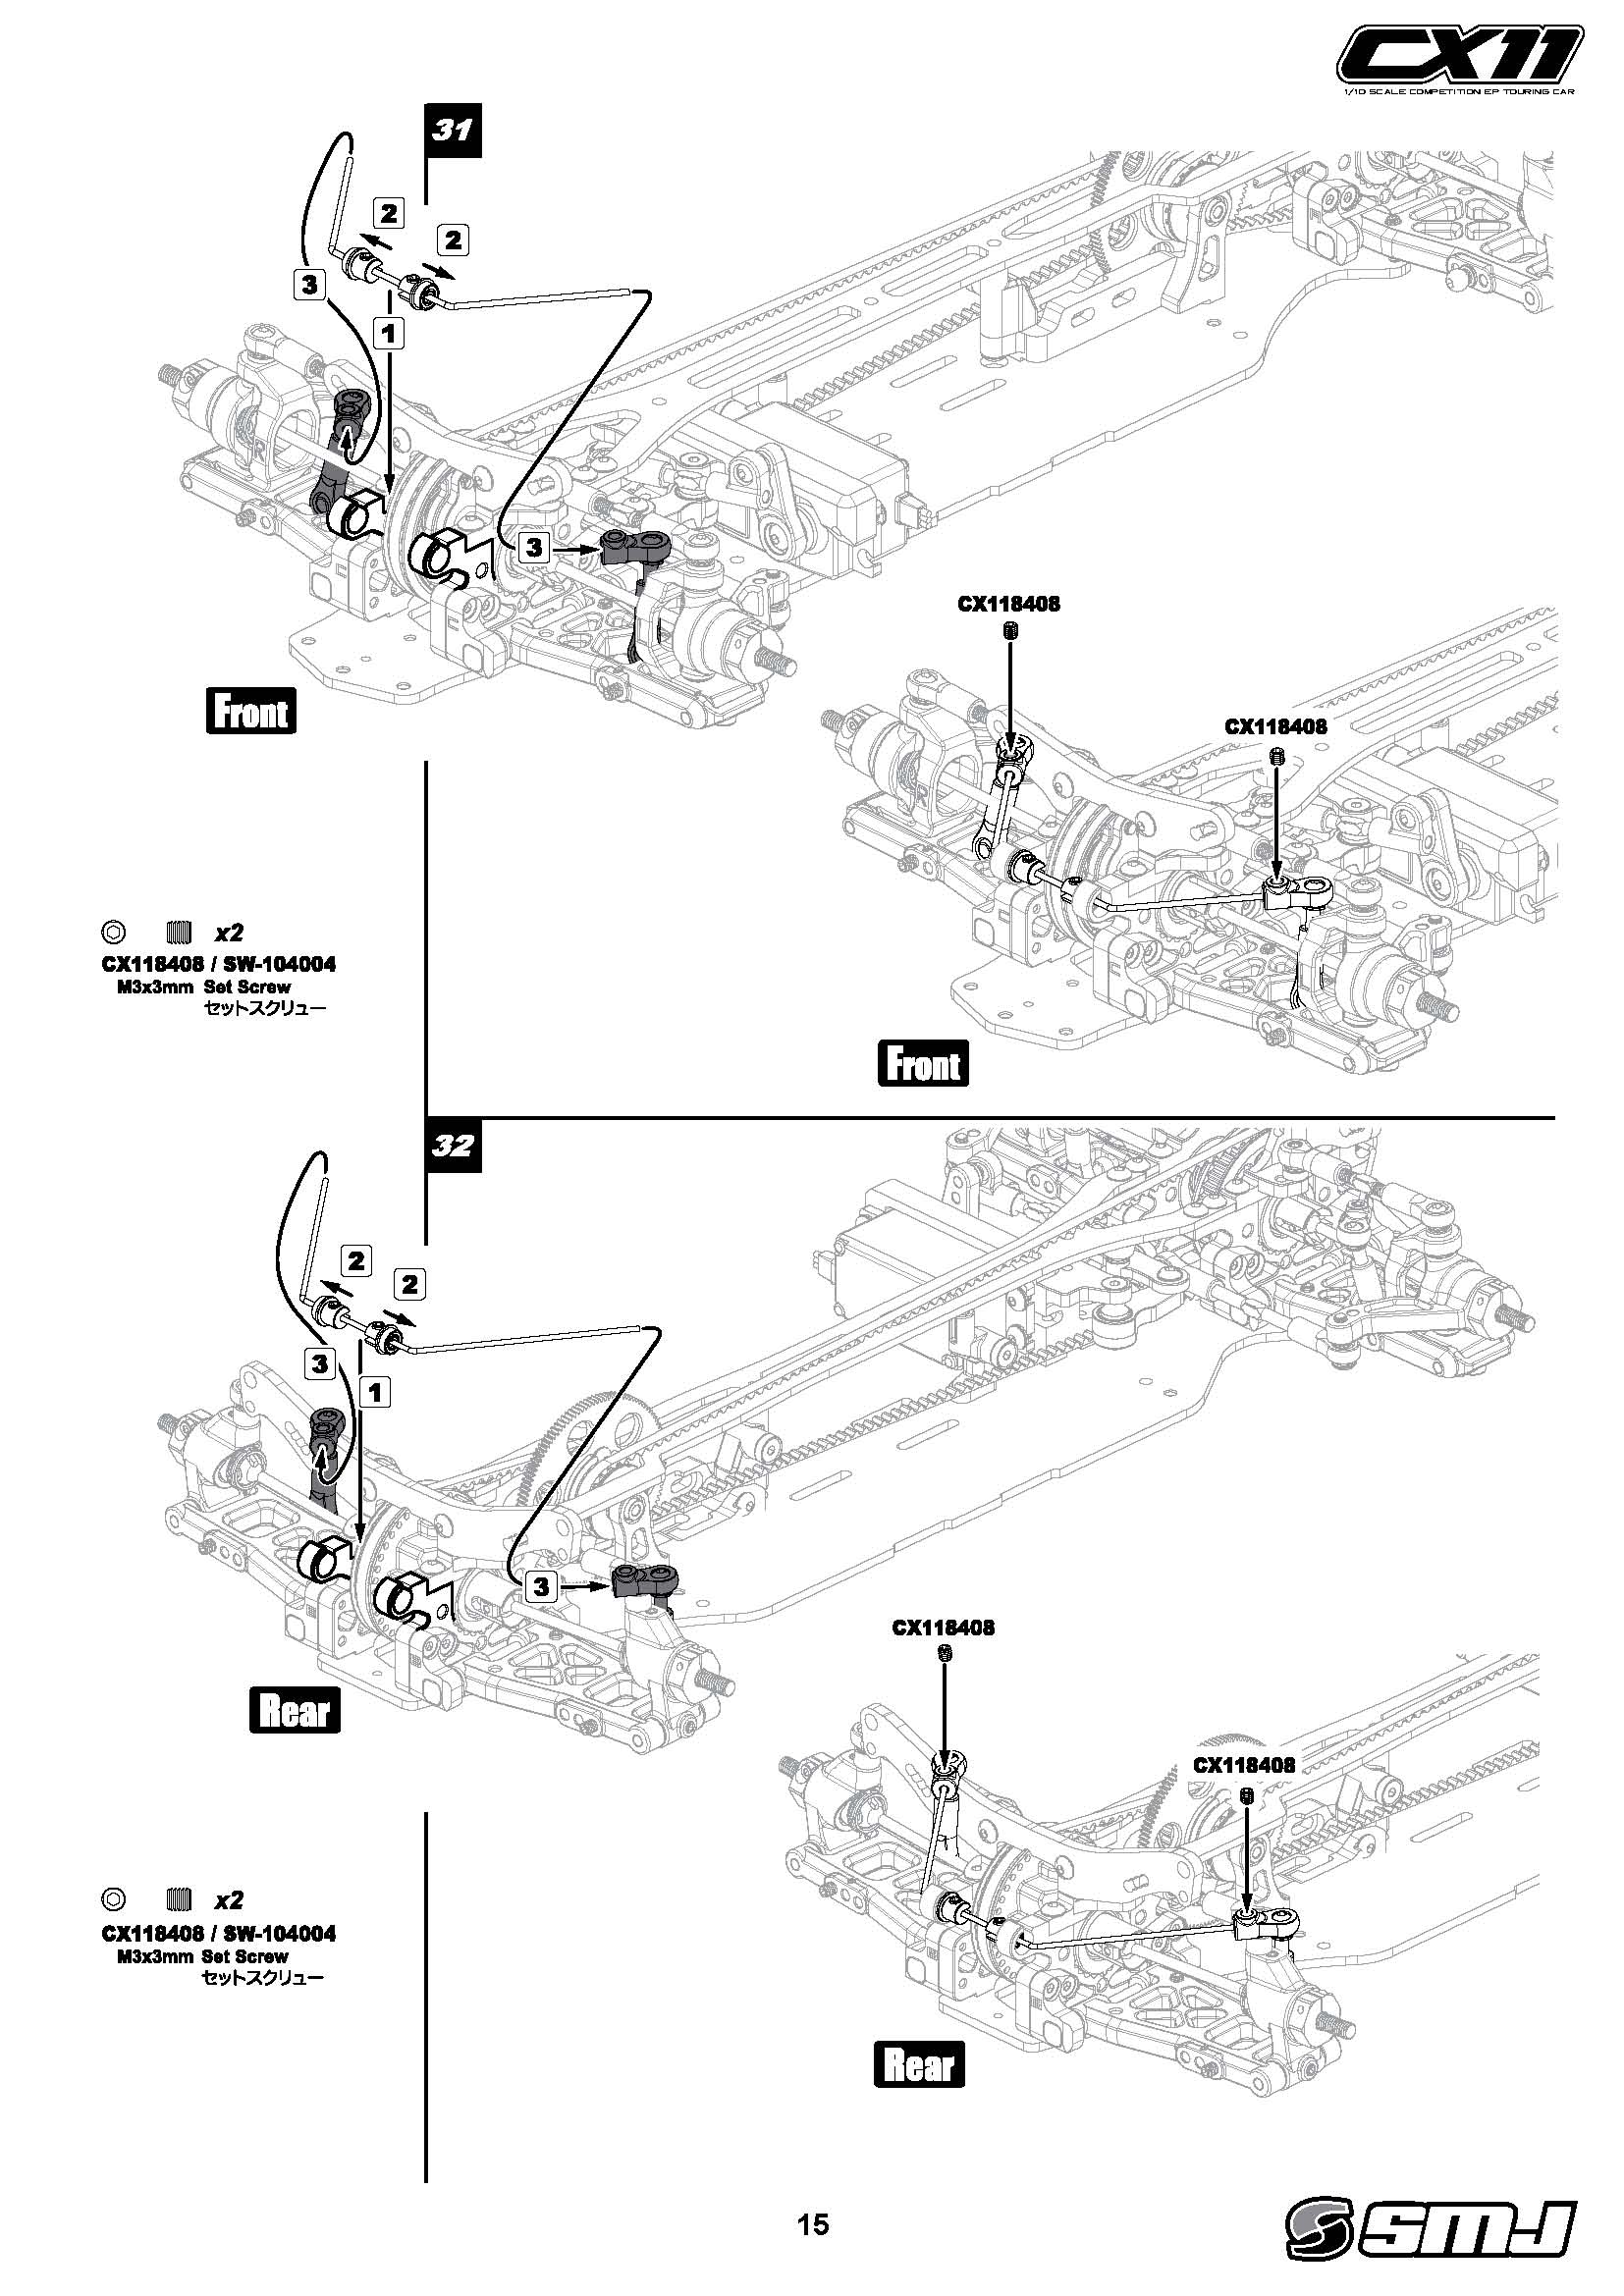
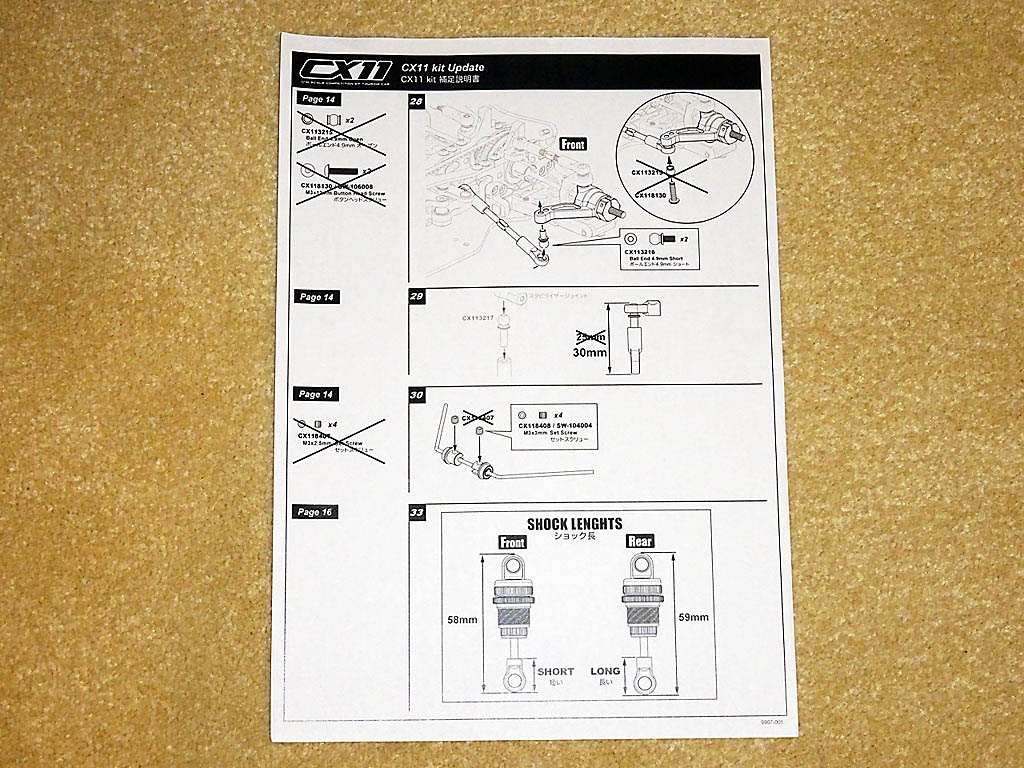
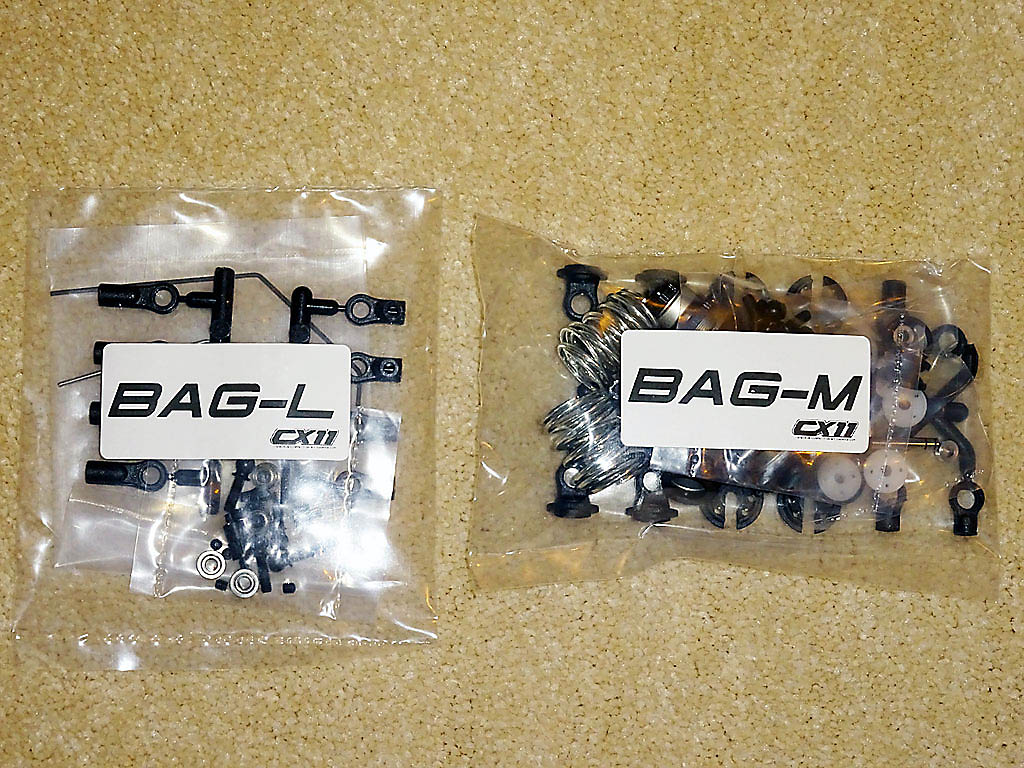
Bag-L contains the CX11's anti-roll bars and fittings. The roll-bars are suspended with ball bearings resulting in a nice smooth free action once mounted onto the bulkheads. Adjustable drop links enable the roll-bar to be fine-tuned to perform equally left to right, removing any potential chassis tweak.
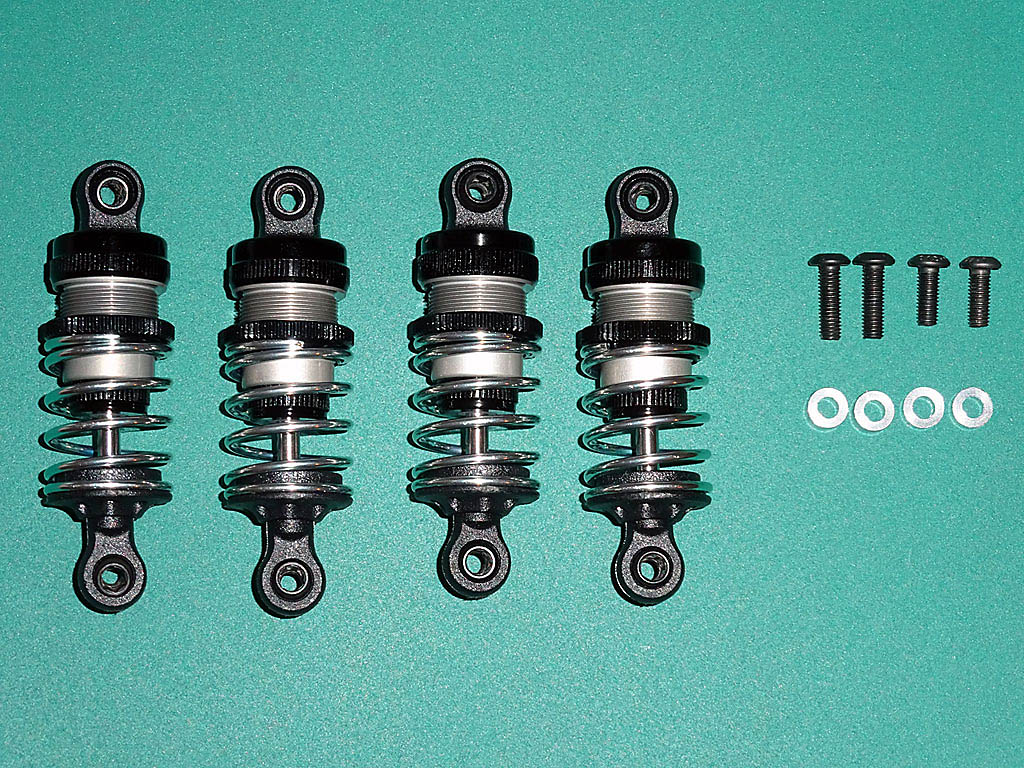
Keeping the CX11's centre of gravity as low down as possible are the short low profile big bore shock absorbers in Bag-M. They consist of aluminium main shock bodies, black anodised aluminium knurled shock caps, lower caps & adjuster nuts, plastic spring retainers & ball joint cups, machined plastic 1.1mm x 4 hole pistons, 3mm steel shock shafts and SMJ Silver Line springs.
The CX11 kit generously comes supplied with three complete sets of SMJ Silver Line linear springs; Silver (301gf/mm), Pink (324gf/mm) and Gold (351gf/mm). SMJ's springs are fast becoming the default choice for other manufacturer's TC kits, and professional factory drivers including multiple world champion Marc Rheinard.
Before building the shock absorbers I coated the O-rings with Team Associated Green Slime grease to reduce stiction and potential leaks, then assembled as per the manual. It's also best advised to use a proper set of RC shock pliers to avoid damaging the shock shafts when attaching the lower ball joints.
The default kit setup recommends filling the shocks with #400 SWORKz silicone oil (SW-410005) which I allowed to sit for 15 minutes once bled to fully enable any remaining air bubbles to escape. If you haven't got a shock absorber stand you can make an inexpensive one by reaming/drilling four 11mm holes into a plastic aerosol cap.


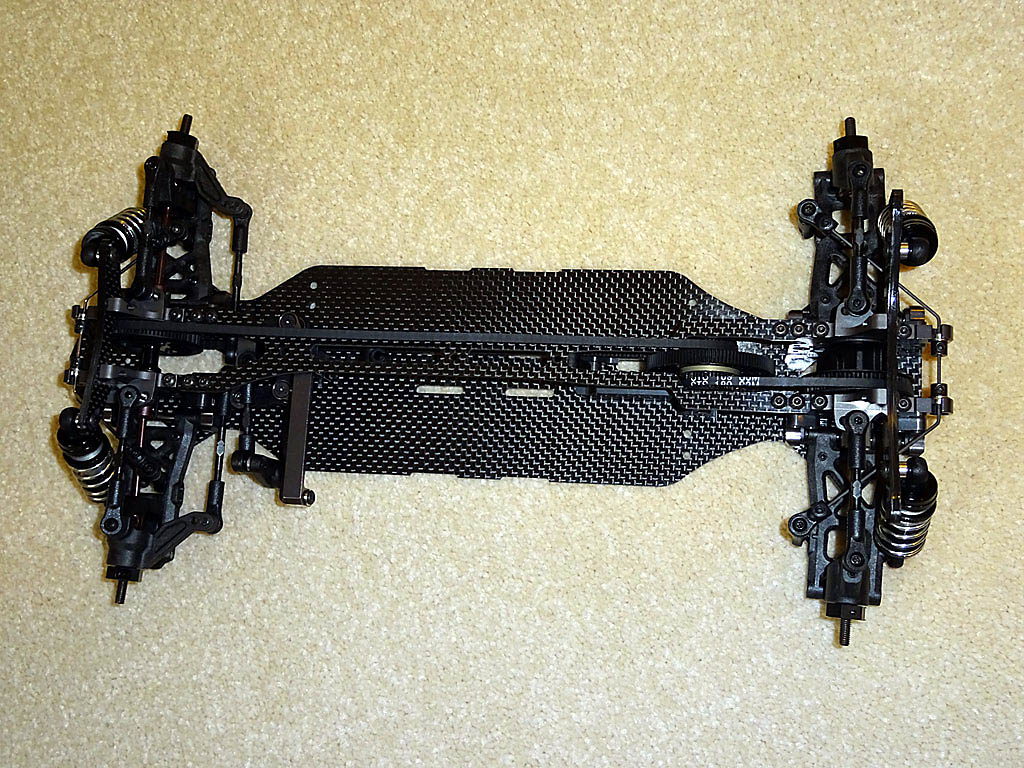
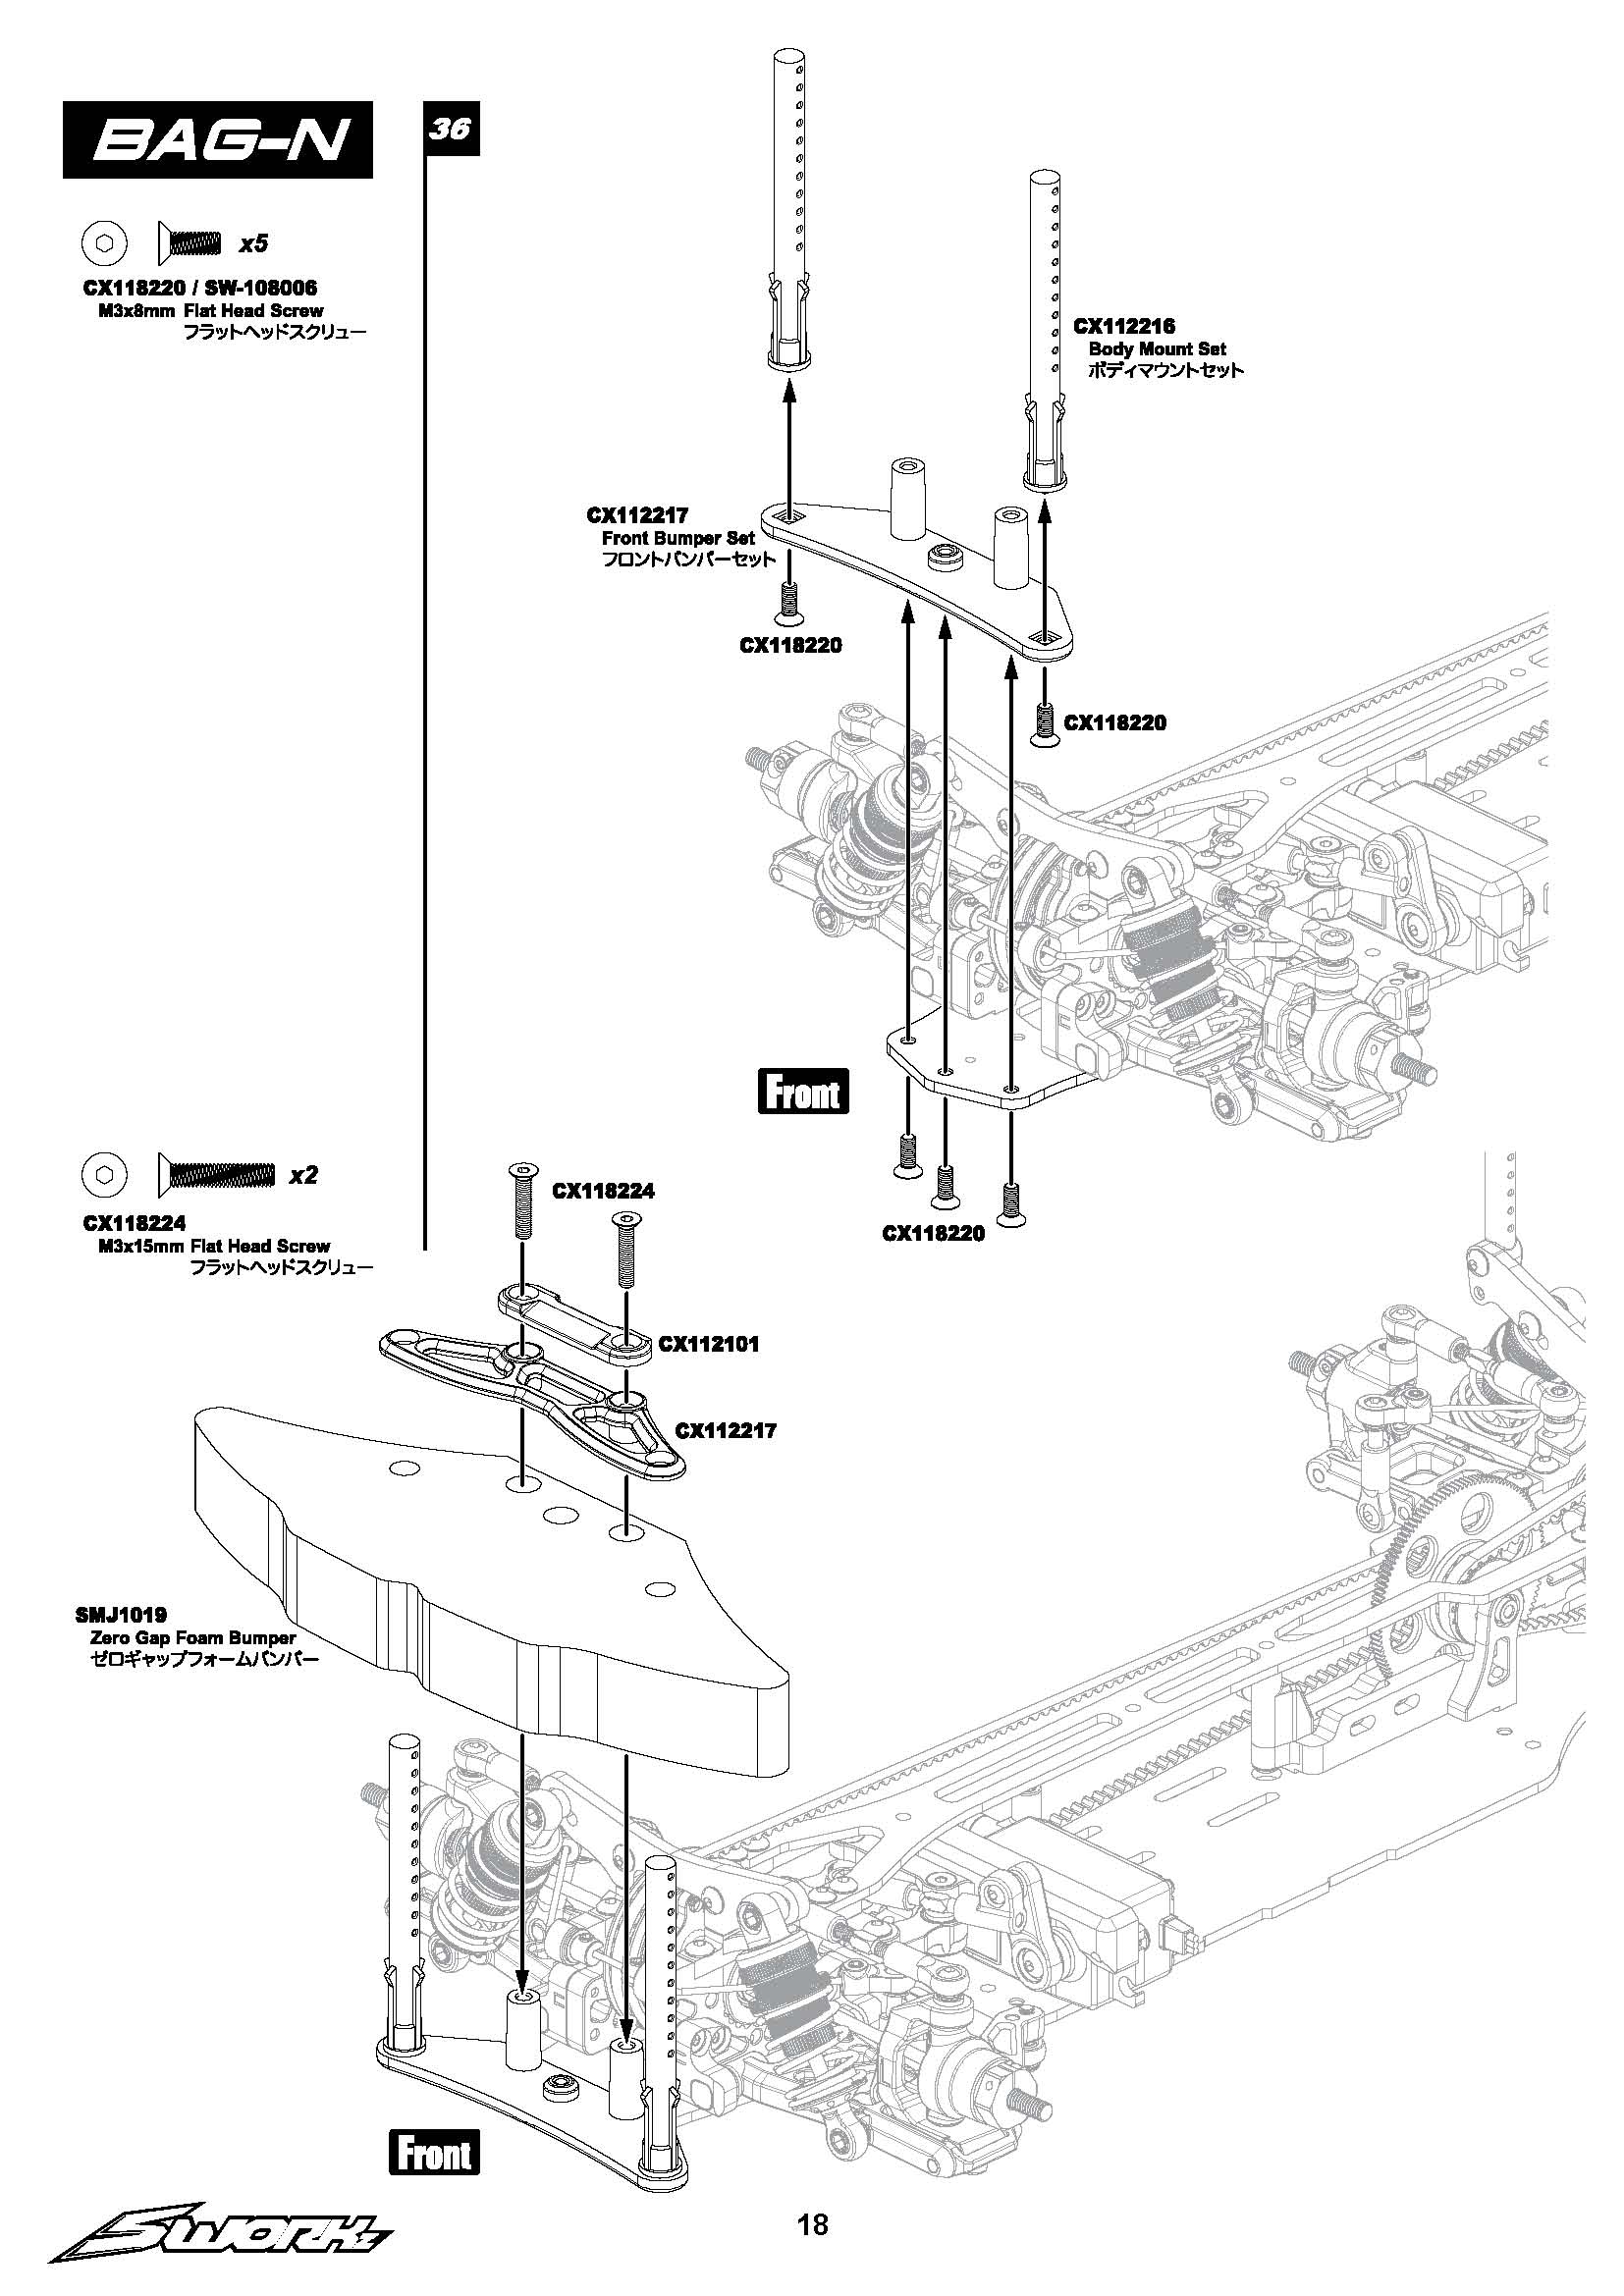
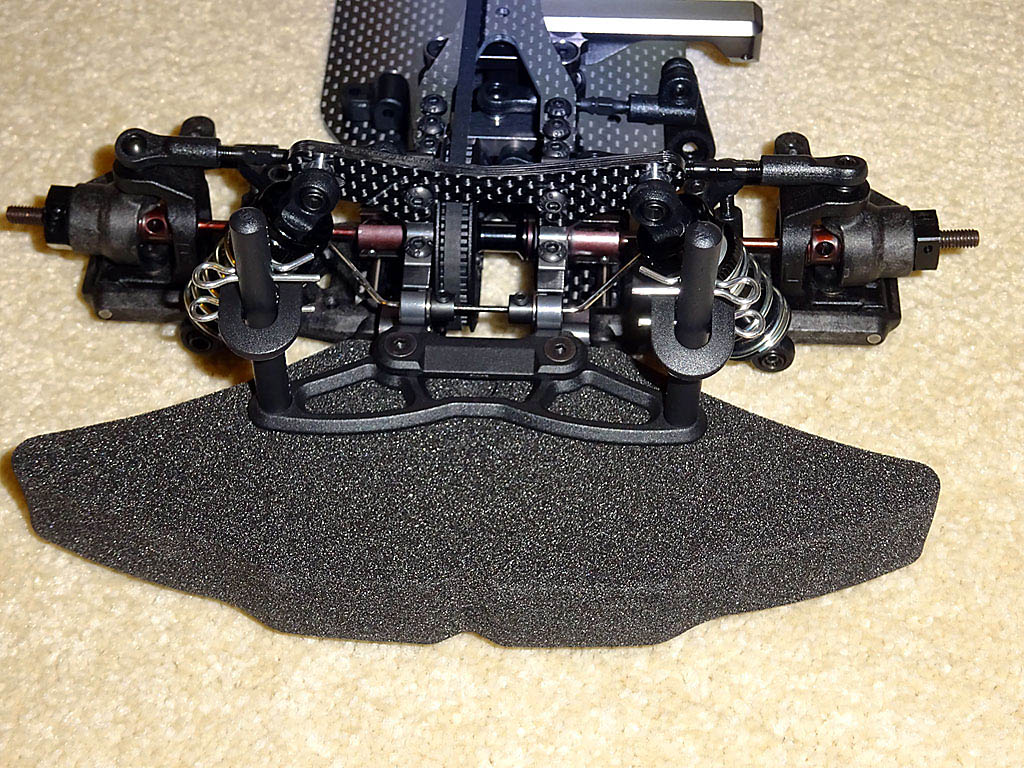
Bumper, Body Posts & Battery Stoppers
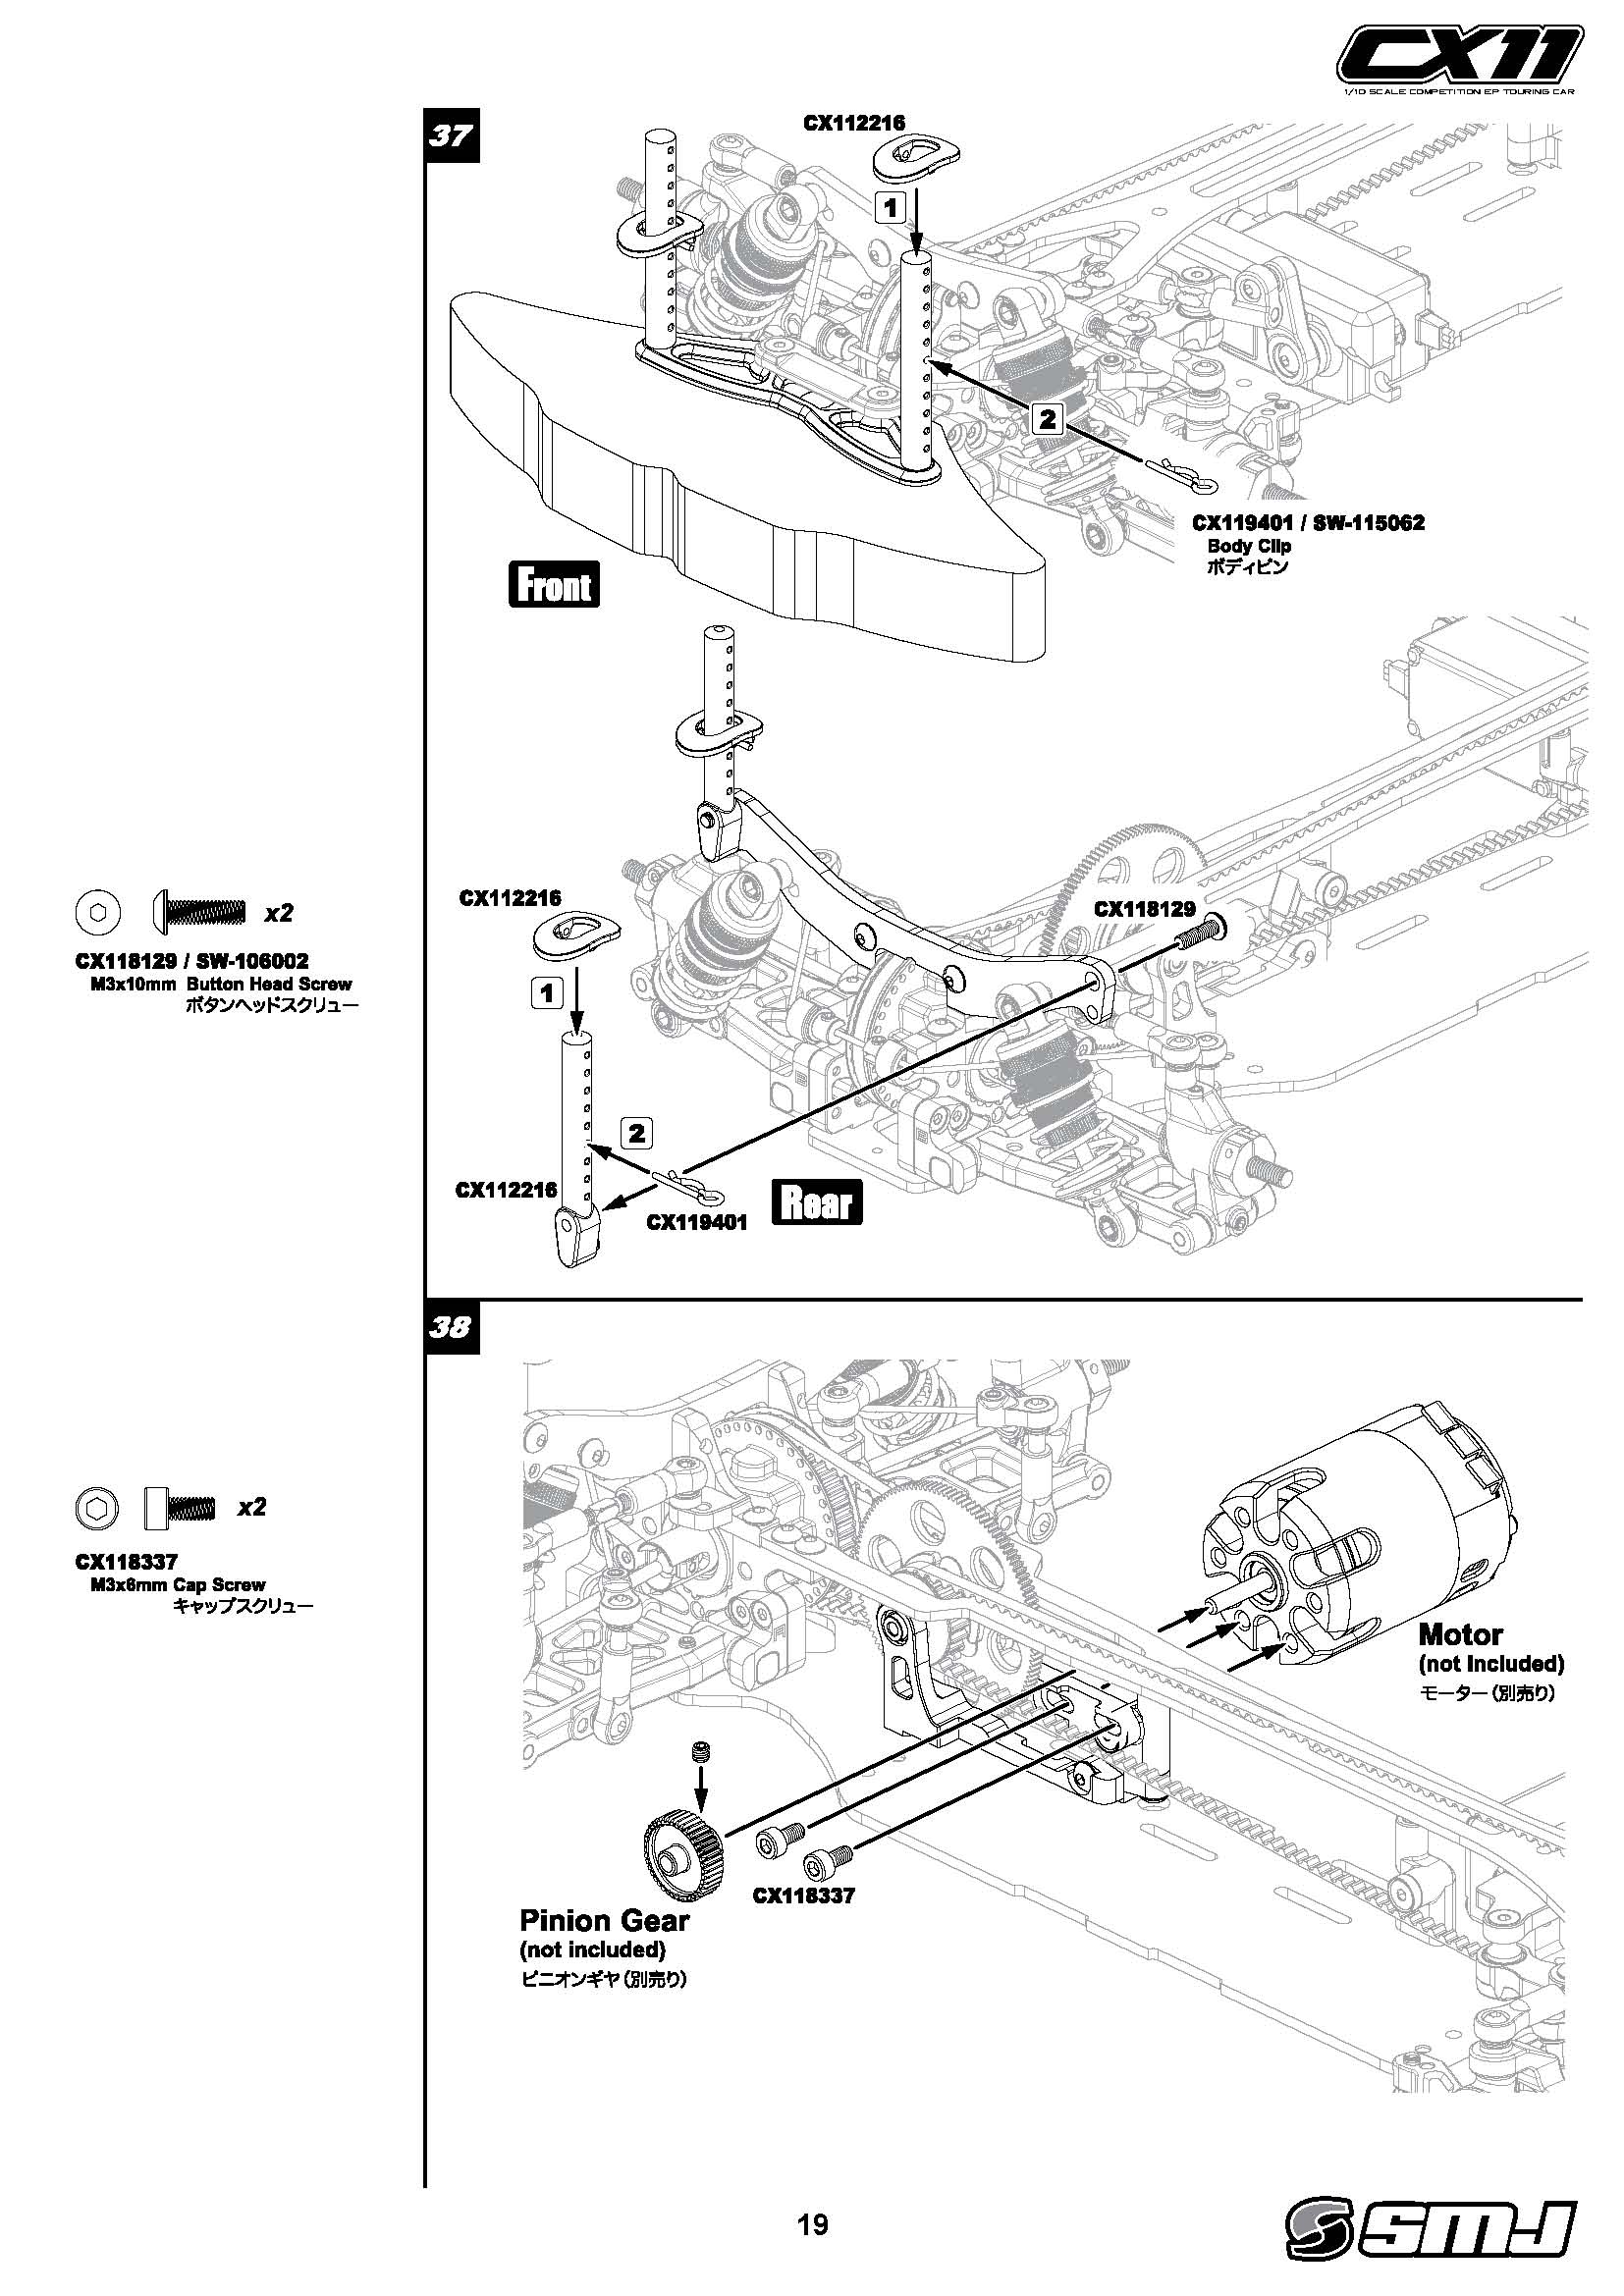
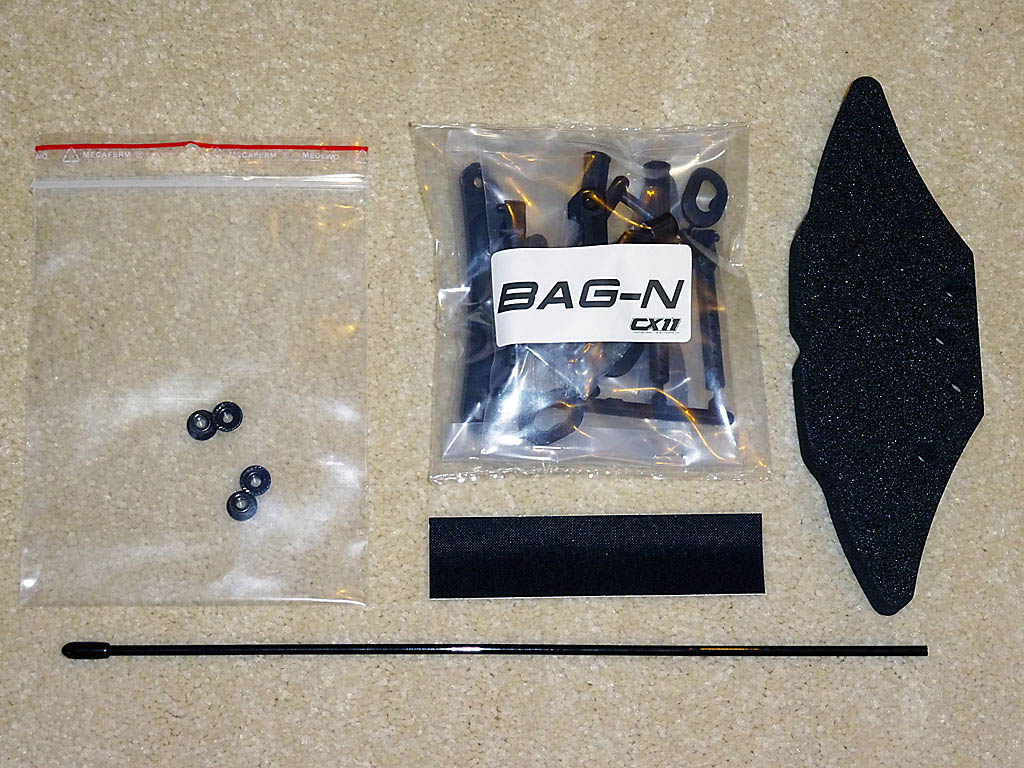
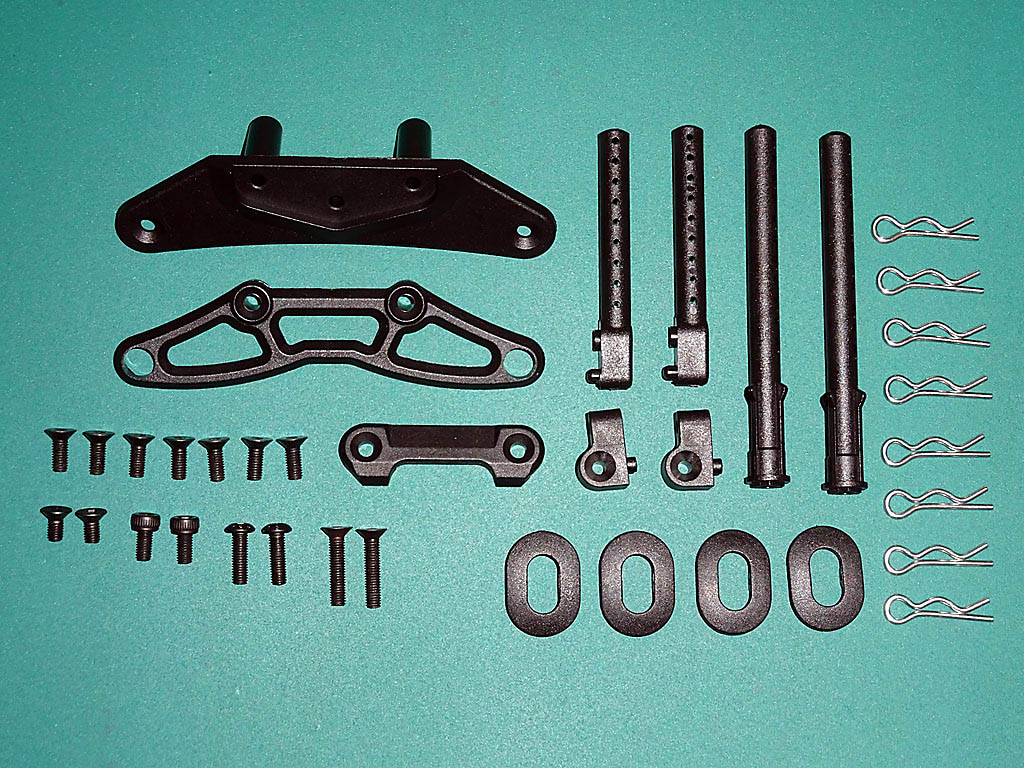
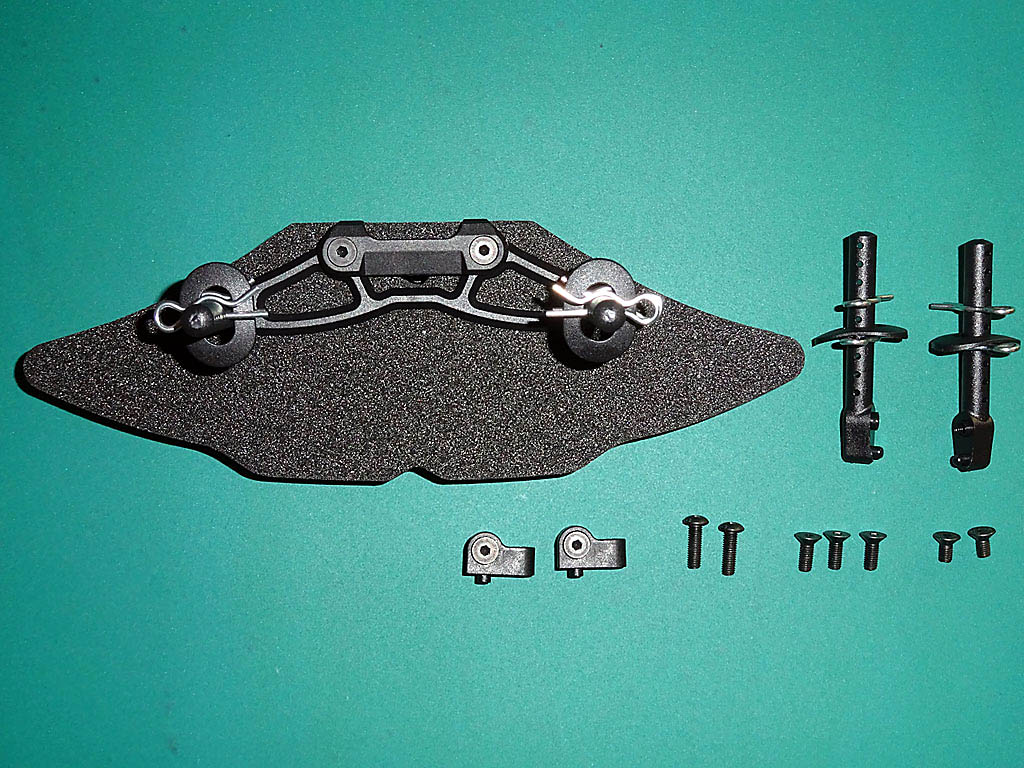
The CX11 kit includes a SMJ 'Zero Gap' lightweight foam bumper with a plastic lower bumper/support and upper brace contained in Bag-N along with a variety of fixing screws. Bag-N also includes the adjustable plastic body posts and body shell support hats which can be mounted in multiple different height positions using the supplied R-clips.
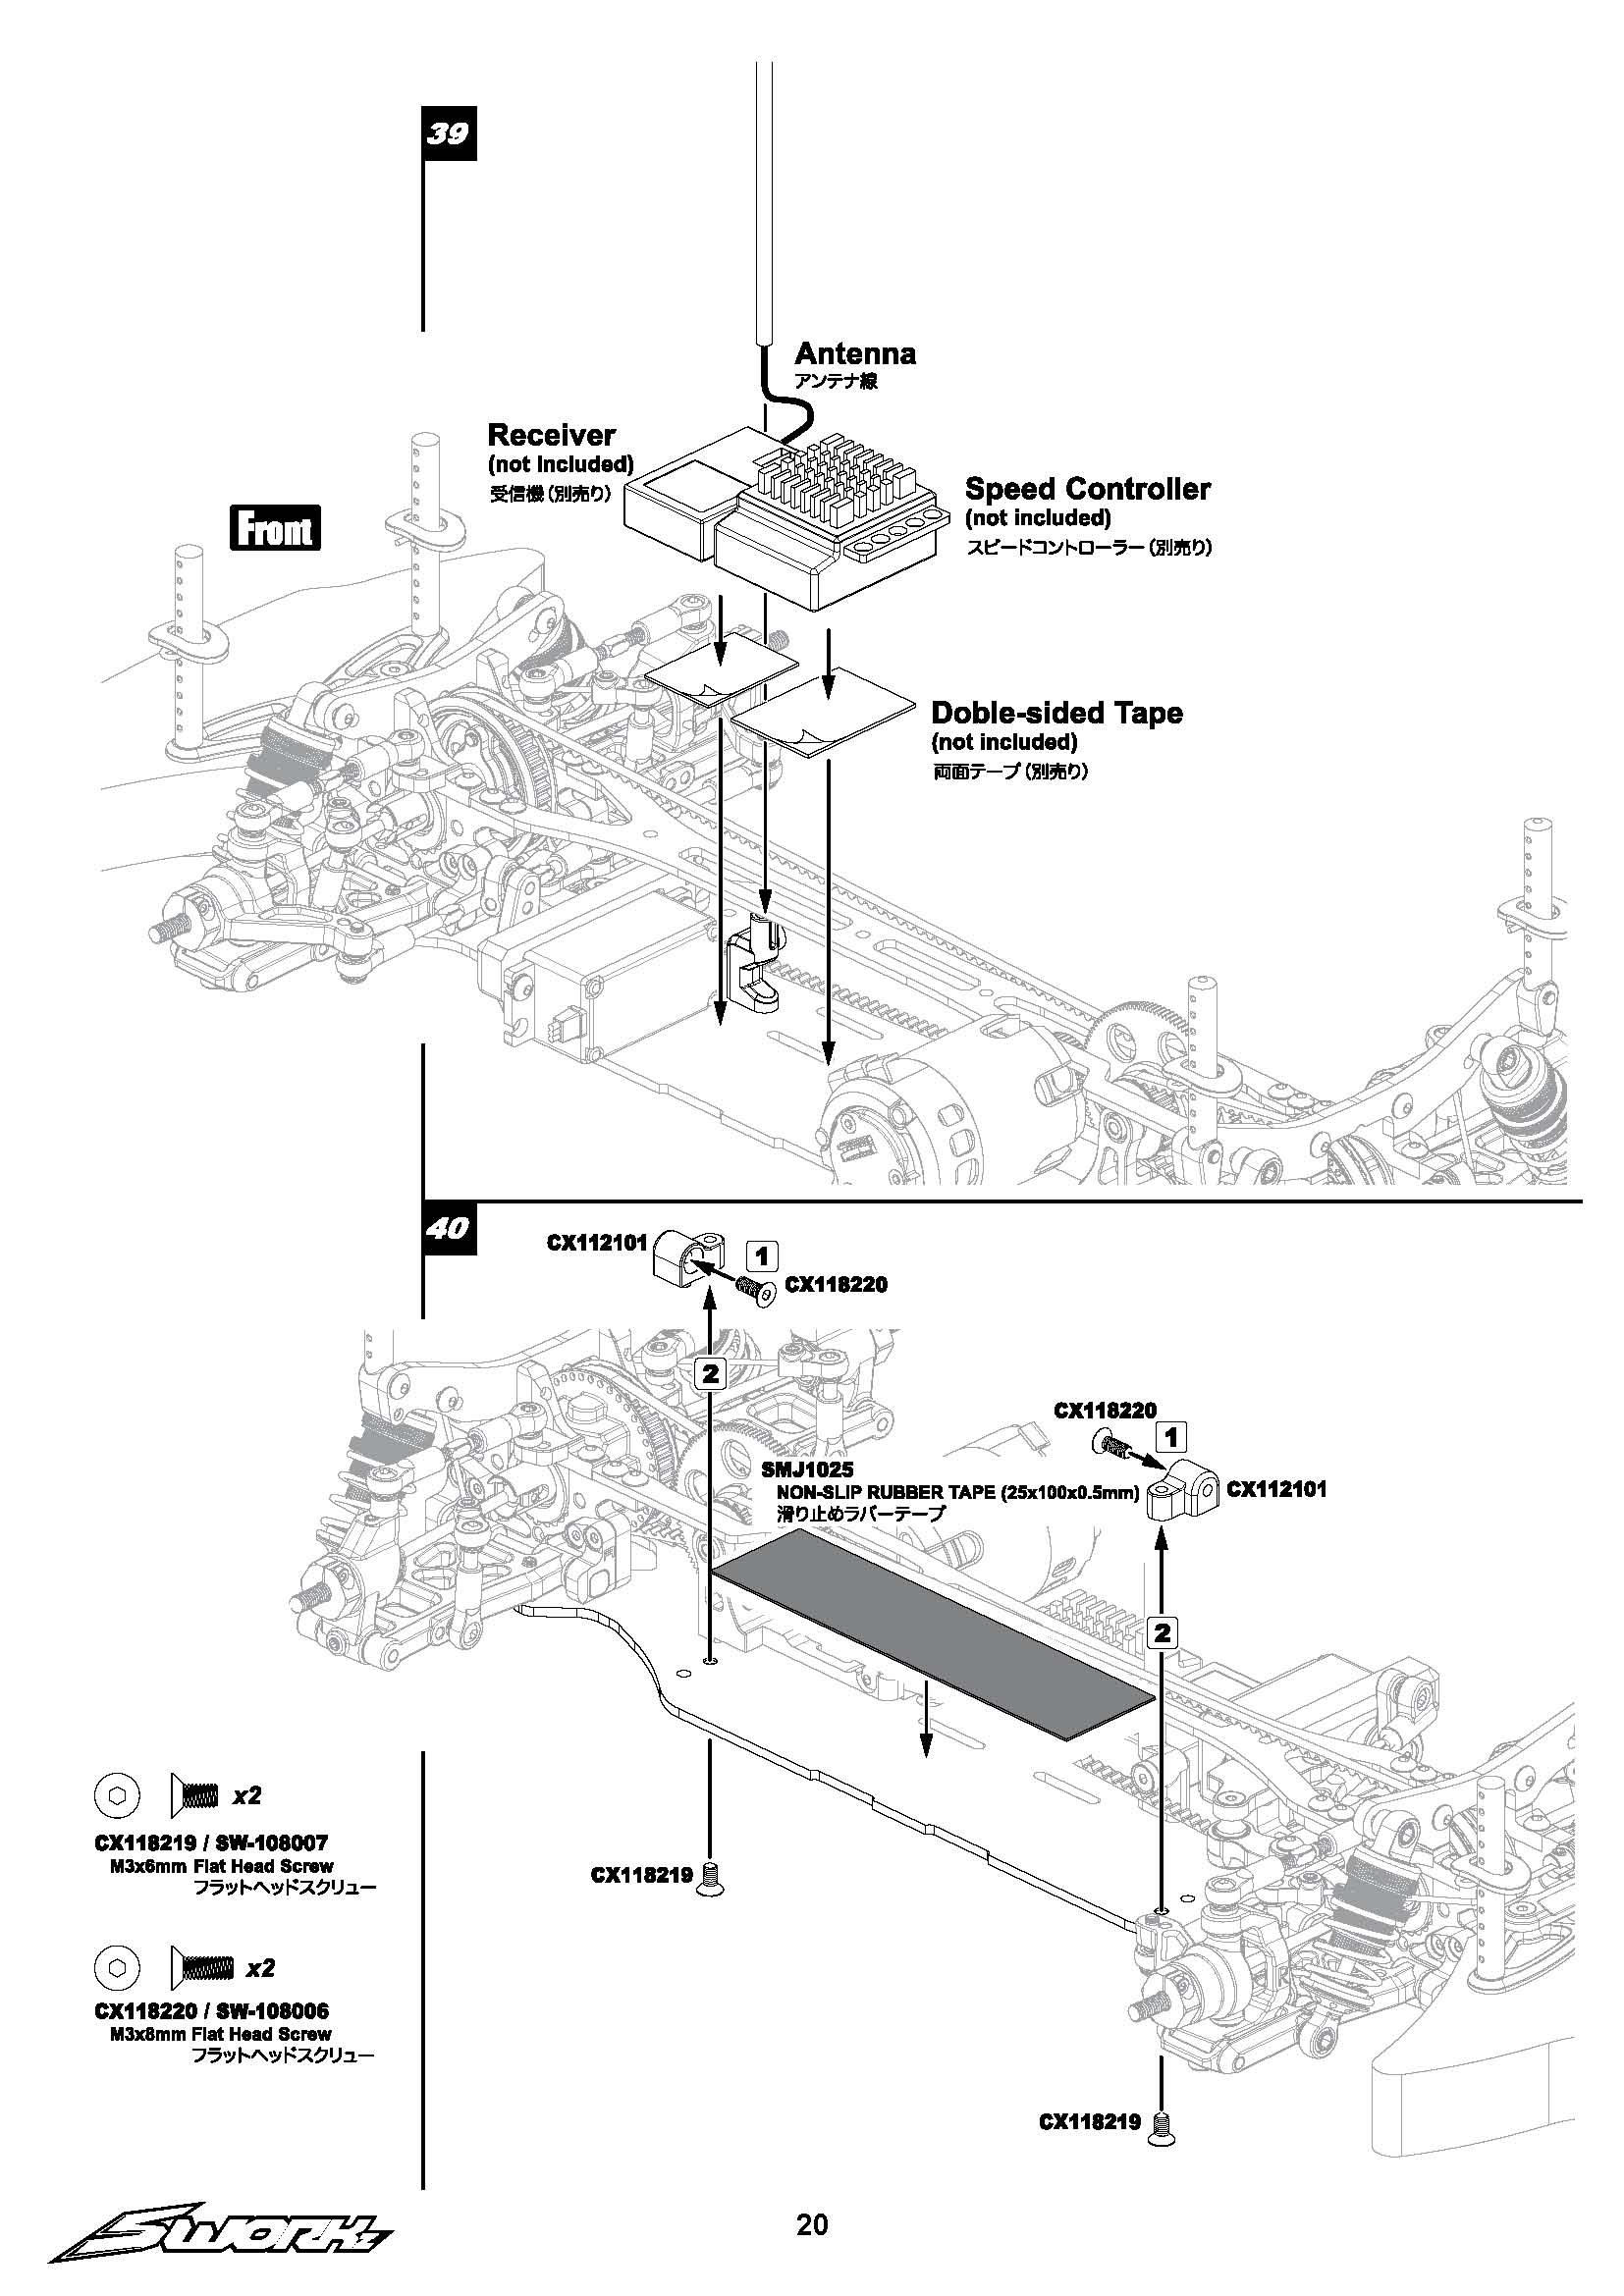
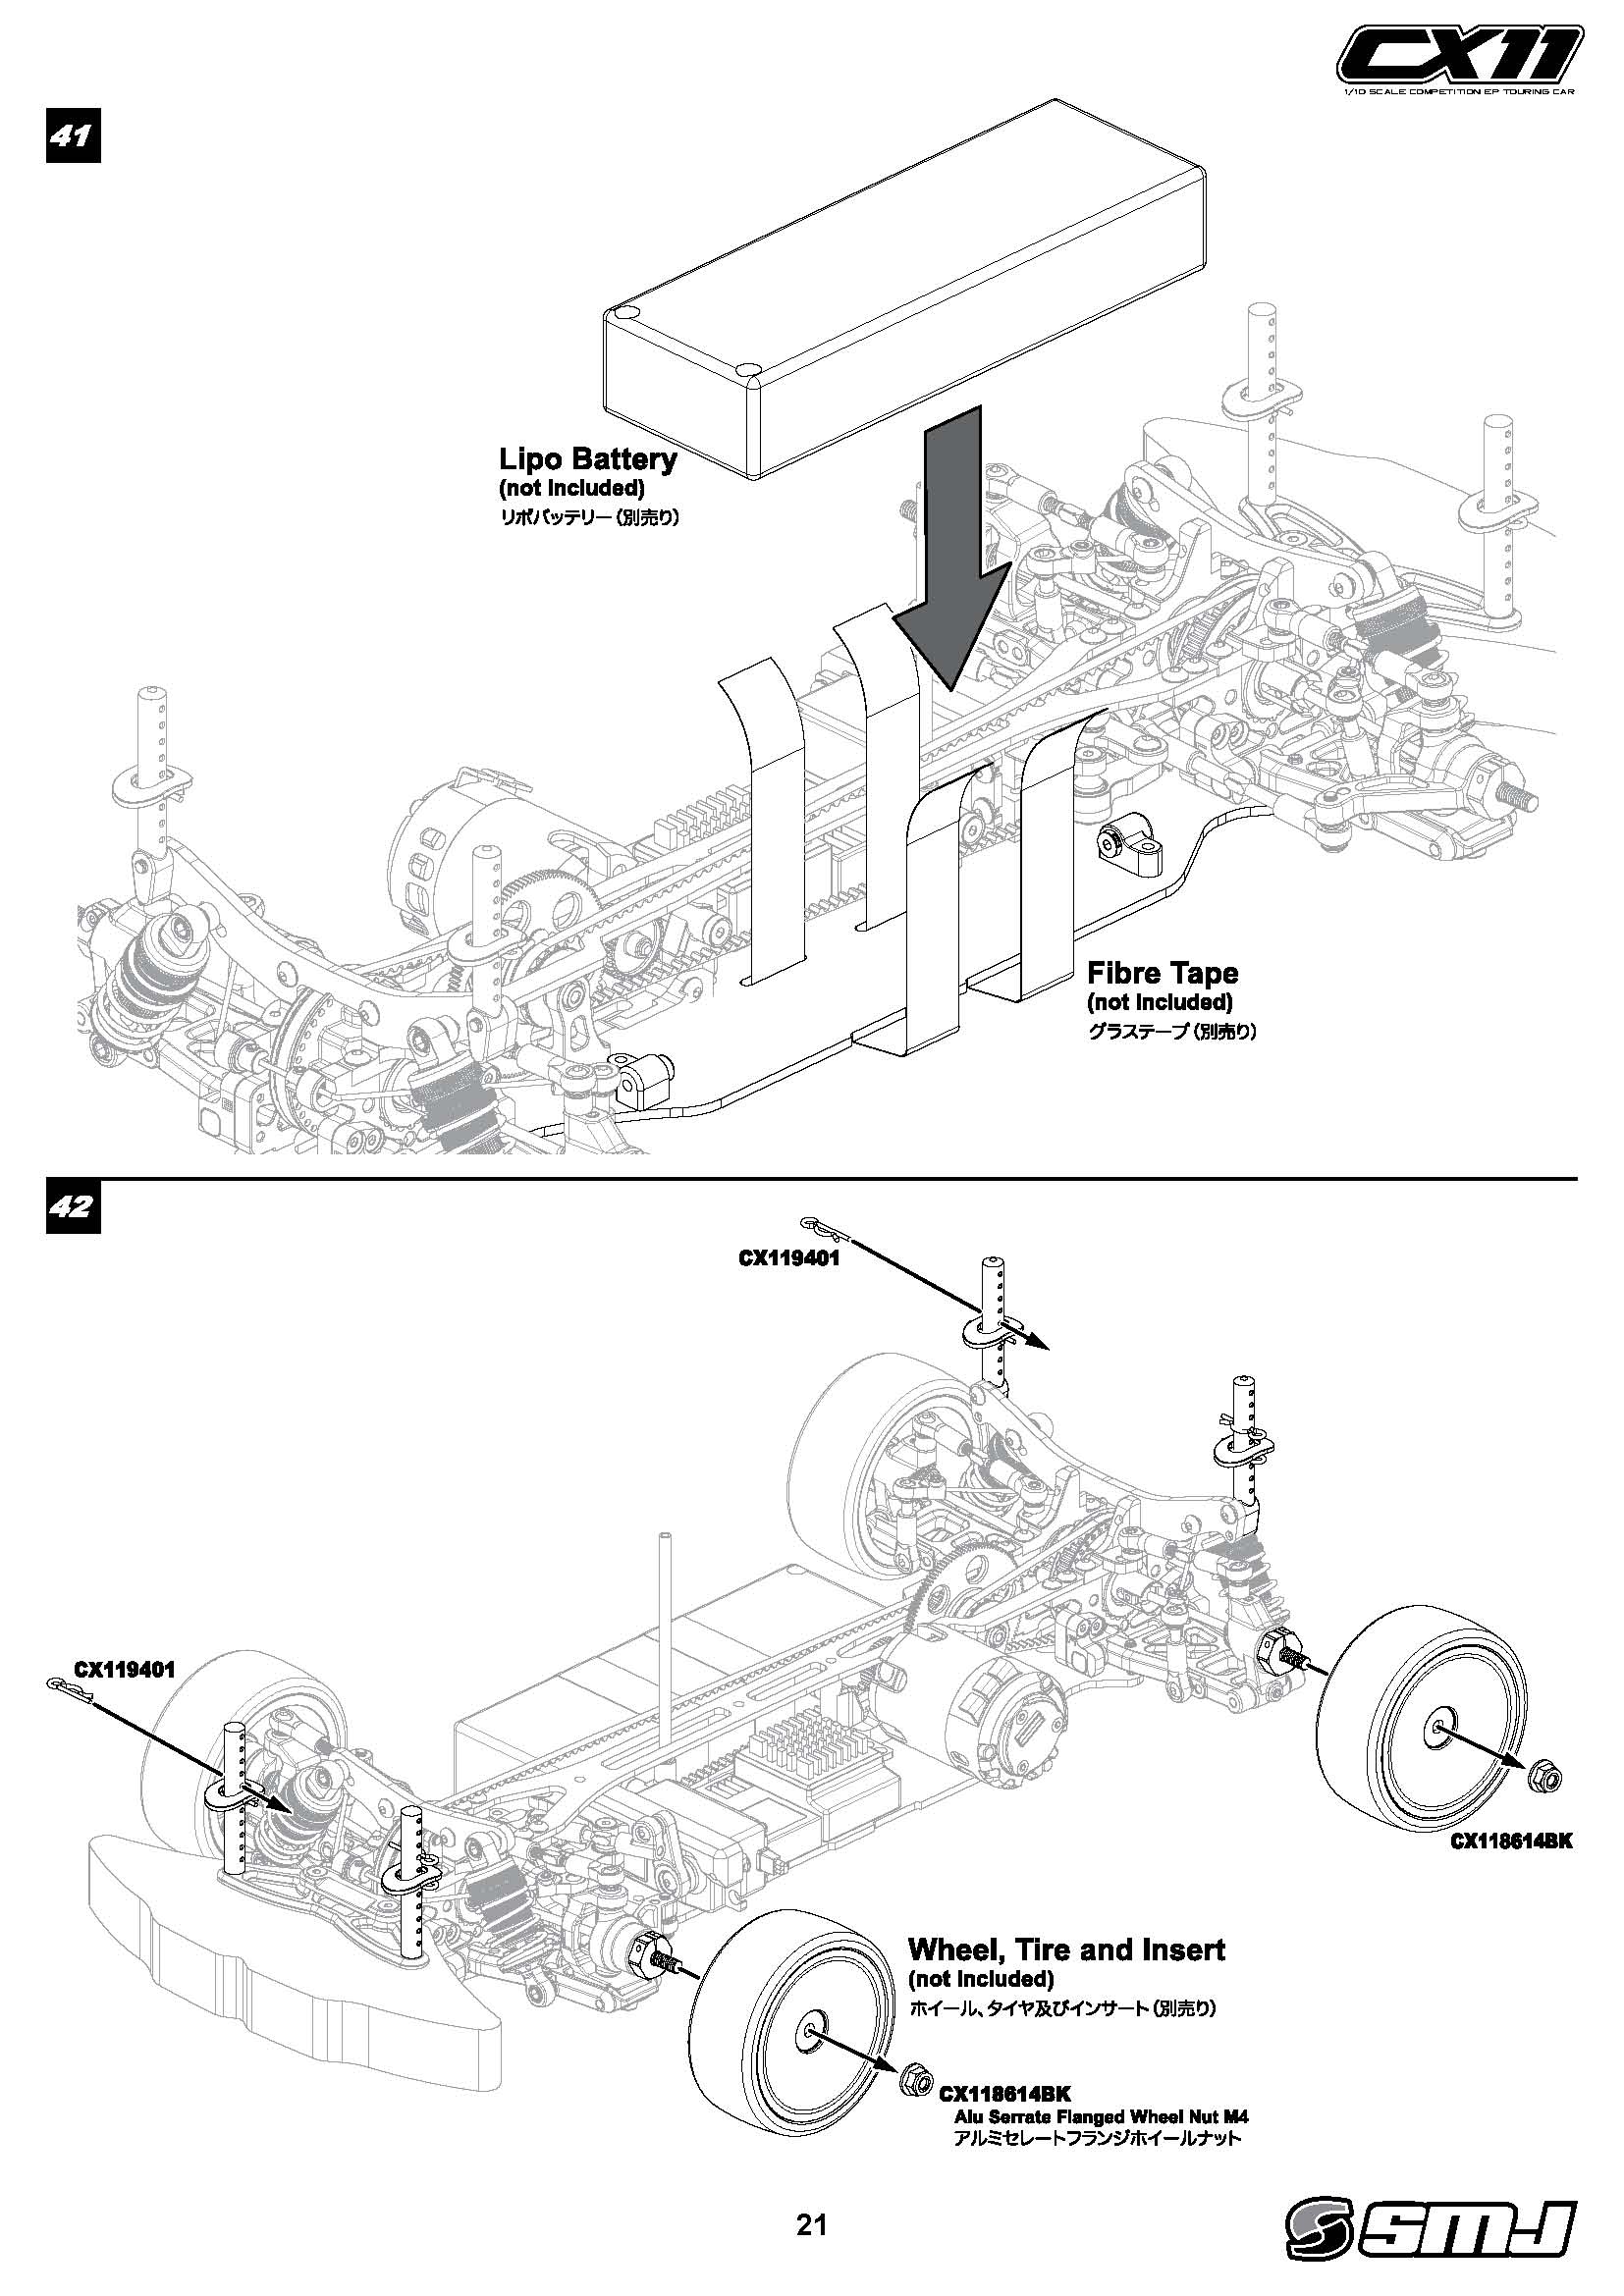
The final components to complete the CX11 kit build are a pair of moulded plastic battery stopper posts and a strip of SMJ non-slip rubber tape to keep the battery pack from sliding around under sudden acceleration or braking.
Other items included are four aluminium serrated flanged M4 wheel nuts, two M3x6mm cap screws to attach the motor (not supplied), an antenna tube & top cap, plus a sheet of pre-cut CX11 decals.
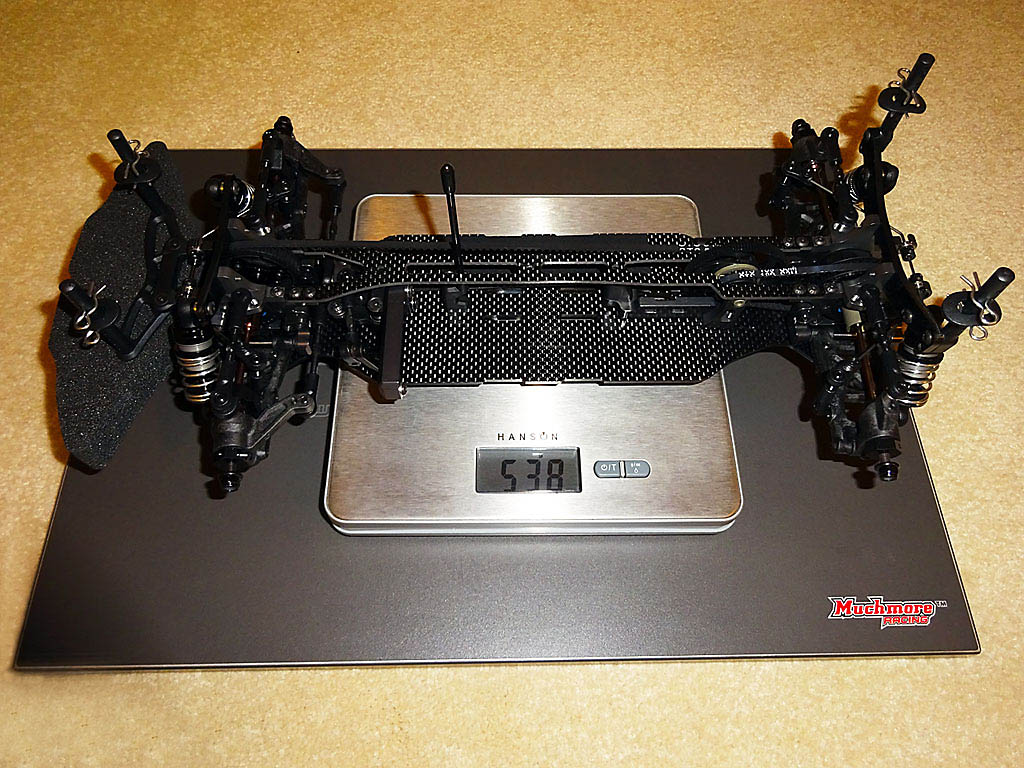
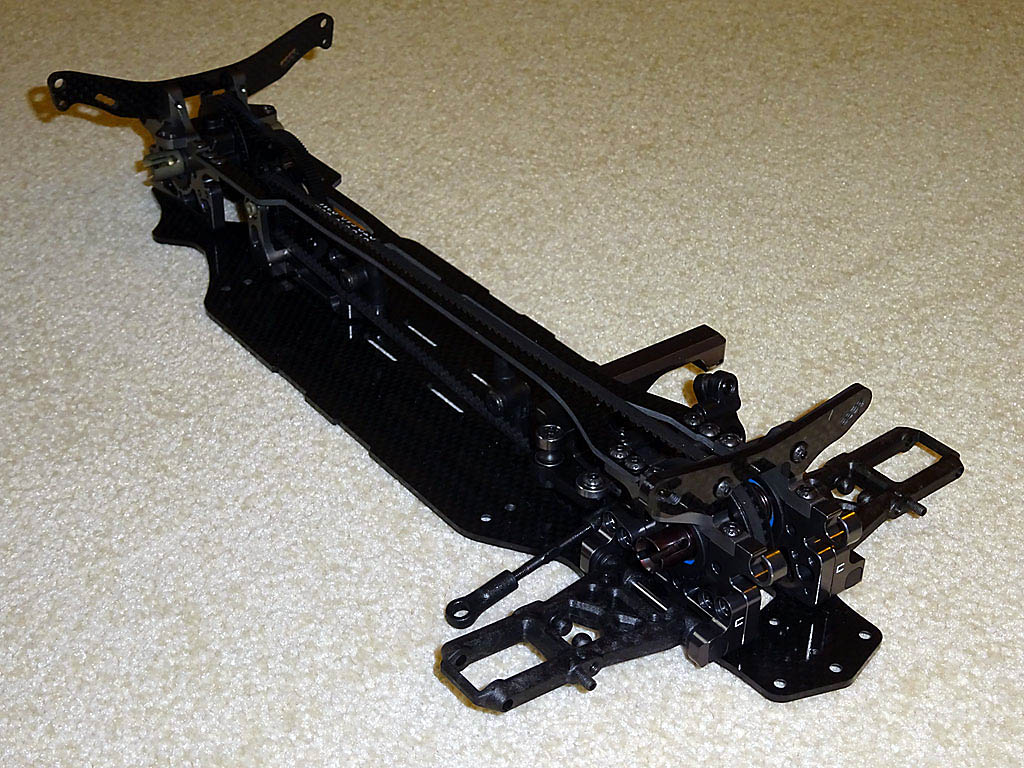
My completed SWORKz SMJ CX11 built as supplied to kit specifications including differential and shock oil is 538 grams in weight.
For further information visit on SWORKz products visit sworkz.com.
SWORKz cars, spare parts and support are available worldwide from official UK distributor Answer-RC.