|
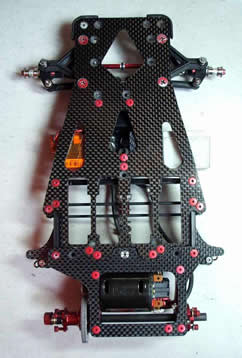
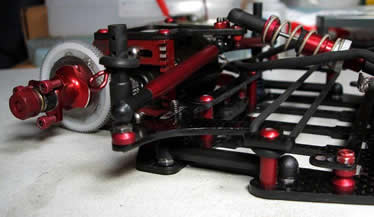
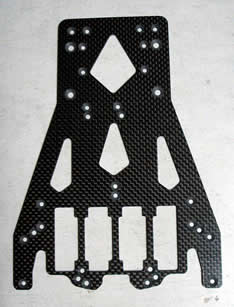
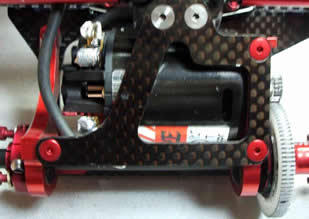
1 - Because the chassis we would like to designate [puroto] like width as narrow ones, you must relocate the post in order to install the chassis brace. When the various places are searched, there was a sufficient opening where you can attach the post of thinner one in both sides of the [pipotsudo] plate. As there, left and right not slipped, boring the hole, it did plate processing.
Next, it had with spare, [CRC13991] to try also the battery brace for the ABP chassis, to be attached you were trying another hole you could be less crowded in next door of the hole which now bored the hole.

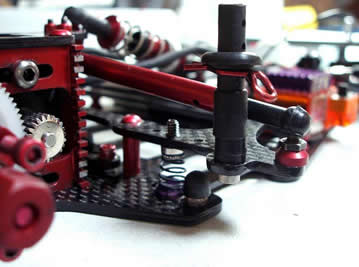
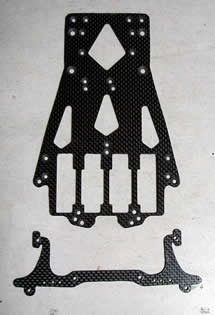
2 - Next, the hole of the post which is raised to the part of the battery holding down of the chassis brace, the hole it could be less crowded on side of dress link. After that, in the same place as the ABP chassis, the hole for the servo mount it can be less crowded, the hole space to the chassis is end with this.
3 - Cutting down the part where the chassis does not need, you arranged shape. Because this [CRC1355] the freon part of the main chassis for carpet knife V3.2 width to be wider than one for 3.2R also the overhang was long a little, it trimmed in the same length as the ABP chassis.
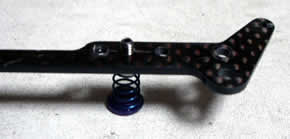
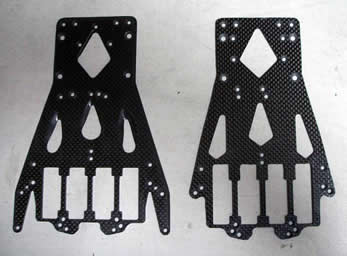
4 - Next, the chassis brace the original work was done. CRC
likely, the meat it pulled out and as the way, it thought, but the post with side of the [pipotsudo] plate, thought also the strength of side of the chassis brace, did not do the meat pulling out. 2 types it could be less crowded also the hole of the side spring. While (outside normal and 5mm) with this, the hand becoming deep-black, as for job end. After this being instantaneous, it set the side of the carbon.
Because the left the right for 3.2R as for the light weight conversion chassis brace of 11g is 2g increase with the latest 3.2 reforming this, it is the light weight conversion of 9g altogether.
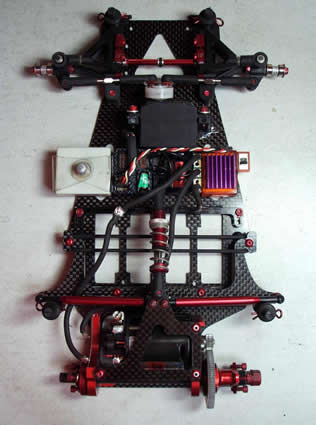
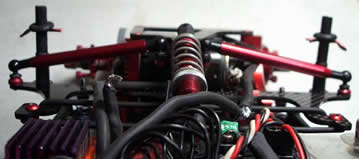
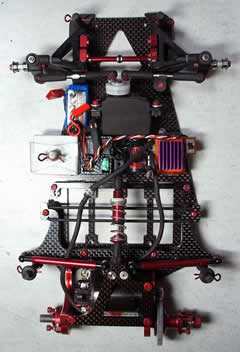
5 - Because the part completed, it enters into the installation now. This time, the
plate CRC1366 was exchanged to the plate for carpet knife V3.2. This is diluting one for 3.2R compared to.
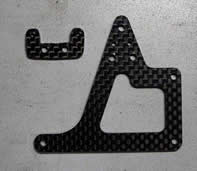
Because the chassis brace did not have the size which is wanted being red, [CRC1402] cutting the stand off for T-FOURCE in 12mm, you used.
When trying to attach the battery brace for the ABP chassis, just a little trouble ......
Because the brace hits to antenna [danpamaunto], adding the hole to the same place as the chassis of ABP another, somehow it became shape.
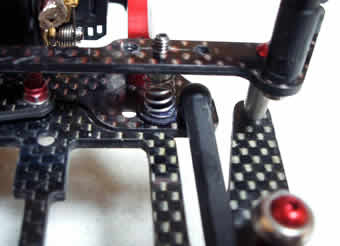
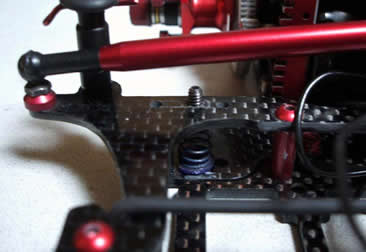
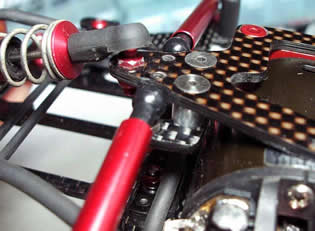
6 - Remodelling was the expectation to here, it is, but while looking at the car, when you write this report and because we would like to change in various ways came out it made the part.
Because the operating quantity of the side spring was changed with the latest remodelling, to make also the operation quantity of the friction tube a little many you were trying, the varieties the result which was thought, you became like this. 4mm increasing the ball stud inside the friction tube, about 16% the operating quantity increased generally. It was the schedule which above 4mm is lifted, but when above this it lifts, because the body and the tube hit, this is the limit.
Because this was not in schedule of the latest remodelling, the screw & the spacer are the silver, but when this time asking the part to
kimihiko, it orders the screw & the spacer of red.
After this remodelling, the body being able to rub the screw which stops the plate, because the alumite had come off, in order next also these three holes to be able to use the flat countersunk head screw, it processed.
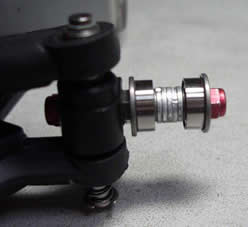
Postscript: Between of two bearings of the front wheel is inserting the spacer. Tightening the wheel nut to end, it turns the wheel lightly now.
|