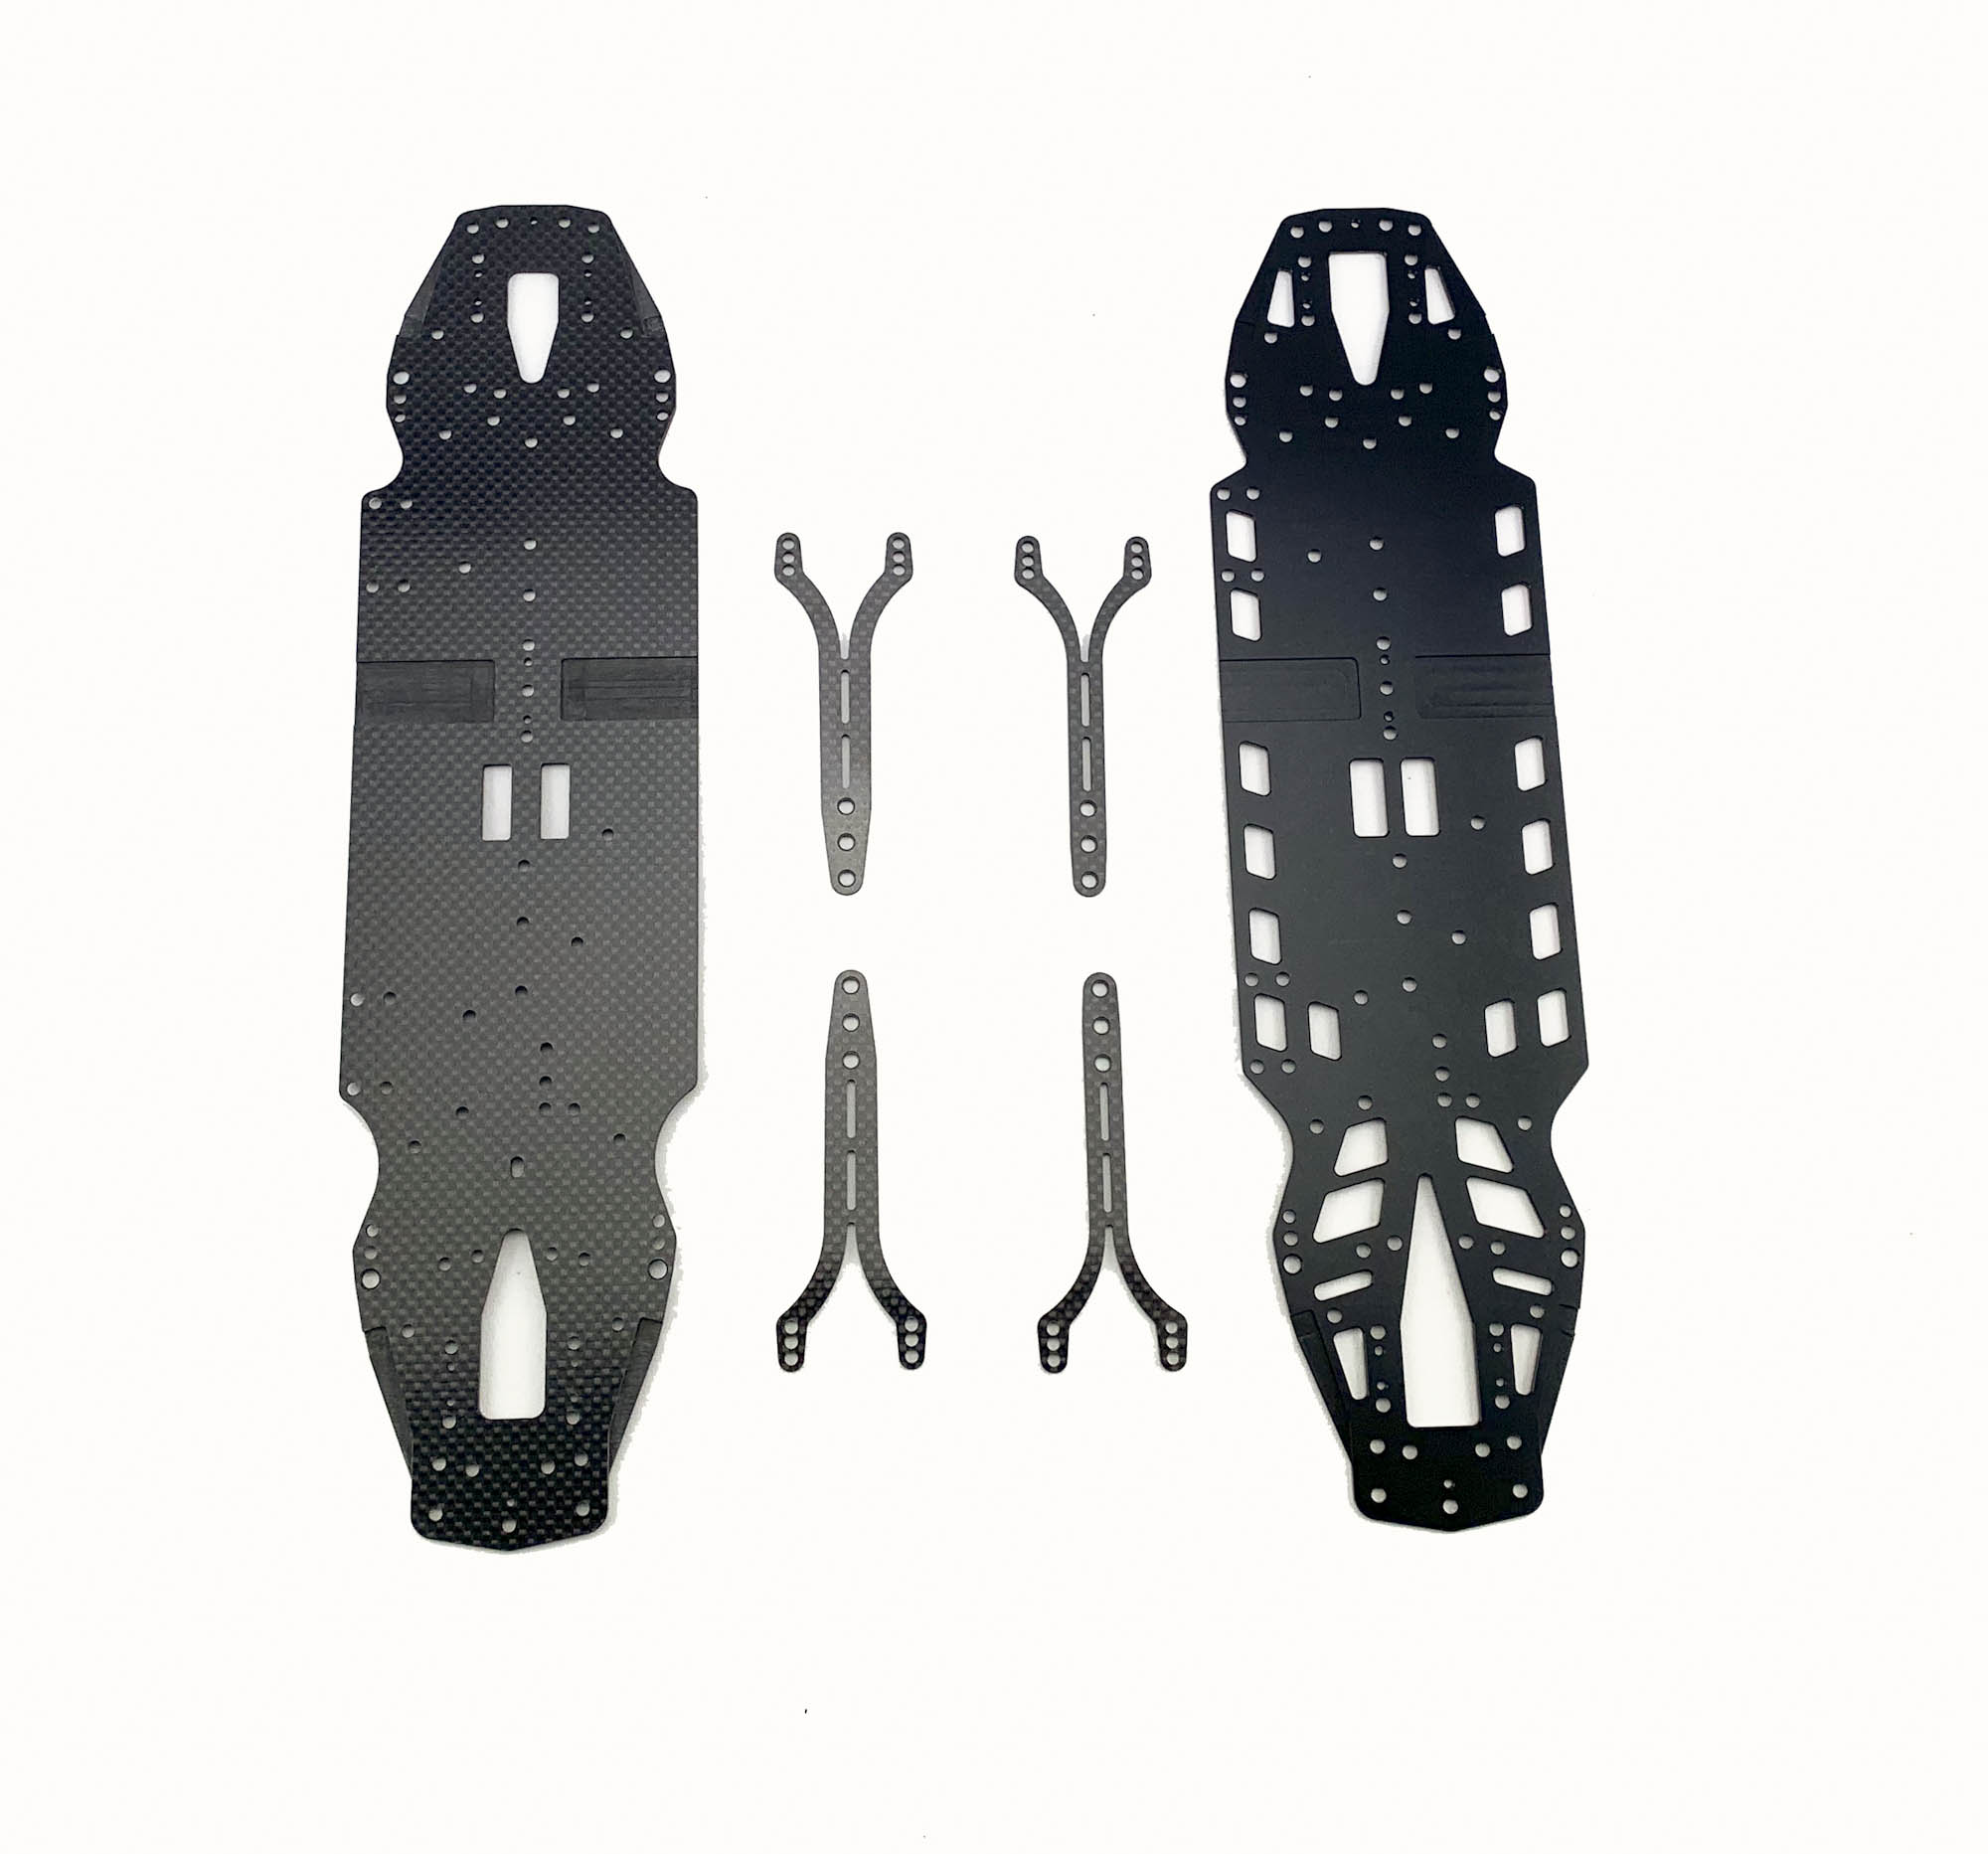
The difference between the A800MMX and A800MMXA. Only the main chassis and the topdeck is different between both variants.
A800MMX with carbon chassis includes the stiffer C127 topdecks. A800MMXA with alloy chassis included the C127S topdecks.
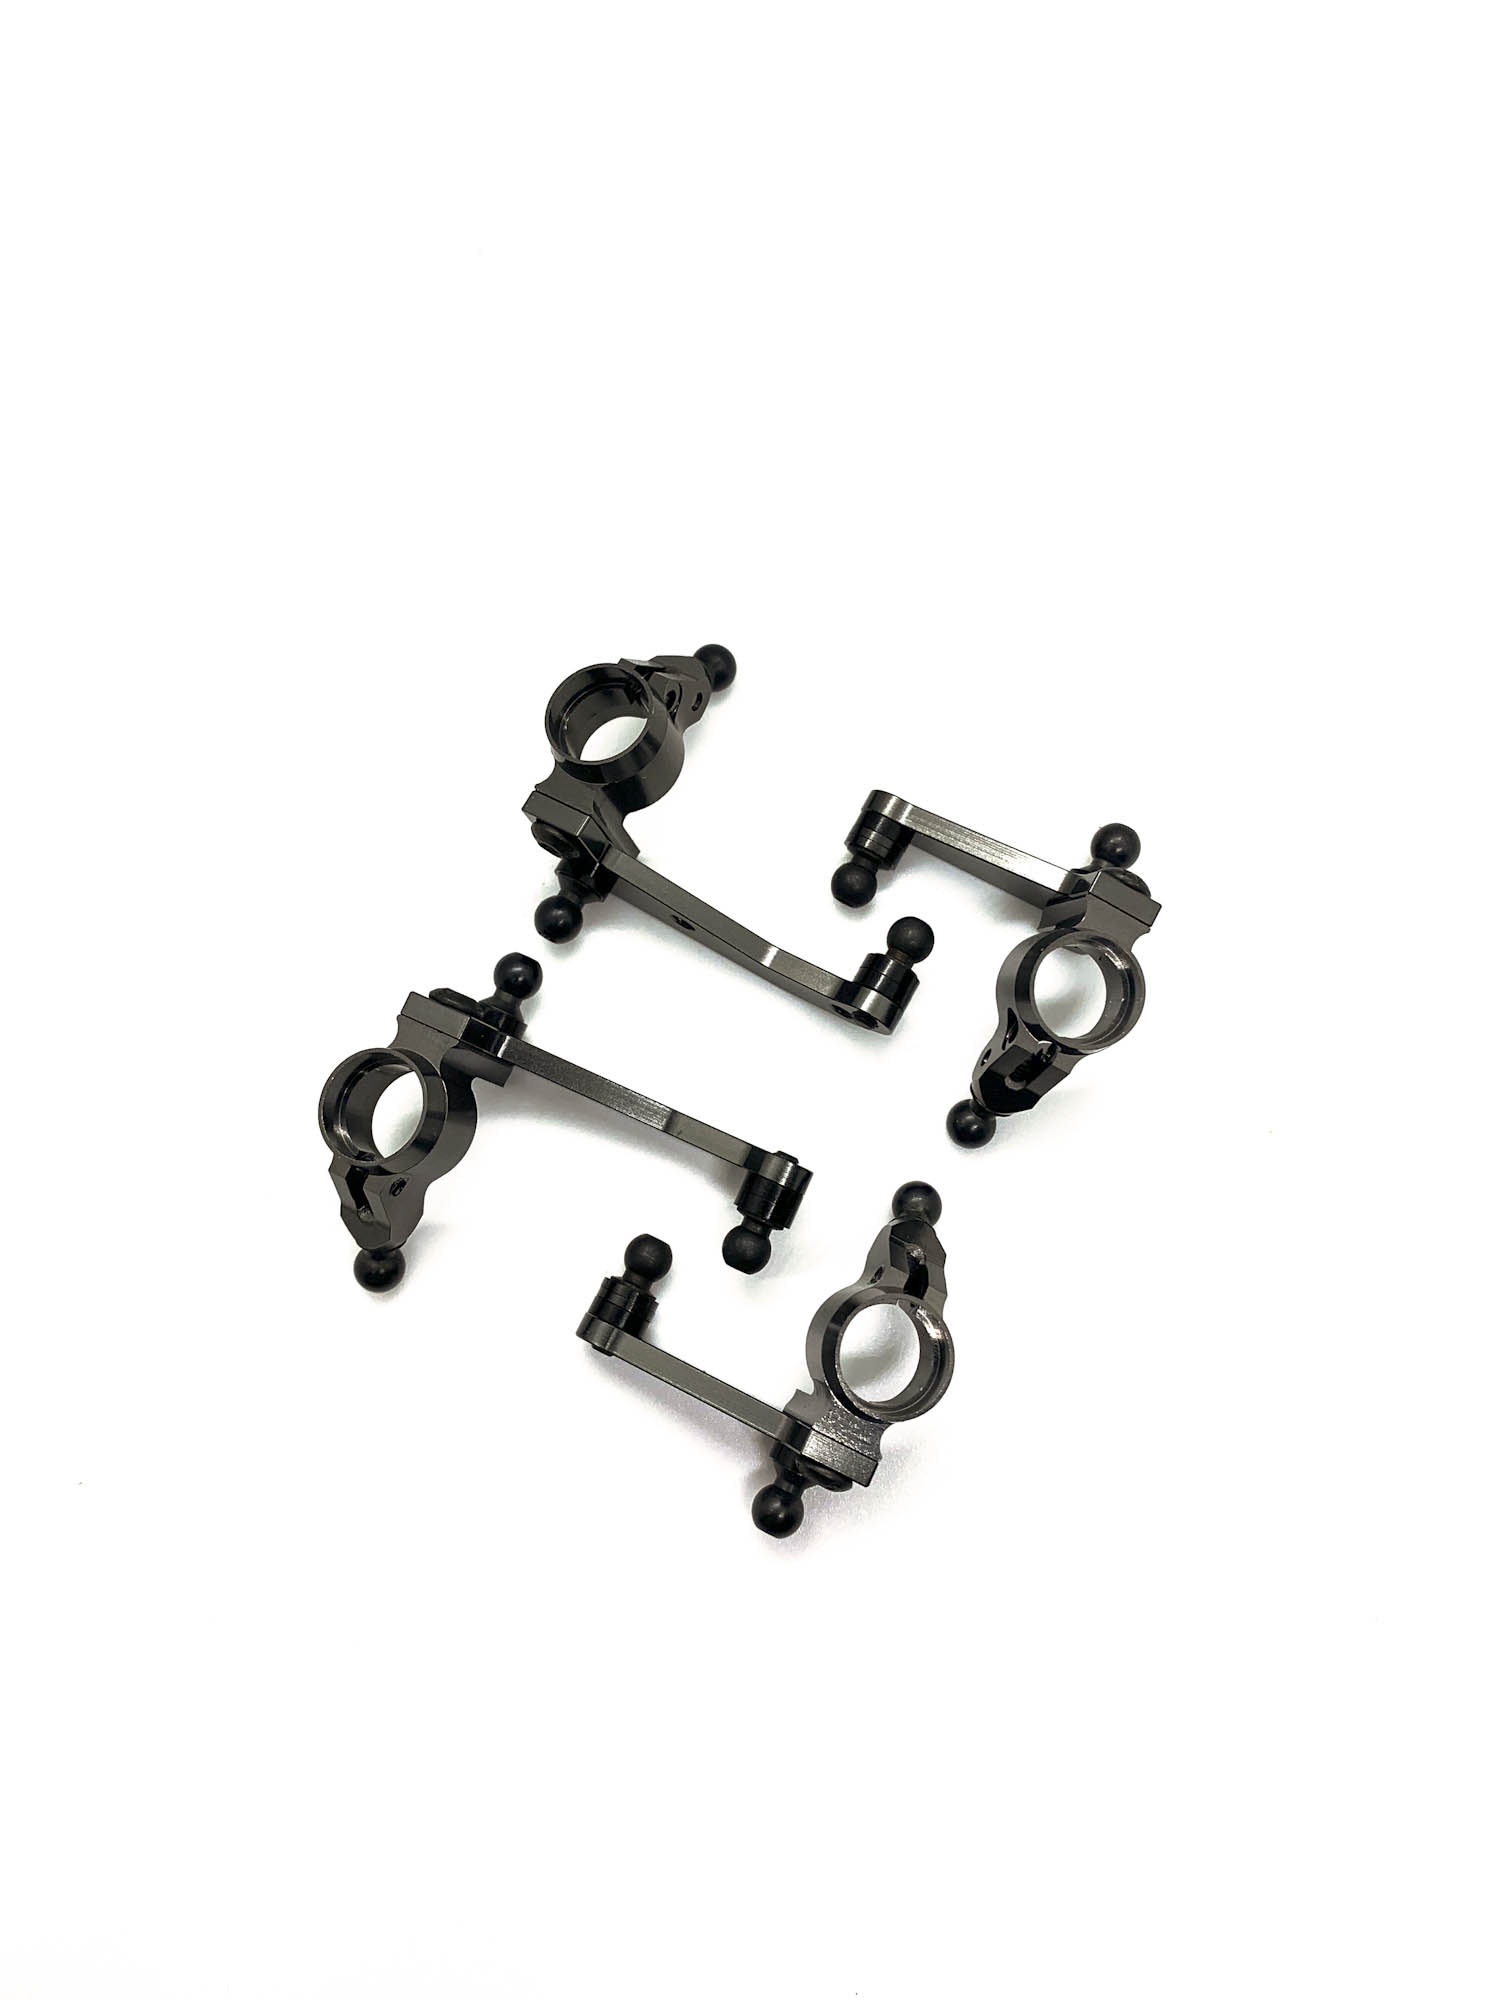
As always at building an Awesomatix kit we start with the full aluminium wheelhubs and and arms.
The AM06WL are same as in the A800X Evo and A800FX kits.
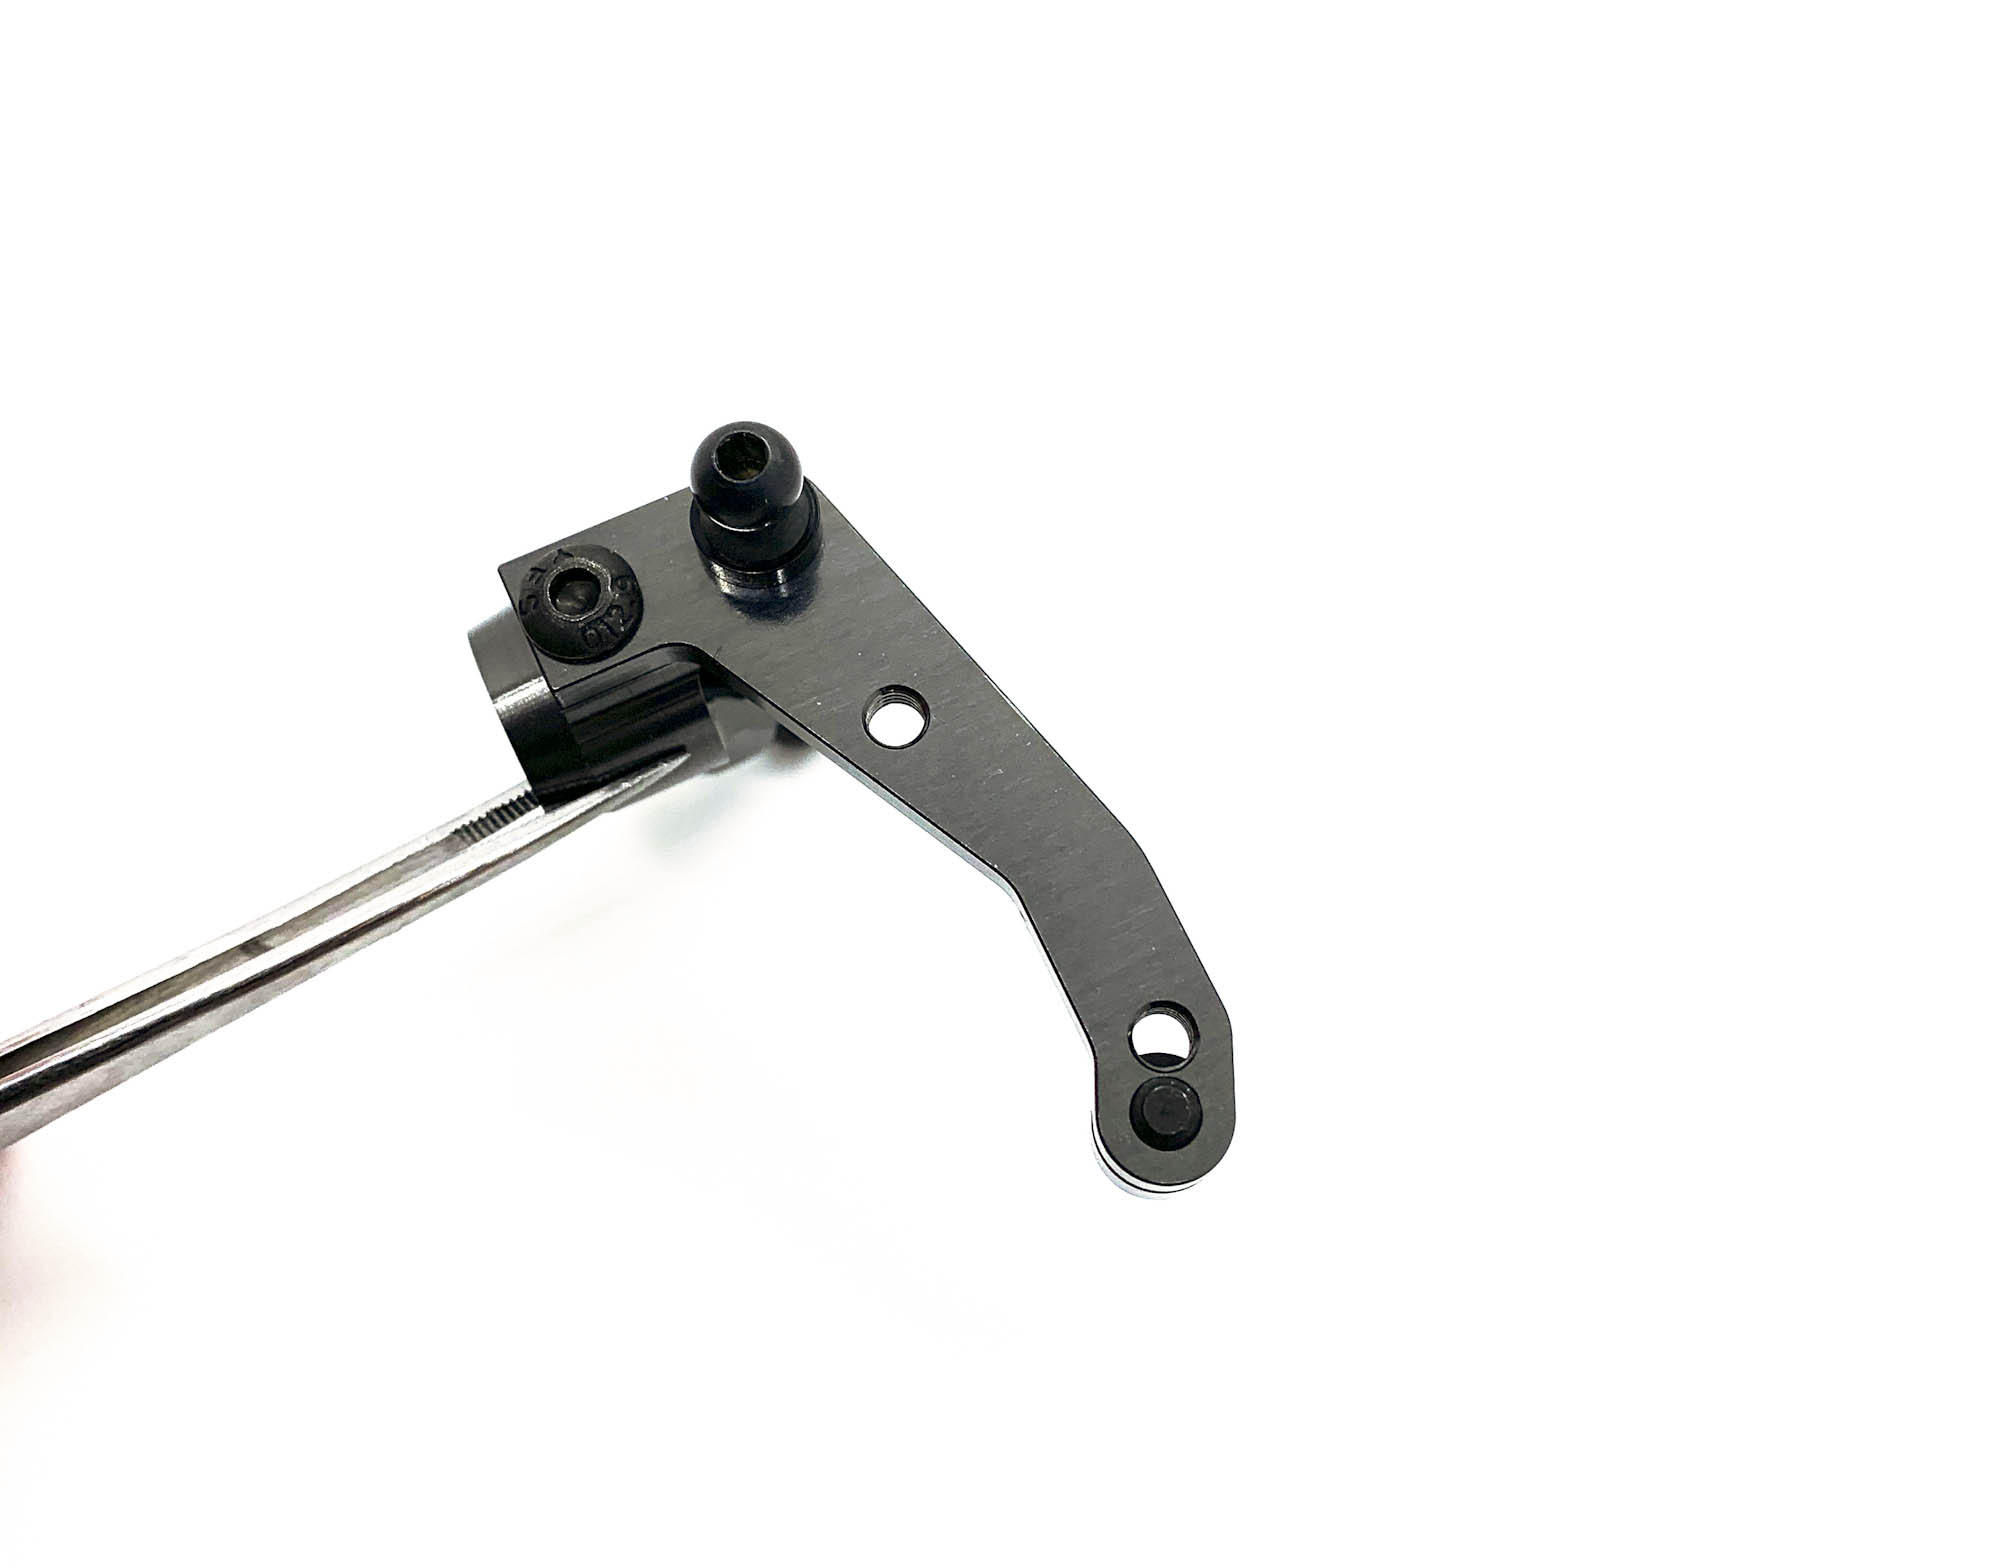
For the new Single Bellcrank steering its needed to use the outer hole on the AM14LS Steering Arm.
Make sure to not miss this change.
With the BSSX steering we always used the inner hole.
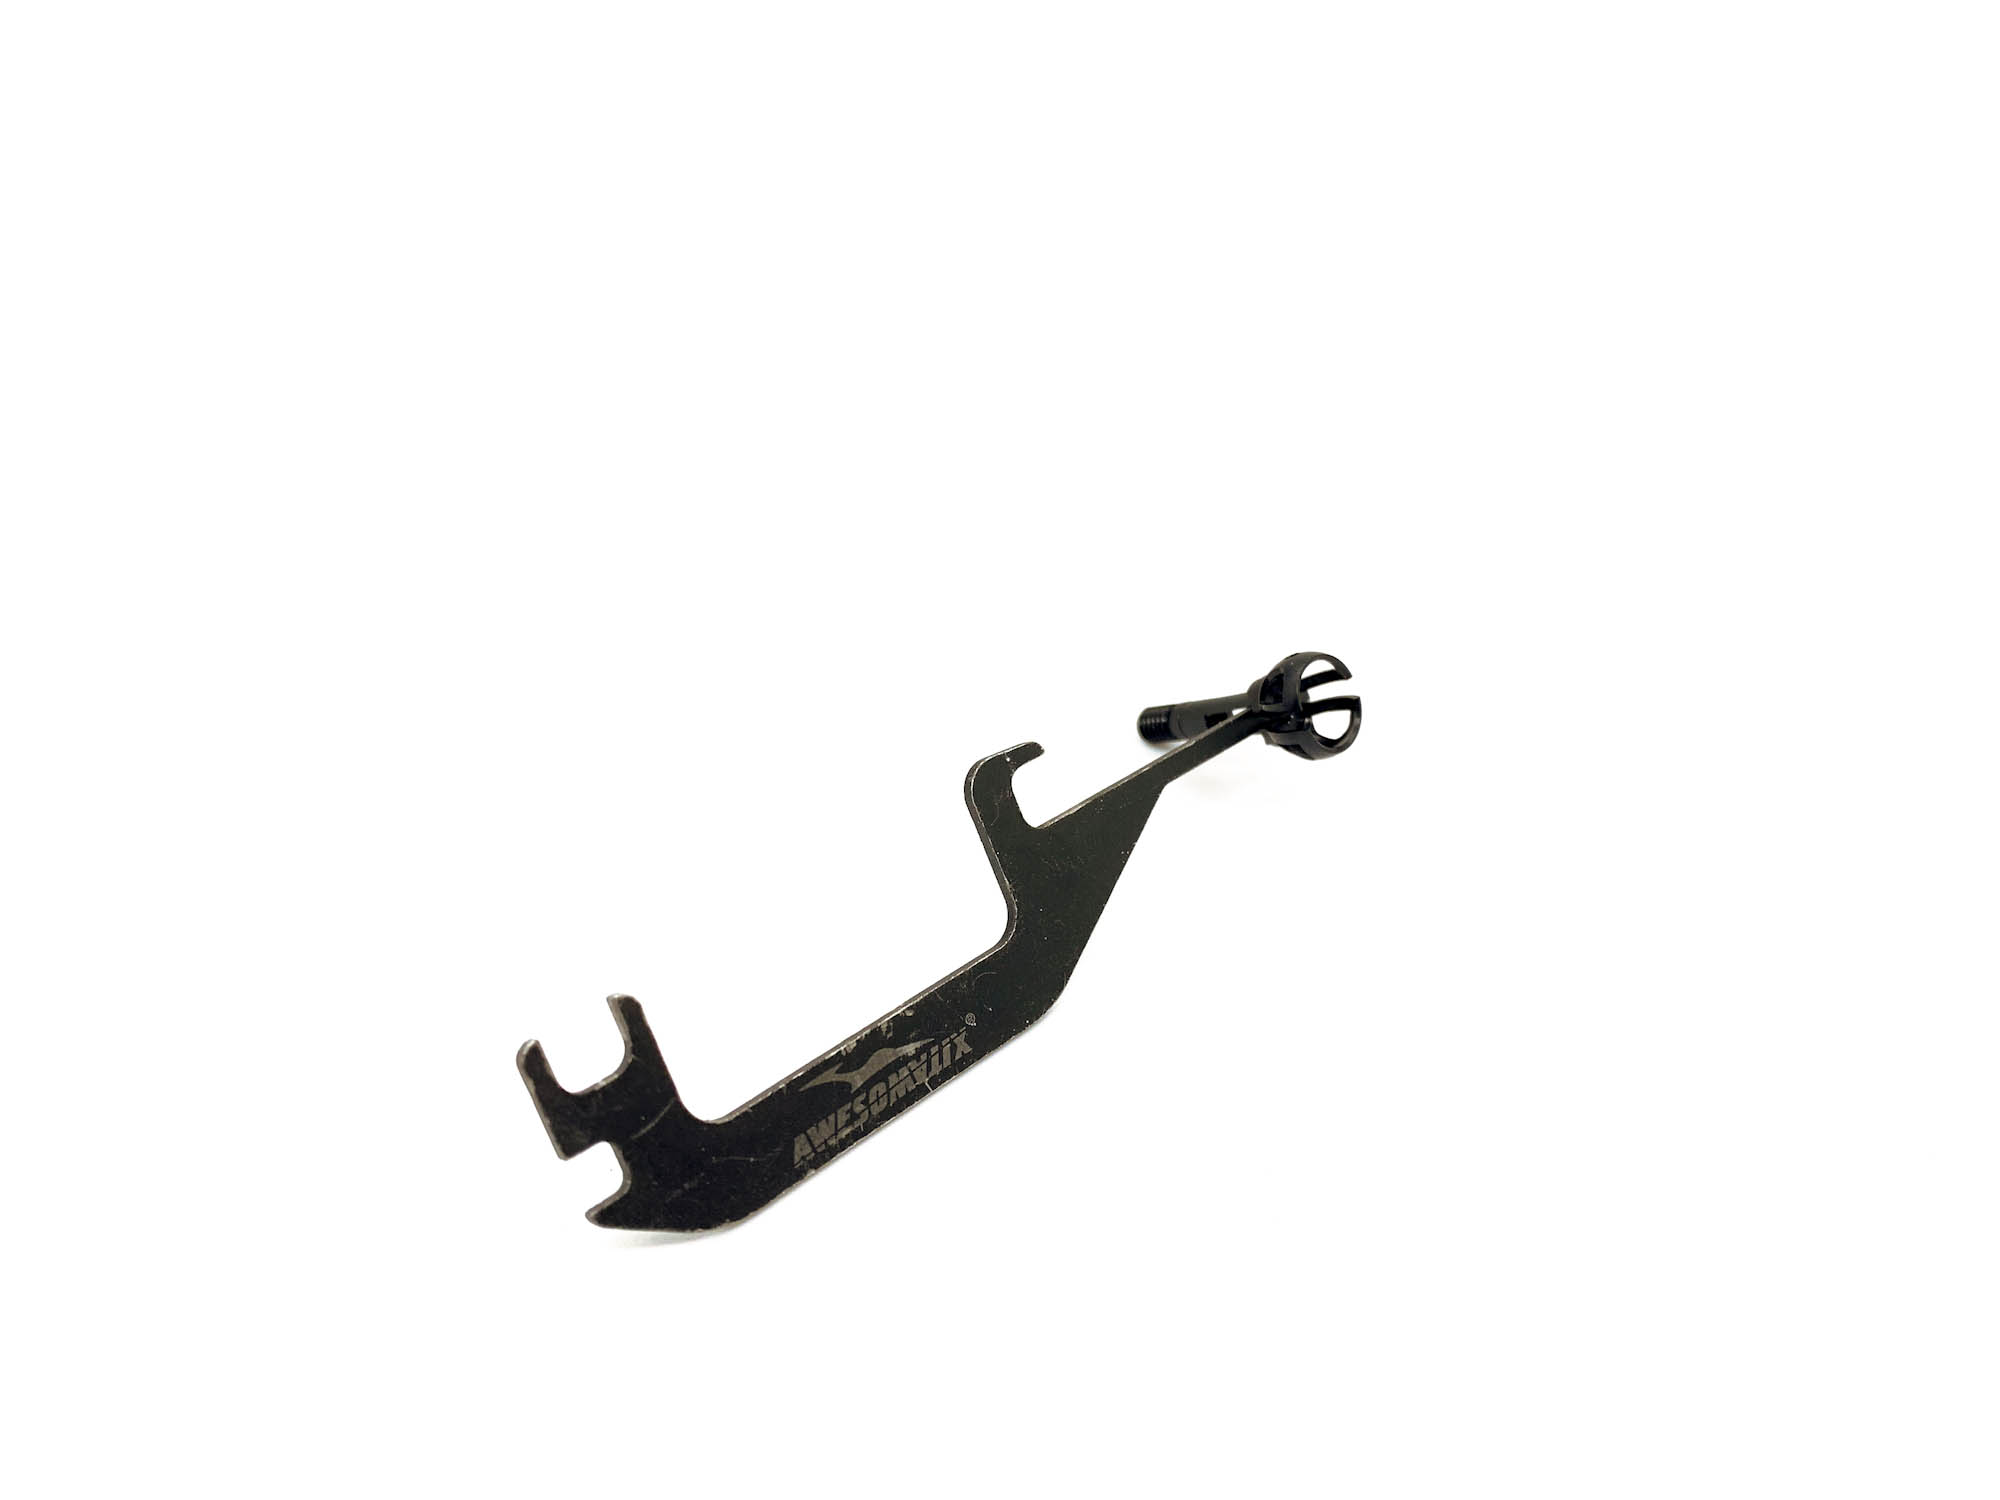
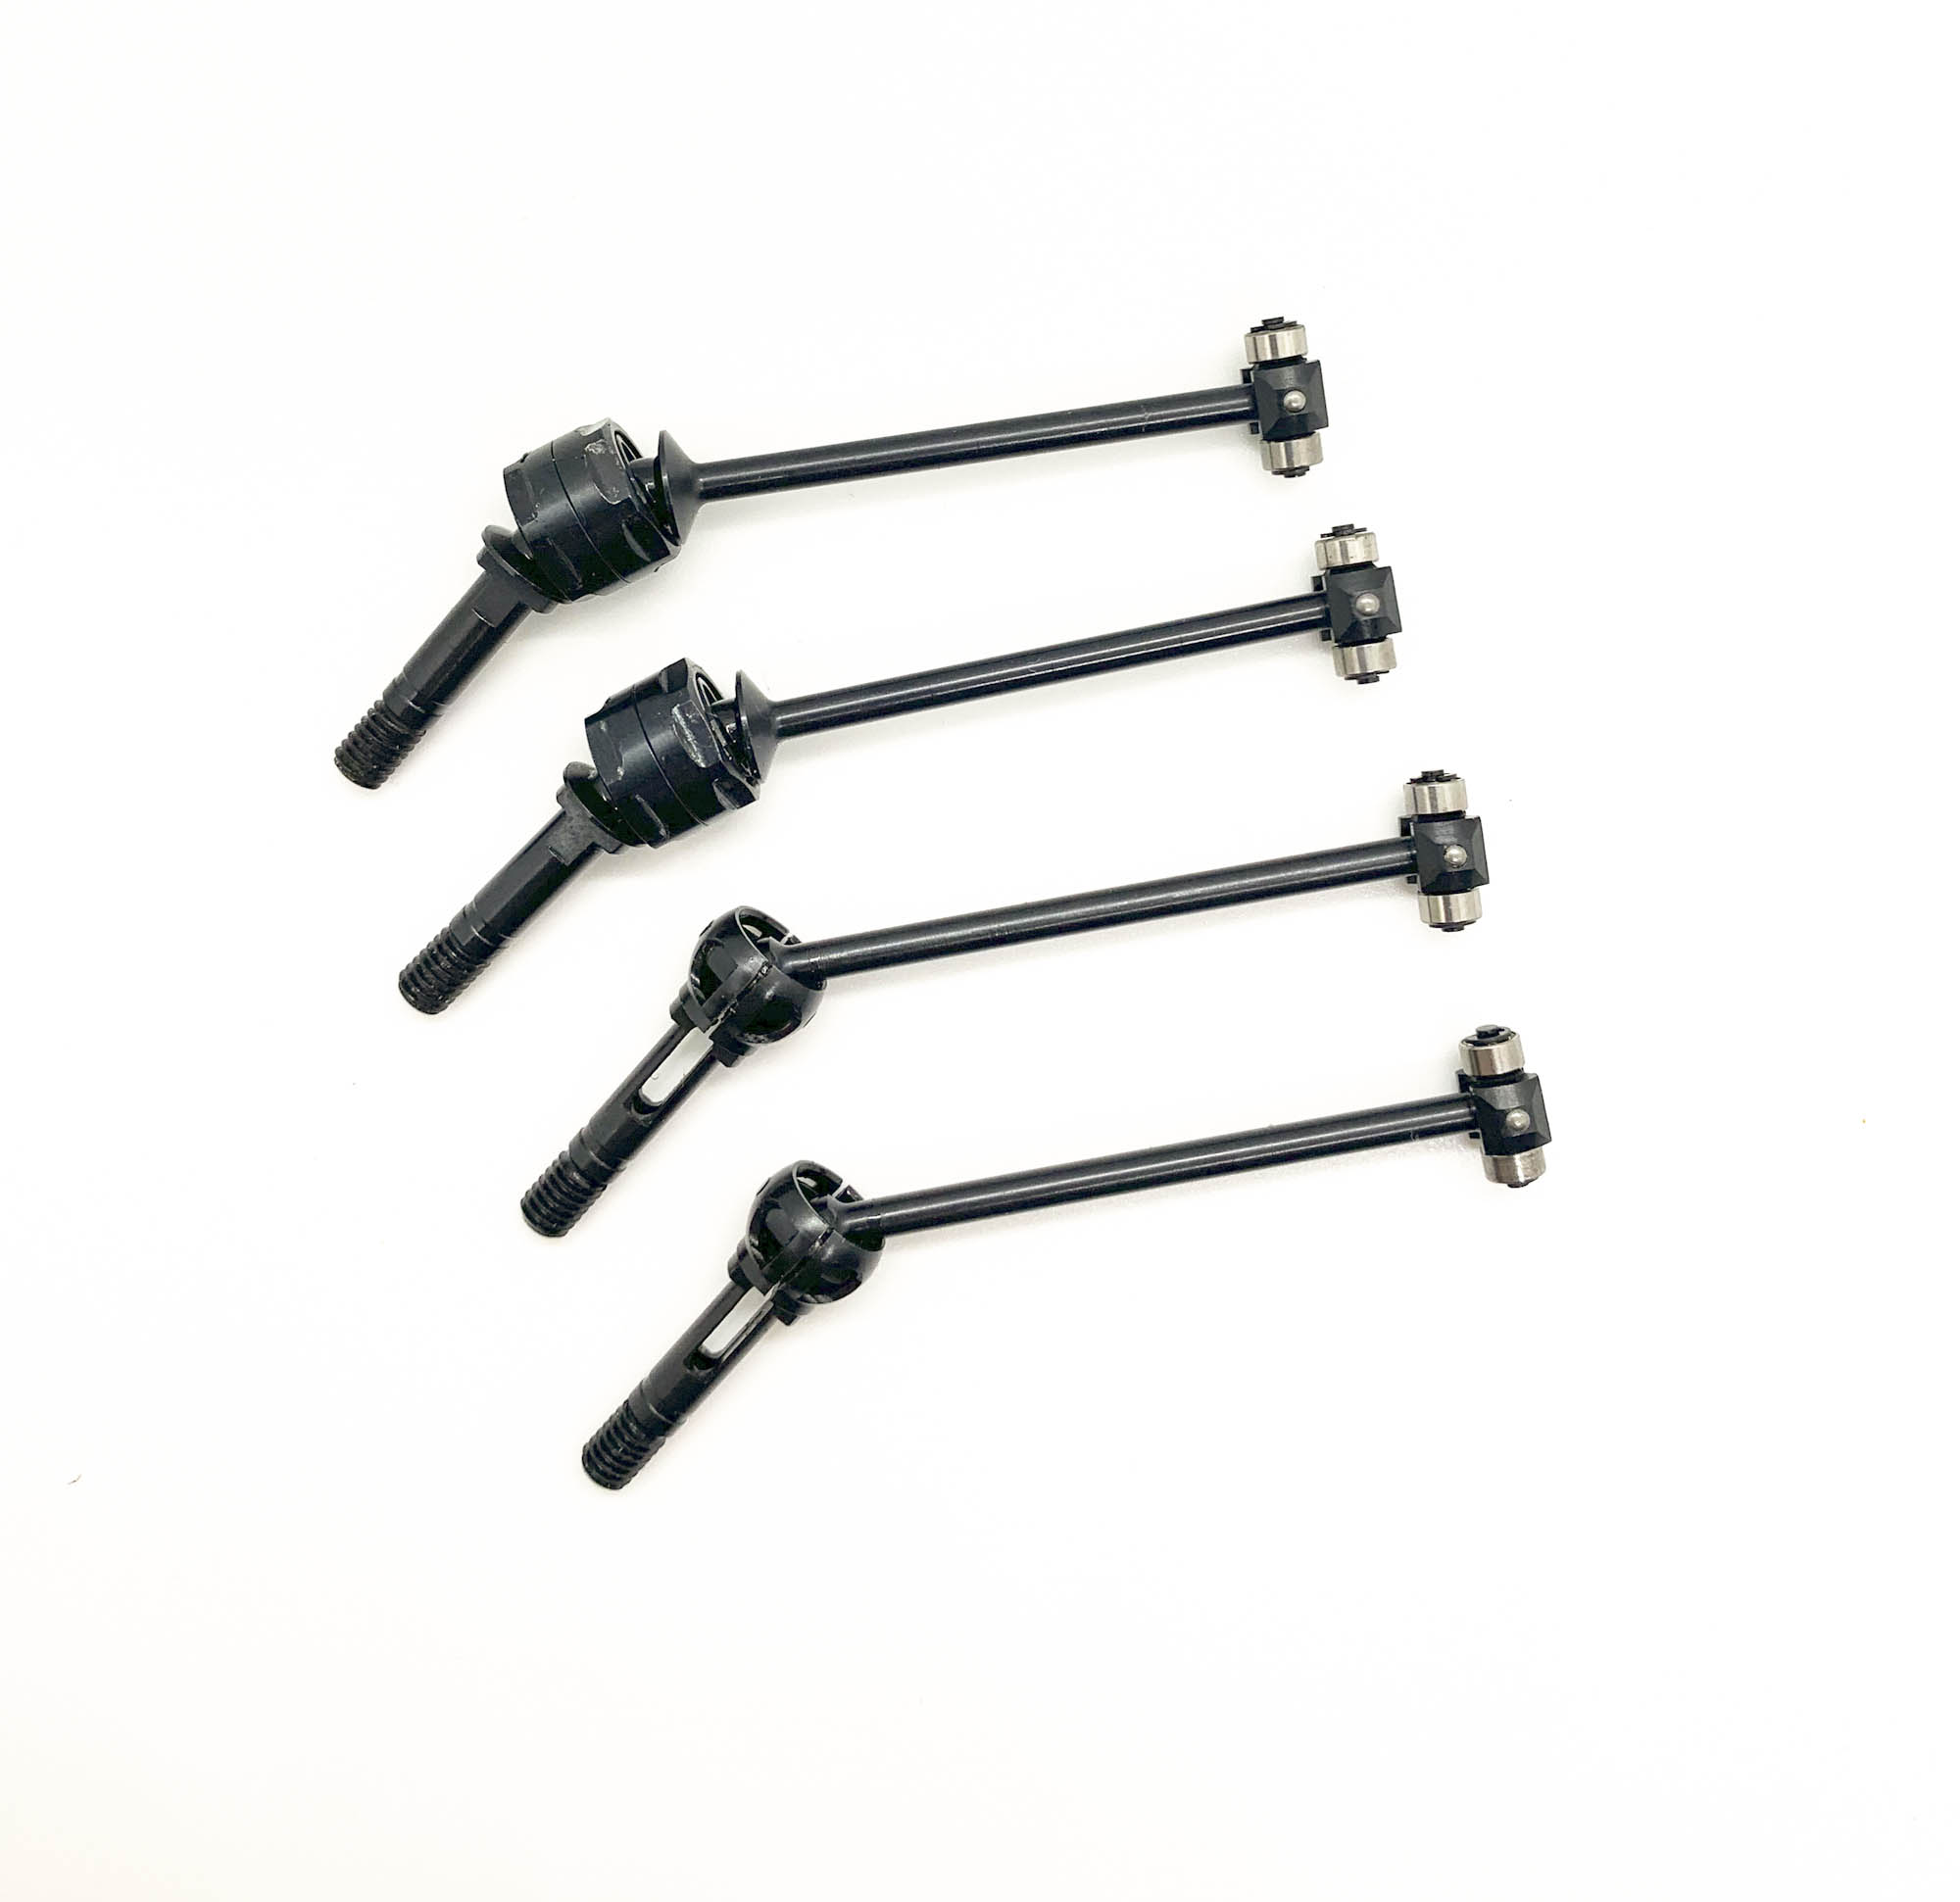
For building the rear driveshafts i can recommend the T01 tool. Perfect size to open up the ST02 outer axle for installation of P16.
The full assembled driveshafts. IFJ for front and IRJ for rear. Well know and well proven since long time.
After installation of the wheel hex with bearings and the drive shafts you should take care at screwing the SC2x6 screws on the lower leg of the hub.
In case you tight them to much you bind the bearing!

By screwing the P04 plastics onto the suspension arms with the hubs attached you should make sure to not overtight these screws.
The hub need to move super free and at same time there should be no free play/movement of the hub inside the suspension arm.
New is also the use of an steering limiter on top of the AM14LS. This prevent from breaking at hard hits where the impact itself could bent the steering arm. Highly recommended to use !
A great update are the AT119 Spring screw holder with the ST69-00 Linear spring screws.
Make sure to follow the instruction manual for correct placement of P46R rubber ball.
Optional available are the ST69-15 and ST69-25 progressive spring screws to add 15%/25% progression into the spring action. Easy to change and a great upgrade for certain conditions.
The Dampers come this time as set and not pre-build. I think this is also a great move as most racers changed the oil directly out of the box anyway.
All the good "V" type orings are included already and a new Damper Vane Piston (P63).
P63 is a new designed "piston" made from special material. It replaces P45R and works even smoother with better sealing. Result is less maintenance needed, which means more track time :-) Important to add a tiny bit oil on the outer lip to generate smooth movement inside the shaft.
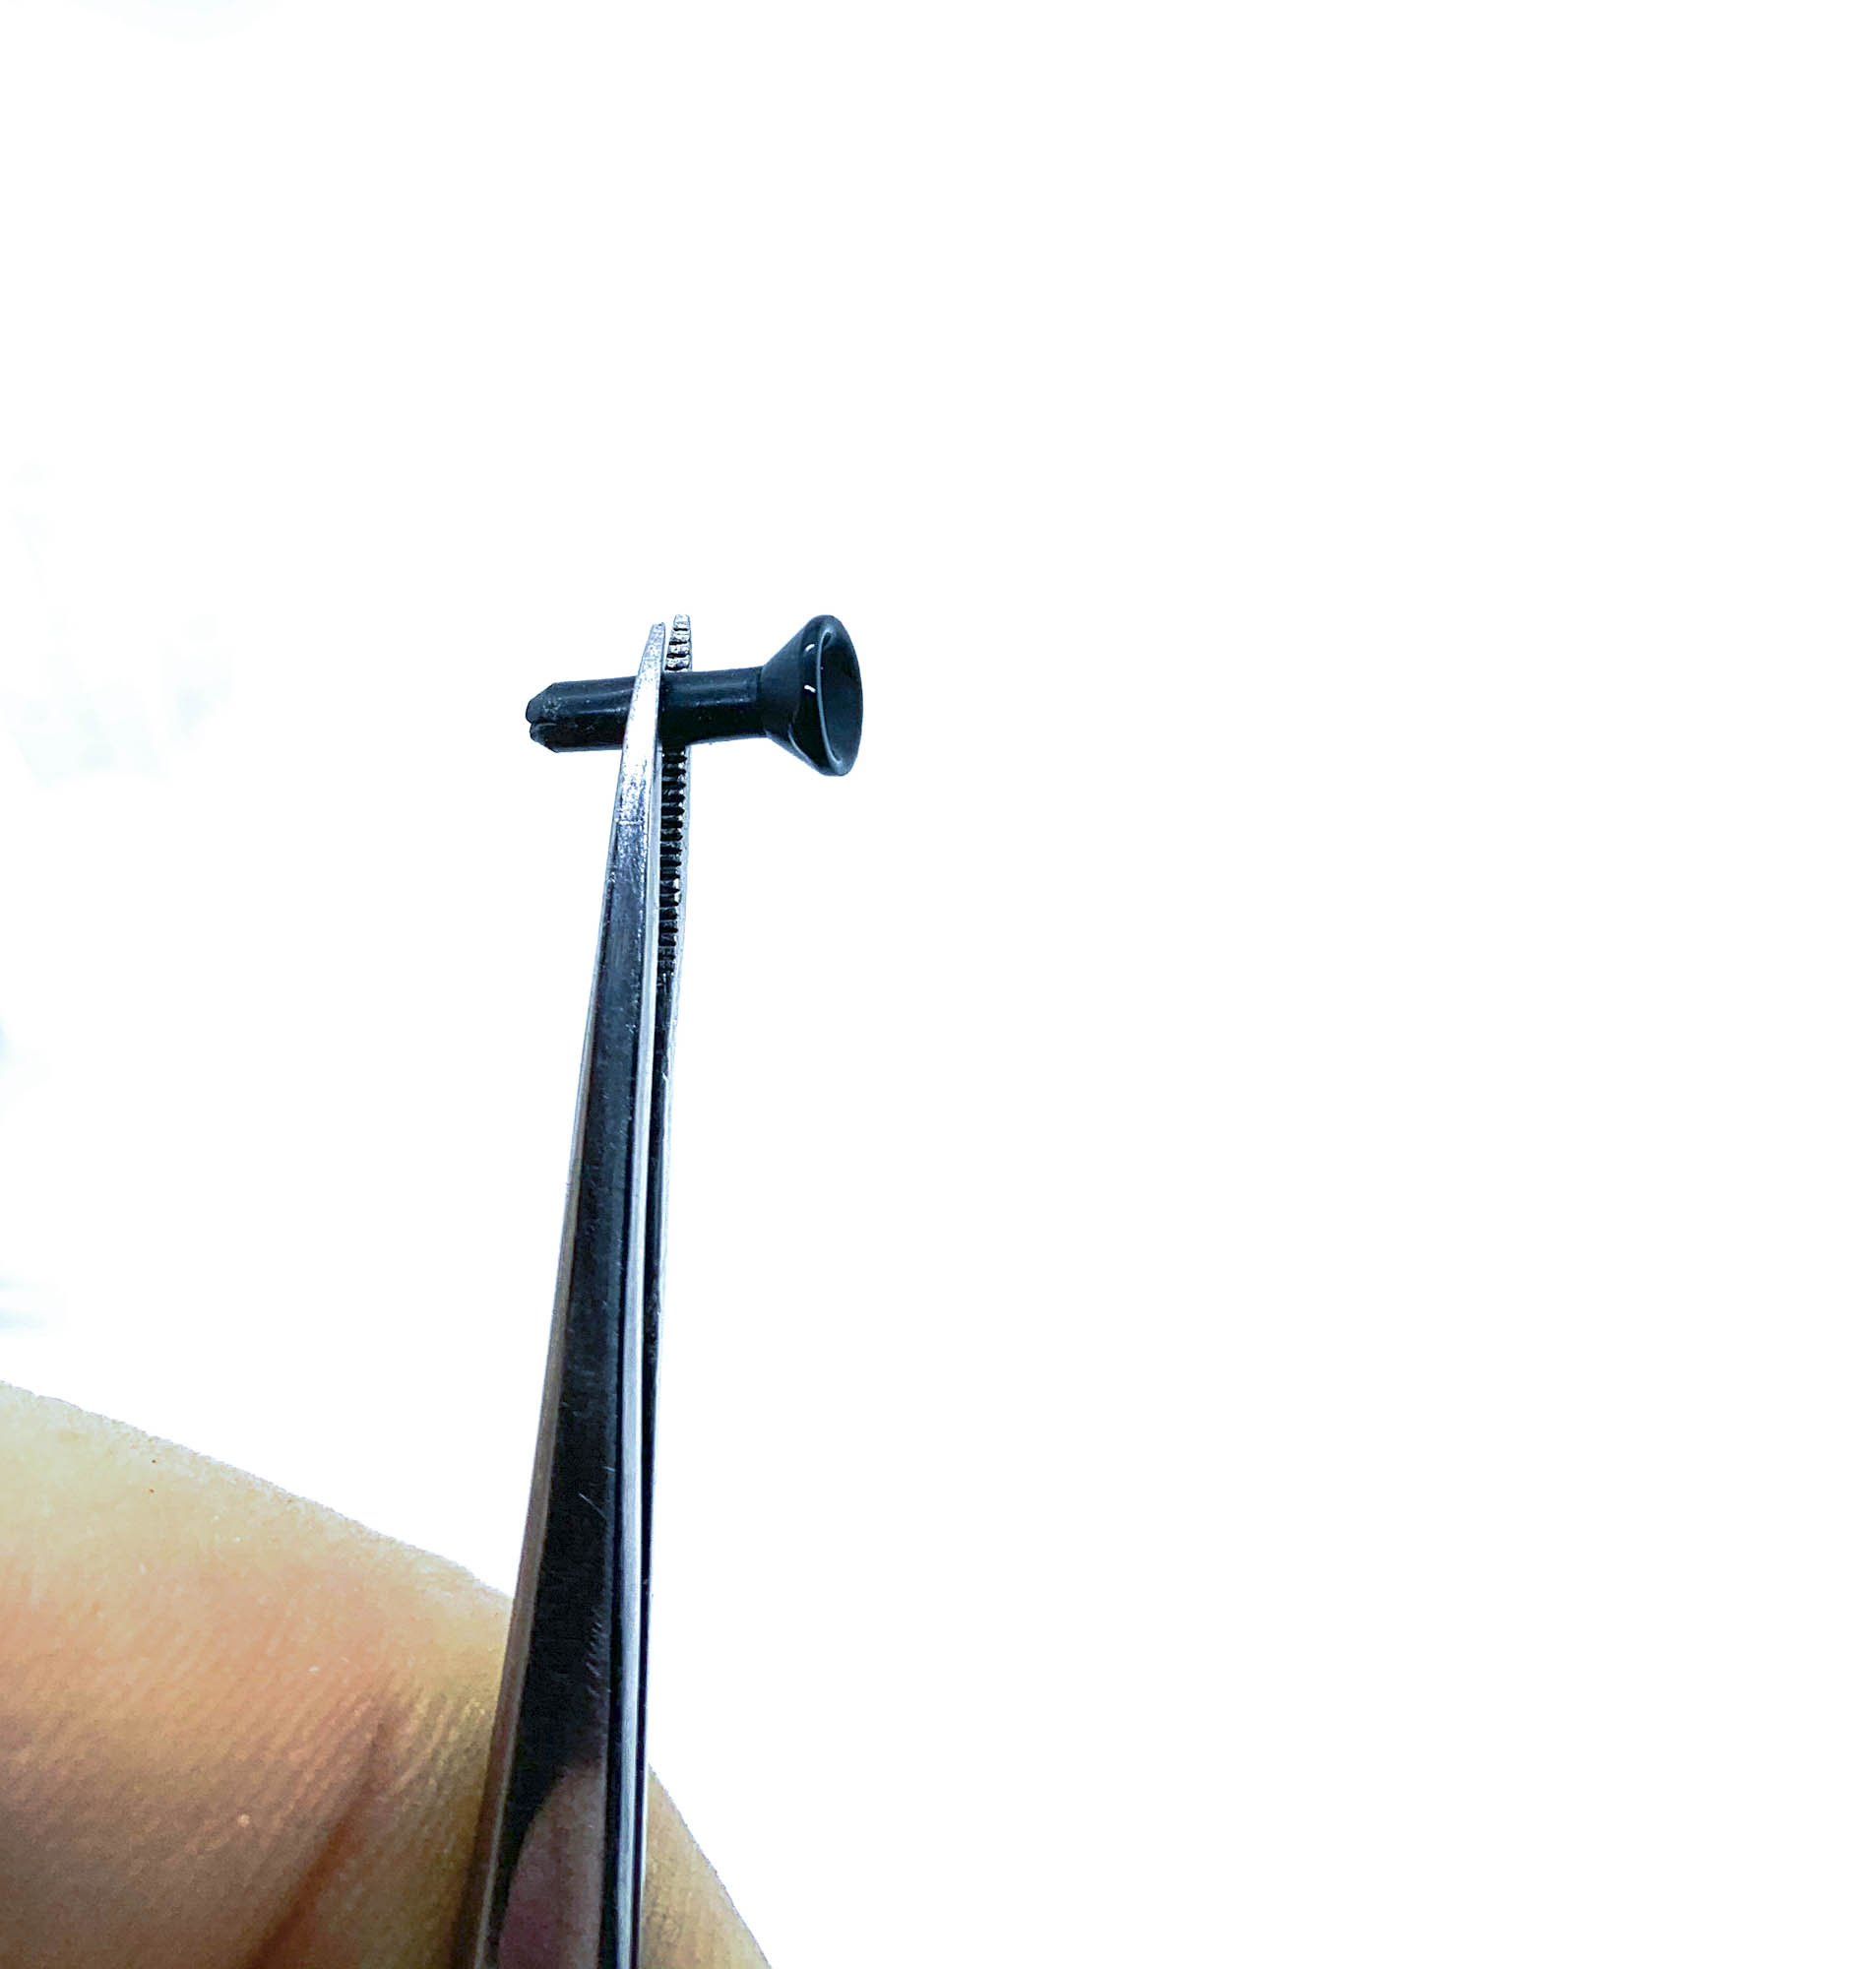
Don't forget to add a drop of oil into the cavity of P63 befor putting it into the damper housing.
Turn the rotor inside the case and let it sit for some time. This will allow the airbubbles to escape.
You can also use a vacuum pump to speed up this process.
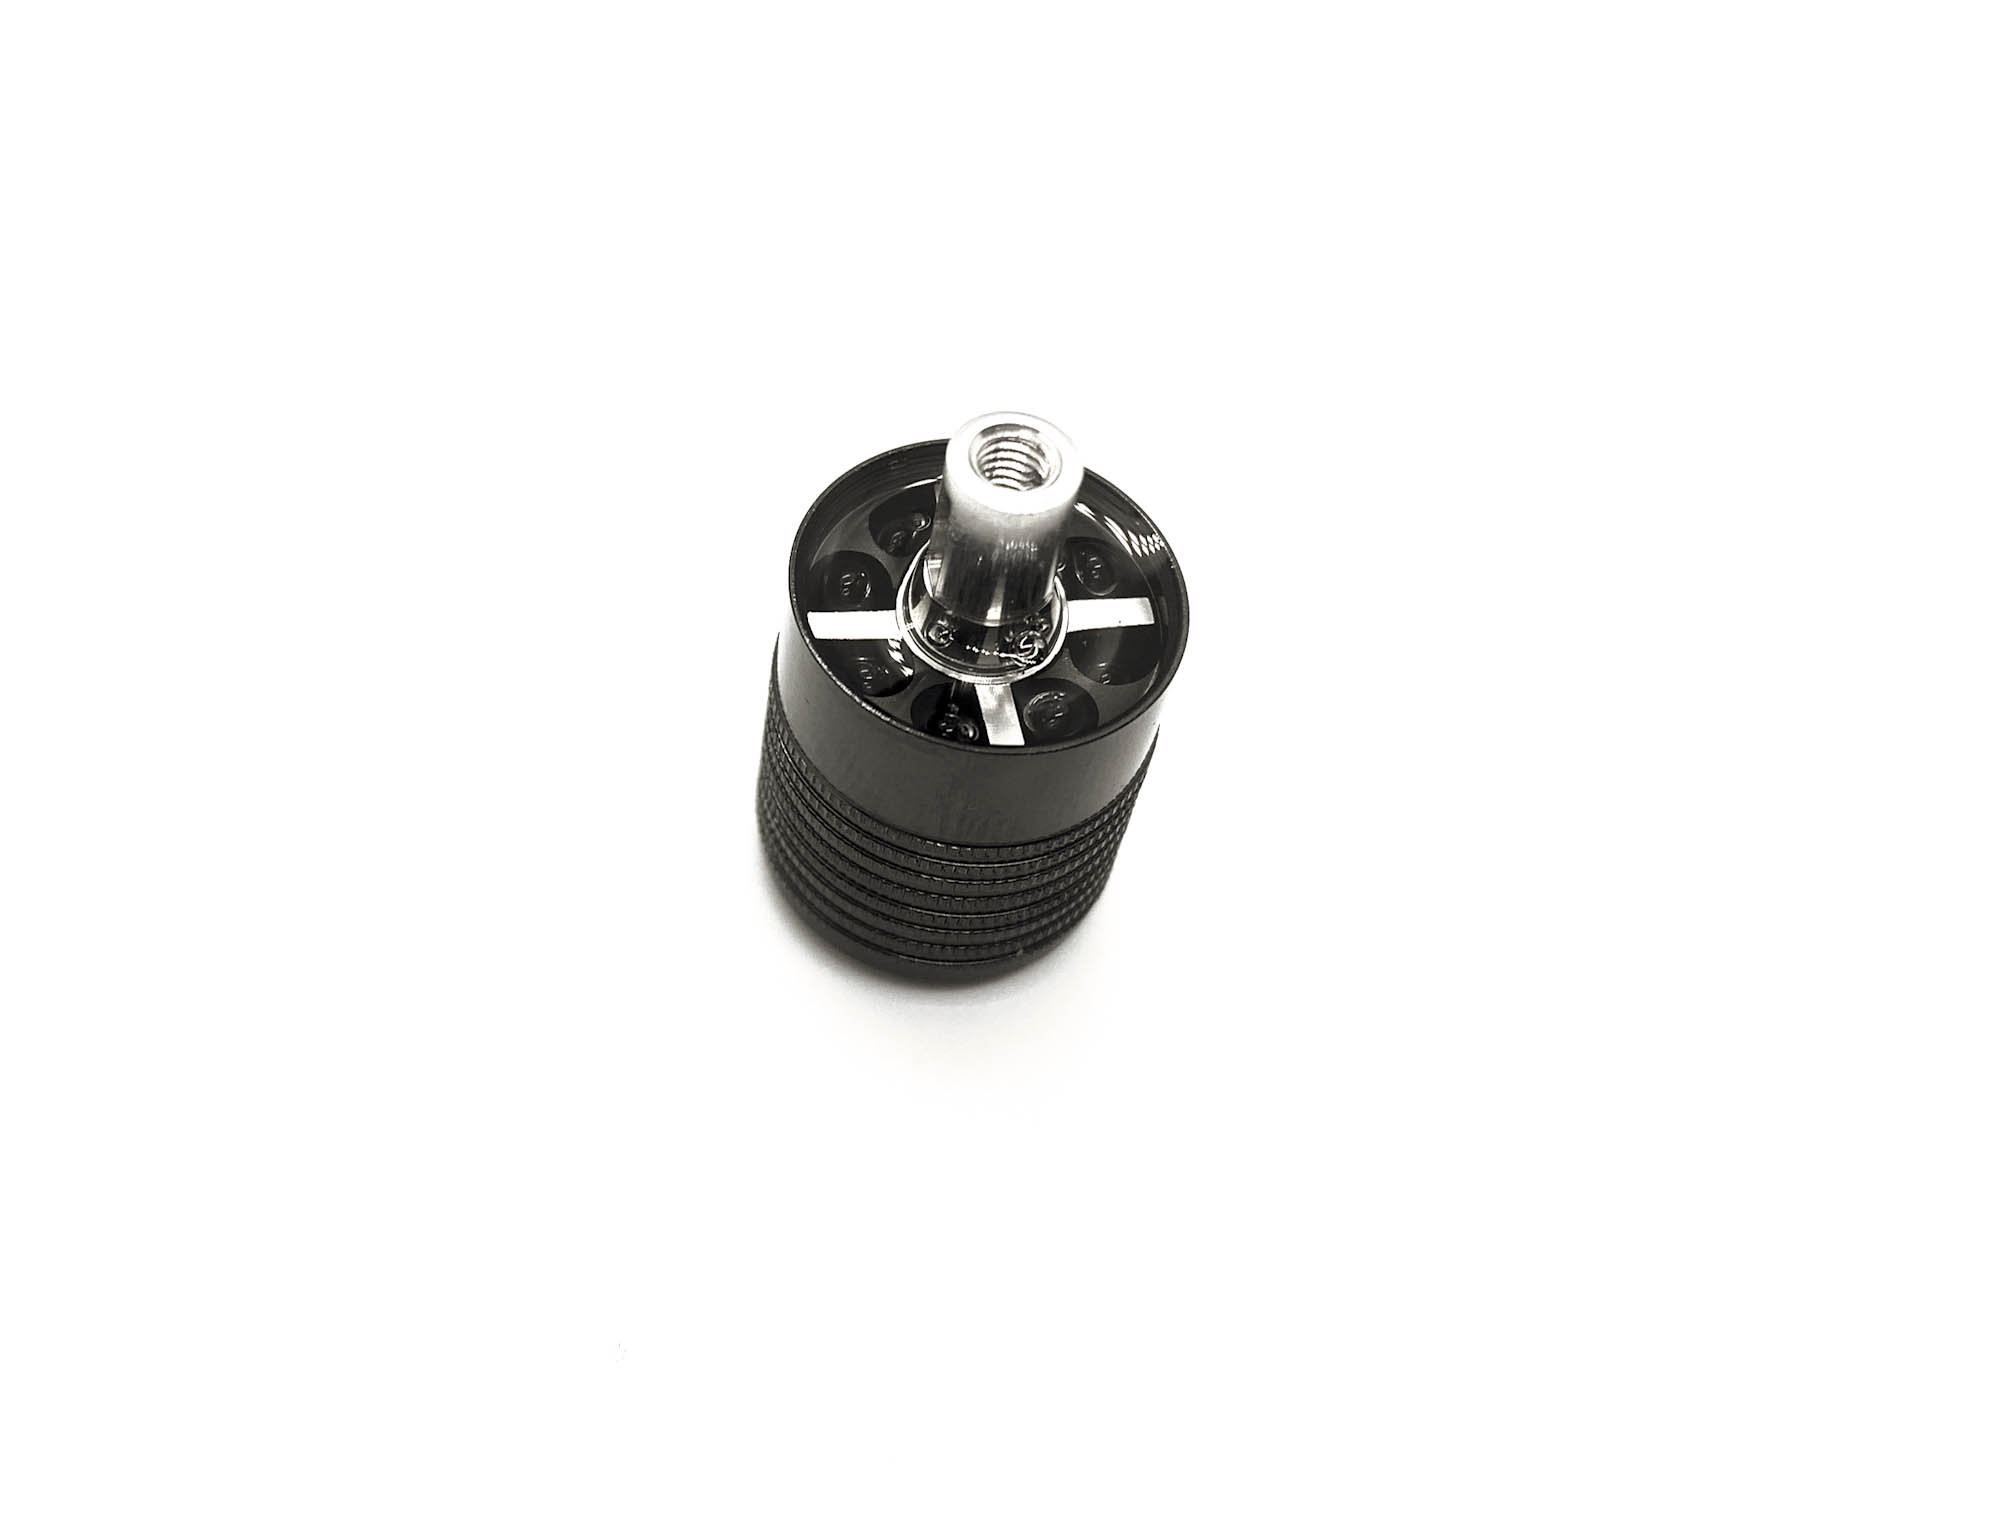
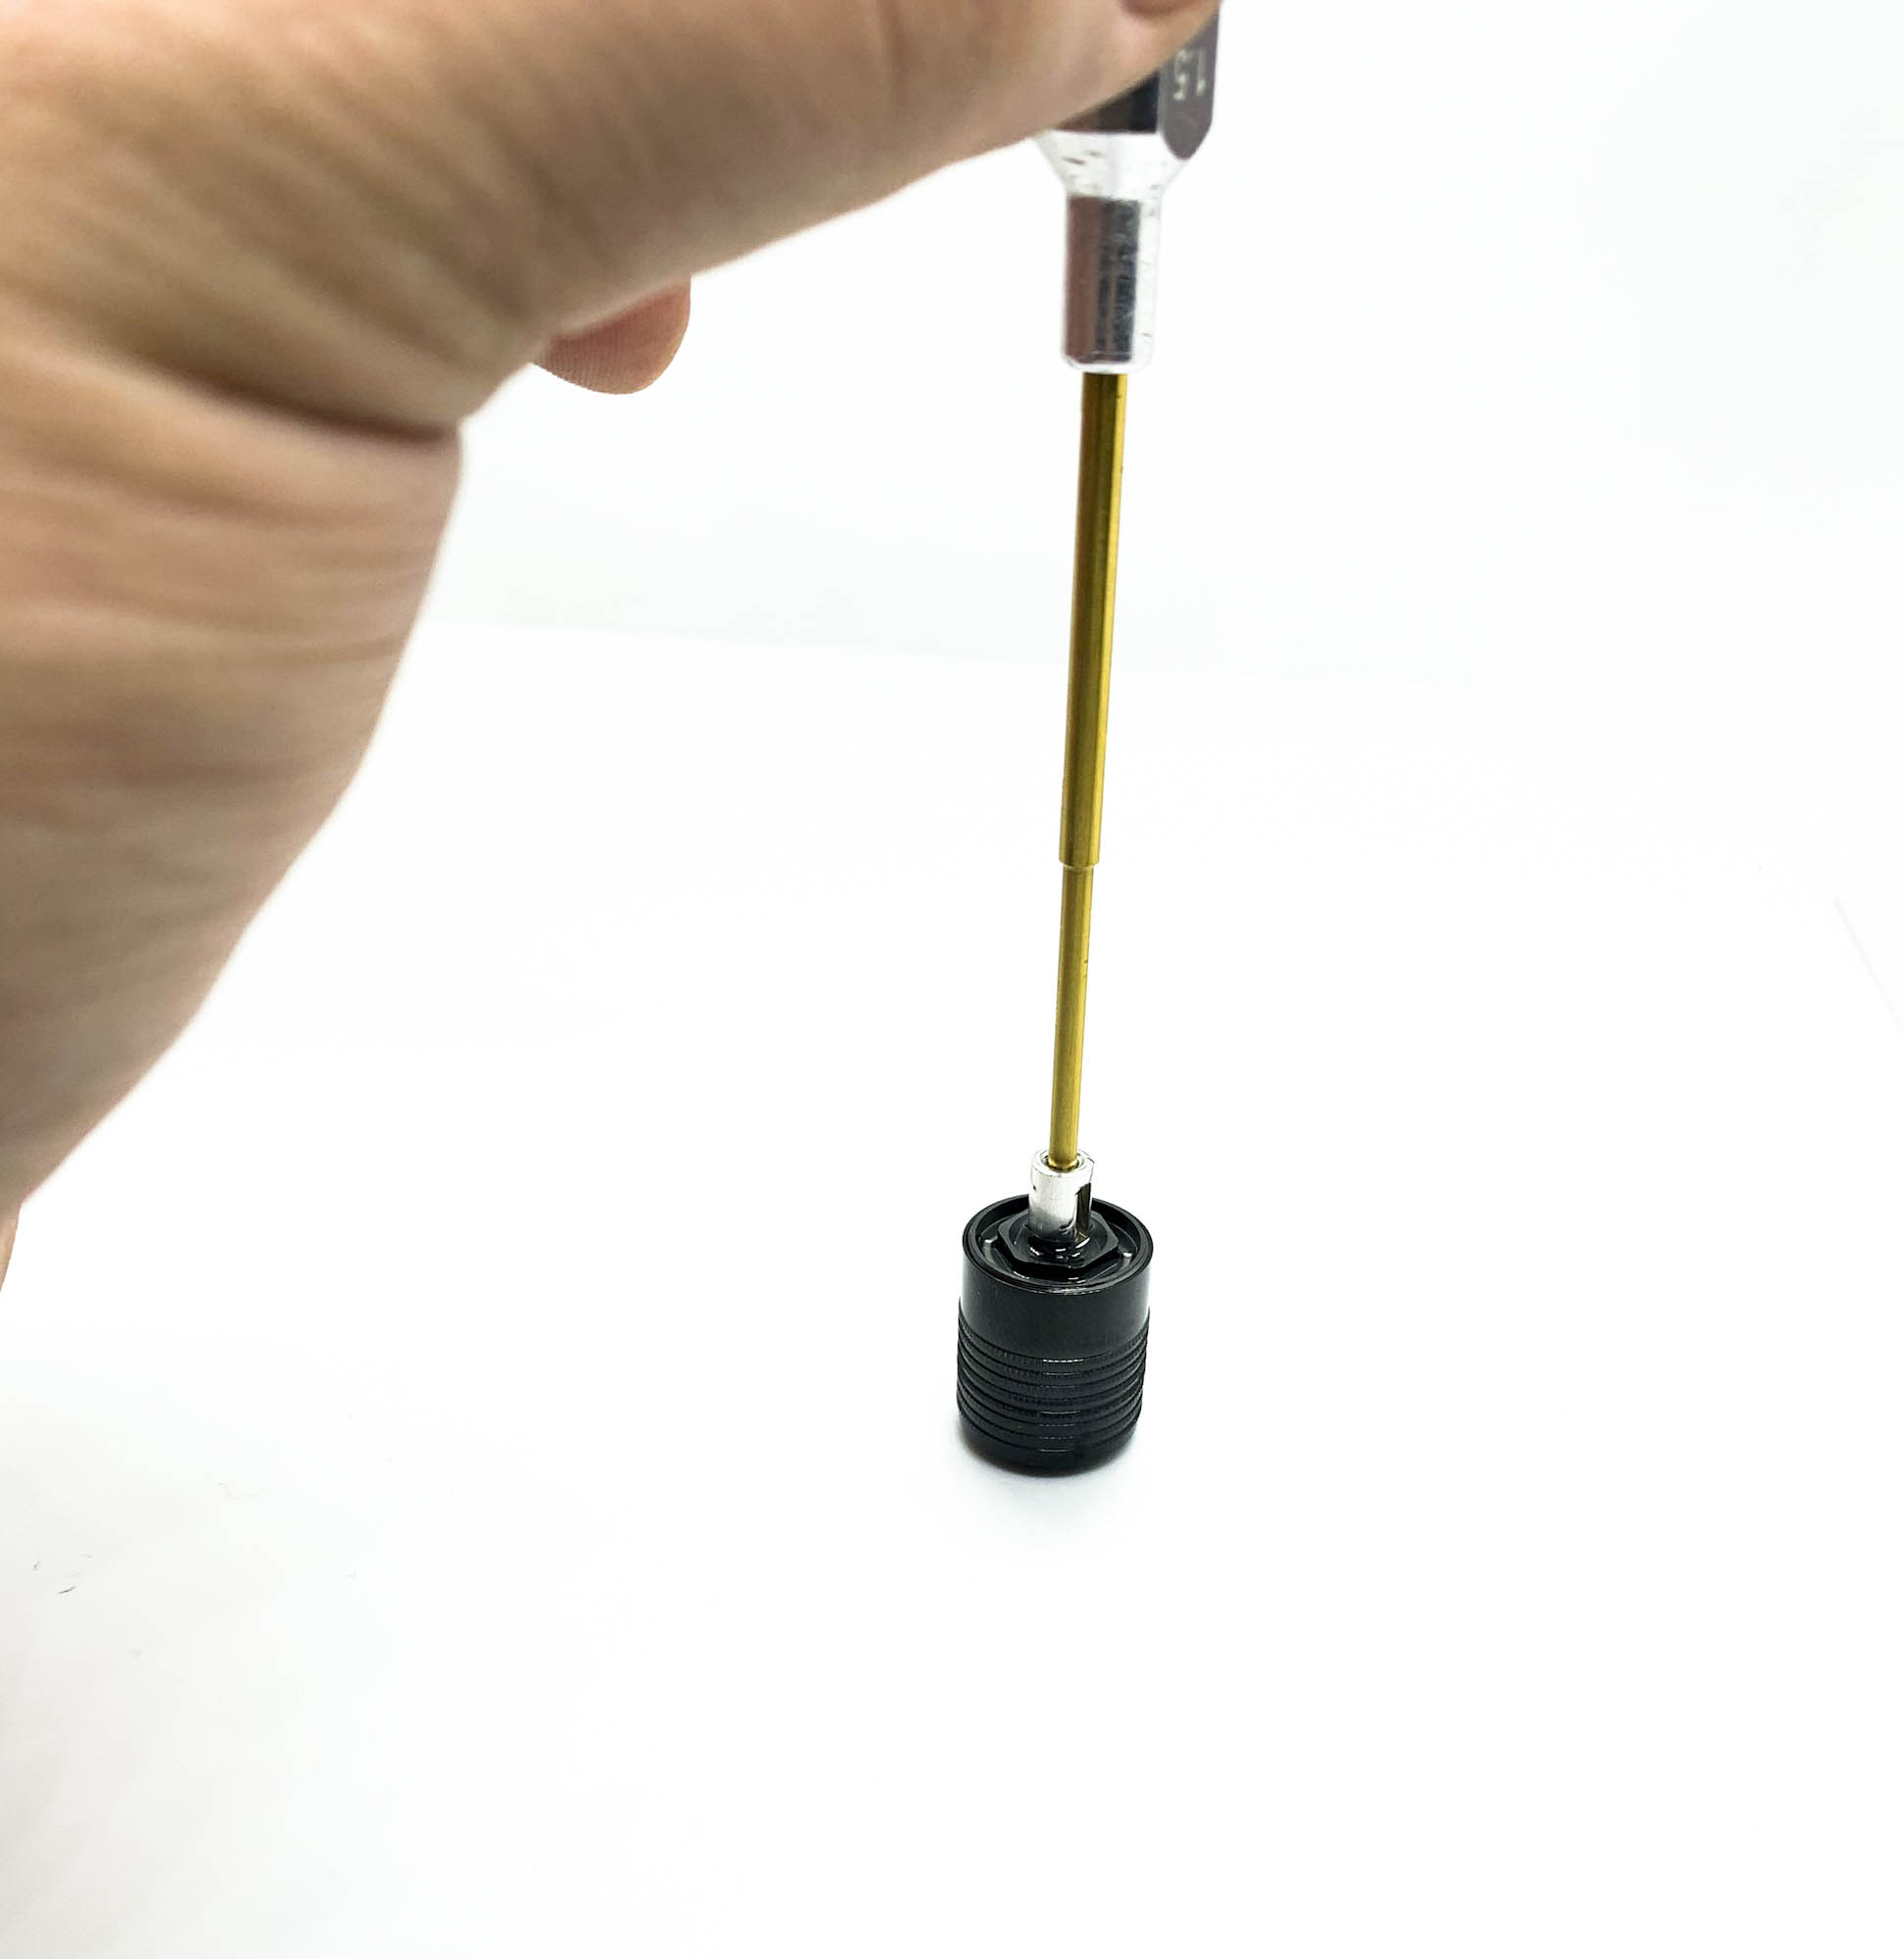
Make sure the P63 is in lowest position before you install the OR155V and B85.
If P63 is not fully down, you can use a 1,5mm tool to push it down (before adding the oring and bearing!).
Assembly of dampers and holders is easy.
In the kit are SPR01 std. springs included.
For Carpet racing I recommend the optional SPR01S springs.
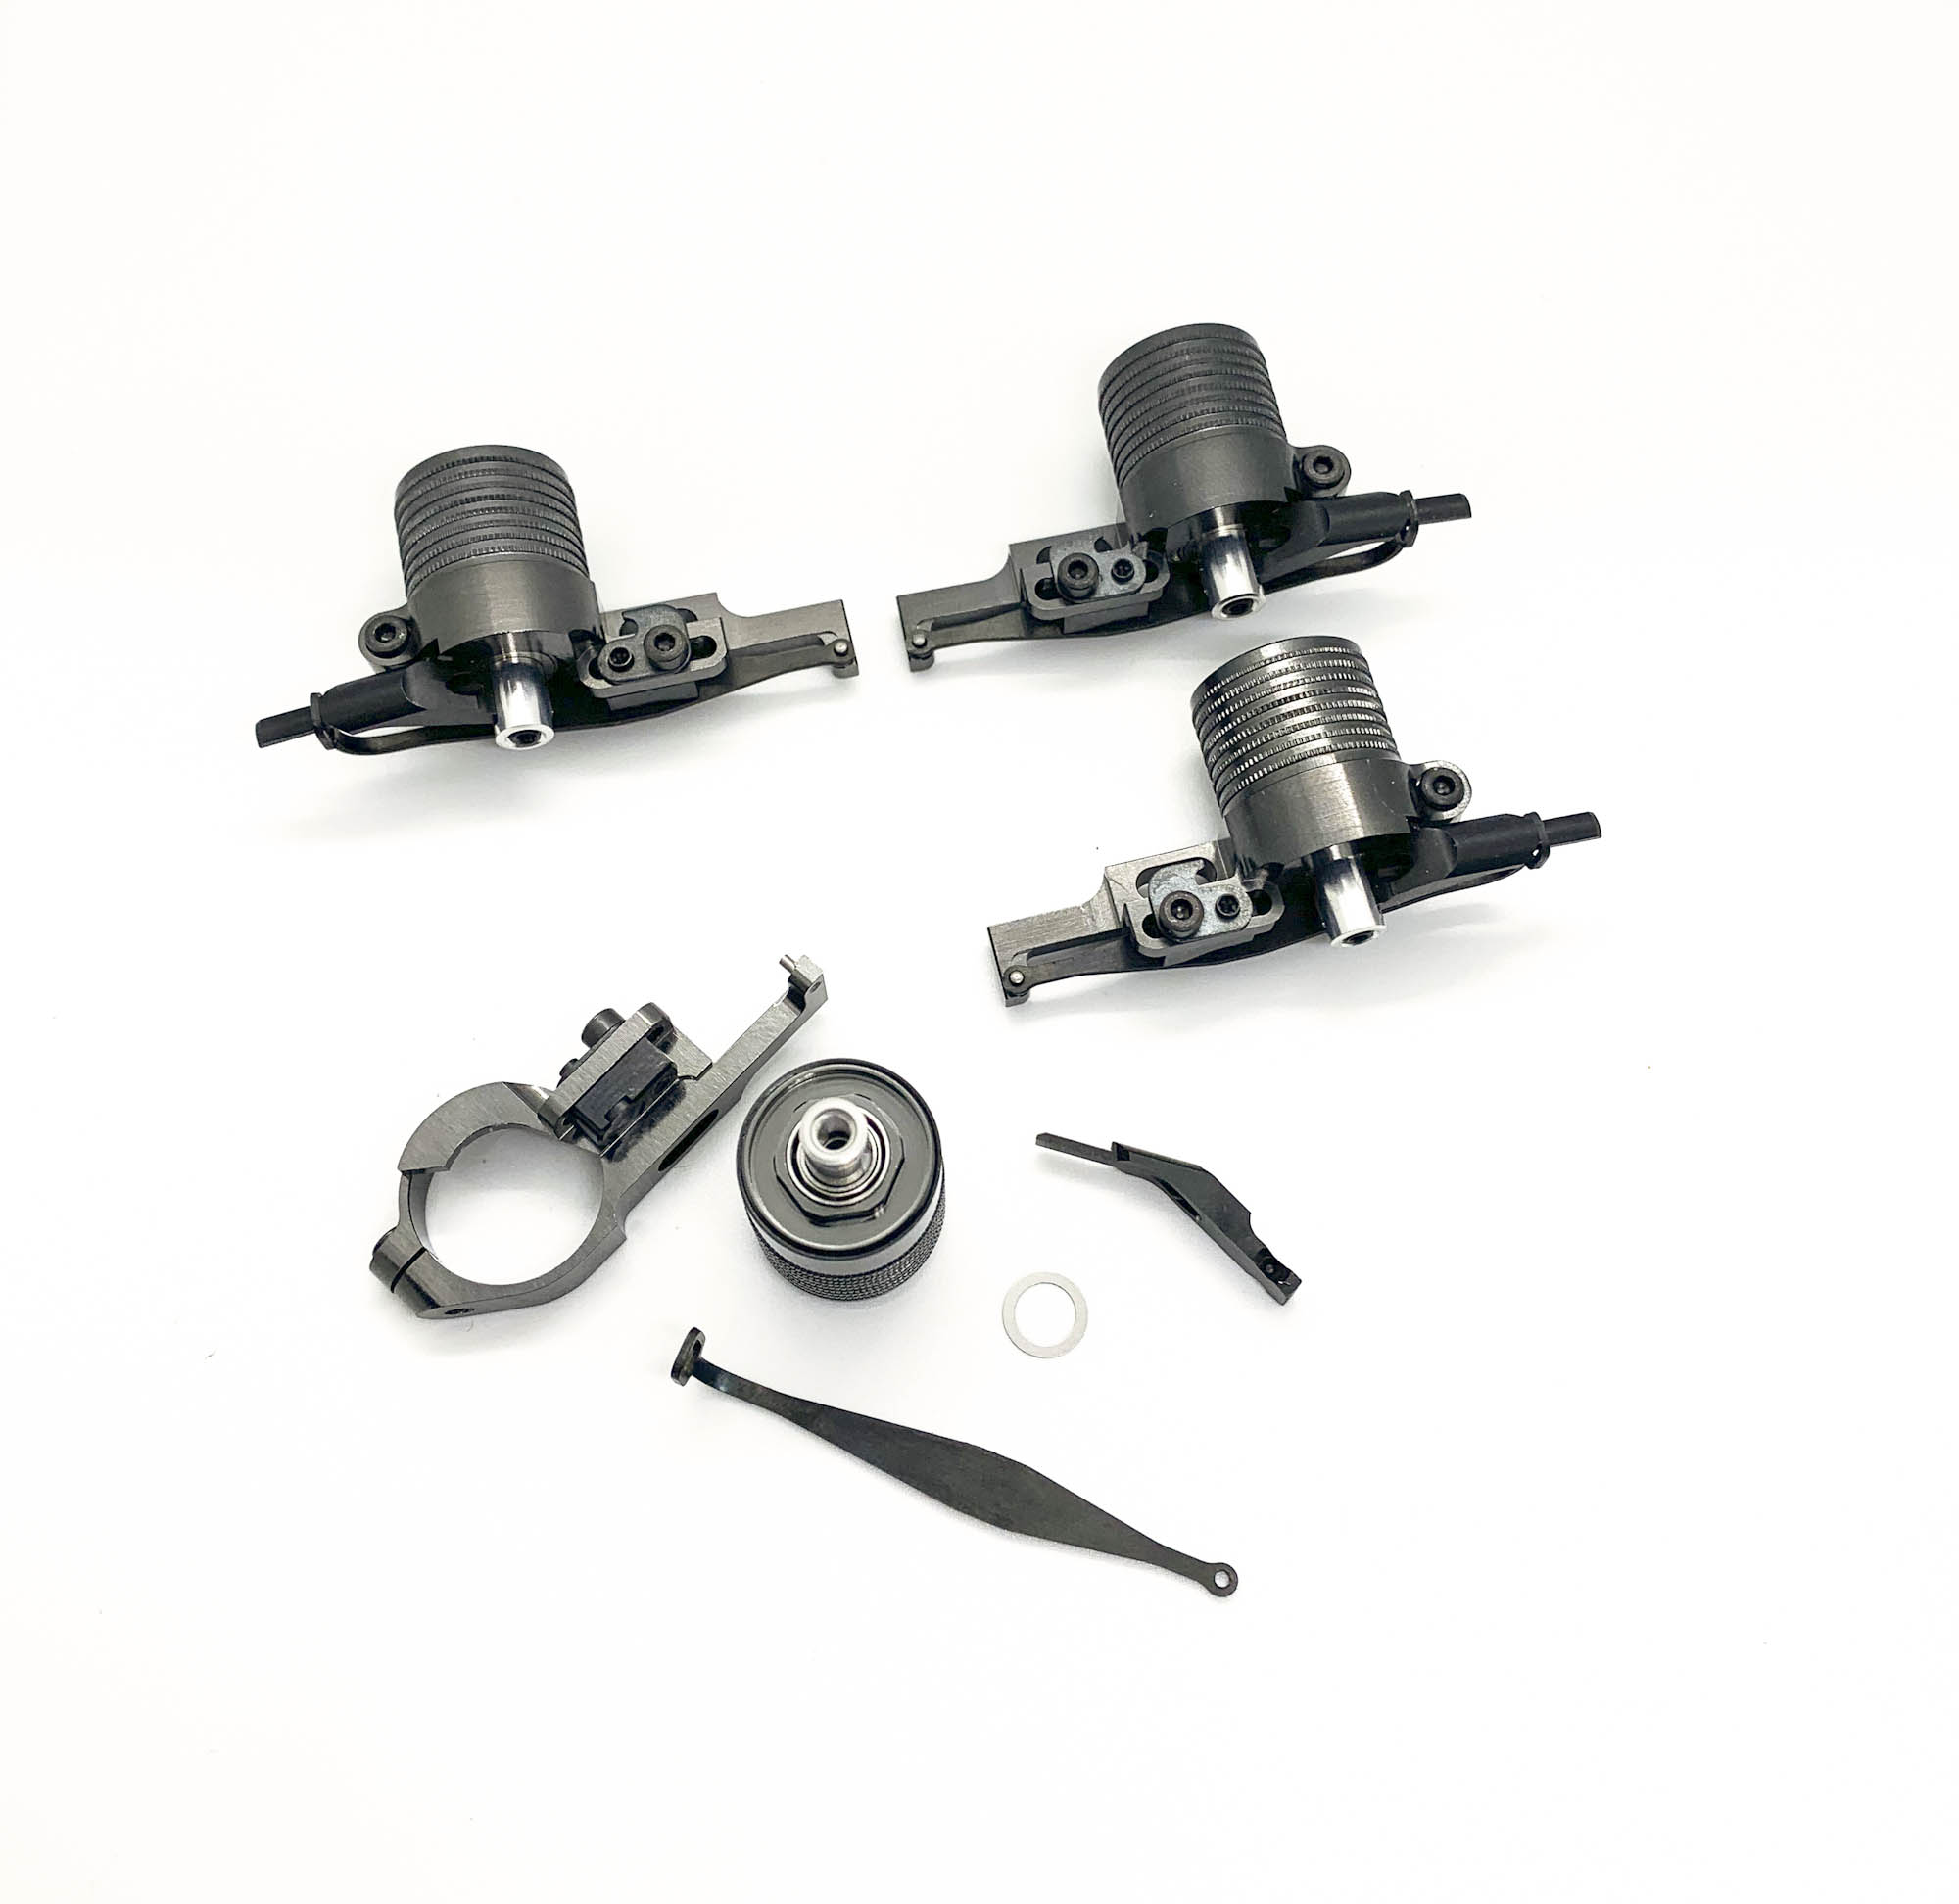
Take care and do not overtight the grub screw at installation of SPR02X !
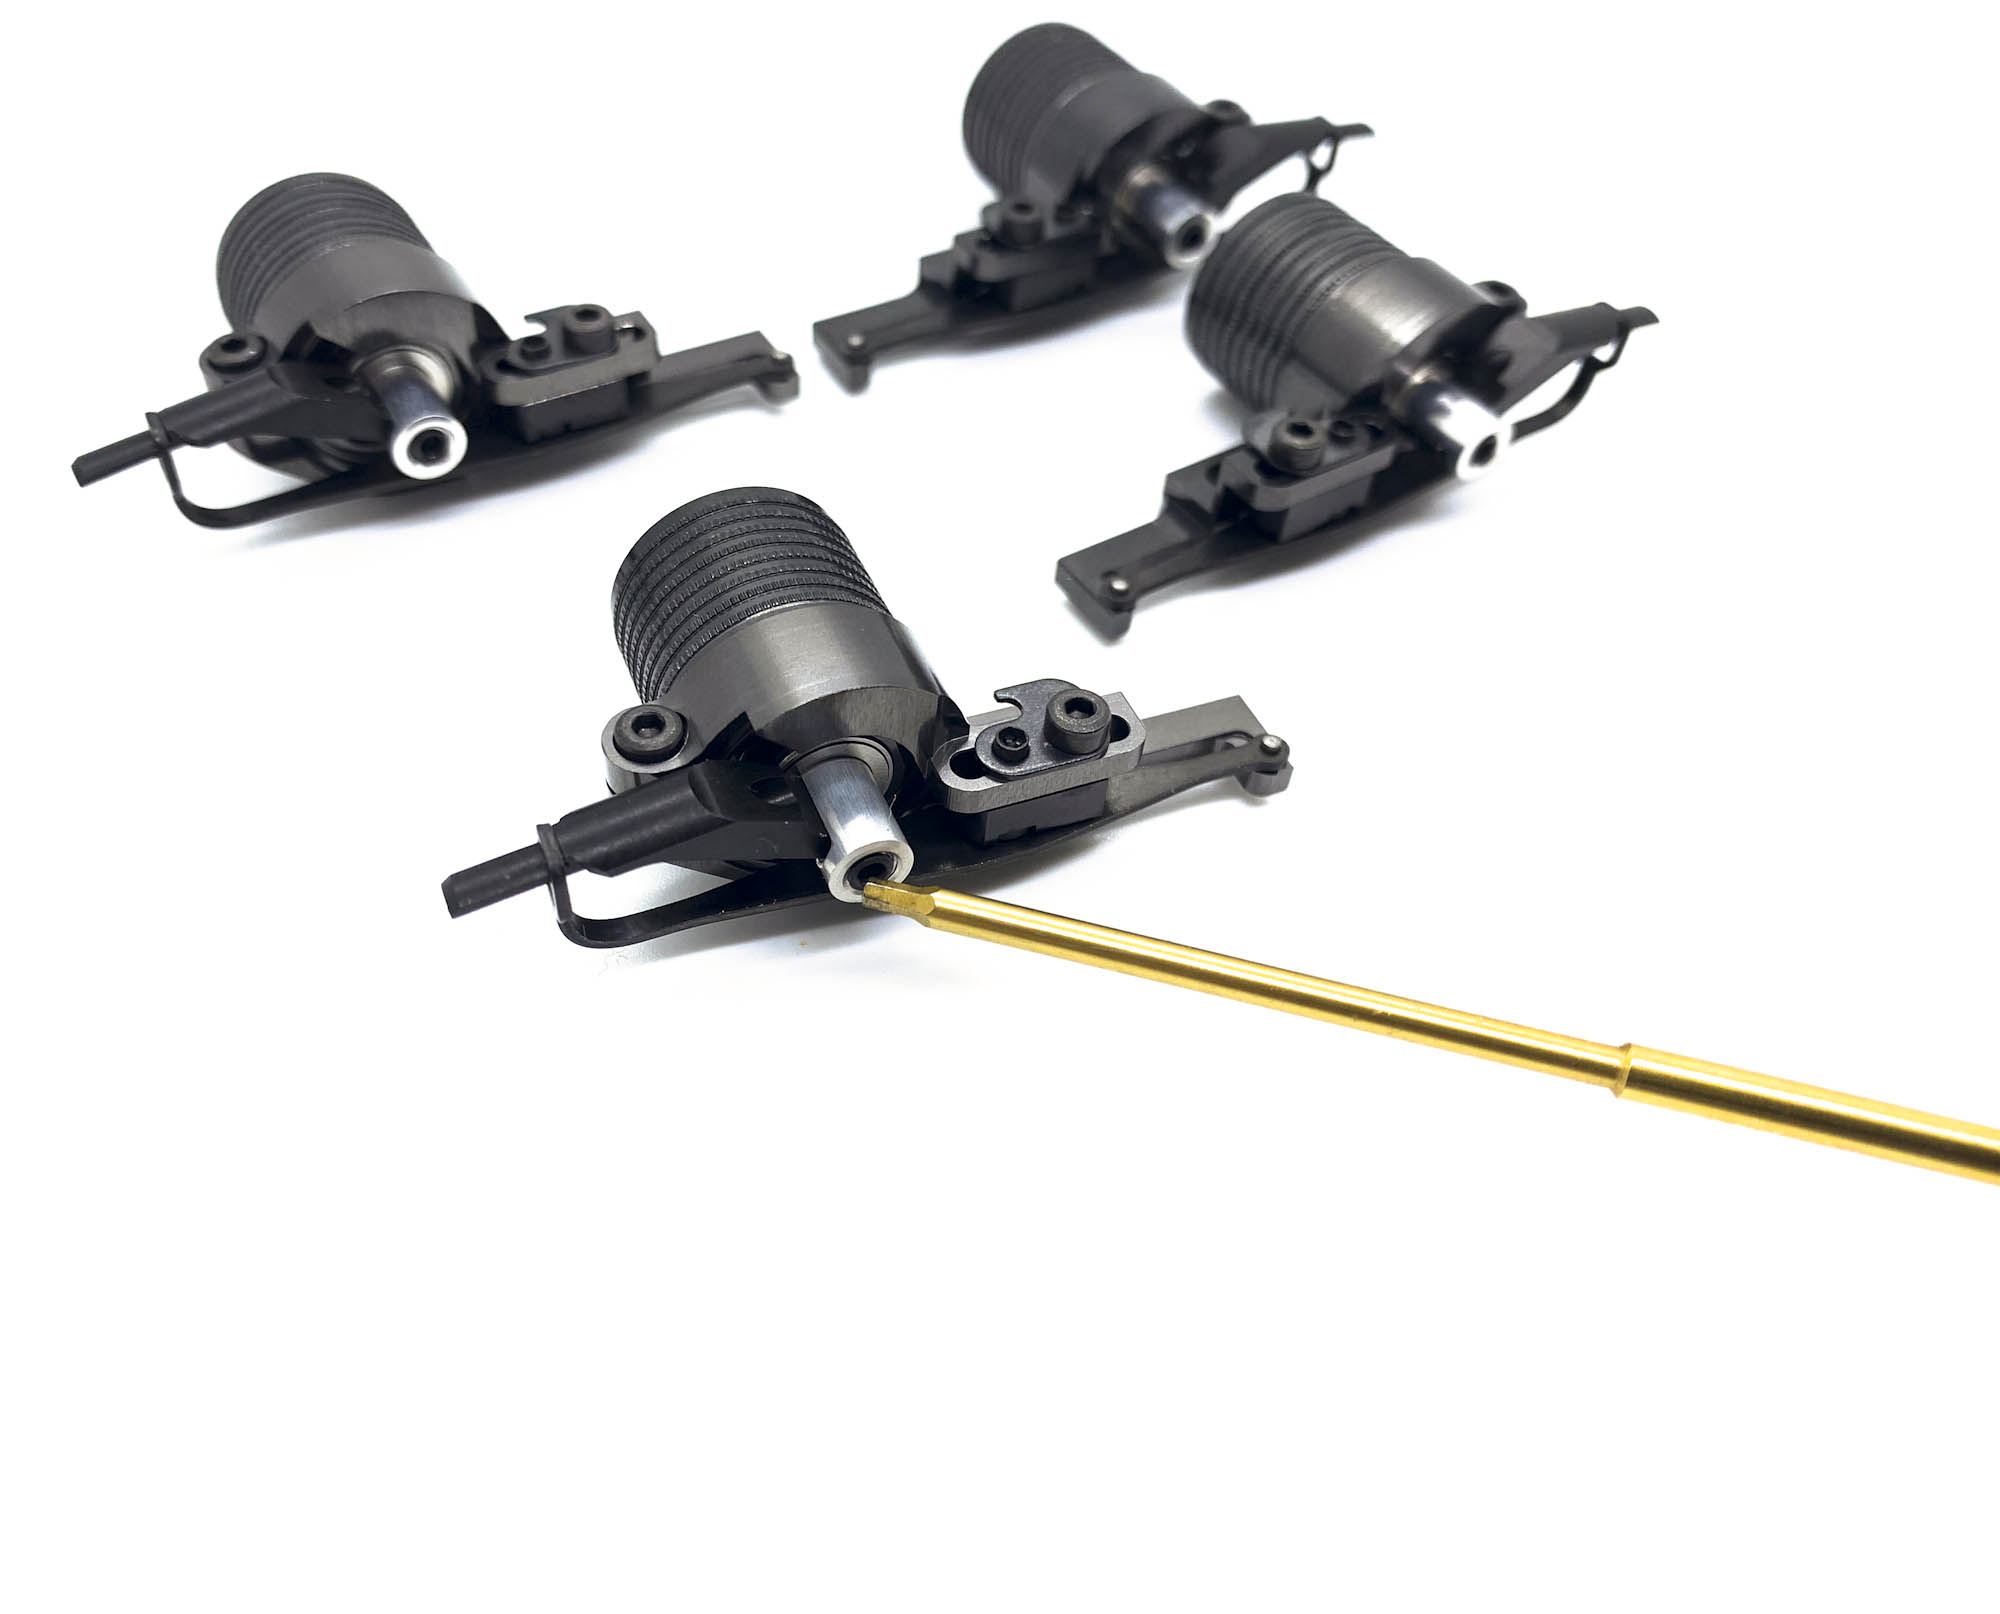
Make sure to not overtight the clamping screw in AM17X holders. There is a risk of binding the bearing/vane and make the damper stuck.

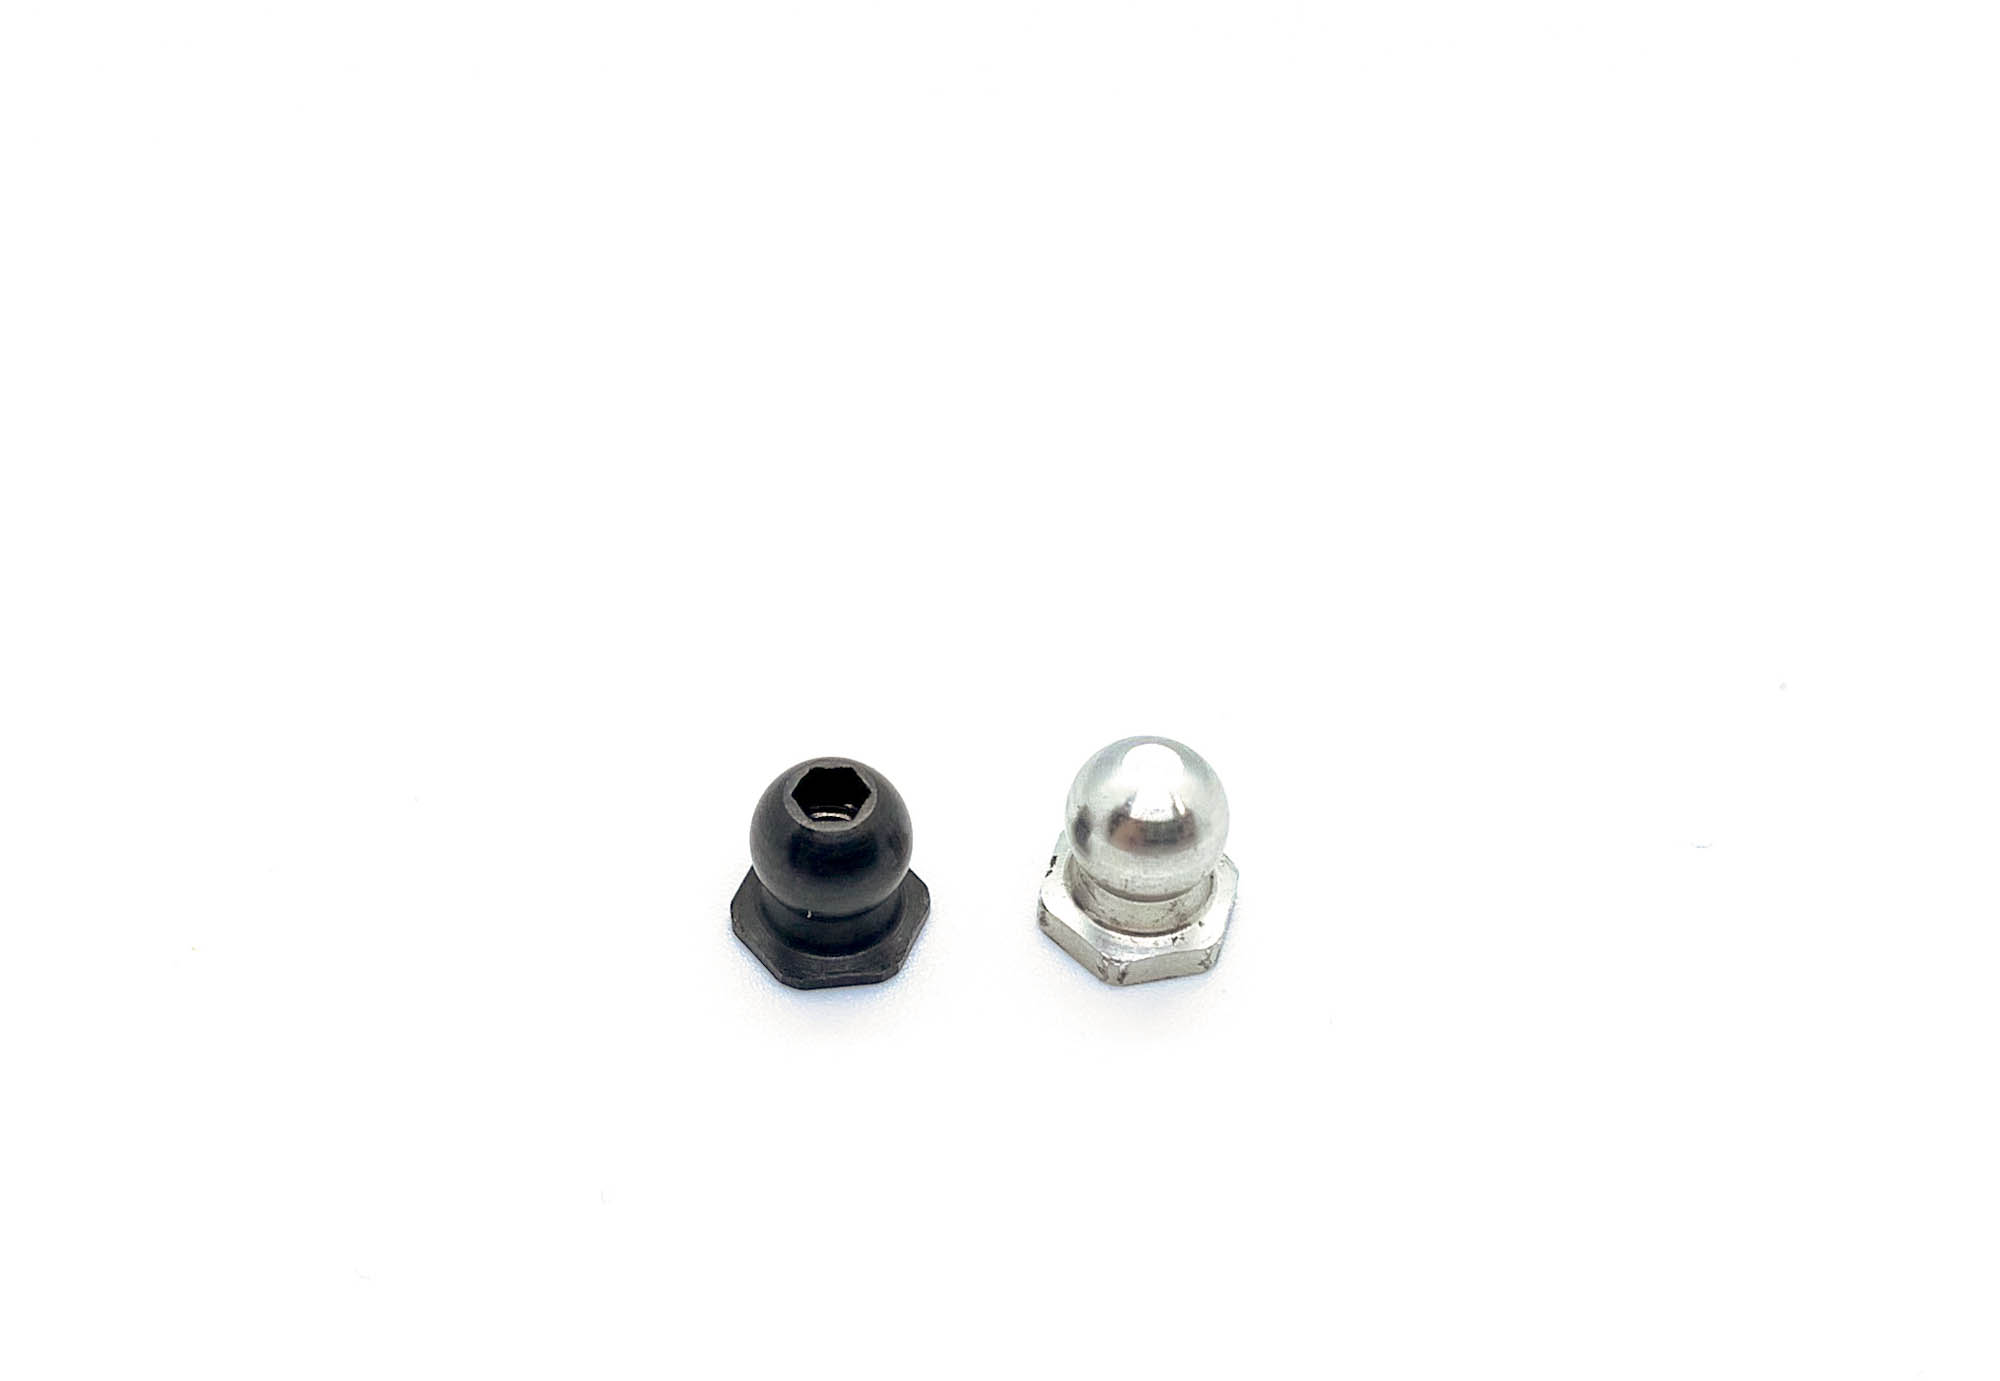
New in the MMX kit is the use of AT21ST-A instead the AT21 balls.
The AT21ST-A is made out of steel, means more weight mounted lower and also more reliable against damage of the thread.
IMPORTANT INFO:
The steel AT21ST-A are 0,5mm lower than AT21.
This need to be noted when comparing setups!
Example: If you were running 1mm shim with AT21 then you should use 1,5mm with AT21ST-A.
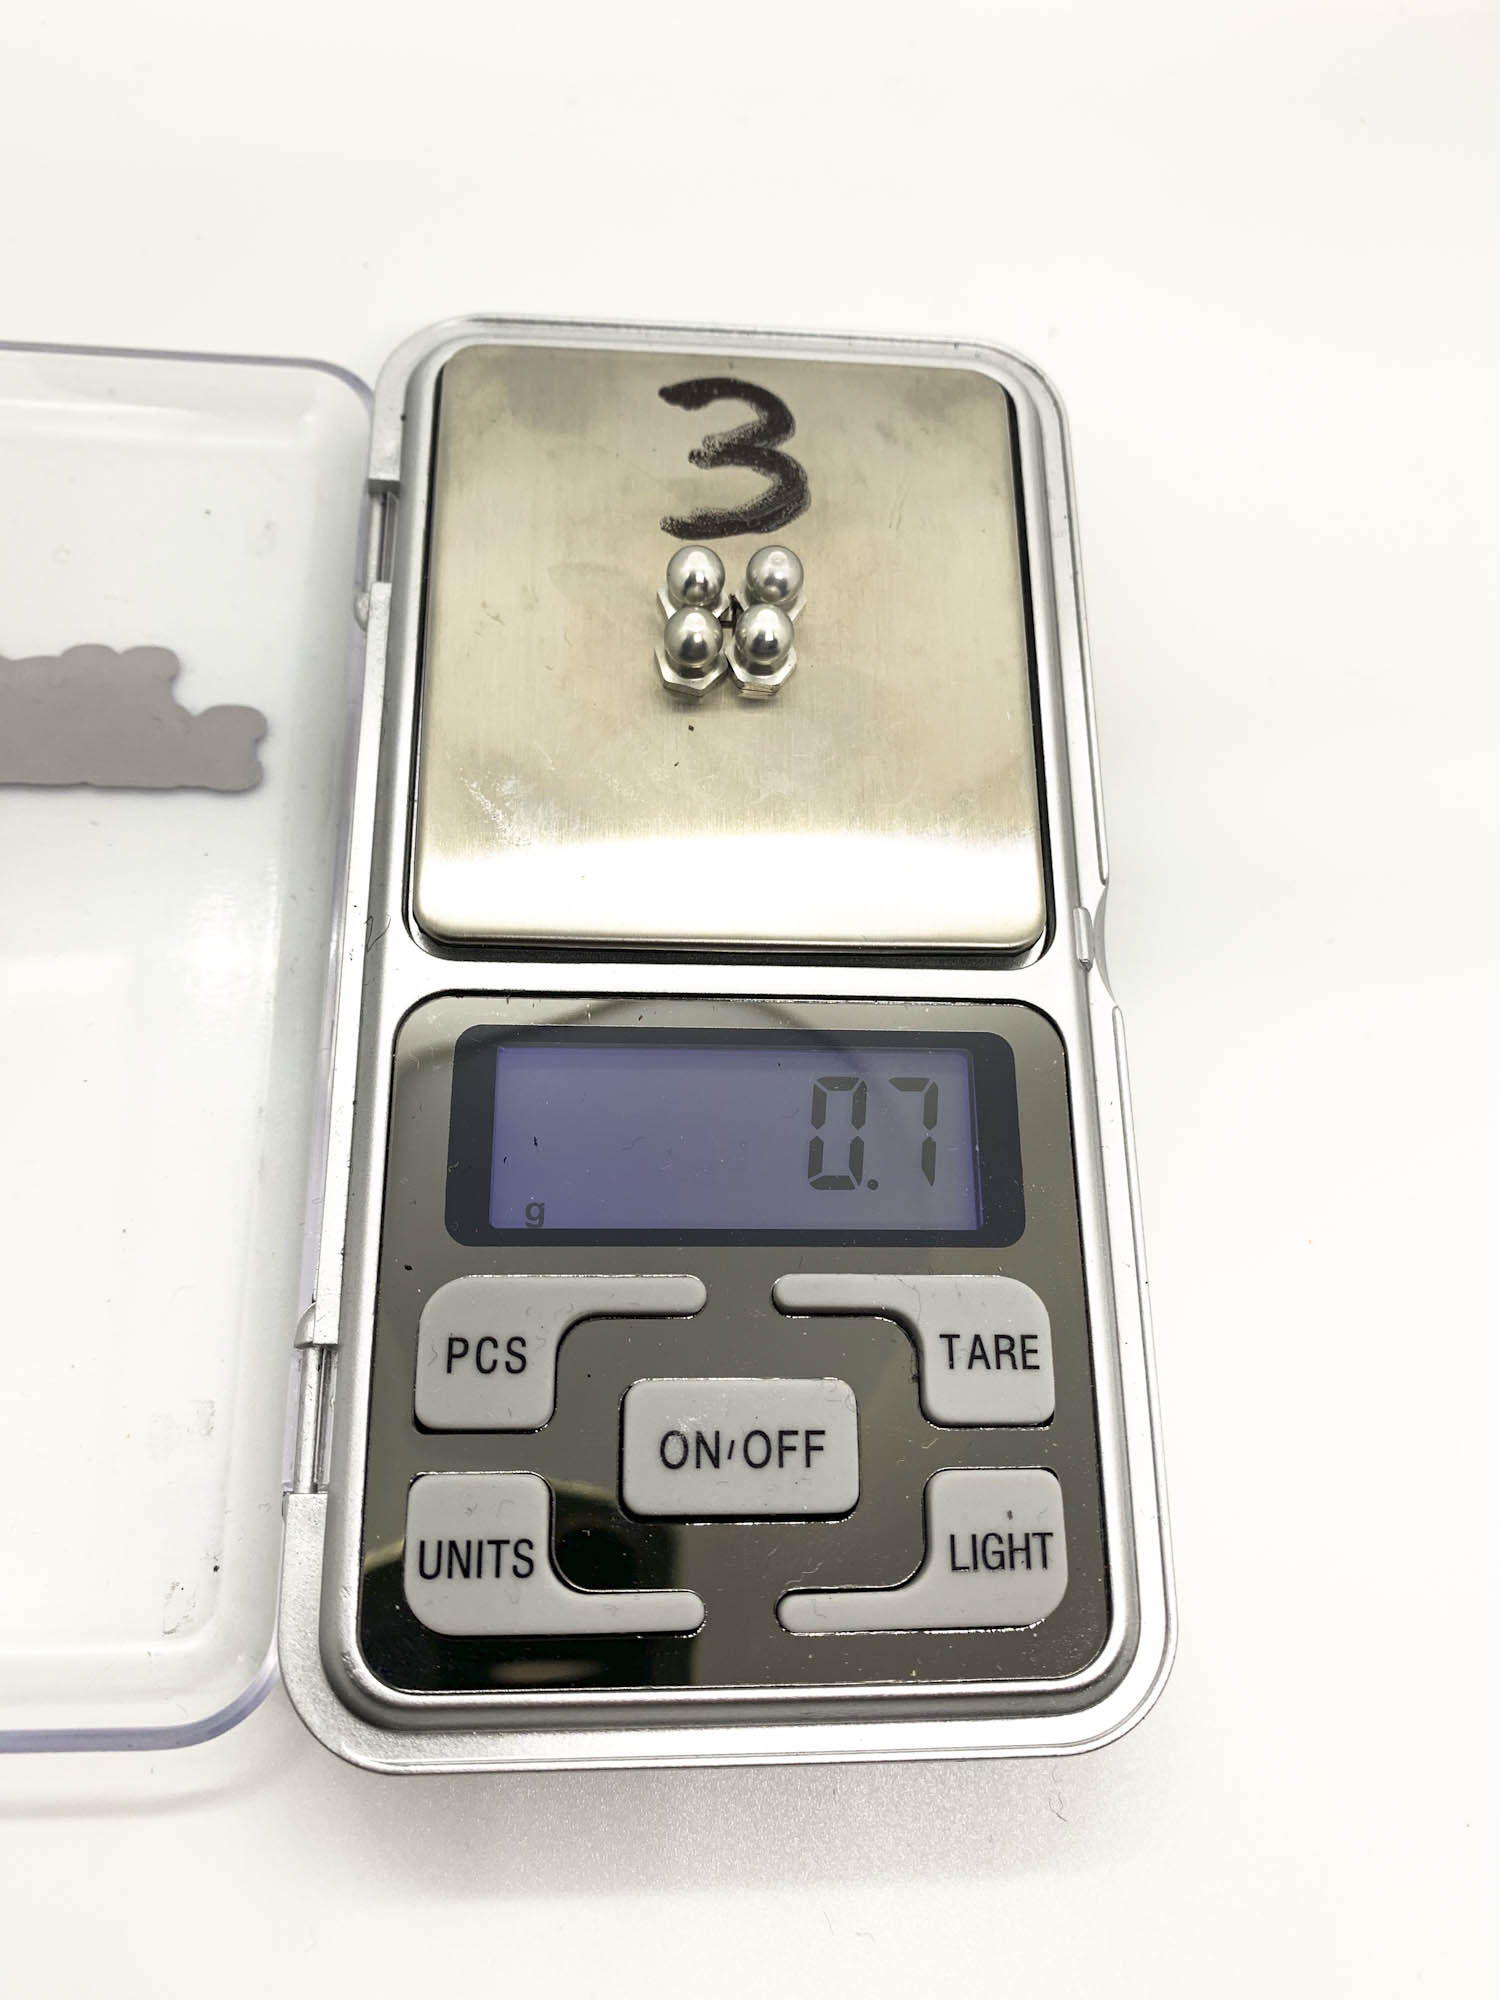
Just a small example of the weight difference.
4x AT21 = 0,7g.
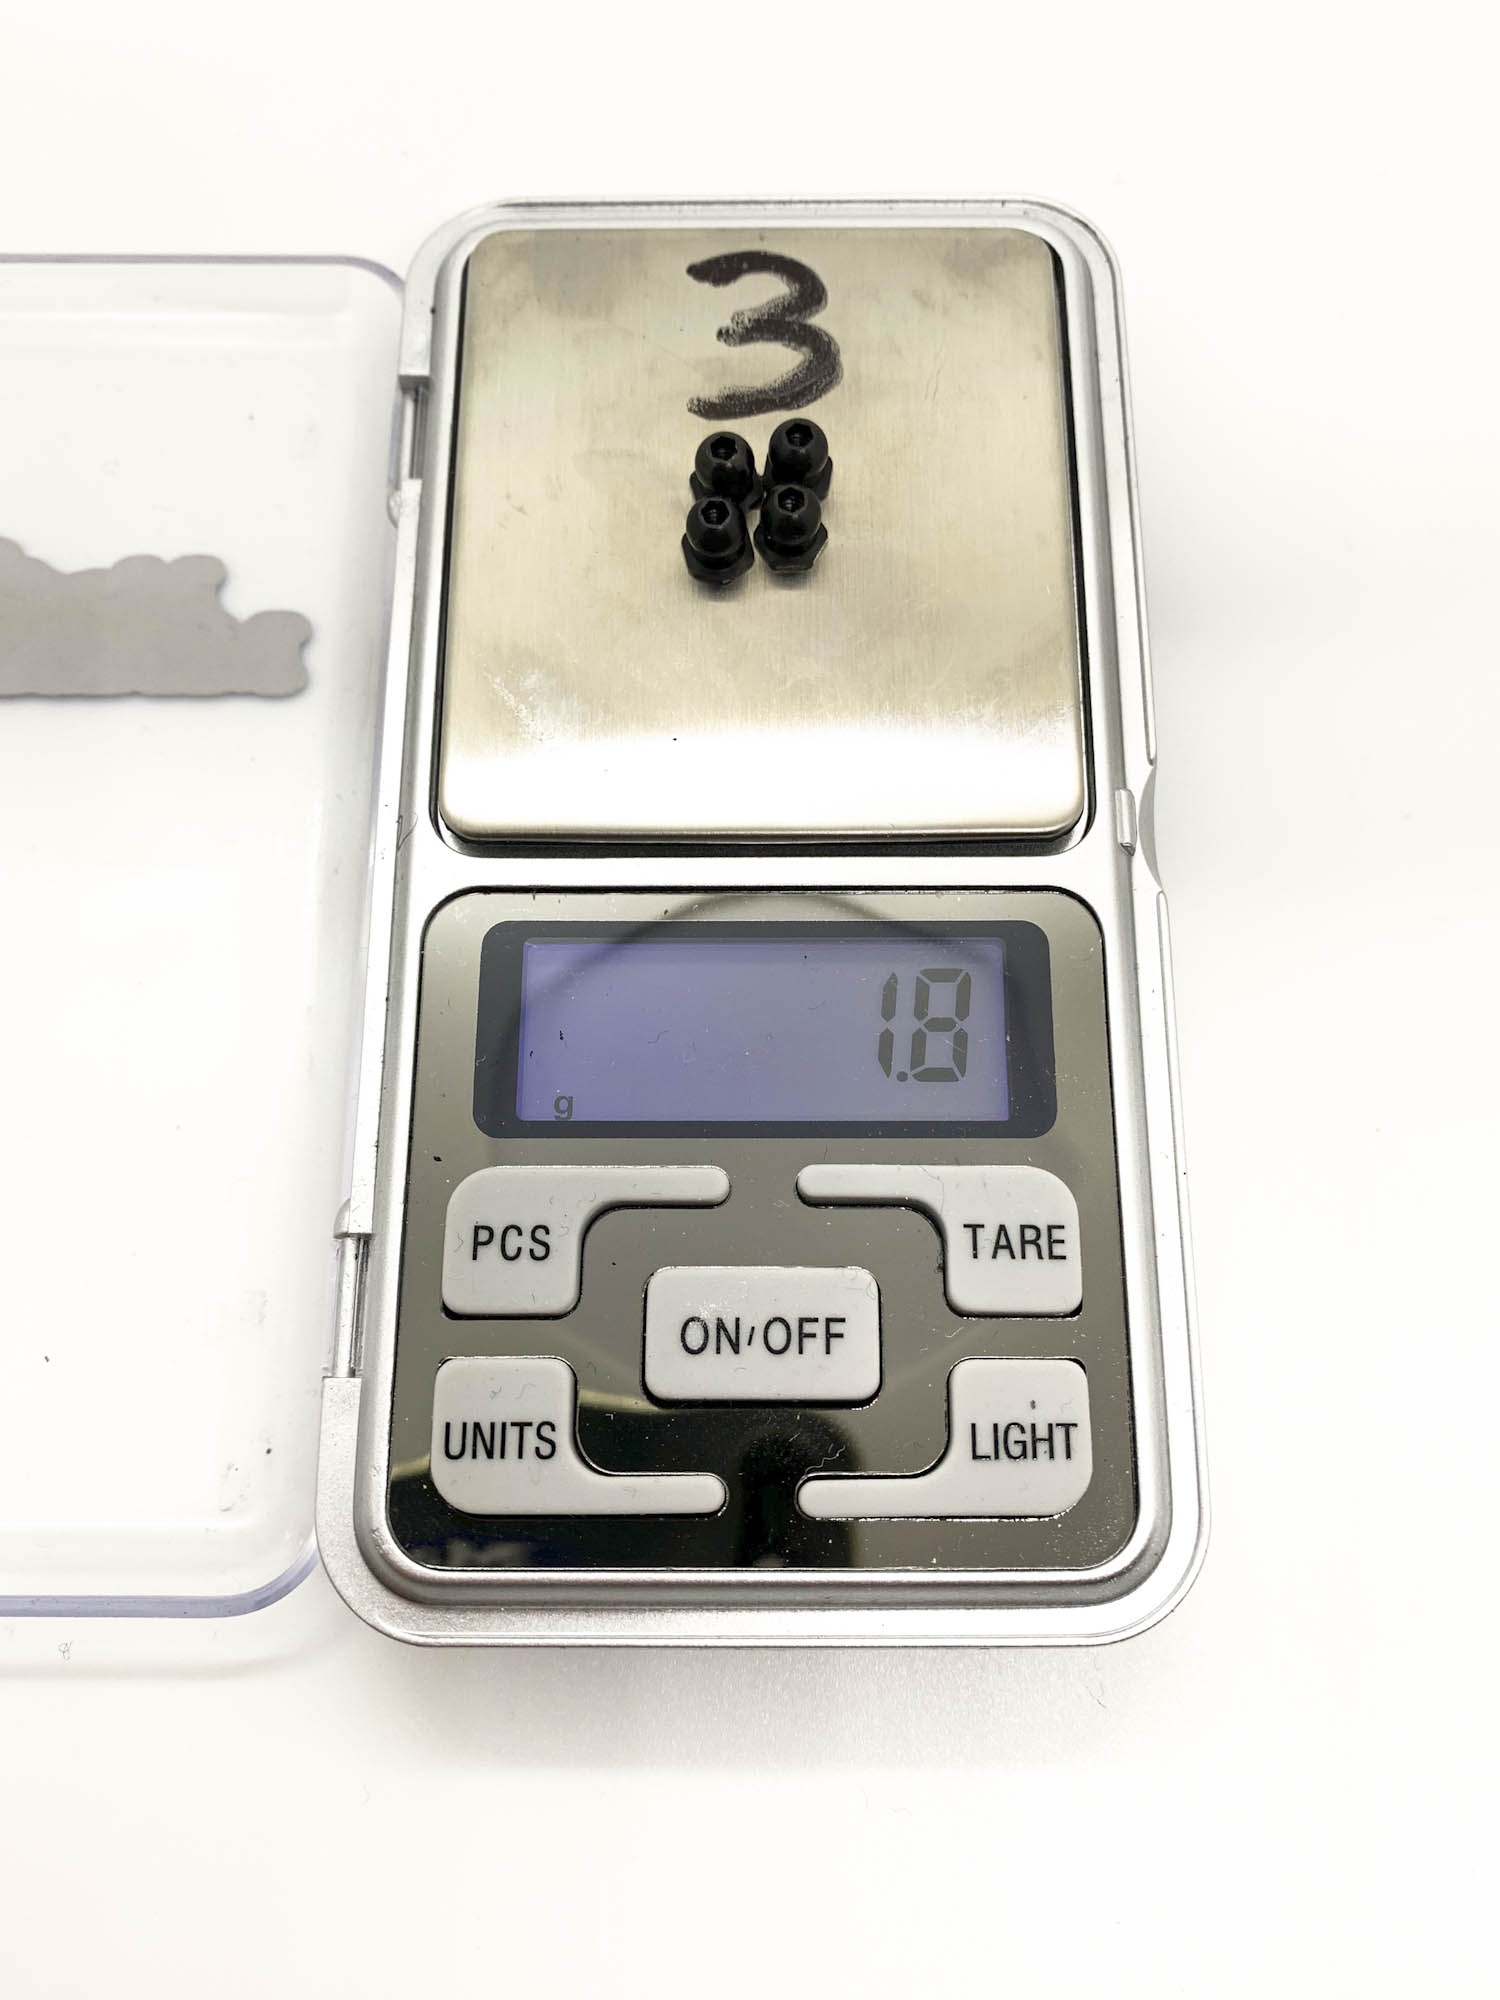
4x AT21ST-A = 1,8g.
With the 2mm hex hole on top its easy to tighten the balls on the screws.
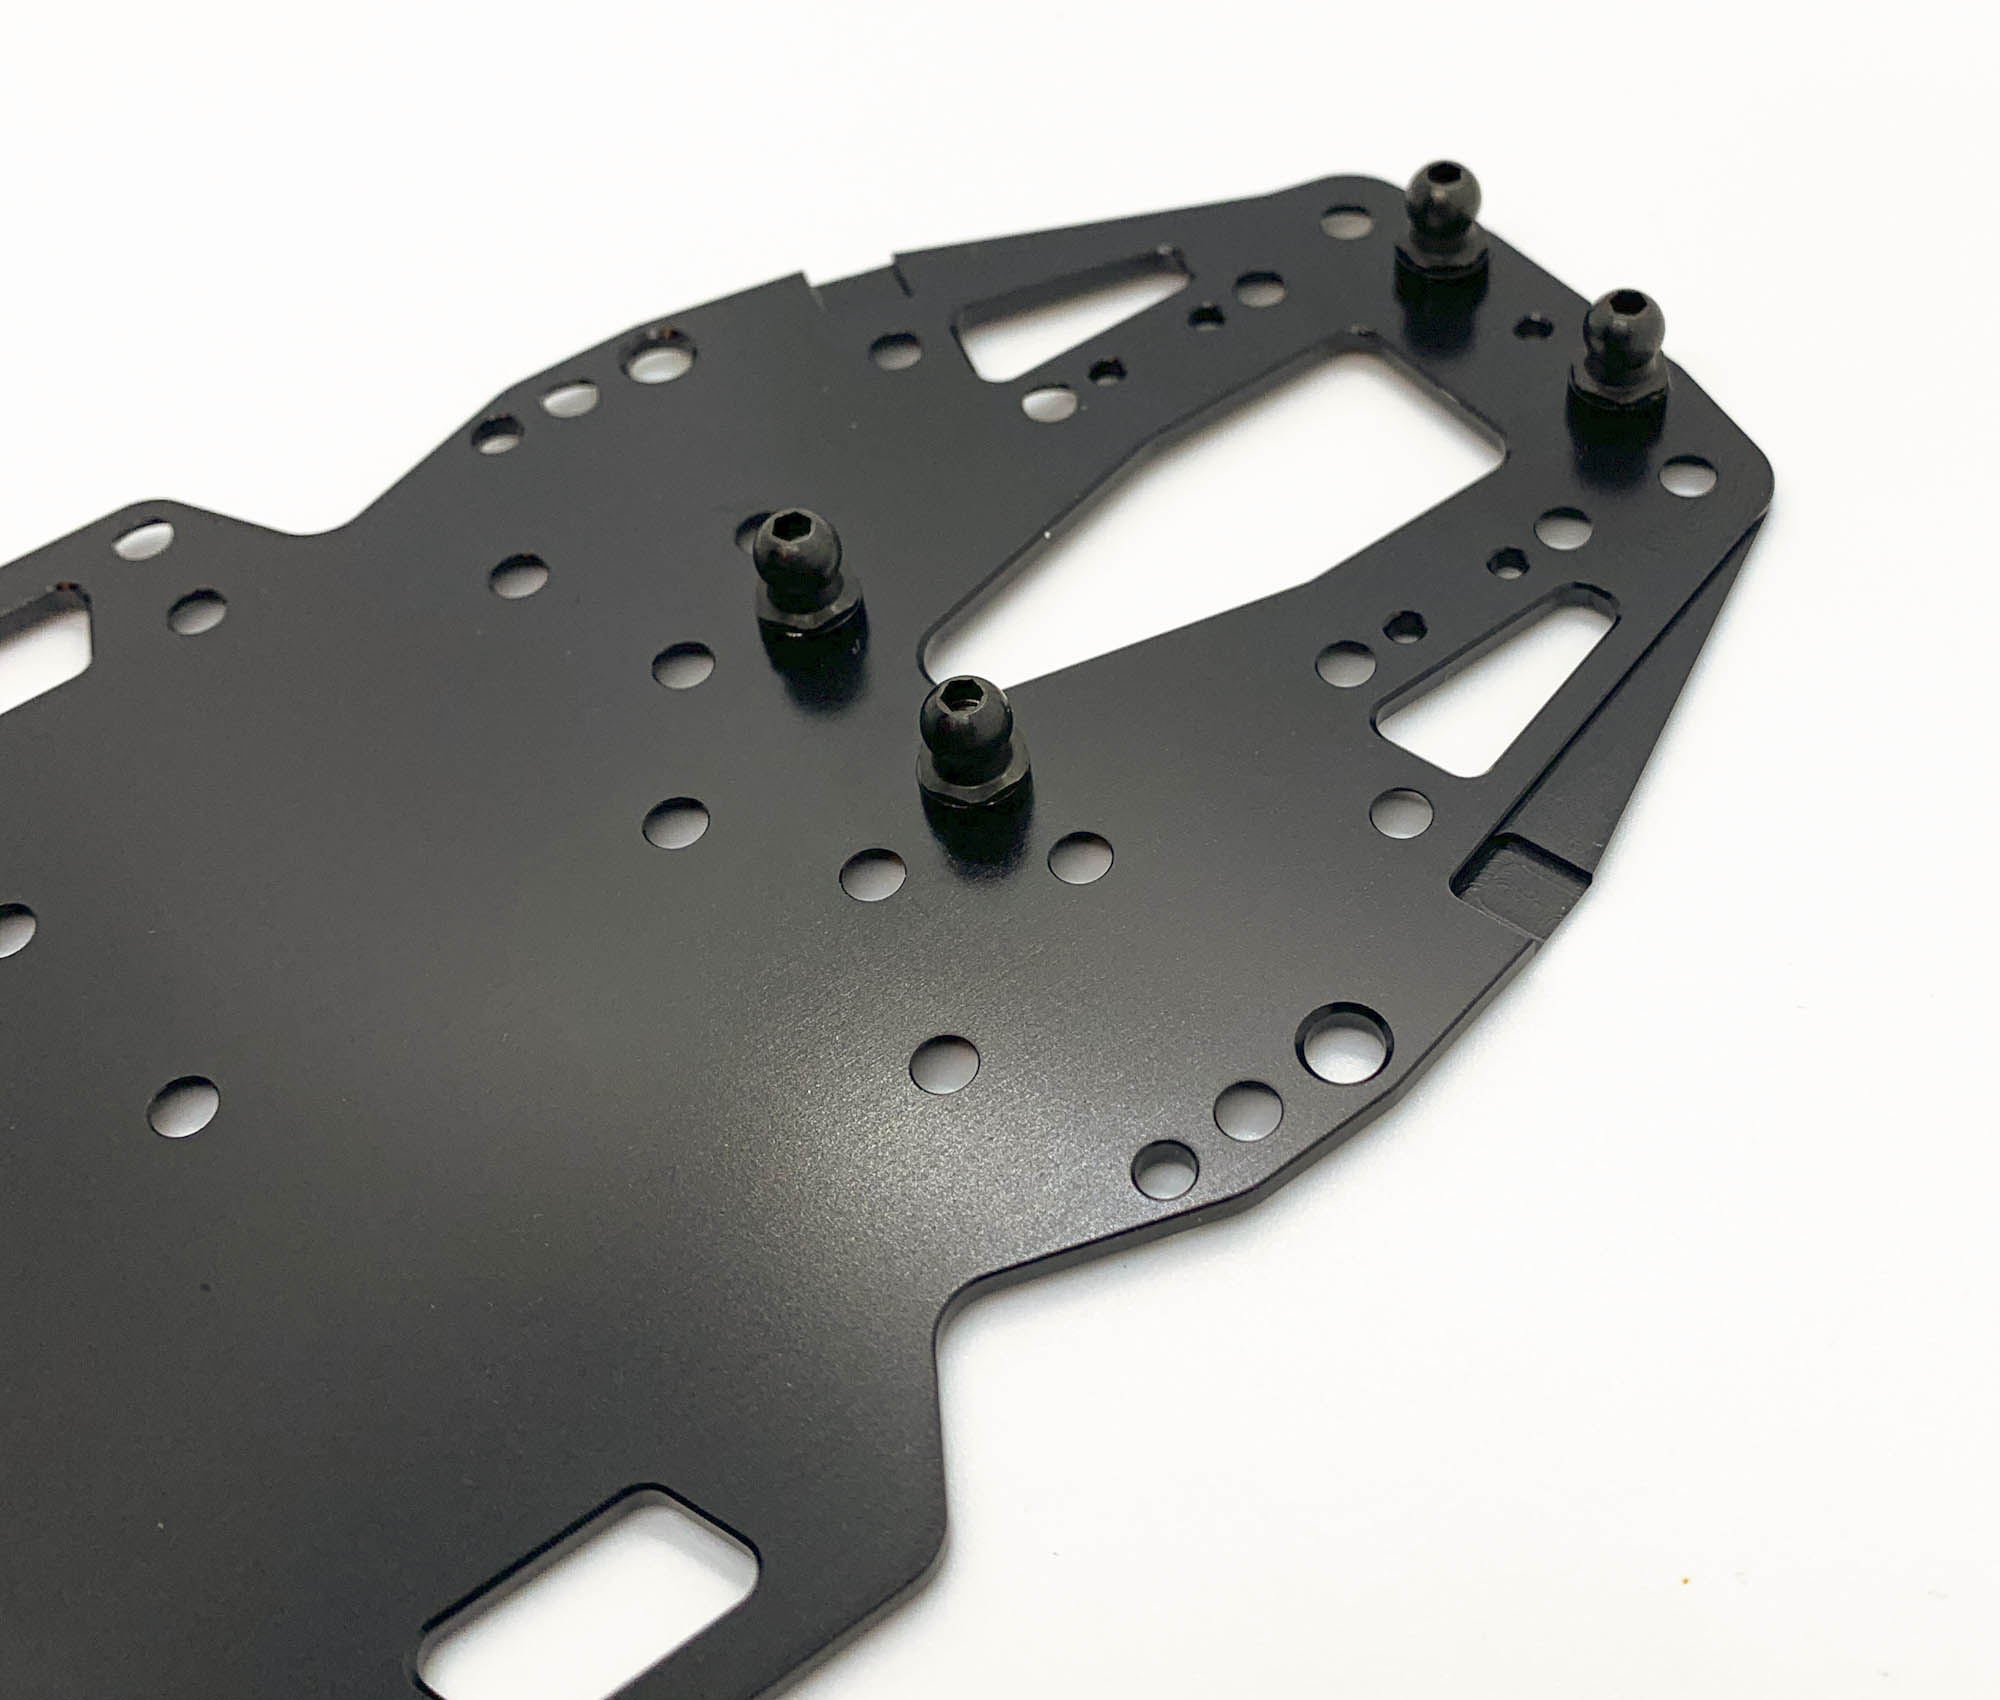
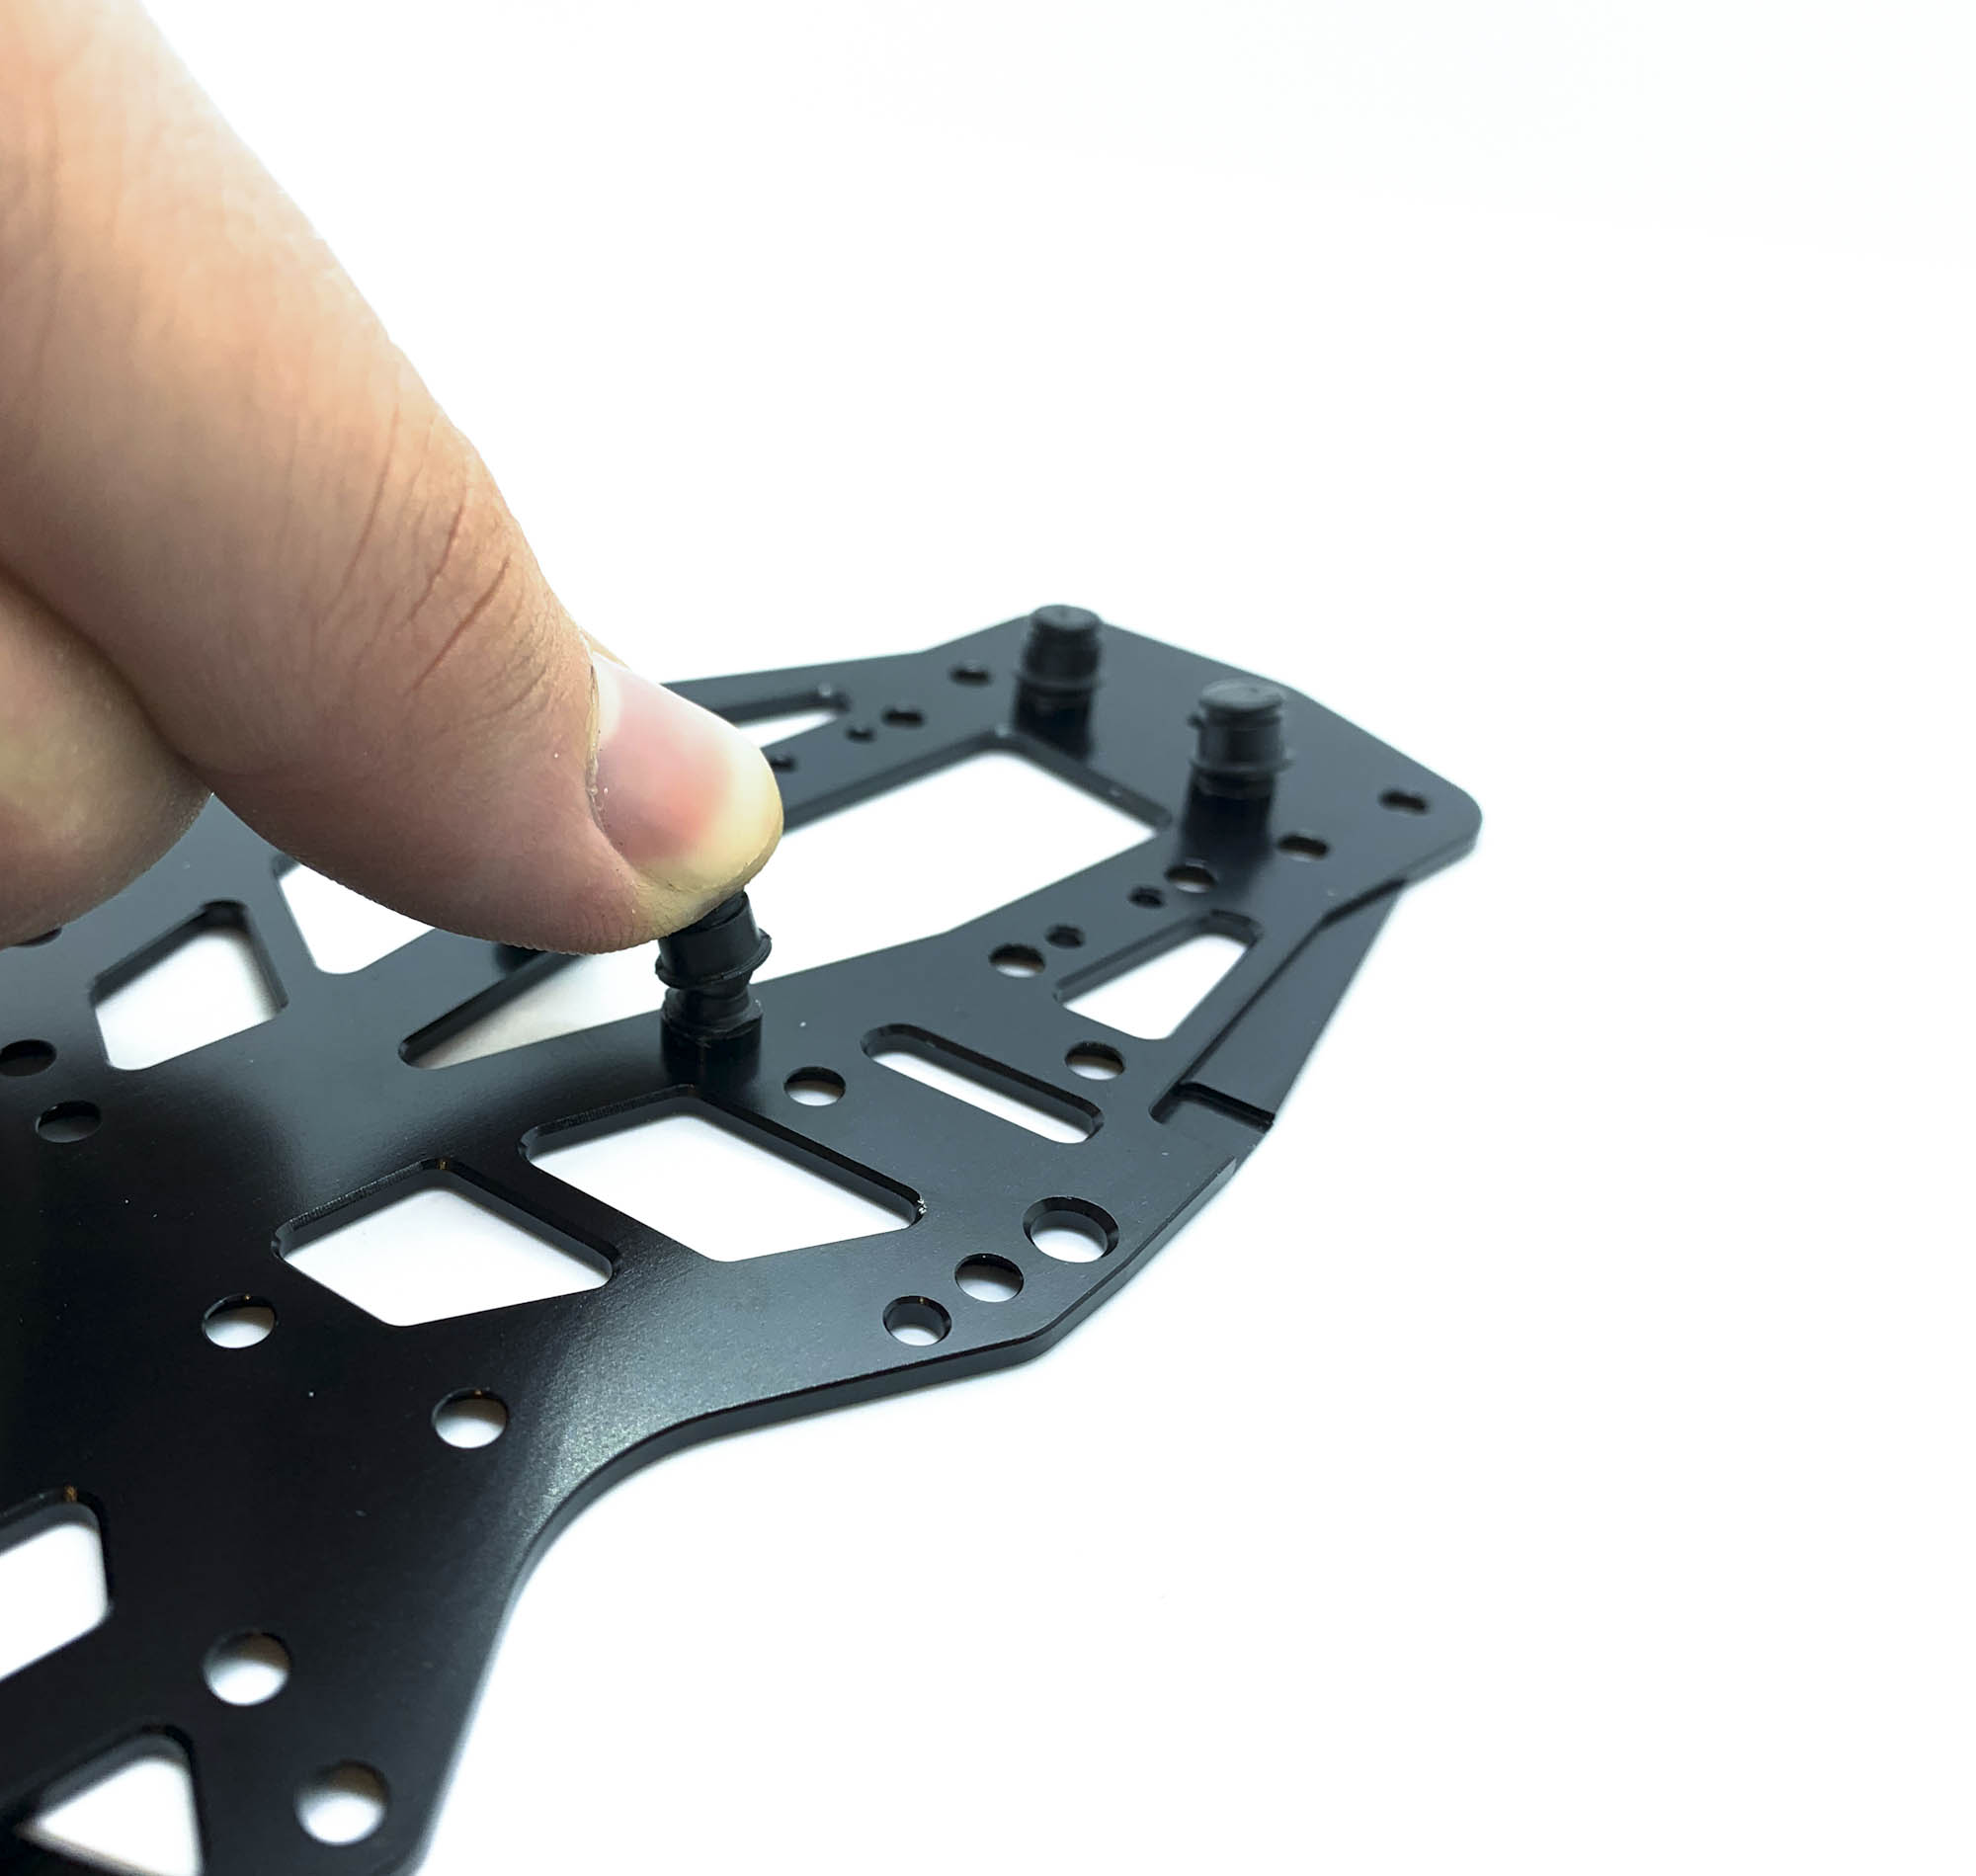
Best way to press the P03 on the balls is using your thumb. Don't use any hard material tool for this, otherwise you can damage or split the P03.
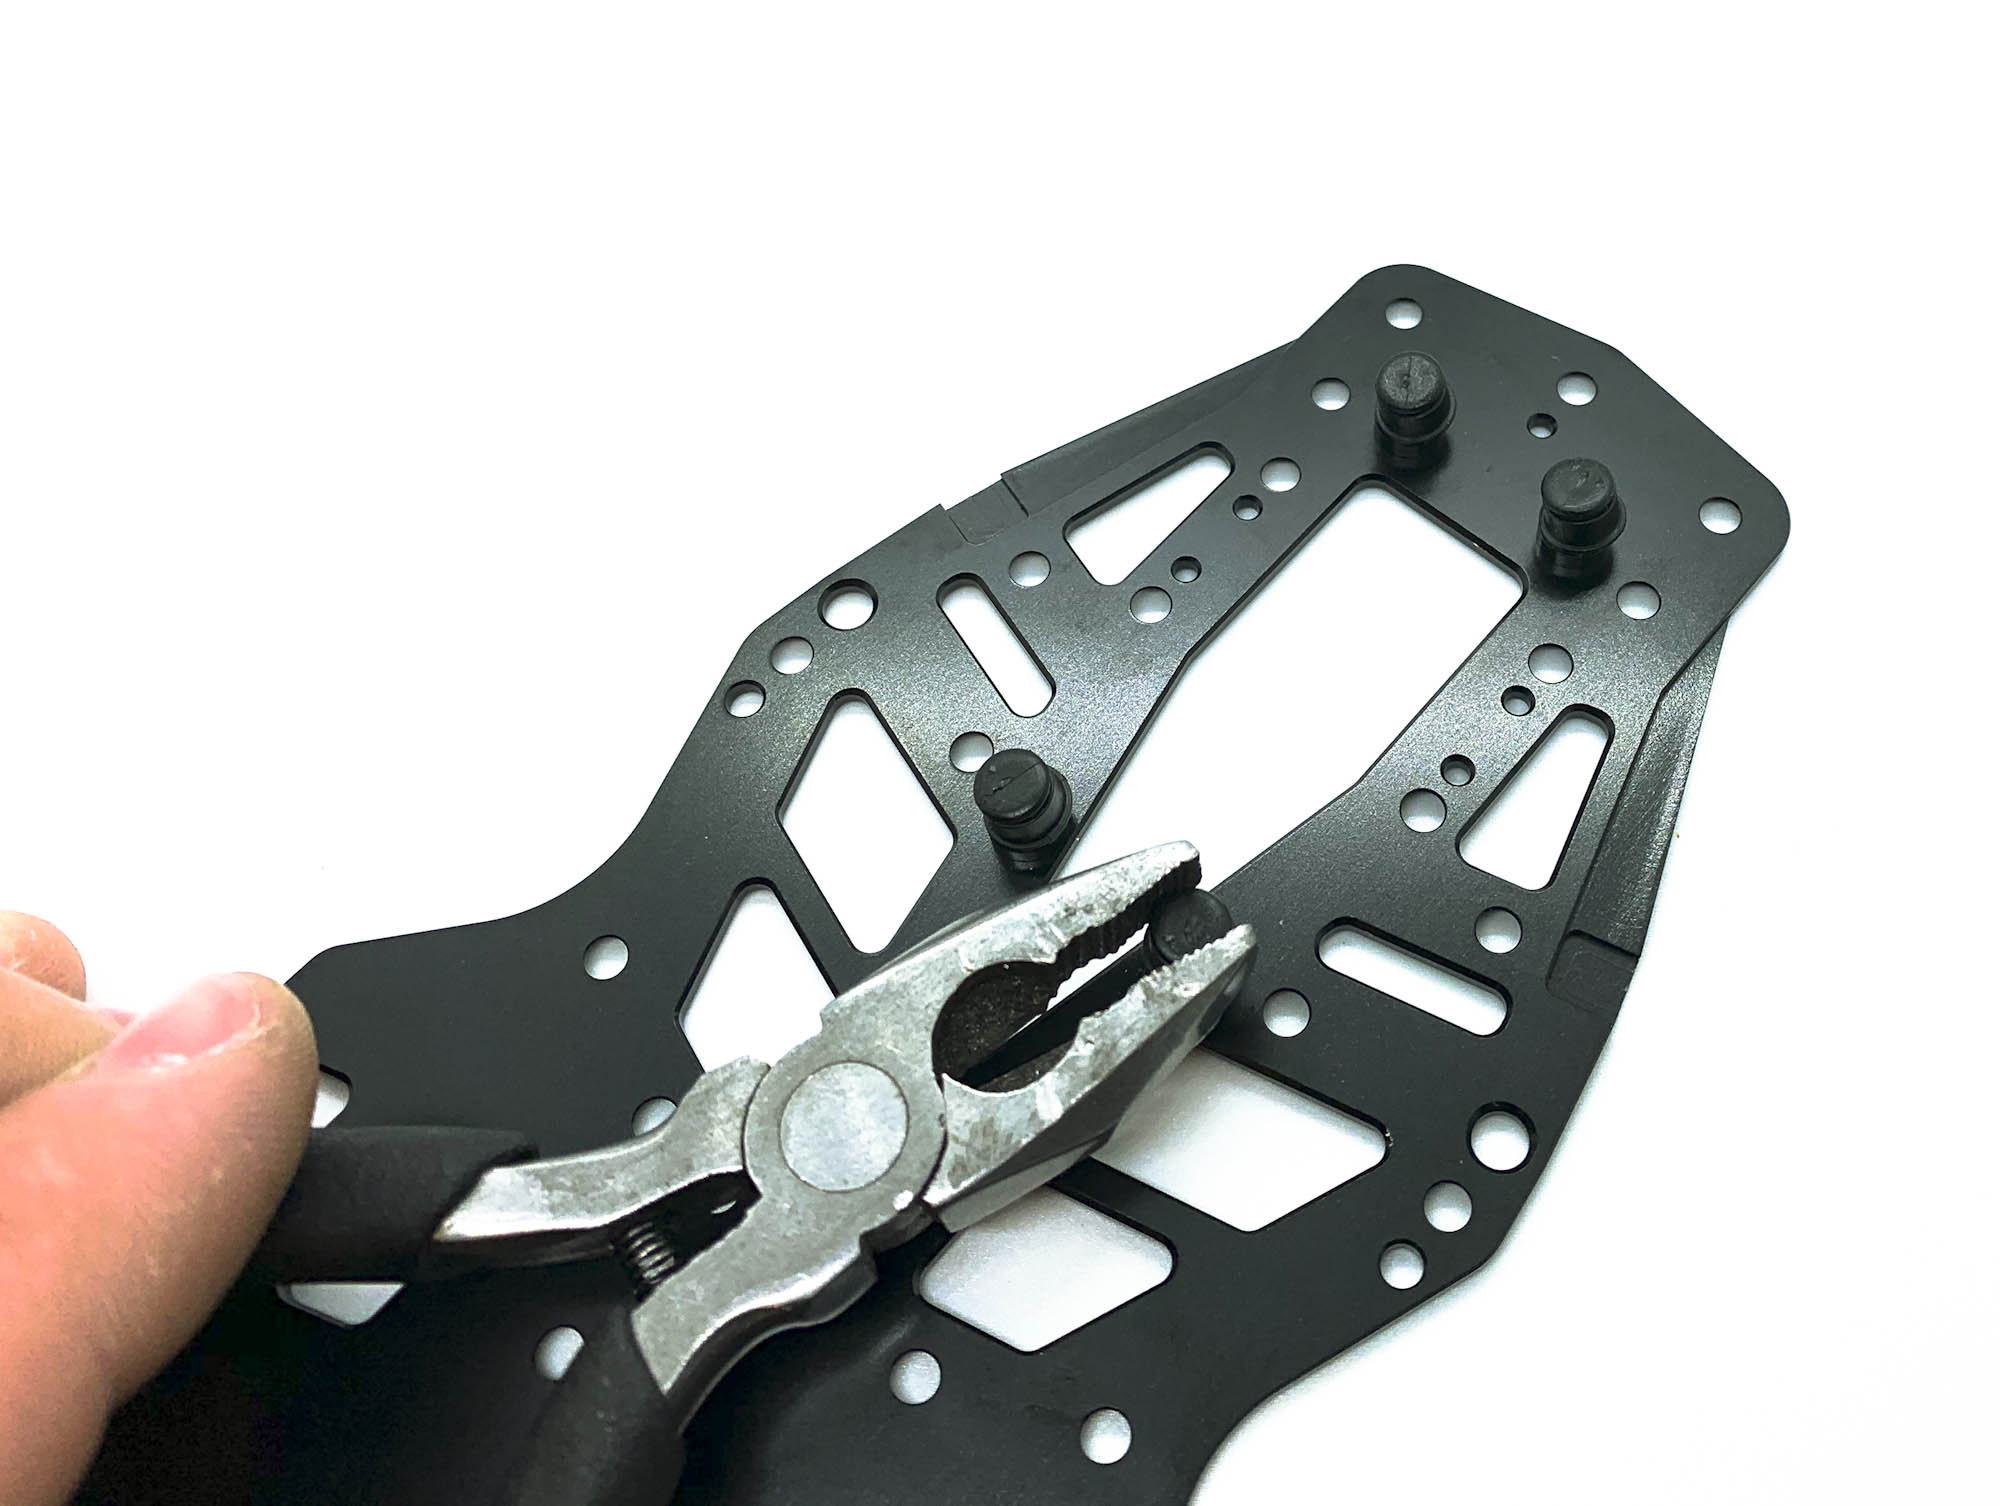
Pliers can be used to press the P03 after installation. This can help to free up the movement on the balls.
The AM78X1 bulkheads got a small "running change". The front nose is a bit longer now and act act as dirtect bumper support in case the optional C07A is used.
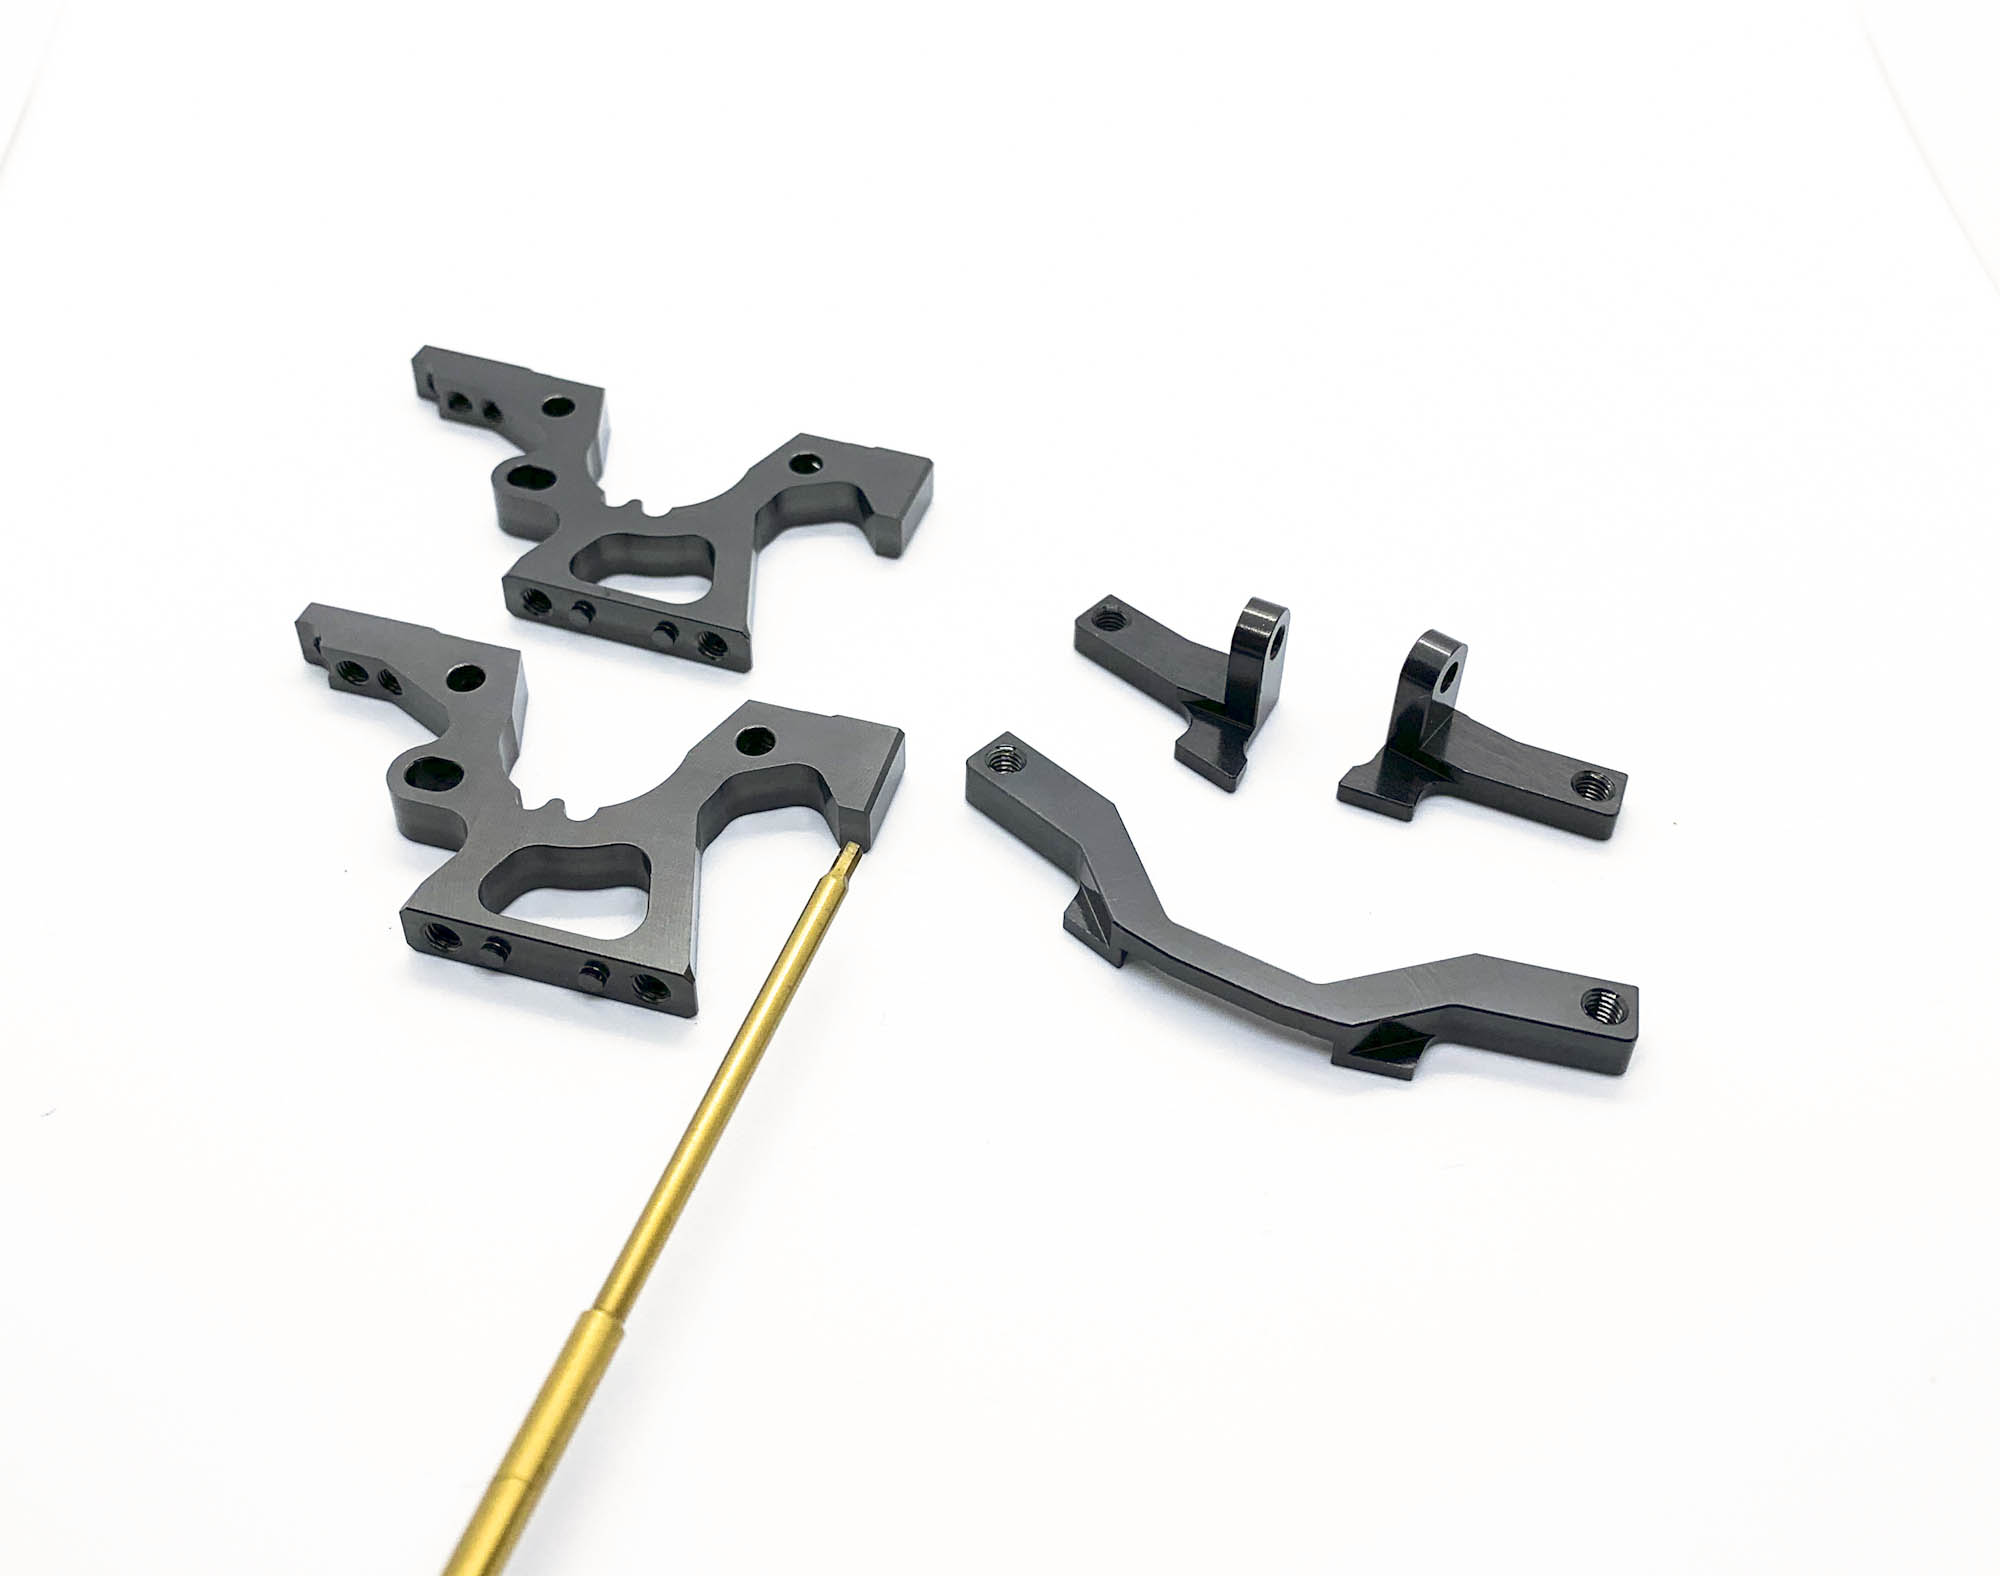
Don't forget to screw the ST24 into AM78X1 on rear before you install them on the chassis. Otherwise you will be unhappy later :-D
The rear Bulkheads also need AM88L/R to fix the damper holders at later stage.
In front are no AM88 parts used anymore.
Here we will need the AM08-3 "bridge" damper holder then.
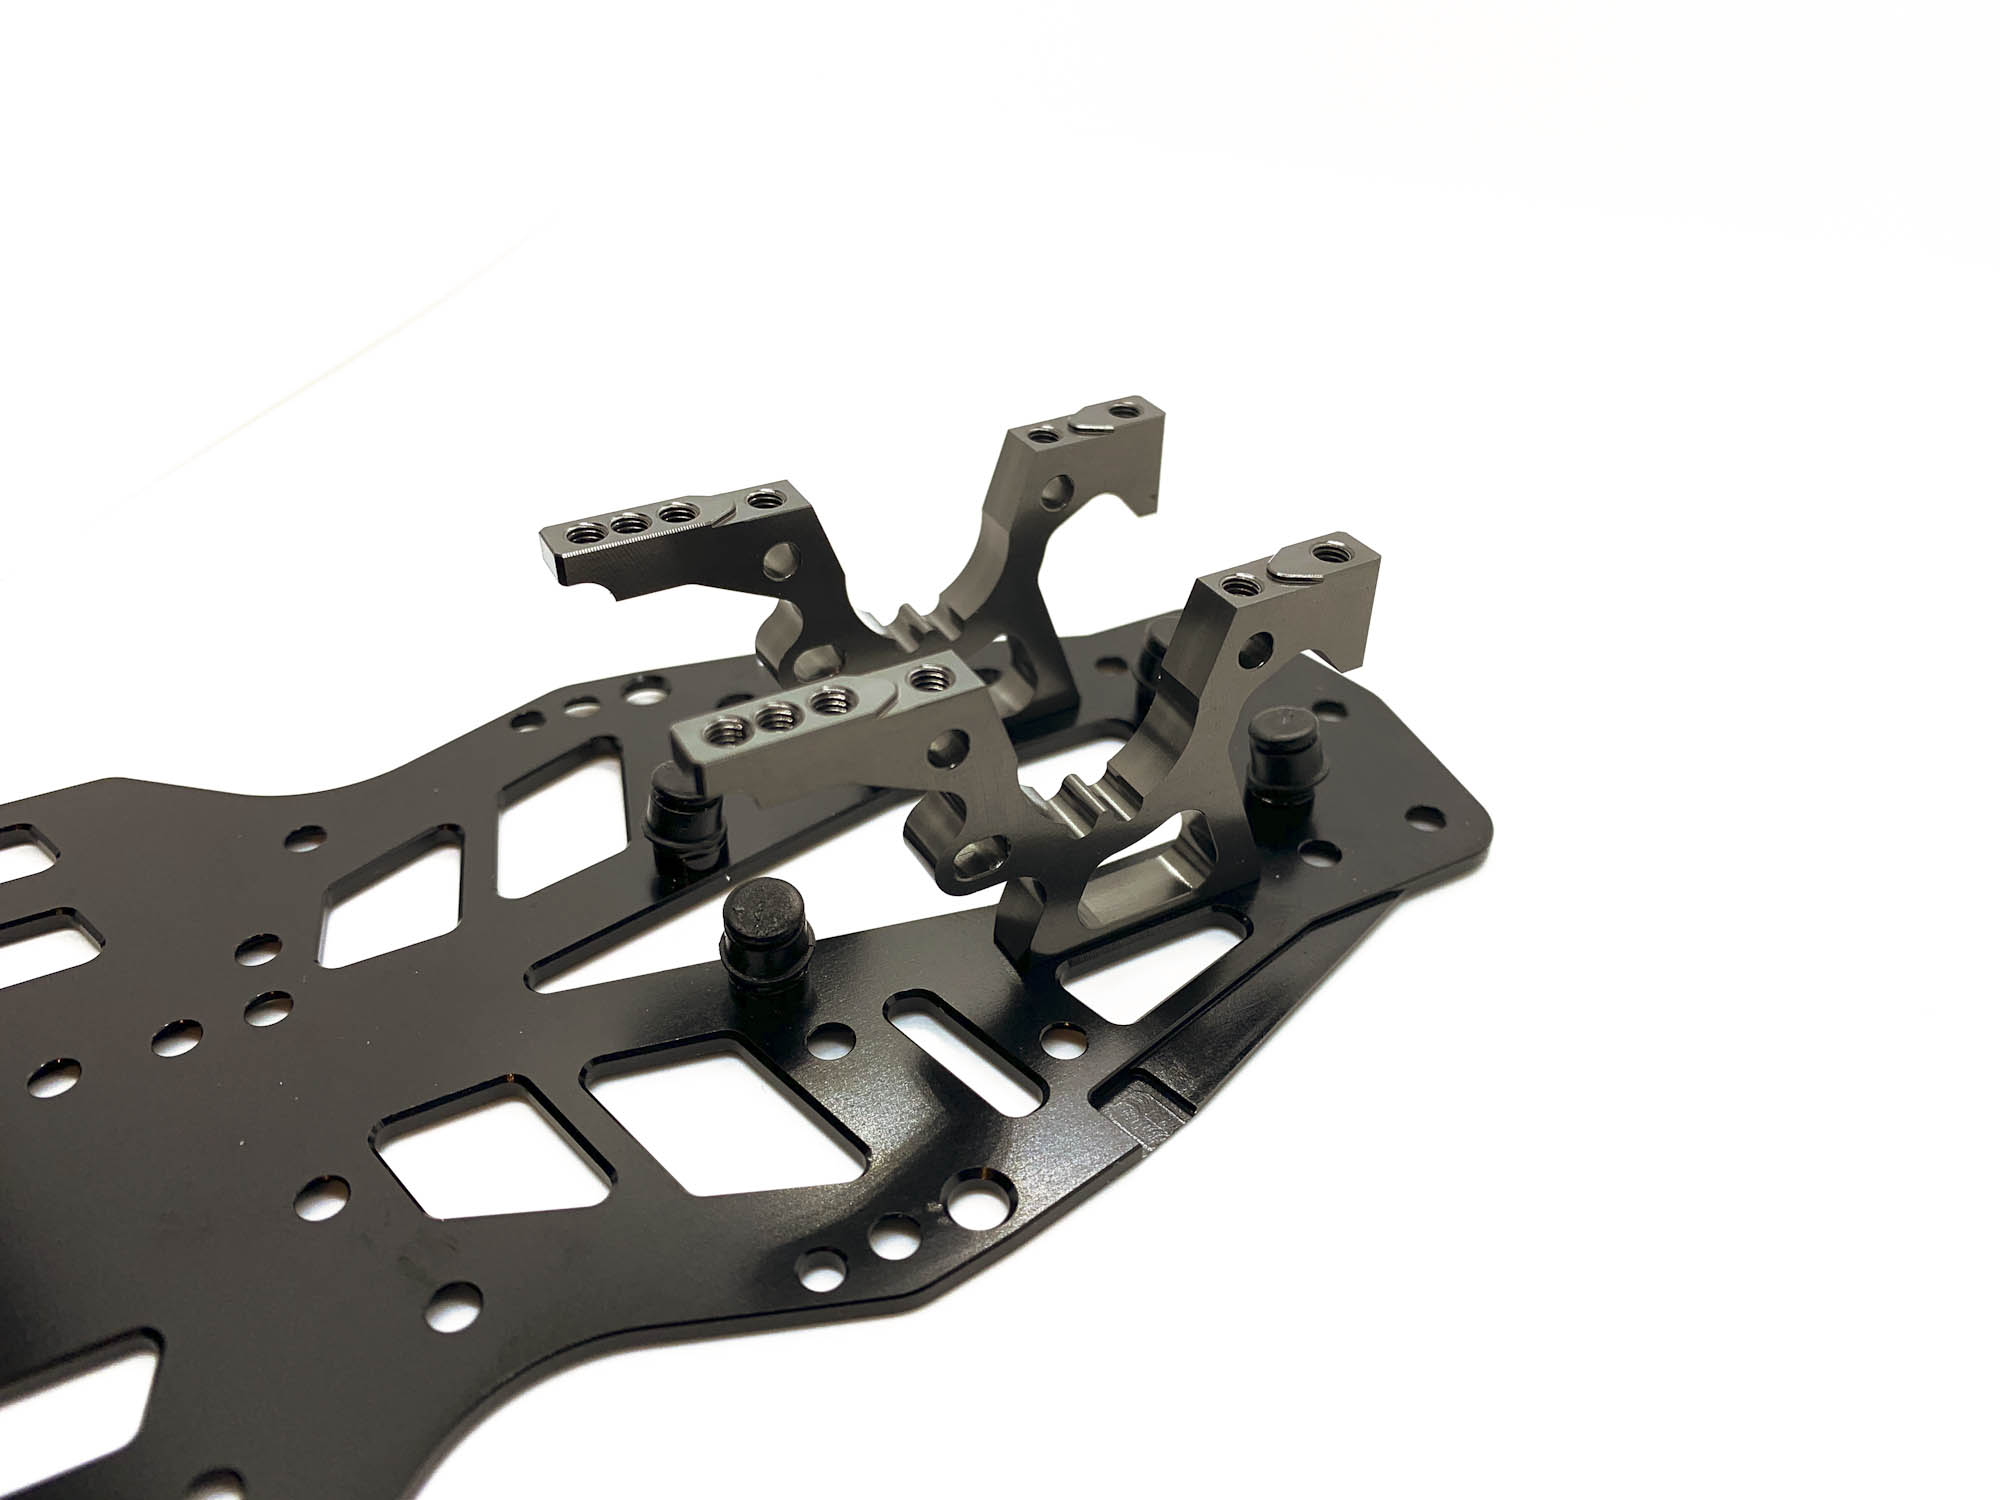
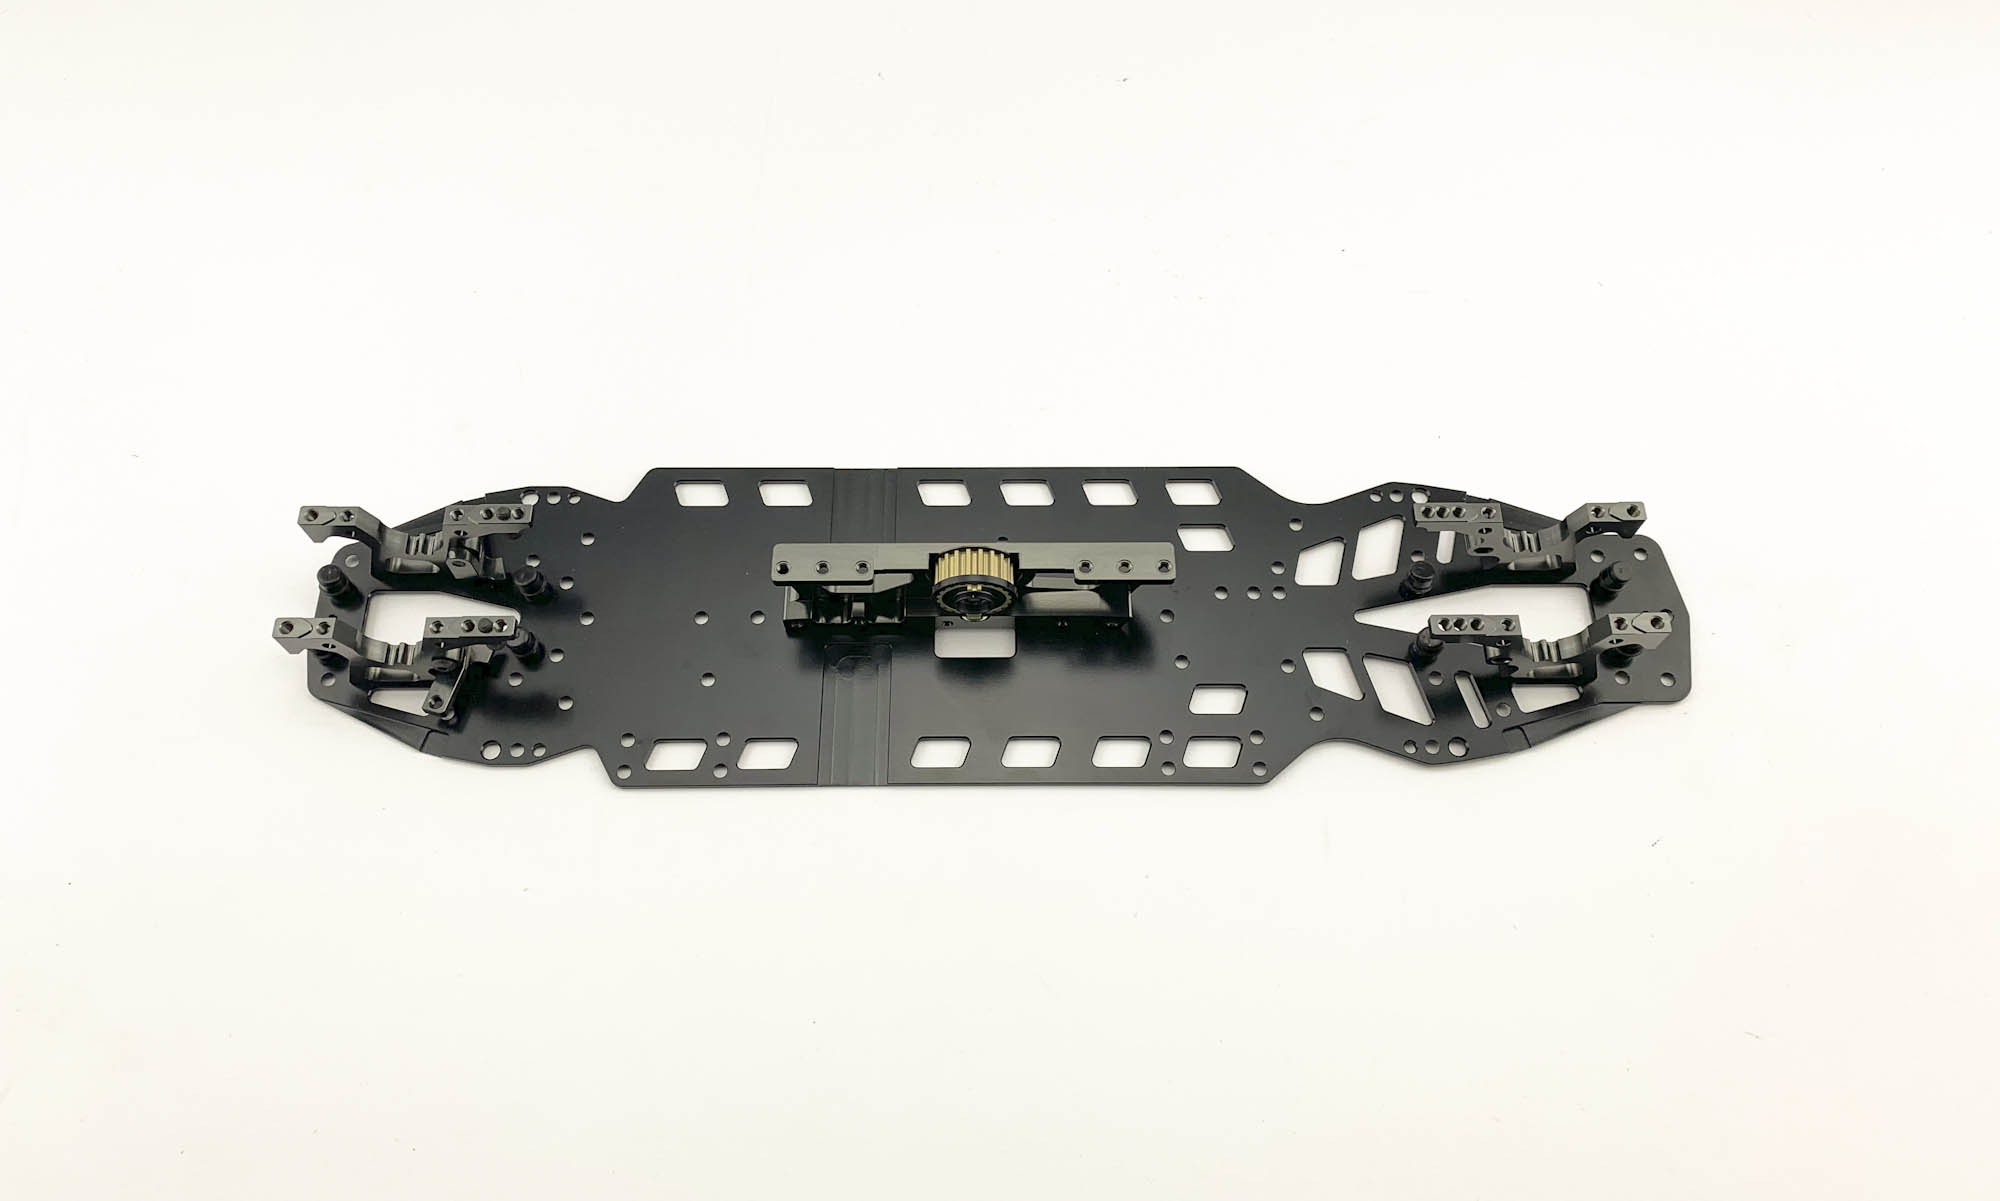
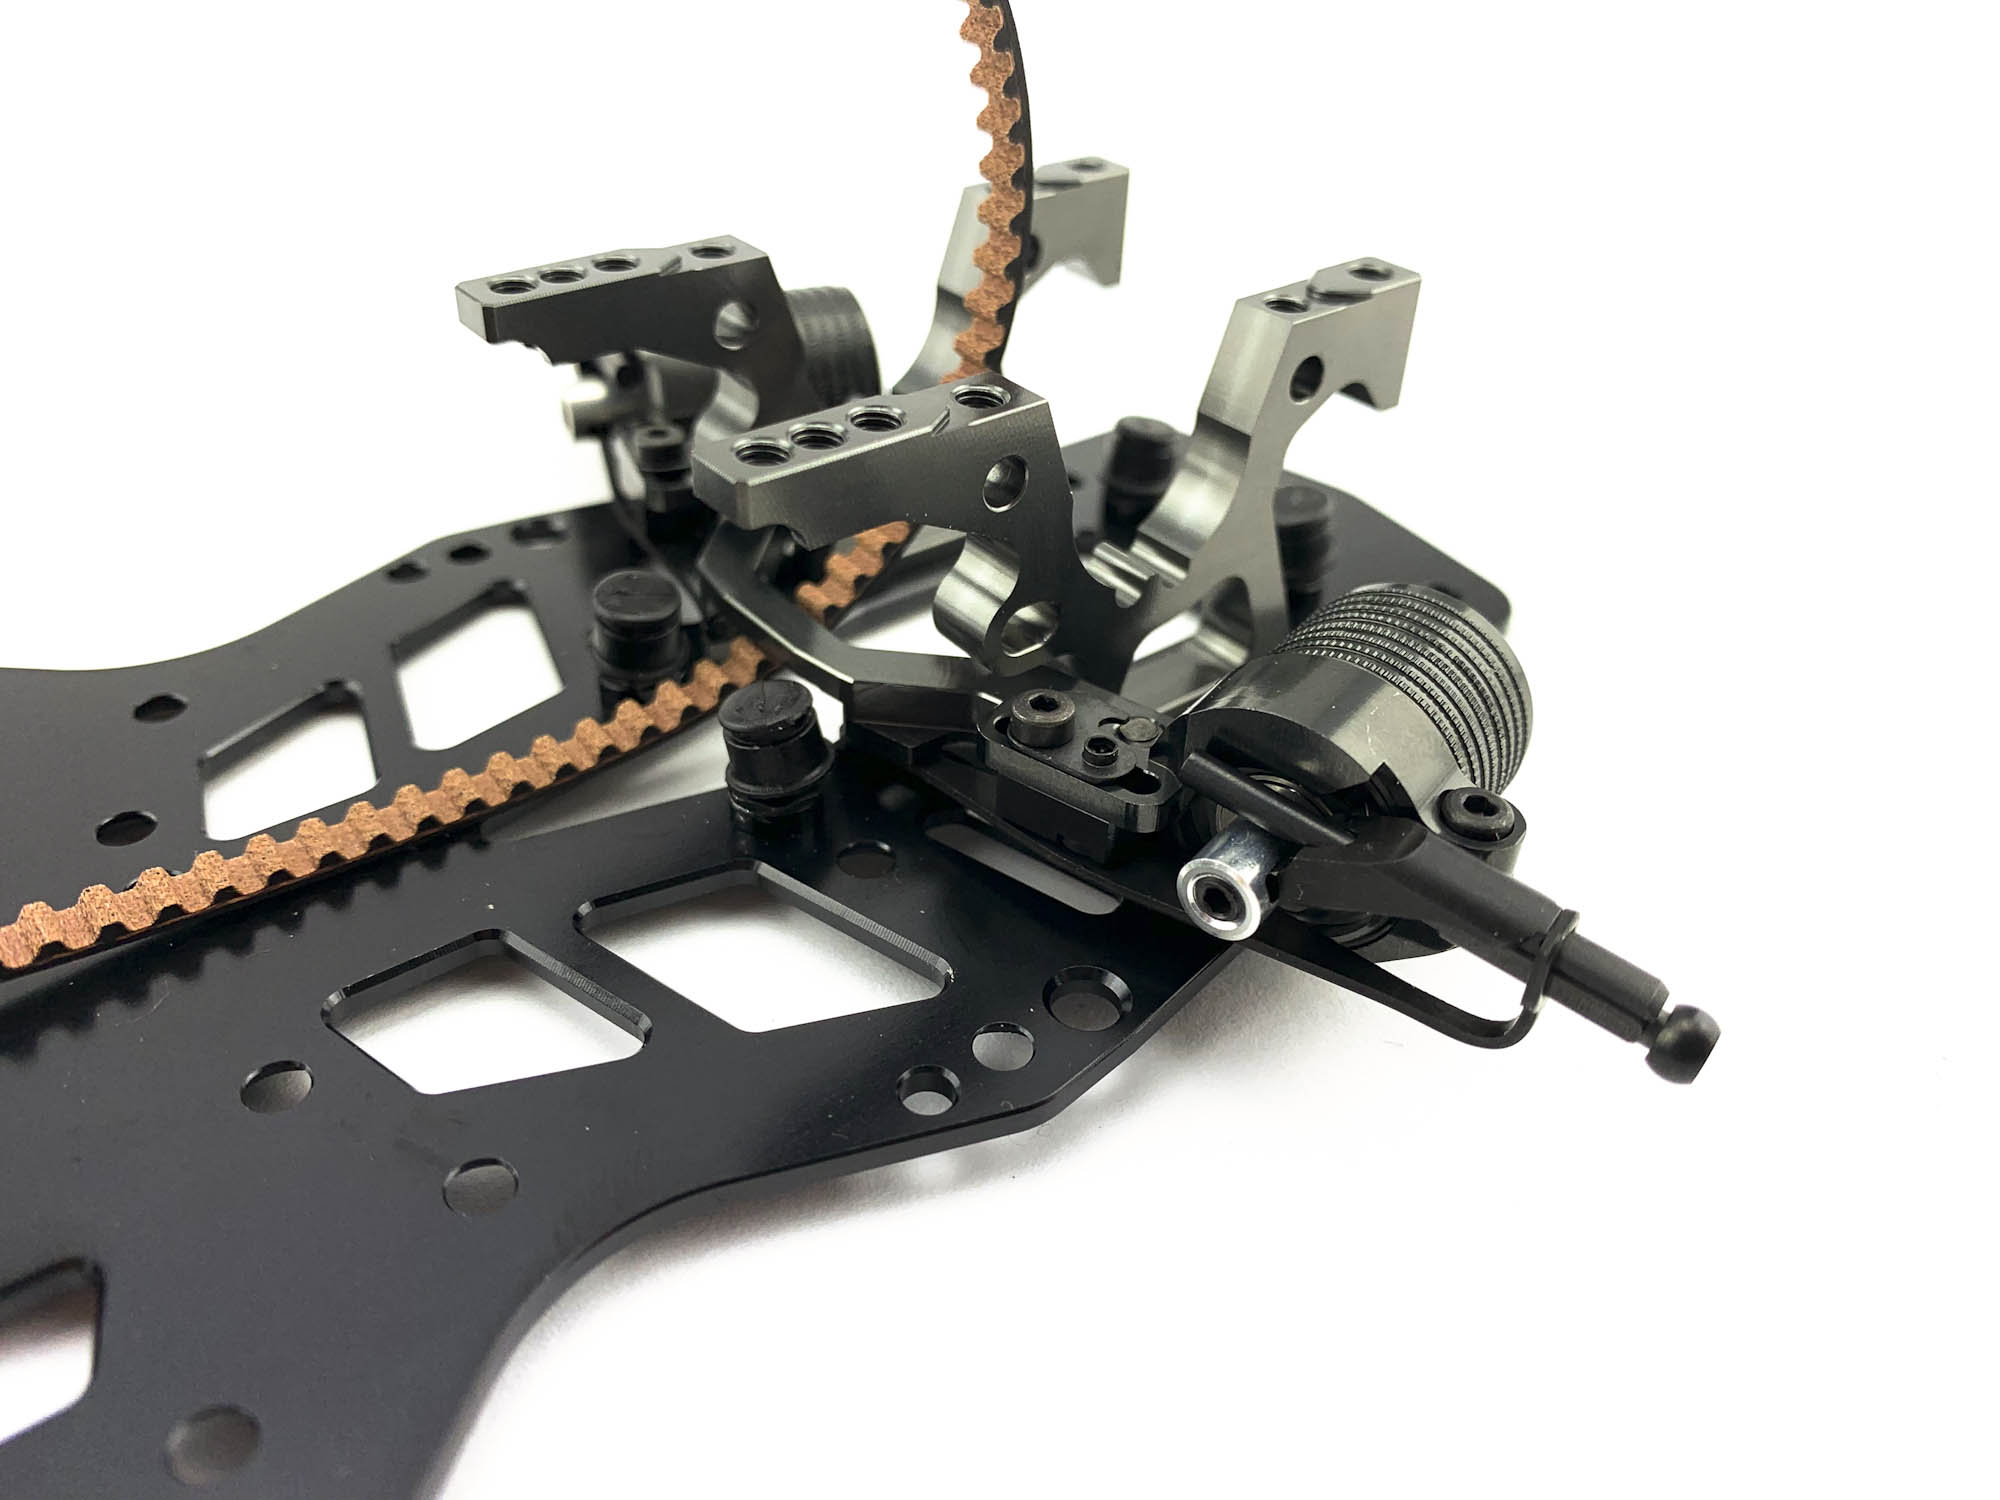
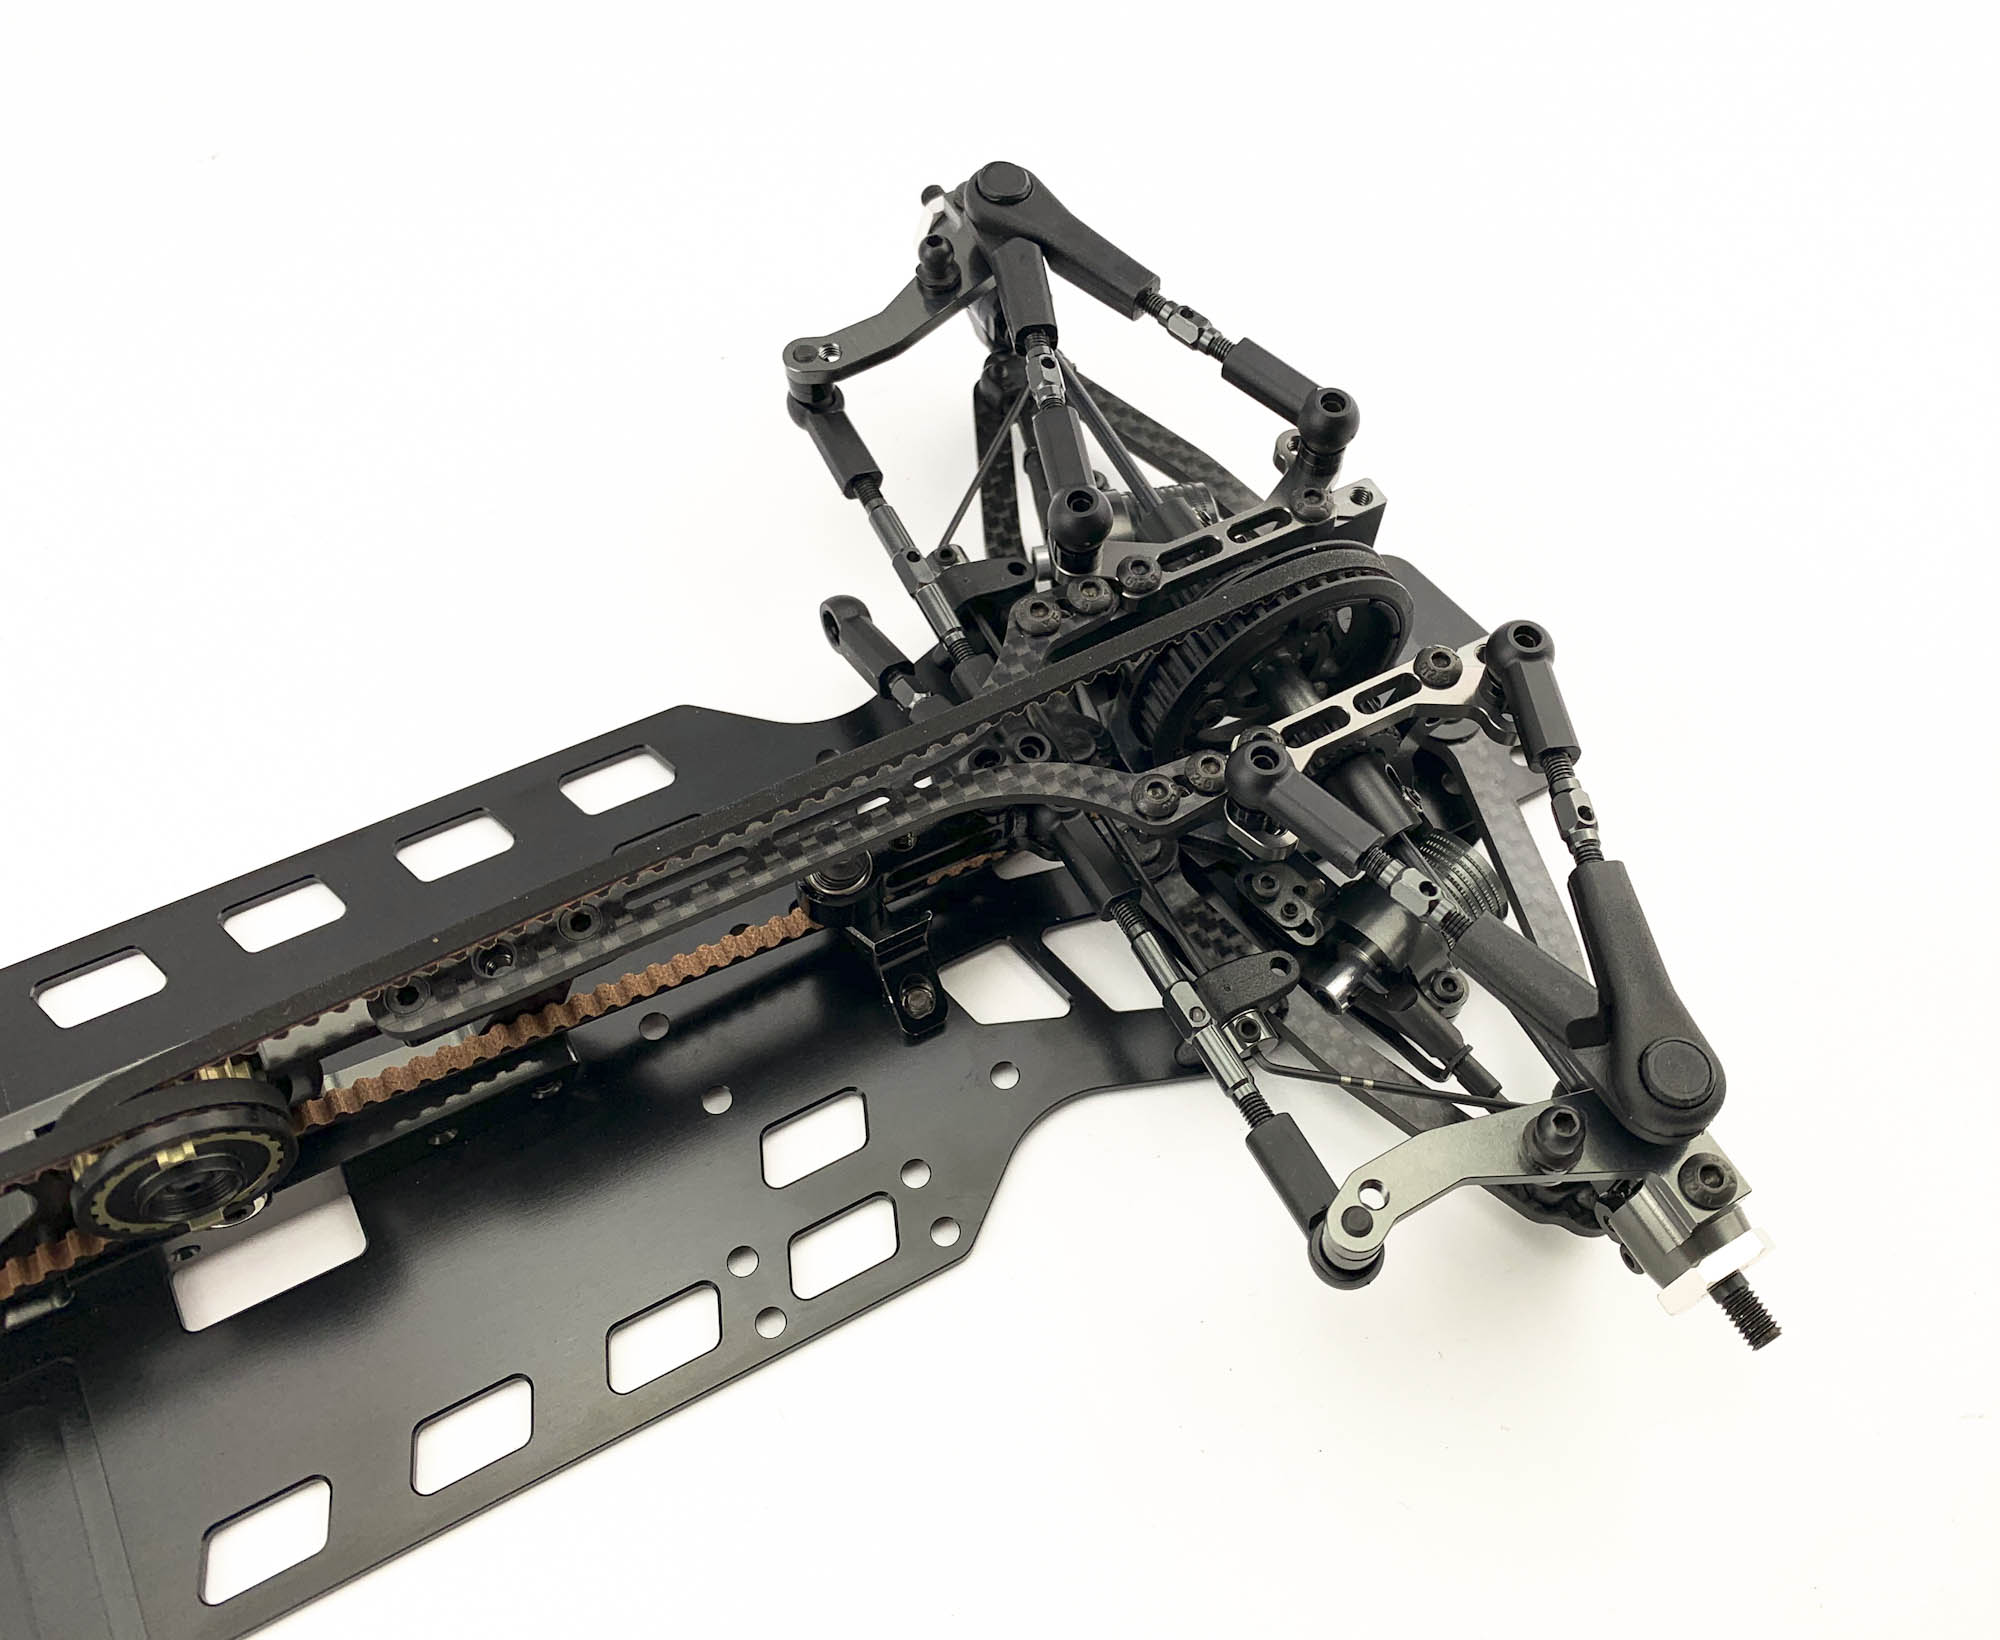
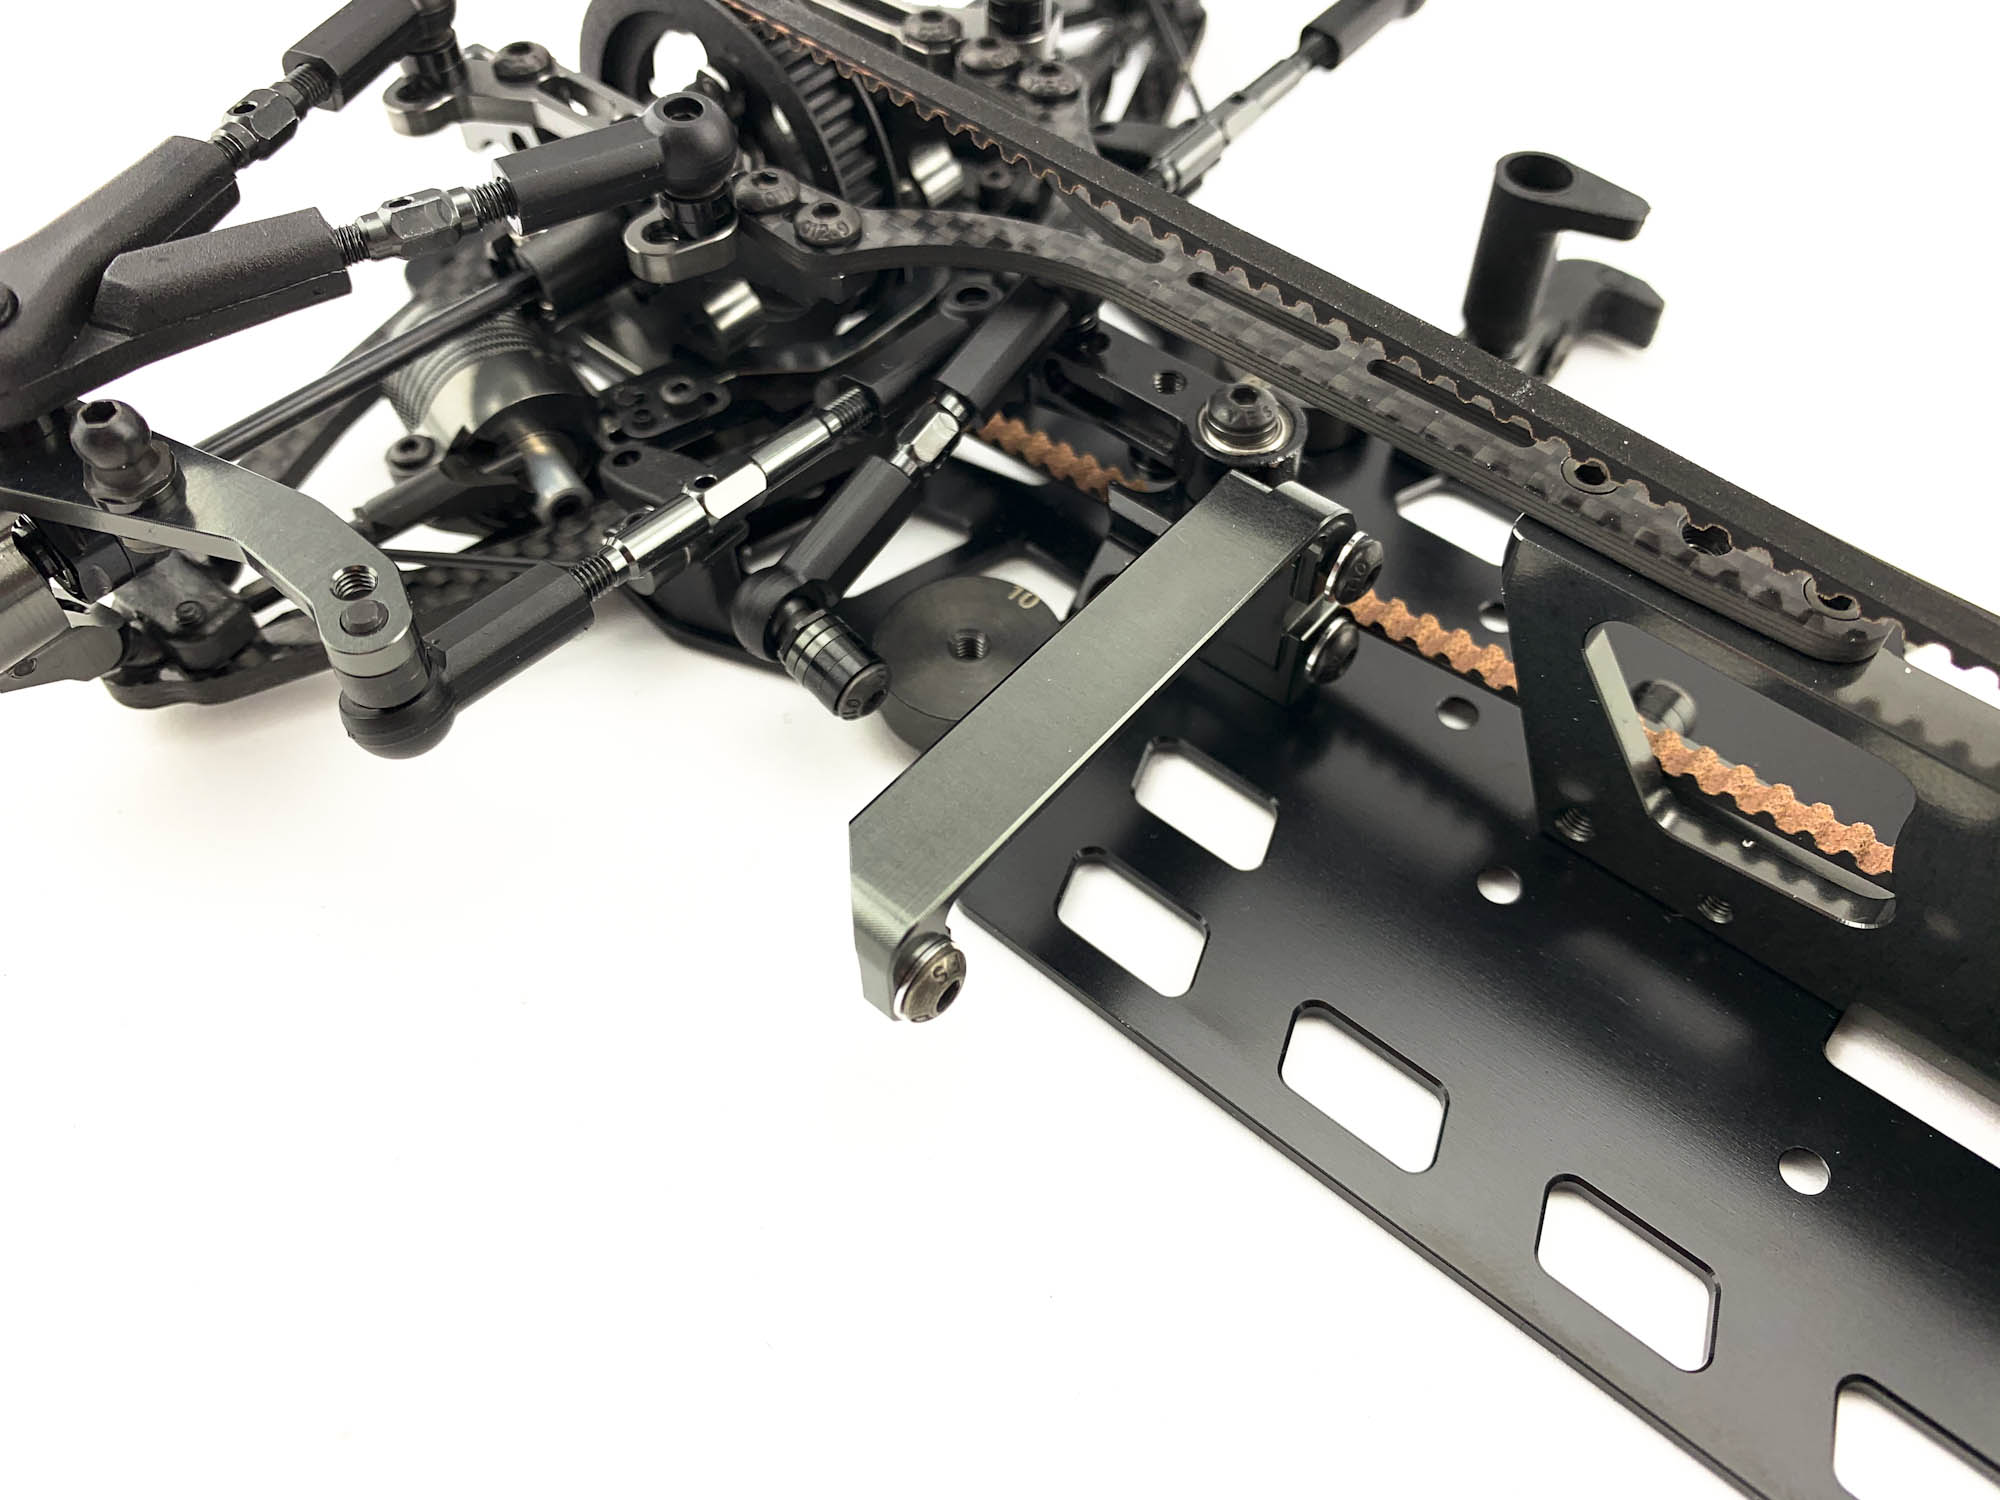
A new masterpiece is the AM177 Motormount of the MMX kit. A bit longer than the old AM77MM and with more mounting points for the two pieces topdecks.
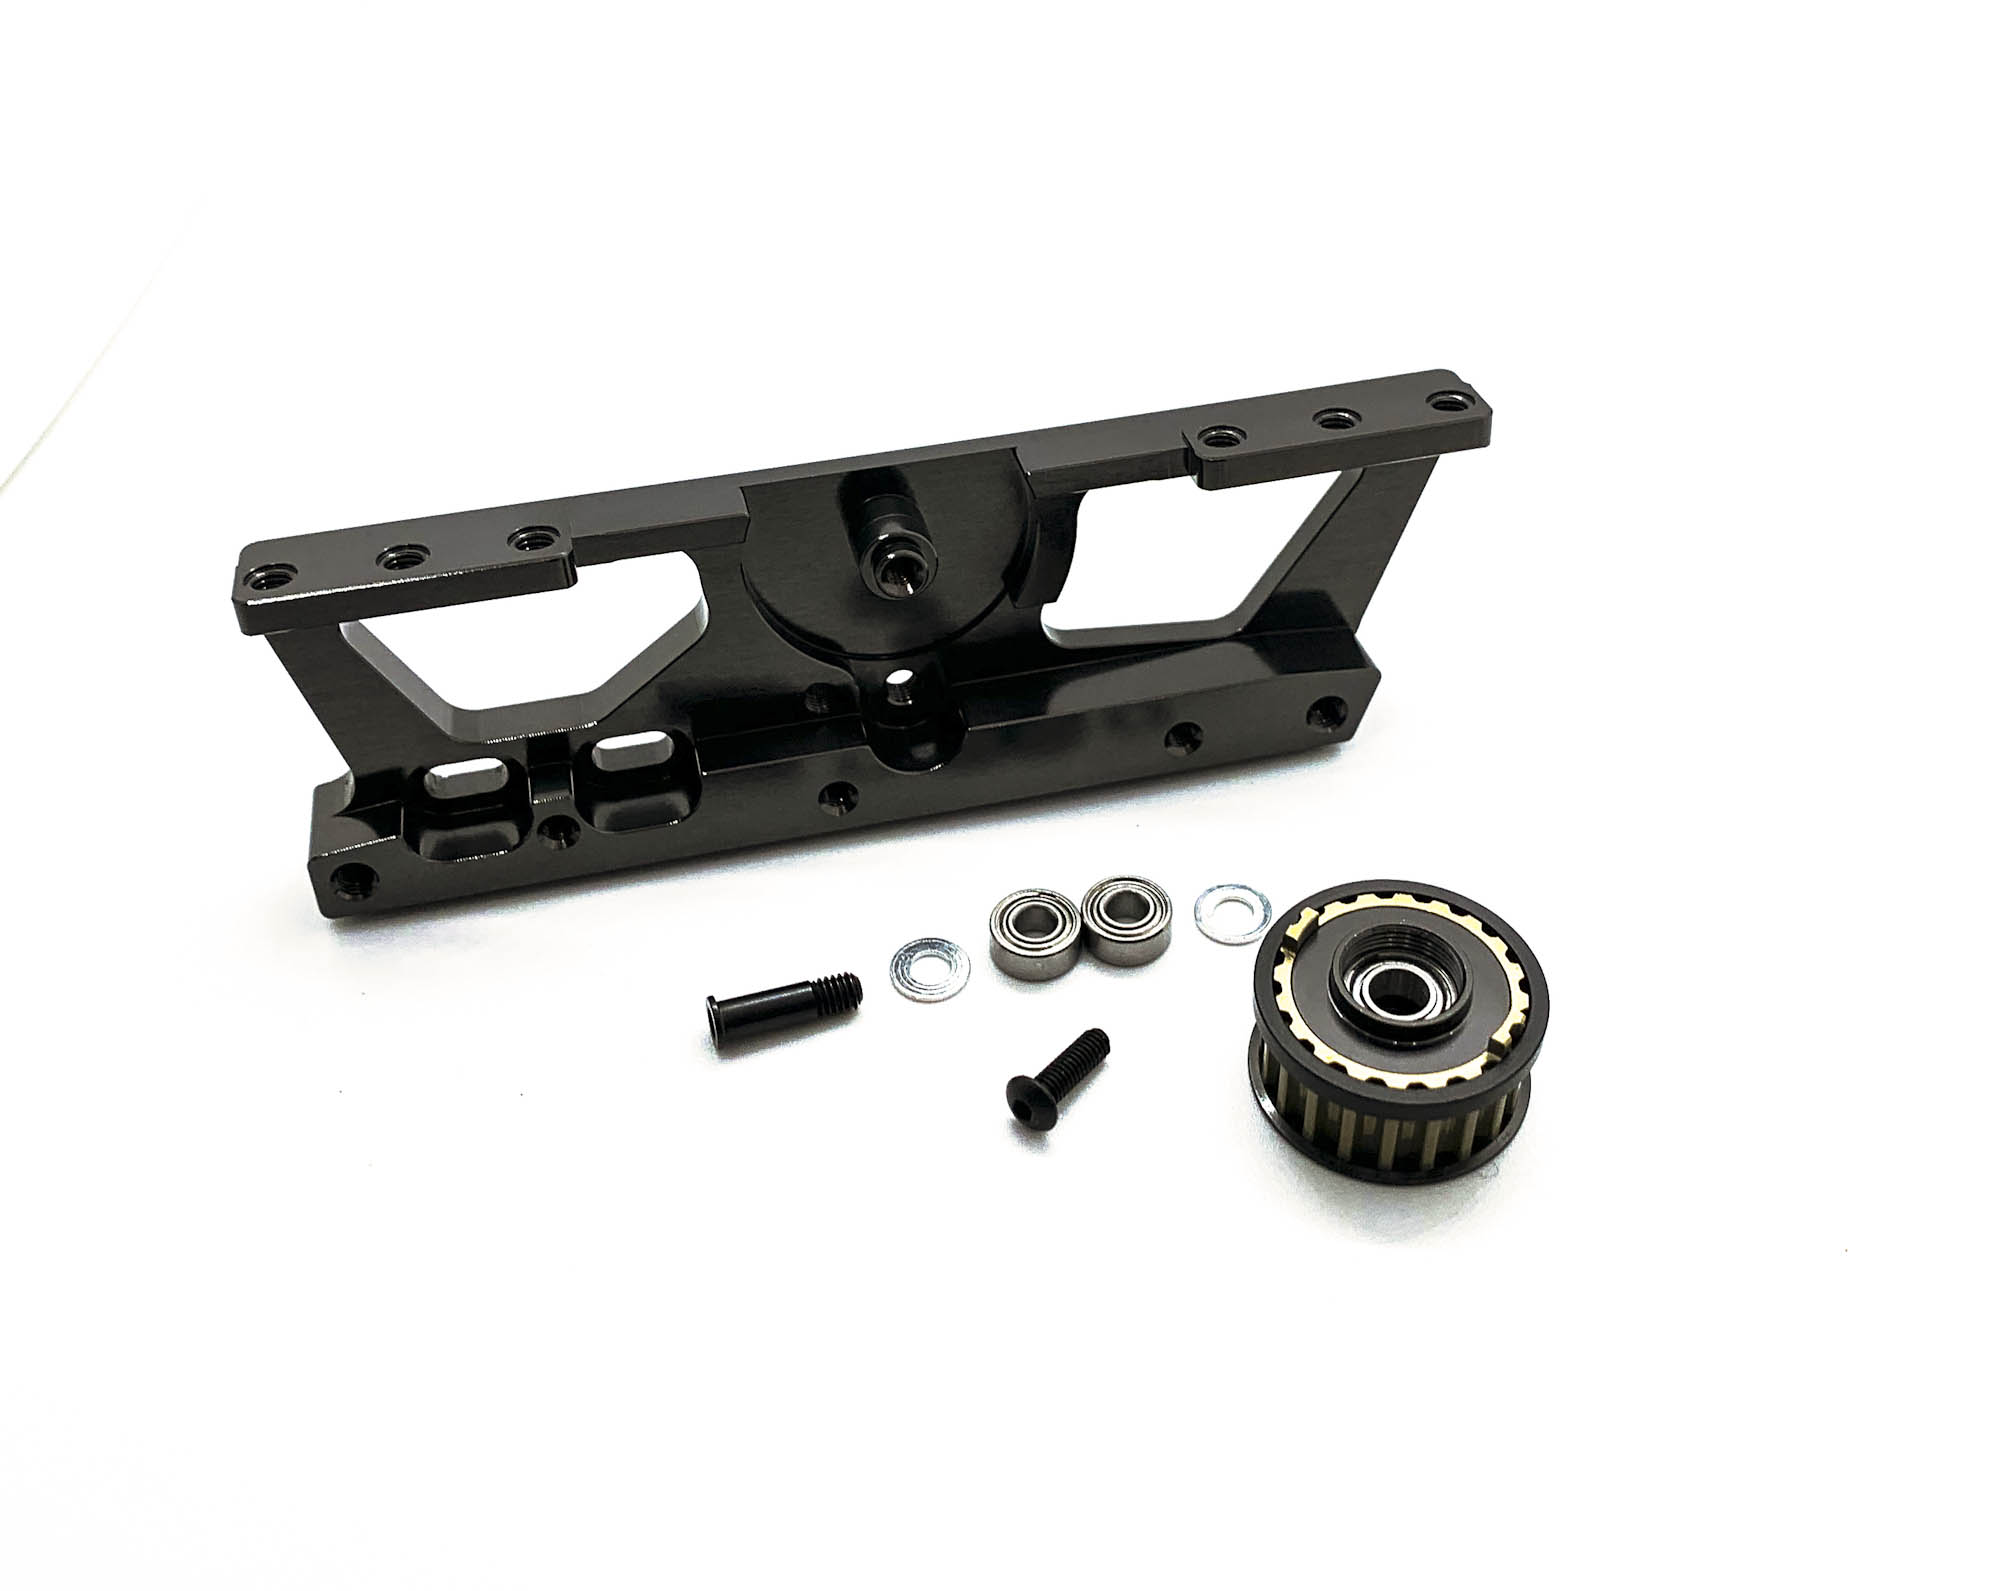
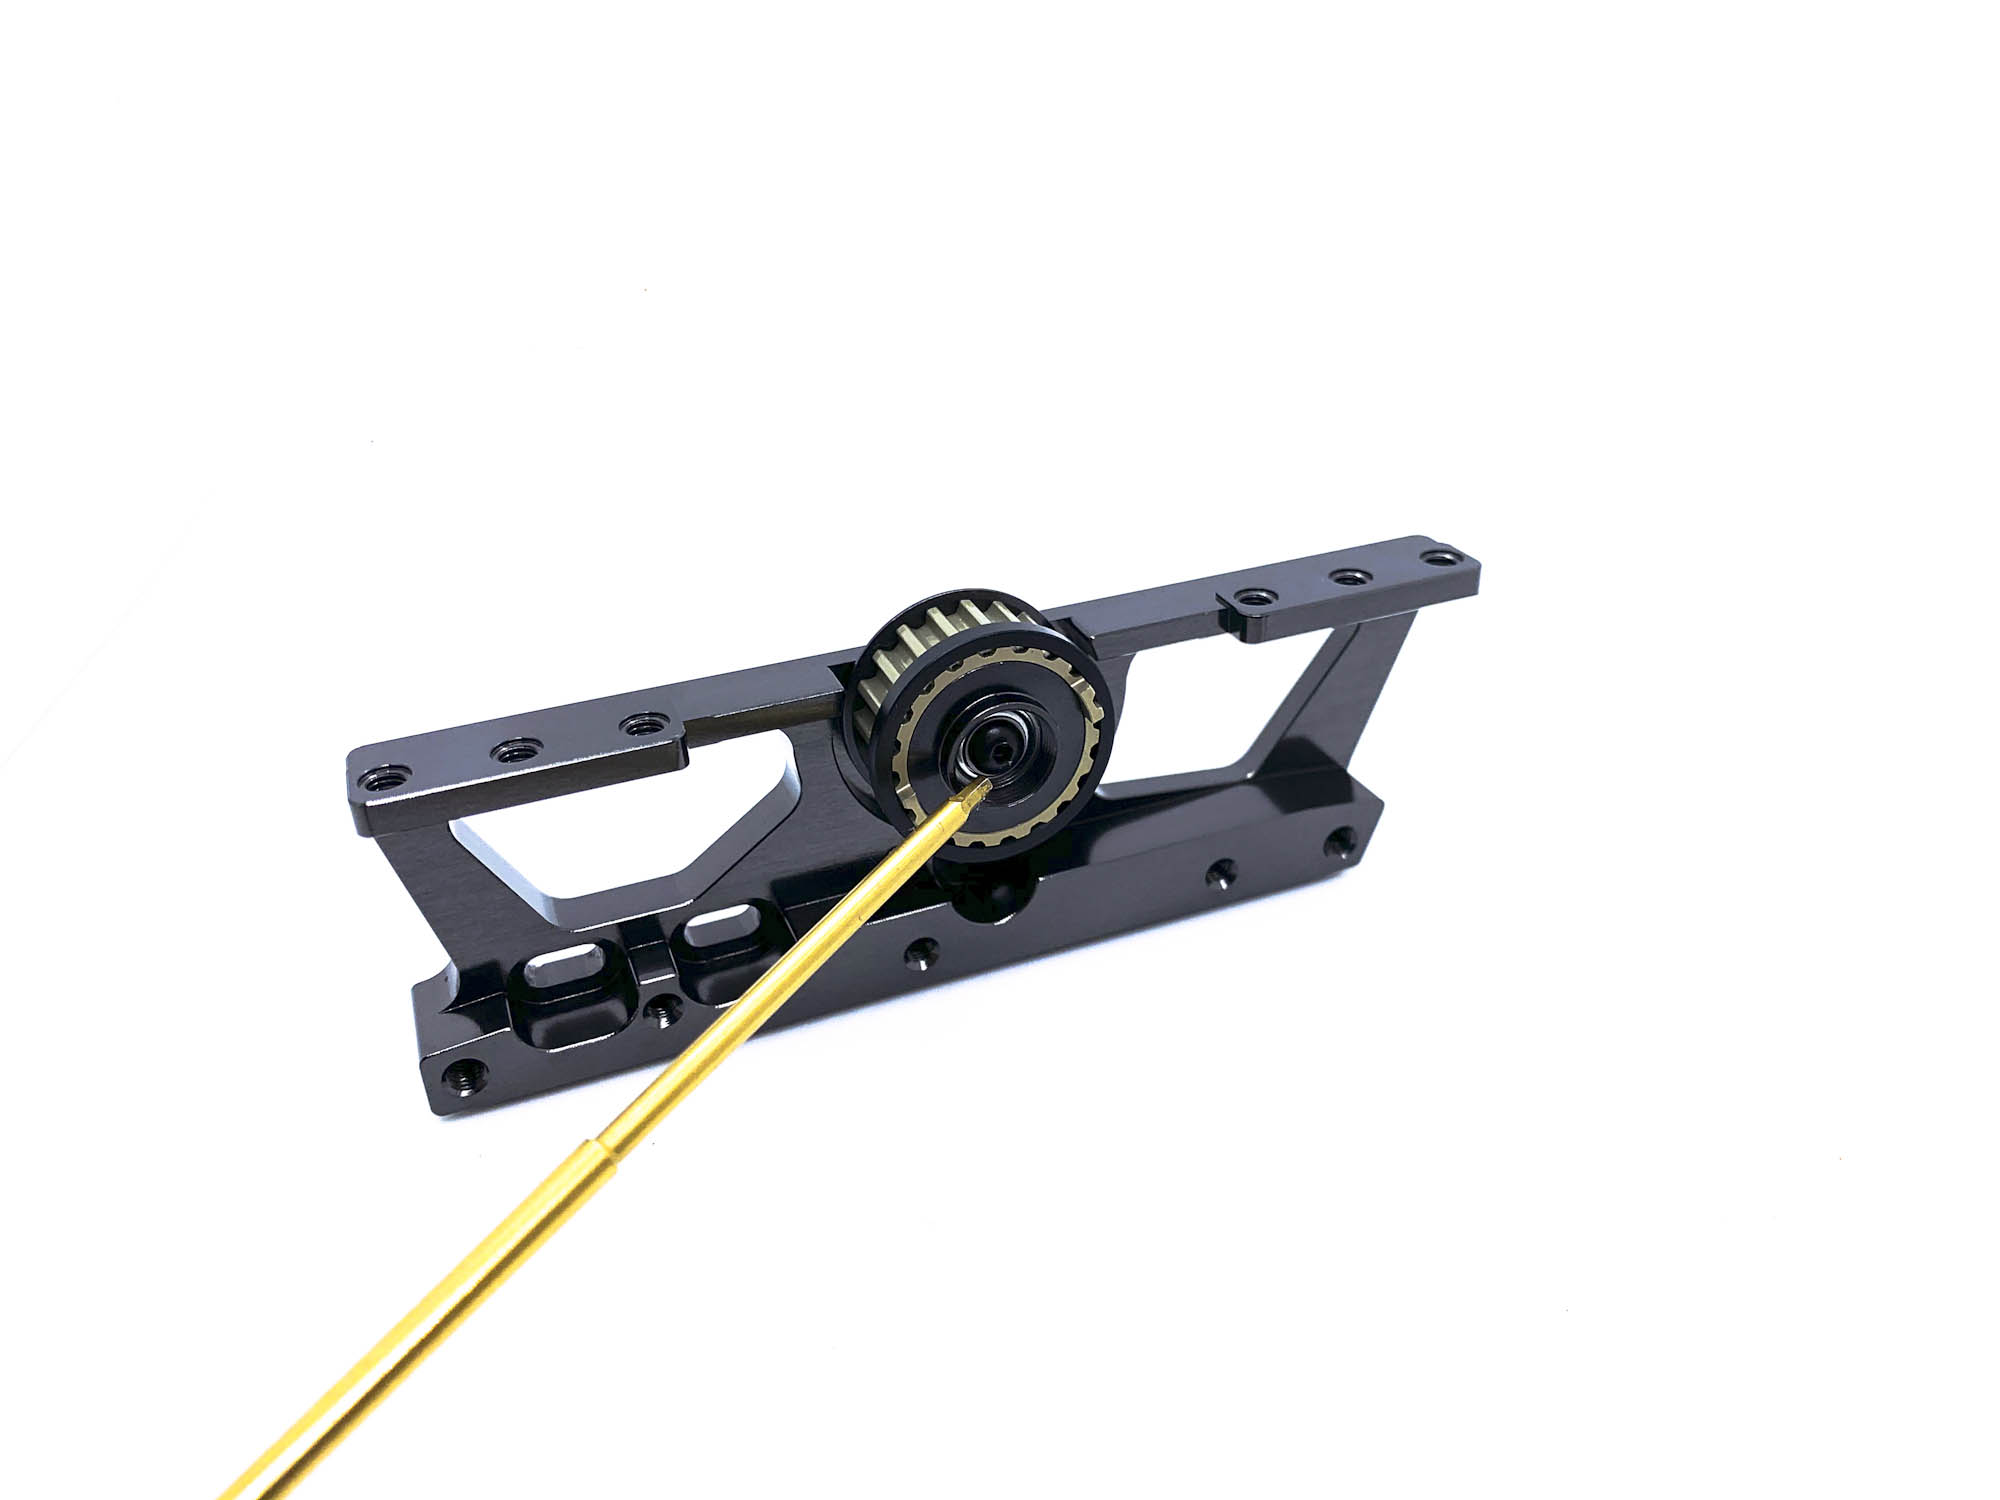
The screw to fix the AT120XB Alloy pulley is changed from M3 to M2.5 !
In the past we noted some problems for customers when they removed the AT55M spur nut and went to deep inside and turned off also the screw of the pulley. This can't happen anymore because the M2,5 screw is 1,5mm head.
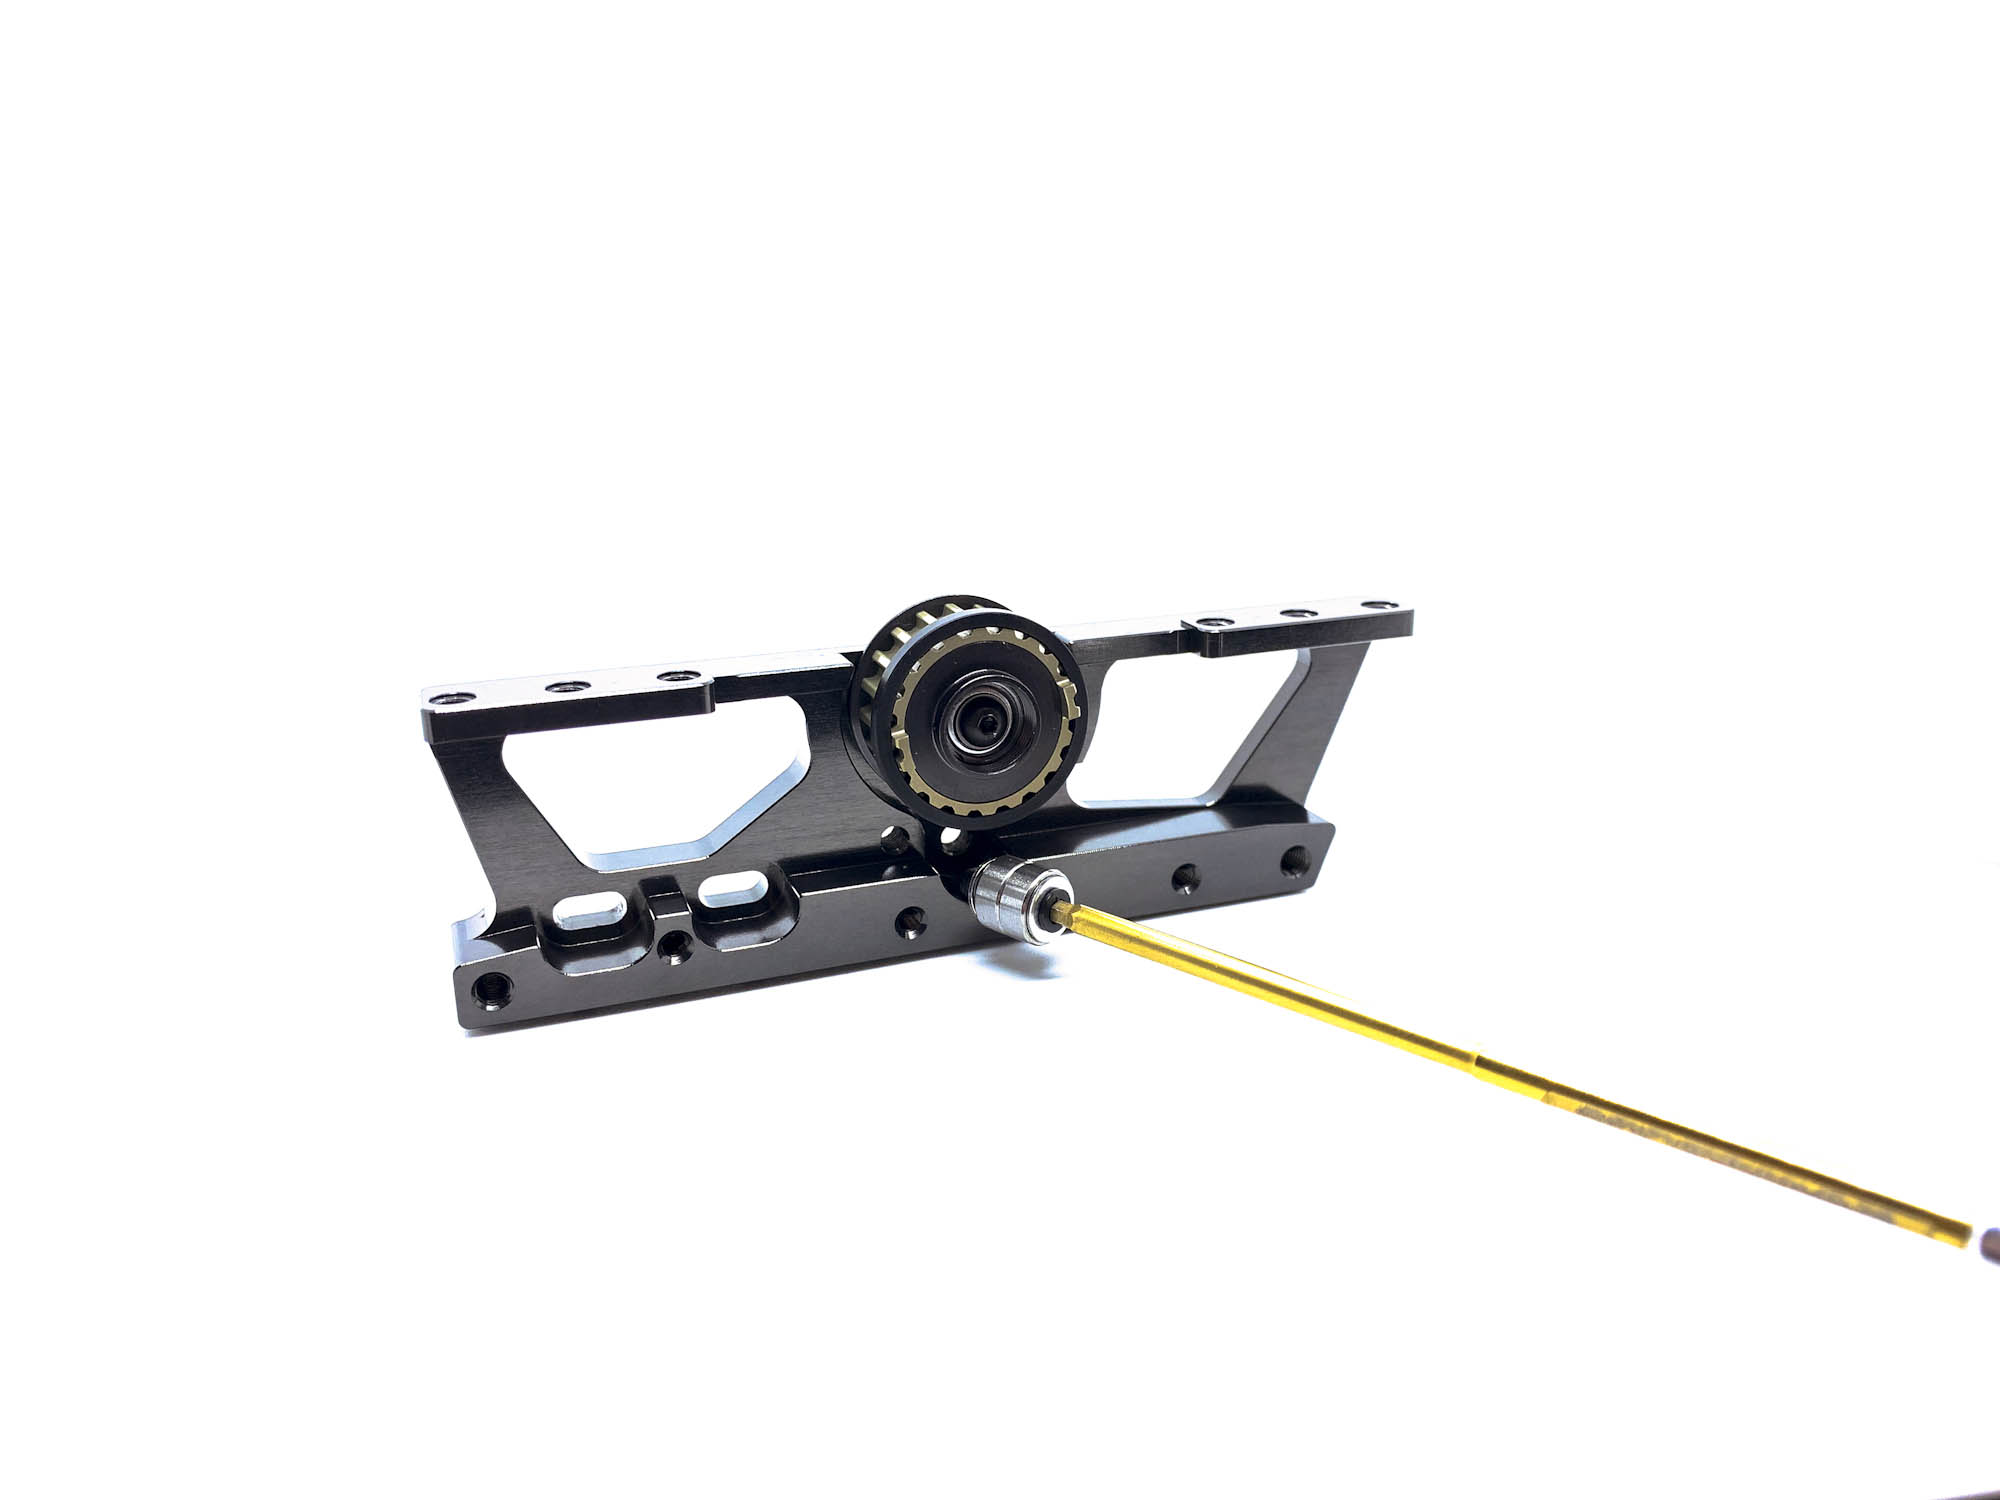
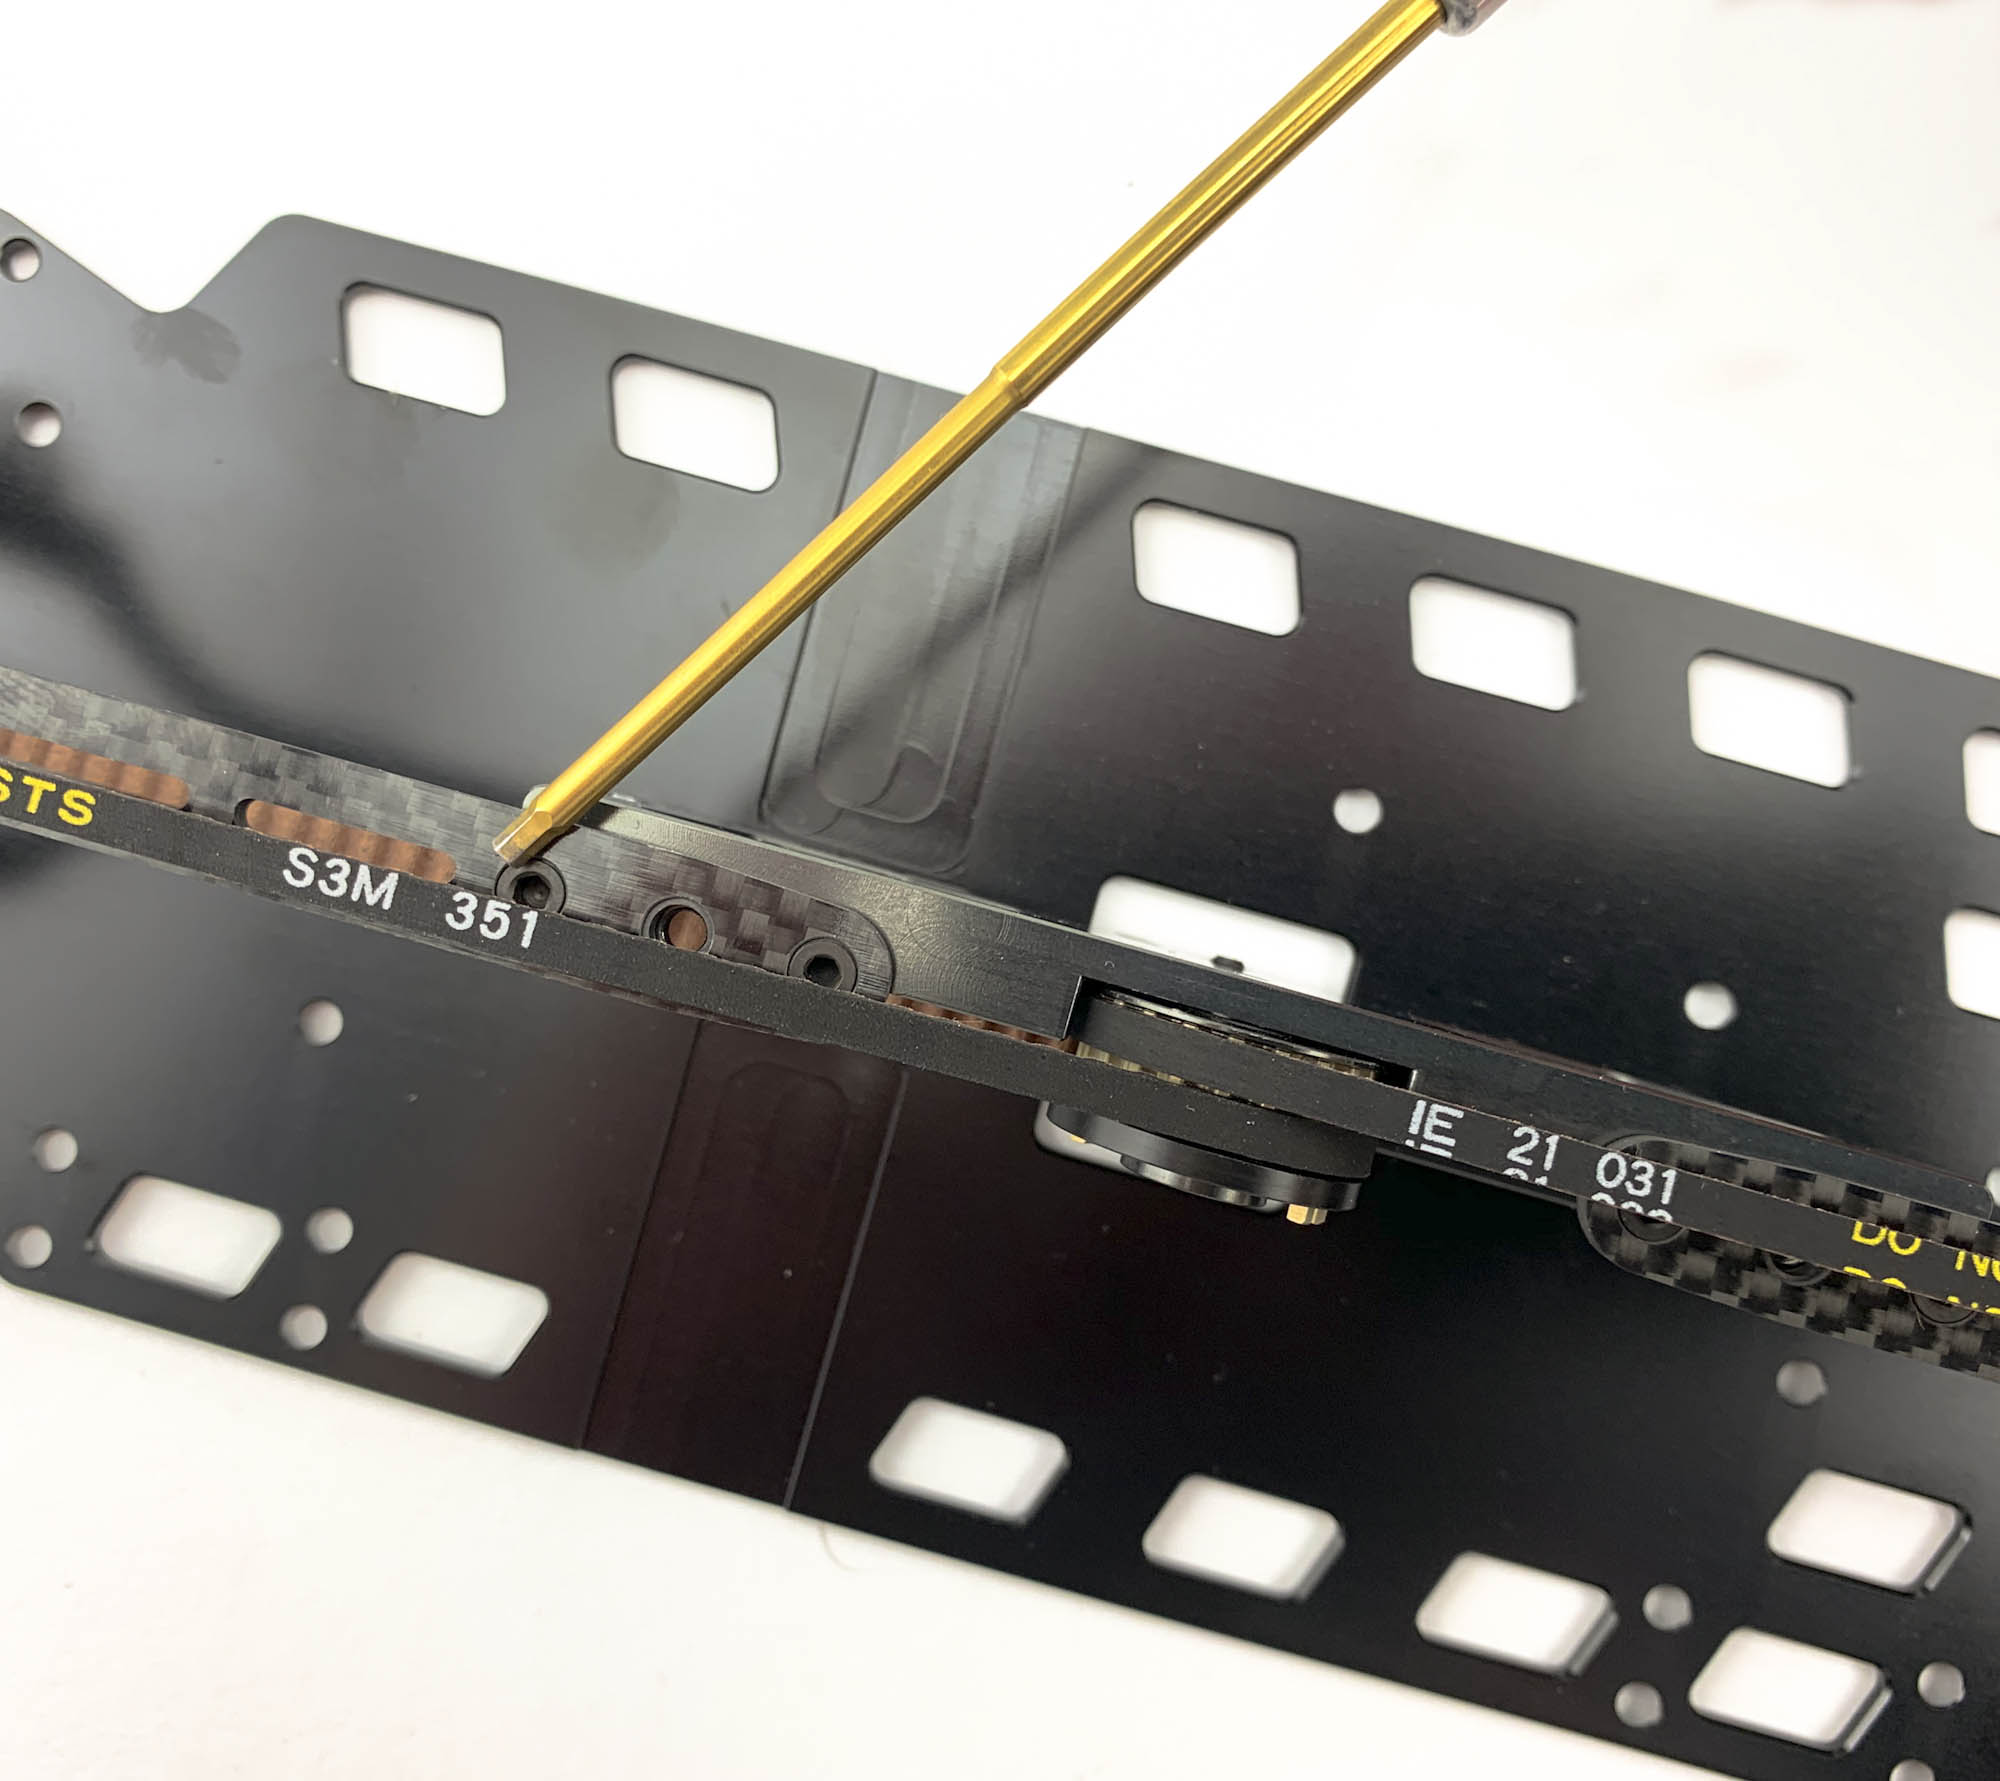
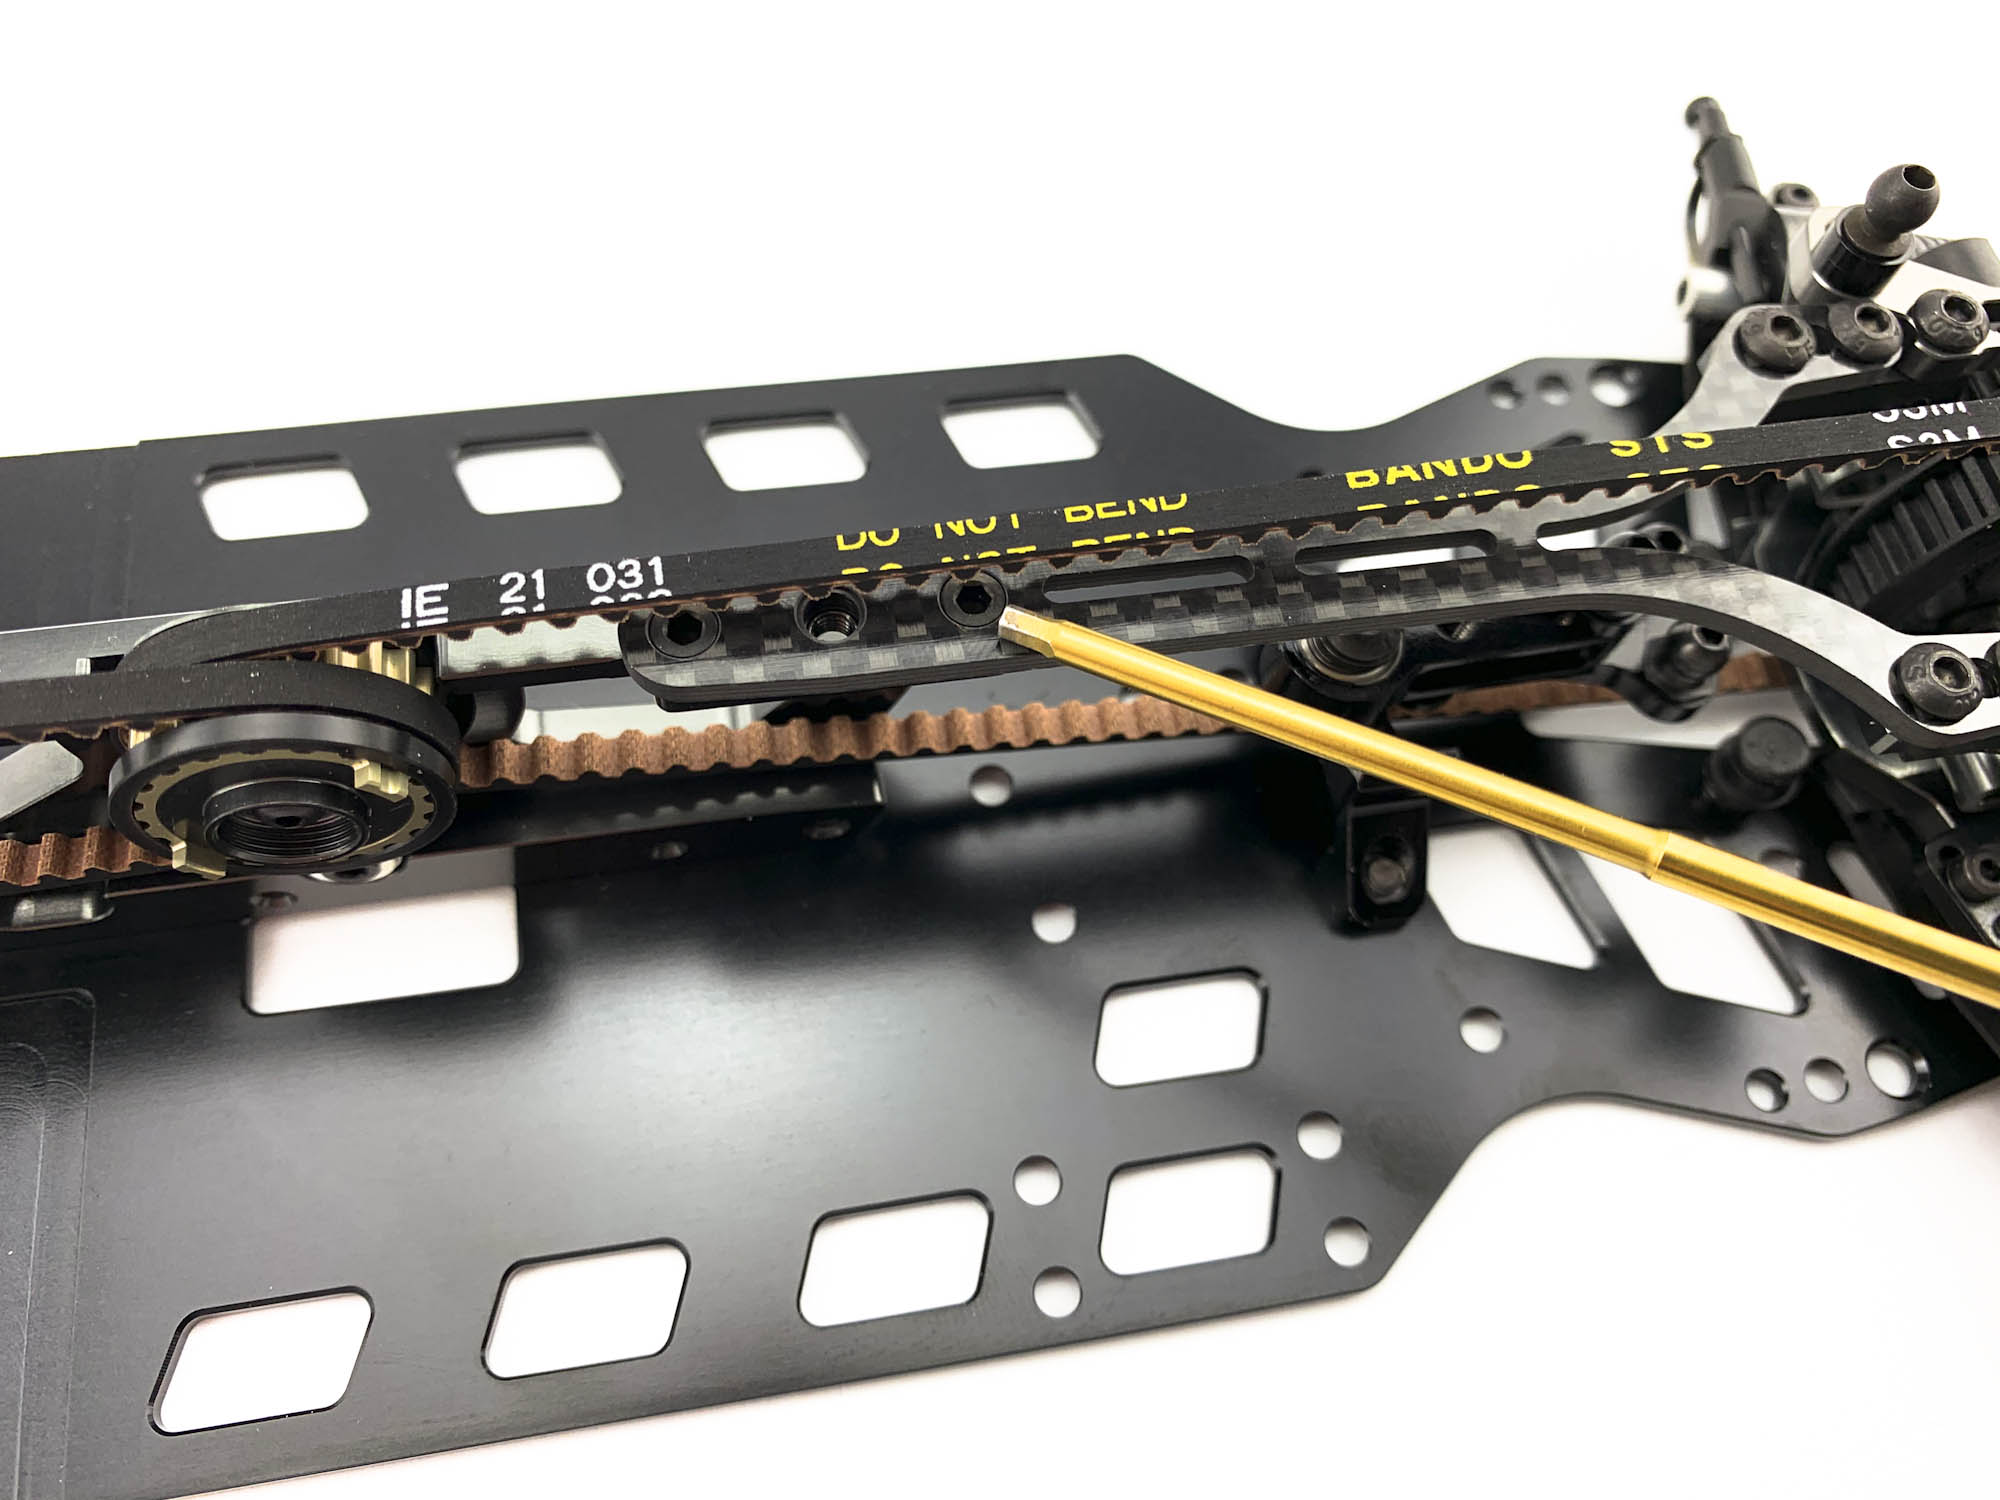
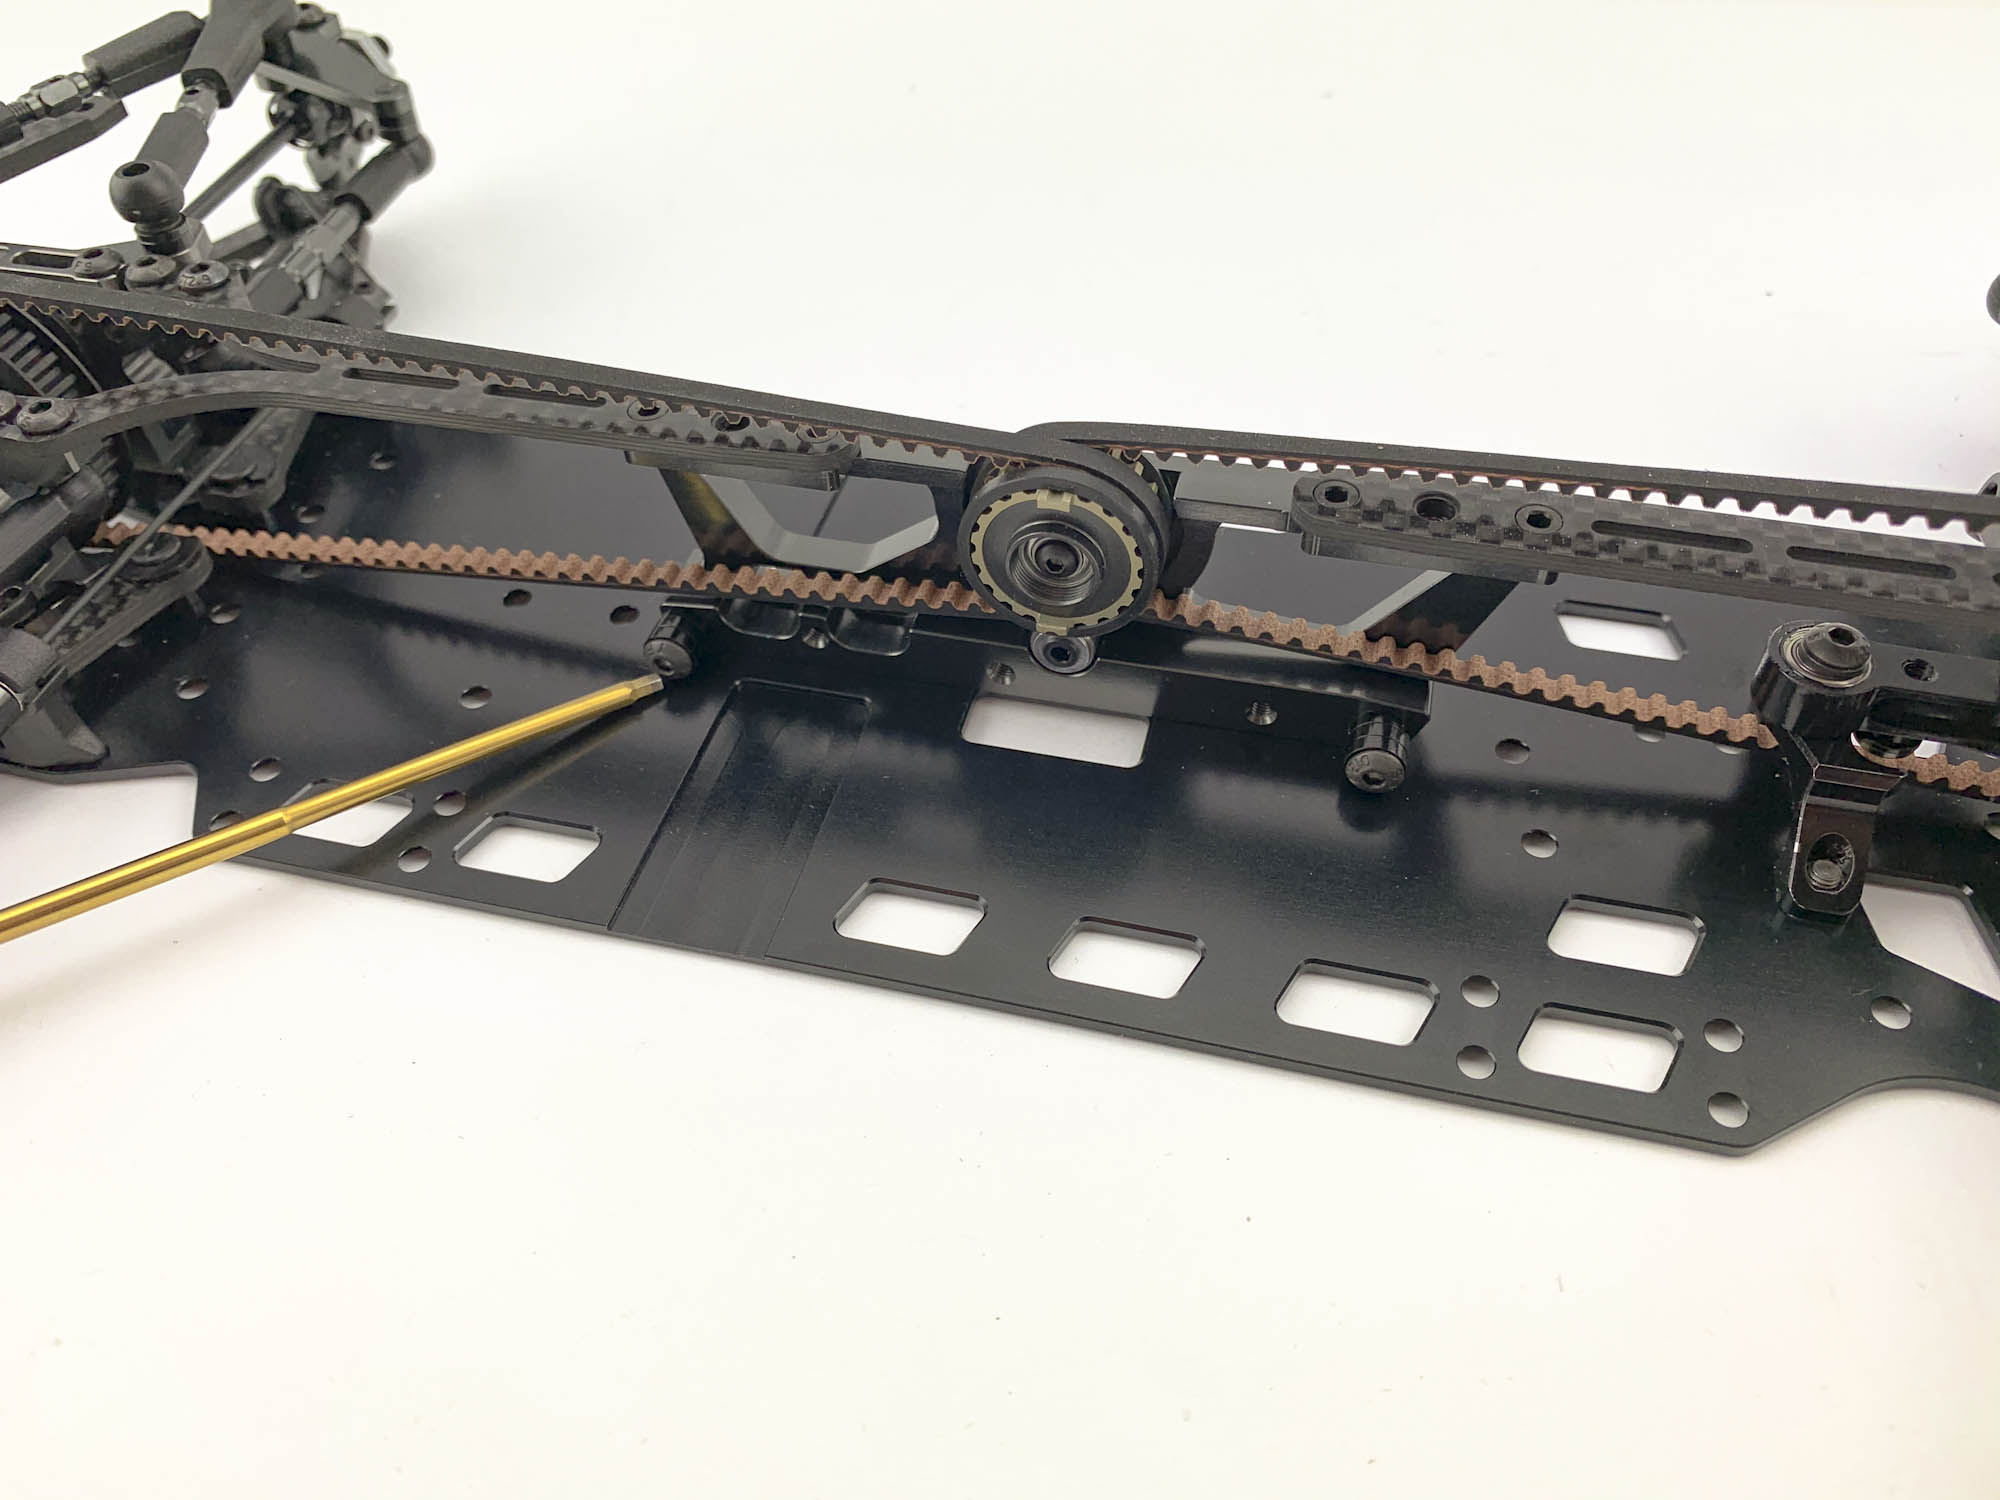
Another innovation is the "Anti skip unit" which is placed directly under the Pulley.
The ballbearings support the belt and will prevent the belts from skipping.
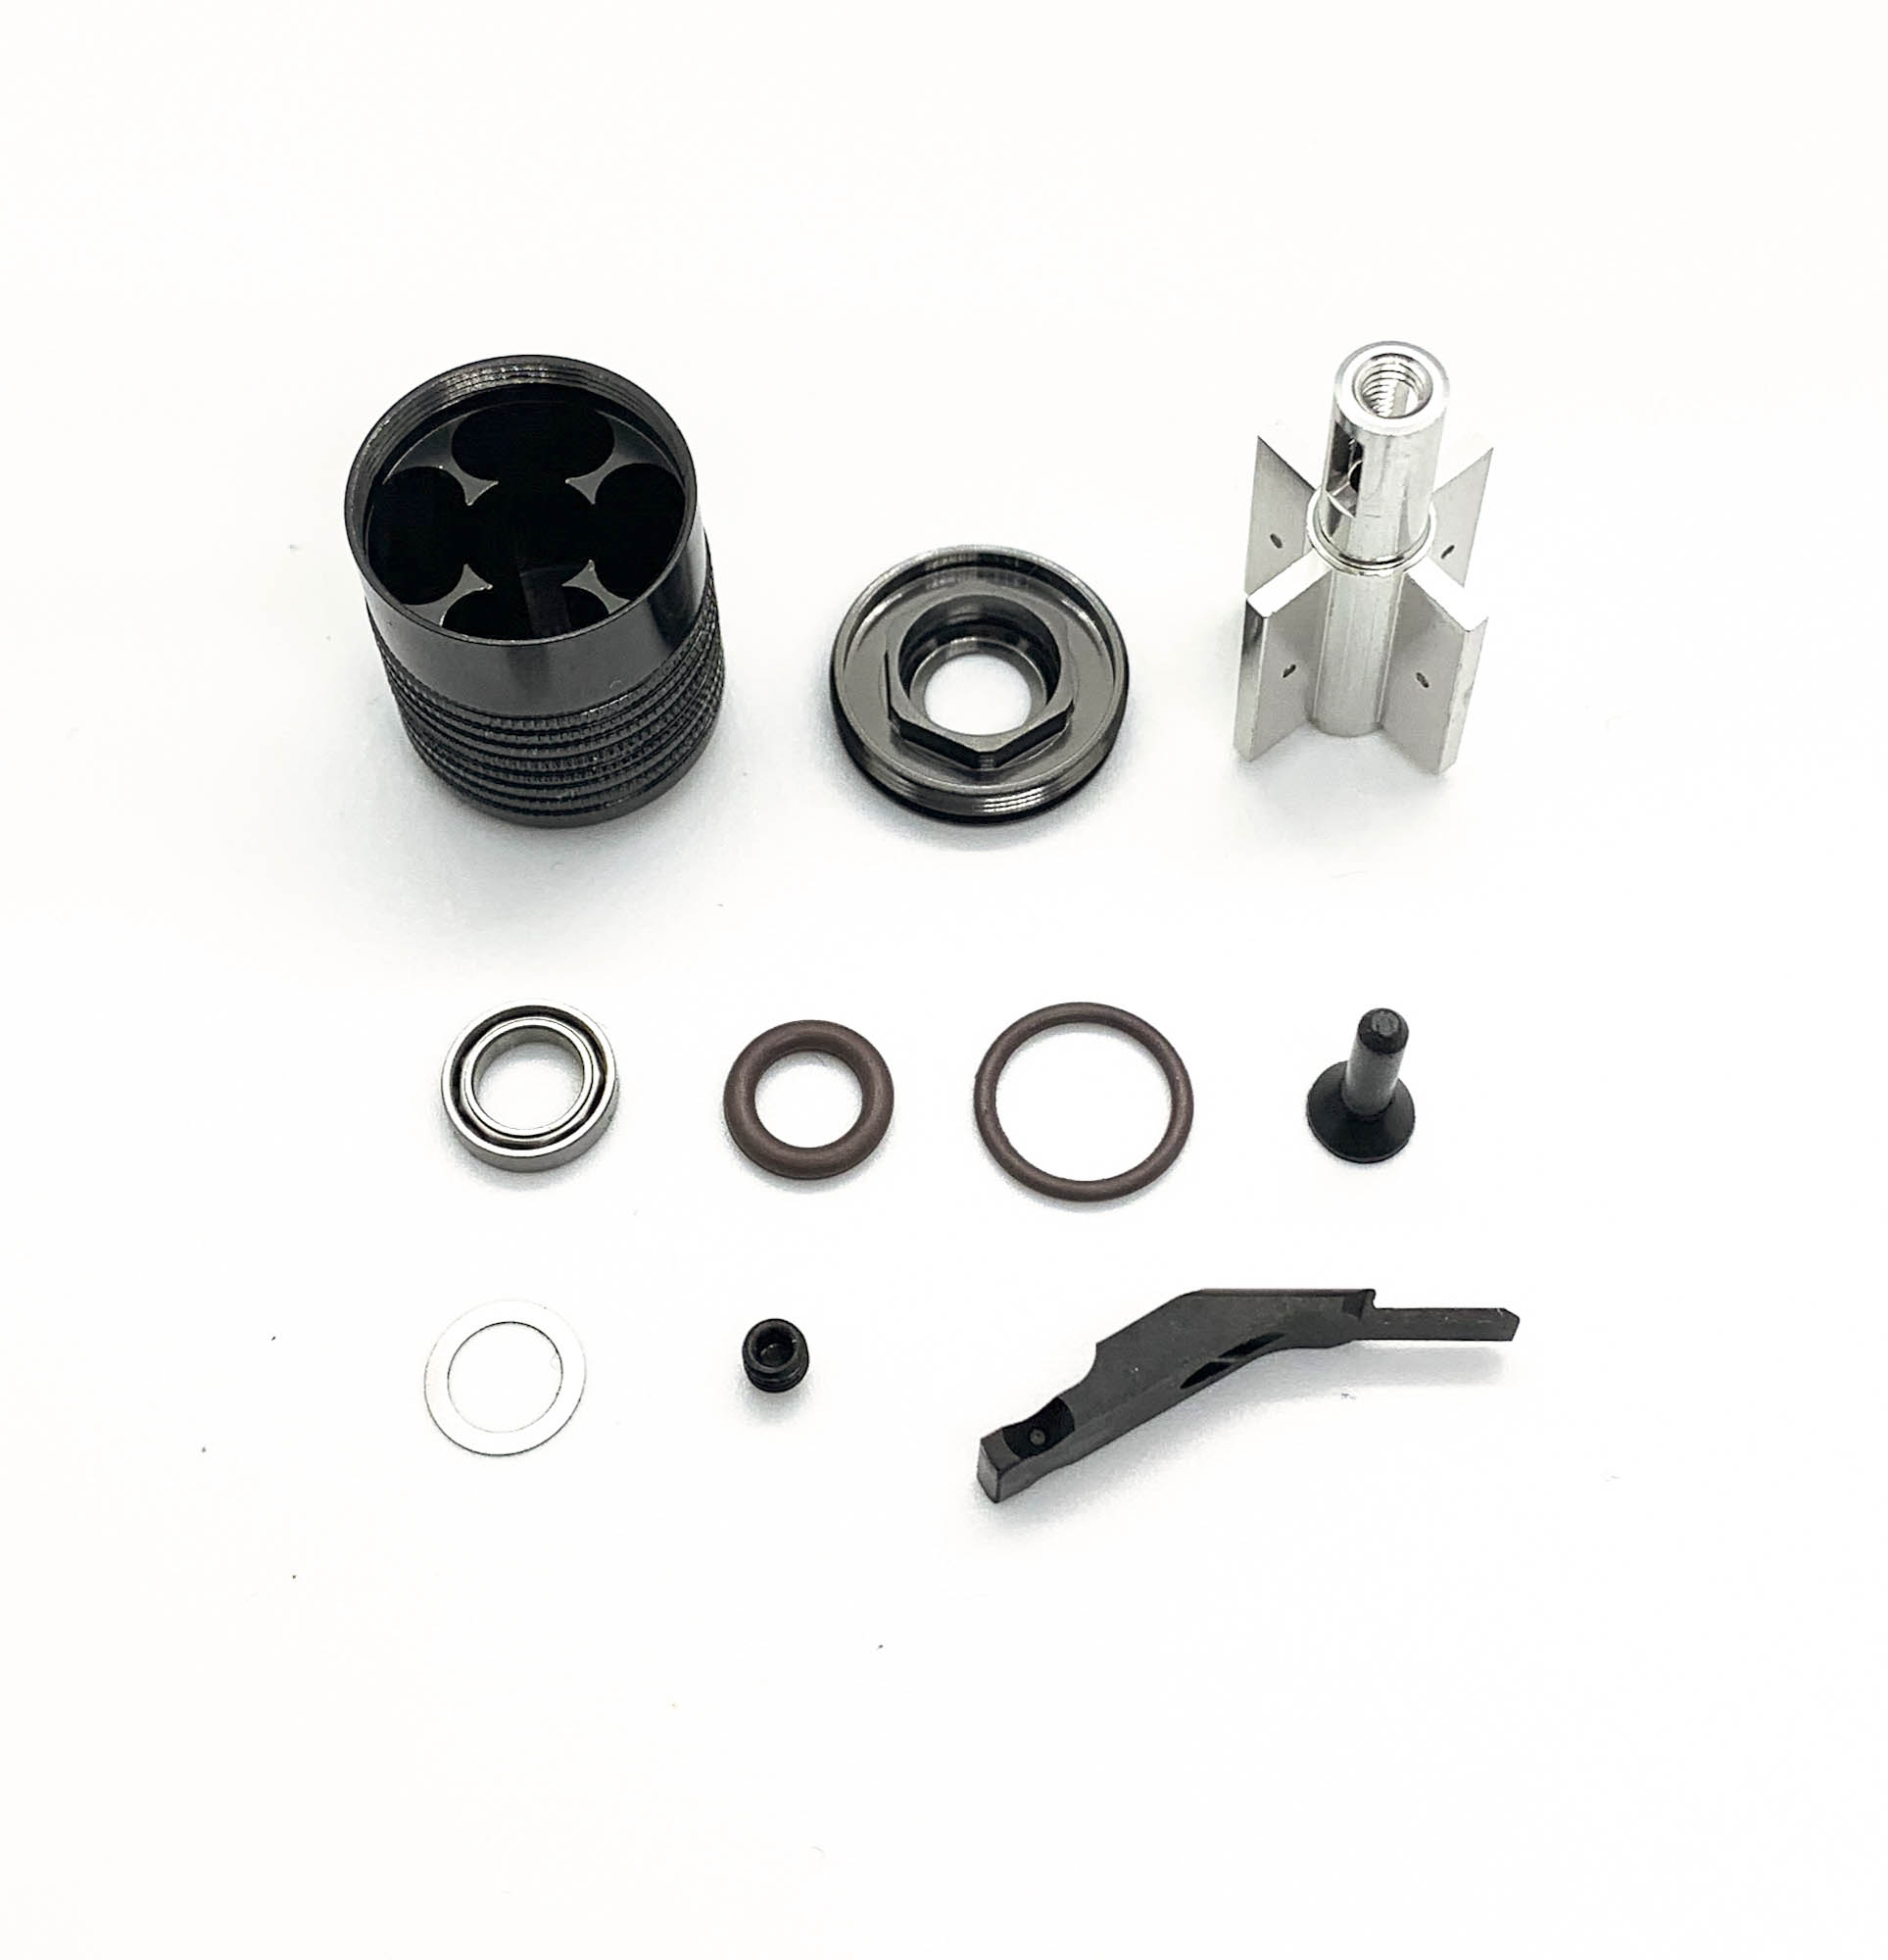
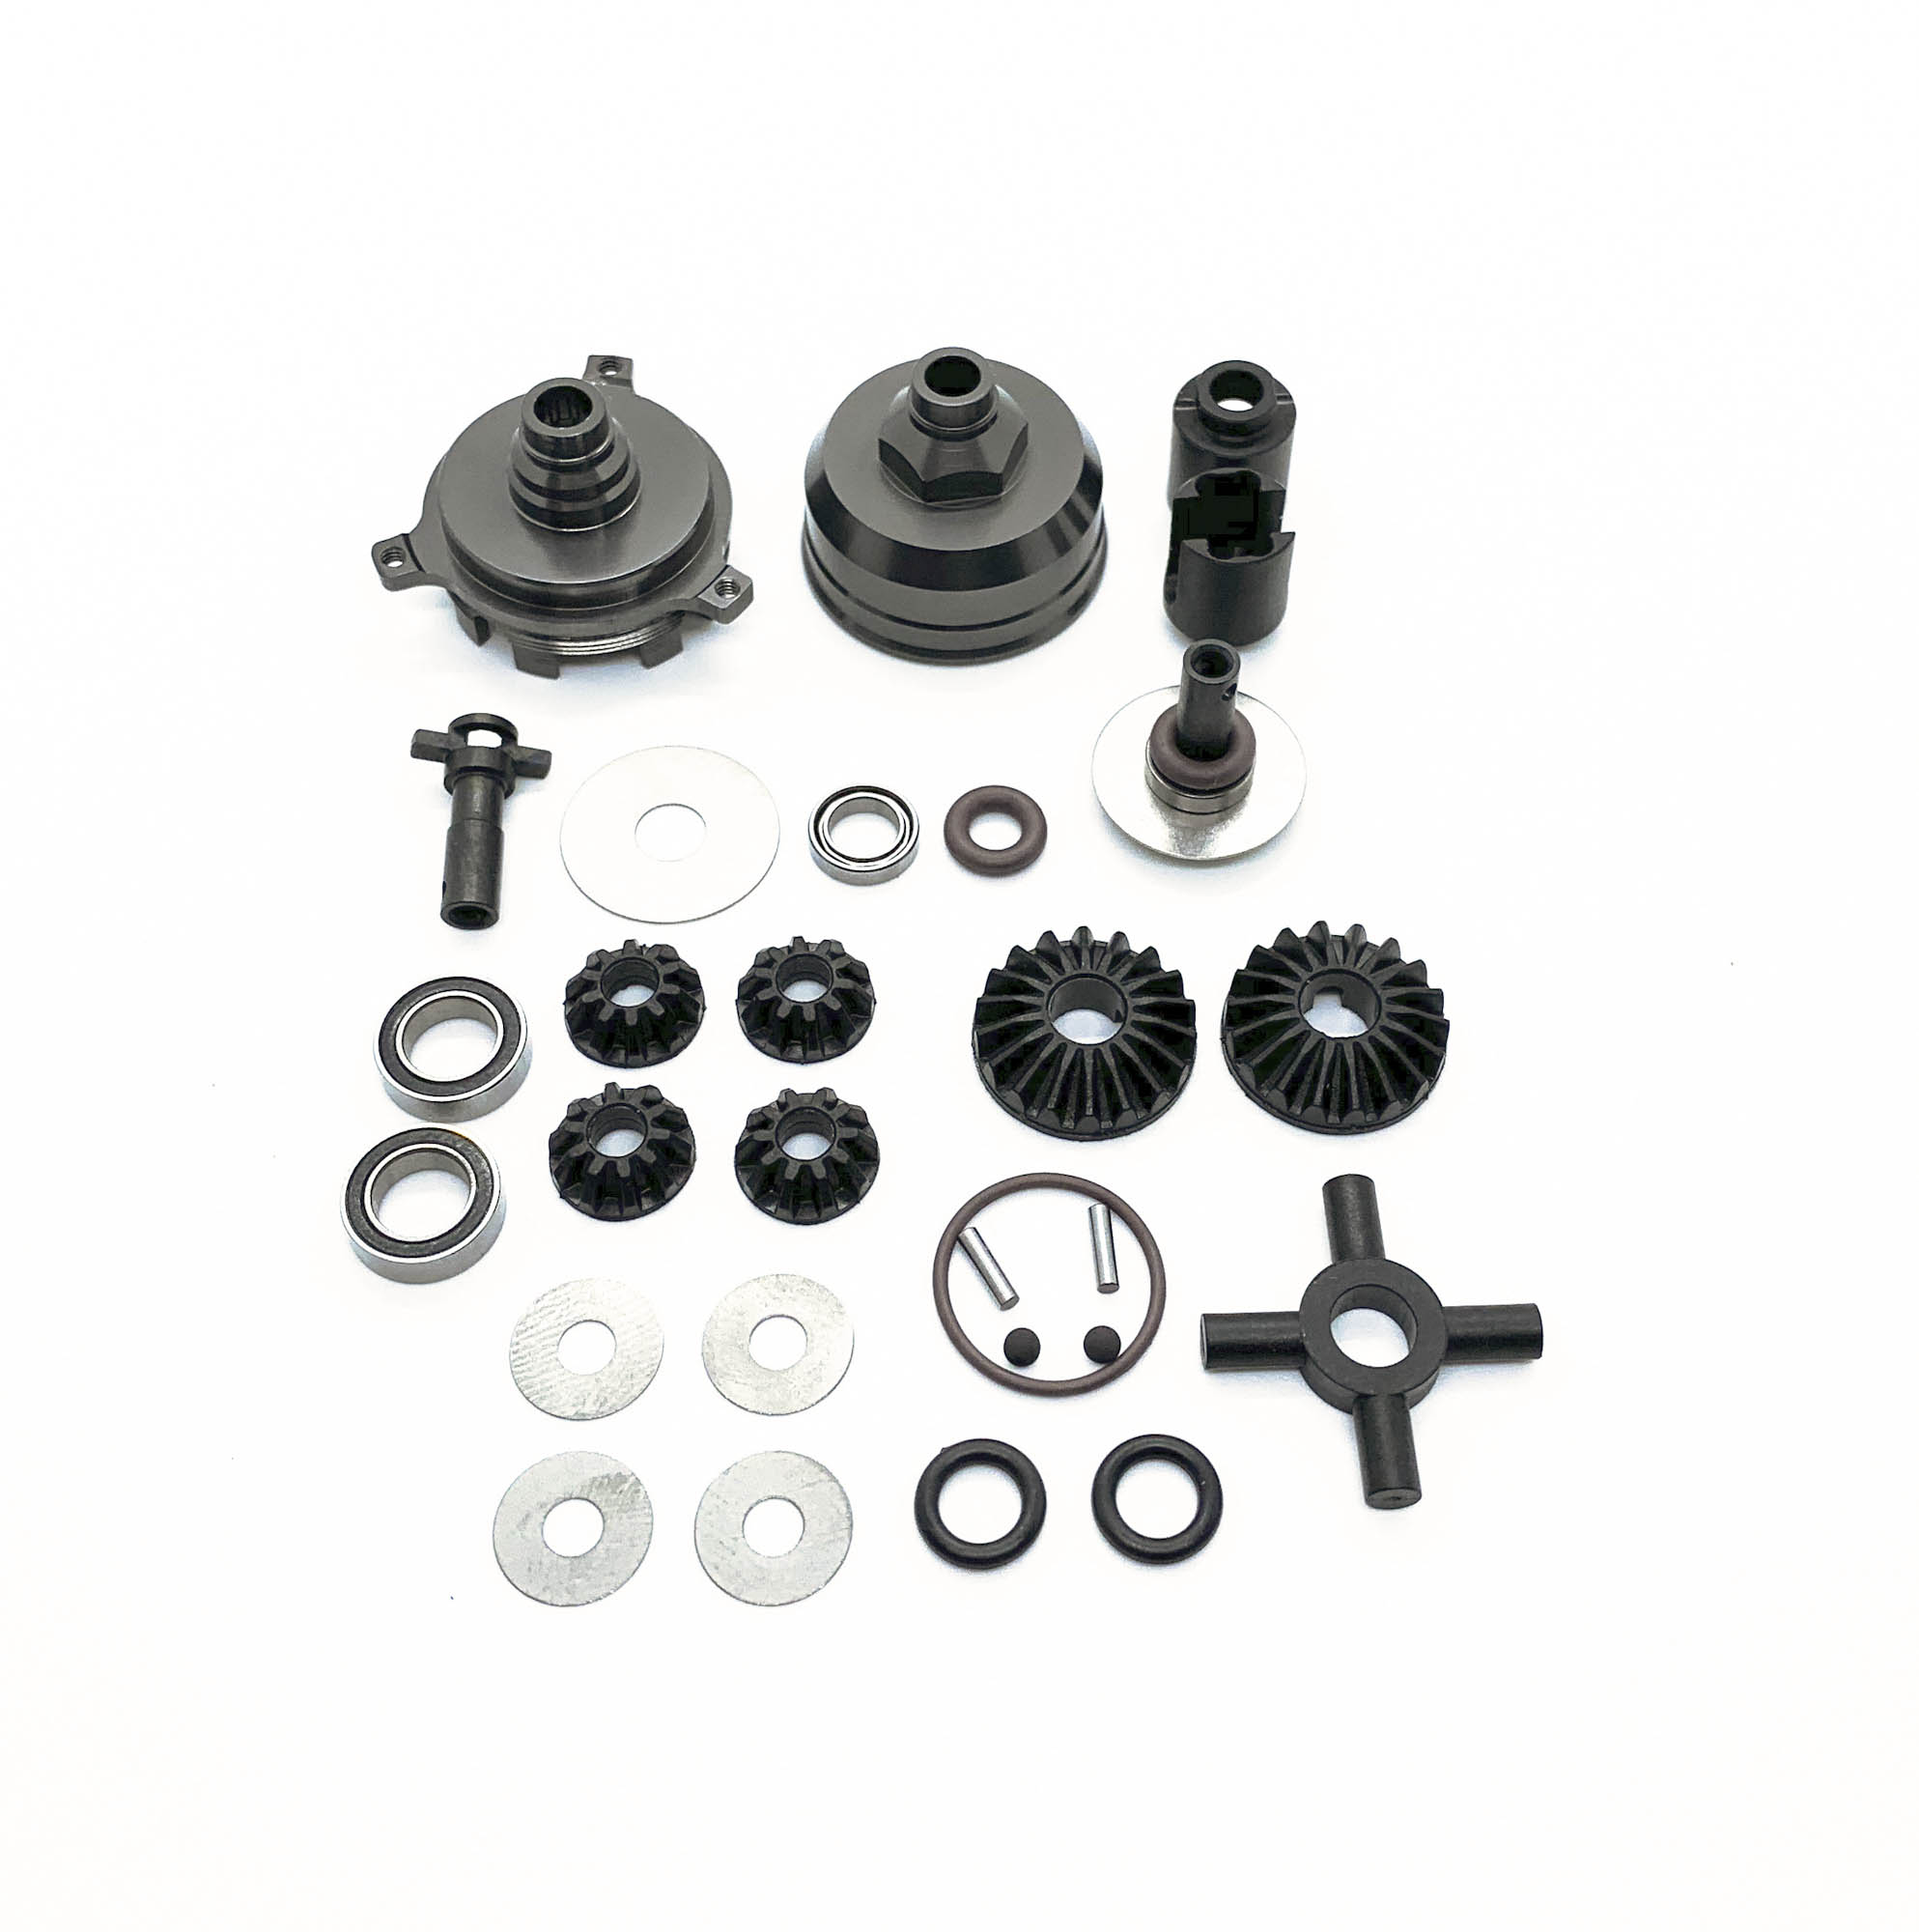
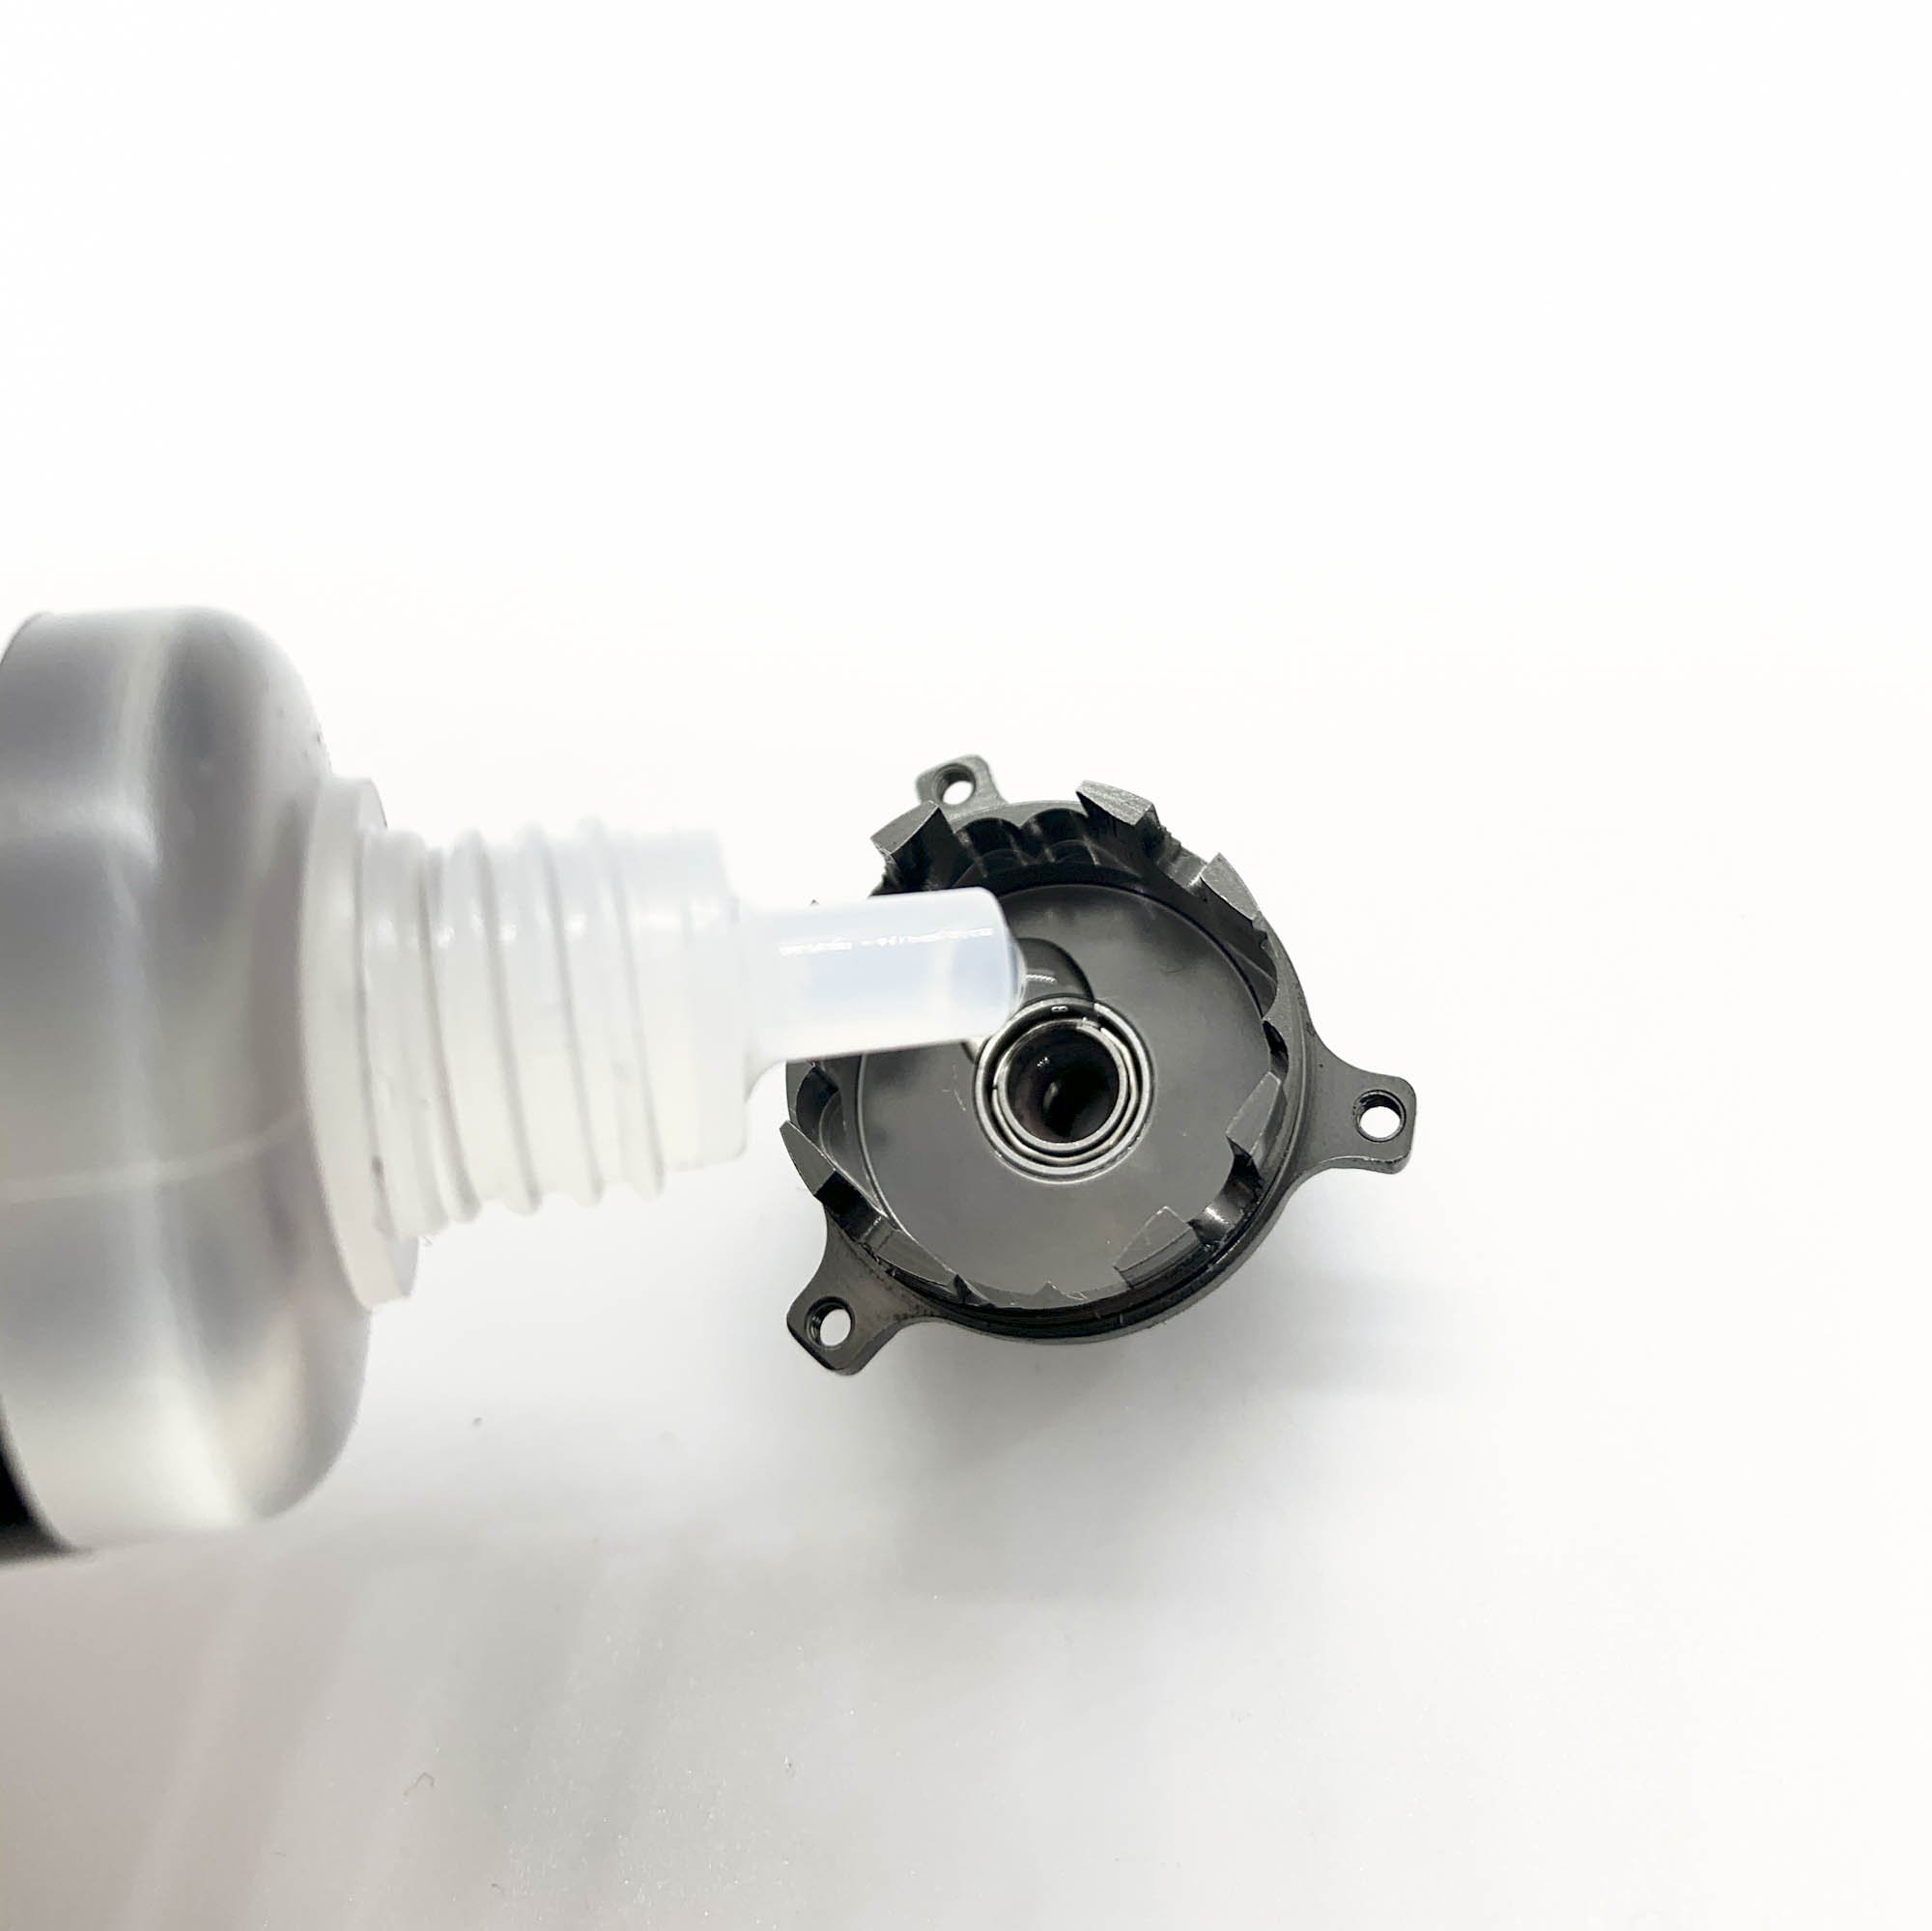
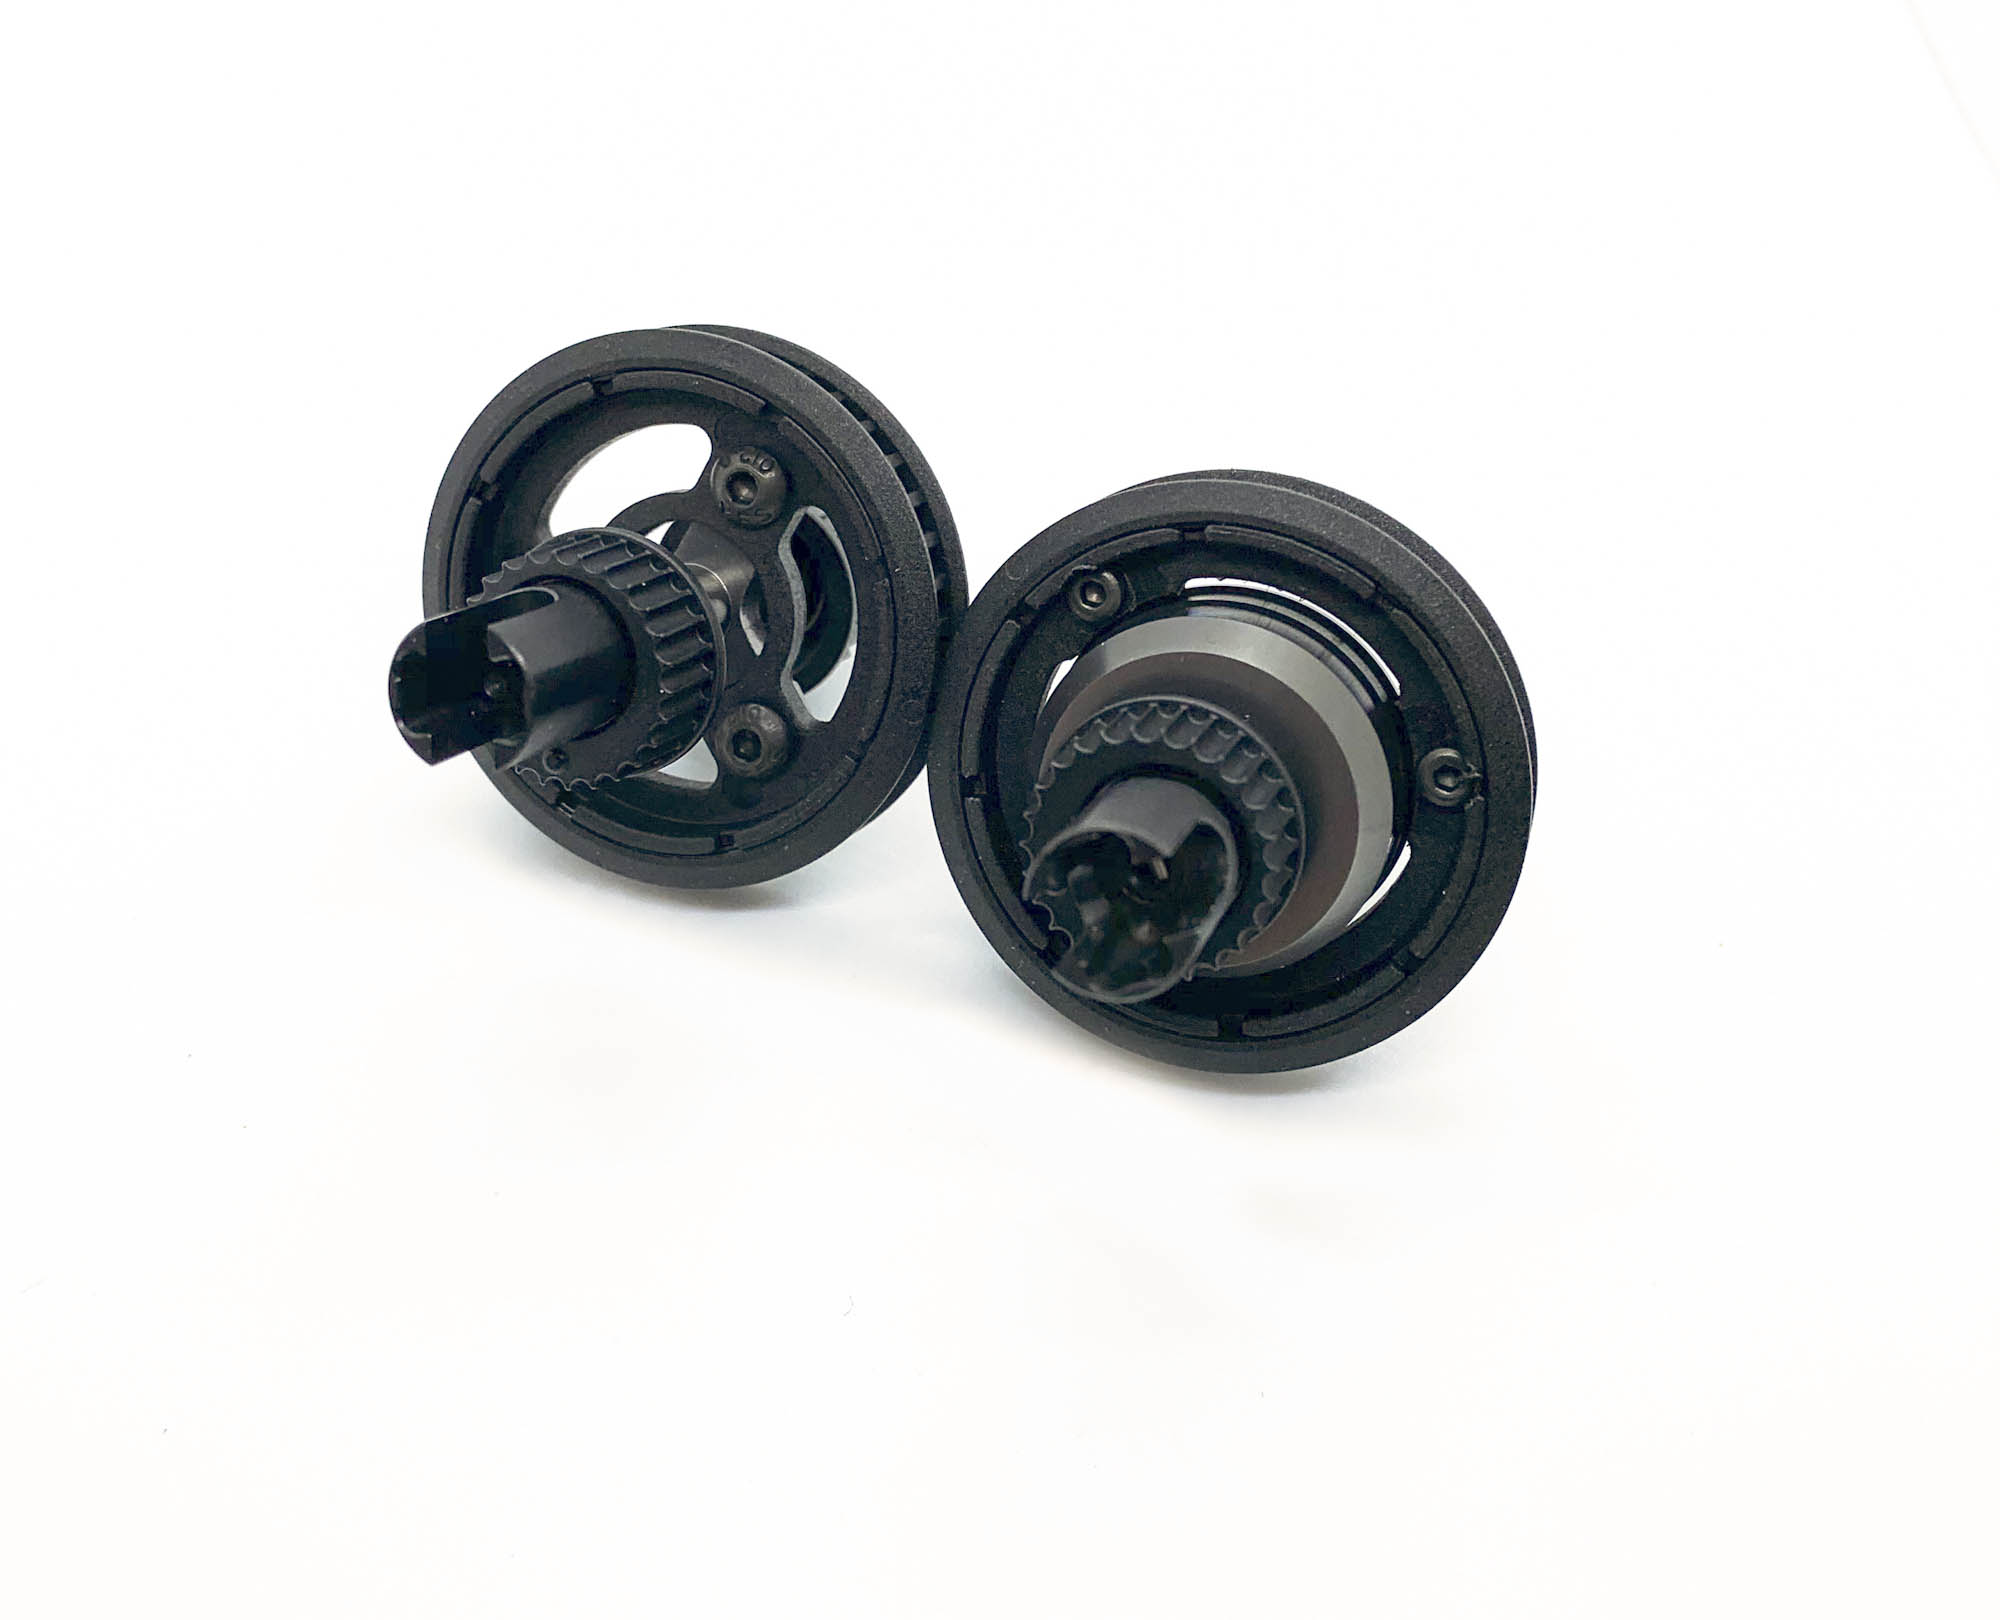
An overiew about the GD2B-R parts. The included OR05V and OR13V o-rings can be always detected by the slightly brown shade.
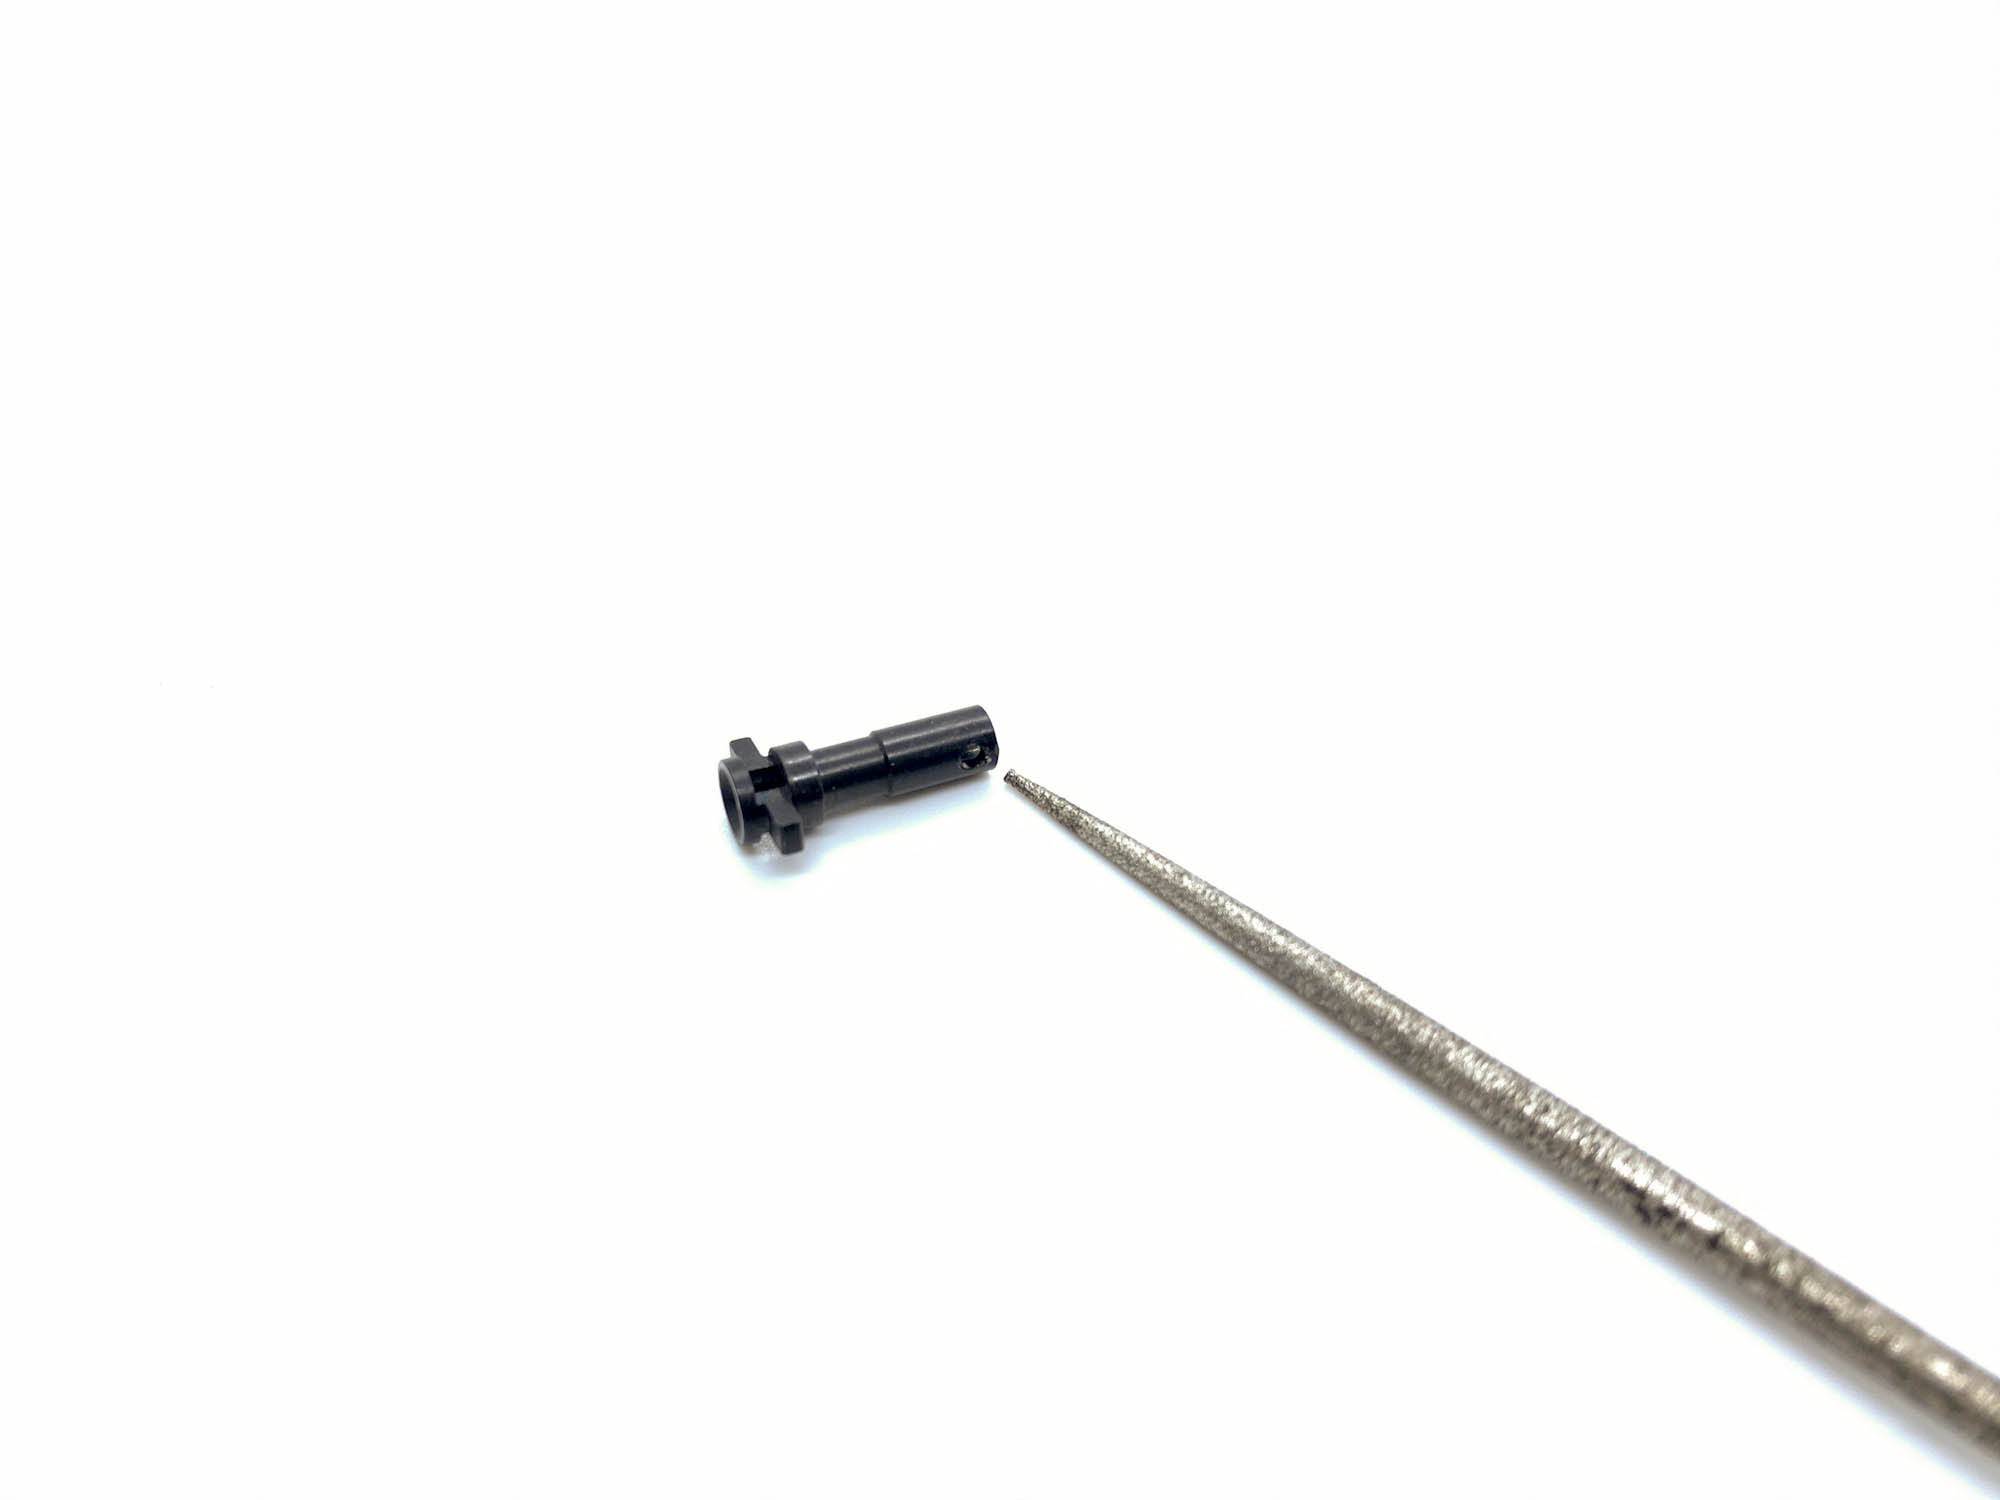
First i check how smooth the PIN02 slides into the ST31-1 shaft. This can be sometimes a bit tight during small burr's from production. I use an small round diamond file and just turn it one time slightly inside to hole.
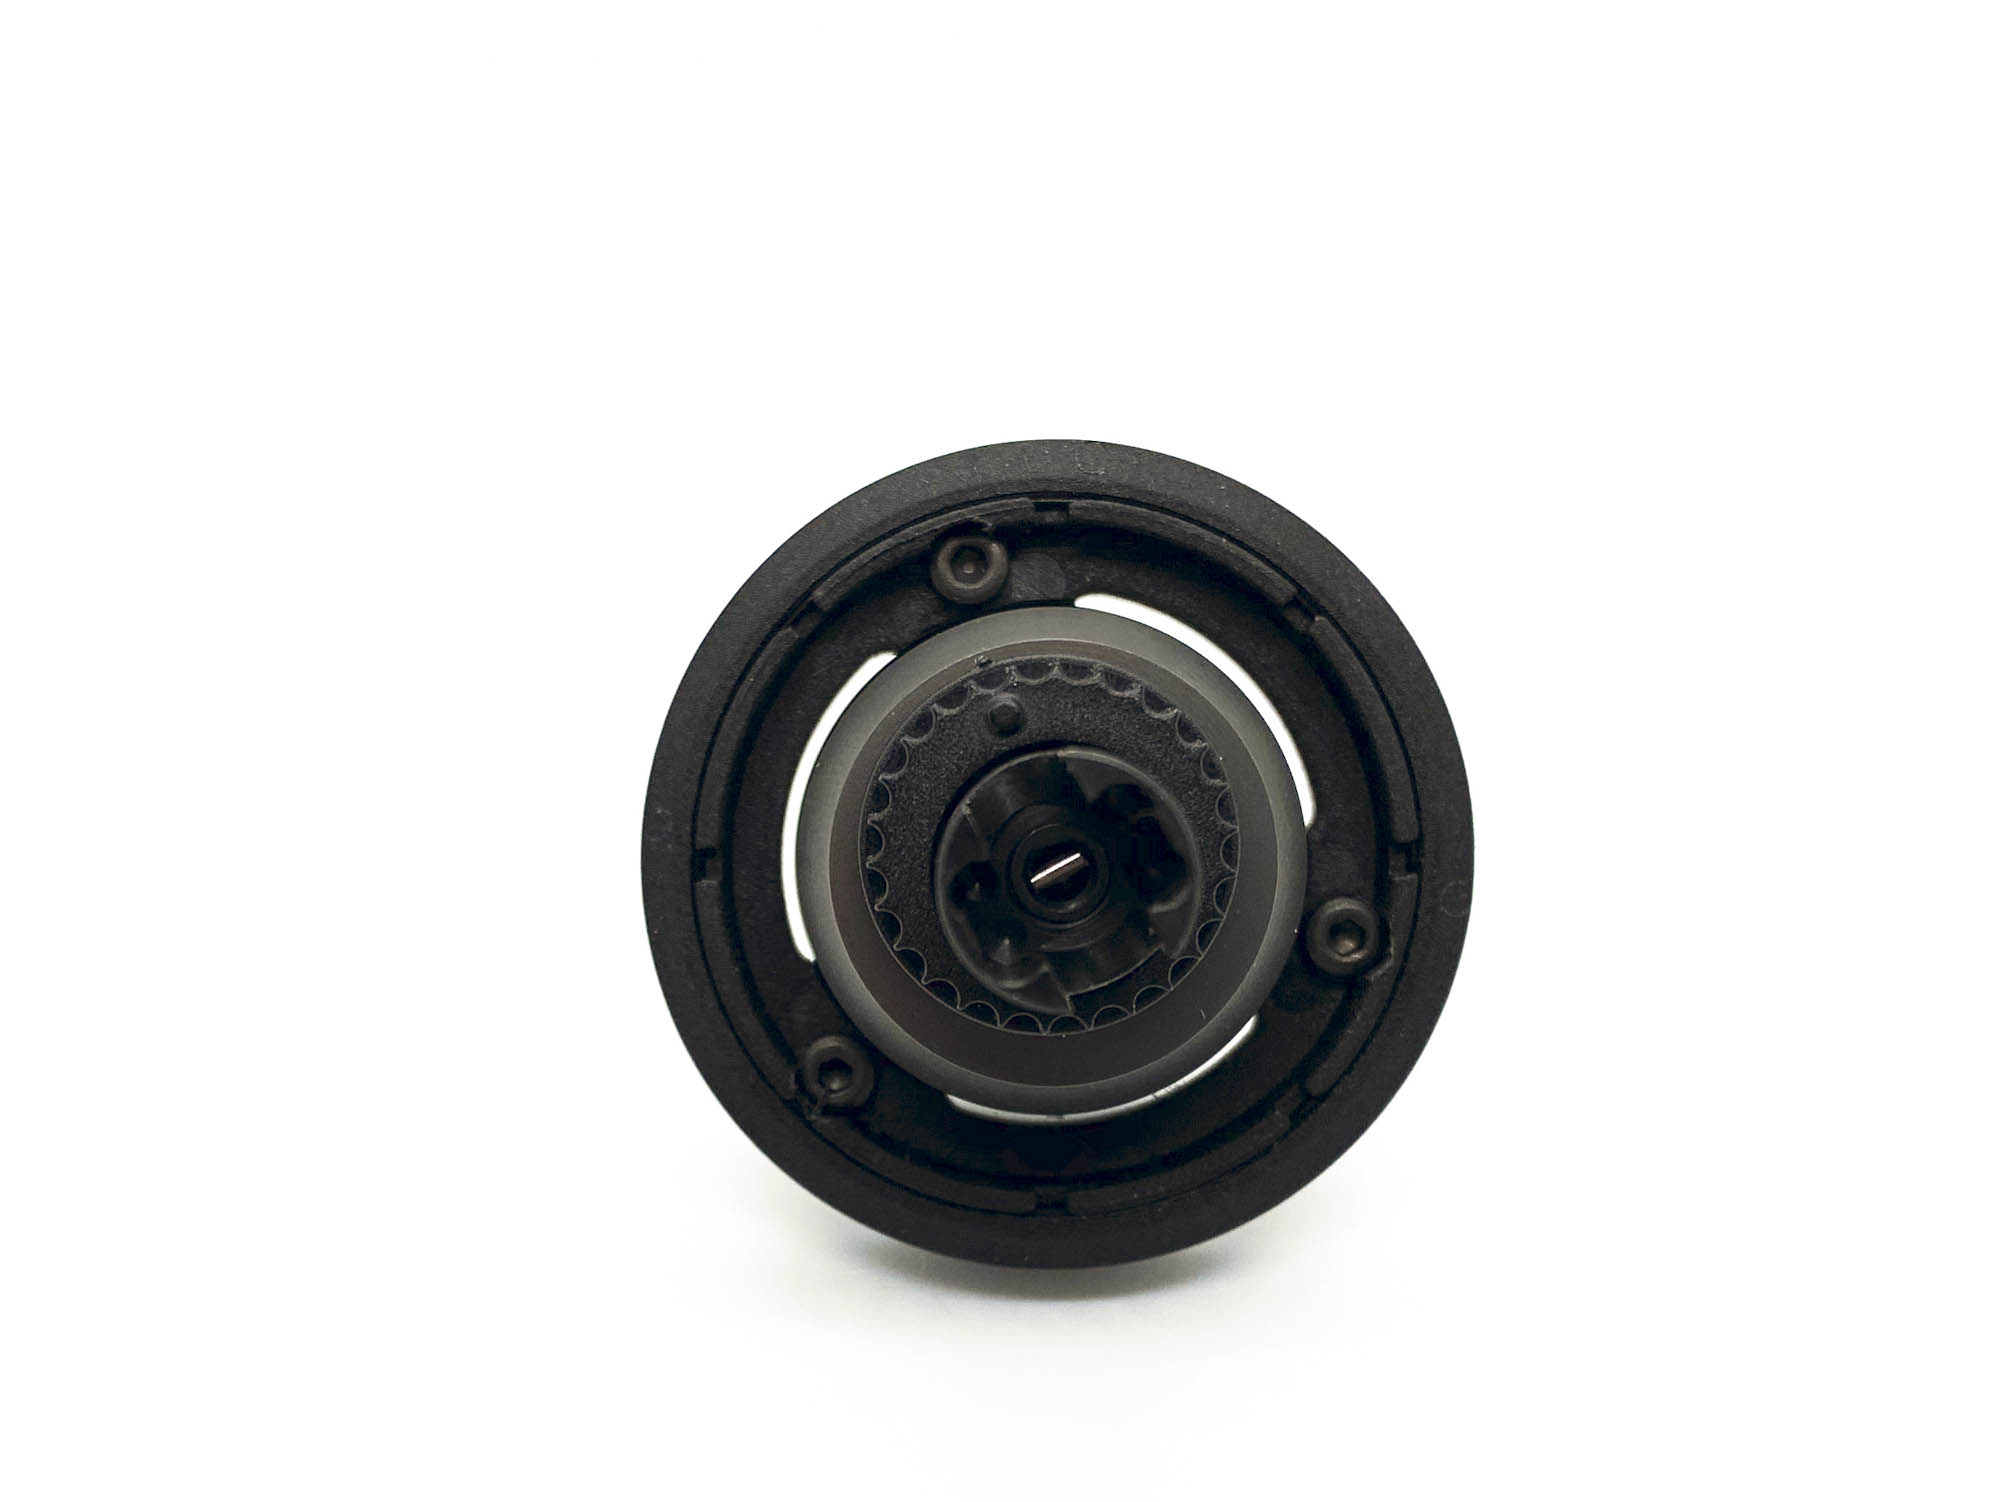
The next part where many guys struggle is the correct installation of the OR05V inside the case.
There is one easy method for this, like i show on this picture. Place the OR05V inside the AT123B/AT124B diff housing without any grease or lube. Now use an 5,5mm nut driver and press the oring fully into his position.
Yes, sometimes its hard to, but trust me, it will fit and stay there.
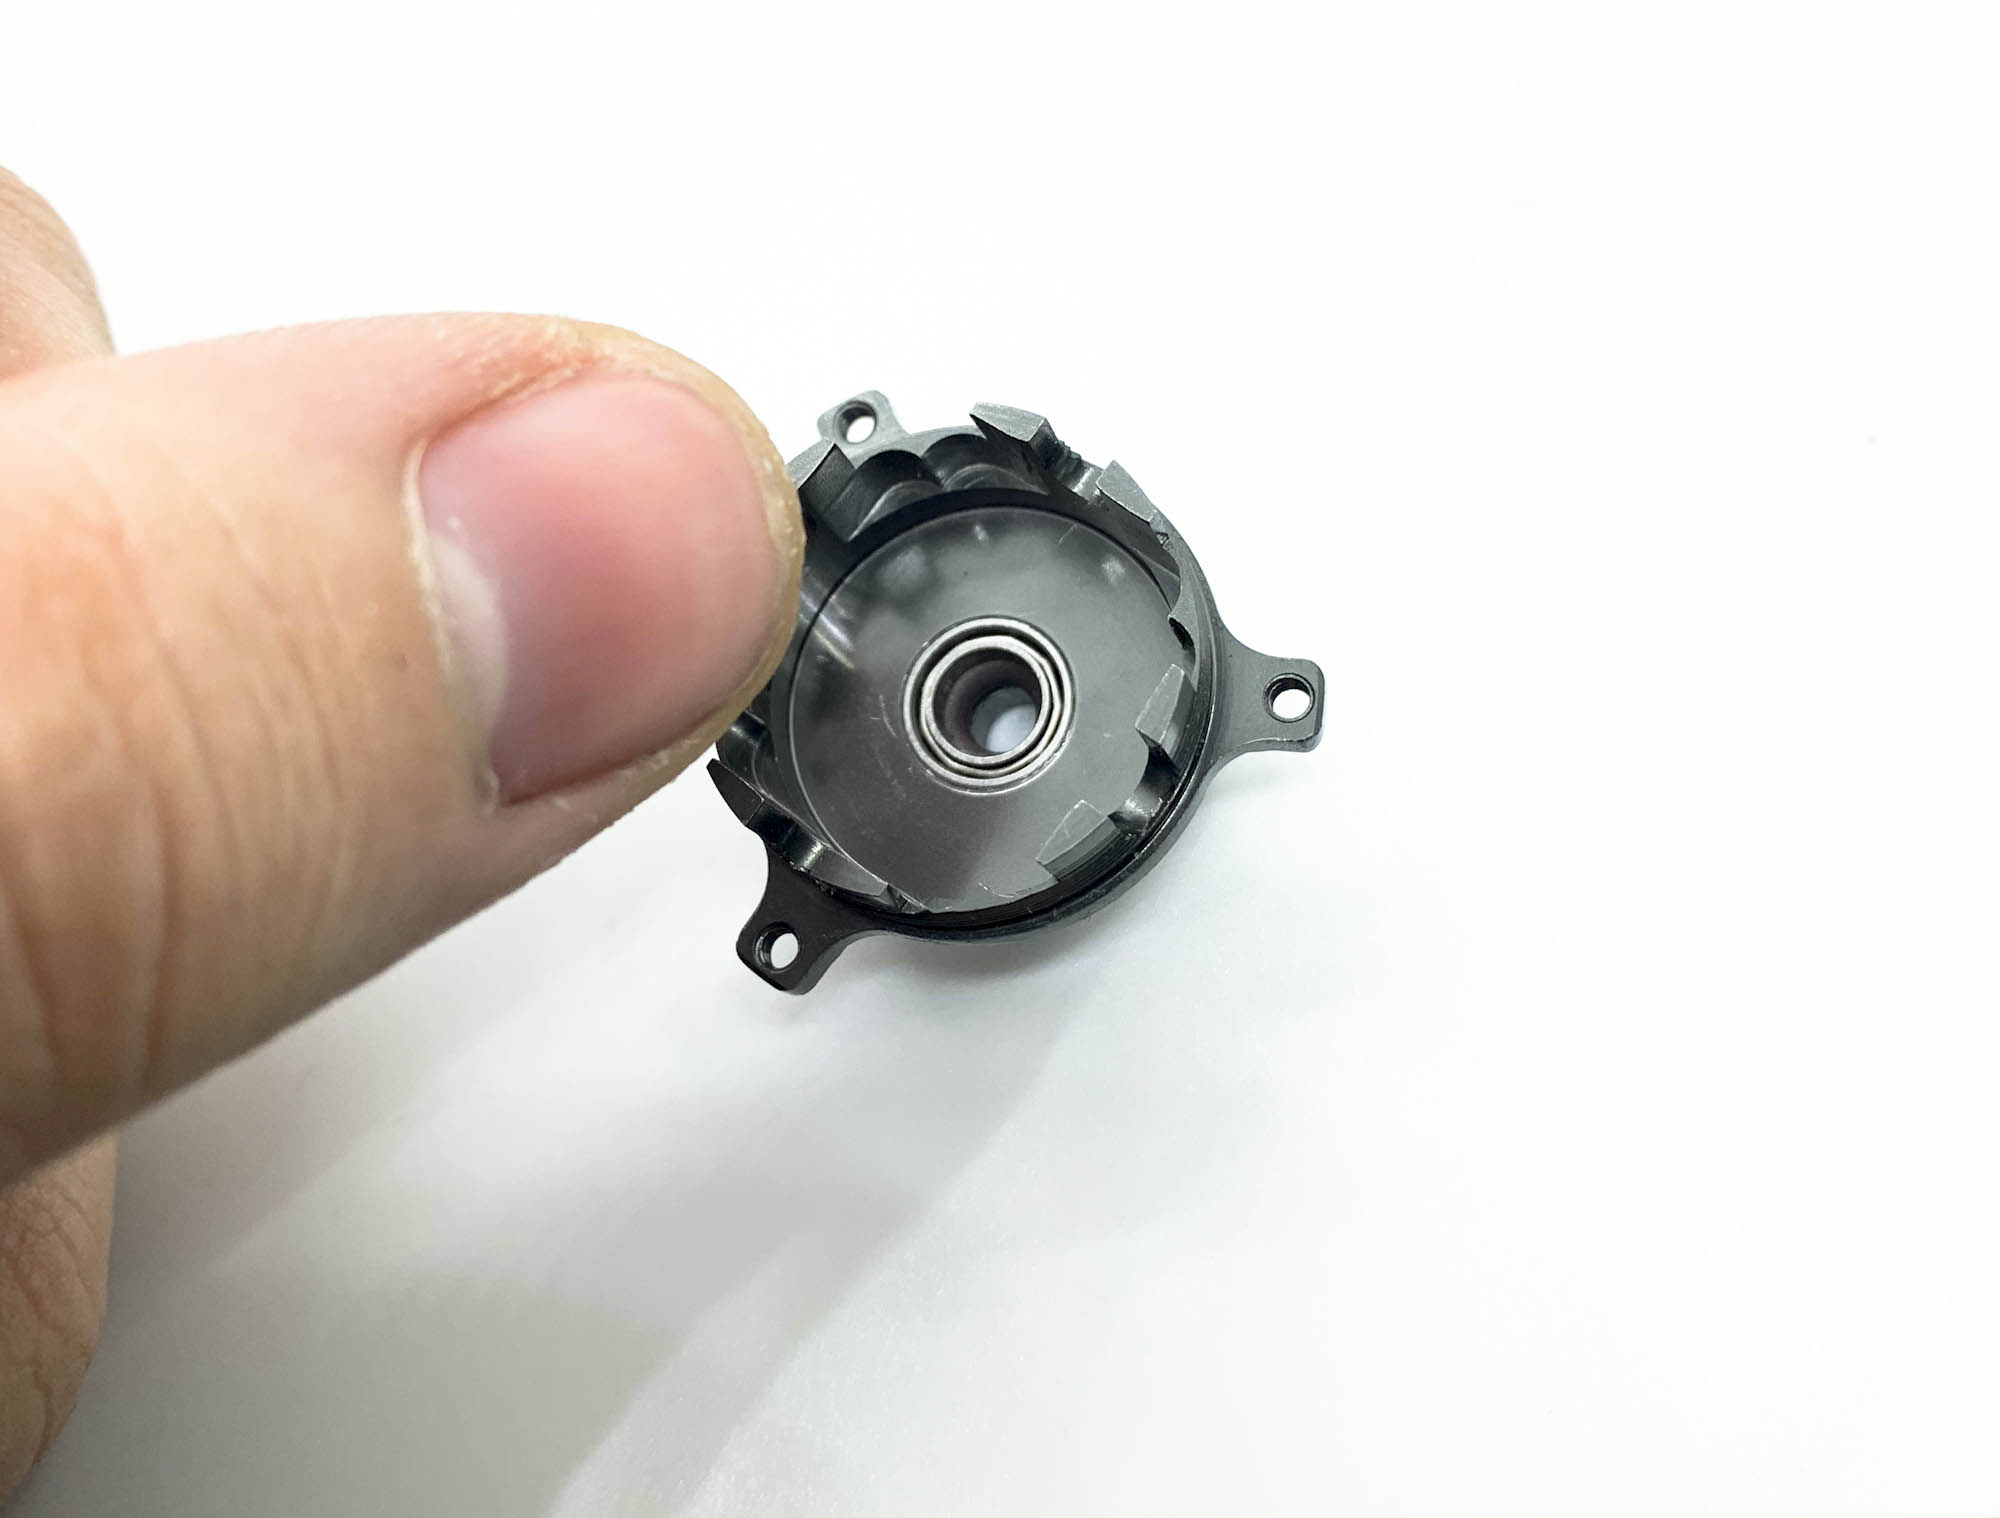
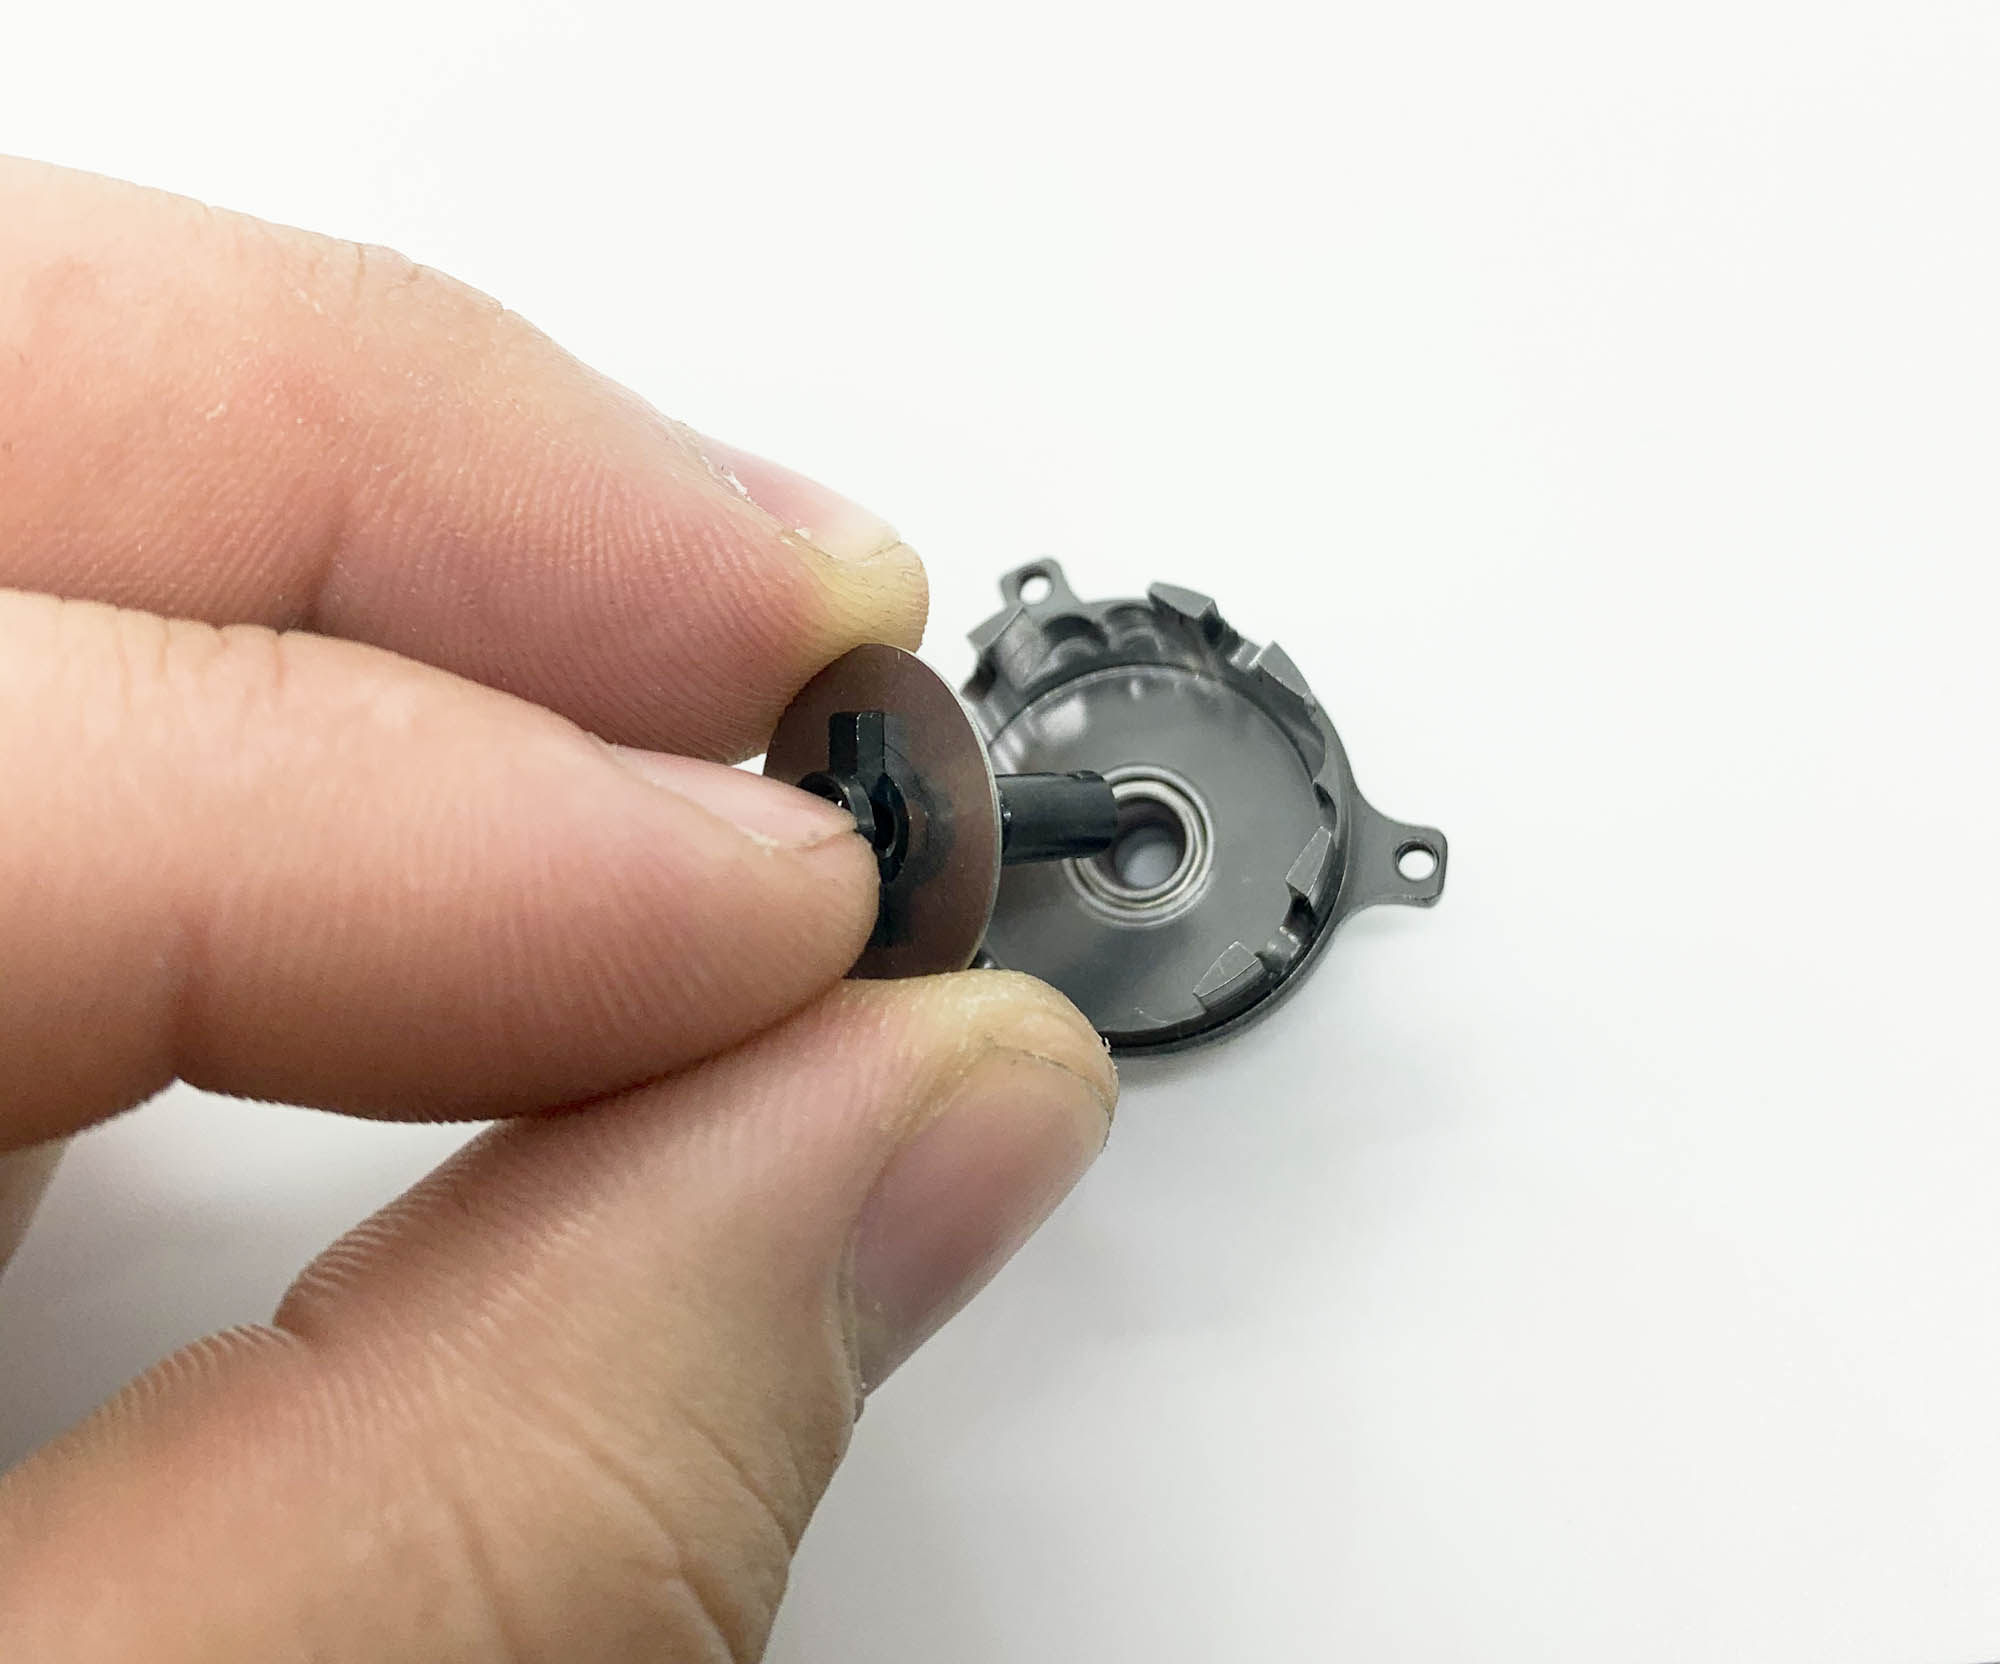
After you pressed the OR05V into his position, you should install the B85 bearing. Please do not use any tool for pressing. I recommend to do this with your fingers only. Press it until its same levle as the housing. In case the bearing sticks out 1-2/10 then the oring isn't in correct place!
The bearing need to be fully inside before you move on, otherwise you can't assemble the ST23X outdrives later.
Apply some silicon oil into the B85 bearing and onto OR05V at this stage to allow a smooth installation of ST31-1 part in next step.
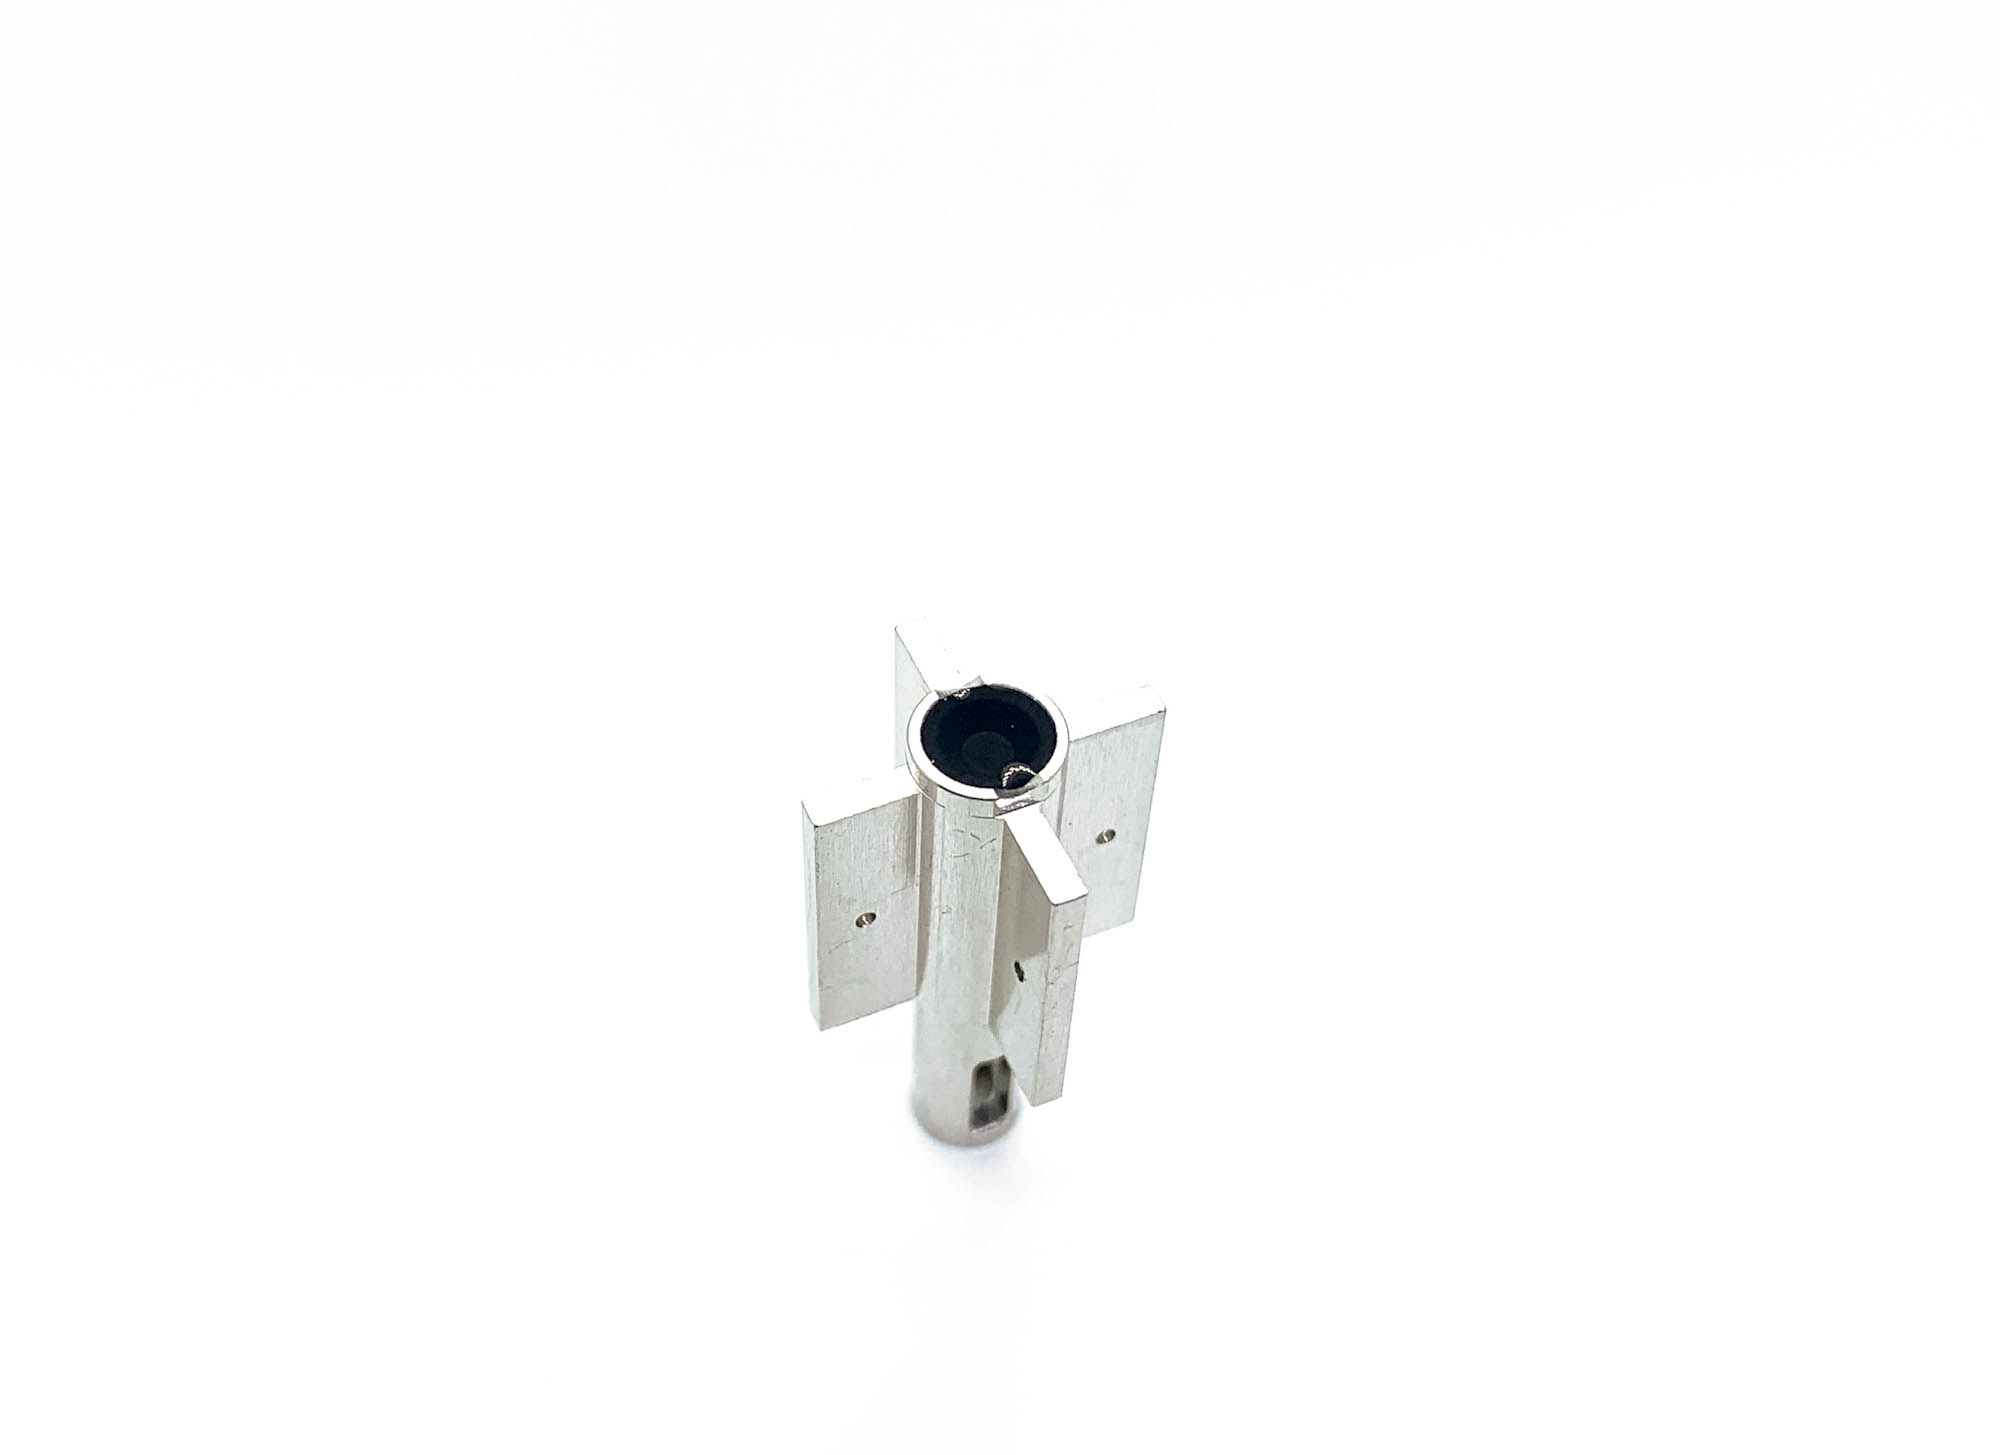
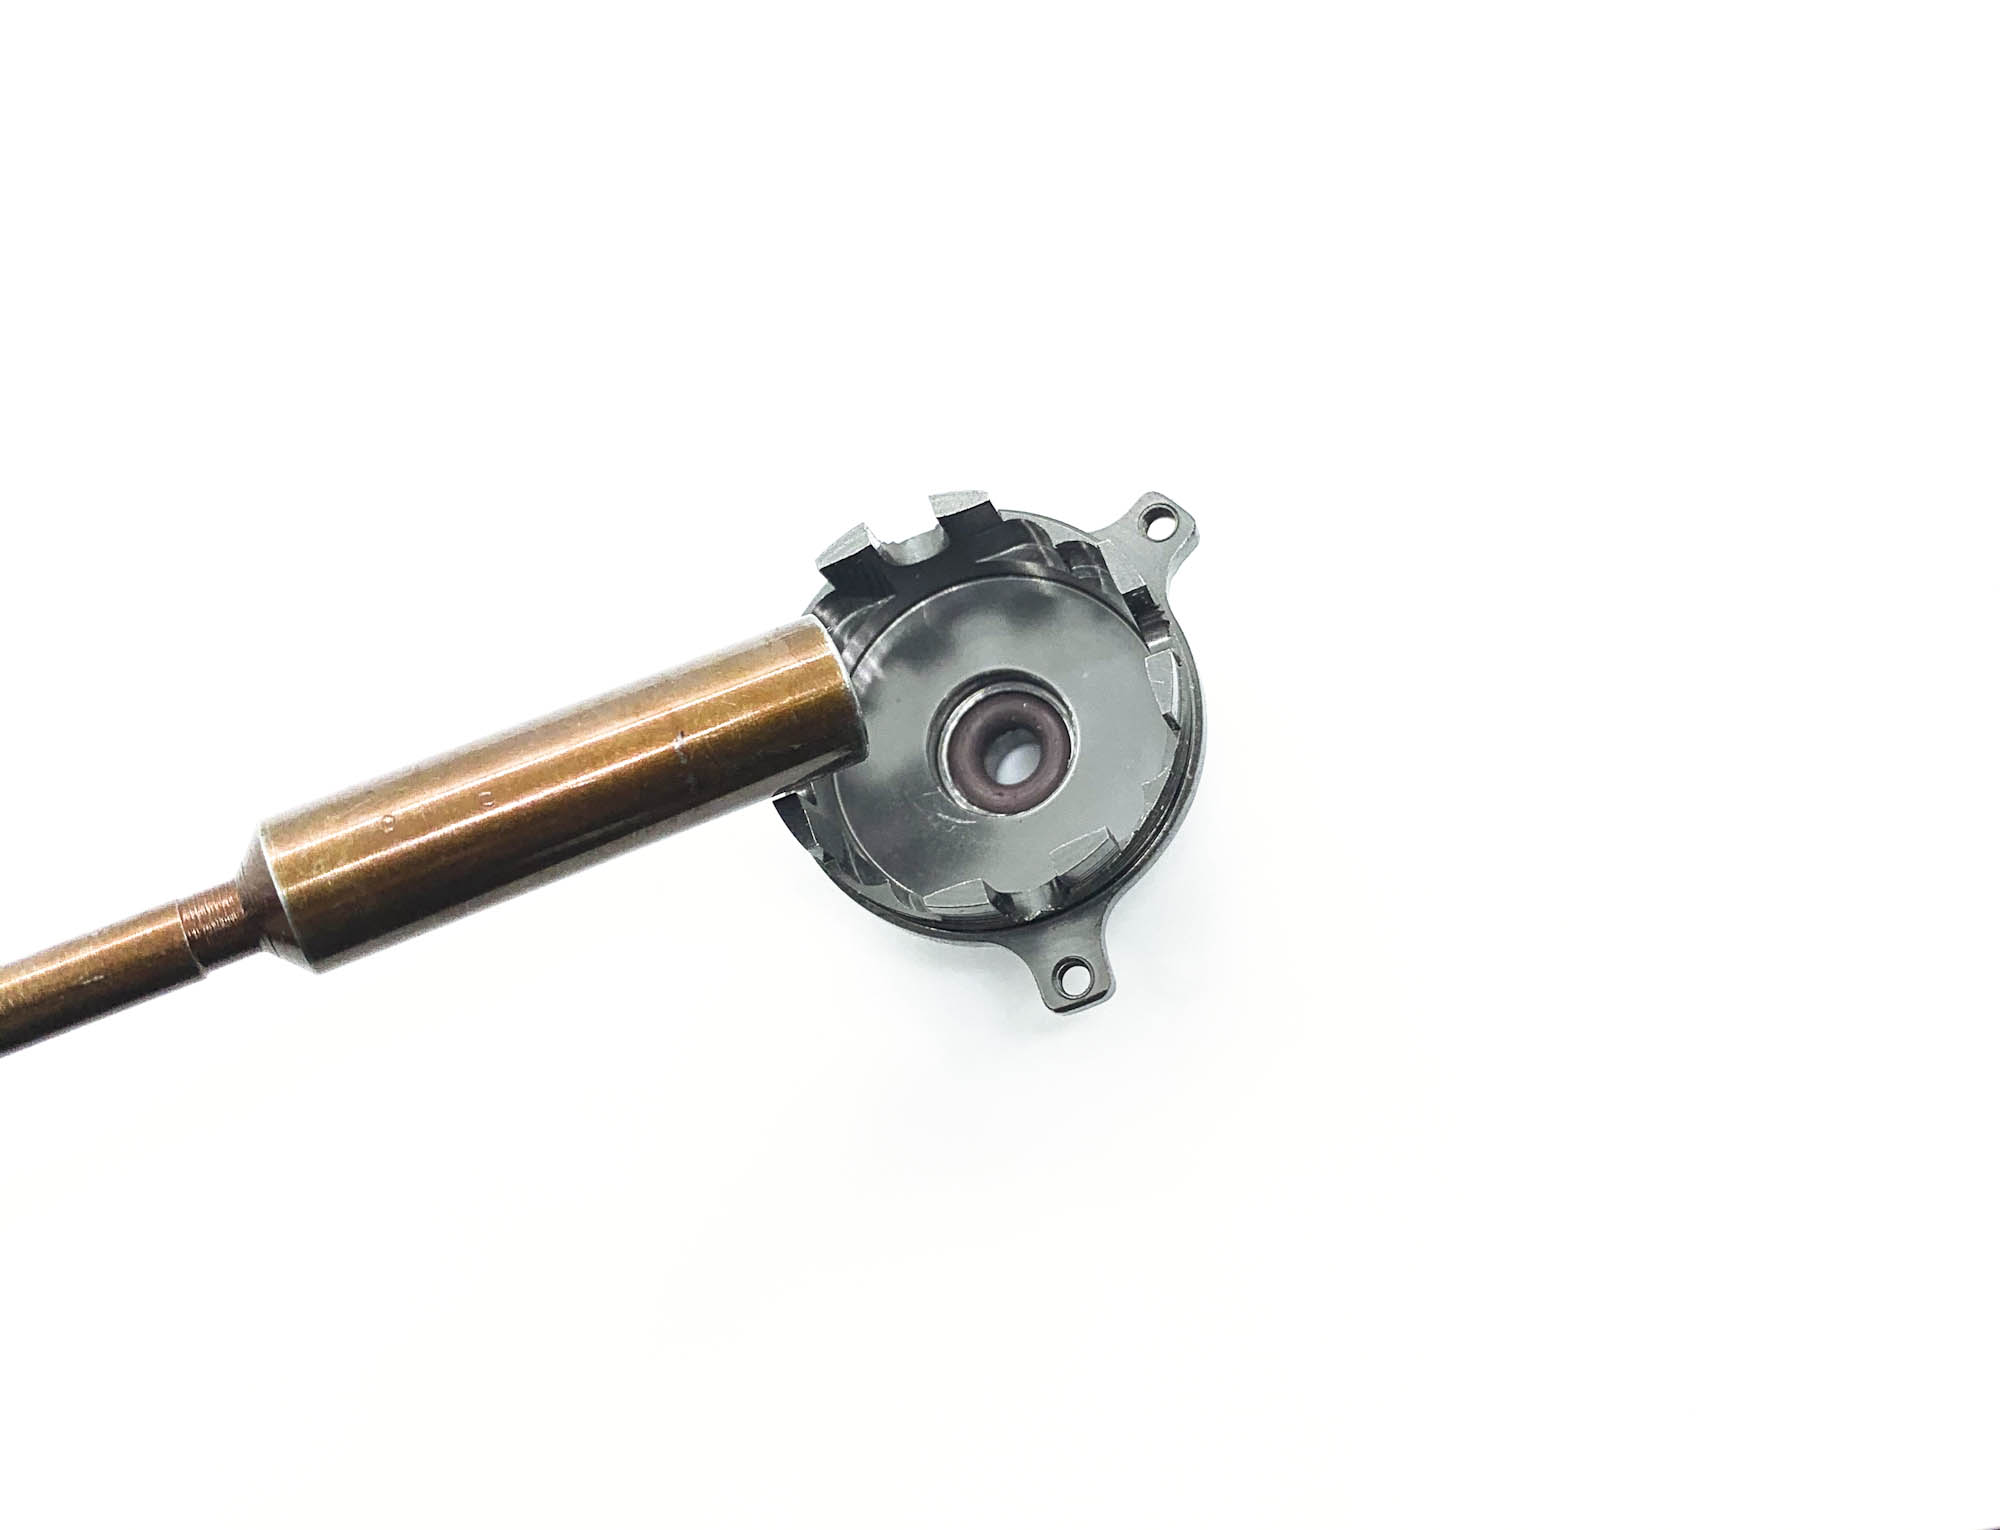
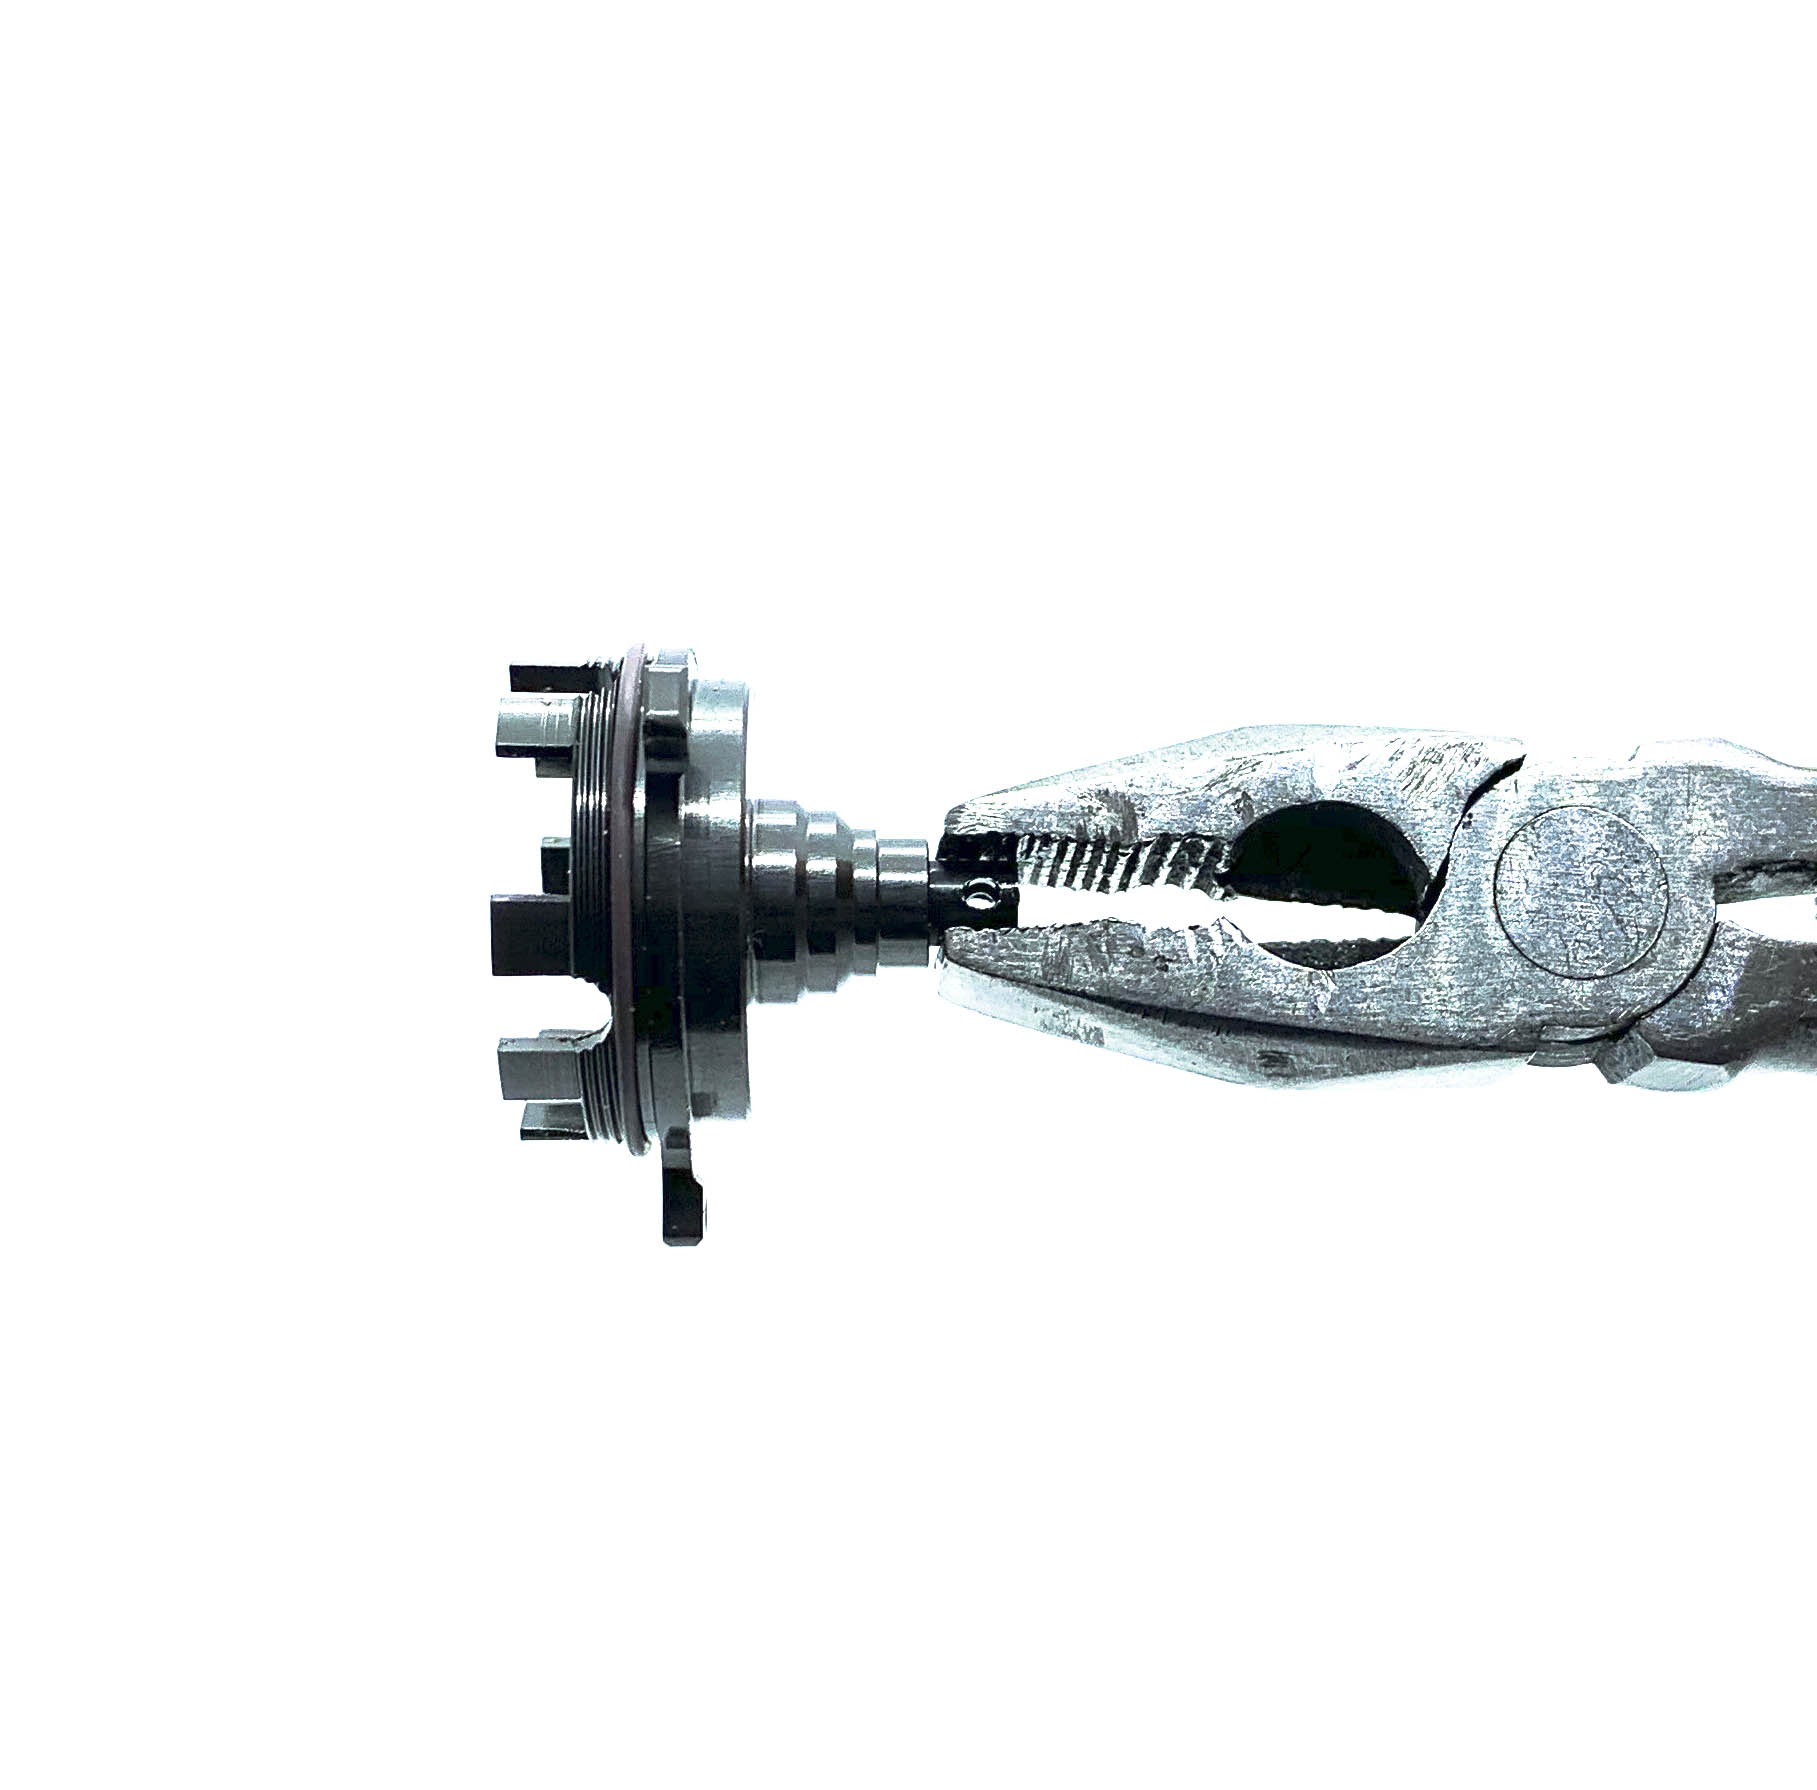
Push the ST31-1 with WA03 washer during the housing into its position. Make sure WA03 is centered and in correct position on ST31-1 shaft!
I always use pliers to pull and turn the shaft a view times after installation to maker sure it sit correctly and moves smoothly.
Make sure to give the silicone oil some time to let the airbubbles move up. Alternative you can even use an vacuum pump for this.
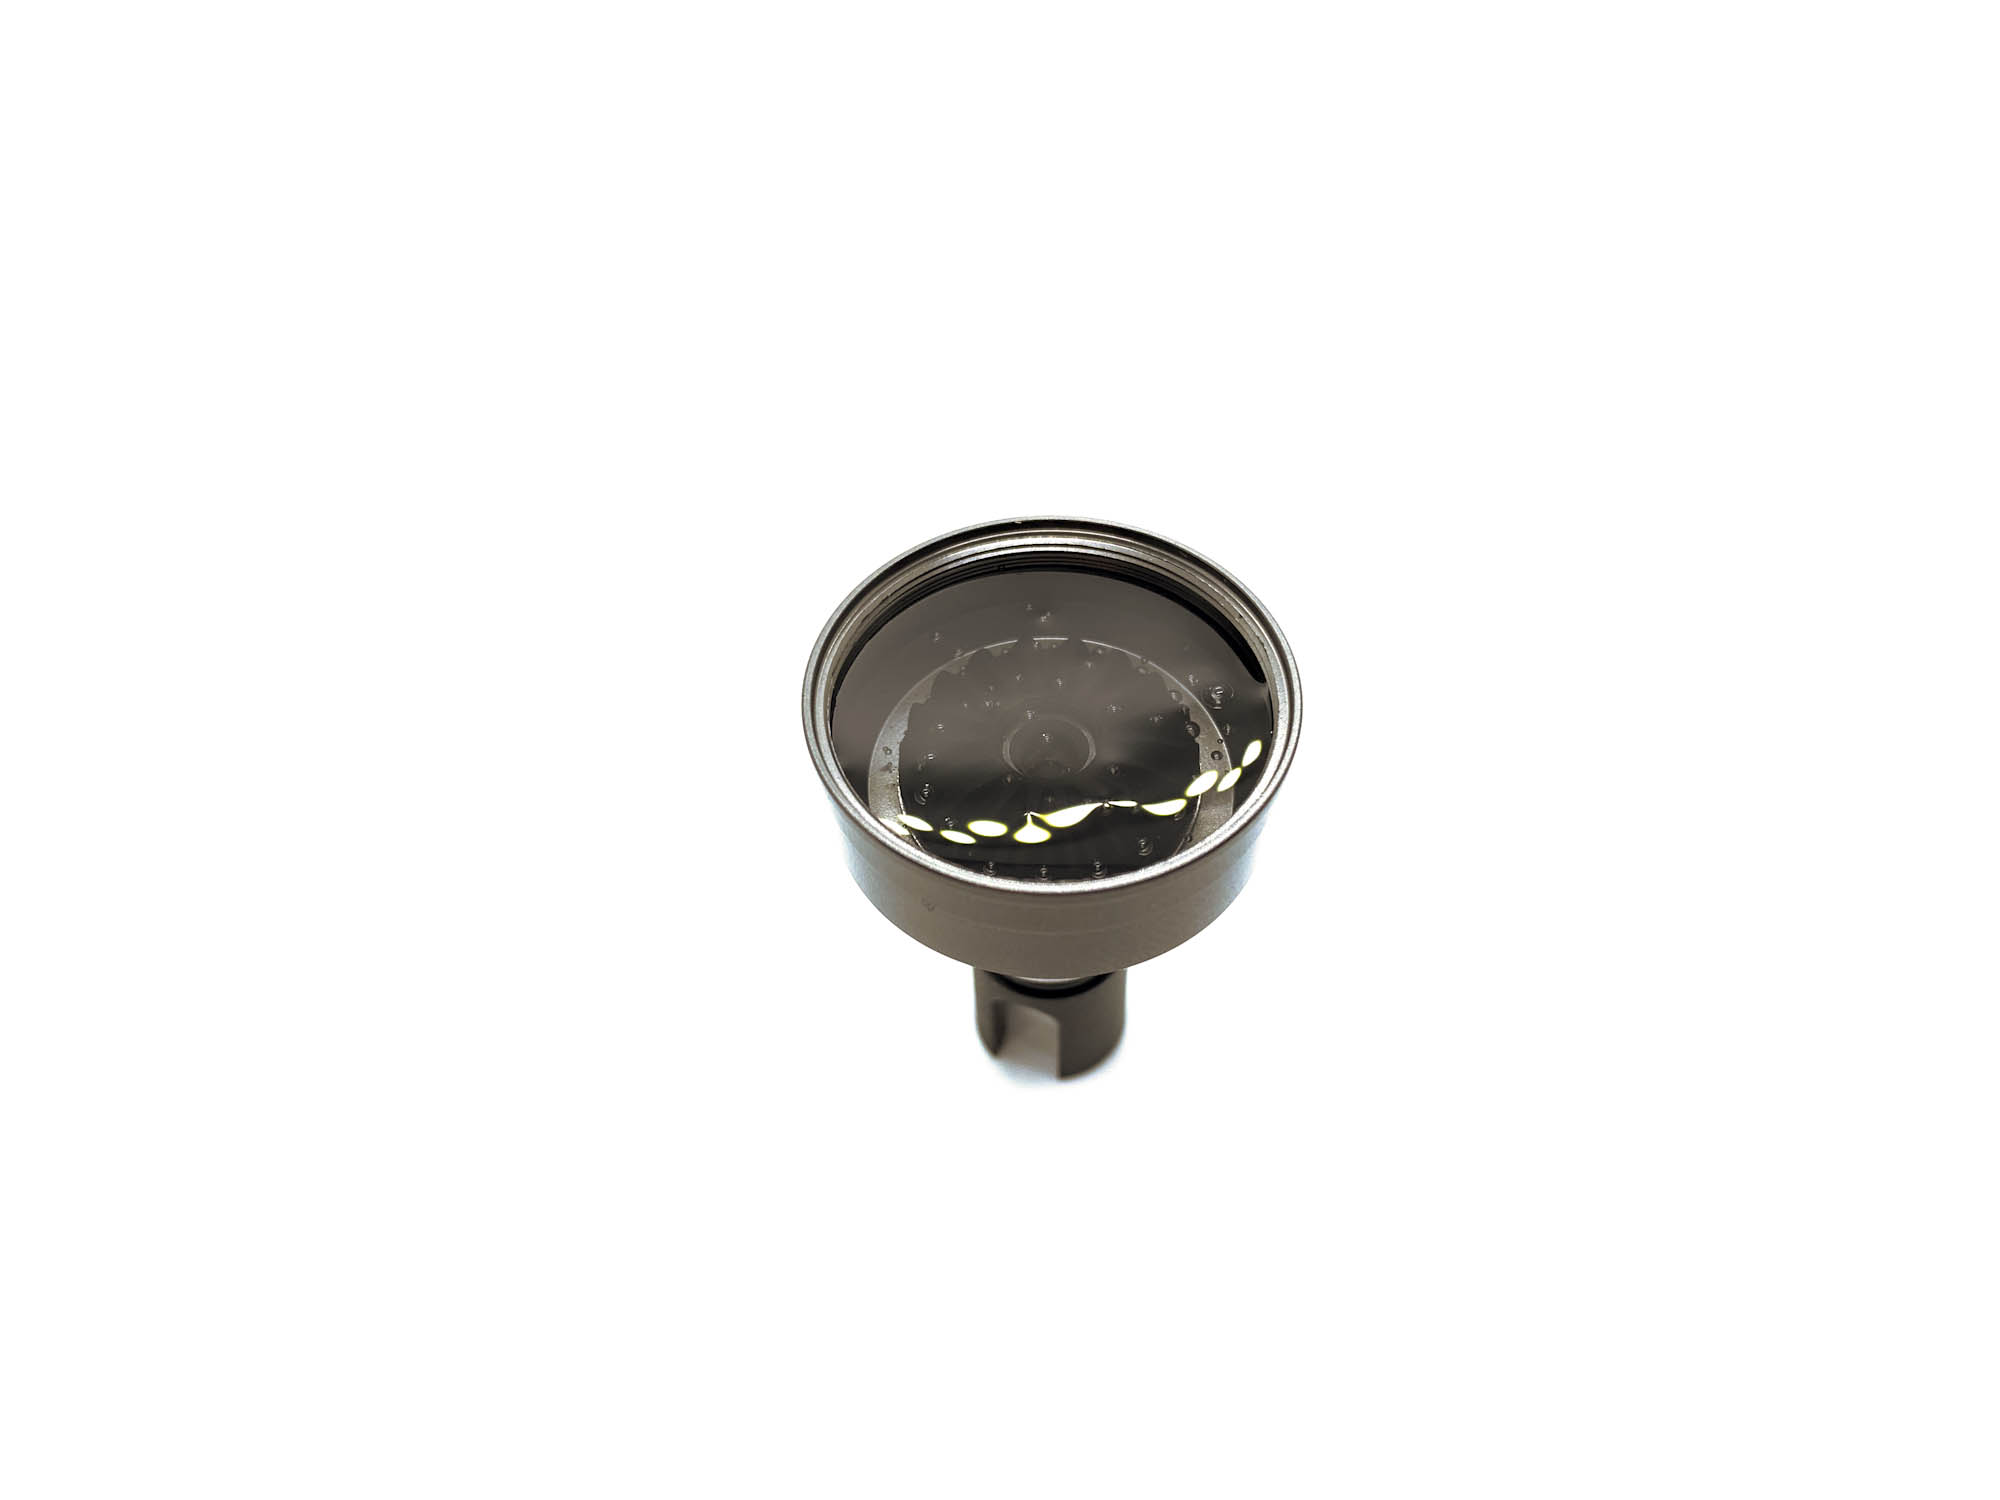
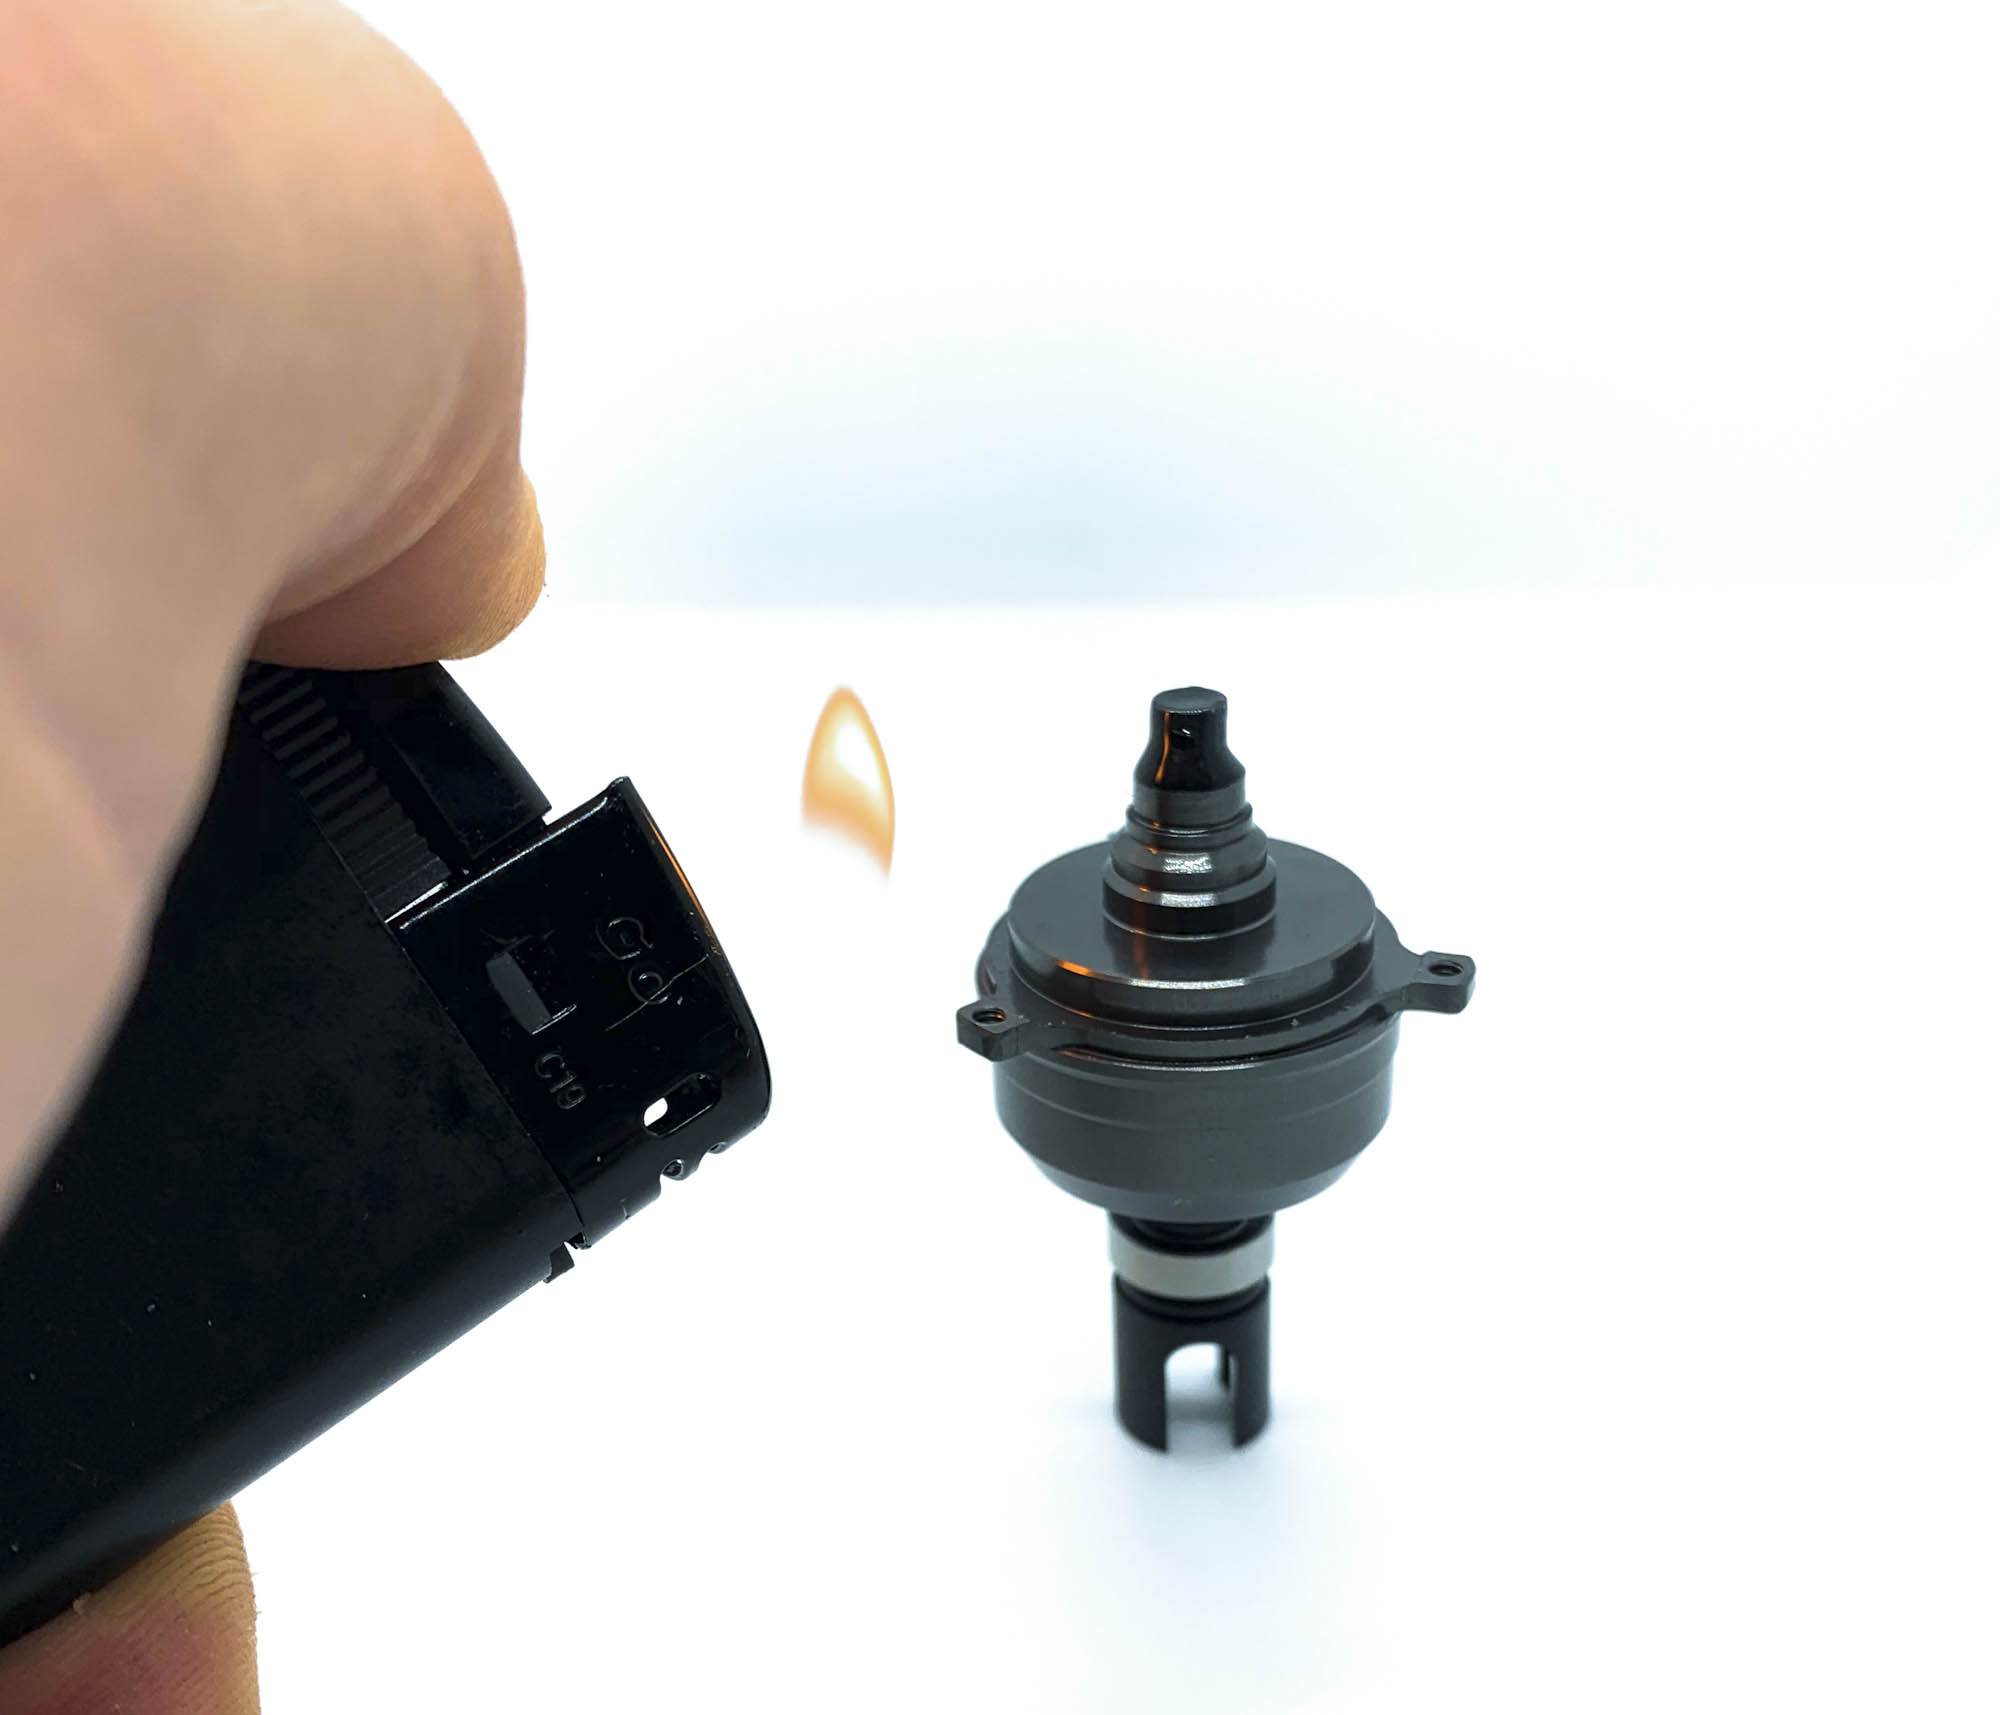
Another useful tip is the "lighter trick".
After full screwing of the diff, let one side of the shaft still open and don't close it via P46R.
Use a lighter to heat up the diff case (turn it several times). Don't heat it up to much, otherwise you can destroy or melt the o-rings!
You will note some more air bubbles coming out and also the to much filled oil will bleed out. With this method you are able to get the 100% correct amount of oil needed in your diff.
Clean the shaft, put in P46R and install B106RS and ST23X to finish your perfect build GD2B-R diff.
The shape of P138 is also updated slightly and secure a more "round" diff pulley than before.
At the front spool all is same as before.
No need for any updates as its super light and reliable at same time.

Diff and Spool ready!
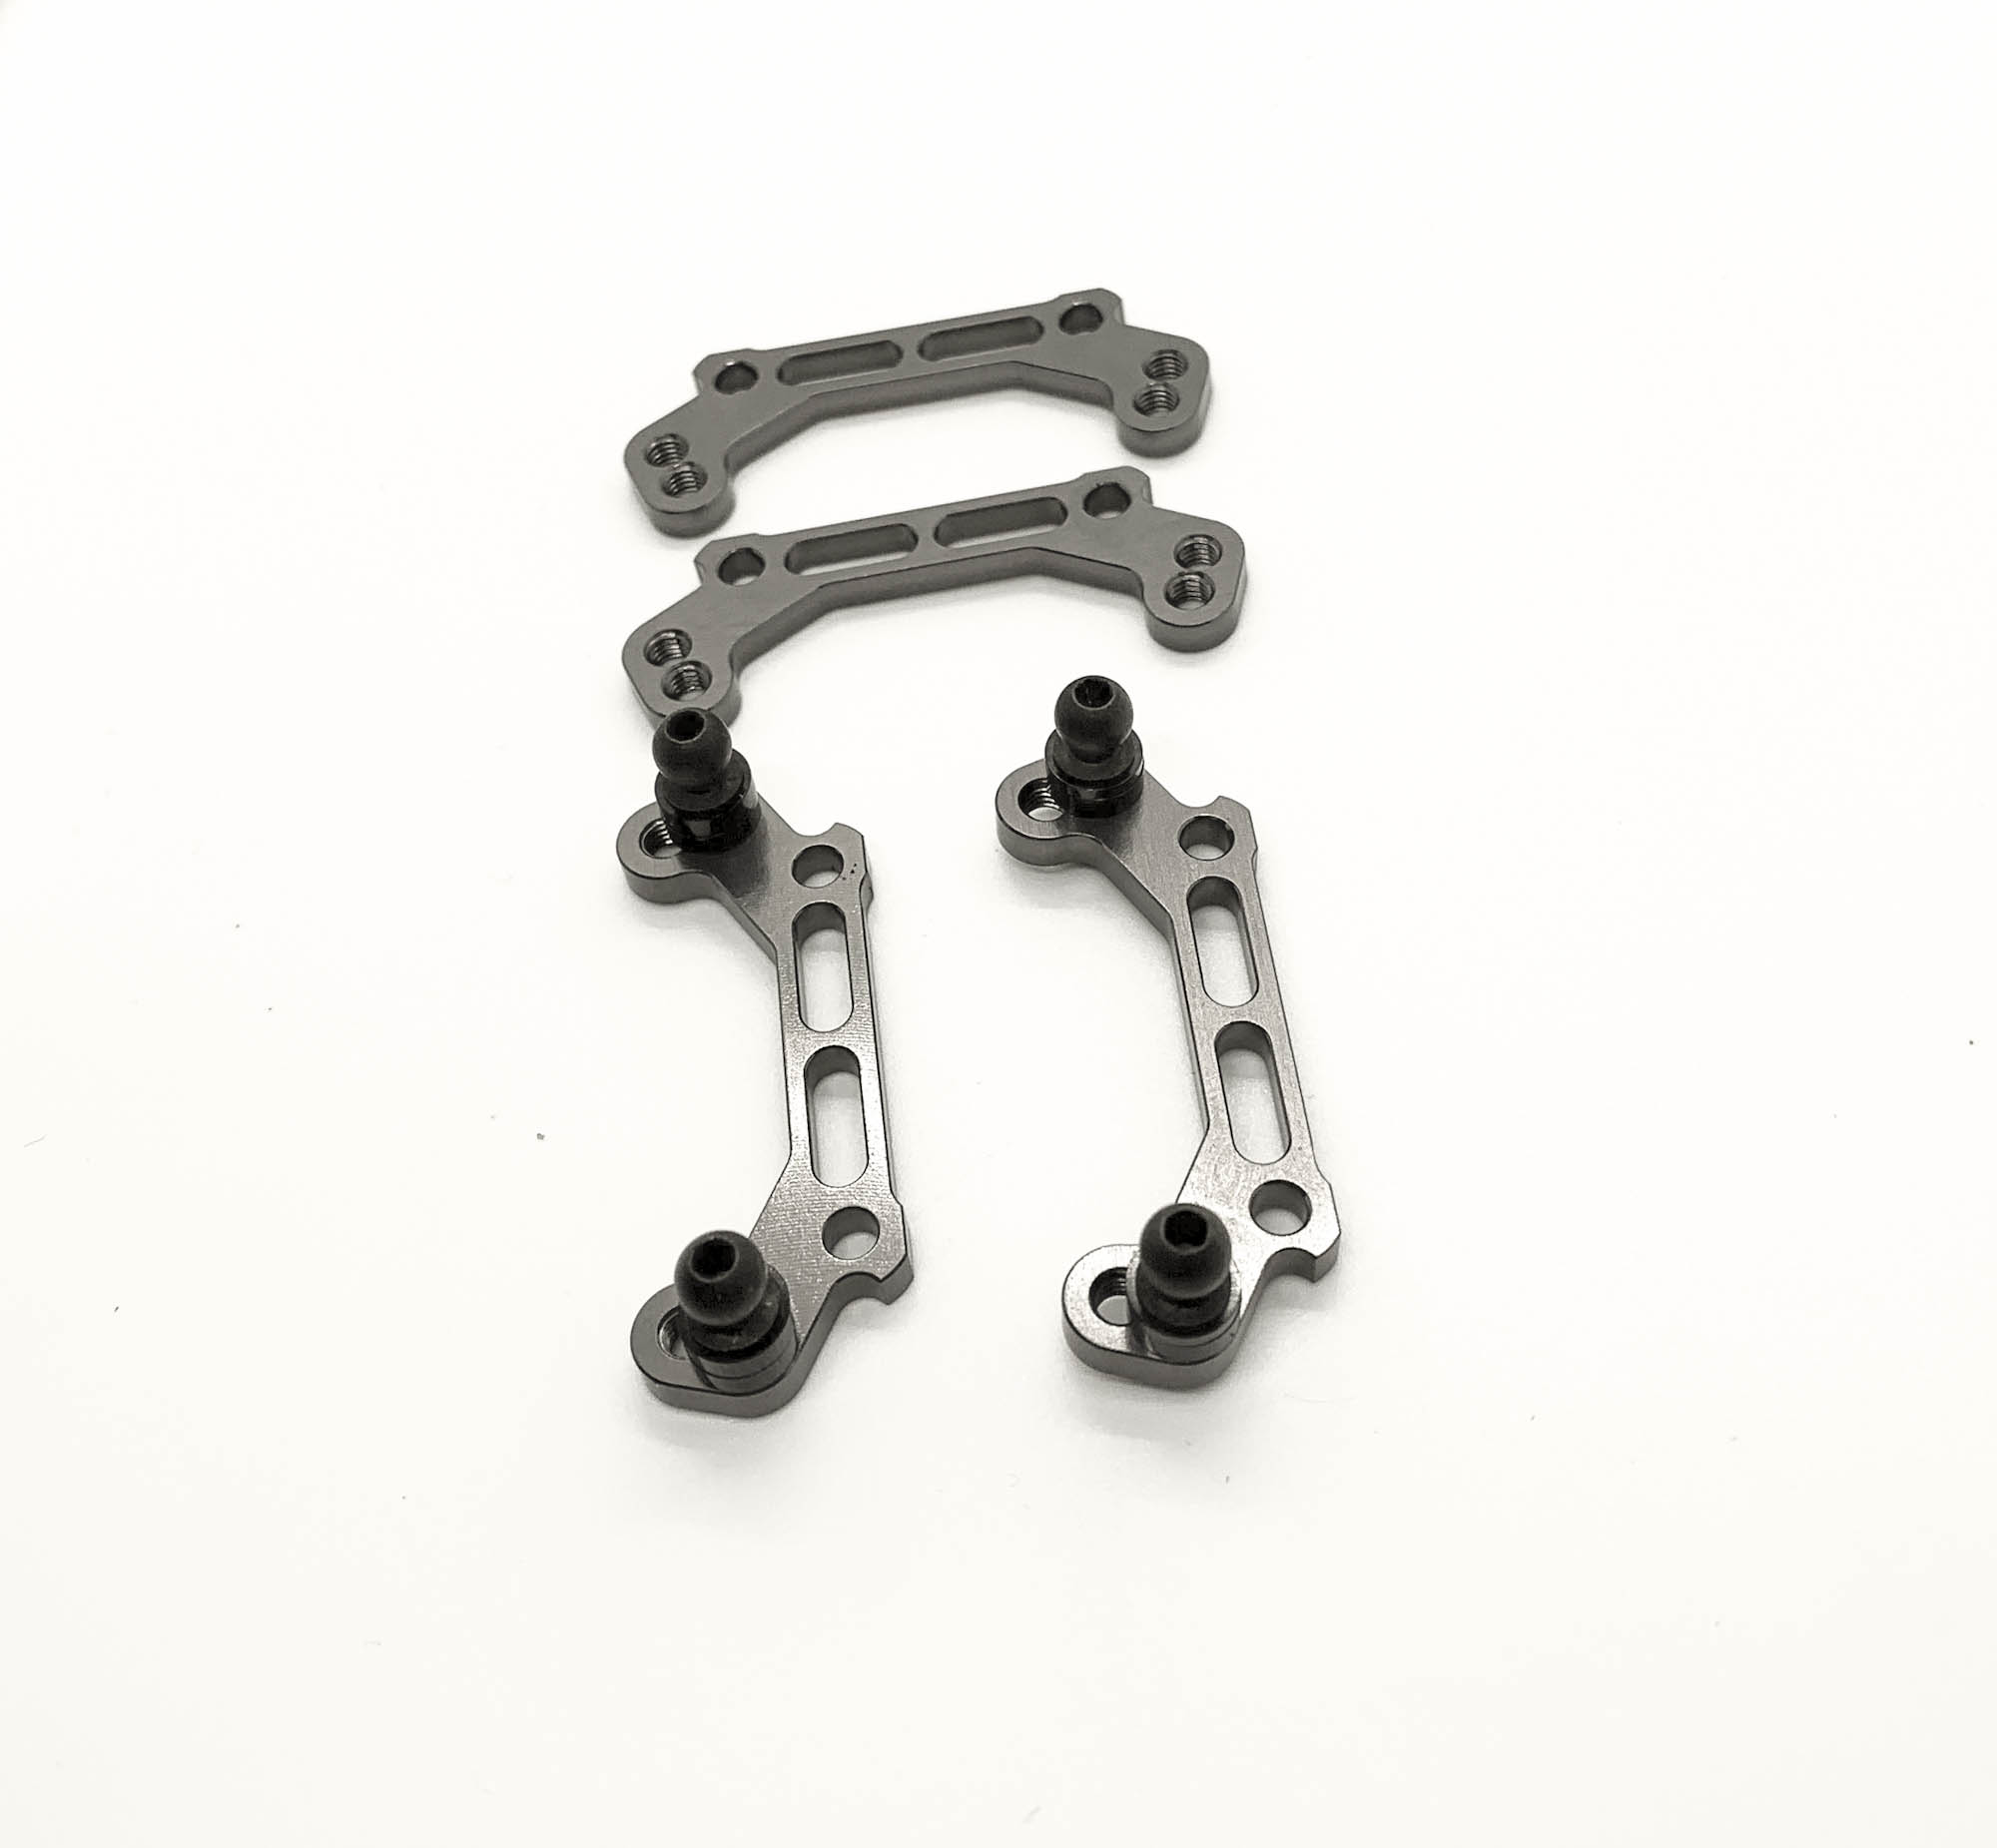
In the A800MMX kits are the new AM19-FX toplink holder the new standard. They are 0,25mm thicker than AM19-2 and offer a slighlty different toplink position which improves the smoothness of the suspension action.
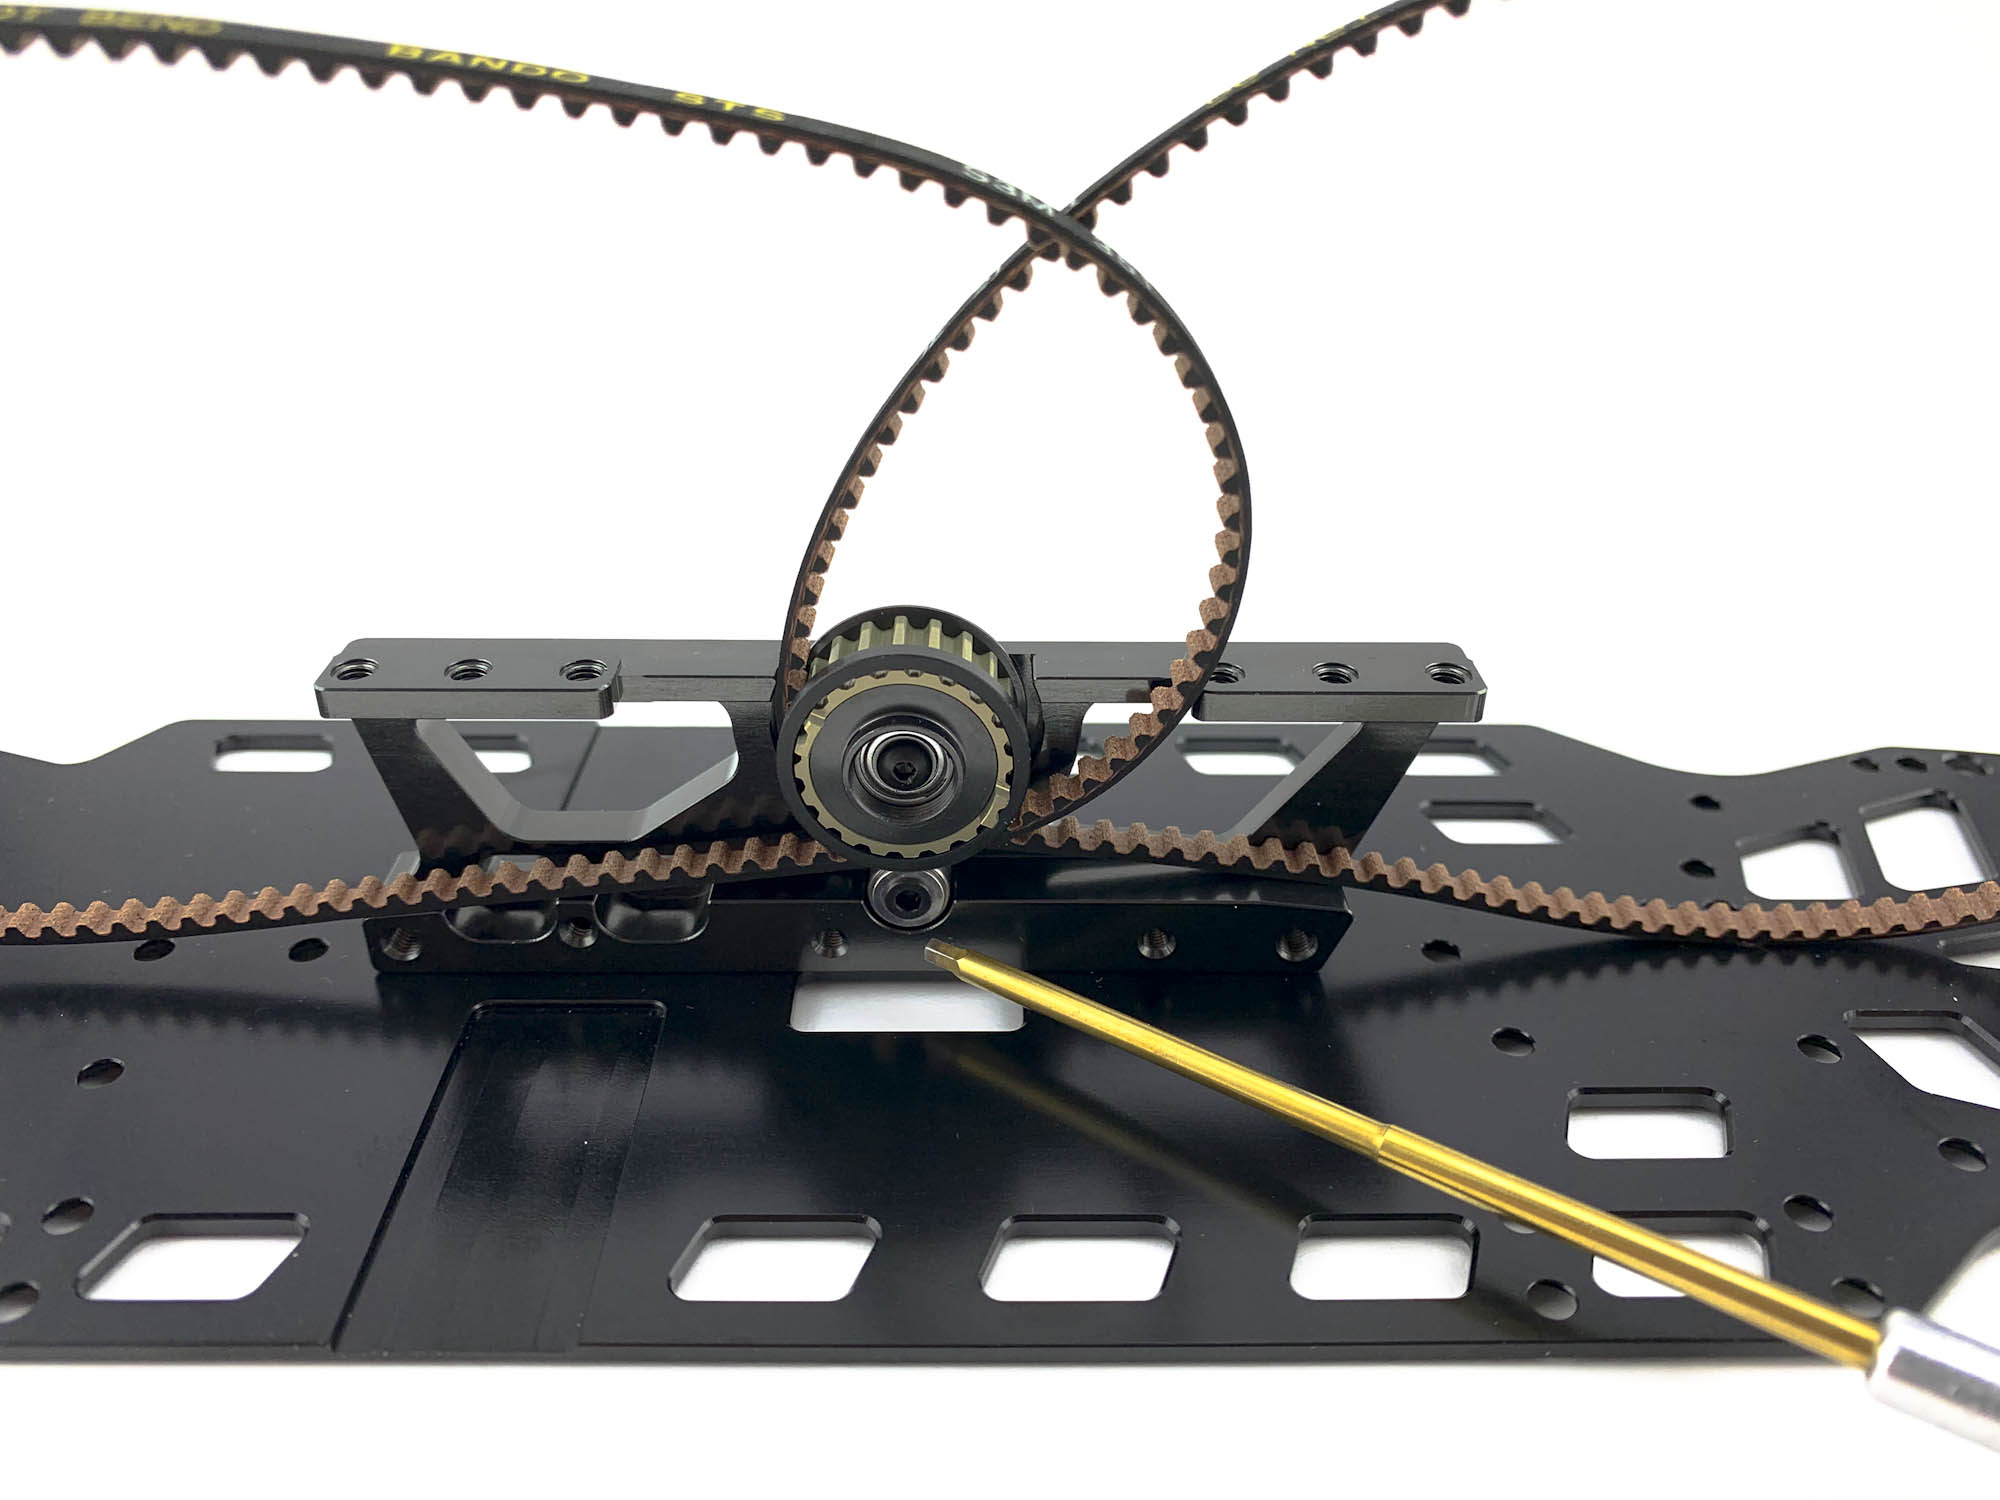
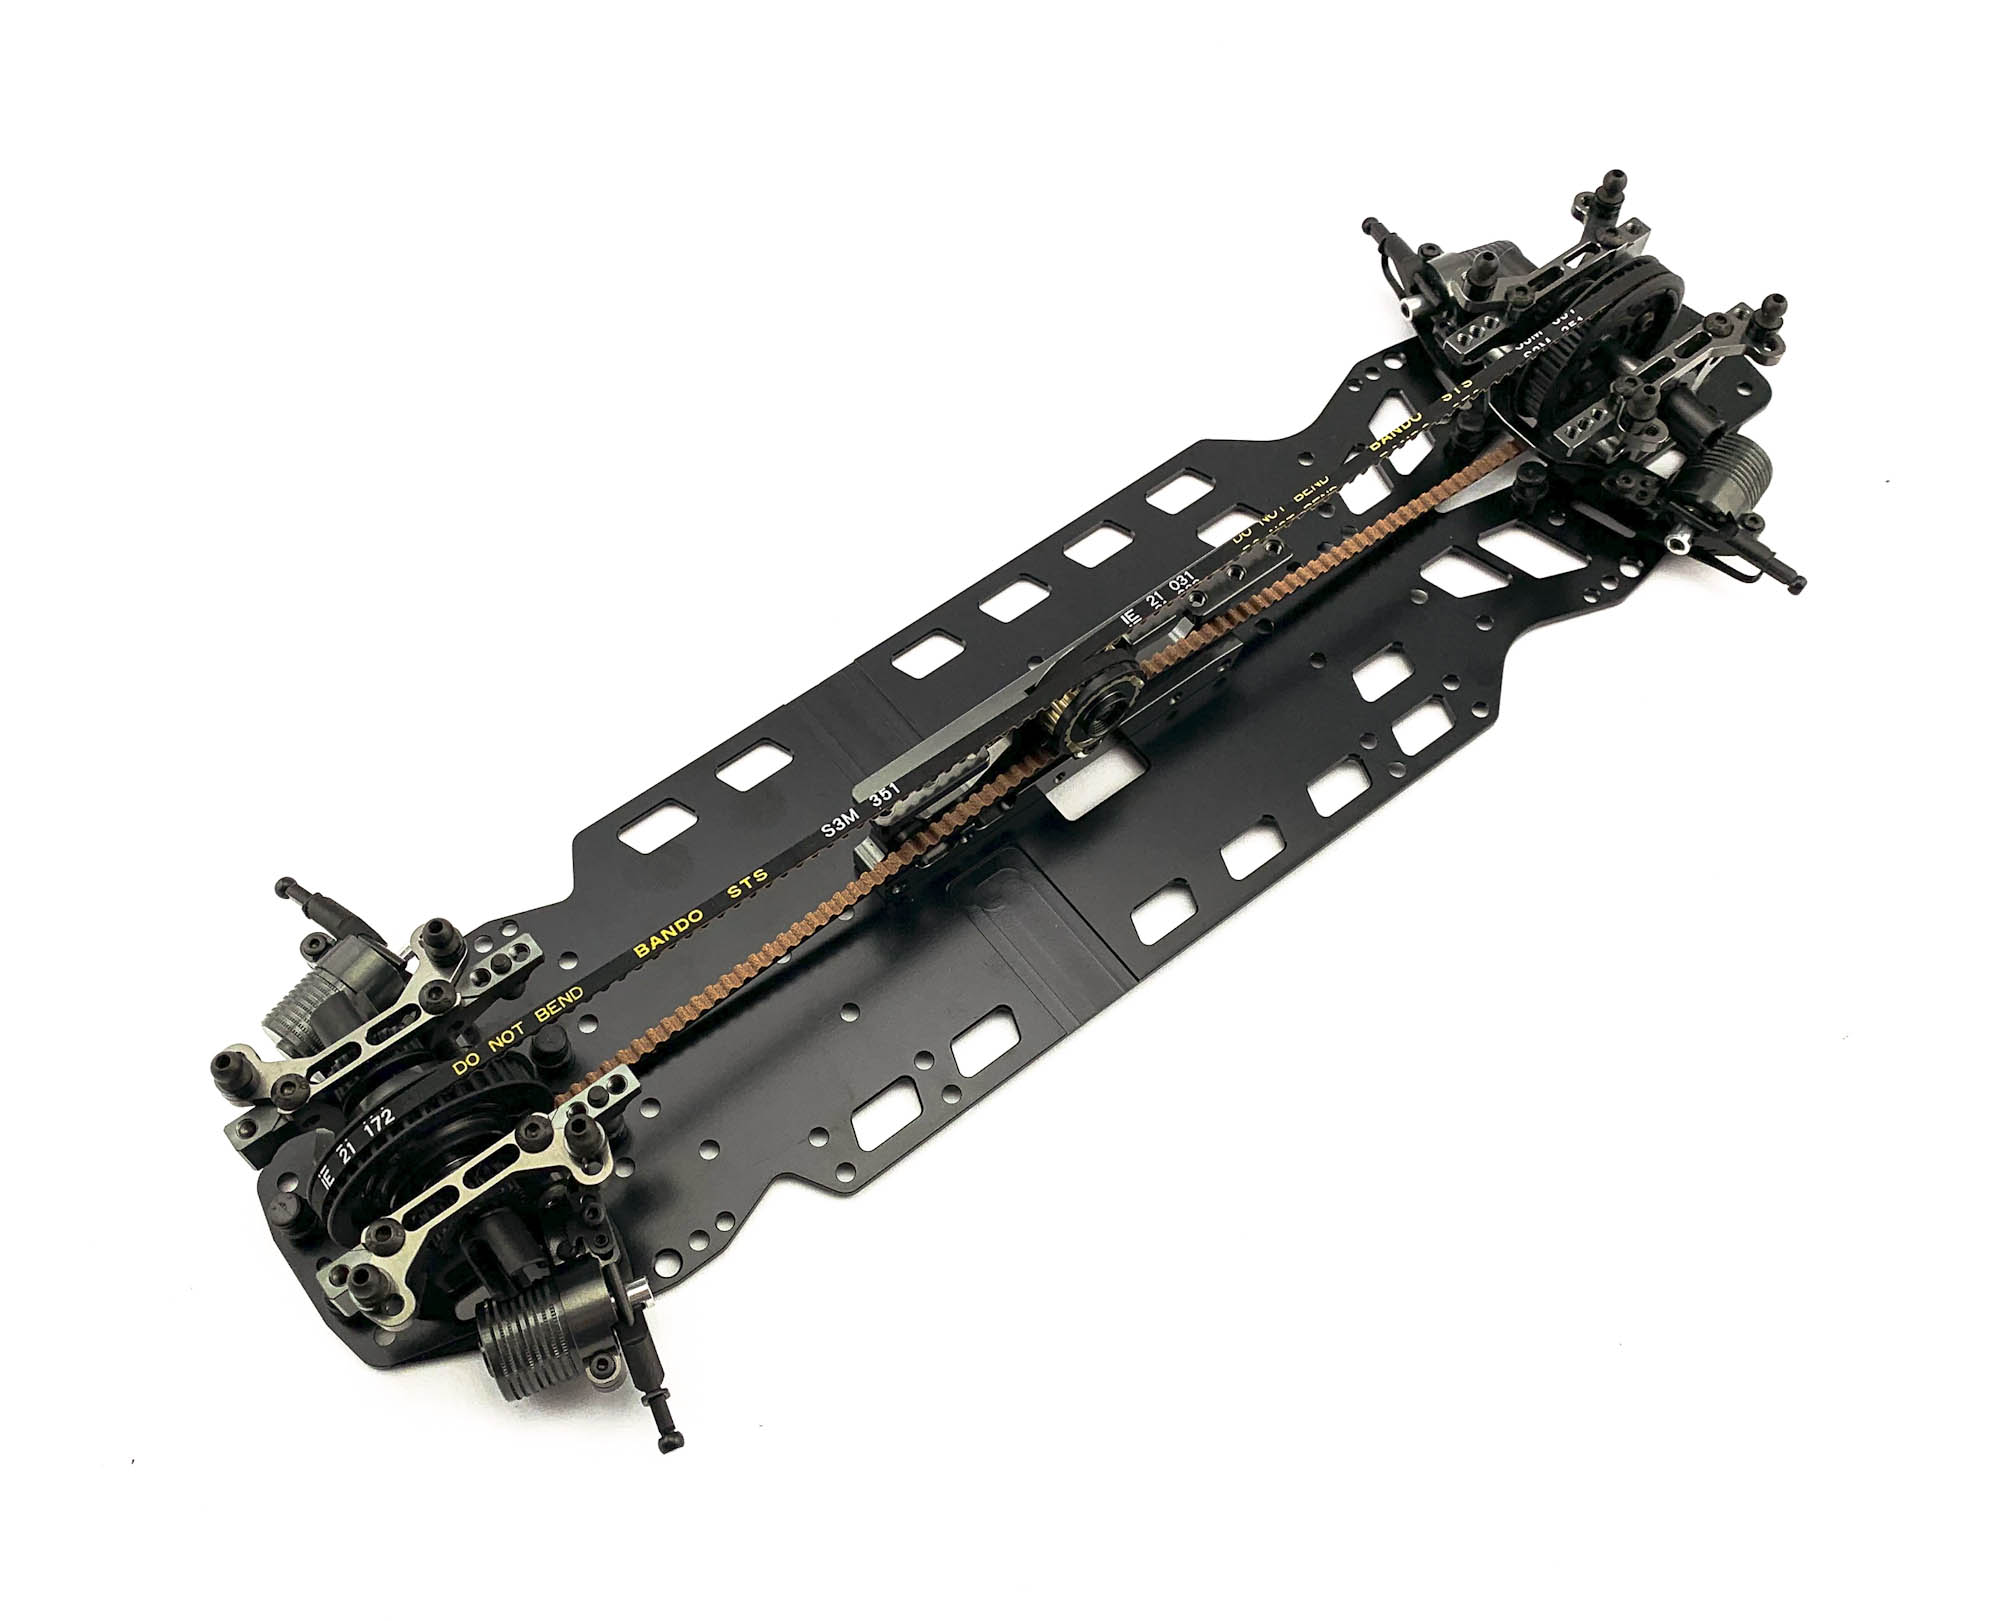
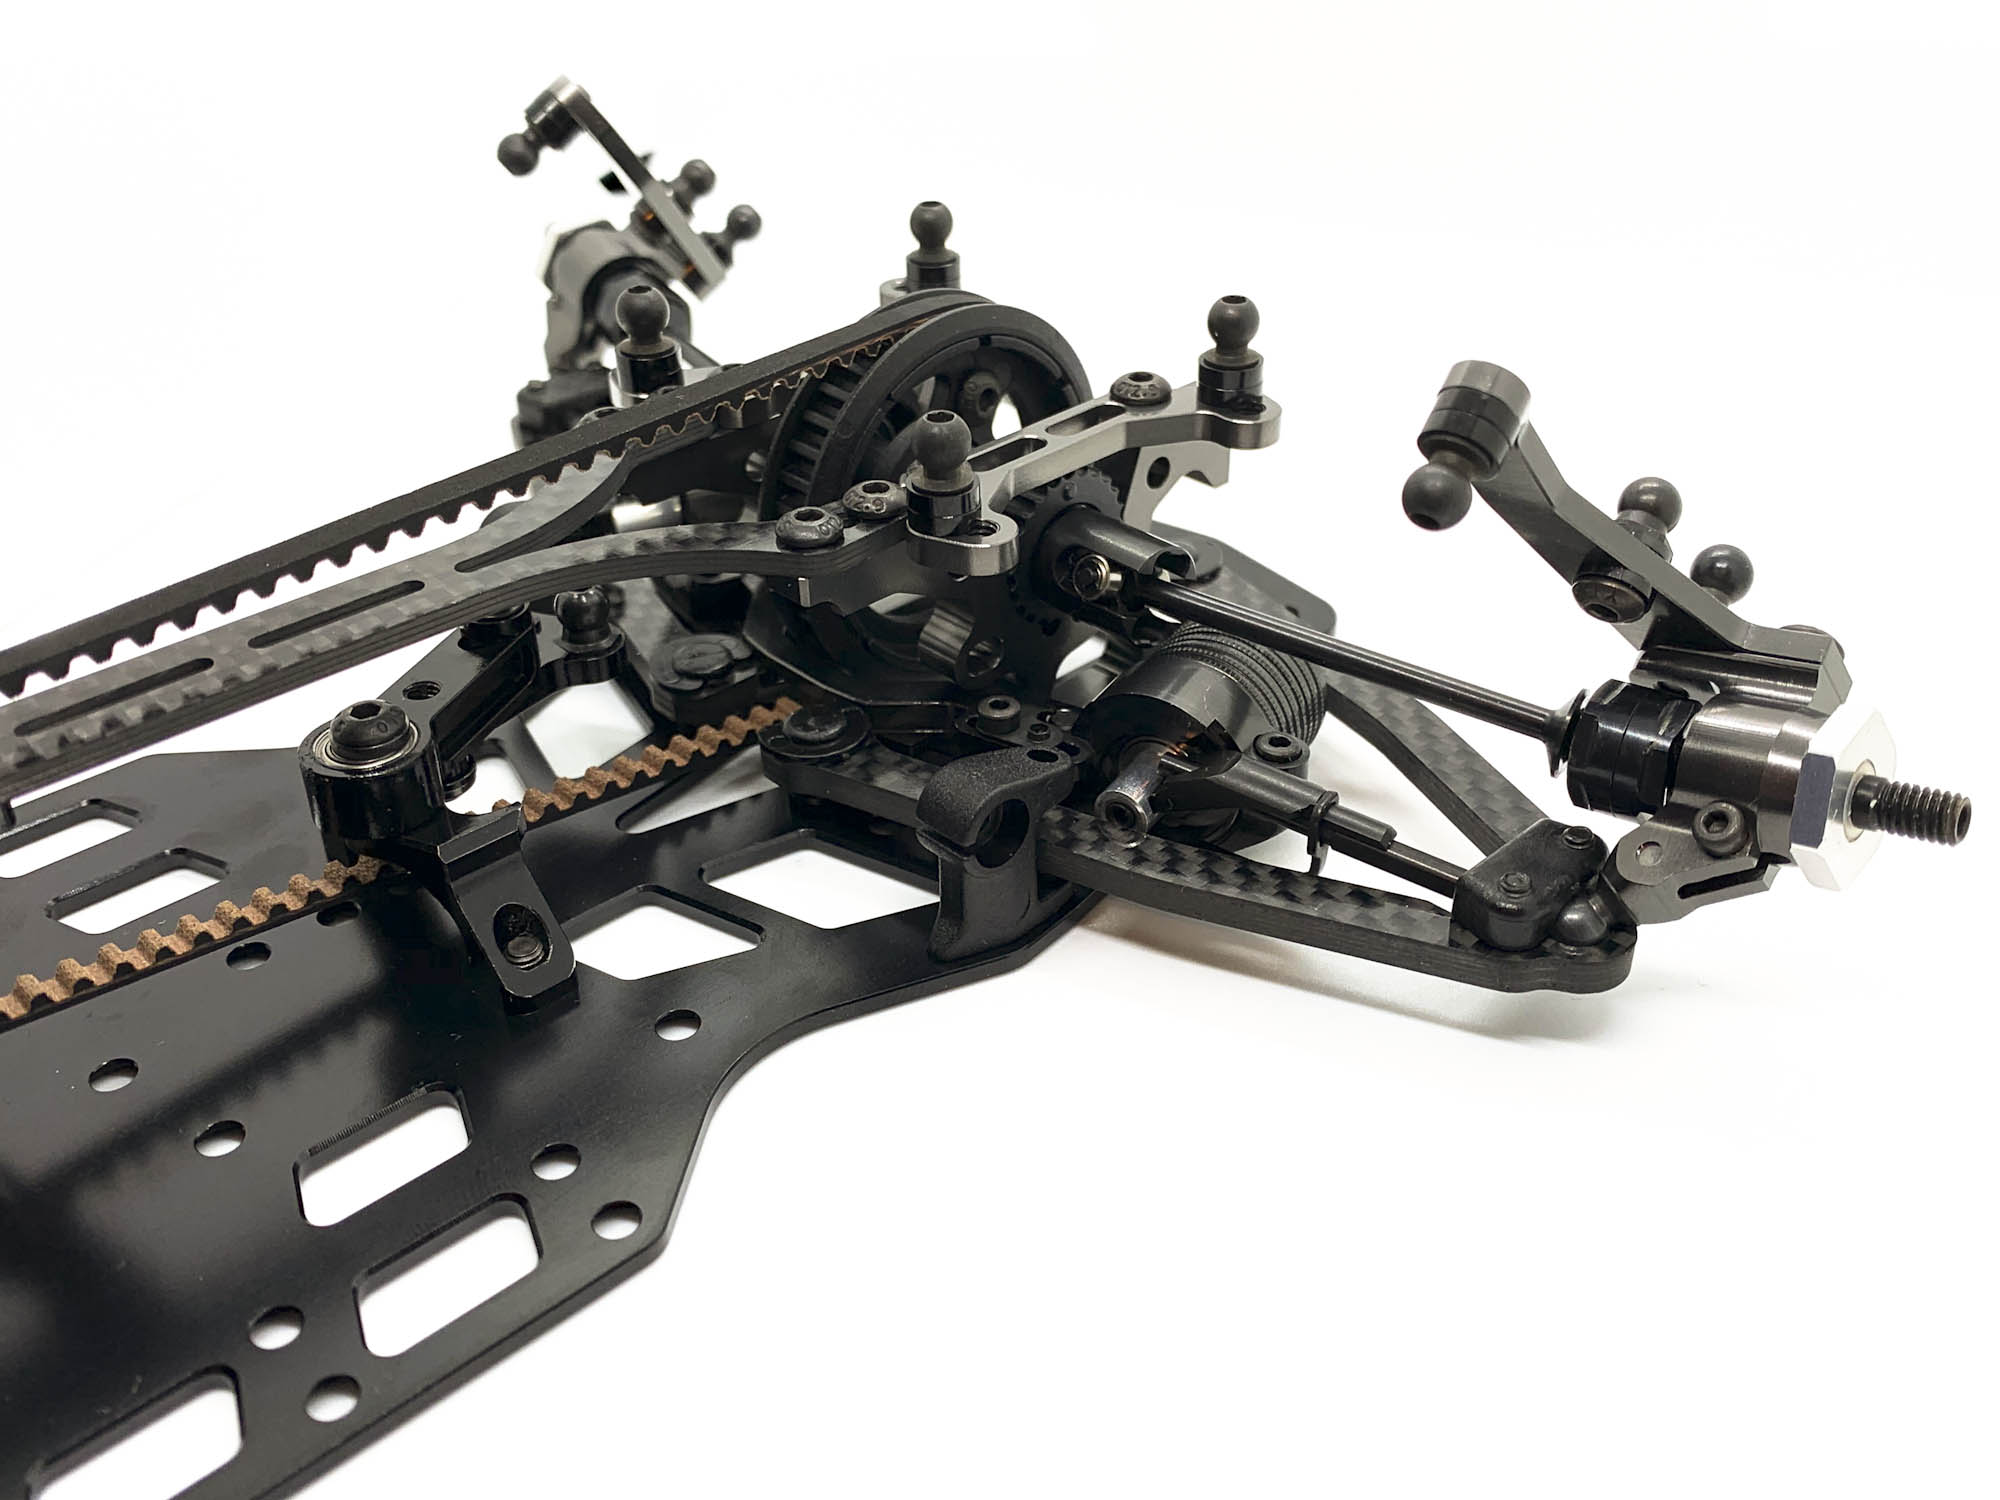
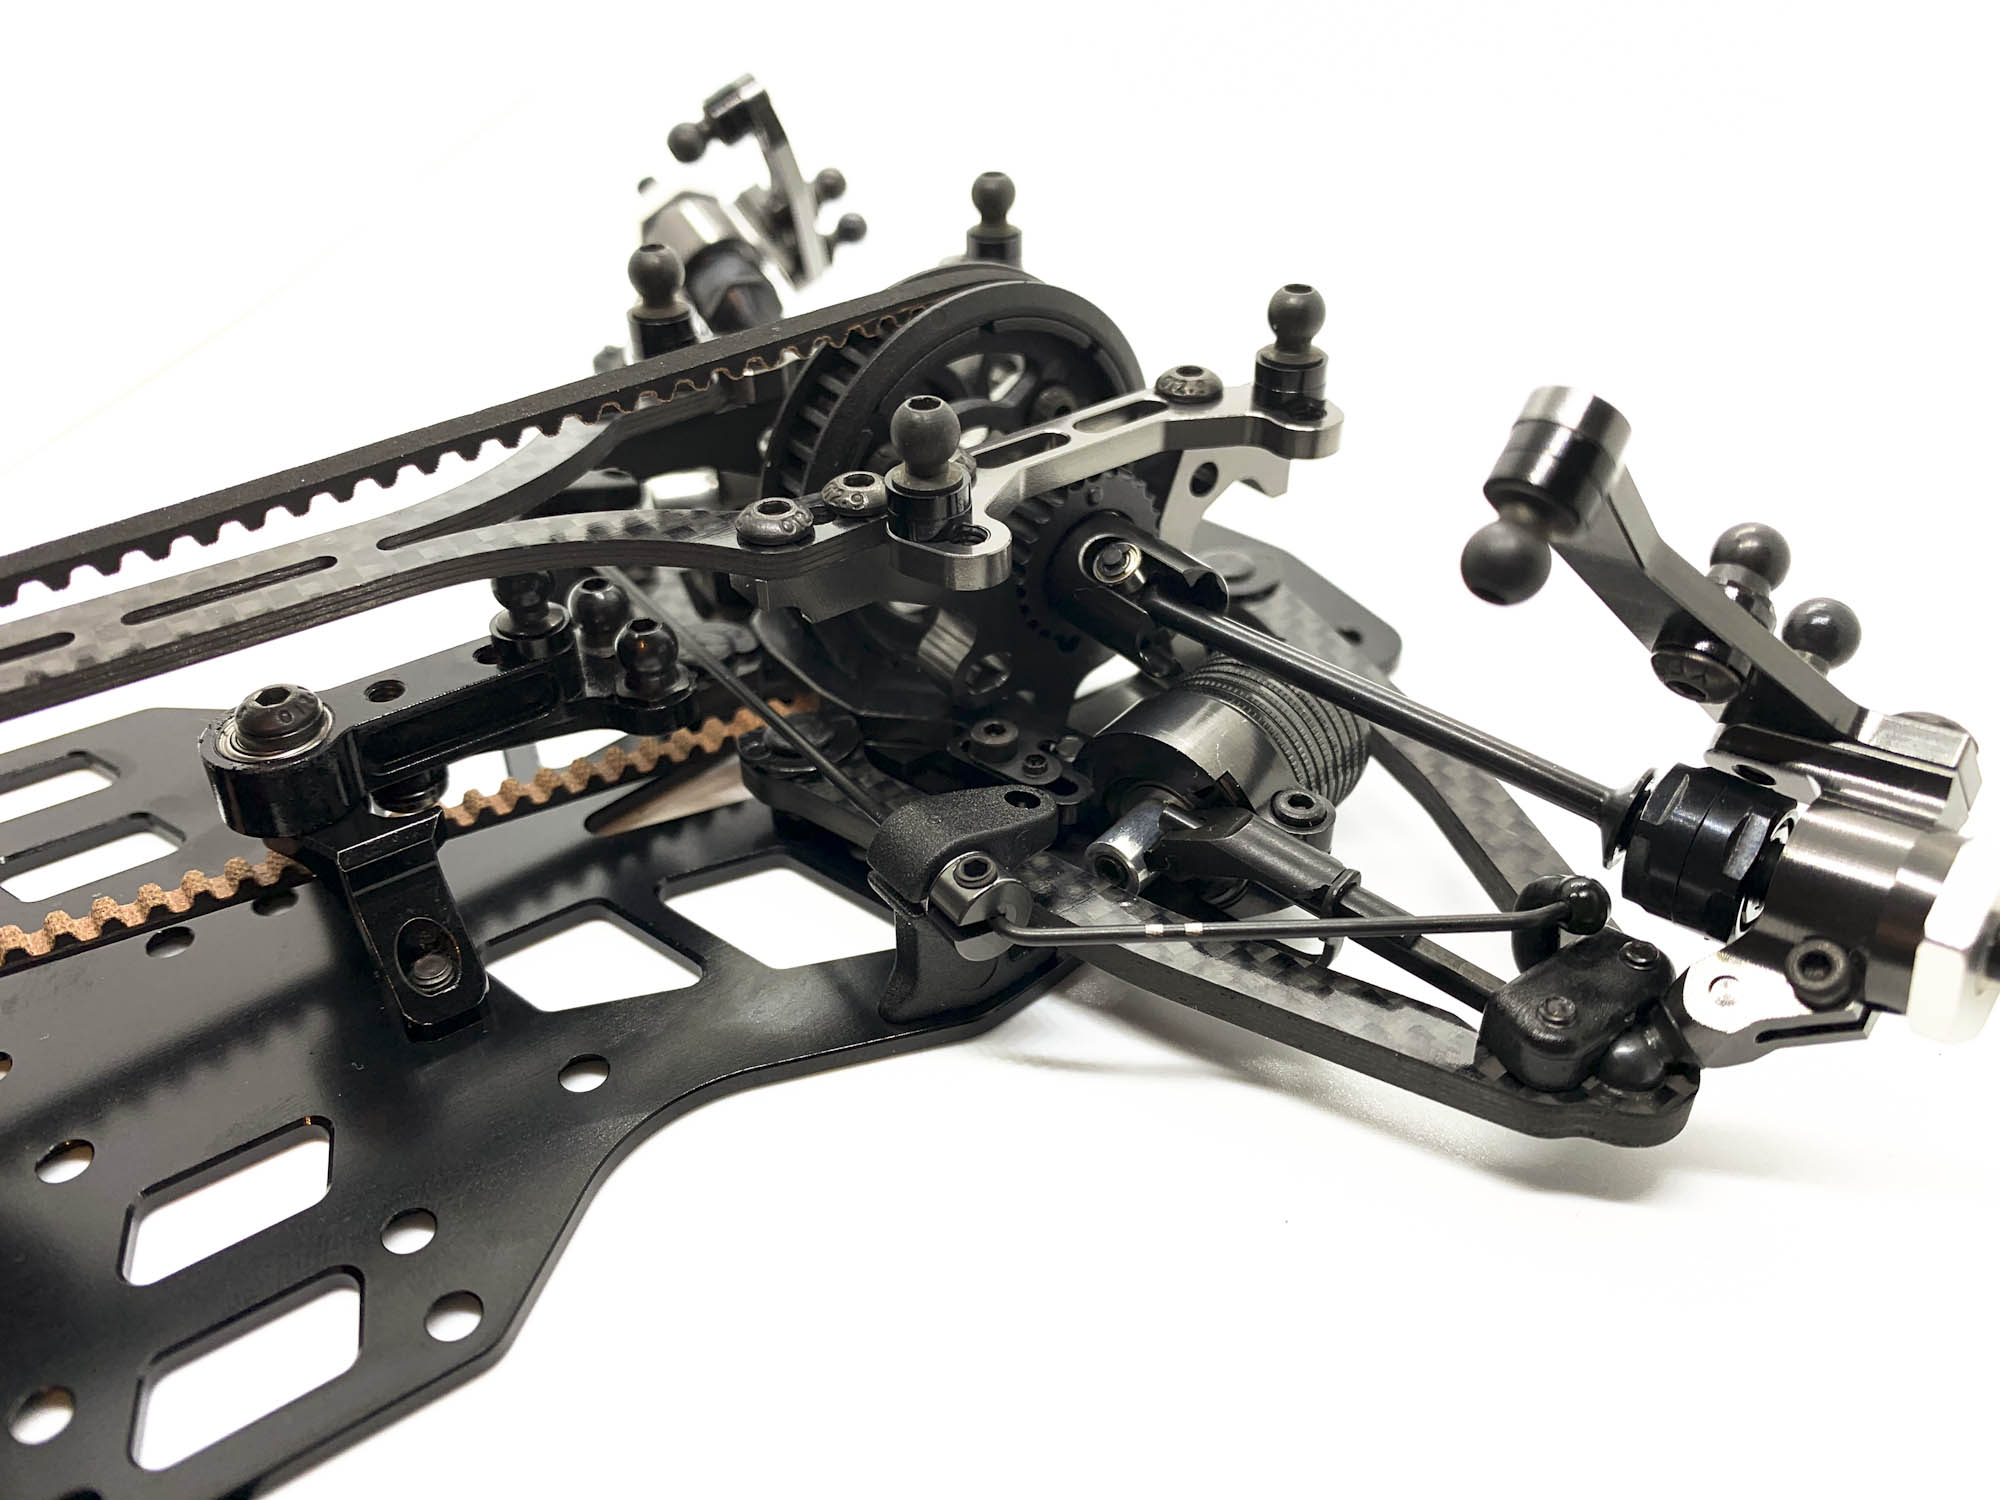
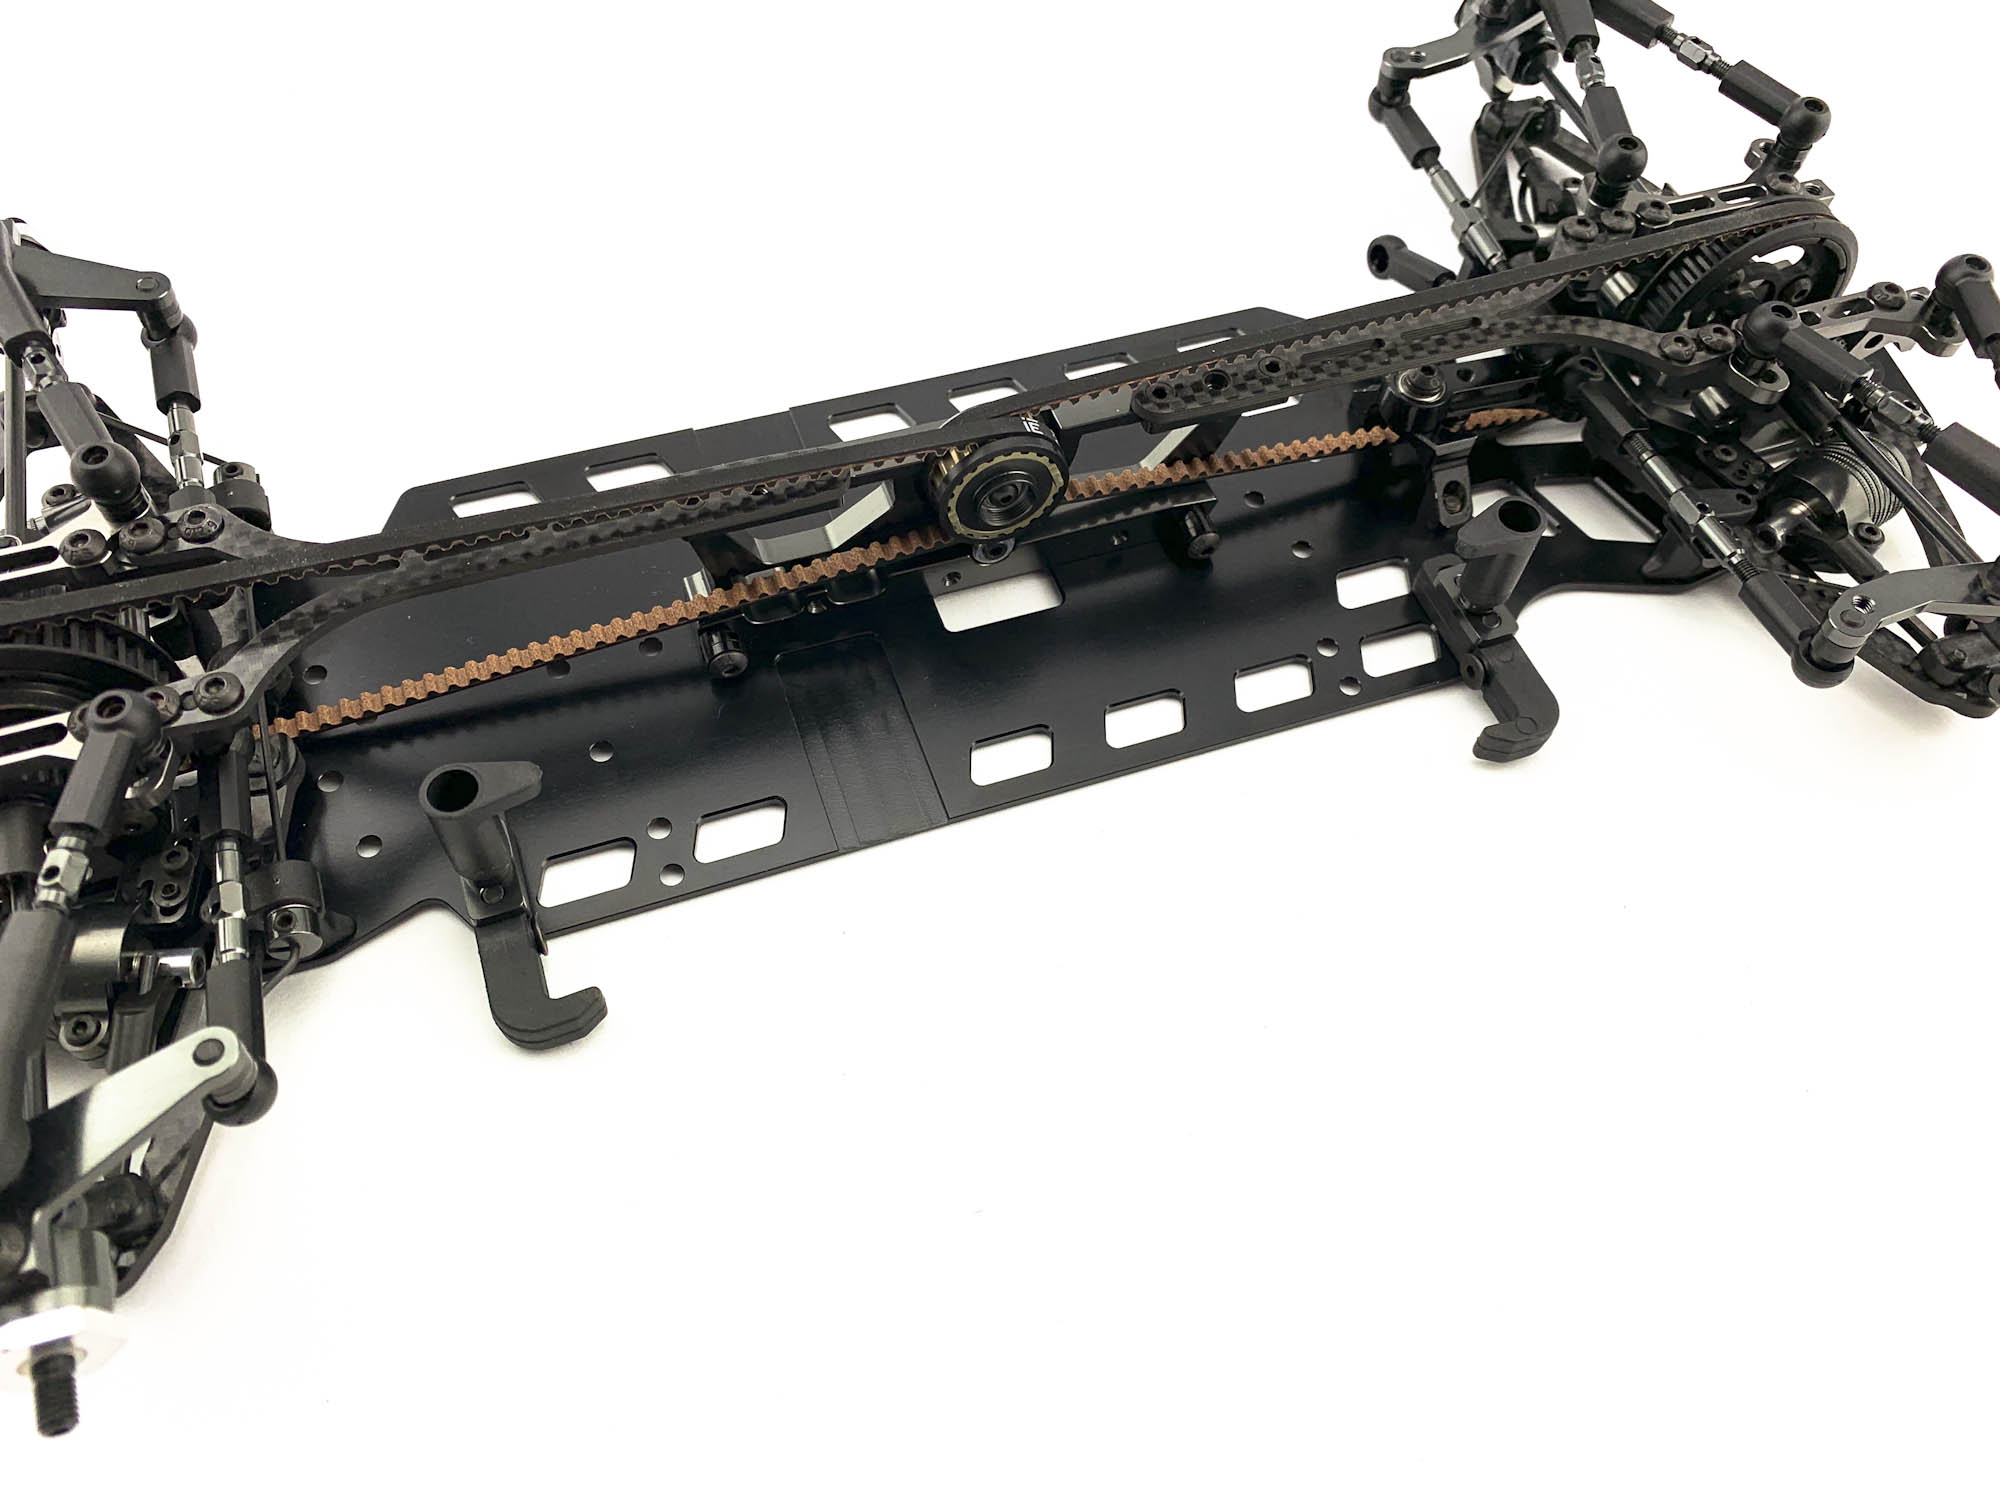
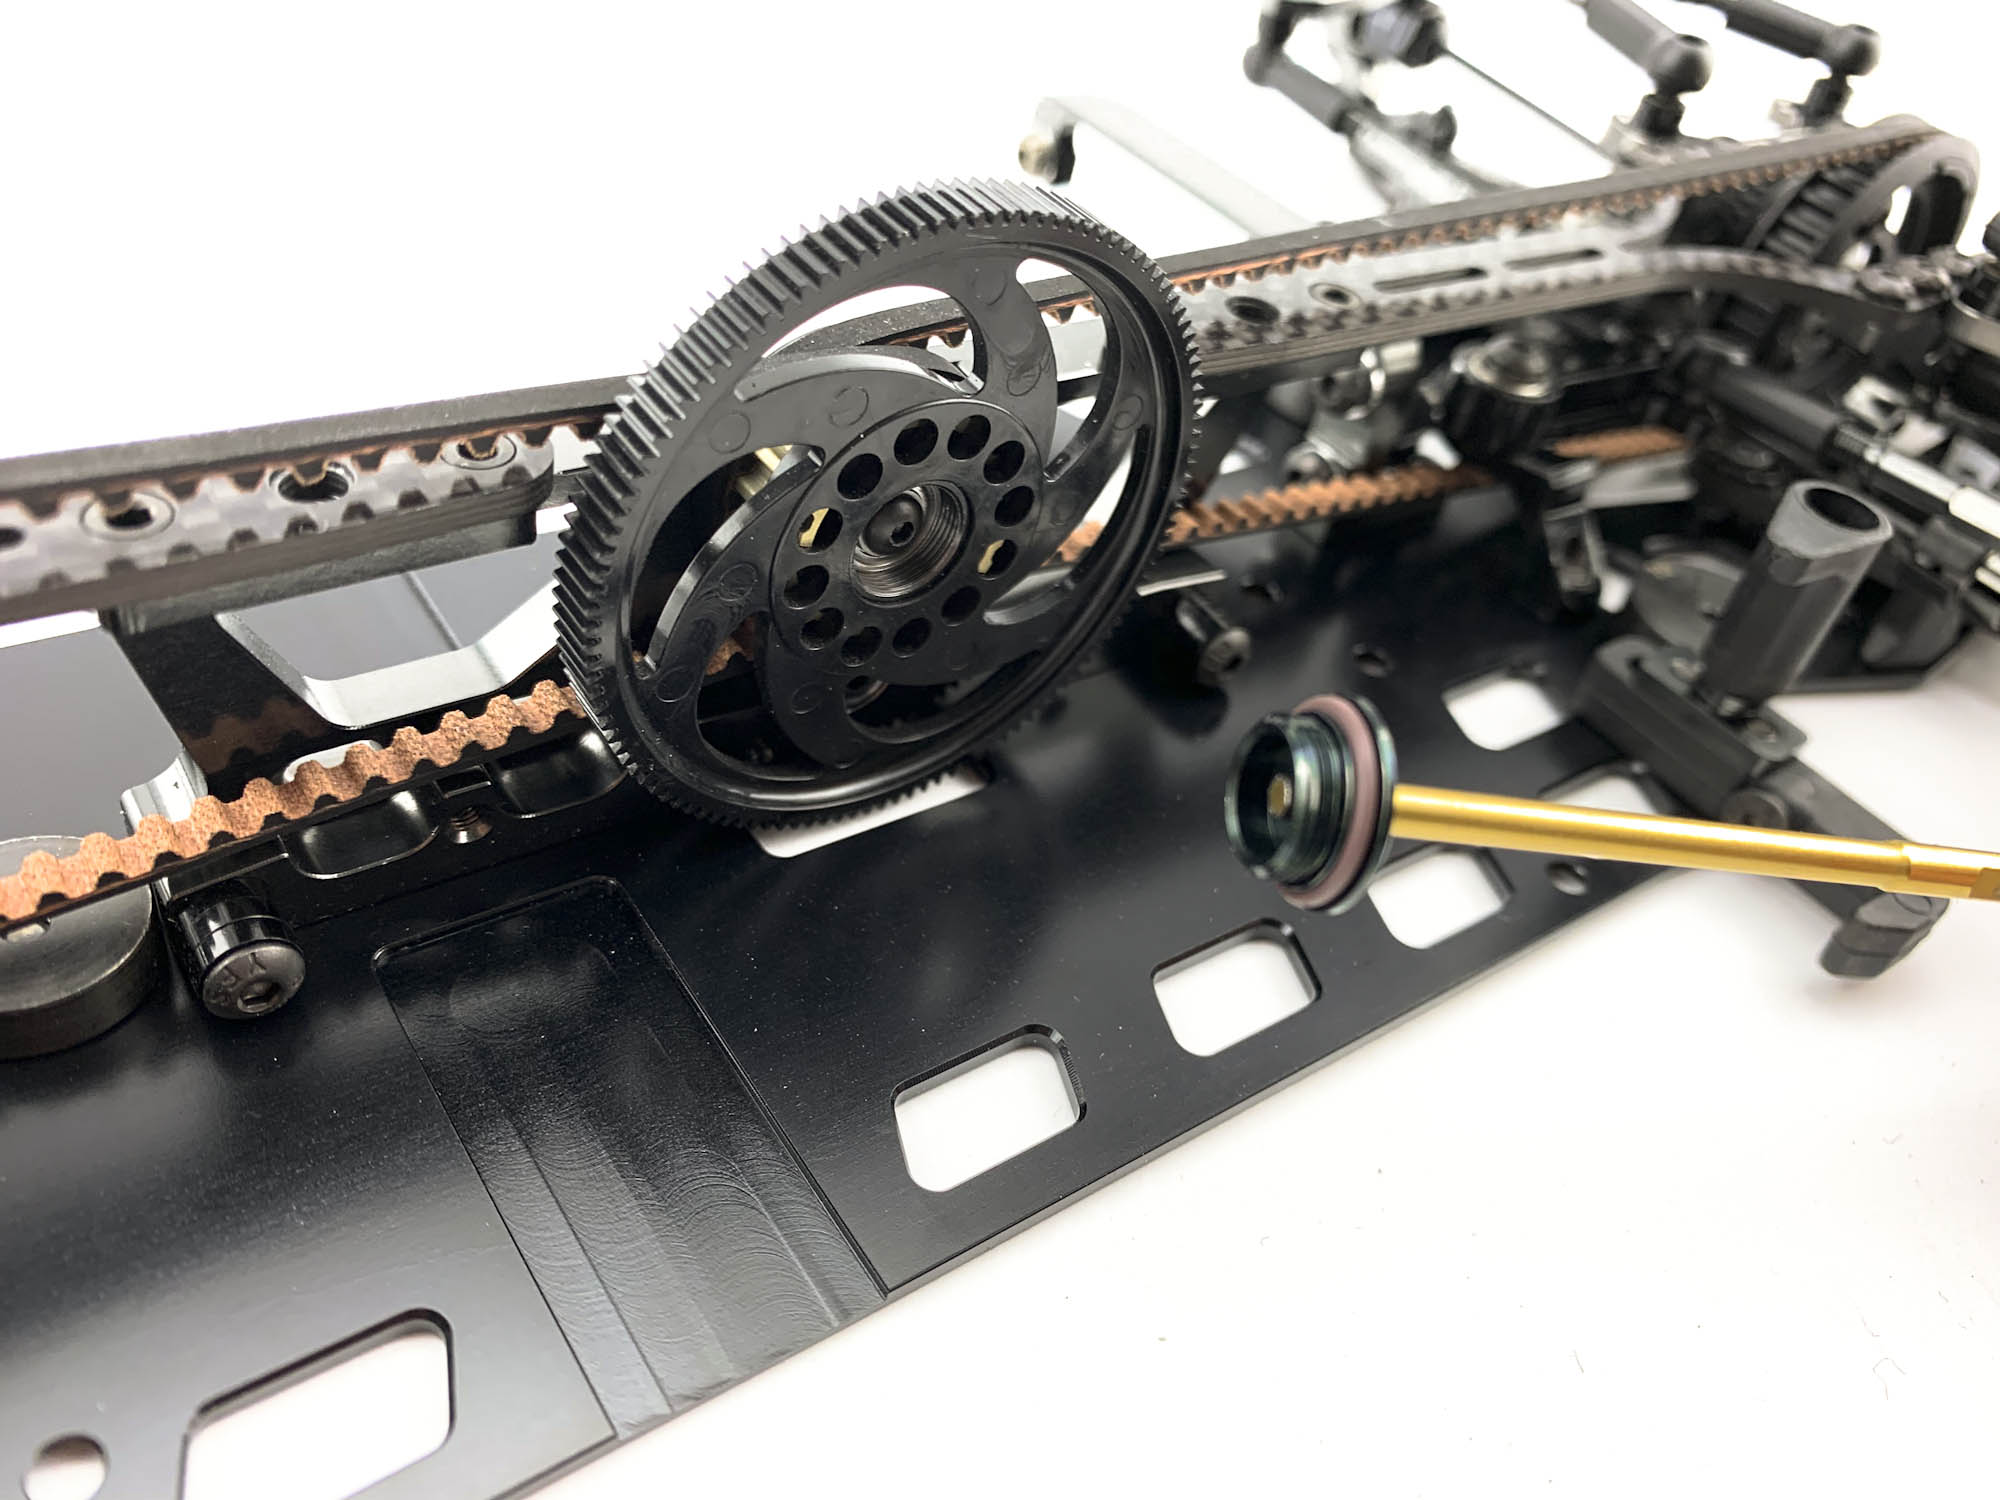
Looks very nice with Bulkheads and Motormount installed. Next up will be the belts. They are the same front and rear.
Its better to install the "Anti skip unit" after the belts are in the pulley. Otherwise it's not easy to install the belts.
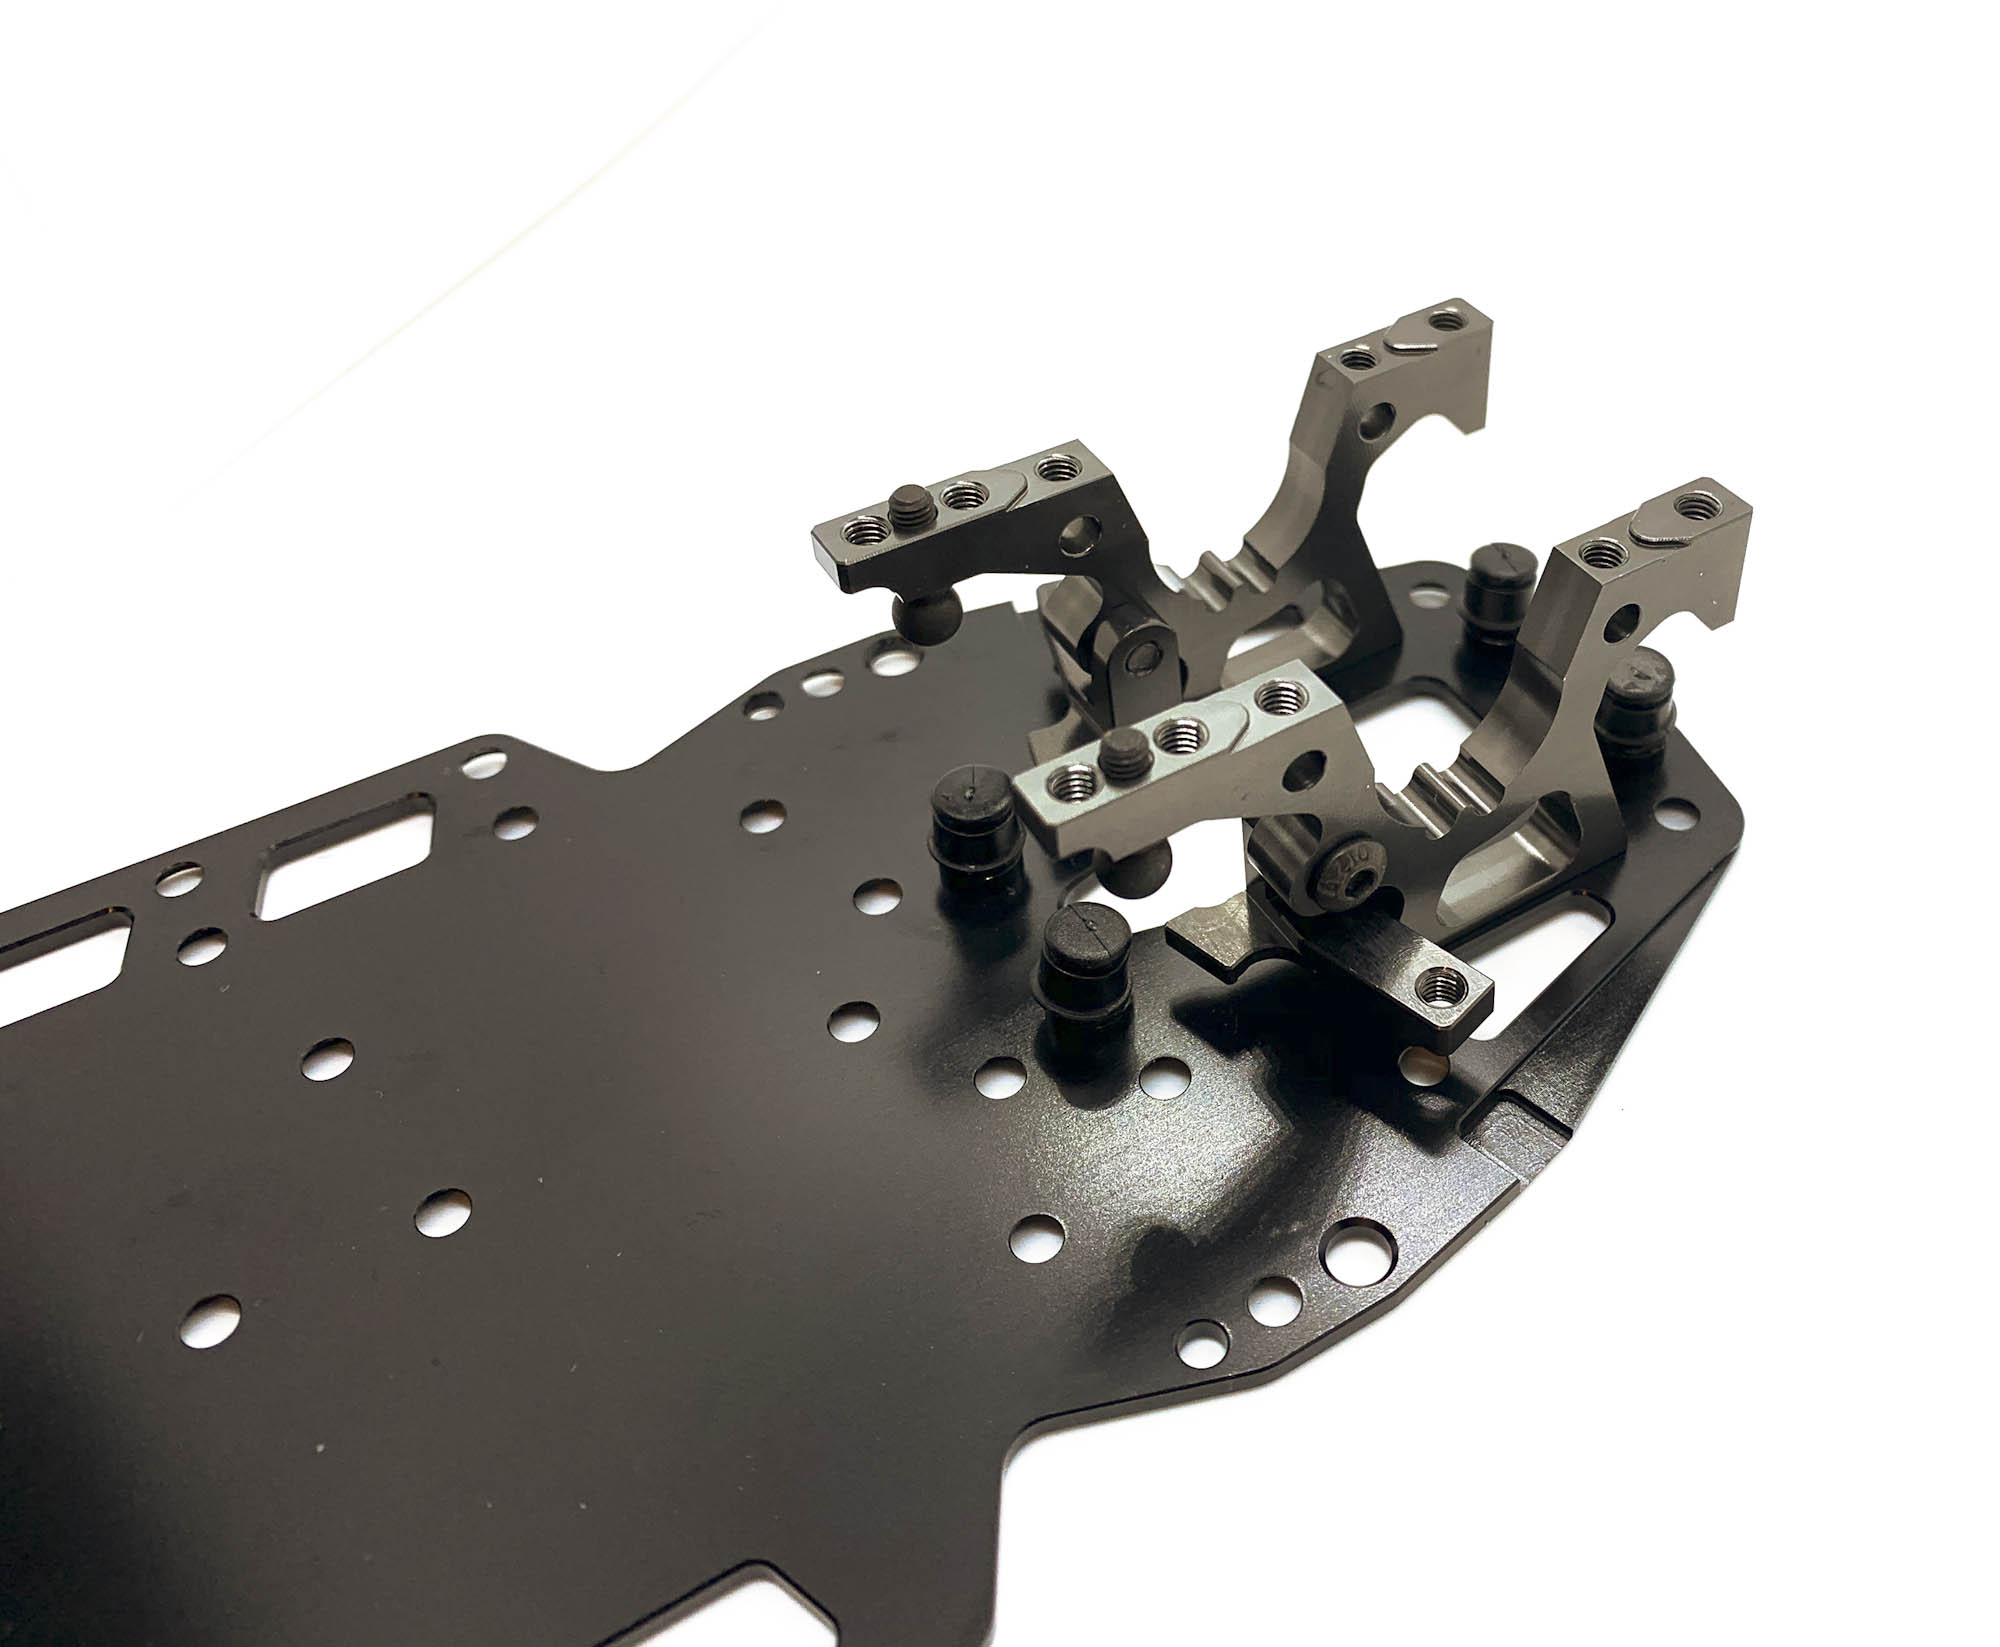
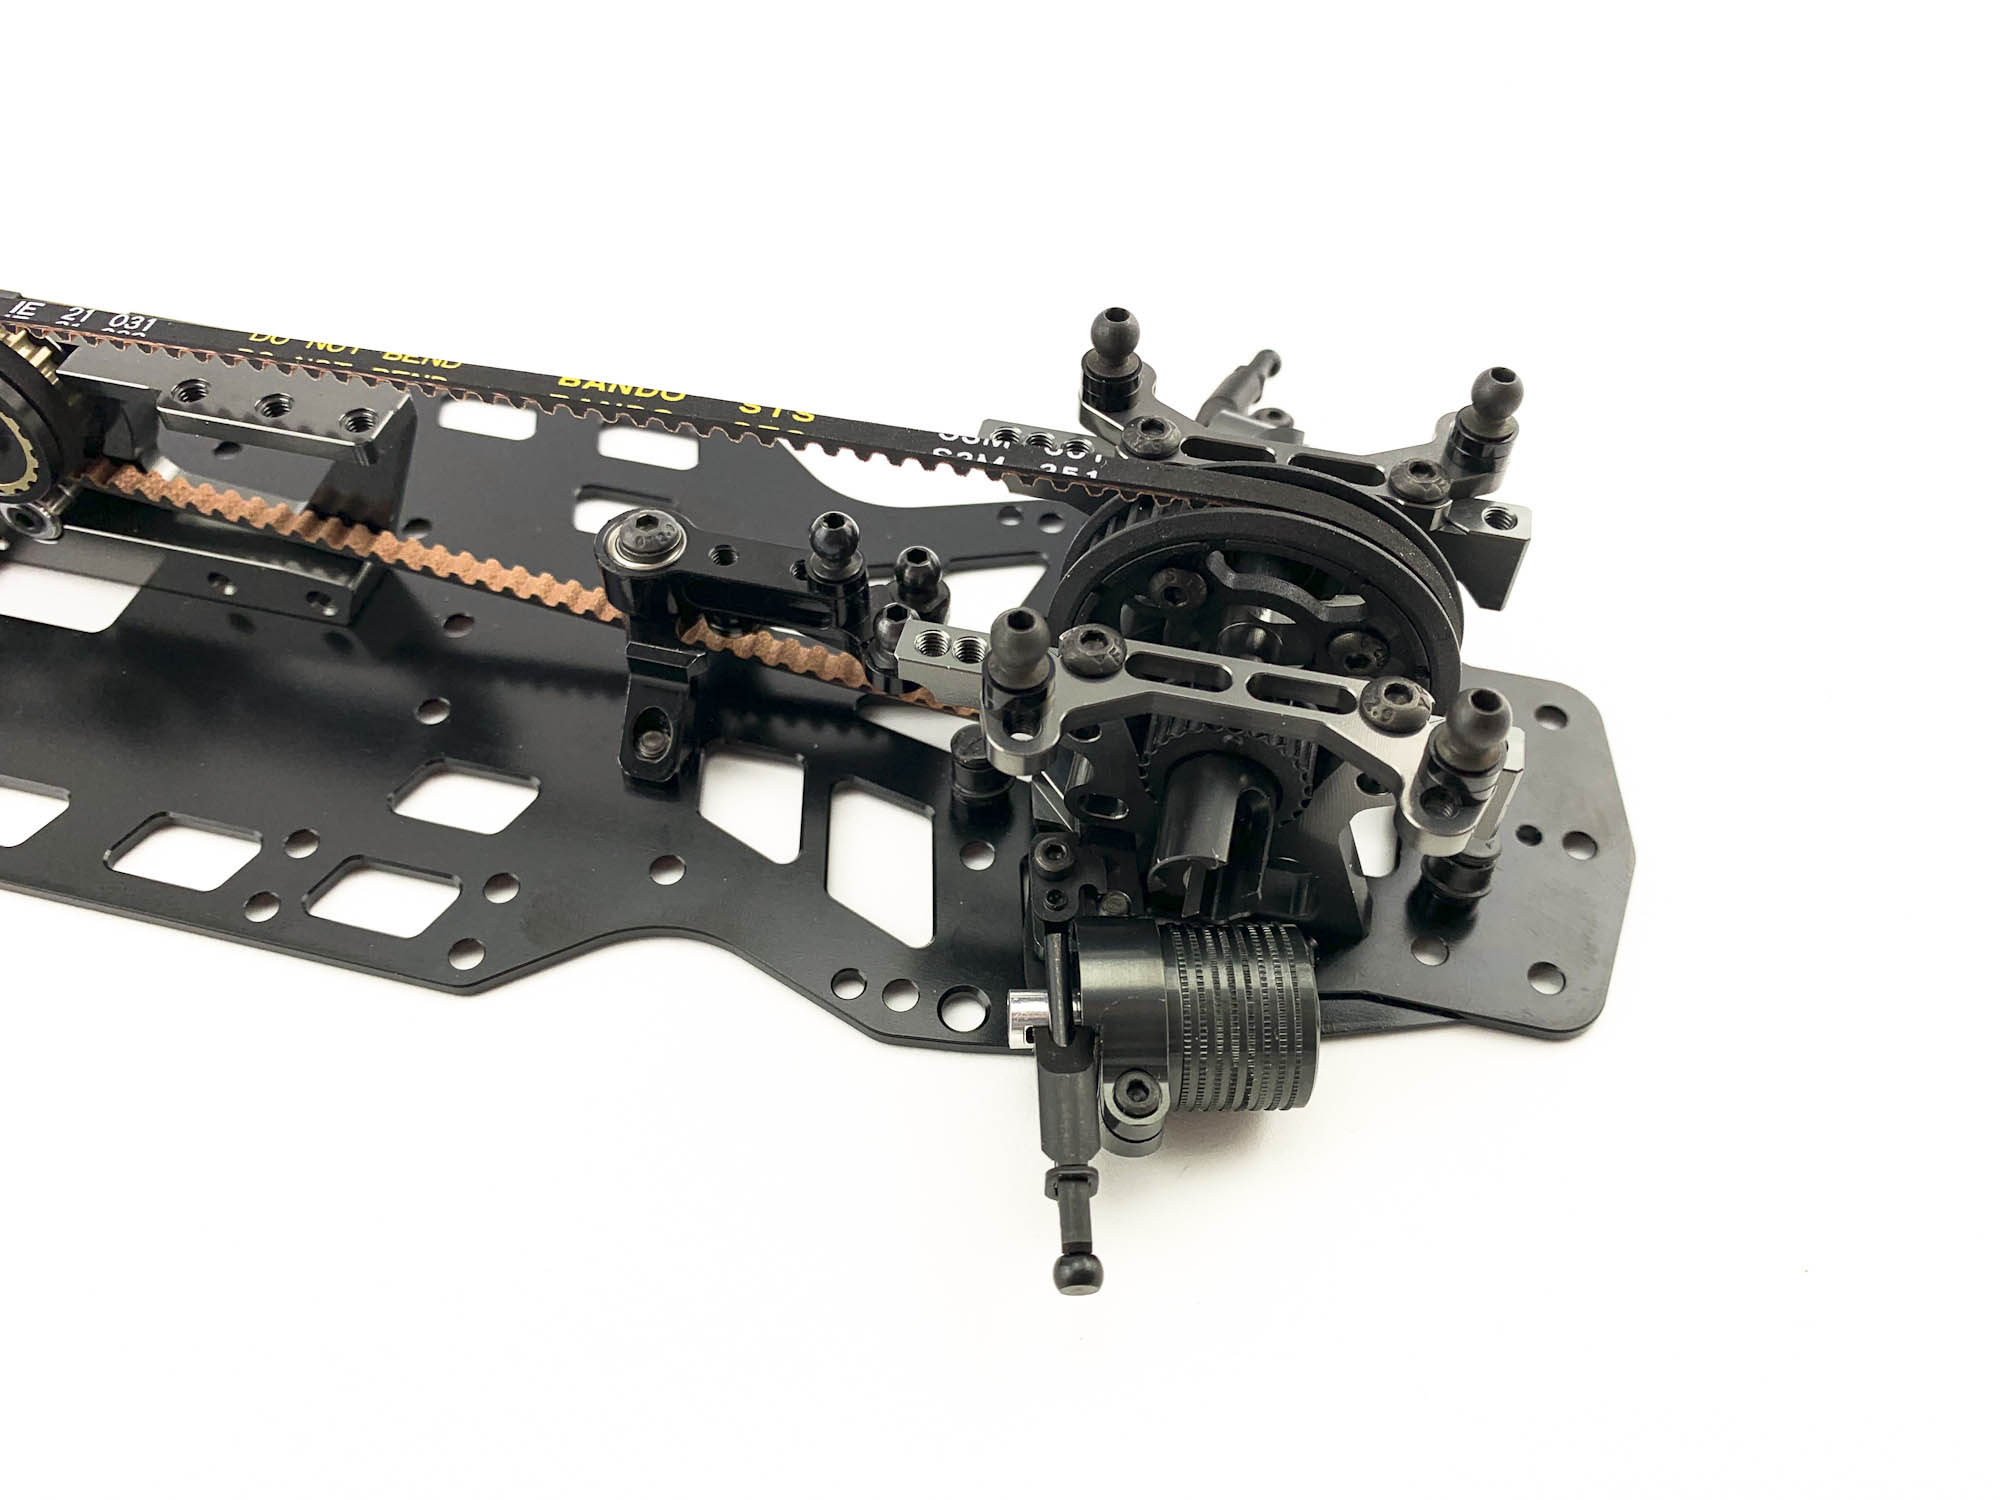
Mounting of the rear dampers to the Chassis.
Same procedure as known from older models.
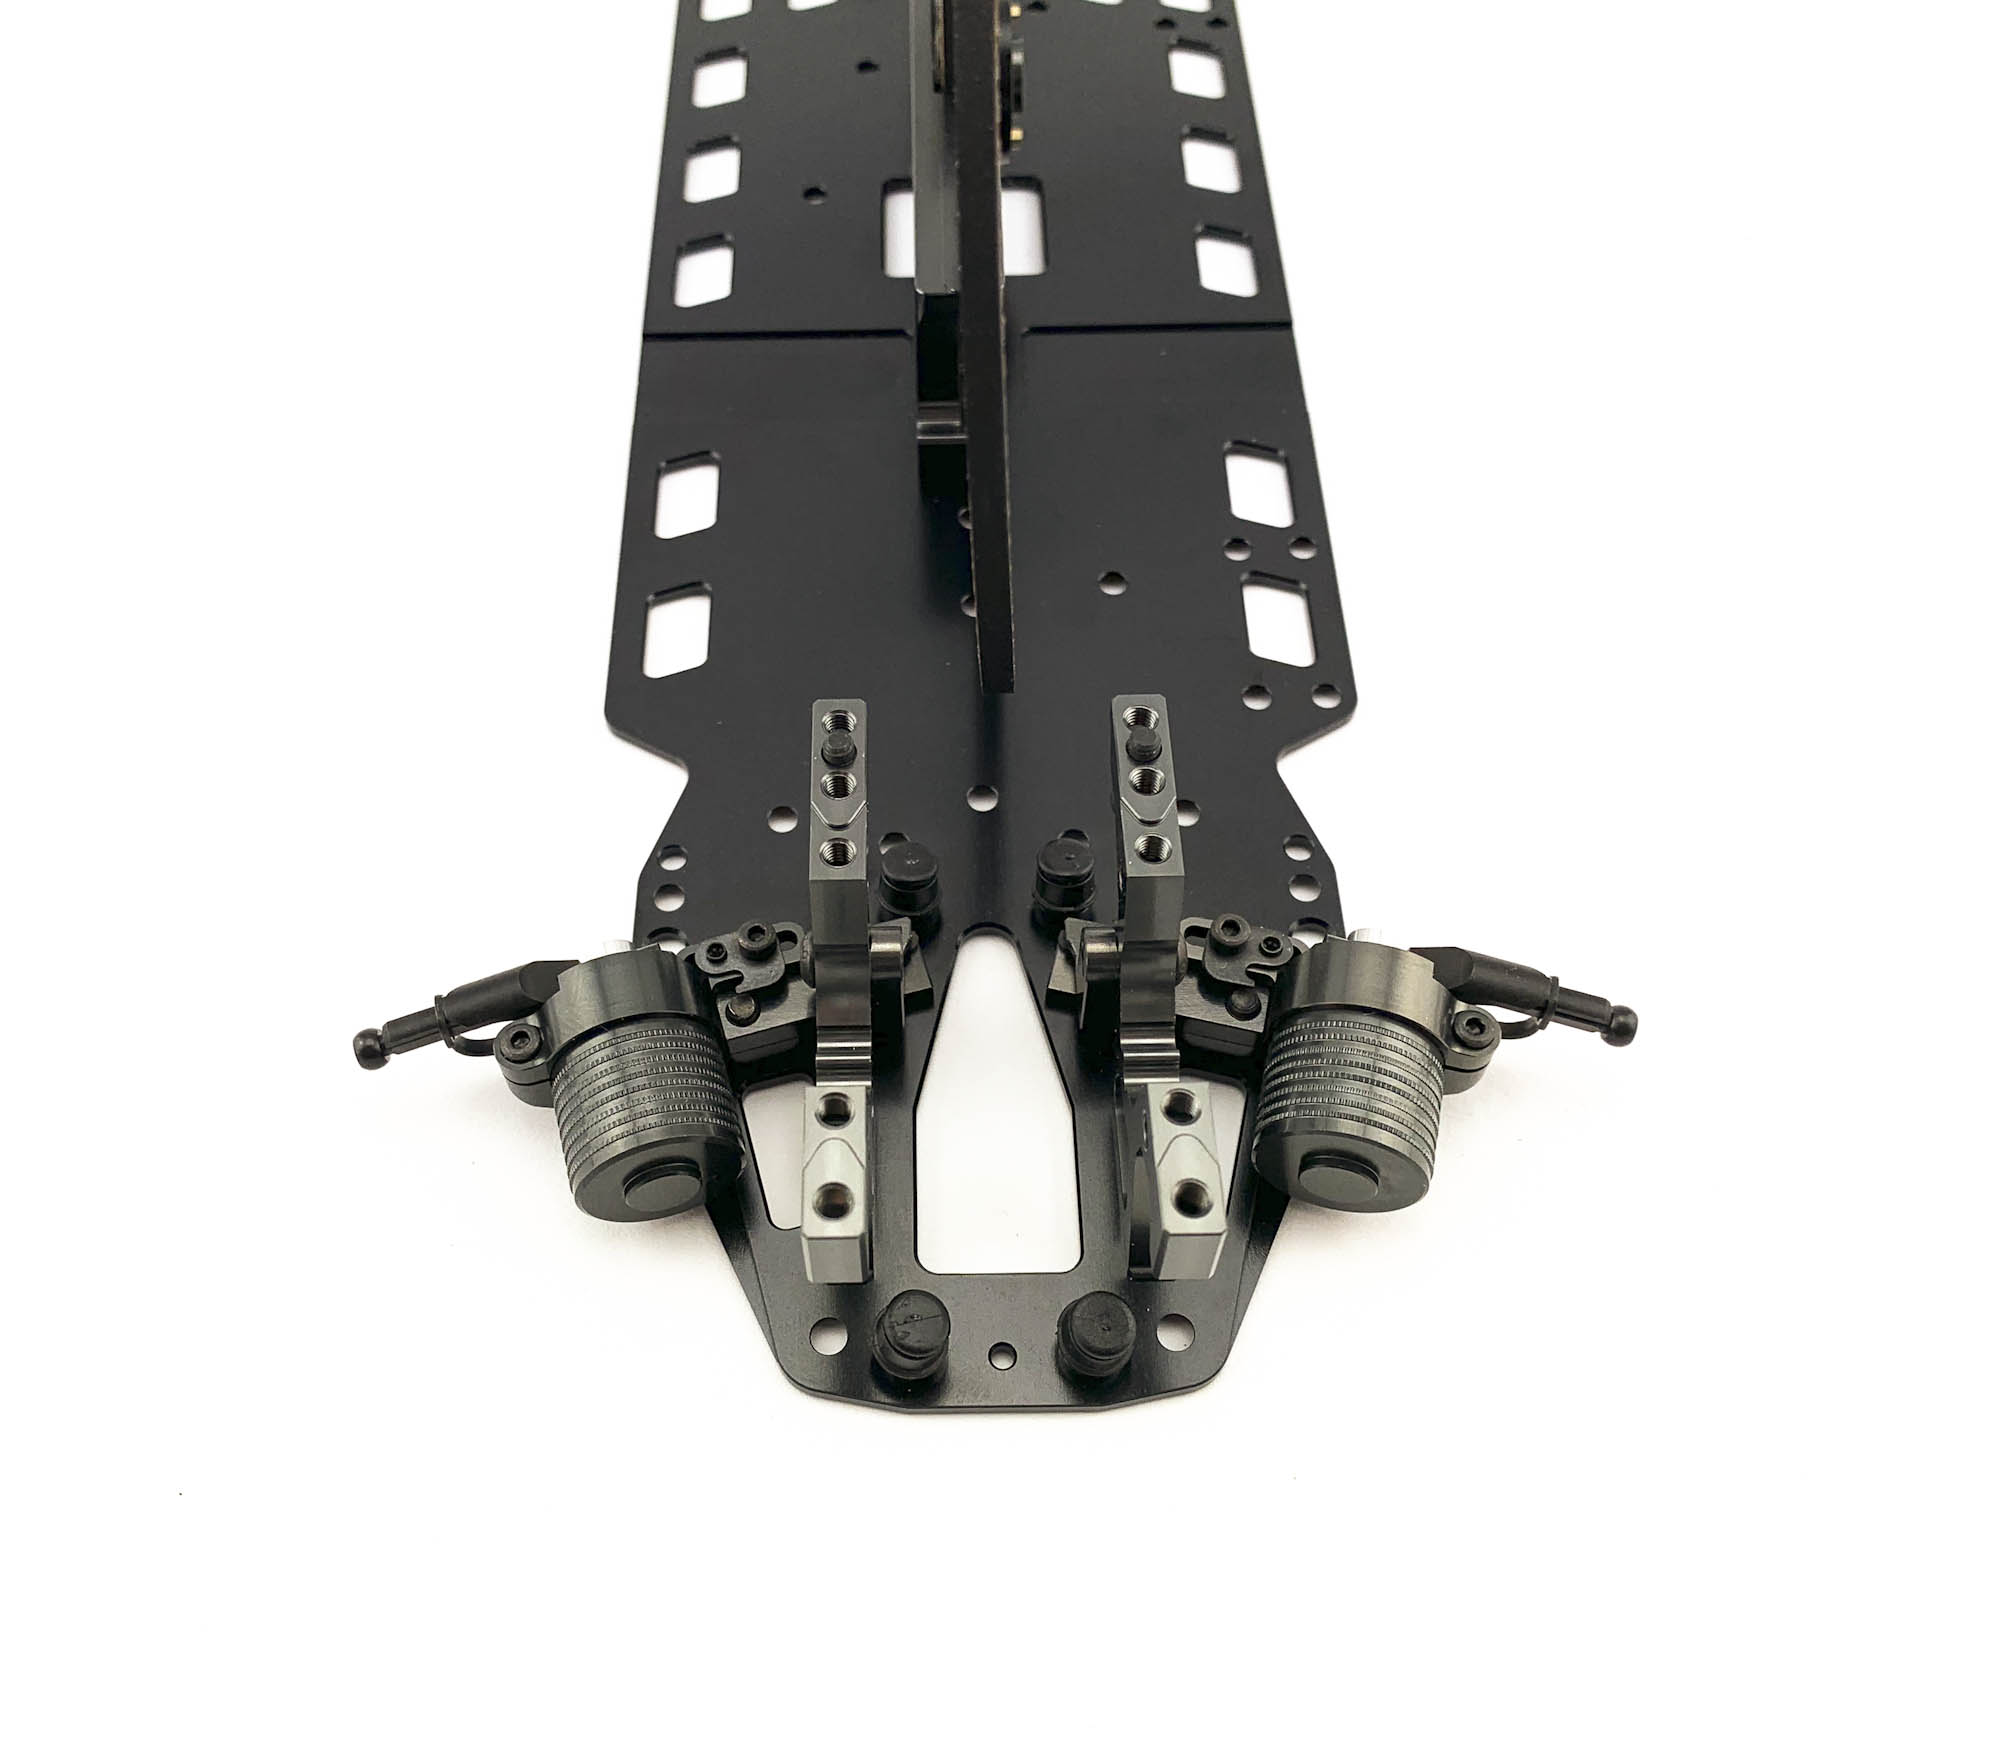
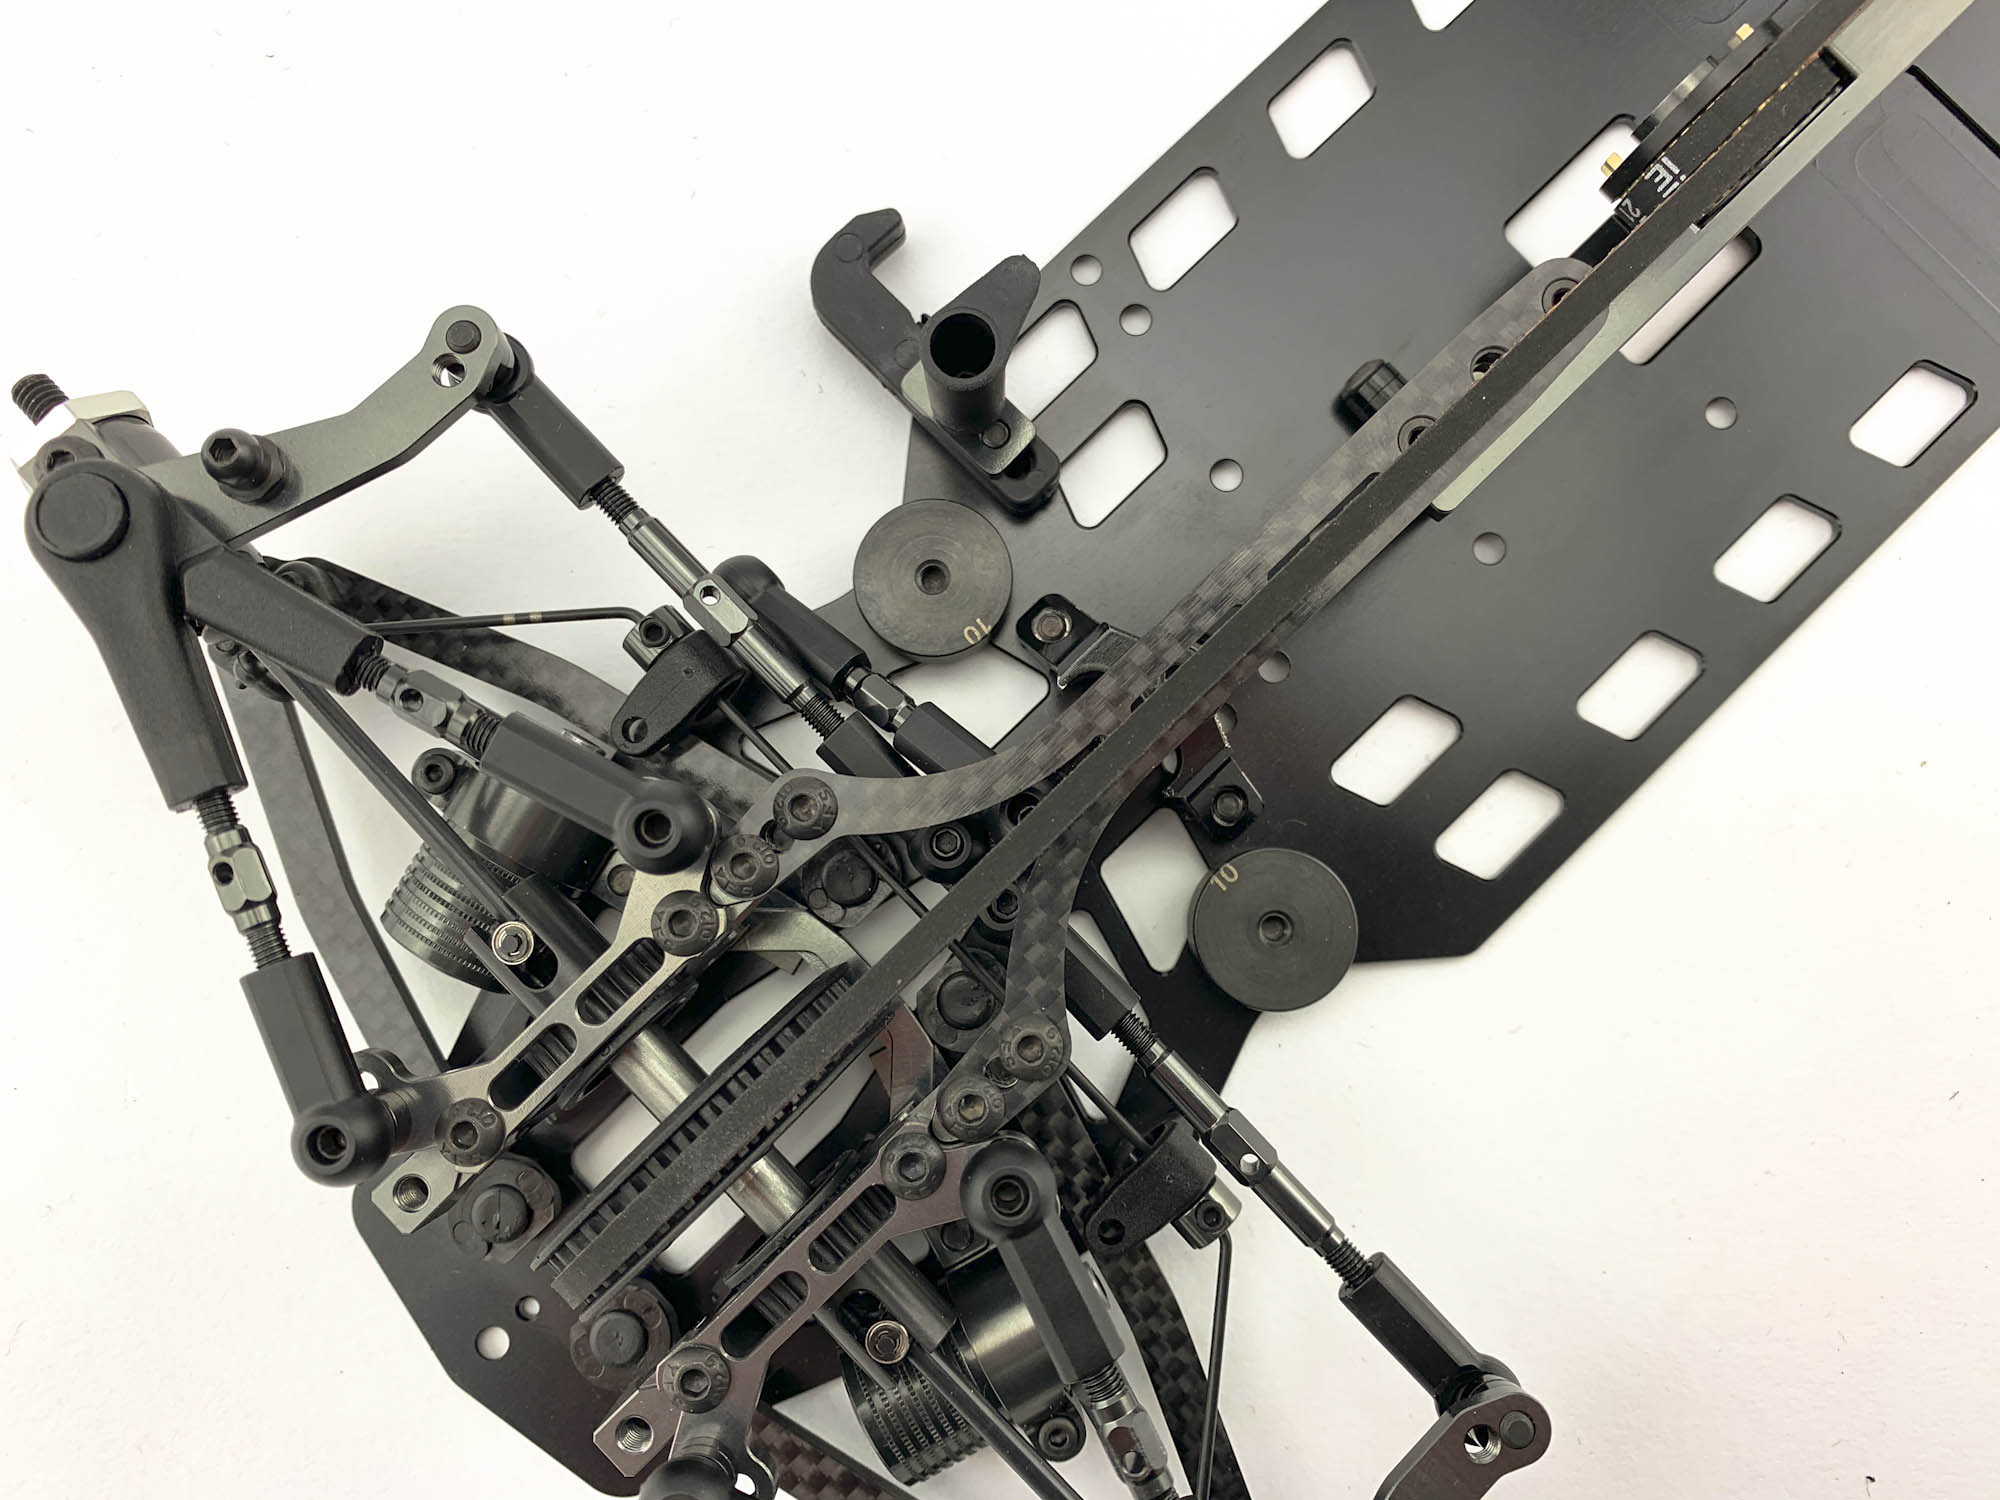
At the front we have to use the new AM08-3 holder.
This connect the both damper holders and fix the position on the chassis. This holder is not connected to the bulkheads anymore and offer more flext in the font end of the car.

Screw one side first and then you can easily slide in the other side.
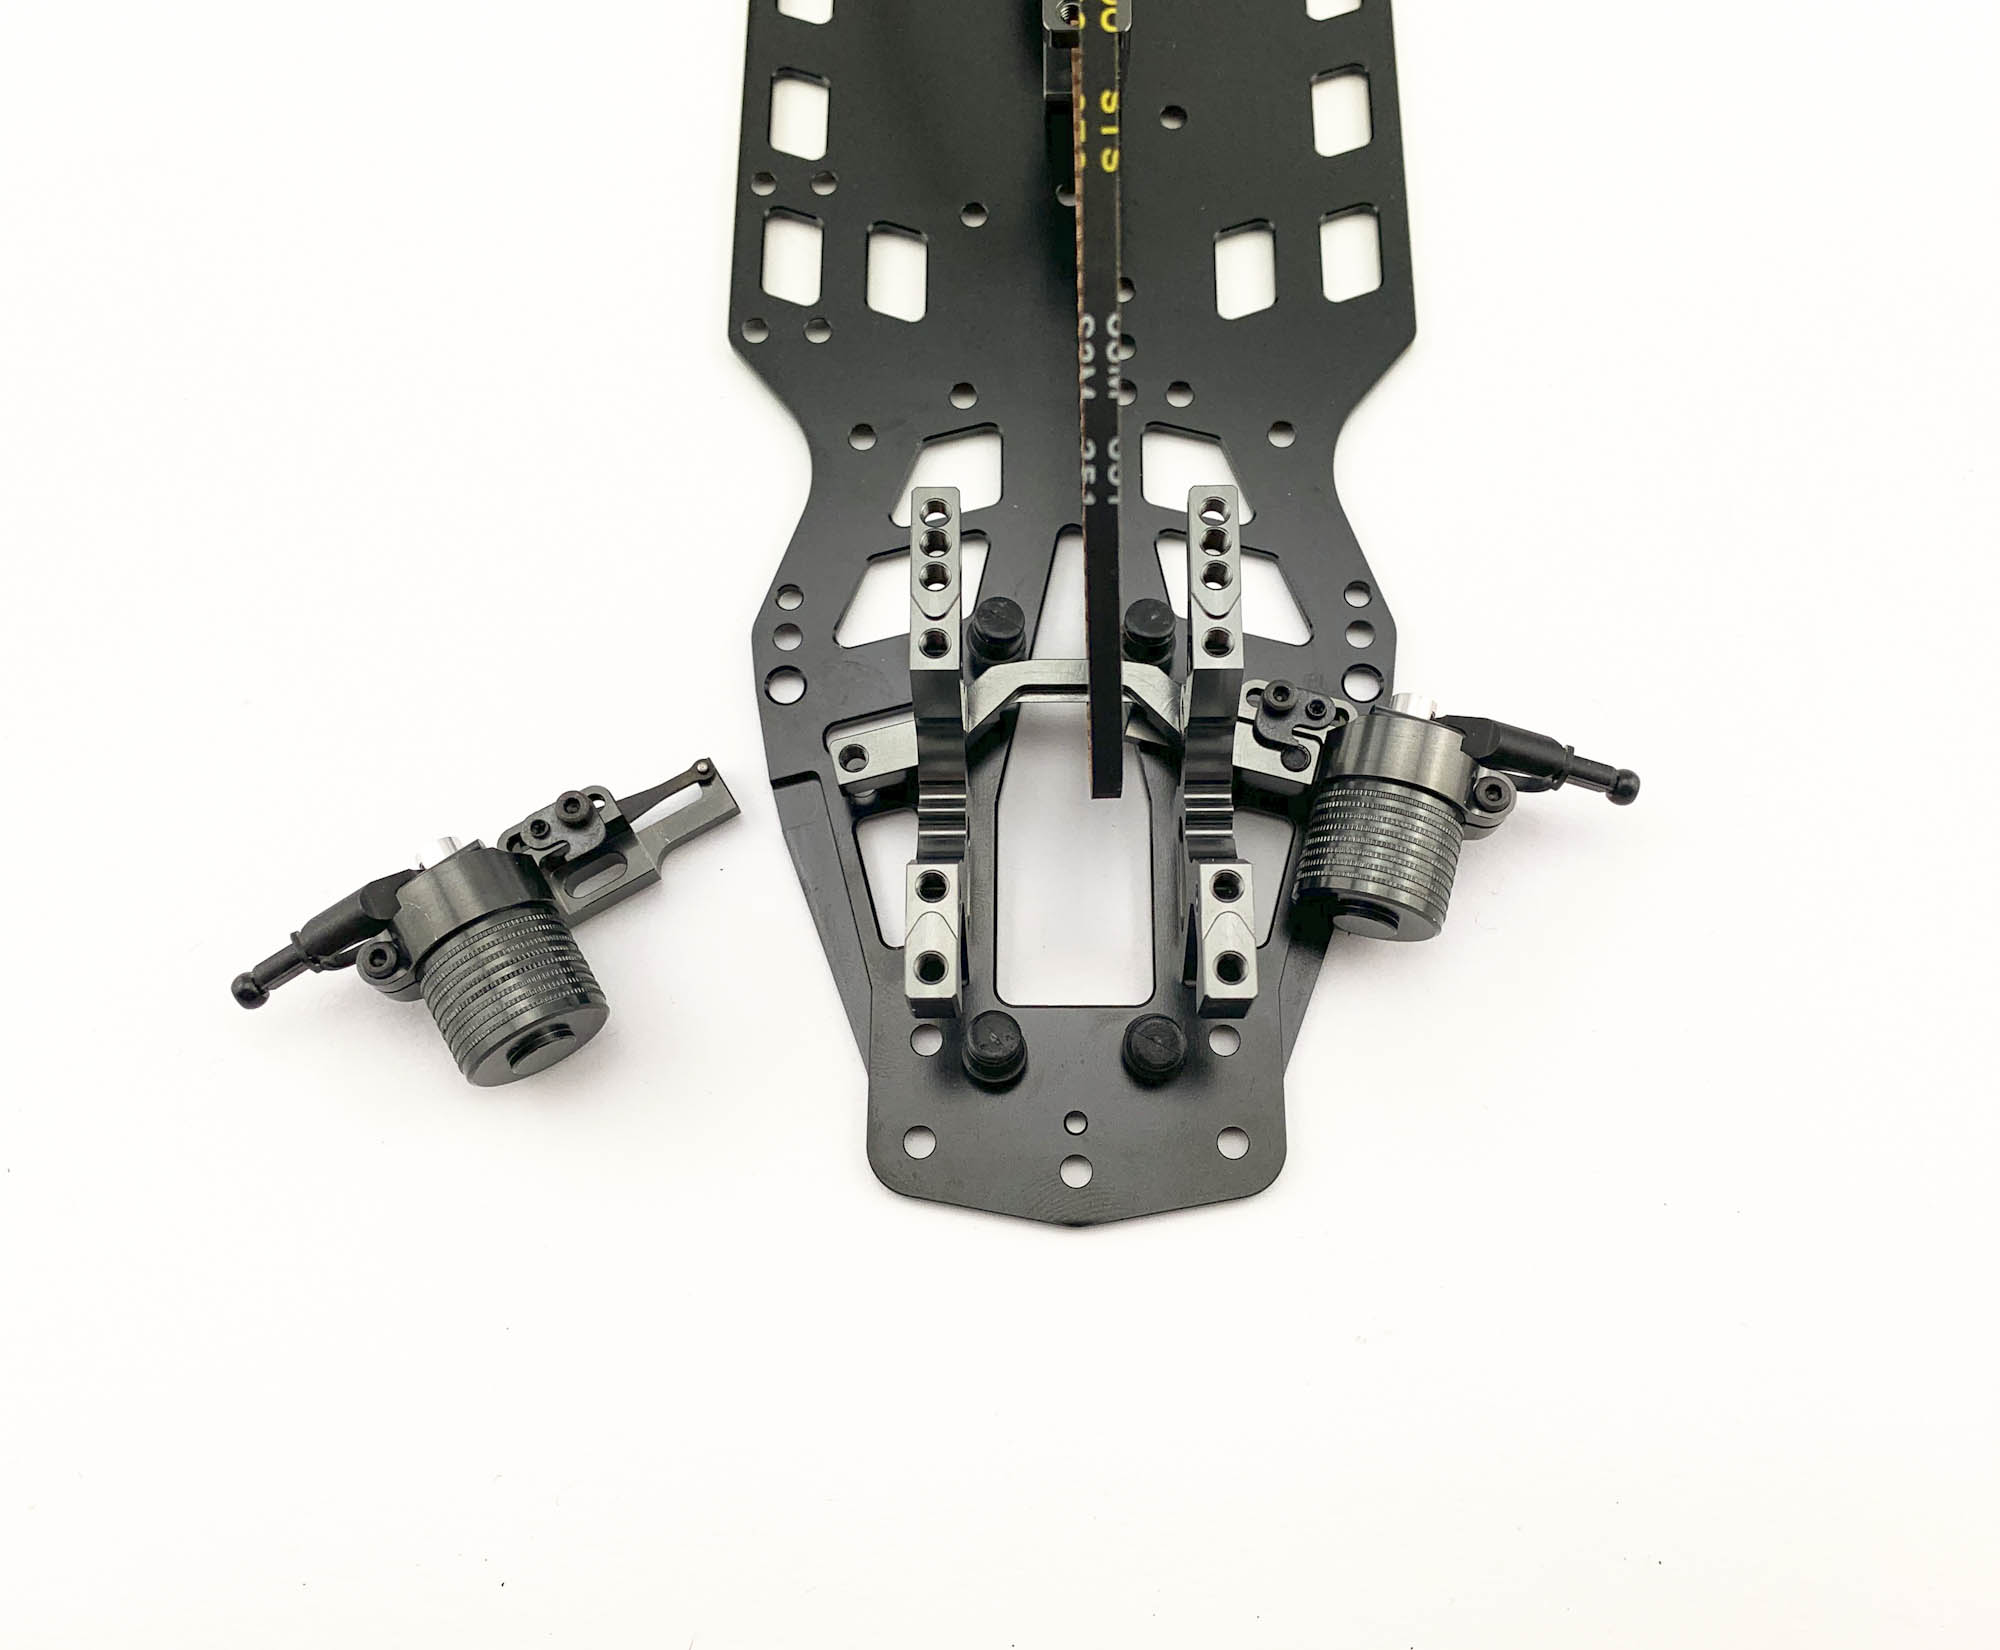
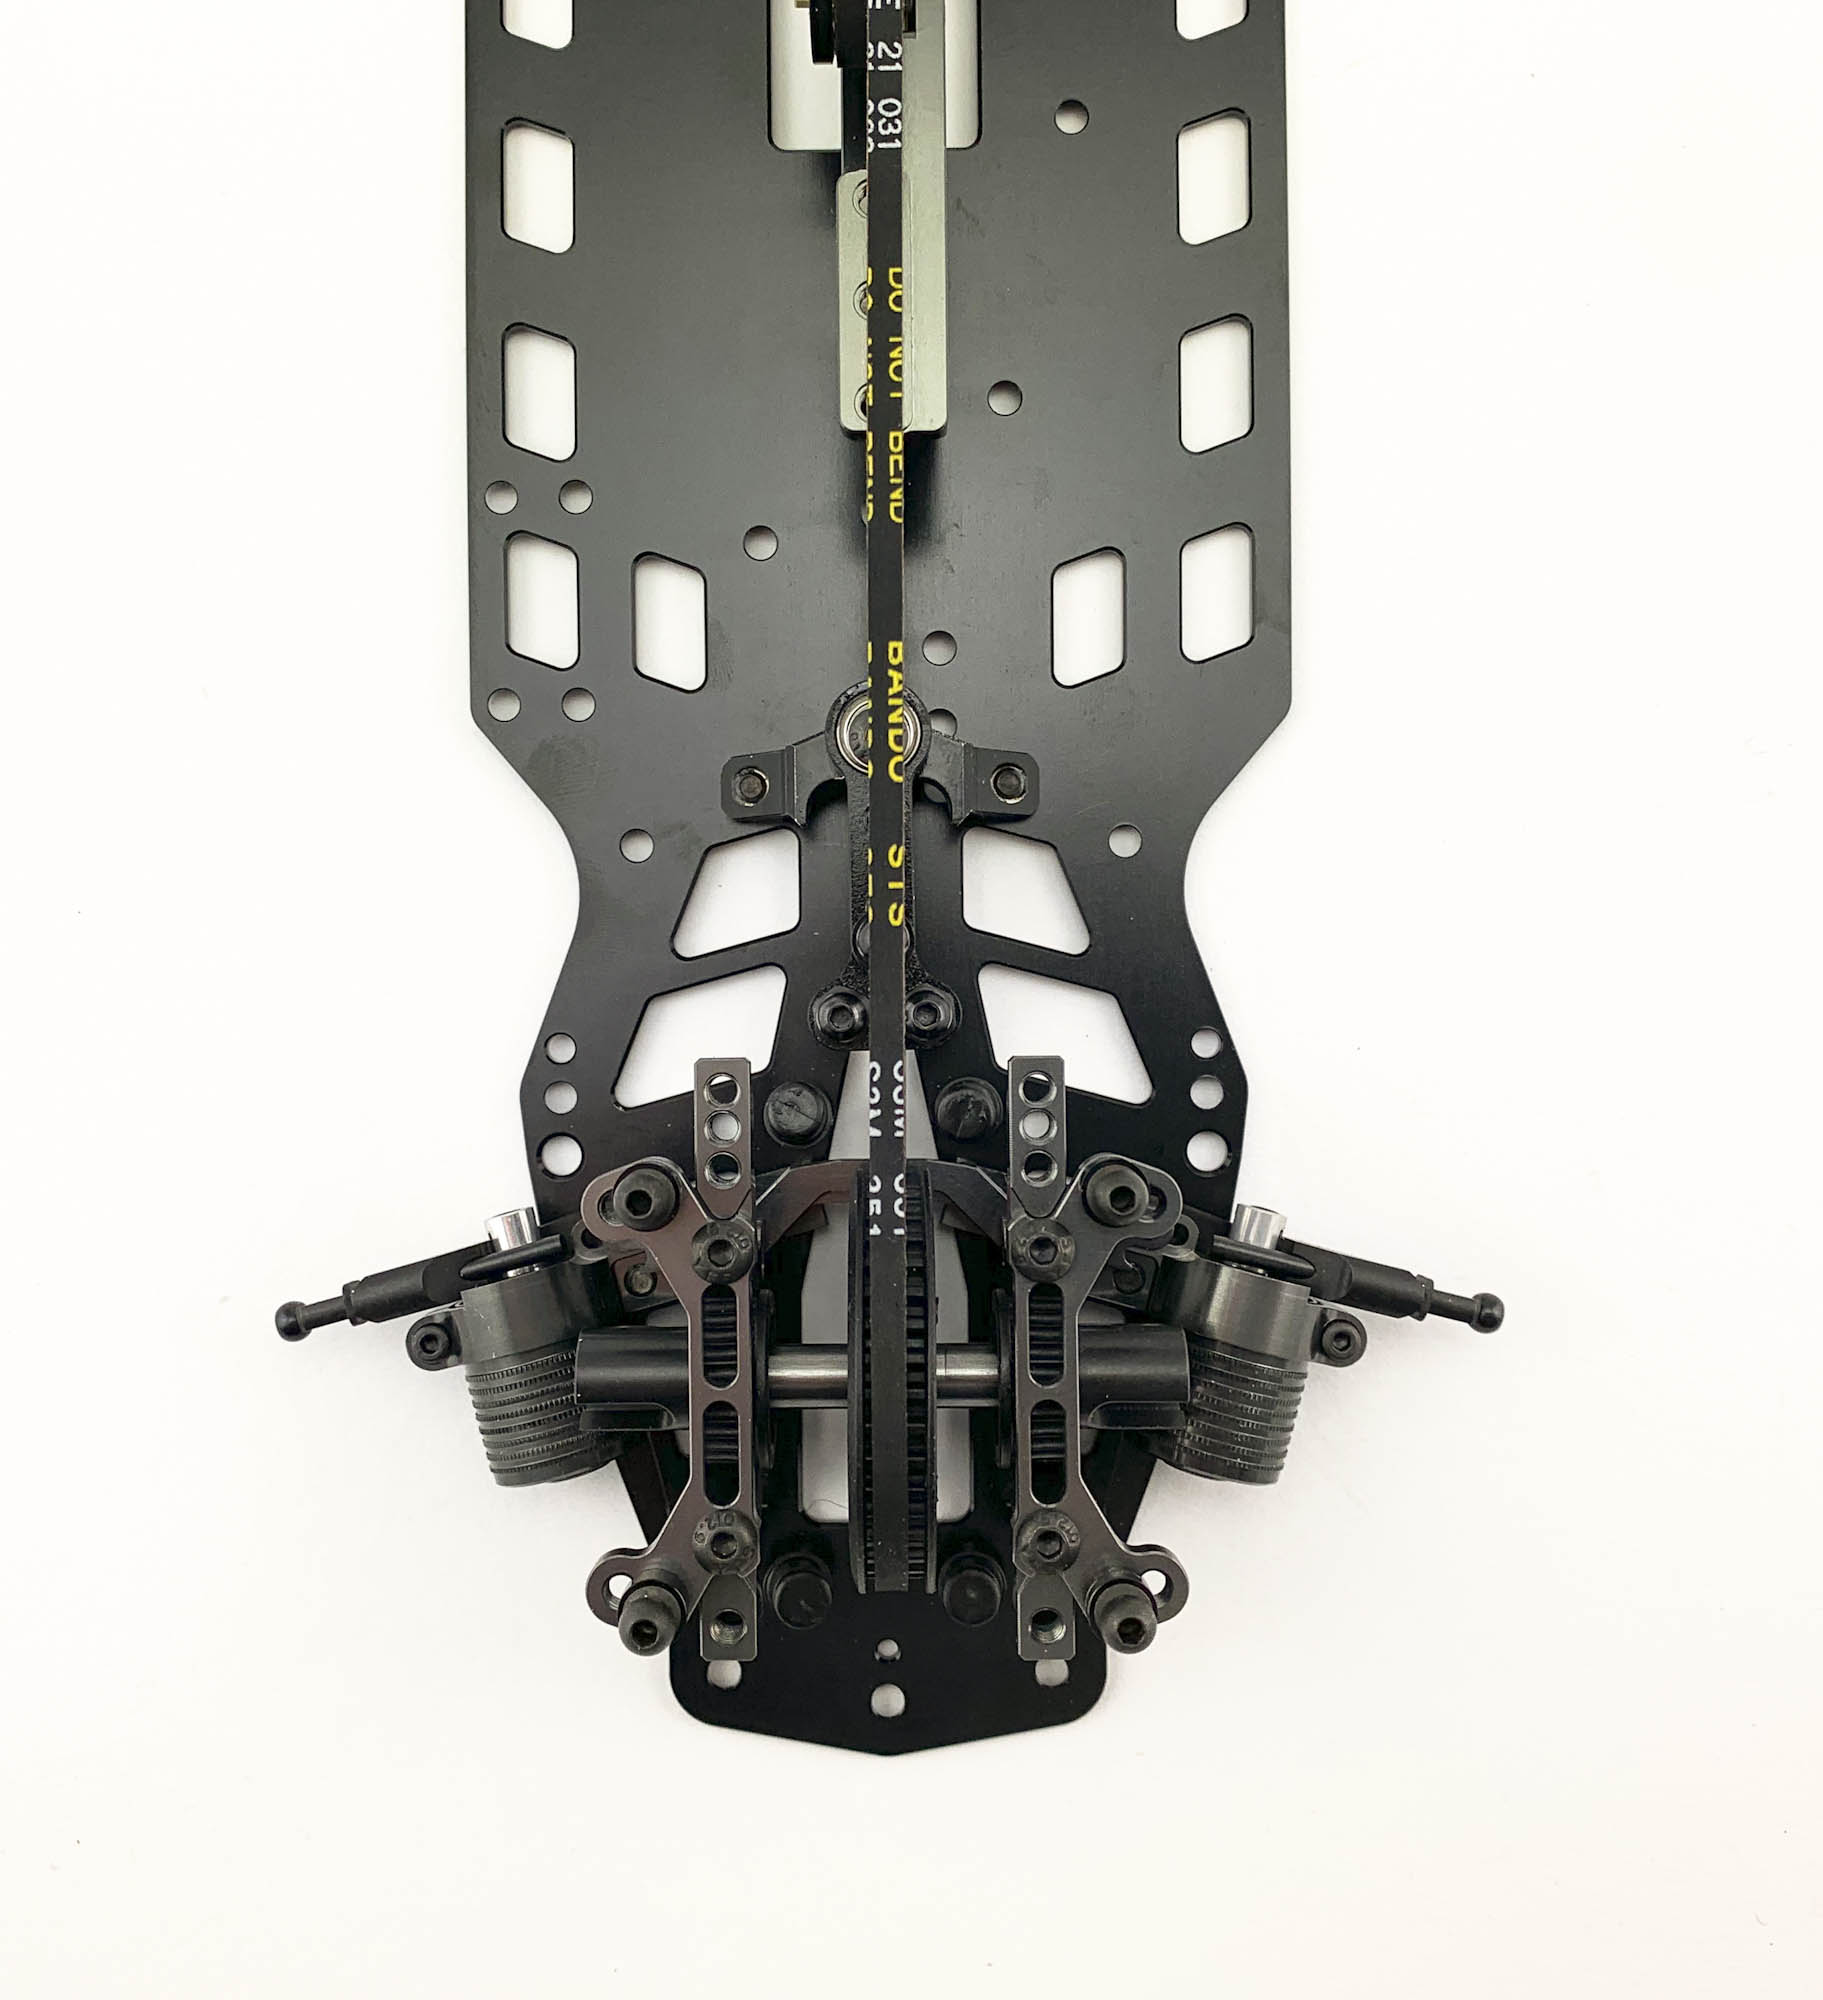
Make sure the belt is under the damper holder brace. Otherwise you will be not able to install the spool!
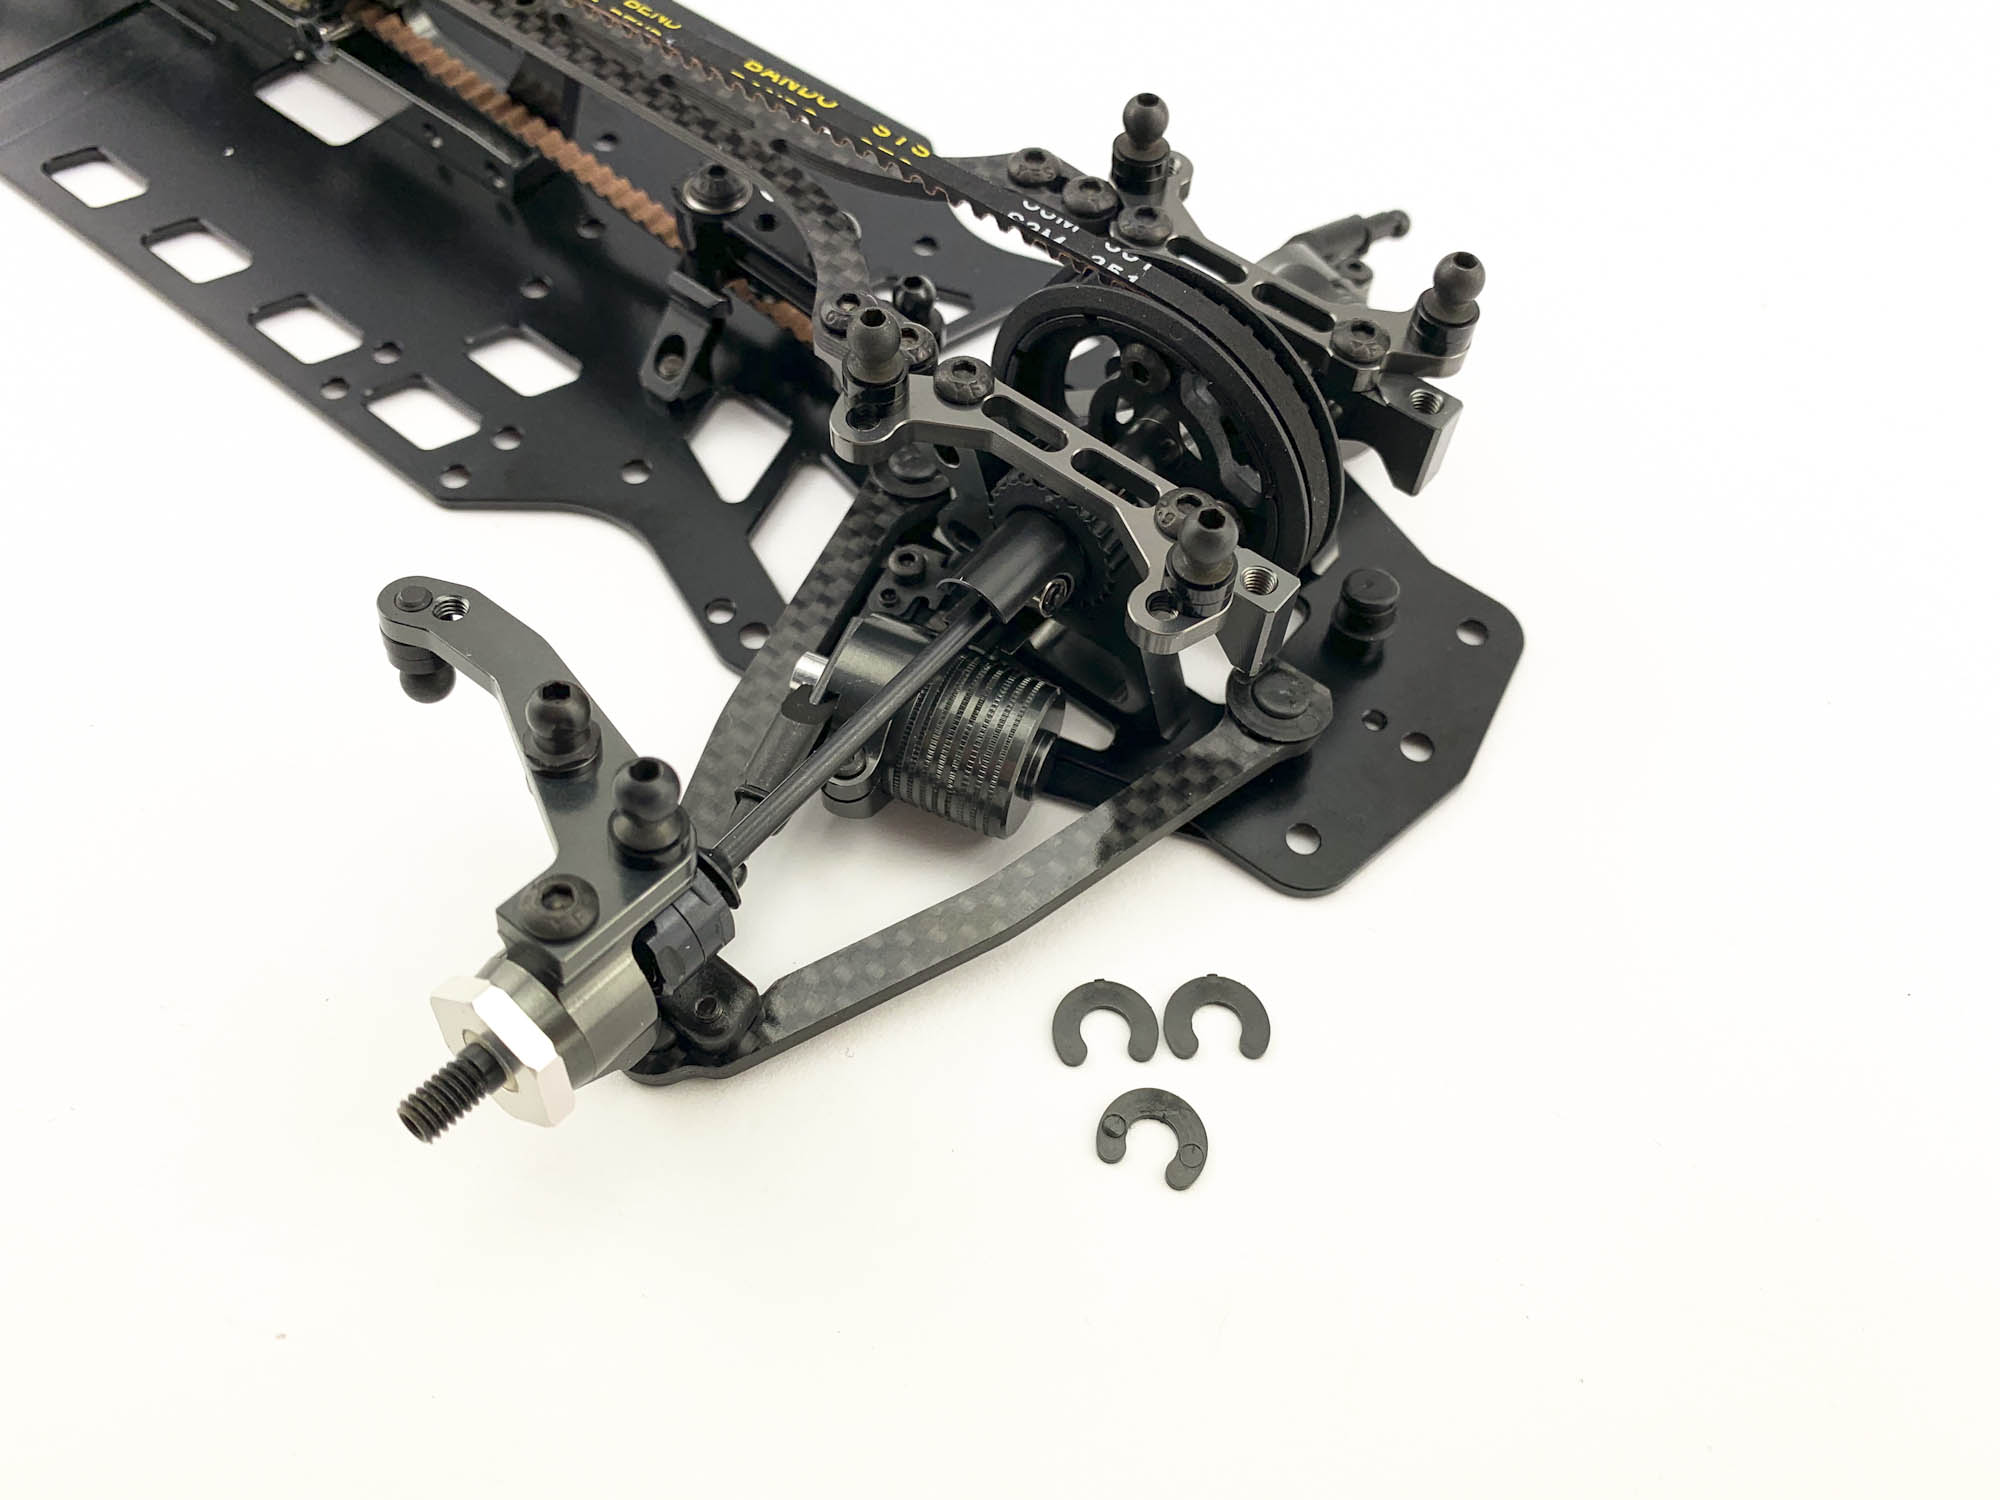
Next up install the spool and screw the toplink holders onto the bulkheads.
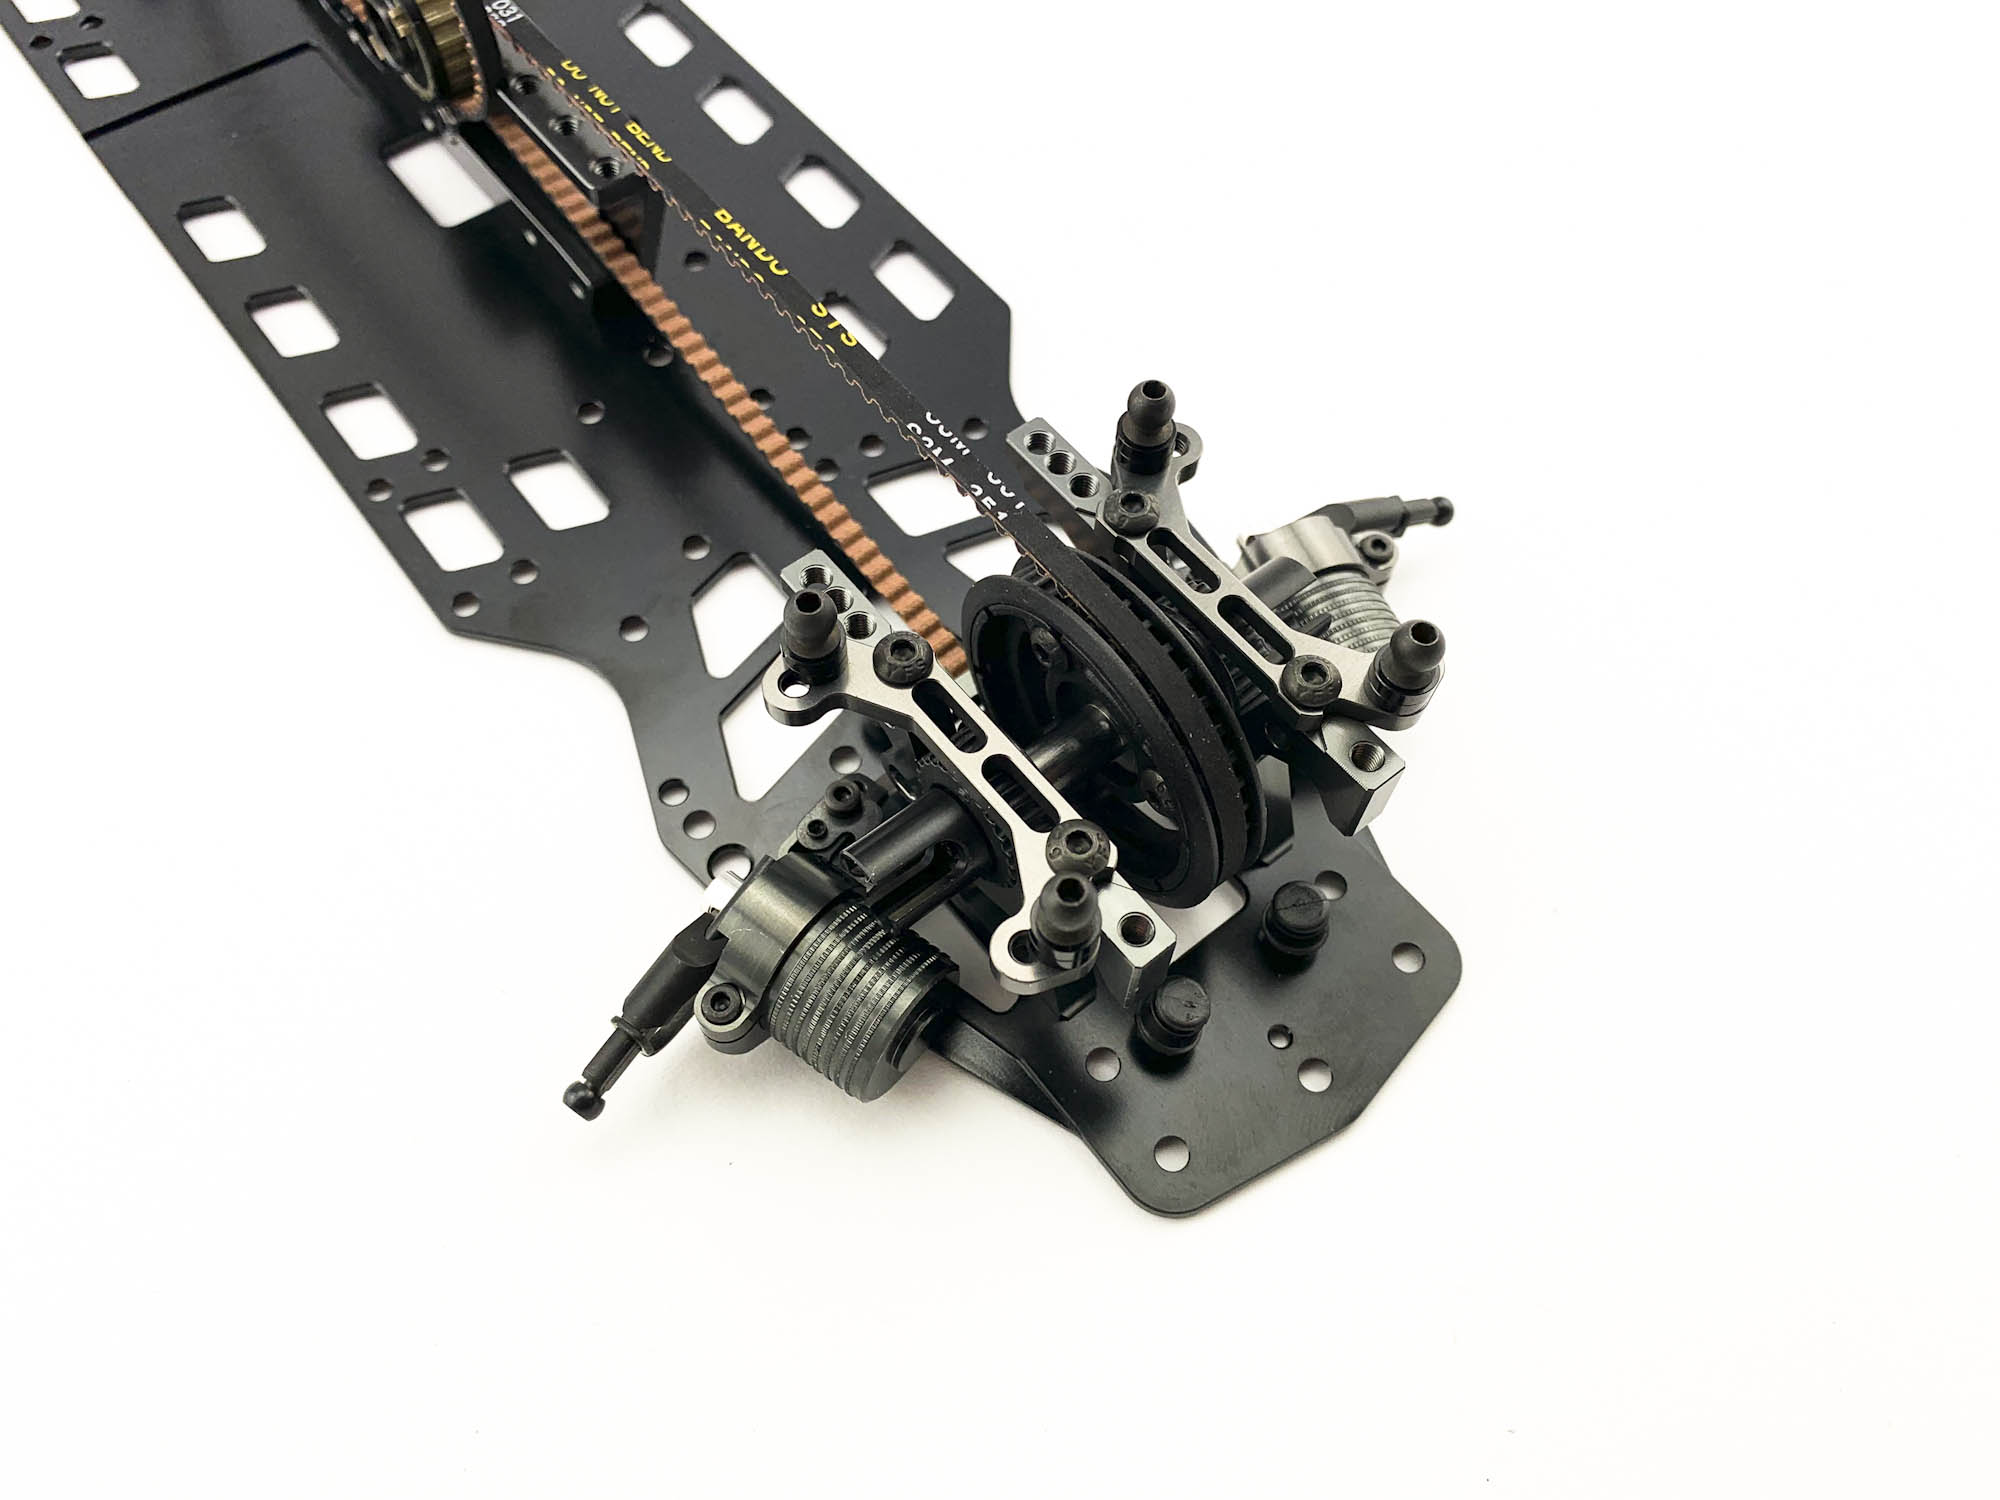
Same in the rear. Install the diff and screw the toplink holders. Make sure to adjust the belt tension right via the P110 adjusters.
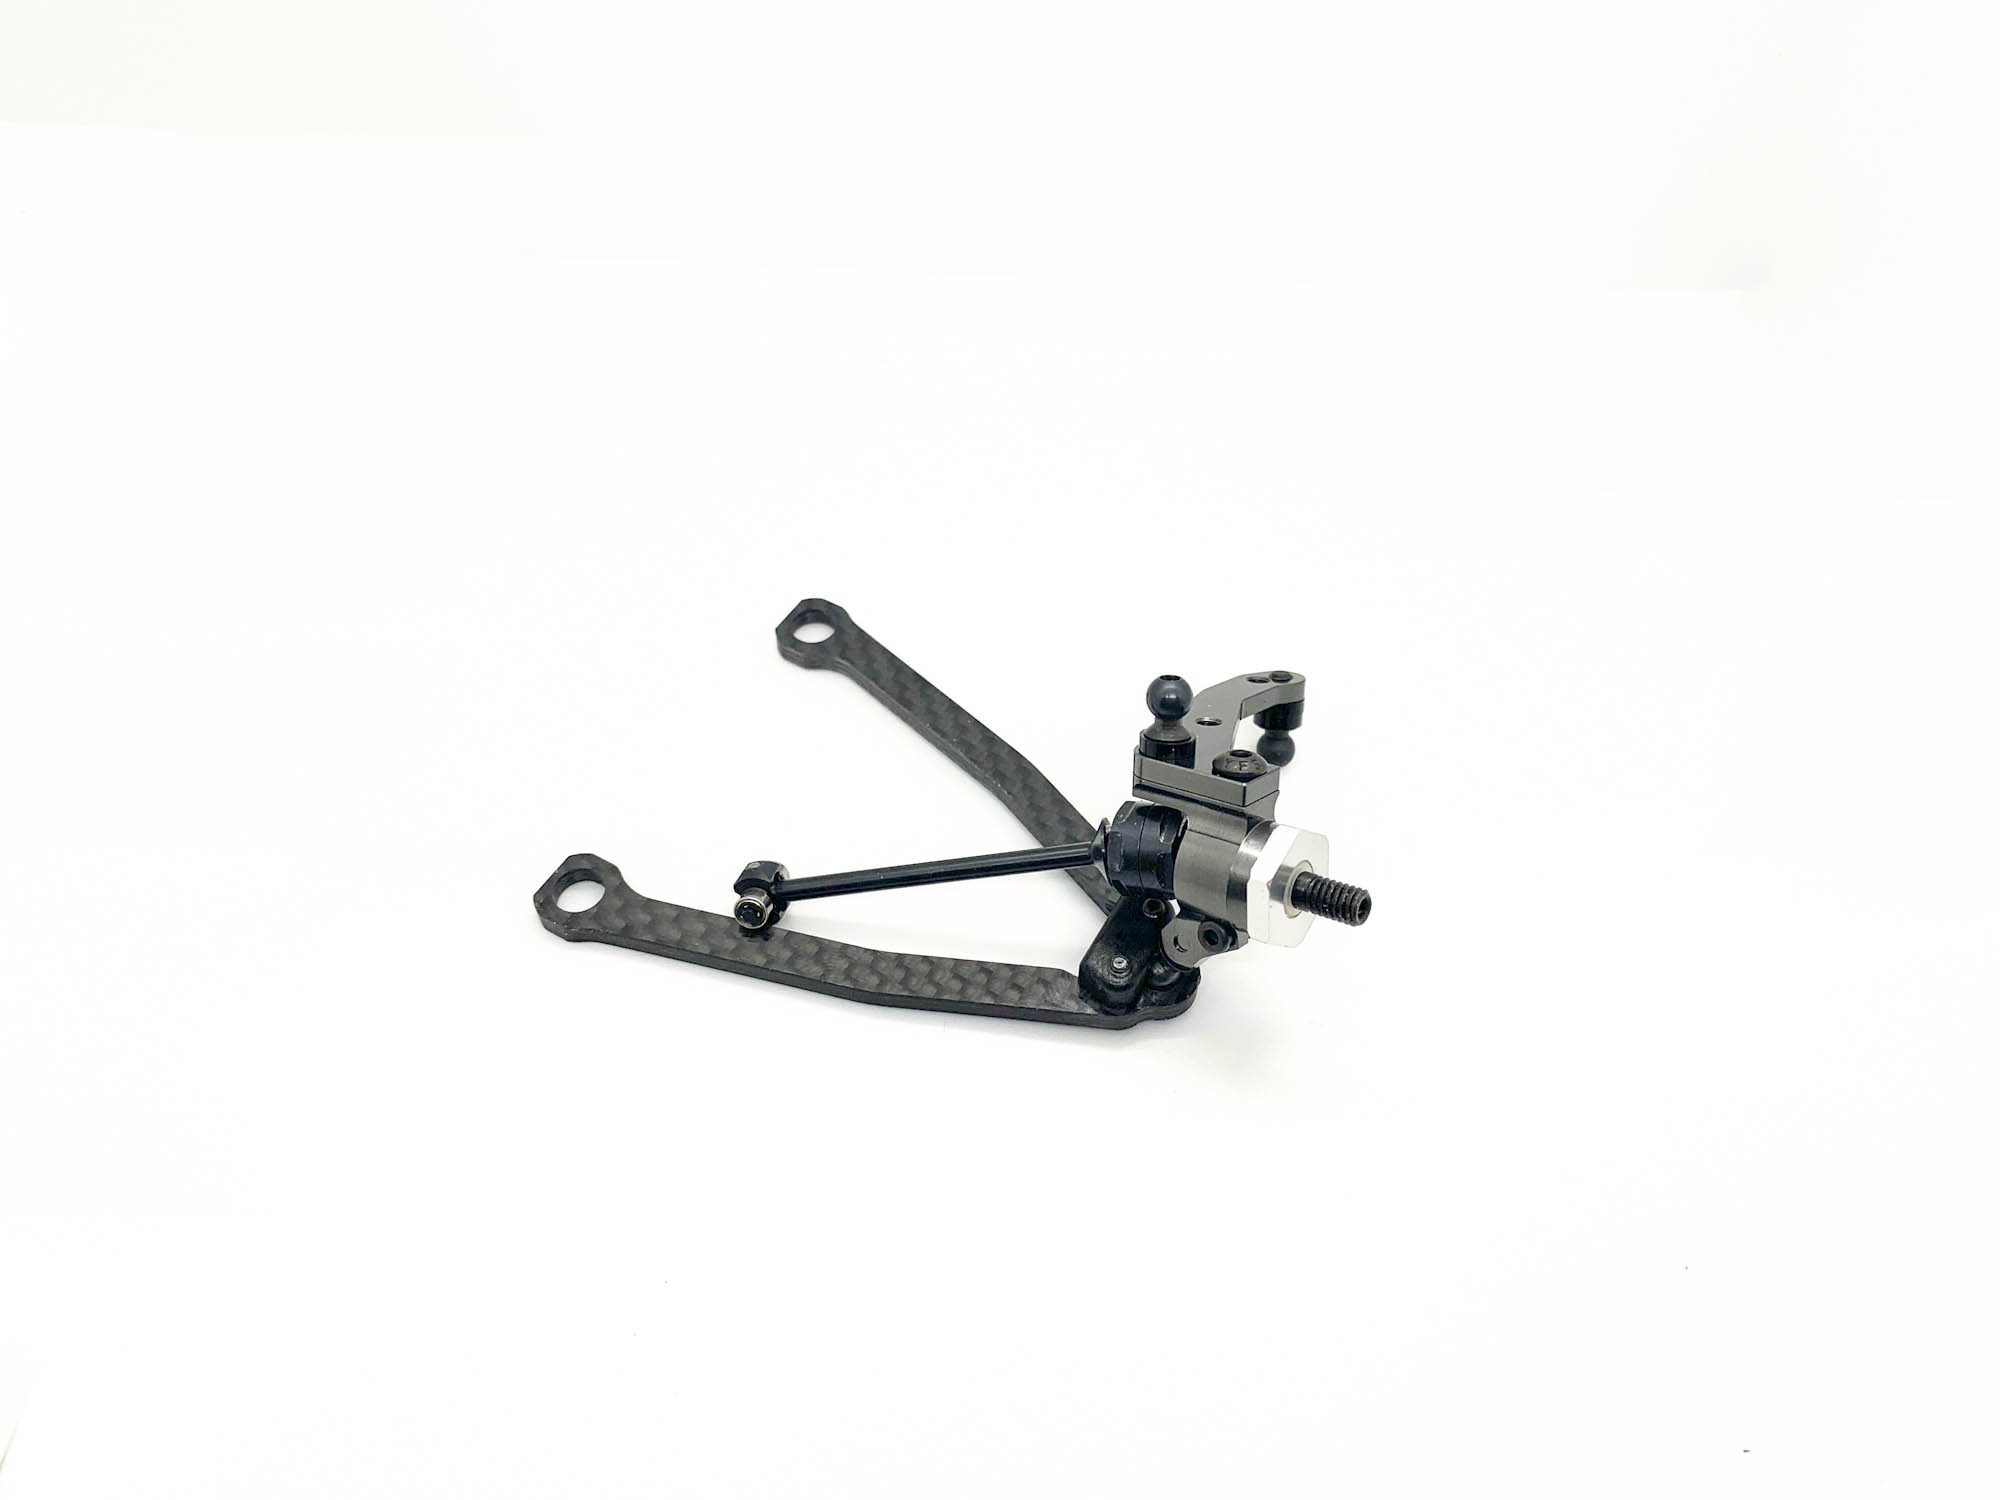
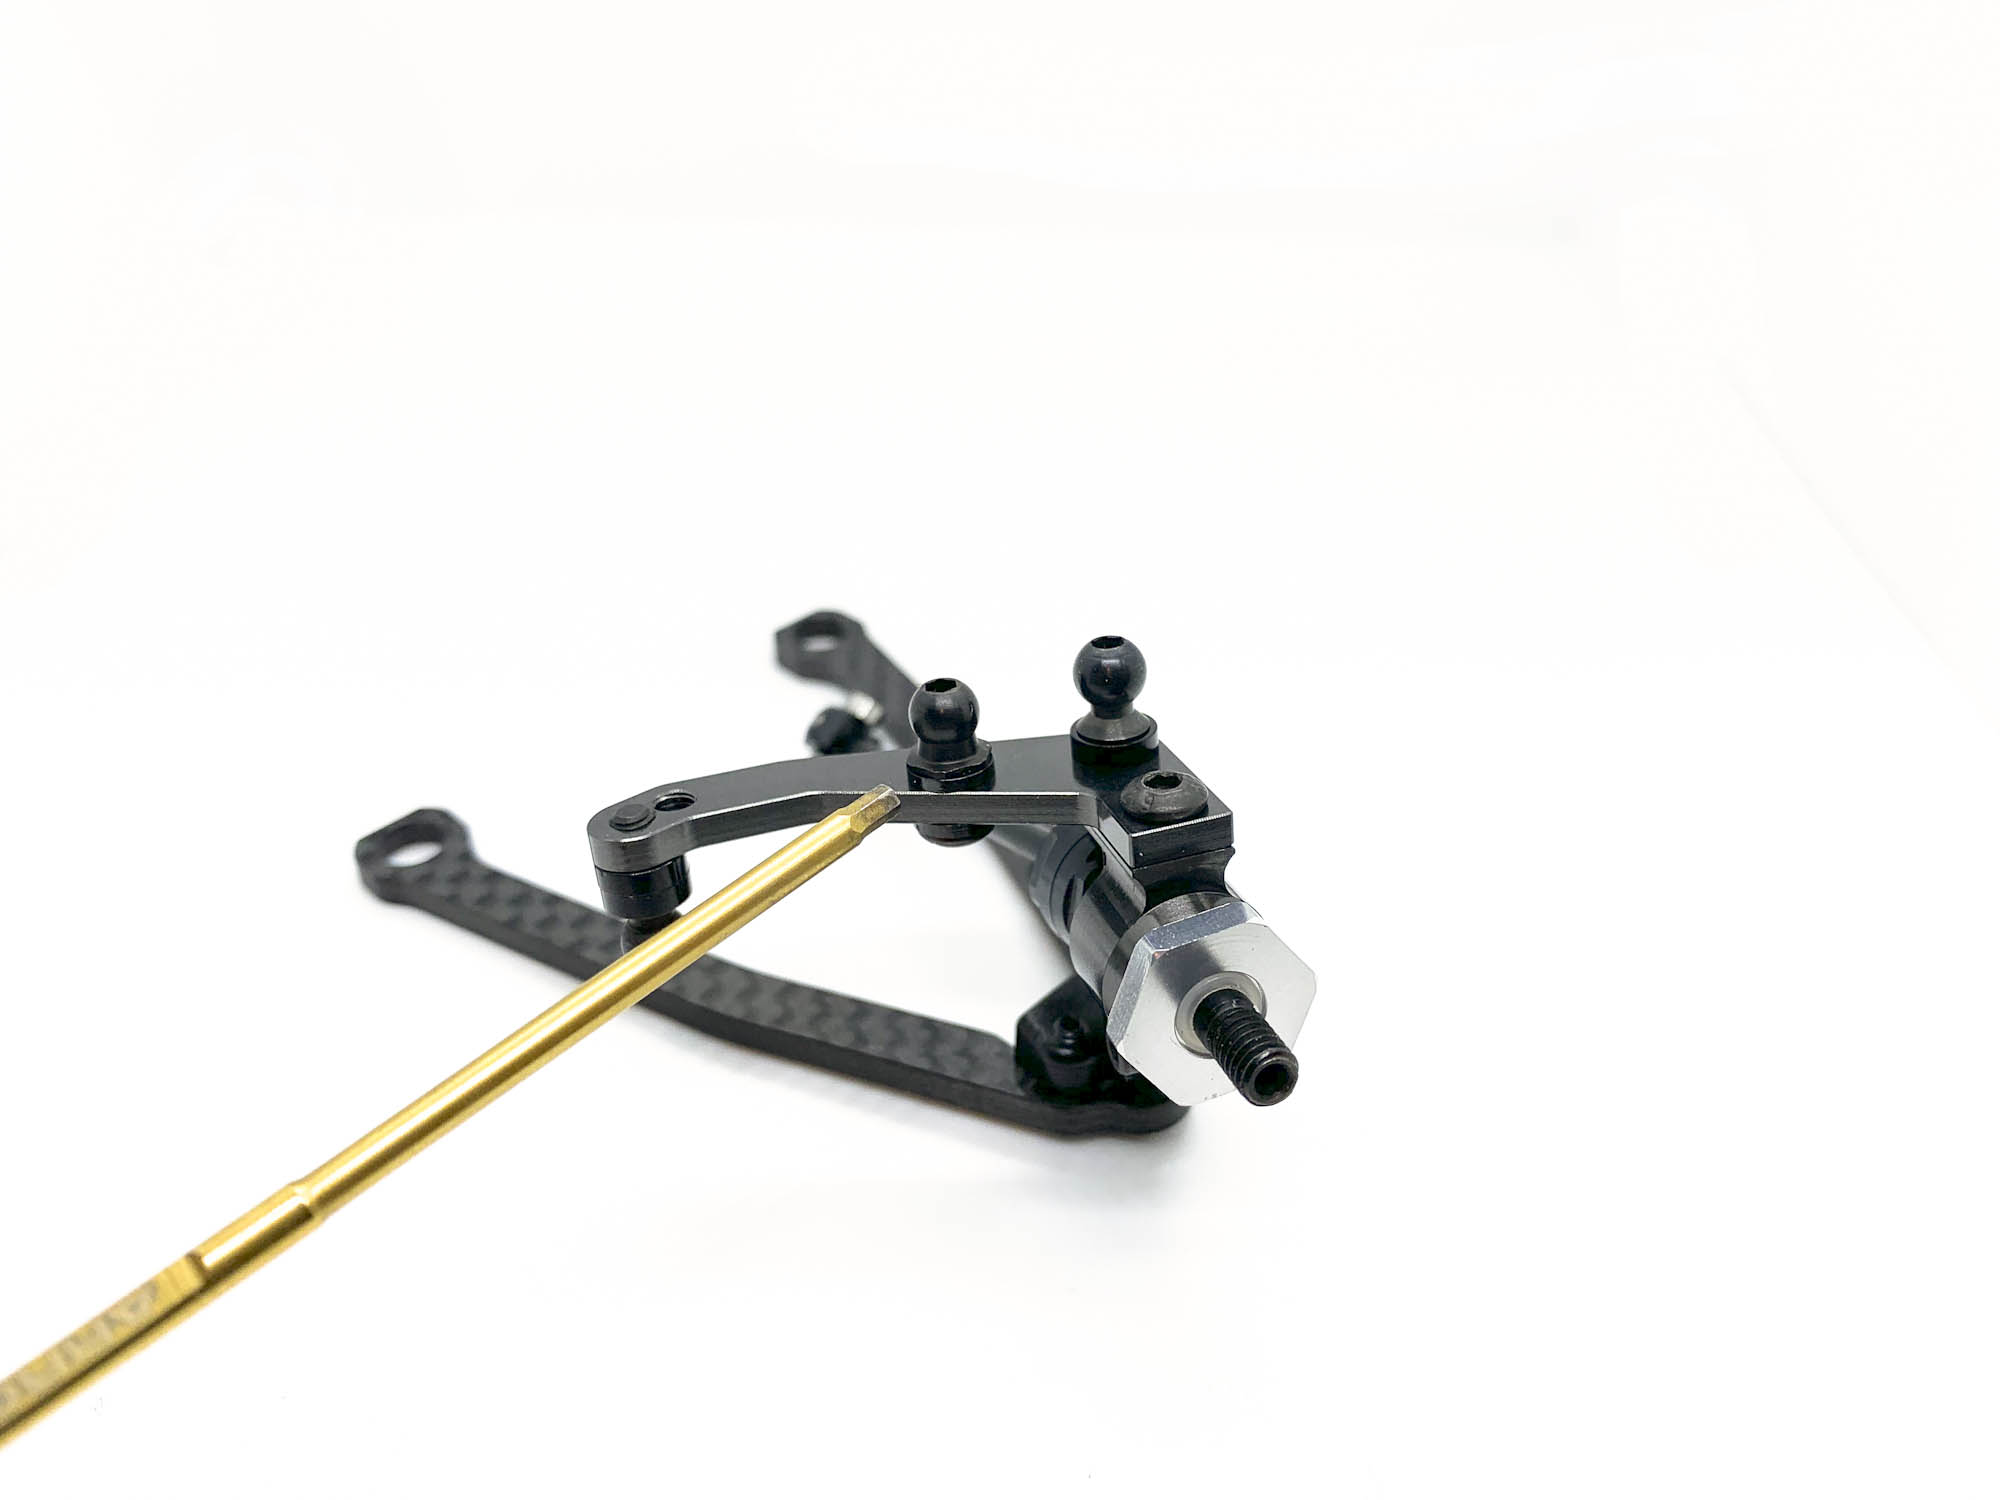
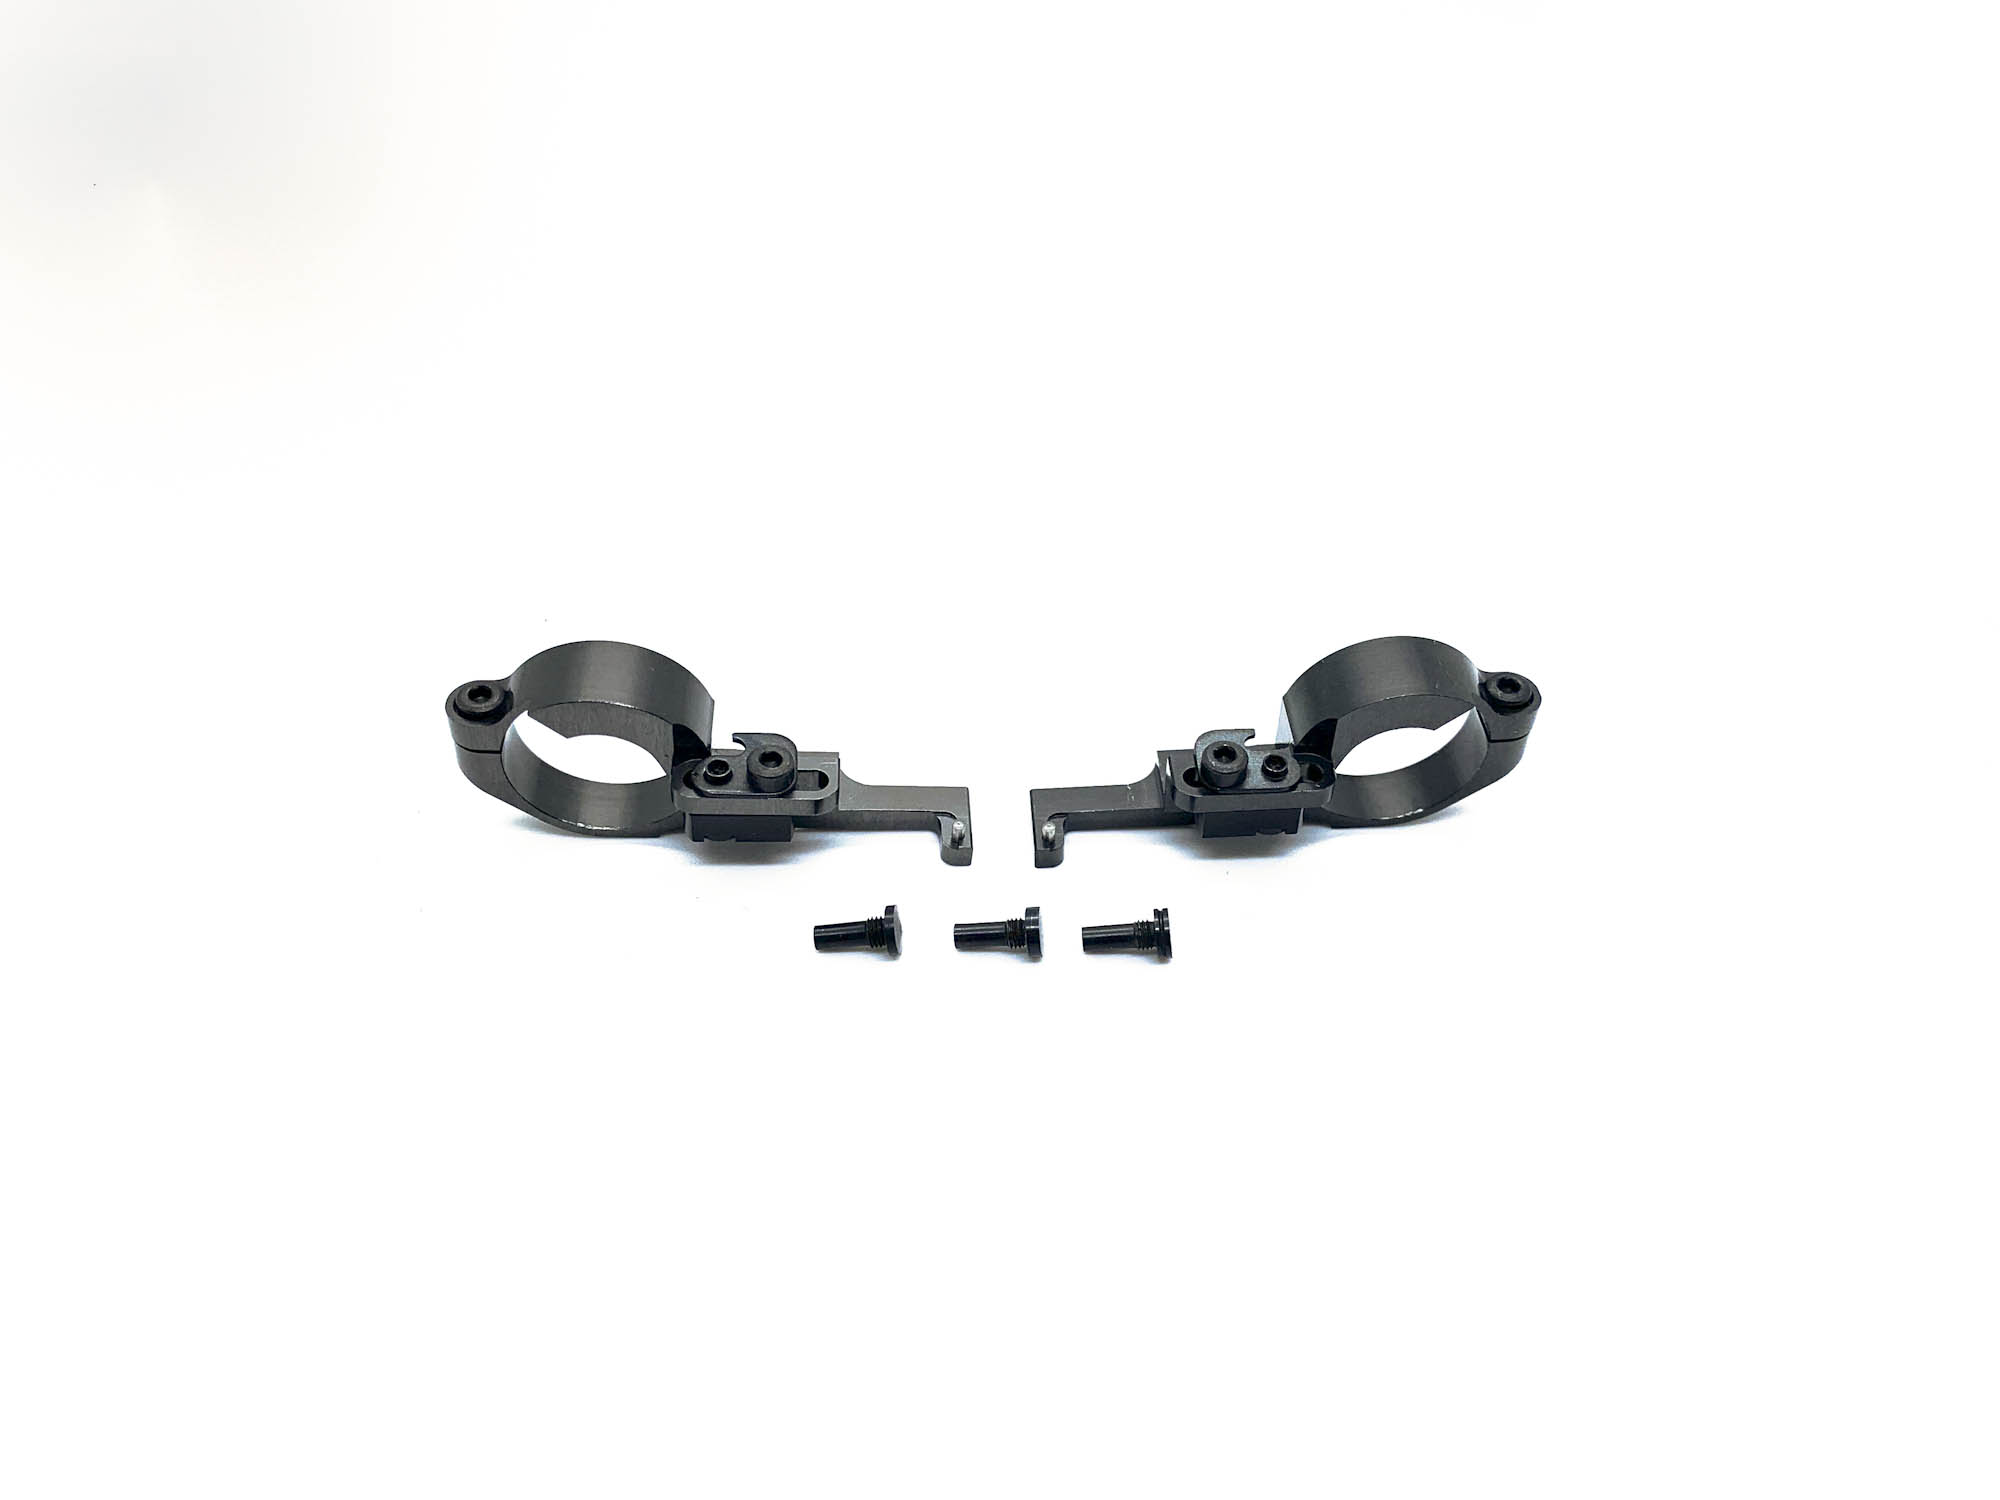
A complete new design is the Single Bellcrank Steering. It combines the same steering characteristic as the BSSX steering but with fewer parts, less free play, and less weight.
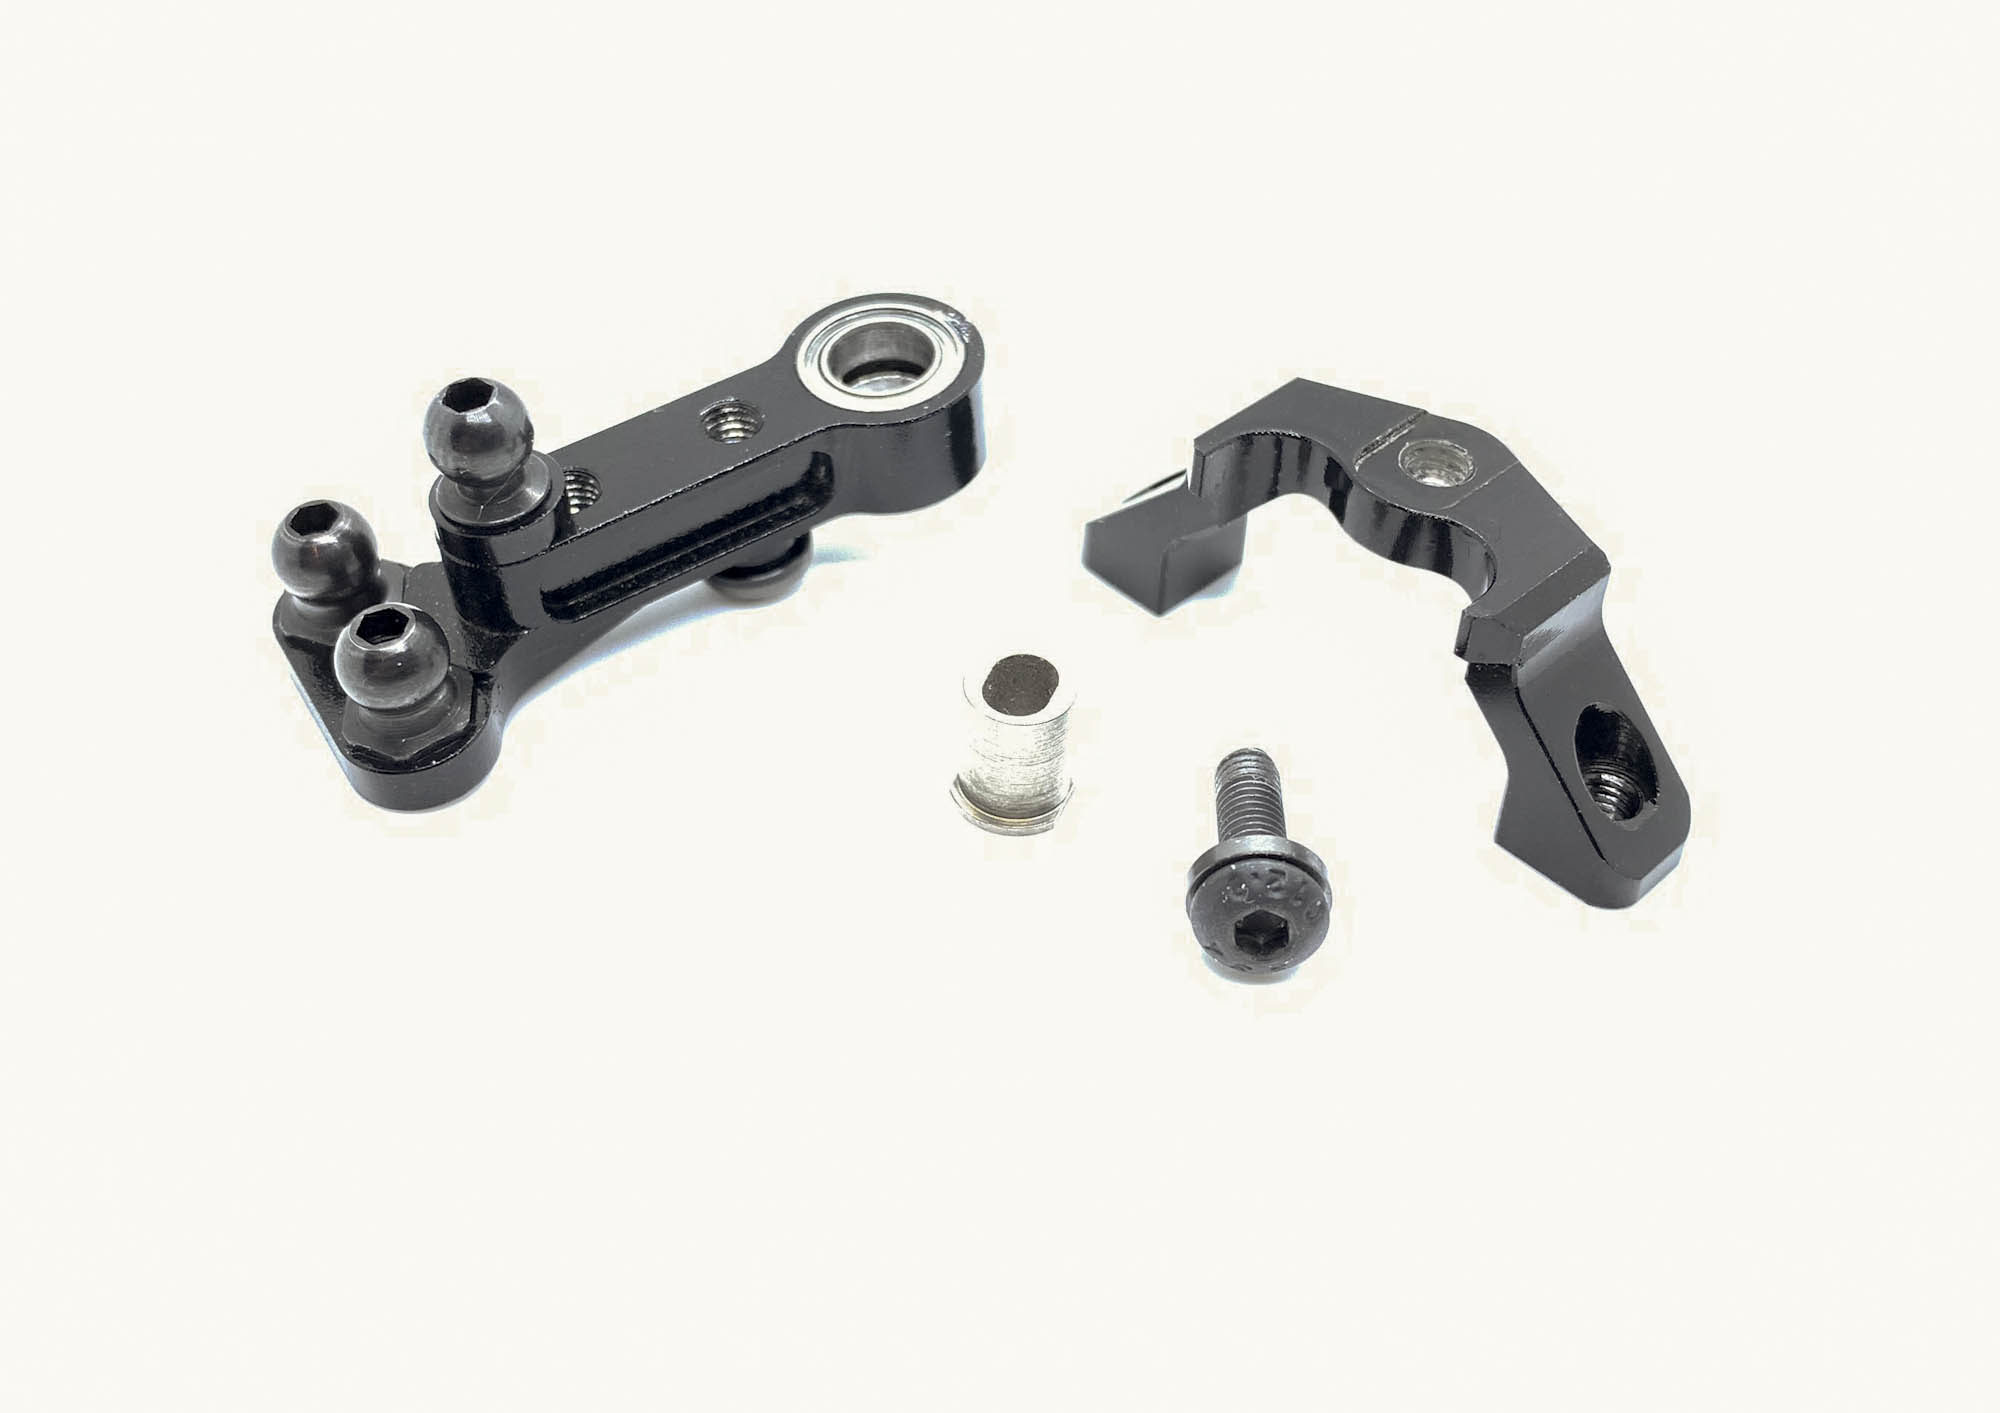
On the lower side you can see the Steering Lock Limiter in from of a SB3x5AL screw. In case more steering lock is needed just remove this screw.
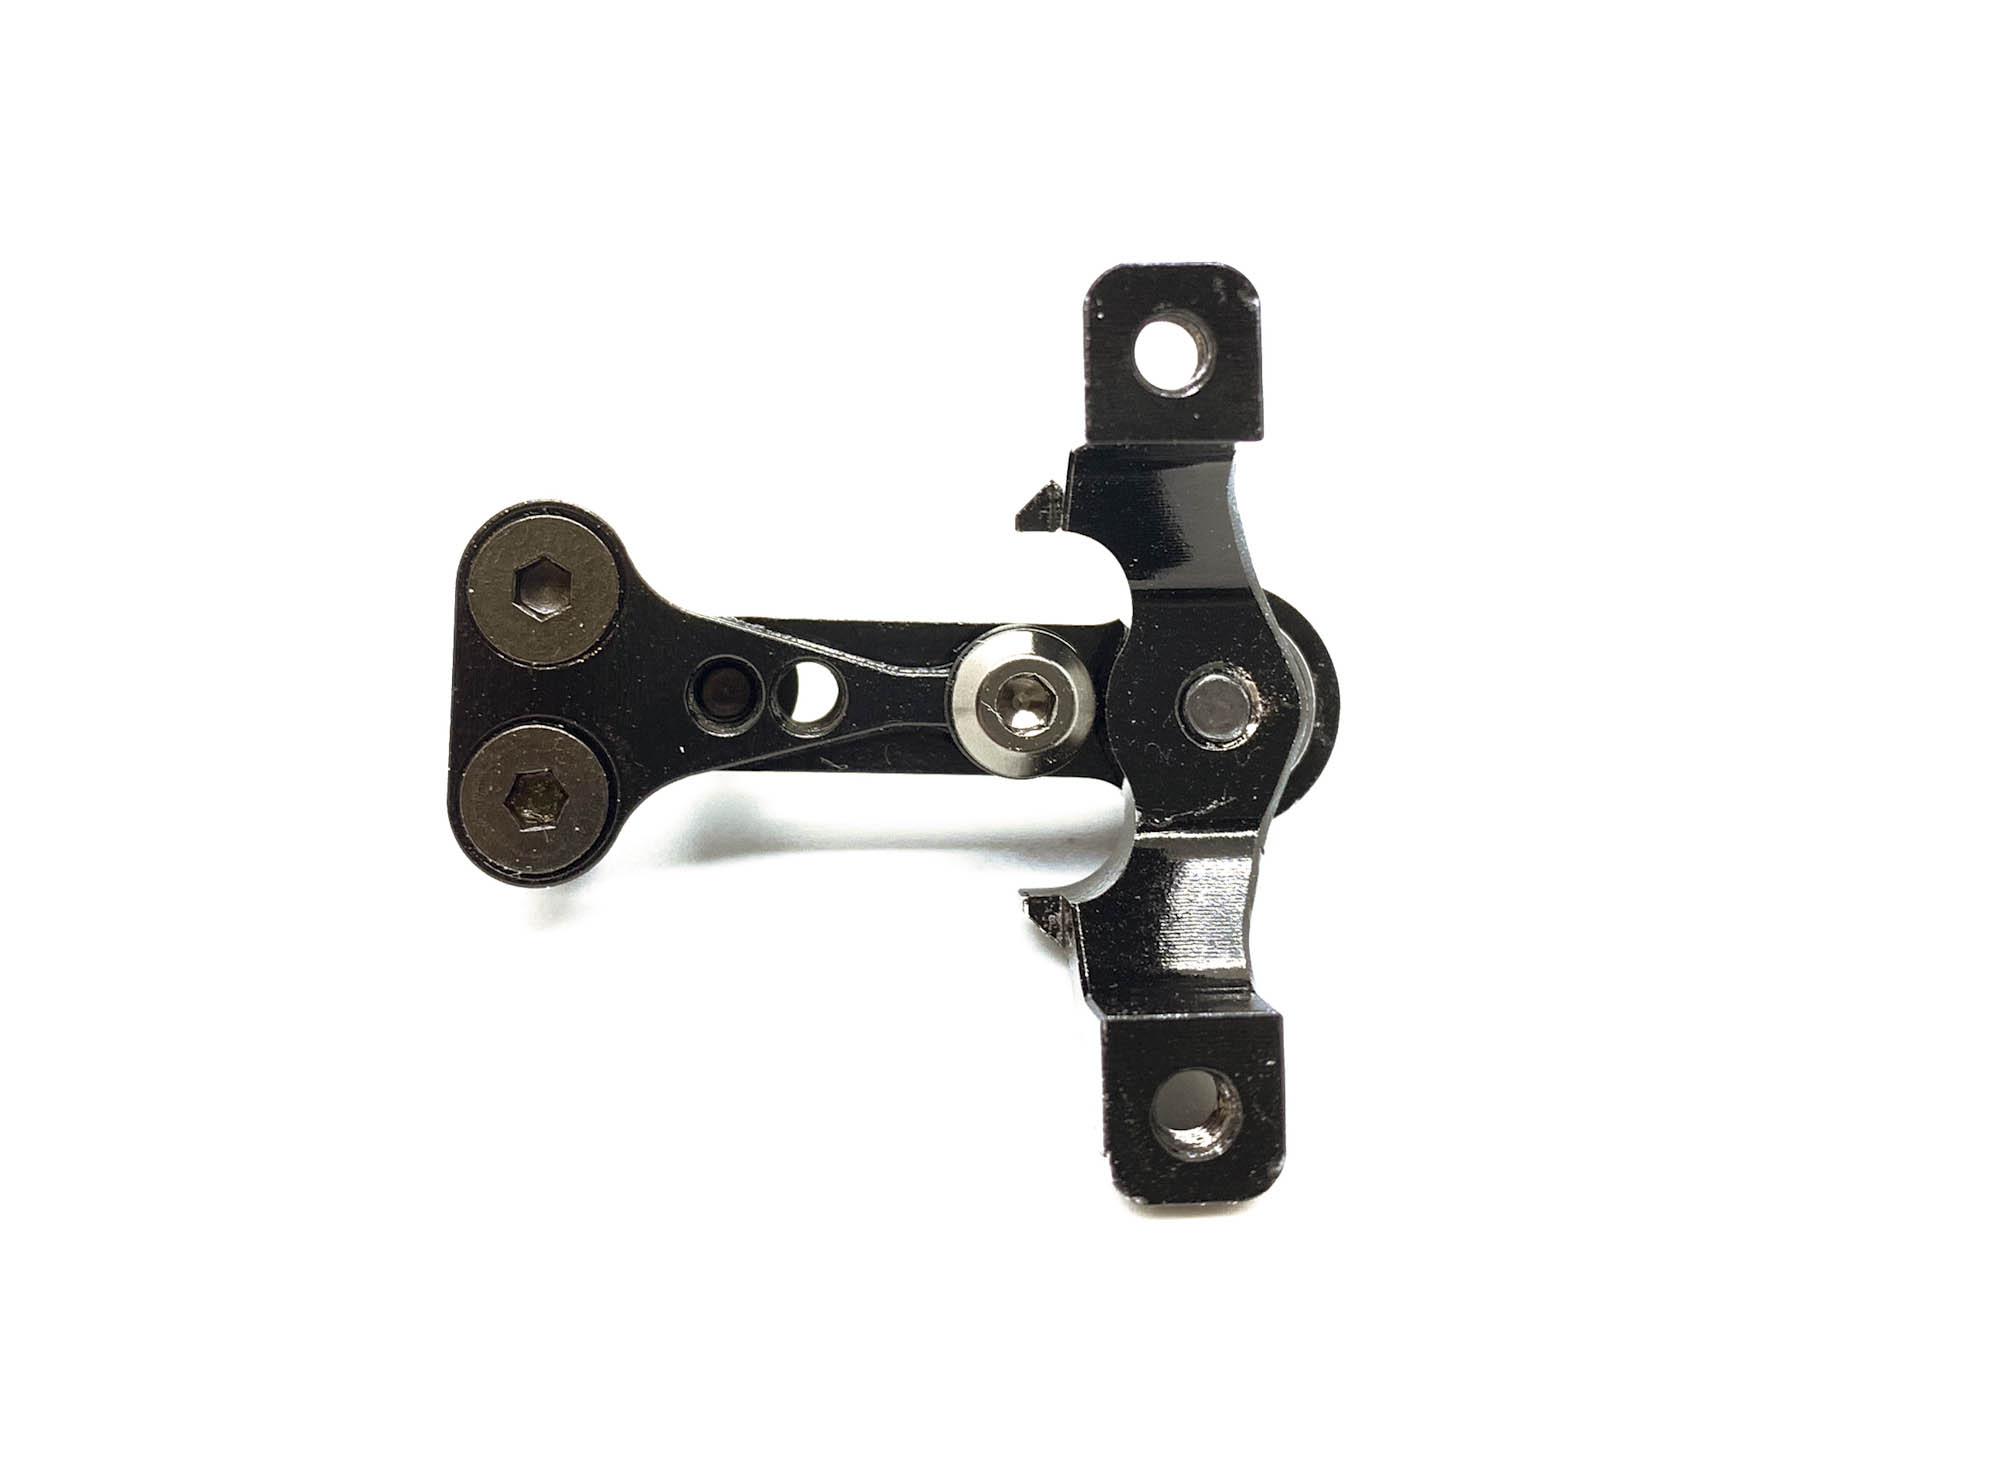
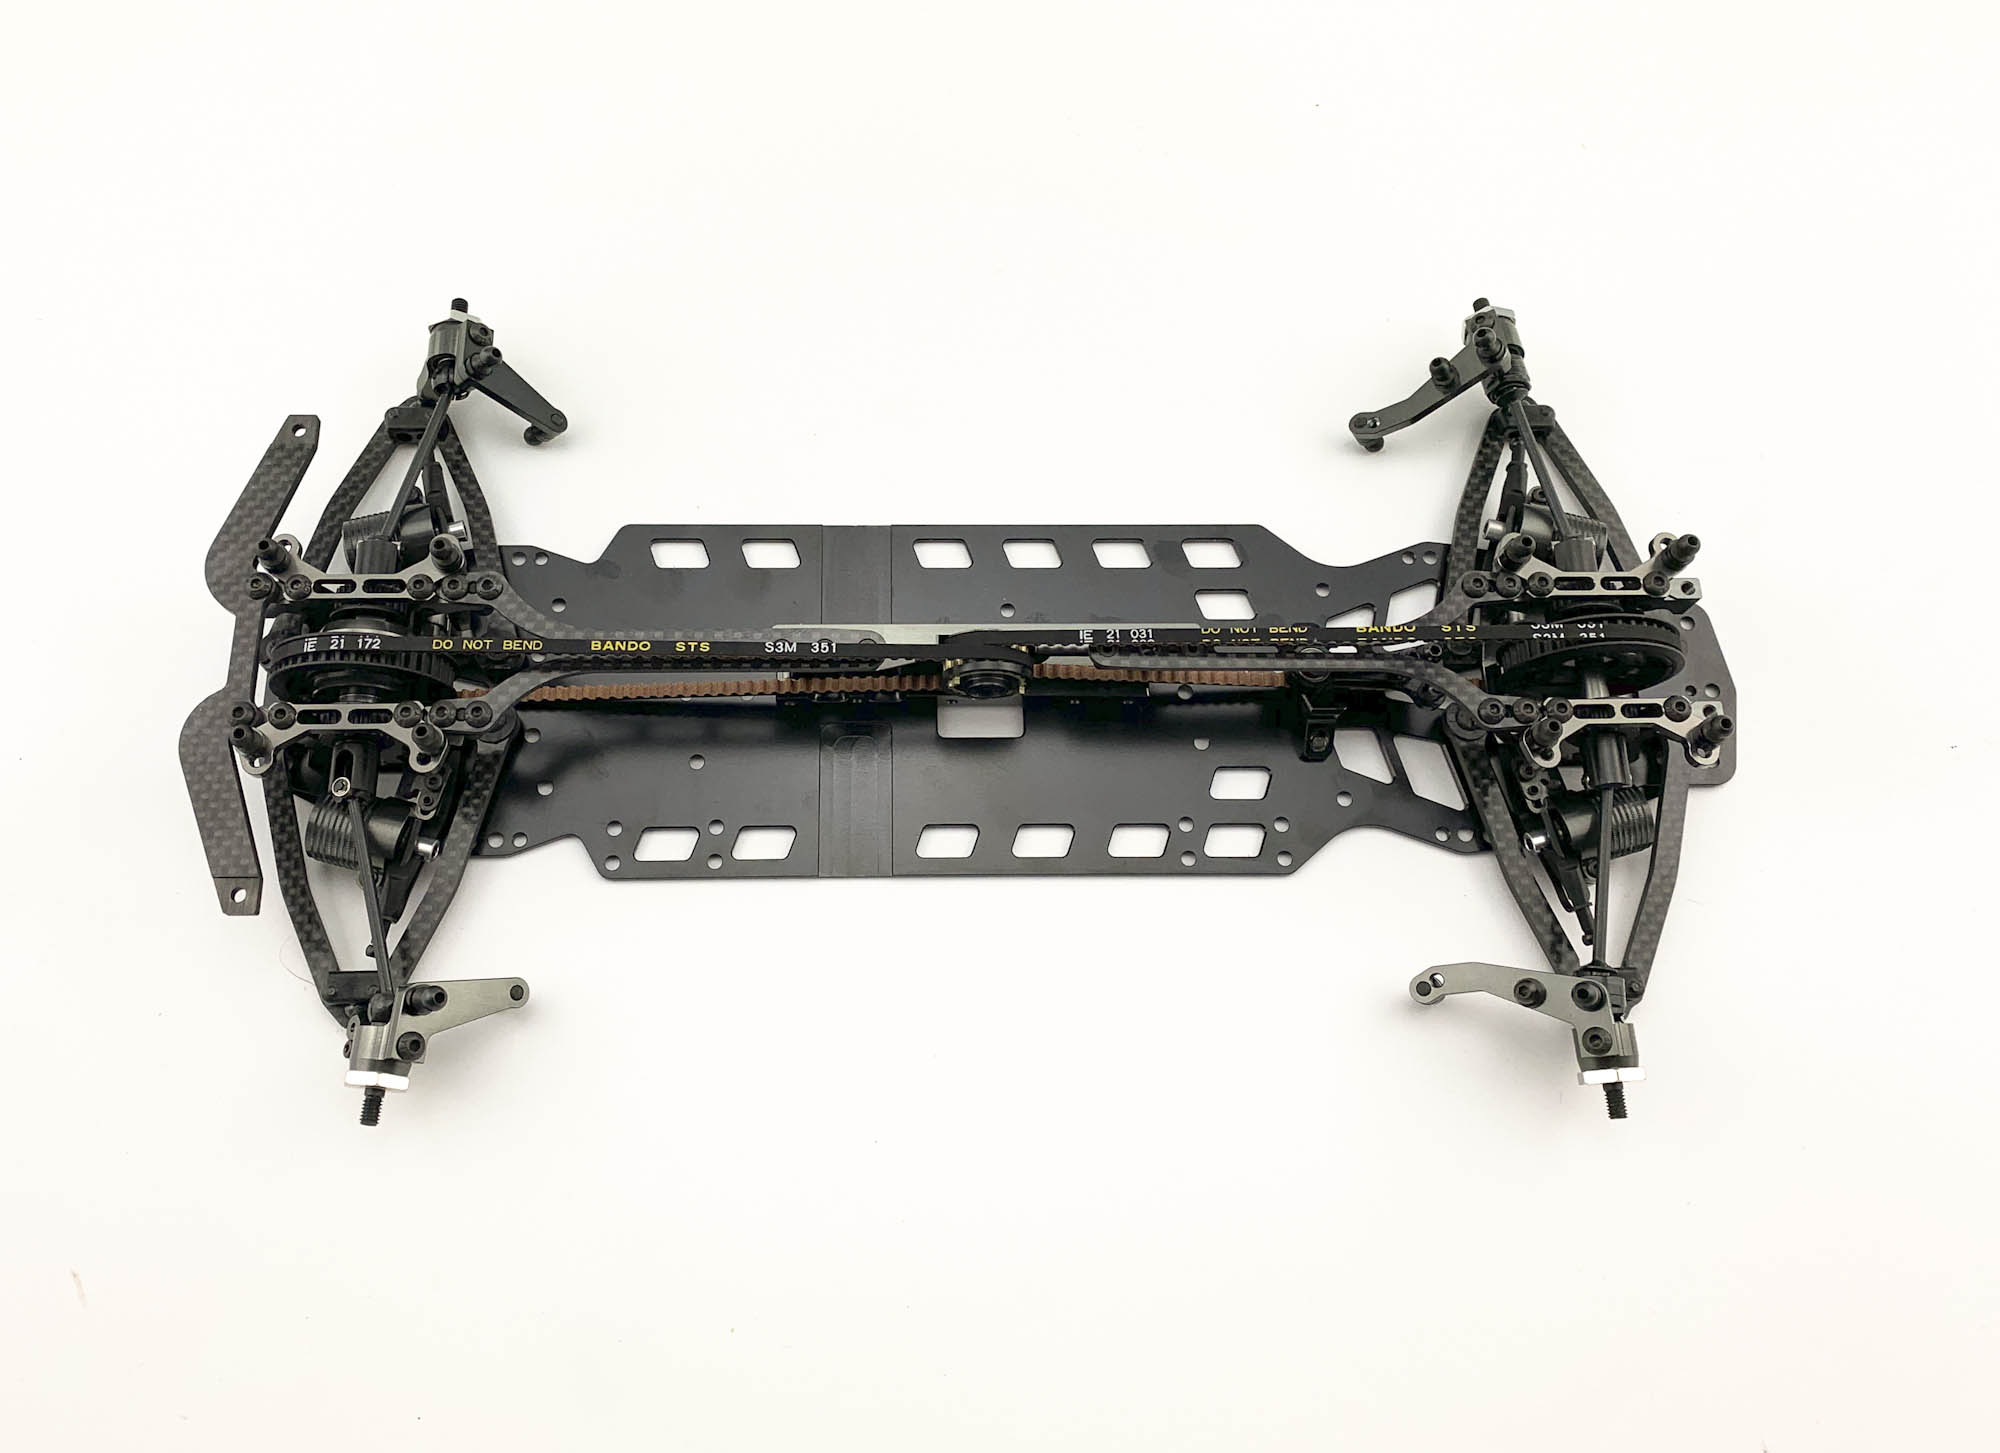
The finished steering.
During less need of ballbearing the play of the steering is reduced to an minimum.
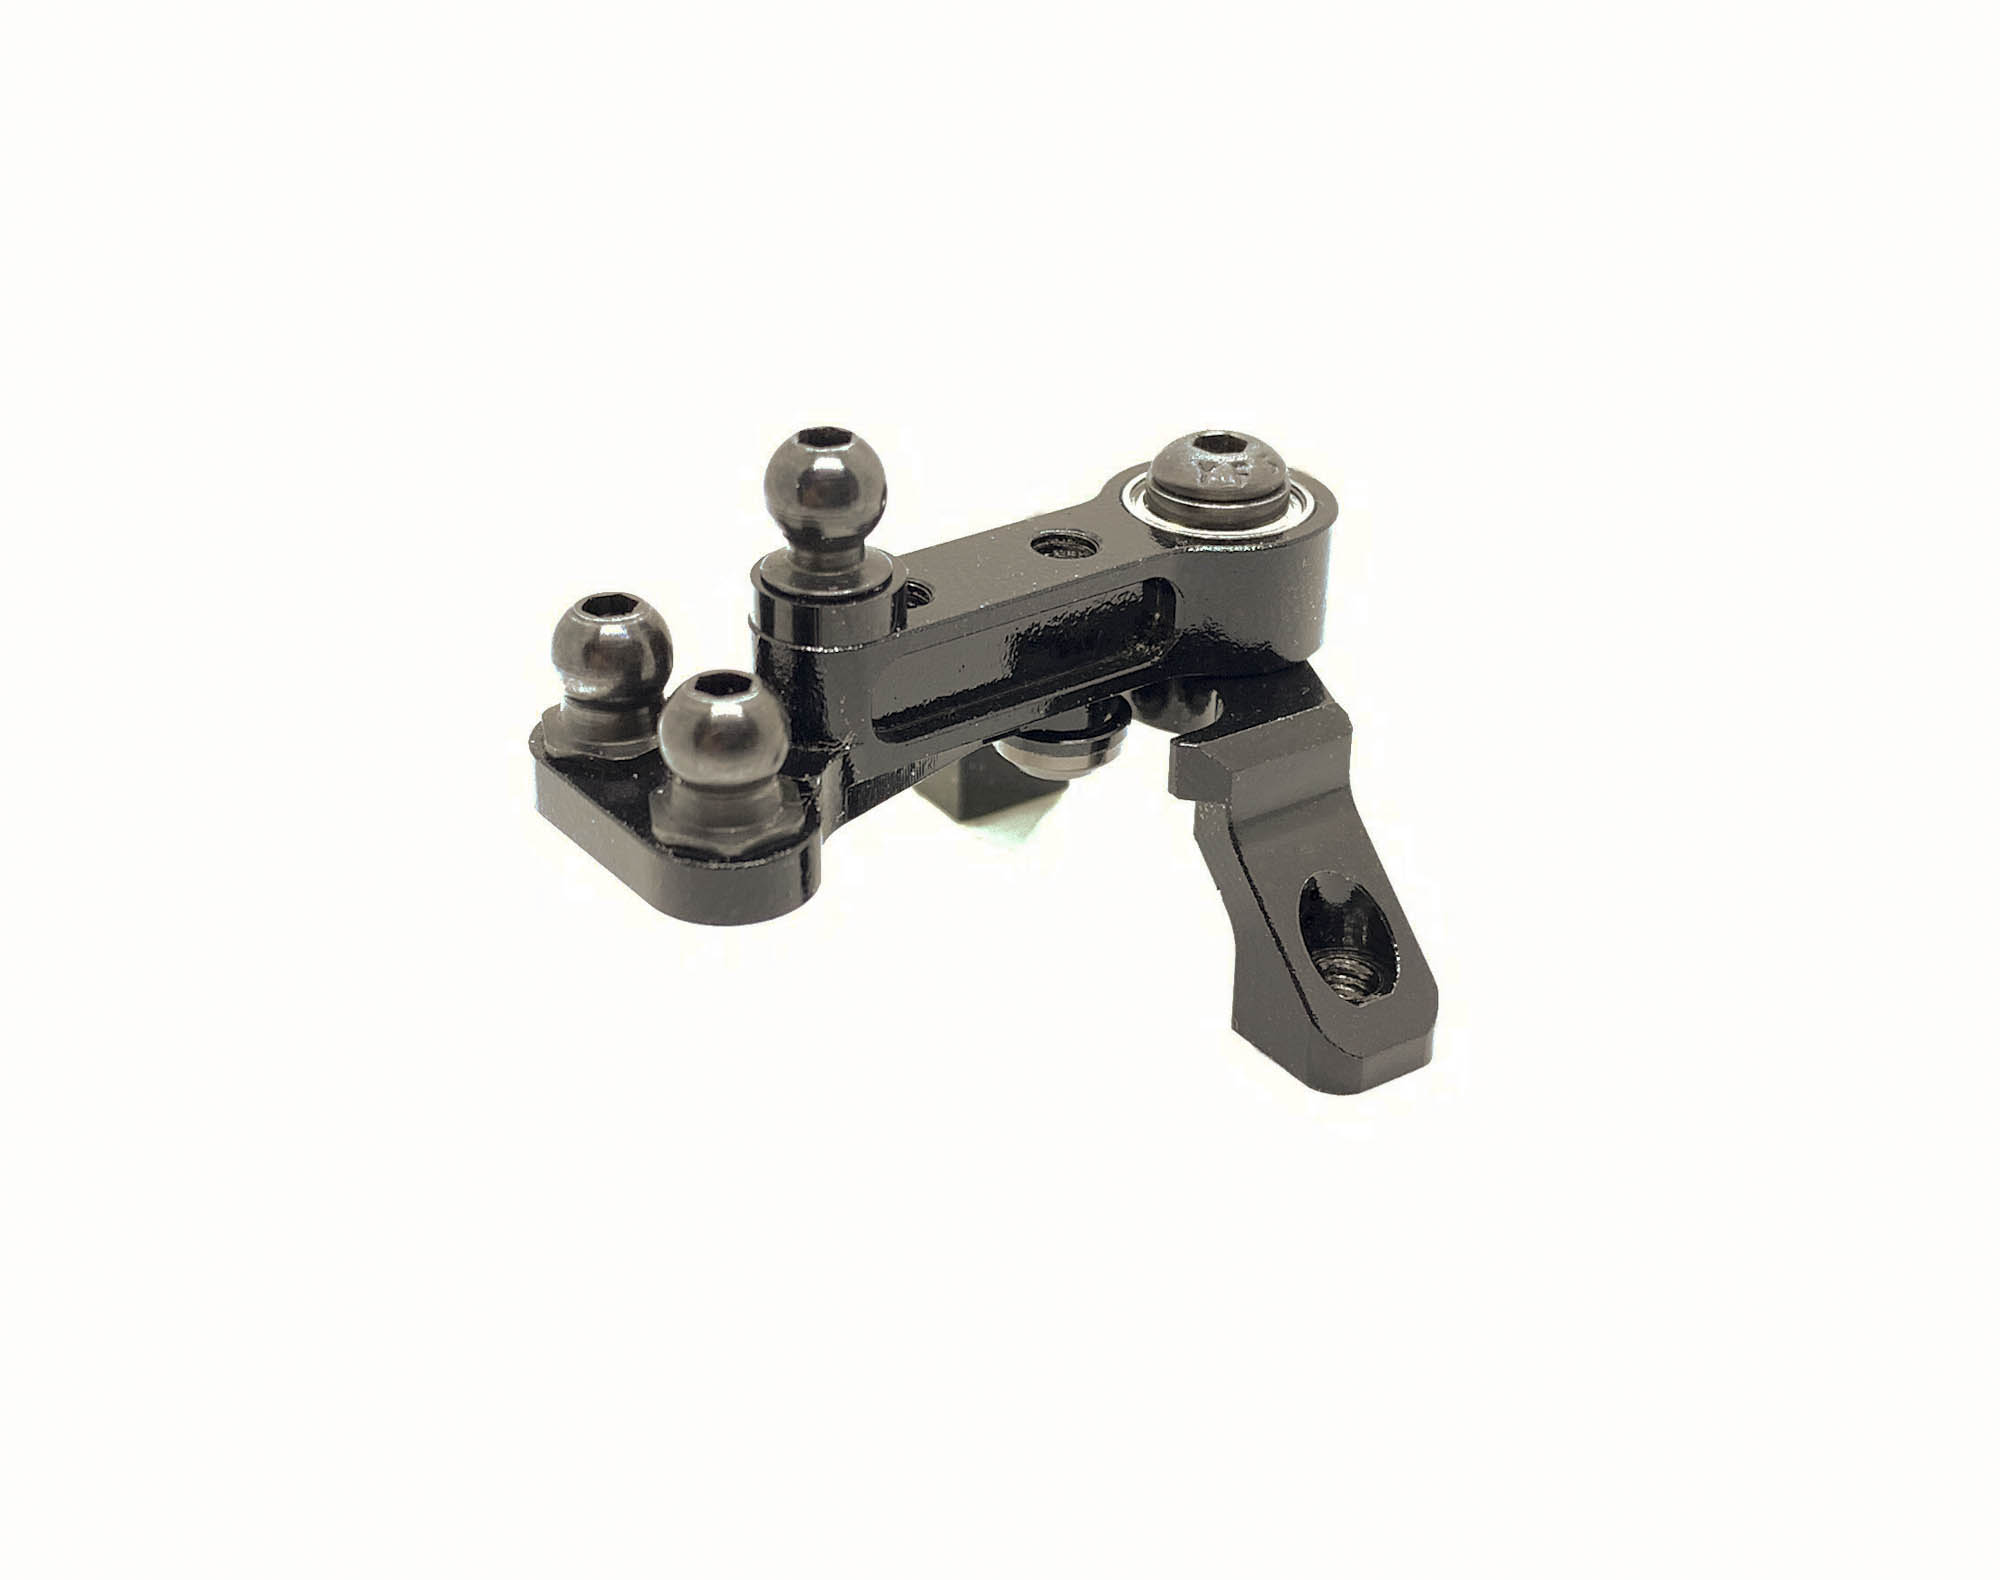
The steering is connected to the chassis by 2 screws.
Looks very slim from the top view :-)
Time to install the two pieces topdeck.
They are the absolute same in front and rear.
The Alloy Car kit use C127S topdecks which are a bit softer during a more slim design.

At the motormount we have several options to adjust the flex of the topdeck either in front or rear.
ST019 TopDeck screws are used to allow the needed movement in case of the softest flex settings are used.
Installation of the suspension arms to the chassis via P07 c-clips.
Reminder, make sure once again the ST03 balls (whole hub) can more free in the C04/P04 suspension arm. Otherwise it will have a negative effect on the car handling.
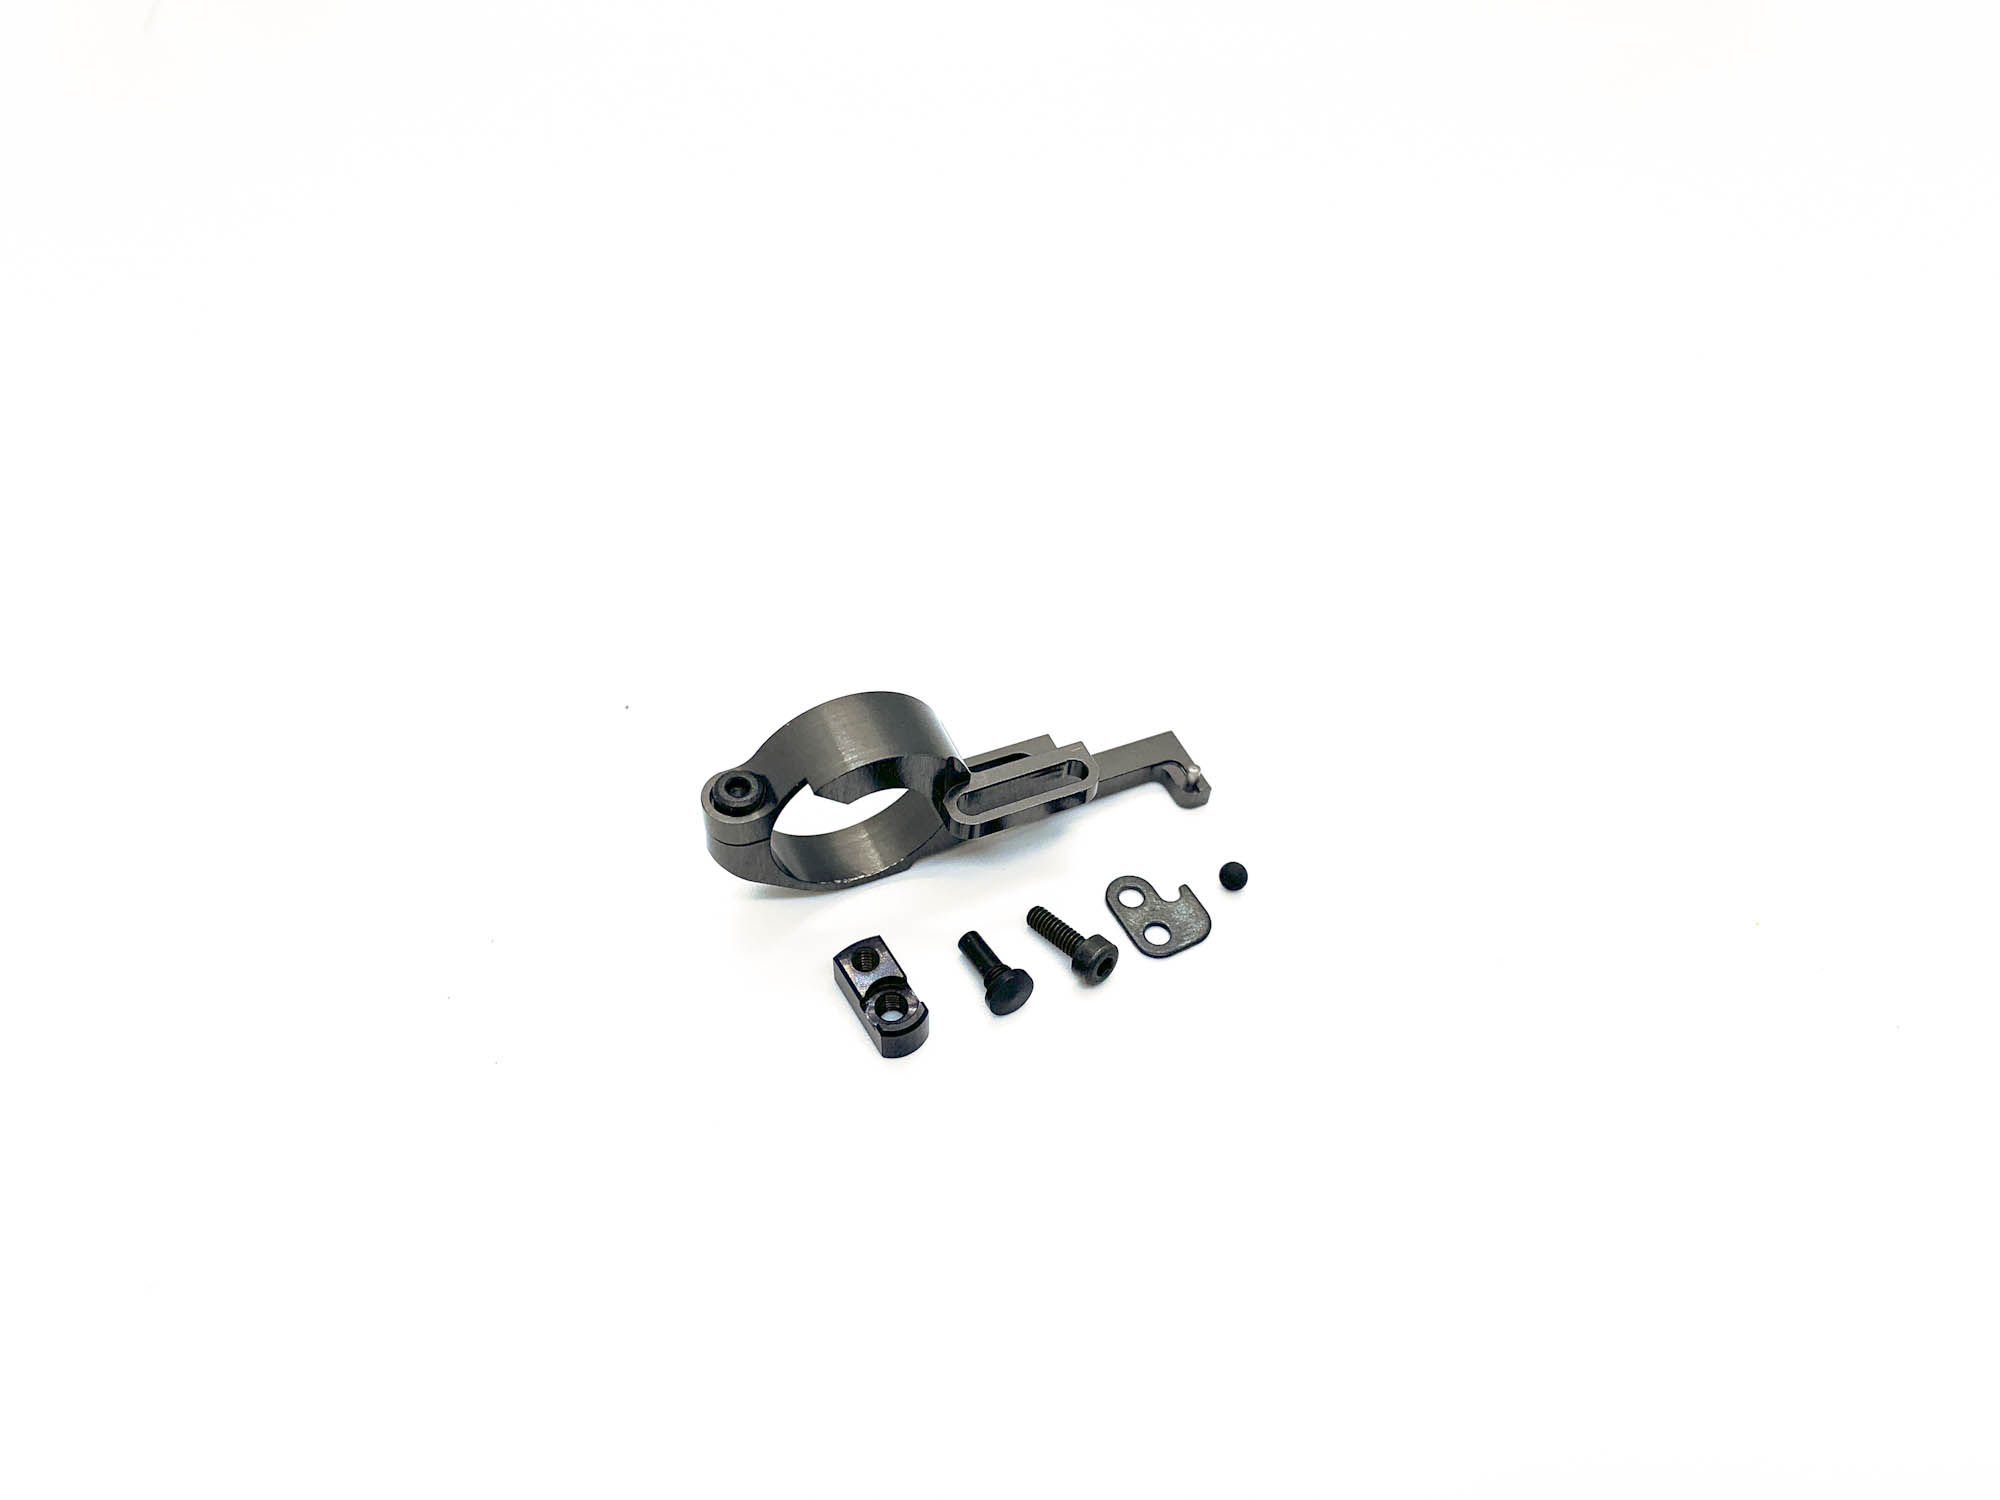
The P12X swaybarholders for the ball bearing holders are same as in previous models.
Take care if you use higher rollcenter shims to cut off the top nose like shown in the manual.
As always, all needed Swaybars are included in the kit to give you the best possible chance to adjust your car at the track. (2x 1.0 / 2x 1.1 / 2x 1.2)
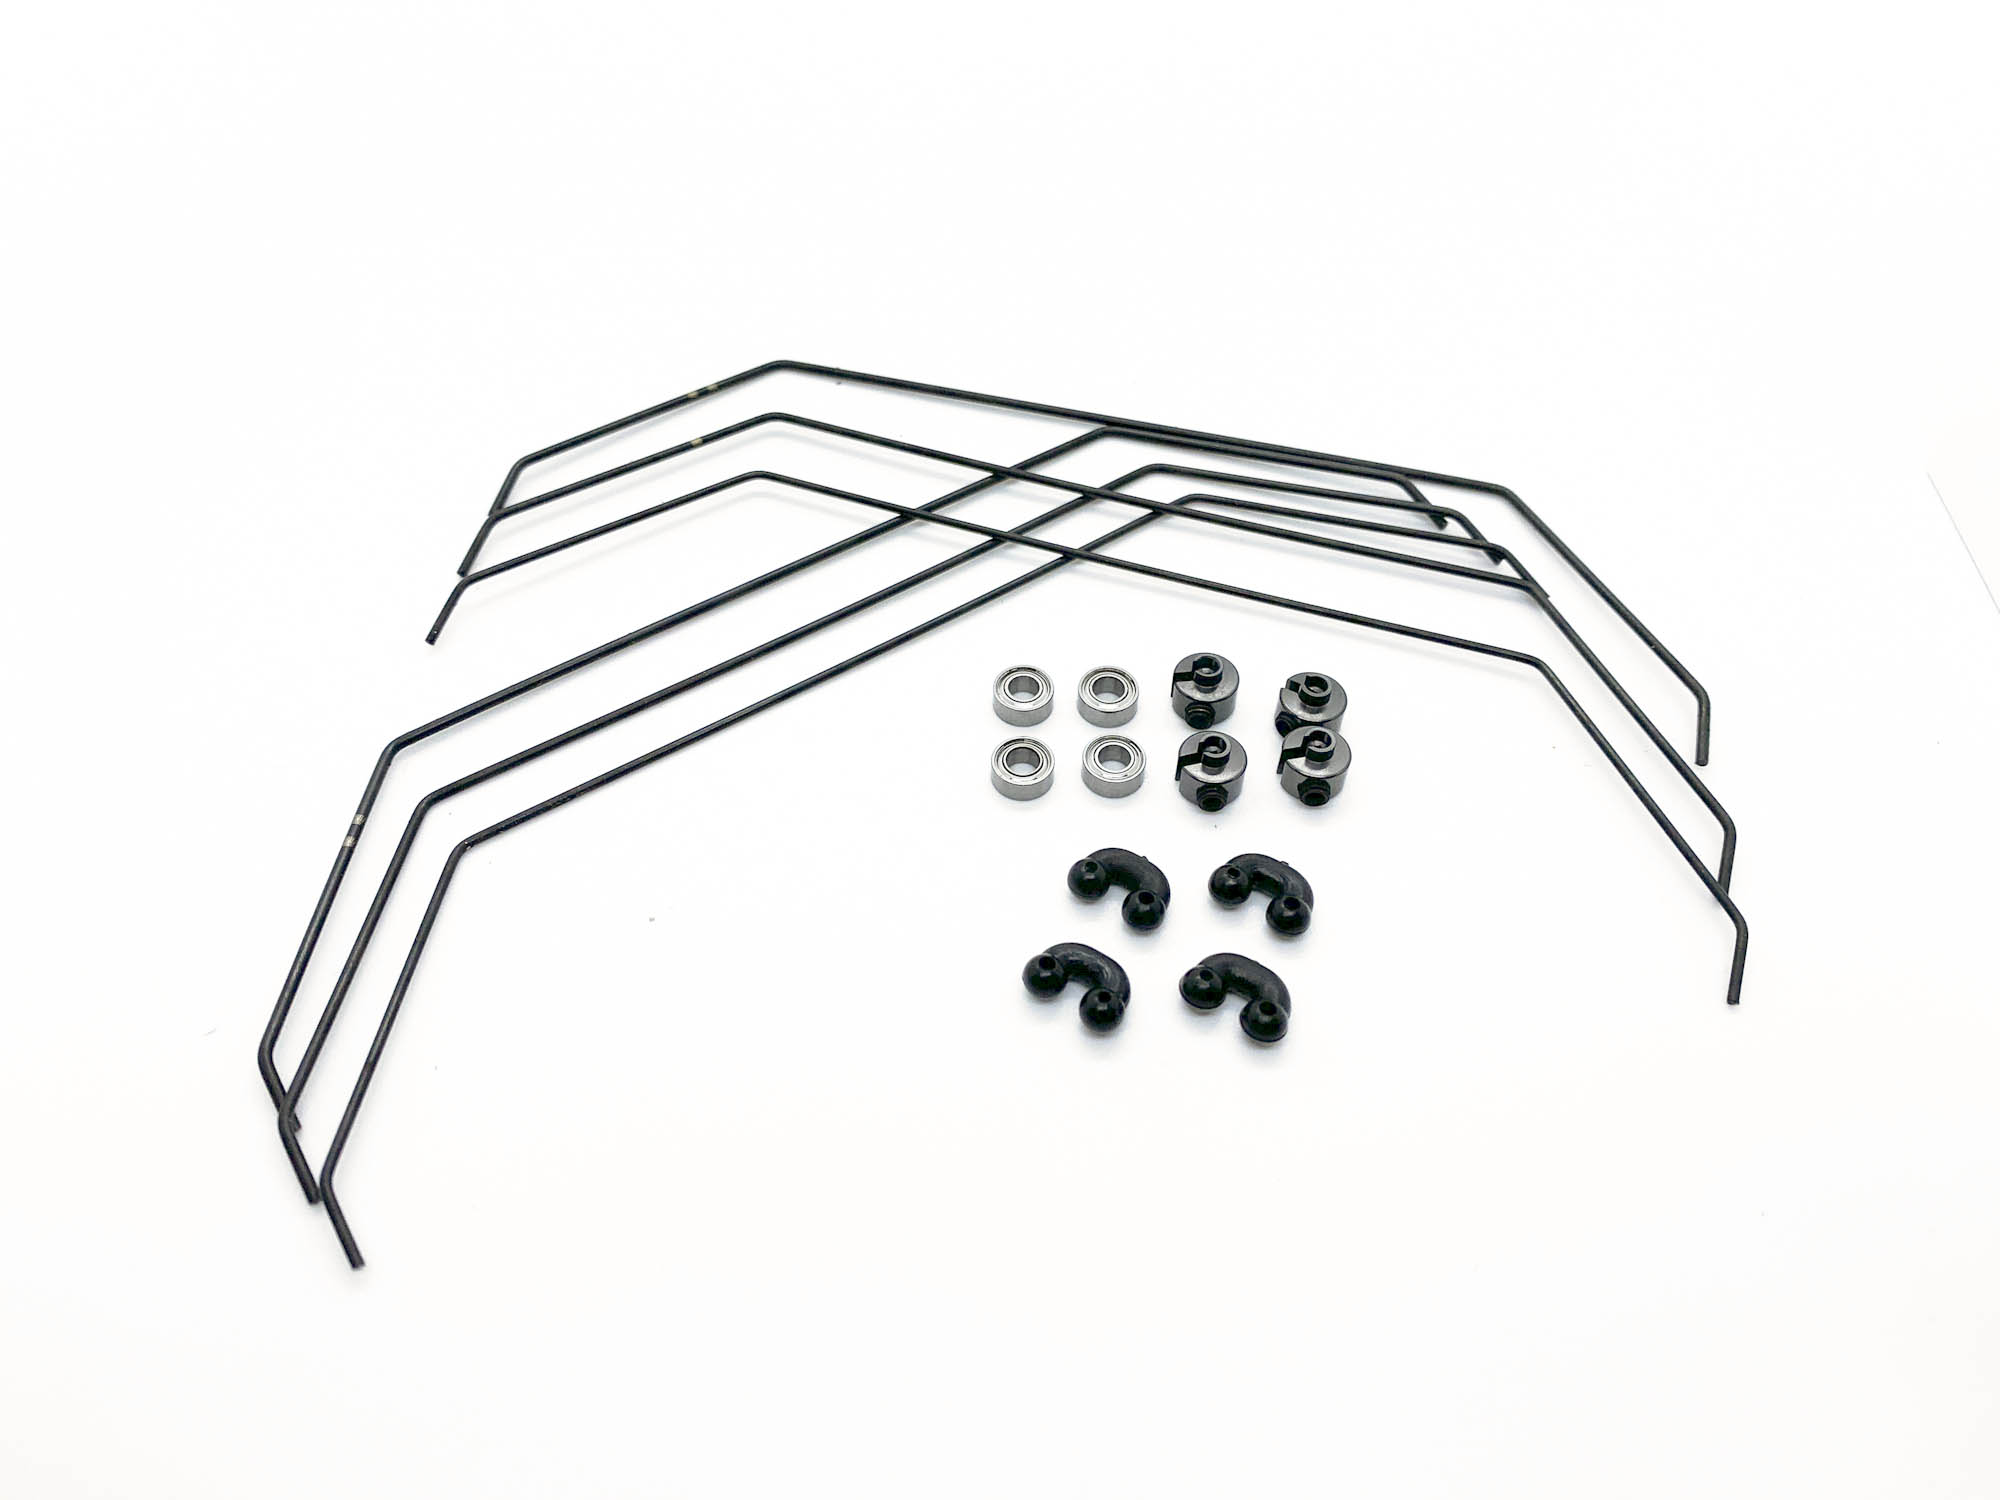
Mount the swaybars accordingly the manual. Choose the right hole in the P05 clip to match the swaybar thickness!
Turnbuckles - the part which needs the actual most "screwing action" of the whole car build.
All turnbuckles are made of high grade 7075T6 aluminium.

TIP: Add a drop of oil inside the plastics before you turn in the turnbuckles. This will make the process more easy and also ensure easy setup work at tracks.
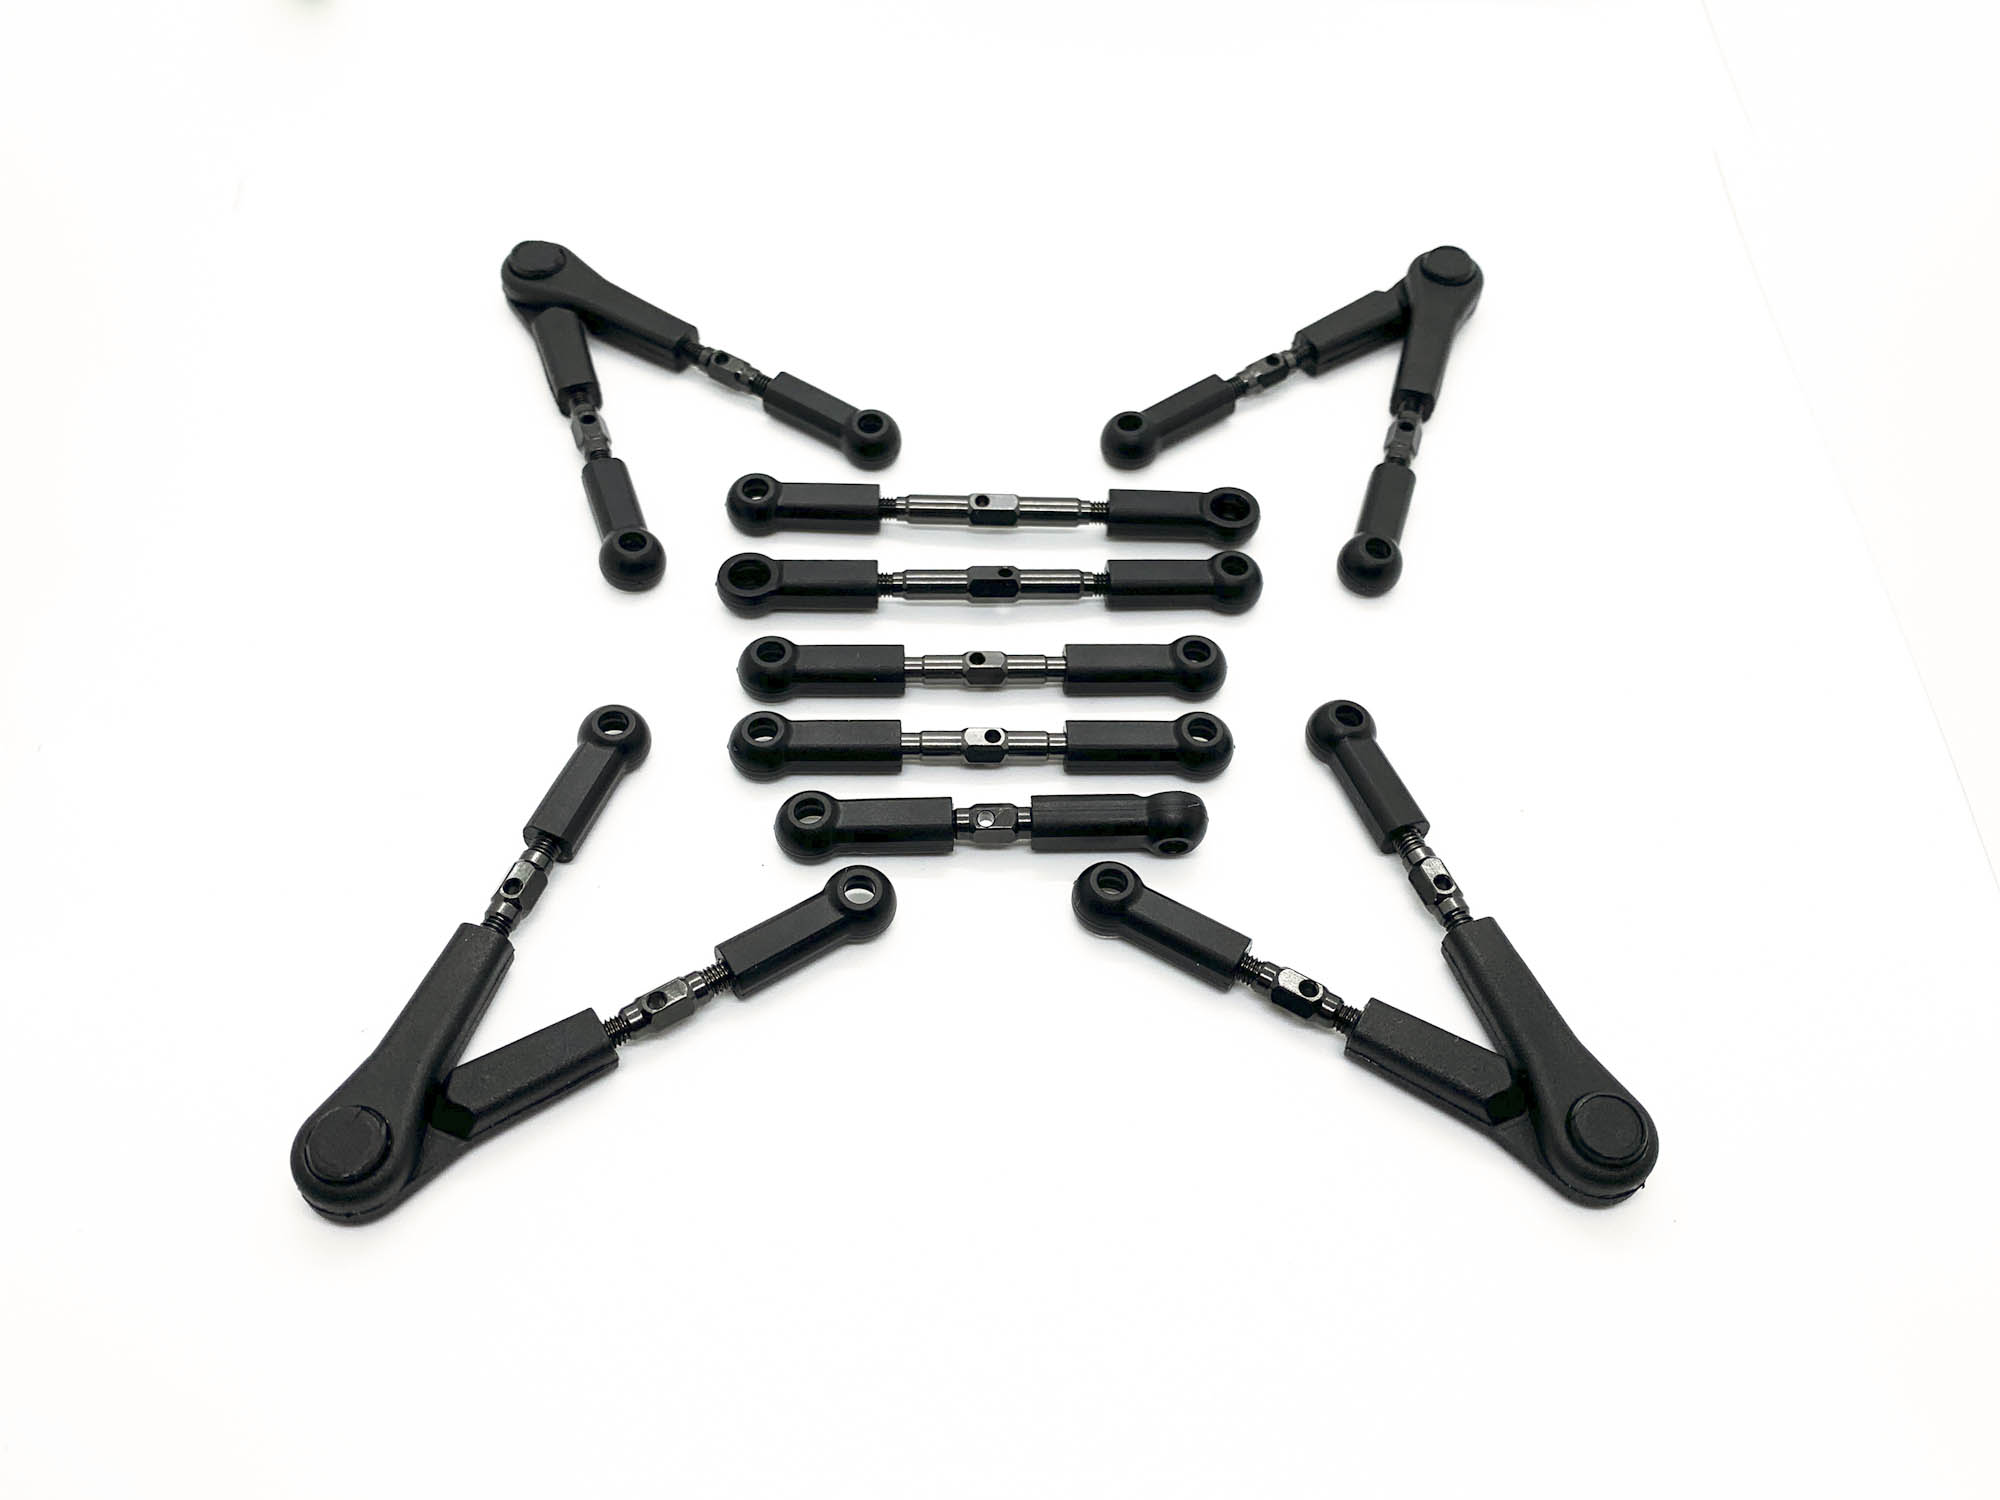
Snap all turnbuckles in the right place.
Personaly i make sure that the "holes" of the turnbuckles all face to the outside of the car.
One of the final last steps is to install the inner battery stops. You adjust the amounts of shims to your needed preference. An easy and good way to balance your car.
The well known Awesomatix battery mounting system. Adjust the height of the Battery posts by shims to match your battery height.
Its important to not press the battery to the chassis. There should be minimal free play for the battery inside the chassis.
Two pieces of ST105 5g weights are included to adjust the weight balance of the car.

Also two ST110 10g weights included.
We recommend to aim for a 49/51 front->rear balance for the race ready car. This should be checked via scales.
The floating one piece Servomount is well known from the past models.
Choose the right Oring for AT55M spur nut to match your spur gear. In my case I always use AXON inc. spur gears which are secured well by using the OR18V.
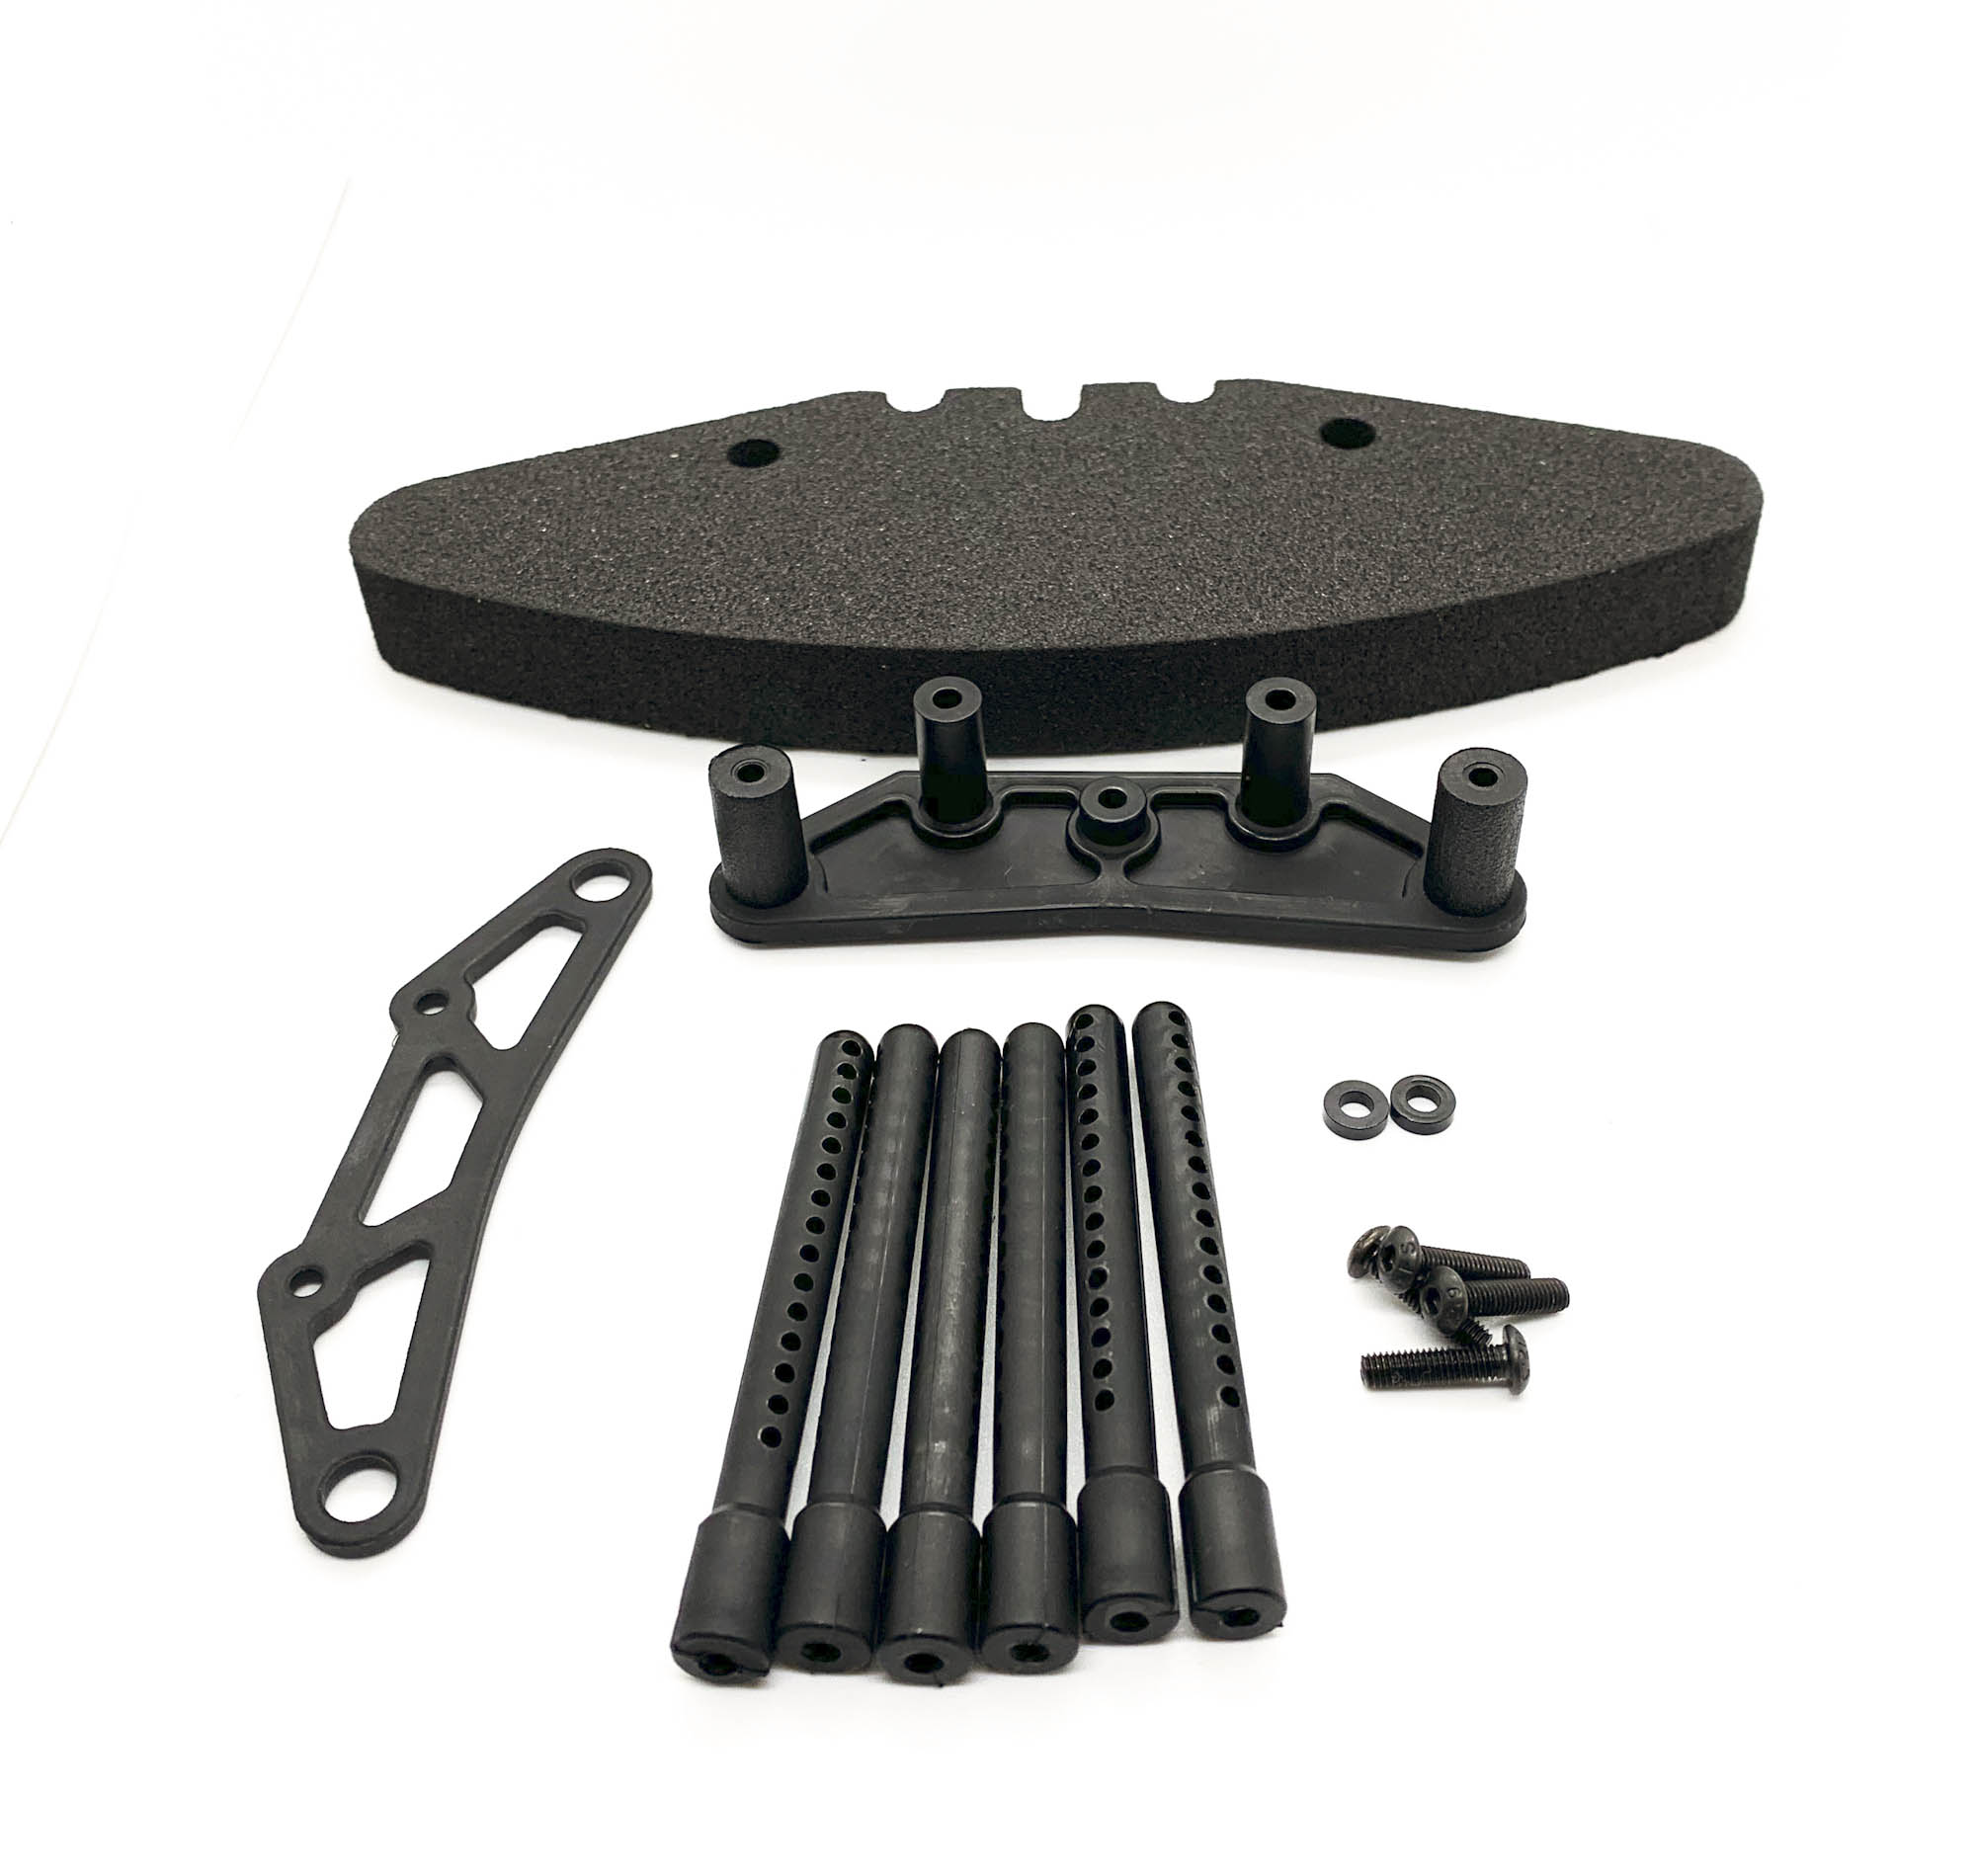
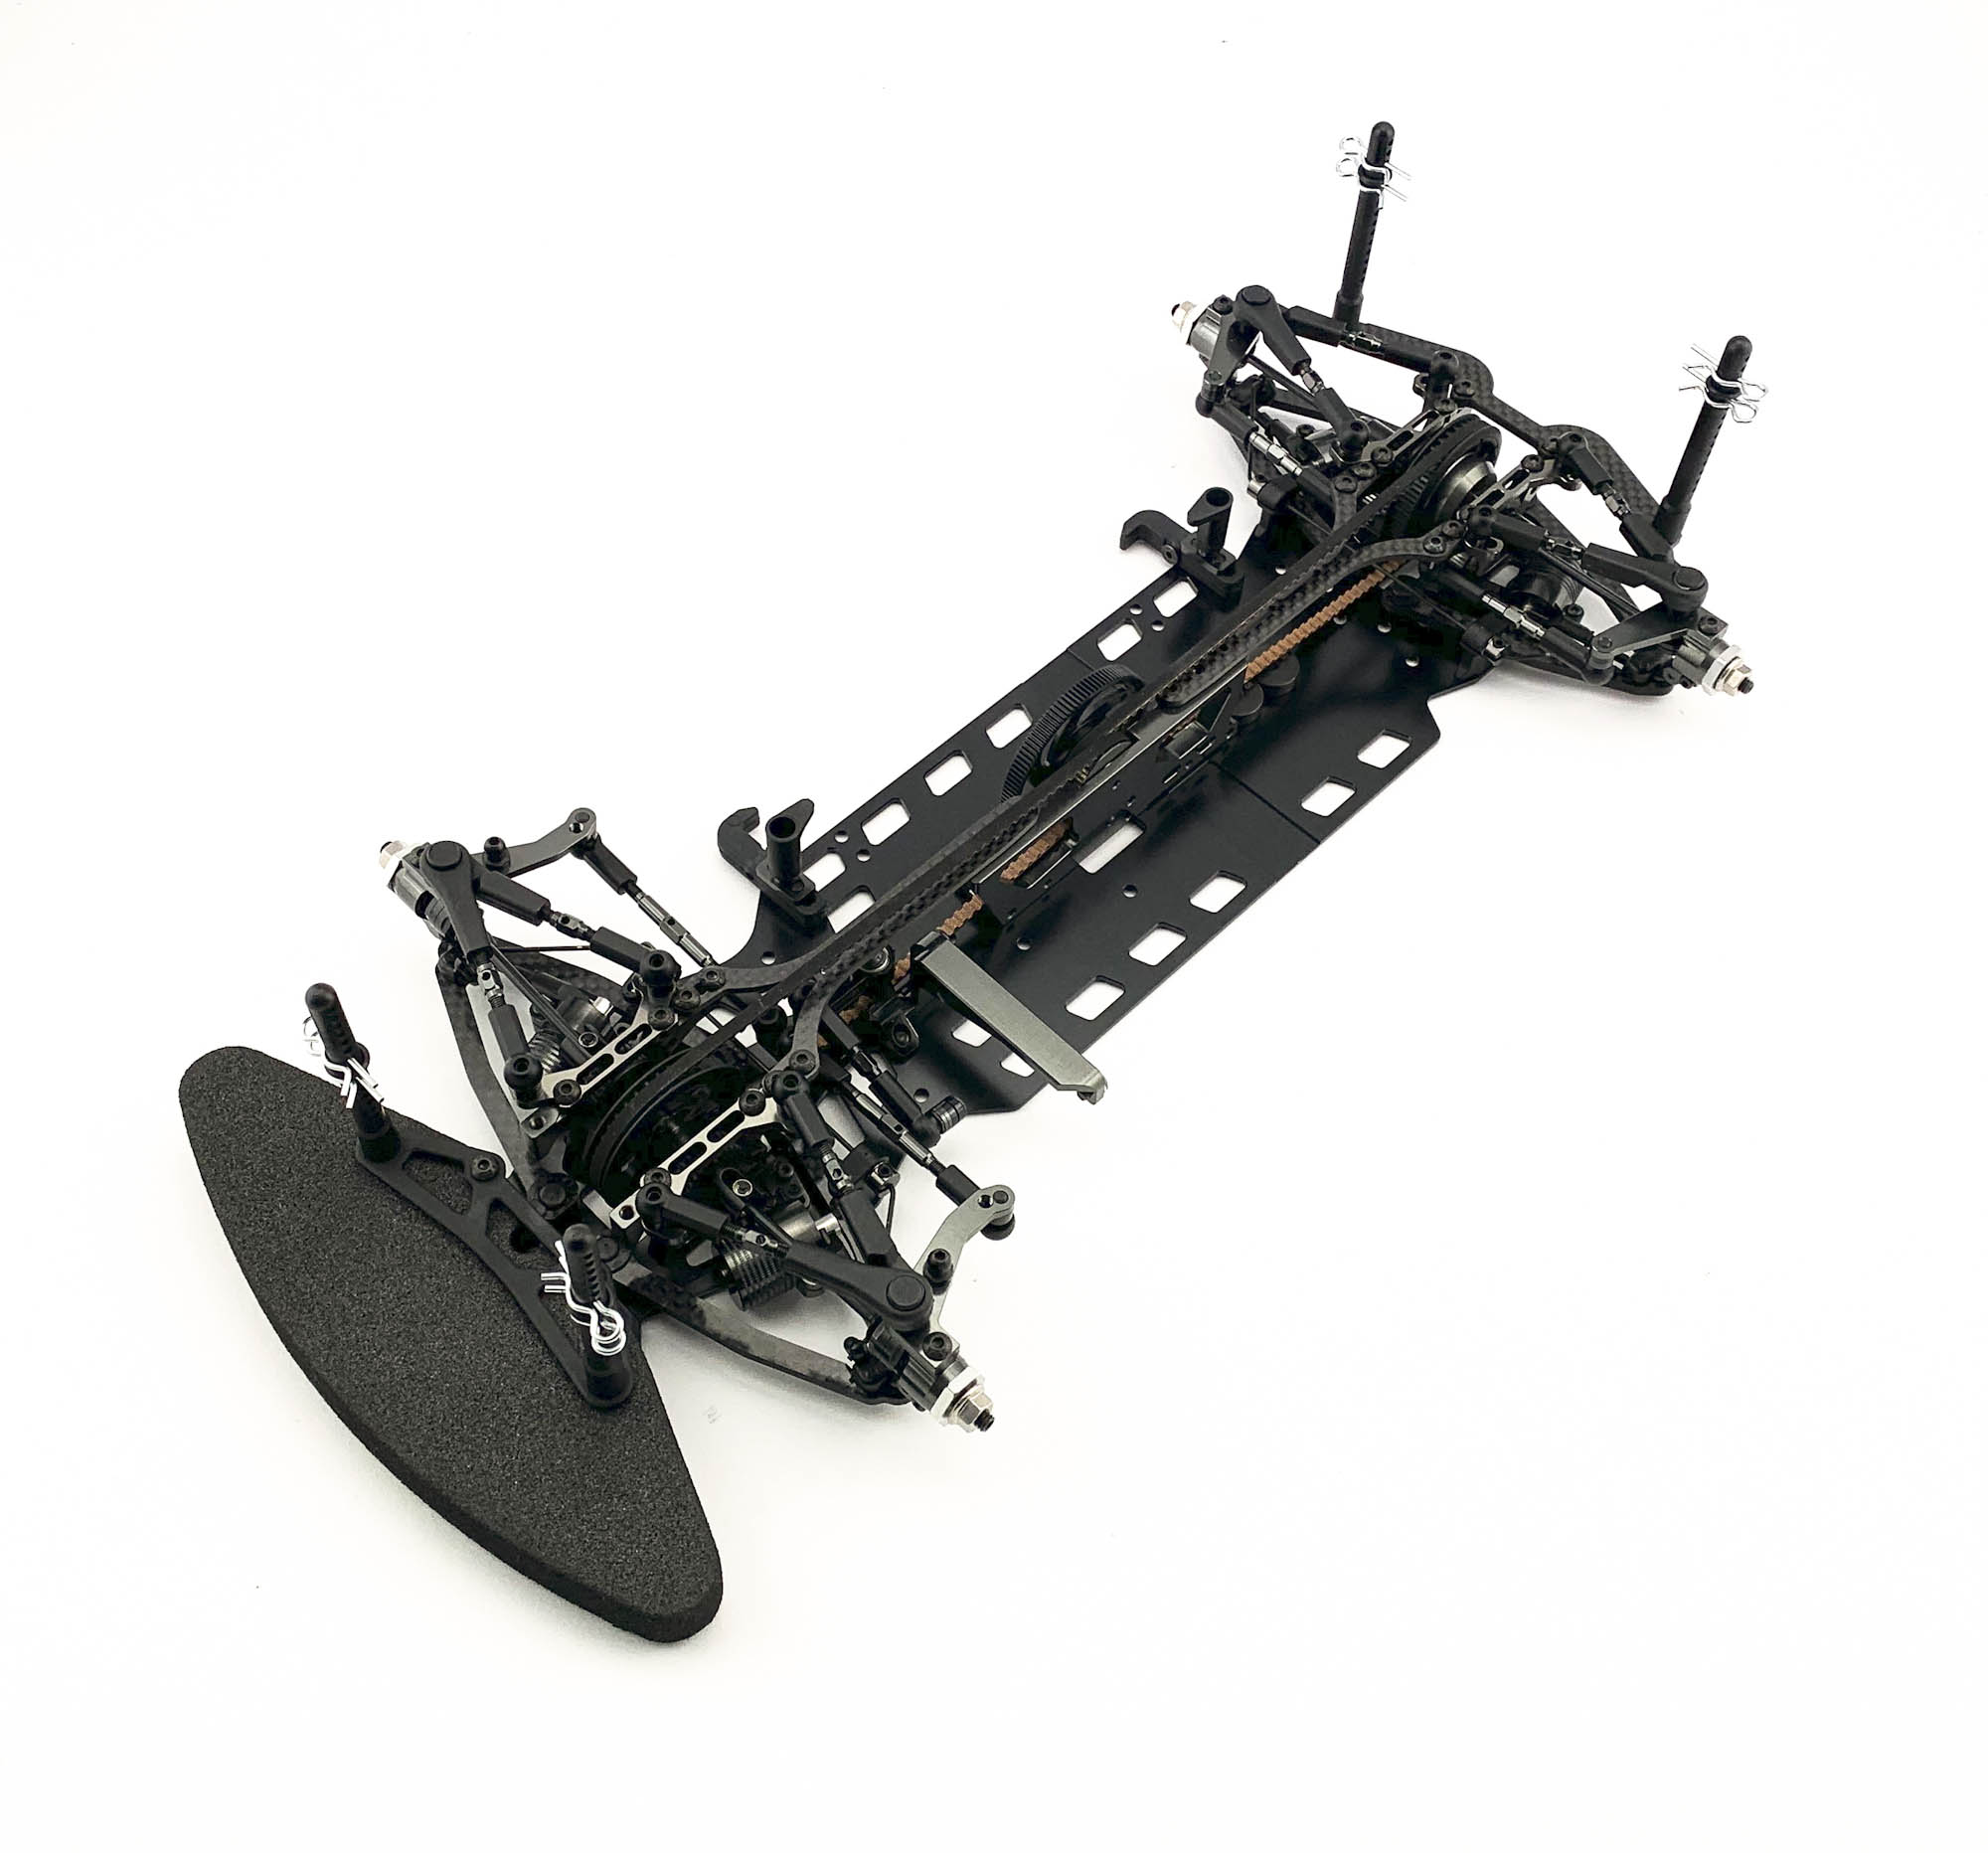
Last step to finish the build. The front bumper and bodyposts.
Don't forget to cut/sand the front lower bumper area to avoid contact with the suspension arms!
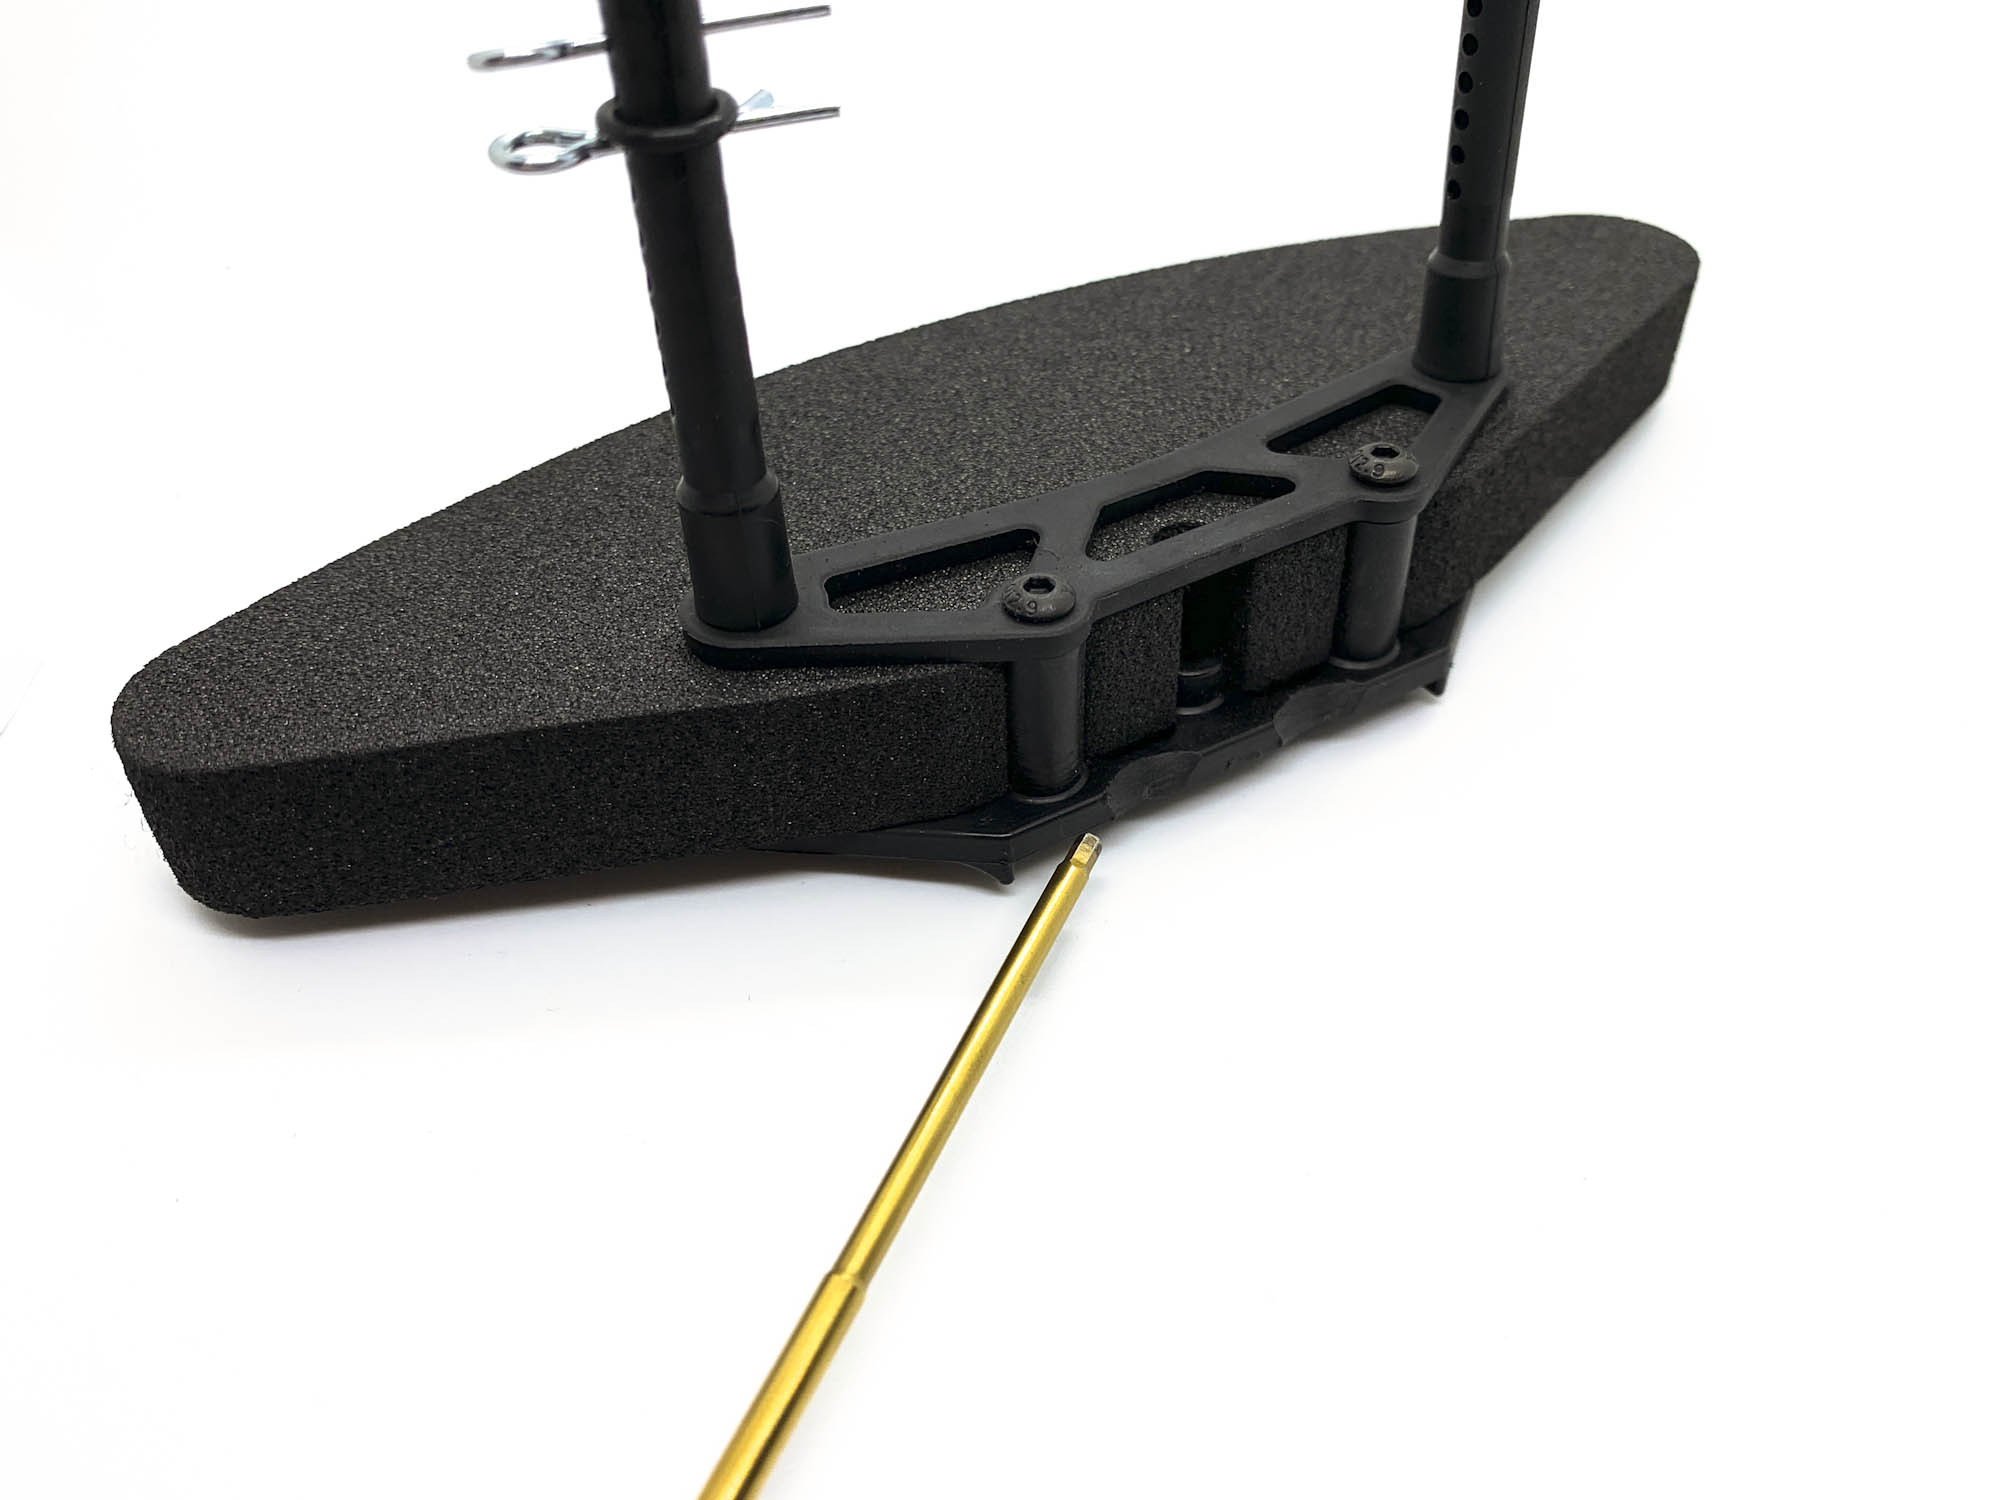
Last screws. Install the front bumper and rear bodyposts to finish the build of the A800MMX kit.
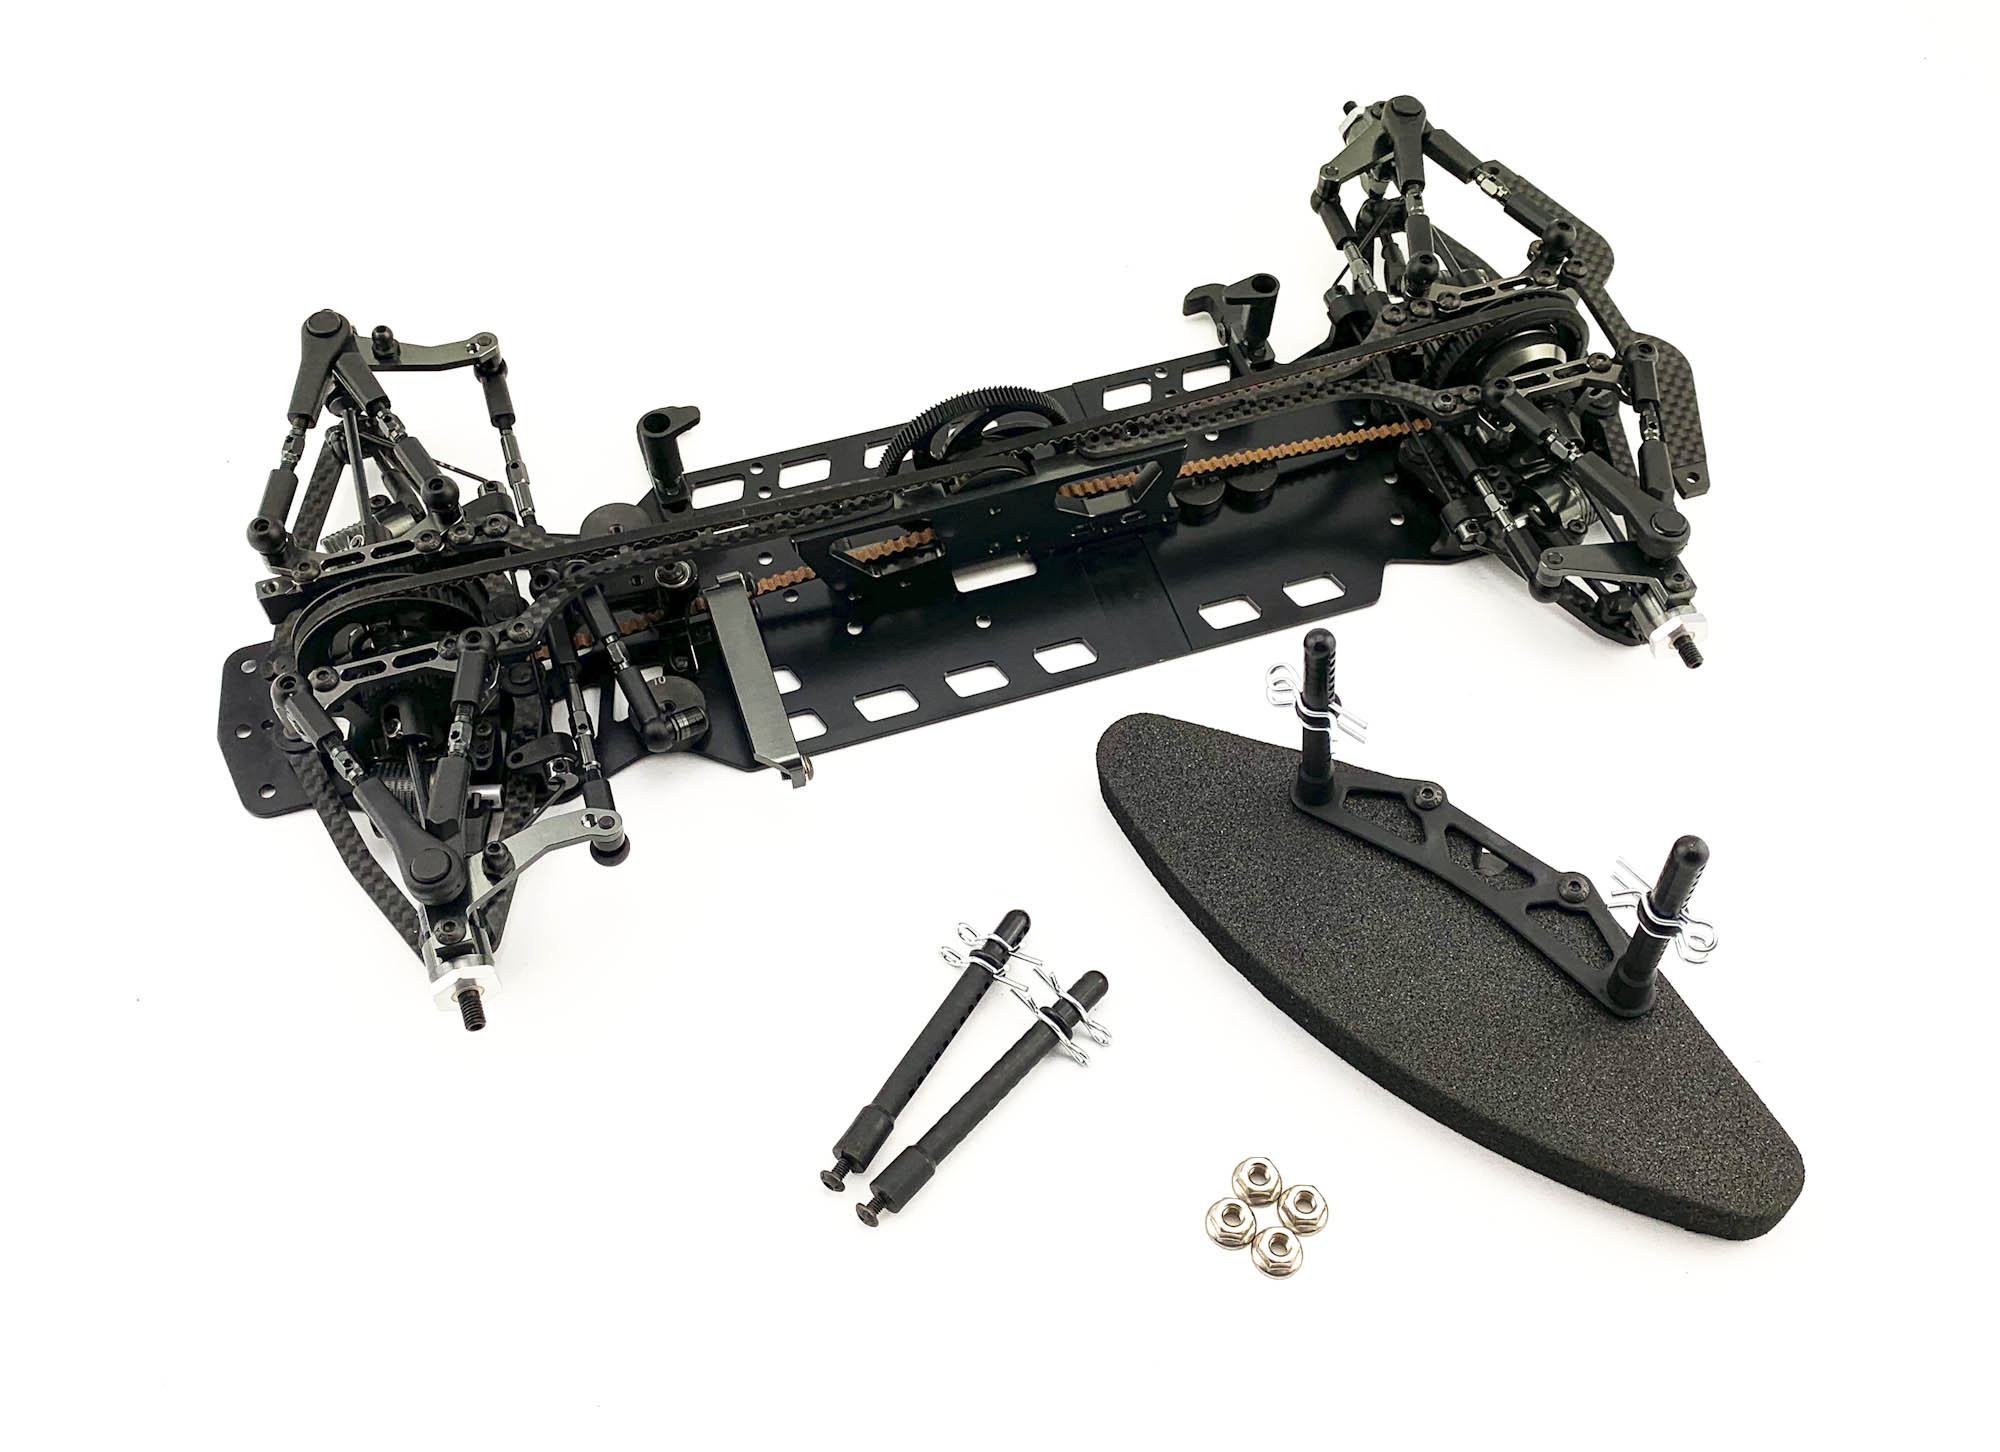
FINISH!
Once more Awesomatix stepped up the game and created a further improved race car with maximized performance!
|
