The Build – Part 3
The next step in our Team Associated TC7 build is the suspension. This suspension is similar to the TC6.2, using separate hinge pin blocks and inserts to control things like anti-squat and toe. It also uses a unique shock mounting system that makes removing the shocks quick and easy. Ok, on to the suspension build.
Build Notes:
- My manual states to use a #3 and #1 insert on both the front and the rear suspension blocks. This put the hinge pins at a wierd angle so, after making a call over to Team Associated, I was informed that the manual was incorrect. The front should use #3 inserts front and back while the rear uses #1 inserts front and back. I’ll reiterate this in the steps below. I’m sure this will be fixed in future manuals so yours may already be correct.
- The manual also has building the turnbuckles incorrectly. The front and rear camber links should have matching, flat eyelets on both ends while the steering links should have opposite eyelets. Check Step 1 to see the proper building of the turnbuckles.
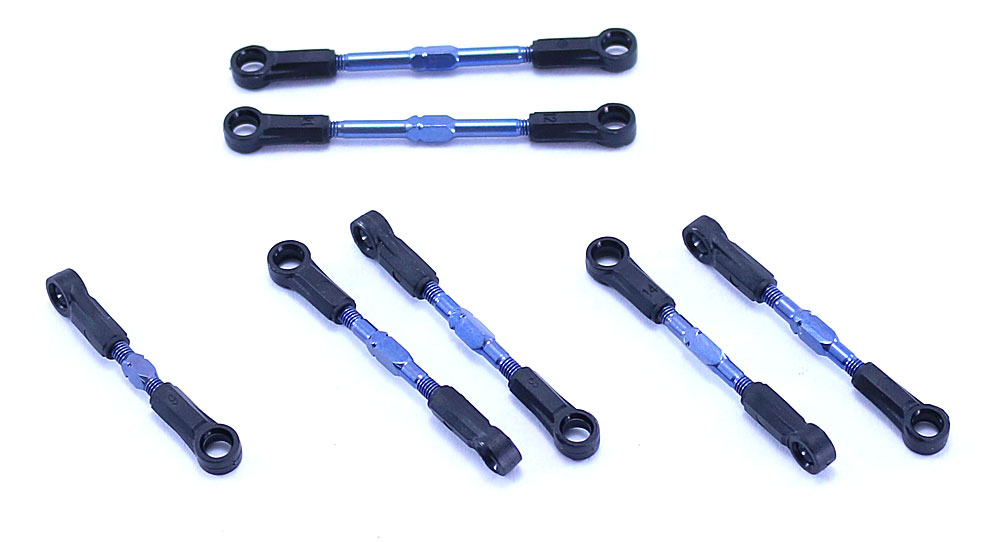
Step 1:
The first step is to build the turnbuckles. Shown are the drag link, the front and rear camber links and steering links. You should note that, as I stated in the Build Notes, both the camber and steering links are shown incorrect in the manual. Use the picture above and the build notes to make sure you get them right. After building them, I suggest keeping the front and rear camber links separate so you don’t mix them up.
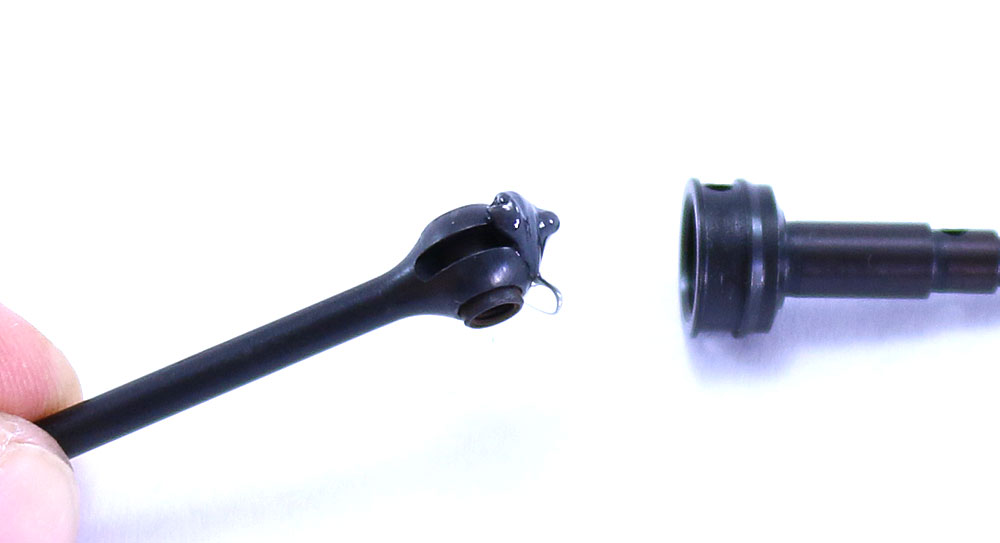
Step 2:
The CVAs are next. Insert the CVA barrel into the bone as shown and liberally coat the end with black grease. Insert it into the CVA axle and slide the cross pin though to connect everything.
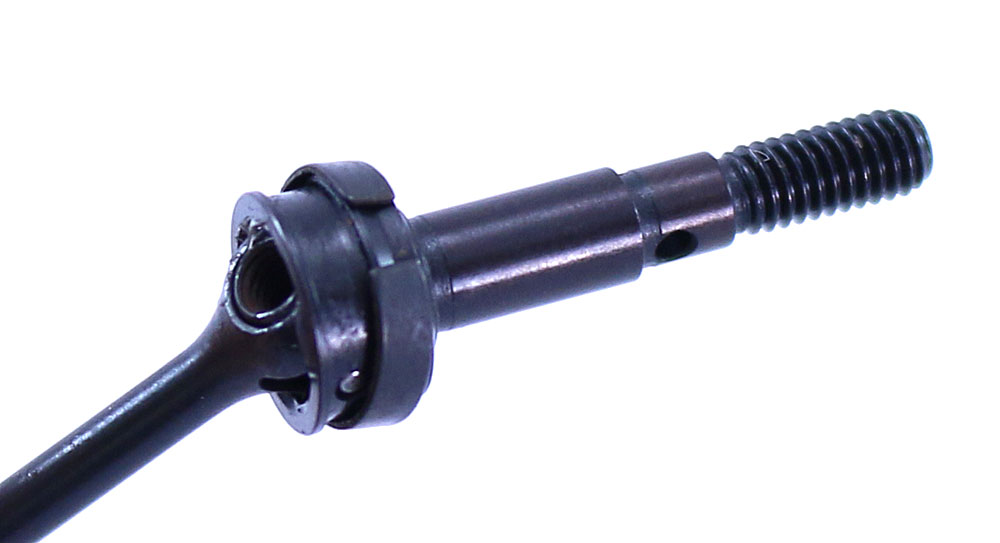
Step 3:
Slide the retaining clip up and into the groove in the axle as shown. Make sure the ‘gap’ in the clip is not located where the cross pin is.

Step 4:
Slide the CVA blade onto the ‘bone’ end of the axle. Your 4 axles should look like this.
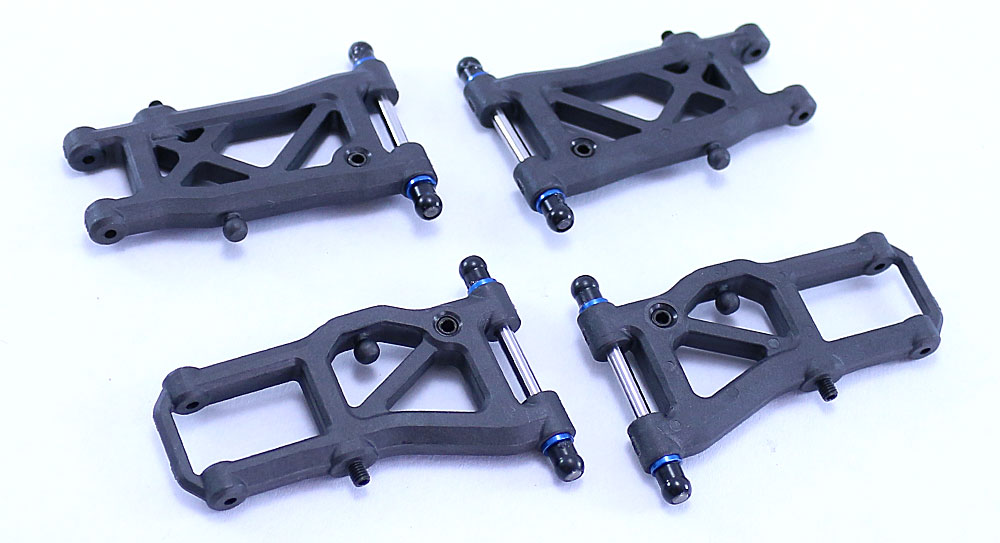
Step 5:
Before attaching the arm mounts, lets jump ahead and build the suspension arms first. Insert the drop screws and shock mounting set screws as shown followed by the hinge pin, spacers and hinge pin balls. A little dab of black grease will help keep the hinge pin balls in place. Pay attention to the orientation of the left and right suspension arms.
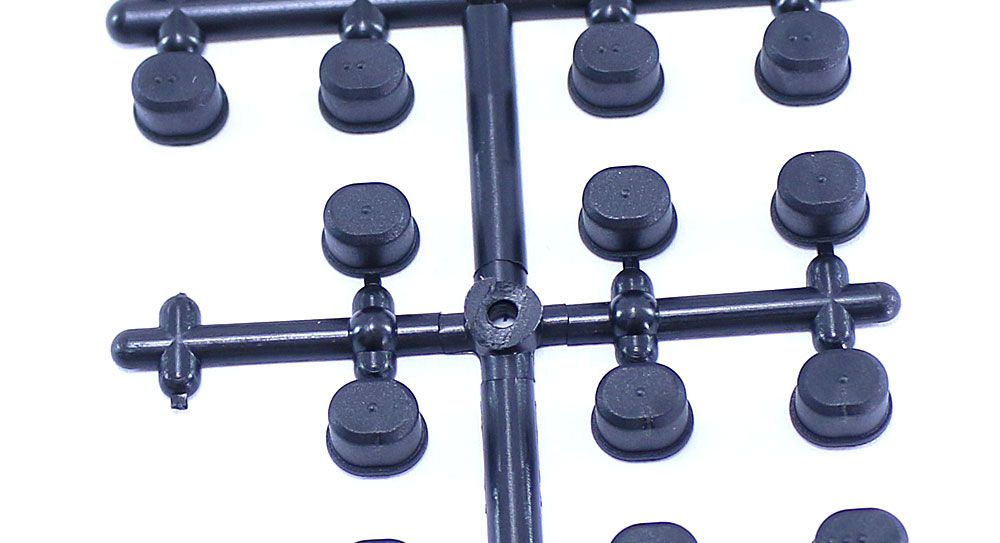
Step 6:
Now find the tree of arm mount inserts and remove four 1-dot inserts and four 3-dot inserts. For clarification (as stated in the Build Notes), we’ll be using the 3-dot inserts up front and the 1-dot inserts in the rear.
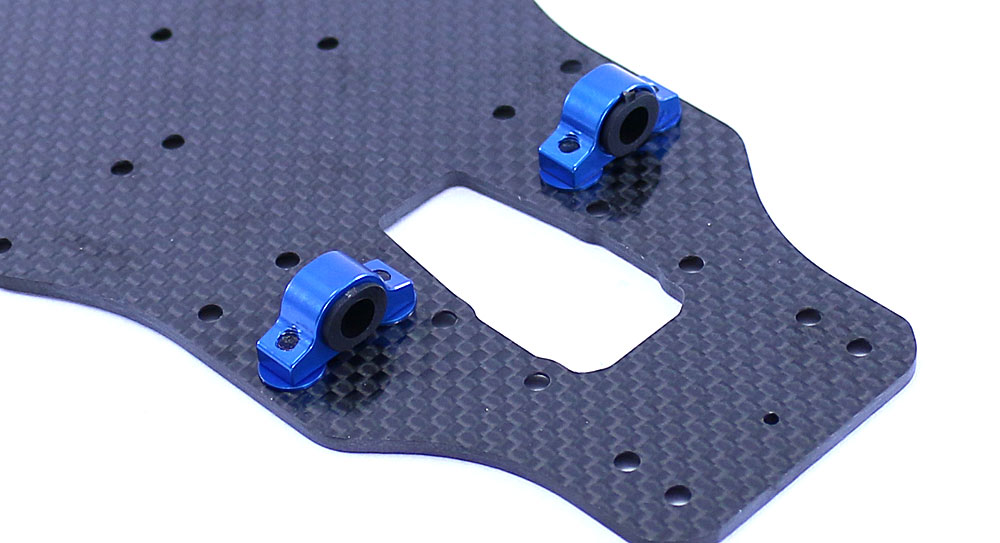
Step 7:
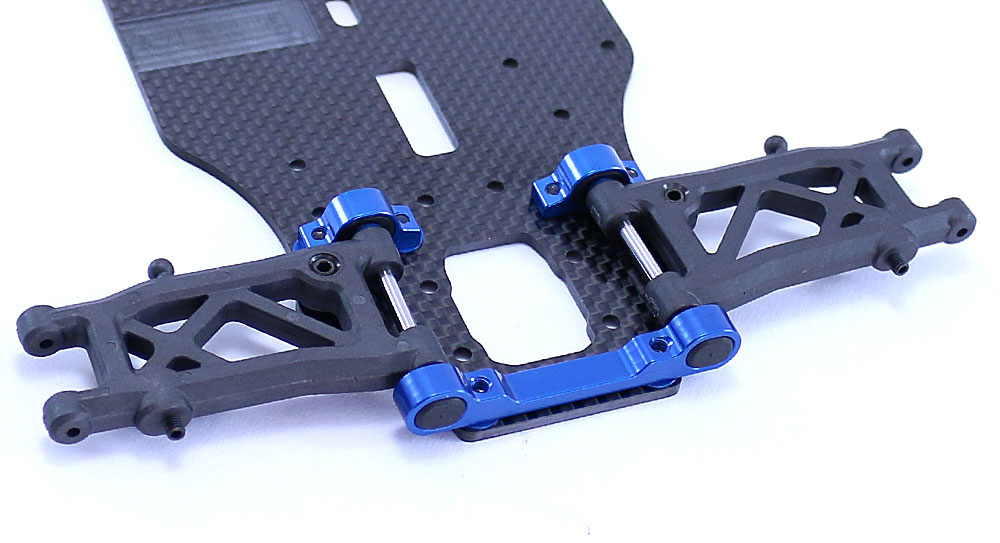
Press the 3-dot inserts into the ‘B’ arm mounts, making sure the 3-dots are facing in towards the center of the chassis. Now attach the arm mount assemblies to the chassis, using a pair of .5mm shims under each mount (1 per screw).
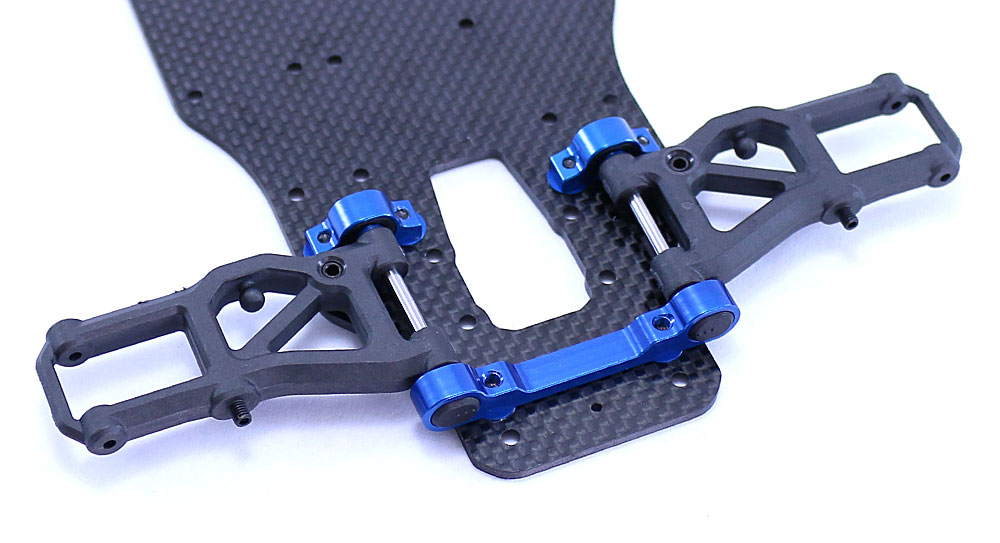
Step 8:
Press the other two 3-dot inserts into the ‘A’ arm mount, making sure the 3-dots are facing towards the center of the chassis. Slip your assembled front suspension arms into place and capture with the ‘A’ arm mount. When attaching, make sure you use a pair of .5mm shims under the ‘A’ arm mount (1 per screw). Move the suspension arms a bit to make sure they swing freely.
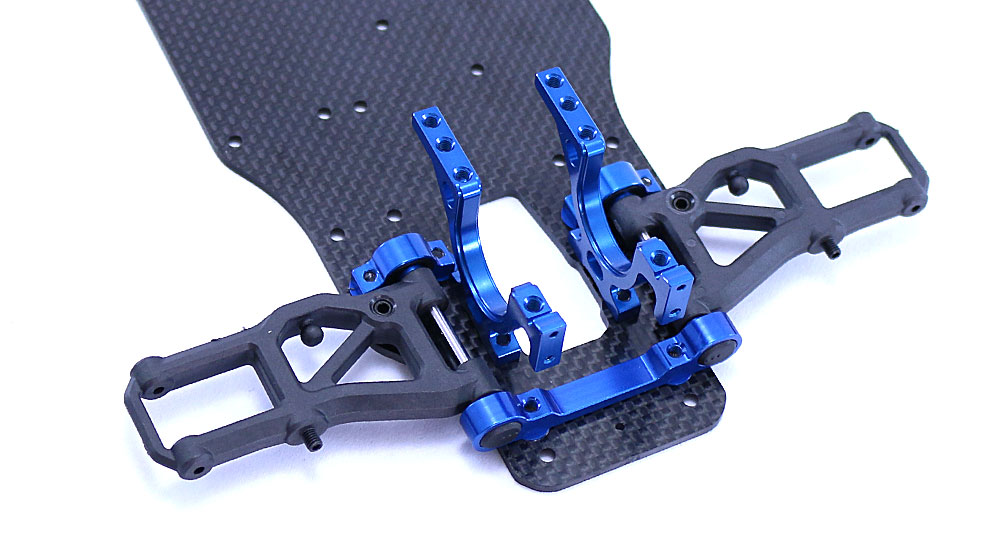
Step 9:
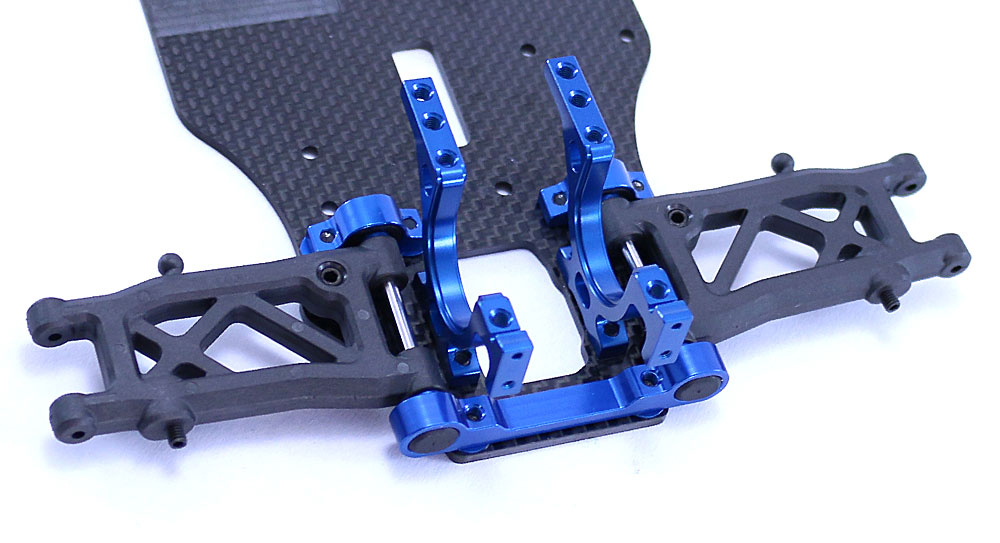
Attach the bulkheads to the chassis. These will work on the left or right as well as the front or back, just make sure you have them orientated correctly as shown. A dab of blue threadlocker is suggested here.
Step 10:
Use the same steps to attach the rear suspension arms. Note that the only difference will be that we will be using the 1-dot inserts on BOTH the ‘C’ and ‘D’ arm mounts. Don’t forget the .5mm shims. Once attached, move the suspension arms a bit to make sure they move freely.
Step 11:
Attach the rear bulkhead in a similar fashion as you did the fronts.
Great job! Next up will be the Top Deck and Center Bulkhead.
Next: Center Bulkhead / Top Deck
