|
- ARC R10-2013 - Review / Performance Test -
1/10-SCALE ELECTRIC SEDAN | KIT
ARC joins the fight as an underdog and comes out swinging
TEXT BY ERICH REICHERT, PHOTOS BY PETER HALL
Over the past decade, on-road sedan racing has seen more change and evolution than any other type of racing in RC. Vehicle design has gone from having more body choices than setup options to a modern day scene overwhelmed with cars that are all at the top of their game, with competition results depending on fractions of a second. Enter today’s crop of cars and the new ARC R10 2013. More the newcomer to the racing scene, the R10 ’13 is the product of endless hours of testing and finessing of the original R10 by ARC’s top drivers, and its debut was a smashing one with wins in two of the premiere classes at this year’s ROAR Carpet On-Road Nationals at the hands of Josh Cyrul. What is it that makes this car the out-of-the-box (pun intended) success that it is? Let’s take a look and find out.
LOW-PROFILE SHOCK TOWERS
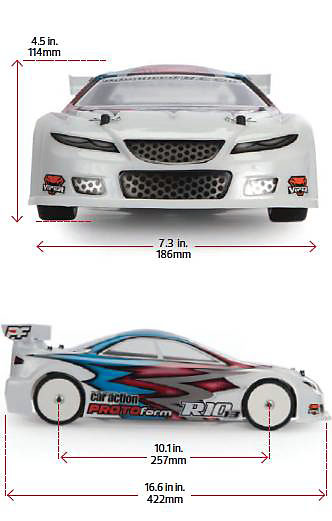
Both front and rear shock towers are 7mm lower than those on the R10’s previous version. This, along with shorter shocks, allows the car to have a substantially lower center of gravity, which makes the car handle better and allows racers to fit lower-profile, 2-door sports car bodies on the R10 without any modifications. The towers also allow for upper shock mount changes in 2mm increments and are made of 3.25mm carbon fiber for ultimate strength and rigidity.
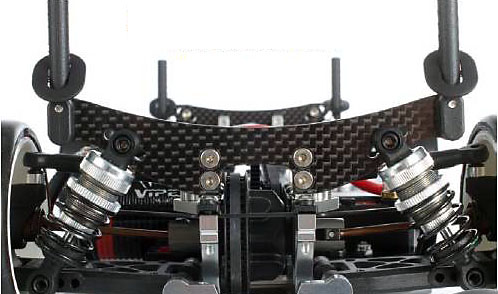
To achieve these low-profile shock towers, ARC went designed shorter length shocks that have a larger bore to make up the difference in volume.
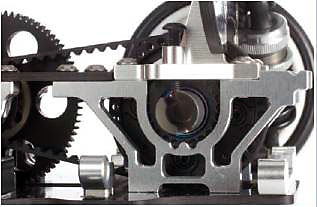
FLOATING SERVO MOUNT
A problem that any of today’s ultra-narrow sedan chassis face is that with so little material, having the servo mounted directly to it drastically affects the chassis’ ability to flex properly. ARC’s previously option-part-only Floating Servo Mount is now included, and it holds the servo from above, rather than bolting it straight to the chassis plate, and mounts along the centerline of the of the car to minimize the servo’s contact with the frame of the car.
Measuring in at just 82mm, the chassis is the narrowest that’s currently produced. this reduces grounding ... and moves everything closer to the center of the car.
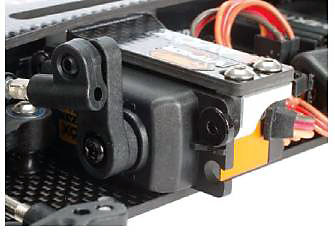
Left: Previously an option part, the ’13 includes a floating servo mount that attaches along the centerline of the car to keep the servo from binding up the flex of the chassis plate.

Left: The arms on the car are marked for their orientation. By flipping them upside down you get a second set of lower shock adjustments in 1.5mm increments.
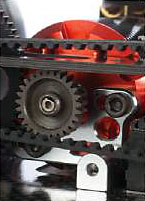
Right: ARC designed the motor mount to lift the motor up off the chassis. This helps the chassis flex and lets the car roll over a little bit more to improve cornering speed.
Right: Symmetrical are isolated from the other parts of the car to help with flex as well. Small notches are used to set the belt tension.
CENTER MOUNT BATTERY
Flex is the key to the R10’s grip and handling, and the 2013 features battery strap mounts that span across the middle of the battery rather than down its length. By taping the battery across the car, the chassis is able to maintain its flex independently of the battery. The pack is attached to the car using strapping tape but held in position using a pair of adjustable battery hooks on either end to determine its location longitudinally.
The overall goal with the design of the R10 ’13 was to keep things minimal and isolate the various components on the car so they don’t effect each other’s ability to perform.
OPTIMIZED FLEX CHASSIS
The most important change to the 2013 version is its all-new chassis. The new thinner material lightens the car and adds flex to increase overall grip. Measuring in at just 82mm, the chassis is the narrowest that’s currently produced. This reduces grounding during cornering and moves everything closer to the center of the car.
LARGE-BORE SHOCKS
With the shock towers lowered as much as they are, ARC had to redesign their shocks to shorten their overall length. To compensate for a smaller shock body, they increased the diameter of the bore from 10mm to 11.2mm. The larger size maintains the correct volume of the shocks, which are 7mm shorter in the front and 8.5mm in the rear. New larger diameter springs and an option spring set keep the same rates as the original R10.
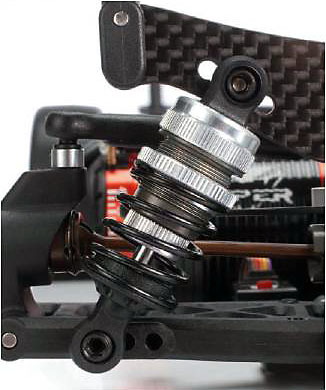
By bumping up the diameter of the shocks, ARC was able to maintain the correct damping with a shorter, more low-profile shock.
BUILDING THE R10 2013
On-road racing in general, but even more specifically, touring car racing, is all about tolerances and car preparation. In a field of competition where everything equates to split seconds, it’s absolutely crucial that your car be at the top of its game even before it hits the track. Here are few pointers to help you assemble your R10 like a pro.
Chassis. The instructions call for the graphite chassis to be sanded and glued but many people skip this step for some crazy reason. Gluing the edge of the chassis bonds it together and protects it from cracking apart. Start with 800-grit sandpaper and sand it gently to remove any rough edges before applying the first layer of glue. Then apply the glue in an even coat around the entire outside edge of the chassis and allow it to dry. Next, use 1500-grit paper to re-sand and then re-glue, followed by one last sand — this time with 2000-grit automotive sandpaper. You’ll see the glue start to polish to a bright sheen. I also like to sand diagonally toward the bottom of the chassis to create a rounded contour to help prevent a sharp corner that could rub and catch on the track.
Read explanation given by Team CRC for more details on this important building step.
Shocks. Building shocks correctly is one of the most important things you can do to optimize handling. Like the hingepins, polish the shafts to a mirror finish. Next, build the shock seals according to the instructions but before installing any of the plastic pieces, inspect them for any flashing and lightly scrape them with a hobby knife blade to make sure they’re perfect. Although the manual calls for shock fluid, lubricate the rubber seals with a good-quality grease such as Team Associated’s Green Slime to give them the best seal and smoothest operation possible. Once you’ve filled the partially assembled shock with fluid and set them aside to allow any air to rise to the top, install the bladder by placing it slowly over the top of the fluid on an angle so any excess can escape. On completing the assembly of your shocks, they should have no bound or rebound. When pressed in, the shaft should stay at the top and not rebound and vice versa when extended. The last and most crucial part is to make sure that the shocks are exactly the same length. Using a set of calipers, measure the front shocks at full extension and adjust the ball end until they are the same and then move on to the rears.
Differential. Gear differentials are fairly new to on-road sedans and many on-road only racers often misunderstand their correct assembly. Start by inspecting each of the parts for any flashing. After looking at the teeth and all other surfaces of the internal parts, insert the outdrives into the case halves and then lubricate the seals with diff fluid before sliding them over the back of the drives. Using the drive’s shaft as a guide ensures the seal seats properly and doesn’t twist and leak. Now, install the drive pin and all of the internal parts while rotating the outdrive as you do so. Rotating the gears while they are installed helps seat them properly into the bottom of the assembled diff and keeps them from pinching. Next, fill the diff with fluid, again turning the outdrive and rotating the gears to work the fluid all the way down. Fill it up until the fluid comes up to the spider gear brace and then stop — don’t over fill it. Finally, put the two halves together and tighten the screws in an “X” pattern to make sure the parts sit flat against each other.
Suspension. The machining work on the R10 2013 is done very well but when it comes to molded plastic parts, there’s always a little give that comes into play. When you first mount the suspension arms to the chassis, you’ll find that they don’t move very smoothly. While the arms are smaller than the space needed, the shims that are added behind the pivot balls tend to be a little too snug and bind everything up. The easiest fix is to replace them with a slightly thinner shim, but if you don’t have any, you can sand the ones that come in the kit down a little. Remove any excess material before reinstalling and once you do, reassemble the arm and test it. When lifted and dropped, the arm should return completely to the bottom freely.
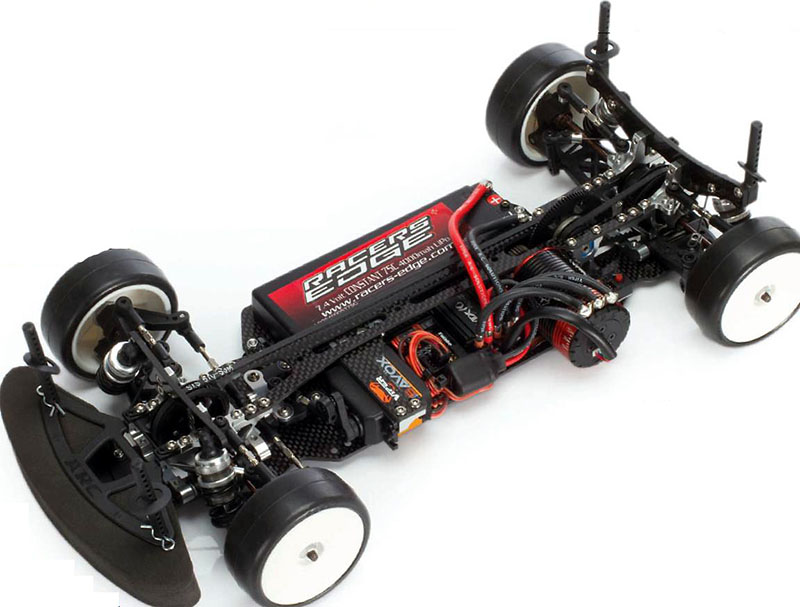
BEHIND THE WHEEL
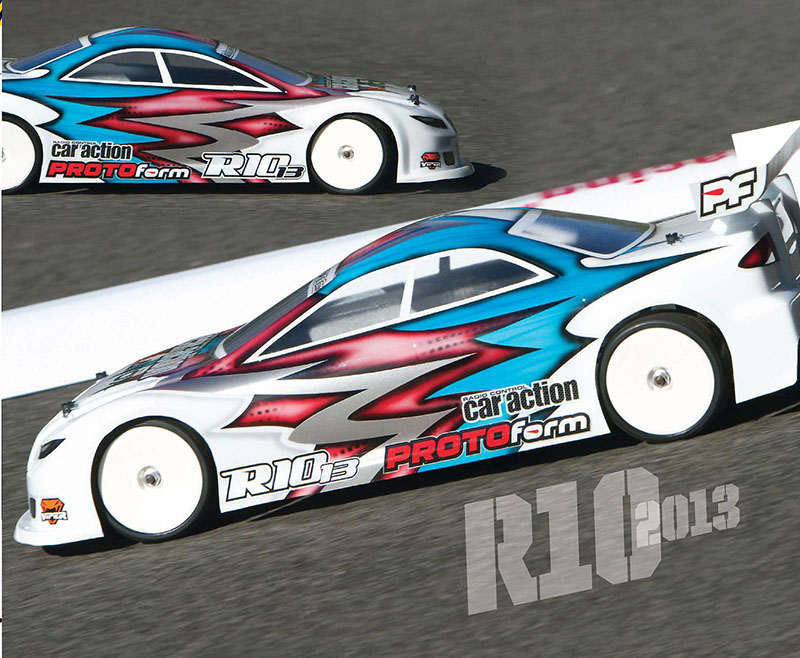
With the R10 built, I installed a Viper RC VTX10 BE speed control and 17.5 motor along with a Savox SB-2251SG servo and my trusty Futaba 4PKS Super-R radio system. I finished the car off with a set of SpeedRex 28R from APS Racing and a PROTOform Mazdaspeed 6 body that was meticulously painted by local airbrush guru Dean Issac. With the R10 finished up, I headed to a local parking lot and set up my own track using our office RoadRail System. I made a layout that would offer a little bit of everything, tight corners, high-speed turns, a long straight and a chicane so I could put the R10 through everything it would ever face all in one layout. The Viper brushless system is a great powerplant with a balance of rpm and torque to get it through the layout quickly. Out of the box the setup is a little off for asphalt. I built the car for rubber tire carpet racing so I wasn’t worried about it, but while the car would roll over a little too much and understeer out of the corners, it was very sharp and responsive initially. Even from just the first few turns I took before opening up the throttle, I could see that the car’s flexible chassis was very forgiving. To test the R10 2013 on carpet I took it to RC Madness in Enfield, CT, home track of ROAR National Champion Mark Smyka. On the carpet, the R10 was much more at home in box stock setup. It accelerated well with the tires prepped and was very easy to drive around the course. The combination of the carpet and the rubber tires made the slight twitchiness I experienced on the pavement disappear and what emerged was a very well balanced sedan that came off the corner with equal efficiency as it turned into it. Down the straight, the Viper 17.5 pumped hard with the timing I added in via the included handheld tuner, and I was surprised at the end by a car that nearly slid out. I dialed back on the brakes but found that I didn’t have enough for some of the tighter infield section. Back on the setup board I realized that when I put the R10 together, I forgot to set the rear droop. With 1.5mm of droop added, I headed back out and found myself cranking the brake back up. With a lot of sedans, I click back the dual rate. Although I like a car that turns aggressively, the car always has too much steering. Off the bench, the R10 was just fine and at no time did the car feel like it wanted to break loose on me. Whether racing on carpet or outdoors, the R10 2013 is a very predictable car to drive. ARC has developed a sedan that lets each part do its own work unaffected by the other parts. If I could modify anything to make it more adjustable, I may shim the servo mount so the servo sits a little lower. While ARC spent a lot of time developing a low CG suspension and shock towers to lower the roll, having the servo hoisted 1.5mm above the chassis feels like it may be the culprit in my excessive roll on the asphalt. I would say a small piston adjustment would be the easy fix but I love the quick response of the car turning in and would hate to sacrifice that when I could shim servo a little bit lower and drop the roll center down without compromising the suspension at all.
Pros
Minimal parts means lighter rolling weight
Shocks are very easy to build smoothly
Electronics have plenty of room
Cons
Instructions miss a few important details
Oh man, are those ball studs hard to pop in!
VEHICLE SPECS
Item no.: R100005
Scale: 1/10
Price: $425
Weight, as tested: 3 lb. 8oz. (1,590g)
Chassis: 2.25mm carbon fiber
SUSPENSION:
Type: Lower A-arm with adjustable upper link
Inboard camber link positions (F/R): 3/3
Outboard camber-link positions (F/R): 1/2
Shock positions, towers (F/R): 5/7
Shock positions, arms (F/R): 2/3
Shocks: Threaded 11.2mm aluminum bodies
DRIVETRAIN:
Type/ratio: Belt drive/2:1 ratio
Spur gear/pinion: 85T/36T
Differential: Spool (front), gear-type, fluid-filled (rear)
Driveshafts: Aluminum constant velocity style
Bearings: Rubber-shielded
WHEELS & TIRES :
Wheels: Speedmind K-28 Impact Master
Tires: APS Racing SpeedRex 28R Compound
Inserts: Medium
ELECTRONICS :
Transmitter: Futaba 4PKS Super R
Receiver: Futaba R614FF-E
Speed control: Viper R/C VTX10 Black Edition
Motor: Viper R/C VST 17.5
Steering servo: Savox SB-2251SG
Battery: Racers Edge 4000mAh 7.4V LiPo
FINAL WORD
ARC just recently landed in North America, but after countless laps and hours of research and testing, the R10 2013 has made a big splash. Today’s touring car scene is very technical, and racers expect their vehicles to have every adjustment and then some. ARC’s goal wasn’t to create a new car that just worked better, this car truly brings a new way of thinking to the table with its low-profile and flex-centric design. With a fresh approach to the design and by isolating each part of the car to do its job independently, the R10 2013 is a true performer that is easy to tune and equally as easy to be fast with.
SOURCES :
APS Racing apsracingusa.com
ARC arc-rc.com
Futaba futaba-rc.com
PROTOform racepf.com
Racers Edge racers-edge.com
Savox USA savoxusa.com
Source:

|
