|
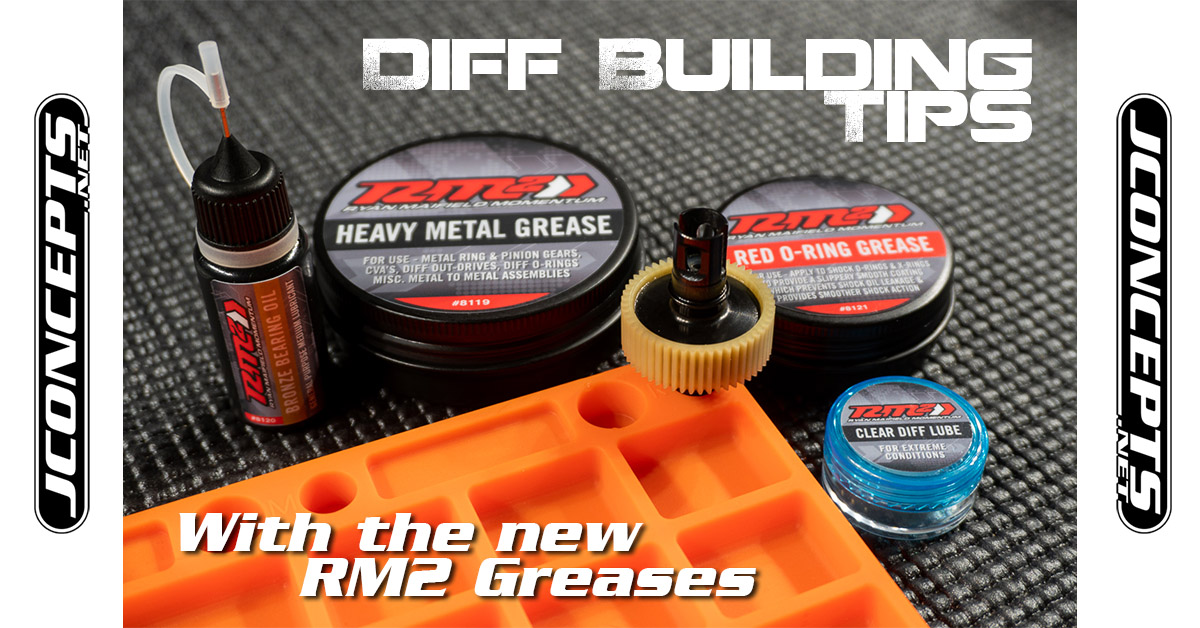
- Ball Diff Building Tips Using Ryan Maifield Greases (or any other as long as you are please with the end result)!! -
Building a proper ball differential can be a tricky task, especially if you're doing it for the first time. However, once you figure out a good method that works for you, this daunting task can actually be quite rewarding particularly when you nail a quality differential build. There's nothing like a butter smooth ball differential that lasts!
While there are many methods of building a ball differential, there's really no right or wrong way to assemble it as long as everything is in place and working as it should. But sometimes you build a differential and it's a bit notchy from the start or the differential doesn't even last a day. Both can be frustrating experiences, but here's a simple method on how to build a differential using the top shelf, quality JConcepts RM2 greases (other top quality grease will do, e.g. AE has a good ones for years!) that enhances the smoothness and life of the differential. Hey, if it works for the World Champ, it's probably good enough for you.
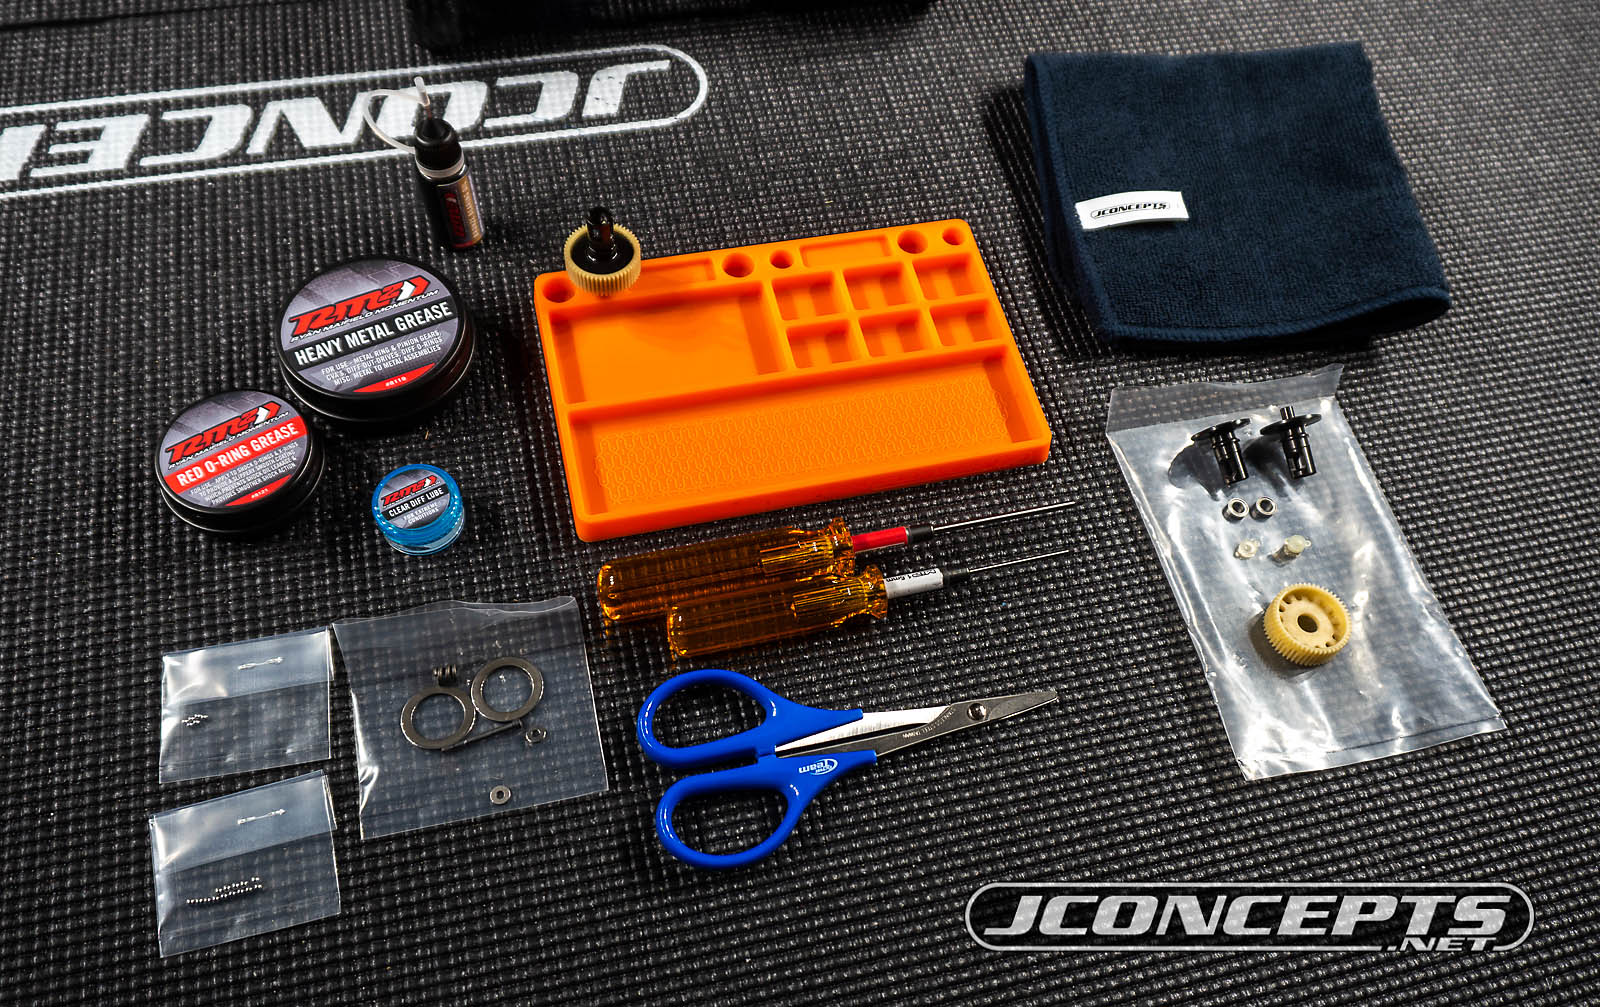
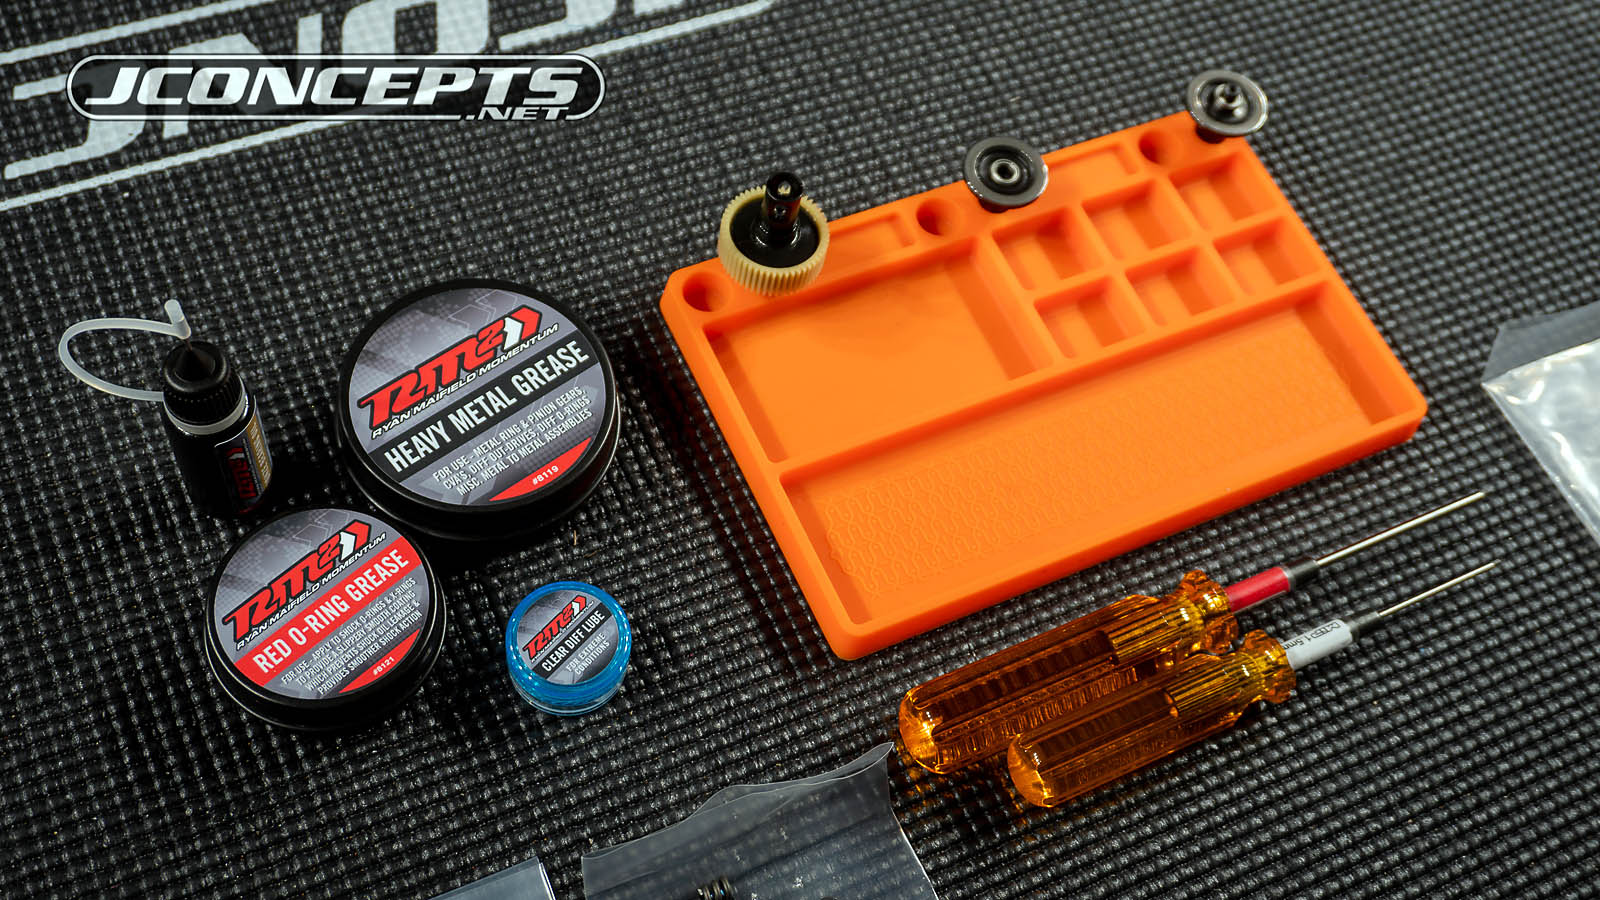
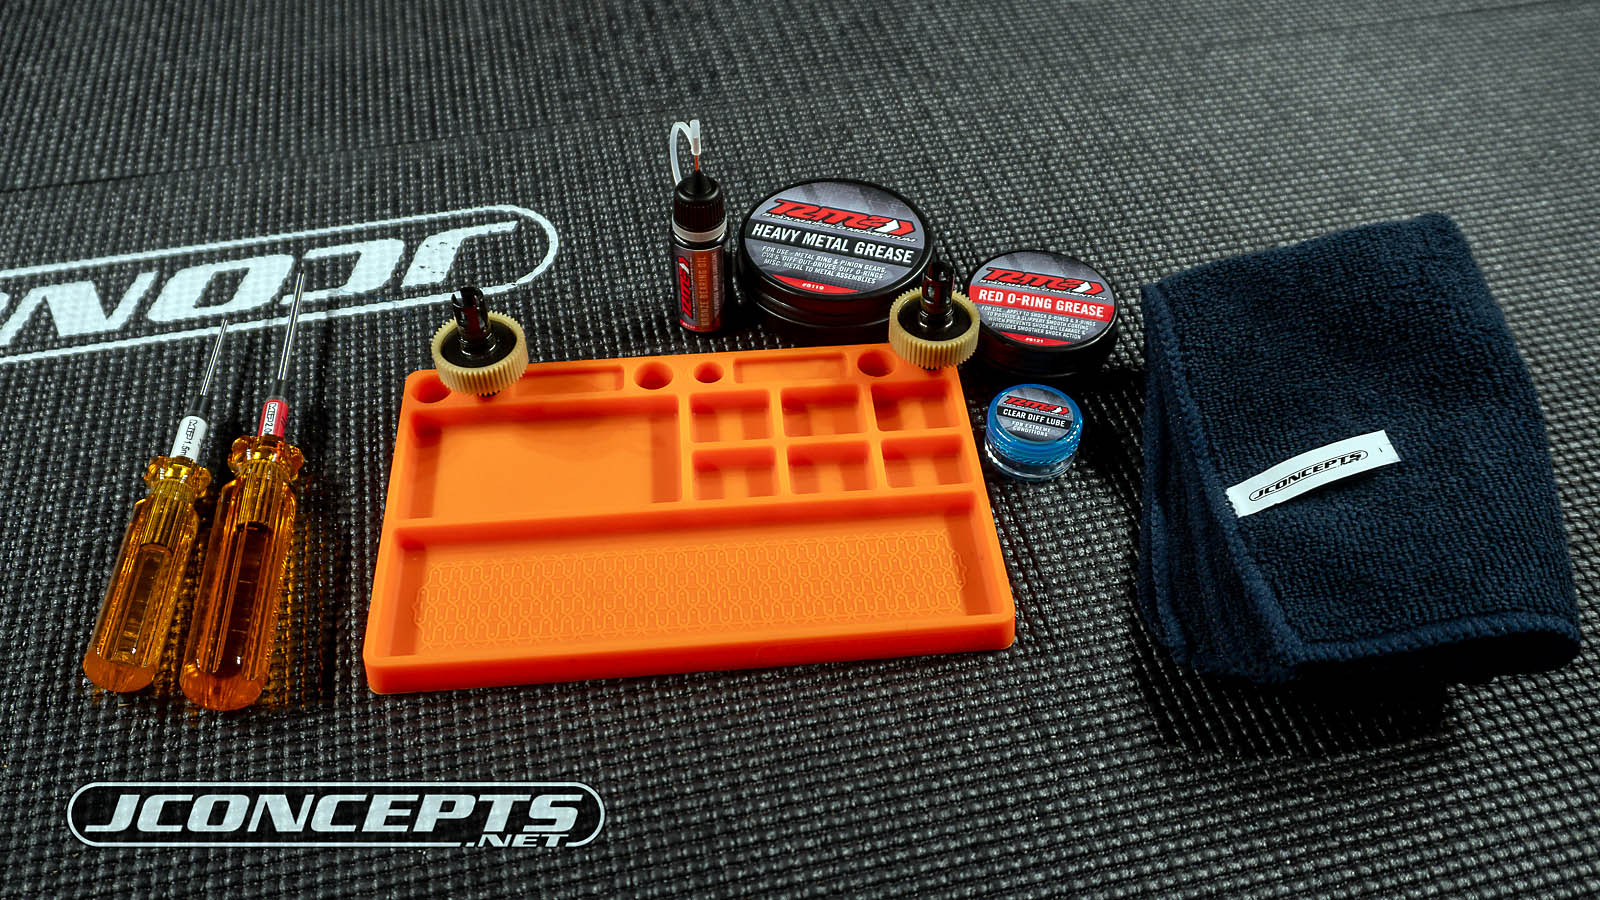
First thing's first, gather up necessary tools together to build a differential. This way you're not looking for tools during the build process. Scissors, 1.5mm hex wrench, 2mm hex wrench, RM2 Heavy Metal Grease #8119, RM2 Clear Differential Lube #8118, and having a JConcepts Rubber Parts Tray always helps (but not mandatory) keep things organized.

Next, there's always some sort of grease on the differential rings and thrust rings that helps prevent them front rusting. Clean the differential rings with a clean microfiber cloth and set them to the side.
You know that free lube you get in differential kits? Pre-greasing the differential outdrives is the perfect place to use the stock Differential Lube or just use the RM2 Clear Differential Lube all the way through. The only real reason to lube this side of the outdrive is so the differential rings have something to stick to. The last thing you want to happen is the differential ring falling out just before putting the differential halves together.
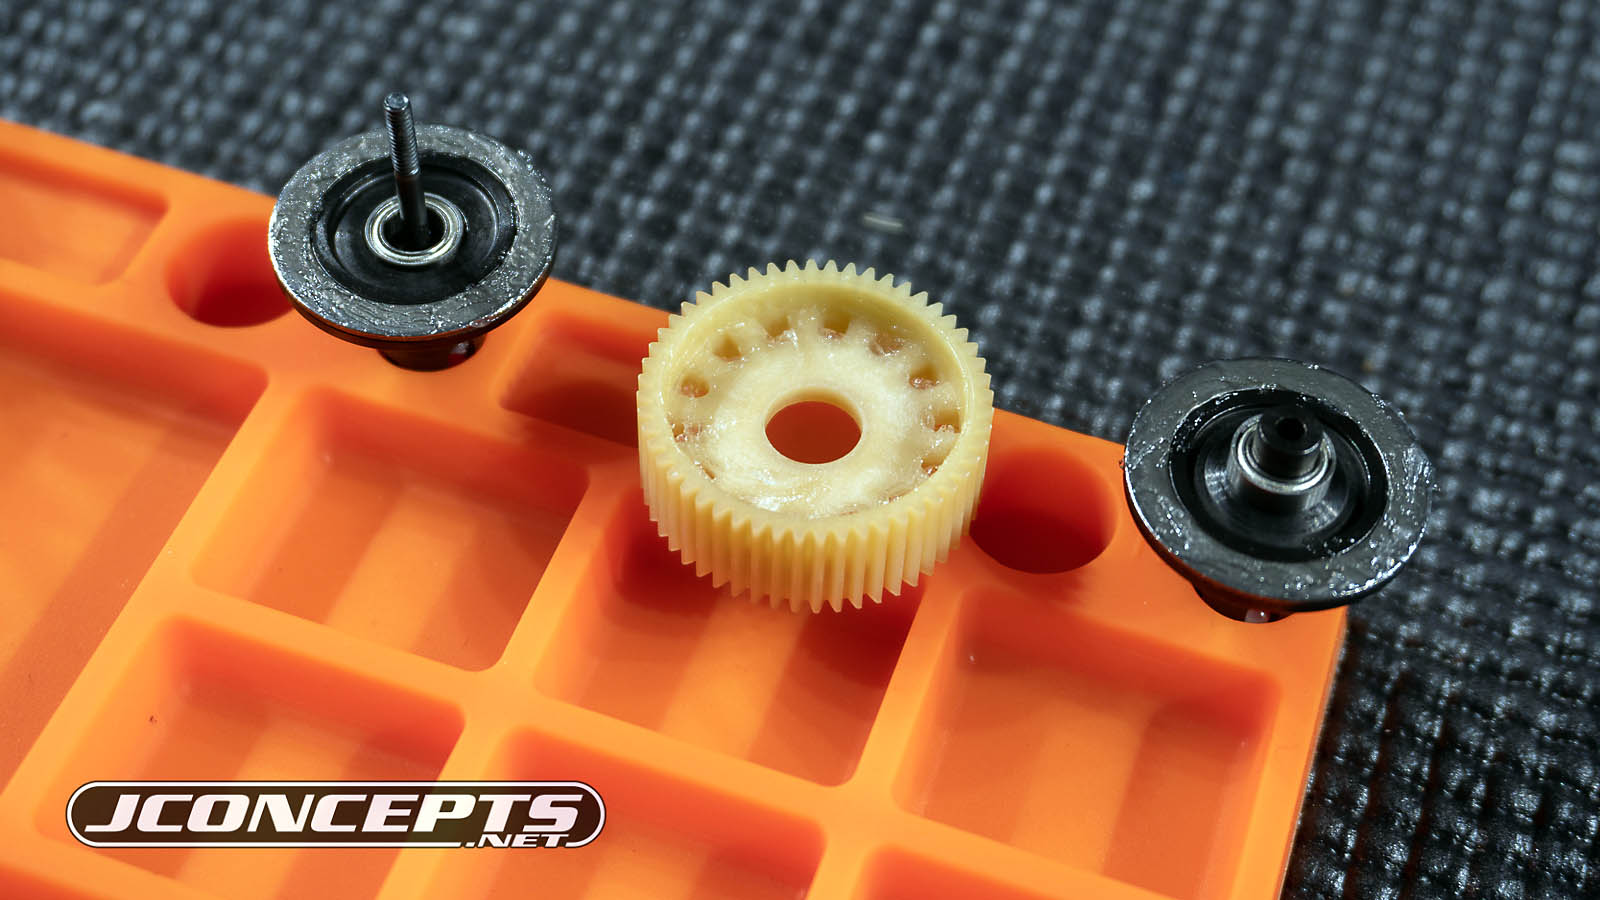
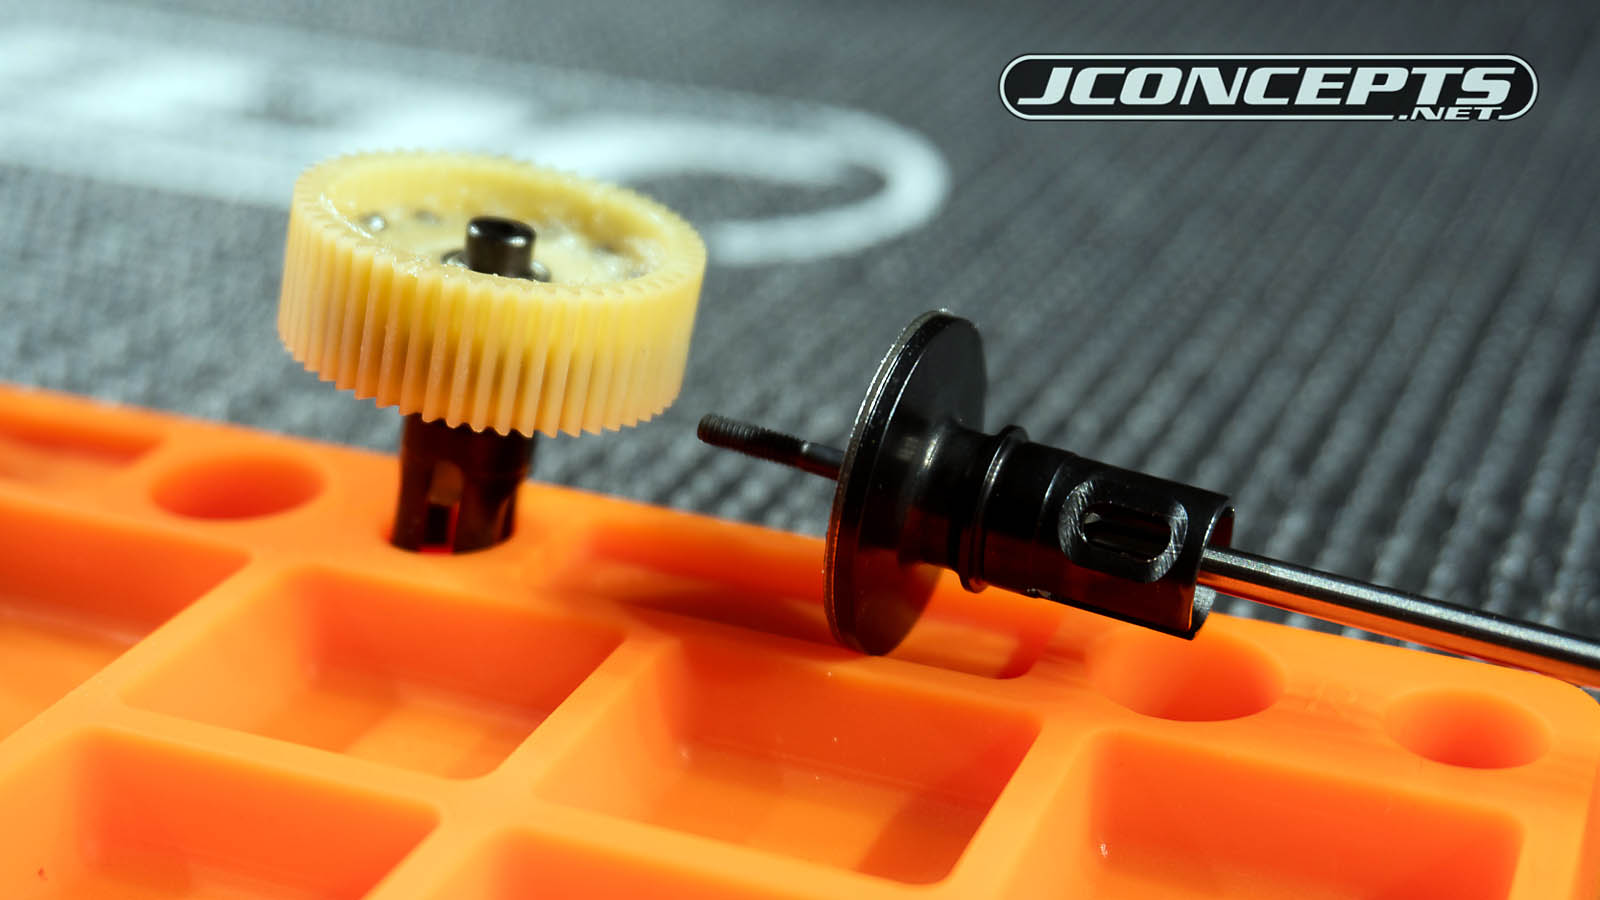
On the left is just a finished differential sitting in the tray while on the center and right side, we have the two differential halves ready to go.
Keeping things organized and working in a clean environment can help ensure a good differential build. Just a small bit of dust, dirt, or debris can cause premature failure and often leads to loss performance. Not only that, it's going to take more time and money do another differential so having one that lasts is a huge bonus.
***In the photo, the prototype Heavy Metal Grease is in a rather large size that took up a lot of space in your toolbox. The released version is smaller, easier to pack, and filled to the brim.
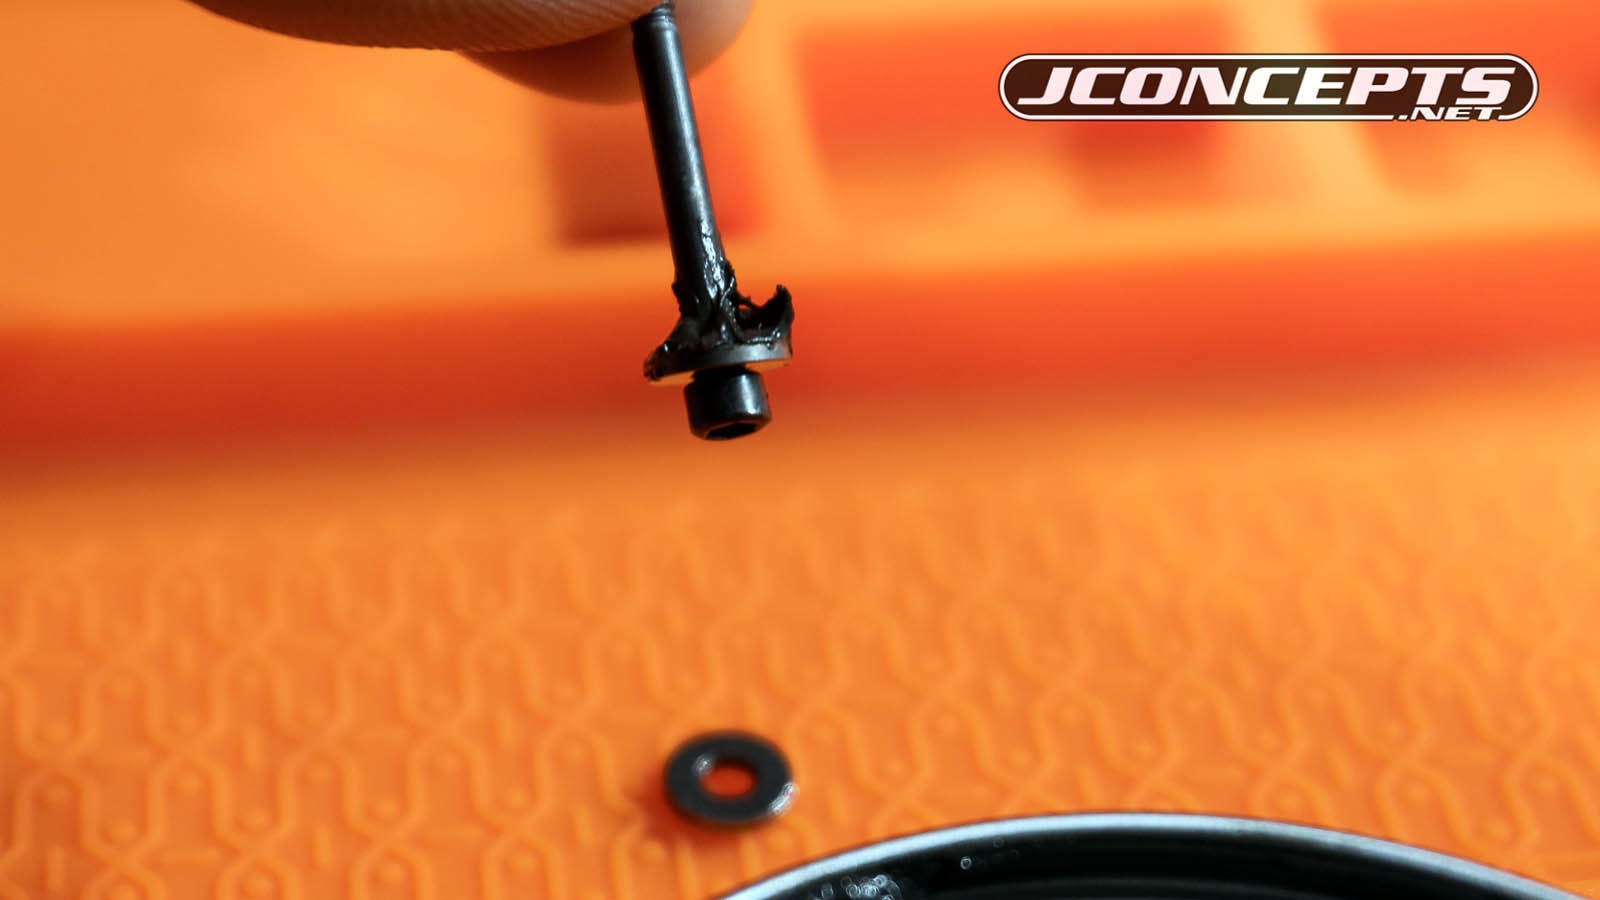
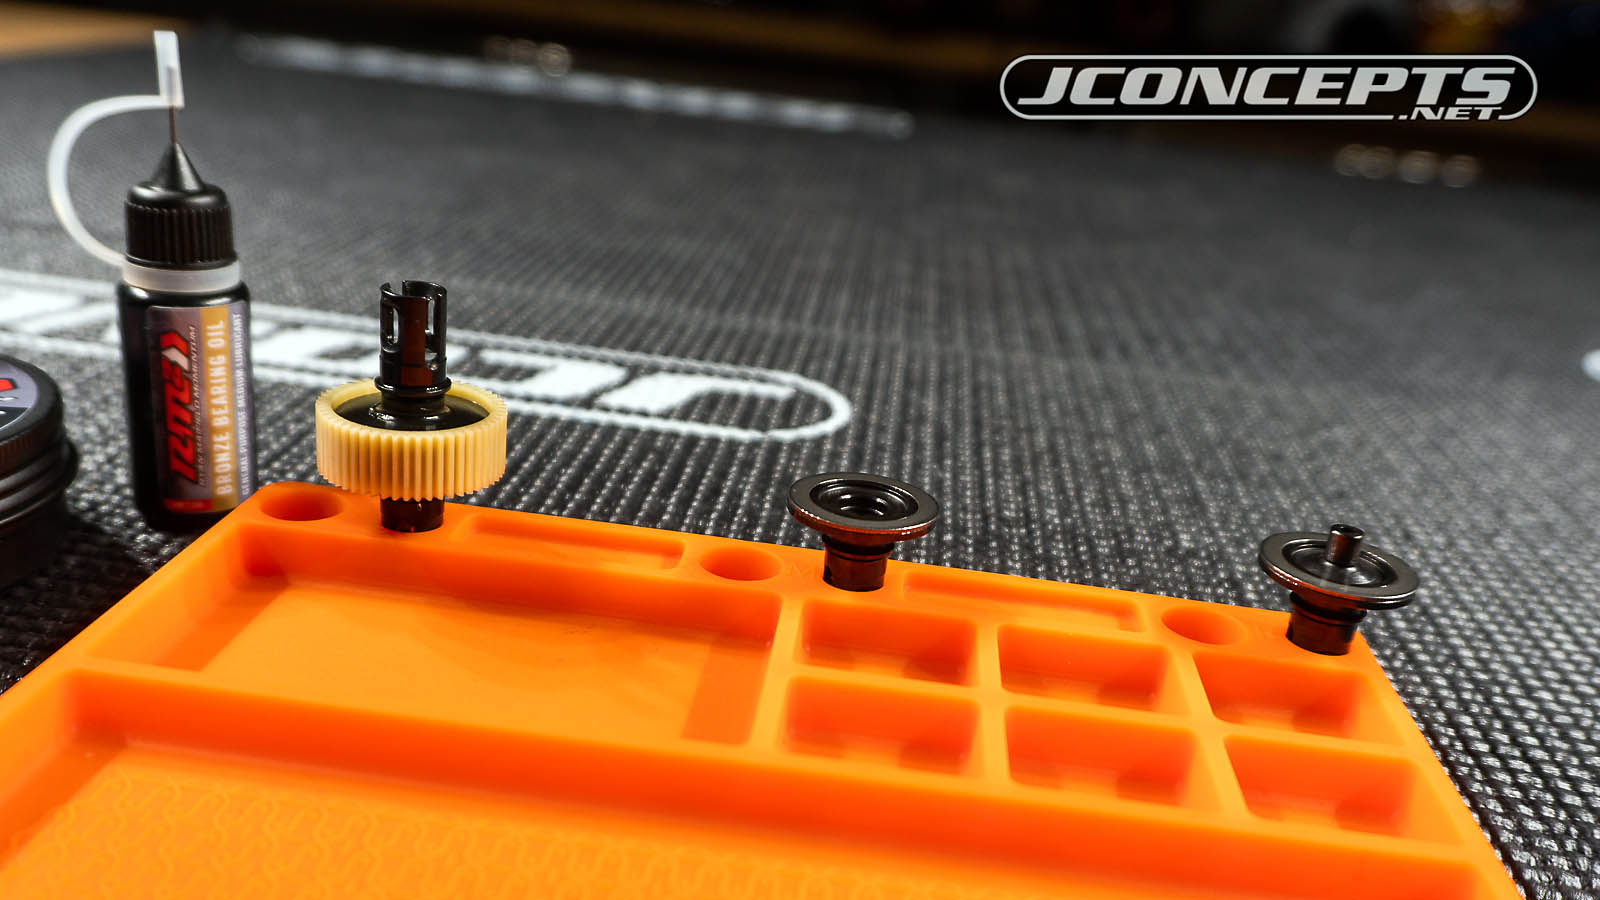
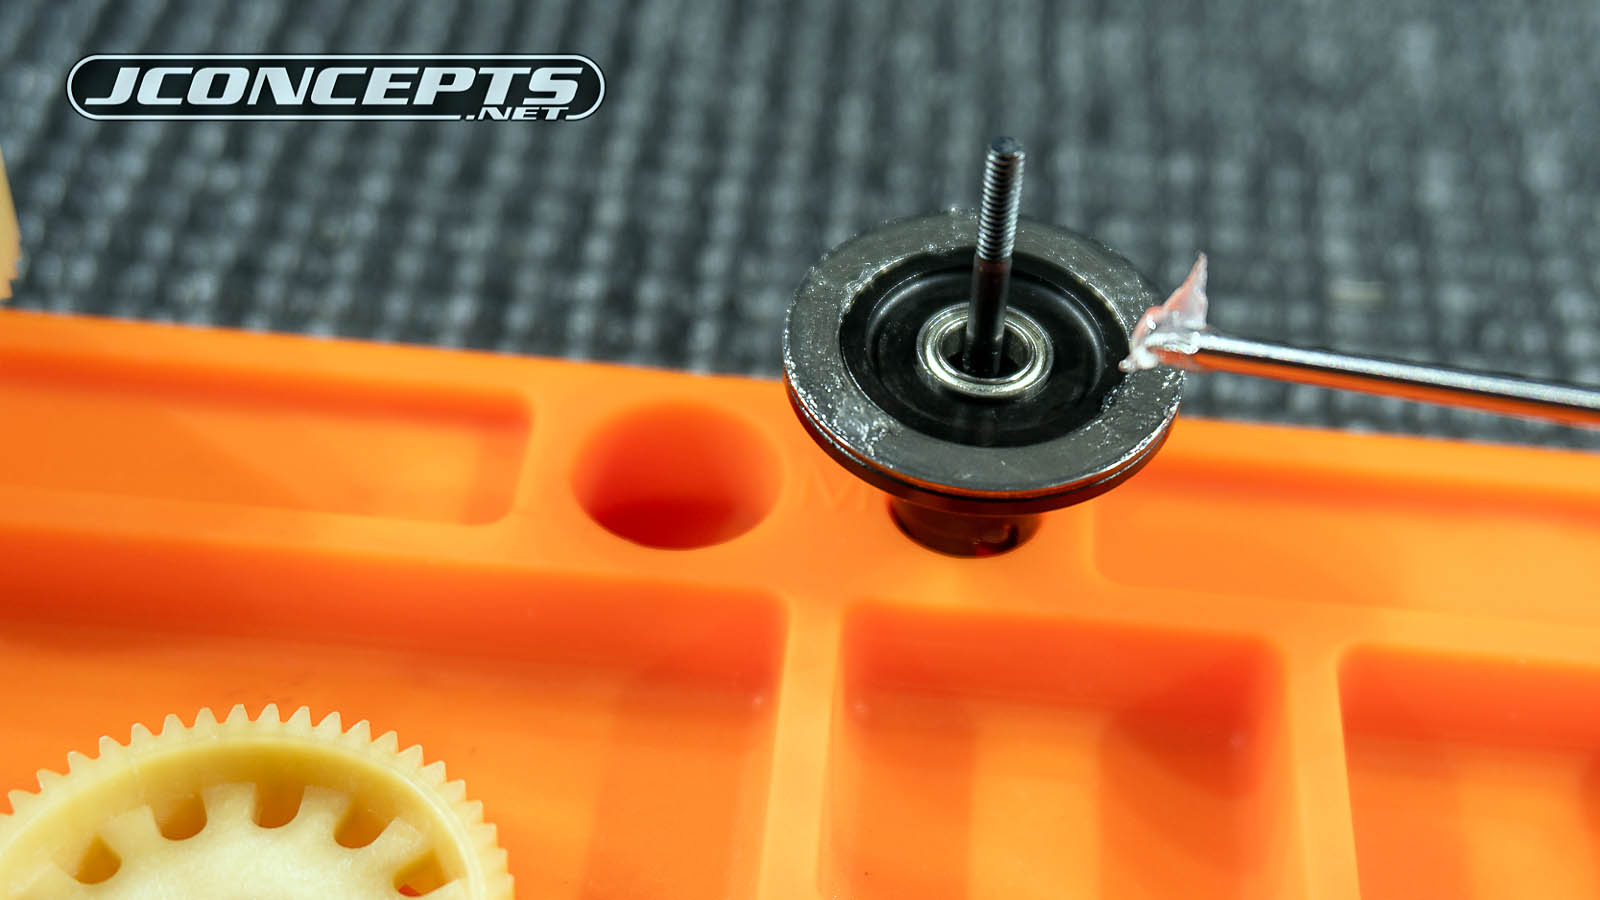
Next, assemble the thrust bearing using the RM2 Heavy Metal grease. This high-quality grease can prolong the life of the thrust and can be used on any kind of metal to metal contact points. This includes thrust bearings, CVA's joints, CVD's joints, outdrives contact points, ring gears, sun gears, etc.
Use the 2mm wrench tip and dab a little bit on the tip and transfer it over to the thrust bearing washer. This way your hands stay clean, but make sure you clean the tip with a rag before switching to a differentialerent grease.
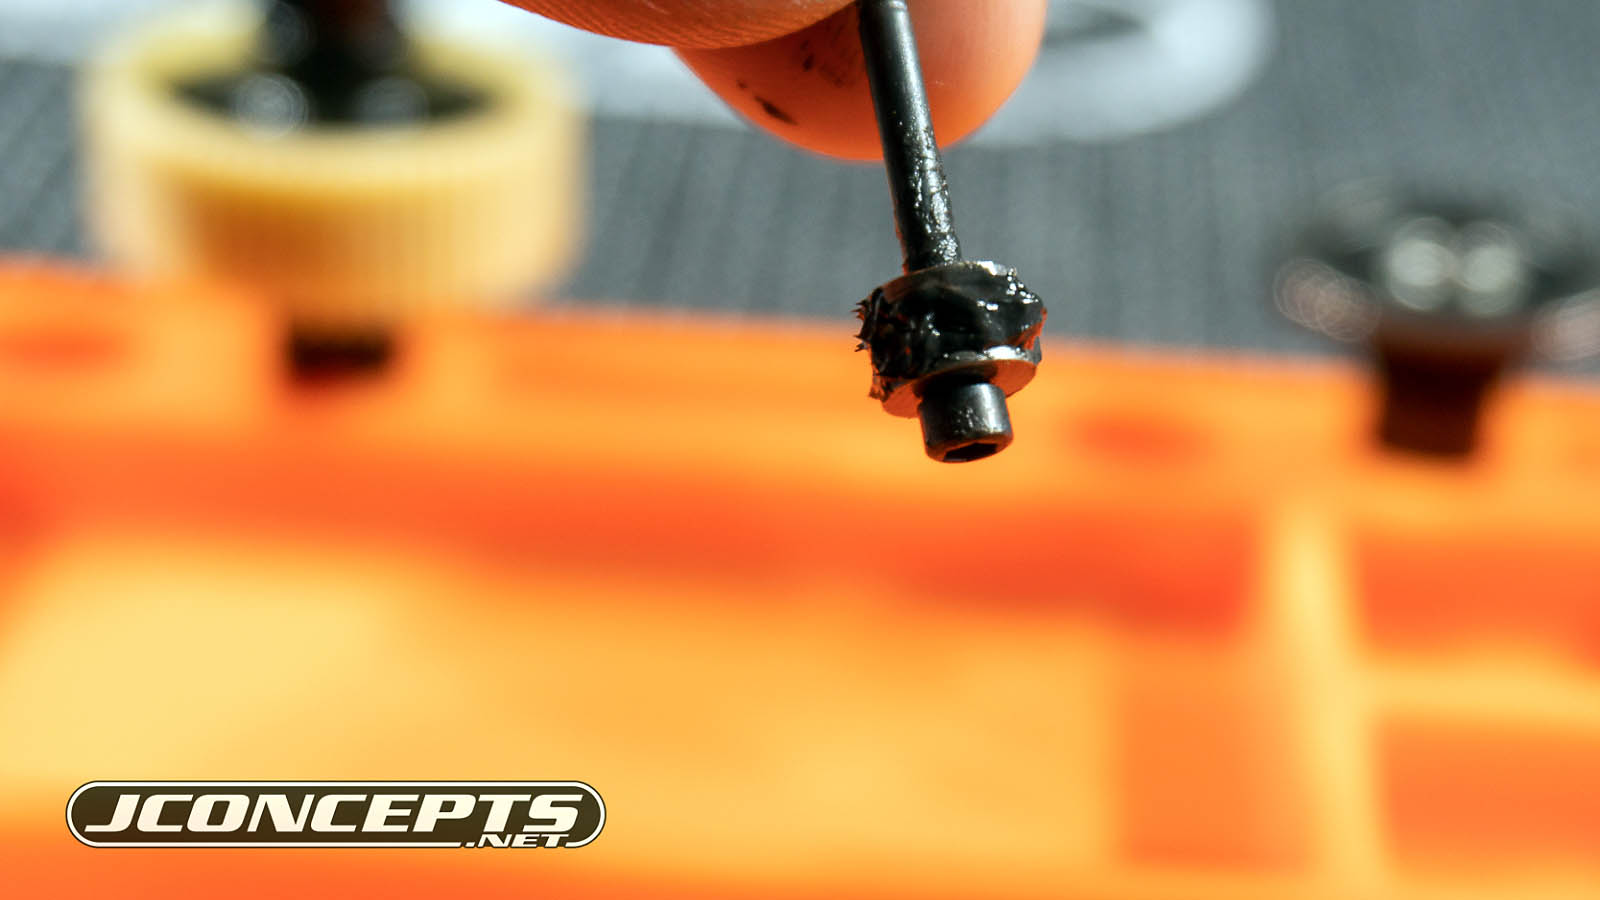
Next, transfer the thrust balls to the thrust bearing washers with a good amount of Heavy Metal grease. Be careful not to contaminate the thrust balls with dirt, dust, or debris. Once complete, install it on the correct side of the outdrive and let it sit while we prep the differential gear.
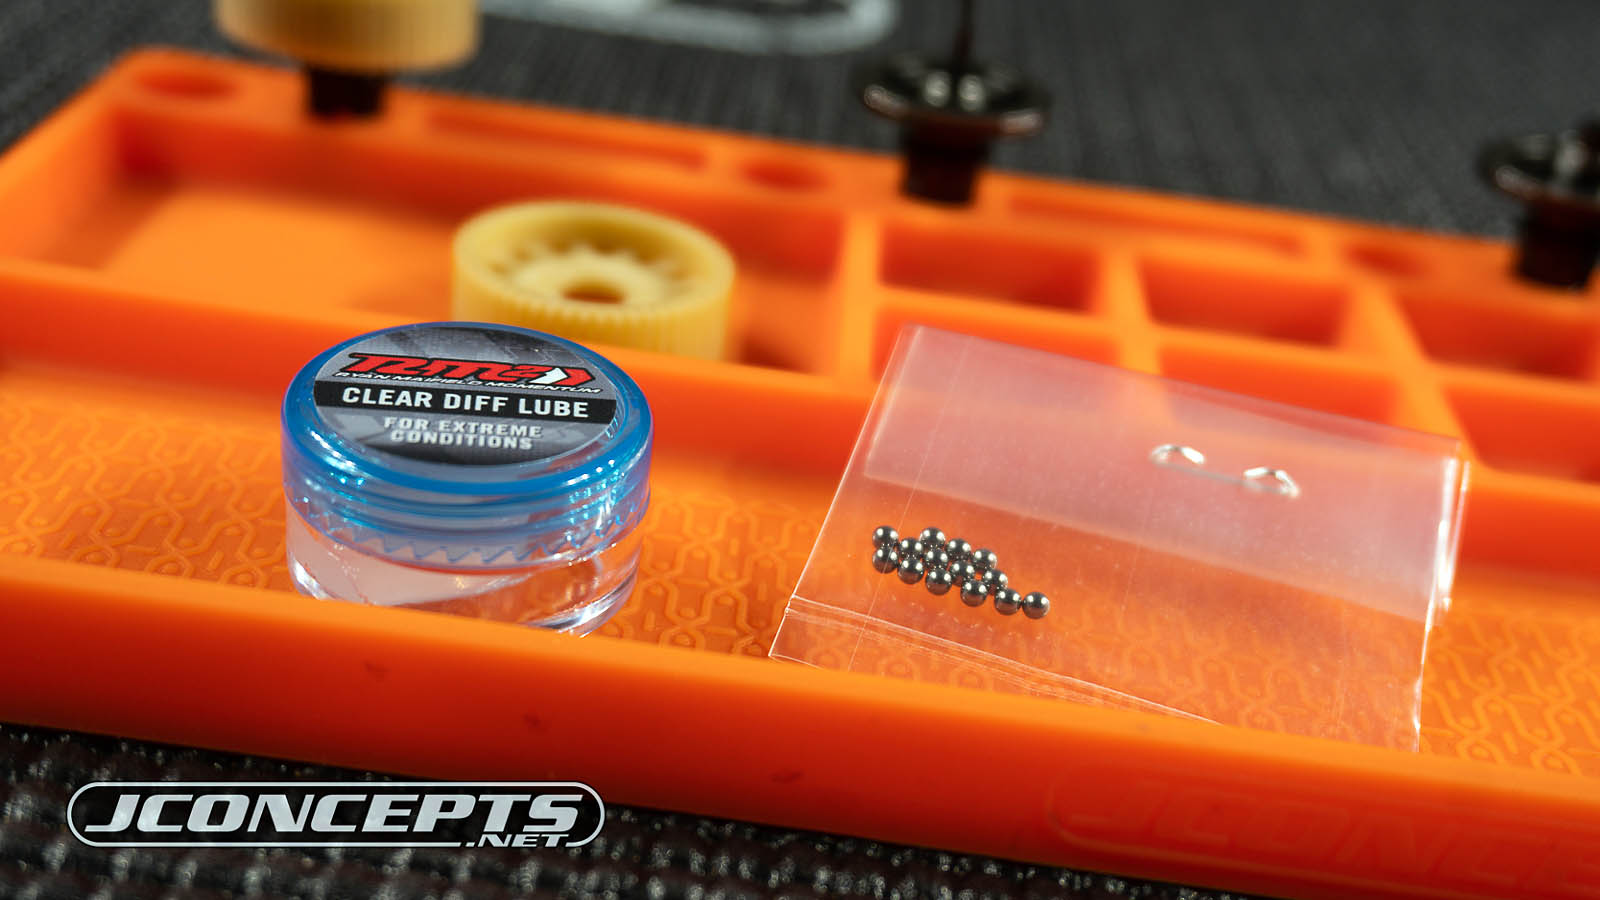
Next up, time to assemble the differential gear using the RM2 Clear Differential Lube. This clear lube is the perfect consistency for ball differentials that results in silky smooth action and long wear. Not to mention, this IS the exact grease Ryan uses on his race cars and that he used during his 2017 IFMAR World Championship winning run in Xiamen, China (Other differential greases were also successful with many other world champions on various tracks).
Once again, using the 2.0mm hex tip and apply a good amount to the differential rings. Get those babies coated!

Add Clear Differential Lube to the gear itself. Make sure you put lube everywhere, especially where the balls will sit.
Once everything is lubed up and ready to go, the next step can be a little tricky. The main idea is to transfer the balls to the differential gear without dropping or losing any of the balls. Also, keeping the balls clean is key here.
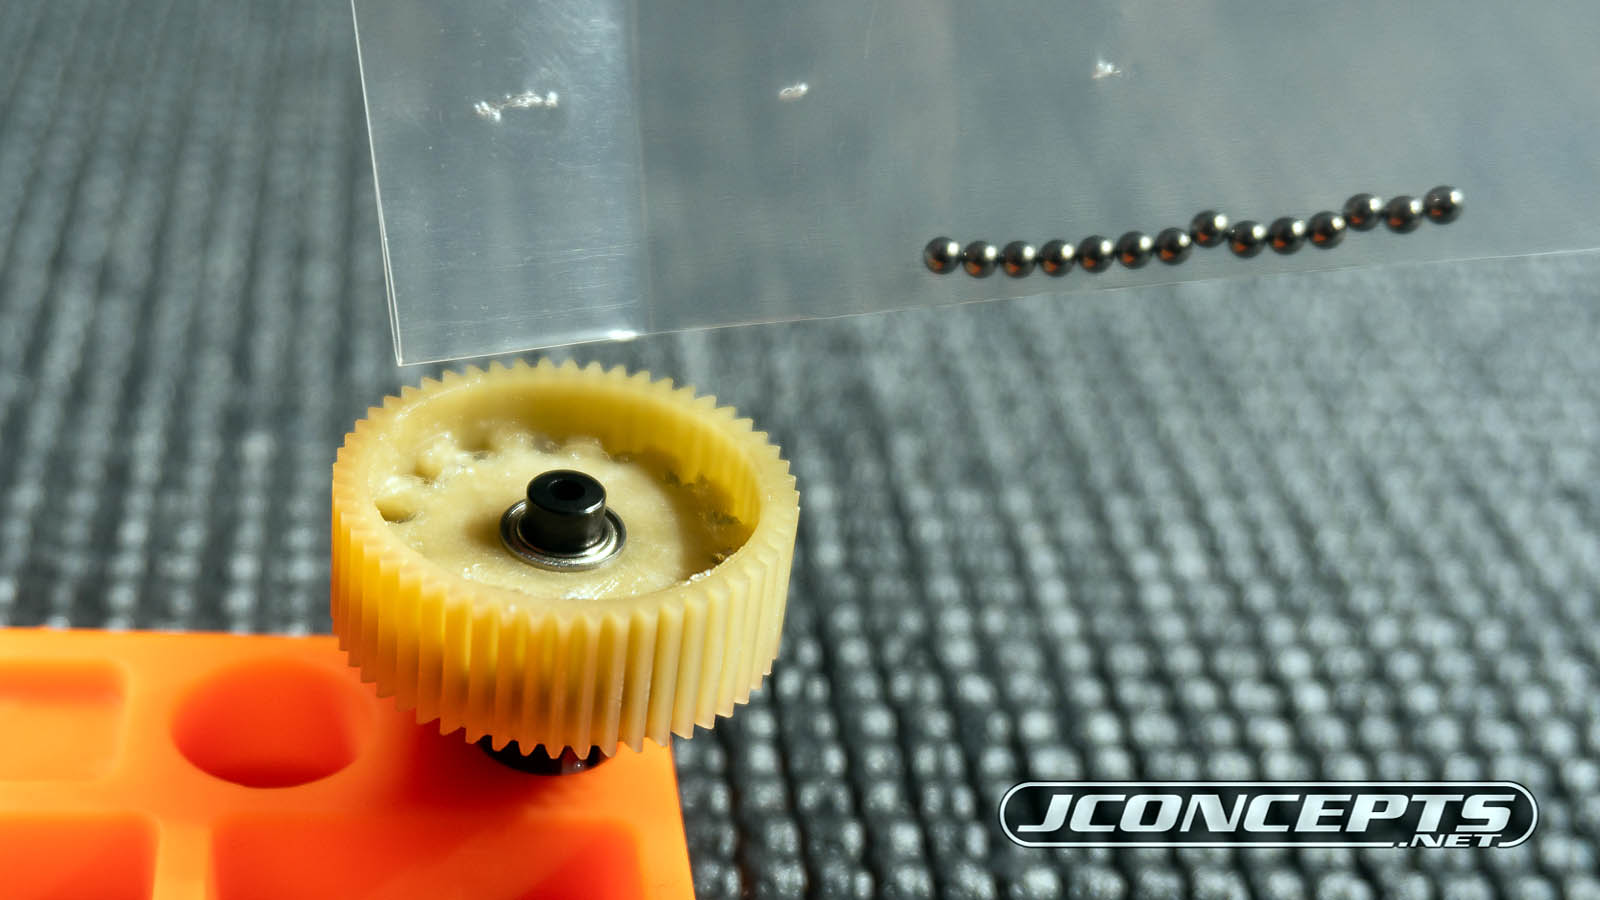
One of the easiest ways to keep the balls from being contaminated is to keep the balls in the plastic bag for as long as possible. The last thing you want to do is to pour your balls out on a dirty table, cloth, or even a blue towel because of the fibers. Whatever you do, avoid catching any dirt, fibers, or debris. Next, put the differential gear on the differential outdrive and carefully push the balls out of the bag and onto the gear.
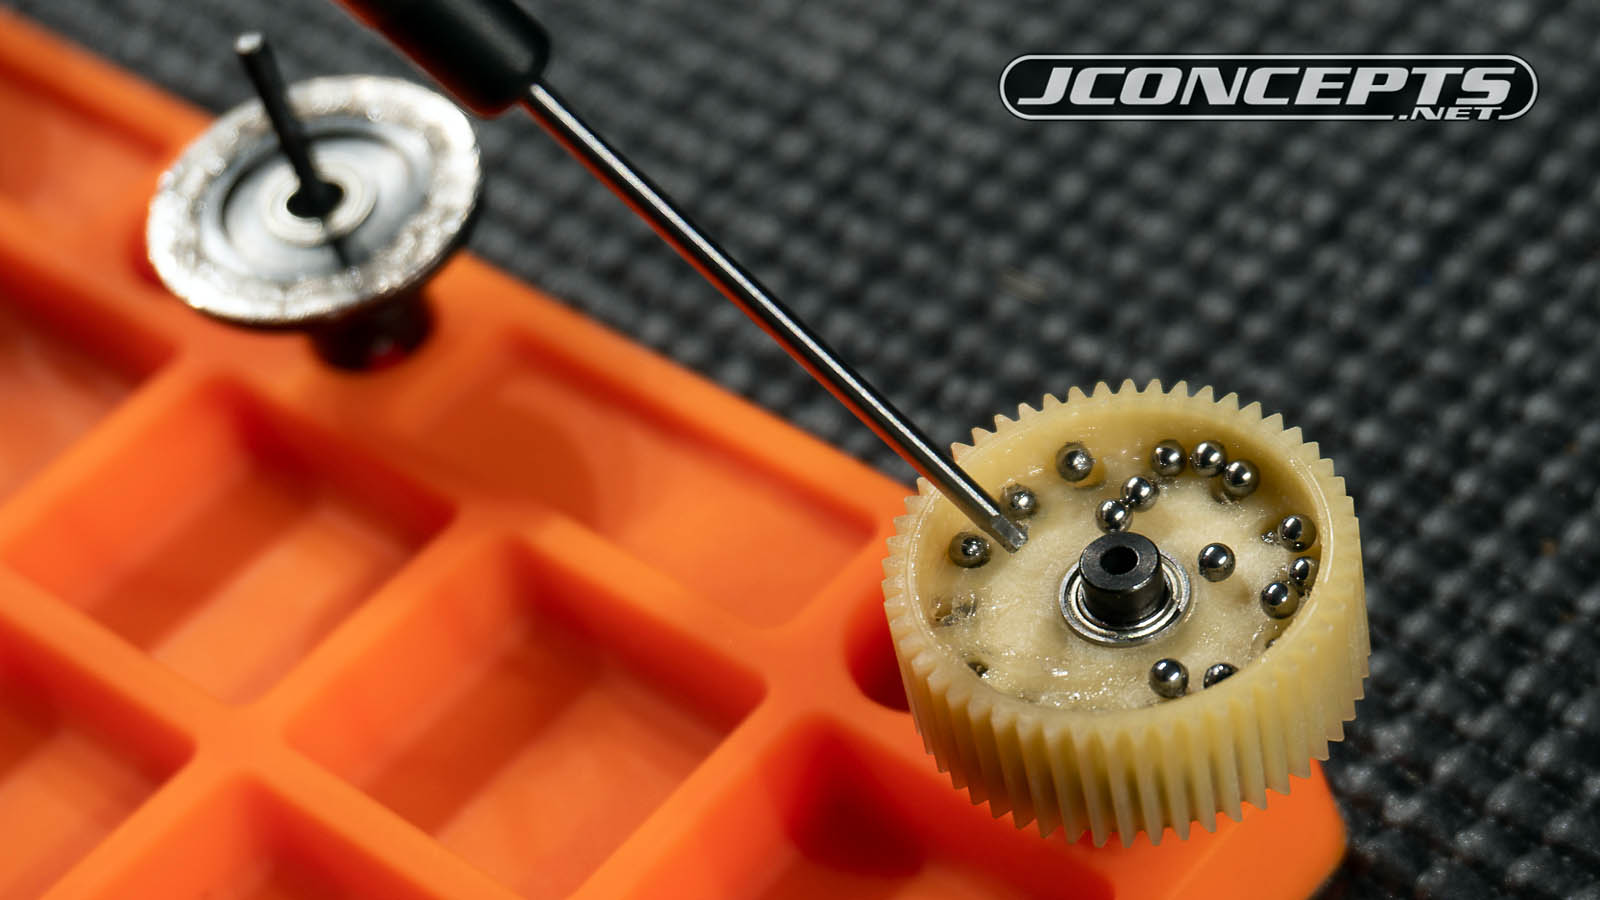
Slot the balls into place with your trusty 2mm wrench and you're almost done. This might not be your method, but like we said earlier, there's no wrong way to build a differential as long as it works for you.
After everything is lubed up and the two differential halves are ready to go together, join the two differential halves and tighten accordingly. If you get it bench tight and it doesn't feel perfectly smooth, sometimes taking the differential apart and packing it with more clear lube and reassembling can fix this. Make sure you properly break in your differential and adjust differential tension accordingly. For high grip, Ryan tends to have his differential set on the tighter side.
Now that your differential is built (with the RM2 Heavy Metal grease and RM2 Clear Differential Lube), you're ready for battle!
Thanks for joining us on this little tech tip on how to build a ball differential with the new RM2 Heavy Metal Grease and Clear Differential Lube. If you like what you see, like, share and a part of this RC adventure! |

